Leaderboard


Popular Content
Showing content with the highest reputation on 12/30/2024 in all areas
-
Happy camping and happy New Year!4 points
-
3 points
-
3 points
-
Best wishes for a happy holiday season to the entire Oliver community… Best group ever!3 points
-
Inquiring minds want to know! It’s true that inverters are complex devices because they can invert, convert, charge and switch large currents, and they have notable efficiency losses when doing so. However, with the inverter turned OFF, the only “parasite” load I can think of might be the Bluetooth or a memory function. Thats why I conservatively guessed an estimated ballpark value of approximately under 20 milliamps (+/- 20.) 😁 The inverter OFF load was too small to register on my shunt and therefore I consider it inconsequential. . . like years to discharge the battery. But, if I ever disconnect the battery, I'll let you know exactly what the load is and let's not be surprised if it's zero! Also consider this: Even with the inverter “inadvertently” left ON, with no AC devices turned on, the “parasite” load is only 0.2 amps per my shunt as I previously mentioned. That’s because it’s actually operating to power the microwave clock . . . speaking of inefficiency. But that's also a small current that would take months to run down the 390 amp battery. Good discussion! Cheers! Geoff2 points
-
I've searched through the forums here and have seen this topic come up and either fizzle out with no answer/resolution posted or a resolution that I've tried and it has not fixed my problem. I'll start with some background on my situation. I purchased a 2008 Elite back in 2021 and had it for almost 2 years and loved it and never had a problem with it but just wanted more room so I purchased a 2016 Elite II in March of 2023. Ever since I got it I never felt the water pressure in the bathroom (whether on city water or using the fresh water tank with the pump) was that great for the sink and the toilet. It seemed to get worse as time went on and maybe it was my imagination but I felt the kitchen sink and outside faucet didn't have the same amount of pressure anyone. I did find a leak in the back of the outside faucet and just replaced the entire box and that fixed that issue but not the issue in the bathroom. In the basement storage area I found the water pressure regulator and back flow valves and took them out and soaked them in white vinegar for a few hours. This seemed to help the kitchen and outside faucet but not the bathroom. I would recommend everyone do this every couple of years because there was a fair amount of build up on these and they really weren't that hard to get to. So next I took the sprayer off the faucet and soaked the entire handle in white vinegar for a few hours and put it back on and there wasn't any improvement. With the sprayer disconnected from the hose water flowed from the hose ok but not great, but never having seen it flowing from there before under perfect conditions I don't know for sure. I double checked the toilet again and it was still slow to fill. I checked to make sure the valve was fully opened and there were no kinks in water line to it. I did finally notice there is water pressure regulator on the back of the toilet, I don't remember having one on my previous Oliver but I also never had a water problem with it so that night be why I don't remember it. Is/was this standard equipment on a 2016 or is it an addon by one of the previous owners? I have not tried to adjust it yet, not even sure it is adjustable hoping someone here can tell me. (excuse the mess, I didn't realize until just now how dirty the floor behind the toilet is) Next I tried filling the fresh water tank and using the water pump to be sure it wasn't just an issue with city water. Below is a video of the kitchen sink running and you can hear the pump running smoothly and then cut off when I turn the water off then it switches to the bathroom sink and you can see the water pulsing and hear the water pump surging, That pulsing/surging doesn't seem normal to me but I have no frame of reference, I'm hoping someone can tell if that's normal or not. OCVideo.732576672.863039.mp4 The next things I am planning to try are pulling the cartridge from the faucet and soaking it in white vinegar or just replacing it, and putting on a new faucet head just incase the original one was just too clogged for soaking it to help. Have I missed anything? Any suggestions on what I might try next.
 1 point
 -
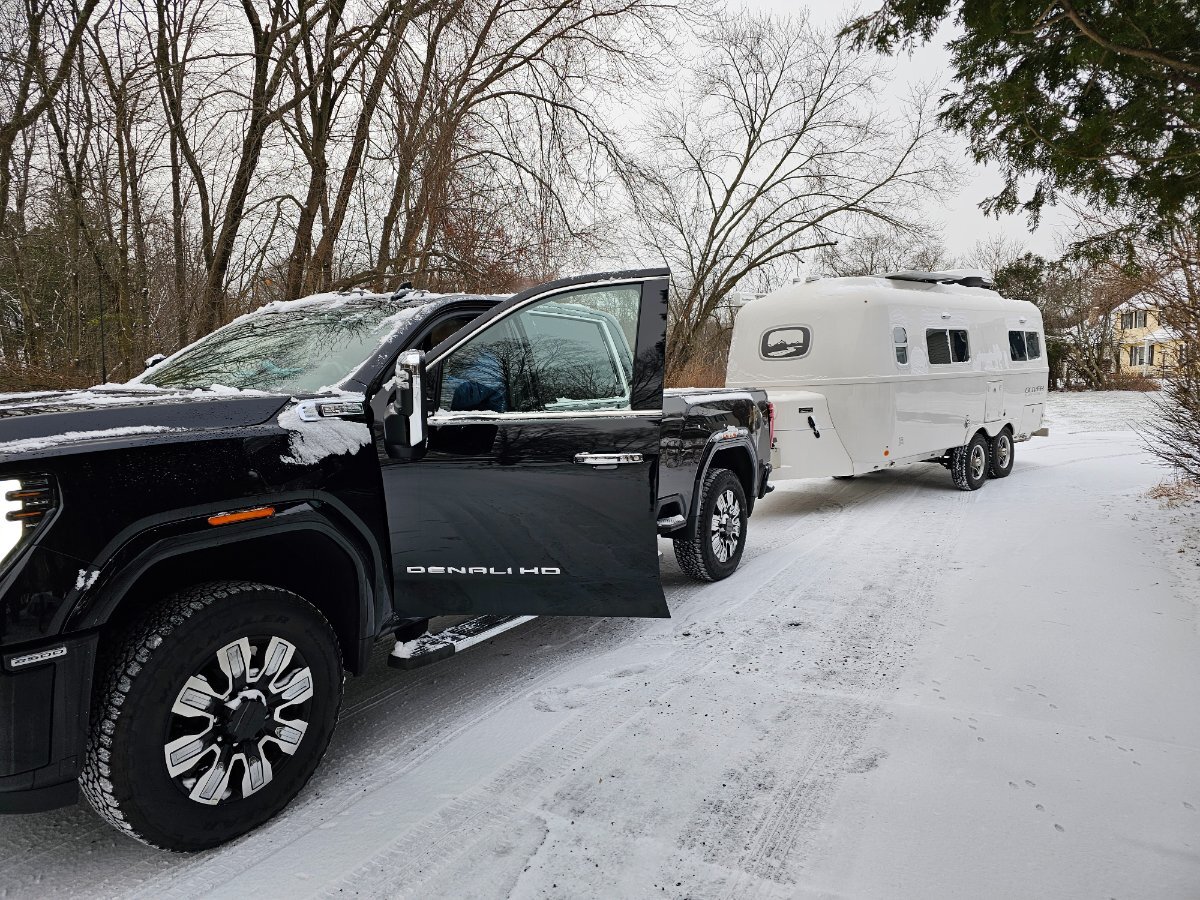
We are the new owners of Piccolino (original name as we have not yet had a decommissioning/recommissioning ceremony with appropriate amounts of rum to change the name) hull # 1346 and are on our inaugural trip from MA to Mayport FL. We had a fabulous experience with the previous owners and are thrilled with our new rolling nest and our new tow vehicle aka The Beast, 2024 GMC 2500HD Denali using the Gen-y Boss hitch. Jason and Kelly were so helpful as we marched up our learning curve in towing and Oliver's. This forum has also been a great source of information, thanks to you all. So far, our tow experience has been great, feeling very stable and at ease underway. Our first two nights saw temperatures down to 14F and we remained warm and dry. Unit is winterized with composting head so no worries for frozen lines. We have previously owned a 2016 J Navion and a 2019 Tiffen 34PA and are finding our Oliver to be so well designed, engineered and manufactured. But I have to admit, I still need to understand how the toilet paper holder is designed! See you on the road!
1 point
-
Wishing everyone and their families Merry Christmas and Happy New Year! Bill and Debbie LE2 #75 North Carolina1 point
-
We got our LE2 with the bike rack mount and realized we will probably always carry our folding Ebikes in the back of the truck under cover. With that understanding we decided to add a cargo tray and locking box for general items needed for setup, and camp site necessities. Obviously weight is a critical factor so with the tray, box and gear inside we are shooting for less than 200# total. I'm sure we have succeeded after adding up the weigh of all items. The most difficult part is making the extended rails for the tray to mount on. I used the same T6061 aluminum that Oliver uses on their frame members. It's available in small sizes at local metal supply houses such as Metal Supermarket. The aluminum tubing drills and cuts easily with carbide woodworking tools. Use a little lite oil on the blade to keep the aluminum from fowling the blade. You must use good eye protection when cutting. I copied the way the bike rack rails were machined. Here's the results of the project: We have pulled the camper a couple times for local camp outs and the weight of the addition is completely unnoticeable while towing. The box is well made but light weight with locking double latch system. It has a double layer of aluminum in the lid and is foam filled to keep the contents from heating up too much in direct sun. The whole thing is very sturdy and at 220 pounds I can stand on the box lid to see the top of the camper with no effect to the box lid. Good traction and very solid. The softener tank is mounted with a tank wall mount and strap and is set up with quick connects and the standard hoses hook up in just a minute. The softener comes with a regeneration kit and it takes about an hour to perform a regeneration using a box of table salt. It will last up to 2000 gallons of water depending on the mineral content. No need to remove the tank for regeneration, just connect the kit to the external QD fittings and run the process. When done, you are good to go for a few more camping trips. No more hard water scale or rust on pluming fixtures. Remove the tank for winter storage inside the garage. I'm very pleased with the overall project. The box can be removed just as the bike mount is removed for spare tire access. You can actually access the spare without completely removing the tray assembly, Just slide it out about 6-8 inches and the cover and tire are removeable. I bought a self lit license frame and mounted to the back of the tray. I added a plug connection to the license light wire to power the new license plate light. I wanted a removable connection for obvious reasons. The connection is mounted on the lower part of the spare tire cover under the original license bracket. The old license plate bracket is still useable if the tray and box are removed. Tray: https://www.amazon.com/gp/product/B0017H9N4E/ref=ppx_yo_dt_b_asin_title_o02_s00?ie=UTF8&psc=1 Box: https://www.amazon.com/gp/product/B000MK4F68/ref=ppx_yo_dt_b_asin_title_o02_s01?ie=UTF8&psc=1 License Bracket: https://www.amazon.com/Car-License-Plate-Light-Chrome/dp/B00S1Y5TSK?pd_rd_w=jpDah&content-id=amzn1.sym.e8faeee7-63c9-4cb3-96e0-e50a41f3b35b&pf_rd_p=e8faeee7-63c9-4cb3-96e0-e50a41f3b35b&pf_rd_r=018MZ7KVYFFMGM0WSKBV&pd_rd_wg=mdsBW&pd_rd_r=eff79229-c9bb-45a5-8656-400649d9a361&pd_rd_i=B00S1Y5TSK&psc=1&ref_=pd_bap_d_grid_rp_0_1_ec_t Softener: https://www.amazon.com/gp/product/B09Y2KNFFL/ref=ppx_yo_dt_b_asin_title_o06_s00?ie=UTF8&th=1 Tank Bracket: https://www.amazon.com/gp/product/B00208DY76/ref=ppx_yo_dt_b_asin_title_o04_s00?ie=UTF8&psc=1
1 point
-
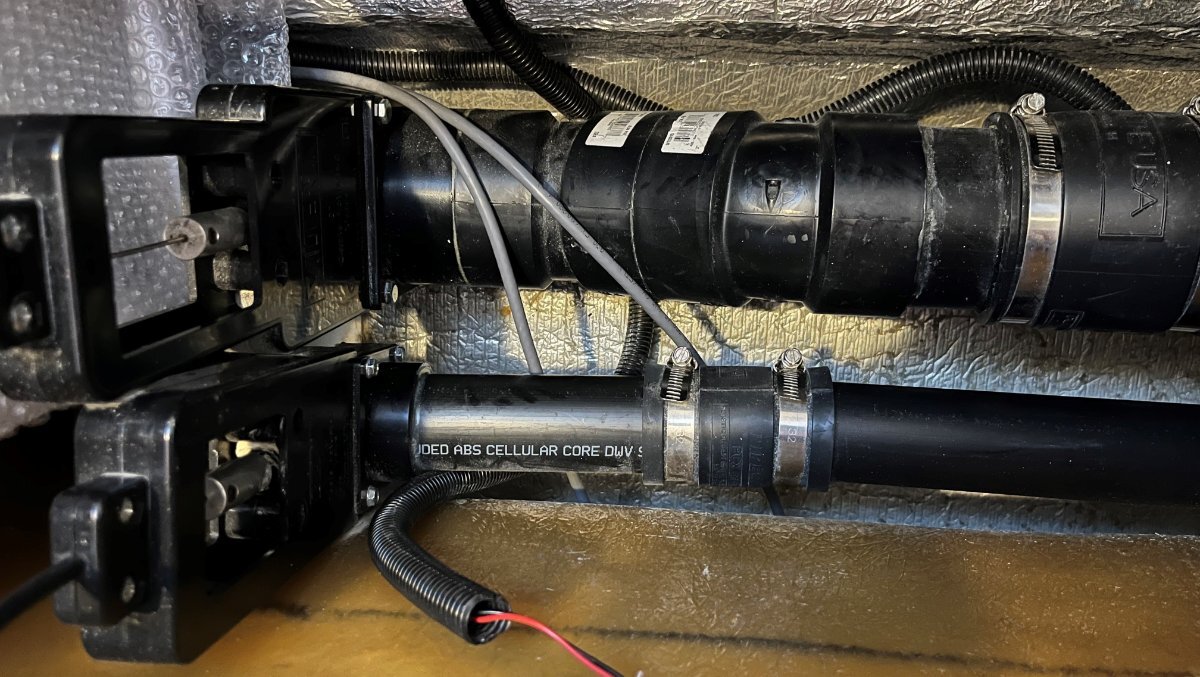
The larger of the blade valves under the front dinette seat is for the black tank (see pic). The smaller is to cut off drain water from going out on the shower floor while traveling and it's the gray tank valve that is under the streetside bed. First, I would fill the blank tank with water to be certain of leak. If it's just a little black water after travel, it is likely black drain water left in the main line when dumping with the trailer level or forward leaning (without raising the front of trailer higher which is a good practice). Quite a bit of black waste can sit in this long plumbing. Question, are you getting a quart of black or gallons? I would work the drain many times prior to the pain of replacing! After filling, open and close the blade repeatedly. This may dislodge something lodged on the blade. You could use a chemical drain cleaner letting it soak for a while and then again open and close. I forget, but there also may be a way to remove the valve blade for cleaning without replacing the entire valve. Best wishes.
1 point
-
If your batteries are low your charger will draw a larger amount of current which will likely exceed a standard residential outlets current capability. You can adjust the settings in your inverter / charger to lower the charger current. This will require a longer time to recharge your batteries.1 point
-
Absent kinked or crushed hoses, Jason is spot on with "more clogs". Annual sanitization, vinegar de-scaling every three years, with full flushing the system of antifreeze has been the norm for many years. Frequencies may vary due to water sources, but the idea is proven to pretty well keep biological "clogs" at bay. That said, we often see pipe and tank plastic caused clog problems. they are a result of OTT not fully flushing out the new tanks and other items of the thread cuttings and other items before installation. Those plastic clogs have to manually be removed as no non-destructive service procedure that I know of will do so. In your case it would require you to incrementally disassemble water fittings and flow test your way down stream of your kitchen sink. One question that I did not see asked is the low flow in both the hot and cold side of the bathroom only?1 point
-
@grweber1 Gary and I have a bit of history. His 2KW Inverter is the one removed from our hull when I upgraded to our Victron 3W MP2 inverter/charger. This 2KW Xantrex model is inverter only, no integrated charger. To upgrade to LiFePO4 he had to upgrade to the newer PD model or add the suggested pendant. This is added to the PD charger, independent of the optional inverter as wired. This was a very good reasonable upgrade for Gary, who does not have solar and just wanted an inverter for coffee makers, occasional MW use, etc. Since I upgraded to an integrated inverter/charger I disconnected the OEM PD charger vs. upgrading it for LiFePO4 (reconnect the black/hot wire to the 120V breaker panel and it can be used as backup if ever needed).1 point
-
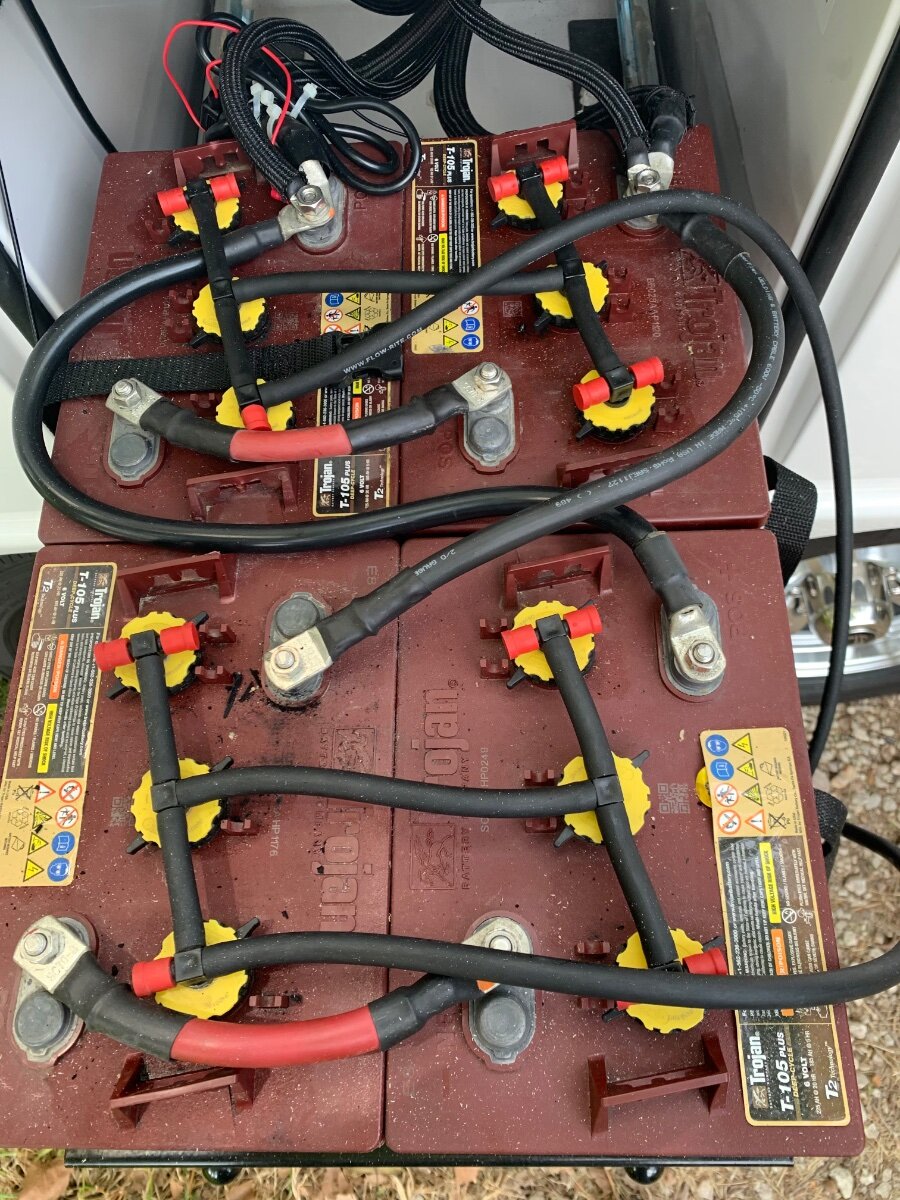
Our 2020 OLEll 579 was ordered with the stock Brightway battery bank, Xantrex 2000W inverter and no solar. I soon ditched the Brightways and installed four Trojan T-105 6V batteries my Son gifted me when he upgraded his motorhome to LiFePO4s. Last year I upgraded to LFPs, specifically two LiTime 230Ah batteries. I changed settings in the Xantrex for the new battery type and disconnected the vehicle charging wire at the 7-way cable connector. I, as well as @topgun2, have detailed the installation of said batteries in respective posts. I have had no issues using my Xantrex with this setup, and have also taken measures to operate the a/c on battery, as well.
1 point
-
I'm still working on getting that ad posted here on the Forum so we all can see it. Bill1 point
-
It was lots of fun last night when a big group of us were watching TV. An ad came on for the Ford F-150, showing it towing an Airstream on some beautiful coastal road. Of course I had to pipe in with "That's not such a great trailer. Ours is better!" (And our LE2 was sitting right outside.) Then the next ad, back to back, was for Oliver. Wow. We all hollered. Very nice ad.1 point
-
Merry Christmas to all !! Wishing everyone the best 2025!!1 point
-
Merry Christmas and Happy New Year to all!
1 point
-
Merry CHRISTmas and wishing All a Happy and Blessed New Year!! Soooooo looking forward to the New Year! 🇺🇸🇺🇸🇺🇸🇺🇸1 point
-
Merry Christmas and Happy Camping in 2025!1 point
-
Geromino John, thanks for the kind words. Sure I can elaborate why I haven’t installed a Master battery switch, and I’ll also provide a better solution if the objective is to switch off all the stand-by loads when the trailer is in storage. The battery switch will add resistance to the circuit from the additional cable length needed to reach the switch, and through cable lugs and switch contact resistance. Granted it’s not much, but anyone who has ever dabbled with cable resistance knows that it doesn’t take much to create a voltage drop, particularly in high amperage battery systems like the Oliver. Voltage drop impacts the systems efficiency and it means your creating heat and burning watts. I don’t think there’s an optimum place to install a switch given the stiffness and limited bending radius of the size cable that you would need. It's best to keep the cable as short as possible and that really limits the mounting options. I haven’t see a compelling reason to install a huge battery switch. I’m in and out of the trailer enough where it would be an unnecessary burden to turn the battery off. The only reason I can think of for installing a switch, is to shut off the stand-by loads while in storage. I personally think stand by loads are not a significant concern. There are not many scenarios where solar or shore power is unavailable and, if so, there are other solutions. If there is a desire to shut off the stand by loads while the trailer is in storage, then simply shut off the DC breaker that supplies the DC fuse panel. It’s located next to the inverter. You can see from my previous post that all the primary loads are fed by the DC fuse box. However, I’d recommend re-powering the CO2 detector so that it always stays energized. Hope you find this useful! Cheers, Geoff1 point
-
99.999% probability that they are of chinese origin with steel from a ‘59 Buick. So on the bright side they may in fact be made of mostly USA steel. 🤪1 point
-
In the video you included, I have the same water pressure in the bathroom as you have in your kitchen sink, so definitely not normal. You might have kink in a hose somewhere.1 point


.jpg.2563185667c22ee5c68422850ff4bed5.jpg)
.jpg.4c60ff4d9a3404e60fac13bec748c983.jpg)


-
Recent Achievements
-


")


")


")


