Leaderboard


Popular Content
Showing content with the highest reputation on 06/03/2025 in all areas
-
TLDR - this post tells you in words how to detail-clean your MaxxFan I haven’t seen it posted anywhere else so far, so I thought I’d throw this out there. After three seasons of practically full-time use of our Ollie, the MaxxFan was looking pretty cruddy - especially when it was sunny and you could see the dirt and grime buildup inside the hood. The fan “maintenance” I’ve found online seems to be limited to cleaning the screen and maybe the fan blade. I had done that a few times, but it didn’t address the real dirt. There’s no way to clean inside of the hood with the unit assembled. Nor would you want to try doing that with the unit overhead. Since I had to pull the unit off the roof to replace the motor. (Wouldn’t go above 30% without beeping, and shutting down.) I decide to pull the whole unit apart and give it a serious bath. Sorry for no pictures - by the time I thought of that I was elbow-deep into soapy water. Instead, I’m giving you the 10,000 words. I pulled the control panel with circuit board, the fan motor, and the open/close gearbox off the unit. I left the rest of the opening mechanism in place. I pretty much tore the unit down to individual parts. Every screw - aside from those holding the open/close mechanism to the main frame - was removed. Start with the hood in “open” position. It’s probably easiest to remove the interior bezel and manual open/close knob first - though it may be possible to access the power wiring with it in place. The black ground wire and white + wire can be disconnected by removing the electrical tape Oliver put over the connectors, and lifting the orange tab to release the wire. (I was originally thinking I’d have to cut & re-splice the wires, believing Oliver used some kind of crimp-on connector. In my case, luckily not.) Once on the roof, removing two screws on each side of the base on the unit will allow it to lift the unit off of the roof. Back on terra firma- Flip the unit on its back - upside down - on your workbench. (Picnic table?) If you didn’t remove the control panel and circuit board, do so now and set it aside. (Four screws for the control panel, one more in the center of the open/close knob.) The fan motor and open/close gear motor have keyed 2-wire connectors that attach them to the circuit board pigtails. The hood is held on by eight sheet metal screws that go into “u” nuts, so no worries about screws going into plastic stripping out. Five at the front edge, three at the rear edge. Once those are out, disengage the hood operating arms and lifting the rest of the unit off/out of the hood. Be sure not to lose the two plastic bushings that fit over the pins in the ends of the operating arms. The pivoting rear grille has two keyed tabs that attach it to the main frame. Rotate the grill up to disengage them. That frees the grille. At first, I left the piece of hardware cloth and its plastic retainer attached to the grille. Later, I found I couldn’t clean it thoroughly with it assembled, so I took out the four screws. These four DO go into plastic, so use proper technique when reinstalling them. The fan motor wiring is held in place with a plastic clamp and two screws. Take out the screws, lift off the clamp and feed the motor wire connector out through the hole. The motor is held in with two nuts onto threaded through-bolts. I think they were 5/16”, but don’t quote me. There are also a couple of wire ties holding the motor wires to the support “spoke”. These can be clipped off. You’ll need new ones. I used electrical tape. The open/close gear motor is held on by three sheet metal screws. Be sure to remove the ones holding it to the frame - not the ones holding the gear motor together. There also a splined coupling between the gear motor shaft and the opening mechanism. This is loose, so make sure you don’t lose it. Now - all the electrical parts are removed, you can do the cleaning. I sprayed all the dirty surfaces with a household cleaner/degreaser. “Fantastic”, “409”, etc. I used Clorox kitchen cleaner because that’s what I had available. I suppose you could use Dawn or TSP or whatever your favorite water-based cleaner degreaser is. I used a cheapo hardware store “chip brush” to do the cleaning. There are a LOT of crevices and internal corners to collect grime. I probably took about 30-45 minutes with the brush, then sprayed the parts off with a hose. You’ll probably see spots you missed to revisit with the brush and the 409. Dry everything off and admire your handiwork! As the old saying goes: reassemble in reverse order. Really. One caution: to avoid stripping out thread-cutting screws that go into plastic, set the screw in place and with just the weight of the screwdriver on the screw, turn it slowly -backwards- until you feel it “drop in” to the old thread. Then gently turn clockwise to tighten. It -should- screw in fairly easily until it’s fully seated. All of the above just goes to say that if your MaxxFan starts to look like the inside of your range hood (and it will if you use it much - especially if you cook inside of your camper) then you can easily clean it to like-new condition with just some time and effort.4 points
-
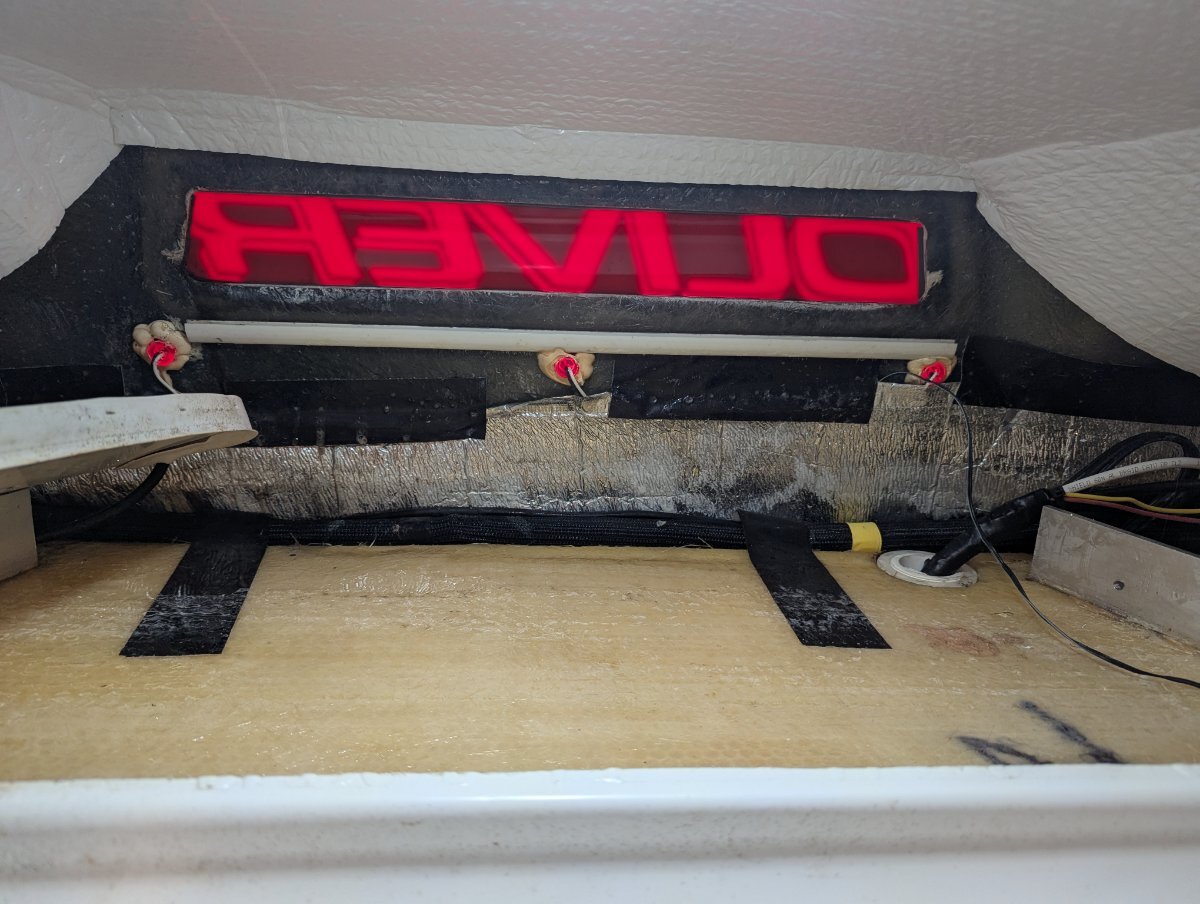
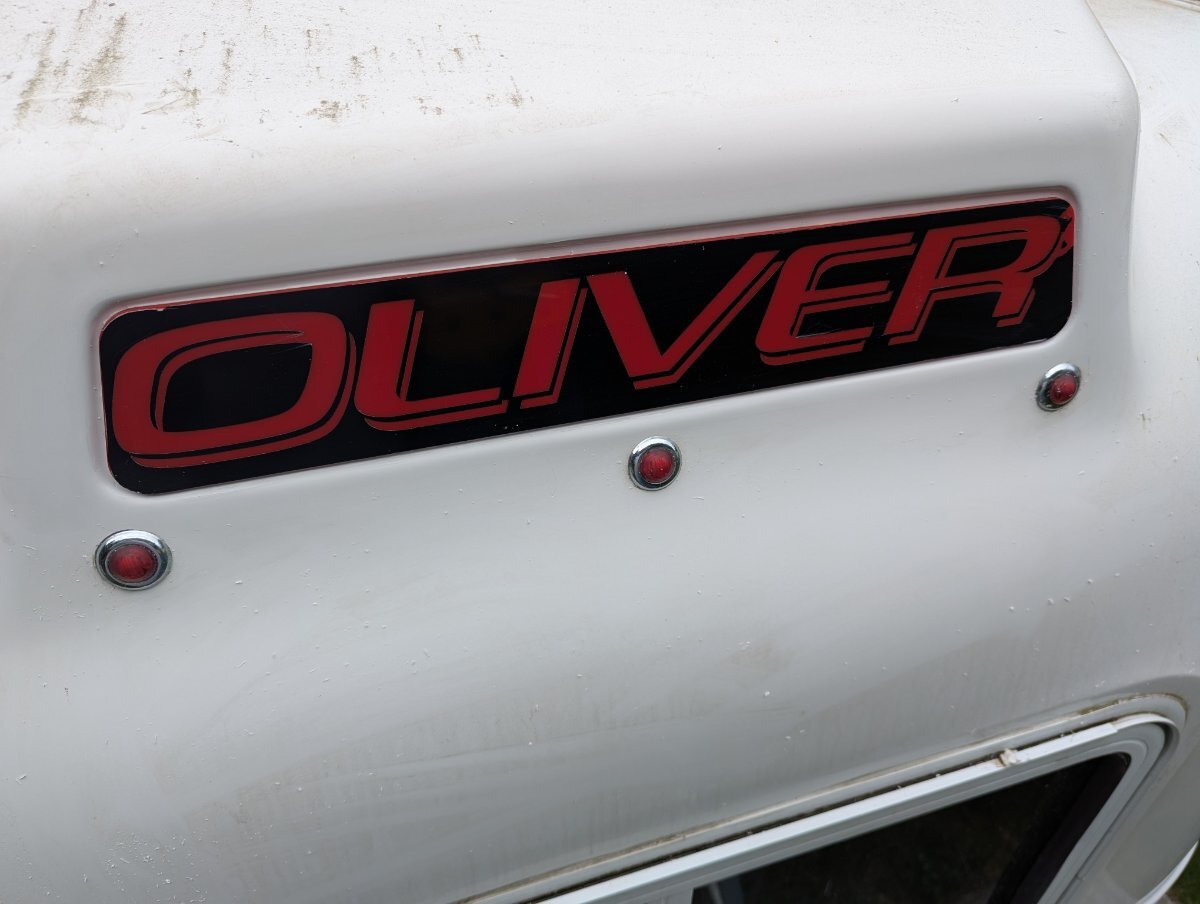
After returning home I was able to better investigate the water issue. Turns out the attic was not dry. It was wet underneath the white insulation layer. I was able to easily peal the the insulation up. The leak was coming from the Oliver Sign. The caulk had dried and cracked. It is actually amazing how much water could get in from that source. All things considered this was the best scenario for the source of the leak. I was able to remove all the old caulk and re-caulk the sign.
 3 points
 -
Nice tailgate party you have there! While on my long "walkabouts" with The Wonder Egg, Bosker & I seldom make reservations in advance, unless I'm traveling on a holiday weekend, or near a huge tourist location. (I'm sorta burnt out on tourists, having lived in both Myrtle Beach and Orlando) Not being in any rush, with months for the sojourn, I don't usually get on the road until 9-11AM and usually stop between 3 - 4 PM. Most others are still on the road at that time and usually the campgrounds will have something available for 1 - 3 nights. When I come across a picture perfect, quiet location with great weather, we'll hang out for up to a few weeks before moving along. I may have a final destination in mind, (this year - Whitehorse YT) and meander a long a winding pathway, simply in the general direction, without detailed planning. As Patriot says, keep those great pics coming!3 points
-
We're traveling this week, 1300 miles in a few days on our original leaf springs (backup set onboard in case of roadside failure). This will be our first trip of real mileage, likely 4500 miles when back home and done. I love auto restoration with HD/HP parts, so I will start collecting parts, budget permitting over the next year or two, as I always have. First, I will purchase two 5200 LB axles to fit the Oliver (68" or 68 1/2")? Then likely a disc brake system, although upgrading from 10" to 12" drum brakes may be enough for a trailer (cost basis). Then we will go with the Alcon recommended leaf springs, proven by our friends and confidants, Lance @Mountainman198 (how are you buddy)? And of course Steve @ScubaRx (call me before I call you), and say hey to Tali, see you soon)!!! When you see Steve's 3500+ Diesel Truck, 1000 LBS of tools onboard (beside the usual campin' stuff), he is cruisin'. 🤣 We're are going to have a b!tch'n setup (when?) and when we're up I will likely mount my Honda CRF in place of the front basket and mount a big-@ss basket in the rear. I totally need a waterproof carrier like a Thule carrier, just to hold my acoustic guitar! And to carry all the extra weight, my 25-year-old Ram-Cummins will need extra leaf springs on each side of the rear axle! 🤣🤣🤣2 points
-
@Geronimo John Thanks for taking time to consider and draw out a possible fix. Appreciate your time! I'm impressed with your engineering skill as it's way above me! I'm neither an engineer or mechanic. I don't even own an angle grinder so trying to go this route would not exactly be in my comfort zone. I feel Oliver should send me a properly welded stabilizer that I can swap out, and that's what I've asked for. Today, I spoke with Mike Sharpe at OTT Service. He said that the action OTT takes is up to "manufacturing" and not his call to make. He agreed that he would like to send me a new one but had to wait for "manufacturing" to make a decision on my issue. I asked him if there was someone else I should speak with and he said no - that he was the contact. He went on to say that there is a meeting with "manufacturing" tomorrow where he will make sure my issue is discussed. We agreed that I will call him back on Thursday. I will update then... Much appreciation to this group, especially @Geronimo John and @jd1923, for your technical expertise and willingness to help.2 points
-
When I went to loosen the nuts on the breaker posts, I found them loose. I used locktite. I now wonder whether the breaker was actually bad. When I pulled cable ends off the breaker posts, I found them to be pitted, which leads me to believe there was arching due to loose connections. I gave both cable ends a good spray of DioxIT D5, both sides and two applications. I let them dry before re-installing the cable ends onto the posts. I used Green Locktite, per Jason E. I tightened everything as tight as possible I waited 24 hours for the Locktite to set-up before turning the power back on. As mentioned in an earlier post everything works normally. Lesson learned. Check all electrically connects at the beginning of the year. There probably wasn't anything wrong with the breaker, just loose connections. Since I purchased 2, I decided to install a new breaker. It appears what happened was Owner error for not checking the connections.2 points
-
Chris: Thanks for starting this great post, and video! One suggestion that I do may help during wanding efforts: Raise or lower your front jack to assist the water flow to the next weep. Gravity is a wonderful thing... occasionally anyway. For this purpose it is. Certainly made my window weep process faster. Also having some really long pipe cleaners to push and scrub in places you can't get to. GJ PS: Recommend not going too steep as water will pass by one drain hole and could over flow inside at the low end. Figured that one out all by my self! Sadly!2 points
-
John, your idea of overnighting is the same as mine. Stay hooked up if at all possible. Drop the tailgate and slide the little Weber Q1000 out. Quick and easy! Looks like a great trip developing! Mike2 points
-
That's the way to do it. We try to plan routes with Google-estimated 4 hour travel times or less. Much more relaxing.2 points
-
Hello this is my first post! I am removing the Dometic AC that came with my 2021 LE 2. I bought a Pioneer Inverter AC/Heat Pump 13,500 BTU. Any tips on removal and installation will be gratefully accepted!1 point
-
I kinda dove into it feeling confident that once I saw how it came apart, I’d be able to put it back together. Had I needed to drill out rivets or the like, I would have hesitated to take it further apart. It’s really not as complicated as it looks. I did feel the need to take it apart not only because it was disgusting inside, but because one of the operating arms looked like it was about to pop out of the slot in the hood. Next time (another three years or less I’m guessing) I’ll try to do a video or step-by-step photo essay. I’d say it’s in the comfort zone of anybody who has rebuilt a carburetor (remember those?) installed a ceiling fan, or shops regularly at IKEA. Aside from being a little dirty - it actually was kinda fun! Always nice to see something grimy and needing a bit of TLC look shiny and new again!1 point
-
Finally finished! I admit to being quite lazy and uninspired - and yes - busy traveling and not in one spot long enough to get to it. But, the rest of the Valterra electric black tank dump valve installation is complete! The 18-3 wiring harness that came with the valve was far too short. Since I was going with a longer run, I upgraded to 16-3. I used the existing manual valve cable to pull the electric cable through. It was certainly easier than if I had to pull a harness with terminals on both ends. Only snag (literally) was where the original cable was taped to the insulation. I had to duplicate the control end of the cable. Basically 5 crimp-on 1/4” female disconnects and two jumpers. The valve end of the harness has a special connector which I couldn’t find the terminals or removal tool for - do I just butt-spliced it onto the end of my harness. Not my preference, but it was either that or cut out the connectors entirely and just butt-splice the harness right onto the valve. Six of one, half a dozen of the other. First picture shows where I installed the control. I contemplated putting it where the manual pull handle was - but it’s a tight fit, and I’d have to scrap the switch plate and open/closed legend. That, and it looked much easier to make the cutout in the place I put it than the manual dump handle location. I’m not super thrilled with this location - and having visions of it being actuated by accident - by an elbow or something I toss back there. (I don't wanna go full Dave Matthews on anybody!) I debated adding another switch, but for now, I can always swing the valve handle out of engagement with the actuator until I’m ready to dump. The “board” here - between the basement area and the location of the outdoor shower and other goodies is easily cut with a spade bit and a utility knife. Second picture shows the valve in position. Pretty straightforward. The electric physical valve swaps out with the manual one. Route your wires, use OTT official black gorilla tape to hold cable in place. Snap the connectors together and - Bob’s your uncle.
1 point
-
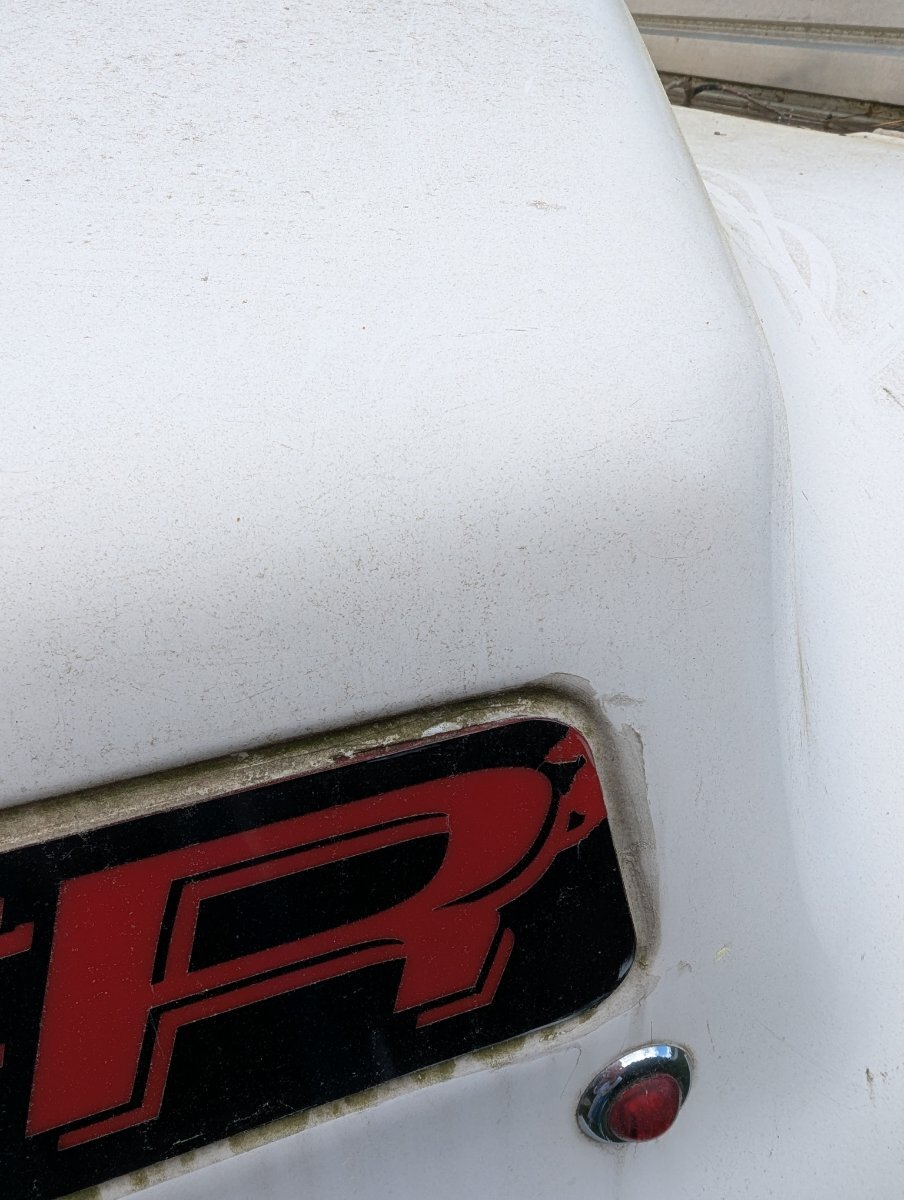
So the rear Oliver lense strikes again.... I would also check those marker lights. The one under the O of the Oliver sign especially. If it leaks, the water would run down its supply wire where it looks like it touches your TV cables. The water would then continue down that cable and into the cabin. All those wires up there with no drip loops designed in are are major pathway for water to travel to far off places. I had drips out my rear speaker from one of those marker lights.... Cheers, Dave1 point
-
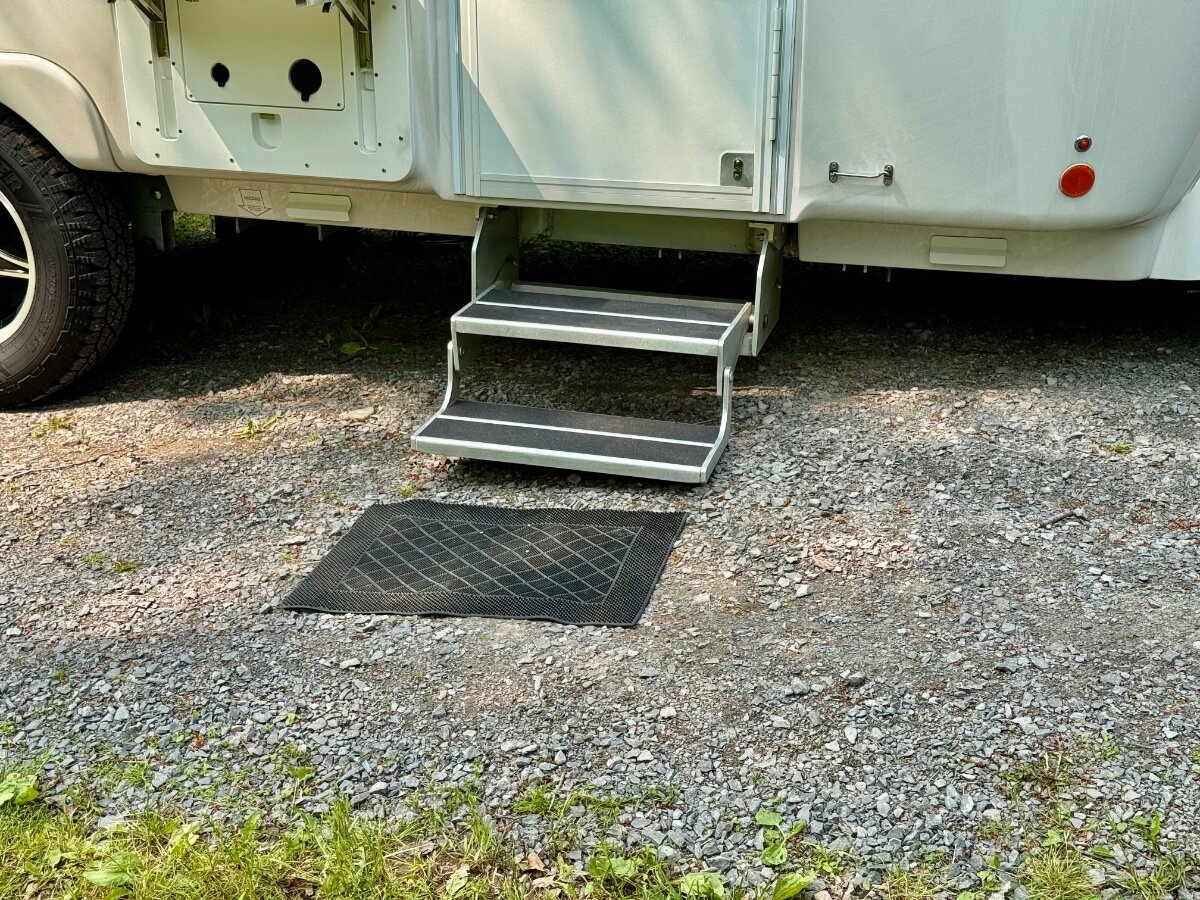
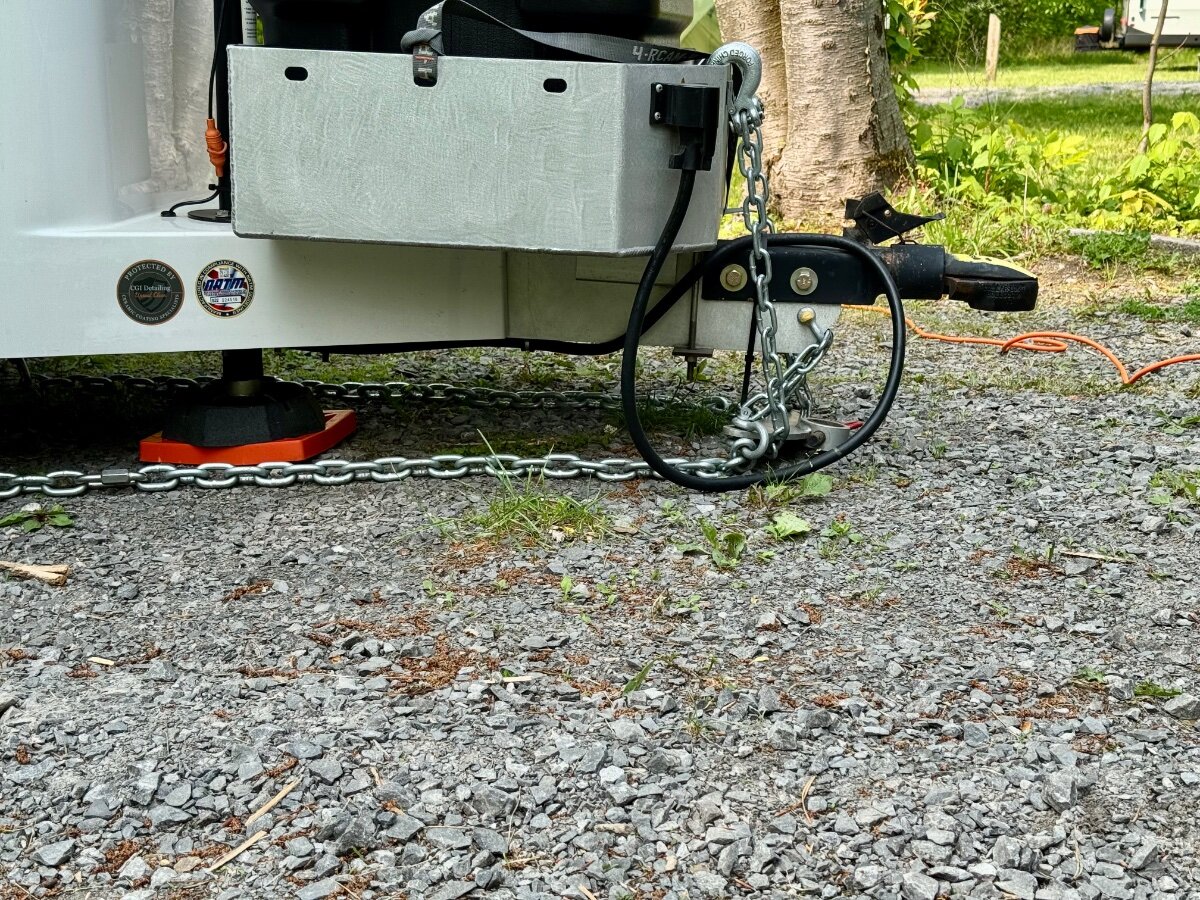
Yes, 2" up from unhitched height. Once chains are snug at this height you should get plenty of tension when you lower the jack. If your TV isn't sitting level when you're done you might have to repeat the procedure by jacking a little higher before snugging the chains. So far I've used the 2" height on two separate vehicles and it worked perfectly for each.1 point
-
Is that raise the TV up 2” from its normal, un-hitched ride height, or up 2” after lowering the trailer into the hitch with no tension on the chains? Either way sounds like it will give you minimal WD from the chains. I guess it depends upon how stiff your suspension is. Our previous TV seemed to have a stiffer suspension, and it would depress less than our new TV seems to. So I find myself going tighter on the chains than I did previously to maintain a level TV. As touchy-feely as they are, I try to follow the Andersen instructions as written (both from their site and as reprinted in the OTT manual) and I seem to get the indications right. We switched to a “higher” truck around the first of the year, so the hood pretty much always seems “high” these days - and this seems to be the lowest-slung Sierra GMC builds unless you do some aftermarket stuff to lower it. This truck (supposedly) also has some “active suspension”, but I don’t know what real effect that has or if it’s even active when a trailer is attached. (And it -knows- when a trailer is attached!)1 point
-
Yes, corrected post🙃1 point
-
Did you go Gorilla?1 point
-
Invest indeed! I have the ELEY Garden QC sets, which happen to be on sale now. I like that they are full-flow, commercial-duty fittings.1 point
-
Received my 2 Gorilla hoses last week. Looking forward to using them. I have had one soft hose for 12 years I use to flush my black and gray tanks.1 point
-
I’ve been down the route with the quick connects before. Generally I like them. I had a bunch of “Gardena” (high-end German made) ones when I did a lot of outdoor stuff. I’d have to find one I thought was really great before I invest in as many as I’d like. I do find that they’d tend to leak after a while. Some you could get replacement O-rings for. For now, I’ll stick with the GHT and spend an extra minute hooking/unhooking. I do the same thing - but without the flow meter. Once I have the black valve open I unleash the Sann-T-Flush water and close an open the valve a couple of times. I just “guess” when I’ve got a couple of gallons into the tank.1 point
-
Thanks for this. It’s not a fun job, but do-able. The first time I did it was while I was doing a repair on the lifting mechanism. Once I got the fan out and disassembled I got concerned that I would be able to get it back together! Mike1 point
-
After getting disgusted with the white Camco hoses (stiff, bulky, kinks easily, can’t take prolonged pressure) I snagged a Zero-G hose on impulse at Camping World. (One of the very few things I didn’t buy from Amazon.) It’s lightweight, flexible, and very flexible even when cold. I have two minor gripes: the connectors seem to be zinc or some alloy that corrodes. Not to the point of crumbling, but it does make it hard to thread. I’ll try a little plumbers grease and see if that helps. Also, as the hose material is quite soft, you could probably twist or damage it if you’re not careful about tightening/loosening it. It could use an extended “grip” just behind the coupler. I have a dedicated Zero-G hose for city water or fresh water fill, two old Camco hoses for added length if needed, and a cheapo green hardware store hose for black tank flushing or grey water drain. Though storage IS at a premium on the LE2, the above hoses, electric cable, water pressure regulator, and a few other things fit easily in the “basement” accessible from outside.1 point
-
We had a blue friction cone and the replacement they sent just a month ago was also blue. From the Andersen website: "Replacement cones may vary in color, but it does not affect the cone's performance." Our original blue cone (10 years old?) was almost as thick as the new one, not nearly needing replacing. I did replace it though, since I had purchased a new ball to upgrade to 2 5/16" and the old cone had horizontal wear marks from turning. I wanted a new friction cone on the new ball which is the right way do do it. Yes, funny the warrantied is the wear-out maintenance item. Free $18 part for the $13.50 CONUS shipping. Feels more secure with new Bulldog and Andersen parts, over-engineered to 12.5K LBS GTWR. One thing I learned in this maintenance is never use the Andersen hitch without attaching the chains. Without the anti-sway plate bolted below only the snap ring would be holding the tapered ball from coming up and out hence decoupling the trailer.1 point
-
Seems like an unlikely part to be covered under warranty - unless it fails prematurely. Surely it’s a “consumable” part - like a brake lining. At any rate, I didn’t know it would have been covered under warranty and wouldn’t expect it to be, so I bought one soon after we purchased the trailer to keep as a spare. For that matter, I also bought two of the elastomer bushings, extra tensioning nuts Acme threads) and washers since I figured these are all parts that will wear (a lot of force, friction, and dirt). That said, my original ones are still there and looking much better than I’d expect. Then again, I’ve used “NeverSeize” on the threads and thrust surfaces of the washers and nuts since early on. It really reduces the torque need to load the WD system. It also hasn’t seemed to make the nuts loosen or back off. (Blushing: I also bought spare chains with the treaded studs as I figured they would wear as the nuts would….) Anyway, I found very little service or maintenance information available in either the Andersen hitch instructions or online. So I did the “belt and suspenders” approach to having spares in hand.1 point
-
Craig: I got 40K Miles out of our OEM Monroe shocks. All four of them were fine. With tires off they are a snap to change, I would do so when doing the springs. But a lot of others have gotten a lot less miles on their OEM Monroe shocks. I have no experience with the Bulldog's, but from this forum it appears they are doing well. How well vs. cost? How about it fellow "Bull Doggers" Any shocking experiences so far? 🙂 GH1 point
-
Unfortunately, it does not fold up enough to store compactly. OTOH - it is light. My last searches (Amazon, eBay) showed solar ovens/cookers that are a lot flimsier than the Sun Oven. They literally look like they would blow away with a slight breeze, and they appear to have little or no insulation. To be fair, the SunOven does take up a chunk of space in my pickup bed - but I keep all the graniteware pots inside if it, so it’s not just wasted space.1 point
-
Nice trip pics, keep em coming! 👍🏻🇺🇸😊1 point
-
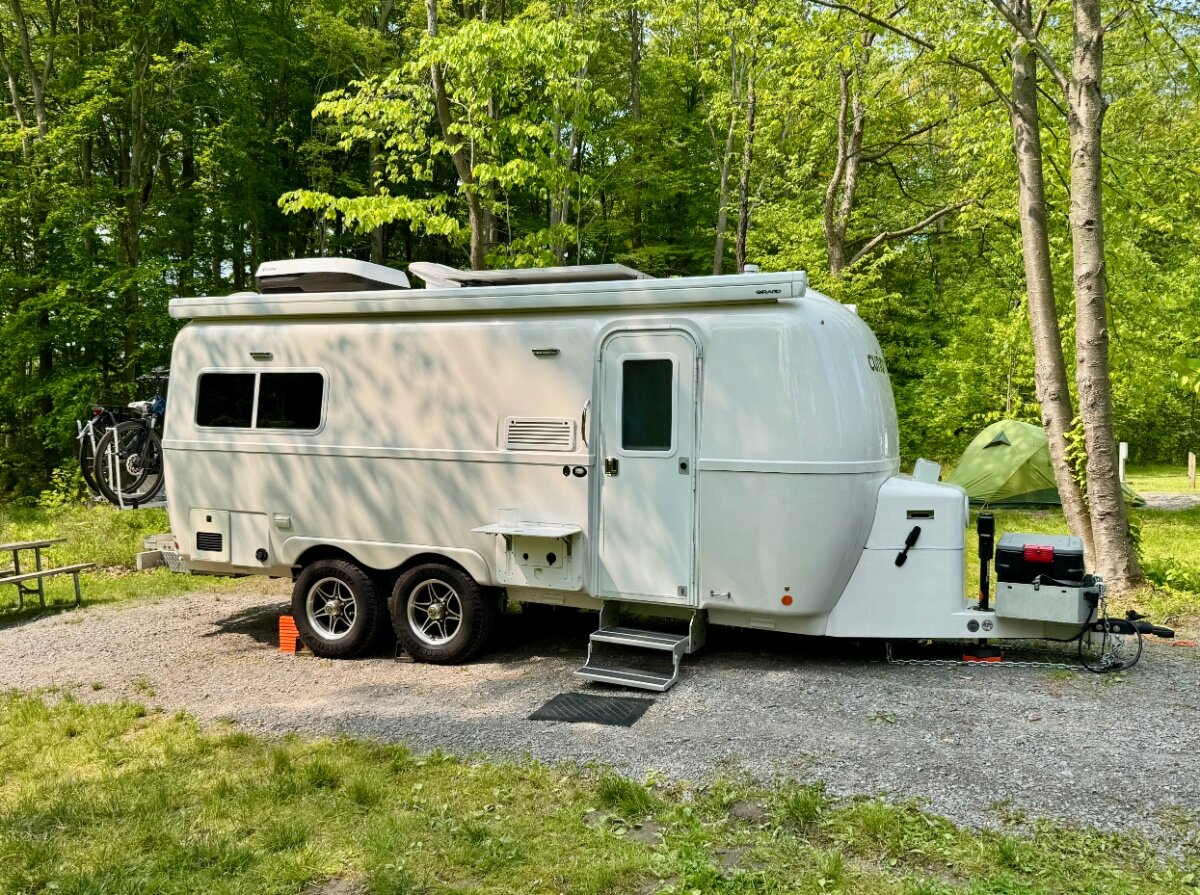
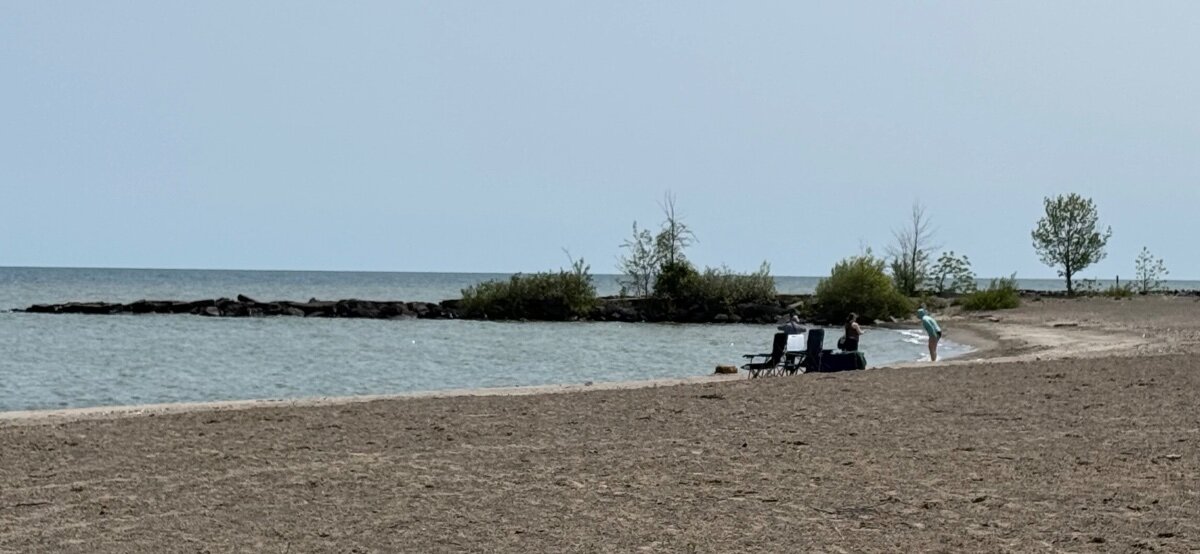
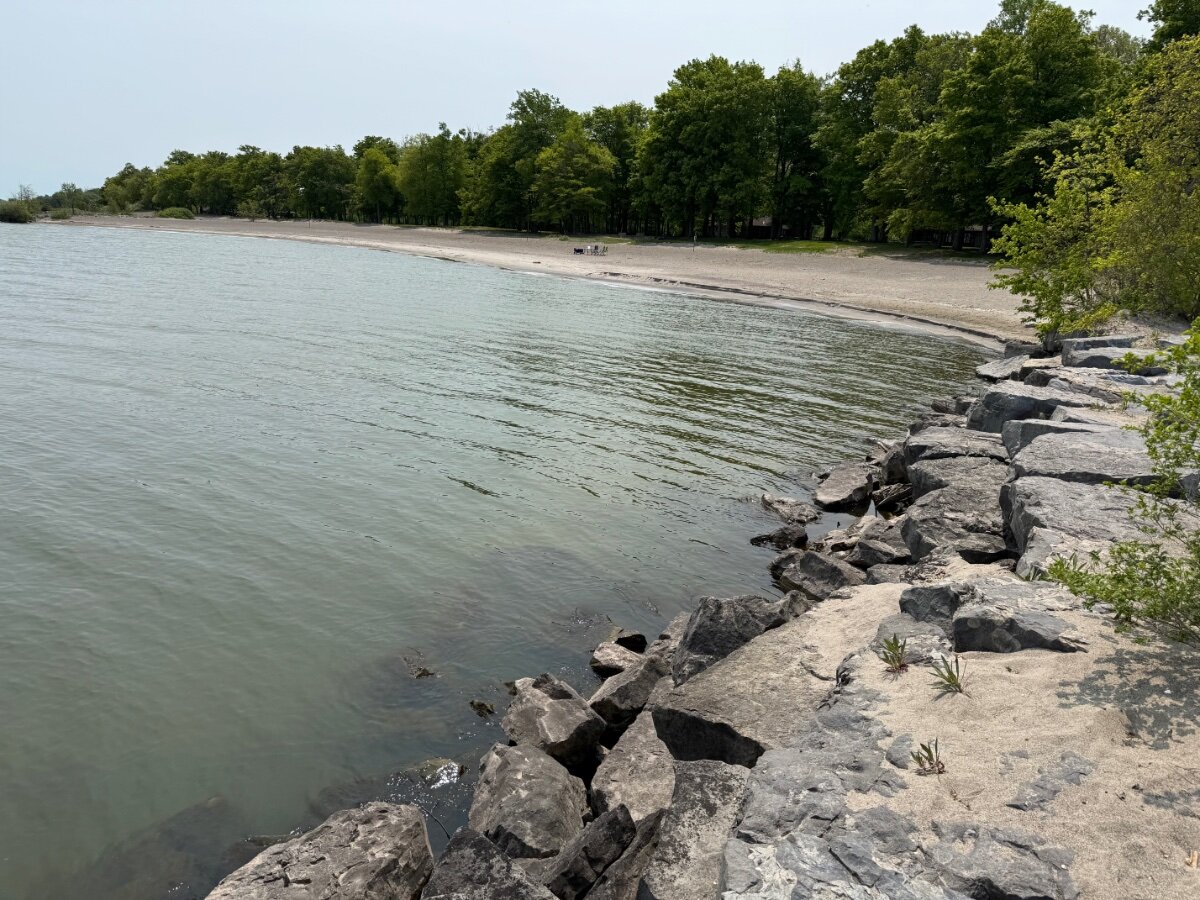
Lowrider! We are currently at Hamlin Beach State Park, in New York, on the shores of Lake Ontario. On the way here, I realized that I’d never seen this Great Lake before, despite several trips across New York over the decades. It is a very nice park, with brand new bathroom/showerhouse combos, and lots of beach, shelter houses, laundry, playground, etc. Tomorrow we leave for Fish Creek Pond in the Adirondacks for the six night TearUp ADK rally.
1 point
-
How in the world does that little lady eat all that food? Looks good though. Bill1 point
-
For any Oliver owners that have an interest in rear mud flaps. I sent David Hess at Sea Biscuit the info on this thread about rear mud flaps for Olivers. I would not be surprised if Sea Biscuit starts fabricating and selling a nice set of rear mud flaps for our Olivers. @connor77 has also been instrumental working with Sea Biscuit to possibly get this mod into production. 👍🏻 Stay tuned! 🇺🇸1 point
-
First, PLEASE replace your CO alarm if you have any doubts. Especially for a trailer that has an ammonia absorption refer. For these class of machines, the front of the refer cabinet must be sealed from the cabin, regardless of the brand. Aluminum foil tape is what I would use. I personally believe that running a condenser fan 24/7 to help scavenge air from the back of the refer and out the top outside vent is a good idea. It will tend to draw in good air at the bottom and exhaust whatever is in there out the top. In the process it may put this area under a slight negative pressure... further helping keep the family safe inside the trailer. GJ1 point
-
That's what we did Dudley. I sent you a PM. 2 years later and the fridge still works fine. I would do again! John1 point
-
Reviving this thread. Now that we're doing more shoulder season camping and using the Oliver more while closed up we're getting more frequent propane/CO alarms from the sensor below the dinette. Like @johnwen above I can feel cold air entering around the top of the fridge and we have the same large gap above the fridge behind the top service vent that he has. I can look straight in and see the back of the fridge control panel from outside the trailer. I'm convinced we're getting exhaust gasses blown in that way and intend to seal it up with aluminum tape unless anyone can give me a good reason air should be allowed to flow through there.1 point
-
Your guesses make for a good starting point. I'd get up in the attic with a bunch of blue paper towels. Take the panels on both sides of the attic down - you don't have to remove them or disconnect any of the wires. Lay and/or tape the blue paper towels near/on the areas that you suspect (i.e. around the "Oliver" sign, around the hole into the main cabin, in the area of the rear view camera, as far as you can reach towards the a/c, etc.). Go outside and give this area a good soak with the garden hose. Go back inside to look for "dark" spots on the blue paper towels which will give you an indication as to where the leak is coming from. Good luck! Bill1 point
-
How is October 21 - 25 “over Halloween”? And besides, they announced at the Rally this year this year that the rally would be moving to the fall next year. Personally, I think it’s a great idea, by late October the weather should be moderating and there’ll be almost zero chance of a tornado.1 point
-
A year out is the park policy on reservations for both Alabama residents and out of state folks too. Just a reminder you will have to pay in full for the dates you reserve. The park used to take just a deposit for one day to reserve your site for the rally. Not anymore, now you pay for all the days you have reserved up front.1 point
-
Thanks for letting us know! Apparently there were more of us that also called and got the same story from the campground. Bill1 point
-
Just called Lake Guntersville State Park campground and they are not taking reservations for this rally yet (12 or 13 months out only). I thought perhaps Oliver made arrangements with the park for early reservations but apparently that's not the case.1 point
-
Heck - some of us are scary enough even without getting dressed up! However, a mask just might do me some good.😁 Bill1 point
-
I'm happy with Fall dates, as it fits well with my typical 'return to home' routine after a summer journey, and it should be nice weather. Should we have a costume contest for the Oliver Rally?1 point
-
John, if you like and when you make it out to Arizona, buy the parts I listed above (just $100 with tax and including a backup fuse) and in an hour, we'll make the change. Service costs for custom work (most auto/RV service) is crazy these days! I could not afford our Oliver and tow vehicle, let alone the many other vehicles on our property if I had to pay for service. It's a labor of love! Hull #113 made it to the Mothership for service twice prior to our ownership, but not likely again. It's too far (that cost alone is infeasible for us), too much in service costs and it's well beyond warranty! I have a service policy here. When one vehicle breaks down, I park it until I have time to make the repair. In the meantime, I switch insurance to another that is ready to go! We also have cars for fair-weather driving and AWD trucks for winter. My insurance agent loves me! 🤣1 point
-
Oliver went to the Large Fuse starting with the 2024 or 2025 trailers. I asked Jason what the cost was with this new system. Maybe $1,200+/-. He suggest I stick with the breaker. Tomorrow I will contort my body to replace the breaker.1 point
-
Do you have a digital volt/ohm meter? If so, you can do a voltage drop test of your cables and connections while under load to determine what is causing the excessive draw to trip your breaker. If only the breaker is getting warm I would test across both terminals of it first. With a 1000 watt load and using the millivolts scale on your meter you should read less than 15mV. Much more over that and the breaker is bad.1 point
-
Time for anybody needing to replace the main breaker, get a fuse and fuse holder instead. Fuses protect bidirectionally, meaning they will protect the power source (battery) and the load, inverter and/or other loads. Breakers are OK for like a 40A or 60A DC branch, but not on the 4/0 cables between battery and inverter. A fuse will protect a ground fault at the batteries or at the inverter and a breaker will only protect one side, depending on which direction it is wired. In our older hull, OTT had wired a 250A ANL fuse and holder between the batteries and our original 2KW inverter (check inverter manufacture's spec for correct fuse amps). When I upgraded our inverter I only needed to get an ANL for higher amperage. You can even better protection with Class-T fuses ($$$) but ANL will perform much better than the breaker shown above and certainly is good enough. I would suggest these. The Blue Seas holder is rated to 750A. They have a smaller 300A holder for less money, but this one is nice, with two pairs of mounts which allows you to change the fuse without loosening the battery cables. The second link assumes you need a 300A fuse. Enjoy! 😂 https://www.amazon.com/Blue-Sea-Systems-Block-Insulating/dp/B001VIVWAW/ https://www.amazon.com/Blue-Sea-Systems-5133-300a/dp/B07D1VJ7BM/1 point
-
Anderson isn't one of them. For their WDH they say not to grease the ball or coupler.1 point
-
Excellent choice. We towed a 26' travel trailer coast to coast across the US with our son, dog, and cat using a full size Ford van as the tow vehicle back in 2005. It was a great travel vehicle and yours has the same 6.0 engine we have in our truck now. Plenty of power for an Oliver it's been a solid engine for us.1 point
-
We received the replacement rubber from Pelland quickly and they sent an extra foot+ in length. Installed it last week, starting from the bottom, pushing hard to compress as much stock as possible. I used an automotive hose cutter tool. Cut it 1/4" longer at end and pushed in the extra length, so that when it shrinks, we should be good. The black does look so much better, as it is recessed, and the white frame is still prominent. Thanks all for your help! 🙂
1 point
-
There is no reason air needs to pass around the fridge into the cabin. In fact, it shouldn't. That's a propane burning appliance. The rear of the fridge should be exposed to the exterior vents but the front of the fridge should be isolated from that service area. Take photos and start a service ticket.1 point
-
I was with you 100% until this statement. Walked through an Ikea ONCE in Austin TX. Could not wait to get out of their maze of cheap kits, ASAP leaving EMPTY-HANDED! 🤣 My son who has been an Angie's List contractor, on and off, has installed these kits for the mechanically-impaired for big bucks! I do however, certainly appreciate your long written procedure, pictures not required! I have another way to clean this fan QUICKLY (though many forum members do not always like my unique methods)... With fan fully opened, old bath towel on floor below, pressure washer in hand with short wand and wide tip, blast upwards in a circular fashion for 10 seconds and the whole unit is as clean as can be! I do this every summer (and it works well)! 😂0 points
-
I can just see those guys at CGI having their way with #113! 😇 Bill0 points


.thumb.jpg.e34bf01ef7f7d5e99ad31856d45afbeb.jpg)


-
Recent Achievements
-
")


")


")


