Search the Community
Showing results for '"Backup camera"'.
-
 I'm interested in replacing my original backup camera with a new Furrion Vision S. I'm hoping the better day and night vision it's supposed to provide will want me to use it. The original was nearly worthless at night, and now it has a cut cable and damaged antenna due to vandals. Anyone here retrofit their Ollie with a Vision S system or is using one that came with a newer Ollie? I'm interested in what it takes to retrofit and if it actually works as well as Furrion claims. Thank you, Duane
 -
Like Mike, same here with the backup camera assist in our truck its piece of cake really. I've also done many solo trips several hundred miles away with no issues so far and I am not alone in these type of endeavors. There are many RV'ers doing the same.
-
My husband has gotten so skilled with the truck backup camera that I almost never participate in the hitching up process anymore...
-
 Hi All! I will be picking up my Ollie in less than 2 months. Again, as a newbie to RVing, I am still trying to learn…but so far, I feel I have learned a lot from reading these forums – so a big thanks to all of you! Anyway, I have looked at different checklists on how to set up and break down the trailer, trailer hookup, trip preparation, etc. After looking at tons of checklists (and Youtube videos), I have attempted to create my own checklists. Some may look at these lists and think they have too much info, and that they are overkill – but personally, I work better with very specific instructions. Although these checklists are long, I was hoping that you guys would look and provide feedback on them. Did I miss steps? Is the order correct? Did I use the correct terminology? And so on. I know this is a big ask as the lists are longs on detailed....but any help would be appreciated. If worst comes to worse, I guess I will find out if they are correct when I go to use them. Note that if you see RED in the script, then it is a question I have or something I still need to fill out – so if you have the answer, I would love to hear it. I have attached a document with the checklists, but I have also cut and pasted the checklist below....just to make it easier for anyone. The document is in .docx format...if you need it in another format, let me know. Also, after I complete the checklist and go through them a couple of times, I will post a file with all the updates of them so it can be downloaded by anyone interested in it. Thanks! (1a) Campsite arrival and set up - Inside trailer 1) Put steps down of Ollie. 2) Unlock Ollie door. 3) Open window shades. 4) Open windows as needed. 5) ? Open stove vent ? 6) Pull out shower drain cutoff valve (inside bathroom at toilet base) to open shower drain. 7) Open bathroom fan vent. 😎 Open Maxx fan lid/vent if it is not open. 9) If propane was not on: Verify stove is off, turn on propane outside, and light stove burner for 30 seconds (to remove air from line). 10) If at RV park (with electrical): Switch refrigerator from ‘LP’ (propane) to electric. 11) Verify refrigerator is working correct AND in correct mode (should be ‘LP’ if not at RV park with electric). 12) If boondocking and using fresh water tank: Turn on water pump. (but maybe turn on faucet first?) 13) Verify kitchen faucet is working. 14) Turn on gas water heater switch ? 15) Turn off backup camera. ? 16) Turn on furnace if cold. 17) If at RV park AND electrical is hooked up: Turn on A/C if hot. 18) Put out welcome mat, chairs, etc (1b) Campsite arrival and set up - Outside trailer 1) Using spotter, back up into campsite. Watch out for branches. 2) ? Turn off GPS in vehicle. ? 3) Put on work gloves. 4) Eyeball trailer is not too far and will be able to hook up to sewer, electrical, and water. 5) Level trailer side to side using Anderson levelers. Use level inside for final determination. 6) Set chocks - front and back of both wheels. Important: set chocks before detaching safety chains or the trailer from the hitch! 7) To unhitch trailer (after you are sure you are close enough to water/electrical/sewer): A) Detach breakaway cable from truck and stow. B) Remove hitch coupler pin (that has electric pigtail under it) from hitch coupler lever and stow. C) Detach 7-pin electric pigtail from truck and stow. D) Detach safety breakaway cord from truck and stow. E) Detach safety chains from truck and stow. F) Put leveling blocks under front jack leg so it doesn’t sink in. G) Lower front jack leg so tongue is raised about 2-4" until chains are slack. H) Pull cotter pin from WDH triangle pin. I) Pull WDH triangle pin from WDH (you may have to wiggle triangle back and forth while pulling out). J) Insert cotter pin back into WDH triangle pin (so you don’t lose it) and stow WDH triangle pin. K) Drop WDH triangle and chains on ground. L) Raise front jack leg so tongue is level with truck hitch. M) Pull up on hitch coupler lever. N) Lower front jack leg to raise tongue and release tongue from ball. If necessary, use foot to push down on hitch to help separate ball from hitch. O) Lock trailer hitch with hitch lock. 😎 Move truck to parking spot. 9) Raise or lower front jack leg onto leveling block to level trailer front to rear. Use level inside for final determination. 10) Lower rear stabilizer legs onto leveling blocks to stabilize back of Ollie. 11) After making sure that stove, heater, furnace, and water heater are off: Turn on propane 12) If at RV park: Hook up electric: A) Attach one end of electrical cord to RV. Note: Always hook up to RV first!!! B) Attach the other end to surge suppressor. C) Attach surge suppressor to 50-amp converter if needed. D) Verify that breaker is OFF on pole side before plugging in. E) Connect converter (or surge suppressor) to park electric outlet. F) Make sure no faults are detected by surge suppressor. G) Turn on breaker. 13) If at RV park: Hook up water: A) Wipe off water faucet with sanitizing wipe (or spray with disinfectant). B) Attach ‘Y’ to faucet. C) Attach 55 PSI pressure regulator to ‘Y’. D) Attach inline filter to pressure regulator. E) Attach white water hose to inline filter. F) Attach white water hose to city water line. G) Do NOT turn on water pump inside Ollie! 14) If at RV park: Hook up gray water sewage: A) Put on gloves. B) Bring out sewage drain hose support and put sewage drain hose on it. C) Remove cap and attach sewage drain hose to sewage hole. D) DO NOT pull out grey tank handle to open. Save grey water for cleaning sewage hose. 15) Check water heater for propane odor - light pilot and turn on or use auto ignite on newer models. 16) Turn furnace electric switch on - older model have switch on the furnace under the sink, newer models do not have a switch. Not sure if we have a switch or not. 17) Extent and secure awning (optional). (2a) Campsite departure preparation - Inside trailer 1) Clean up, put stuff away, secure items. 2) Vacuum. 3) Refrigerator - check inside, throw away anything old, latch door tightly, switch to ‘LP’ (propane) (if you were set to electric), and verify that refrigerator is running on propane. 4) If dumping garbage: Collect and bag garbage AND put in truck. 5) Turn off TV and stow away. 6) Verify stove burners are off. 7) Secure microwave glass plate (maybe in sink?). 😎 Close and secure ALL windows (including bathroom window). Note that non-bathroom windows can be left open ( < 4 inches) if there is no rain in the forecast and the day is hot. 9) Close ALL window shades (so they don’t have problems when traveling) unless windows are kept open. 10) Close bathroom fan vent. 11) Push in shower drain shutoff valve (inside bathroom at toilet base) to close shower drain. 12) If dumping garbage: Collect and bag garbage AND put in truck. 13) Turn off A/C. 14) Turn off furnace and lower thermostat. 15) Turn off Maxx fan - close lid/vent, turn switch and speed to off, thermostat on red. Note that the Maxx fan lid/vent can be left open if there is no rain in the forecast. 16) Make sure ALL cabinet and drawers are closed tightly. 17) Lock bathroom door. 18) Lock pantry and front closet door. 19) Turn on backup camera ? 20) Turn off water pump. 21) Bring in any outside mats. 22) Turn off all lights. (2b) Campsite departure preparation - Outside trailer 1) If at RV park/dump station: Raise 2 rear stabilizer jacks a foot. 2) If at RV park/dump station: Raise front of trailer one-half foot using electric stabilization jack so grey tank will flow out better. DO NOT raise so high that 2 rear stabilizer jacks touch ground! 3) If at RV park/dump station: Put on disposable gloves. 4) If at dump station: Connect sewage drain hose to sewer hole (it should already be attached if at RV park). 5) If at RV park/dump station: Empty black tank by pulling out black tank handle to open. 6) If at RV park/dump station: Verify sewage drain hose has stopped draining. 7) If at RV park/dump station: Push in black tank handle to close. 1) If at RV park/dump station: Empty grey tank by pulling out grey tank handle to open. 2) If at RV park/dump station: Verify sewage drain hose has stopped draining. 3) If at RV park/dump station: Push in grey tank handle to close. 4) If at RV park: Turn off white tank water at RV faucet. 5) If at RV park: Disconnect white water hose, spray with disinfectant, connect ends, and stow. 6) If at RV park/dump station: Spray black tank water hose with disinfectant and attach to RV faucet. 7) If at RV park/dump station: Attached black tank water hose to black tank flush inlet. 😎 If at RV park/dump station: Turn on water at faucet. 9) If at RV park/dump station: Monitor black tank from inside RV. When 2/3 full, pull open black tank handle. 10) If at RV park/dump station: When running clear, turn off water at faucet. 11) If at RV park/dump station: Disconnect black tank water hose, spray with disinfectant, connect ends, and stow. 12) If at RV park/dump station: Squeeze sewage drain hose so any excess goes into sewer hole. 13) If at RV park/dump station: Disconnect sewage drain hose from sewer hole 14) If at RV park/dump station: Spray sewage drain hose with disinfectant, cap, and stow. 15) If at RV park/dump station: Throw away gloves and wash hands. 16) If at RV park/dump station: Spray water hose ends with disinfectant, connect ends, and stow. 17) If at RV park: Turn off electric from electrical hookup. 18) If at RV park: Disconnect electrical cord from RV and stow. 19) If at RV park: Disconnect cable TV cord from RV and stow. 20) Stow outside thermometer. 21) Get any items you need for truck from inside trailer (water, keys, etc.). 22) Close and secure awning. 23) Bring up both stabilizers and front tongue support jacks. Stow all 3 leveling blocks. 24) Water heater - off. 25) ? Secure stove vent. ? 26) ? Put on A/C cover. ? 27) Walk around trailer and stow anything left out. 28) Lock outside storage compartments. 29) Verify all lights are out. 30) Lock trailer door. 31) Raise aluminum steps. 32) Hitch up truck to travel trailer. Follow instructions in '(3) Trailer Hookup' section below. (3) Trailer Hookup 1) Back up truck to hitch about 6 inches from trailer hitch - make sure you are straight. 2) Need to add part if trailer and truck are not straight to each other (could be tough to set up WDH). 3) Raise rear stabilizer legs all the way up and stow both leveling blocks. 4) Unlock hitch coupler lock and stow. 5) Pull up on hitch coupler lever. 6) Put leveling block under, then lower front jack leg to raise tongue so ball receiver (on trailer) will clear the hitch ball (on truck). 7) Back up truck as to position hitch ball under ball receiver, but just a little forward - about a 1/2". 😎 Raise front jack leg to lower tongue onto hitch, until hitch is snug with ball. 9) Push down on hitch coupler lever to lock hitch onto ball. 10) Insert hitch coupler pin into hitch coupler lever (so secure it). 11) Lower front jack leg until no weight on truck hitch. This not only verifies the lock/ball is secure, but allows easier installation of WDH. 12) Take cotter pin out of WDH triangle pin. 13) Slide WHD triangle under the hitch 14) Secure WDH triangle with WDH triangle pin. 15) Insert cotter pin in WDH triangle pin to secure it. 16) Raise front jack leg all the way up. 17) Verify that WDH chains are tight. 18) Attach safety chains to truck so they crisscross UNDER tow bar. 19) Attach 7-pin electrical pigtail to truck (under hitch coupler pin). 20) Attach safety breakaway cord to truck (NOT to safety chains). 21) Remove chocks and stow. 22) Pull trailer forward a little - recheck hitch to see if secure. 23) Pick up Anderson levelers and any 24) Test trailer brake lights and turn signals. 25) Walk around trailer and stow anything left out. (4) When leaving the RV for a hike or car trip 1) Retract awning. 2) Bring in any items that you don't want wet or blown away. 3) Turn off generator and lock it up. 4) Put away solar. 5) Check A/C or heat – turn on if needed. 6) Lock up trailer. (5) Trip Preparation (leaving home) 1) One day before: Connect RV to shore power (AC). 2) One day before: Check propane tanks and fill if needed. 3) One day before: Verify stove is off. 4) One day before: Open up propane valve. 5) One day before: Turn on stove for 30 seconds to clear air from propane lines. 6) One day before: Turn refrigerator on to AC and set to 9 (which is the coldest setting). 7) Check air in tires - fill to recommended psi of tires. 😎 Fill fresh water tank about 1/3 full - top it off at or near your destination. 9) Open hot water tank bypass valve - handle in vertical position to open, horizontal to bypass. 10) Turn on pump and run all faucets (not all at once) from the rear to the front - hot and cold to remove air. 11) Run water into toilet to remove air from lines and to add water to black tank before use. 12) Day of trip: Follow instructions in ‘(2a) Campsite departure preparation - Inside trailer’ section above. 13) Day of trip: Disconnect electrical cord from RV and stow. 14) Day of trip: Follow instructions in '(2b) Campsite departure preparation - Outside trailer’ section above, including any instructions in the ‘(3) Trailer Hookup’ section. Ignore any ‘If at RV park/dump station’ instructions. 15) Open Maxx fan vent. (6) Trip ending (arriving home) 1) Follow instructions in '(1b) Campsite arrival and set up - Outside trailer’ section above. 2) Put steps down of Ollie. 3) Unlock Ollie door. 4) Turn off backup camera. ? 5) Remove all items from refrigerator. Turn off refrigerator. Make sure door stays open. 6) Put dog towels in refrigerator to capture water from defrosting. 7) Turn off propane. 😎 Empty water tank. 9) Close Maxx fan vent. 10) Close window shades. (7) Filling up 30 gallon white water tank from water spigot (fresh water inlet) 1) Wipe off water faucet with sanitizing wipe (or spray with disinfectant) 2) Attach 55 PSI pressure regulator to water faucet. 3) Attach inline filters to pressure regulator. 4) Attach white water hose to inline filter. 5) Attach white water hose to fresh water tank inlet. 6) Turn on water until water overflows or Seelevel monitor says it is full - then turn off water. 7) Detach pressure regulator from water faucet. 😎 Detach white water hose from inline filter. 9) Squeeze out water from white water hose, then detach from fresh water tank inlet. 10) Wipe off white water hose with sanitizing wipe (or spray with disinfectant), connect ends. 11) Stow white water hose, pressure regulator, and inline filters. (8) Filling up 30 gallon white water tank from water container or jugs (via boondocking inlet) while you are boondocking 1) Wipe off boondocking inlet with sanitizing wipe (or spray with disinfectant) 2) Attach white water hose to boondocking inlet behind Ollie. 3) Attach white water hose to jug or container holding the water. 4) Turn ALL 4 valves counter clockwise. As info: a) upper left valve opens from rear boondocking inlet. b) lower left valve opens from fresh water tank. c) lower middle valve closes from faucets. d) lower right valve closed from city water. 5) Tun on pump – water will start flowing from water jugs to fresh water tank. 6) When all water has been pumped in, turn off pump. 7) Detach white water hose from inline filter. 😎 Squeeze out water from white water hose, then detach from boondocking inlet. 9) Wipe off white water hose with sanitizing wipe (or spray with disinfectant), connect ends. 10) Stow white water hose, pressure regulator, and inline filters. 11) To continue boondocking: a) Turn upper left valve clockwise to close rear boondocking inlet. b) Turn lower middle valve clockwise to open faucets. tripmush - checklist.docx
 -
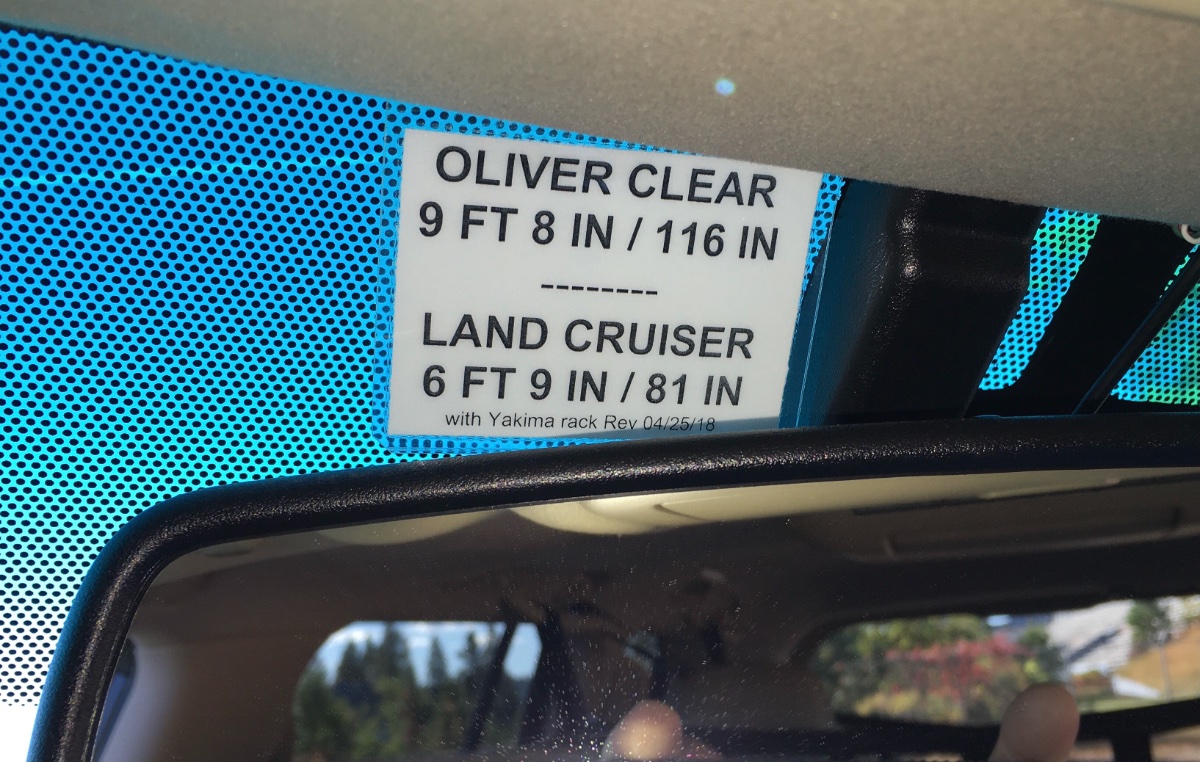
Just remember, if the guide can't see the mirror, the driver can't see the signals. Then again, most of you probably have newer trucks, with backup camera on the trailer. We don't.
-
Here's one that I LOVE everytime I park the trailer: It's a bubble level that I mounted on the face of my basket so I can see it from inside my TV via my backup camera. Makes leveling the trailer (side-to-side) almost a one person operation (except I still need my partner to shove the Anderson wedges under the tires before I let the brakes off.) I did seal the backside of the tubes with epoxy per a suggestion from (I think) John Davies a few years ago. https://www.amazon.com/Camco-25563-AccuLevel/dp/B000EDUTOA/ref=asc_df_B000EDUTOA/?tag=hyprod-20&linkCode=df0&hvadid=312128189269&hvpos=&hvnetw=g&hvrand=12342072316441648381&hvpone=&hvptwo=&hvqmt=&hvdev=c&hvdvcmdl=&hvlocint=&hvlocphy=9008247&hvtargid=pla-448524087016&psc=1
-
GJ- The Rock Tamers have a couple of "bolts" that are supposed to be used to both "lock" the Tamers in place and to help "level" everything. In my case, I had to install a couple of small shims in order to get it looking level with the rear bumper. There is absolutely no problem with the backup camera and the "zoom" feature still works great when hitching. However, the bars at the top of the Rock Tamers do interfere with the sensors in the bumper. This causes them to "sense" that I'm too close to something and they sound an "alert" whenever I put the truck into reverse. I could adjust these so that they would sit below the level of these sensors but I don't like the looks of them that way. So, I simply put up with the warning.
-

TPMS -Tireminder App version
John E Davies replied to TexasGuy's topic in Mechanical & Technical Tips
I bought the amp and found out that it was not needed for either my full sized Ram pickup or my shorter Land Cruiser. There have never been any issues with connecting, except when a sensor battery gets low, which is to be expected. I have never even needed to raise the dorky antenna mast on the display.... https://olivertraveltrailers.com/forums/topic/2482-review-tire-traker-tt-500-tpms/ IF you needed to install it, a good spot would be in the left overhead cabinet at the bathroom divider wall. You could splice into the power and ground wire for the cabinet lights, that is where I mounted the Garmin backup camera transmitter. John Davies Spokane WA -
HOW TO: Move the factory cargo tray to a rear rack
John E Davies replied to John E Davies's topic in Ollie Modifications
Update, I have used this system for two camping seasons without any issues. At first I was pretty paranoid about the hardware loosening from the often violent up and down motion at the rear of the trailer. I retorqued the bolts a couple of times, I got a little nut movement the first time, but never after that. I do check them annually, when I check stuff like the front jack attach nuts and the hitch and suspension bolts. Even when I forcibly backed the rack into the stone siding on my house, it did not budge. But the stonework sure did 🤭 Note to self: a trailer backup camera only works when you actually turn it ON! John Davies Spokane WA -
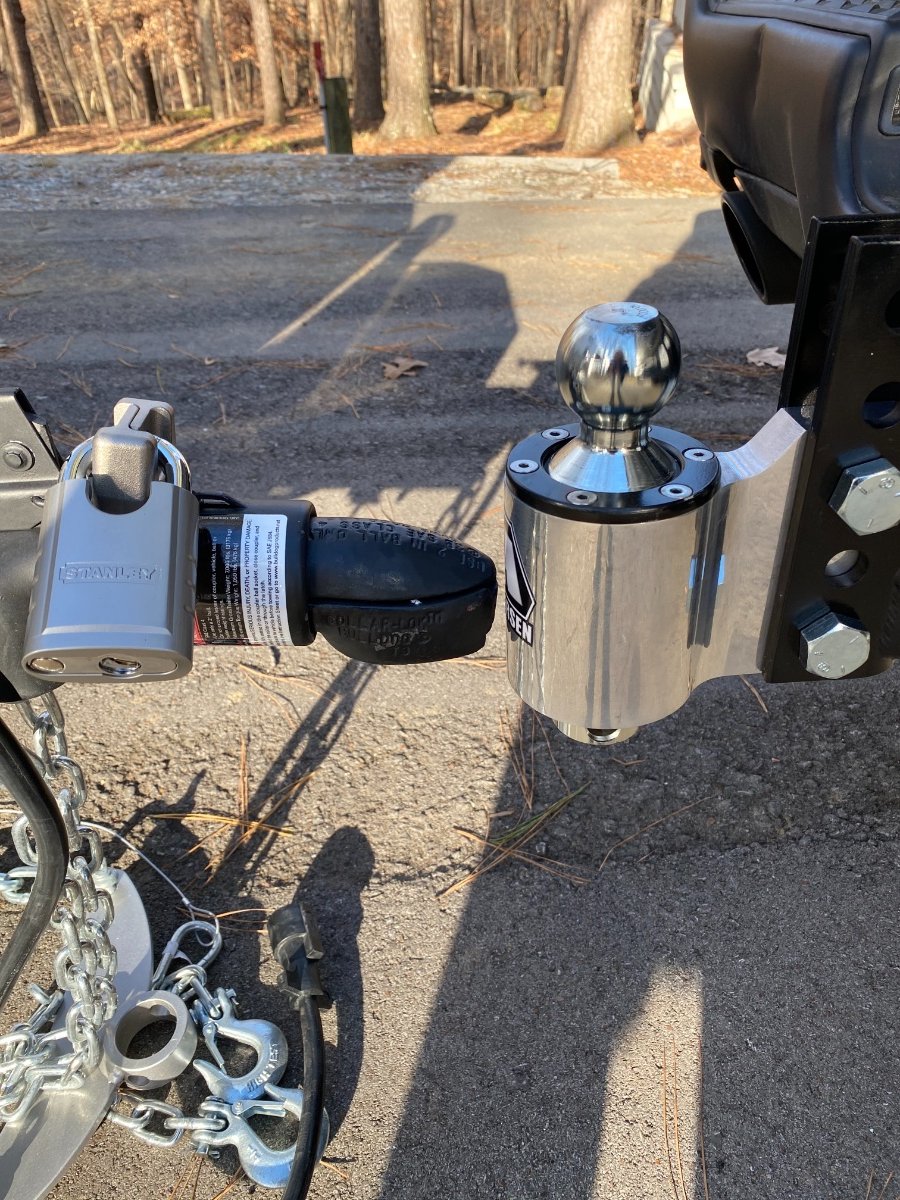
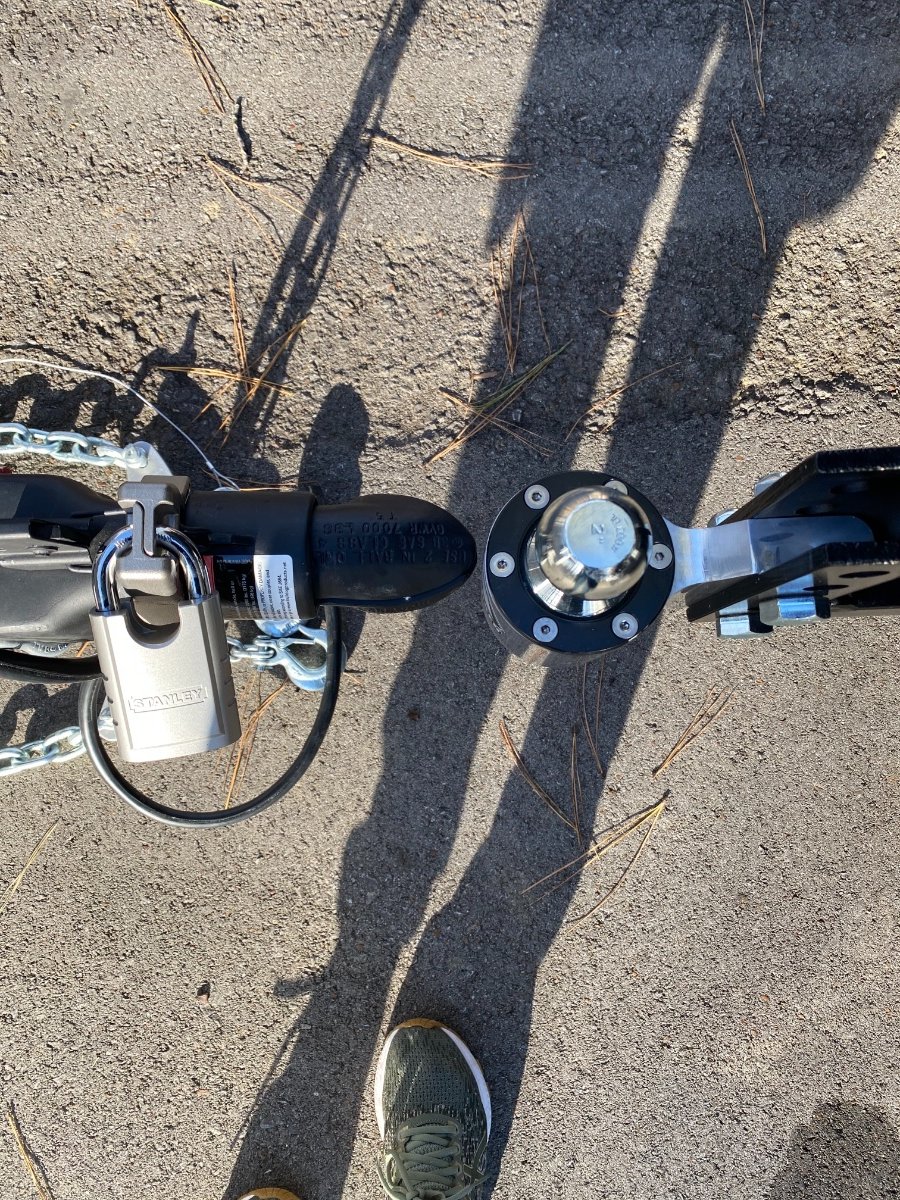
Look! I backed up without Annoying Park Assist thing on, and this almost looks doable alone when it comes time to re-hitch, am I right? Used the Ram’s backup camera.

-
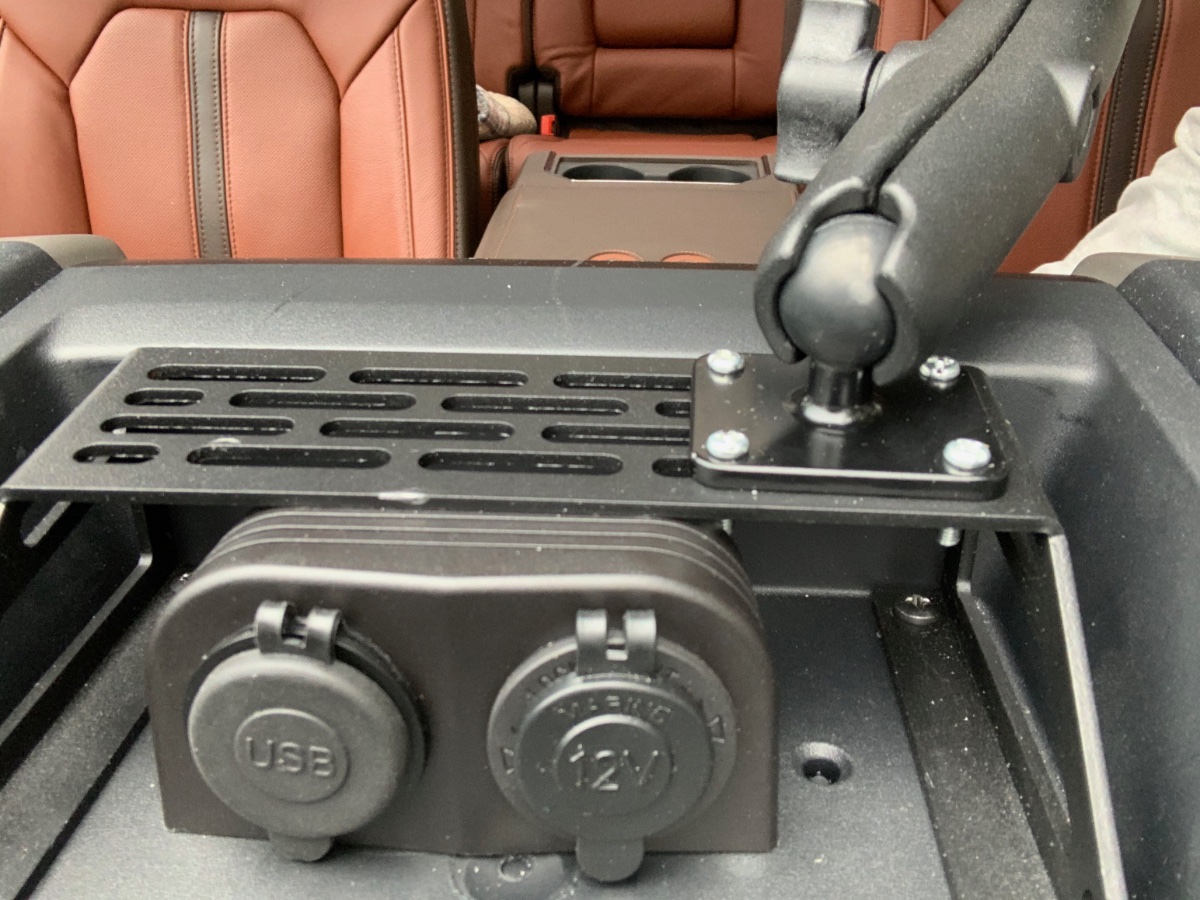
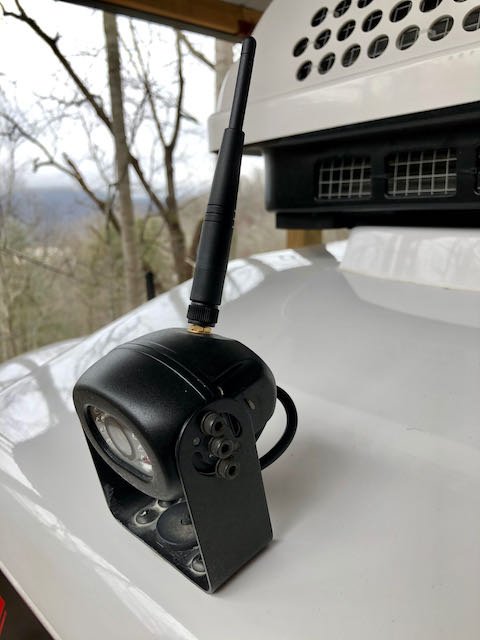
I followed Topgun2's advice and executed a similar install to enable a swivel arm in our new F350. (EDIT - I also pulled the 20A fuse for the Power Port before doing this work.) 1) I started by removing the dash tray (I used painters tape to protect your dash from scars from the plastic pry tools). 2) Snap off the "speaker cover" it is hard to pull off as it's secured by clips in 4 corners. 3) Remove 2 - 7mm bolts in the front (windshield side) of the tray. 4) Remove the 2 - 7mm bolts on the top of the radio stack front surround. 5) Pull out the radio stack surround, and loosen 2 more 7mm bolts below the radio facia to remove a retaining facia (holds on the side trim stacks.) 6) That allows you to pull straight out on trim to the right of the radio which includes the a/c vent and more importantly access the back of the power point (cigarette lighter). 7) Splice onto the wires from the Cig Lighter port. Feed the wires up into the area above the radio and below the speaker tray. The wiring diagram below was supplied by the Ford BBAS service for 2021 F350. The Cigarette Lighter B+ is the Green/Brown Stripe wire, and Ground is Black with Blue Stripe. Finished install with Garmin all setup. Since the tray removal and wiring was a little tricky I made a quick video showing tray removal and re-install. I considered using the up fitter switch, but realized that there wasn't enough current draw to warrant all that effort and using up a switch. Also, I learned that the "through the firewall" wires ended up making me wish Ford would allow 6" more wire for the "through firewall" feeds. They are so short, you need to completely remove the fuse panel to get access to the bundle of 4 through firewall wires. So I stopped that effort. I wired into the same dash 12v power port circuit as Topgun2. That port dash circuit has a 20Amp fuse, and my devices don't pull more than a couple of amps normally. My backup camera plugs into the 12V power port in the tray, and my Garmin into one of the 2 USB ports. Here's the video showing dash tray removal and reinstall. Dash Tray.mp4
-
Thank you, Bill, for your detailed descriptions and comments. Do you think that the combination 890 and BC35 camera would be a solid alternative to the backup camera system that Oliver installs on new trailers ("Furrion Vision S" with a 4.3-inch screen)? Or, do you find that the 890 provides substantial benefit as an additional backup camera system so that both are warranted? From your description, the Garmin combination would offer a much bigger back up screen (perhaps making it easier to see obstacles when backing up), plus give all of the benefits of navigation, especially if you can easily toggle between rear-view and navigation when driving. Does the BC35 camera have a motion-detect function (I don't see anything mentioned in the Amazon descriptions...).
-
We have two full camping seasons under our belts now with our Elite II, and we’ve only had a couple minor problems with things that are out of Oliver’s control. We had water in the backup camera lens (Oliver sent a replacement next day and it was an easy swap out), and a gasket on the bathroom fan cover came loose and needed replaced. Everything else still works as new. We shopped around for several years, going to RV shows and dealers comparing trailers, and were very close to purchasing an Airstream Nest, but found a lot of articles and web posts about huge problems with the Nest (Airstream has since discontinued the Nest). Once we did a visit with another Oliver owner and then did the factory tour and saw how they were built, we were convinced. The Oliver company and people have all been great to deal with. When the family name is the company name, it makes a difference.
-

Four (easy) questions about truck Payload for Elite II?
SteveCr replied to david shiffman's topic in Towing an Oliver
For grins and giggles here is a Ford dealers explanation of their different trailer tow packages. The regular tow package is what I have and is "ok" for the LEII. Post sale, I installed the max pkg FORD OEM trailer brake controller myself....an easy mod....just had learn how to mod the software. I do not have and I think I will miss having the larger gas capacity. *********************************************************************************************** What is the Ford Max Tow Package? June 12th, 2020 by Evan Riley Many of our customers at Kings Ford in Cincinnati, OH, who are looking at Ford trucks for sale are interested in using their vehicle for towing. Ford trucks are all excellent choices for this sort of work, but determining exactly which configuration and packages are right for you can sometimes be confusing. Perhaps the question we get most often is: what is the Ford Max Tow Package? And how is it different from the standard Trailer Tow Package? If you are one of the people who have this question, this post is for you. We will lay out all the differences so that when you are ready to purchase one of our Ford trucks for sale, you will know exactly which towing package is right for you. The first piece of information that you should know is that the Ford Max Tow Package (or Max Trailer Tow Package as it is officially known) is only an option on the Ford F-150 series trucks. For the Ford Ranger, there is only a basic Trailer Tow Package that adds a hitch and 4/7 pin connector as well as increases the tow rating. With the Ford Super Duty trucks, all models come ready to tow from the factory with a hitch and 4/7 pin connector. However, they do have specialized tow packages for campers and gooseneck trailers. So if a Ford Ranger can handle your towing needs, or if your trailer requires the extra might of a Ford Super Duty truck, then deciding which tow package you need is a straightforward matter. However, most of our customers are interested in the Ford F-150 and will need to decide between the Trailer Tow Package and the Max Tow Package. The differences between these two packages are not obvious, and you will probably not be able to tell which package is present on a Ford truck without referencing the build sheet. However, once you hook a trailer up to your vehicle, those hidden differences will soon become quite apparent. The Trailer Tow Package The basic Ford Trailer Tow Package is actually not that basic. It, of course, comes with the obvious Class IV trailer hitch and standard 4/7-pin wiring harness to connect your trailer. However, the package also includes numerous less obvious features to improve your trailering experience. For instance, on every engine except the base 3.3L V6, the Trailer Tow Package also adds an engine oil cooler to keep the truck from overheating under the heavier strain of towing. Other mechanical upgrades include a heavier front stabilizer bar and, on some models, an auxiliary transmission oil cooler. Finally, the package adds a tailgate LED that makes hitching a trailer in the dark a much easier experience. Altogether, these upgrades mean that an F-150 with the Trailer Tow Package is a far more capable vehicle than one that has simply had a hitch and wiring added later. So if you are looking at Ford trucks for sale with the intention of adding towing capability down the road, be aware that spending the money on a factory tow package will get you far more value for your dollar. However, the Trailer Tow Package does not stop with physical upgrades to the truck and also adds two valuable electronic features. These are Pro Trailer Backup Assist and Smart Trailer Tow Connector. While a good mechanic could replicate the mechanical additions of the Trailer Tow Package, these integrated electronic upgrades are only available from the factory. Pro Trailer Backup Assist is designed to make reversing with a trailer attached a far simpler and more intuitive task. When this feature is activated, and the truck is put in reverse, steering is performed with an auxiliary knob on the dashboard instead of the steering wheel. Simply turn the knob in the direction that you want to go, and the computer will figure out the necessary steering inputs to get you there while monitoring your trailer through the backup camera. This not only makes maneuvering with a trailer a breeze; it means that you will never again need to stop and think about which way to turn the wheel to keep from backing into something. The second electronic system included in the Trailer Tow Package is less evident to the driver but just as valuable. Smart Trailer Tow Connector monitors the electrical systems in any trailer plugged into your truck and displays relevant information right in your instrument cluster. This will let you know if your trailer has any burned out lights or if its batteries are running low, preventing any unpleasant surprises while you are out on the road. Along with Pro Trailer Backup Assist, these advanced electronic features more than justify purchasing a Ford F-150 with the Trailer Tow Package if you have any desire to pull a trailer in the future. The Max Tow Package If you are looking at Ford trucks for sale specifically for something to tow trailers, then even the basic Trailer Tow Package might not be enough for you. In that case, look for an F-150 with the Max Trailer Tow Package. This improved towing package includes all the mechanical and electronic features found in the starting towing package, from the engine oil cooler and upgraded stabilizer bar to Pro Trailer Backup Assist and Smart Trailer Tow Connector. But it also adds some extra features that are particularly valuable for pulling heavier trailers longer distances. The single most significant change included in the Max Tow Package is the upgrade to an electronic-locking rear axle with a 3.55 gear ratio. The addition of an electronic-locking rear axle means that power will be directed evenly to both rear wheels, significantly improving traction on poor surfaces. If you are in mud or snow, this might be the difference between getting your trailer moving or not. While the larger 3.55 gear ratio is not as large an improvement as the electronic-locking rear axle, stepping up from the standard 3.15 or 3.31 will provide more effective torque and help you get a heavy trailer moving more efficiently. If the Max Tow Package is combined with the Heavy-Duty Payload Package, then this will be further upgraded to a 3.73 gear ratio. Two other physical changes included in the Max Tow Package are a larger fuel tank and an upgraded rear bumper. While the base Ford F-150 has either a 23-gallon or 26-gallon fuel tank, trucks equipped with the Max Tow Package have a 36-gallon fuel tank. Increasing fuel capacity by almost 50% is not only important because pulling a large and heavy trailer will result in higher fuel consumption, but because needing to stop for gas with a trailer attached can be a hassle that is better avoided. Finally, the Ford Max Tow Package includes the Integrated Trailer Brake Controller. This electronic system not only connects your trailer’s brakes to the brake pedal in your truck, but it also allows you to adjust just how much brake force your trailer is applying on the fly from a switch on the dashboard. This valuable system makes stopping with a trailer much simpler and safer. And with its adjustability, you can easily get your trailer to behave the same way, no matter if it is empty or fully-loaded. Further improving safety, if the connection to the trailer is lost, your truck will immediately alert you with a warning chime and a message in your instrument cluster. Overall, the Max Tow Package is a valuable upgrade over the already feature-rich Trailer Tow Package. It is a vital addition to any Ford F-150 that will often be used for towing. We hope this post has answered your question of what is the Ford Max Tow Package and given you insight into which of our many Ford trucks for sale is the right choice for your towing needs. If you have any more questions or wish to test out some of these advanced features for yourself, stop by Kings Ford and let our friendly sales team help you out. ******************************************************* -
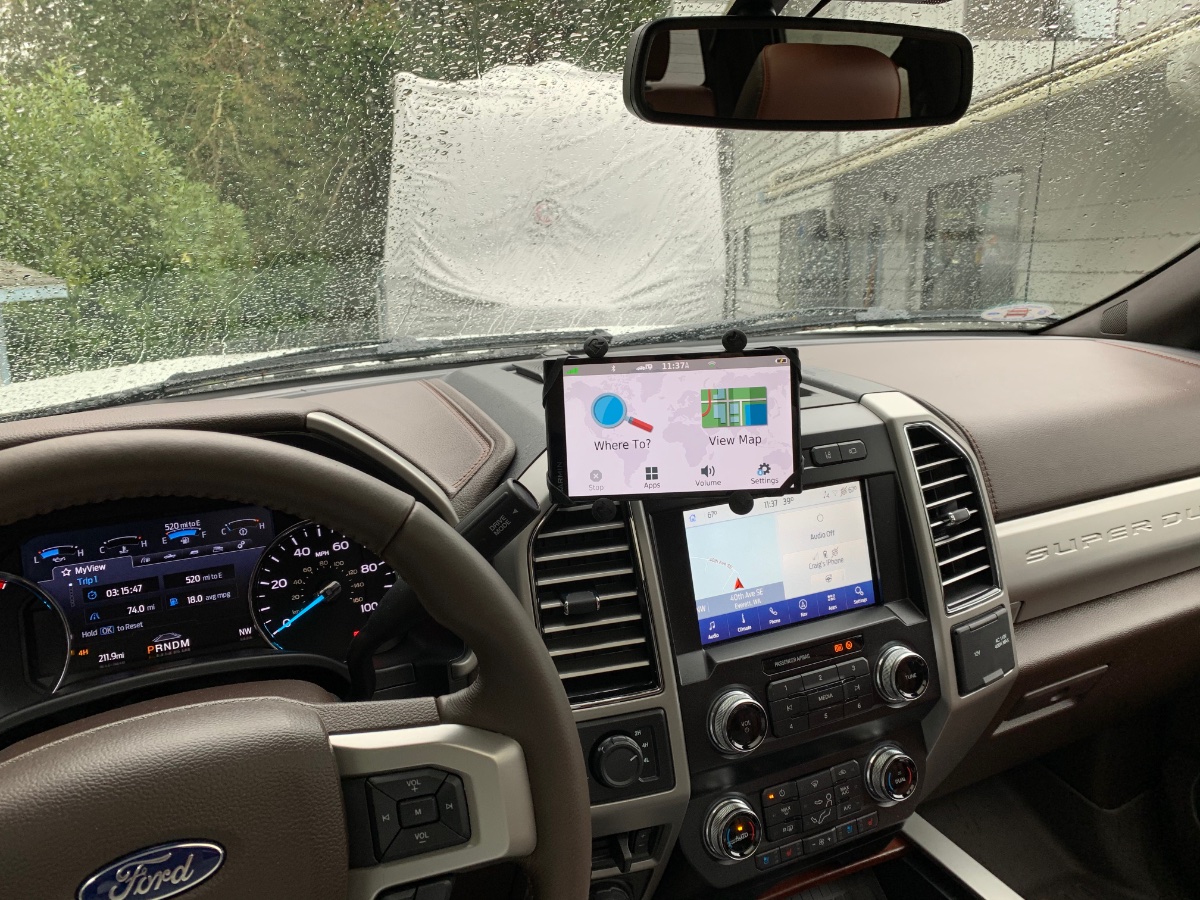
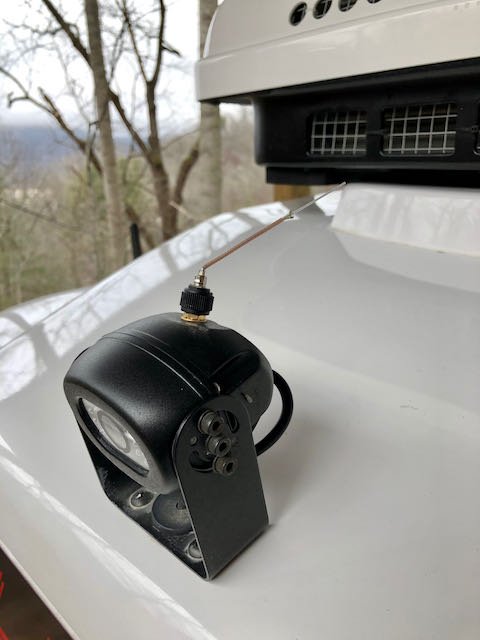
 A falling branch wiped out our backup camera antenna recently. I found this replacement at etrailer.com (p/n PXXHD0006301R fits camera model WVCMS130AP, $21 plus tax and S/H). First experience with that site, fully satisfied with their prompt shipping and protective packaging. Hoping this info may help someone. - Brian
- 1 reply
-
- 4
-

-
I haven't looked any further into it than noticing this in their marketing copy "Pair RV 890 with our BC™ 35 wireless backup cameras (sold separately) or compatible third-party wired cameras to help you can see what’s behind you." So what I wonder is, and haven't found in a fairly quick hunt, is what constitutes a "compatible third party wired camera" and for instance could you use a Rear View Systems camera (excellent IME and used by a lot of fleet vehicles fwiw)?
-
I'm looking at backup camera options and I noticed a pretty large wiring bundle running to what I'm guessing is a light for the license plate. Does anyone know if there is a reverse light wire also grouped into that bundle?
-
FYI, all factory truck backup cameras, and many aftermarket cameras, only work when in reverse. Typically they get energized when the reverse lights come on. This is not so great ... I think most of the rvs we've delivered yo Alaska have a fulltime rear view camera. It would really be nice if all of them worked that way.
-
FYI, all factory truck backup cameras, and many aftermarket cameras, only work when in reverse. Typically they get energized when the reverse lights come on. This is not so great when you are zooming down the freeway in heavy traffic, and you are trying to switch a few lanes..... It is possible to rewire one so that it is powered all the time, and there is already an On/ Off switch inside the Ollie cabin. I don’t know if Oliver will do this, maybe a recent camera owner can comment. A Garmin BU camera can be viewed at any time, you just exit out of the map view and touch the camera icon to bring the image to the Garmin nav screen. As Mainic said, a camera is a highly desirable accessory, more so when you are flying solo. When backing into a campsite, it shows you that big rock or tree before you hit it. Otherwise you whack it with the bumper and yell, “what the heck was that?” John Davies Spokane WA
-
 (1) How difficult to future pull wires and piping/tubing ? (2) What standard wiring is put in place in all trailer builds for electronics options even if they are NOT purchased from 'Oliver Trailer'. . . . Helpful to know for owners that might need to do aftermarket install of some electronics ? *************************** - (1) I was wondering about asking for empty sections of PEX tubing to be left in place during the build as conduit for future installs of wire , tubing etc. / / / / Perhaps this is overkill as it might be just as easy for us to do ourselves. . . . Any thoughts ? The stories about modifications and some pics and videos of the basement areas make it seem doable to run things in the basement. Wiring to the overhead / roof seems another story. -(2) Electronics Options: Cellular / WiFi / Antenna / Backup Camera / / / / / / / - - Looking at the current state of electronics both capability and cost it is no surprise to anyone that electronic things are changing quickly. For example: WiFiRanger was bought recently by Winegard and there are WiFi boosters in the Winegard lineup with integrated LTE cellular for a few hundred dollars. Keeping up with technology is a bit of a nightmare for a manufacturer and getting the most bang for the buck is challenging for the consumer. e.g. $449 Winegard , ConnecT 2.0 4G2+ (4G LTE + WiFi Extender + Over-the-Air TV + AM/FM Radio) for RVs (WF2-95B) ( 16" x 8" , 3.7 lb) / / / / / This shows up on Winegard website as 'NEW' and as 'Not Purchasable' so I am guessing it is the latest greatest and is on hold for virus delays or some such manufacturing hold up, but it shows what is around the corner. Seems like one $500 item to replace three Cell, WiFi, Antenna gizmos totaling about $2000+. BUT . . the 3 gizmos are available right now even if they are a bit long in the tooth. *************************** POSTFACE: As we try to fill out our 2021 Build Worksheet . . It seems that we have just missed the era of Wild West free-for-all factory custom modifications and are now somewhat locked into the standard configurations. It is understandable that as Oliver grows and services multiple markets each with their own regulatory systems they must to some extent standardize their products . Oh Well . . . So be it . / / / "Tell us again grandpa about when 'Oliver Travel Trailer' custom made this and that gizmo and modified such and such widget on 'Old Betsy' that we have known, loved and traveled in for all these years."
 -
 OK let me update. I looked over my 'Build Sheet' as it currently stands. Yes, they added the ANDERSON ($799). But the BASKET comes as part of the "Outdoor Pro Package" which includes, in addition to the "Aluminum Storage Basket," the following: Front and Rear Propane Quick Connects Rear Bumper Receiver Additional 30 AMP Convenience Connection ------ Not sure I can do away with "the basket" and still get the other stuff (which sounds useful) because the basket is part of the "package" addon. I will ask. ---- My other options/addons on the build sheet are: AC Easy Start; Hypervent Condensation Prevention Matting Water Heater Option: Truma AquaGo Comfort Tankless Water Heater with Electric Antifreeze Kit Power Package Option: Solar Pro Package for Legacy Elite - Two 6V AGM Batteries, 230 Watt Solar Panels with Charge Controller, 2000 Watt Inverter. Electronics Pro Package Option for Legacy Elite: 4G Cell Phone Booster, WiFi Booster, Electronic KeyPad Door Handle, Backup Camera. And lastly, the "Shower Track Package Option."
 -
Hello I'm in the same boat. I've got my deposit down and my build starts in April. I've got a 2020 GMC Sierra 1500 with the trailer package. Rather than the wireless backup camera offered by Oliver, I'd rather use the GM camera so that it integrates into the existing software and screen. I'll see if Oliver would be willing to install it for me during the build. Otherwise I guess I'd have to run the wiring on the exterior of the Ollie which wouldn't look so hot.
-

Any ideas on warming the bathroom and closet?
Ray and Susan Huff replied to John E Davies's topic in Ollie Modifications
Not the large vent I had envisioned, but I do hope it's the white version . . . . it will blend in with the Oliver's white exterior. Here is the info I received from Matt Duncan, OTT Marketing Director We just started building 2021 models. Here is a list of most of the changes on a 2021. - Girard Awnings replace Dometic (standard is powered) - Furrion stereo replaces Jensen - Vizio smart TV replaces Jensen - Furrion backup camera replaces voyager (option) - MaxxFan bath fan I believe we added a 12v/5v charging station back under the dinette and a few other electrical changes. Decor options are now packaged to included flooring, upholstery, and countertops. These are on our website. -
type "garmin" in the search box for a start. I use a dedicated GPS unit because of its larger screen - yes, I could use my tablet but that device is already being used for my backup camera. I also have navigation in my TV but I tend to like the features of the dedicated GPS better and it is nice to have the backup. Bill
-
Garmin GPS Recommendations?
John E Davies replied to Ray and Susan Huff's topic in General Discussion
I have the RV660LMT and really like it. It is a slightly older model, and a larger screen would be welcome. The RV mode is needed to warn you of low bridges, steep grades, etc and it is SUPER ANNOYING. I turned it off the second day of our first trip. It kept popping up constant alerts that I already knew about “curves ahead!!!”, duh, I have been driving on curves for an hour. “Steep grade ahead!!!” True, but many miles away. The RV database is clunky, the icons are big and block details. In general I think it is simply poor programming. For low clearance, use the eyeballs you were born with, anything posted 12 feet or under, stop and double check before proceeding. I have a height placard hanging down to remind me as I drive. You can add additional map layers to this series Garmin. I have 24K topo maps which I can add to the existing road map when out in the boonies. Instead of a single line against a totally blank background, I get elevation contours and other features. The big plus is that the Topo maps are routable. You can add up to four low res camera inputs to the main display, I use one for my trailer backup camera. The Garmin Connect phone app is pretty lame, I never use it. I am a big Garmin fan, for the most part. I won’t buy another brand. The only thing I dislike about mine, other than RV Mode, is the external flash card sticks out the bottom, no recess or guard, and it is easy to accidentally press and eject it. John Davies Spokane WA


.thumb.JPG.dd838cdb3df463dab6a16861fa23a319.JPG)