Leaderboard


Popular Content
Showing content with the highest reputation on 07/09/2022 in Posts
-
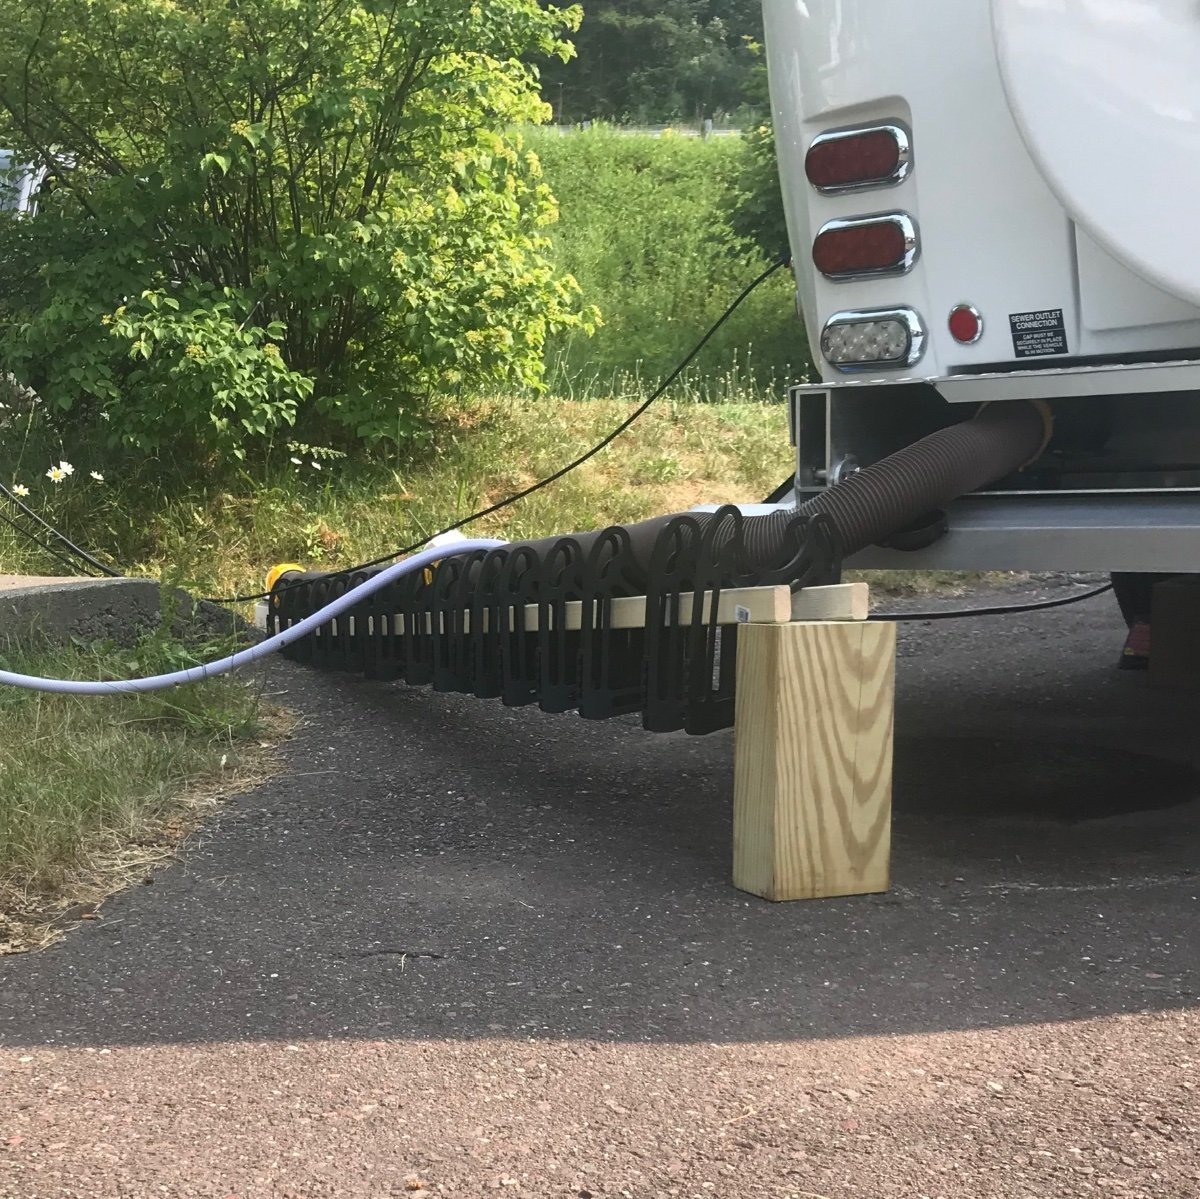
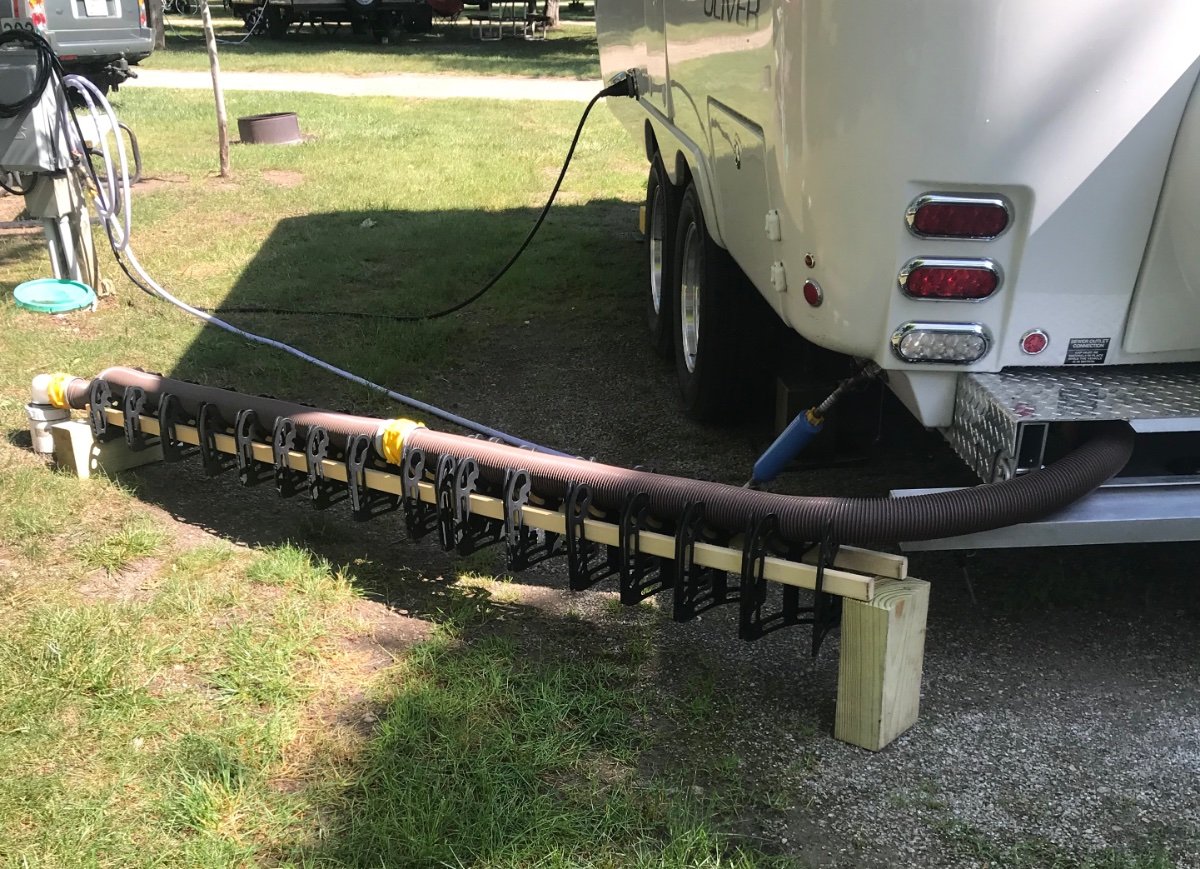
Just another idea for leaving the sewer hose connected to the trailer. I’ve had the hose connected since pickup in 2017 without any issues. I use a cap on the hose end that also has a garden hose connection. I also have a small ball valve attached to the cap. This makes it easy/controlled to drain the hose if it’s filled with liquid.
 3 points
 -
Hi, we have sold the 5th wheel / tow and ordered a new Oliver Elite 2. We travel for work and of course love camping/ hiking/ backpacking. After being FT for several years we realized the 5th wheel was to just to big. CRAZY right! Thanks for all the info, suggestions, and pics we have seen on the site they have helped tremendously. Can't wait to see you guys on the road or parked in a field in the middle of nowhere. BTW our travels can be seen on insta at Gypsysoul2blame. ✌️
2 points
-
I just did the same! Although I miscounted 1 “L” fitting and one “T” fitting so I have 2 more to do. That being said, any of the connections that have come lose in the last year were replaced. (this has happened to us twice in less than 5K of miles on the road 😬) For such a nice trailer at such a high price, these should definitely one standard with brass fittings. They are even easier and faster to install than the plastic alternative anyway, could save a small amount of time at the factory.
2 points
-
It may take a while, but looking for a 2 next! 👍2 points
-
2021 LE2....I've had some difficulty removing hose caps left on at some dump stations.....painful thumb joints contribute ! I bought a set of spanner type wrenches and have successfully used them on one or two occasions when needing to break an overly tight connection. They work fine.
2 points
-
Keep an eye on your support bracket bolts. As reported previously, mine had either been removed and not replaced during the build or both(?) managed to back out and are living a life of freedom in the hull somewhere. Caught it before I saw any damage, but think I need to check my rivets, given four lead batteries.2 points
-
Best fuel prices I have seen in our area lately, photo taken today, Newton, NC:2 points
-
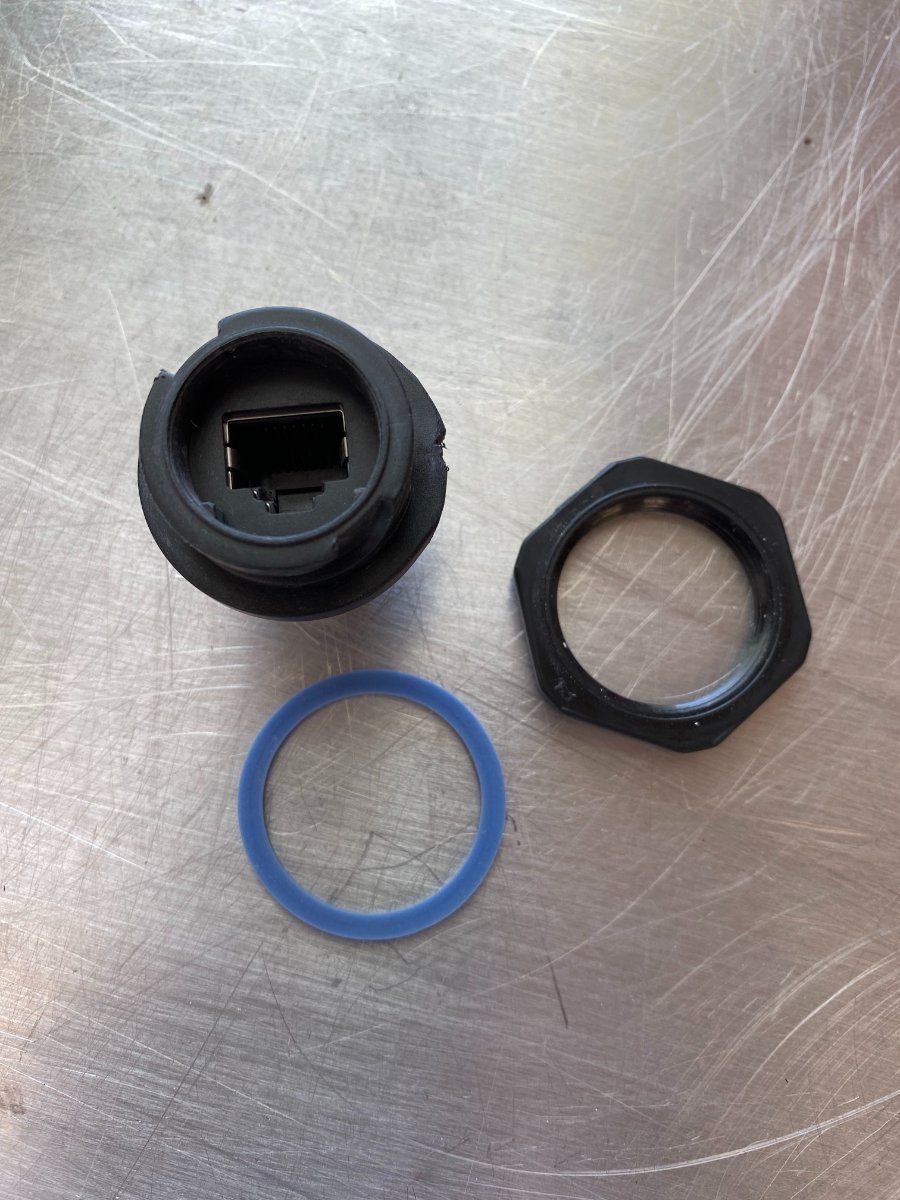
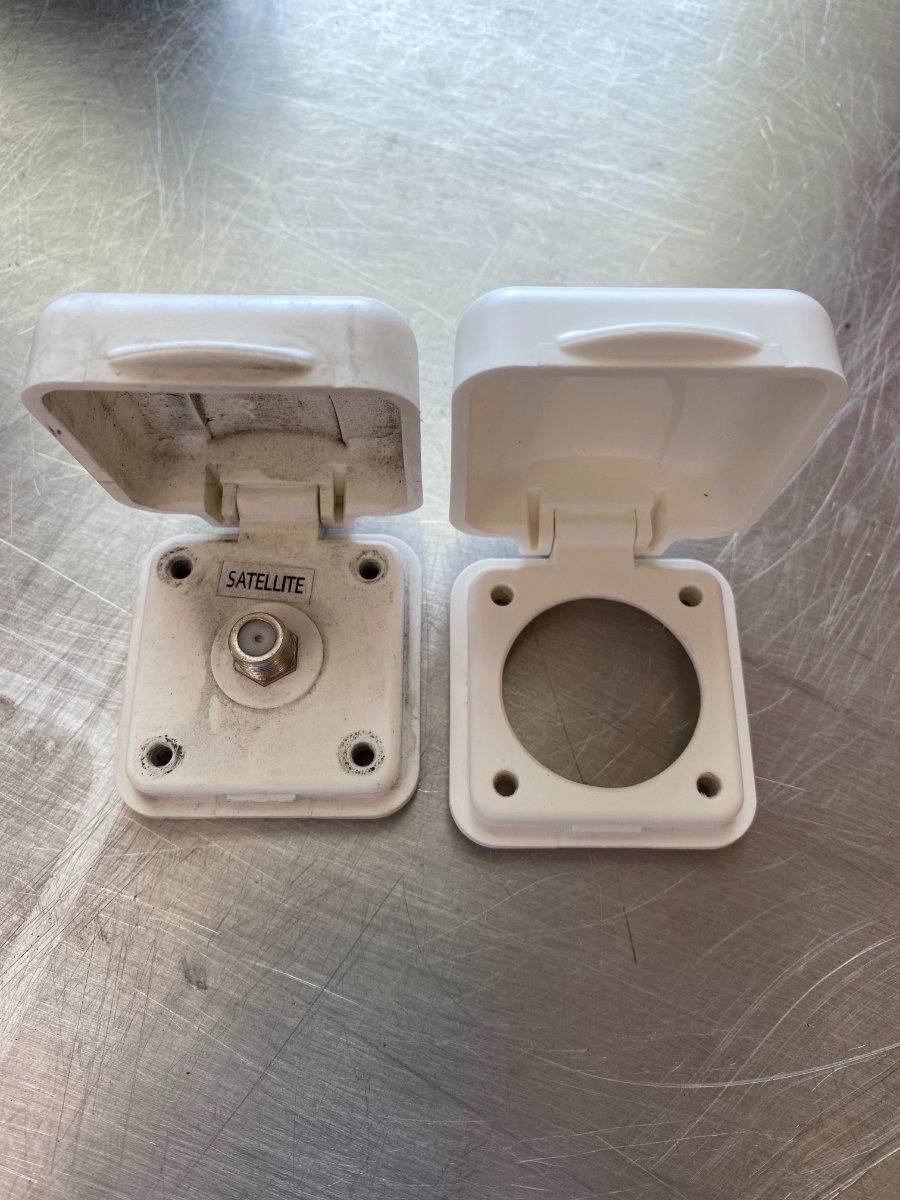
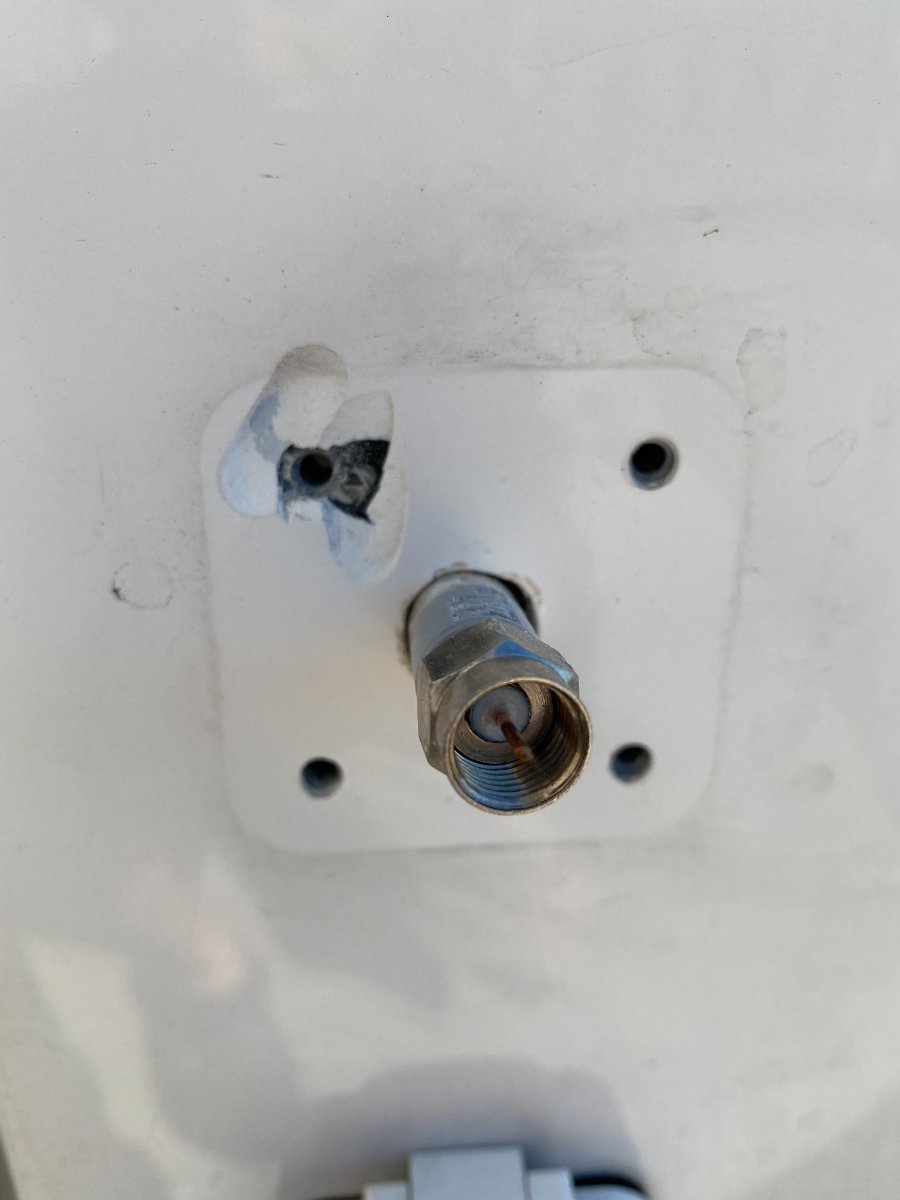
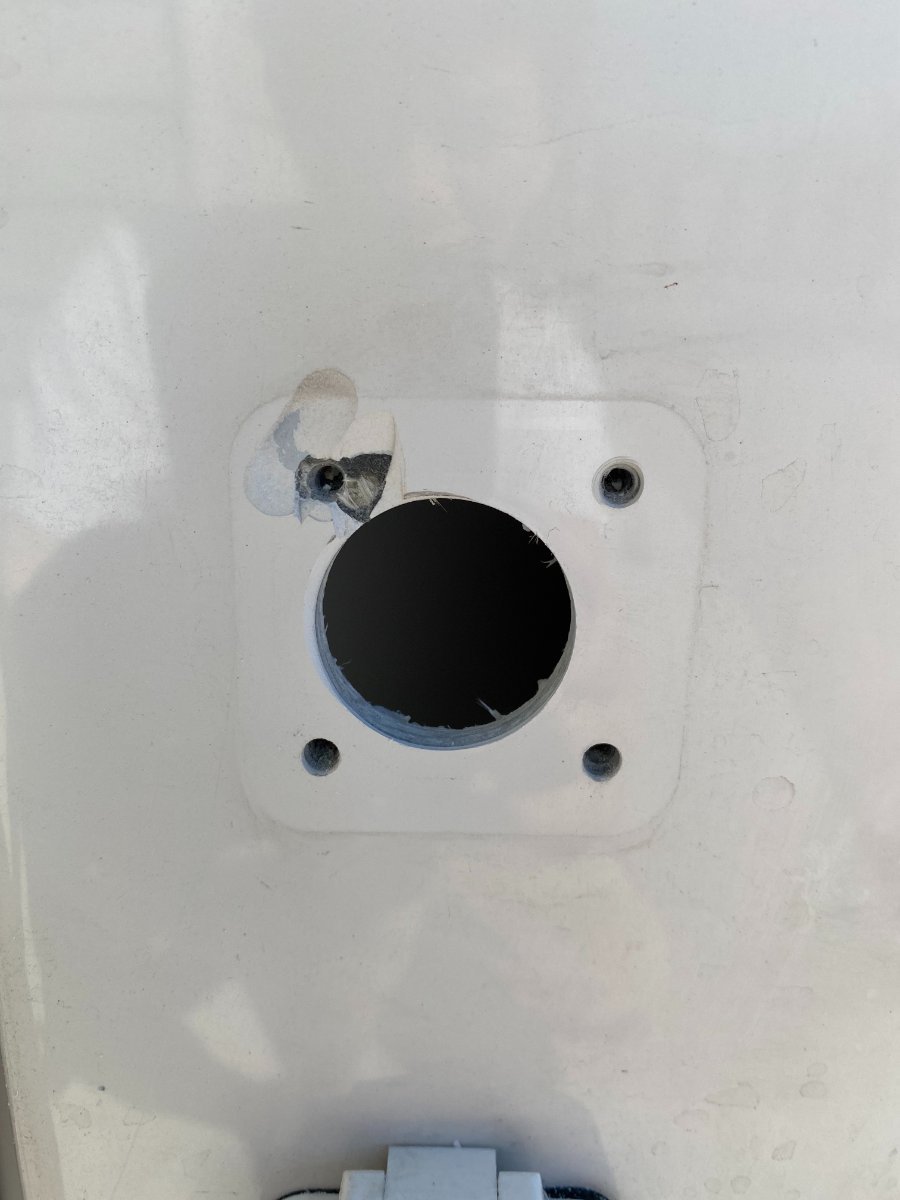
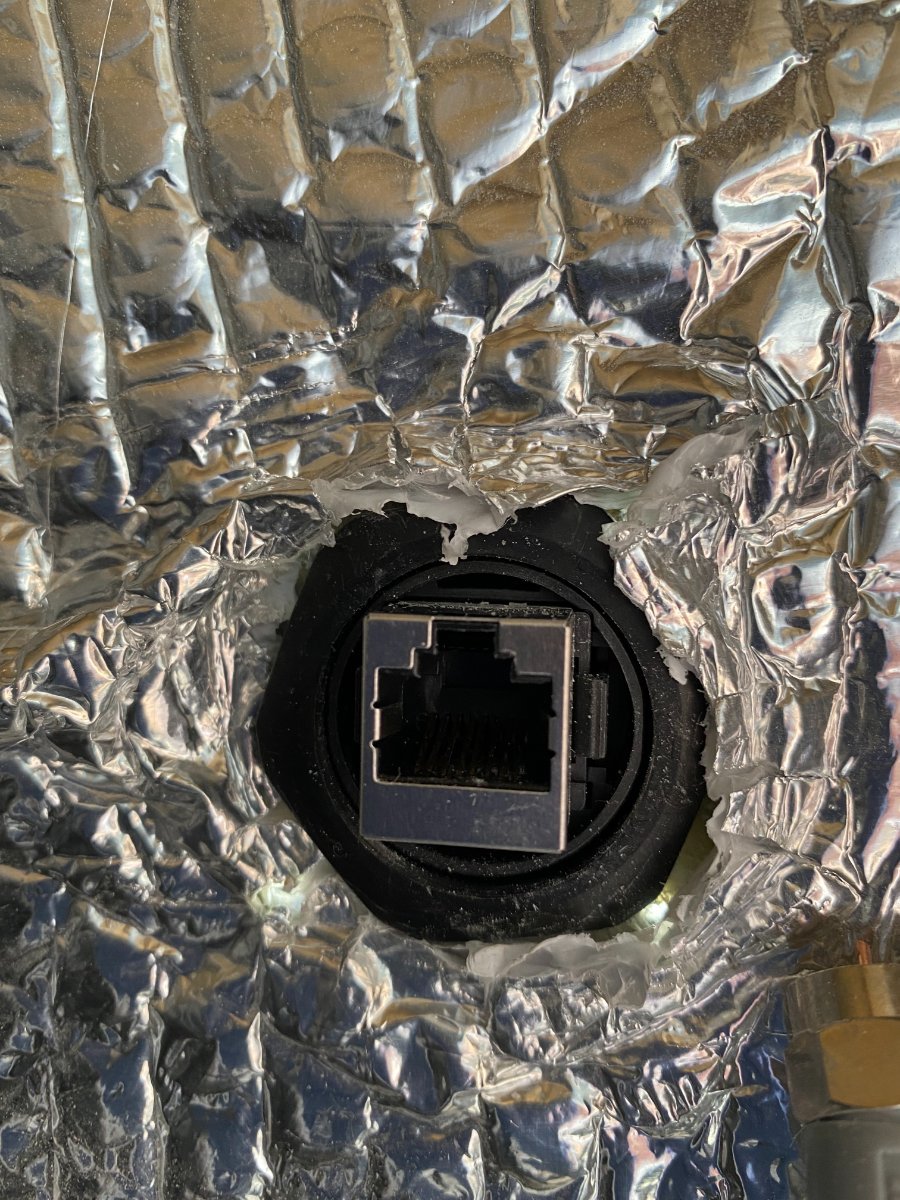
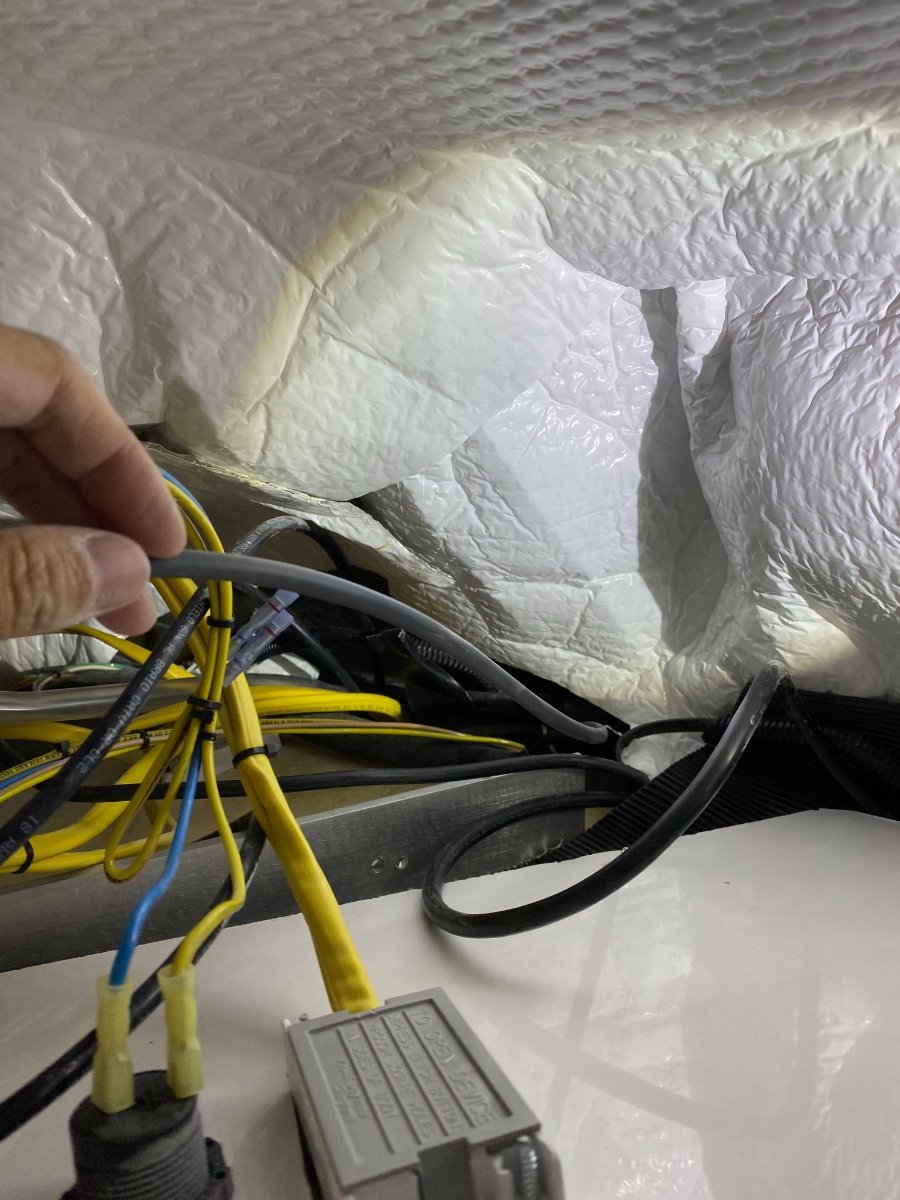
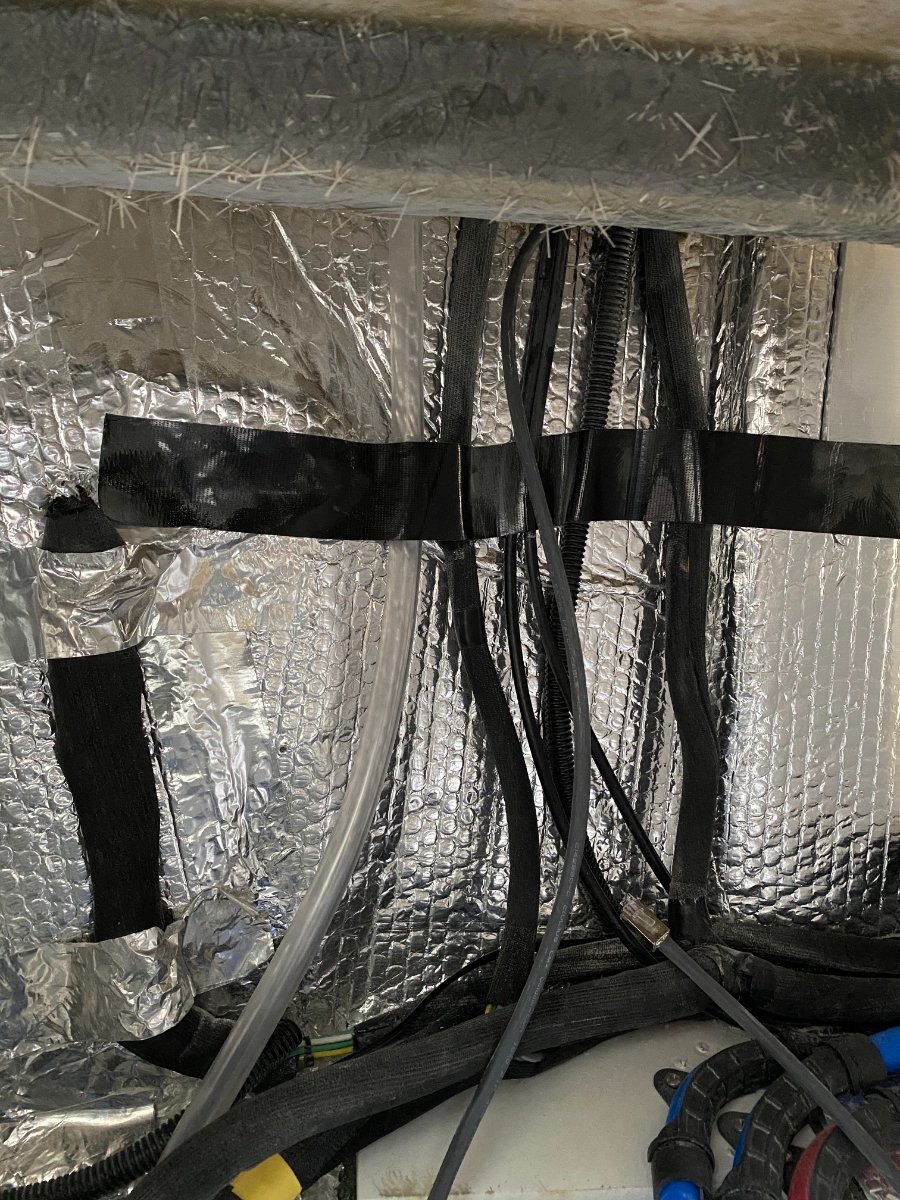
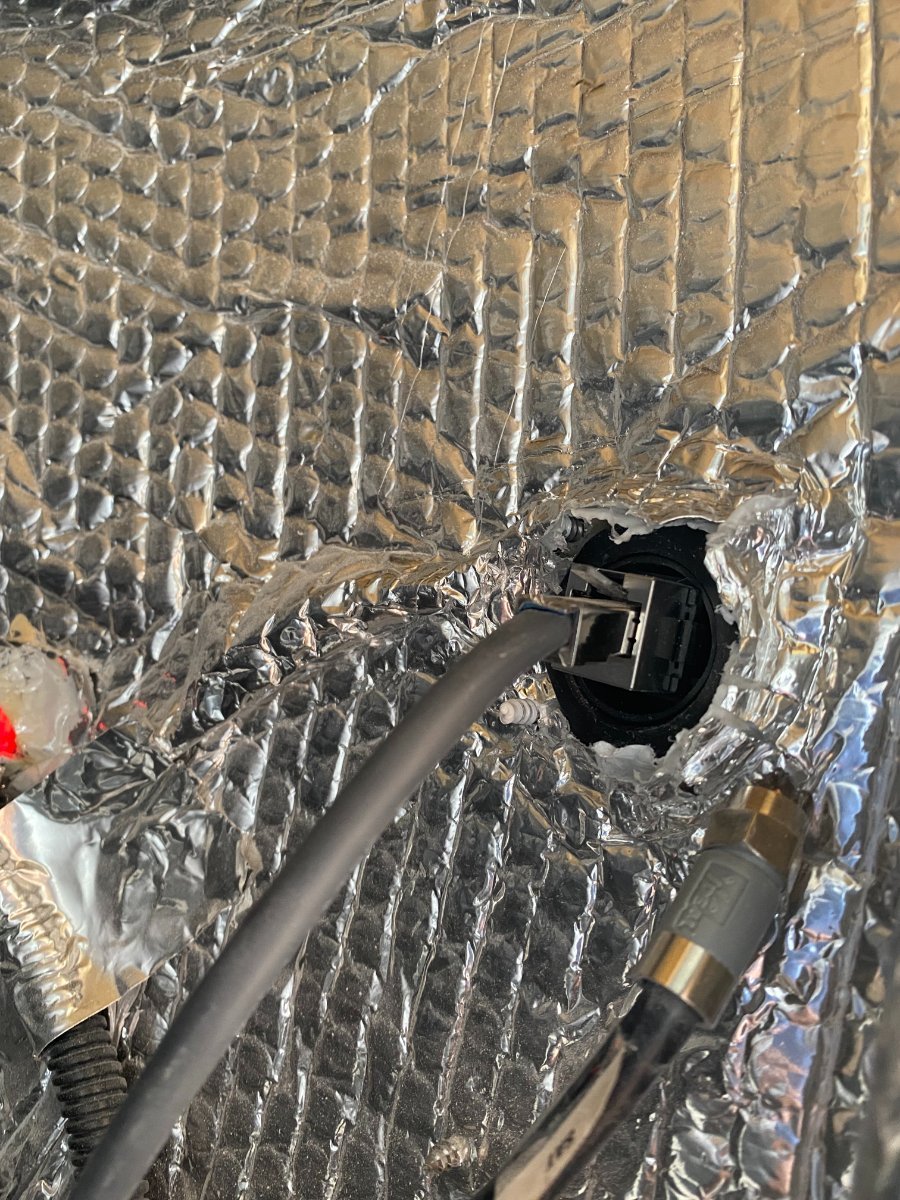
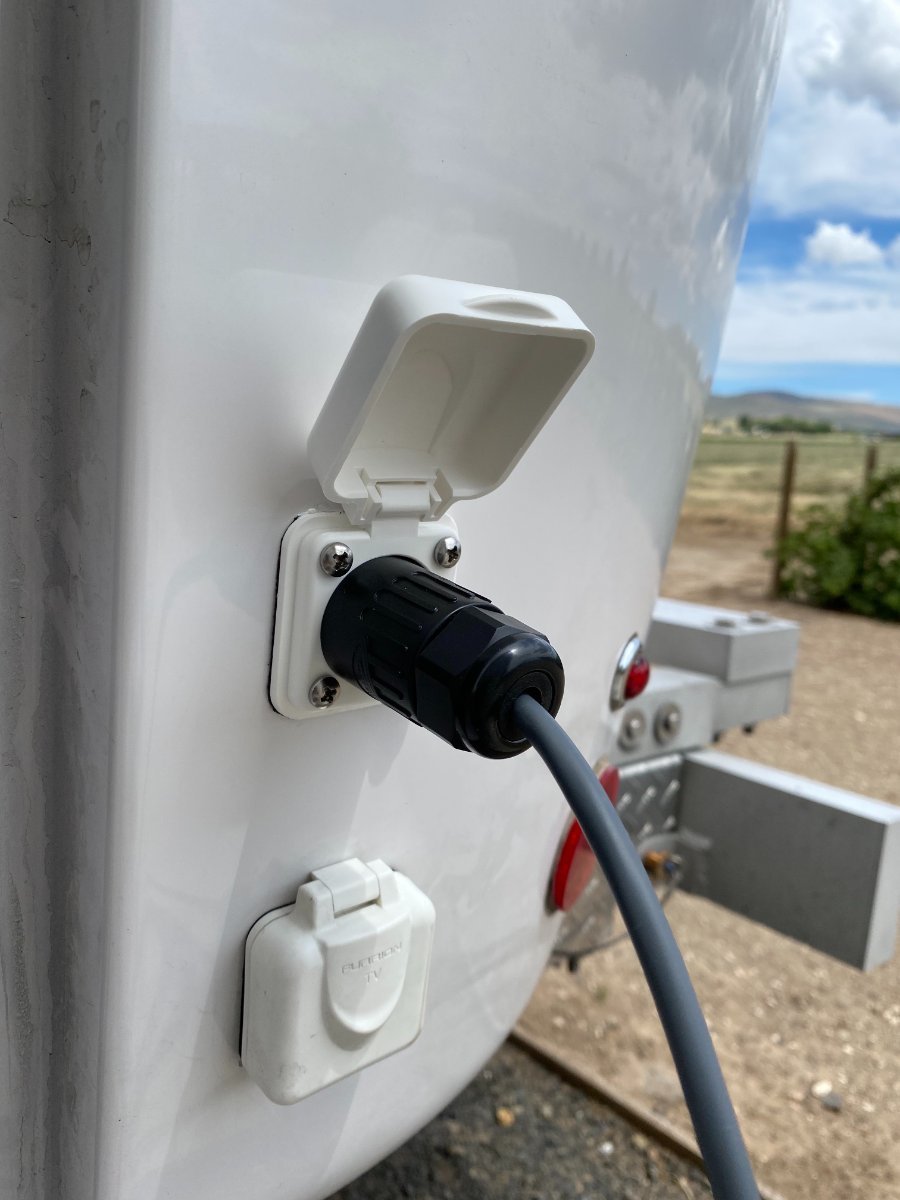
This project is to create an inlet port for Starlink cable into the attic where I put the Starlink router. I decided to repurpose one of those TV/Sat ports. Below are the pictures of the Furrion coax inlets. The left picture is the original and the right one is modified by drilling a big hole using hole saw. This is the waterproof RJ45 inlet port I got from Amazon. Next steps are removing old Furrion and enlarge the cable hole. To my surprise, I found a nice gift from the factory hidden under the seal. No big deal, I can add a little bit of 3M sealant to patch that up. Then install the RJ45 connector, left picture is from the outside, right is from the inside. This is what it looks like after putting back the cover. Next is to fish the cable from attic down to the belly near the furnace and pull it along the back and plug into the RJ45 inside port. You will have to cut the cable and install RJ45 male connectors. There are a few video on YouTube about this. Then plug it in at the RJ45 female at the inside of the inlet. The cable end from the dish will be on the outside. Plug the router in and enjoy fast Internet!
1 point
-
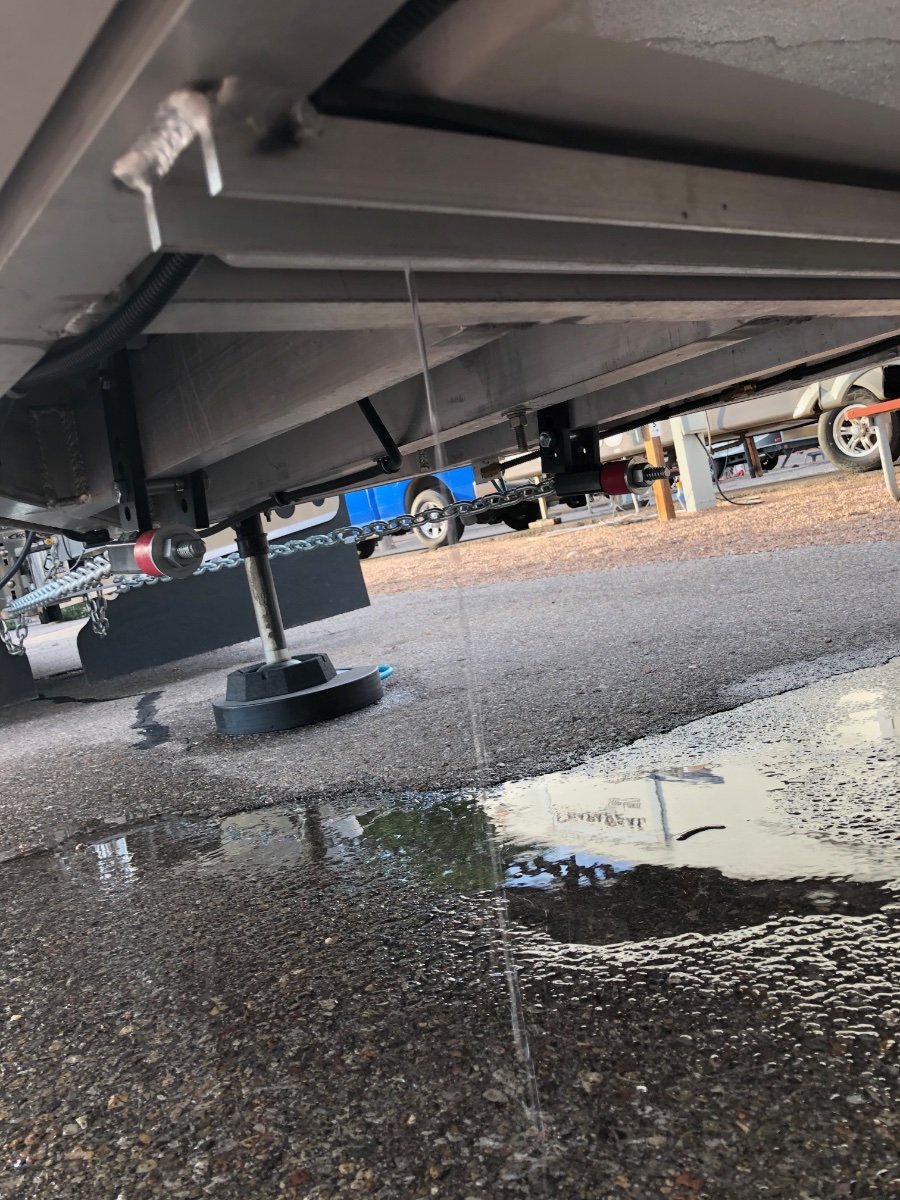
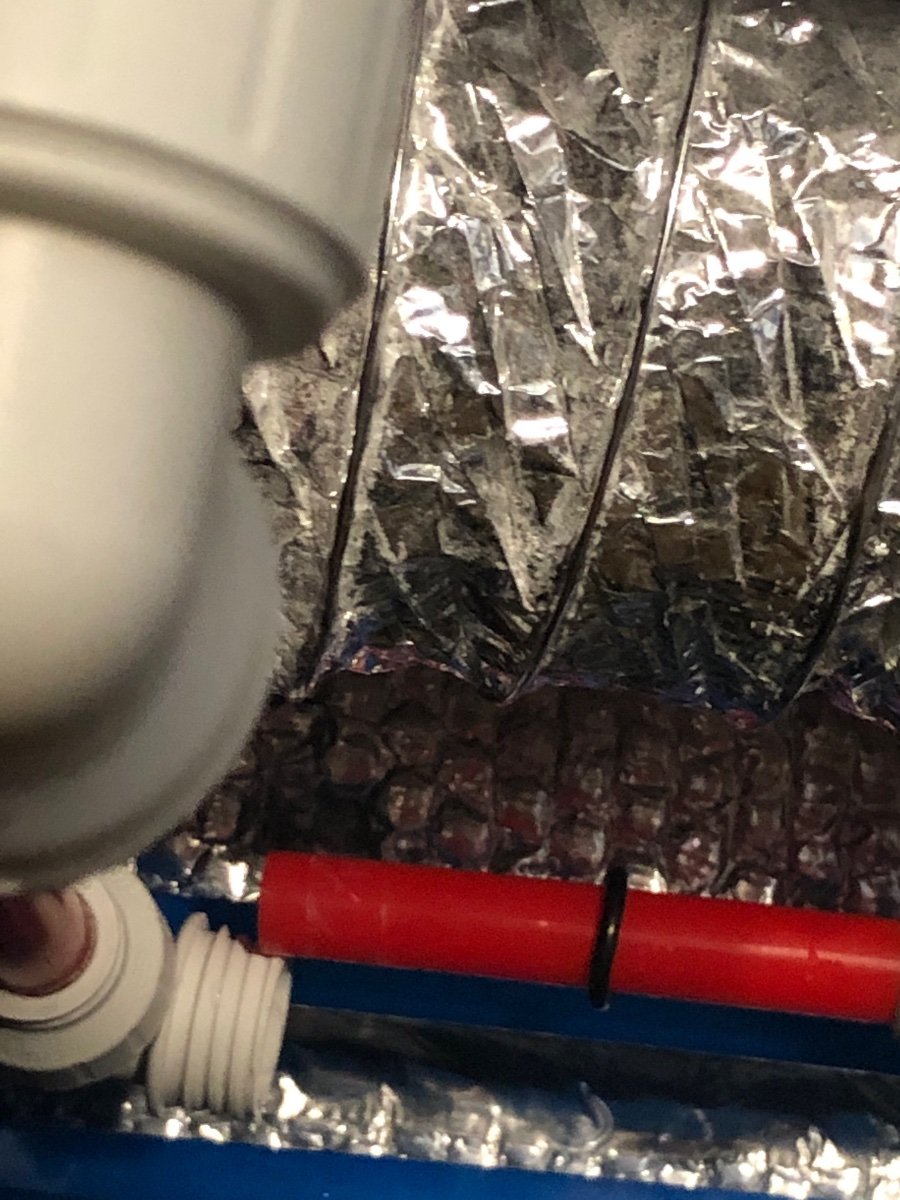
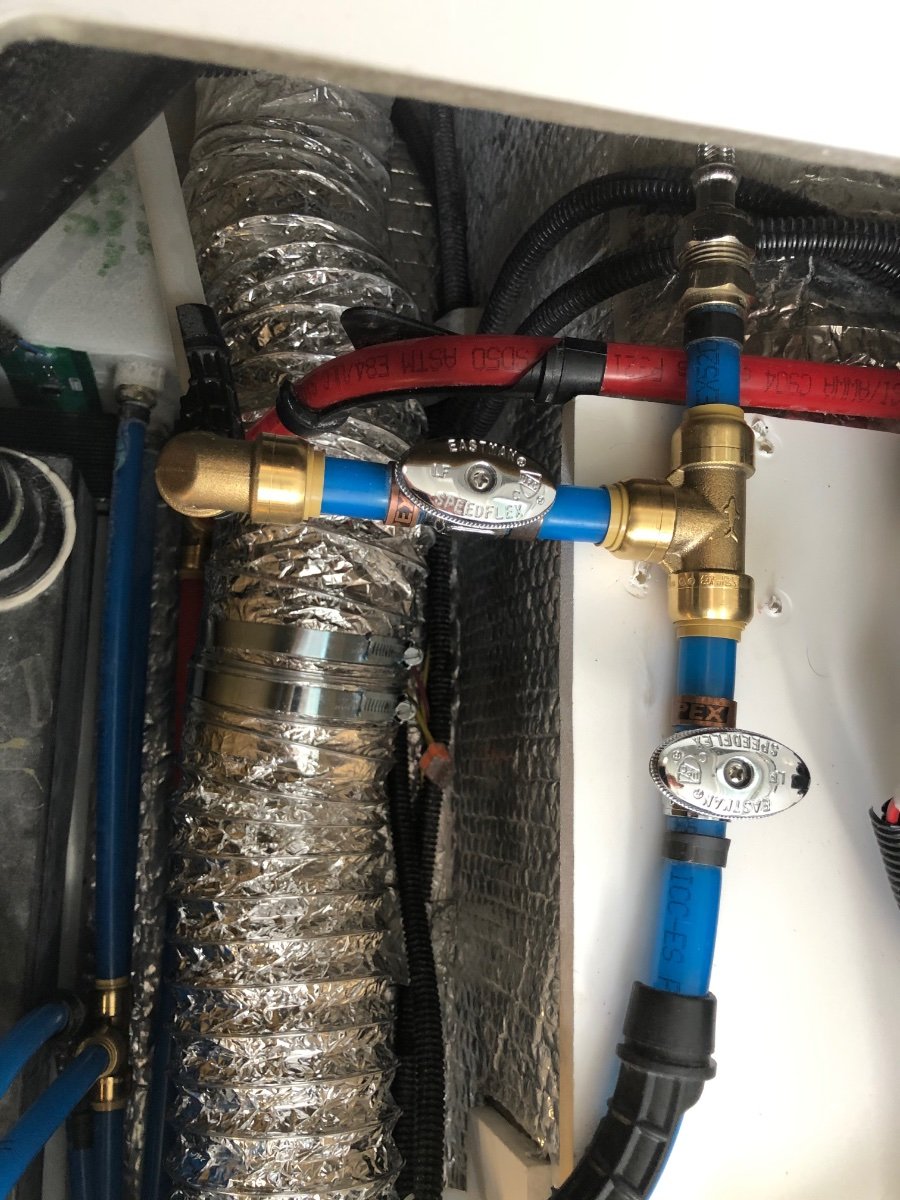
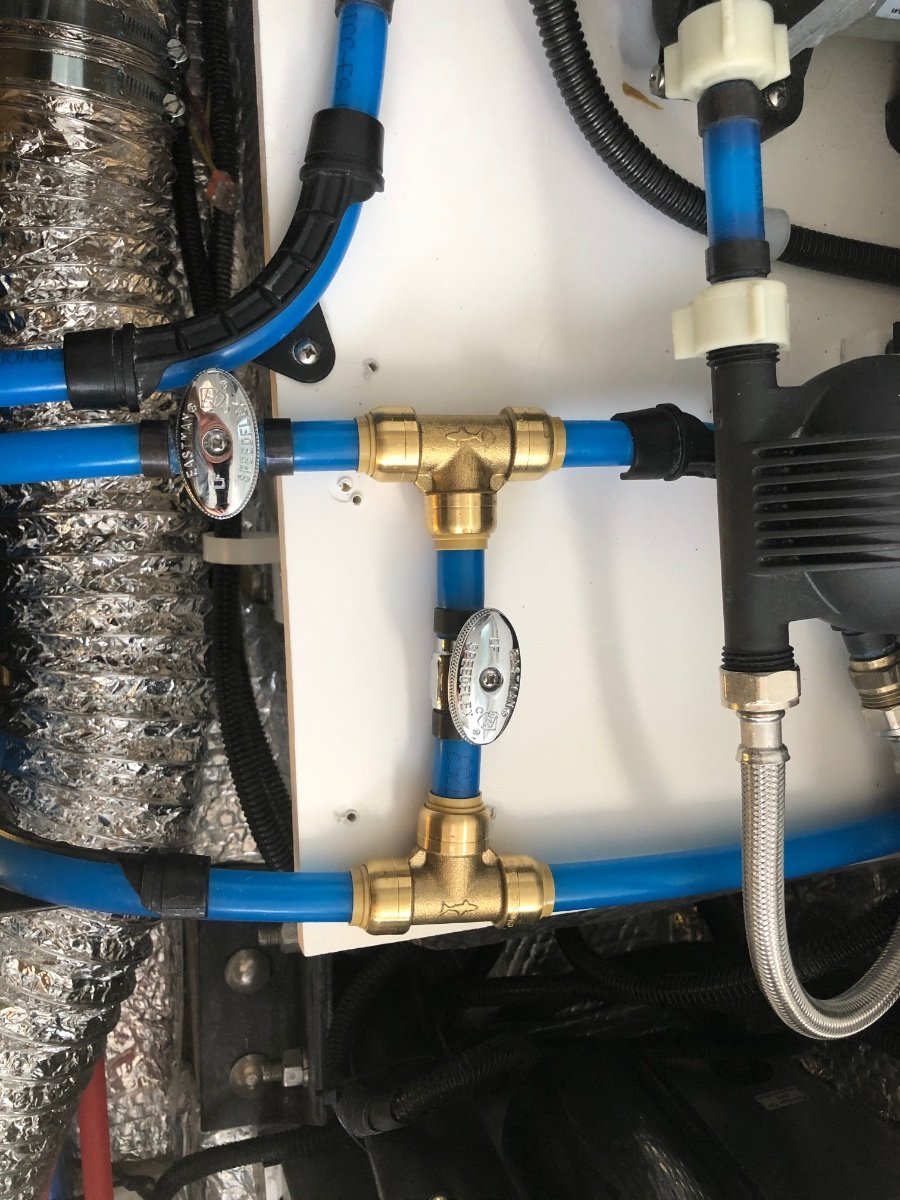
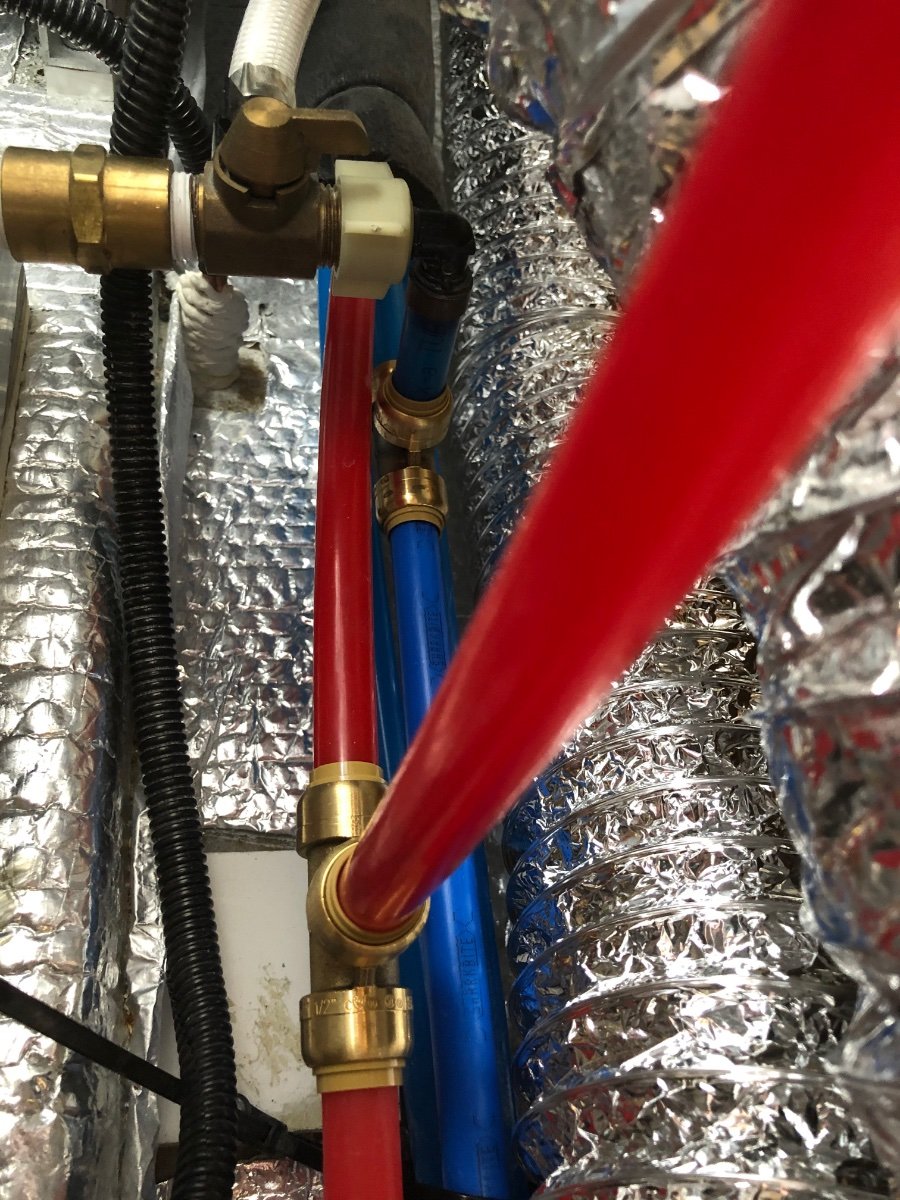
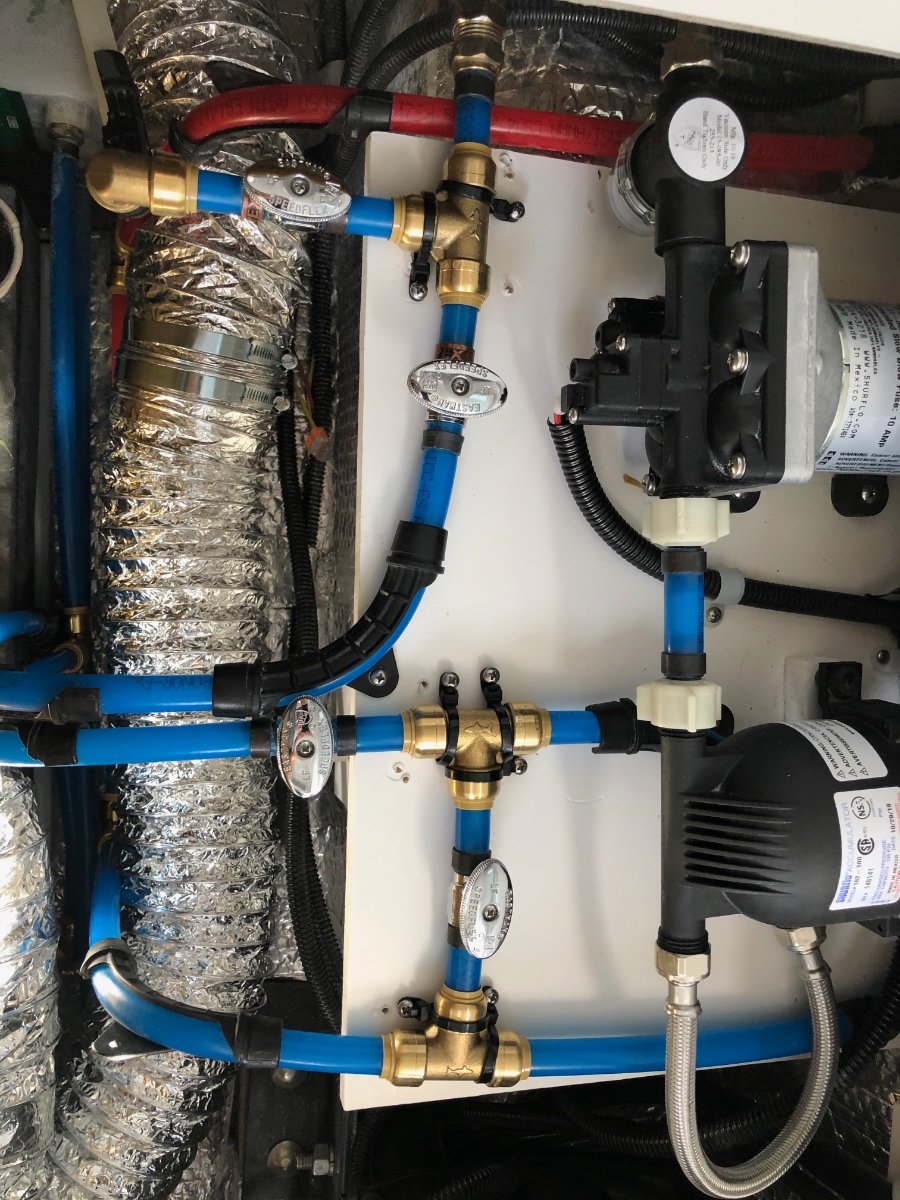
Hi everyone! I wanted to share a plumbing episode that I experienced in Albuquerque, NM last year (6/2020) after getting it serviced in TN. After two (2) days of driving, I hooked up my WPS (water/power/sewer) connections at a KOA and had a major plumbing issue, or so I thought... After shutting the water off and inspecting under my curbside bed, I found the culprit. It seems that, the offending hot water line to this tee fitting was cut about a half-inch too short when installed at the factory. Mind you, this happened after a few thousand miles on the road and after a few bad miles on I-40 in Oklahoma before this manifested. After understanding just exactly why this happened, I contacted our good friends in the service department and Jason was able to offer some very helpful assistance. Luckily, there was a Home Depot just a few miles down the road and I was able to purchase a longer length of the same hot water line installed on the Ollie and Jason recommended the "SharkBite" brass fittings as a permanent replacement for the plastic ones installed at the factory. This was a quick and easy fix and I have had no problems or worries since. The SharkBite fittings are the best and I decided I didn't ever want an episode like this to happen again, so I later replaced every elbow and tee fitting in my Ollie with the SharkBite brass fittings. The Team at Oliver was great and reimbursed me for all materials for the tee that caused this problem. I came out-of-pocket and did the rest on my own. I highly recommend these fittings and wish they would have used these in the first place. Below are photos of my experience... Nicky Ray
1 point
-
Hello! This week I sold my 2021 Lance 2075 and ordered an Oliver Legacy Elite II. Having previously owned a Casita, I know it's hard to beat the quality and longevity of a molded fiberglass trailer. I toyed with ordering an Escape 5.0, but in the end, the Oliver's 4 seasons capabilities and strong solar/lithium options won out. I truly hope Olivers are generally as trouble-free and of superior quality as the company's reputation suggests. Anticipated delivery: January 2, 2023.1 point
-
I don't see where anyone mentioned filling the frige too full as to not allow the air to circulate well within. Charlie.1 point
-
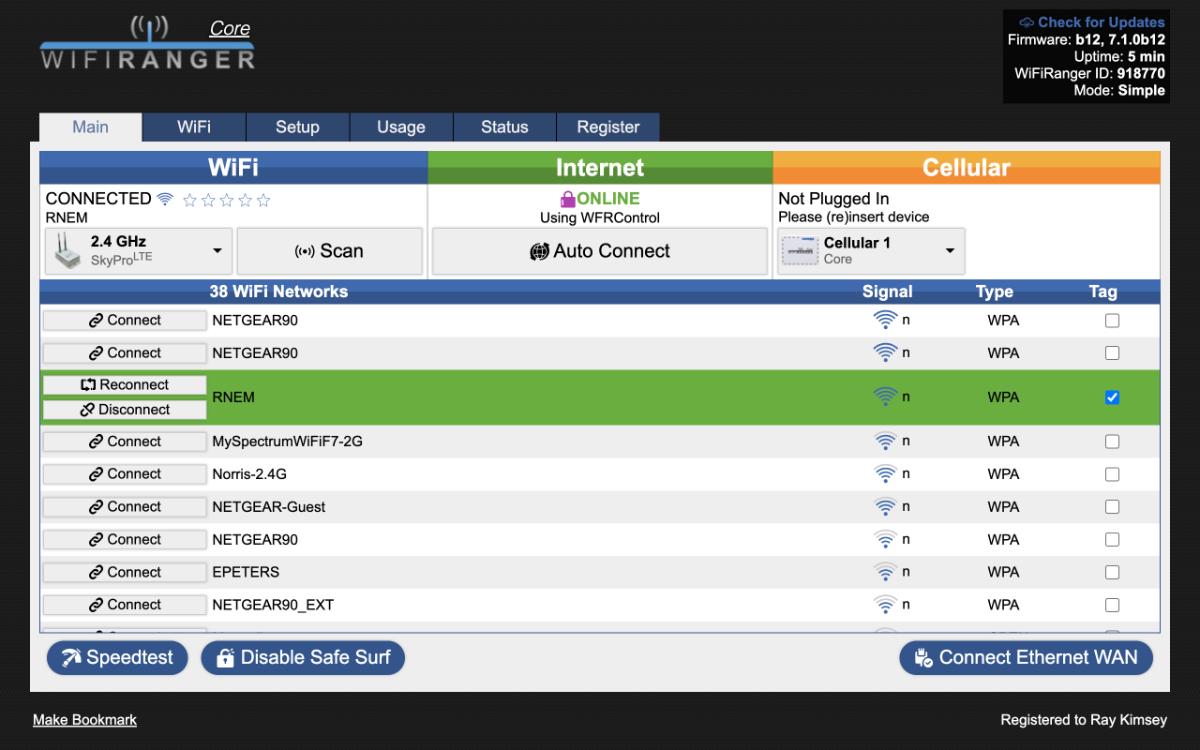
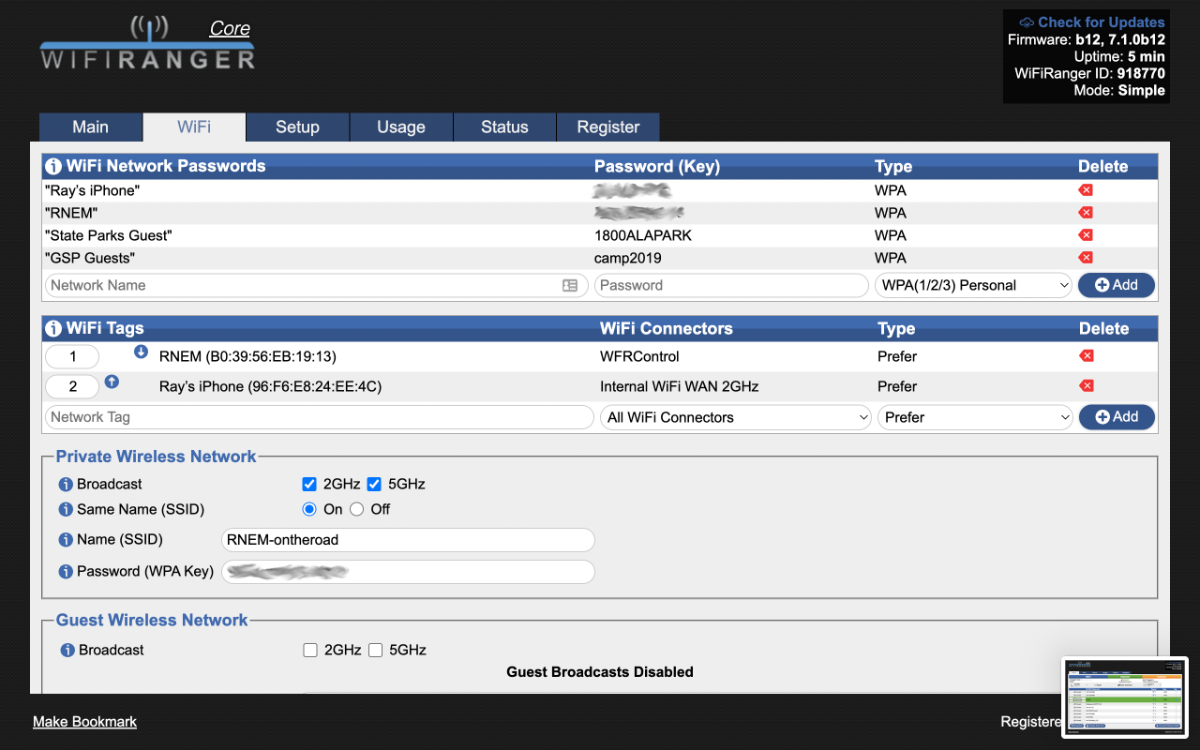
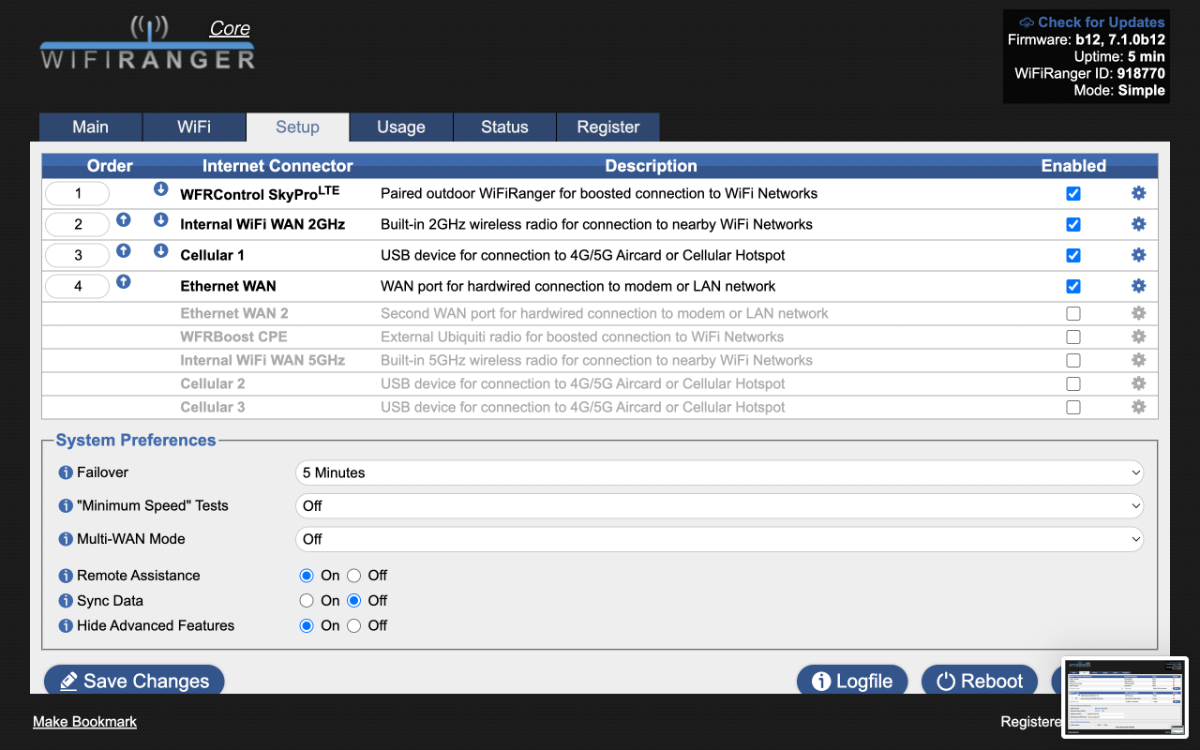
My understanding is the SkyPro is the external antenna and that is what I usually use. The Core I believe is an internal antenna. I assume you see a list of networks if you getting a connect button. I have attached some photos of my setup in the control panel. I updated firmware this morning since I was playing with it, so it may look slightly different, but should work the same. In the main tab you see a list of some neighborhood wifi and my house wireless (RNEM). On the WiFi tab I set up the Wifranger as RNEM-ontheroad and entered information on the order of connection priority. First my home wireless and then my phone. Other wifi connections I have made follow those and I remove them every so often.
1 point
-
I'm so glad I checked the forum today-just returned from out 2nd trip and at the dump station the hose was full-so we will check the valve under the dinette. So many good ideas about tips at the dump station. Thanks all1 point
-
So glad to hear it!1 point
-
UPDATE: OTT connected me to Dexter and Dexter was excellent to work with. The problem was the NevrLube spindle washers. A batch of them were not heat treated properly and were brittle, which can lead to total bearing failure and wheel loss. Dexter overnighted new washers to me and I found a mobile tech to come out today (http://certifiedonsiterv.com/ if you need service in central CT). Eric, the tech, was excellent and made quick work of the repair. (Our washers looked fine. No damage done.) Ready for the next trip! 😃1 point
-
Bill …. https://alcobrametals.com/telescopic-tubing/ John Davies Spokane WA1 point
-
I too have been trying to come up with a way to carry the 8 foot sticks since I put the bed cap on our current truck. I thought about sticking an 8 ft piece of electrical conduit inside the frame rail, but I don’t want that rattling around. I also thought about fixing some way to carry them under the camper, secured to the frame. But I just now remembered the sectional aluminum tent poles that we used when I was a Boy Scout. Those things were extremely durable. There is no telling how many sword fights we had with those pole sections. You could stick the end of a section down in mud then sling that section and it would send a deadly mud slug at an a adversary. We even used them as javelins and spears. I’m going to see if I can locate a source for sectional aluminum tent poles 8 feet long and order a couple to use the next time I need to dump uphill.1 point
-
Wow! Been a long time since I've seen a "3" in front place. Awesome !1 point
-
Bill and Martha- the more I look at your sewer hose arrangement around the side-winder... the more I like it 🙂1 point
-
As always... some great ideas from the group! When I see confirmation from so many others it is affirming what all of you have said. I will keep a section connected to the Oliver and capped on the other end to eliminate the reaching in under the bumper. It will be especially nice to have "fair warning" from any weight found in the sewer hose before I uncap it. Adding a check under the dinette seat to confirm the valve is seated all the way is a good idea too. In a pinch... and assuming there isn't people waiting, I'll try to put the front jack down enough to raise the trailer up a few inches. Not unhooking, but just taking the weight off the truck should be enough to get some extra fall from front to back. Thanks again! I hope this newbee question was helpful to some one else too!1 point
-
Campsite sewer connections are placed for RVs with mid vehicle dump valves. Olivers have the dump valves in the bumper. I used this setup at a campground on the Keweenaw Peninsula so that I could dump up hill And at another campsite where the sewer connection was too high to allow proper flow
1 point
-
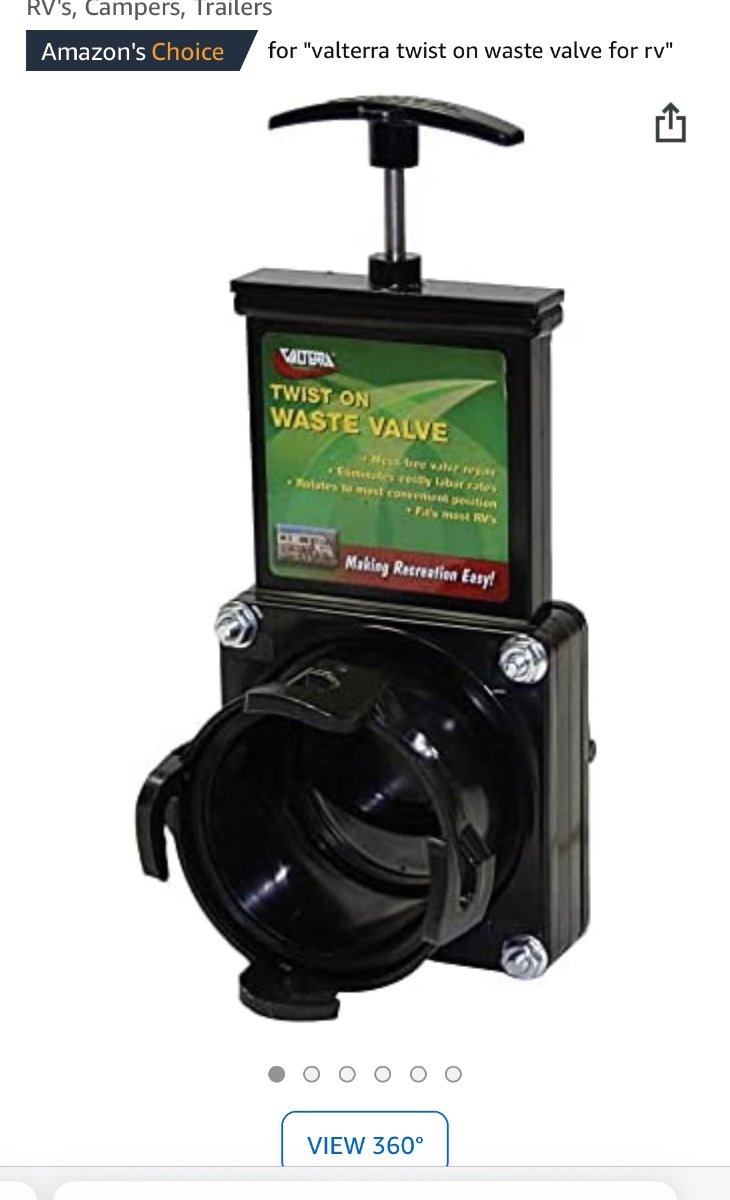
Valterra has a twist on waste valve that you can attach to the end of the pipe in the bumper to provide a “last line of defense”. I carry one in case I have a valve failure upstream, but you could use it all the time. https://www.amazon.com/Valterra-T58-Twist-On-Waste-Valve/dp/B000BGHYJS/ref=asc_df_B000BGHYJS/?tag=hyprod-20&linkCode=df0&hvadid=312128189269&hvpos=&hvnetw=g&hvrand=18049546831347238612&hvpone=&hvptwo=&hvqmt=&hvdev=m&hvdvcmdl=&hvlocint=&hvlocphy=9013575&hvtargid=pla-448831038926&psc=1
1 point
-
We keep a 3' section of hose connected to Ollie's black/grey water drain at all times. Also have room for a 5' and 10' sections of hose in the bumper. Always look at the dump station grade when arriving to see which direction will give Ollie a higher nose up attitude while dumping. We use Camco leveling system to level Ollie while camping, also use these two leveling wedges to lift the rear wheels of the TV and lift Ollie's nose in situations when the dump station is lower on both sides of the dump drain pipe in the ground causing Ollie to be nose down in both directions to get better draining of the tanks. One campground has a dump station with much lower ground on both sides of the dump station drain pipe, making it difficult to completely drain the tanks, even using wedges under the TV rear axles. In this case we use a Camco 15 gallon dump tote and don't take Ollie to the dump station except for fresh (potable) water. This campground has the only dump station before getting back home, so I want to empty the tanks completely before leaving that campground.1 point
-
We always left the hose attached in the bumper, but after getting a full hose surprise a few times, we made sure to check the valve under the dinette seat and give it a firm push down to make sure it was set. After adding that to our dump routine, no more surprises.1 point
-
Yep, there’s no need to disconnect the black hose from the connection in the bumper. I have a 15’ always connected and another 10’ section behind it in the bumper space. If you’re getting some “liquid” in the hose after dumping you might try manually pushing the valve closed under the dinette seat. Sometimes a bit of debris or paper can get caught preventing the total closure of the valve. Another advantage of keeping a hose connected all the time is that if you can feel a certain heaviness when you pull the hose out just hold the end up while you connect the right angle end piece then quickly insert it into the sewer. Mike1 point
-
I feel your pain. Trying to get your hand in that small bumper space to attach and detach the sewer hose from the trailer outlet pipe is a real pita. So, like AndrewK, I never detach the hose. Makes life easier and far less fussing around. Never had any issue doing this. Just be sure to cap the end of your sewer hose, which you can only do after you have collapsed most of it into the bumper area. If you cap first, you won't be able to fit the hose in there as you'll be compressing trapped air in the hose with the cap locked in place. I also use one of these, and wouldn't be without it: https://www.amazon.com/Camco-Sidewinder-Support-Lightweight-Plastic/dp/B000BUU5WW/ref=sr_1_2?crid=205BE4AEGCSY8&keywords=rv%2Bsewer%2Bhose%2Bramp&qid=1657242718&sprefix=rv%2Bsewer%2Bhose%2Bramp%2Caps%2C137&sr=8-2&th=1 Very simple and really helps get a continuous slope down to the sewer inlet. Take a little time to set up your hose and all will drain well. Tanks drain best when they are near full. If you have time, drain the black tank, refill to 50% with the black tank flush inlet, then drain again. Then drain your gray tank. And like others have said, tip up your trailer for a better drain! It does get easier! Dave1 point
-
1 point
-
We run the rear tires of the truck up on leveling blocks when we pull into a dump station (to raise the front of the trailer) then put the tongue jack down for another inch.1 point
-
These Rhino Fitting Wrenches (camco.net) work for us.1 point
-
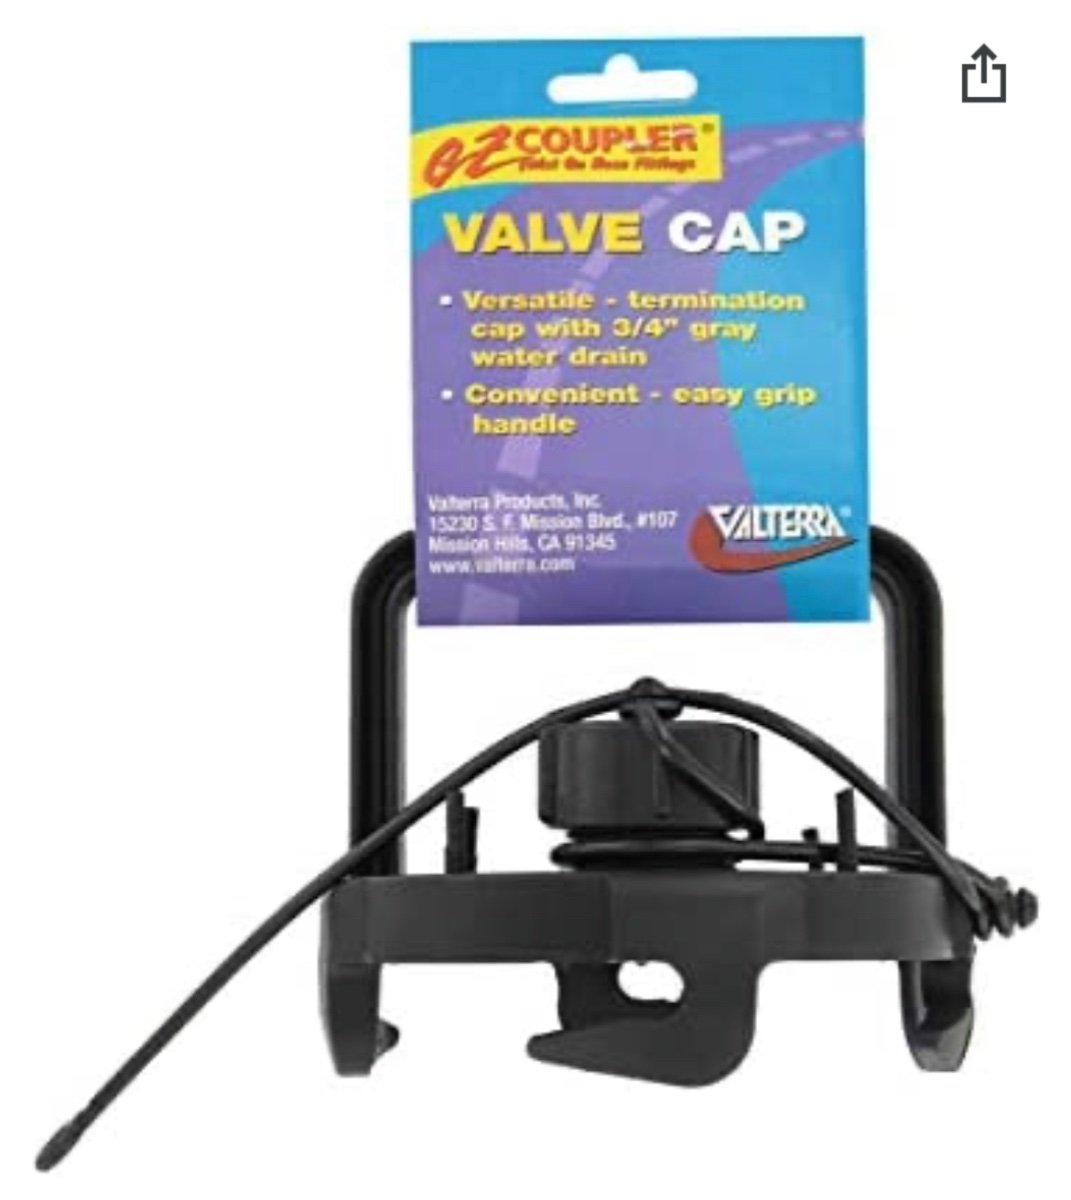
What about this https://www.amazon.com/Valterra-F02-3106BK-Black-Coupler-Handle/dp/B0006MRR2Q
1 point
-
Get a can of silicone spray lubricant it should help mitigate this issue.1 point
-
You could try a little lubricant to see if it makes the twist easier. I switched hoses a few years ago to the Valterra Dominator. It doesn’t have that kind of locking cap, just a plug that goes in and stays by friction. Never had an issue with it. The other advantage to the Dominator (and Camco RhinoFLEX I think) is that when you scrunch them up they stay scrunched up. You only need to unscrunch what you need. Mike1 point
-
It seemed very strange to be happy about finding regular gas at "only" $4.14 as we did yesterday, at a Murphy's near the Asheville Airport. We "saved" 25 cents a gallon filling up there, as most stations near us were $4.39. My brother reported $4.76 in Florida, today. If I owned that diesel pusher at 5 mpg/over $1 a mile, it would have a for sale sign in the window. Or, trade it in on a nice sailboat. The wind is free.1 point
-
Glad the issue was resolved quickly. What you’ve done looks great. Like Steve, ours have held up well for about 60K miles but now I’m inspired to do some plumbing work! Mike1 point
-
We've owned two different Oliver's over the past 12 years. Collectively, we have traveled over 150K miles. I have had one fitting to break and it did cause a mess. I agree that brass fittings are better than plastic and they should be using them. I always carry several feet of tubing, a few different brass pex fittings, and the tools to replace them in case that ever happens again.1 point
-
I understand why (money) plastic fittings are used but it couldn’t coast more than an extra $30 to do it correctly and use brass fittings. At this price I would expect the best materials to be used during manufacturing. John1 point


-
Recent Achievements
-


")


