Leaderboard
Popular Content
Showing content with the highest reputation on 07/17/2024 in all areas
-
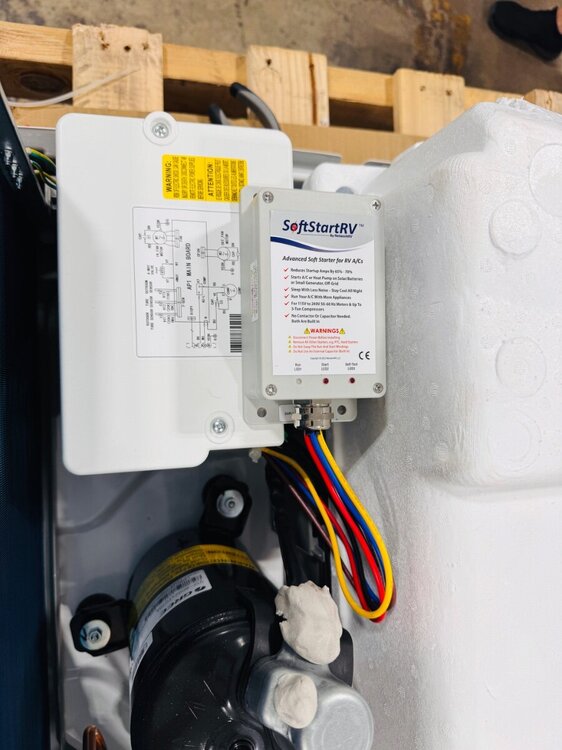
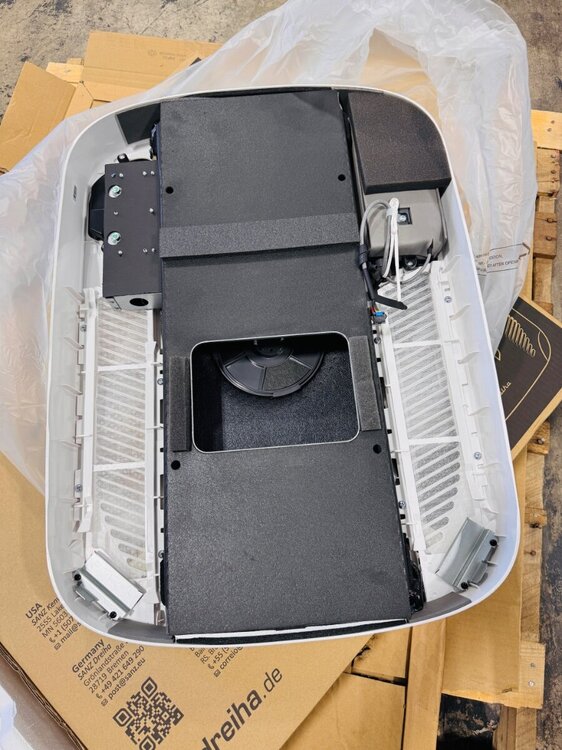
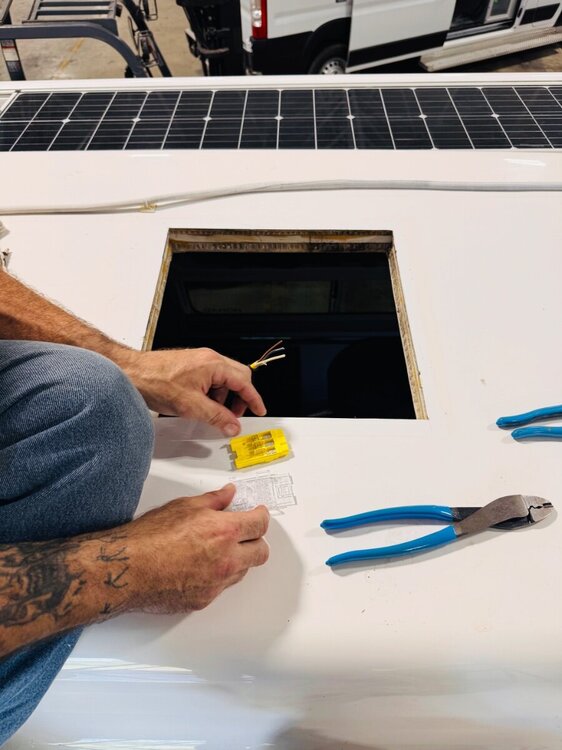
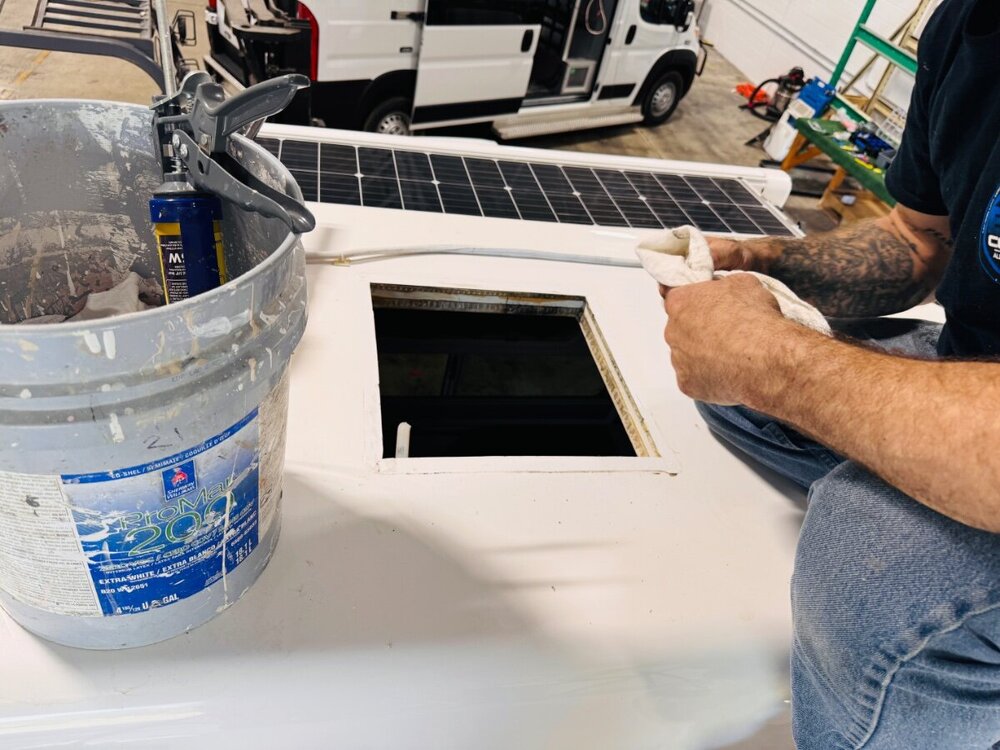
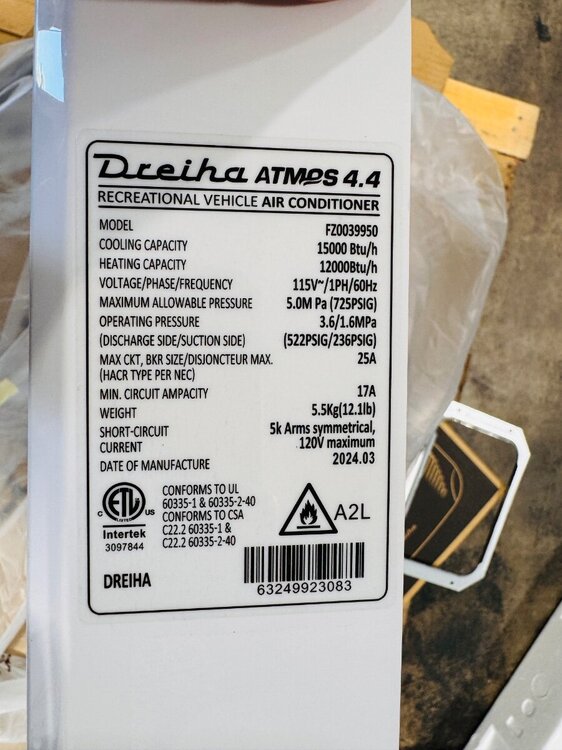
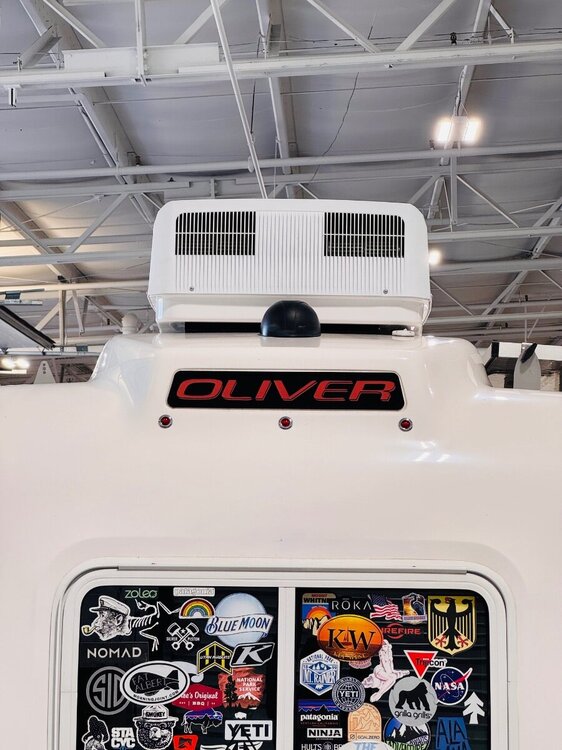
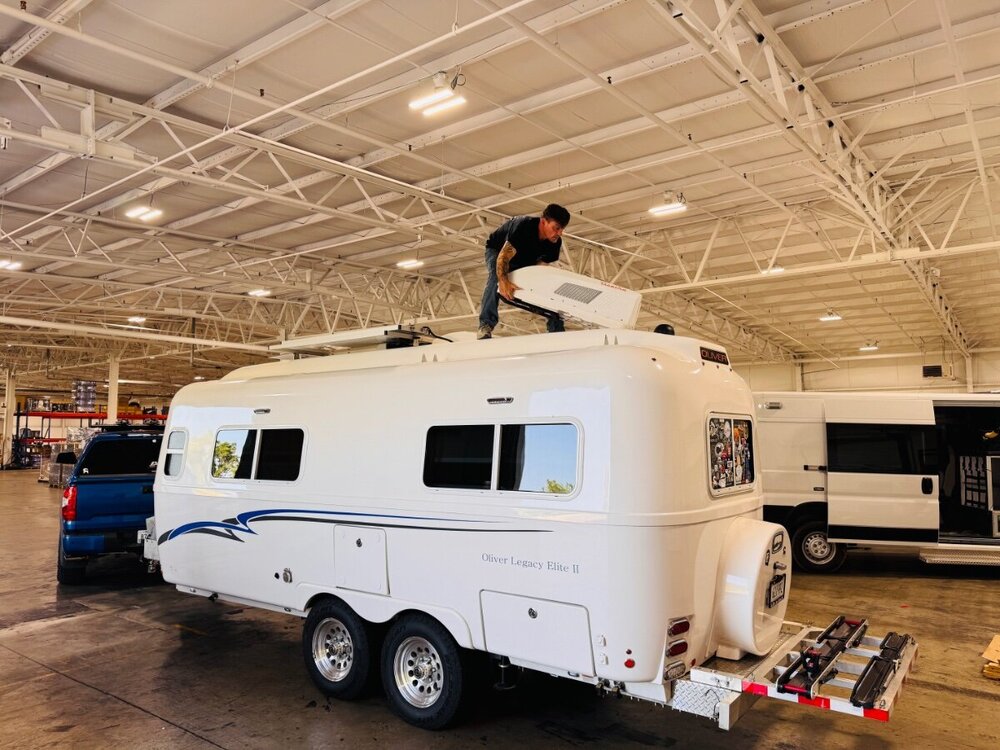
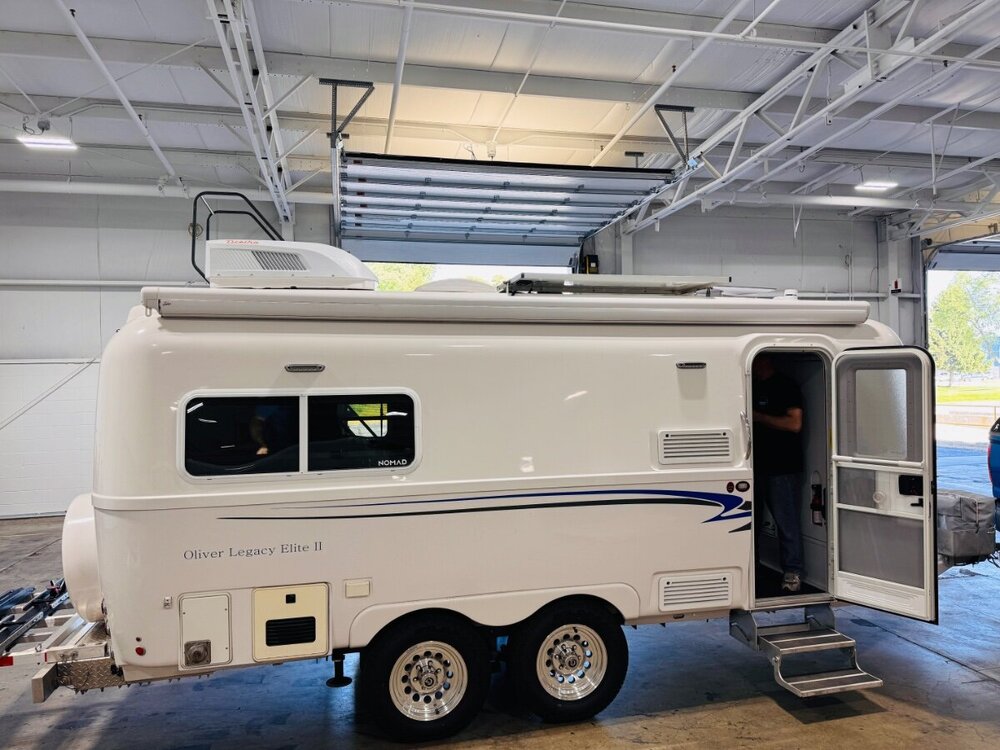
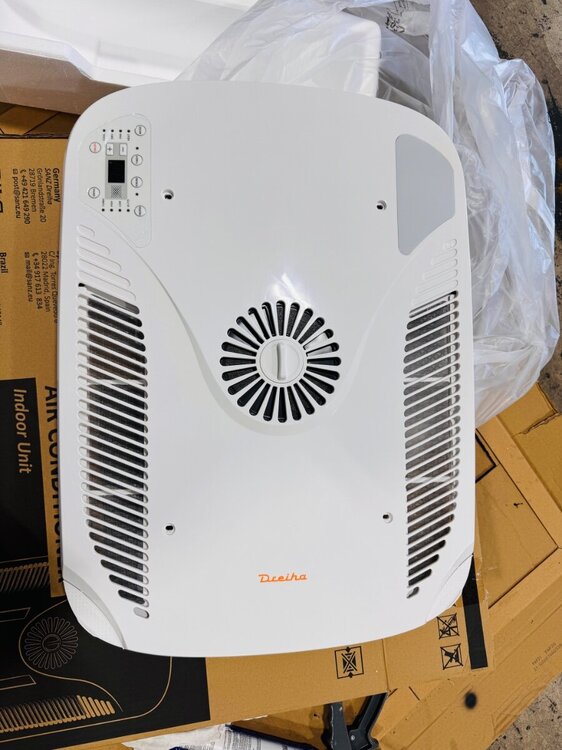
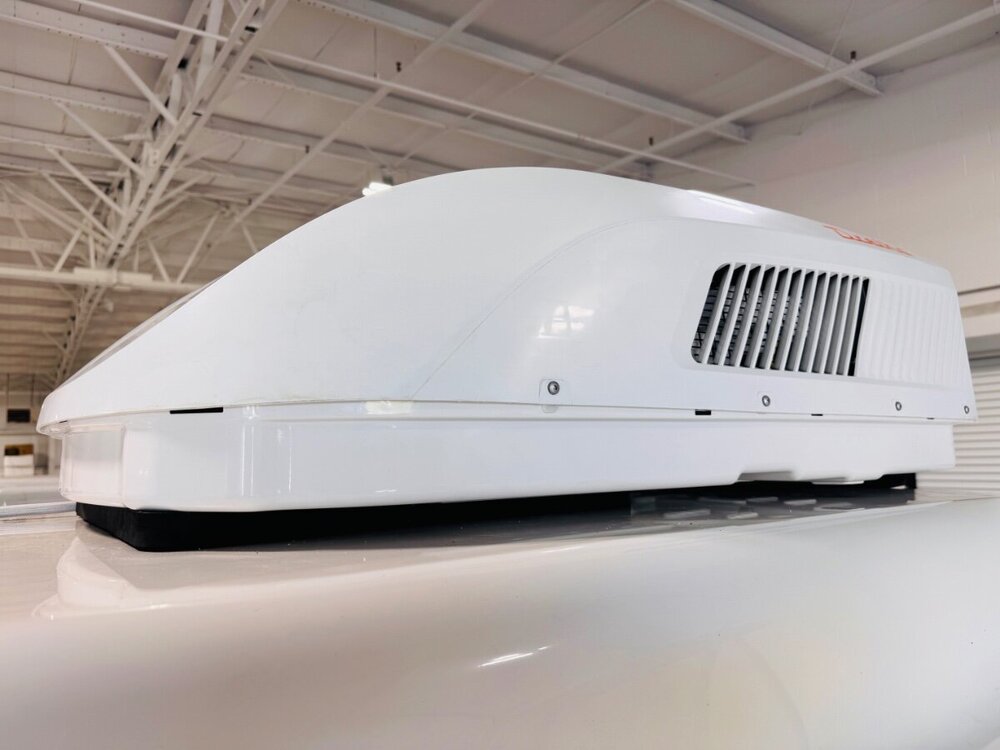
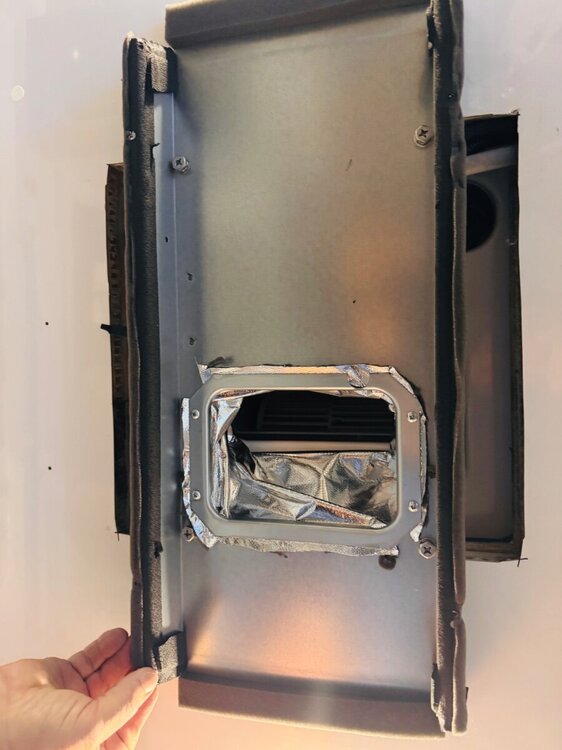
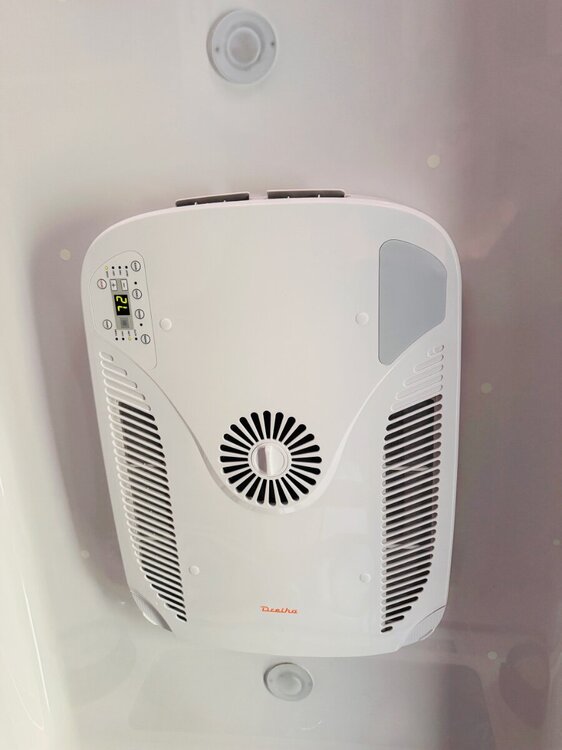
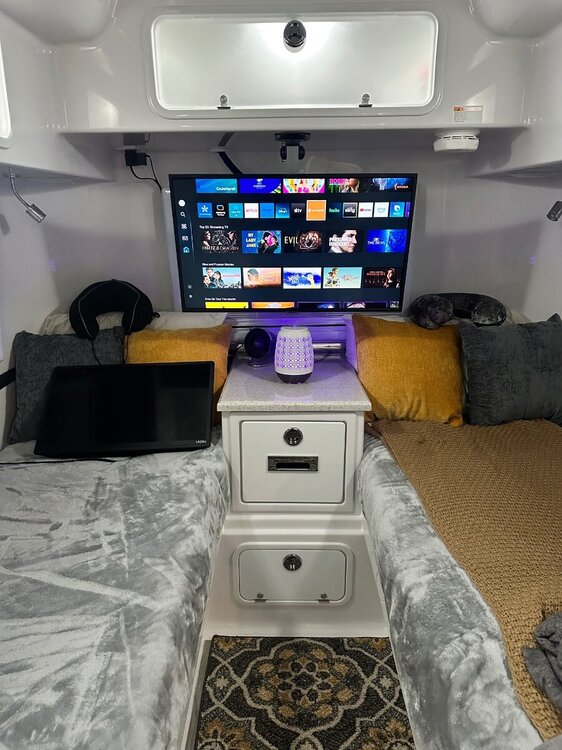
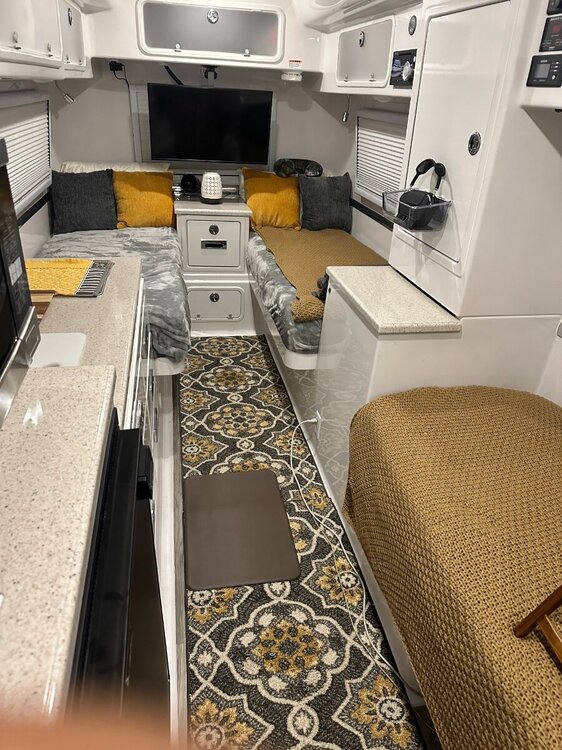
On the last leg of our summer family vacation we stopped at my dad's in MI. Next morning, I drove down to Elkhart, IN and had SDG install the Atmos 4.4. Guys were on time, efficient and knowledgeable. Installation went great! Pics below: They now offer SoftStart as an option on their website but I brought my own SoftStart Breeze (smaller version) . Atmos 4.4 Pics Removed the old Dometic Penguin II, cut drain line and plugged. Cleaned surface, applied very small bead of Dicor self-leveling on the inside perimeter of fiberglass 14 x14 opening Removed interior shroud. Penguin shroud was screwed to fiberglass ceiling, the 2 holes on each side will barely show after Atmos plenum installed. Fixed mine with a couple of the small glow in the dark dots we use on the ceiling to amuse the kids. Kevin was able to use the wiring for the original thermostat location to power the Suburban propane heater control. I may change or remove this later. They used Molex connectors instead of JXN box additional pics The new unit is a good bit quieter (6-10db) depending on mode and has around 40% less draw on the battery. On high it was pulling 1200 W vs 1800 W for the PII. Fan only was under 300 watts. They were done with the install in 2 1/2 hrs. App and remote are working well but still figuring it all out. I know this is short but on our way home to TN. I did find out that the Atmos 4.4 is designed so that the fresh air coming in and the exiting conditioned air is in a sealed unit and does not contact the outside (humid air). So running the fan only does not introduce humid air, it only re-circulates cabin air. Still awaiting answer on how exactly AUTO mode works. From the manual, it only states that it senses ambient air and automatically heats and cools but nothing about a parameter. You actually cannot set the temperature in that mode at all as far as I can tell. I did notice this unit manufactured 3/24 is using R-32 refrigerant. Best, Mike5 points
-
5 points
-
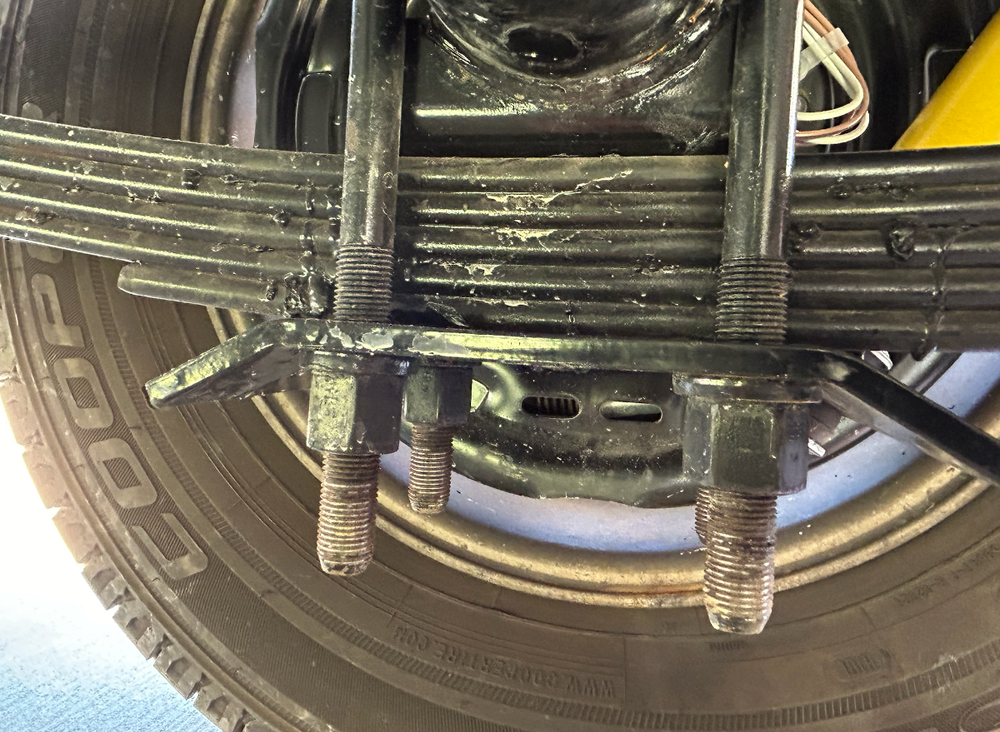
Last week I changed out my Dexter OEM 1750 pound springs and installed new Dexter four leaf 2400 pounders. The process was not all that complex, but it is tedious and liketly will take the average owner more than a day, unless you have access to heavy duty tools and floor jacks. This process is not one that I would never try to even contemplate doing on the side of the road or even at a rest stop. I put a thousand miles on the trailer with the new springs and the wheels did not fall off. I strongly encourage all OTT owners of any trailer over a handfull of years use to inspect their trailer springs. They should be the shape of an ole style long bow, with ends that curve; not straight. If yours do not bunb all the way to the end, they are in the process of failing. If so, see the above paragraph and read it again. Repeat as many timess as necessary. 🙂 GJ4 points
-
3 points
-
If your 2023 model has a Truma air conditioner then, yes, we had a similar experience with our 2022 LEII. We found water leakage around the inside of the AC unit after the first rain storm. Ultimately, Oliver's service staff determined that the leak came from the screws used to secure the exterior AC hood to the AC body, and from the failure to caulk the heads of those screws during installation. Those screw heads sit in wells that collect rainwater. After longer replacement screws were installed, and the wells containing the screw heads were carefully caulked, no more leakage.3 points
-
Art, Understand there has not been any Dexter 5 leaf spring failures, yet. 🙂 Feel fortunate that Oliver installed the 5200lb axles and 5 leaf springs on our 2015 LE2 # 75. We used to support a fleet of industrial mobile machines (before retirement) equipped with hydraulic, pneumatic, electrical, mechanical, and electronic equipment. We supported the field technicians trying to make life easier for them with parts stocked and durability. We standardized hydraulic pumps used as much as possible and air compressor/hydraulic motors so folks in the field and rebuild shop would needed less parts that worked on more machine applications, point is well taken on standardizing parts when possible. 👍3 points
-
I did my career at Honda of America, Mfg in Ohio. We of course tracked every units build and history with the V.I.N.. I thought Oliver was doing the same with the Elite and Elite II builds, using either the "hull number" or some other identifier... but I realized when they sent out the mass-mailings on the Bulldog hitch recall that they weren't doing anything at all like that. THEY upgraded my hitch from the 2" / 7000 lb Bulldog to the 2 5/16" / 12,500 lb version. Even though they had done this... they sent me a recall notice. If their build records were complete... this would have been unnecessary. Evidently, at some point in their production run... there was some 5,000 lb Bulldog hitches that had gotten inadvertently installed. Maybe even just one?? But because they couldn't ascertain the production window where they KNEW there were good parts... they had to go back and check all or nearly all of them, because the risk was just too great. I suspect that this has shined a light on why they might want to be doing something like this going forward.3 points
-
Just as an interrogative comment and question on the subject: New OTT owners may still have spring issues with 2024 model year and forward rigs even though the new OEM axles are D52s. When we replaced our axles last May at Hohenwald, I noticed that our D52s were configured from Dexter with 1,750# 4-pack leaf springs. Since we had already installed Alcan 5-packs a few weeks prior, the OEM Dexter 4-packs were not used and stayed in TN after our D52/Alcan installation. @rideandfly - Bill, y'all seem fortunate to have your #75 rig come with the LE configuration running gear (D52s plus Dexter 5-packs)... It's my understanding that there has yet to be a reported any 5-pack spring failures. My question is, why doesn't the factory order the same axle set configuration for both the LE and LE2? Wouldn't this simplify supply from Dexter, inventory stocking, removing possible installation errors (as with 5k#/7.5k# Bulldog couplers), and ultimately do away with the 1,750# 4-packs which have a history of failing?3 points
-
John, Our # 75 LE2 received 5200lb axles with 5 leaf springs (originally for a Legacy Elite) because Oliver ran out of 3500lb axles with 4 leaf springs during manufacture of our Ollie. The 5200lb axles have larger drum brakes, too. We are not the original owners, but learned this information on this forum. Off the shelf Dexter axle/brake/spring parts are available for our Ollie and I have always liked the fact they put higher capacity axles on our Ollie during manufacture. I would be happy to take more bracket photos, measurements and compare with your photos/measurements, if needed. Here's our center hangar:3 points
-
Yes, for example the Battle Born folks provided the charge parameters for their batteries. Blue Sky Battle Born setup.pages I sent the BB folks a copy of the Blue Sky setup pages and they supplied the parameters that they wanted to see for the 3 BB batteries that I have. You will have to do the programming procedure as per the Blue Sky instruction manual. Very easy process.3 points
-
While at OTT Jason and I were talking about using the hull numbers to track service tickets. Unless I misunderstand him, and he seemed pretty clear, they have no way in their system to track repairs via the hull numbers. The numbers are "more for the owners", than OTT themselves. They "currently" pretty much track only via the owner's name. So, if you sell a trailer, the next owner would need to know your name, and likely have their database updated. I would think they have all the VIN numbers too. Since the VIN numbers no longer correspond with the hull numbers, it's not as easy now to use the hull #s. The VINs have "rotated" back around with new suffix numbers so they can no longer use the last 3 or 4 for the hull #s. Maybe many of you knew this already. BLUF: If we say we own hull # blank, it means nothing to OTT. They key on our name only, or mostly. They're just for us "fun monkeys" to use. Do you think Hull #s should be put on the back of Ollies by default? That would be a fun poll to run on FB.2 points
-
2 points
-
Dexter P/n PR4, 2400 pound rated. Also order brass/bronze bushings and new U=bolts. Their PR4A is the OTT OEM 1750 pound ratged. For those late to this topic, please do NOT replace your springs with the OTT OEM 1750 rated ones. GJ2 points
-
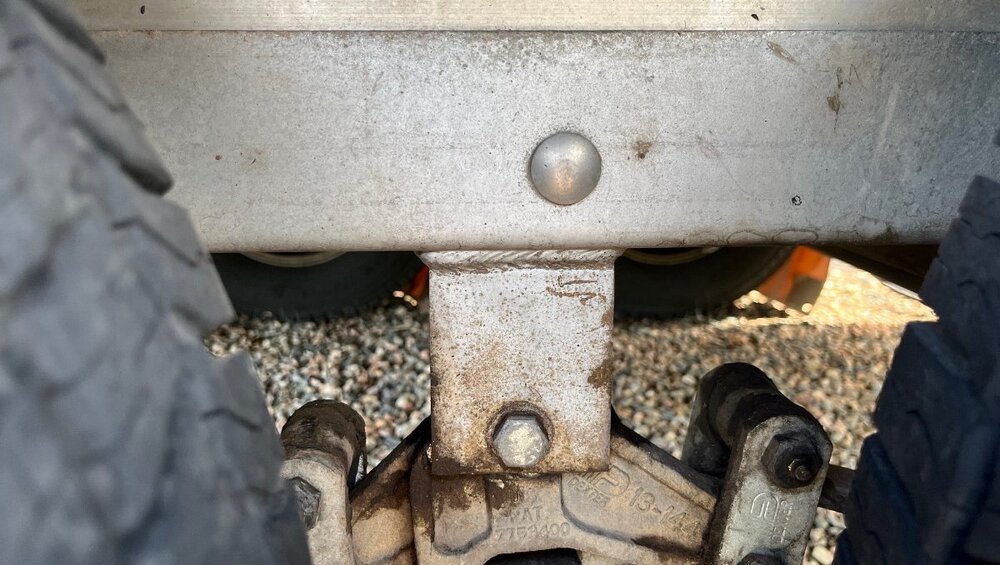
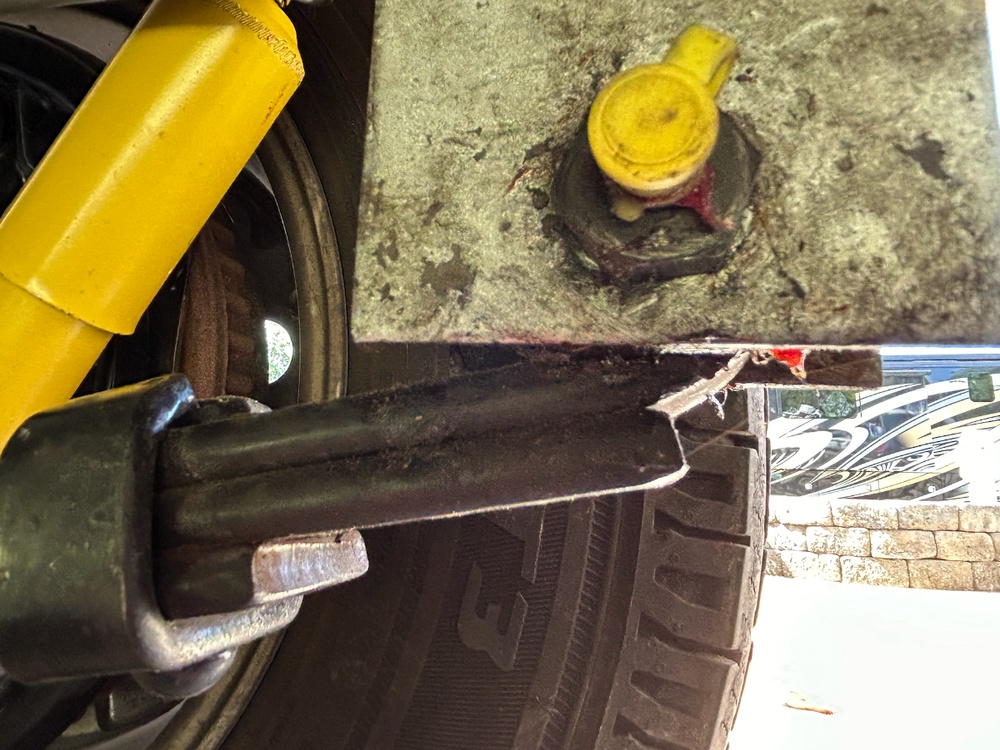
This truly upsets me for Chris, and it makes me doubly mad since it appears mine are the same way (now hulls 75, 110, 113 and others?). One mine, it's recessed 1/4 to 3/8" on the outside and I can feel the weld sticking out a good 1/8" on the backside! Neither picture above, @rideandfly nor @Wayfinder shows the inside weld past the steel frame. If ALL hulls from 75 to 113 had this as the specs, then it is NOT a defect. But if some are and some are not, then certainly a defect. I'll get a better picture, but these three pictures look completely different in many ways. Trailer manufactures do not set specs for mounting distance of axles, in this case Dexter does. Were different axles used? Did Dexter change the spec? As @Mountainman198 nicely stated, "have the narrower steel suspension frame replaced with one with a SC of 50.50”, thereby allowing newer axles to be fitted." If you're replacing axles anyway, this would be another hour of labor to bolt on new steel frames, not a manhour concern. However, today like everything else, these steel frames are another considerable expense added to an axle upgrade. If I was to do this on our hull, I would determine the required length spec, take measurements, remove the steel frames and have a local welder replace the hangers. Or simply hold on to and service the original equipment as Chris has done.2 points
-
If the axle label is missing, Dexter engraves the axle serial number on each axle. I gave Dexter the serial number off of one of Ollie's axles a few years ago and Dexter emailed this axle spec sheet back to me. With this information a Dexter dealer should be able to supply an axle built to original specifications. At the end of this informative video, Dexter mentions engraving the serial number on each axle in case the label is missing.2 points
-
I would remove the air filter and check the condensation drains. They pass through the air conditioner to roof seal on each side. There should be some sticky caulk around each tube. Also I would check the four hold down bolts. There’s one in each corner. To access these you’ll need to remove the inside cover/trim. I think that there’s six screws holding the cover. Don’t over tighten the bolts, just make sure that they are snug.2 points
-
I just opened a ticket for Jason. Maybe he'll have those exact hanger measurements needs for the axles. I sent them a pic of one of my hangers, if they need to mark it up on the pic. If nothing else, maybe we can save his team's time by not entertaining the idea if the hangers don't meet what the new axles expect. New tech, old tech - they don't usually play nice together. Like mentioned above, it's not a defect. It's just the way things were done "back in the day" and now we all expect to have the shiny new "gear" on our old rigs. It's just not usually practical in the real world. LOL. This is why we constantly need to upgrade our computers. Dang it. Difficult to plan for the future widgets not yet on the market. Here's is pic of my driver's side hanger. We specifically talked about the position of this one.2 points
-
I’m not quite sure that OTT created any defect. It seems to me that Chris's 2016 LE2 was built to the axle specifications used on his trailer and have been in service for about 8 years without any problems. Mossey2 points
-
Mine's wired exactly as the illustration you've posted... My negative bus bar is within 6 - 8" from the Orion and with a common ground between TV and TT, FYI.2 points
-
When I serviced my bearings, I cut back all the wires to clean copper and replaced all those old crimps. It's easy enough to run new wire if needed. I would suggest using the old wire to fish new 14 AWG wire, interior to the axles, not exterior using wire ties to the axles as John E Davies showed in an old post.1 point
-
My theory of what happened may or may not be correct. We will have to wait for Chris to let us know what Oliver Service says and/or what his axle sticker says (if it is still there)1 point
-
1 point
-
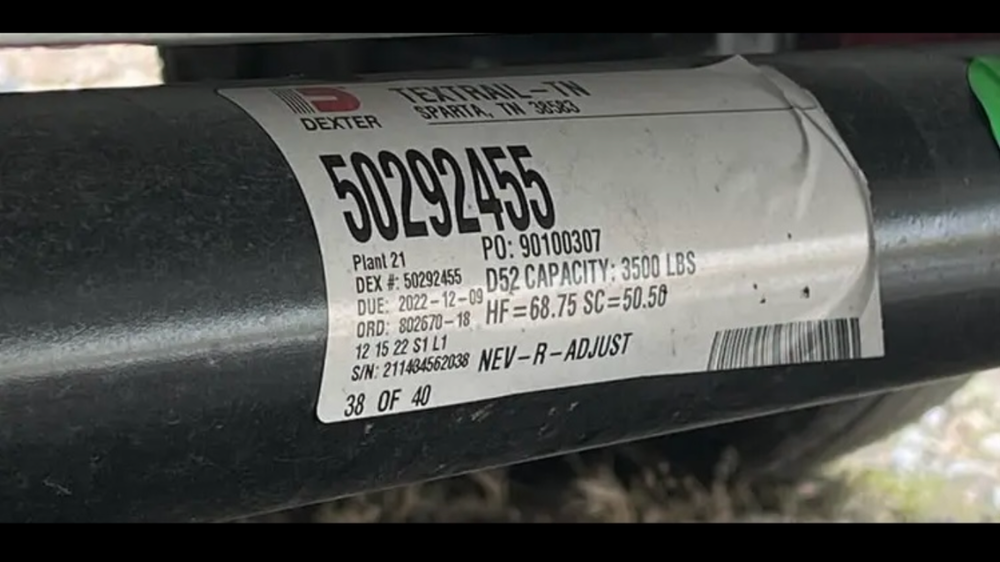
Without more specifics it is hard to prove for sure, but from what Chris has provided so far, I believe you are correct. From what I can tell, the current standard for E2 axles is a Spring Center(SC) measurement of 50.50”. This is the measurement from the center of each of the centering holes located on the axle spring perches, across each axle (see my axle sticker below). I do not know of Oliver manufactures the steel suspension frame to which the spring/axle assemblies are then bolted to the aluminum frame or if this component is provided as part of a complete suspension package provided by Dexter which is bolted to the aluminum frame. Regardless, it appears that there was a period of manufacturing where the axle SC measurement was less than 50.50”, necessitating that the spring hangers on the steel frame were moved inboard. Not a defect IMHO, rather a manufacturing change to meet the narrowed spring perches being provided on the axles at that time Couple of questions I have: 1) how many trailers were manufactured with these narrower spring perch mounts? 2) since the steel suspension frames are bolted to the aluminum frames, is it possible for those impacted hull#s to have the narrower steel suspension frame replaced with one with a SC of 50.50”, thereby allowing newer axles to be fitted? For those interested, HF (hub face) measurement of 68.75” (as shown on the sticker) is the outside to outside width of the axle, as measured by the outside of one hub, across the axle, to the outside of the hub on the other side. I believe that this should remain unchanged for all E2 trailers built.1 point
-
Wayfinder, Appears hangars on 2015 #75 LE2 are positioned inward similar to your hangars, if I understand you correctly. We have original 5200 pound axles with original Dexter 5 leaf springs, no issues on 5200 axle springs yet, that I'm aware of: Purchased a spare # PR5 five leaf 3000lb spring, 25 1/4" eye to eye & 1 3/4" wide," from Dexter off the shelf that matches the original if I need to replace one along with # SP01-060 U-Bolt kit for 3" axle. Installed bronze bushings after picking up at Dexter:1 point
-
In the past week there have been four (4) reported spring failures. The trailer years might not be exact, but if I remember correctly 2015, 2019(2), and a 2021. That's a lot in a short period of time.1 point
-
There is a new post and a video in said forum of interest; in short, more corrections to misinformation. Anyone considering a Gree (Eco Cool/Atmos 4.4) product should take time to read/watch the very pertinent information and discussions provided therein. I have learned nothing that would change my mind about purchasing an Atmos 4.4, looking forward to my pending delivery and details on your install.1 point
-
1 point
-
JD: If any of the posters (Other than mysself) had found a 2000 to 2401 USA made 4 leaf spring I would have bought American. But after two and a half months, I have seen zero. Not one. Like the early adopters, I had to make a call for repacements. Mine are shot and I have 7,000 miles to roll this summer when I get there. I did my homework. My mistake was trying to convnce you and others that the SOB's were not what an OE2 needs. Add to that the dishonest representation, intentional or not, of springs to the early adopters by SOB of a spring set which was way over what had been sold is bad. But what followed is far worse. Having been strong armed by several owners that by my suggesting that a 2400 pound spring would be too hard a ride, only to find that they had purchased a 2750 pound springs.... and all fall in line with that's what they need. Pure confirmation bias. Then to say that they will be running their super springs at over 20 pounds over the Michelin E-rated tires pressure chart recommends. Hopeless. And now trumping the discussion with the idea that I am not patriotic by not buying an American made spring is beyond my limits of civility. As a retired USAF Colonel who served in several war zones for 30 years, and 40 year plus engineer, I will just say that... I hope your end up loving your springs. I suggest that this post be locked until OTT advises what they are suggesting for the fleet. Further discussion is no longer healthy for this forum. I'm done. GJ1 point
-
Absolutely correct, Steve. We did the same procedure by drilling-out our spring plates for the 9/16" U-bolts. Not only are the U-bolts beefier, but the Alcan-provided nuts are 50% longer than those on the standard Dexter axle made with sub-standard Chinese spring steel leafs. More thread contact between bolt and nut = mo betta. This was one of the main decision points in going with Alcan versus Dexter spring packs for our application. Dexter's 5-pack springs are designed in the same fashion as the 1750# 4-packs - with the 4th longest leaf extending to only about 3.5" from either eyelet. This is the traditional break failure point that Steve's referring to in his description above. With the Alcan design, that 4th spring fills the gap by extending to the point where the 5th leaf starts curving for the eyelet. Another feature of the Alcans, previously discussed but adding here for clarity, is the larger walled bronze bushing - 3/16" versus 1/16" for the Dexters that had bronze bushings. This thicker walled bushing creates an even larger diameter eyelet = mo betta. Please note that the current Dexter 1750# 4-spring packs w/D52 axles are fixed with plastic bushings. I observed this first-hand last week when replacing our D35s for the D52s. Serious NOTE: Owners with the newer Dexters should determine if their axles are equipped with either bronze or plastic/nylon bushings. Why, you ask? If a rig's running gear is fixed with an axle kit using spring packs with plastic bushings and using Dexter EZ-flex wet bolts, the bushings will likely not last a season. The petroleum-based grease used for the wet bolts can decompose plastic bushings. Not good, IMO. The pic below shows Alcan's extended 4th leaf right to the curvature point of the 5th spring's eyelet - a robust design feature not found in either the 4- or 5-pack Dexter Chinese-made spring kits (FYI, the traditional breaking point with the Dexter 4-packs is about where the end of the 3rd spring is located, see below pic): Comment on Shocks: If one assumes that OTTs are "under sprung" - i.e., not heavy enough leaf springs, then the constant expansion/contraction rate that the Monroe's experience is very high. IMO, this wears out the shocks much sooner - and which were never designed for an "under sprung" suspension to begin with. Using heavier-duty shocks on the same running gear may last a bit longer but shock failure will occur sooner than if they were mounted on running gear of heavier design. The Alcan option may just allow our shocks to last their designed lifespan... who knows? Let's get some miles on these babies and find out! 'nuf said.1 point
-
I just want to make clear to Oliver owners that are researching information about replacement leaf springs. I have received a PM about my earlier post and and they were understanding that the Alcan leaf springs were rated at 2000# when they are actually rated at 2750 pounds. I want forum members to have the right information so they can make the best choice for there needs.1 point
-
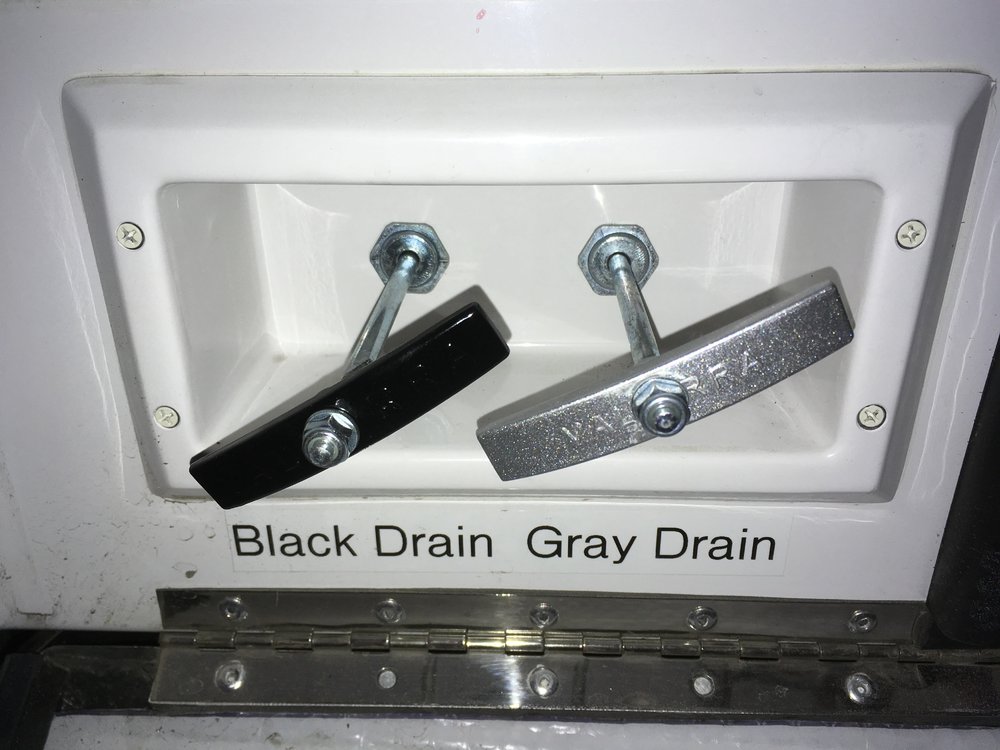
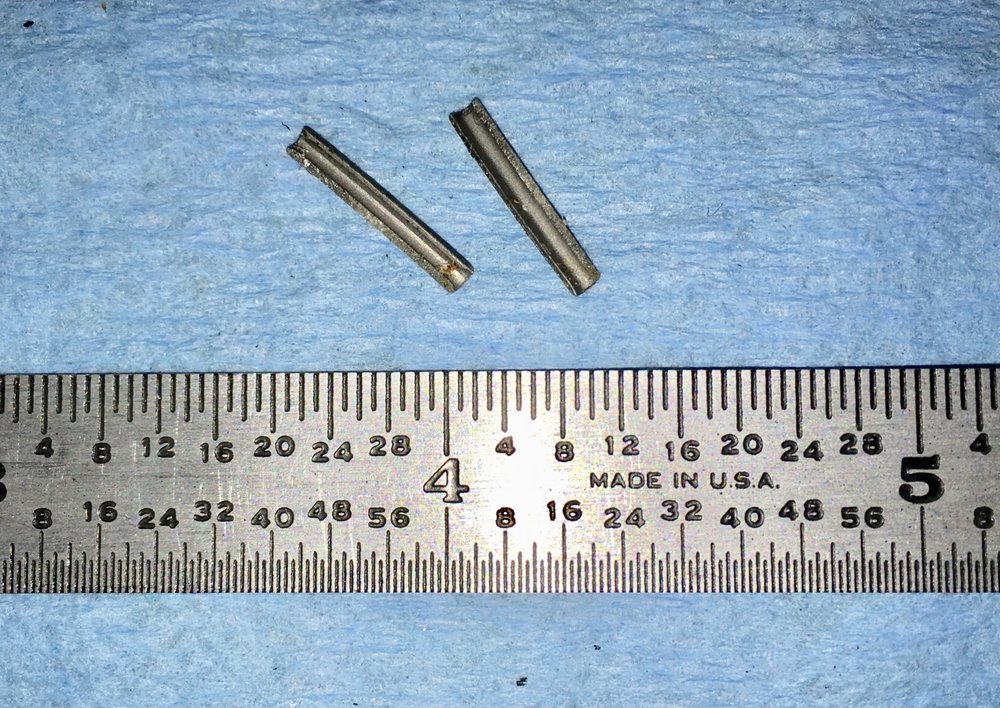
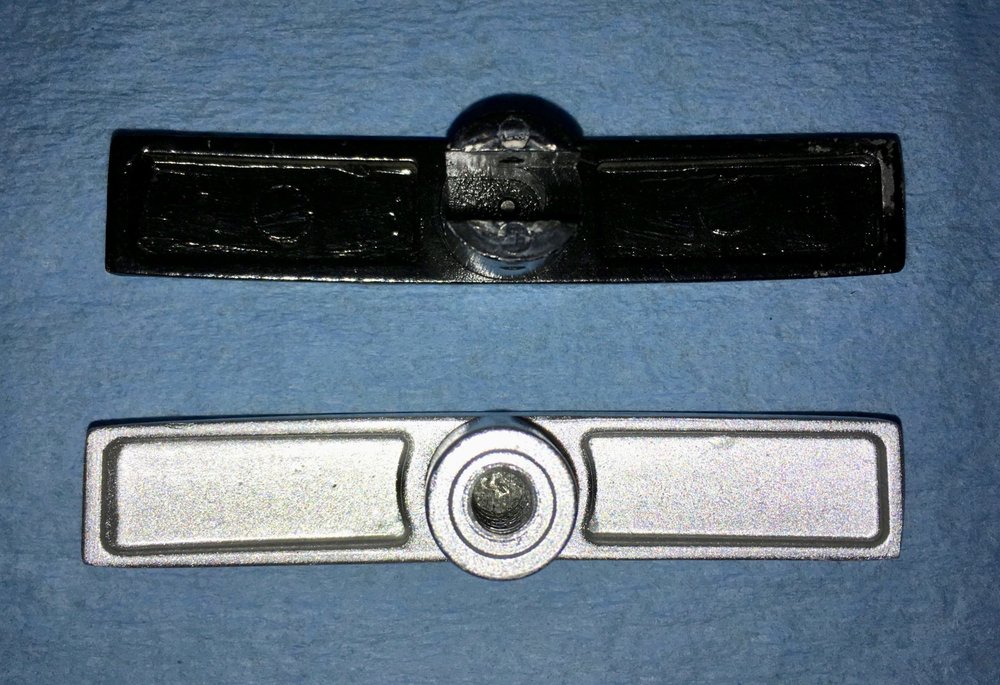
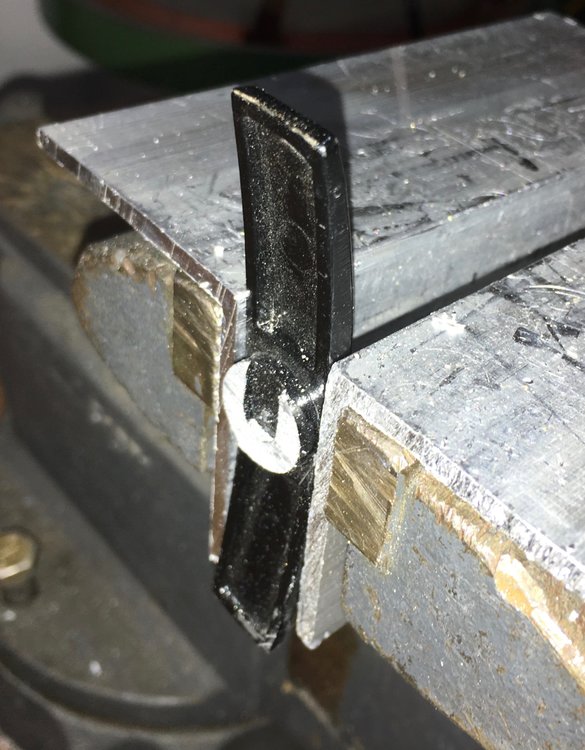
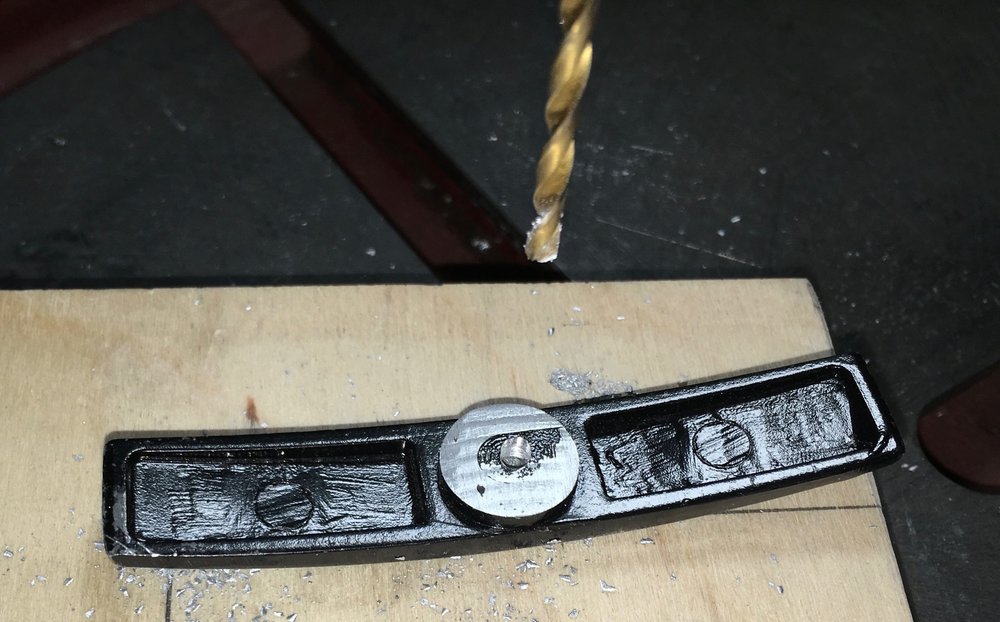
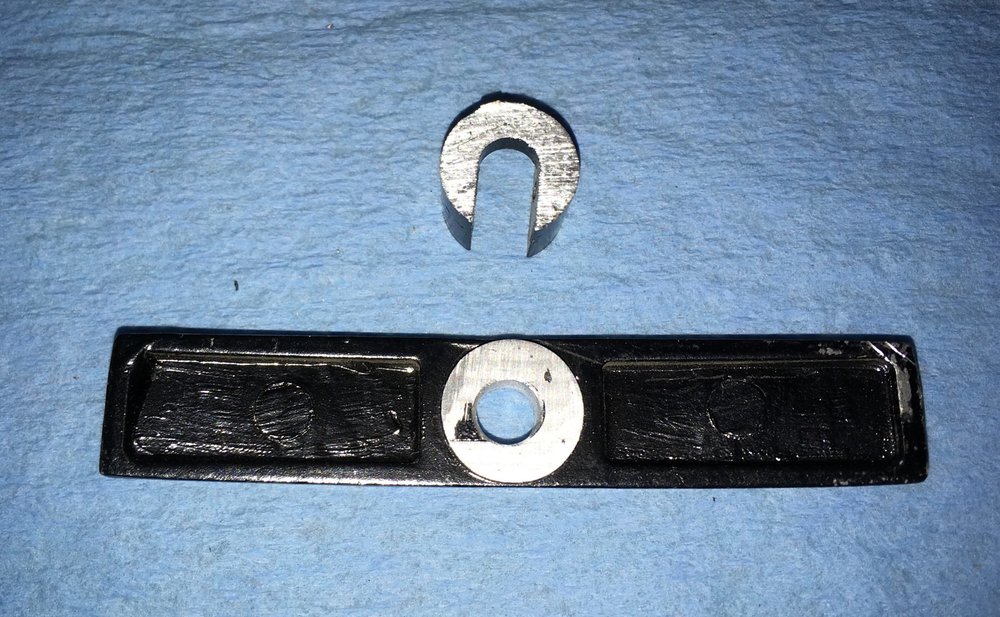
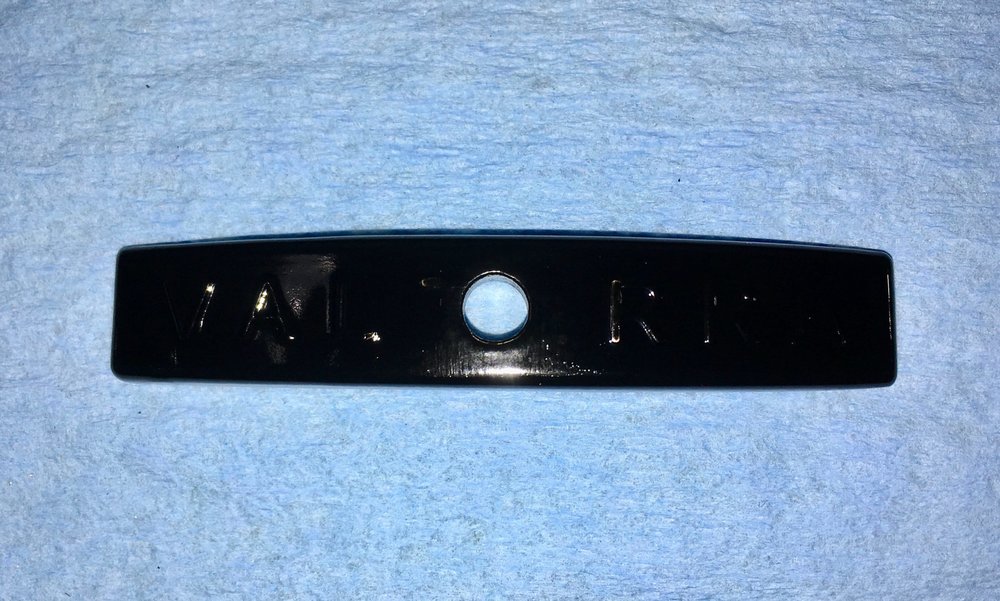
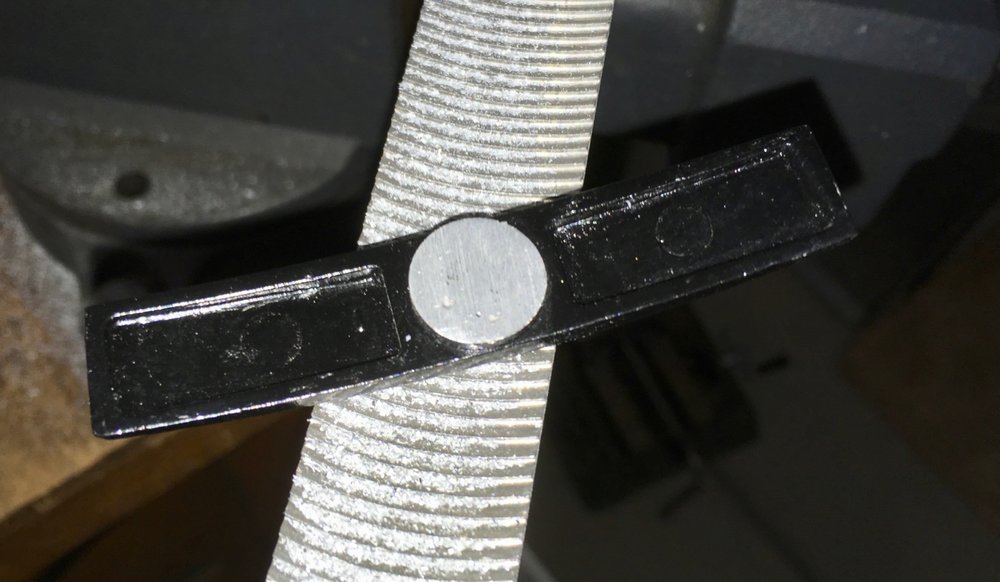
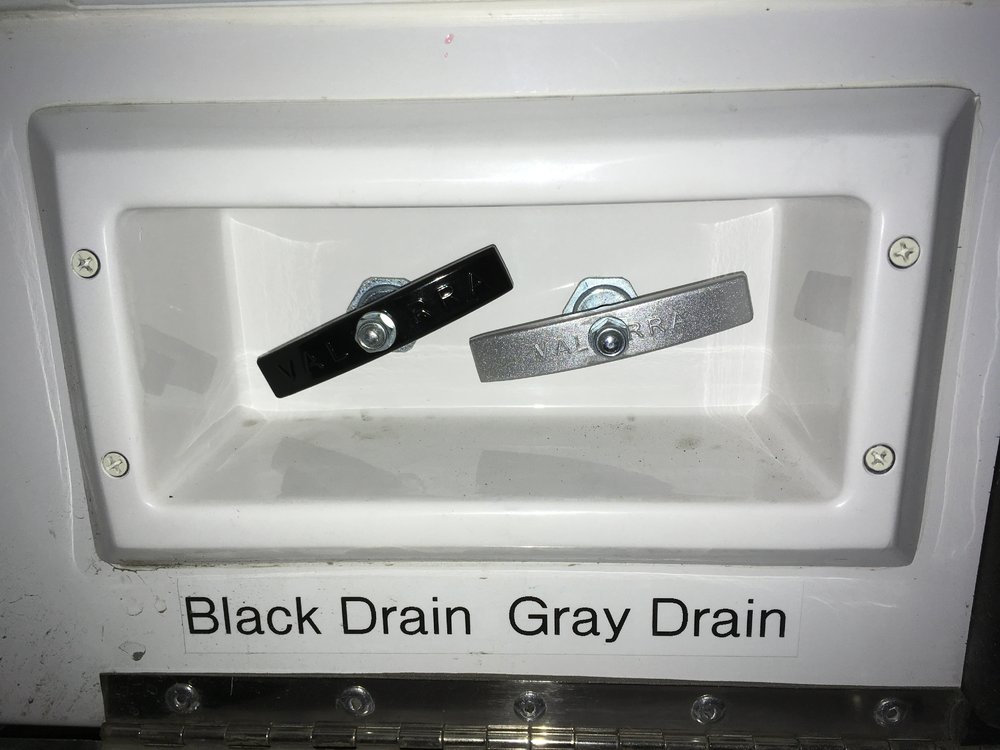
This is related to this thread, read more info here if you want to: ...http://olivertraveltrailers.com/topic/looking-for-a-threaded-waste-tee-handle-metric-6mm/ I never did locate a 6 mm threaded handle, so I modified the 1/4-20 threaded one I bought to make a silver colored Gray Water handle, and modded the other black handles to match. Here is the big reason to do this mod before one of your handles breaks off ... the dinky hollow roll pin through the handle is simply inadequate for the job. This one split into two long halves during removal: If your tanks are completely empty, it will make this job much easier. Don't accidentally dump anything nasty on the ground or get black water in your gray tank.... you will have to pull the rear handles out all the way to do this. Remove your old handles with a 1/6" pin punch and a helper (to hold a heavy block of wood underneath), after some really bad words. These handles are a pain to remove by yourself, and would be more so while camping. With a helper it doesn't take very long. Here are the threaded aftermarket and unthreaded Oliver handles for comparison. Secure a handle in a padded vise and cut off the excess shank with a coarse hacksaw blade. The finished handle needs to be 1/4 inch thick or less where the threaded rod goes through. File the cut side flat and true (90 degrees all around) and also take a little off the other side to provide a flat in the center. I used a large curved tooth mill file held in the vice and it worked well. Drill a pilot hole and then a larger one straight and centered, I used a 15/64",(just under 1/4"). I used a drill press just because it was there, but you could use a hand drill if you are careful to keep it aligned: Here is the finished handle with the cut off piece: And the other side after painting. I used DupliColor (brake) Caliper Paint - it sticks very well without primer, is really hard (contains ceramic) and it dries fast. I use it for all small paint jobs and am always happy with the results. Run the rear nut all the way down the threads, insert the handle, add a flat washer and a 6 mm Nylock nut. Clamp the shaft carefully with a small vice grip pliers to keep it from turning. Align the handle as desired, secure nuts. Done: Don't forget the one in the bathroom. This is one of those silly little things that takes a little time but virtually no money, as long as you have access to the tools, but it will save major headaches when your handle snaps off in your hand at the dump station, with a line of anxious campers behind you. John Davies Spokane WA1 point
-
Recent Achievements


