Leaderboard


Popular Content
Showing content with the highest reputation on 12/22/2024 in all areas
-
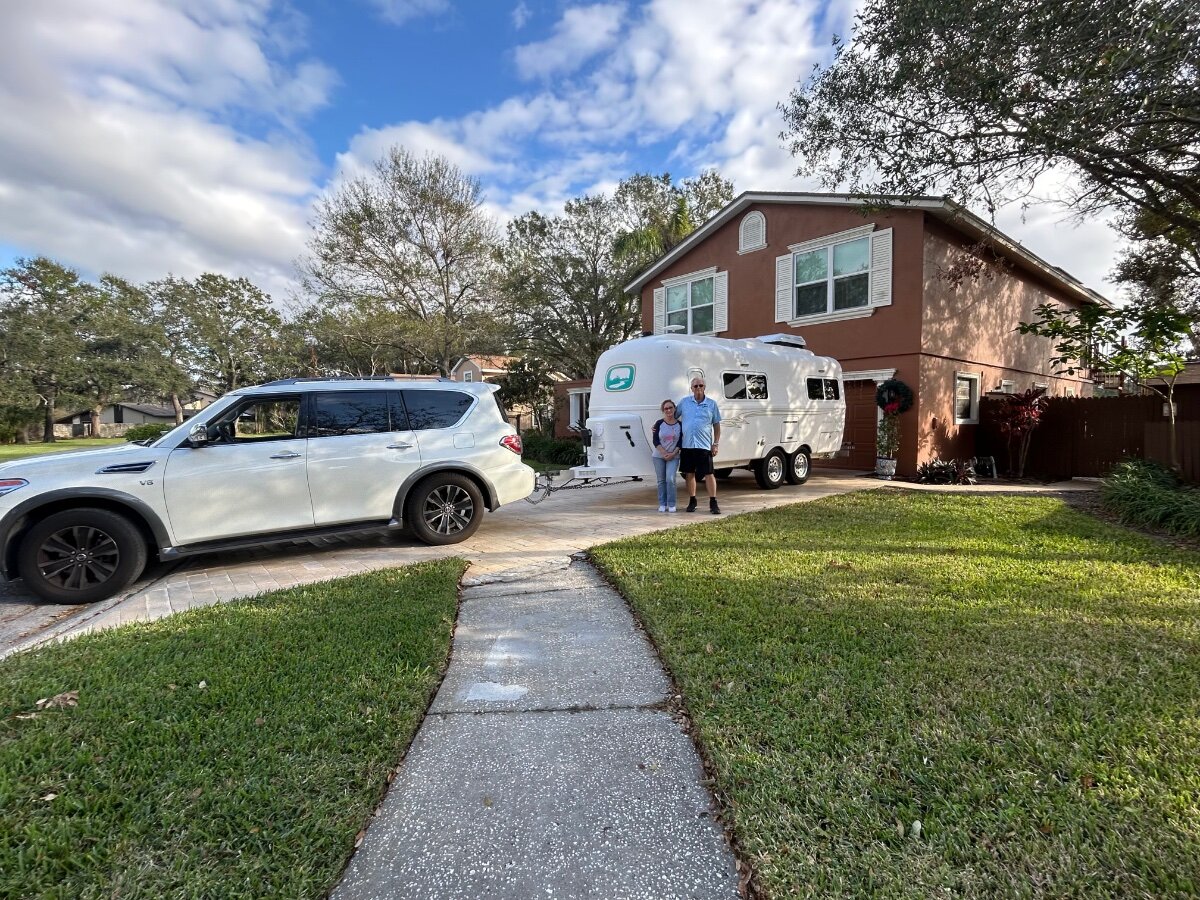
After almost a year on this forum, reading all the wonderful information, getting used to the you get what you pay for price of an Oliver, and finding the wonderful owners of Hull 292, Duke and Chris Chadwell, on Dec 16th we took the plunge. Duke and Chris loved their Oliver and bought so many toys to go with it. We were so happy to get them included. We head out on our first adventure Dec 26th to St. Augustine with our Standard Poodle, Ranger. Anita, my Wife, came up with the perfect name for our Ollie, “The Range Rover.” We’ve already booked site F27 at the April Ollie Rally. Hope to see you there. Gary, Anita, and Ranger
 3 points
 -
JD & JD: Roger on the CO detector. Also there are: The transformer for the USB plugs, The refrigerator LED's on the control board. The furnace feeding power to the T-stat if digital The Microwave control board and LED's The feed back loop that can occur where the tail lights have a dim light despite not being plugged in. to the TV. What else have we missed? So basically there are multiple sources for power to be drained. Super small amounts each, but together they can be measured. Years ago John Davies tried to find them all, and pretty much did. But after spend a lot of time on this drain and eliminating all he could, he was still losing power, I believe .1 amp if I recall. If he could not find it, it was not worth looking further in my eyes. GJ2 points
-
Welcome, Gary and Anita and congratulations on your “new” Oliver! We will miss Duke and Chris but are glad to have you on board. Mike2 points
-
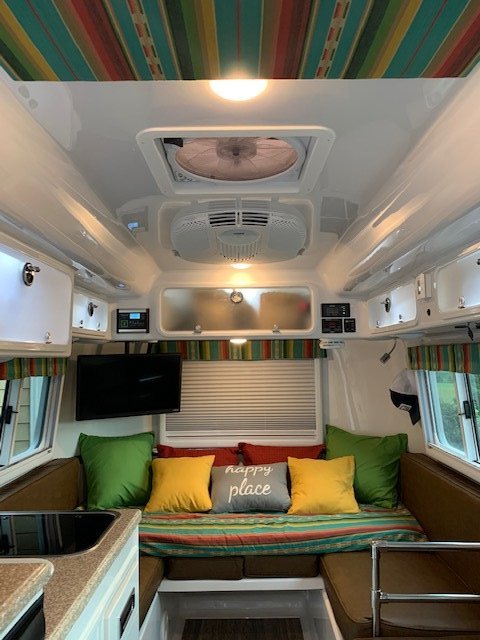
When we did our initial walkthrough of our new Oliver, the Oliver service rep strongly suggested we keep short segments of pool noodle between the back of the retracted tv and the lower surface of the attic to prevent the fiberglass from fatiguing around the tv mounting bracket. Even ratting around Moab, we have never had the TV deploy while traveling.2 points
-
Congratulations. Welcome, and glad to see #292 remains on her home state. Wishing you safe travels, and many miles of smiles.2 points
-
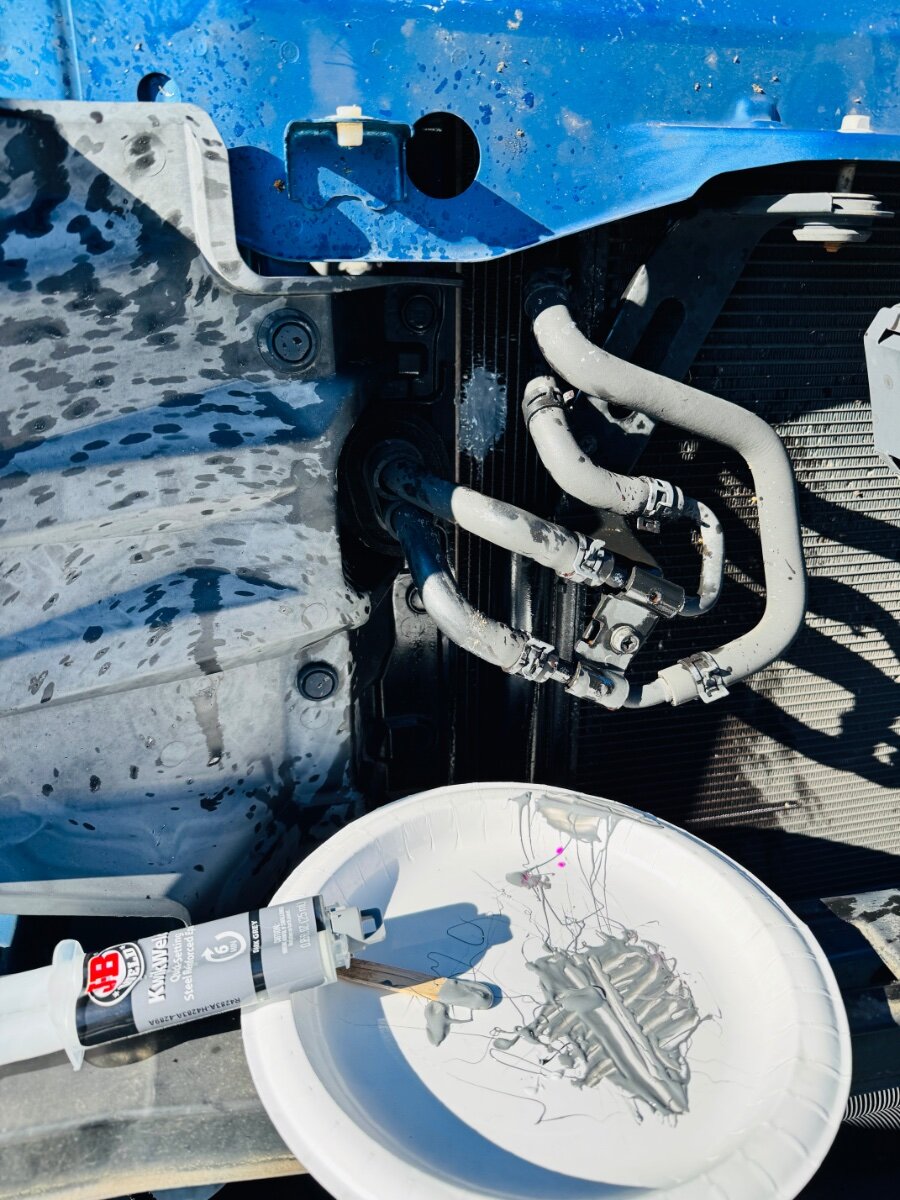
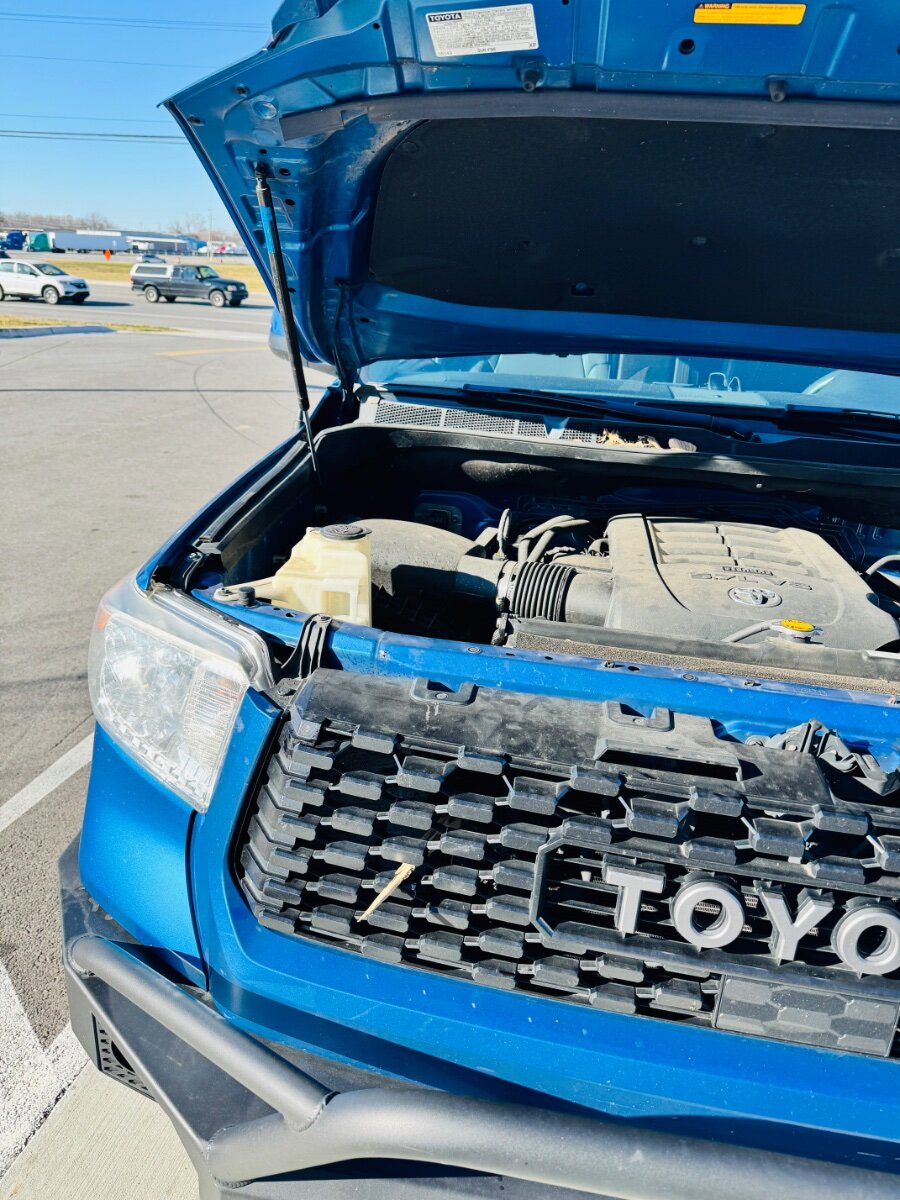
Good for you! What are the odds that the piece of 2x4 would clear the grill and hit the important stuff behind it? Glad you had the JB with you. Also, thanks for the update on the DC to DC charger. Bill2 points
-
Just another reason to have AND USE a high quality made in the USA master cutoff switch on your RV when stored. Highly recommend BlueSeas 350 amp switch (Model 9003E) as it has a rock solid reputation that most Insurance investigators already know about. When stored isolated behind such a high quality switch, our Litho's are pretty much immune from outside hazards. Stored isolated, about the only way our LiFePO4's could be associated with a fire is if the facility burns down on top of our magnificent RV's. By then, everything is totaled and the cause was not our OTT's. I recommend that the RV Industry Association adopt: That all RV battery or battery banks have a quality master switch. That such switch shall meet or exceed those listed below in the US Made switch. That all RV battery banks also have a fuse that is rated at a capacity less than the wire size being protected. That the battery cutoff switch be located in a location where fire fighters would expect it to be. With such a switch, the vast majority of our OTT's would easily pass muster of these suggested requirements. However I would postulate that the vast majority of SOB RV's on the road today do not. This is the message that the Insurance Industry, and especially RVIA needs to get smart on. GJ
2 points
-
Periodically I take a couple of hours and retorque selected components of our OE2. My list of torque values is more extensive than what I have to date found on our forum. BUT, it for sure is not complete. If you disagree with my values OR have other values, please post back. It would be helpful if you included the source of your input and it's date. I'll periodically update the attachment and repost. Down the road if you want to check the currency of one you may have in hand, just check the version dates in the upper left hand corner. With this post, it is 21 DEC 2024. GJ PS: I was surprised to note the updated NTSB web site provided info for the Dexter EZ Flex. I suspect is may have been updated in response to the "Walking EZ Bolt" problem. EZ Flex Installation (April 2021 From NTST Web Site) MC-10190118-0001.pdf GJ TORQUE VALUES FOR OE2.docx2 points
-
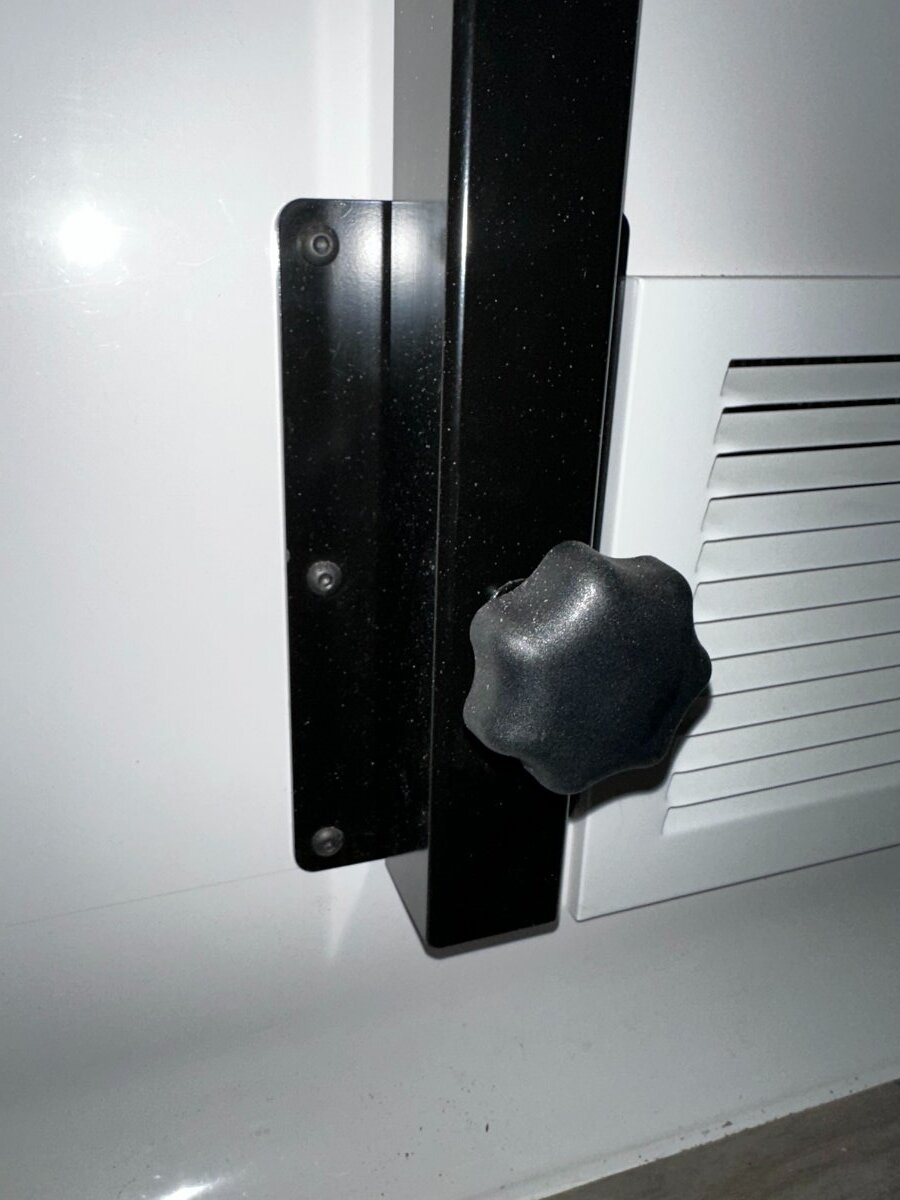
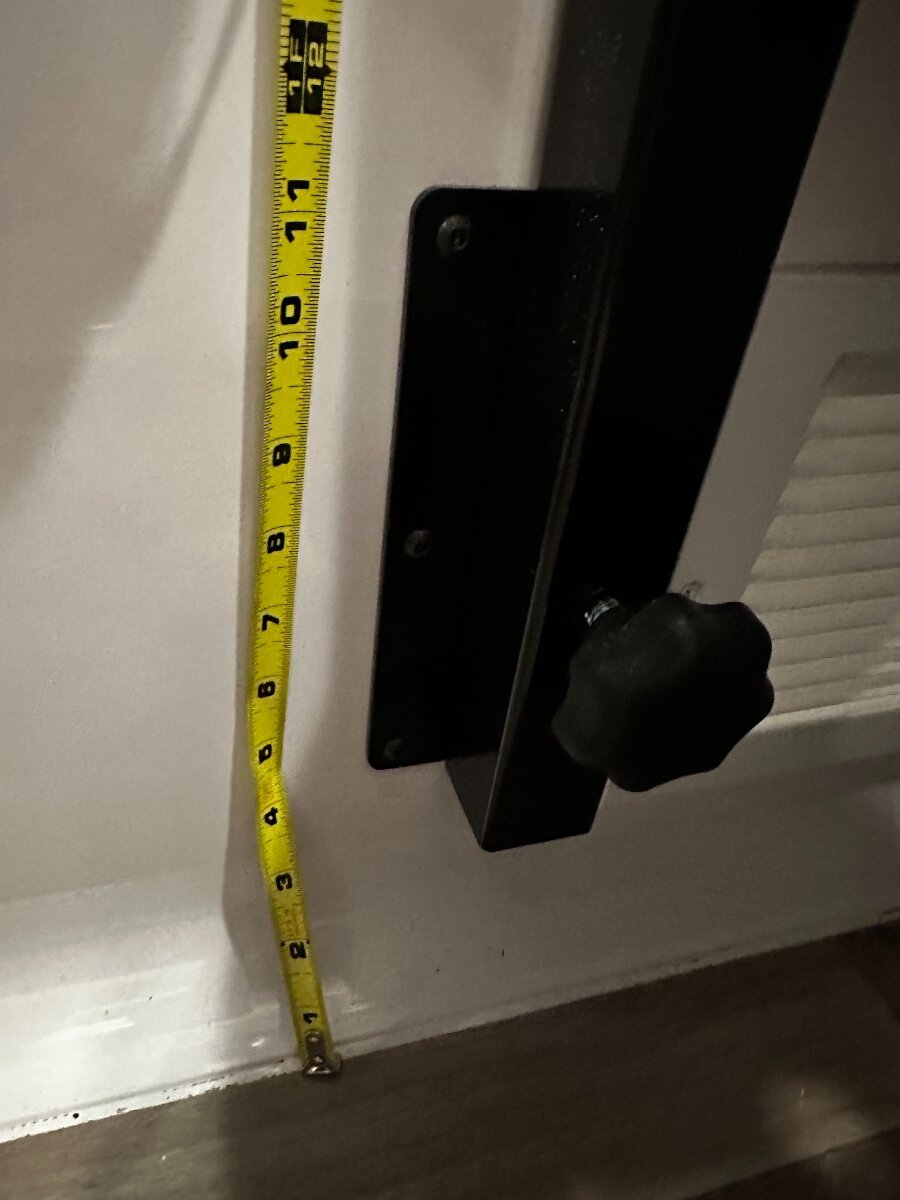
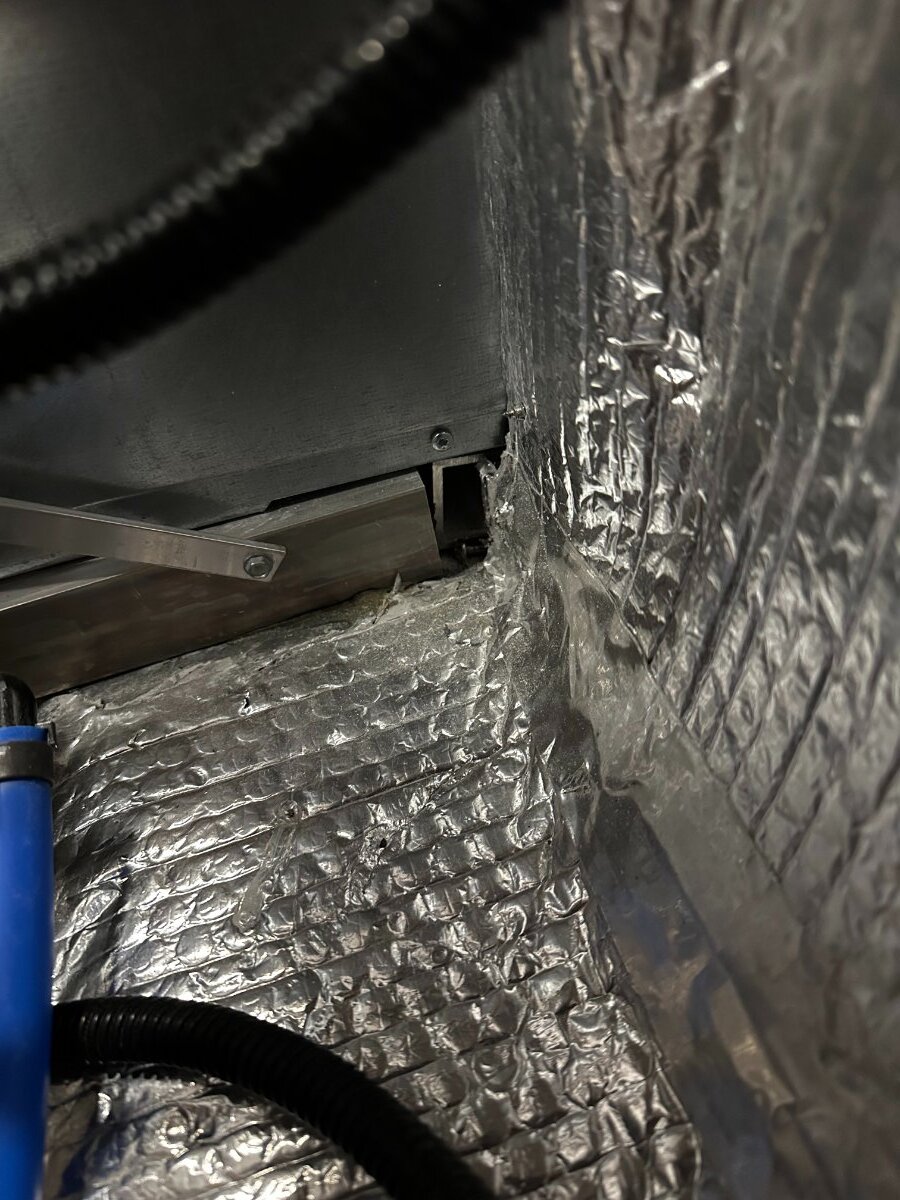
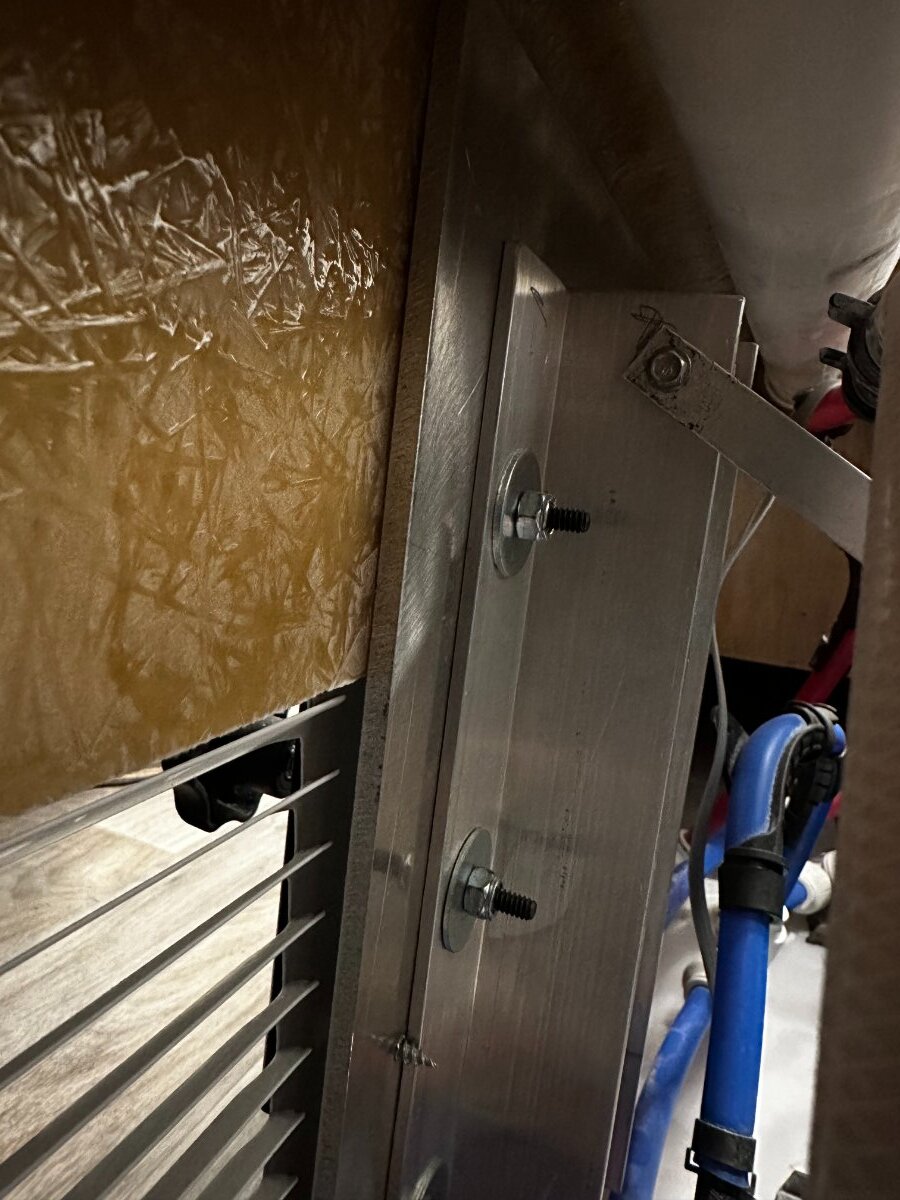
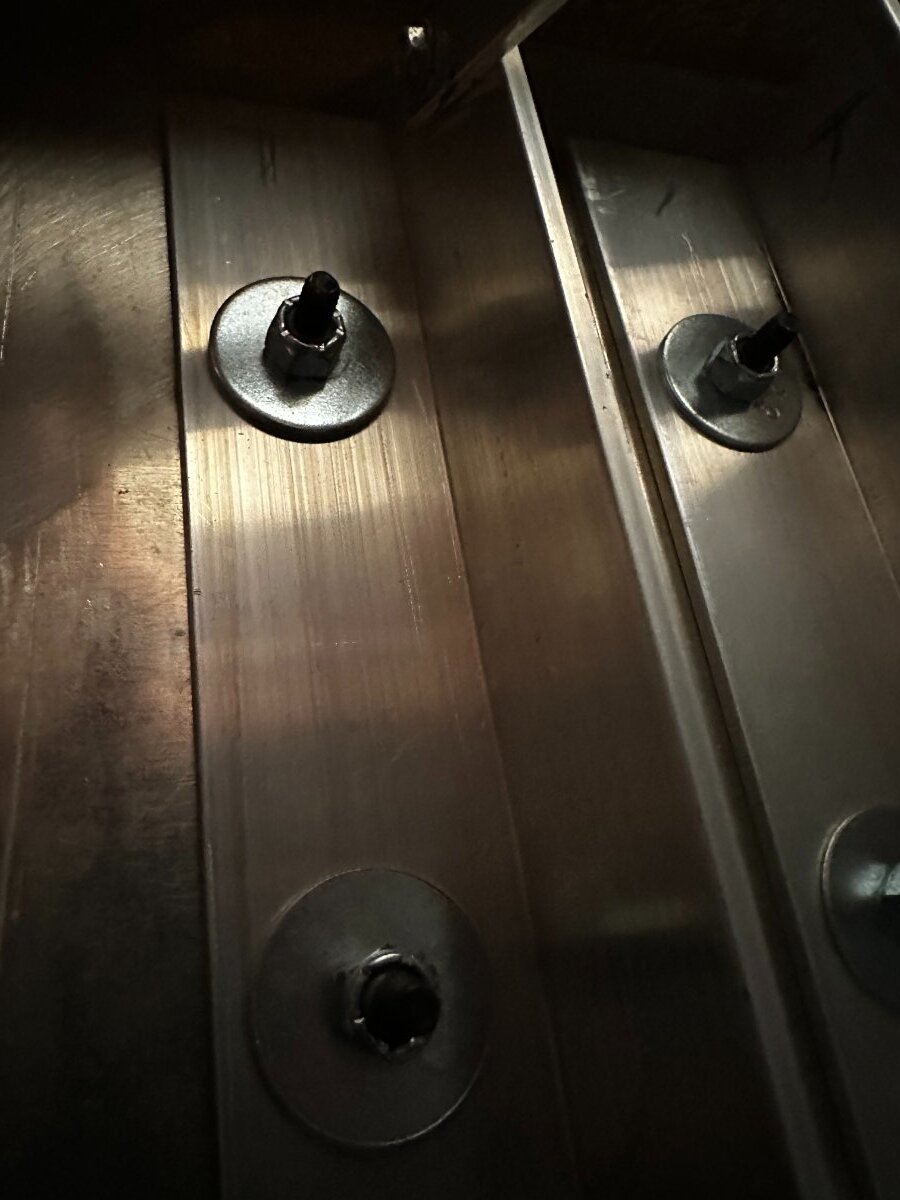
I’ve attached photos showing how I mounted the EZ Reach table system. To do this, I used a 12" x 16" aluminum sheet and aluminum L brackets. Additionally, I attached an angled brace from the top of one of the L brackets to the aluminum frame supporting the heater. The setup is very sturdy, and we’re pleased with how it turned out. For the EZ Reach system, we selected a 16" arm and a 12" arm to achieve the level of articulation we needed. The table top was purchased from Oliver. Note: We always remove the table top from the system while traveling. Hope this information is helpful!
2 points
-
Seeing the ad the first time was fun because we are used to seeing trucks in ads pulling Airstreams. When the trailer pulled into view we realized it was an Oliver and an Oliver ad not a truck ad. The voice over seemed like a familiar voice also.2 points
-
We were accustomed to separate single beds in our pop-up A-frame. Since picking up our Elite I Hull # 1209 on August 11, we are trying a single bed across the back for my wife, that we leave in place. I use the dinette bed across from the galley, putting it up each evening. This keeps us from having to crawl over each other during the night. It also creates more space by not having the large dinette and opens up a seat on each side in front of her bed. I simply made a plywood support and use the small fiberglass extension that was in the closet. The 4 small side cushions are the middle of the bed and we have a 3 inch memory foam over the cushions that extends across the back. By no means will this work for everyone, but we're not very large so it seems to be working well for now. Having lots of small pillows, that I recovered, helps for lounging around in the evening while watching a movie or reading. The valances are on 1x2 poplar with the fabric stapled to it and velcro holds them in place very well so far. I borrowed Foy's ceiling panel design. I did have him make me one of his beautiful shower mats! Ron
1 point
-
Thanks Ron. Haven't tried that but will consider going forward.1 point
-
So happy for you guys and can't wait to see it in person! Congrats, and welcome to the club! Chris1 point
-
Congrats, now you can add the Mechman to your Signature!1 point
-
Can’t be much. Haven’t tested but likely about 0.02A. Anybody test it power on then off?1 point
-
How much draw on the CO detector?1 point
-
No magic on this process. Drop by your favorite auto parts store and ask to borrow their electrical clamp on amp meter. It has jaws like a huge pair of plyers. Set their meter for amps and put it around your battery + cable. It reads the amps on the meter. With your TV motor shut off, you can practice with their tool. Just put the jaws around your + battery cable. then have someone inside the vehicle and turn on various electrical devices. You can easily see how much power they are drawing.1 point
-
Ditto: Lock N Lube, Mystic in my axle zerks and CV-2 on the bearings. That said, when I run out of CV-2 (In about 8 years) I'll go with the Dexter Mobile Synthetic bearing grease. It is specifically called out in the EZ Flex installation procedure that I posted earlier today. GJ1 point
-
Well that was pretty dumb.... Thanks for the reminder to post the link. Up there now. 🙂 GJ1 point
-
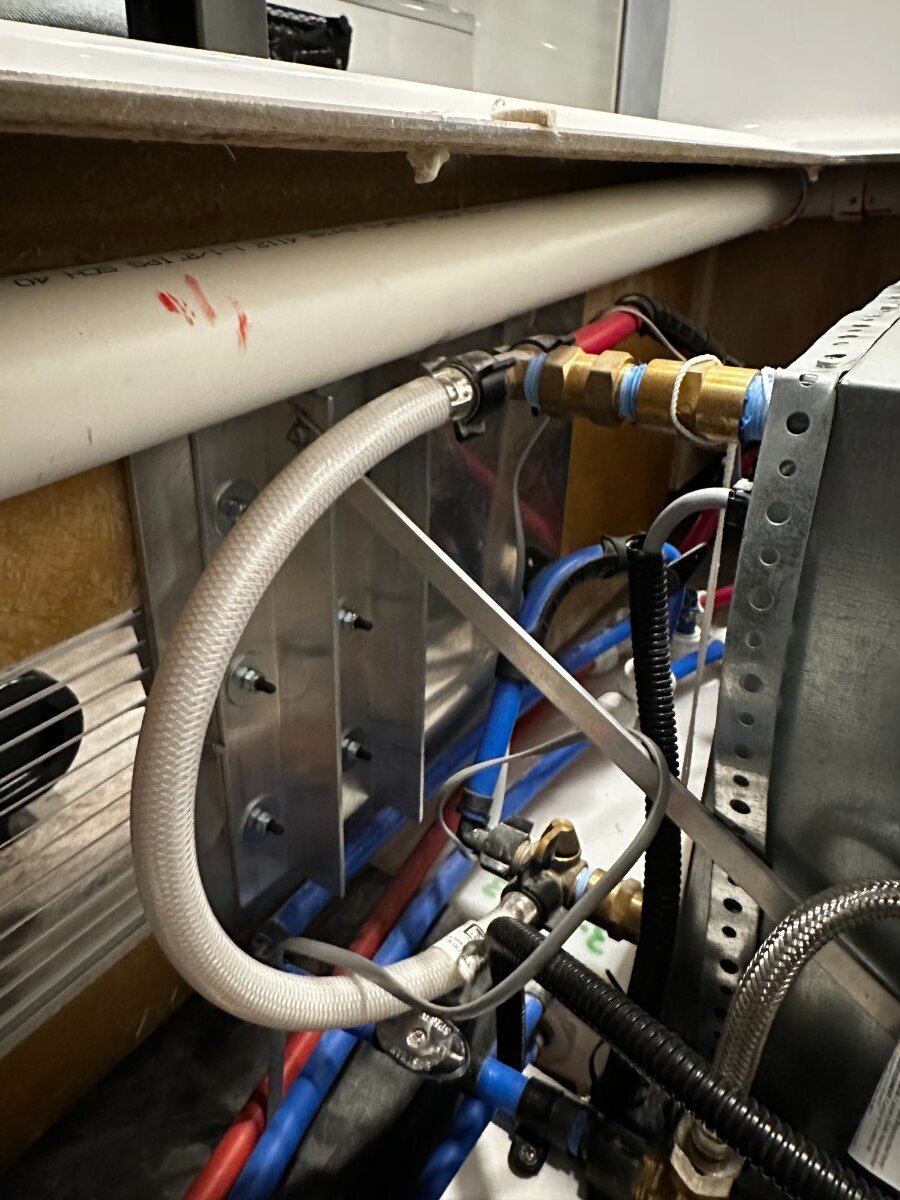
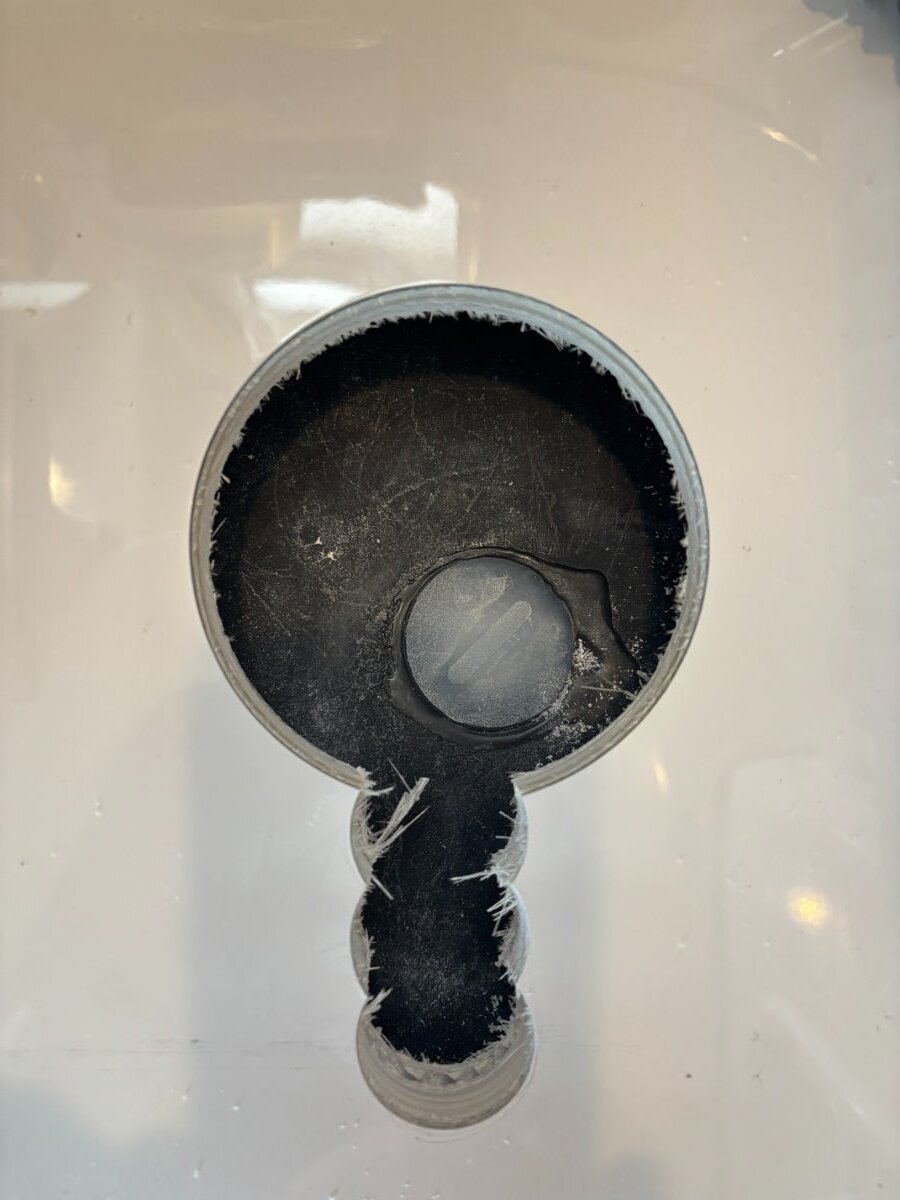
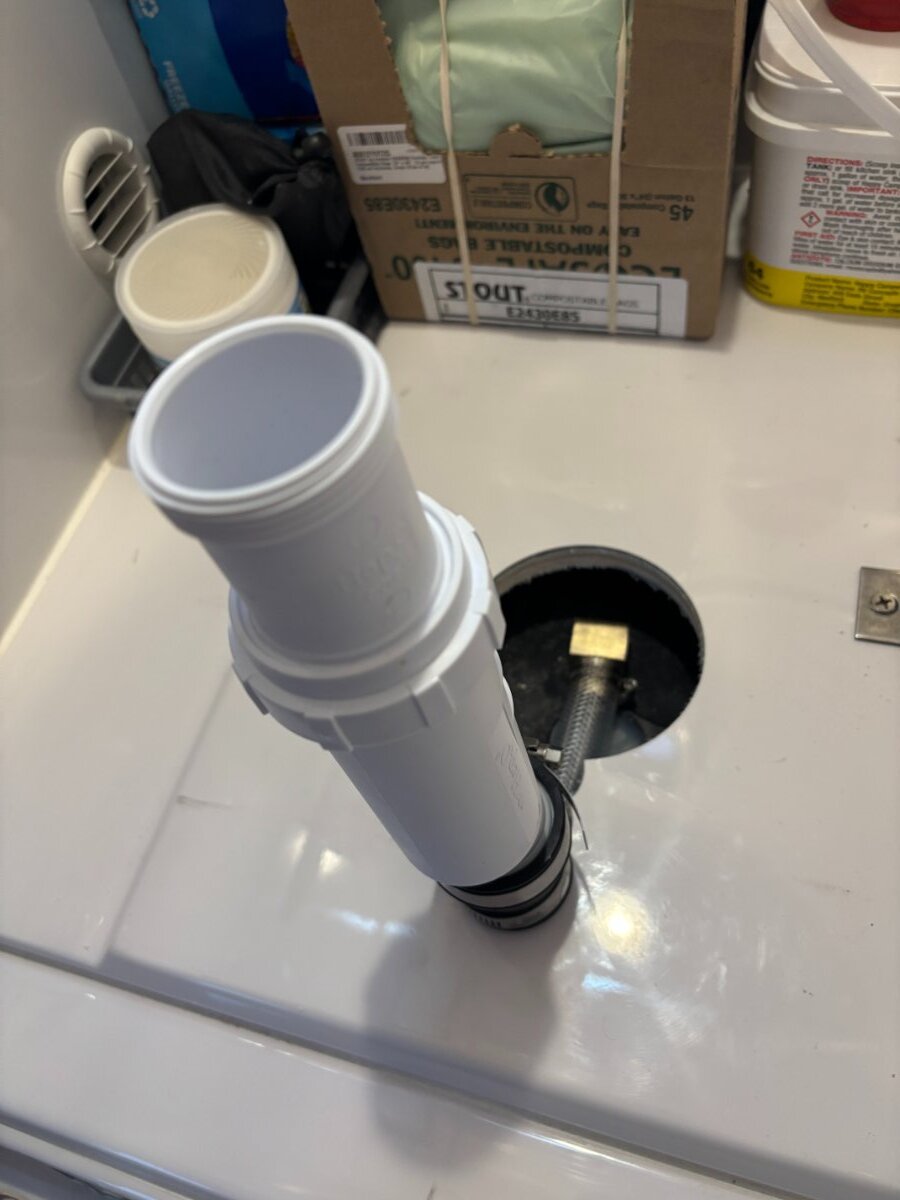
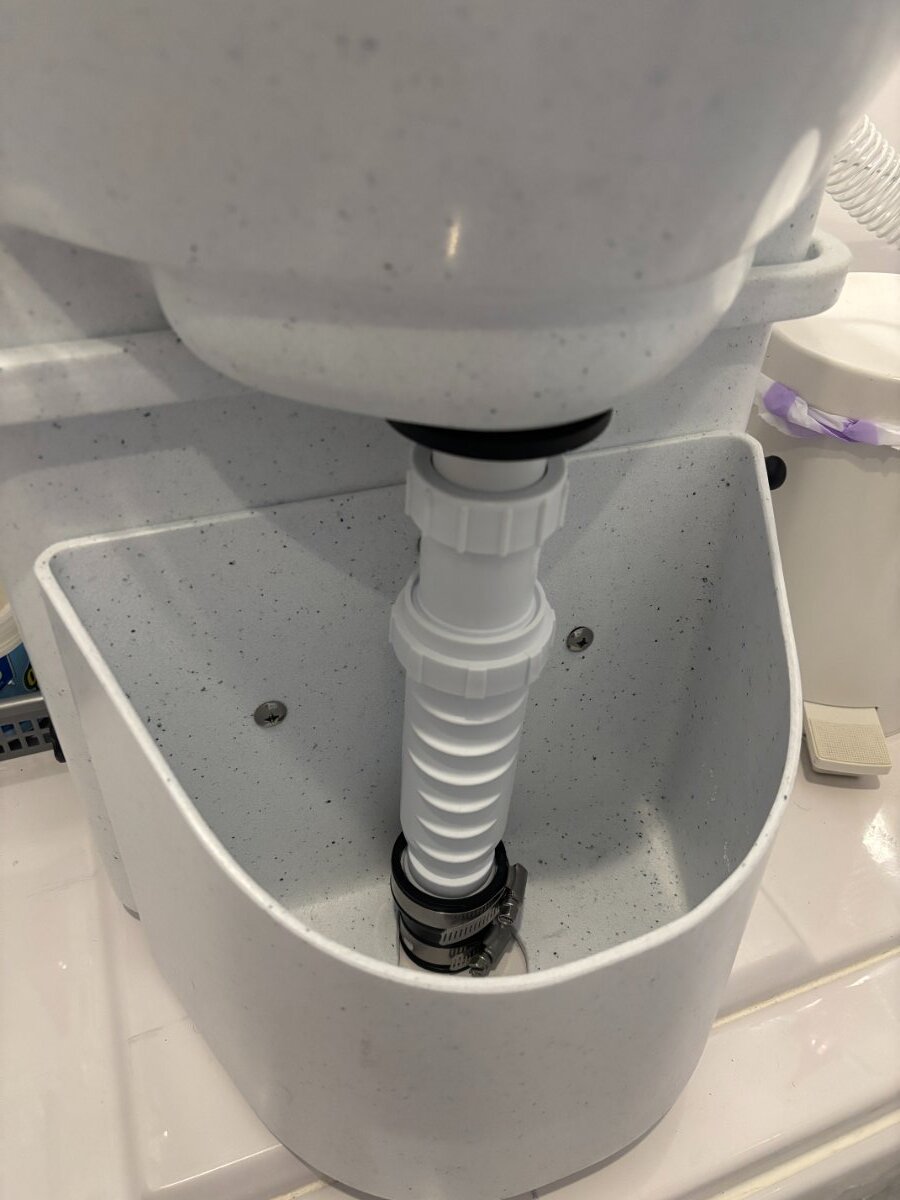
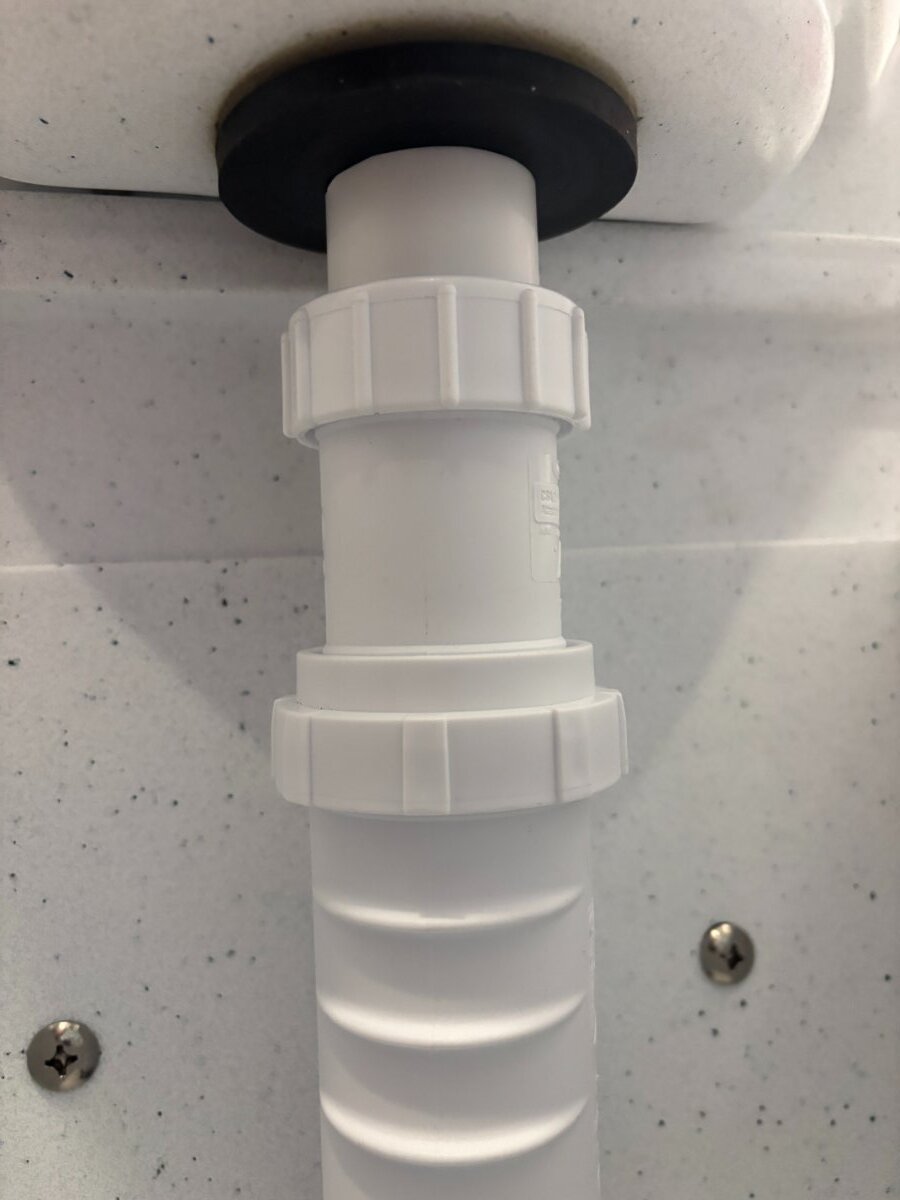
Ok time to revive this thread! I know there are mixed feelings about diverting the nature's head urine tank into the Ollies unused black tank. Well, I actually went ahead and did this mod and so far FOR US we absolutely love it, more so for me not havig to dump and clean the 2.2gal urine tank every 2 to 3 days!🙂 Instead of using a ball valve to eliminate any odors from the black tank I used a 1.5" BV1B/UB HepvO Sanitary Waste Valve, and yes we still add some water and vinegar after every use, so there is no odour at all. Obviously there are other ways to do this, and maybe a better way, but here are some pics of how I did it, pretty self explanitory so I will not go into much detail explaining it. Next mod will be to reroute the sink drain to the black tank. Large hole was from factory, I drilled the 3 smaller holes.
1 point
-
I'll send a note to Jason W and ask if he has a way of putting that "ad" here on the Forum for all of us to see. Bill1 point
-
Apple TV user too, and had the Oliver ad show up while streaming our local news affiliate.1 point
-
100% Satisfied customer!! This thing is a BEAST.1 point
-
I hope you are plugged in to shore power, if you are running on dc. F on a dometic means failure to light. Could have been an air bubble. Or many other issues... You won't "hear" much if you're running on dc. Or ac. Pretty much have to put your ear to the door , and you'll only hear something when the compressor is running. Not nearly as much heat exhausted at the vent, because you don't have flame, and all that heat.1 point
-
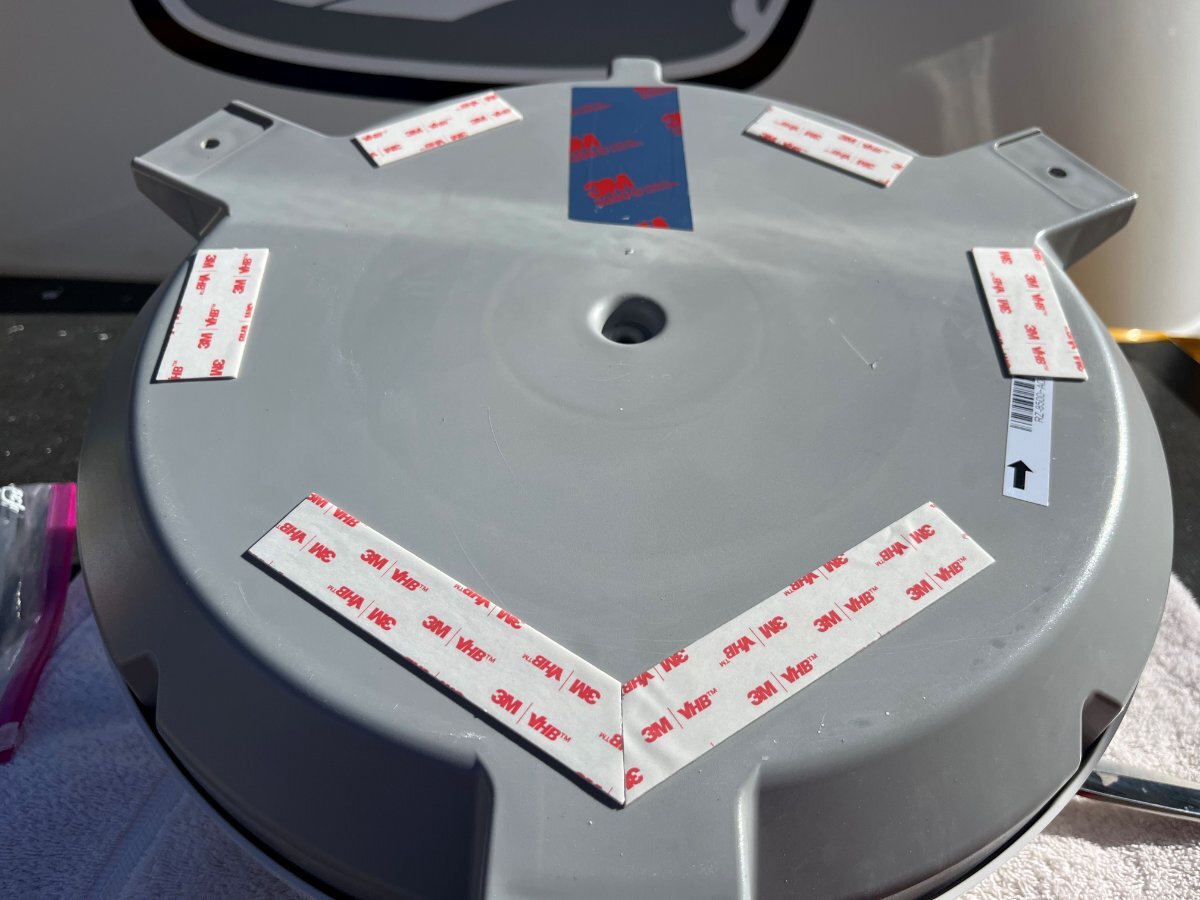
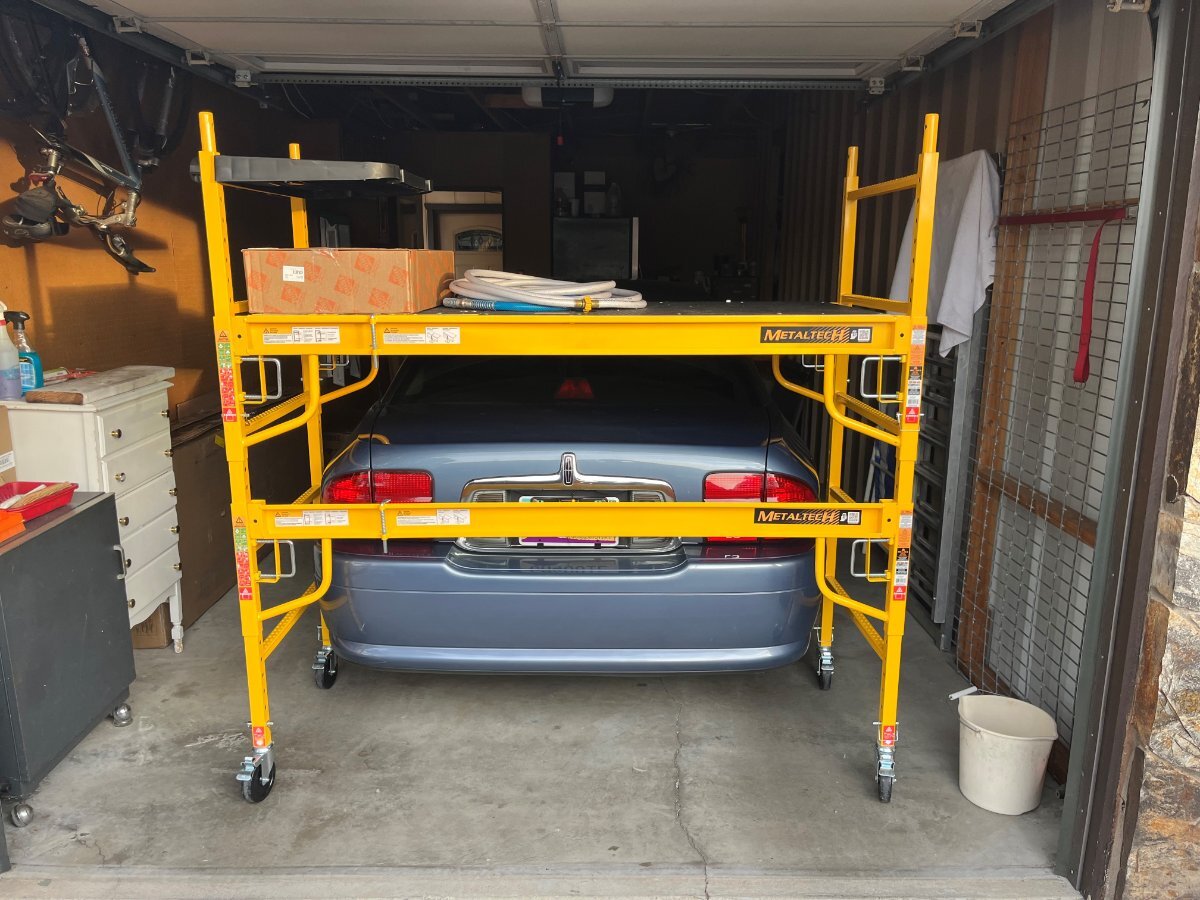
I moved the scaffolding all around the Oliver this weekend to wash her thoroughly. It's been forever LOL, actually never in 18 months, since on prior trip returns, I have only hit the travel dirt with my pressure washer! It's great how this scaffolding can be set at different heights left-to-right. Given the slope of our driveway, I had one side mounted up two holes about 4". And BTW, notice the in the pictures above, how the original install has the 4 monstrous brackets attached to the Sat Dish (Winegard makes big extra bucks selling these). Notice how in my installation, I could have used 3 of the same brackets and drilled a bunch of holes, but NOT. Picture below shows the 3M 4950 VHB tape I used. I probably used too much but our old fiberglass is a bit porous. I used a V-shape up front to deflect wind & rain up front. Lastly, love this scaffolding! We stored the extra parts in our shed, but the main section as pictured will always sit somewhere in my 3-car garage for a variety of projects. It will store nicely in front of or behind any car and provide a storage shelf that can be rolled around. This is where I kept it while working recently. I could also use it at just a 2' height when working in the truck engine compartment, to get up and in there, instead of standing on a milk crate or something else sketchy! 🤣 Those of you who have ever serviced a HD 2500 4WD truck should understand.
1 point
-
We just returned from CGI detailing in Murfreesboro. I was amazed by how fantastic our Oliver looked after their detailing and ceramic coat application. The trailer is absolutely stunning. The guys were fantastic, did great work and were fun to talk to on drop off and pickup. We would strongly recommend them for their excellent work. Our trailer is only 18 months old and the improvement in its shine is awesome.1 point
-
AND - not only was the repair less expensive but you also kept additional stuff out of the landfill! Good job! Bill1 point
-
@TimD I see you have discovered the difficulty in starting the installation of a new roll pin. Here's a trick that has always worked for me. And, as usual, there's a You Tube video for it.1 point
-
Thanks David, Springs are replaced, but 1 of my 2 1/2 month old Monroe shocks was blown (I replaced all 4 in July). Thanks to Scuba Rx my lifetime guaranteed shock from O'Reilly was ordered at the next stop and I replaced it...no problem).1 point
-
Lew owner of Alcan Springs gladly tossed the Dexter China 🇨🇳 made springs in the junk scrap metal pile. Glad you got scheduled John! You will never need to think about leaf springs again. 👍🏻🇺🇸1 point
-
Okay, that’s our definitive answer. Anytime someone is evasive in answering a direct question it only means one thing and one thing only. They are not proud of where their product is made and that means china! Okay, TruRide is off my list. I can buy less expensive china made springs most anywhere. The cheap ones I bought with u bolts, nuts, and bronze bushings are for emergency roadside replacement just to get me home. When I can go to Colorado I’ll get the USA made springs and not need the emergency spares. Those will go in the yard sale pile. Less junk to haul around.1 point
-
I would have kept 1-2 of the old ones still in decent condition, just to have something. If I installed 4 new ones and one of them breaks in the next few years, install the spare to get home. Then study the leaf spring thread and upgrade!1 point
-
OK then - the obvious answer is that you should be on the road. Problem solved!😇 Bill1 point
-
If the engineering behind the Lithionics product would allow ANY current to the heater when temps are above freezing or say above 35+ degrees Fahrenheit, the heater should be disconnected. This very well could be the cause of 3% daily loss. @Geronimo John hit this on the nail! Oh, and if you are losing 3% daily and the Lithionics app shows no negative current draw, the app is not reading correctly. Loss of SOC can only occur with -Amps over a period of time. Love my $40 shunt, pure and simple, mounted to the negative terminal of my battery bank ALWAYS shows -A when batteries are discharging, and +A the next morning in the Arizona sun! You can disconnect the ground and not worry about the cause (easy solution, takes just 5 min) or strip the overhead out of these batteries. If they were mine, I would first bypass the heaters, and if that did not solve the problem, I would disconnect their BMS and monitor my batteries the old-fashioned way, with system shunt or a simple voltmeter. 😂1 point
-
@Dave and Kimberly This is the old-school method for storage. I've done this alone for 40+ years on anything automotive that will sit a few months, for charge loss and safety reasons. It appears you have three 12V LI batteries wired in parallel. The grounds between the batteries can remain as wired. The cable providing ground back to the interior must be disconnected. Keep in mind that in this state, with ground disconnected, the batteries cannot provide power nor be charged. So, get them fully charged first. If you prefer, you can install a switch at the batteries, in line with the cable described above, or where that main ground cable comes into the interior prior to any connection to negative busbar or device (inverter, 12v panel, etc). It's relatively easy at the battery location. Besides the switch you would need a shorty cable or short copper bar to connect the switch to the battery post. I would want to figure out cause of the constant current draw. Given you have an Amp reading on your Lithionics App, I would do as you wrote "1) Pull each one of the 12 volt fuses from the panel under dinette..." Pull each 12V fuse one at a time looking for a change in amp reading that reads less negative. Of course, you must have shore power disconnected and the solar feed switched off too.1 point
-
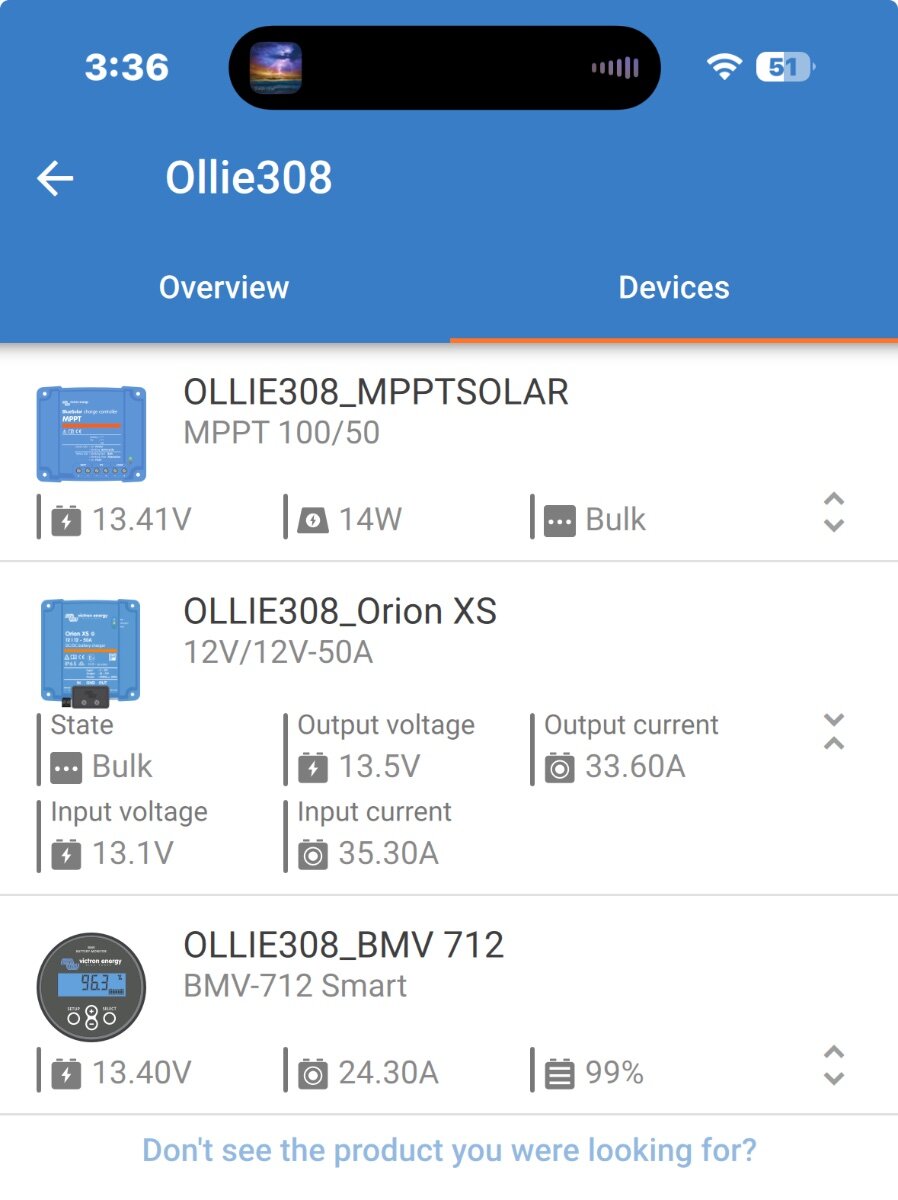
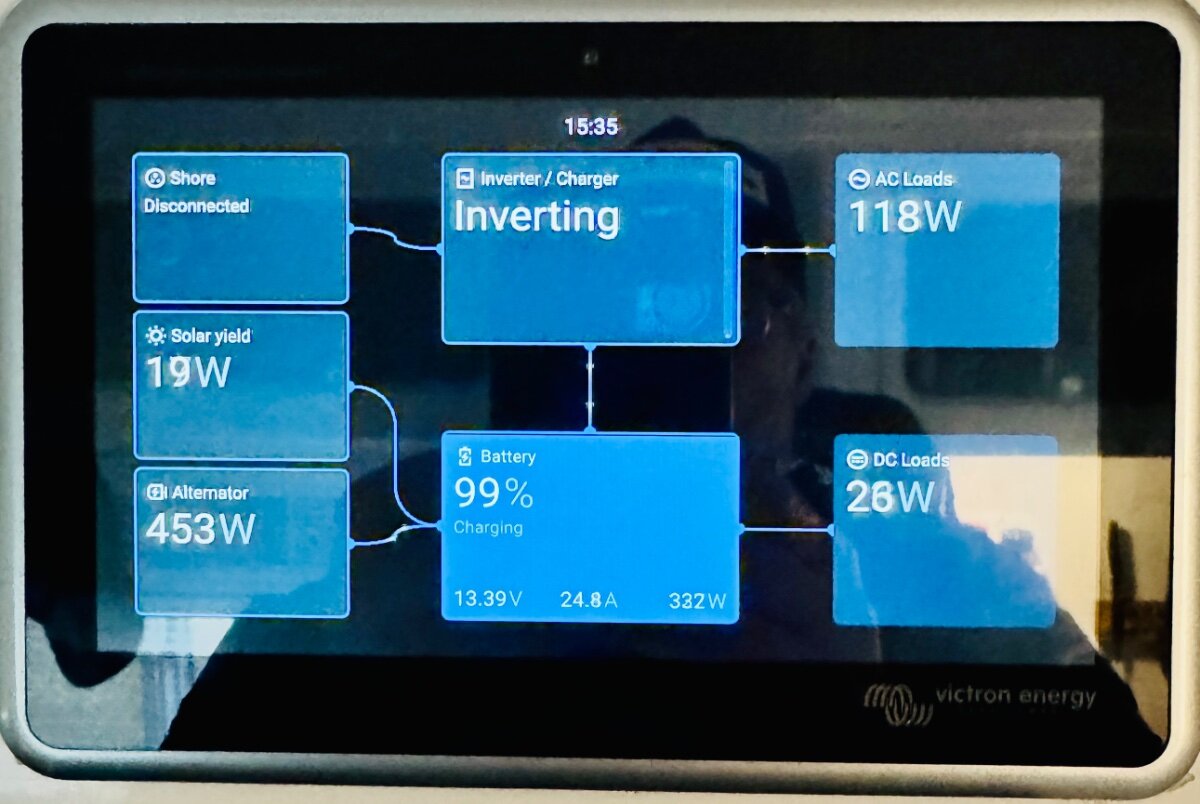
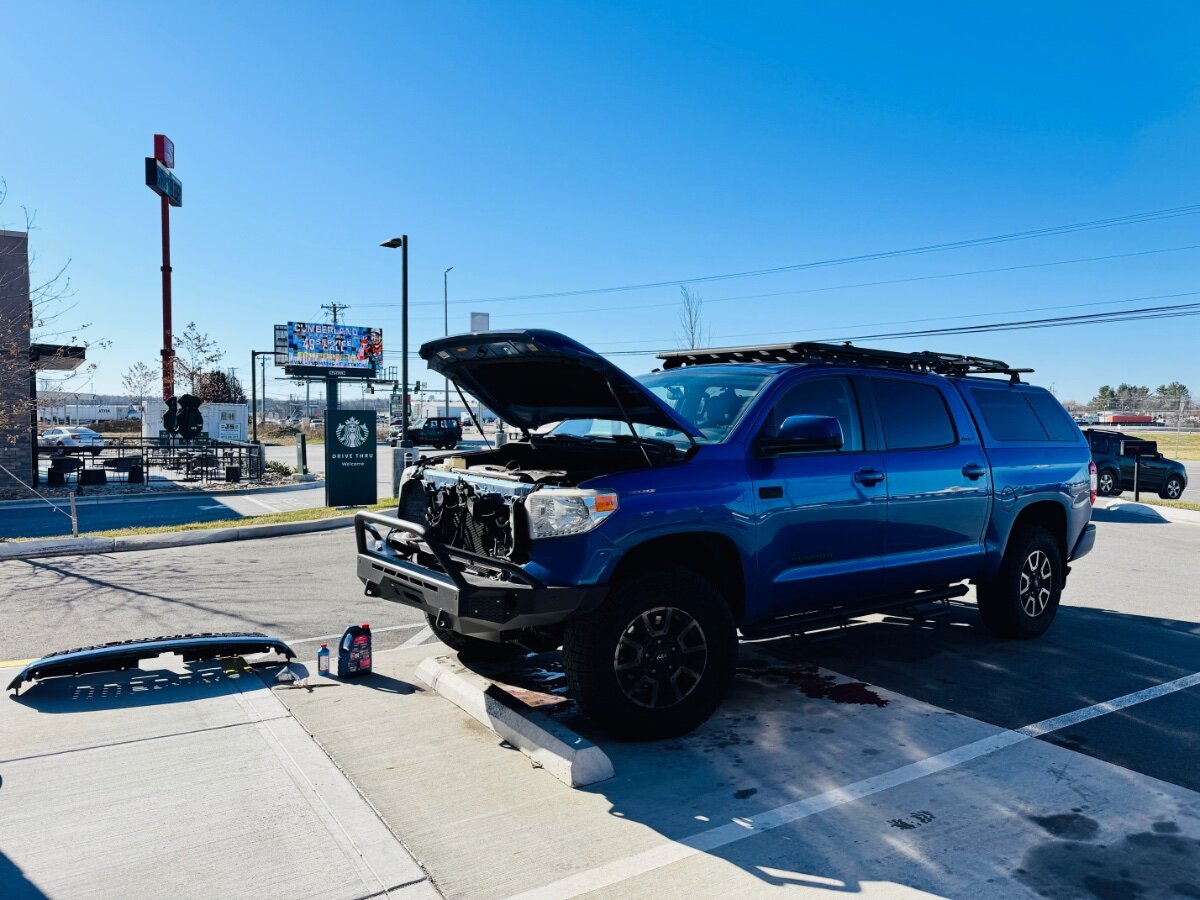
Finally got the Mechman 370 amp HO alternator installed. Dramatic difference @idle 35 amps showed up on display. Woohoo! Interestingly, it took a piece of 2x4 going through my radiator on I-40 East headed to Johnson City, TN to get the incentive to do the upgrade. The Mechman alternator had been sitting in my garage for 6 months. Now, I can finally replenish the 920aH battery bank while driving on long legs out West. Best, Mike BTW, used JB weld to temporarily stop the drainage of coolant... made it back home without a tow.
0 points
-
Our TV comes unlatched about half the time...and that's highway driving - not on dirt roads or across open fields! We've had 2 break in transit and one of those was WITH using a velcro strap. It, too, came loose! We've since switched to using a dog collar (size XS, 8-12").0 points


.thumb.jpg.e34bf01ef7f7d5e99ad31856d45afbeb.jpg)


-
Recent Achievements
-


")


")


")


