Leaderboard


Popular Content
Showing content with the highest reputation on 05/21/2025 in all areas
-
Yep - With so many vehicles being sold with navigation, many people simply rely on that to get them where they want to go. Actually, there are many times on longer trips when I use both the nav in my F-150 and my Garmin at the same time. However, whenever the two disagree I almost always trust Garmin over Ford. To be fair - I have updates for life with the Garmin and I've never even considered paying to have the nav updated in ANY of the vehicles I've ever owned. So, it is highly likely that the Garmin would have the more up to date information. Of course, I always have the good old standard paper maps to include a Gazetteer map. Bill2 points
-
I experienced this last fall. Jason E. checked out at the Texas Rally and it was diagnosed as a bad inverter breaker. Cables got hot. Oliver switched to a fuse in the 2024 or 2025 models and didn't have any more Zoro breakers. I bought 2 and will be replacing it this week. I think you have the same as our 2022 and it is a breaker, not fuse.2 points
-
John, On our trailer (2016 model - hull 145) there was a cigarette lighter receptacle on the left wall in the attic. Had to remove the wall to do the installation and I just tapped into the back of that plug. Very easy and you can test it by holding the wires on before you install. Good Luck2 points
-
I had never considered one until I started reading stories about drivers intentionally pulling in front of cars, slamming on the brakes to get in a crash, then claiming they were rear-ended. Someone on here had a car back into his wife at a stop light and claimed she’d hit him. Only the dash cam saved them from fines and insurance claims. There are some sleazy people out there, and I want all the protection from their scams as I can get.2 points
-
I think an addition of a sliding tandem axle would offer each of us the ability to tailer the tongue weight the way we want.2 points
-
Thank you @ScottyGS for the reminder re this Sirocco II fan! OTT had drilled a HUGE hole in the back corner for TV cabling, so I was able to install ours without drilling any holes. If this hole was not already there, I would have drilled a 9/64" hole for the wiring, centered to the mount so no wires would be visible. Instead you can see about 3" of wiring coming out the the side wire channel of the fan. They provide 2 screws and nuts to secure the mounting plate to the fan. Wire first, then screw the plate, then add the tape. Wired it to the 12VDC present above and the whole job took an hour. It's rather hard to square up the fan in this location, since the back wall is curve. To line it up, I laid on the bed looking up, let one edge slightly touch and when sure of its alignment pushed up. Then push up on all sides, rock it, twist it so the tape will bond. The down side of VHB tape is if you do not get it straight on placement it will forever be installed on an off angle. Be patient. 3M VHB 4950 is a great product. I've used it to install rooftop solar panels on our old Class-C, on the new antenna I installed on the Oliver and in dozens of installations. Some do not trust tape but it is amazingly strong. In fact I will be very sorry if I ever have to remove it. Likely for this fan, I could have used half as much tape. I ran one length of tape right down the middle and then two more and used a razor blade to trim it to a fitting oval (pic1). BTW, do not purchase the tape I linked above which is 3/4" and a mil thinner (another Amazon return!), pay more and get this product instead. https://www.amazon.com/dp/B007Y7GIKI/ If you prefer to use screws, do it correctly as Scotty demonstrated, machine screws with nuts and make a backing plate. I used that kind of installation for our TV mount. Never use wood screws into fiberglass as OTT does in way too many installations. I wanted the fan far back and pretty close to our TV to make the most room possible for our PJ baskets (pic2). Also, in this location the rear window can be cracked on that side to bring in cool fresh air. Chris will be VERY happy on our next trip. We're leaving next week to MN, ND, SD, WY, and the Western Slope of CO!
 2 points
 -
A different Sirocco fan mounting option. Mossey
2 points
-
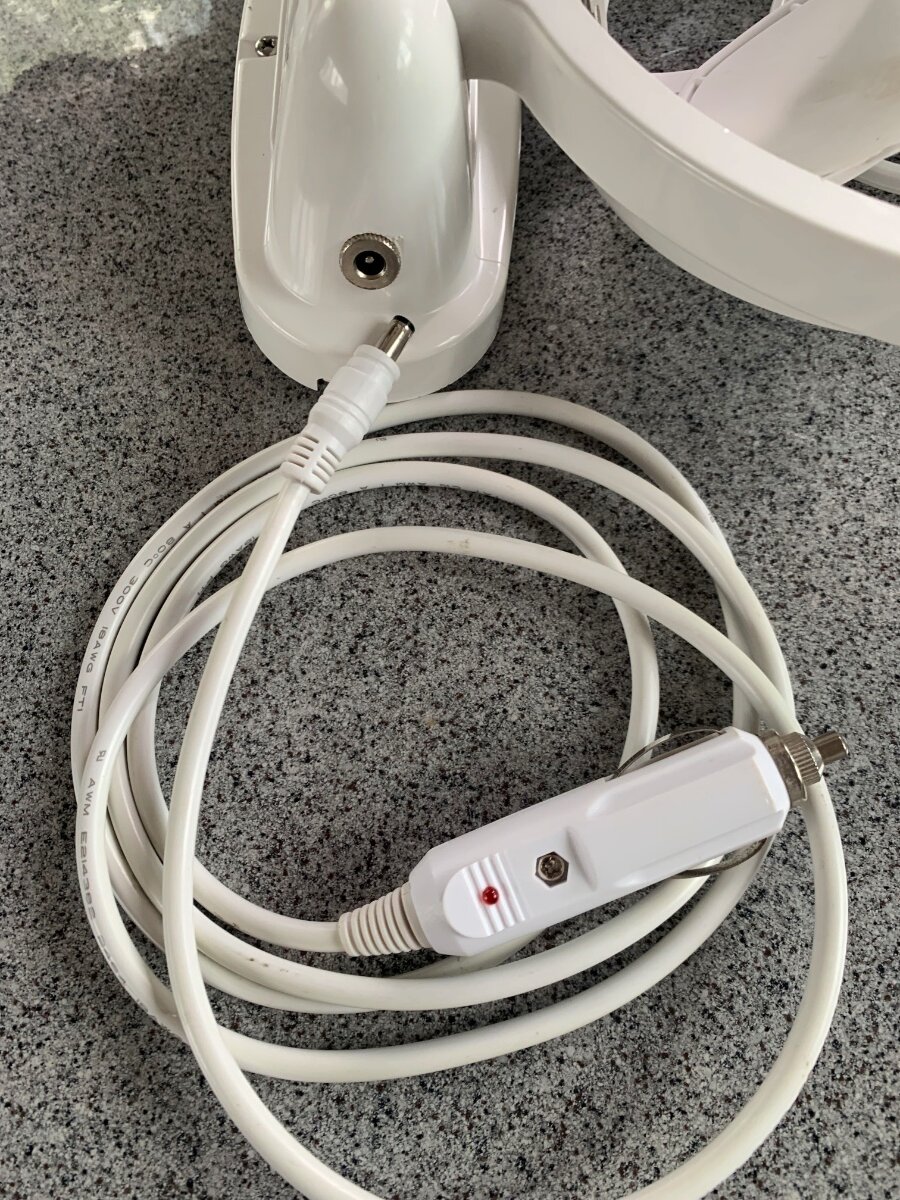
Here’s my adaptation in mounting the two Sirocco ll fans back in 2020 shortly after our OLEll purchase. By chance, my setup has worked really well, thus far! Rather than a permanent mount and hardwiring, I used Velcro for attachment and installed ports in the fan base for a detachable power cable. The fans and cables are stowed in the attic when not in use and can be deployed, as needed. The two primary locations are above each bed and an alternate in the galley to direct air flow toward the dinette. I like that the fans are multi-directional both forward and downward facing. The white Velcro is not very noticeable at the three attachment points and excess cable is simply wrapped around the base for a clean appearance.
2 points
-
Hey Everyone, Just wanted to share some info on the Sirocco Fan install that I did recently to #145. We've had posts on this type of install before... John Davies I believe was the most robust with a metal backplate between the ceiling over the bunk and the fan base itself. This install is a bit simpler. I used a plastic sheet to act as an interior backing plate AND a drilling template. Lots of measuring and fretting were involved before actually drilling the holes. The result was better than expected. The mounting is rock solid! I used 6-32 x 2 inch machine screws with washers to mount the interior plate that the fan installs onto. The supplied backing tape is very sticky so make sure the plate is exactly where you want it before peeling the backing off that stuff. When you drill... there is an air gap above the ceiling so be prepared for that (I wasn't for the first hole) and make sure the drill is as perfectly straight as you can hold it. One thing worth mentioning is.... You will be forced to place the fan so that the stowed position is tilted FORWARD. If you try to mount it so there is enough room that the fan can fold toward the rear You will most likely have some plate mounting holes that hit the aluminum L bracket that holds the side wall of the attic. Again... lots of measuring and noodling about the placement. For power I just tapped into the cigarette lighter plug in the wall, very simple. The fan moves a lot of air even on low power. I believe it will be very nice for those hotter boondocking nights that require a LOT of fan power. I have purchased a second fan and will mount it to a small cutting board with a Cig lighter plug wired on so we can move it around as needed. I thought some folks might be in the same boat as I was in wanting to mount this fan above the bunk but worried that it might not be sturdy enough. Seems very solid. Will let you know if the next series of bumpy roads changes that. Happy Camping, Scotty
1 point
-
OTT has provided a notice of the mini-rally (beginning on June 2, 2025 in Maine) in the Oliver TT web site under Resources tab and under the Upcoming Events tab. All Oliver Owner's are welcome to attend.1 point
-
This is serious. Recommend an immediate call to Jason and Team! GJ1 point
-
That is a shame. Our preferred method of keeping cool is to use the maxxfan set on out and open the windows. We always kept the rear window closed and never thought about it. But since installing the fan.... I am a big FAN of using the rear window to pull in fresh air... especially since it opens on my side. Of course the more windows open the lower the airflow through any one of them... Let the window negotiations begin!1 point
-
I had high hopes myself. I've owned nothing but Toyota's for more than 35 years and just when I'm ready to retire and travel the country they come out with this dud. I'm sure they'll get it straightened out eventually, but it's going to have a few years of no engine issues under it's belt before I'll feel comfortable buying one.1 point
-
Given the area of the country in which you live and the kind of camping that I think you do, I'm a bit surprised that in addition to the data requirements for cell phone based GPS there is also the issue of cell coverage. I too tried to reduce that number of screens in the cockpit - but - I failed. Having as many "programs"/apps as possible on a tablet seemed like a great idea. Unfortunately, I found that there was no "simple" way of switching from one app to another. Mind you - I normally travel alone. For those that travel with a navigator that is good these issues become much more tolerable. Good luck! Let us know if you find that perfect solution. Bill1 point
-
I did the same as Scotty. The back side of that outlet should have two spade connectors, male connectors on the outlet and female on the wiring. Oliver uses yellow for negative DC wiring and my other wire was purple for positive. The male spades have a small hole in the center, so all I did was to remove about one inch+ of the insulation off the fan wiring, twist it and poke the wire through that hole, wrap it over the top an push the female connector on the wiring over it. They held tight that way and I did not have to splice the existing wiring. @Jason Foster you could use that center hole for TV wiring for both fans but then you will have lengths of wiring showing across your back area. You could also drill a small hole for each wire, center to the fan mount. I measured the wiring pair at 1/8", so any small drill bit just larger would work. Either way you prefer. Also, I'm sure I used too much tape. If you use two strips, line them up to the outer edges front and back and trim them oval it will be enough for sure. Don't use the mounting tape they include with the fan. included tape in these kits are always subpar! Too much tape just makes it a bigger job to remove the mount if need be in the future. However taped this way, if a fan fails it can be replaced with same fan model reusing the original taped mounting plate by loosening the two screws that hold the fan to the plate.1 point
-
What, no sliding windows on newer hulls? Make sure you get this version of the tape: https://www.amazon.com/dp/B007Y7GIKI/1 point
-
I don’t have that back window option. No screen. But I do appreciate the tip about the existing hole for wiring. I will bepurchasing the 3M VHB 4950 tape.1 point
-
All sites in the campground? I know the sites in the live oak loop are full, but when I checked yesterday there were still sites in other areas.1 point
-
We spotted another Ollie in Atches NP today. Unfortunately we were going in opposite directions on the park road1 point
-
Update on The Dexter Fail: I contacted Dexter using the warranty claim form on the Dexter Brakes web page. In that they asked all kinds of trailer info, and to include contacts at the dealership that did the install and also asked for pictures of all the failed units. After sending all that in via their web form, in 2 days they determined that they were "replaceable under warranty" Dexter agreed to replace all 4 brake assemblies with brand new manual adjust assemblies which they have shipped to my home. End to end the warranty claim to delivery of parts took 1 week. E-Trailer had nothing to do with it, in fact they gave me the wrong contact info for Dexter brakes.. Craig Hull 5051 point
-
Added a cooling fan following many other installations in our 3 way Norcold. Fan mounted by bolting onto a shall sheet of screen door panel from Home Depot. Air flows up from the heat chamber around back side of the panel and forced out vent slots by fans. Unit held in place with high temp furnace aluminum tape. Used high temp race for wires down to the bottom chamber where the control is mounted and wired into +12 / GND. Hope this helps anyone else doing a similar mounting process. Pix 1: Upper Vent area: Fans wouldn't fit directly onto vent cover due to space, so I chose to mount it at an angle that blows the hot air directly out the vents (which are slanted that direction). Wiring in the controller to the +12 and GND took a bit of cable splicing and re-building. In hindsight, if I'd had 3-way cable crimp connectors it would have been easier to wire in the controller. Craig - Hull 505
1 point
-
Wow, that's a nice setup! I have the TST system for monitoring tire pressure and a VIOFO Dash Cam A119 Mini 2. And based on Mike Urbancic's replacement rear view camera at the rally, I just bought a Haloview MC7108 to swap for my Furrion. Combining these three into one unit would be fantastic, and eliminate some wiring. The Haloview I just bought was $200, and I could send it back. But I'm not sureI want to spend an additional $400 to replace the TPMS and dash cam I already have. Hmmmm... But if I were starting again, this is definitely the way I’d go.1 point
-
I like it. Only thing better would be a Tim Taylor modified Binford model.1 point
-
Never had one of these fans fall in 5 years of use, nor any issues with the Velcro adherence on the wall or fan base. Use quality Velcro on a clean surface for best results. I actually have to give them a bit of tug when removing, so can’t imagine one just loosing grip and falling. That said, if left up when bouncing down the road then Newton’s Law likely will factor in!1 point
-
Amazon delivered ours today, but I’m waiting ‘til Monday or after since I’m getting a fresh batch of 3M 4950 VHB tape (stored tape and glue dries out, goes bad quickly out here). I strive for minimum drilling, one 1/8” hole max for the thin wires. I’ll post my install in a few days.1 point
-
I'm guessing that there are a bunch of kids in the pool here.😇 Bill1 point
-
With my juvenile mindset, it was really difficult not to say something inappropriate here. But I refrained. 😁1 point
-
JD.. Yes that is the fan I installed. No, it's not whisper quiet... but it is pretty quiet when set on low. We like the maxxfan a lot when sleeping... provides just the right amount of white noise to cover any other sounds. The Sirocco is about the same as the maxxfan but it's a lot closer. Still not annoying and should not interfere with sleeping. I posted a video of the fan on the facebook page... you can look for it there. I cycled through the 3 speeds so you can hear how loud each is. Steve, Have not travelled with it at all but plan on leaving it in the down position. I think it would stress the fan especially on bumpy roads. Will probably leave it in the down position all the time. Thanks, Scotty1 point
-
That would be my Chris too! I’m not into fans, so for me just one fan is needed on her side. Thanks1 point
-
Not Scotty, but in our experience with two fans, each mounted either side of the television, it is indeed whisper quiet. Even with both on the highest speed, I'd say it isn't as loud as the Truma A/C on low. And the fan that you linked is the one we ordered. Ours were $88 in December 2022. We had them even before taking delivery of Curiosity! We pivot one fan toward the other, with the second posted forward, in an effort to help with circulation. The advantage of having two is that either of us can have the fan blowing directly on us in the twin beds as desired. Deb sleeps hot, so frequently has hers on medium blowing directly on her, while I might not have mine on at all. Much better than her having the ceiling fan on medium at home while I have the blanket up to my chin! 🤣 @ScottyGS Do you travel with yours stowed in the up position? I had considered doing that, but was concerned that the bouncing might wear the catches on the locking mechanism. So we make sure ours are locked in the down position before travelling.1 point
-
Here's a Dexter video about the label and they mention the number etched into the axle. I called Dexter with the SN etched into one of our axles and they emailed a build sheet from that number.1 point
-
They replaced the sliding window in the back with a solid window that swings up as an emergency exit. No screen or prop to hold it open.
0 points
-
And I think we'll see further engine recalls in the not-to-distant future. Low mileage engines are still blowing in trucks outside the current recall dates.0 points
-
Another recall….🙁 https://autos.yahoo.com/toyota-recalls-almost-half-million-000000687.html0 points
-
Follows is a whimsical discussion "envisionating" what such a trailer would be. I'll crawl out on the limb and call it an OE3 for grins. First I agree 99.9% of your suggestions on the what we would like to see in an OE3. Assuming 25' and 8000 pounds of the OE3 we can consider the tongue weight/balance. I assume that your suggested OE3 12%+ tongue weight is to accommodate heavier than average OE2 rear bumper loads. Over my past eight seasons with our OE2, I have noted a significant number of owners hauling more stuff on their rear bumper. So far, I don't recall any such owners experience any increased sway of their rigs. This speaks highly of the OTT efforts to make a non-sway trailer that we all enjoy. It is logical that a family wanting a larger Oliver, would also want to haul more storage inside as well as on the front and rear of the OE3. Additionally that pound for pound, that rear loads have far more impact on sway than front loading. Granted my Beast (F-150) would likely protest that assumption! For OE2's, If we are running with no or lighter rear bumper loads, then the current OE2 sway design is near perfect for most of us. As well, it is likewise for those running with greater rear loading. A statement of design safety margins OTT used. I am postulating that most of us are likely running in the mid 500's on tongue weight as a result and our loaded trailers are around 6,000 pounds. That calculates to about 9% tongue weight. For an OE3: I am thinking that the additional length and mass of the box section would move the CG rearward of the current OE2 CG. The further from the hitch the CG. the less sway becomes a concern. So I am thinking that if they shoot for the same % tongue weight for a 8000 pound OE3 (720# TW), they should be good to replicate the great sway performance of the OE2 design. What do you think? GJ0 points


.thumb.jpg.e34bf01ef7f7d5e99ad31856d45afbeb.jpg)


-
Recent Achievements
-


")


")


")

