Leaderboard


Popular Content
Showing content with the highest reputation on 07/29/2025 in Posts
-
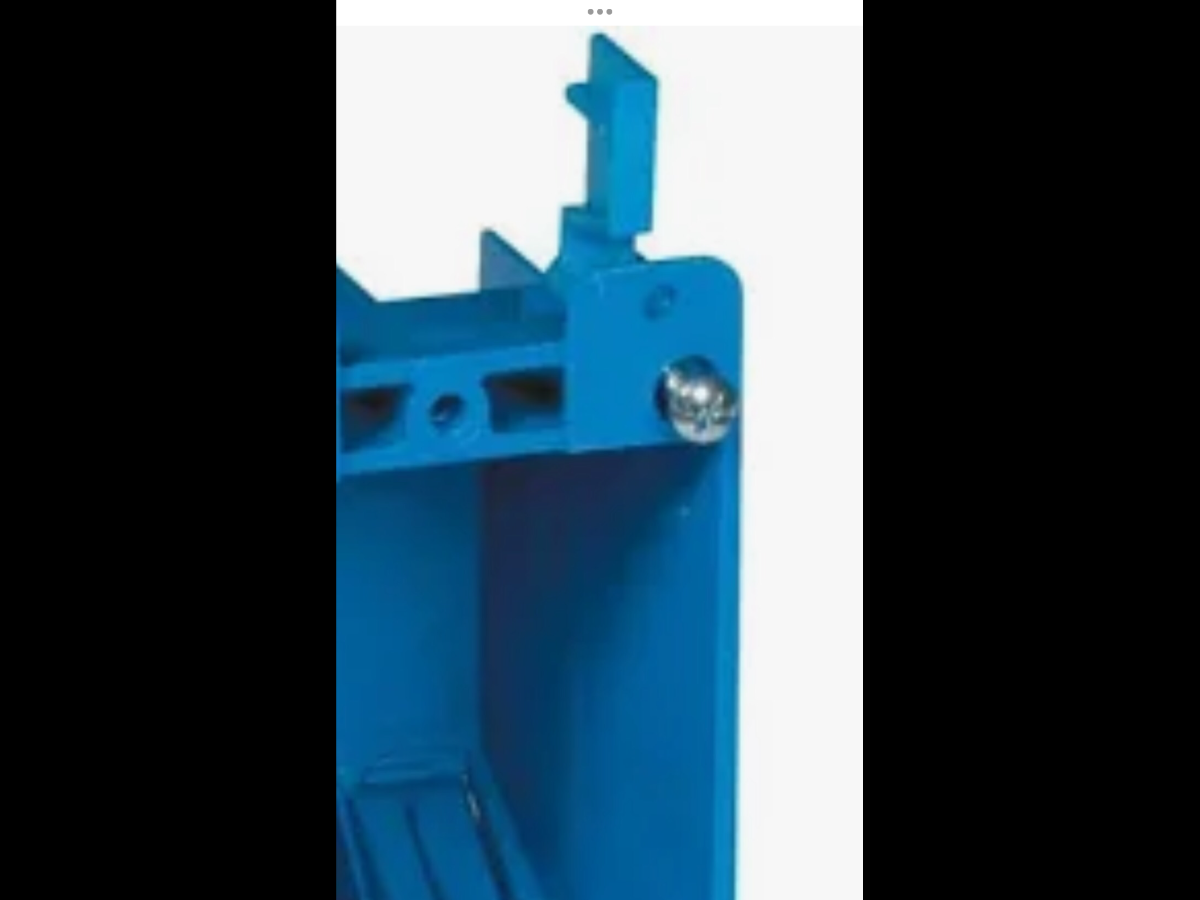
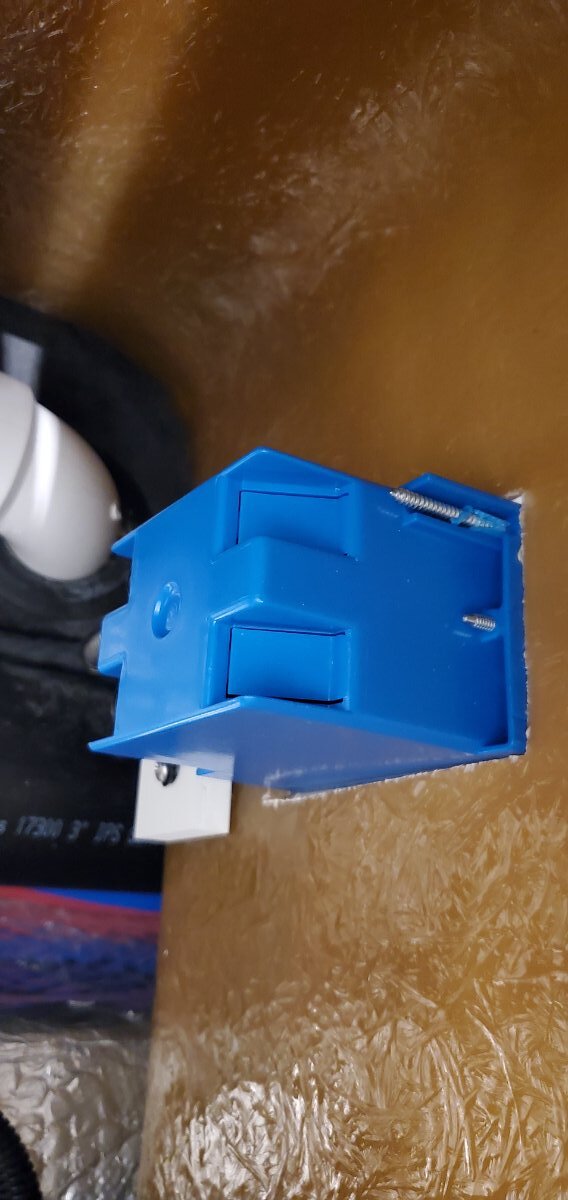
There should be a wing on that mounting screw, looks like it broke off.
 5 points
 -
When I met Jim Oliver, on Christmas day of 2017, he showed me Oliver Hull # 1 (or2?) and talked about the conveniences he built into the trailer. Jim had a 30 amp power input on the front of his Oliver that he connected, via cable, to a monster remote started generator in the back of his 3/4 ton pickup. As he and his wife were going down the road and thought they'd stop for lunch in about a half hour, or so, he'd simply remote start the generator. The A/C thermostat was already set for the air conditioner to come on when power was applied. So as they pulled over to make lunch, the cabin was already cool for them to enjoy a nice, relaxing lunch. Of course, this was well before Lithium batteries became the rage, so a generator was needed for power.5 points
-
Dexter’s springs are made in China, probably from crushed up old rusty Changan’s.4 points
-
Well done Tom, And I agree, that mounting board is now permanently glued like it is supposed to be. 👍🏻3 points
-
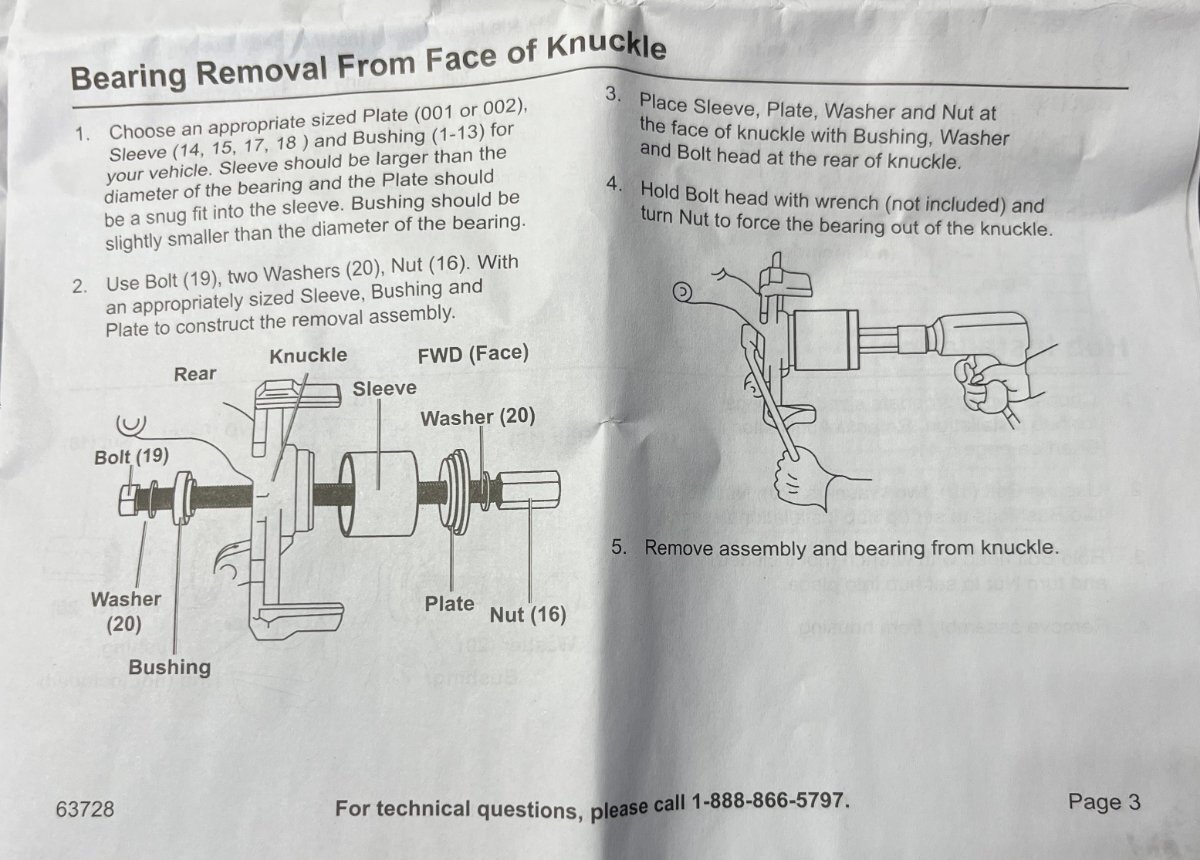
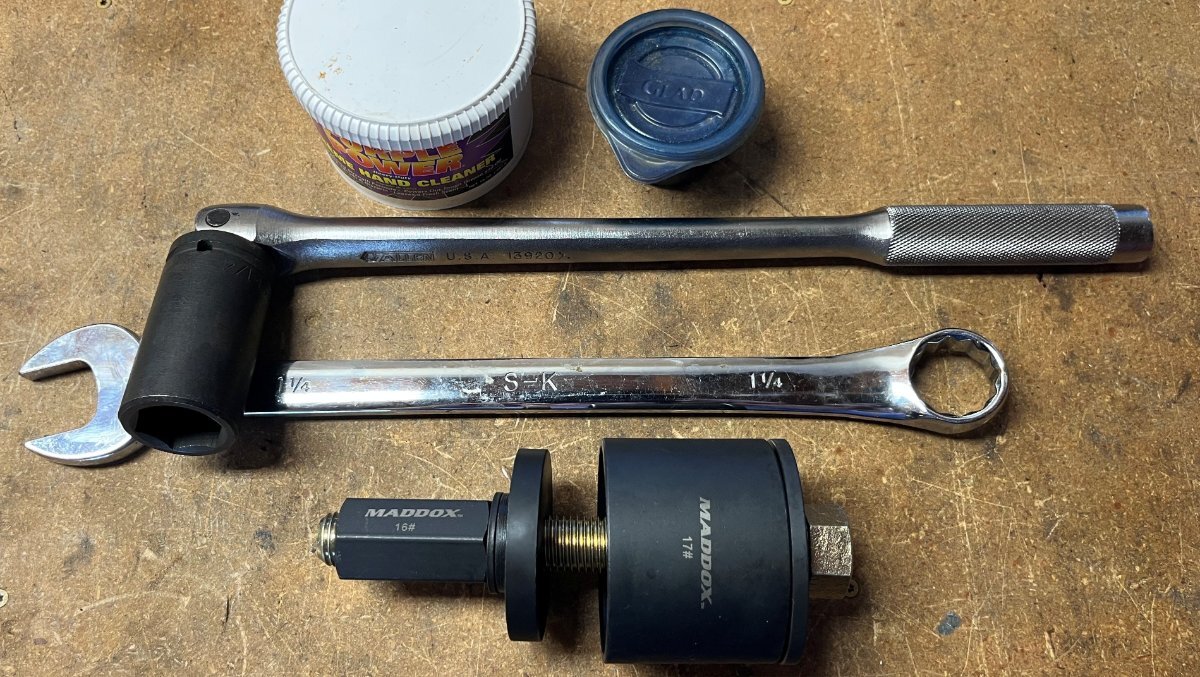
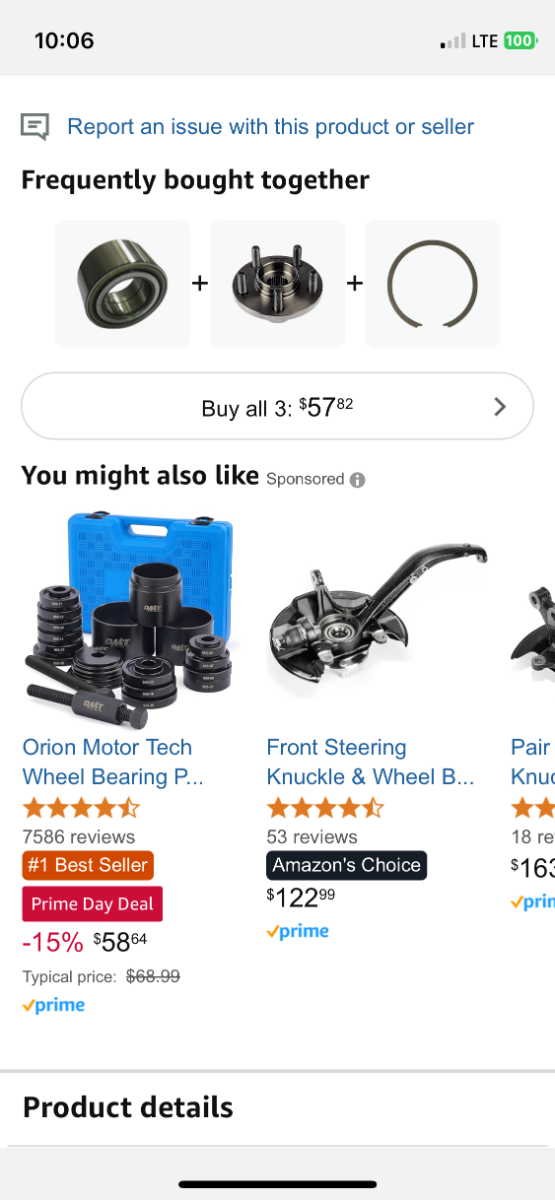
CRM, now I believe you are correct in your thinking. Please let the misses know I approve. Get the friggin' 3/4 impact! 🤣 (Do note the press instructions show using an impact)! Chris picked up the Maddox kit today (had to get it while my 15% coupon was running) and needed a shopping cart to carry it away! The HUGE box measures 17x15x4" and weighs near 20 LBS. No way I'm carrying this kit with me, but our dear friend @ScubaRx would likely store it right next to his battery-powered grease gun and another 800 LBS of tools onboard (love you Steve)! The first pic shows part of the installation instructions. In my professional opinion they show the 'bushing' in the wrong direction, TBD. Second pic shows the tools I would bring, given I have guessed the right bushing/sleeve sizes. The instructions also have an application guide which lists the 2001-2010 PT Cruiser! Holding the drum will not be an issue, but holding both sides of the press may be! the bolt is 7/8" DIA with heads of 1 1/4" on both sides. It would be great if you could torque down the wide nut and the bolt would stay, but you should have both sides held and the drum would not turn anyway. Sitting flat on the truck tailgate may not work, TBD. How many of you have the automotive tools I have in the toolbox (1 1/4" socket and 3/4" breaker bar and 1 1/4" wrench)? Not many, but this will be my toolkit, after testing of course that I have the complete and correct set of tools. Don't forget the grease and the Go-Jo hand soap that's always packed in our rig! 🤣
3 points
-
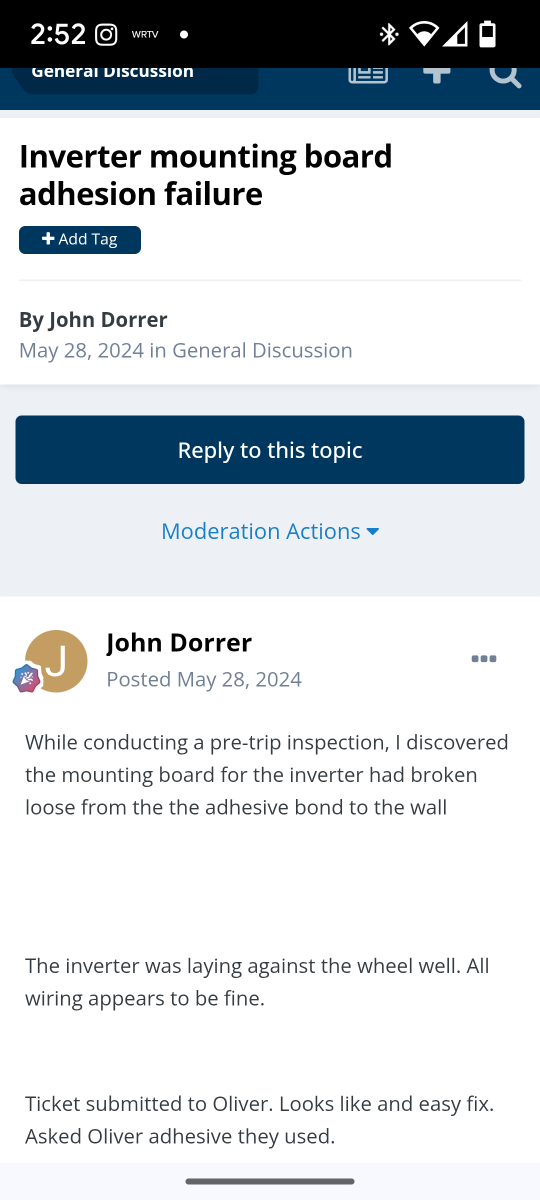
So far after about 9,000 miles and plenty of rough roads there is no spider webbing. One thing that has probably helped is the original glueing/epoxying was still holding, so now I have bolts helping to support the original adhered joints. The things that I have put back on, I have roughed up and made slight grooves in a cross hatch pattern in the mating surfaces and then used JB weld to hold things in place. If the inverter would have fallen off before my proactive change, because of all of the weight I would have JB welded and bolted.3 points
-
Mine did that I scraped that off and applied a heavy duty Gorilla Adhesive, re-adhered with compression and have had no issues since. Set blocking underneath to keep it in position3 points
-
This 3/4" impact has an insane amount of torque, at "1900 ft-lbs of breakaway torque." and you would need the 3/4" to 1/2" reducer most of the time to turn nuts and bolts 1" or less which includes TT and TV lug-nuts. This 1/2" model would be better for everyday use. A little more expensive, but smaller, 1.5 lbs. lighter and breakaway torque spec'd at 1750 lb-ft. Still a beast! https://www.homedepot.com/p/DEWALT-20V-1-2-in-High-Torque-Impact-Wrench-Tool-Only-DCF961B/328393371 Or you could save $38 and go another 1.25 lbs. lighter and go with this very capable model with breakaway torque spec'd at 1400 lb-ft. https://www.homedepot.com/p/DEWALT-20V-MAX-Cordless-1-2-in-Impact-Wrench-Tool-Only-DCF900B/317991357 Either model would be preferred by most of us vs. the 3/4" beast! I have a 3/4" to 1/2" reducer for when I need sockets >1" like the 1 1/4" socket shown above required for the bearing press. The 3/4" breaker bar shown removes wheel lug-nuts easily or just put the weight of your foot on it to get it started! 🤣 However, not all 1/2" models have the required torque. Check the torque specs. I purchased one years ago, when they were not as strong as some today. It could pull lug-nuts off 12mm or 1/2" studs torqued to 120 lb-ft but it would not budge lug-nuts on a 2500 series truck with 14mm or 9/16" studs torqued to 140-150 lb-ft. I returned it after it failed to loosen a lug on my Dodge Ram. Ever since I've used my pneumatic 1/2" impact in the workshop and work to keep our vehicles well maintained so not to breakdown on the road, having hand tools for this rare case! I work on the TT and TV too much at home and thankfully we did over 50 days of travel in the last 3 months and all my tools stayed in the bottom of the TV toolbox! 😂2 points
-
Meriwether's Retreat Bed & Breakfast Wonderful host, great breakfast, and she gives a discount if you tell her you are in town for Oliver. 🙂2 points
-
Yes you need a controller for the 2 external panels as the ZAMP connector on the side of the trailer goes through a fuse then onto the batteries. Solar Suitcase Tips and Build Inside this article I discuss how the zamp connector is reverse polarity from other SAE connectors so be certain you wire your adapters correctly. You can buy the adapters on Amazon. Zamp Cable - Zamp Cable from Amazon Craig2 points
-
You need one of those! I had to change a tire in Yellowstone and I was glad to have mine! Mine is the 1/2 inch.2 points
-
Just talked to one in sales, induction cooktop ; the silver band will be white; leather fabric is only option, the speaker will be gone New radio bluetooth connect to other devices.. new tv, and something about the wall where the bathroom door is will not be WHITE…. Stay safe out there…2 points
-
The rings/halos add space to avoid crushing the detectors. I have a competitor brand (Smartsense) & they needed the extra space. The sensors look identical to mopeak.2 points
-
Thanks everyone !!2 points
-
All, as a quick reference enter Cielo in the forum Search for more info on installation and use of this thermostat and phone app. It should be comparable with any IR controlled a/c, but waiting for confirmation on use with other unit brands.2 points
-
There is a slight risk of the drilled holes and new bolts supporting the weight of the marine board &inverter resulting in “spider webbing” the exterior gel coat. Hopefully with all the bouncing around running down the road or super slab with your Oliver in tow this does not occur. The glue failed on my inverter board shortly after we took delivery in 2020. I contacted service and they recommended using a strong adhesive and not drilling through gel coat to secure the inverter marine board. So I cleaned both surfaces and reglued the marine board back on with no issues since. Service did not recommend drilling through the gel coat. The adhesive on the marine board spreads the weight out across the back of the board vs just the bolts. Hopefully long term you won’t have any issues with your gel coat cracking or spiderwebbing where the bolts are. 👍🏻2 points
-
I've used epoxy before, but it's rather permanent and overkill IMHO. I've had great results from ACE construction glue. There are plenty of inexpensive and high strength construction glues that would be more than adequate. These come in caulking tubes that require a cheap caulking gun for super easy application. It's tacky enough that clamping is not required, just push it firmly in place and prop the board up so it doesn't slip. It appears they originally used this type of construction glue from your photo. I've also had original glue failures, and I believe it was caused from glue application on dusty surfaces, and it looks like yours was barely touching both surfaces. There is a surprising amount of dust on the interior surfaces, so be sure to clean surfaces before using glue. Also, I think you could just add more glue to that surface and save yourself a lot of scraping of the old glue. Cheers! Geoff2 points
-
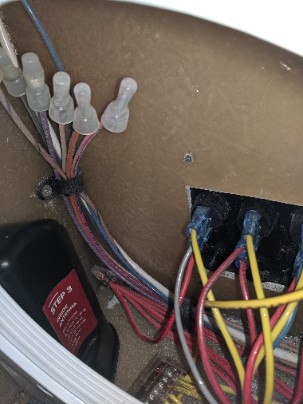
Hi all, I notice that my power outlet in the dinette area under the cushion next to the bathroom is loose. There's no backing plate inside. Can someone take a picture of yours from inside to see how the power outlet box is secured or advise me in how to secure that? Thanks in advance.
1 point
-
Here’s a thread addressing this issue with pictures. If this is your problem it’s pretty straightforward to fix. Good luck. Mike Brake Disconnect Thread1 point
-
Yep, it could be broken or folded back and the should be two of them. They are designed to spread out to hold when tightening the mounting screws. If broken, it’s a $2 HW store part. You would need to rewire the outlet replacing the box. First open the “outlet” breaker or the main 30A breaker in your 120VAC power panel.1 point
-
Another vote for Meriwether. We had a great stay there and the host is wonderful.1 point
-
Here is my 2024 post. Many photos included
1 point
-
Ollie Haus found a post I did on remounting the inverter board back on 2024. I forgot I had posted.🙃1 point
-
Now that I see the instructions I think you could *probably* get away with two breaker bars and sockets, and maybe some short sections of pipe for additional leverage? Still like the idea of bringing an impact wrench along though since it would make wheel removal quick and easy too.1 point
-
Minimize the use of Construction Glue, but OK as a repair when needed. Mounting a styrofoam sheet to a wall to hold it temporarily in place until I screw down the paneling to finish. This was the original purpose! Many over-use glue and sealants for lack of better solutions. The worse part is having to remove something you’ve glued down! 🤣1 point
-
We started doing this on our last trip when it got to mid 90s up north unexpectedly for too many days. Great results! Please see my most recent post on our DC-DC Charger mod thread --1 point
-
UPDATE: Shades are new Probably the same frame/blinds as current Olivers. The windows and frames/blinds operate independently. Please post the other changes Thank You1 point
-
Well friends, ask and you shall receive. Got an email from OTT coupla days ago showing off the new windows and listing changes made to the 2026 model E2. It’s my understanding the new windows open outward ( similar to some food trucks) but my question is how the shades and screens work on the inside. Has anyone heard about this operation or am I living under a rock? As always, thanks so much for your intel.1 point
-
Yeah, that would do it, no crow bar required! I have the baby 3/8" version and at home use air and a 1/2" drive Ingersoll Rand impact. They have an 1/2" model which should be enough, but if you buy this beast, get something like this to fit your 1/2" sockets. 🤣 https://www.homedepot.com/p/K-Tool-International-3-4-in-Female-1-2-in-Male-Impact-Socket-Adapter-KTI34016/2070247611 point
-
The external SAE port goes directly to the battery, not to the charge controller. Even if it did go to the charge controller, you wouldn’t necessarily be able to tie into it. In my case, the Oliver mounted panels are 24 volt, where my portable panels are 12. Mixing voltages drags the 24V panels down to the lower input. And if both your installed and portable panels are the same voltage, you might need a larger charge controller to handle the combined input. I’ll eventually mount a controller inside for convenience. But having the setup that I have now has already saved the day for a friend while camping with no hookups. He was able to use my kit to keep his battery charged enough to run the fridge instead of having to go home early.1 point
-
Now, a new mod idea: a remote control in the truck for the trailer thermostat so you don't have to pull over to turn the A/C on. Electrical wizards commence...1 point
-
Upon examination it appeared that the original application of adhesive did not adequately fill the gaps between the mounting board and the fiberglass as a result the mounting board was only adhered to the fiberglass in a few spots ( along with the black tape ). I followed the recommendation of @John Dorrer and applied Gorilla Max Strength Construction Adhesive making sure that the adhesive bead was adequate to more than fill the gaps and surface area. I'm pretty sure that this bond will last longer than anything else in the trailer.1 point
-
I have seen reports of this happening before to the inverters. I have had other things come off where it was adhered to the fiberglass. I made the decision to be proactive and when I was working in the area, and decided put #10 bolts through the marine board and through the fiber glass. I used and white plastic screw head cover on the outside to hide the bolts.1 point
-
Okay, risking banishment from the planet and the inevitable public humiliation, my one and only update on my recent axle and spring upgrade. We are in the midst of a 3 1/2 month western trip. Granted a good deal of the trip was planned around a visit to Grand Junction Colorado we have made a complete trip out of that one appointment. I firmly believe that Oliver’s decision to change axles from the 3500 pound version to the 5200 pound version is one of the best decisions made. Nothing like extra capacity. Also the heavier springs are also a great benefit. I have noticed reduced rocking during travel. My original springs had relaxed quite a bit because I had only about an inch or less of clearance between the U bolts and the frame. There is now around an inch and a half to two inches of clearance which is probably a little more than what was originally there. I have done a little research on the Nev R Lube Dexter axles with very limited cell service so more research to come. The bearings used for the 5200 pound axles are also used for the 6000 pound axles. So there is a little bit of extra capacity there. I also found out (not totally confirmed yet) that the bearings are also used for front and/or rear axles in several smaller cars. I also found out (not totally confirmed yet) that the Timken bearing used is a standard Set 49 bearing sold at every auto parts store for a fraction of what Dexter charges. The bearings are fairly easy to replace using a standard automotive wheel bearing press kit. So can be done on the road if needed. The bearing press is available at Harbor Freight and Amazon and I’m sure dozens of other places as well. Of course all the above information is to be confirmed once we get home in August sometime. Others are more than welcome to join in the research.
1 point
-
After removing the old adhesive, I wiped the board and fiberglass with rubbing alcohol to achieve a very clean surface.1 point
-
There was an earlier question about removing the old fridge. I had quite a bit of trouble with the original fridge (as many on the forums can testify to) so was extremely happy to get rid of it but still was very careful about it’s removal. 🤪
1 point
-
with 80” long beds! (1/2 a queen)1 point
-
If keeping the OE2 footprint/size the same, I think that a taller refrigerator with more freezer space, and keeping a space for a Microwave/Convection/Air Fryer (pick one). To do so, the overhead cabinet would need to be reduced. Or maybe a 25' Ollie with a dry bath and bigger kitchen to get a full size frig. With a Heavy Duty Package that includes beefier jacks, 5200 axles, disk brakes and race style FOX cooled shocks. Ditch the Anderson and require a F-250/2500 TV. But then this ought to be a separate thread I suspect! GJ1 point
-
Our 2018 Dometic frig is a ditto to yours. We were having the same issues out west in the heat. I found that by parking the curb side to the north direction, and deploying the awning a few feet to also keep the sun off of it together helped. But the dual condenser fans in the top vent helped it a LOT. On the other hand, I'm in full agreement that John Davies had about these ammonia absorption. He was worried in his posts about the fire hazard. But to me the real hazard is the potential for it to let CO into our trailers. The refer cabinet was initially well sealed. But with each mile and years, we see that the foil tape seals are being degraded. Any crack in those seals could lead to a CO fatality. I earnestly suggest that all owners of the three way absorption refers ensure that their CO detector is fully serviceable. Also that even if it appears to be OK, that you replace it every fourth year. Not five or ten as some have suggested. If any full time Oliver owner of an older trailer is financially not able to do so, PM me and I'll send you a replacement for free. That's how serious I take the CO hazard in our older trailers. GJ1 point
-
New fridge, but you lost half of your freezer space. Excellent installation work though, just wish some manufacturer would design and offer a compressor fridge with a full-width freezer. Love the freezer space in our old Dometic absorption fridge and glad it still performs well. Don't want a fridge like this and then have to buy another freezer for the TV.1 point
-
UPDATE: 5/30/24 I received the Gorilla Epoxy Ultimate recommended by Jason. Prior to fixing, I wiped the back of the inverter mounting board and the fiberglass wall with alcohol, removing construction dust. I mixed the 2-part and applied large dabs of epoxy to the back of the mounting board, and immediately pressed the board to the fiberglass wall. I wedged my MacGyver fix to keep the inverter tight to the fiberglass wall. I will keep the wedge in place until we get back from a short trip.1 point
-
Noticed in the pictures most of the adhesive beads were still intact, with only a few places where a small amount was on the fiberglass wall. It appears the mounting board was never pressed into the adhesive beads.1 point
-
I bought my first combustible gas detector 25 years ago after I watched a Washington Natural Gas investigator use one to find a natural gas leak near one of our water heaters. Like you, I am a DIYer. I like to use the tools the pros use.1 point
-
From my many years of HAZMAT training and environmental responses, always be mindful that one can quickly become desensitized to smells, even the mercaptan odorant in propane! I often got a whiff or two, but then nothing further and moved on. I now get the sniffer to further investigate for piece of mind if nothing else. Thanks for clarifying your previous statement and advise to others less experienced!1 point
-
I was joking in my previous post; however, I have used this method in the past. Now I just use my nose. I have a marvelous amount of knowhow that includes electrical and plumbing which covers gas lines. I have never paid anyone to do my own work. While it is true that you can use lighters to find leaks in gas lines, I would suggest that only the most qualified and trained plumbers do this. Everyone else here should either use a gas sniffer, or better yet, hire a qualified professional. You don't get second chances with explosive stuff.1 point
-
My sense of humor is a bit off. Tina tells me that all the time.1 point
-
I know that there used to be some "issues" with certain RV's where there was not enough room under the tanks to allow the sensors clearance. Of course, a side benefit is that the halos help prevent rust, cushion the bottoms of the tanks (i.e. you don't have that metal scraping on concrete or asphalt), helps prevent sharp metal edges on the bottoms from cutting and/or scraping things, etc. Bill1 point
-
Yup, that's a pretty good deal on the bundle:
1 point
-
I'm also the guy that removes all those ugly warning labels on most things we own! Not so many on the Oliver anymore. You know that "Air Bag Warning" label that has been on automotive visors for decades? Like 30 years later we don't know about air bags. And that's just what you need while driving, a bright yellow label right at eye level! Took one off years ago and we stuck it on the back of Grandma's shirt during a family reunion. It was quite fitting, as my mom doesn't stop talking at these events! Even she had to laugh, once she figured out why everybody else was laughing. 🤣1 point
-
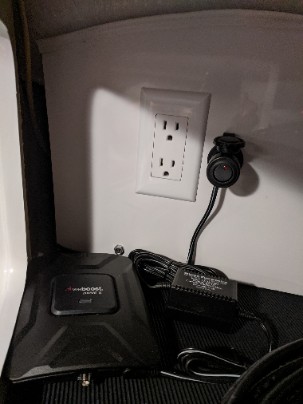
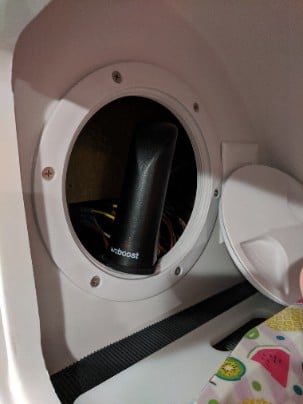
I just bought and partially installed the WeBoost Drive XRV. I installed the booster in the attic and used the cigarette lighter port for DC power (that plug was an extra item not included. I ran the wire for the internal antenna through the back of the cabinets on the kitchen side and actually placed the antennae inside the area where the switches are located. I have not gotten the courage up to drill the hole in the top and mount the antennae. For now we will use a 1/4 inch pvc pipe as an antenae pole and run the wire out a window. I will upload a picture of the antennae install after I get up the nerve to cut the hole. Lol. BTW: The signal does not seem to be interrupted at all by having the inside antennae in that port area and the signal is definitely better when this thing is running. We will be NH this weekend where I know the cell service is spotty. I will report back in how it works there.
1 point


.thumb.jpg.e34bf01ef7f7d5e99ad31856d45afbeb.jpg)


-
Recent Achievements
-


")


")


