Leaderboard


.thumb.jpg.e34bf01ef7f7d5e99ad31856d45afbeb.jpg)
Popular Content
Showing content with the highest reputation on 08/16/2025 in all areas
-
We haven't read re a Houghton install in about 2 years. There are other competitive brands today. Not sure anybody has proved the 9.5K version is viable. Houghton had humidity and thermistor location issues requiring rewiring. @Geronimo John is the resident expert re Houghton and he has all the fixes well documented. If QUIET is your main goal, look at Gree! Great unit as compared to most. Brand names include Atmos, then Tosot, all made by Gree. I witnessed @Ronbrink's Atmos installation, purred like a kitten and performed excellently! @mountainoliver just had SDG install a new Tosot and has a current thread. Search our Forum for 'atmos' 'gree' 'tosot' and/or 'SDG' to find these posts. This is likely the best all-around product offered today. Some of us are interested in "Inverter A/C" RV units that copy the "mini-split" units installed in many remodels/room additions today. The upside is less power consumption for us boondockers! Brand names include 'Greenland' and 'Pioneer' and the company name is Turbro. Search for these brand names or "Inverter.” BTW, this unit is on sale with promo code at $1200 plus tax. Likely the best price we’ll see this year or next, see turbro.com (turbro not turbo)! I'm still on the fence, but really want a viable inverter A/C which may take another 1-2 years to perfect! We just came off a 36-day trip up north, thinking A/C would not be an issue. Yet I had to book lame RV parks to run the G-awfully LOUD Dometic P2 almost 10 nights! PLEASE, just shoot me before we have to do that again! 🤣 There is a new thermostat on the market, the Cielo Breez Max! This product forces a fan shutdown when the compressor cycles off (to reduce humidity). Has not yet been tested on the Houghton, but works well with the Gree and Turbro products which may eliminate rewiring the Houghton re this specific issue. Search our Forum for “Cielo!” Hope this helps! And please keep us posted re your upgrade! 😂5 points
-
And, unless you are about the size of and have the agility of a spider monkey, forget about getting your head inside to see and your arm (forget both arms also) inside to work at the same time. But, taking out the vanity insert and replacing it with an access door is one of the handiest mods I've done. I literally use that access all the time.3 points
-
@Ronbrink I will warn you about opening that can of worms, if you think working under the beds or the dinette seats is hard on your back, just wait until you pull the vanity door off. Mossey3 points
-
I think the noise level is the one thing they need to focus on, maybe a variable speed fan motor instead of 3 speeds too. Not as loud as the Dometic, but not as quiet as the others you have mentioned. They get that sorted out and I don't see any reason to ever go with a single speed compressor unit again. They use half or less wattage (no soft start needed) and can control humidity much better which are the two biggies for me. I doubt it will be long before all the big names make the move to inverter tech and we'll see even more advancements in RV AC units.3 points
-
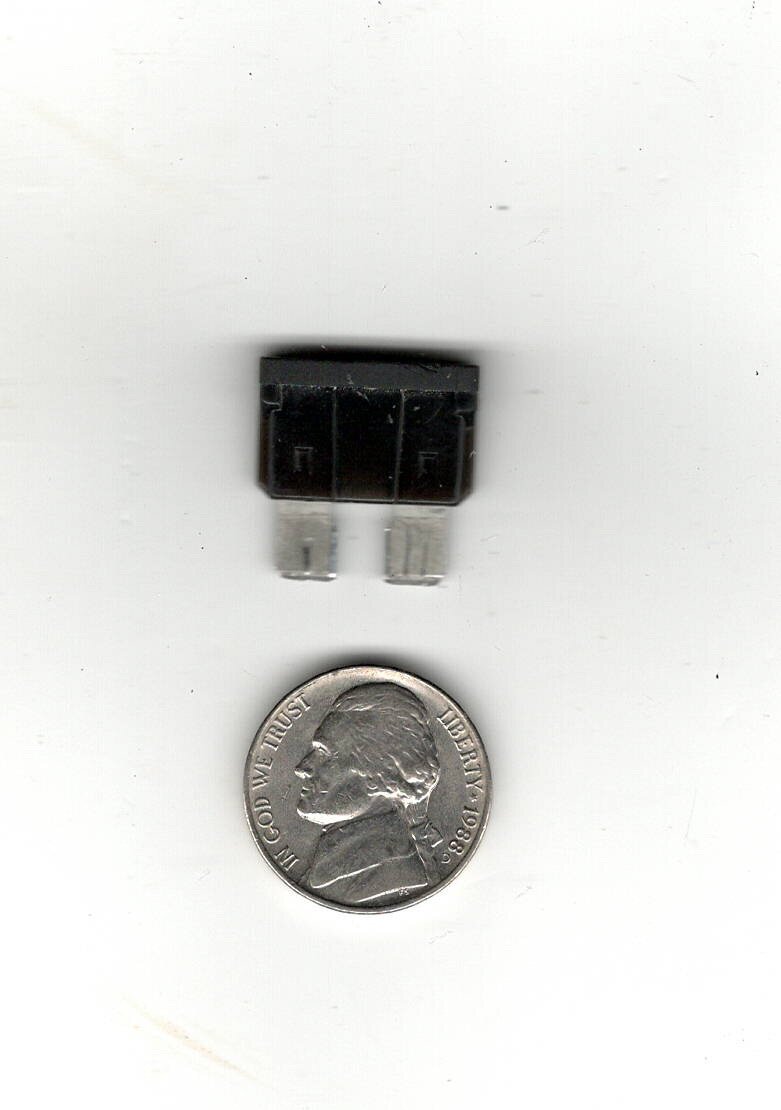
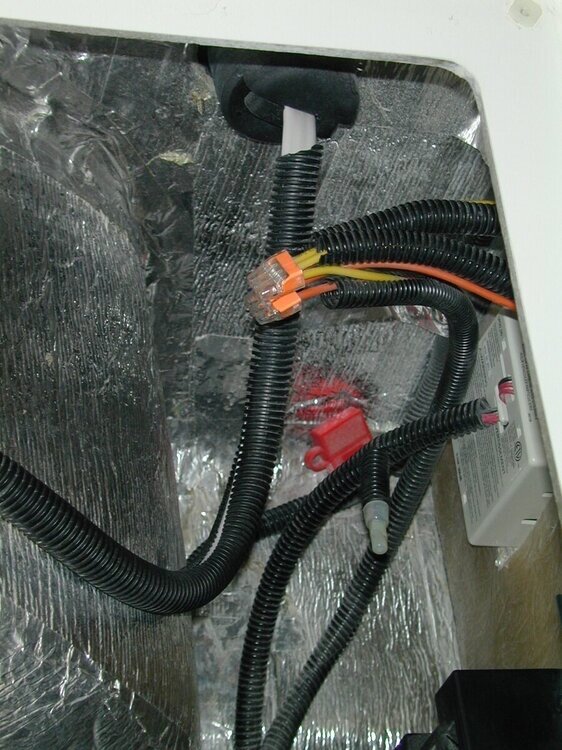
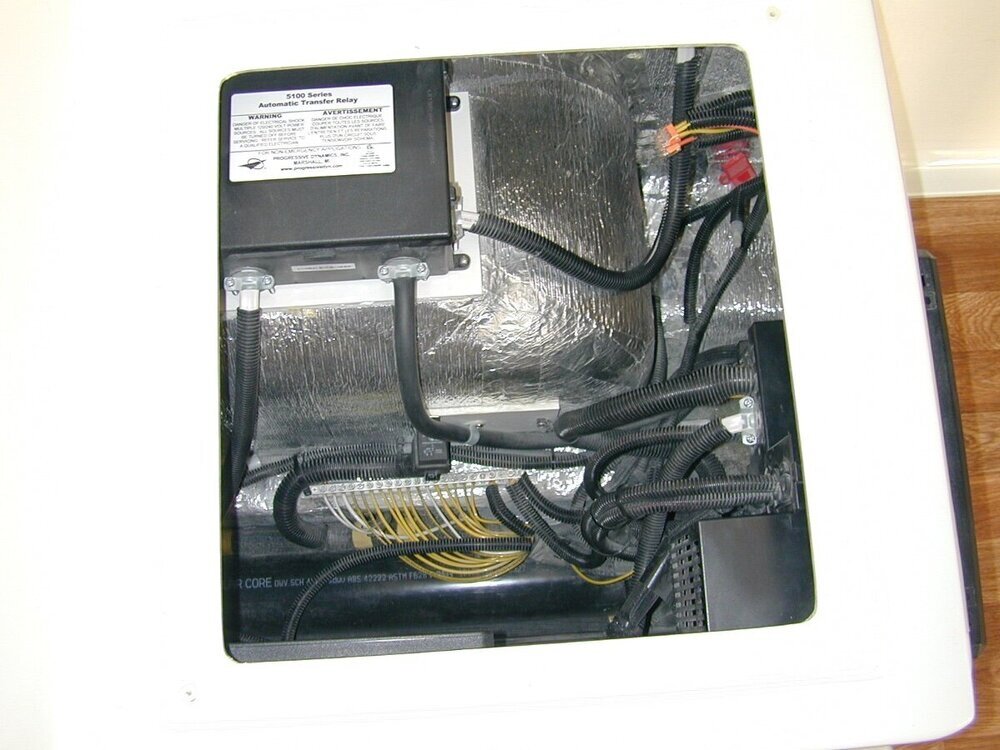
Steve Thanks. Now everyone knows. This is information that is often found by those with experience! Learning one 'fuse' at a time. I will plug it back. My Electric Brakes seem to have a Fuse issue or Wire inside the Oliver. Maybe a simple fuse, reset or something that is between the operating brakes and 7 pin plug. Or a wire not making contact in a wire bundle under the table or bed access areas. Wow. Again that was quick.3 points
-
This is the fuse for the CO2 detector. I needed to find it in the middle of the night at Camp Oliver the day we took delivery of Curiosity! 😵💫3 points
-
For those members who don’t do FB, here is recent pic of a few 26 YM interior updates from the Oliver FB page. I am seeing the fiber-granite sinks, a vent over the closet door where the pervious speaker use to be mounted. A new Bluetooth speaker, induction cook top, a texture wet bath wall, under cabinet switch lights, a new bath door, and the white belly band. 🇺🇸
 3 points
 -
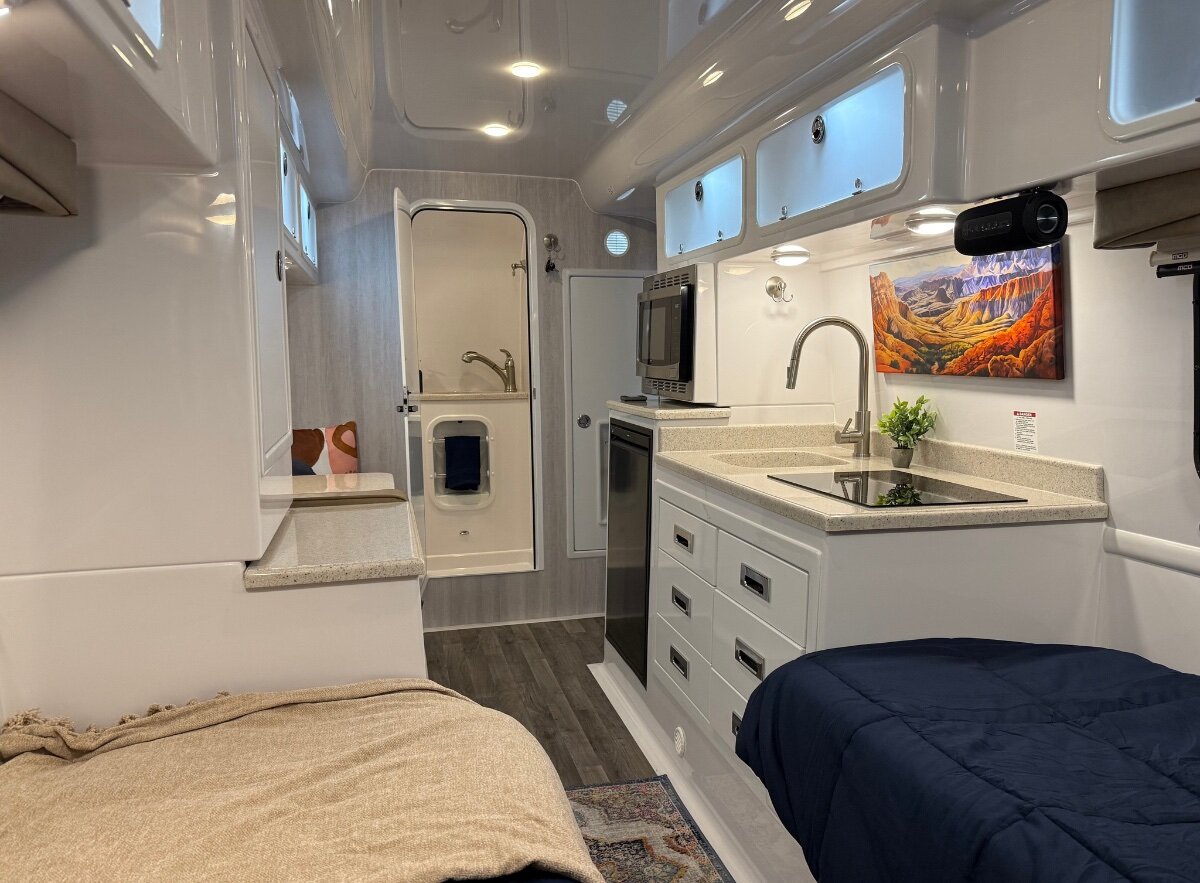
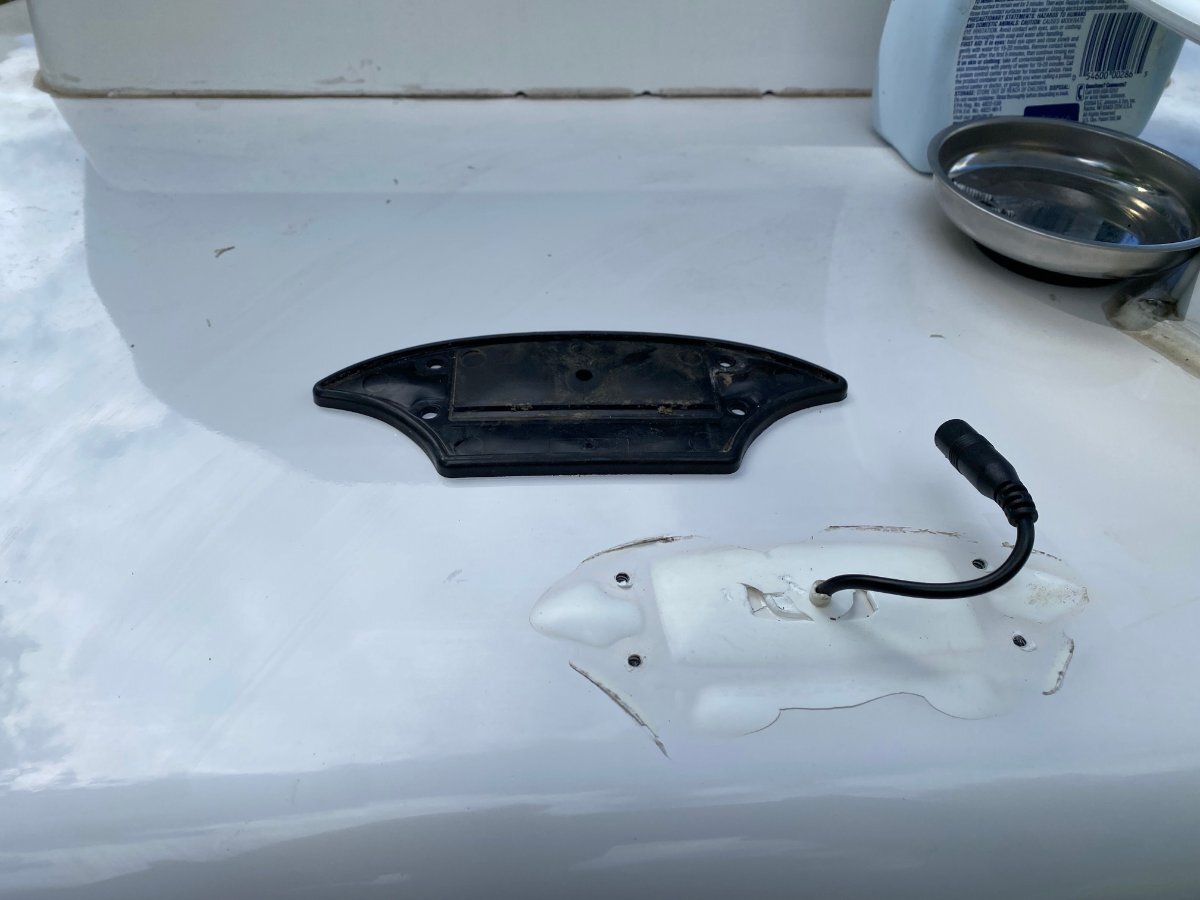
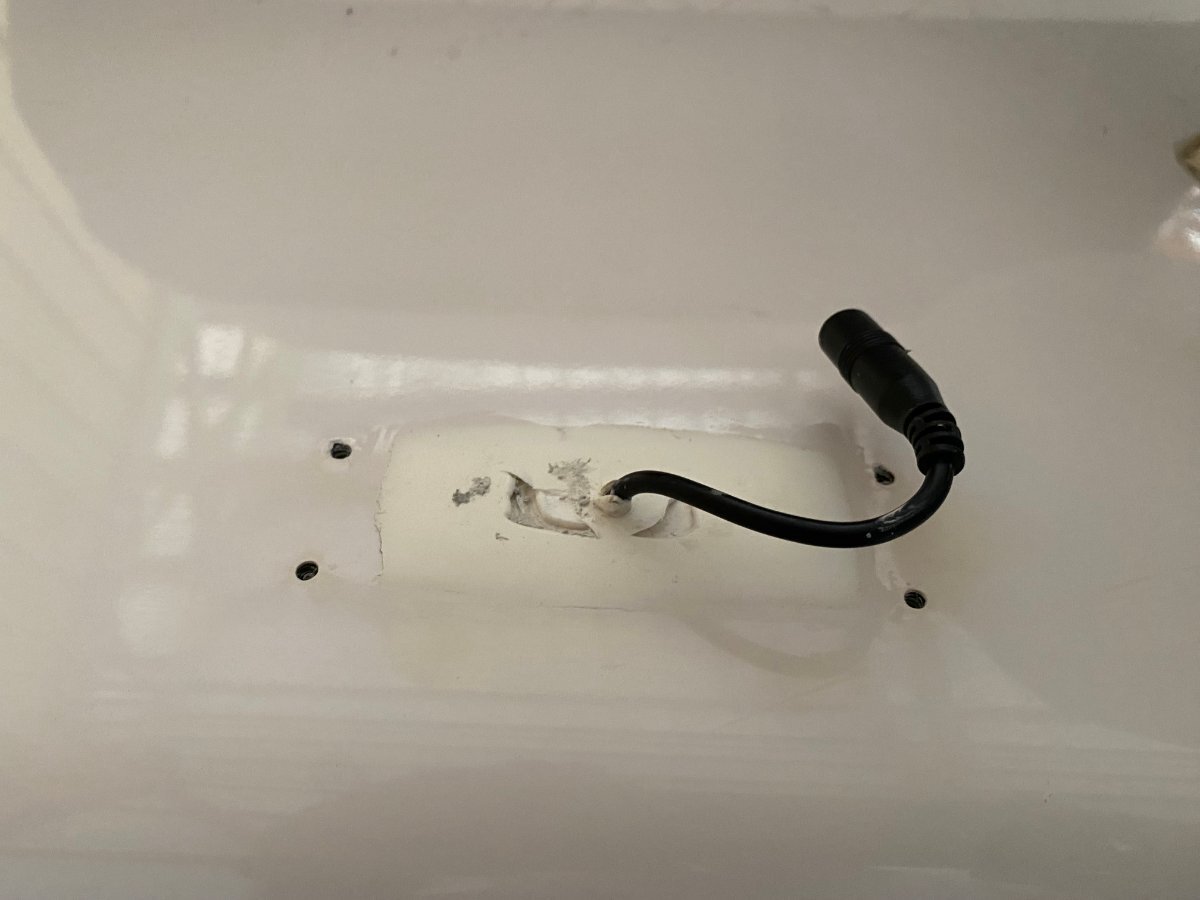
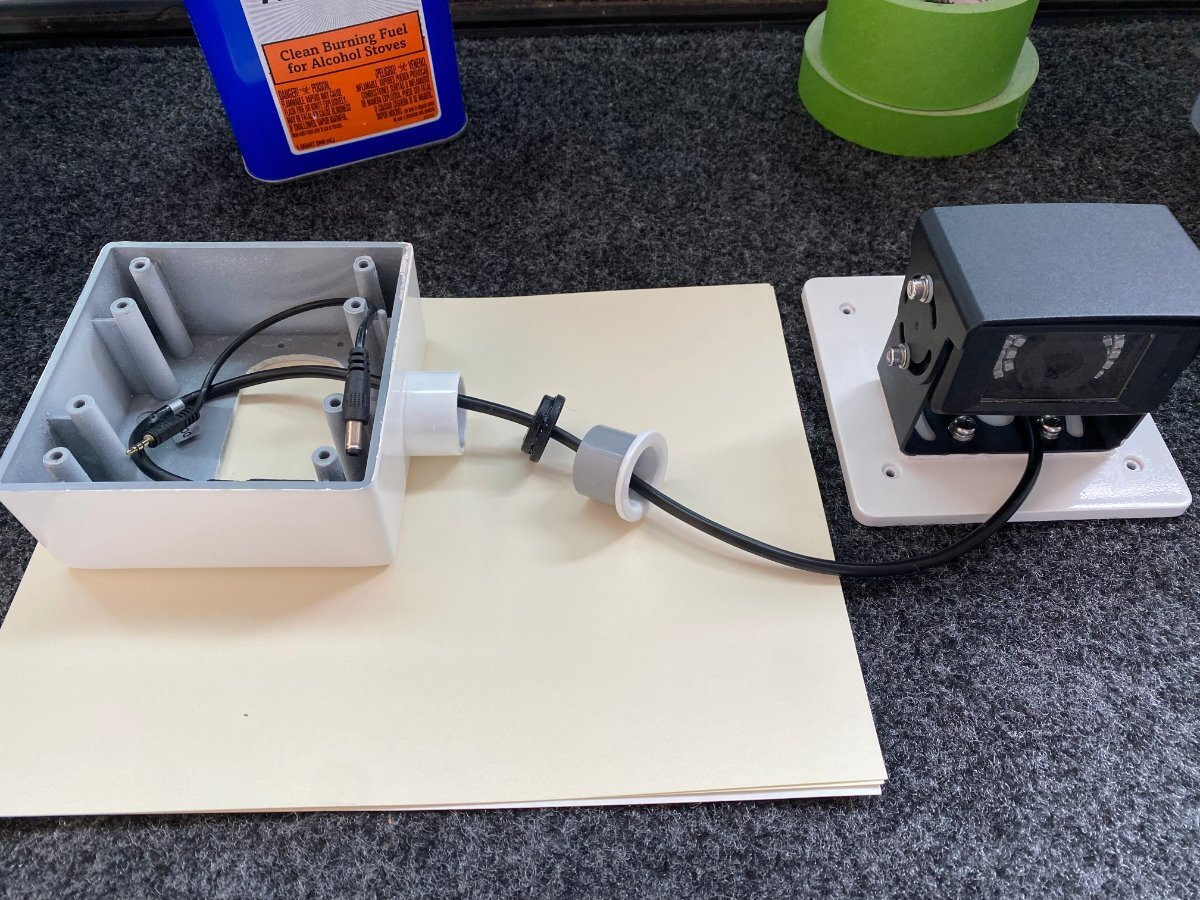
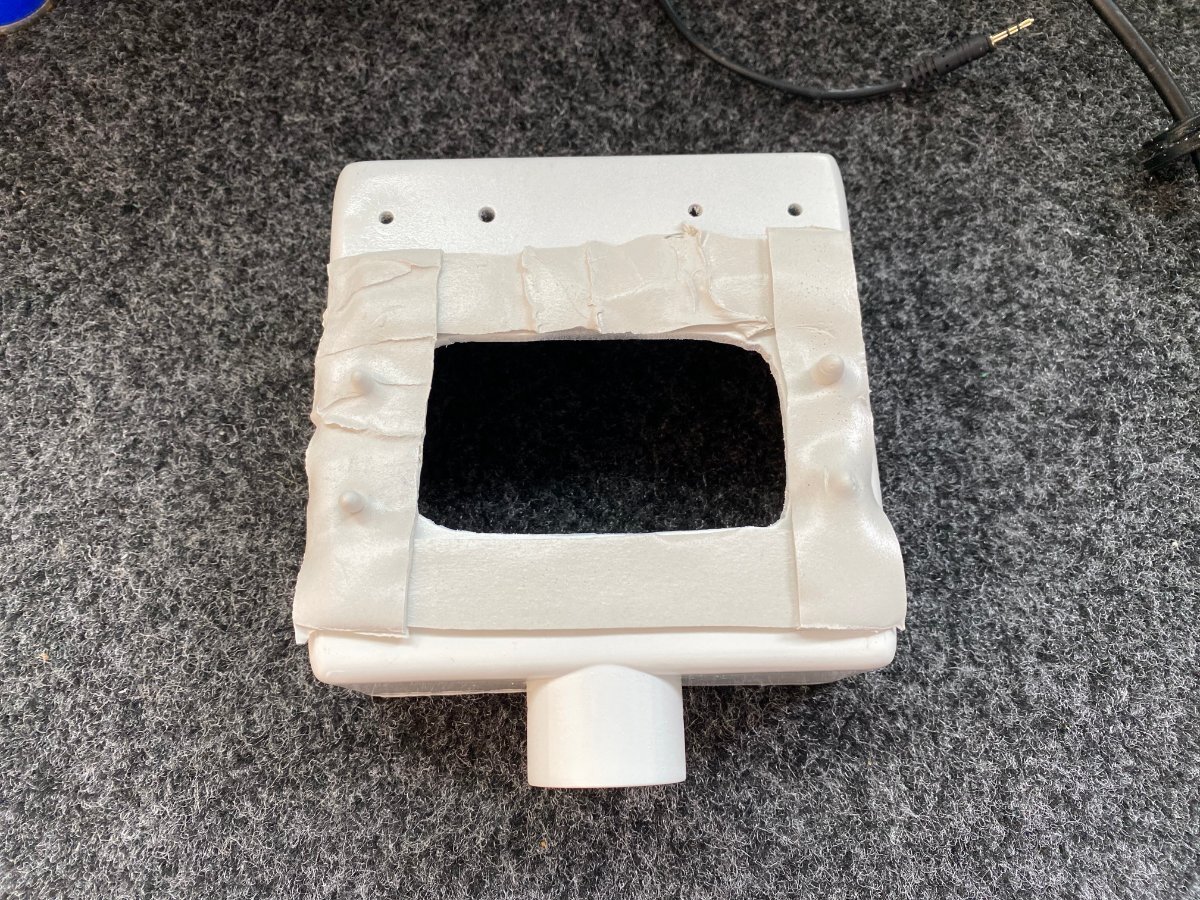
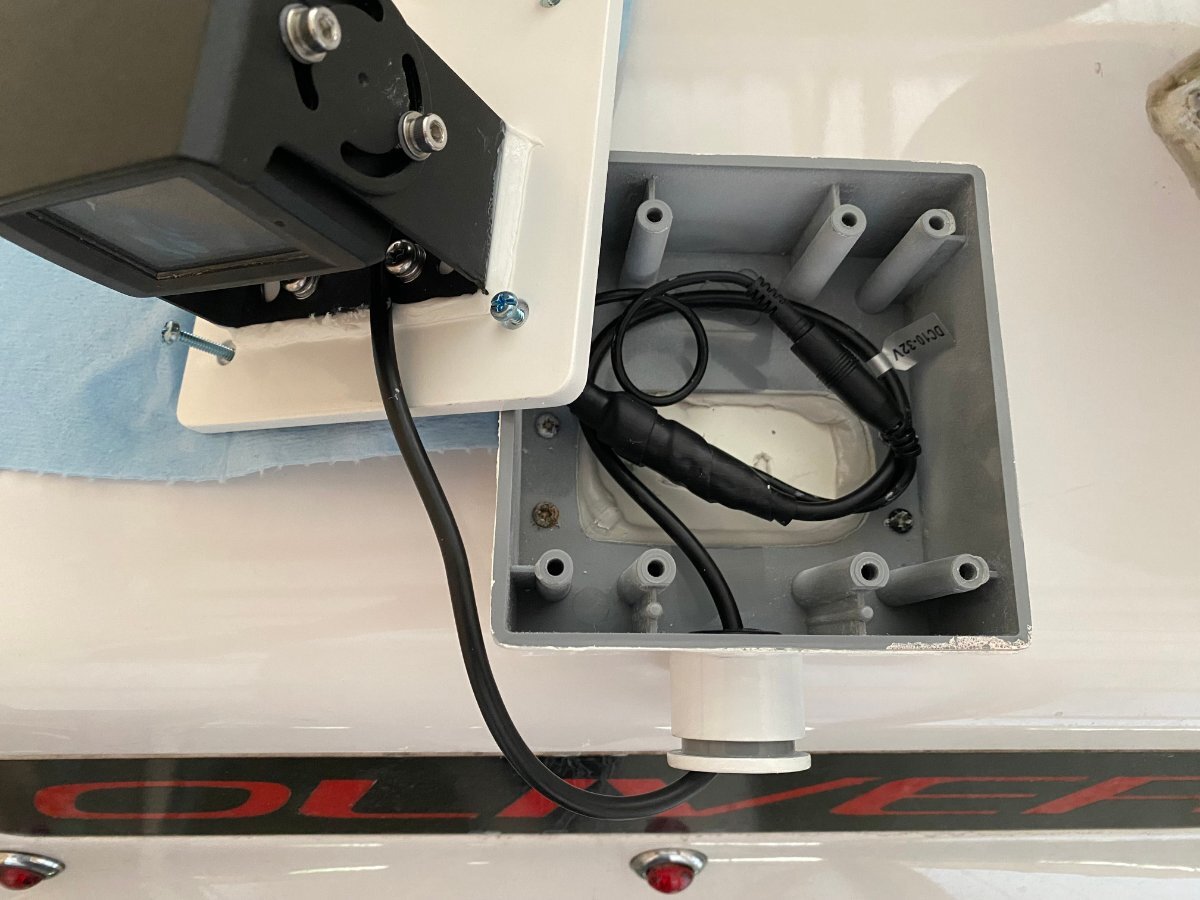
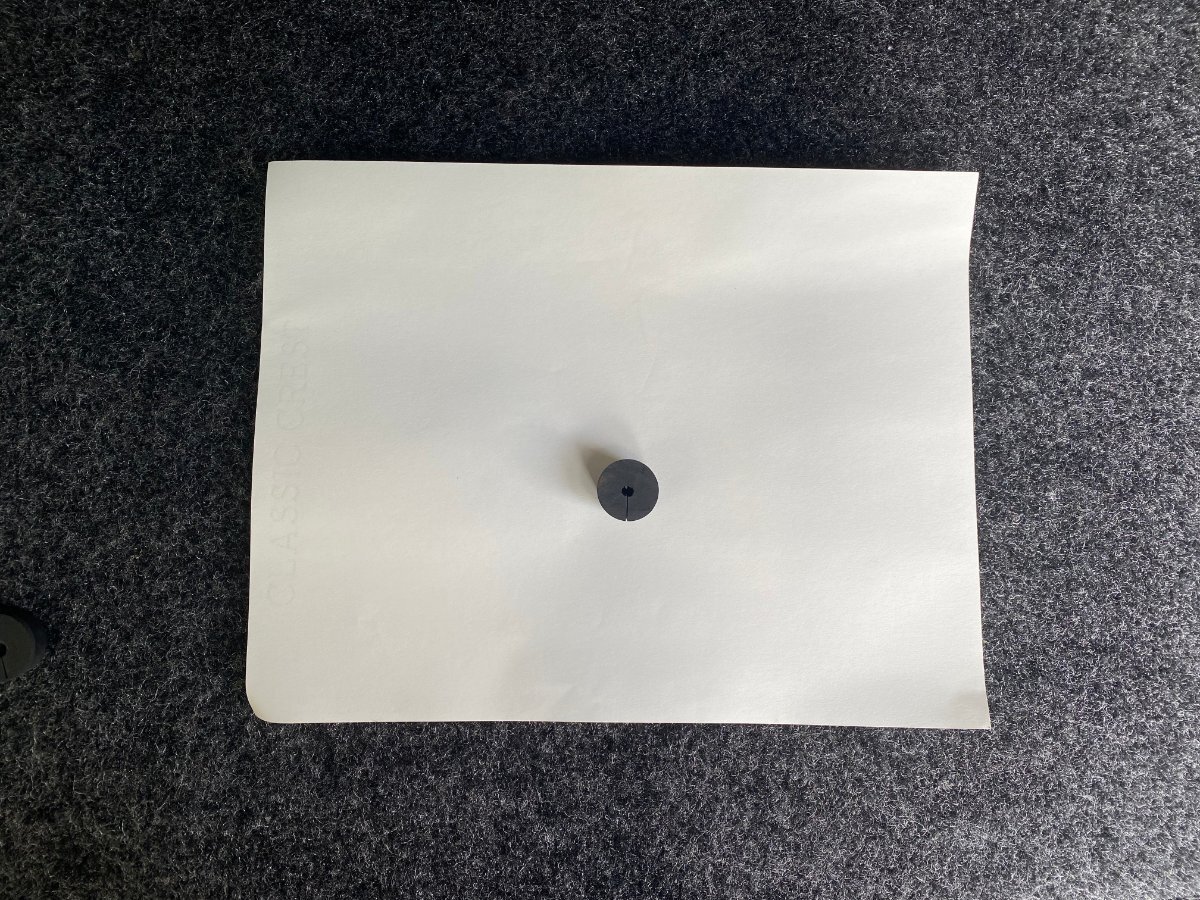
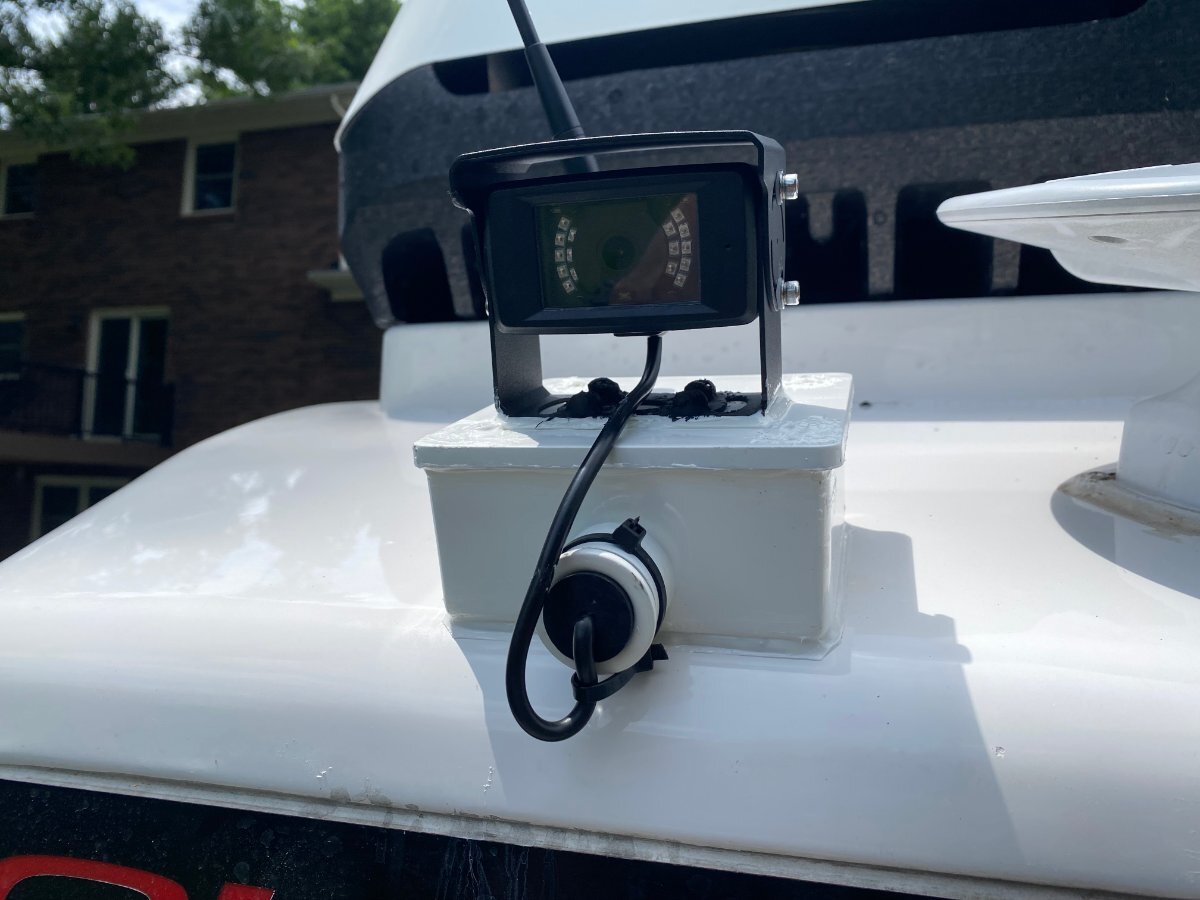
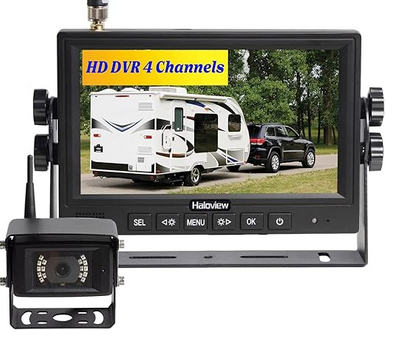
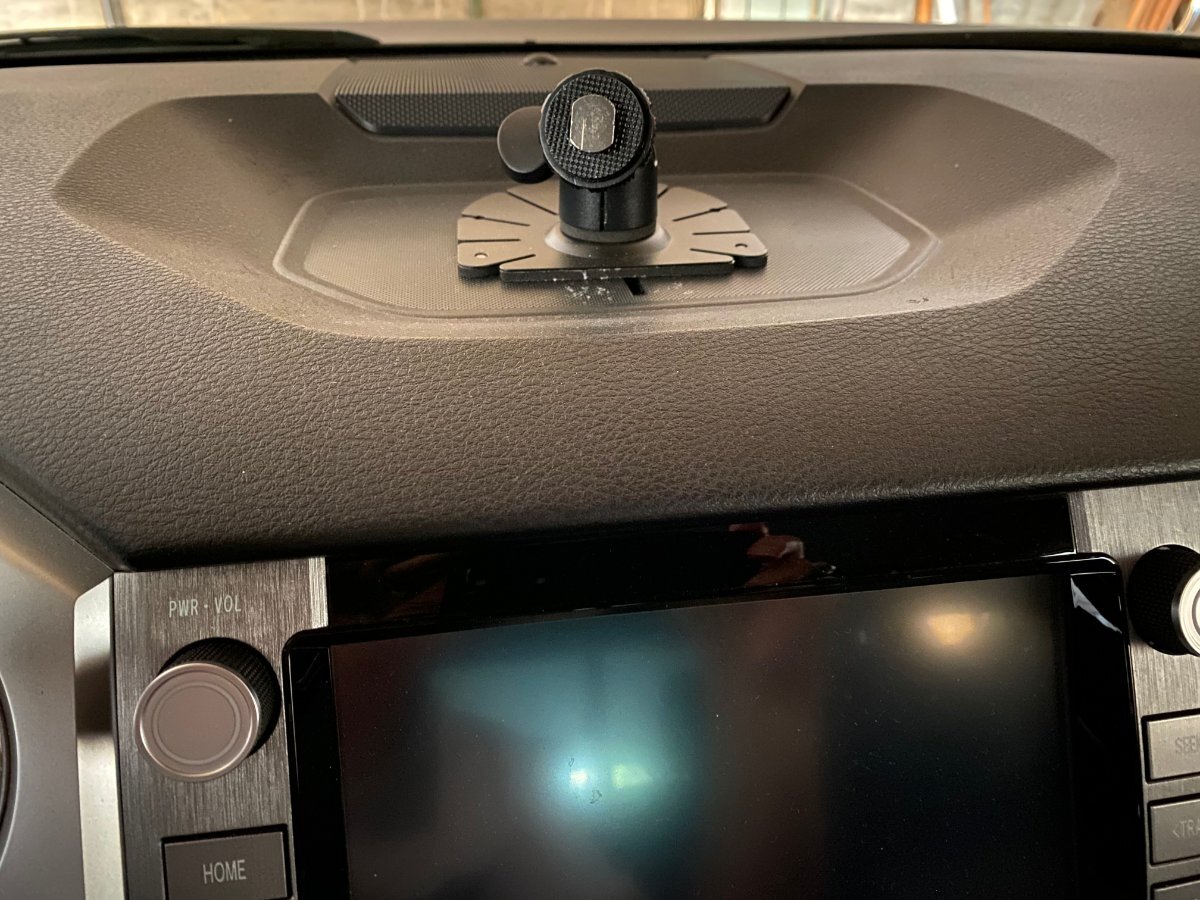
One of the first things that I did after I bought my Winnie Minnie back in 2020 was to install a rear view camera. After doing some research, I chose the Haloview MC7108 Wireless RV Camera with 7'' Monitor. I was not disappointed. It had excellent resolution and the image on the screen had brilliant color. Fast forward a few years and I bought the Oliver. Although nearly everything about the Oliver was an upgrade, IMHO the Furrion rear view camera was certainly not. First, the image on the tiny 4” monitor was so small that I could hardly make out any detail. Even worse, the image brightness was so poor, if I had my sunglasses on I couldn’t see anything but a blank screen (yes, I tried adjusting the brightness and contrast). So I finally scrapped the infuriating Furrion and replaced it with another Haloview MC7108. I am very happy with the replacement. Below are the details of my installation. In making modifications to the Oliver, my number one rule is to try to avoid drilling any additional holes in the fiberglass. With that in mind, I also purchased the Yinettech Camera Bracket Adapter Kit for Furrion. The steel adapter plate is made to screw onto the Furrion “shark fin”. The kit also included a Pig Tail Plug Adapter since the plug on the Furrion camera is not the same type as the one on the Haloview. It turns out that the Haloview camera is much heavier than the Furrion. So I was concerned that the plastic “shark fin” might not hold up over time, especially considering my lengthy travels and the state of some of our roads. Also, the Haloview camera comes with a rather long cable which won’t fit inside the “shark fin”. Rather than take a chance on using the “shark fin”, cut the cable and make new connections, I chose to mount the camera on top of a Carlon PVC Type 2FSE electrical box. This provided plenty of room for the long Haloview cable and the Yinettech plug adapter. So the wiring was essentially just plug and play. When I removed the “shark fin” gasket from the Ollie I noticed that the area underneath it had been filled with caulk and this was raised above the fiberglass. I decided not to disturb the caulk around the opening for the cable since it was in good condition. Instead, I cut an opening into the bottom of the PVC box to accommodate the raised area and thereby allow the box to sit flat on the fiberglass. I cut off the mounting feet on the box and using the Furrion gasket as a template, drilled holes to match the existing ones in the fiberglass. Since the PVC box was grey, I sanded down the exterior, wiped it down with acetone and then applied several coats of Krylon Fusion All-In-One Gloss White spray paint and primer. This paint is formulated to bond well to plastics like PVC. A weatherproof cover plate was treated similarly and painted. Coincidentally, the rubber gasket that comes with the camera also fits nicely inside the conduit opening. Adding a PVC conduit adapter holds the gasket firmly in place. In order to keep water out, I overlapped butyl tape all around the bottom edges of the PVC box, covering the screw holes. I then secured the box to the fiberglass using the original screws that were used with the “shark fin”. Next, I used Geocel ProFlex RV white sealant around the exterior edges of the box, the top cover plate and the bracket supporting the camera. Screw heads on the cover plate were sealed with the GeoCel and screw heads on the camera bracket were sealed with black Dicor. Finally, I used two cable ties to form a drip loop on the cable to keep water out and used a gasket cutter to cut a hole in a rubber stopper to make an additional seal for the cable. The Haloview kit comes with two nice options for mounting the monitor on the dash. One is a U-shaped bracket that can be secured to the dash with screws. I chose the other which is the center mount bracket. It is simply attached to the dash with 3M tape but is very secure. I am extremely happy with the addition of my new rear view camera system. I think the resolution and color of the Haloview system are exceptional. There are also a lot of extra features on the Haloview system that you will not find on the Furrion.
2 points
-
This fuse is under the street side bed and half way up the right side among other wiring hardware. What does this Fuse Protect? What is it called? I am trying to hunt down an obscure reason why my Trailer Brakes are not recognized, when my 2019 Oliver Elite II to my 2016 F350 Diesel. I plug in and when press the F350 Brakes... disconnected. My 2019 Airstream has no issue with the Brake Controller. So it is the Oliver and some wiring issue? Pull the Trailer Disconnect when spinning wheels on either side... they immediately lock up firmly. Insert the Pin and power is disconnected and free wheeling with no effort. Have a Post on Oliver #448 and trying to find the... obscure... problem, but following wiring using a flashlight is the best I can do at the moment.
1 point
-
Perhaps you have already tried hooking up the Oliver to your Ram or a friend’s tow vehicle that has a known, working brake controller? It may be too late to try this as a definitive test as you have made several changes to the trailer wiring. I had a similar issue when hooking my Dodge Ram to my car hauler and the brakes would not work, yet worked when hooked-up to another trailer. Brakes on both subject trailers worked when hooked-up to my Toyota Tundra. I put a new brake controller on the Ram and the issue has not returned. It’s worth a try. Hate to see you fire sale your Ollie if the problem might be with your tow vehicle.1 point
-
Thank you @jd1923 and the rest of youse for all that! Very helpful! I've looked at the Gree unit and the Turbro previously. Continuous fan run seemed like it might be a problem, as did lack of a condensate drain connection. I was not aware of the Cielo thermostat. More homework to do! Thanks again Tim1 point
-
Just to add one more data point, I made a frame with some aluminum angles, and mounted the camera itself on a vertical plate. I used a pair of rubber “bands” that mount the display on the rear view mirror. That makes it natural for a rear view. I have had no signal problems with the setup. I could not use the Furrion. I was actually surprised that it was so poor. My next step is to put another camera on the rear of my cap so that I always have a hi quality rear view.1 point
-
Without a test lamp, one other thing you can try while connected to the tow vehicle is to run a wire from the frame of the truck to the frame of the trailer and see if you now have brakes. This will tell you if you have a problem in the white ground wire somewhere. Just make sure you get a very good connection on both sides, like under a bolt.1 point
-
I would prefer an induction stovetop with the lithium power packages...1 point
-
@Steve Morris sorry to hear about your issues. Knock on wood I haven't had any issues to date. On my Winnie Minnie I purchased the external antenna and attached it on top of the air conditioner shroud. You might try that. But mine works fine on the Ollie without it.1 point
-
Thanks Mike! After seeing your setup at Lake Guntersville, I ordered and installed the same unit, although I used the adaptor kit you had recommended and simply tucked the wires away under the camera. Unfortunately, my experience was not as good as yours. I had frequent loss of signal, and terrible signal delay. To the point that a car would sometimes be beside me before it showed up as behind me on the display. But this only happened at highway speeds. It worked great when stationary or backing into a campsite. I thought it might be engine interference, so I put the truck in low gear at low speeds to get the RPMs up, but it still worked great then, too. Haloview Customer Service was useless in resolvingtheproblem. Looking at reviews online, this is a common complaint. So I'm now back to the original Furrion camera. It's not great, but it at least works for me. If anyone wants a Haloview MC7108 for a truck camper or backup camera for a car that didn't come with one, I'll sell you mine for $100 plus shipping. Cost new in June was $200.1 point
-
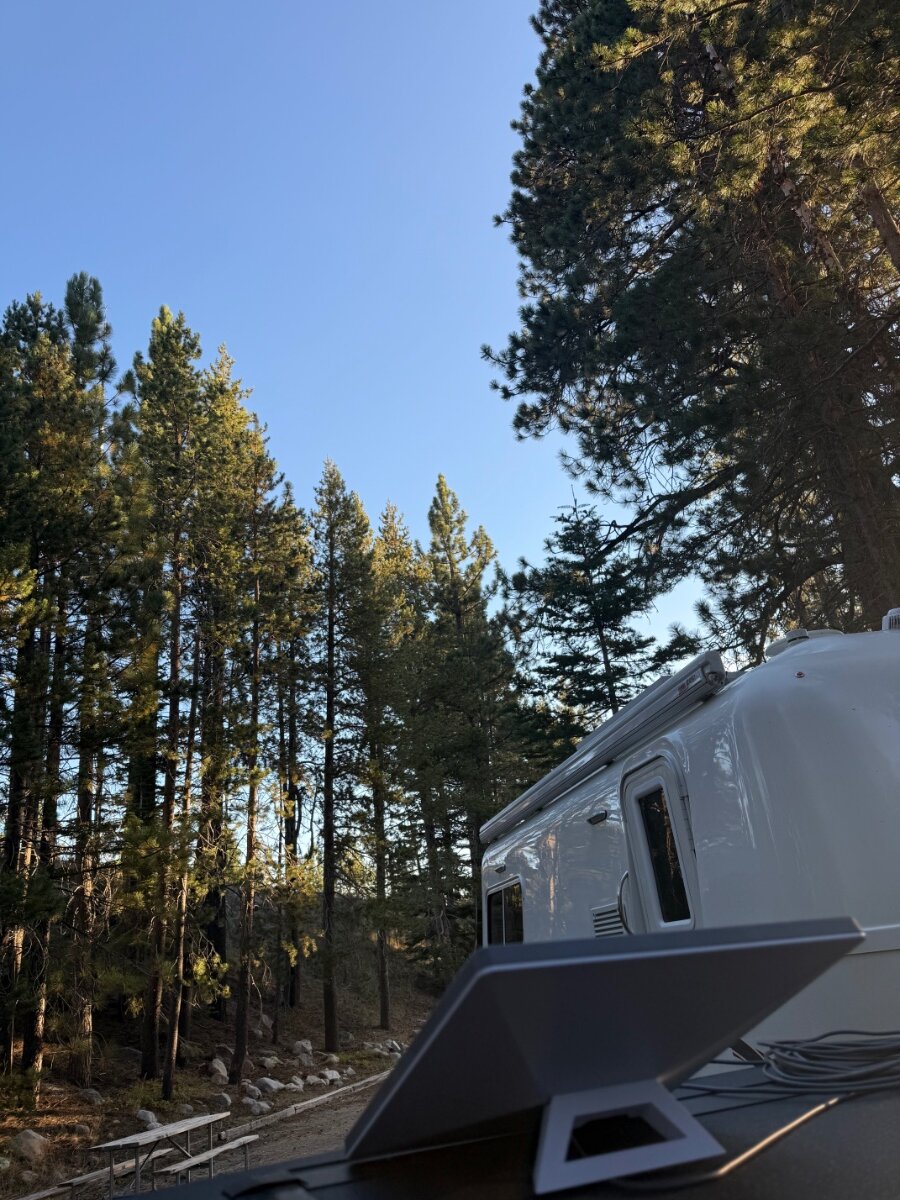
We haven’t needed our router yet. With the dish on the box on the tongue we get a strong signal. I’ve now got it on the truck tonneau cover, we’re under a lot of trees (Lake Tahoe, CA). Even with a narrow view of the sky it’s working well. My sophisticated mount. Sky view. There’s a bunch of satellites racing through that blue patch.
1 point
-
We just replaced ours, 2 years before its expiration date, because of false alarms. It appears to have become hypersensitive and was alarming because of errant exhaust fumes coming from the Norcold fridge. 2 problems there. I sealed the large gap at the top of the lower fridge access panel with metal tape (discussed in another thread) and then I replaced the detector with a new one. I did the same as @John Dorrer, using Wago connectors to make the next replacement easier.1 point
-
In regard to this. Here is what I have done when I need to "clear" a Truma code. I have not had your code but in case it helps. 1) Open the panel to the heater outside. Turn switch to the middle or off position. Wait at least 30 seconds. Then turn it back on by flipping the switch up or down. The other option is reset and there are steps here for that. What is the reset function on the CP plus used for?1 point
-
The one axle that has the bent brake backing plate must have really been hit hard! The backing plate on mine is at least 1/8 inch thick steel. With the strengthening ribs and flange it would take a lot to bend it which means the drum must have taken a heavy hit as well. The drum being cast iron could be cracked I wouldn’t use it and if the brake backing plate is tweaked at its mounting flange the shoes will never contact the drum squarely and you’ll always have braking issues with that assembly. You’re doing the right thing to send the entire mess back and get all new assemblies.1 point
-
That’s terrible. Hopefully they will take extra care with the next shipment. Free shipping for your troubles? Can’t hurt to ask.1 point
-
No, the internal drain system was abandoned. The condensation now just runs off of the roof.1 point
-
Thought I would check back in after our first towing/camping trip with the new Powerboost F150 for those of you who might be interested or new comers considering this truck for a tow vehicle. I'll cut to the chase and state thus far I have been astonished not only by the trucks capability but also the gas mileage both in tow mode as well as untethered. On our trip down to Yellowstone this past week we averaged just a tad over 13 mpg, all uphill or nearly so. The return trip we were hitting at 18.5 mpg mostly downhill other than 4 formidable hills north of West Yellowstone, but speed limits through the canyon are mostly 55 mph with occasional periods of 60 mph and I kept the truck at the speed limit. Driving untethered in the park we were obtaining as much as 42 mpg from the Canyon area back to West Yellowstone and on a second trip to the Canyon area 36 mpg but we encountered quite a bit of headwinds on the second excursion. Granted speed limits in the park are only 45-35 mph which helps, but still incredible for a half ton truck loaded with bikes, cameras, Yeti ice chest, various other gear etc. In Eco Mode while driving around town back home I am seeing around 24 mpg on short trips. While racking up some miles before towing (1000 minimum suggested) the truck averaged 28 mpg in Eco Mode traveling from Bozeman to Ennis down the Madison River Valley over to Quake and Hebgen Lake then down the canyon past Big Sky. All in with just over 1700 miles, towing, in town and highway just a sliver less than 21 mpg for system not broken in yet. That's the good news, now the not so good news depending on one's disposition. These new vehicles are very complex and technical beast and while I am fortunate enough to be technically inclined there are a lot of folks who are not. For those people vehicles such as this can be very overwhelming and intimidating. Many of the features can mostly or partly be ignored, but a lot of them cannot which could be a very frustrating experience for some people. The adaptive cruise control is awesome but thus far have not appreciated the lane assist nearly as much. Our 2017 Subaru is much better at this task than the F150. I simply don't trust it on winding, curvy mountain roads and turn it off. The free trial of Blue Cruise has been somewhat of a mixed bag, and like the lane assist seems to struggle with tight curves but is fine on wide sweeping curves and straight interstate highways. Given the cost of this feature it's unlikely I will pay for it beyond the initial 90 trial period. It's my understanding GMC has produced a much better version of this feature than Ford. When it works, it's great but I would be lying if I didn't say it feels downright weird at times hands free driving. The tires (Hankook AT) Ford installs on these ridiculously expensive trucks suck, period. They are round and roll down the road but thats about it. The reviews of this tire concur. Ford, what were you thinking? Enough for now thanks for all the input and info leading to this. Rob1 point
-
Quick update. Battery fully charged now while I was out on a bike ride. System seems to be making an effort to balance the cells from what I can tell. Upon returning the battery was indeed at 13.9 volts with a -.2amp discharge in progress. Checked the history with minimum and max volts and sure enough it did hit 14.3 volts at some point before going into float mode. I suspect within the hour it will rest at 13.6 volts in float at the rate it's going. Hope this helps others to understand the process when upgrading batteries. It sure had me confused for a day. A lot of excellent input on the situation, thanks all.1 point
-
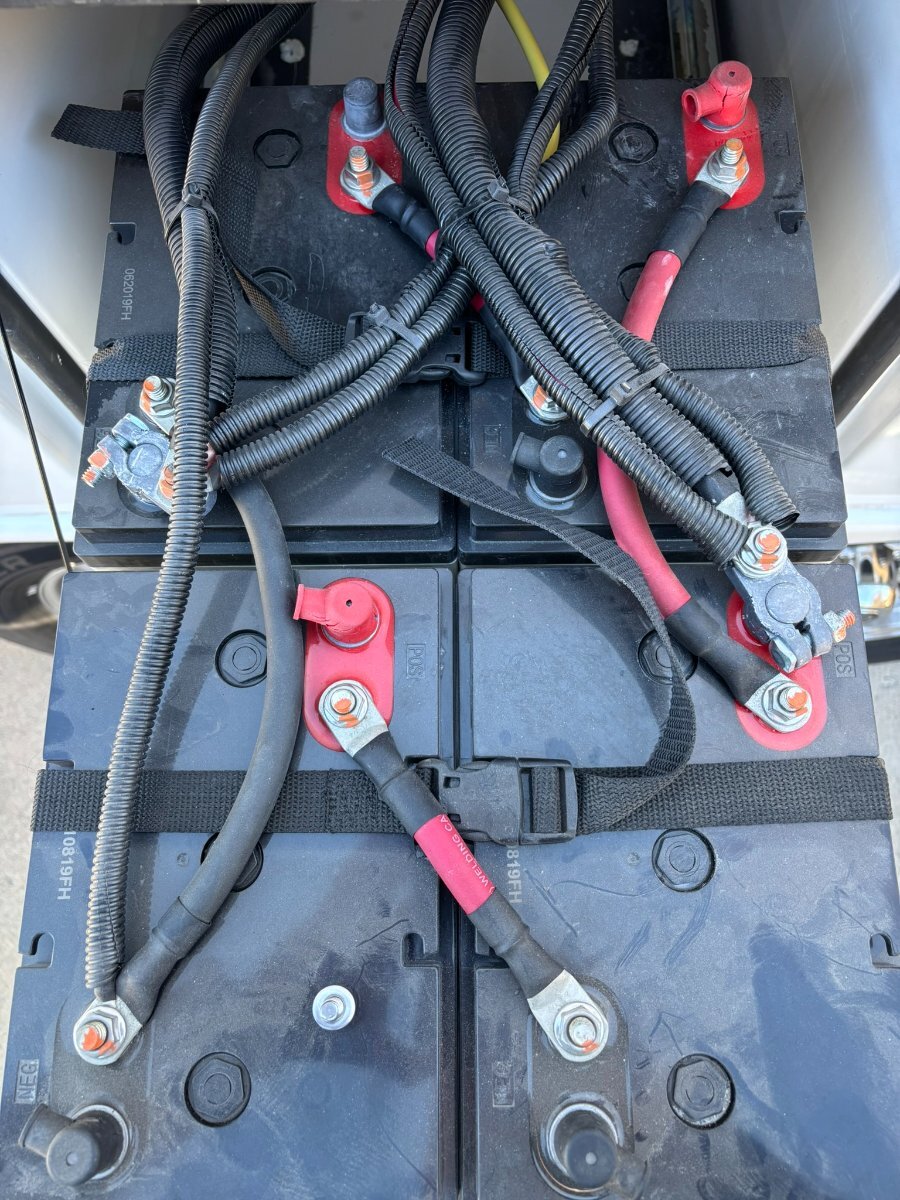
Thought I would follow-up with photos of my finished install. BIG, BIG thanks to @Derek B and especially to @jd1923 for sharing their photos and offering info to help! I don't think I could have done this without you! I would say my install is more "DIY amature" compared to their professsional work because I did not reconfigure the 6g wires inside the trailer on bus bars. This would be best, but I just didn't feel comfortable enough in my level of skill and also didn't really want to spend the time - so my battery compartment is messy compared to theirs but everything works. I wanted to install a manual disconnect switch and this turned out to be a needed extension in my case if I wanted to avoid replacing the main negative cable with a longer one. There was no extra lenght to be pulled through from inside, so the cable was too short to reach far enough forward in the battery tray (without packing the batteries together in the back requiring shorter jumpers to be ordered as well). The switch is connected by re-using one of the short red jumpers and I put black gorilla tap around it to mark it as negative. The switch provided a large/long connection post to stack the multiple neg wires. I did have to use a drill and dremel tool to slightly enlarge the terminal connector holes on the neg 6ga wires as they were slightly too small to fit on the post of the switch (a professional would have replaced these terminal ends with the correct size). I was going to secure the switch to the battery with 3M VBR tape but decided to let it simply sit on a piece of rubberized foam. This allows it to shift slightly as the stiff wires bend to close the drawer. The OEM bolt on the main + terminal had to be replaced with a slightly longer one to accomodate the stack. I have a bit of concern that the stacked terminal connections could be more prone to loosen with vibration over time so I will be checking on this periodically (they were stacked by Oliver's original configuration without a problem) I can easily reach the disconnect switch without pulling out the tray. It was very easy to program my Xantrex 2000 inverter/charger and my Zamp solar controller as they both have settings for LifePo4. My total cost was $1725 ($1698 for the two batteries, $25 for the switch and $2 for the longer terminal bolt) and I'm loaded with 600aH of lithium power. I have SOC and detailed charging/discharging data available in the Epoch app on my phone via bluetooth. Really appreciate the info/help/advice available in this group! Hope this might be valuable to anybody else with similar OEM equipment considering a DIY lithium replacement upgrade. Here are photos of before/after -- not a professional install but it works... IMG_1478.HEIC
1 point
-
Thanks @jd1923. Really helpful. I placed my order today for the two Essential 300aH batteries. I have the Blue Seas switch ordered from Amazon. This evening I disconnected, capped and taped the black charging wire from my 7-pin lead under the bathroom vanity. Once the delivieries show up, I'll start pulling apart my AGM set up and hope things go smoothly 🙂 Thanks for taking time to think about my questions and replying with your help and advice!1 point
-
Will Prowse posted a new video yesterday expressing disappointment in the newer v2 Epoch batteries. From his comments, the new firmware has some major issues. He failed the 48 v batteries, gave the 12v 460 a questionable pass, as it had the old firmware. We are quite happy with our original Epoch 460, installed some time back on the boat. So, I guess I'm saying I'd be cautious about the v2 12v, until such time as Will feels they've corrected the firmware issues. He is my go-to guru for solar and batteries. And, he's the reason we bought the earlier version 460 in the first place....1 point
-
Consider redundancy also. With 2 batteries you aren’t dead in the water if one fails. With one 460 you would be SOL. Not that these batteries fail that often but it can happen as with all electronics. John1 point
-
Our first travel trailer was an EII. We loved it. Just enough space and no more. Lived in it full time for nearly 2 years, but pandemic and a serious back injury made us re-think many things. Built a house, sold the Olly and purchased a much larger trailer. It’s great, bigger tanks, queen bed, dry bath, bigger fridge… very civilized. This winter we decided to take our first long trip in the new RV. All other trips have been local (really local) and the truck and trailer did great. This latest trip has been an eye-opener. New trailer is an absolute wind brick. Mileage plummets above 45 (yeah, 45). Average for the whole trip has been 8mpg! I now realize just how fantastic the Olly was to tow. Super obedient, never felt the wind, often forgot it was back there. 12 - 14mpg regularly. Easy to park, clearance was never an issue. So warm and cool (new one is NOT 4-season and basically follows ambient temps). Seriously started looking at classifieds for a gently used Oliver. Sometimes, you don’t know what you got until it’s gone.1 point
-
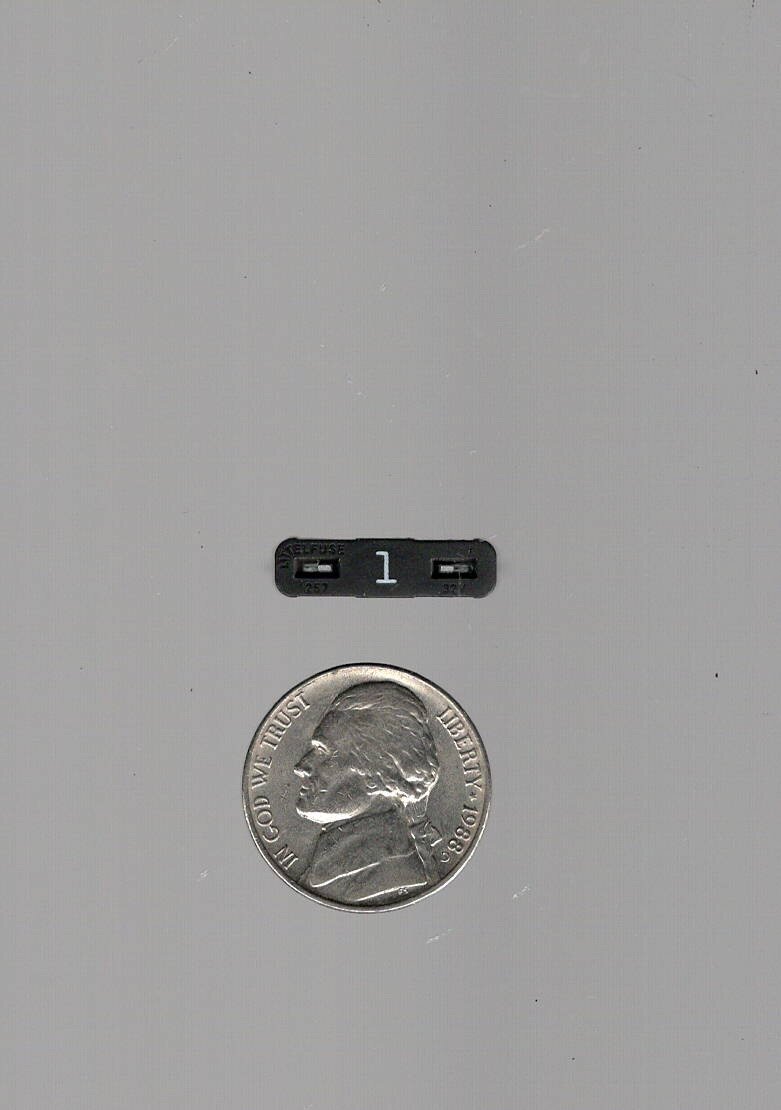
How About THIS ONE, under the second seat at Table. No fuse inside this RED Plastic.
0 points
-
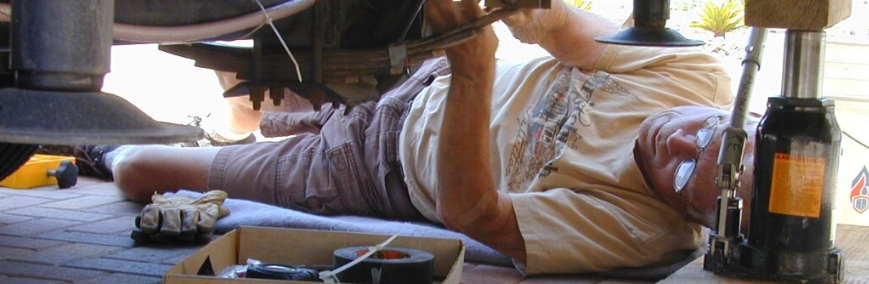
Glad you are making progress on the brake issue. Also glad you were not injured in doing so. As shown in your picture, you chose not to use your on-board jacks as safety fail safes. Yes they can get in the way, but having them down can save your life. GJ
0 points
-
So sorry to hear about this. It is really frustrating.0 points
-
You and @Golfnut with LEI have this. Just got my new axles yesterday and they are rated the full 5200#. Must be an LEI thing likely limited to 5033# due to the springs. Good news, my axles are here! Bad news, Dexter packed them so poorly, they came badly damaged and going back. Alcan was the reseller on the axles. I special ordered the 50.00" axles from them. They got right on the phone with Dexter this morning, forward the many pictures I took showing the damage. Dexter will Rush Order my axles but rush means another 2 weeks plus shipping. Notice dinged Nev-R Lube cap and dented backing plate. So bashed in that the drum on the left will not turn. What a waste!
0 points


-
Recent Achievements
-


")


")


")

