Leaderboard


Popular Content
Showing content with the highest reputation on 11/23/2025 in all areas
-
Greetings, All! Well D and I went over to the "dark side" and sold Casa Blanca to a great guy from near Kerrville, TX, David Knight. Please welcome aboard @Kpaladin David into the Oliver family. We're now into our next chapter of RV'ing and starting new adventures with our 2026 Brinkley I 235. It's totally "Victron'ed" out and includes 600A-Hrs of Epoch LiFePO4s and 800W of solar modules. We'll stay in touch! MAX Burner
 6 points
 -
A friend sent me a link to a YouTube channel — it’s focused on reviewing RVs and helping RV buyers get refunds or assistance / fixes from the manufacturers when they have purchased faulty RV products. (I think she sells a book.) Apparently the Big Three manufacturers own a huge number of “brands” and she says they don’t stand behind their products. At the end of her video, she notes that there are independent companies that are not affiliated with the Big Three brands. Oliver is at the top of her mentions of good products.4 points
-
No, a voltage regulator is not advised for the Starlink mini because it already operates from 12 to 48 volts DC. As was the jest of this thread, it's actually necessary to boost the voltage if using the supplied long cord in a 12 volt system due to the voltage drop. When I started this thread, I had one of the first Minis and there were no accessories or aftermarket options to allow it to work on 12 volts without either boosting the voltage, or shortening the cord. So I utilized a robust Vctron voltage booster that's wired to turn-on whenever the Mini is plugged in. I still use that system and, IMHO, it's still the best and simplist way to go. Of course, you can always use the supplied AC adapter that puts out 48 volts DC if you have an inverter, but that will suck down your battery a lot faster. These days there are more options and shorter cords if your mini is going to be mounted close by. However, it's often necessary to move the Mini further away for it to have a clear sky view, and in such case you need to boost the voltage to account for voltage drop from the longer cord. Some people use a POE injector (Power Over Ethernet) that can supply power through an ethernet cable that is plugged into the auxiliary ethernet port. Others use portable battery packs. I make snap-in re-chargeable battery packs for taking my mini to other campsites and such, but they have limited battery life. Because the Mini has a built in Router, it looses WiFi signal, and thus internet speed, the farther away it is. Mine is hopelessly slow if I use the entire cord length. So a great accessory is the Starlink Mini Router. They are inexpensive, and you won't often need it. But when you have a situation where your Mini is placed farther away for a clear sky view, then the router will save your day! See my post "The New Starlink Mii Router, for what ails you." So you will need to decide how you want to power your Mini based on how you plan to mount it and use it. Then you can make an informed decision on how to power it. Hope that helps! Geoff3 points
-
MAX - please do not be a stranger (well, at least any "stranger" than you already are 😇). I'm sure that you didn't let the pups go with that fine Ollie of yours! DAVID - you've got a really nice Oliver there. We'd be happy to help in any way we can. Bill2 points
-
Welcome to the dark side Art!😜2 points
-
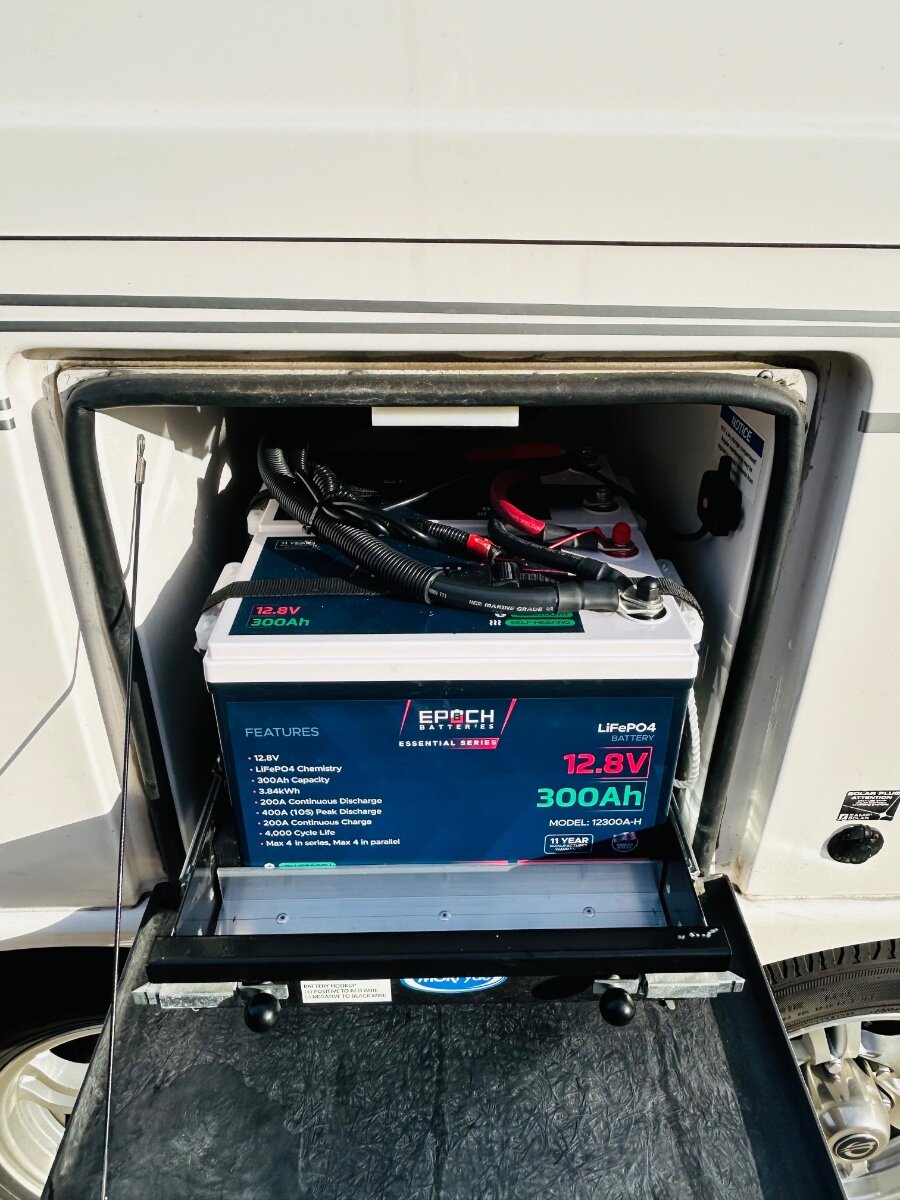
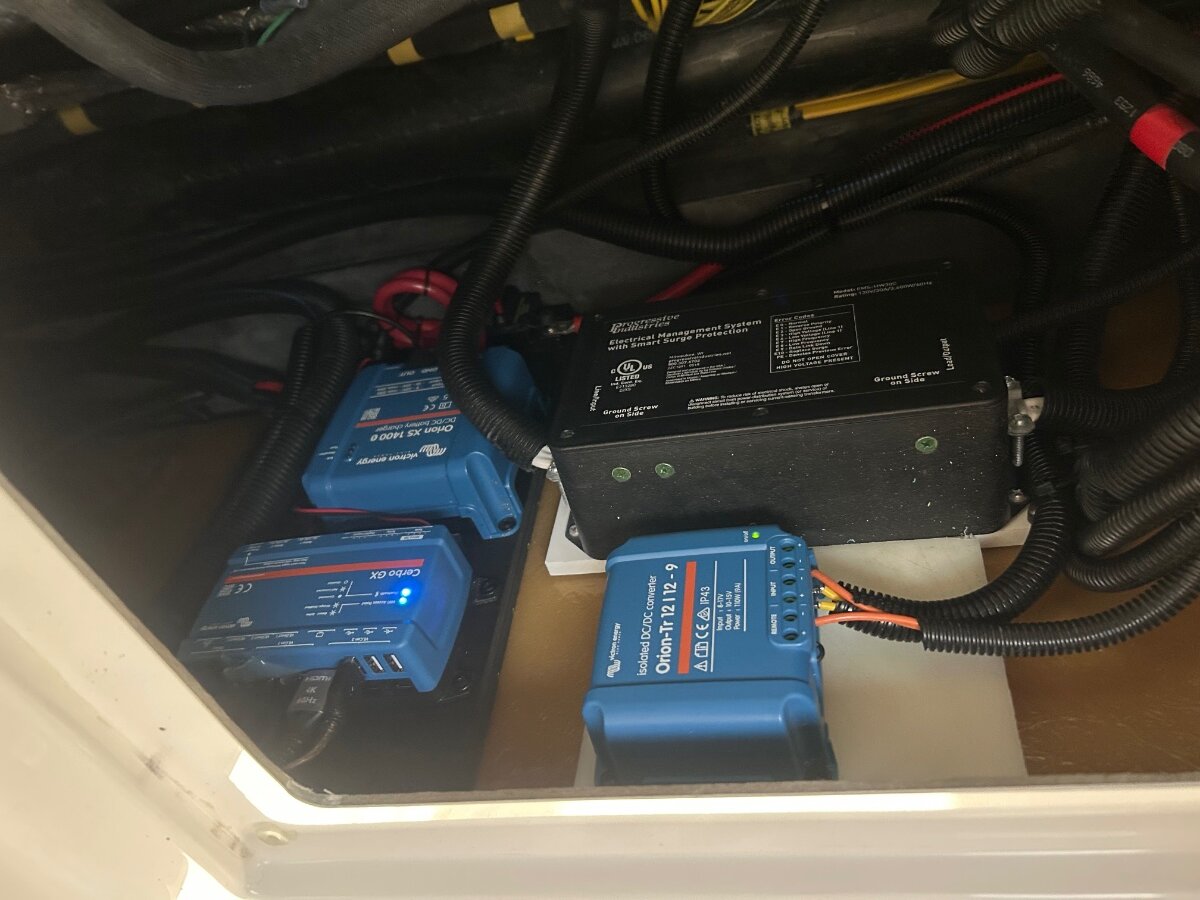
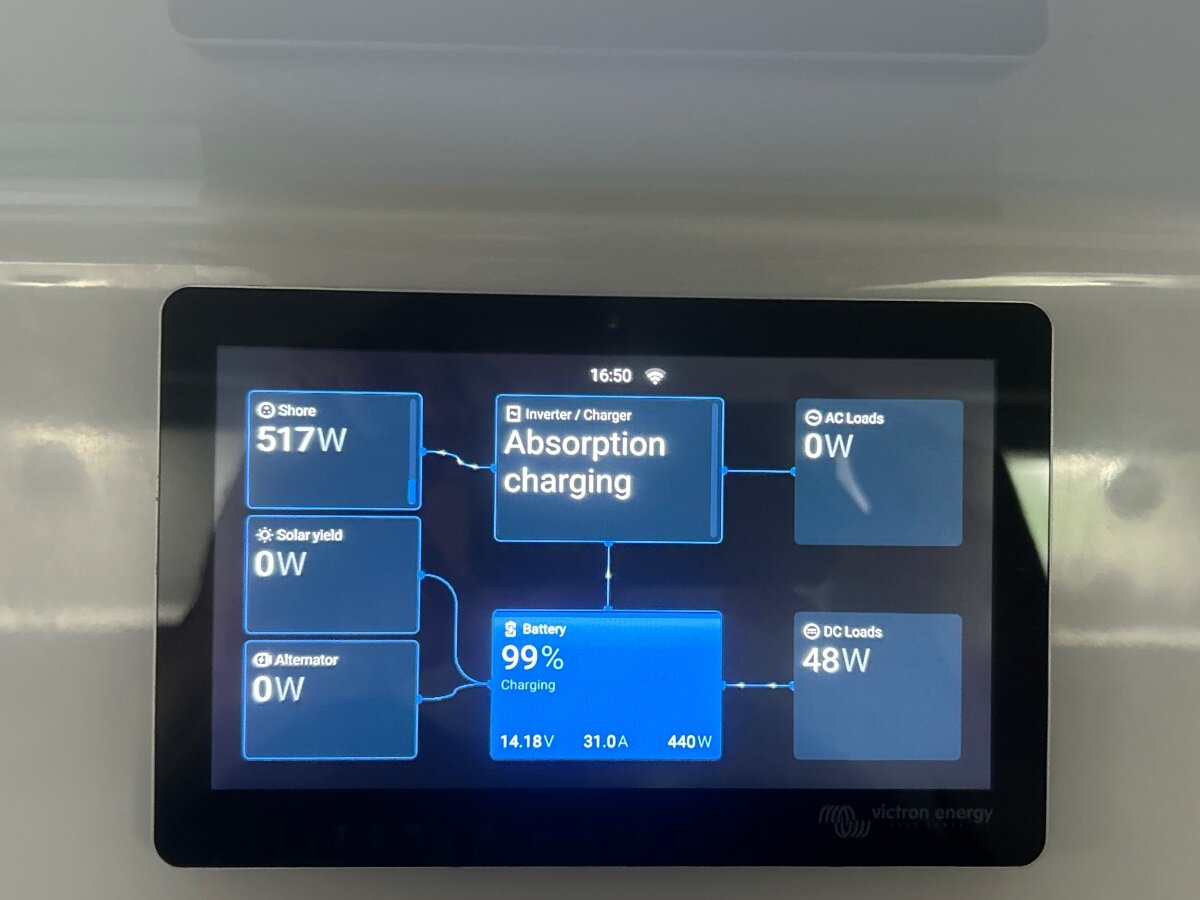
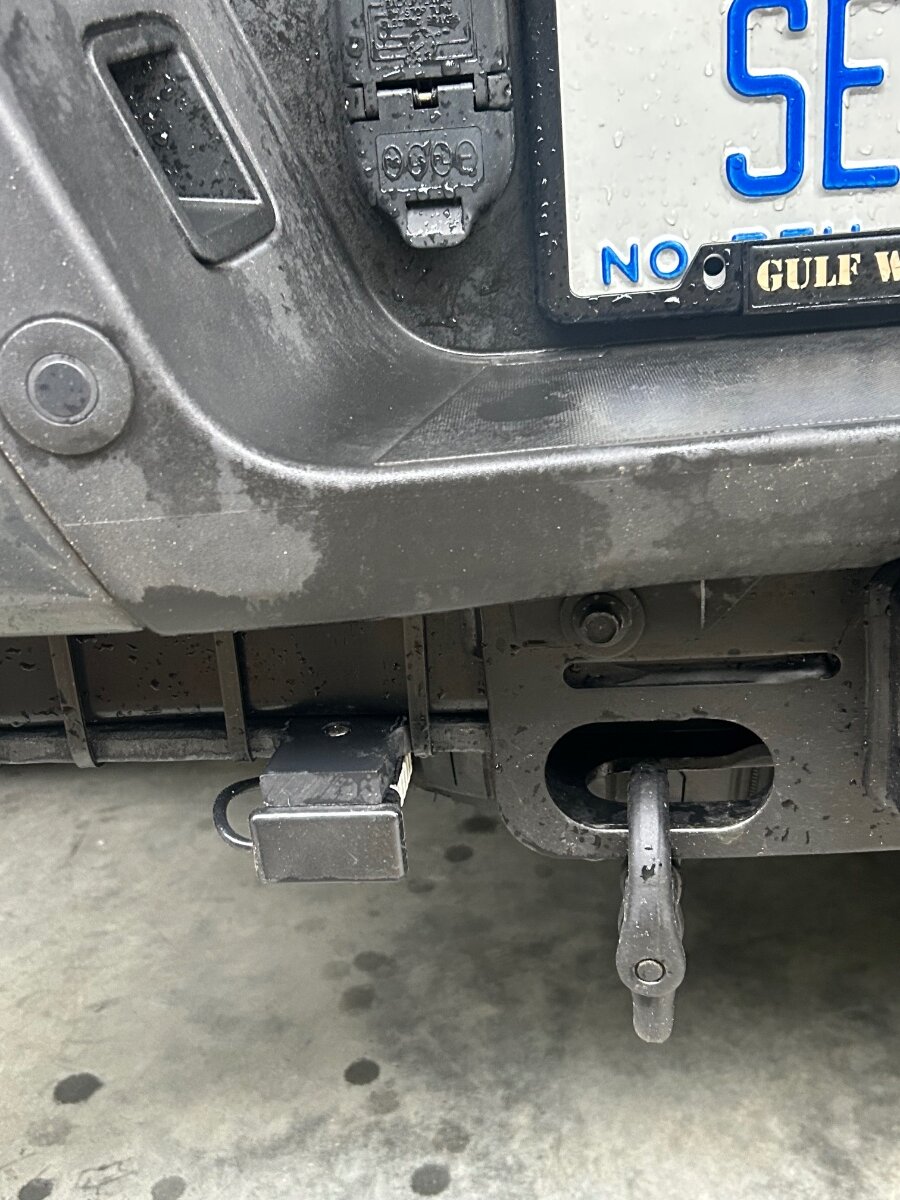
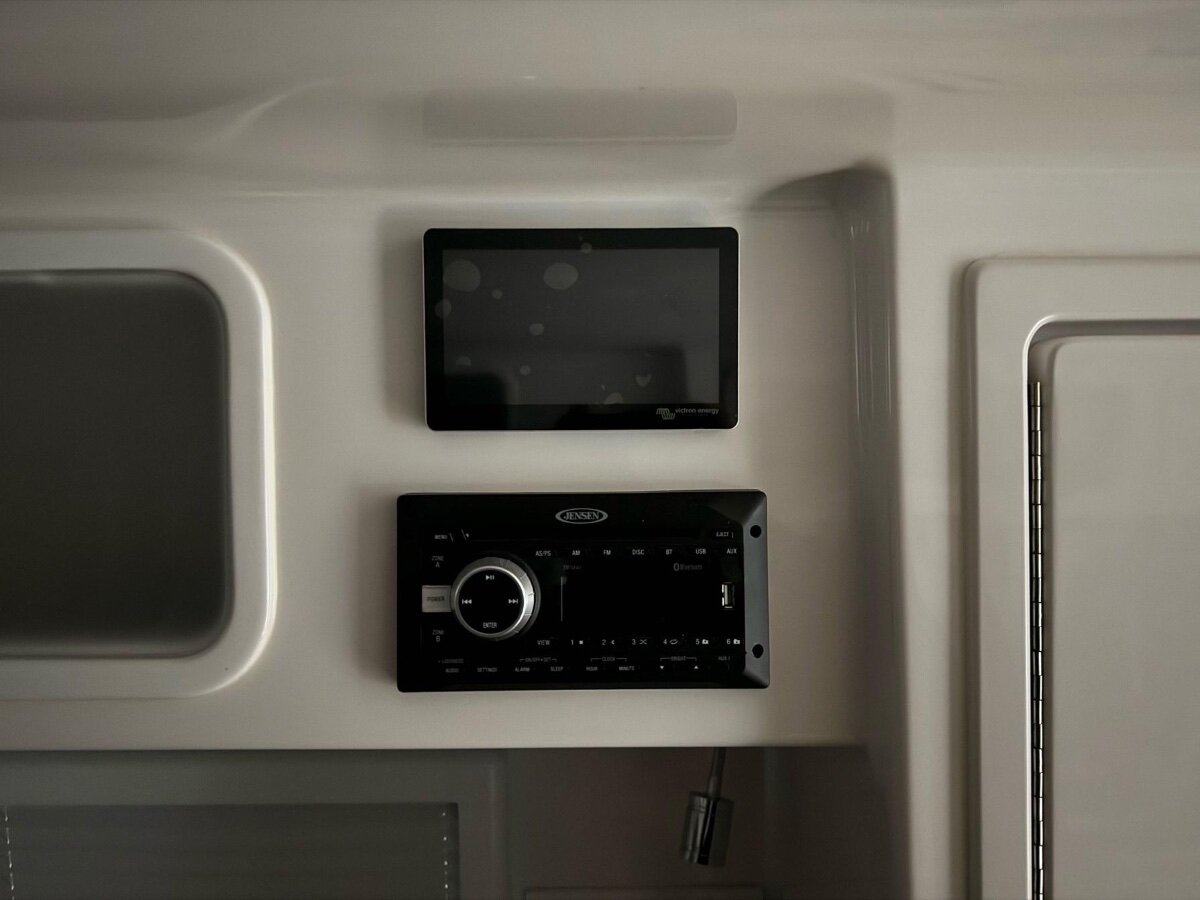
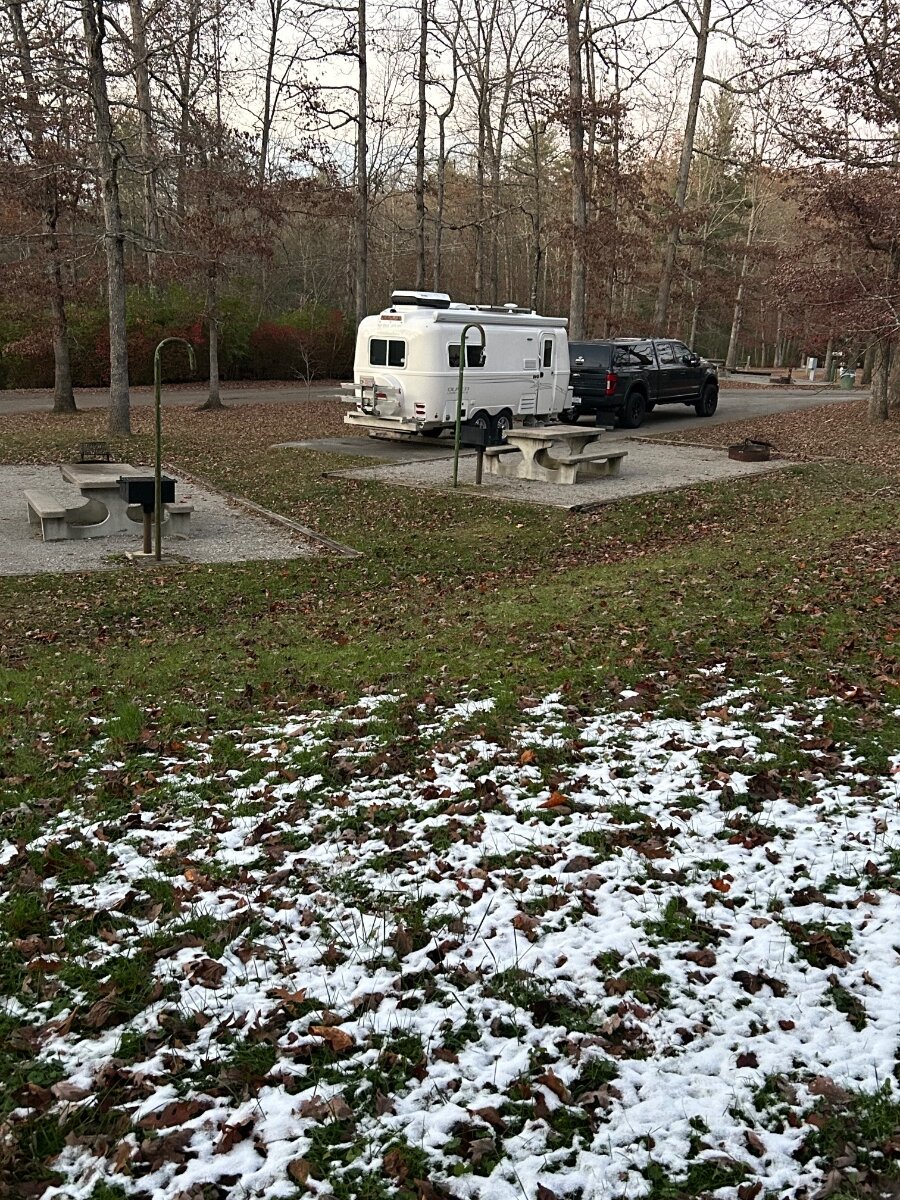
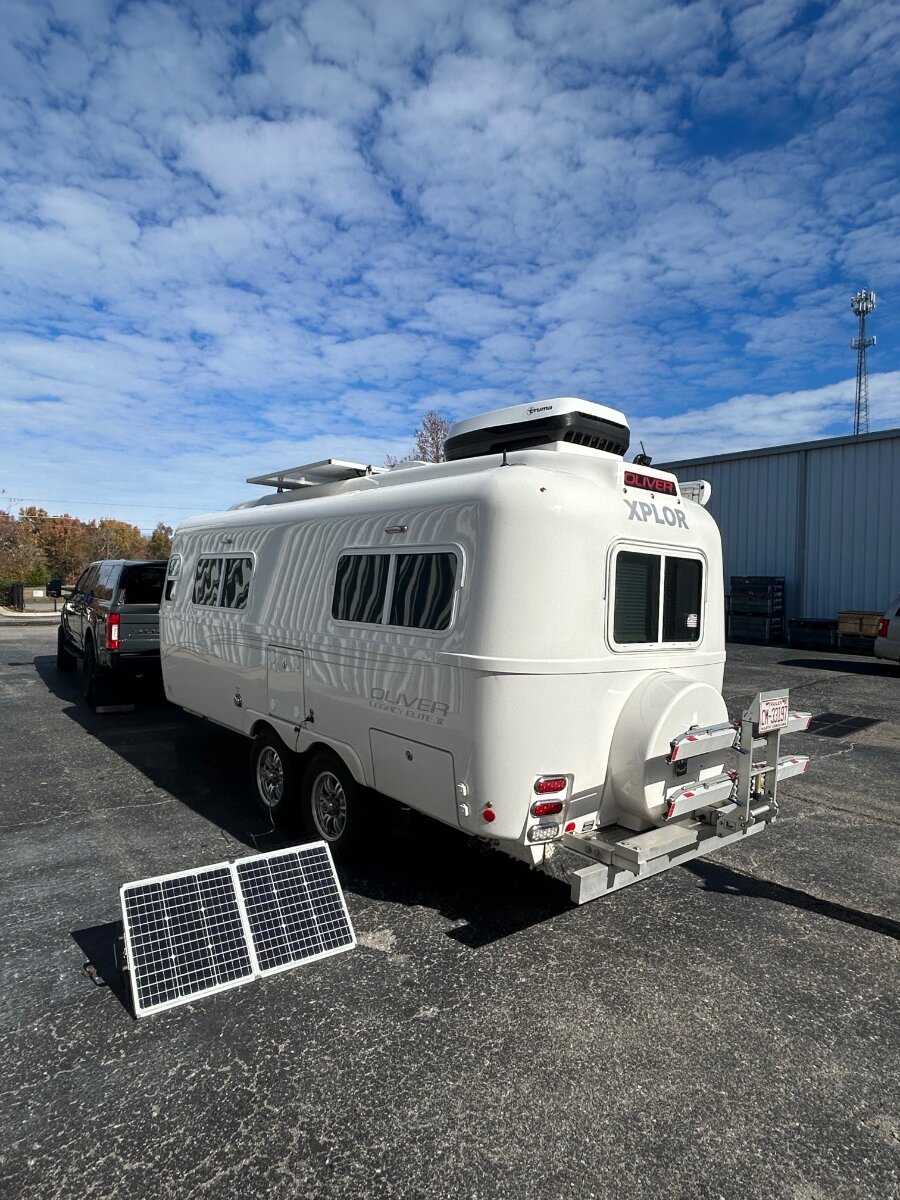
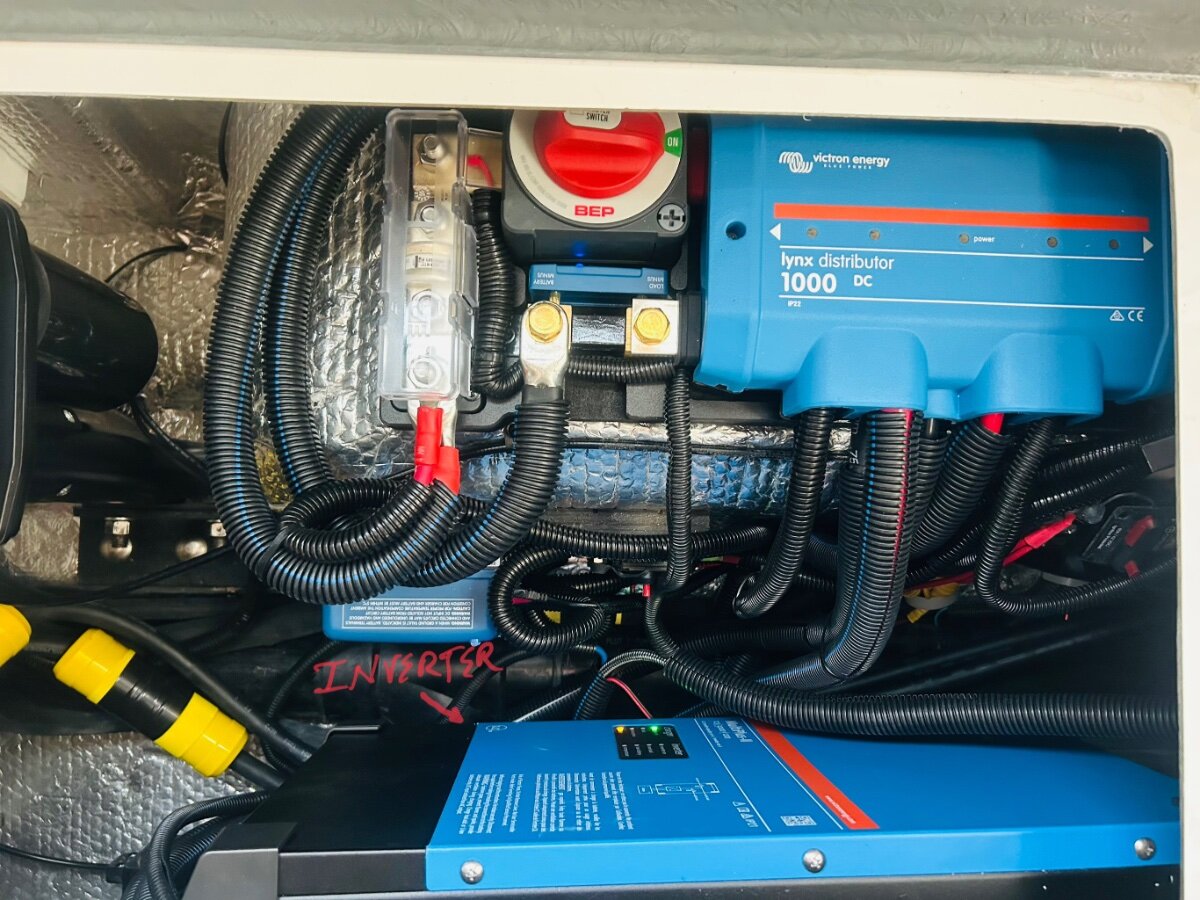
***Long Post*** XPLOR Hull #634 Victron 3000 watt inverter, Victron 12v DC to DC charger and Epoch lithium battery upgrade. Note: To discuss options and pricing, please contact Jordan Hall at Inverter Services, White House, Tenn. Our OEM AGM batteries were getting long in the tooth and it was time to upgrade our batteries to a complete lithium battery system on our 2020 Oliver LE2. Our good friend, and former Oliver owner Jim Posey, highly recommended we speak with Inverter Services in White House, Tennessee. I called and spoke with Service Manager Jordan Hall and discussed our needs and options. Jordan and his team at Inverter Services were excellent to work with and have a lot of experience working on Oliver travel trailers. Our tech/installer, Easton Ford, kept us updated on our install progress with photos and discussions as needed. We found Easton to be extremely detail-oriented and dialed in and focused on our project. We were originally scheduled to have this work done next March. After returning from our 54 day New England and Canada trip, I decided to call Inverter Services and ask if they had any cancellations. They did and we immediately took the cancellation. They are typically booked 6-7 months out. So we hitched op Oliver and headed to White House, Tenn to leave our Oliver with the team for 2 weeks. Important note: Inverter Services supports the RV and Marine industry in ALL things lithium battery and electronics. This is one of the most detailed and thorough, cutting-edge companies we have ever done business with. I chose Inverter Services to do this install because this is not my area of expertise and it absolutely is theirs. These guys are experts in their field and I admittedly am still in the learning process. Based on our excellent experience, we highly recommend Inverter Services in White House, Tenn if you are considering a lithium upgrade. We chose all Epoch & Victron following products for this install. (2) Epoch 300ah lithium batteries (internal heating elements) -https://www.epochbatteries.com/.../12v-300ah-heated... *Victron MultiPlus-II 3000w Inverter/charger *Victron GX 70 Touch Screen *Victron Smart Solar MPPT *Victron Orion XS DC-DC Battery Charger **We also had the RV Soft Start installed on our Truma Aventa AC. Inverter Services provides tech guidance/support/firmware updates as long as we own our Oliver. I cannot stress enough the pride this company takes in their work. As I think most would agree, Victron components are a class all their own and leaders in the Marine and RV industry. Post install, we have on board 600ah of lithium battery power, and with our extra 90W Zamp panel now configured to lithium, we have approx 410 watts of solar. This will certainly give us more options on the roads less traveled and boondocking. Still lots to learn on this new system. Now having the 12v DC -DC charger I don’t think we will see a need to carry a generator any longer. Thanks to all those on the forum who made the Lithium upgrade happen. ⚡️ The information gleaned here helped me decide the direction I wanted to take this install. ⚡️Happy Camping and Safe Travels! ⚡️ A few install pics- The Victron GX 70 touch screen fit the existing opening with no cutting or trimming of the fiberglass. Our system at a glance. The touch screen nice option if no cell service is available for the Victron app. Although with our SL mini that’s not an issue. Very happy with the touch screen and the Victron app. We can set the screen to time out at 5 or 10 min or longer and then go dark for sleep mode. Zamp 90W suitcase. 12v DC to DC Andersen connector. On our way home we camped at Cumberland Mountain SP in Tenn and gave our new system a shake down. It’s nice to not have to plug in. 😊
1 point
-
Epoch Lithium Battery Storage Info- I reached out to Epoch Battery Lithium battery customer service (Stockbridge, Georgia) regarding our recent install of (2) of Epoch 300ah (self heating) batteries in our OLE2 and correct SOC during short term winter storage. They responded quickly and this is the guidance they provided. This information is for anyone that now owns or is considering a swap at some point from aging AGMs over to Epoch 300ah batteries. Epoch recommends 1-6 months in storage a 50-70% SOC. Epoch does not recommend leaving the batteries plugged in 24x7 via 30amp power and maintaining the batteries at 100% SOC during storage months. Just passing it forward!
1 point
-
I hear you for sure. But as an ole brown shoe engineer I beleive that glittering glossy covers don't often meet well with realities of life. Said differently: There is now no doubt that the Ceibo will work with the remote control systems listed. It matches the IR techonology and that is a given. What it does not say is that the functioning of the system "Will Do No Harm". So the real question that it does not answer is: Was the start/stop impact of the Cielo system cause any harm to the A/C in the process? I would bet a $1 Cielo did not test 175 AC brands and at least 4X that all models of AC's to make the case. Hence my Wait and See approach. Yep, I'm ole school for sure. But I'm not from the "Show Me" state, but love their motto! GJ1 point
-
IMHO: YES! A master switch and a fuse is recommended. That said, MANY of the OE2's were wired with 4/0 AWG with a 300 amp fuse from the factory. I am running three 100 Amp Battleborns using this set-up with zero issues. Your max load with the 3000W Xantres will likely be less than my 3000W Renogy. I believe the Xantres is more efficient than mine. GJ1 point
-
Thanks for the post. Under Houghton it shows the below T-Remote. This is the same remote used by their 3400 Houghton (Low Profile Not Ducted: The one several of us are running) as well as their 13.5 KBTU ducted unit (Not low profile).
1 point
-
One can easily find out if the Cielo is comparable with their a/c by way of its remote. I did see that the Truma Aventa remote is compatible and there was one Houghton remote, as well. The following is from the Cielo website: Device works with more than 175+ AC brands covering 1800+ remote controls. To check your air conditioner’s compatibility with the device, go to the following link: http://remotes.cielowigle.com/and choose your brand and remote model number.1 point
-
I share your frustration. The product very cleaverly SOLVES the humidity issues, and gives owners greater flexability in operation of their A/C as well. However, there likely are more than a few reasons for the majority of owners to "wait and see". A big one, as I posted in the previous thread, is not knowing how numerous hard shut down and restart cycles per hour will be tolerated by the existing control boards out there. Or probable warranty impacts on new units. Not being able and willing to mod their unit as some have done with the Houghtons for about $50 in parts. Not wanting to add another complicated device in their lives. Not being able to install the device, or trouble shoot it should it fail. My hope is that manufacturers get the message that they need to provide the remote T-stat and fan control features as standard features. Oh, and in my dream state, design the units to be able to use an internal condensate drain system! Please don't wake me up. GJ1 point
-
I agree that the small plenum area is a root cause of noise from most RV a/c units. Why? It precludes space for proper turning vanes and insulation as you stated. I also agree that the outside portion of the noise is not a prime concern for newer designed units as we are seeing now on the market. But for the 95%+ of the units that are still out there hammer milling away... their uninsulated and non-vibration isolated designs certainly do make inside livability an issue. While on our month long Florida tour this past October, in Key West we were parked for a week next to an older Casita. Their ancient A/C noise inside our OTT was distracting. I could only imagine what it was like inside their trailer. But then I suspect due to their hearing aids it likely did not impact them at all.....1 point
-
Amen to that! Not doing the check and moving Ollie ultimately will make you cry....1 point
-
I felt the same way with the Houghton. But learned that it appears that over time the remoted thermistor and unit would track actual cabin temperature much closer than I thought. Try selecting a temp and let it run for an hour and then check the accuracy with a reliable thermometer. What I had been doing was making changes to the setting and expecting to see a result soon. Would love to know how they do that.1 point
-
Thanks for the additional coaching. The good news: the jack is stuck in the up position / no manual cranking needed. Mossemi, thanks for the location/pics of the jack fuses. I'll think good thoughts and hope its just the fuse.1 point
-
Like BIll, I don’t know of anyone who has moved their switches. If they are in the back you would be able to monitor the jack on that side but not the other side. I prefer them on the front so I can use the bubble level on the front jack to get the trailer approximately level. I’ve found that when retracting the jacks I estimate about an inch per second, then I do a visual check before finishing. Mike1 point
-
Although you likely have an electrical-related issue, the stabilizers jacks can also be manually operated.1 point
-
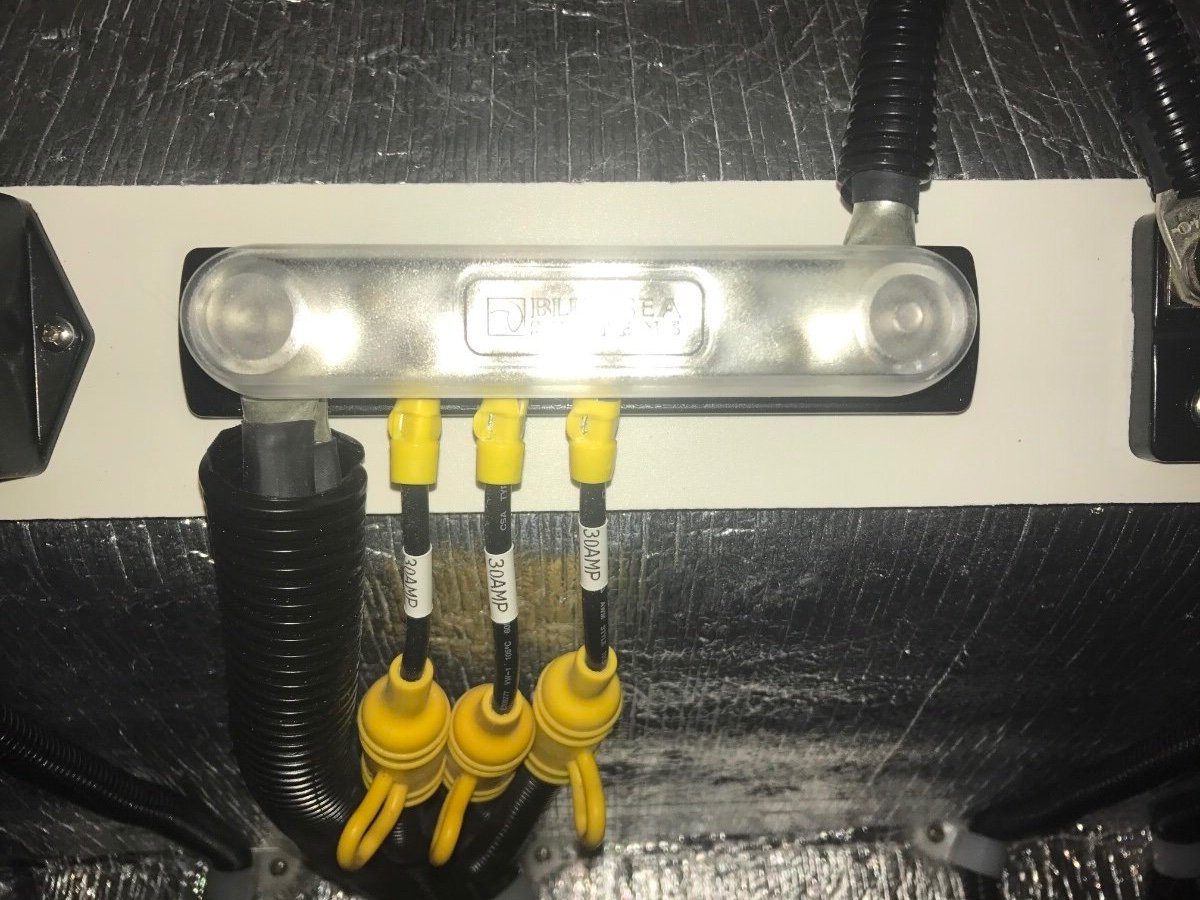
@taylor.coyote This picture is from below the front hatch under the street side bed of my 2017 LE2. The yellow fuse holders are for the 3 Barker jacks, 1 for each jack. There are 2 fuse holders for the front jack, 1 under the bed and 1 outside by the front jack. Good luck, Mossey
1 point
-
“We previously owned an Overland Trailer (which had a Max Air fan). We experienced a voltage issue so I had the Orion-Tr 12/12-9 installed to stabilize and maintain 12v power to the fan. Now I do not have to be concerned about possible spikes or a malfunctioning control board. Max Air Fans operating above 13.8v can damage the fans control board. This will prevent damage to the sensitive control board.” I also had read about this issue with the Maxxfan control board around the time I changed my batteries to lithium about four years ago. I added the Drok buck/boost circuit to run both the bath fan and the Maxxfan and suggested using the Drok circuit for anyone with lithium batteries as a safety precaution. To my knowledge all other “12 volt” appliances are designed to withstand over the typical lithium battery voltage without any issues.
1 point
-
Our rear streetside jack stopped working during a trip a couple of years ago. First checked the fuse as Ron suggested above, but it was not blown. Next, checked the wires at the switch. It turned out one of the spade connectors had come apart. Reinserted the connector and checked the others. Haven't had a problem since.1 point
-
Removed the wash cloth rack to re-attach the heater vent hose when the 12V water pump LED indicator light connection broke off inside of the LED. Checked with Mike at Oliver Service and he said they have not installed that LED for years and did not stock it. He said he could source it for me, but I found a replacement on Amazon. Ordered and installed an 8MM 5/16" IP67 Waterproof 5-24V LED indicator light package of 10 with various colored LEDs for less than $11 during Black Friday sale event. https://www.amazon.com/dp/B0B41ZC73G?ref=ppx_yo2ov_dt_b_fed_asin_title&th=11 point
-
Here are my thoughts: edited- We previously owned an Overland Trailer (which had a Max Air fan). We experienced a voltage issue so I had the Orion-Tr 12/12-9 installed to stabilize and maintain 12v power to the fan. Now I do not have to be concerned about possible spikes or a malfunctioning control board. Max Air Fans operating above 13.8v can damage the fans control board. This will prevent damage to the sensitive control board. The black plastic board material used to secure all components is called Starboard or Black HDPE and I can tell you it’s super tough and used in Marine grade applications. Inverter Services uses lots of this material during their installs. Here - https://www.amazon.com/gp/aw/d/B08M6DJNH4/?_ Open Source info on Max Air Fans- *** MaxxAir fans are designed for a 12 Volt DC system, operating within a voltage range of approximately 10.6–13.6V, with an optimal test voltage of 12.8V. Operating above 13.8V can damage the fan's control board and void the warranty, especially if the system is charging. To prevent issues from voltage spikes, a DC/DC voltage regulator is recommended for stable power, especially when the vehicle's charging system is active.1 point
-
@Patriot I have a couple of questions about your Victron/Epoch installation. Do you know what the black material is that they used for mounting the Victron equipment and Andersen connector? I also noticed that you have both an Orion XS 1400 DC/DC charger and an Orion-Tr 12|12 - 9 DC to DC converter. You mentioned that the Orion XS 1400 DC/DC charger was part of the lithium upgrade, so what is the purpose of the Orion-Tr 12|12 - 9 DC to DC converter? Mossey
1 point
-
I found a thermisor with a 10' lead. I used all of it for the route that I ended up using. It got me well away from the unit and out of the airstream of the plenum. Your test is limited by the length of the existing thermisor. None the less if you shield it from the airflow it will increase validity of the effort.1 point
-
I have noticed that some sensors (both temp and humidity) are more sensitive than others, so despite the calibration I still see a slight variation in readings between devices.1 point
-
My take away from the above is that the current distribution box (Plenum) does not effectively allow good control of airflow in different directions, and that the air flow velocity is excessive out the 1/3 section that does work. I've seen several different inside plenum's and they are pretty all passively turn the air flow and discharge it into the cabin. Noise is directly attributed to that from the over roof section and the noise generated by turbulance in the plenum itself. It would be worth a try to place about 3/8" of washers between the ceiling and the plenum at each securing screw locaton. (You may need longer screws to do this.) Doing so would effectively provide a 3/8" gap all the way around the unit. Some portion of the supply air will exit via that gap. This extra air supply path will (hopefully) slow down the air velocity as the air transits into the cabin. That in theory reduce the noise associated with the current design. GJ1 point
-
John, Under the rear street side bed right where the former Xantrex 2000 was installed by Oliver. A custom platform was added to secure the longer a heavier Victron Inverter/charger.
1 point
-
Restricting airflow creates noise. Just like when you restrict the nozzle of a hose it creates noise. We'll have to look at a way to open up the air handler to increase airflow across the register! Good news is, it's just the air handler! Outside sound is likely much quieter than standard compressor models, and inside & out no compressor ONs and OFFs. And when the manufacturer redesigns the air handler, it's a low cost part with little effort to replace.1 point
-
Yep, it would have saved me more than an hour if it were installed correctly.1 point
-
That's another thing I should have added to the "not so good" list- the fan speed noise doesn't seem to change much between the low-med-hi settings. Maybe it was something I was doing wrong? I'll look closer at this when I'm using it over Thanksgiving. Also, I don't think adding foam between the two who do much since it's not vibration causing the noise, but who knows? I really think the air channels in the cover need a redesign to fix it, especially since airflow is only coming from a 1/3 of the register openings. That alone has to be creating some extra noise. Will definitely be experimenting! In the end, it's not horribly loud, but Just a little quieter would be icing on the cake!1 point
-
Congrats CRM on the install. Looks like a nice unit. My Tosot install was very similar with just the power wires, but with mine the gasket removal was much cleaner. I think whomever put that old Coleman on accidently flipped that seal on install. The sticky side is supposed to be on the AC unit. Makes a mess for you when swapping out the way they did it. This was mine right after I removed the Dometic. Hopefully, John's is like this. I just sprayed it off, then gave it a quick buff to clean it.
1 point
-
I’m one of those where sound level matters, being a lite sleeper! Before installing a soft start on the DPll, I was constantly awakened with each load thud of the compressor cycling. The soft start made a huge difference regarding that issue, but the noisy fan was still an extreme annoyance. While reorganizing a storage bin recently I found these lurking in the shadows, made the hair on my neck stand up! Hard to believe I didn’t think to purge them from the Oliver a long time ago; oh well …… out of sight, out of mind.
1 point
-
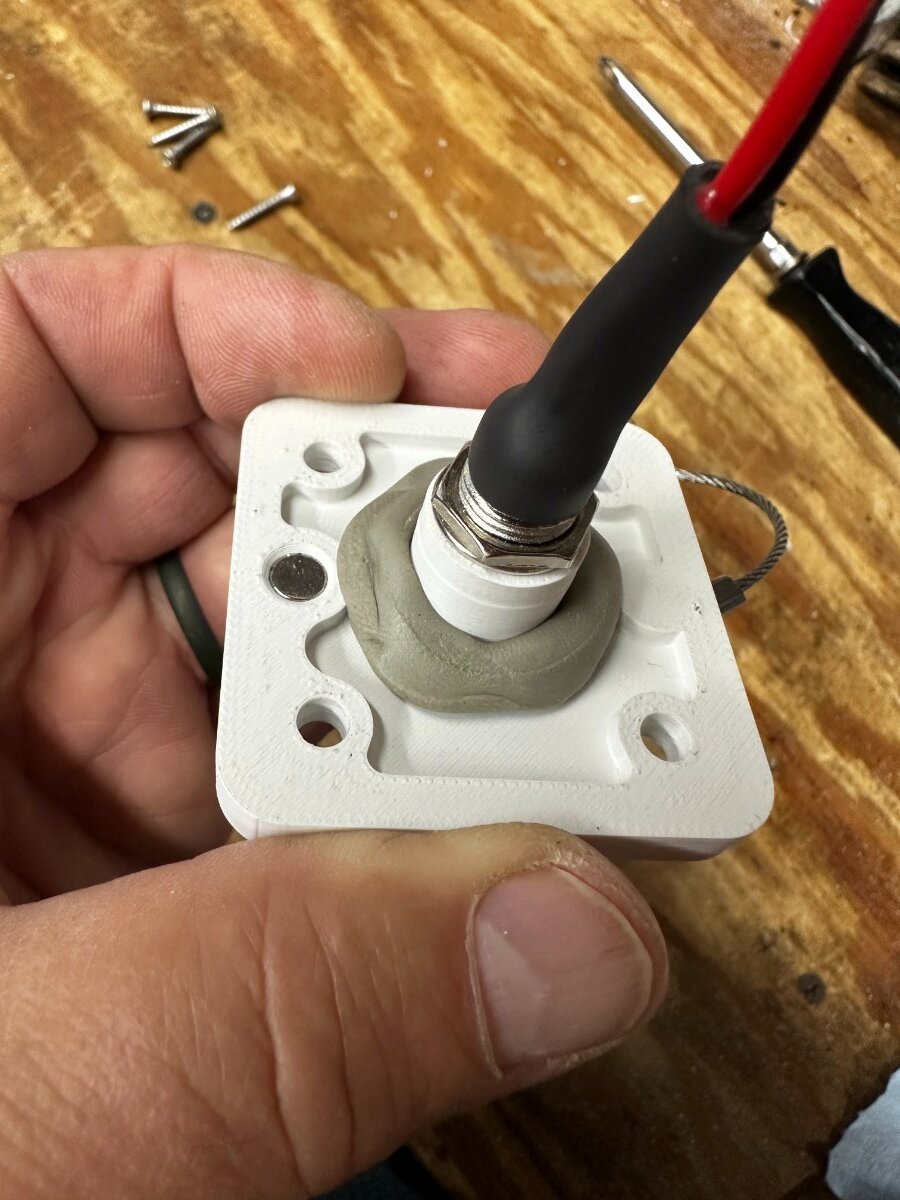
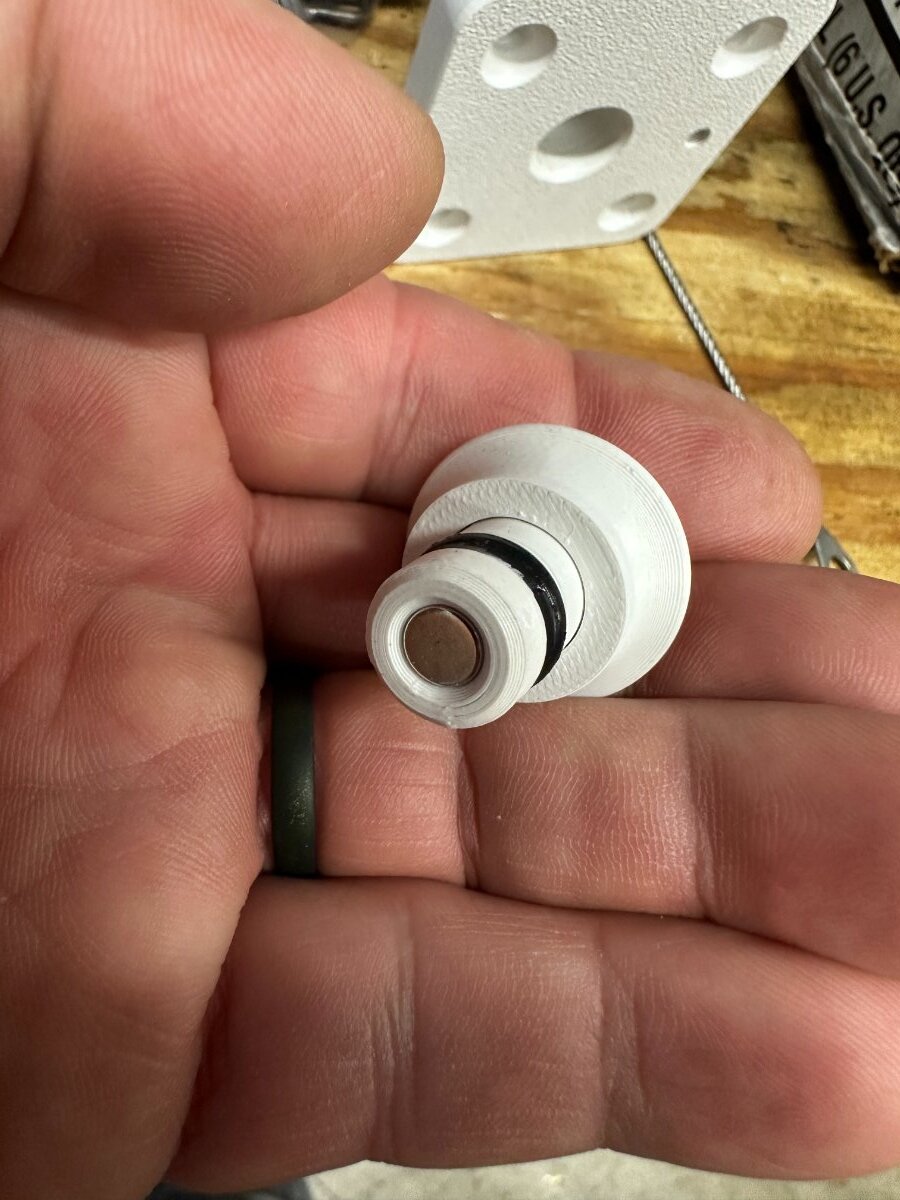
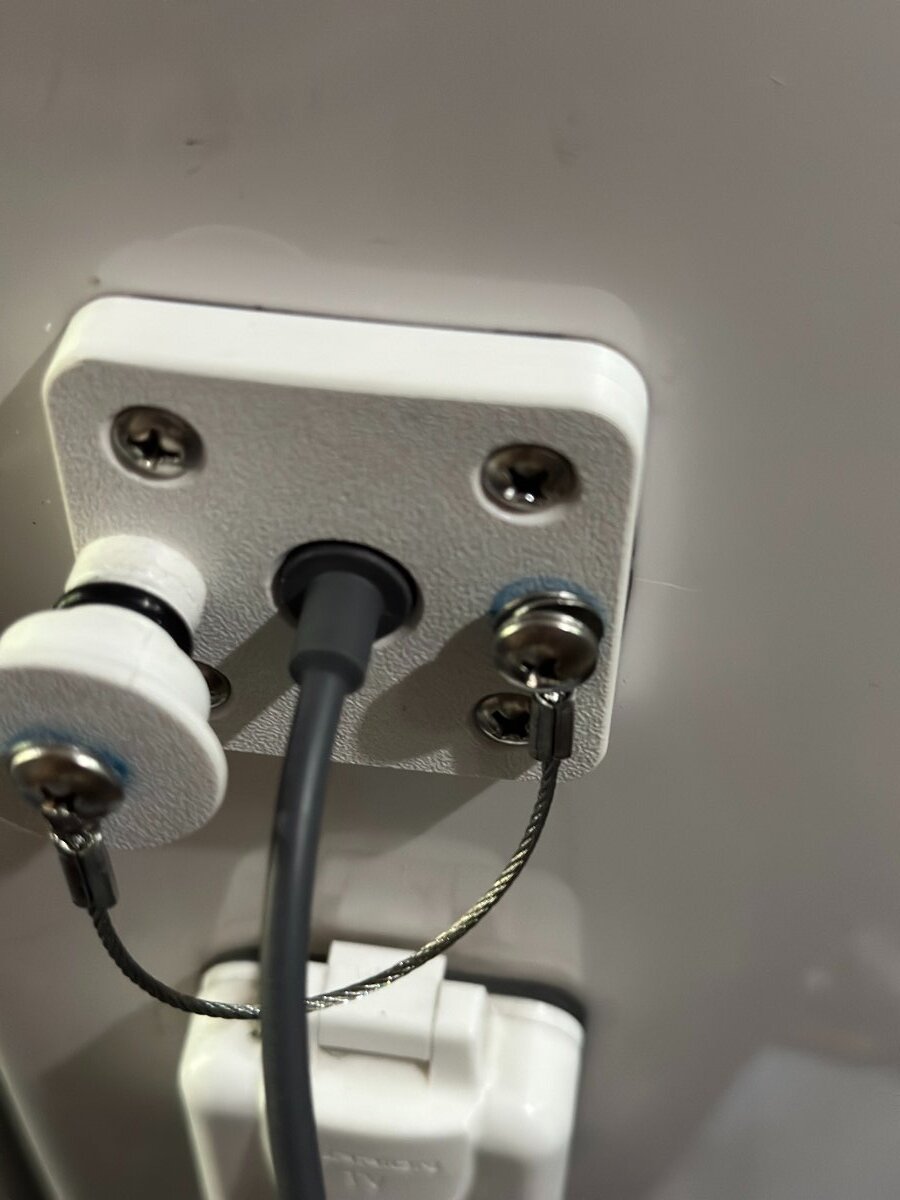
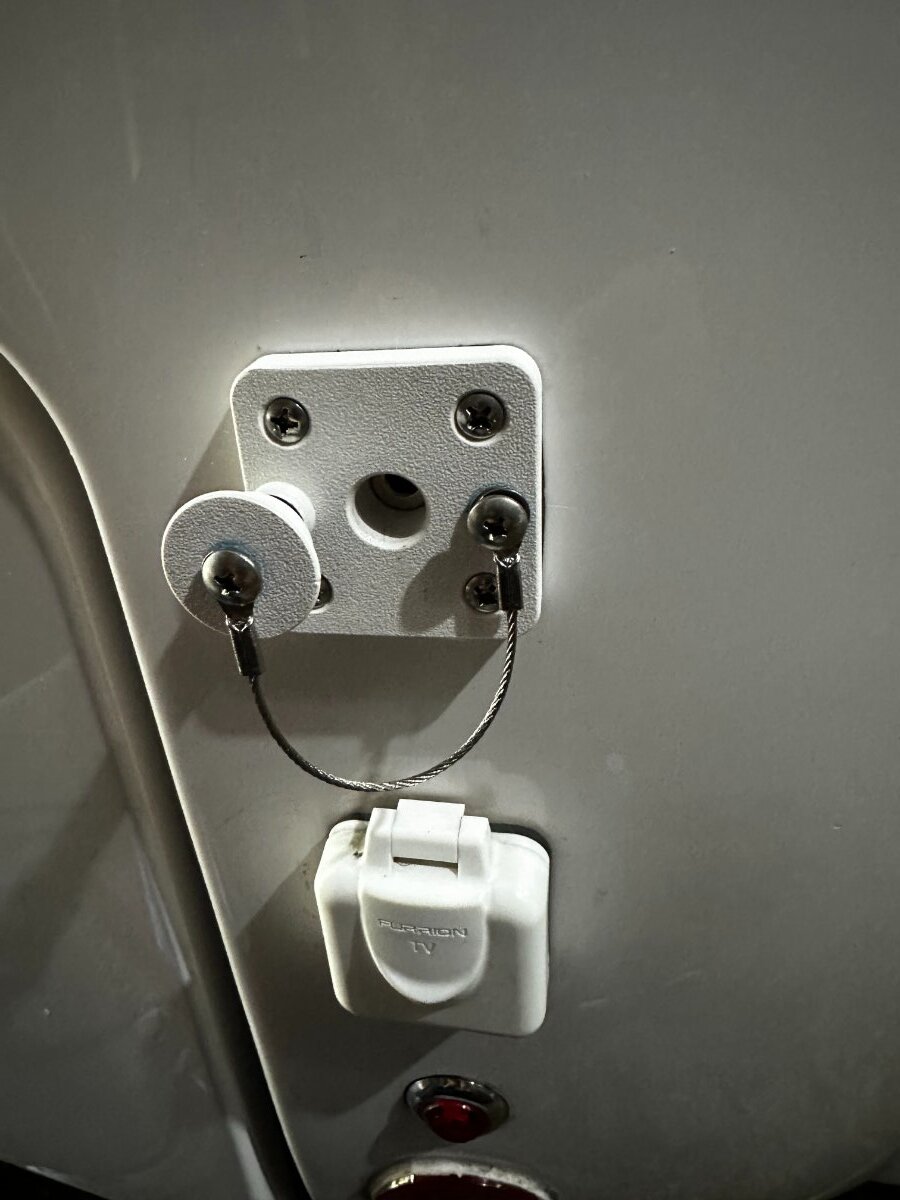
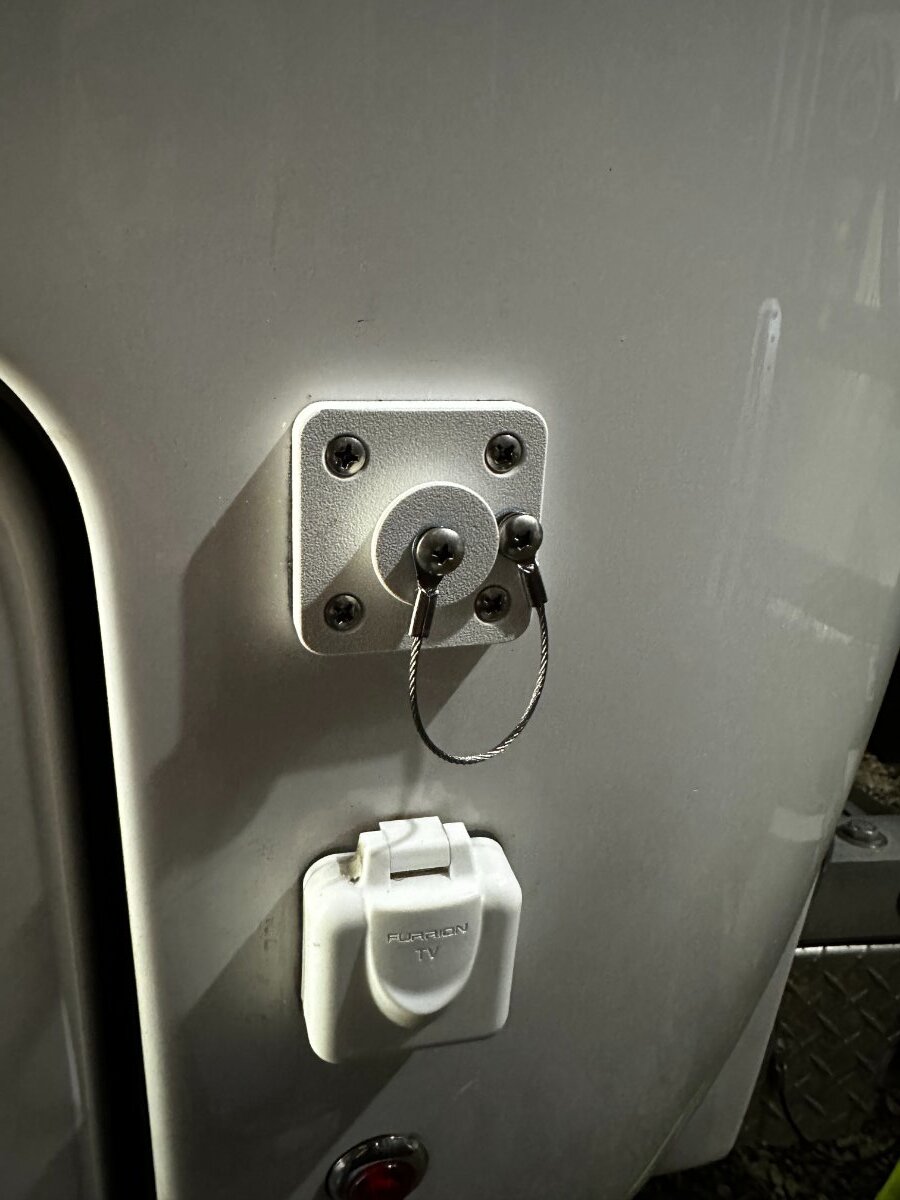
Going back to Geoff's original post on this thread, I did this (except for relay) and it works great but have been concerned about water penetration at the exterior socket when Starlink cable is plugged in. I have swapped mine out for a water-resistant component custom designed and made by Tom at Platypus3DDesigns in Mesa, AZ. Although the original socket worked great, it was not water-resistant so I asked Tom to create one that would replace the Furrion Mini TV/Satellite Inlet. Here is the link to his component. https://www.etsy.com/listing/4349330543/starlink-mini-dc-cable-pass-through It has 18 gauge wires attached and a magnet that holds the cap in. In addition, he adds another magnet on the side that can hold the cap when not inserted. I asked for a modification so I could add a lanyard. Tom drilled and threaded #8x32 holes for that. All screws and machine bolts were attached with blue Loctite. I was able to use the original Furrion gasket. I had to drill out the hole in the fiberglass a bit larger and I wrapped some butyl sealant around the barrel upon installation. Here is a link to the lanyards. https://www.amazon.com/dp/B0B4RXTKBH?ref=ppx_yo2ov_dt_b_fed_asin_title&th=1 To finish it off, I used a very small amount of dielectric grease on the cap seal and rubber fins on the Starlink cable end. Works great. David P.
1 point
-
You owe Mossemi a pop or two. These photos were taken while camped in some forsaken campground where (I'm sure) they had mosquitos as big as 747's and alligators and all things of that nature. 🤣 Bill1 point
-
These did the trick! Thank you very much!!1 point
-
Hope they help! Mossey
1 point
-
This schematic and information is from Barker's website and may be of help! Mossey vip_3000_all_pages.pdf
1 point
-
I asked service what was being used and the response was ASI 335.1 point


.thumb.jpg.e34bf01ef7f7d5e99ad31856d45afbeb.jpg)


-
Recent Achievements
-


")


")


")

