Leaderboard


Popular Content
Showing content with the highest reputation on 01/19/2023 in all areas
-
My son and I completed ceramic coating our Oliver Elite II Hull#1240 and I posted some pictures on the Facebook group and was asked to provide a list of products we used in the process. So instead of just pasting a long message into the group I decided to create a separate document that could be used as a reference. So I'm posting it here on the Forum for those who may be interested in DIY Ceramic Coating. I hope others find it useful. Thanks, Martin Oliver Elite II Hull 1240 Ceramic Coating Reference.pdf11 points
-
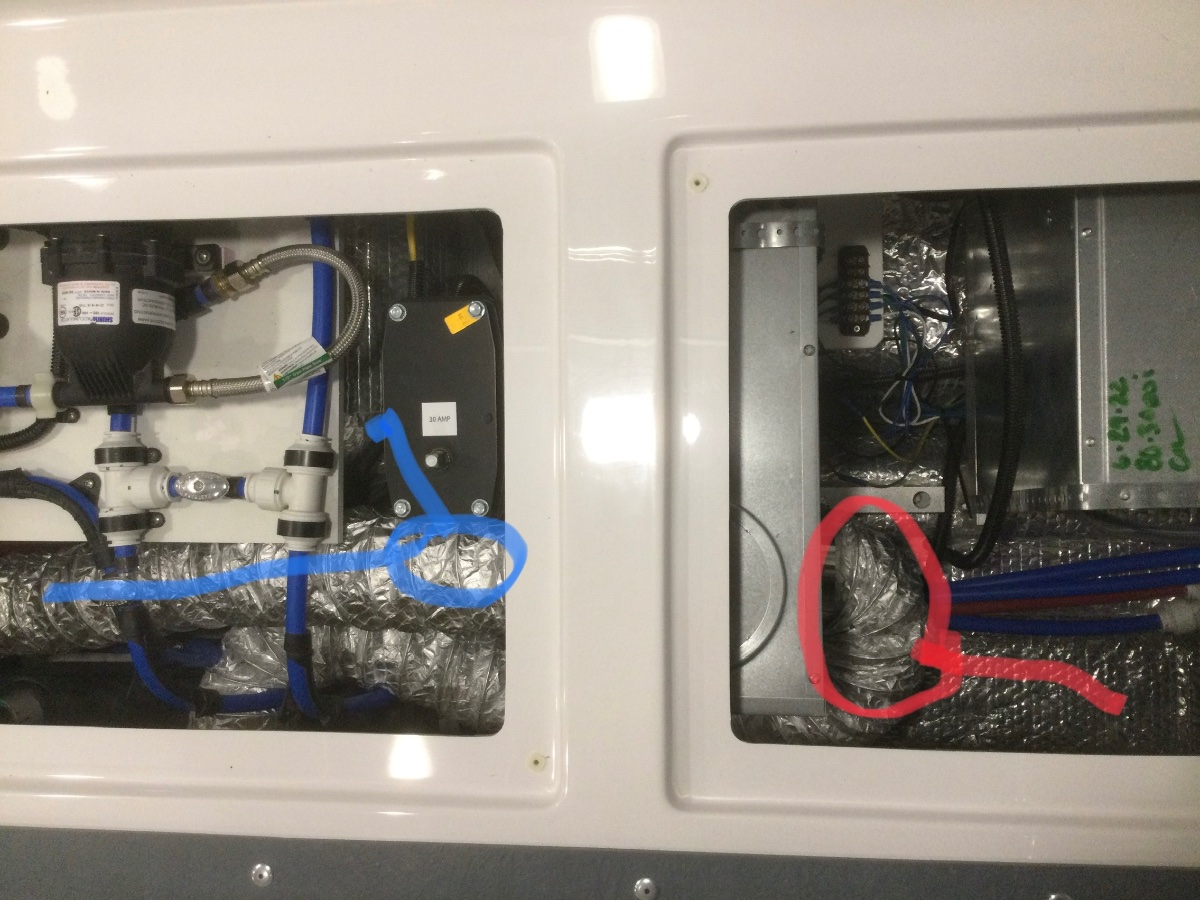
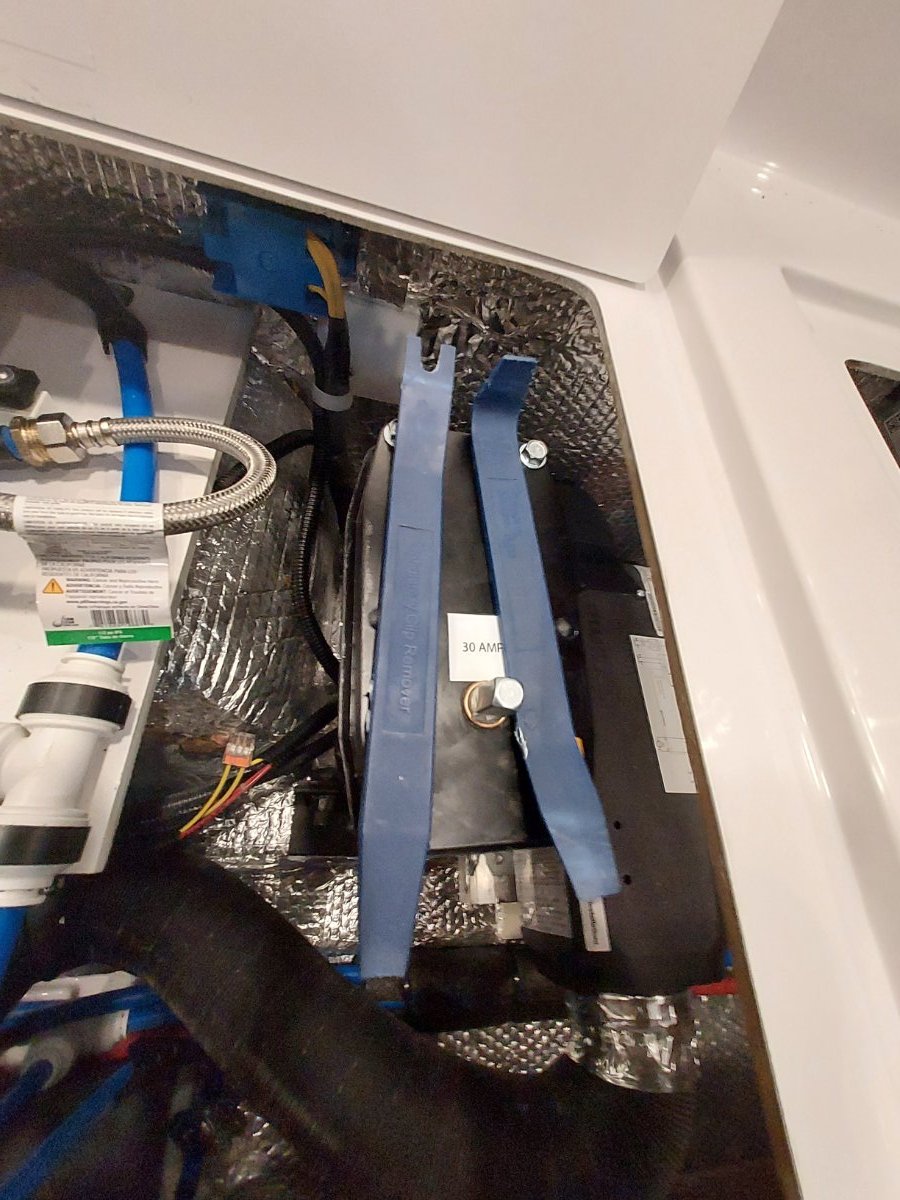
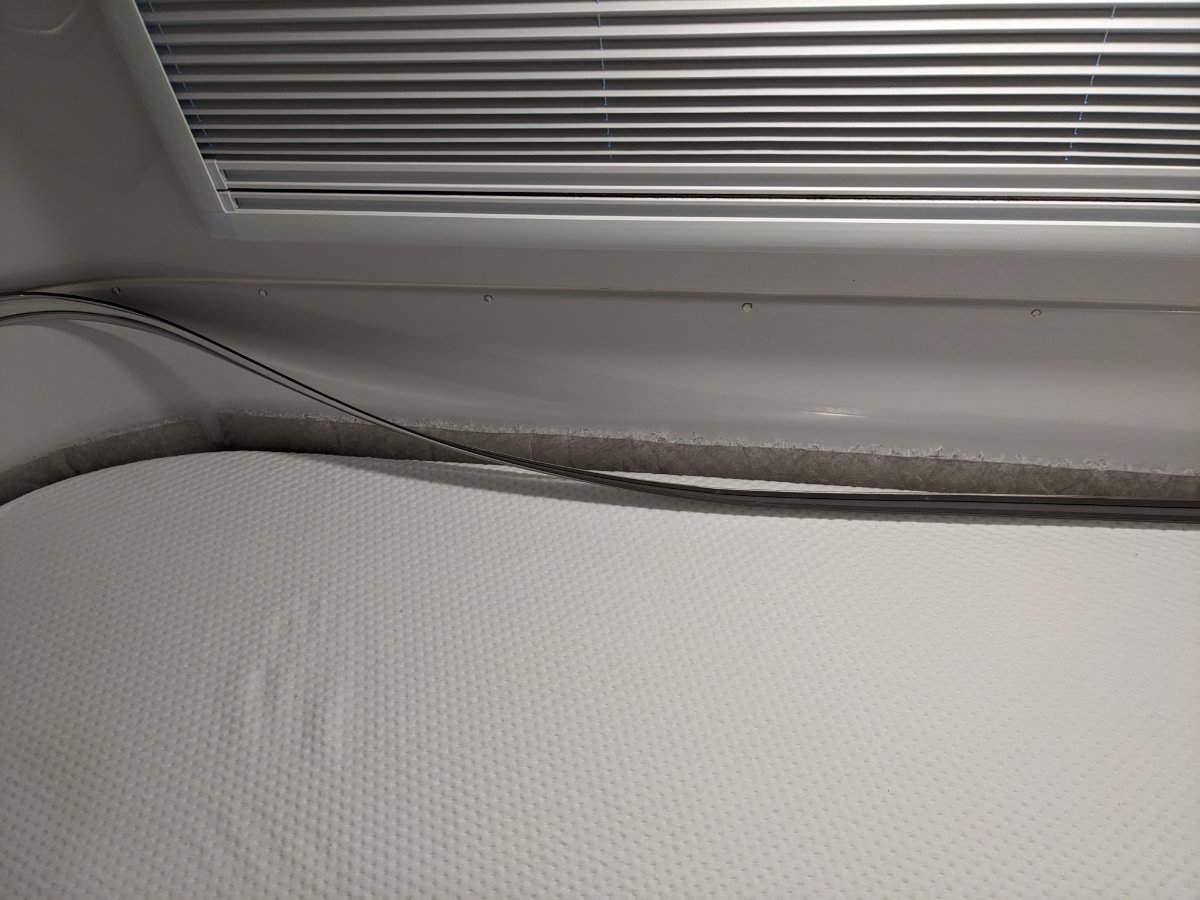
I switched the supply lines around. The red line is now connected to the defuser under the bed from the right side of the furnace. It is a very short line about 3 feet in length from the furnace directly to the defuser. I disconnected it from the left side of the furnace and re connected it to the right side of the furnace. Then I shortened the other blue line by almost 2 1/2 feet and connected it to the left side of the furnace so that runs to the bathroom. The red line makes a tight 180 degree turn more than I would have liked but that’s the amount of line that I had and it may provide a little resistance to the air flow which is a good thing. I’m amazed at the difference it made in the bath room. Its hard to calculate the difference but It’s at least 3 time as much heat coming out of the bathroom defuser than before. And the other two defusers seem to be putting out just as much air. See video. Bill IMG_0165.MOV
 4 points
 -
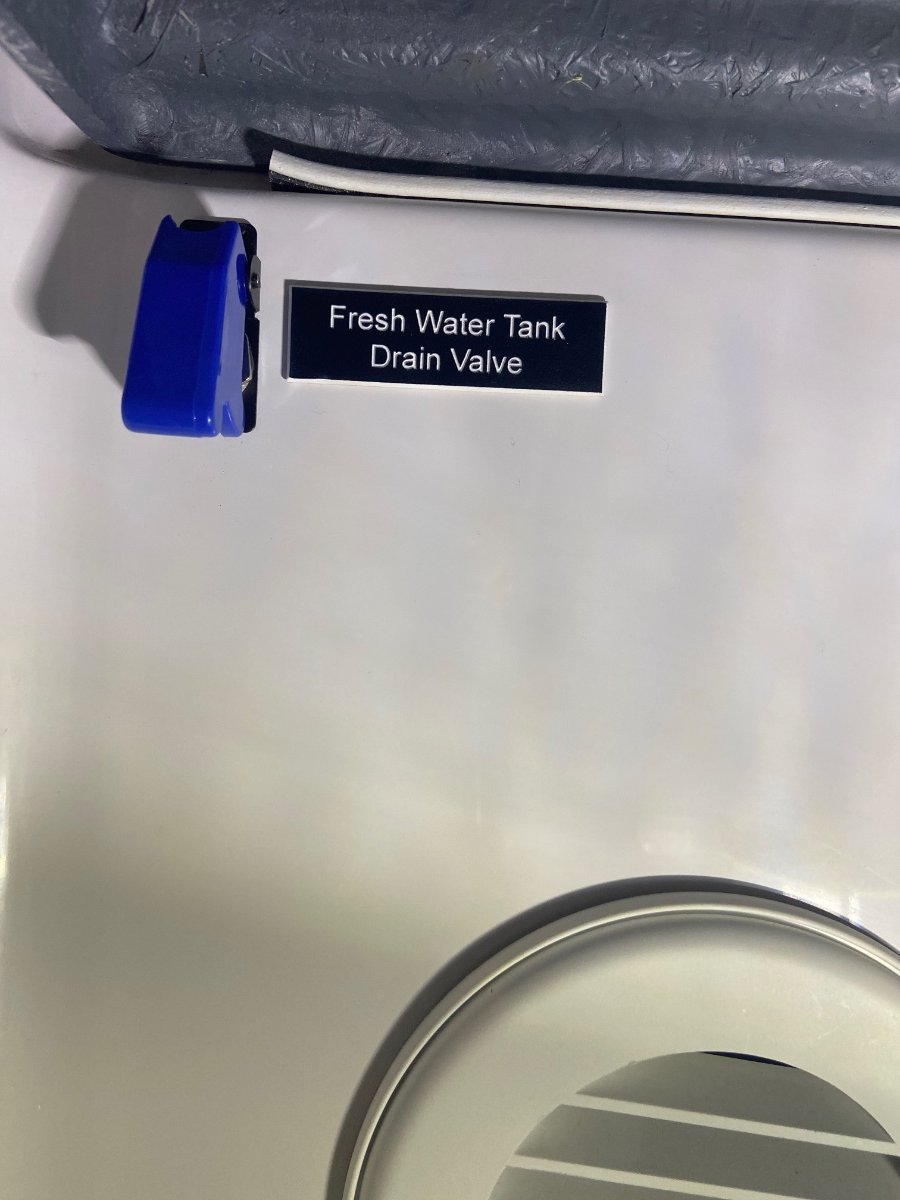
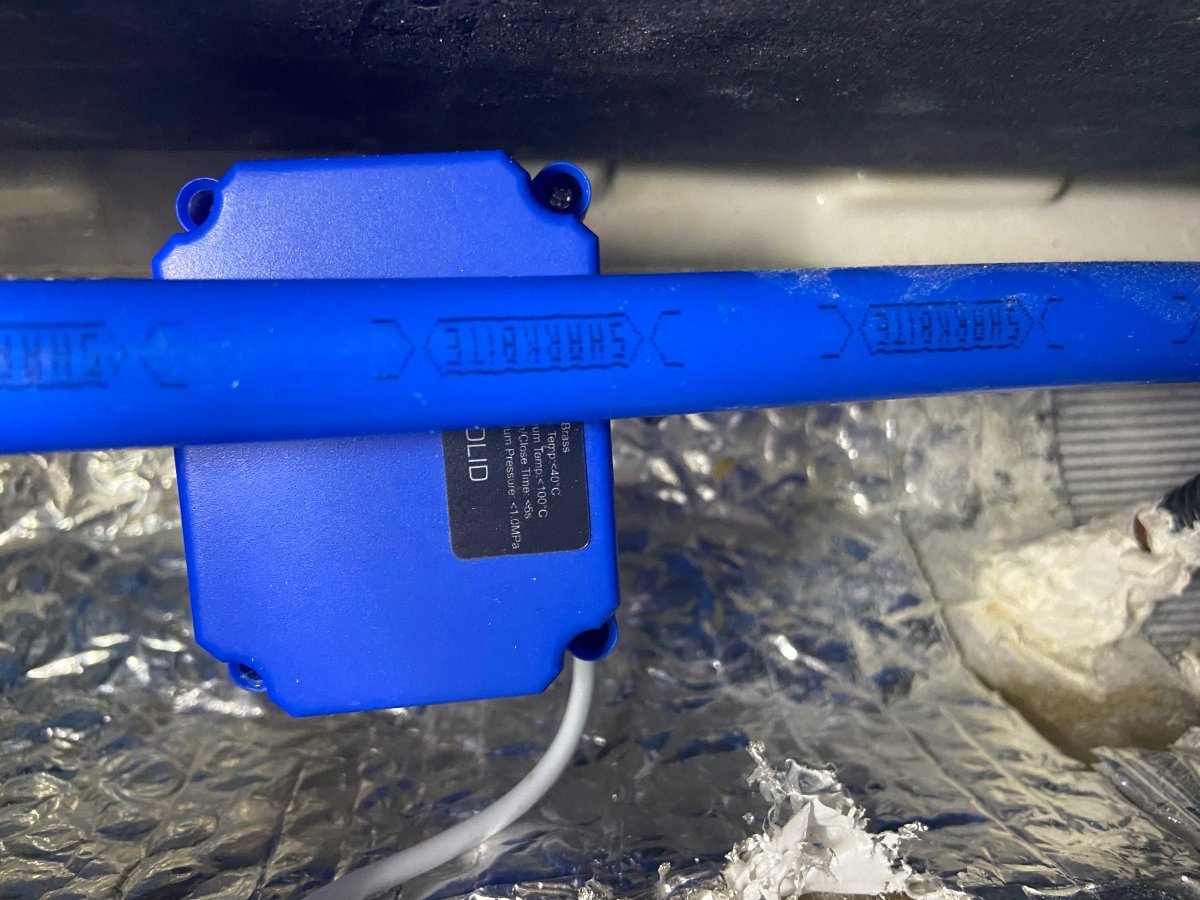
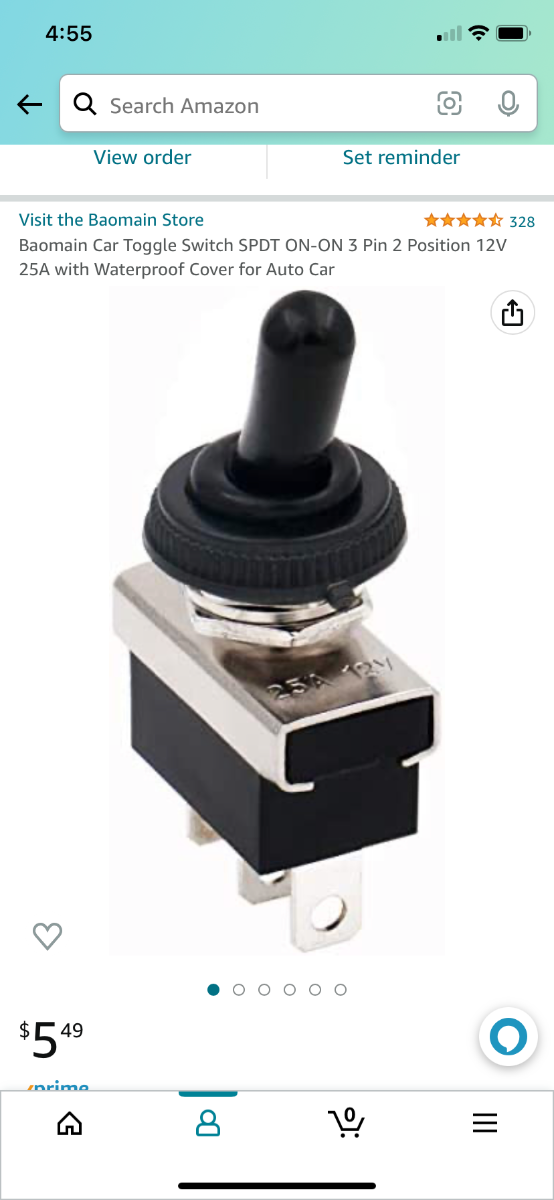
I found accessing the fresh tank drain valve in our Elite I quite cumbersome since we leave the bed set up 100% of the time. We have the optional latex mattress which is heavy and awkward to move. So, I copied what others have done and installed an electric valve operated by a toggle switch. Works beautifully! BTW, when I removed the manual valve and inspected it, I saw a large piece of plastic debris wedged inside. Probably explains why it took so long for my tank to drain. Used the US Solid 3 wire electric valve and SPDT on/on toggle switch with flip cover to prevent accident activation of valve. All parts purchased through Amazon.
2 points
-
Cool! I mean warm! Is there enough room at the rear connection to use one or even two adjustable hard elbows? I fear for your flimsy flex duct… https://www.homedepot.com/p/Master-Flow-4-in-90-Deg-Round-Adjustable-Elbow-B90E4/100033952 Do you have enough return air from the bathroom? John Davies Spokane WA2 points
-
Renting out my Oliver is not going to happen.2 points
-
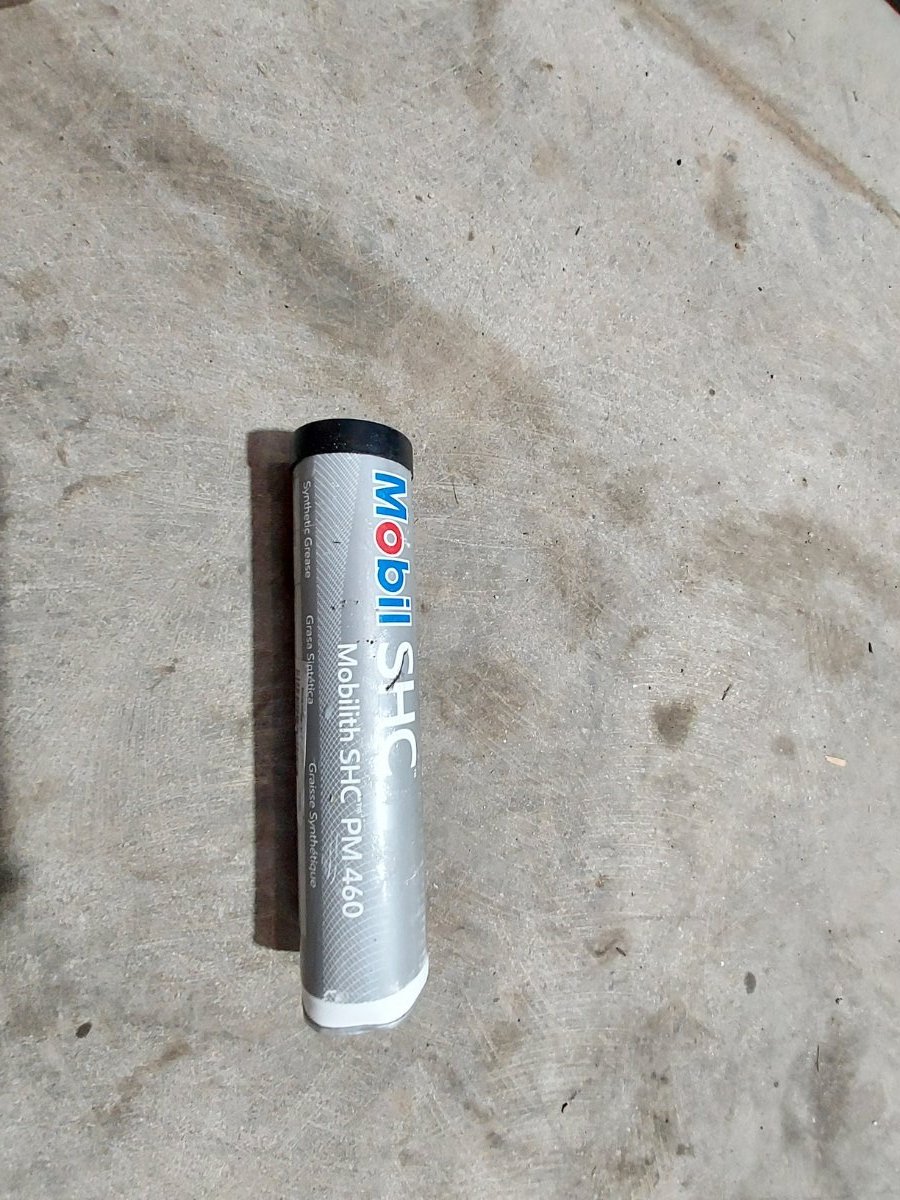
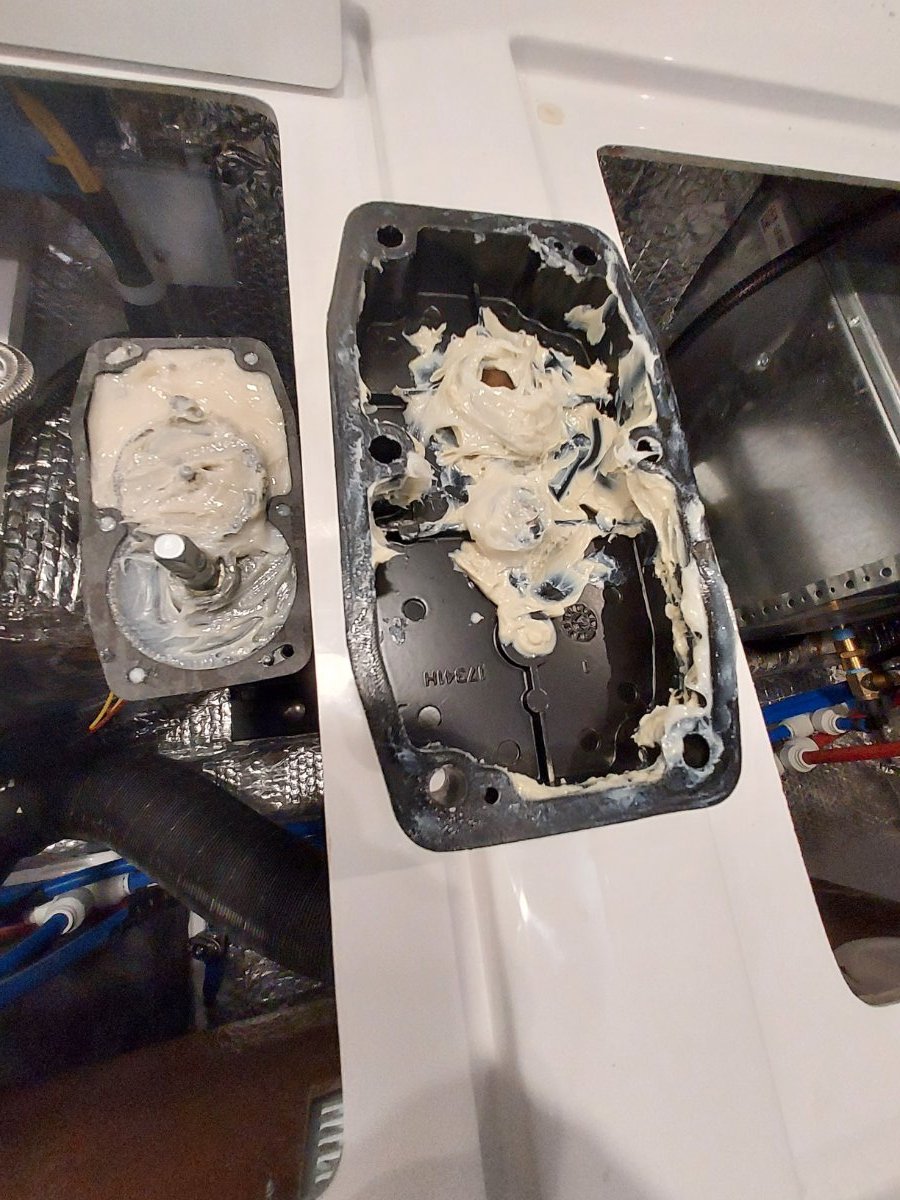
I also have high regard for John Davies' expertise, and his judgment on mechanical matters. I offer this post detailing the way I addressed jack re-greasing, deviating a bit from John's instructions, in case it is helpful to others performing jack maintenance. Knowing that the manufacturer, Barker, may not have properly filled the jack head casing with grease, I determined to follow John Davies' recommendation in this thread to open up the jack head casings on our two-month-old Hull #1291, remove the OEM grease and replace it with Redline CV2. That task turned out to be doable, but not easy. I followed Jason Essary's instructions here: He says to just tap the cover of the head casing, then lift it off. Jason warns not to use a slothead screwdriver or pry bar, to avoid damaging the mating surfaces. That worked for the front jack and the street side rear jack, but not for the curb side jack. After tapping with a deadblow hammer, with increasing intensity for about 10 minutes with no luck, I resorted to plastic pry bars, the kind designed to remove automotive trim panels. After another 15-20 minutes prying between the casing and the cover with the plastic trim panel tools, I eventually got the cover off. There was no damage to the steel mating surfaces, but the OEM gasket that seals between the jack head casing and the cover was torn in one small place. Fortunately, at the recommendation of Jim and Frances earlier in this thread, I had ordered a replacement gasket directly from Barker, using the phone number posted there. So, I was able to use that replacement gasket, rather than use Form-a-Gasket paste to repair the gasket, as John Davies did. The first photo below shows the plastic trim tools I used. The front jack already had plenty of grease, and the grease was fresh, of proper consistency and not thick, unlike what John Davies reported in his post on this thread. So I just put the jack head back on. But, after removing the covers on the two rear jack heads, I found that, although the grease was soft and fresh, the rear jacks had not been adequately greased. So, I proceeded to attempt to clean all of the OEM grease out of the street-side jack head casing, planning to replace it with Redline CV2. But, like Frank C, I found that it was a "pain in the rear" to get all of the old grease out. So, I "punted." As recommended by FrankC, I bought a tube of Mobilith 460, the grease recommended by the manufacturer, which I figured must be compatible with the OEM grease, and should not void the warranty, because it is recommended by Barker. Like FrankC, I concluded that given the limited amount of time the jacks get used annually (unlike wheel bearings), topping off with more of the manufacturer's recommended lubricant should preserve the jack mechanism just fine. The second photo below shows the tube of Mobilith 460, which is labeled "Mobilith SHC PM460." I then refilled the street-side jack head casing, and topped off the curb-side jack head casing with Mobilith 460. The third photo below shows the curb-side jack head casing topped off with Mobility 460. I followed John Davies' instructions in his original post here: Thus, I filled the jack head casing with Mobilith 460, and also added grease around the holes in the cover. Finally, I installed the gaskets and replaced the cover. The fourth photo below shows the cover back in place on the curb-side jack. I hope this will keep all three jack mechanisms "healthy" going forward. I welcome any comments or recommendations for doing this maintenance task better.
2 points
-
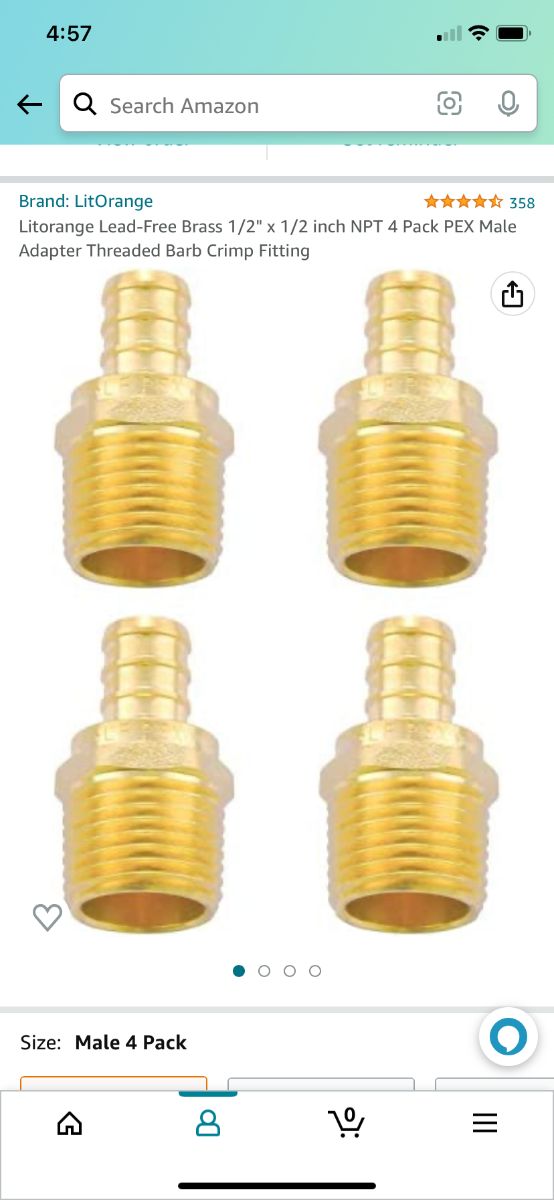
Here are screen shots of the items I purchased off Amazon. You’ll also need spade connectors to attach wires to switch. I already had those, but they too are available on Amazon. Also some hose clamps or pex crimp rings with crimping tool are needed.
1 point
-
Twenty years from now I will look like this guy sitting in the door of my 28 year old Oliver. Mike1 point
-
I do not use a buffer, nor do I recommend it (in my opinion). I do not want to wear down the thickness of my gel coat. I think that professional detailers are more experienced in the safe use of a buffer. I have owned 4 older fiberglass boats in the past and never used a buffer. (There have been other forum posts about the use of buffers and I think that a majority of the comments were from people that do not use a buffer.) On my past older boats, which had oxidation, I would use a fiberglass paste rubbing compound applied by hand with a lot of elbow grease and remove the compound by hand with a clean cloth. After removing the compound and clean the fiberglass, I would hand apply two coats of liquid wax, hand applied and hand removed. That process worked well. On my 2018 Ollie (which is left outside 24-7-365), I have never seen any fiberglass oxidation. I keep the Ollie outside during the winter. In the spring I wash the Ollie very well (sometime twice) and remove any remaining black water stains with the Meguiars 67 One step (liquid) compound applying it by hand and let it film over and then wipe it off with a clean micro-cloth. [The liquid compound is a lot less aggressive on the fiberglass that paste compound.] I then apply the Meguiars Professional Marine Wax by hand, let it dry, remove it using a micro-cloth and then apply a second coat of wax. During the summer I wash the Ollie as needed and if not shinny (but it usually is), I will apply one coat of wax. When putting the Ollie away for winter, I use my spring procedure. Over the years owning boats, I have used a number of different brands of compounds and waxes. Myself, I find that the Meguiars products are easy to install, easy to wipe off and holds up very well. Everyone will have their favorite products but after over 30 years of fiberglass maintenance, I like Meguiars the best (so far).1 point
-
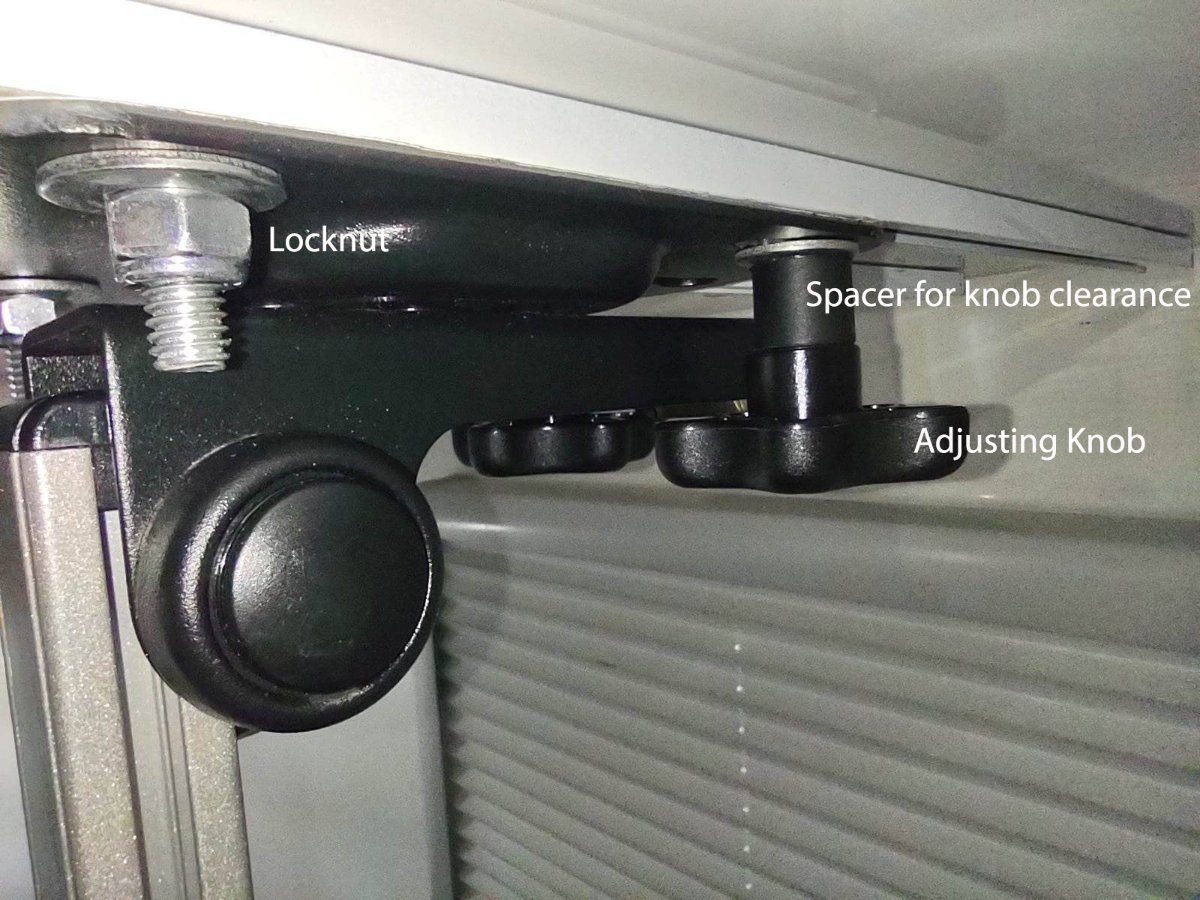
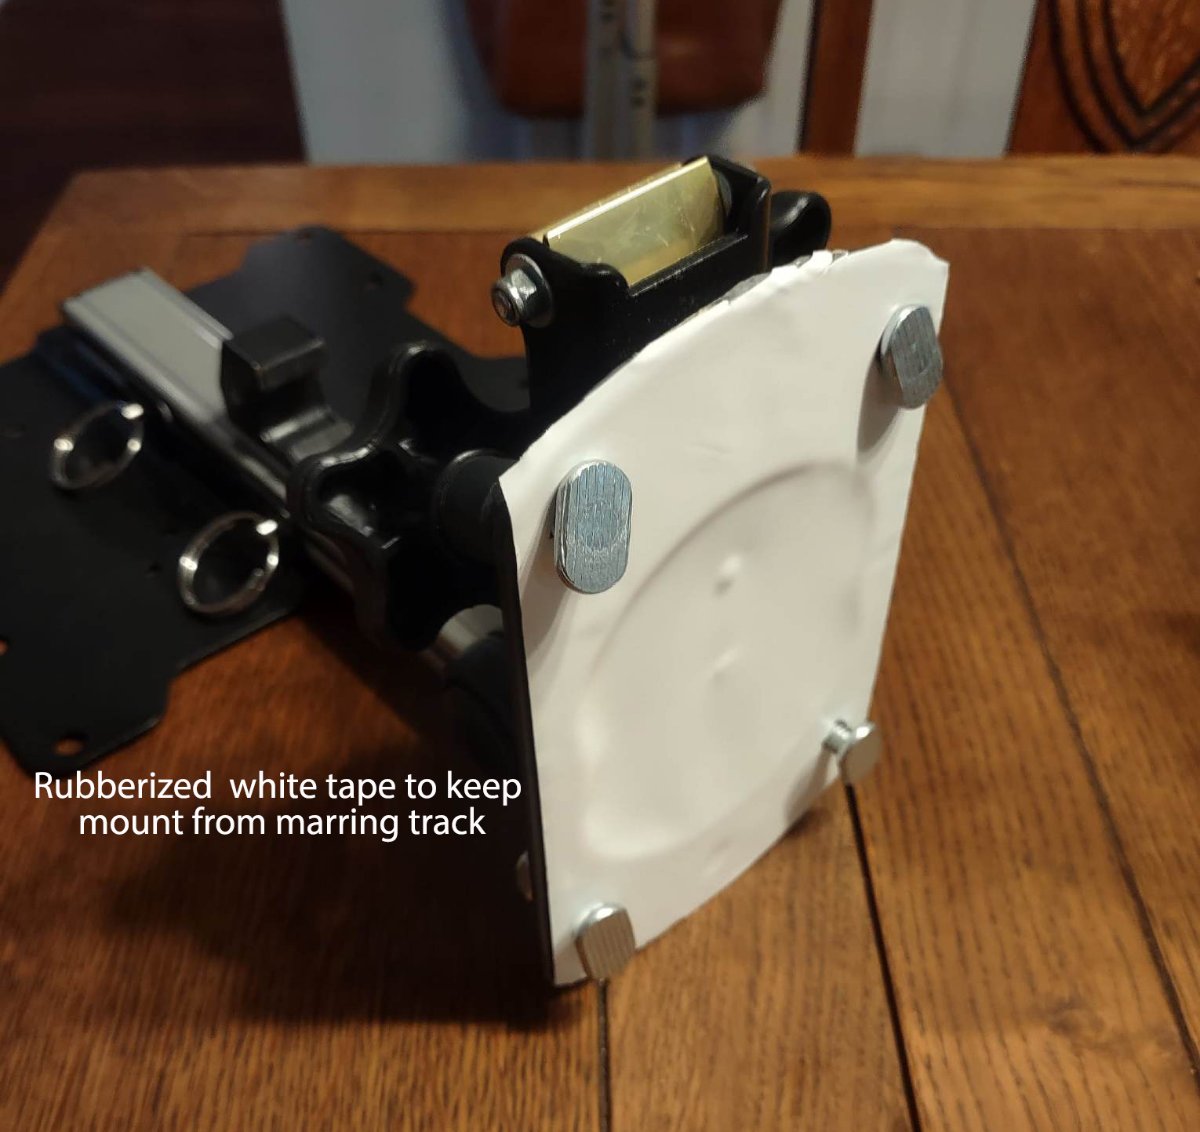
Some more pictures of the track mount that show a little more detail. Painted the track with white epoxy enamel since last pics and it now blends in much better. The locknuts in the front of the mount are only adjusted once when installing and the two knobs in the back are used to lock the mount in place while traveling and then left slightly loose while in use to allow the easy removal of the TV and access to emergency window. Used a 4" wide piece of white rubberized tape on the back of the mount to prevent marring of the track and add additional grip when traveling.
1 point
-
We rented a couple of trailers on-site at campgrounds before buying our first trailer. It was very helpful. However, we would never rent out our Ollie (or previous rigs). Too many clueless people out there and RVs are just too easy to damage.1 point
-
That Ollie of yours sure polished up really sharp! Thanks for the tips and all the valuable pointers! Patriot 🇺🇸1 point
-
Yes my original plan was to do that. But I wanted to see if it would even make a difference before I went through the extra effort . This took me about 10 minutes to swap the piping around to try it and it worked better than anticipated. Next step will be to clean things up a bit and most likely run rigid pipe where possible. Bill1 point
-
You're closest. 😀1 point
-
Should anyone actually consider renting their beloved oliver (i know i wouldn't, ) I'd check out websites like outdoorsy or rvshare, that provide insurance for the owners.1 point
-
It's probably easier for us to open the cabinets, as we have the old school sliders, but opening the cabinet doors does eliminate a lot of condensation, as @Geronimo John suggested. It's definitely worth a try. Could also be the low collection point of a tiny leak. Stuff a paper towel, preferably a blue shop towel, under the third tail light up on the attic, if opening the cabinet doors doesn't improve the situation.1 point
-
I have a Coleman 9.2k BTU in my Elite 2 and would replace with the same if/when it decides to give up on me. So far all of my camping has been in my home state of Florida and mostly during hot and humid weather conditions. Pretty much runs continuously on 90+ days, but always brings the temps and humidity down to comfortable levels within an hour or so of setup, and holds it for the duration. Uses around 10amps on AC and 16 amps on the 6k BTU heat strip.1 point
-
This just happened to us, too. Too cold to deal with now. Our first trip this spring will be to OTT for some other warranty issues. They can fix this while it's there. Will probably tack it up with painter's tape for the trip down. I'm assuming poor prep work is the culprit.
1 point
-
If the fan running while the compressor is off is the source of the problem, would it make sense to have chosen a smaller unit? Would the 9.5 BTU in an Elite 2 run the compressor for longer periods, removing more moisture from the air? I would also guess that the smaller unit running for longer would have a similar power draw to what the bigger unit would use running for a shorter time.1 point
-
Palo Duro Canyon in Texas is well-worth a stop. Not far off planned route in Texas panhandle.1 point
-
taylor.coyote, Beautiful photos and great info. It makes you wonder how those big horned sheep can survive in the desert. Patriot🇺🇸1 point
-
Contact service.....here is an explanation they posted in the same recall thread. Steve MDuncan Administrators 191 Author Administrators Posted June 23, 2022 This recall is for only some Oliver Legacy Elite travel trailers and does not include Legacy Elite II trailers. We will be notifying all impacted individuals by USPS mail and by email. If you print the attached document to have a service center inspect and/or replace your cooktop, please email Regina Rogers and let her know you have taken corrective action. Thanks! 1 2 Matt Duncan Director of Marketing, Oliver Travel Trailers1 point
-
Thanks John. David1 point
-
Our three kids always enjoyed camping when they were growing up. We tented initially then moved up to first a used pop up trailer, then a new pop up. I am looking forward to taking our grandson camping with our LE2. He just turned one so it won't be immediately. John1 point
-
A small can of compressed air is your friend. Just do not use that can and direct the air back into the propane jet. Dusty roads are not your friend as aren't bugs. Obviously it only takes a very small amount of dust to "gum up the works". Bill1 point
-
Mike, Great point, we use the half griddle as well. The full griddle is a no go as it reduces the heat in our experience. Bacon is usually micro waved and omelets are done in a nice skillet stove top! 😊 Breakfast is always hardy!1 point
-
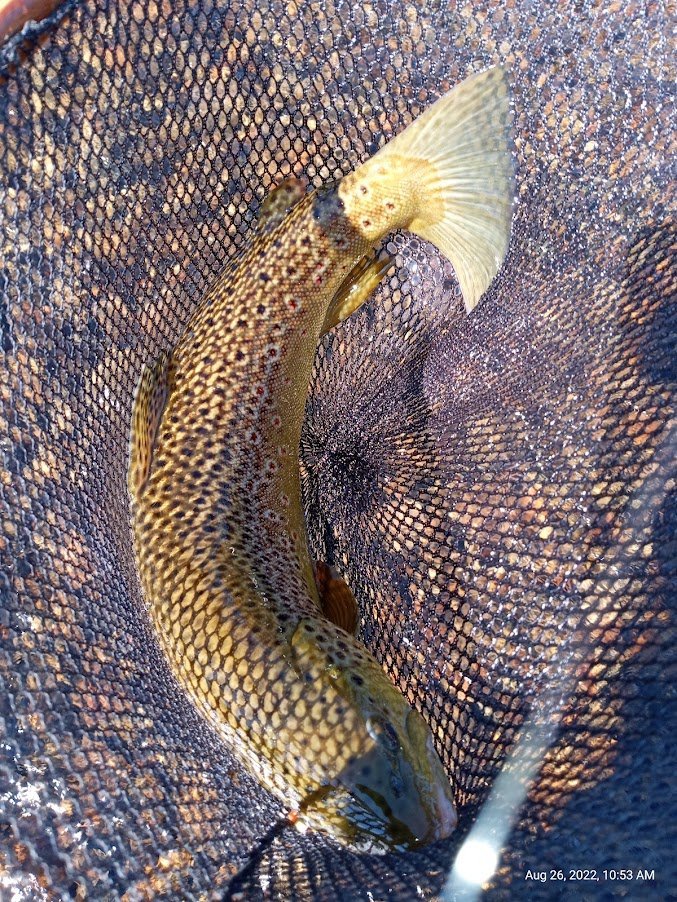
Finally - for those trout fishermen out there - a 17 inch fat brown trout.
1 point


.thumb.jpg.e34bf01ef7f7d5e99ad31856d45afbeb.jpg)


-
Recent Achievements
-


")


")
")
