Leaderboard


Popular Content
Showing content with the highest reputation on 08/18/2022 in all areas
-
If you are going to camp without hookups the majority of the time, go composting. If you will have hookups the majority of the time go with a conventional toilet. We have a regular toilet since that was all that was available back then, we do boondock and can go 4 or 5 days before we need to dump. We’re usually ready to move anyway. I like things to be simple. When my hot water tank gives up I will replace it with another tank, not a Truma. I don’t want a composting toilet because the flush and dump of the regular toilet is easy with very little to go wrong. That’s just me. Mike8 points
-
Yes, you will “need” it with the smaller truck. In fact, according to the Ford towing guide, any trailer above 5,000lbs requires a weight distributing hitch. You’ve already got a 3/4 ton tow vehicle. Why would you not use it? Were I in your situation, I’d use the $50-60K that would be spent for a less capable truck to just pay the difference between diesel and gasoline and drive the half million miles that amount of money will provide for you.6 points
-
Lois, You will get hundreds of opinions on the pros and cons of standard and composting toilets. I would suggest you use the search window a really great feature to learn about which system to consider. It has been discussed on here a lot. One thing for certain please do not be misled by the word compost. It takes a long time for human waste aka “hazmat” to reach its full compost state where it might be useable in a garden or as a fertilizer. You will need to to clean and sanitize the compost toilet and dispose of the “compost” properly in a dumpster or trash receptacle somewhere. With a compost toilet you will also need to dump your Ollies gray water at the dump station if where you camp does not allow gray water to be drained onto the property. Gray water with food particles can attract ants, insects and rodents. So lots to consider of which system is best for you and most importantly how you plan to camp. Also consider checking out YouTube University videos on the pros and cons of a compost toilet. You will see some real scoop on compost toilets pun intended 😅. We chose the conventional toilet as it totally suits our needs. I have zero desire to clean a compost toilet or dump a sitting urine bottle every few days. Let the comments begin!! 😊 Best of luck with your choice. -Patriot 🇺🇸5 points
-
After more than a year, the TV stabilizer shocks have worked as far as not letting the TV unclip and fall down while towing. I suspect the noodle stabilizers do help a bit to reduce various stresses on the bracket and surrounding fiberglass by keeping it from bouncing around, but proper inflation of the tires is probably much more effective and important to everything else in the trailer as @John E Daviespoints out. I run all my tires at 50 psi with a tpms, so not quite as cushy as 42 psi, but much less than when they came out of the factory. I think the best we can all do is soften up the tires and make sure everything is tied down and secured while towing - but it's still like putting the trailer and it's contents through an earthquake every time it's out on the road - so things are going to happen...4 points
-
When I see stuff like that, my first question is how much pressure do you have in your tires? On an LE2, more than 50 psi will beat up your trailer and everything inside it. I run 42 psi (with a TPMS). I also removed my (fixed mount) tv the day after I got back from Tennessee 😬 That big crack might be repairable by removing the tv from the mount and epoxying a big aluminum plate there. John Davies Spokane WA4 points
-
This is exactly why I wouldn’t trust Camping World any further than I could throw a cow by her tail.4 points
-
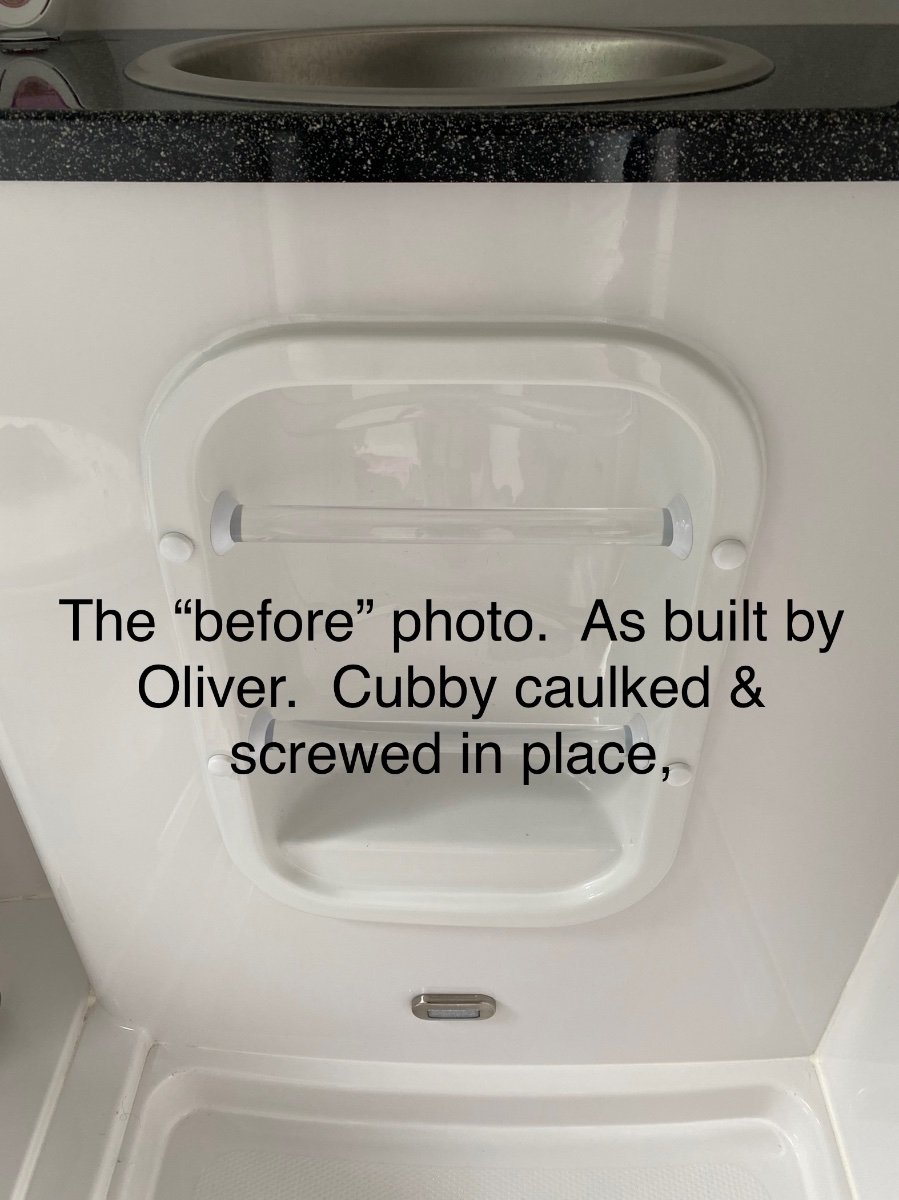
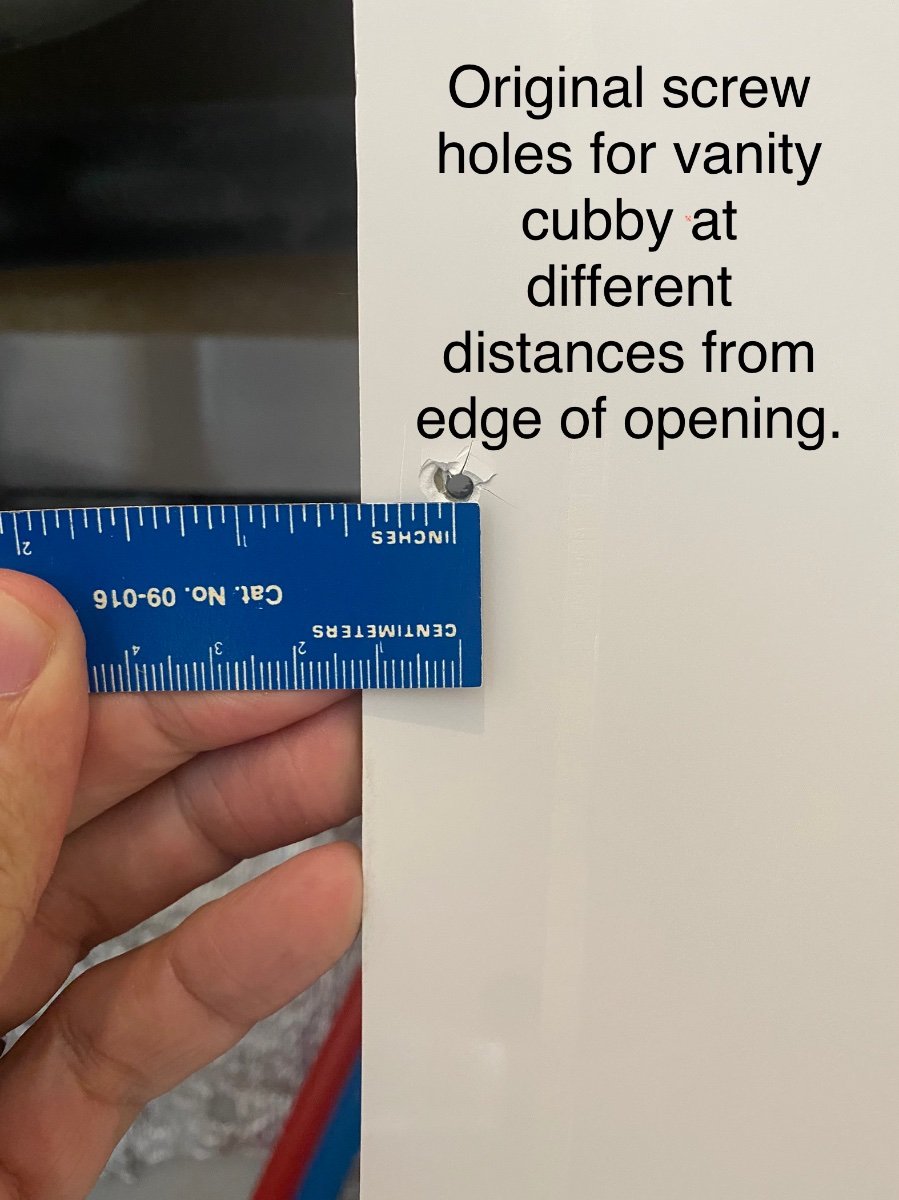
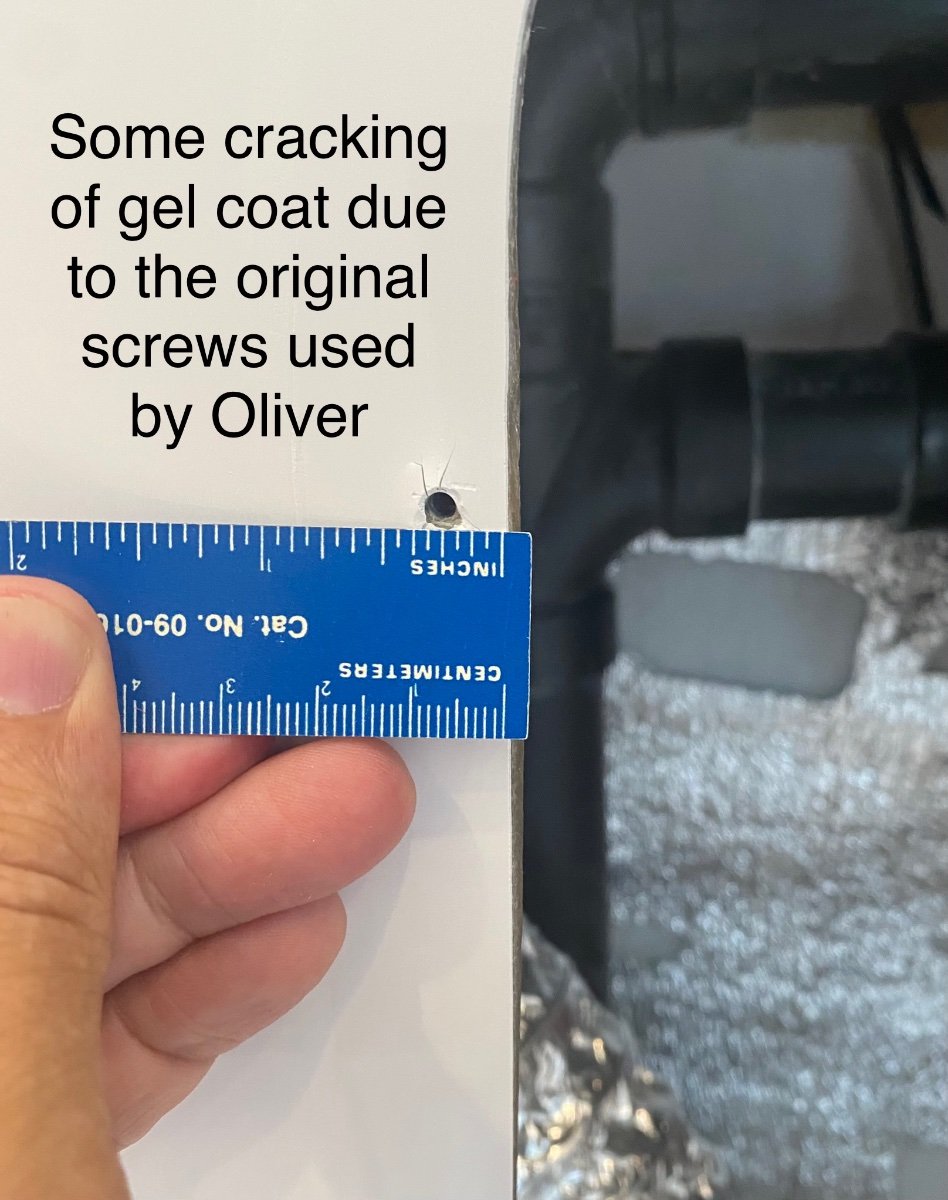
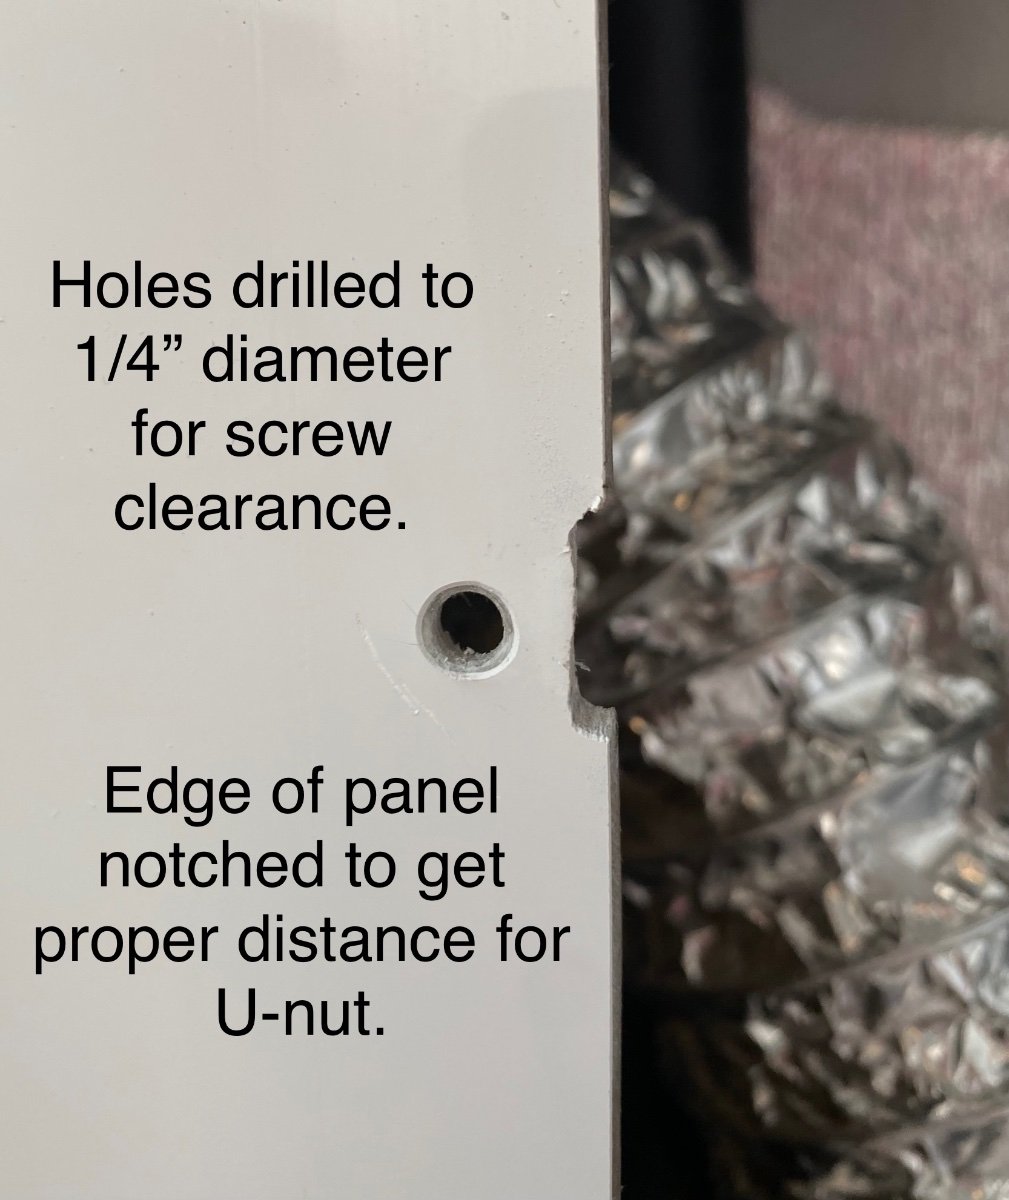
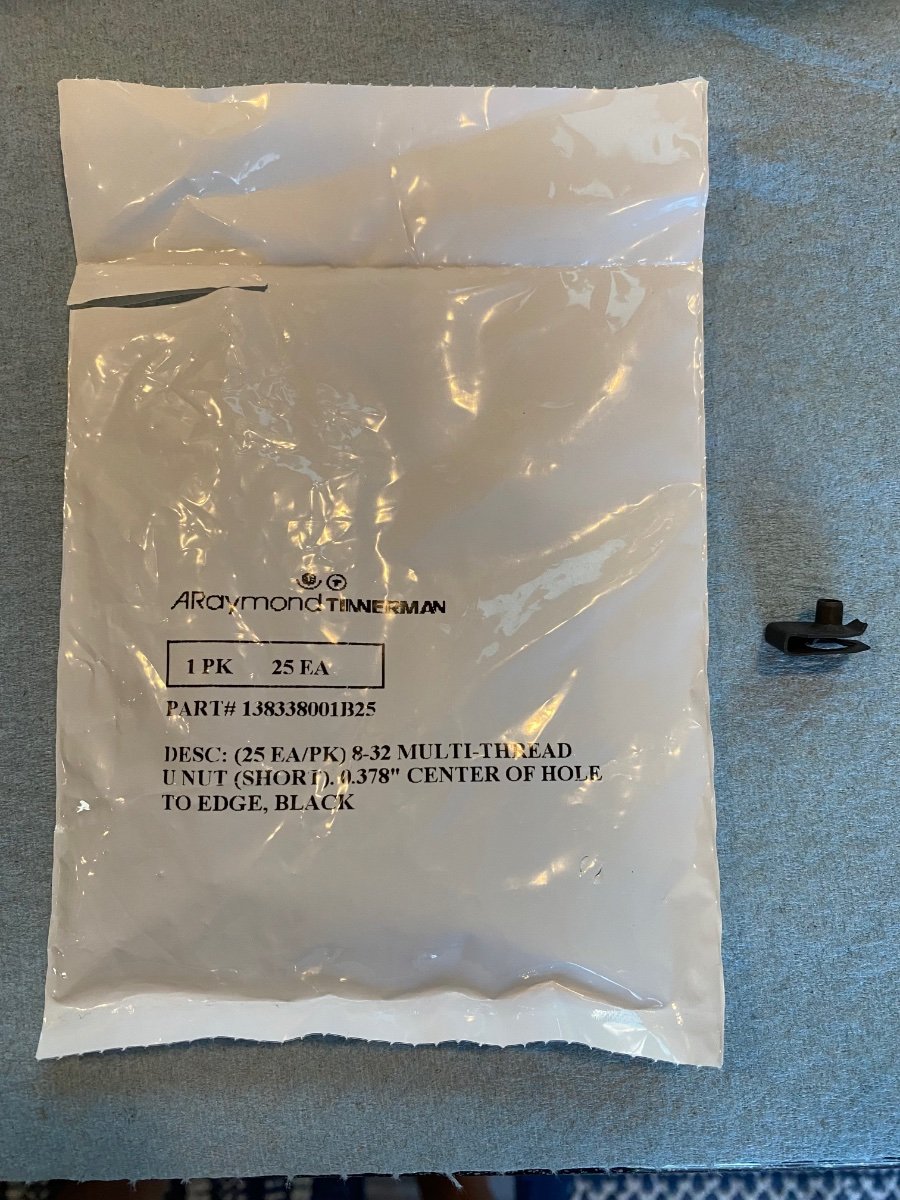
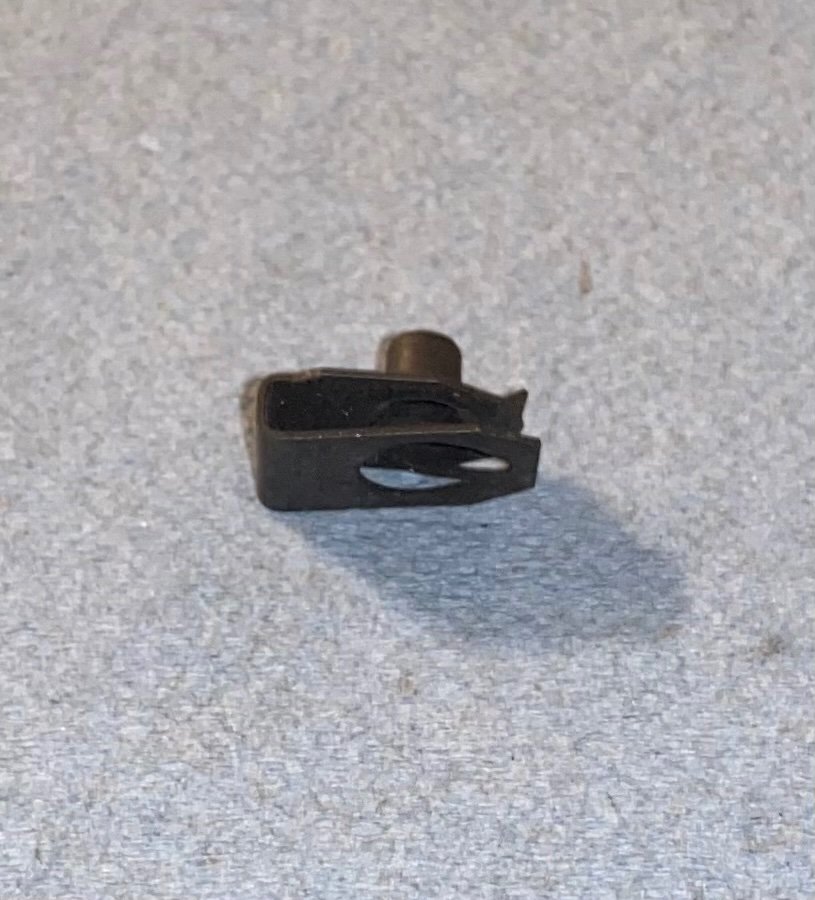
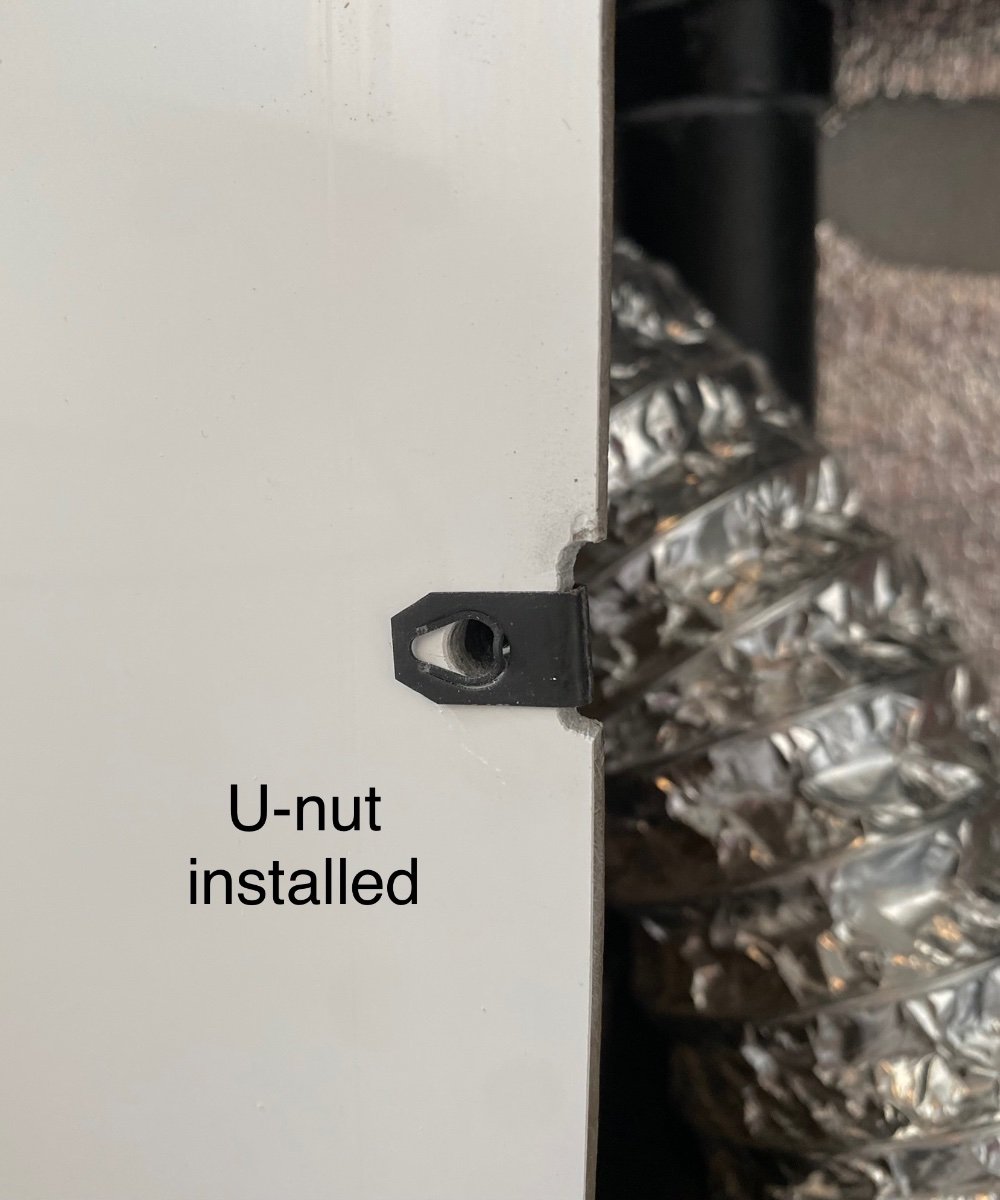
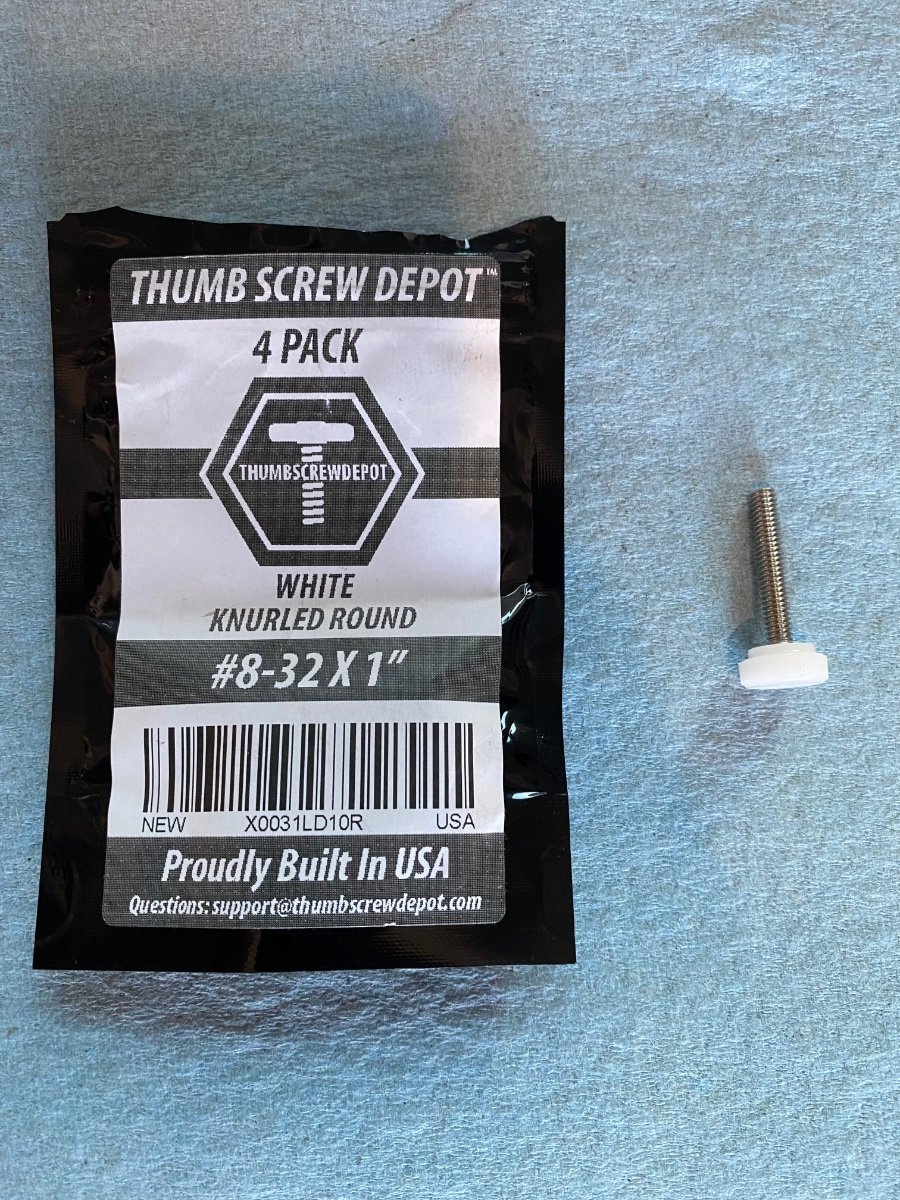
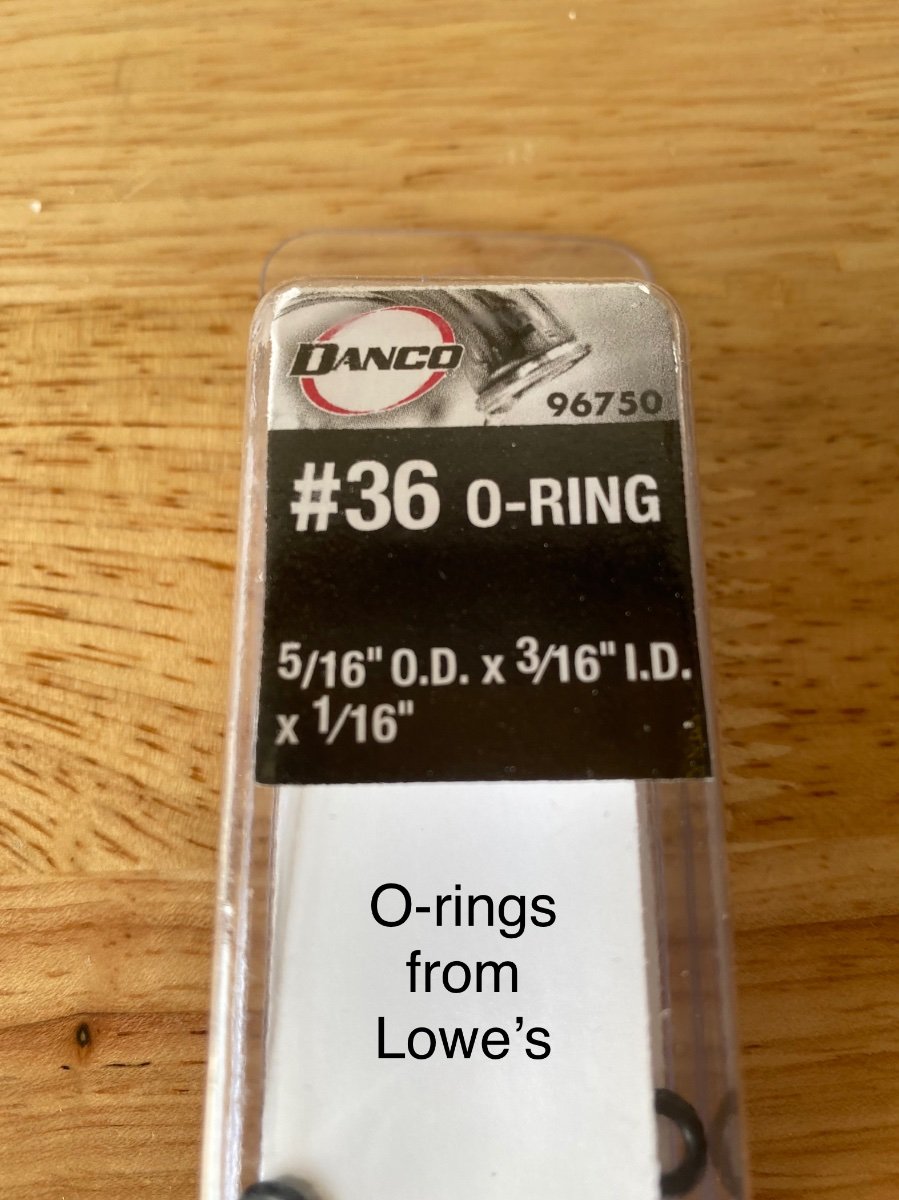
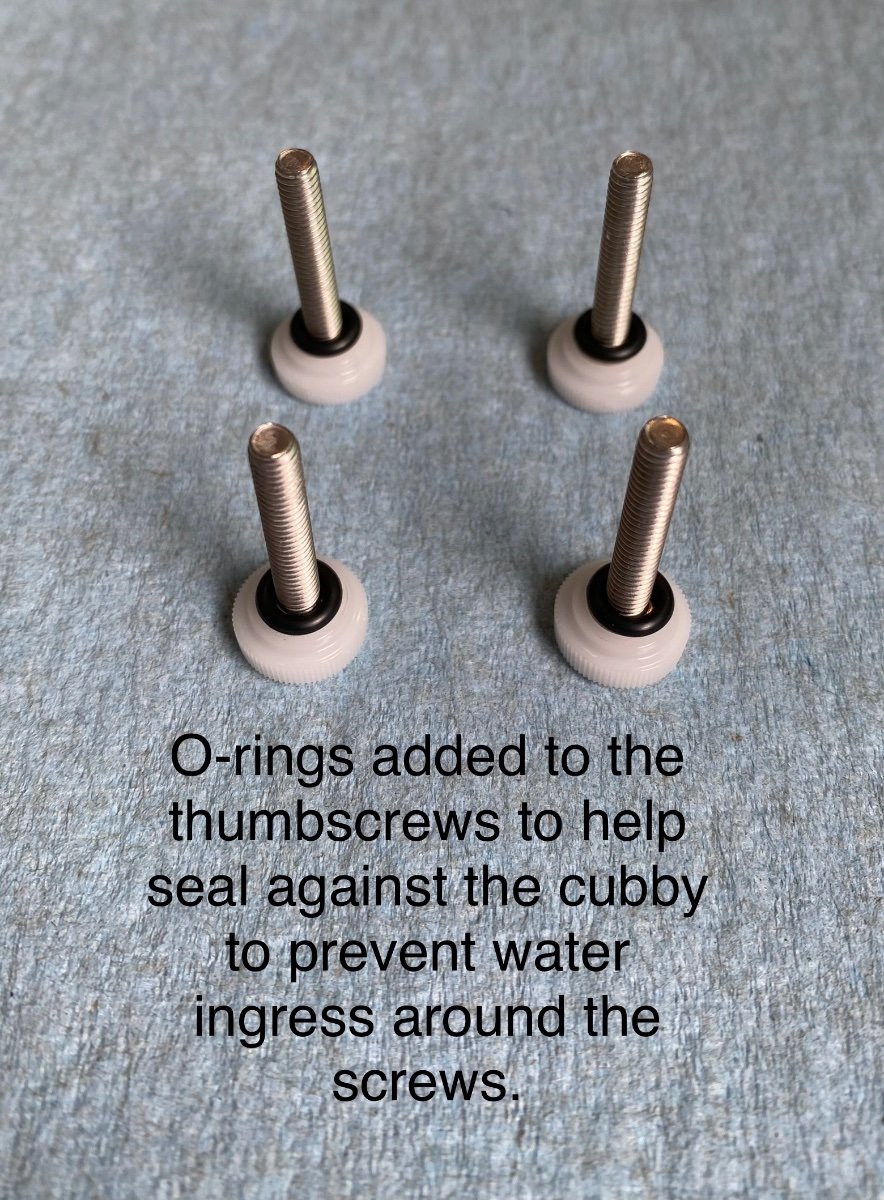
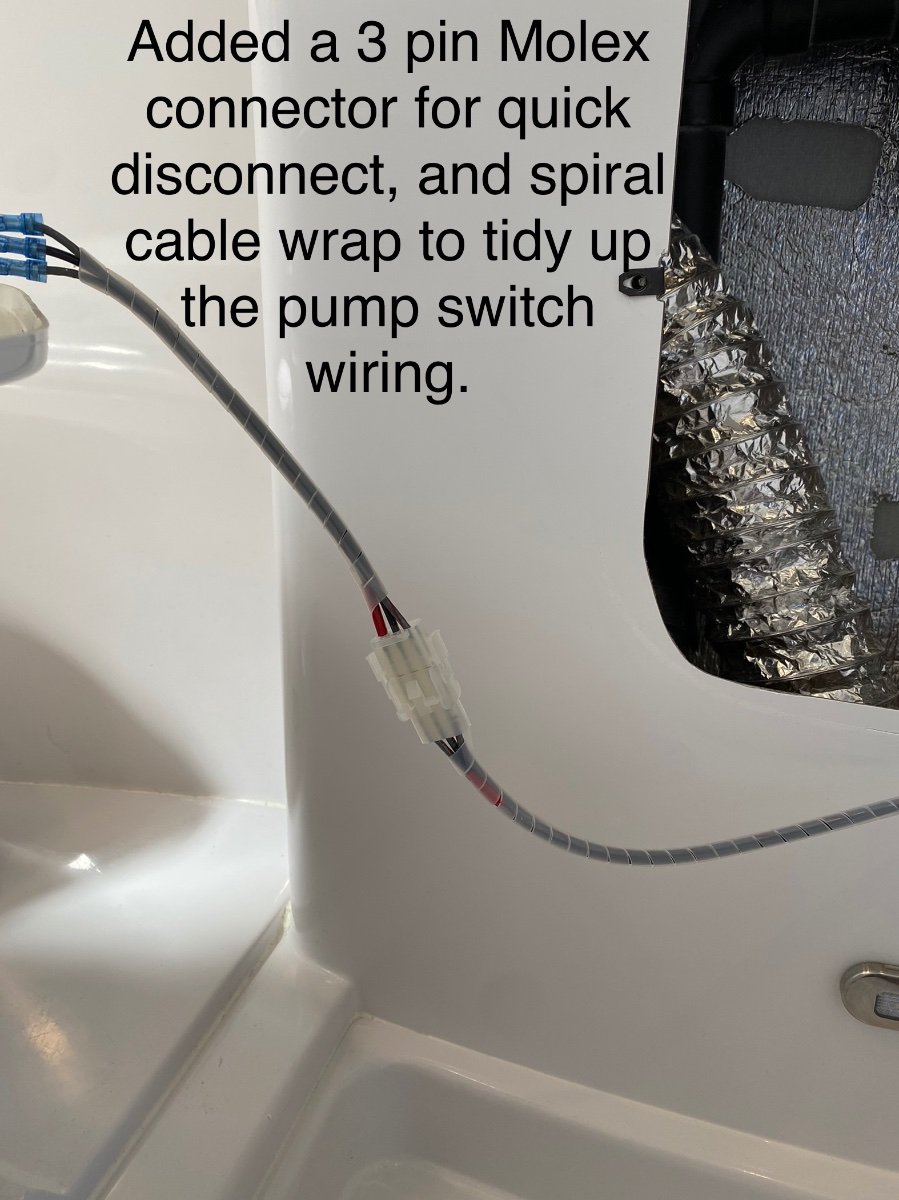
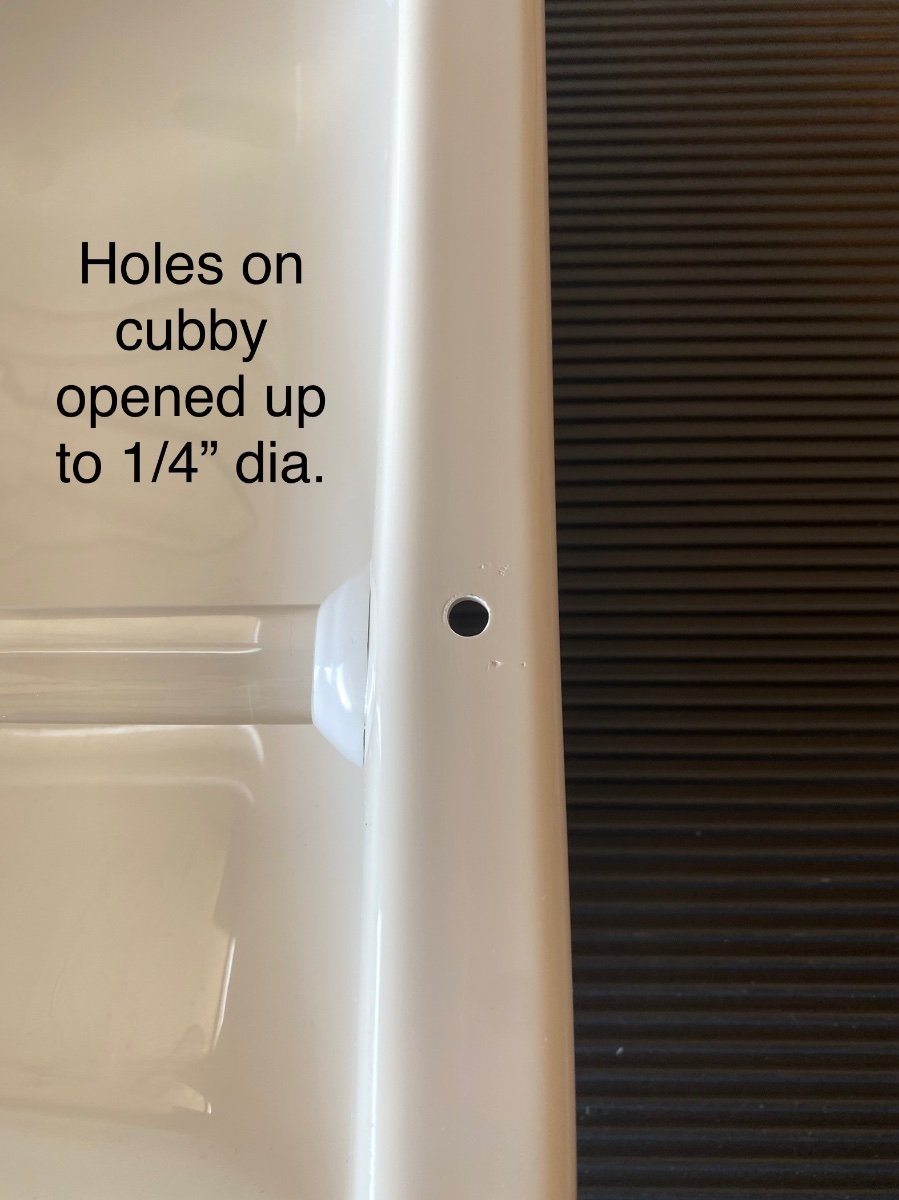
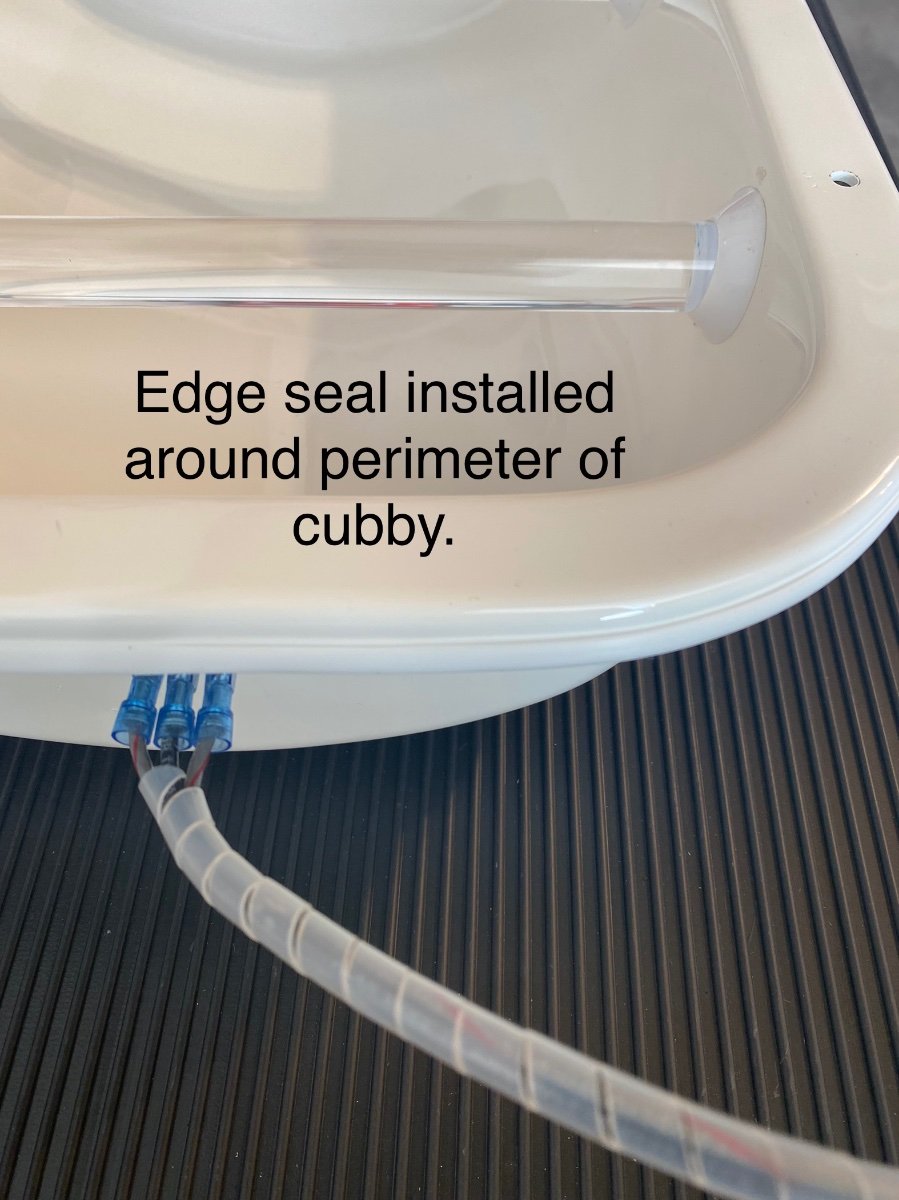
One of the great features of the Oliver trailer design is the fast and easy (no tools needed) access to ALMOST all of the plumbing, heating, and electrical systems through the hatches under the dinette seats and the beds, or by removing the kitchen cabinet drawers. One area that’s NOT readily accessible is the area under the bathroom vanity, even though there is plumbing, electrical, and furnace ductwork all tucked inside the vanity. The storage cubby in the front of the vanity is screwed AND CAULKED in place by Oliver at the factory, so access is a bit more complicated than the other areas. I recently needed to get into that vanity area for some inspection and maintenance, and after completing that I wanted to make future access easier (no tools needed and no caulking). I know some owners have replaced the storage cubby with a hinged marine access panel, but I didn’t want to lose the cubby storage. So here’s a detailed description of a simple modification I did, along with links to the parts used. Access is now fast and easy. No-Slip Clip-On Barrel Nut, for 0.025" to 0.15" Panel Thickness, 8-32 Thread Size https://www.mcmaster.com/94850A111 #8-32 x 1" Thumb Screw Stainless... https://www.amazon.com/dp/B09FZVLZKD?ref=ppx_pop_mob_ap_share uxcell Edge Trim U Seal Extrusion, Silicone White U Channel Edge Protector Sheet Fits 0.5-2.5mm Edge 3Meters/9.84Ft Length https://a.co/d/1uWUZB3 Molex -3 Match Set - (3-Pin) w/14-20 AWG, Wire Connector - 2.13mm D, Latch Lock, MLX https://a.co/d/gapvioi
 3 points
 -
How do I post a reaction, such as thumbs up or a heart?3 points
-
This is not correct btw. Per the instructions for the Nature's Head toilet, you just empty the bin out into either a compost bin where it can go on to fully compost (and then be used on ornamental, NOT food plants) or into a trash bag that goes into the usual trash waste stream, and then you refill the bin with more compost medium (moist peat moss or coconut coir), and the residue left behind from the prior load will serve to help the population of beneficial bacteria build back up. And they are quite strident in their documentation to stress that it is vital NOT to sanitize the bin with bleach or similar cleaners. But for sure, as you note, it takes a while for the material to fully compost, so if you're on the road for a while you'll be disposing of the partially composted material in the trash. The nice thing is that for two people, we've found that we can go *at least* 3 weeks before needing to empty the bin, and if there are gaps of time between weeks of camping, we can go longer as the volume shrinks over time. The benefits of that partial composting include no poo smell even if you are working with an opened bin as long as you let the last "deposit" sit for half a day or so before doing the work, and it really isn't disagreeable to do the emptying at least from a smell perspective. Since it's not fully composted, though, you should assume there is still some fecal bacteria, and just as you should do if you have a full black tank to empty, you should probably be wearing gloves and you should be thoughtful about cleaning your hands and avoiding spillage (which is not hard). If you let it continue composting in the toilet (or a separate compost bin) at home after camping, you can eventually consider it fully composted, i.e. free of that nasty fecal bacteria. I would refer to manufacturer documentation of how long that takes versus social media or web forum claims in that regard. We, btw, put toilet paper in the bin along with the poo deposits, and it's been no problem other than that it can make the crank a little hard, but not impossible, to turn until it's decomposed a bit which it does relatively quickly. Given how rarely we camp with full hookups, the composting toilet has been great for us and I would absolutely choose it again if I were buying another trailer.3 points
-
Hi Owners, We are Wendy and Steven from NW Oregon. We are both recently retired, Steven from Commercial Fishing in Alaska and most of my career I was a Hotel Reservations Manager. We have had several various RV's, a Camper, an adorable Teardrop Trailer, a class B, and a small class C. The Oliver fits our needs and finally our search appears to be over. We like to Boondock, love the mountains and the variety of terrains in this country. We look forward to the trip from Oregon to Tennessee and back....sort of. I am nervous about the trip. I haven't pulled a trailer and want to learn. My husband has pulled several types of trailers but I want to help drive on the way home. Has anyone driven between the Oregon/Washington area to pick up their Oliver? Any advice? Thanks all!3 points
-
There is another option that a few of us use (I learned this option from another Oliver owner on our delivery day). We have the standard flush toilet in the camper but since we took delivery of our Ollie brand new, it has absolutely only been used for #1. No solids, no toilet paper ever go into the black tank. #2 is done either at the campground restrooms, or roadside rest stop restrooms while traveling, or if absolutely necessary, using the bathroom in the camper, but then #2 and toilet paper go into disposable camp toilet bags (bag is placed in the toilet while doing your business) and then disposed of into a suitable trash receptacle. Makes life with the black tank very easy. Keeps water usage to a minimum. Takes a very long time to fill up the black tank before it needs emptying. No toilet cleanup/no scrub brush needed. No stuck/clogged drain valves, easy black tank emptying, easy black tank rinse. Trail Essentials Toilet Bags, Certified Biodegradable and Compostable; Use and Bury in Ground –Includes Convenient Water Resistant Carry Case https://a.co/d/ab7IGyb3 points
-
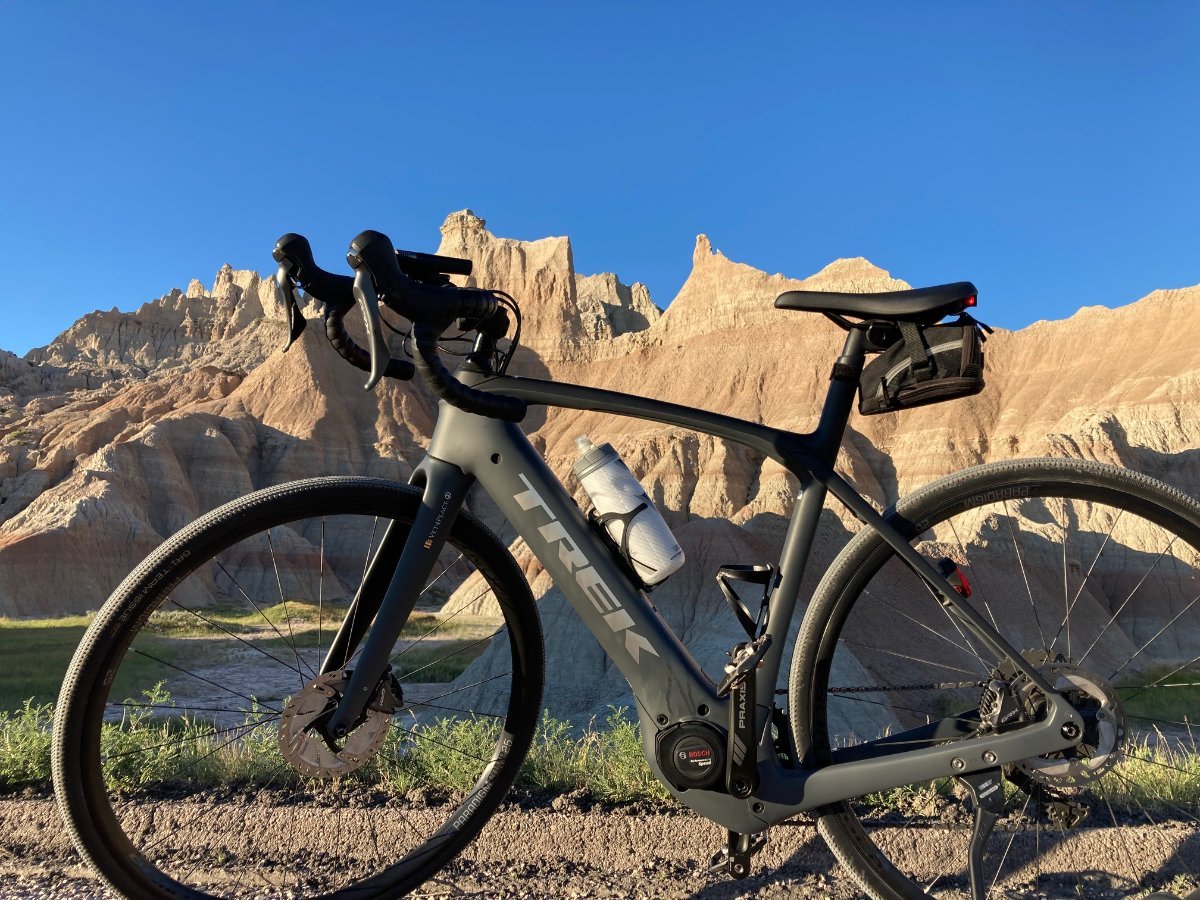
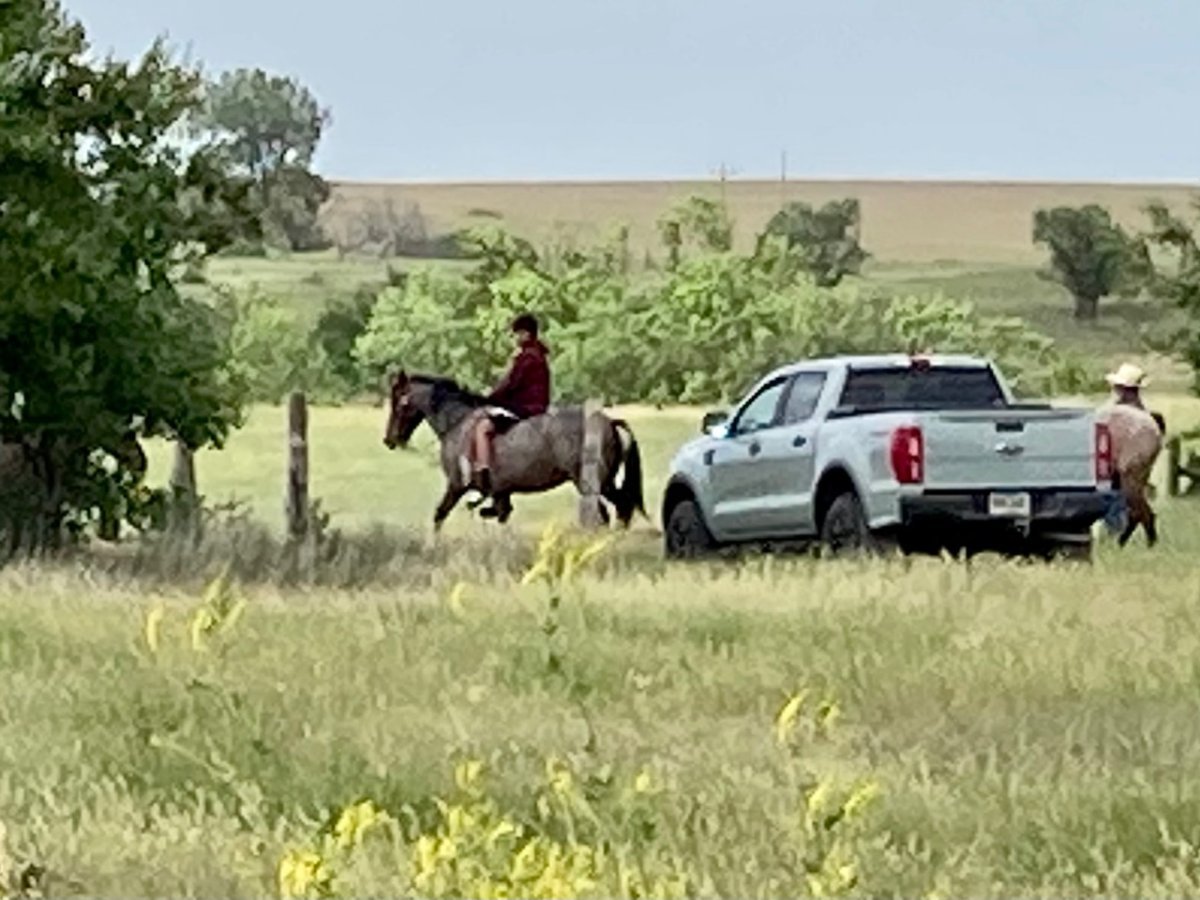
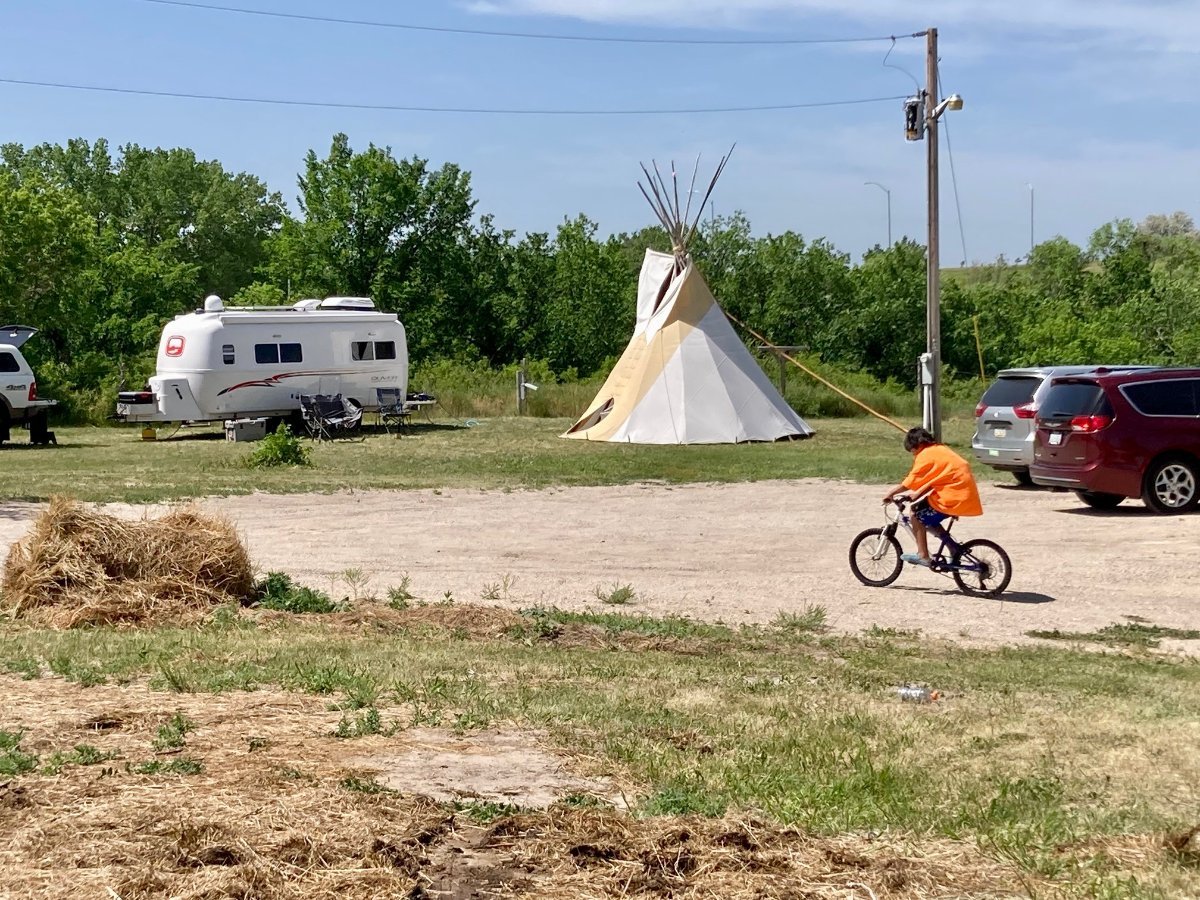
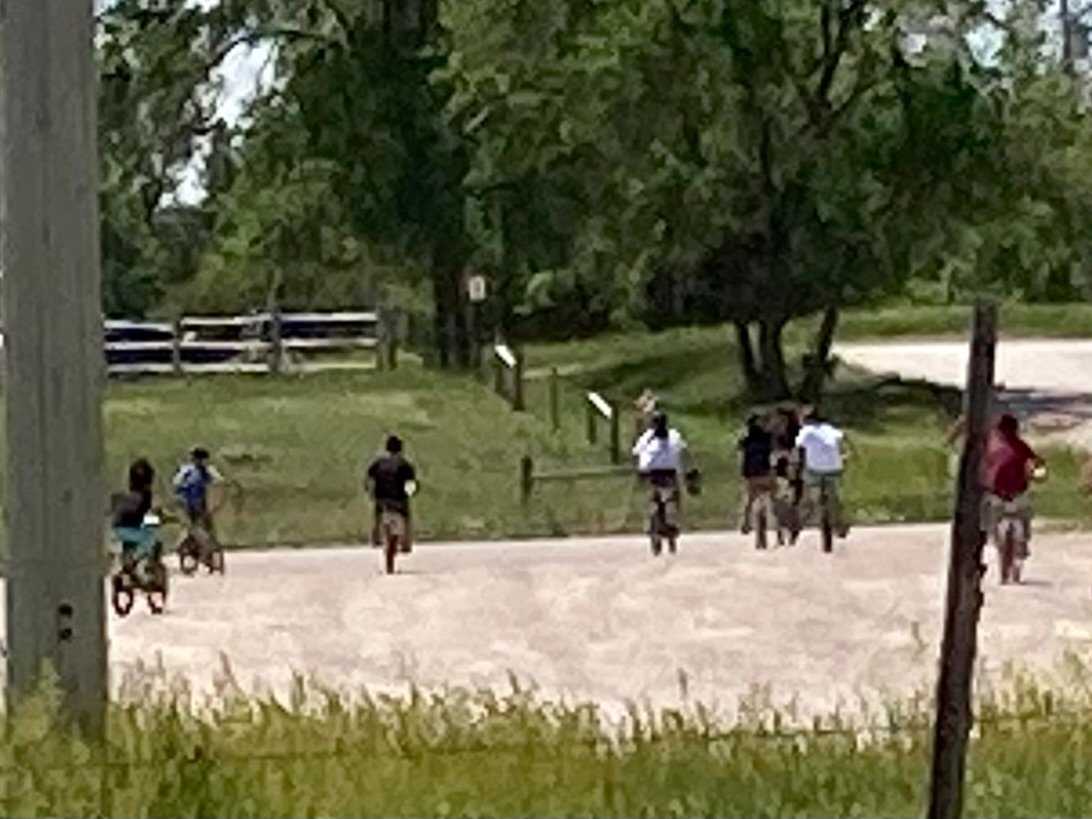
Brian, Thanks for sharing your post on the Badlands! I am blessed to do volunteer work on the Pine Ridge Reservation each year where we work on the local's bicycles (73) and donate bicycles (120) to those in need. I boondock on an Elder's place outside of Wanblee, just south of the Badlands. Thankfully, I was able to bicycle each day in the Badlands and the land massages my soul. The Lakota there are challenged in many ways but, are warm, friendly and loving. They are deeply appreciative of the bicycles - for most, it is their only means of transportation. I am truly thankful to be invited and be a part of such a wonderful program. Here are a few pics from this year's trip and the Give-Away with "Bikes to Pine Ridge":
3 points
-
We picked up our LE2 yesterday, so far so good. 😁3 points
-
I never would have thought to do this until I read your post and now I feel I must do it. And I can, thanks to your super detailed instructions with parts and photos.3 points
-
<SALUTE> to an AF brother! I grew up an AF NCO brat. I am here today to type to you because of the AF - in more ways than one. I fell out of many of your aircraft and the AC-130 came as a blessing more than once. So, thank you to you and all your fellow Airmen/women. Your system of using the topper and putting them in the bed is a good one! I have a topper on my truck and can't live without it. Ya - I ended up with a bunch of surgeries and hardware in me, so the pedal assist sure makes it more do-able and enjoyable.2 points
-
From the Nature's Head online User's Guide:2 points
-
Welcome to the Oliver family Wendy and Steven. My wife Lornie and I (also a Steve) are also retired and live just a few miles north of you in close in SE PDX. We picked up our LEII in Hohenwald two years ago in August 2020 and came back via Missouri, Kansas, Colorado, Wyoming, Utah, Idaho then Oregon. We had planned to take our time returning home like you are planning to do but right after picking up the trailer we got word that Lornie's brother who had MS had gone into intensive care. We accelerated our trip home. I drove 400 miles the first day as a shakedown and and then another 1450 miles total on days 2 and 3. The LEII has such good towing manners that honestly I didn't find the long miles any more tiring than driving the interstate without the trailer. I also found the LEII to be much easier to back up than my 8 foot utility trailer or 14 foot popup. I never realized before how much nicer a well designed twin axle trailer tows compared to a single axle trailer. I don't know what tow vehicle you will be using but if you are at all apprehensive about the trip or towing, then I recommend that you order the Andersen hitch even if it is not really required for your tow vehicle. It really works well and they do everything to set it up for you when you pick up the trailer. I had a big scare the first day on a two lane road in Missouri when I launched off of a unmarked elevated railroad crossing at 55 miles an hour. It felt like the tow vehicle left the road and flew into the air (I probablly did not) and I braced for the porpoising and possible loss of control. There was no porpoising at all and the Andersen hitch dampened all movement after one bounce. I am sold on the Andersen mated with the LEII. The price of many of Oliver's options are approaching obscene, but the Andersen is worth every penny in my opinion. I have never had any issues hitching or unhitching with the Andersen and it only adds 2-3 minutes to the time it takes to hitch up and even less when unhitching. Lornie and I would be happy to meet you some time over food or beverage to share our Oliver experiences with you. Send a PM if you are interested. Congratulations on your Oliver purchase!2 points
-
Brian and Sondra, congratulations on your upcoming Oliver purchase!! It will open up a new world of exciting road trips and wanderings ahead. An Elite will provide years and years of enjoyment across this beautiful land. The last two years have really slowed down my traveling . . . only 139,000 miles on The Wonder Egg so far. So far, I've camped in 48 states, (missing Delaware), 10 provinces, one territory, have seen unbelievable giant Redwoods and Sequoias, monuments, canyons, ancient ruins, pueblos, Viking settlements, and camped with an iceberg grounded in a cove right behind the campsite. The Wonder Egg still looks like it just rolled off the factory floor and is ready for 15 more years of 4 to 7 month wanderings each year . . . roll on!!2 points
-
https://olivertraveltrailers.com/forums/topic/1978-nature039s-head-composting-toilet-installation-in-an-oliver-big-thread/ John Davies Spokane WA2 points
-
Sorry to hear about Maggie & Bryan's TV issues. Good comments on tire pressures. We have been running 50PSI for 6 years on our 2015 LE2. Have not had issues (I'm aware of yet), but believe overall could improve impact on every component in Ollie by decreasing tire pressures. Since our Ollie is 4900 to 4950 pounds ready to camp, going to decrease Ollie's tire pressures to 40PSI cold before next camping trip. Already running 40PSI cold on the Tundra when towing Ollie. Could not find Cooper recommended pressures according to weight transported on Cooper Discoverer HT3 tires. Just sent Cooper an email asking for this information, will let you know if they share it with me.2 points
-
Love this..wish I would have done this after repairing the courtesy/puddle light in the bathroom! Great work and on my list too!2 points
-
These are ten ply TRUCK tires, they are supposed to be adjusted for the weight carried by each tire. A 7500 pound HD truck carrying 2500 pounds of cargo needs 80 psi in its rear tires because each tire is so very heavily loaded. (The front ones can run lower, about 50). One Ollie LE2 axle at maximum trailer weight of 7000 pounds has just 2700 pounds shared between both tires. So the pressure should be lowered to an appropriate level. The air supports the load, not the sidewalks. Hard tires don’t flex over bumps and potholes! Your suspension only moves up maybe an inch before the axle hits the frame. So the tires are a very important part of how it absorbs road shocks. If the Ollie is lightly loaded, hard tires make it even worse. https://olivertraveltrailers.com/forums/topic/2363-how-to-tire-pressure-placard/ A TPMS is a very important safety tool, get one ASAP so you know if a tire picks up a nail and starts to deflate! You both will feel a lot better knowing all your tires are set correctly and holding air. Does the new owners manual show a load/ pressure chart for the Cooper tires? There is no need to include all the garbage general information about tires, that is all easily found with a simple Google search. What is needed is inflation information specific for this trailer. For years they were delivering these trailers at 80 psi and it was wrecking the interiors! Cabinet doors falling open, drawers breaking, cargo getting flung around 😤. TVs breaking! This is a pet peeve of mine for five years and counting, thus the exclamation points😬!!! FYI LE owners should run “about” 50 psi. If you drive long distances on slow speed, seriously potholed dirt roads you need to lower the truck and trailer tire pressures. Or else creep along at a walking pace. John Davies Spokane WA
2 points
-
Congratulations !! I hope you enjoy it as much as we enjoy ours. Now the wait. Take that time to watch the videos, read the manuals, and read this forum. There is so much covered here that are not in the manuals.2 points
-
Imelda, you may not know this, I apologize if it is familiar to you. While the 6.4L Powerstroke offered some improvements over the 6.0, they are still largely unreliable. There are a number of common 6.4L Powerstroke Problems that owners of these trucks consistently encounter. What’s worse is that like the 6.0L Powerstroke, repairing the 6.4 often requires raising the cab to easily access the engine. This makes any repair more expensive. https://dieselresource.com/diesel-resources/6-4l-powerstroke-problems/ I personally would not keep any aging Ford 6.0 OR 6.4 diesel, things will only get worse IMHO. If you want to get away from diesel entirely, look for a 3/4 ton (2500) gas truck, something like the F250 with the excellent 7.3 liter “Godzilla” engine, or a Ram with the 6.4 gas Hemi truck engine. You do not have to buy in Texas, consider finding a dealer in another state, fly in, buy your truck, drive it home. As long as your current F250 is running well - go ahead and replace that fuel pump first - it should be VERY easy to sell locally. A F150 will certainly get better mileage and be a better daily driver, if you need that, but it will always be a big compromise for towing, drivetrain strength and durability, and payload. I am not sure why you think new HD trucks are hard to find in TX, Autotrader shows 230 F250s within 200 miles of Dallas. …. Autotrader New F250 for Sale John Davies Spokane WA2 points
-
yes, I have used an Andersen hitch on both of my previous trailers and will use it with the Oliver.2 points
-
We keep it simple when camping. One of my favorites is burgers. Fire up the Blackstone grill, throw on some bacon, then add sliced onions. Put the burgers on. The aroma never fails to arouse hunger in neighboring campers. Put bacon on the burger, add some cheddar cheese, onions on top. A glass of red wine tops it off. Now I need to go camping. Mike2 points
-
The Mothership repaired the unit that the Dometic service tech said needed to be replaced. Seems a screw came out and keeping the fan from running. Two days out from repair and alls well! Living happily ever after in our Oliver. THE END2 points
-
Back in my Air Force days, the first step to any repair was to hit the defective apparatus with our hard hat. 😉2 points
-
I thought it be fun to start a topic on favorite camp recipes.😋 Share your favorite camp recipes for drinks, breakfast, lunch, dinner and snacks! Dinner: Lemon Chicken & Artichokes I love using my crockpot (with crockpot liners for easy cleanup) when camping and I always make this recipe Lemon Chicken and artichokes. I tweak it a bit and add a bag of petite Blushing Bell potatoes (or red skin potatoes) and I quarter corn on the cob and throw that in. You can add carrots, green beans or whatever sounds good! https://fitslowcookerqueen.com/slow-cooker-chicken-artichokes-whole30-paleo/1 point
-
Don’t keep driving around with it busted, remove the TV from the mount ASAP, or you will have just a scattered pile of scrap plastic and wires.😳 John Davies Spokane WA1 point
-
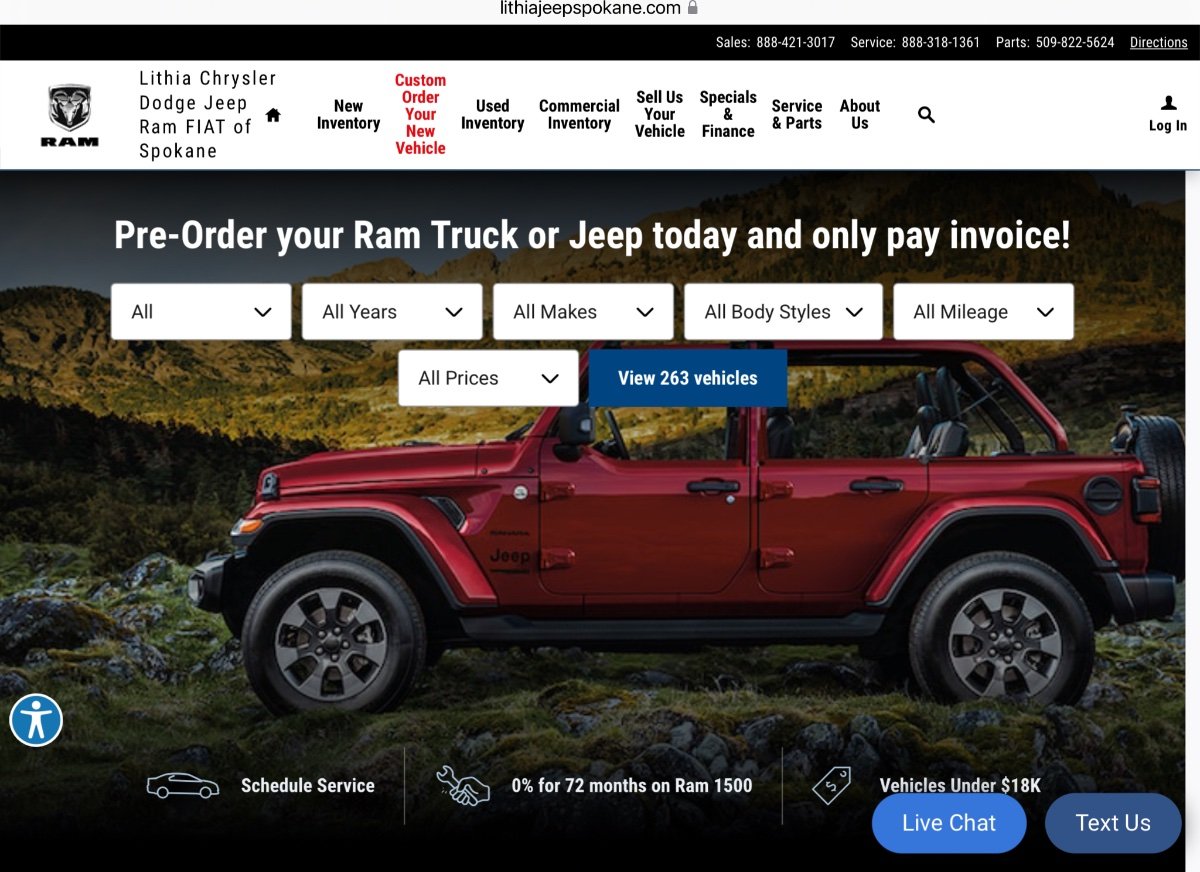
Dennis Dillon Ram in Caldwell ID (Boise) does most of its business with folks who buy and fly, they have a regular shuttle service to the airport, and they post all their prices as well as the window sticker. In better days, they would show a new Ram HD Laramie with $12,000 off MSRP. Those days are gone, I looked yesterday and they have lots of diesel trucks, just one gasser, a Power Wagon. The 2500s are at MSRP plus a $4000 discount if you finance through the dealership. My local Ram dealer has an Order now and pay invoice deal. I have no idea how long it takes to actually get a truck this way😳 There are some deals out there, maybe not in Texas. We bought a new 2022 Acura RDX PMC Edition last November, it is a limited run of just 200 cars. My dealer could not get one, in Seattle/ Portland there were four. Three dealers had them marked up at least $10,000 (20%), plus they had added extra cost “packages.”. We found one at MSRP at an independent Acura dealer in north Seattle. “We are a family run dealership, we never charge over MSRP.” So we bought that one. It pays to check around. Don’t necessarily buy from the closest dealer! I have bought two used cars long distance, one from Colorado and one from South Dakota, and drove each one home. It makes for a great road trip. John Davies Spokane WA
1 point
-
1 point
-
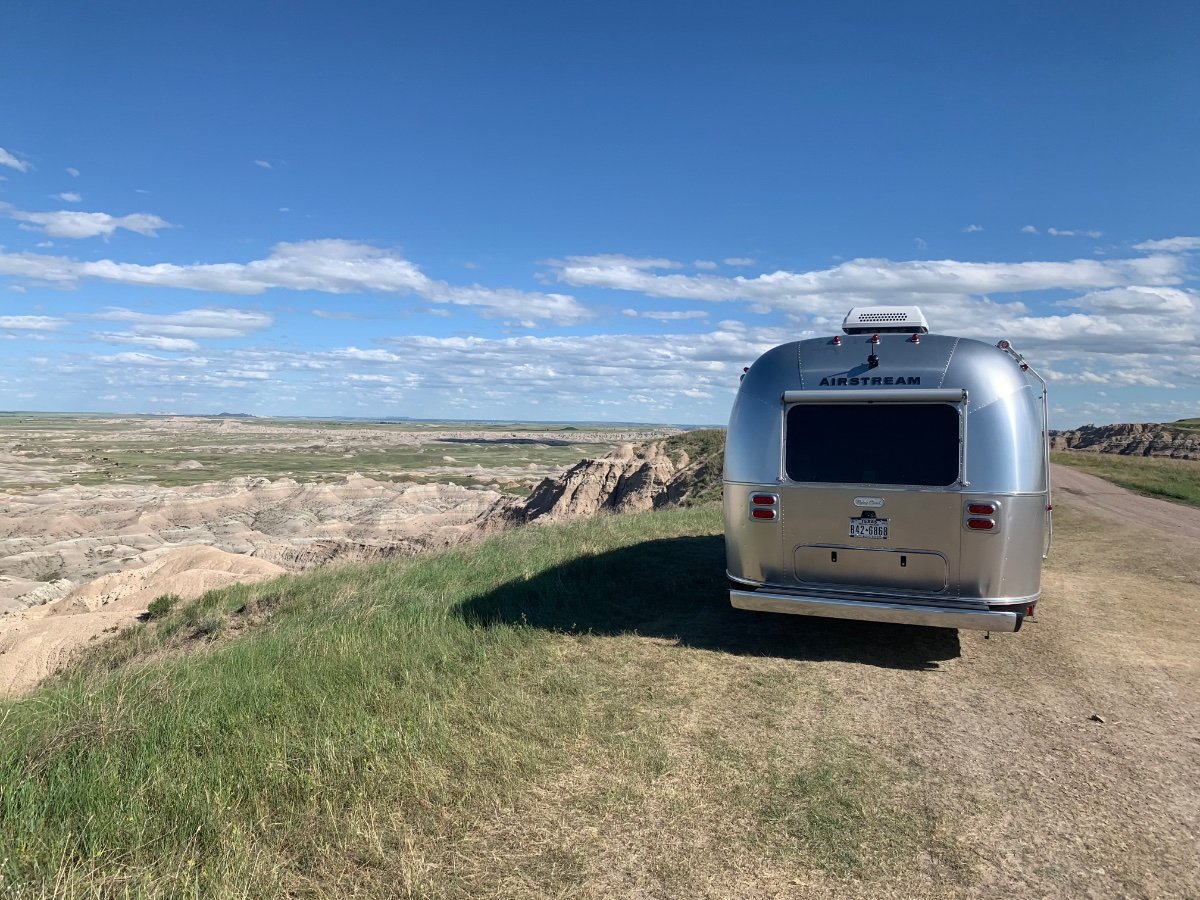
Also, in the spirit of this thread, as we wait for our Oliver LE II. If you haven’t boondocked in the Badlands, you should. Just outside Badlands NP there is a huge area that is a national grasslands and allows up to 14 days free camping. Many pull outs right along the edge of the Badlands like we scored. Great thread, look forward to visiting it often and seeing more places we want to go. Brian Paris, TN
1 point
-
Thank you all for the good inputs. I am considering the pro and cons of keeping my F250 or buying a new F150. I still have to fix the fuel pump on the F250 regardless but I am leaning towards a new F150. I will keep you posted. Imelda1 point
-
I’ve been running 50psi for a long time. I should do what John did and remove our TV, haven’t used it in years. MIke1 point
-
A lot of things to consider here. You are right the $50K need to buy the lesser truck would buy a lot of diesel. My F250 6.4L truck pulls the trailer like its pulling nothing, It's a 2010 84K miles. This year I had some major repairs, brakes, coolant hoses and now fuel pump needs to be replaced. Up to now its been a great truck. And I would just like to have a new truck with lots of buttons and updates. There are no F250s or F350s available here in Texas so I was thinking F150 V8 would do the job but you are right - am I make a sensible decision or just frustrated at chasing down repairs. ..... still thinking1 point
-
Congrats! I pick my LEII up in the middle of winter--January 3rd. But, I'll take the southern route home to AZ and hope Texas doesn't get the ice storm it did in 2020!1 point
-
@Mike and Carol Sounds so good! You can’t go wrong with a grilled burger!😋1 point
-
@NCeagleposted this awhile back. Maybe he'll let us know how it's worked out.1 point
-
Frank, Great modification! If Oliver is not doing this, they should!!!!!!!!! Also on my to-do list!1 point
-
Welcome and congratulations!!🎉😃1 point
-
@Patriot That looks amazing!🤤1 point
-
Fresh trout salad if I am near a trout stream…amazing.
1 point
-
I hear ya Mike! They probably put the bolts on a little better, back in the day. Ours is only 6 months old. John1 point
-
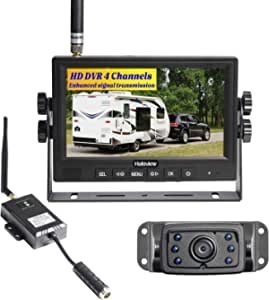
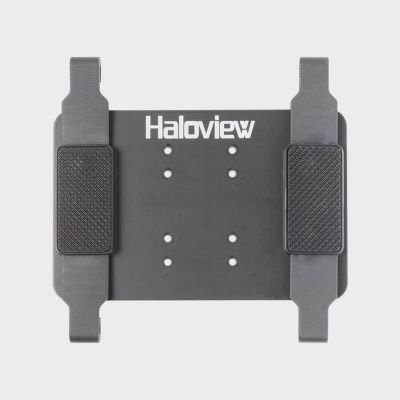
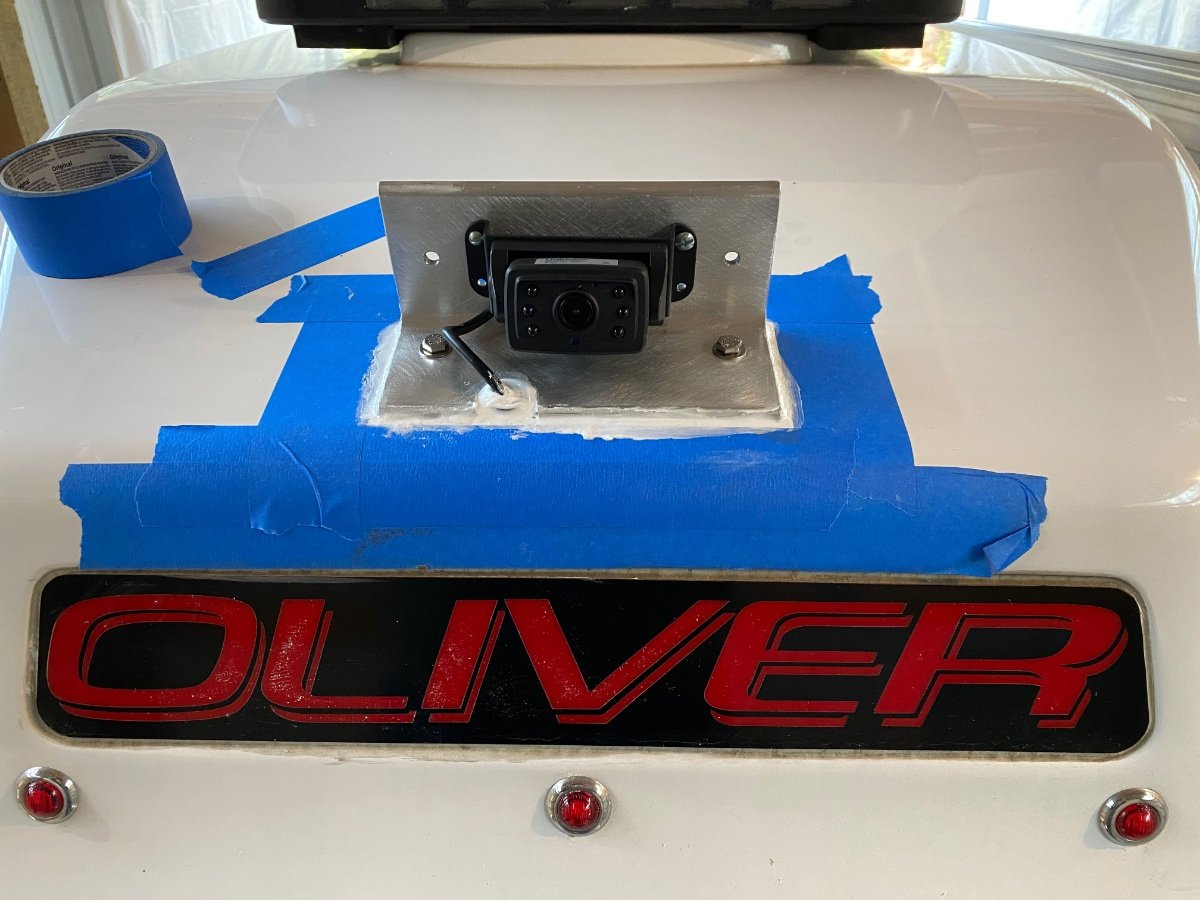
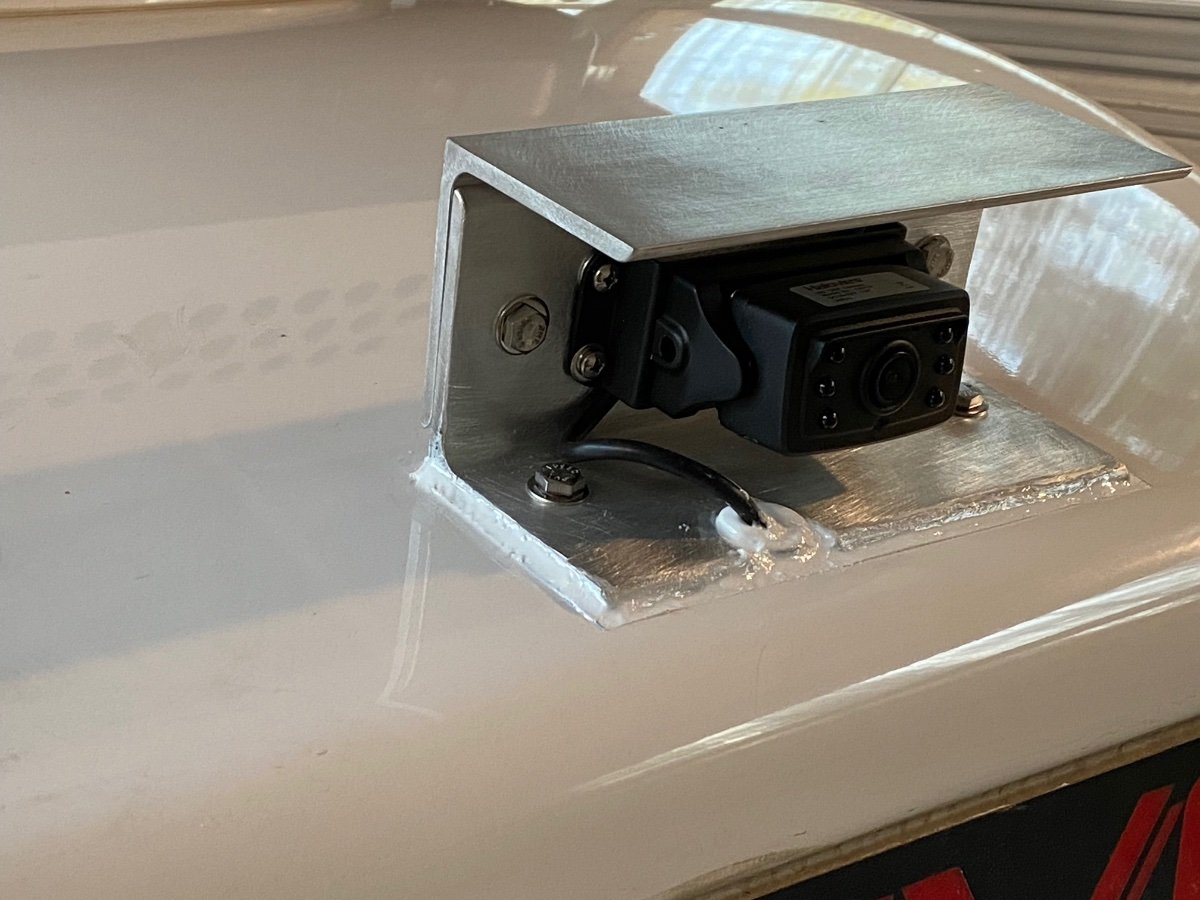
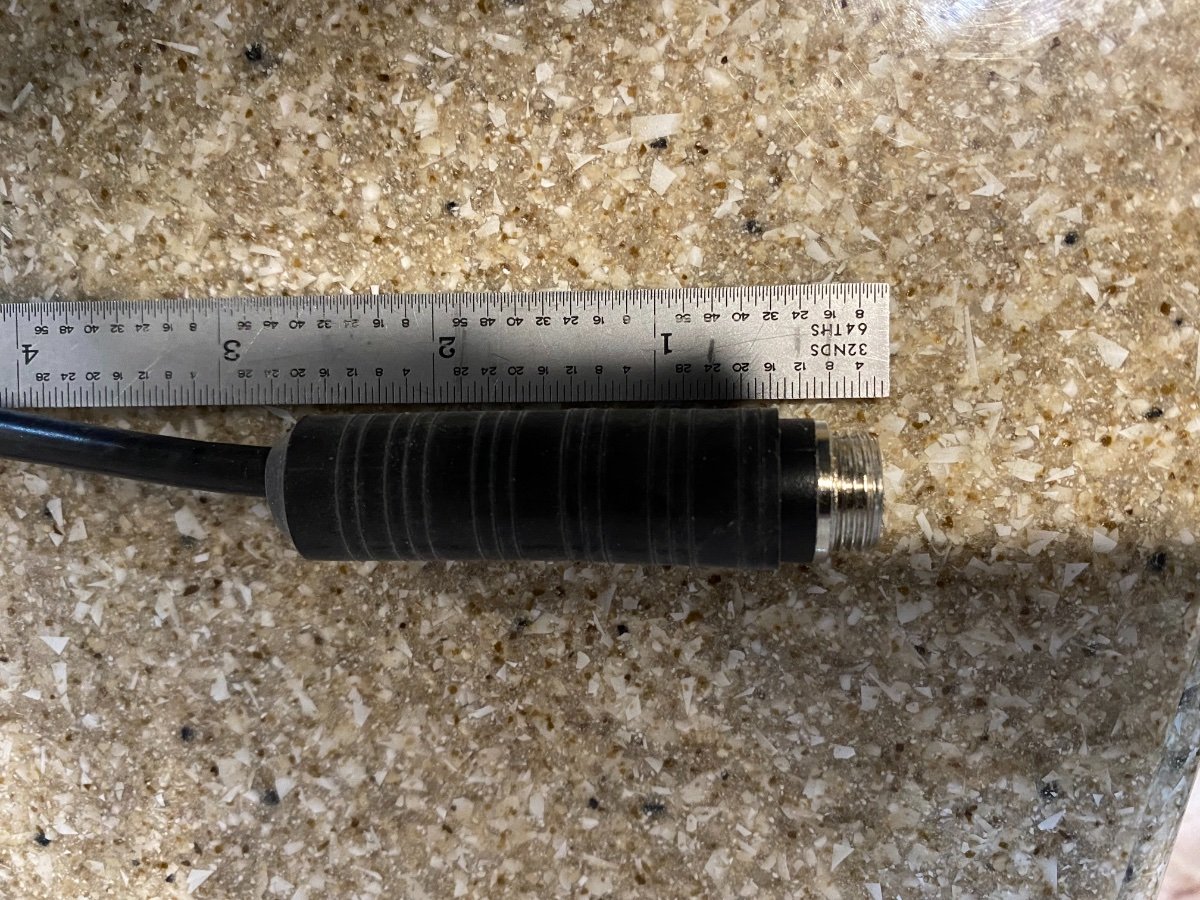
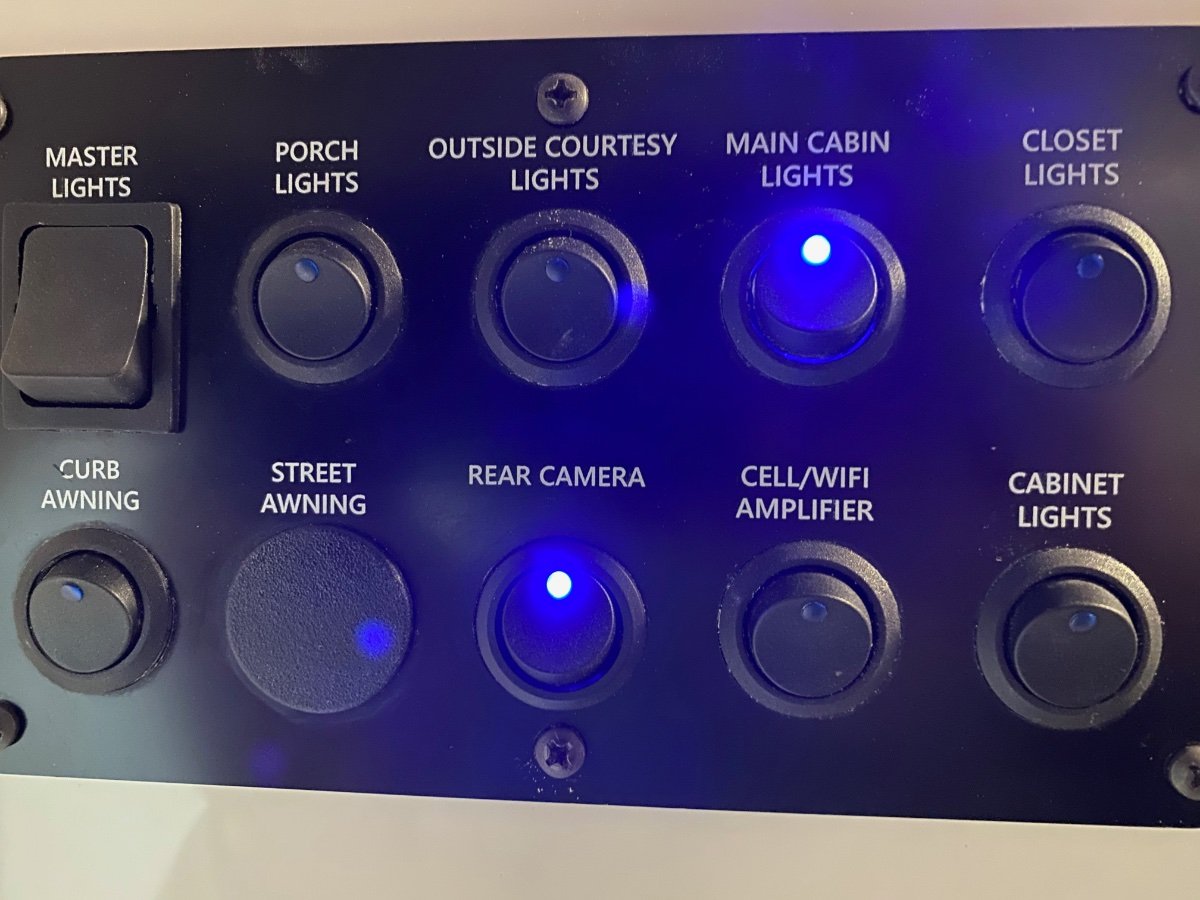
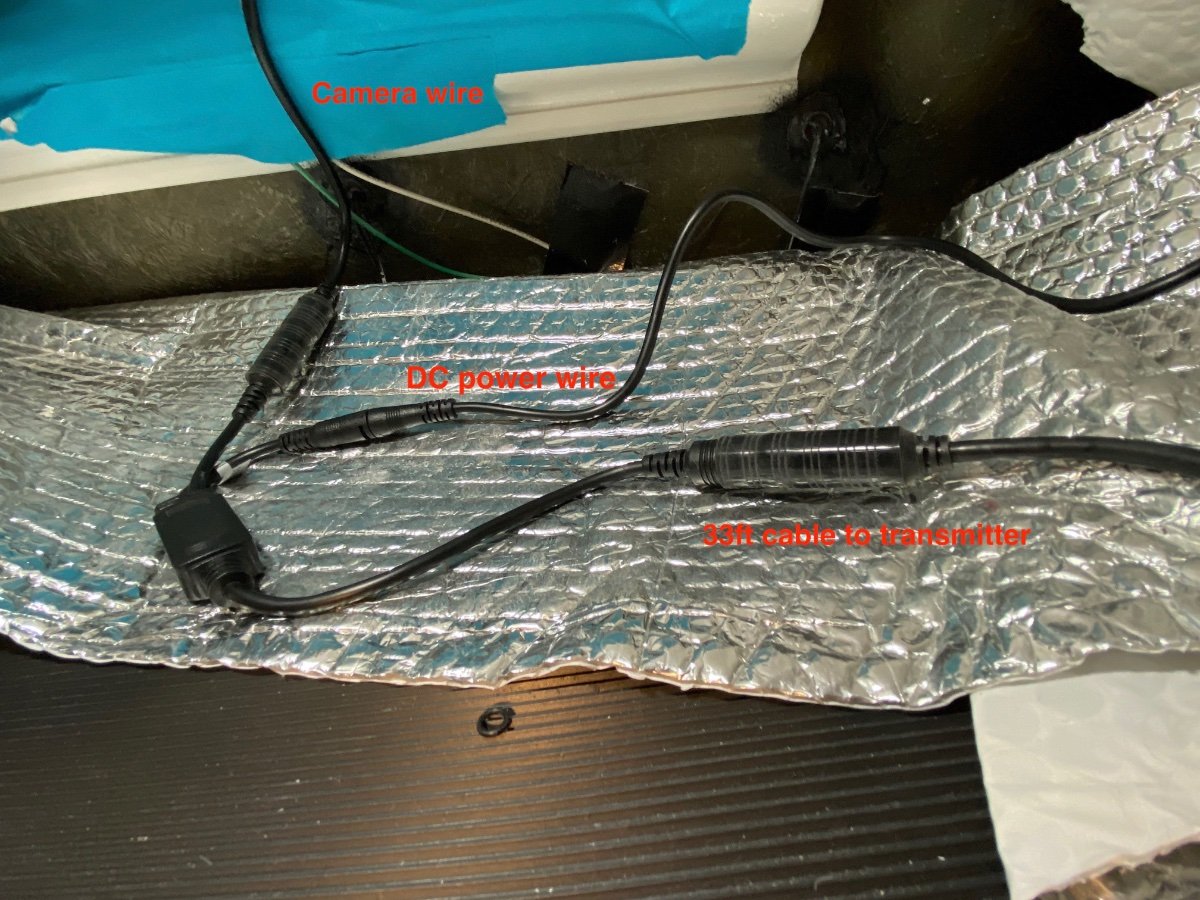
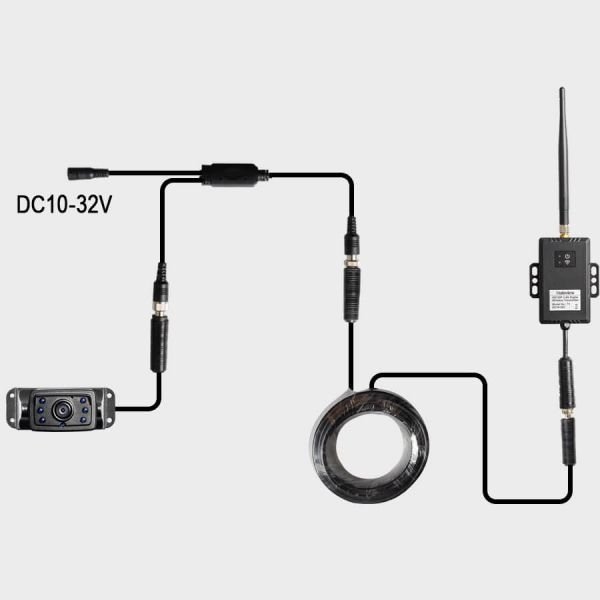
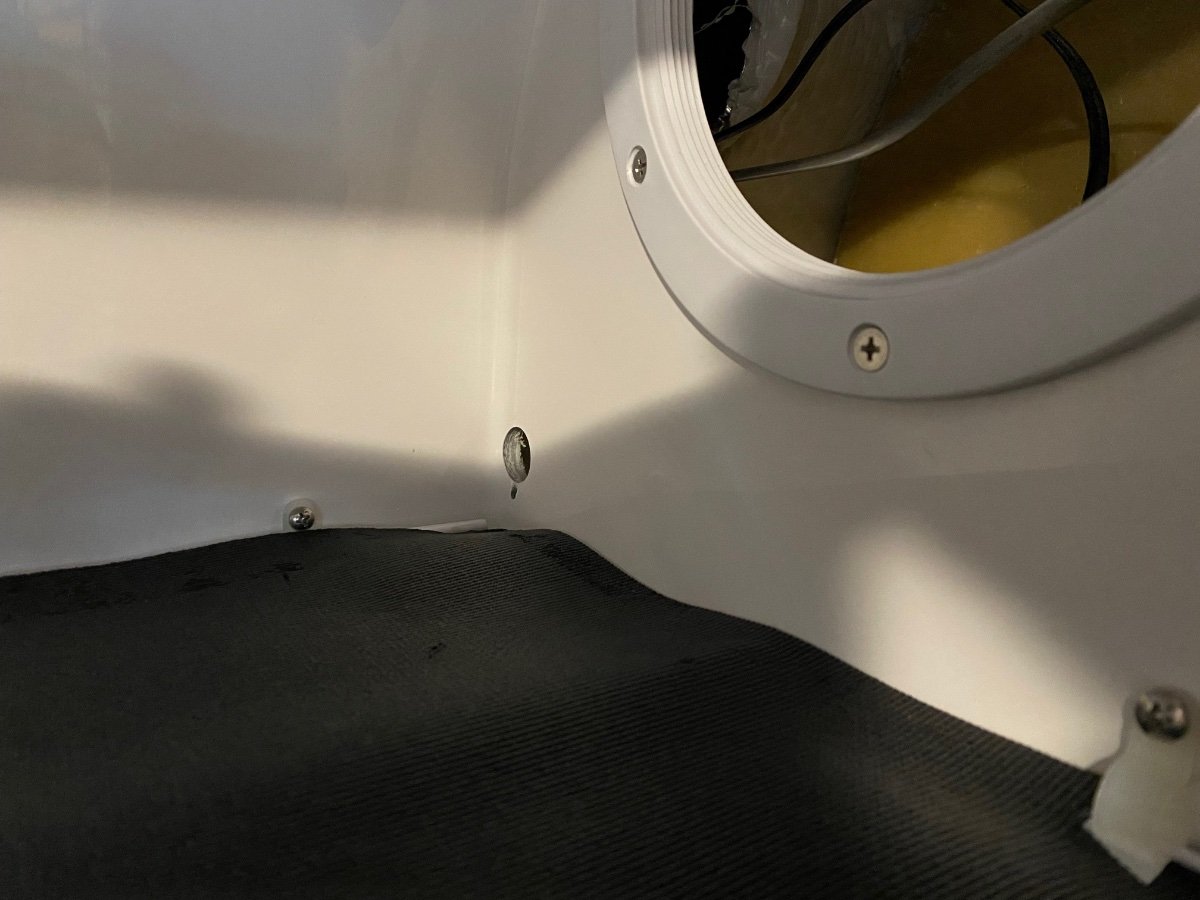
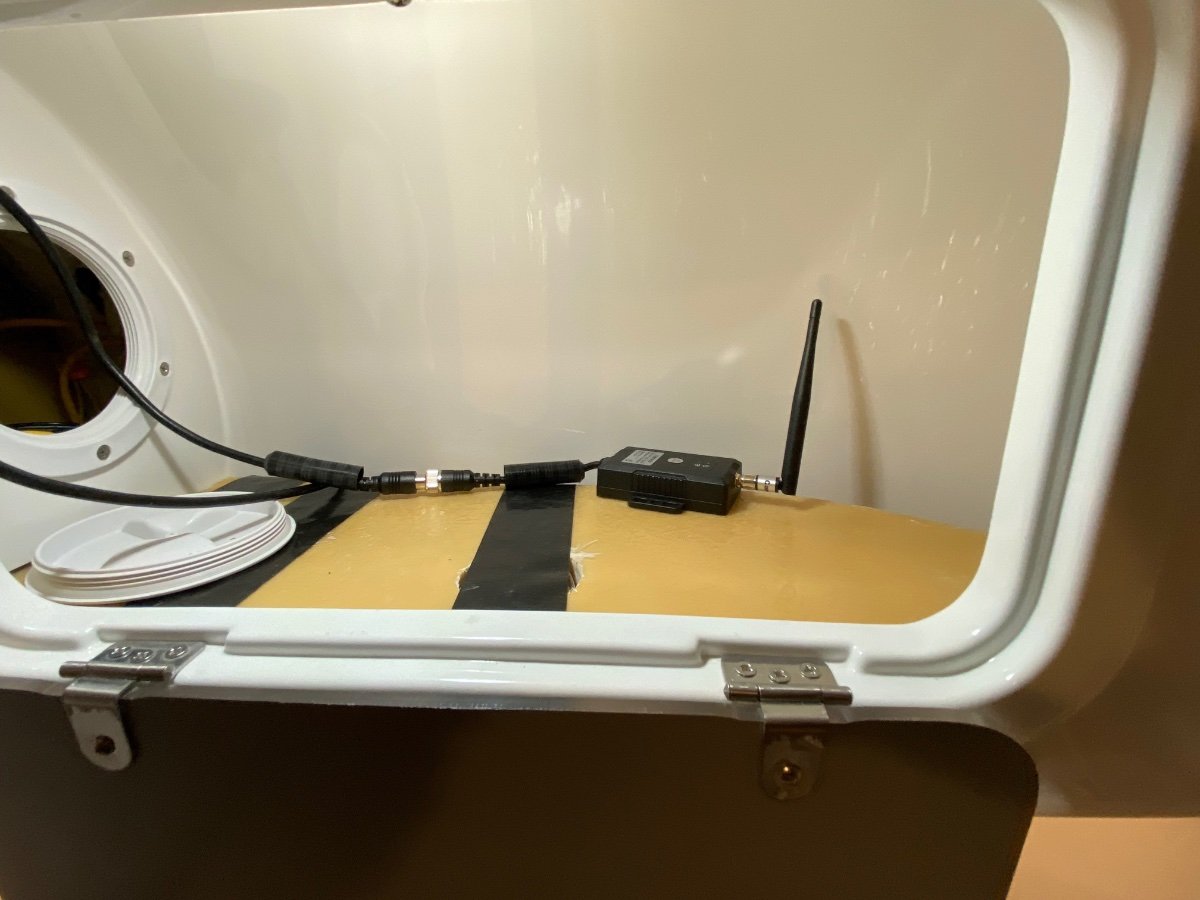
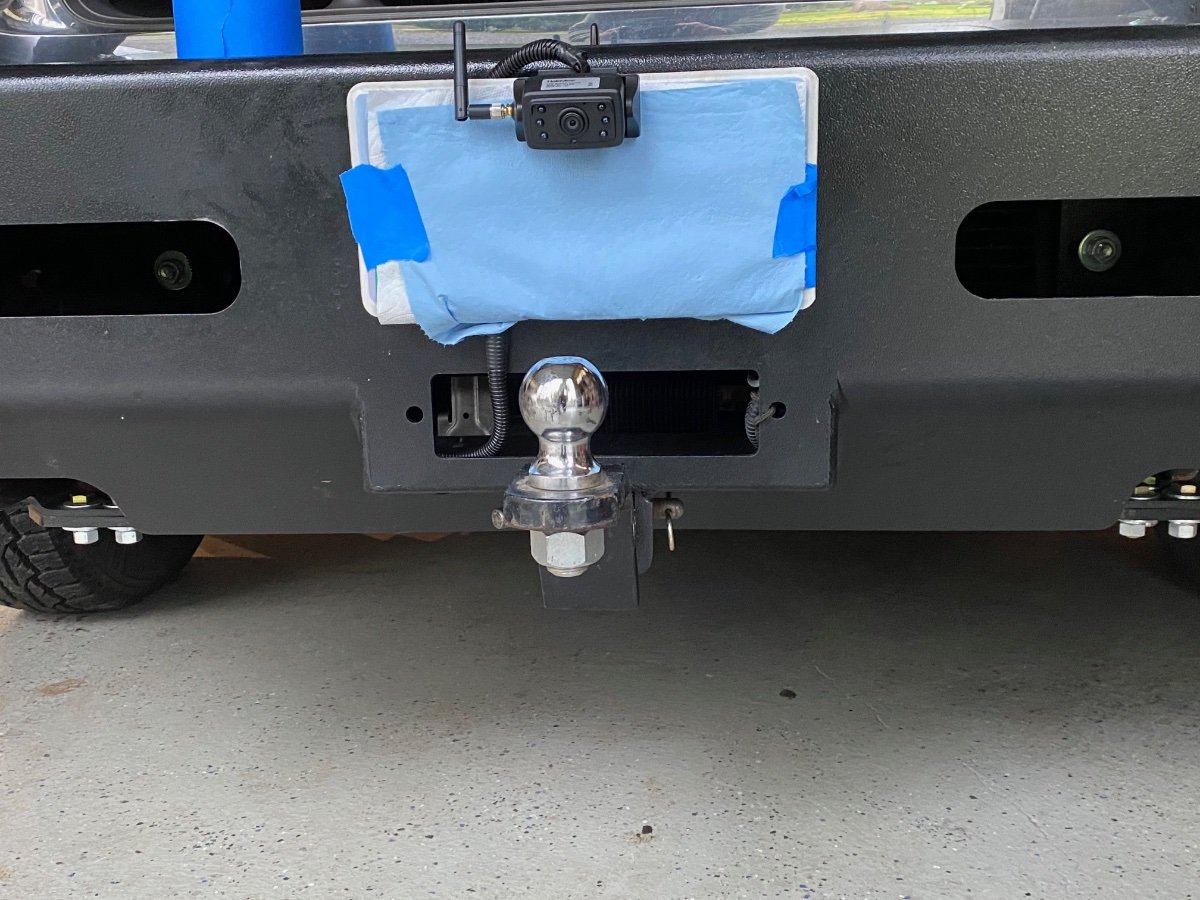
Haloview Rear view camera review. The following is the installation and review of Haloview camera. About 12 months ago I put feelers out there about rearview cameras other than Furrion. I had read about to many people unhappy with the performance of the Furrion. I had read John Davis’s installation of the Garmin with a remote transmitter and I like the idea. I took a lot of Ideas from John’s writeup and implemented them to fit my wants. Thanks John for your writeup. I purchased the following directly from Haloview. Note: Haloview does not have any support in the USA. Haloview’s support and products come direct from China. All support is submitting request via the internet. RD7 monitor and camera with 33ft of cable. The 33ft cable was overkill. I was uncertain if the Haloview would connect as reliably from the Front bathroom cabinet area like John did (plan A), or if I would have to route it to the front Propane doghouse area (plan B). The Haloview was intended to be installed across the top of the camper with the camera mount on the back and the transmitter to be on the front outside of the camper. I really didn’t want wiring running across the top of the camper. License plate Camera. CA109 This was for the front license plate. It was not intended replacement for a Dash cam, but to aid in hooking up the trailer to the front end so that I could park the Oli reliably in the 3 sided RV port. Memory You have to purchase a memory card in order to record audio/video. I decided to max it out at 128GB, So I could keep more data. Rearview mirror Monitor adapter: This adapter plate allows you to mount the monitor over the front of the mirror. I like this because it attaches/de attaches easily. and does not sit on the dash. DC 5.5mm x 2.5mm Male Plug The Haloview comes with a long cigarette lighter power cord. I really don’t like a bunch of cords dangling around the cab. I had looked at several different cables on Amazon, I had found another cable that was 9ft long, but messed up and ordered this instead. I will just add the extra wire I need to make the run to hardware it to my truck. Mounting the Camera I mounted the rear camera above the Oliver sign on the top of the roof. I like the U channel idea that John Davis installed. The depth of the camera was about 2.3inches. I found a piece of scrap aluminum 3” angle. I cut two 7” lengths and made my own U-channel. Angle Aluminum is attached with 1/4-20 stainless steel bolts The camera cable connector is 5/8” diameter and the cable itself is about .220”. I found a shifter bushing at Orielly’s that worked as a grommet. I cut a slot in the bushing so I could get the bushing on the cable. I also had to trim the leading edge of the bushing so I could get it started, It was a tight fit. I also made a 7/8 slot in the aluminum where the bushing resides, instead of just drill a hole in the alumimun. This will hopefully allow keep water from building up around the bushing. Sorry I didn’t take pictures of aluminum before assembly, Above: Male end of the connector with rubber boot The Wiring The wiring came into the upper rear cabinet inside the Oli. When pulled the street side panel off from the inside of the cabinet, I was lucky enough to find a 2 wire bundle with one wire marked “cam”, and the other wire was a ground. The DC power cable that came with the Haloview had 22 gauge wires, and the Oli has 14 gauge wires. So the soldered a small length of 18 gauge DC wire to the 22 gauge and reinforce the smaller wires and connections with a couple layers of heat shrink to reinforce the 22 gauge wires from breaking as easily. I then made a mechanical connection with the 18 gauge wires to the Oli’s 14 gauge. I purchased a LED switch from Oliver and added it to the Master switch panel. I love it that Oliver already had a slot for the camera. It made it easy to add power and ground to the switch and connect the “cam” wire on the panel side. Above: Wires inside the upper cabinet just behind the Oliver sign. Below: Haloview wiring setup. The 33 ft Cable going to the transmitter was the only big cable run the I had to do. I want to step back a week in time just after I received the Haloview products. I wanted to test the equipment and where I was actually going to place the transmitter. I kludged together some stuff to place the camera just inside the back window. Then connected all of the haloview cables together and powered them up with a battery jumper box. I place the transmitter inside the bathroom cabinet and taped to the front bulkhead. I used painters tape to secure everything in place for a drive. I mounted the monitor in the truck and went for a 40 mile drive on 2 lane roads and a good freeway stretch. I found the the Haloview transmitter communicated well with the monitor in the truck. I will cover my results later in my review. The 33ft cable run The 33 ft cable was ran through the street side cabinets. I ran into one snag, I was unable to get a fishtape through the pantry cabinet area. I tried for about 45 minutes and then gave up. OK, time to start plan “B”. I know that getting a wire through the bottom street side waste plumbing areas was doable. So I made sure I could get a fishtape from the bottom storage area to the top rear cabinet, this was no problem at all. The only part of plan “B” that I really didn’t like was getting the bathroom sink cover off, and drilling a hole through the front hull into the doghouse area, and plugging it; yet another point of possible leaks, plus it wouldn’t get finished this week. Then the thought came to mind, if I am willing to cut another hole through the hull, why not just cut 2 holes in the pantry and go back to plan “A”. Time to get the executive committee (Dawn and I ) and make a decision. The committee weighed the facts and unanimously decided on plan “A”. FYI: if you run the wire as I did, Plan “A” Haloview has a 26ft length of wire at will work better, If you do plan “B” and run it below to the Propane doghouse the 33ft length of wire will probably be needed. The Connectors on the rear camera cables are large. They are running power,ground, audio, and video through it. Kind of clunky, but I really do not know any better way. I cut two 3/4” holes in each side of the pantry cabinet. I went a little oversize since 5/8” hole is a very snug fit with the cable connectors and boot. upper pantry shelf It worked great, running the wire and mounting the transmitter only took another hour. I first tested the setup before attaching the transmitter to the bulk head; every worked great. The transmitter was then attached to the front bulkhead with 3mm double faced tape. I had to use 2 pieces thick to get it to stick because of the slight curve in the hull. The transmitter fit neatly in the wire trough and takes up very little space. The area around the transmitter only stores wash cloths and hand towels. Review and Lag Time Results: Rearview Camera: The monitor is 720p resolution, and the camera has a 130º view. Furrion is a 480P with 120º. Because of the viewing angle, things appear farther away than they are. The image appears to be clear with good color. A small vehicle can be seen at about 150yards. Semi trucks at about 300yards. This is enough to keep track of vehicles approaching from the rear. According to Haloview viewing distance is only 32ft at night. This does not seem to be very far. I have not had a chance to test it at night. Hopefully this would be enough to see what is close when backing into a site in the late evening. As far as being out on the freeway hopefully you will be able to see car lights further back than 32 feet. I try not to do much traveling in the dark with the camper attached. Lag time: Lag time has always been a problem on wireless cameras. I tested the lag time by measuring road imperfections. When the road imperfection was at the front tires of the truck I would start a timer, and would stop the timer when I would see it in the camera in the rear. Rearview lag at 65mph was about 0.7 seconds lag from the front tires of truck until seen in the back of the truck. This distance is approximately 55ft total distance from the front of the truck to when seen in the back camera. At 65mph is equates to 95.3ft/sec. At 0.7 sec @ 65mph this is 66.7ft, So 66.7ft minus 55ft is approximately 12 feet delay. 12ft divided by 95.3ft per second is about 0.126 second delay. I watch vehicles pulling out in the lane behind me using the rear view camera. When I would see them start to cross the dotted line I would look in the side mirror. During that time the car would be about 2 ft over the line. I also did the reverse watch cars pulling in behind me from the inside lane watching through the side mirror. As the car cross the dotted line, I would look at the rear view monitor and the car would be about 2 ft over the line. I think the 2 ft differences is the amount of time it takes me to turn my head and refocus. So I think that the small delay is imperceptible. Monitor: What I did notice is that the monitor does not have a fluid smooth motion. It was more like an old black and white silent movie that that flickered in movements jumped just slightly with the refresh of the screen. At highway speeds this really wasn’t a big deal, because you were just glancing in the rear view monitor then back to the road and then scanning the side mirrors. To many things to watch for at highway speeds than just staring at the monitor. In town when going 25mph you might have a full second or two you could concentrate and see the jumpiness in the refresh of the image. This really does not both me. The last time I had experience with a backup monitor was when I Installed a Black & white hardwired 9” tube type monitor in a 35” gray hound bus. So my experience is limited. Audio: The cameras have audio. I have not really tested it. I had it on for a while when I was driving. It just made road noise. Road noise is not enjoyable to listen to. When I had a chance, I pulled over and muted the sound. Depending on how well it works, it might be nice when I am backing up that I can hear my wife. The negative is that you have to go into the menu to change the sound setting. Would be nice if the monitor had buttons that would changing the volume. Backup lines: I was disappointed in the lack of adjustability in the lines. You can in and out and front to back in large steps. Not really super functional. I have 2 different Pioneer stereos with backup lines that each of the 4 points of the lines can be adjusted in both axes. Setup: The program works, but is clunky. Sort of old school technology. This unit can handle up to 4 cameras. There is a lot of ways to set the cameras up for viewing. No wifi/bluetooth to connect to phone There is no way to transfer data from the monitor to a computer or phone besides taking the memory card, microSD, out and putting it into my MacBook. I then have to convert the AVI file to MP4, so it can be read on any (i)phone/computer. ie: Apple does’t do AVI since it was an early 1990s Microsoft technology and uses a lot of space. Cables: Power to monitor takes extra connections. 3 cables totally 9 feet to get to a cigarette lighter adapter. Really! No mater what I do I will still have 5 feet of cable hidden behind the monitor. Front License Plate Camera. The front license plate Camera is only to aid in attaching the trailer tongue to the front ball. Due to the Angle of the camera to ball, the camera only works for this purpose. This use is also limited. I can only see the tongue when I am within about 8 feet away. This after practicing one time, I was able to properly get the ball properly positioned under the tongue 3 more times in a row on the first shot. The camera is only turned on when it is needed for hooking up to the trailer. If I pointed the camera up, I would not be able to use it as an aid in hooking up the trailer. Also this technology is not quite suited as a fully functioning Dash Cam. There is a video delay on front licenses plate camera. The delay was variable from imperceptible to 1.2 seconds. I test it by driving forward in the driveway and then slamming on the brakes and measure the time delay. Fortunately as I got close to the ball the delay seemed to be imperceptible most likely because I was creeping forward, slower than a idle. The camera is mounted on the front of a custom 1/4in thick bumper. The metal may have caused the problems with the reception. Overview: Positives: Haloview had already paired the cameras. I just powered everything up and they worked. Quality appears to be pretty good. Everything was packaged nicely and it took 10 days to get here from China. (not bad from China) I like the rearview mirror mounting adapter. When in use it attaches to my rear view mirror. I do not the rear view mirror when towing, I get tired of just seeing the emblem on the front of the Oli, This unit can handle up to 4 cameras. There is a lot of ways to set the cameras up for viewing. Price was reasonable. I spent over $700 for my 1998 wired rear view camera setup. Technology has came a long way since then. Furrion is $200 more for a similar camera. Records video and audio. Many other setups do not. Negatives: Getting the data off of the Monitor. There is no bluetooth/wifi connection. Kind of a PITA. Since this a totally based Chinese company, I do not know how good there service will be. The Haloview products took about 10 days to arrive from China. Amazon does sell Haloview. I do not know if the support will be any better/different. I did use the online web tool to ask information. In both cases I had a reply in less than 24hours. Finding the communication tool is difficult to find on their website. No phone # to call. Viewing angle of front bumper camera is poor. This could be as much my problem with the angle of setup. Lag time on front bumper is as much as 1.2 seconds. Night time viewing probably poor have not tested. limited to 32ft maximum. Power to monitor takes extra connections. 3 cables totaling 9 feet. Monitor function/setup clunky. Looks like 1990s software technology. Looking online other manufactures are just as bad. This is not a replacement for a real dash cam Adjusting sound is not as easy as just pushing a button. Overall I am satisfied with the investment. For a wireless camera it is good. It is usable and does the job I bought it for. I think the only way of getting better video quality at this time is to hardwire from the camera to the monitor. I really did not want something else to connect when hooking up the trailer.
1 point
-
I would think this is a warranty item with a 2022 unit with either Oliver or Dometic. I would open a ticket with Oliver if you are the original owner. Horrible weather for it to not be working.1 point
-
Camping World diagnosis is locked up motor. Need new motor or unit. They don't have , would be several days. Nearest CW near home could get unit in 8 days, but could not install for 8 Weeks. Headed to Hohenwald.1 point
-
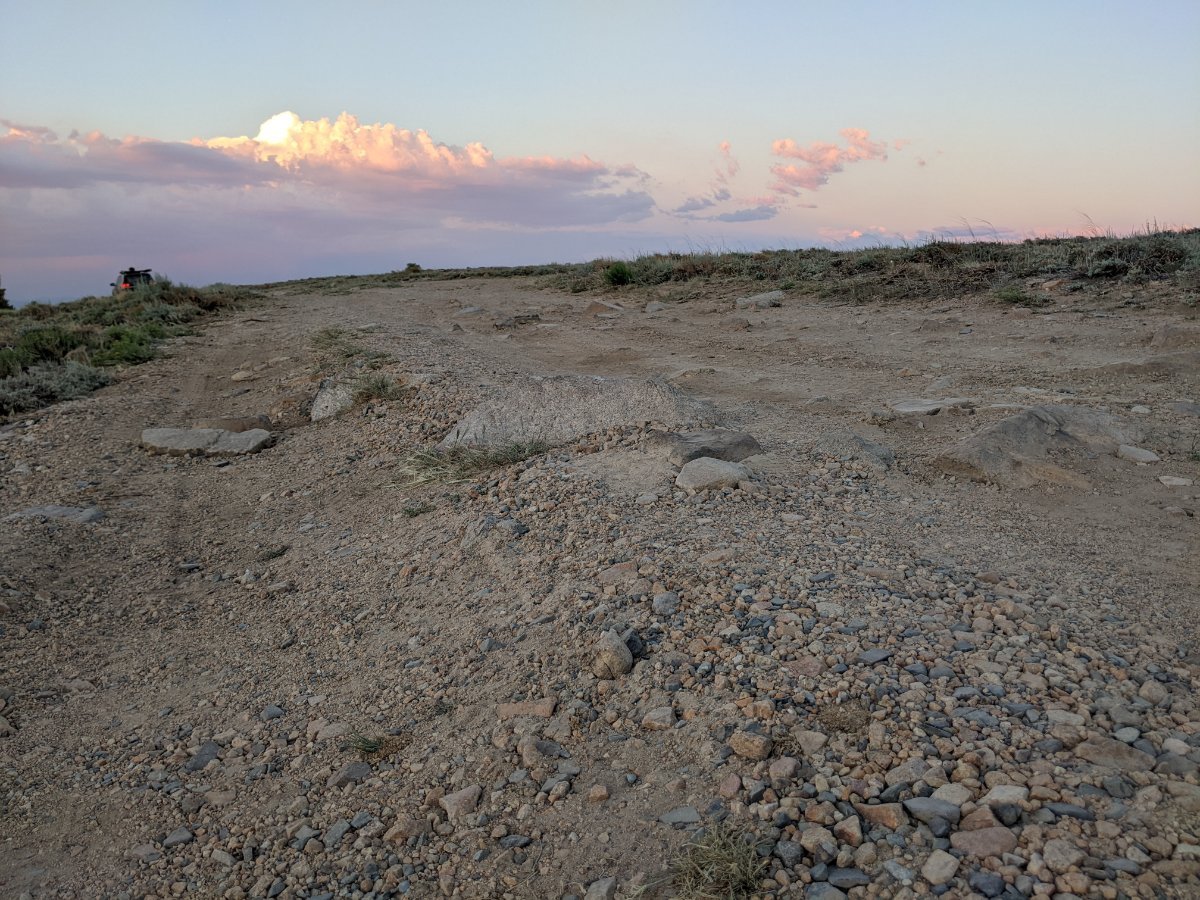
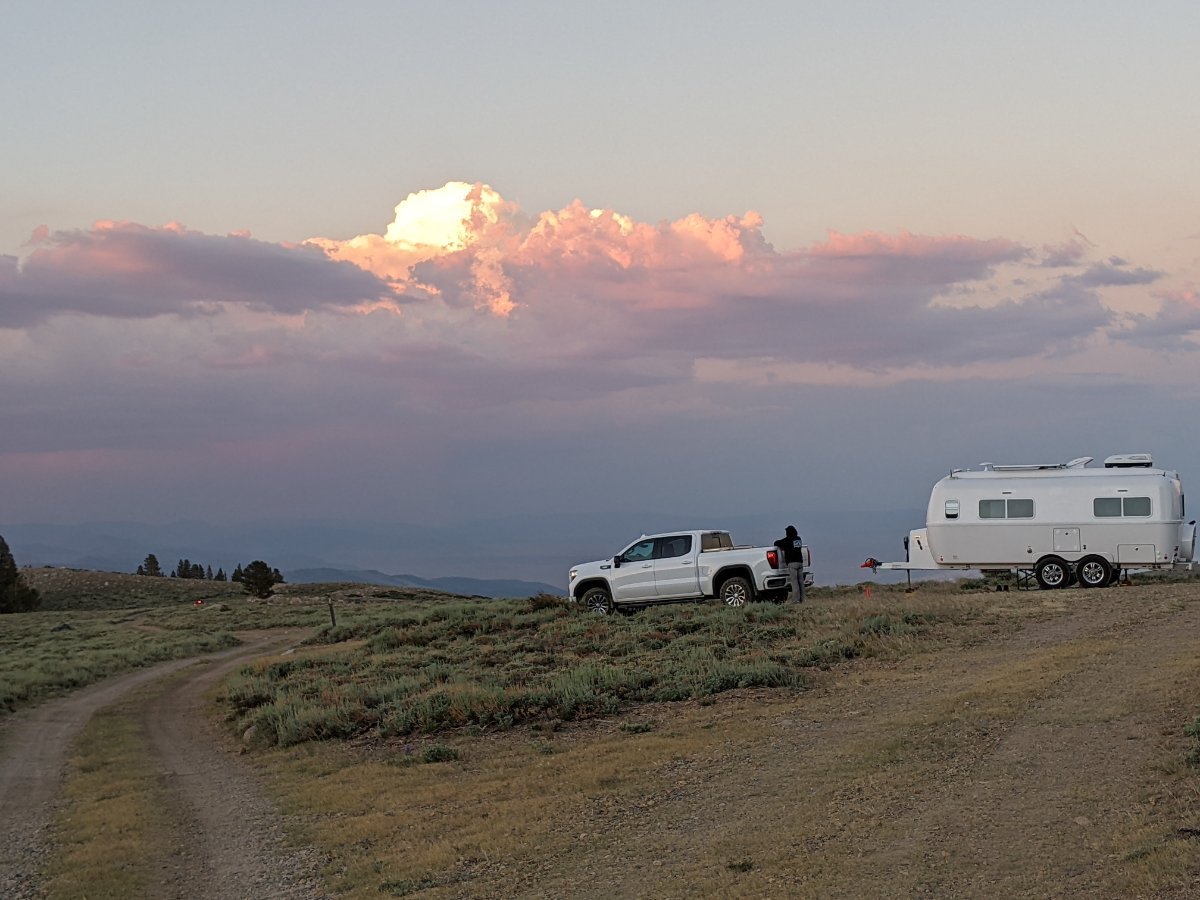
This is why I bought an Oliver. Rough, tough, ready for boondocking. This is off of Highway 395, north of Mono Lake in California. Take Virginia Lakes Road for about six miles (paved) then turn onto Dunderberg Meadows Road (gravel) and look for the spot you want. It's all national forest land so the price was right. We took a spur with big bad rocks, but by crawling along and trying to pick the least bad path, the Ollie performed like a champ. The boondocking inlet port let us fill our fresh water tank again from a couple of 6 gallon water jugs I carry. The sun charged up our batteries and let us use all juice we needed. A hot shower and cold cocktails made cloud watching even better. And the composting toilet makes finding a dump station a non-issue.
1 point
-
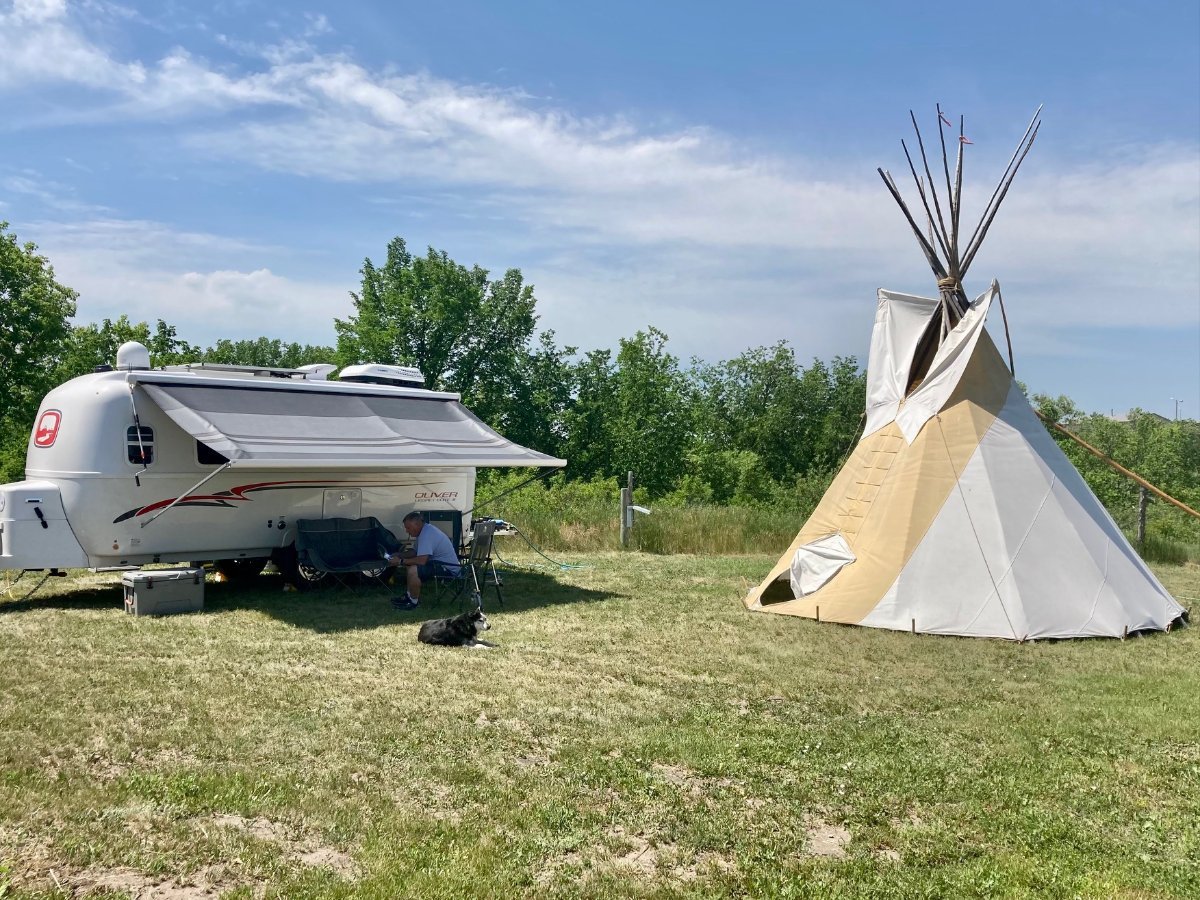
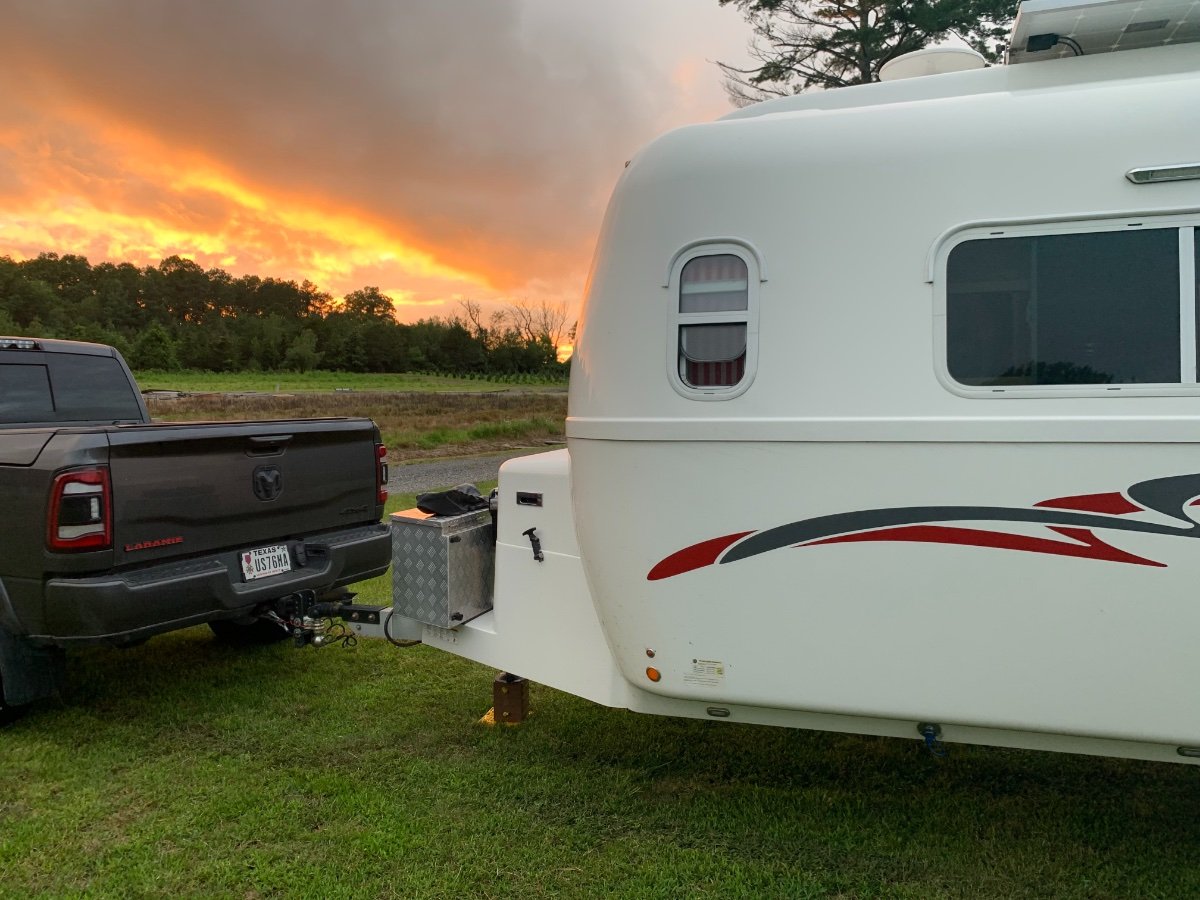
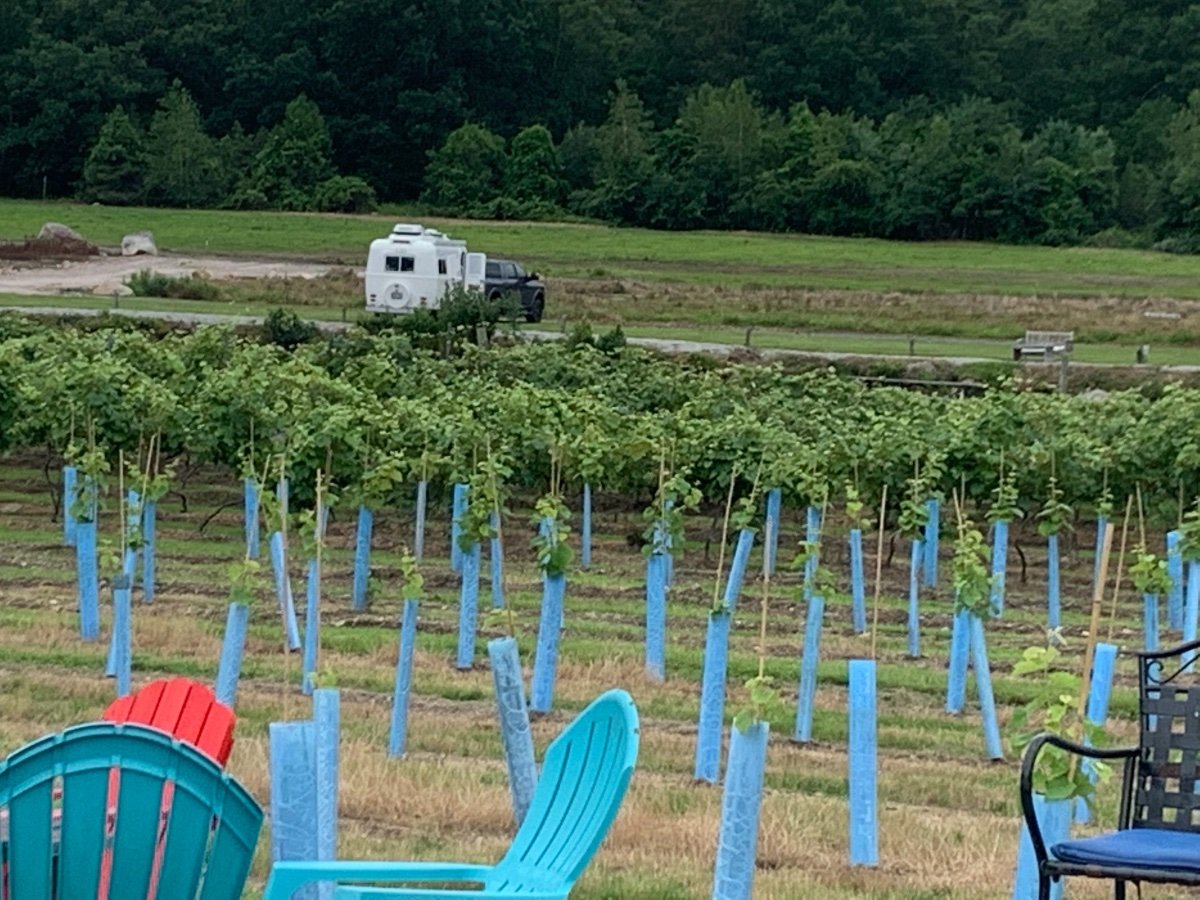
A growing source of Boondocking or Dry Camping (no hookups) is Harvest Hosts. The past couple of years we’ve camped at about a dozen HH locations, mostly wineries and farms. Sometimes you’re in a parking lot, sometimes just a field and sometimes out in the middle of the vineyard. We enjoyed camping at Amber Falls winery just outside of Hohenwald. We’ve camped next to a barn on a farm where we had chickens and horses all around. We’ve never had any hookups, although a winery in PA offered a 20a electrical hookup which we didn’t need or take advantage of. This is at Leyden Farm Vineyards and Winery in RI. Great spot and nice facilities. We enjoyed a glass of wine (or two) on their patio overlooking the vineyards.
1 point
-
Here's the site I scored the first time I stayed at South campground in Zion NP. It was on the edge toward the Virgin River with some widely spaced walk in tent only sites out below and toward the river(phone panoramic photo is distorted mainking a relatively straight road look like it makes a 90 degree bend). This is a really sweet site.
1 point


.thumb.JPG.dd838cdb3df463dab6a16861fa23a319.JPG)

.thumb.jpg.91ab93de4a01f9040d89cc75c92a3115.jpg)
.jpg.c9ac86f4efd5596870623df4fe53240c.jpg)


-
Recent Achievements
-
")


