Leaderboard


Popular Content
Showing content with the highest reputation on 09/07/2022 in all areas
-
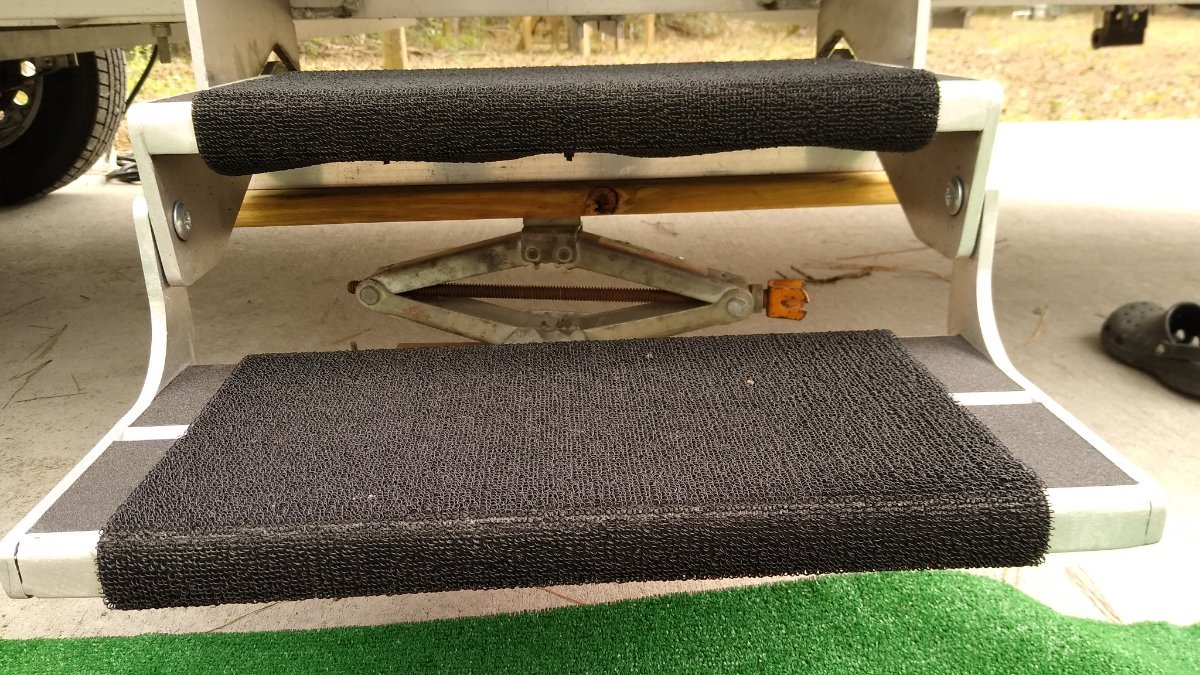
I place a scissors jack and some blocks of wood under the steps. Hand tight enough to keep the steps from dropping with weight, no jacking. This helps reduce the rocking a lot when someone is using the steps.
 5 points
 -
Stay calm, go slow and don't over think things. Follow your check lists and enjoy the experience. There's nothing like stepping out of your comfort zone and finding that it isn't that big of a deal. Just say to yourself... I've got this coach. 😉5 points
-
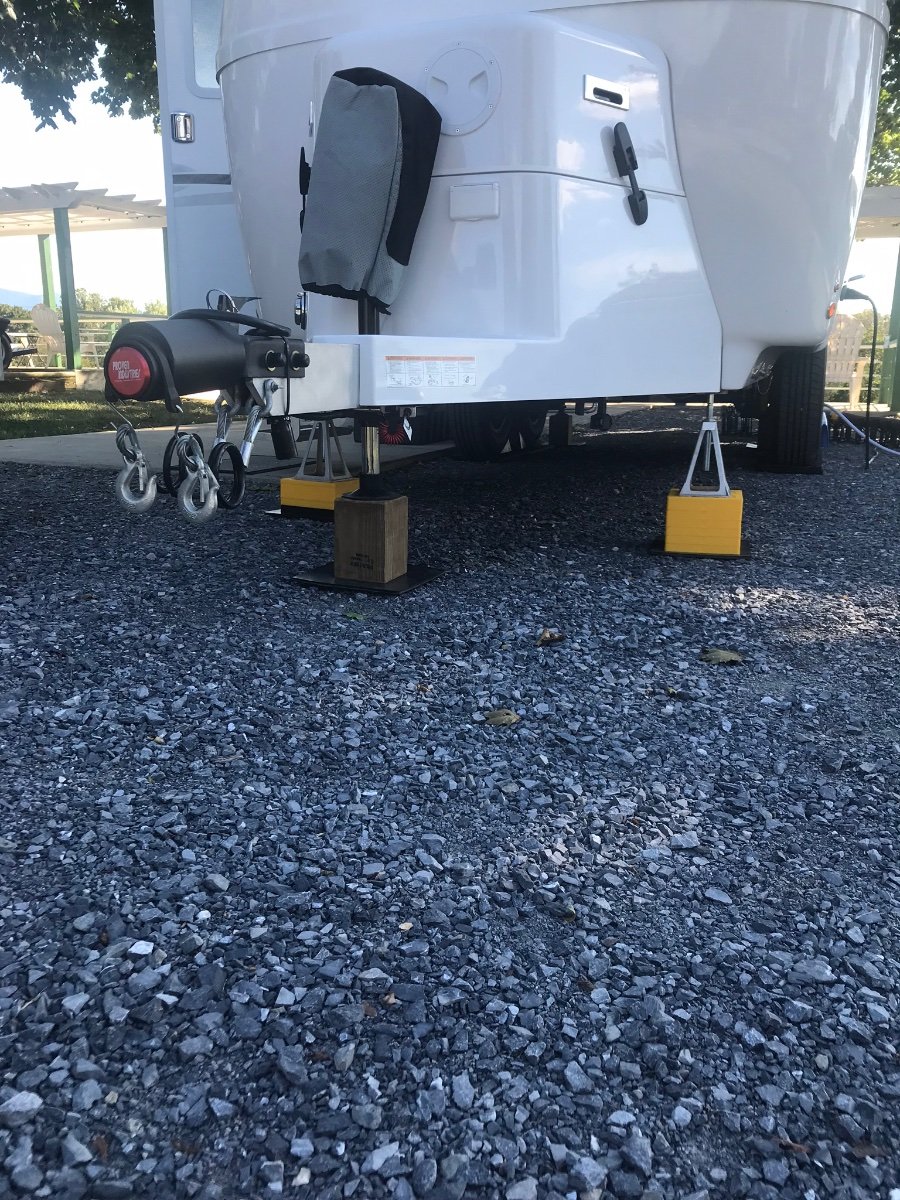
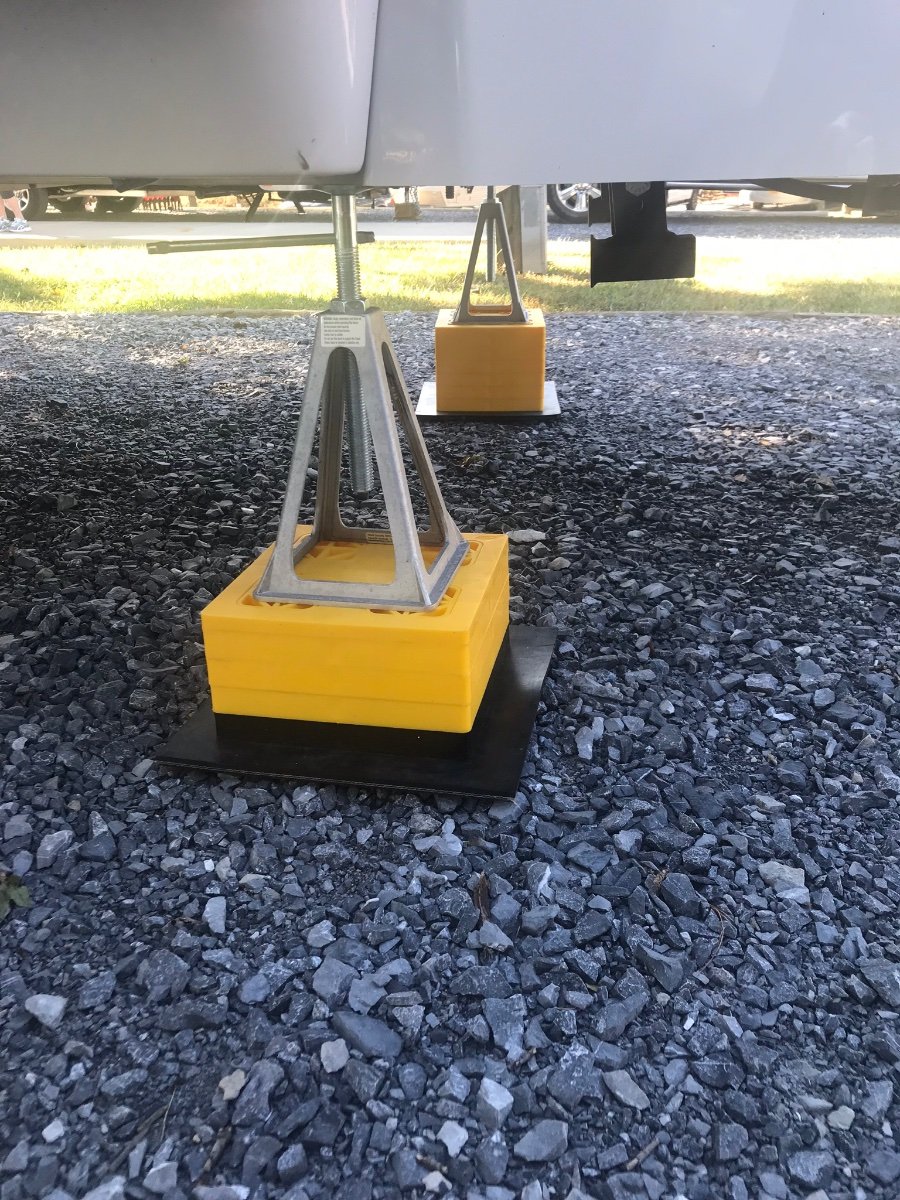
These Camco jack stands will stop the wobble. Just snug them up, don’t try to support the weight of the trailer. We’ve quit using them, and the x-chocks. Just something else to have to mess with. You’ll get used to the movement.
5 points
-
For what it is worth to anyone considering a ceramic coat - Matt Duncan and Rodney Lomax happened to pull a new Oliver into a spray wash place in Hohenwald not 10 minutes after I did the same thing. They were returning from a trip out to Colorado and I was just getting back from Wyoming. We had both driven Interstate 80 and 70 and therefore had about the same amount of bugs, dirt and krud on the nose of our respective Olivers. I would not have believed it unless I actually saw it with my own eyes, but, all that "stuff" on the front of the ceramic coated Oliver came right off. By contrast, even though I have a good wax coating on mine, I still have some work to do to get those critters off the nose. Bill4 points
-
Recently AZ Wanderer posted about the Geyser Shower System. Starting at a bit over $250 it got me to thinking about my present shower system and what it cost. Bottom line with a bit of guessing my shower system cost around $145 including the shower tent. Not only is my system a bit more versatile in that a number of the components can be used for other purposes but it also saves more money, water and propane in the long run and provides for a more "normal" shower compared to the Geyser system (particularly if someone has relatively long hair). I started with just a simple "solar shower" back in my tent camping/backpacking days. Unfortunately, the stream of water wasn't exactly strong and having to use a knob or valve to turn off the water flow when soaping up was a bit of a pain and wasted water too. So, I added a small submersible water pump to the system. I've included a water storage container even though the Ollie's fresh water tank could be used instead. The transfer pump (item with the red top) is used to get water from the storage container into the solar shower. Once the solar shower is full I either leave it at my camp or simply place it on the top of the tonneau cover on my truck where it will get sun most of the day. With a full day of sun this will heat the water to a temperature that will actually scald you and should either be left to cool a bit or mixed with cold water prior to trying to take a shower. On cloudy days either the water heater in the Ollie or heating a pot of water on the stove are alternatives to the solar shower. Normally on a two month fishing trip in the Rockies I will only have to resort to heating water less then 6 times. In either case, the hot water is simply dumped into the 5 gallon bucket and combined with cold water until it feels comfortable. Then the water pump (the blue and white item) is turned on and placed into the bucket along with the shower head. As long as the shower head remains in the bucket the water simply recirculates so there is no need to turn the flow on and/or off between soaping up and rinsing off. At the end of the shower any water remaining in the bucket can either be left there and combined with new hot water the next day or returned to the storage container. If weather permits and grey water is allowed to be dispersed onto the ground then I use a shower tent. This provides a bit more room as compared to showering in the Oliver and reduces the impact on more water going into my grey tank. If I can't use the shower tent then I simply place the 5 gallon bucket on the toilet seat in the Oliver and shower as normal. This too saves water and there is at least as good water pressure and less mess to clean up as compared to using the onboard Oliver water pump and bath. I don't think that my system saves as much water as the Geyser but it does provide for a more "normal" shower and is less than half the cost. I do save on both propane and water as compared to a shower in the Ollie and the 5 gallon bucket and 8 gallon water container can be used for other things around camp. Bill
4 points
-
Until you check the hardware securing your jacks, you are just chasing rainbows. Once you know they are all tight, then you can think about other options. John Davies Spokane WA3 points
-
The FIRST thing to do is get a torque wrench and check the rear jack bolts, 43 foot pounds, four bolts per jack. If they are at all loose the trailer can move around and the jacks may not operate correctly. Also check the front ones, they are smaller, hand tight with a box end wrench is fine. https://olivertraveltrailers.com/forums/topic/6812-check-your-rear-jack-mount-hardware-bottom-frame-bolts-were-1-turn-loose/ John Davies Spokane WA3 points
-
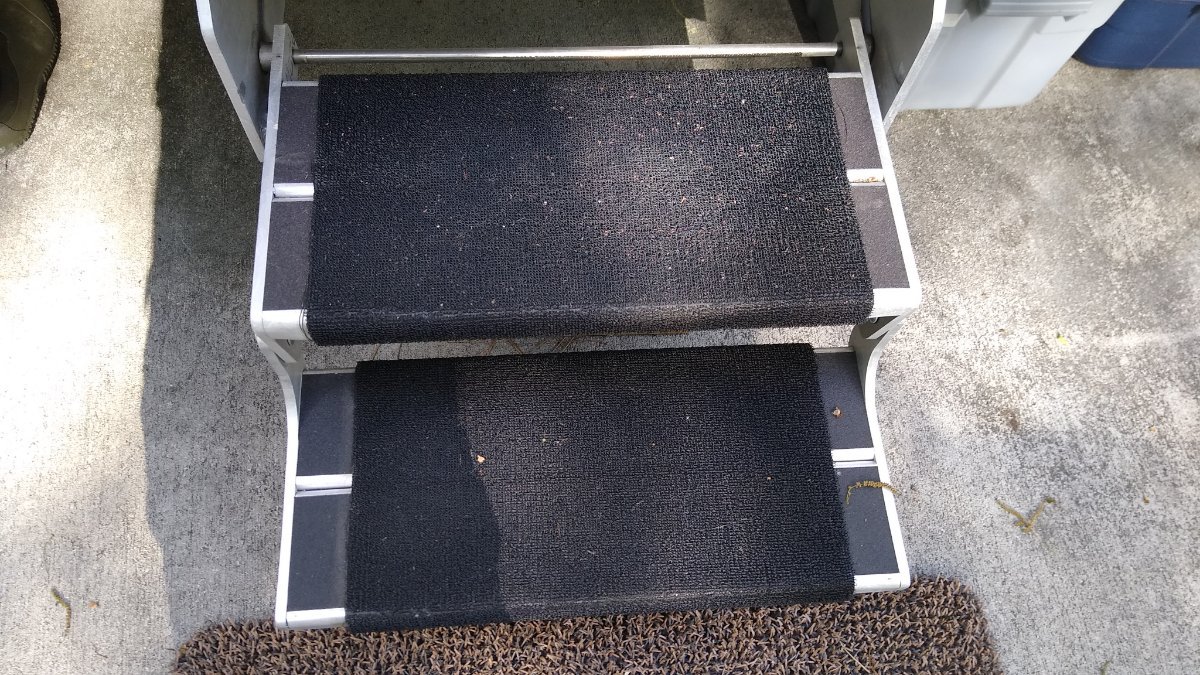
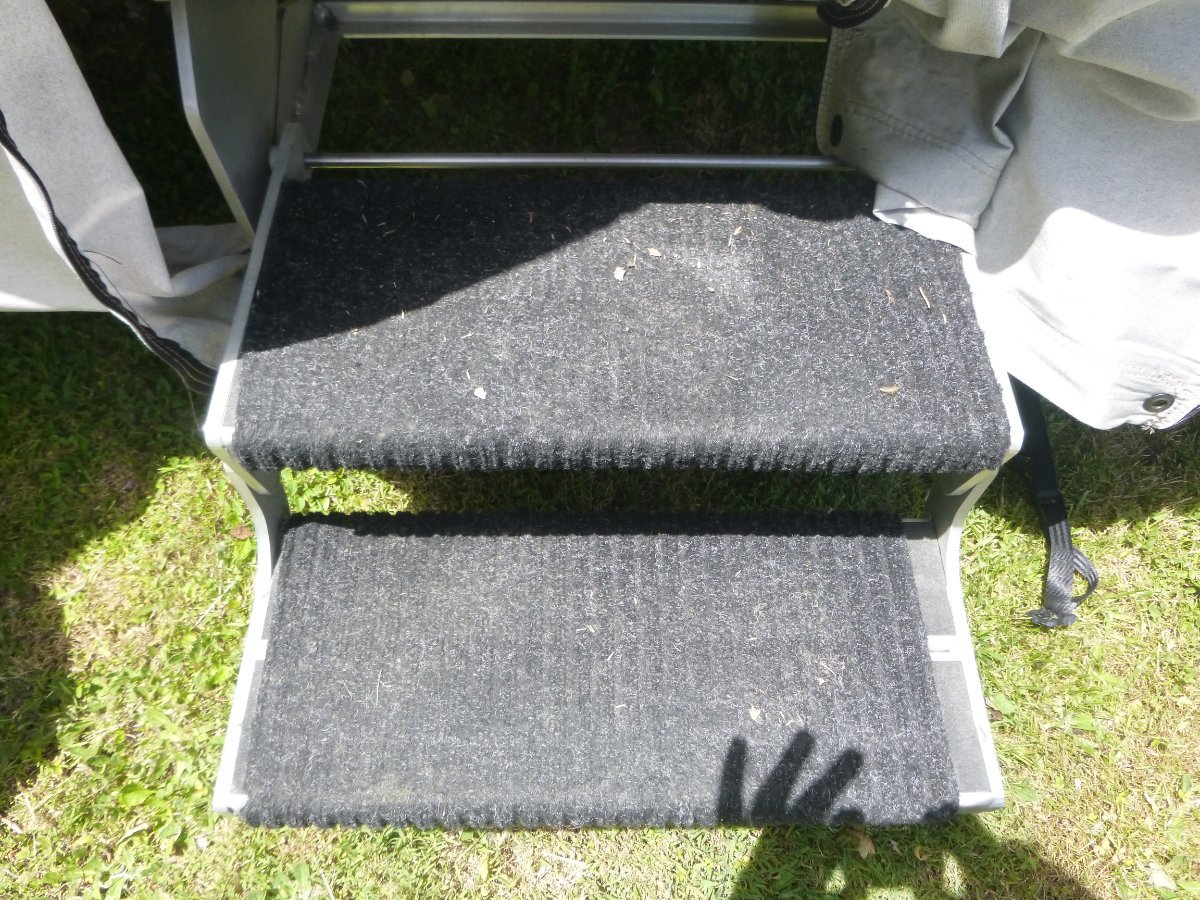
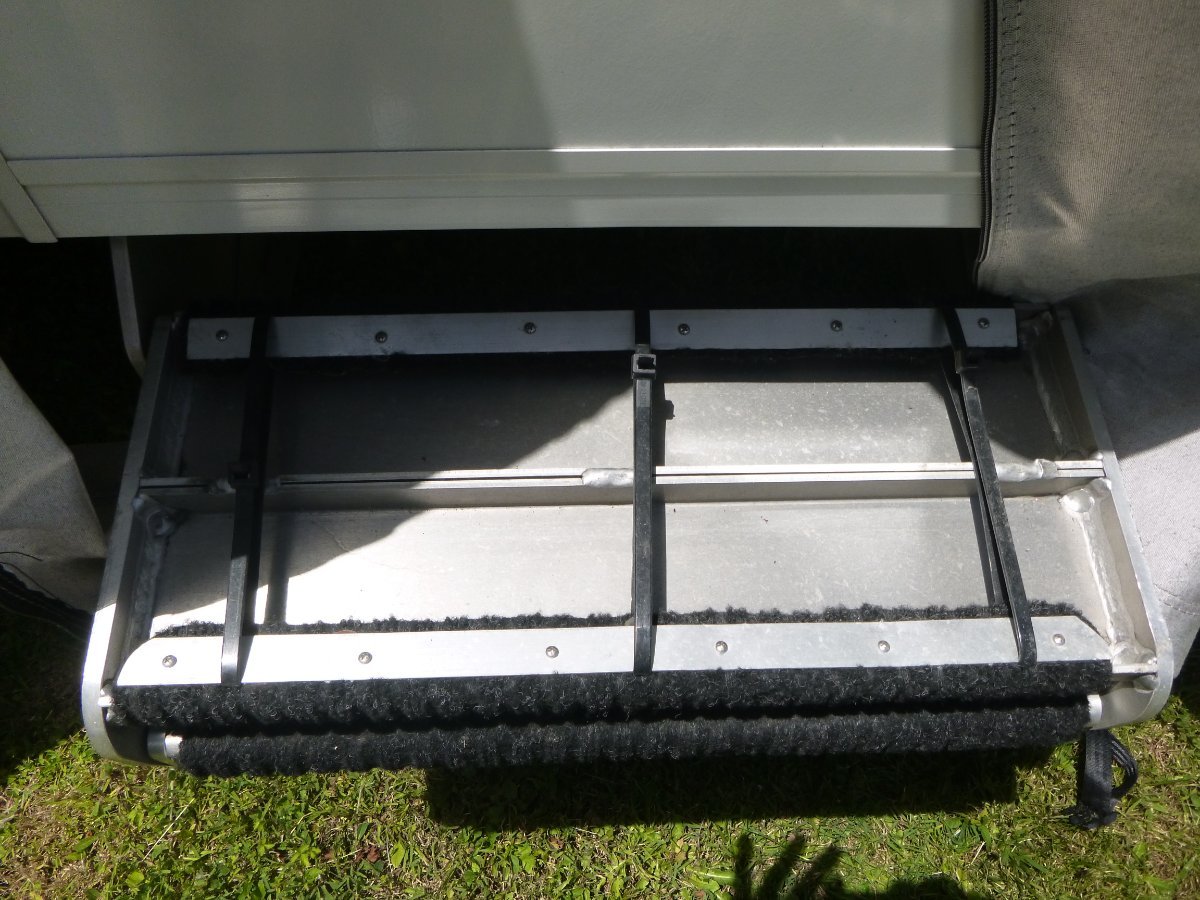
Apologies for the click bait title, but we really do have Grubby Feet and like them a lot. The recent thread Stabilize Oliver II suggestions reminded me of how well our Grubby Feet have worked and thought I would pass it on. Initially our Oliver was in a storage lot infected with Nostoc, a cyanobacteria. When dry it was crisp and dead looking but add a little moisture and it becomes a slippery slimy mess that spreads everywhere it is tracked. It even created a mat of slime on the bare steps making them slippery. I tried one of the carpet wraps on the steps, but it just became a slippery and slimy mess. I came across Grubby Feet while searching for something that would give us more confidence when using the steps. After installing ours nearly two years ago I can say they have performed and lasted better than expected. Here in the southeast it has rained a lot the past two years and I've worn many types of shoes and can say I feel confident when using the steps now. The mats have worn well, looking and feeling nearly the same as they did when I installed them. The only sign of aging is a slight wear pattern and a couple strands that separated on the edge.
2 points
-
In total agreement with Bill. We had the trailer and truck done by CGI, in June, and are totally pleased with their work and the fact it only took 2 hours total to clean and dry the Oliver2 AND truck. That feat would have taken me 7 hours easily after waxing the 2. John2 points
-
The 1.98” ones don’t go on the wheels at all, you throw those center caps away. BTW the LE2 axles are standard 3500 pound axles, they just have special 6 stud hubs so Oliver can use those heavy duty 16 inch wheels. It also means there are no plug and play disk brake kits available, you either have to install two new heavier axles or downsize to 15 inch tires and 5 lug wheels. Not exactly brilliant engineering….. Your Ollie will come with this sort of hub: Trailer Hub and Drum Assembly - 3,500-lb Axles - 10" Diameter - 6 on 5-1/2 … but with NevR Lube bearings, I think. John Davies Spokane WA
2 points
-
Lots of great Tennessee state parks. We really loved Fall Creek Falls, one of the TN resort parks. When we stayed,,restaurant, golf, bluegrass at the amphitheater. And, of course, the lovely falls. Downside, the sites were smallish, and fairly close together, in our loop. Still, a great spot.2 points
-
We stayed at Cumberland Mountain State Park TN several times not too far from I40 between Nashville and Knoxville. We like camping in area 5. It's located in the Plateau area at Crossville. Electricity & water at the campsites with a dump station as you leave. The restrooms were clean, too. https://tnstateparks.com/parks/cumberland-mountain2 points
-
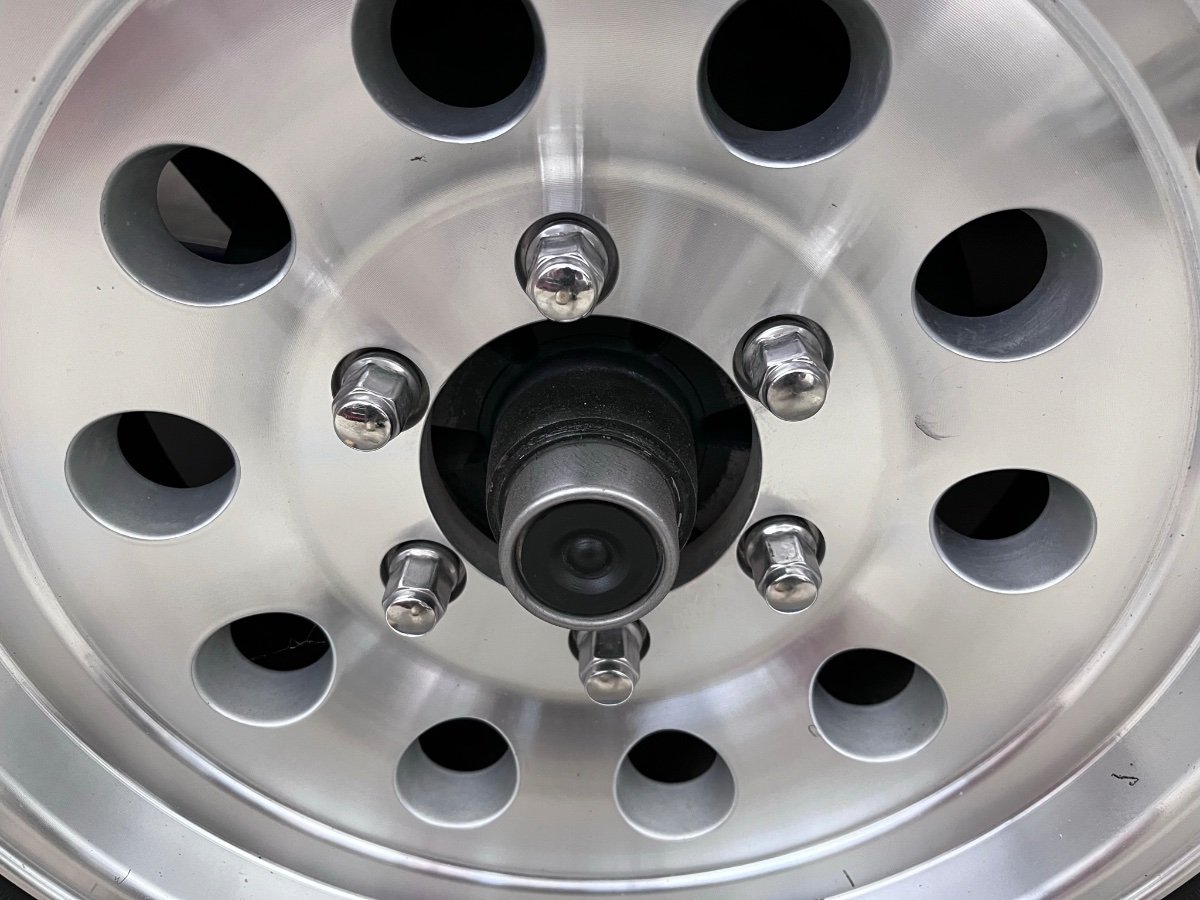
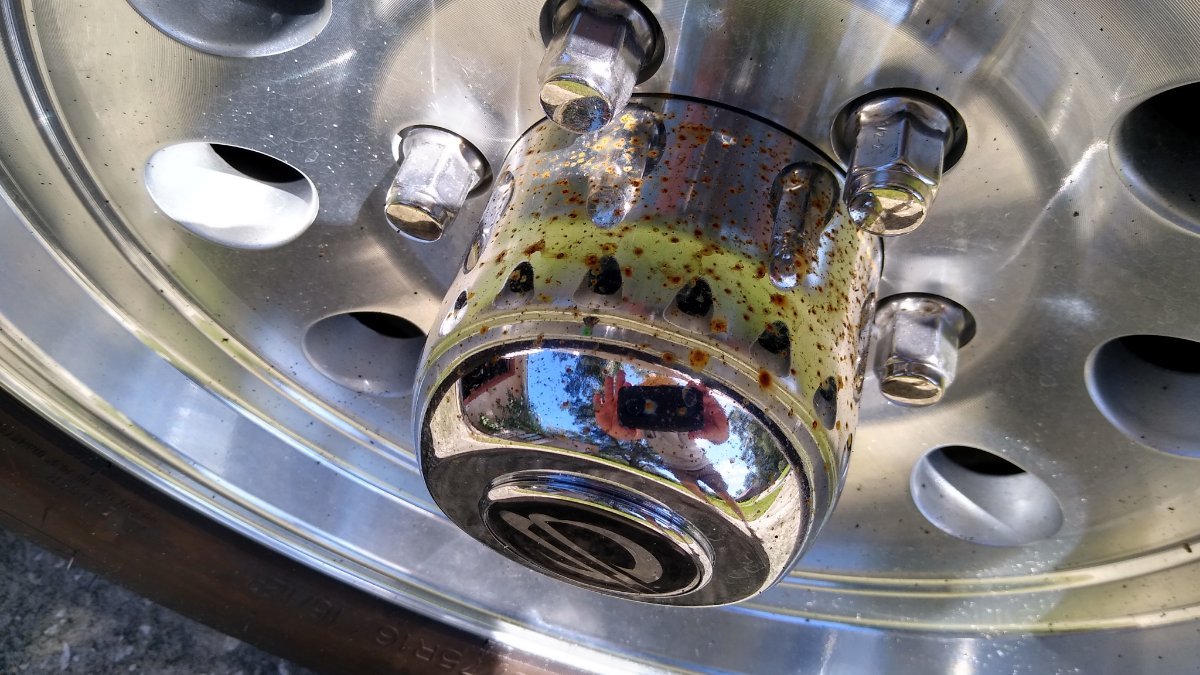
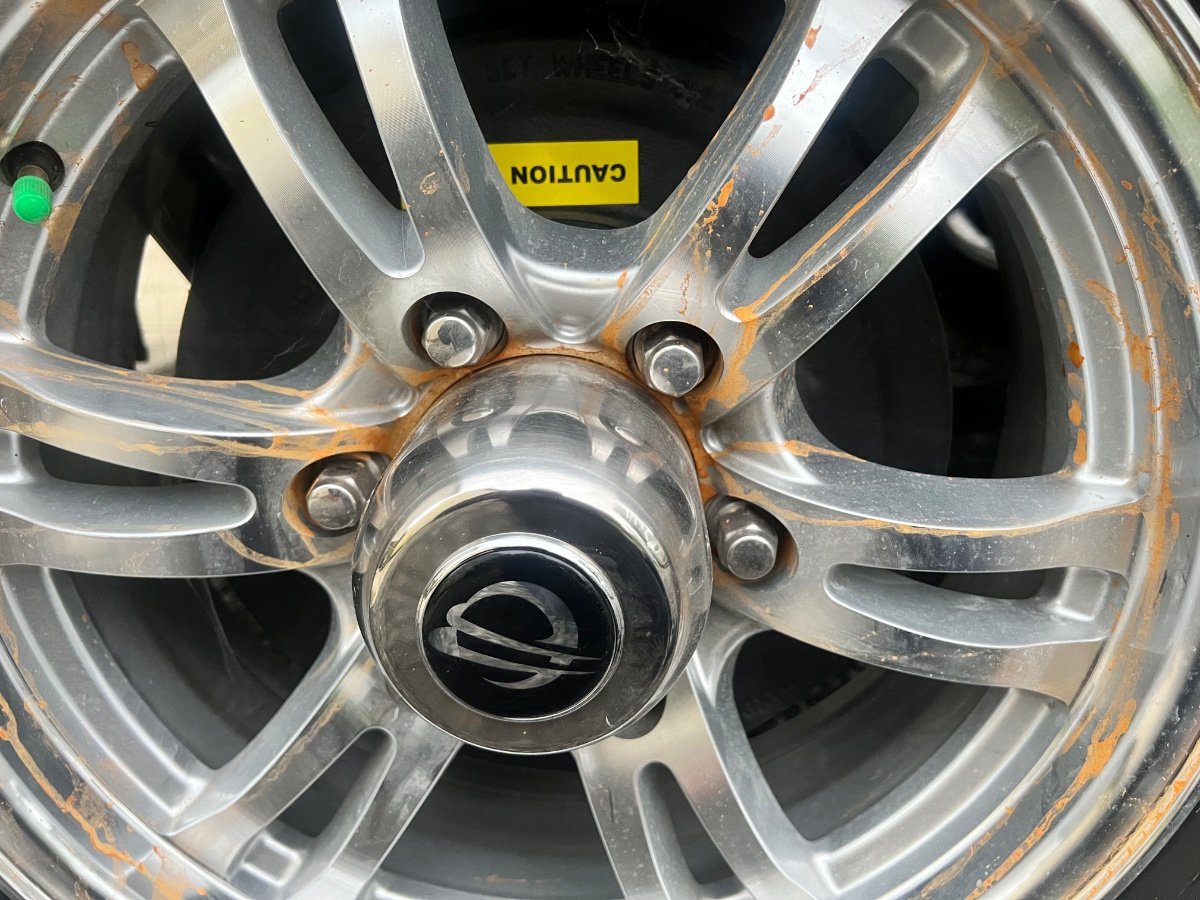
The wheel center caps are probably made by Lionshead and chrome plated steel. The ones on my trailer rusted and pitted in six months. You have to take the wheel off to remove them. All of mine were rusting on the inside too. One of them contained some rusty water. Replaced them with this stainless steel version.
2 points
-
I reposted your pic, this forum will not handle HEIC files, you have to change them to a more common format. Rusty water, you need to remove the wheel and see what is going on, it appears to be trapping water and then the hub rusts and the water slings out. It won’t hurt the wheels, short term, IF they are waxed, but you should fix it ASAP. Long term, it can corrode the wheel inside. It sure is ugly, eh? This is just one problem with center caps, mine are long gone. BTW I sure do like those new style wheels. John Davies Spokane WA
2 points
-
Even though I'm not sure how my stair covers would do with slimly bacteria, they are made from Dollar Store (really $1.25 Store) mats. It takes two mats cut to size, 6 zip ties, some 1 inch aluminum flat stock and 24 stainless bolts. My first set of these lasted 5 years. Bill
2 points
-
LevelMate "For trailer leveling, I use the LevelMate Pro by LogicBlue. I purchased it and had Oliver install it for me on delivery day in the closet because I was not confident that the attaching screws would be too long and pierce the visible side of the fiberglass. This system works like a charm, and I have verified its accuracy using a 4' level.“ I use a Levelmate Pro also. I was worried about the screws inside the closet so I used vhb tape. Occasionally I check with bubble level, it’s still stuck in place.2 points
-
Early hulls had it hard mounted at the back corner of the curb side bed (with no flip up mount).I cracked my skull on it a couple of times making the bed, and removed the entire TV and mount the day I got home. I did not give it away, it is wrapped and stored away because I thought some future owner might like to put it back. After seven years the TV is so far out of date, I guess that is now wishful thinking, I should just toss it. Anyone want a free old unused TV and mount? It's in perfect condition except for a blood stain and some of my scalp on one corner 😉 John Davies Spokane WA2 points
-
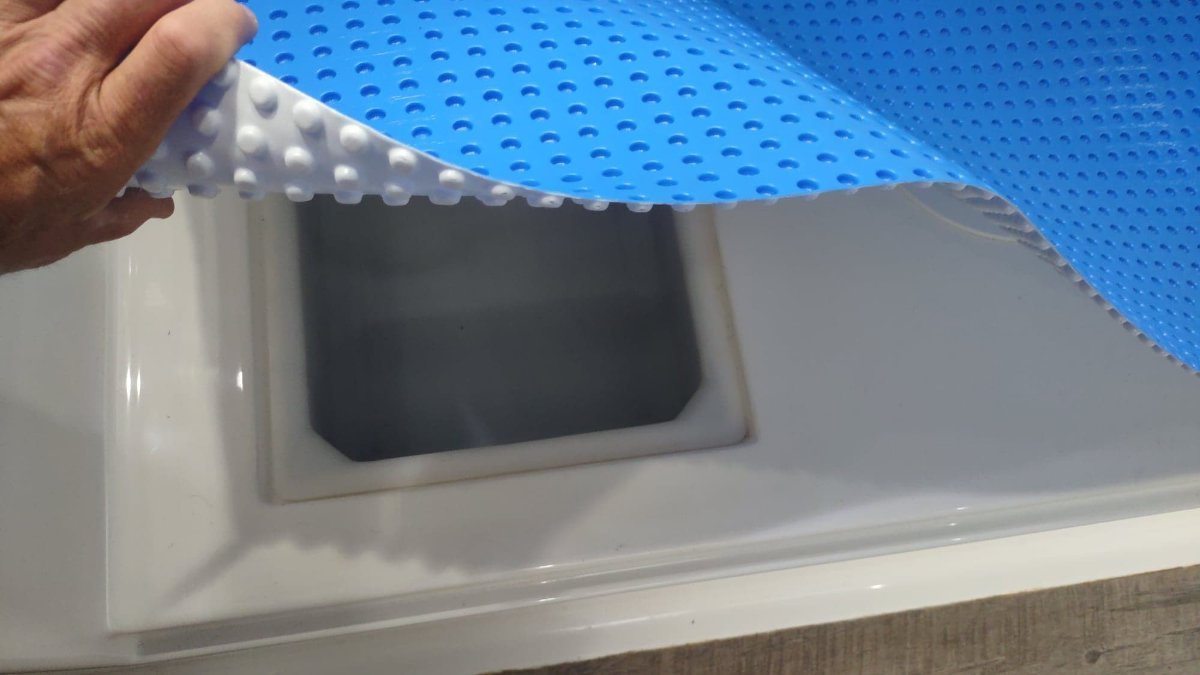
Well, got around to installing the DMX-1 Step underlayment and very happy with the results. Lays flat right from the roll and was easy to cut and fit. About $30 worth of materials and (I think) it will perform better than Hypervent. Time will tell..
2 points
-
We have the same Furrion components and they exasperate me. Fortunately, we rarely watch TV, which, unfortunately, is why I haven't learned how to use the 🤬 components - four years later.2 points
-
John Thank you for this graph. It’s interesting to see that in an ideal situation you would get say 2000 full recharge or 4000 half re-charge etc… It is indeed much better than what I expected but again this is ideal. I remember that my first LED Cree lights were also supposed to last much longer than what I actually got out of them. But for my intended use, it means that those batteries should last me a very long time. Now that I know this, going back to my 1600W Generator question. I now think that I could run my AC from my inverter and feed my generator to only charge the batteries. Ideally, my generator should complement the Inverters but that implies that the inverter AC is 60Hz in-phase with the generator. That’s how a home Solar system would work but its probably not how it works for the 2023 Oliver I wouldn’t be so picky is I could just buy a Honda 2200 and put in in the front basket. That’s not an option and I am already making huge compromises on storage getting an Olivier.2 points
-
During shutdown they sunk some serious money into this campground. Paved it (it was gravel) every site is full hookup, new clubhouse, laundry, showers, & landscaping. Our youngest son lives here & I'll find out about the fish market.2 points
-
This thread is very timely as we wait for our Oliver to be ready March 28th. I’ve been reading every thing I can, watched videos, asked questions, etc. but, having only camped in a 5x8 squaredrop with zero systems in it, I’m sure I’ll still be overwhelmed come delivery day. I already have a Dropbox folder with PDF files of brochures, manuals, diagrams, mods from the forums DIY folder and more. This forum and the Facebook group have been amazingly supportive and a wealth of experience and knowledge. A few of you have contacted me directly, and we’ve had wonderful phone conversations. I’m sure when the day arrives, we’ll be fine! Thank you all!2 points
-
We dove in head first two years ago as new RV and Oliver owners just a couple of months after deciding to purchase an RV. The closest we had come to towing anything was me watching my dad with our boats and travel trailer as a child! I devoured as much information as I could from the forum, Facebook, Oliver University and youtube prior to picking up our LEII and we've just dealt with things as they've occurred by searching those resources, posting with questions or contacting Oliver Service. So far, all is well and we have enjoyed 2 great years of travel. The owner network is a tremendously valuable resource and it was reassuring to know there was a go-to group that was both knowledgeable and responsive if needed.2 points
-
I'll see if I can find the other thread2 points
-
I have an elite, so the experience is different. With either trailer, like @Mike and Carol, I'd never take the tires off the ground, for more than a quick tire change . Imo. For many situations, from what I've seen camping with elite II owners, the Anderson levelers (or similar) are the real deal. We have one axle, so we just use wood blocks on the low side. And extra blocks under the jacks to shorten the "throw." And, maybe you do need the camco jacks, if you're very sensitive to changes. There's a device that can help you get truly level, Bluetooth. I'll see if I can find the thread. It's quite awesome (I've seen it in practice, we don't have it. We don'tneed it, with two of us.) On the sailboat, we get used to being "off level" on a heel. Takes awhile. In a camper, you're usually not inside enough to get used to it. Different circumstances. I carry a small bullet level, but mostly depend on the feel, and a half-filled water bottle on its side. If I'm comfortable, the fridge is comfortable. We often don't bother to put jacks down for one night stays. Never do, at a Walmart, cracker barrel, etc., as it's poor etiquette.2 points
-
I have used the jacks to change tires, balance tires, check bearings, many times. I would hesitate to lift the tires off the ground to stabilize the trailer for extended periods of time while we are inside. If we are off level that much I drive onto legos first, then use the jacks to stabilize keeping the tires on the ground. I do know of owners who stabilize with tires off the ground, I’m just not comfortable with that. Mike2 points
-
I’ve found that I have to run the left and right rear stabilizer jacks down far enough to the point that it lifts the trailer a good bit (and leveling it) and takes a portion of load off of the suspension. The suspension flex is what is allowing the rocking, so you have to make the jacks carry the load a bit. I use the Andersen jack buckets so the jacks aren’t extending very far, so not much flex in the jacks themselves.2 points
-
X-chocks between the wheels may help. https://www.amazon.com/X-Chock-Wheel-Stabilizer-Handle-28012/dp/B002XLHUQG/ref=asc_df_B002XLHUQG/?tag=hyprod-20&linkCode=df0&hvadid=312098740701&hvpos=&hvnetw=g&hvrand=9066806933936176184&hvpone=&hvptwo=&hvqmt=&hvdev=c&hvdvcmdl=&hvlocint=&hvlocphy=9029558&hvtargid=pla-365326661179&psc=1 Also, are your stabilizer jacks fully extended, or are they on jack blocks? The further the stabilizer jacks are extended, the greater the potential for movement as weight is shifted inside the trailer.2 points
-
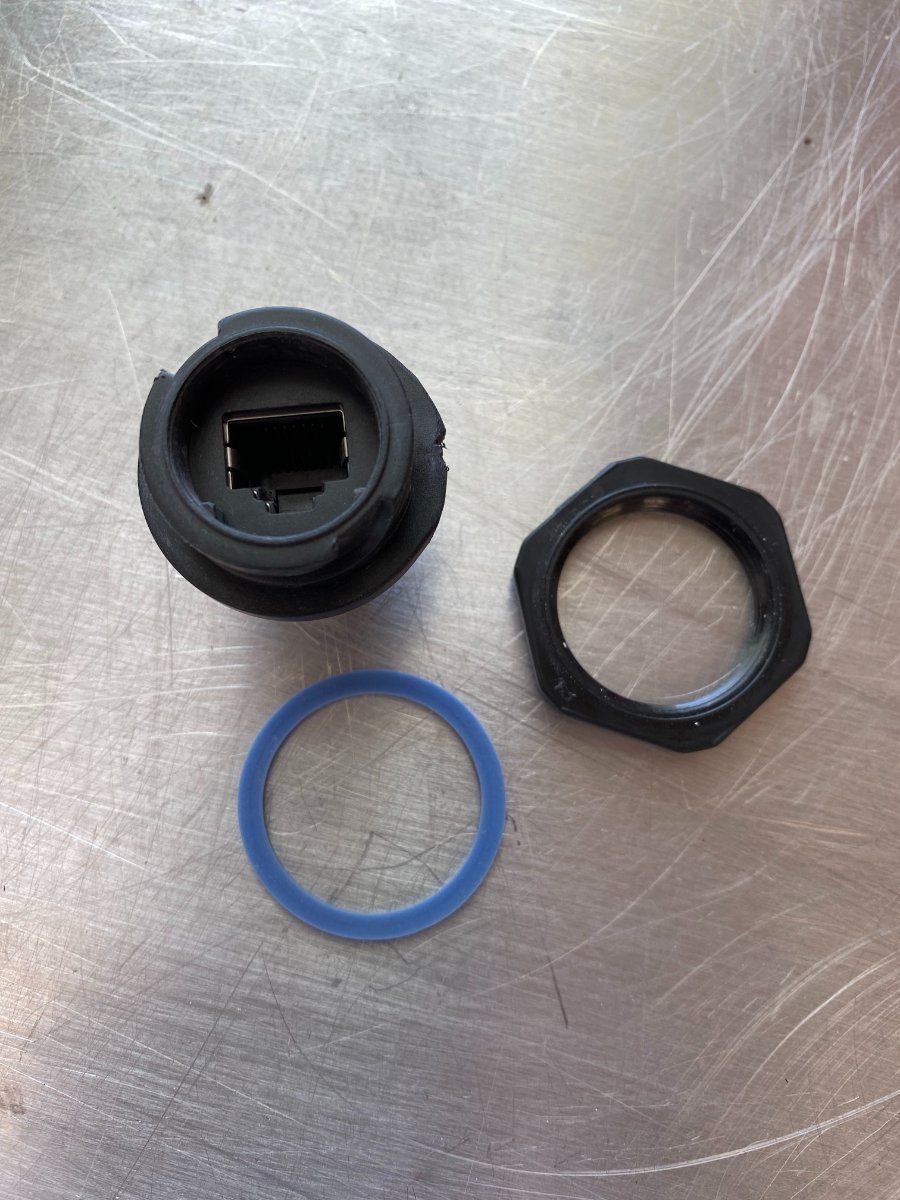
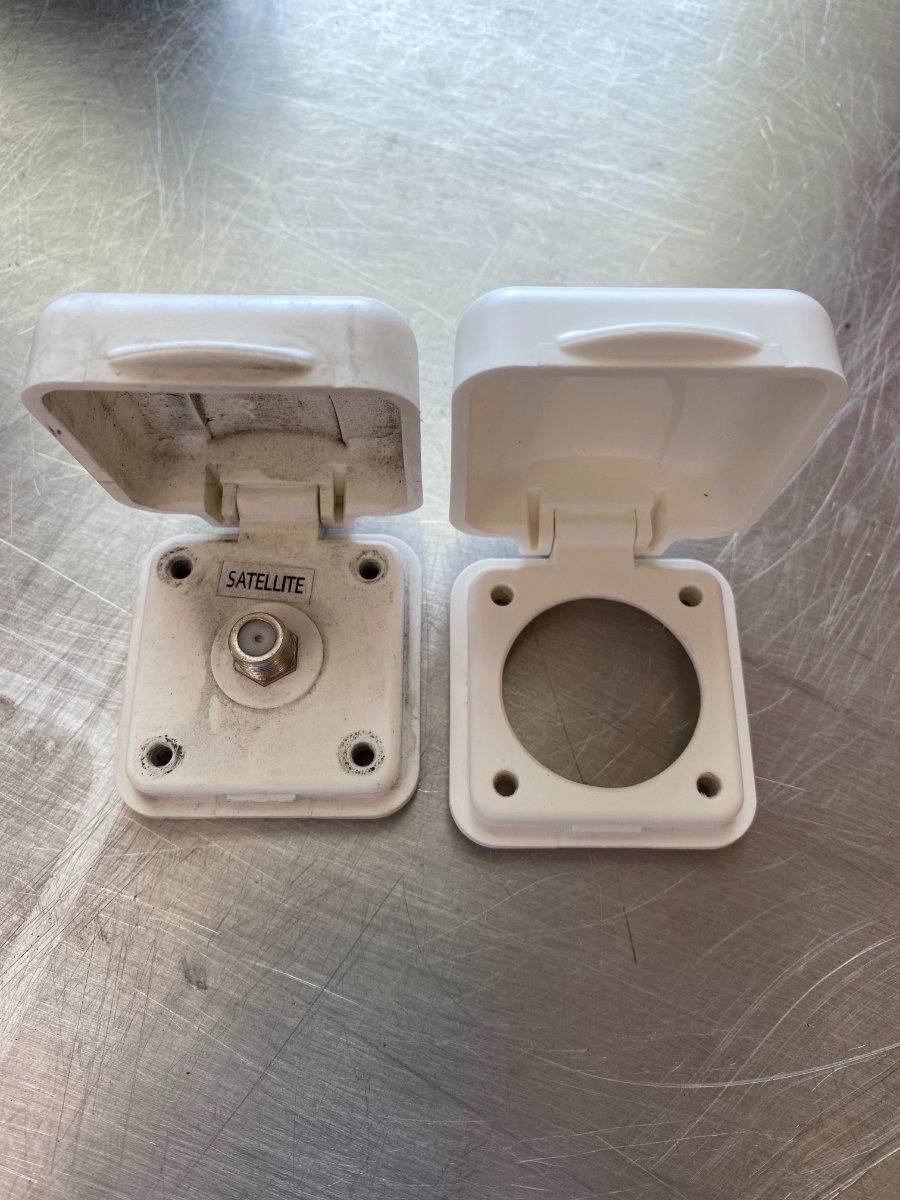
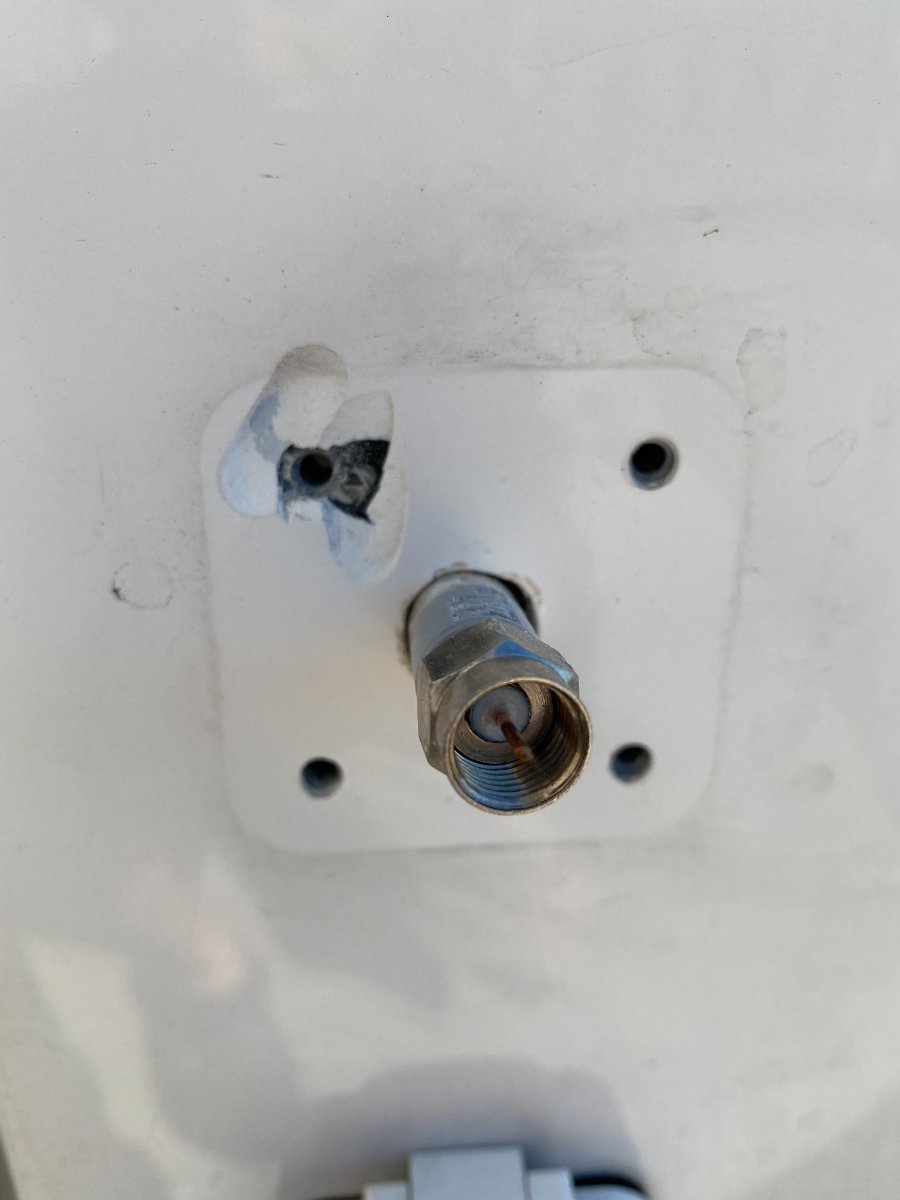
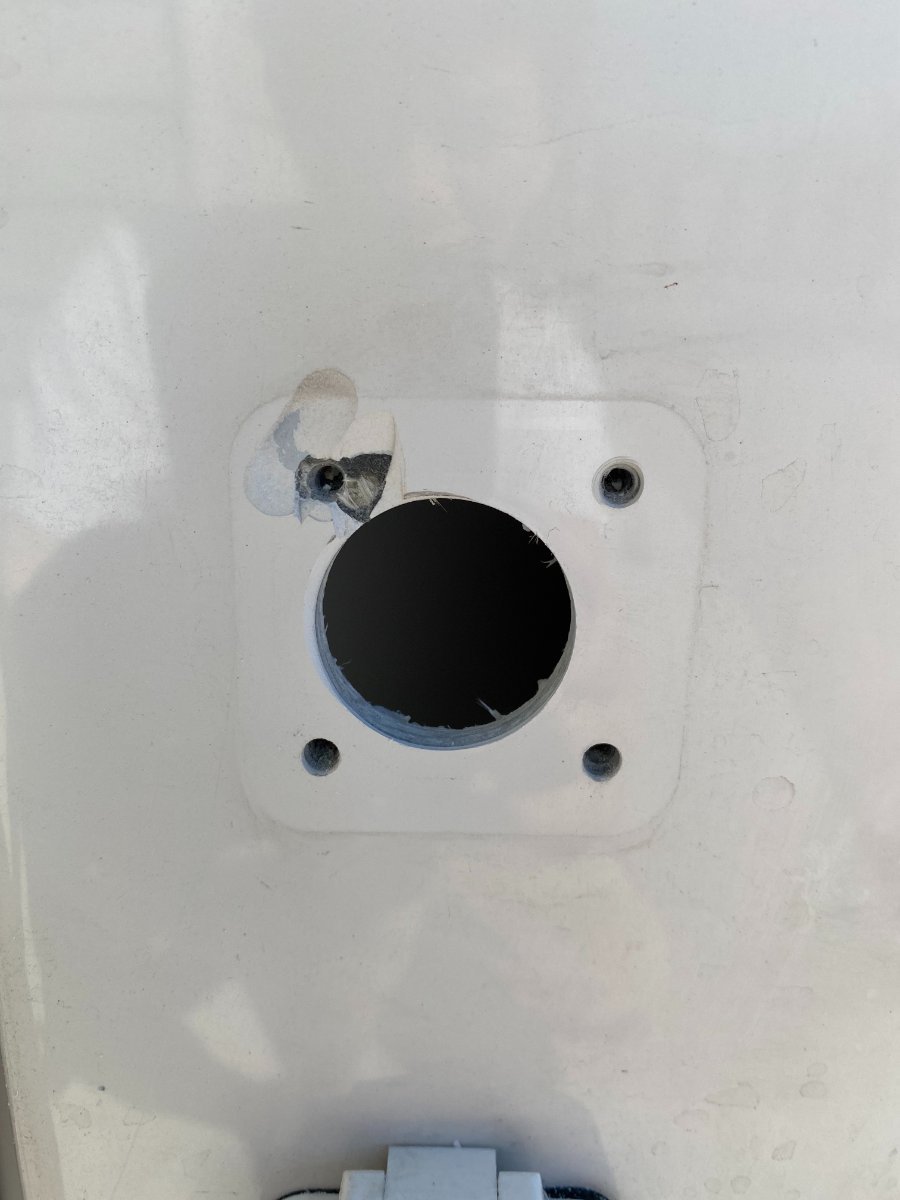
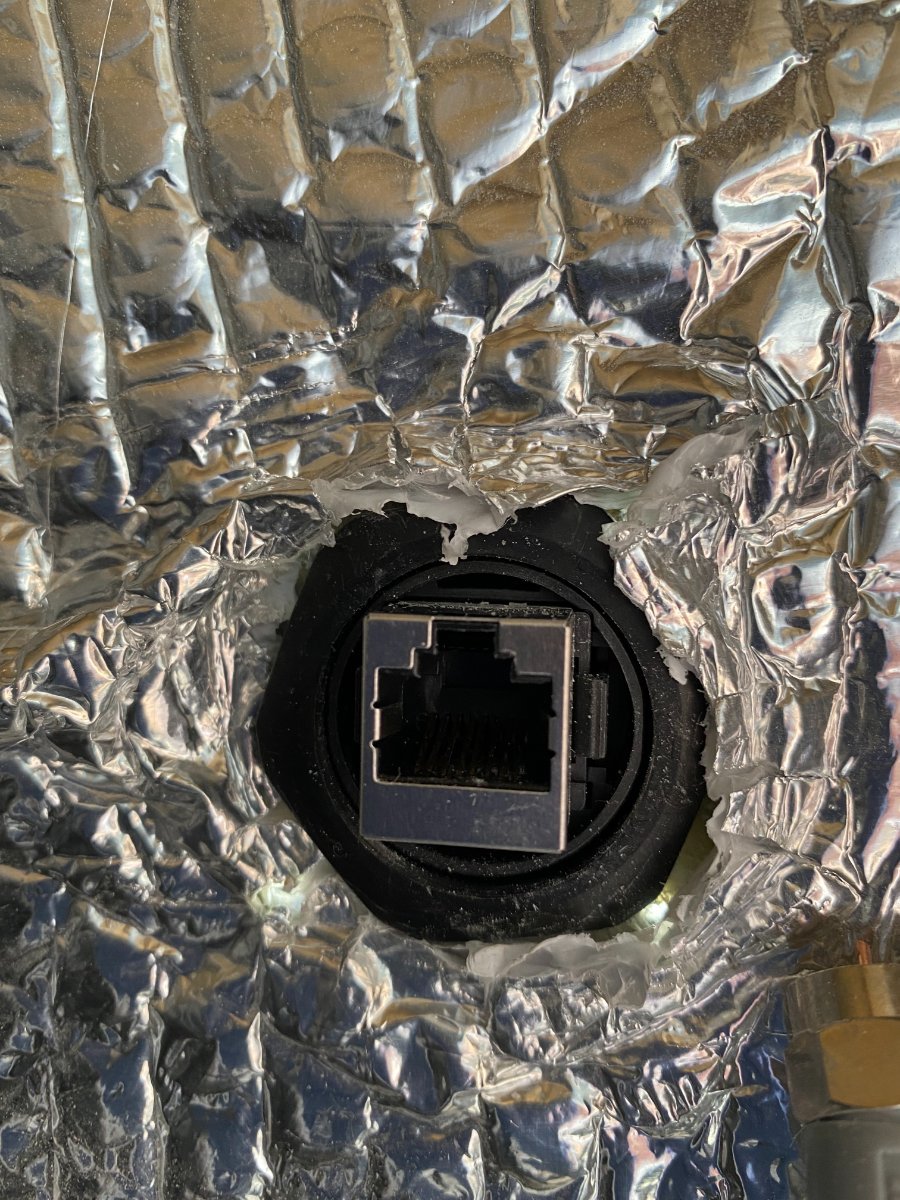
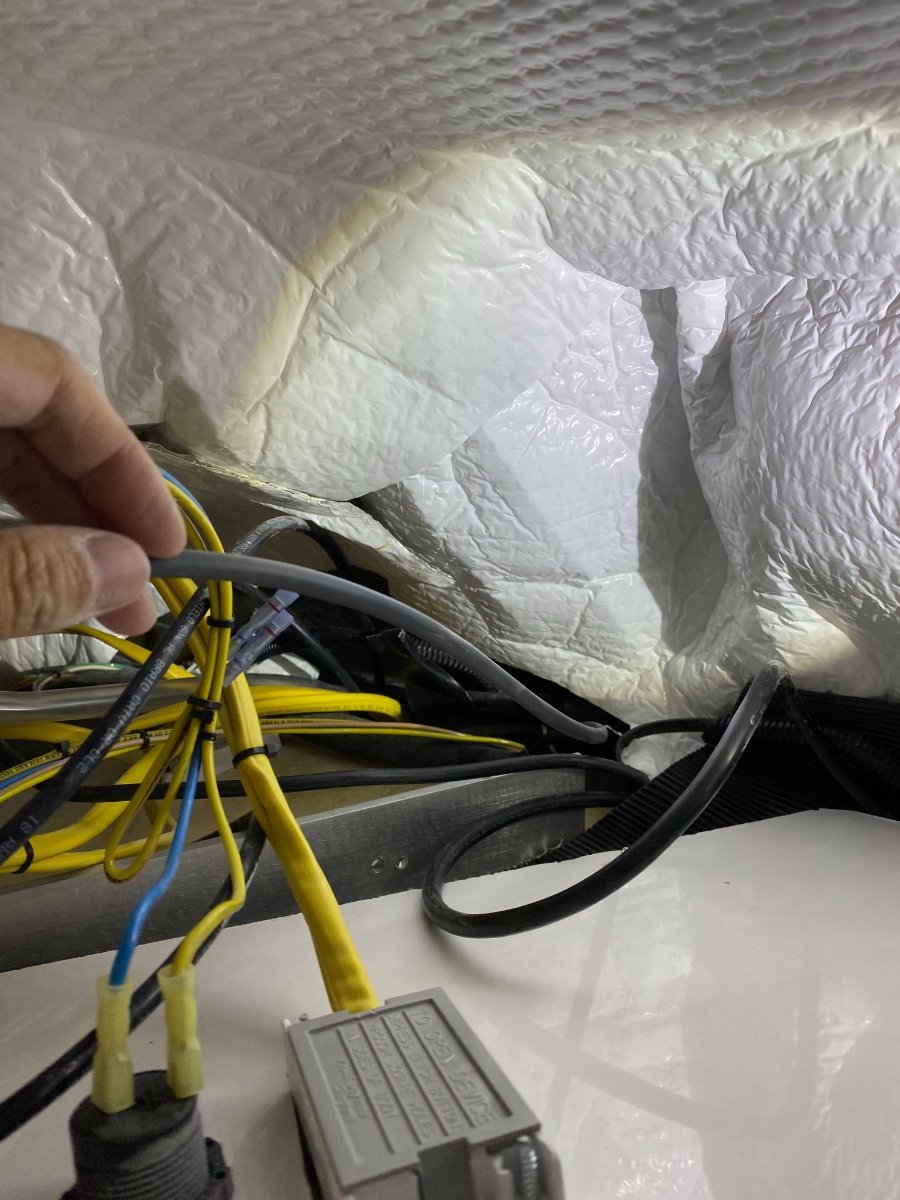
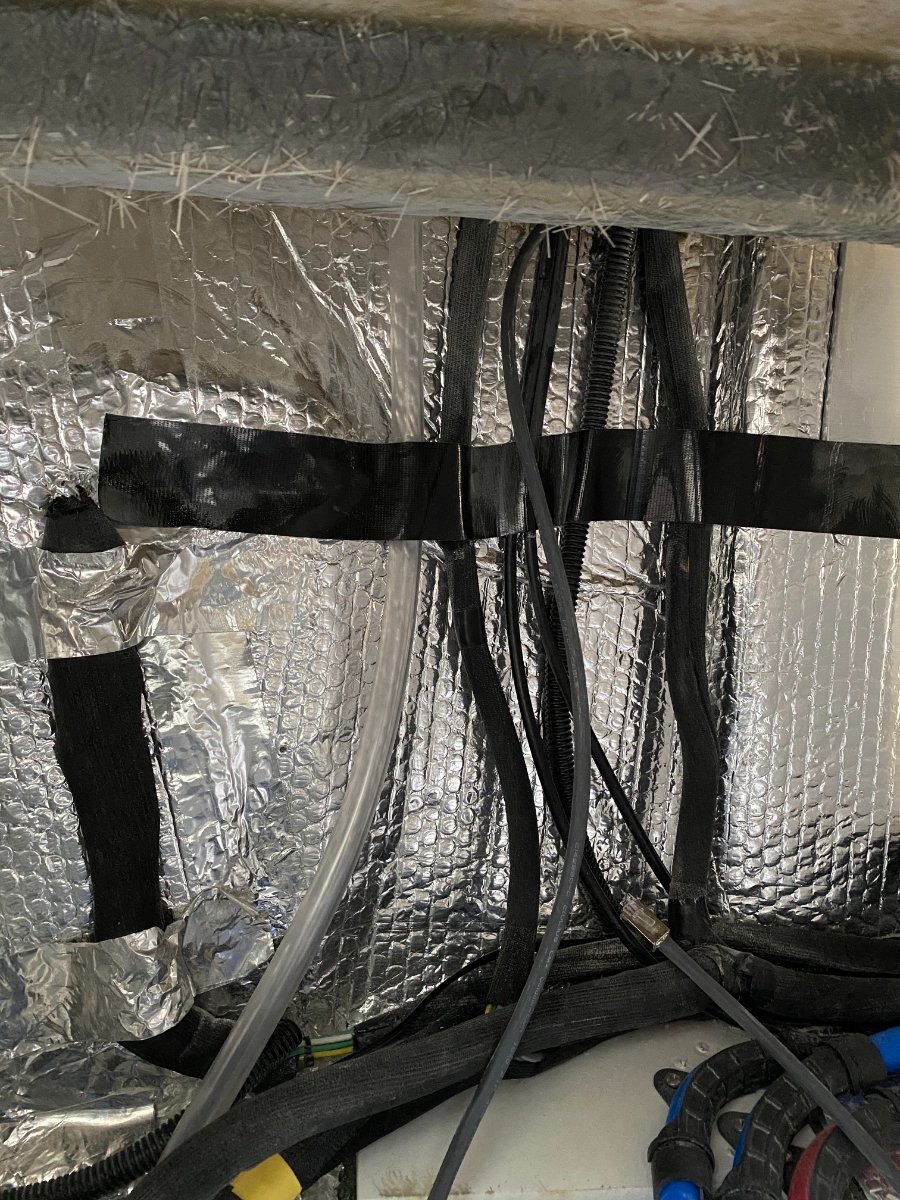
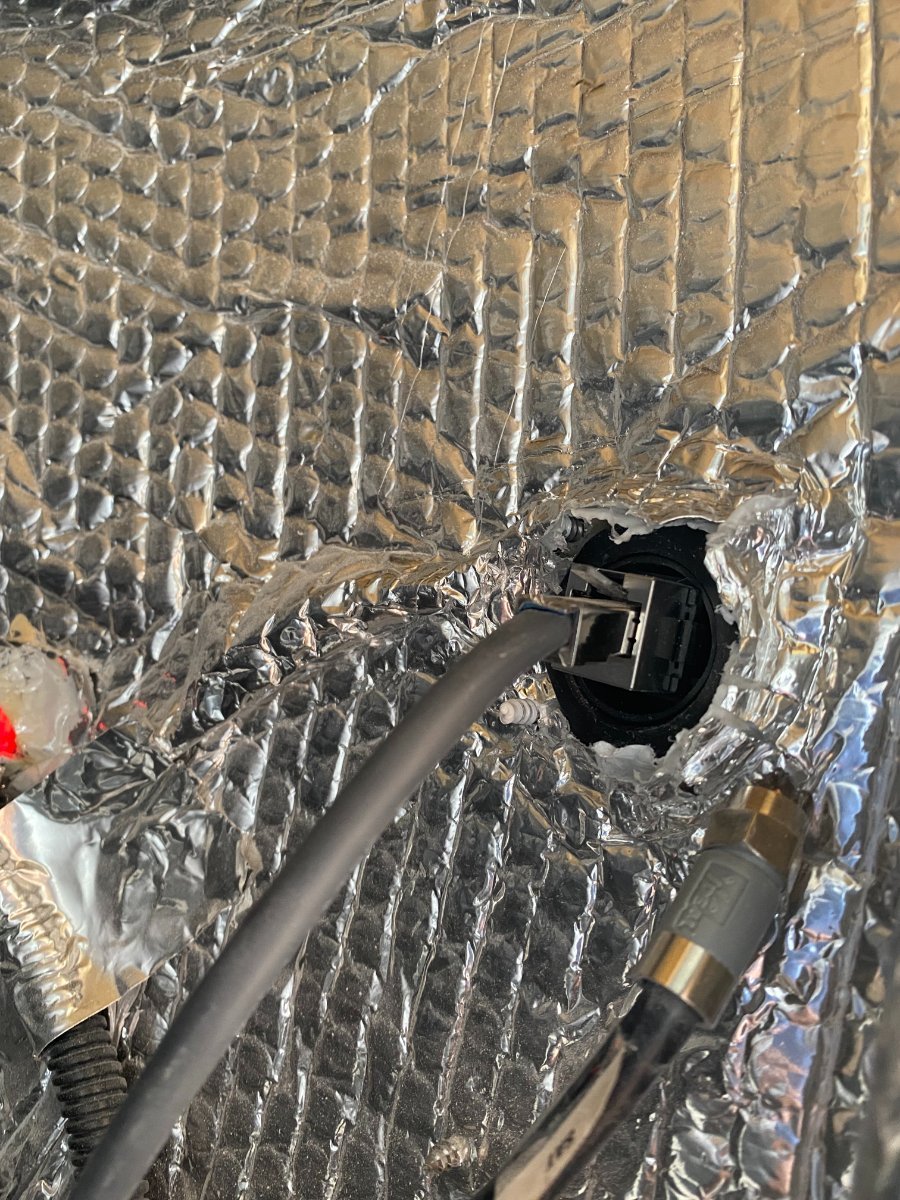
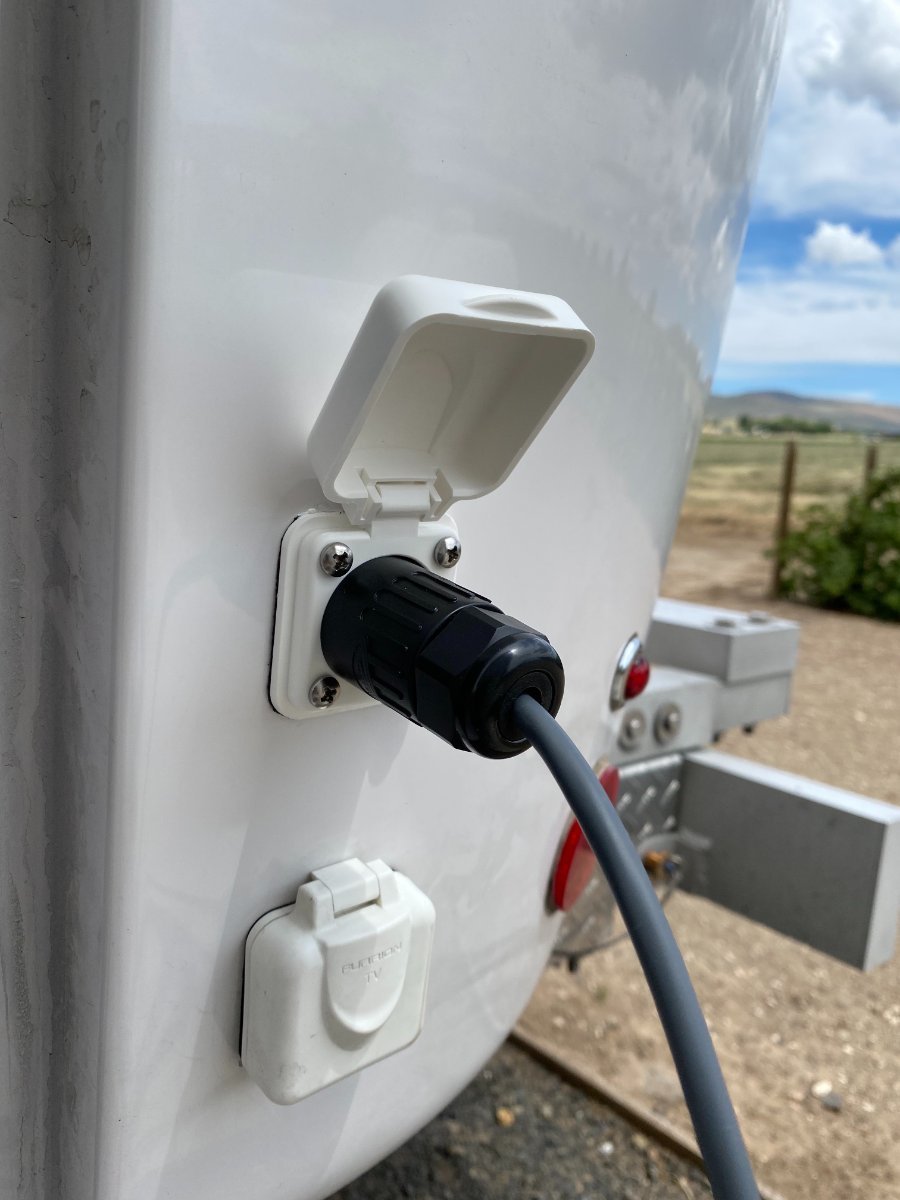
This project is to create an inlet port for Starlink cable into the attic where I put the Starlink router. I decided to repurpose one of those TV/Sat ports. Below are the pictures of the Furrion coax inlets. The left picture is the original and the right one is modified by drilling a big hole using hole saw. This is the waterproof RJ45 inlet port I got from Amazon. Next steps are removing old Furrion and enlarge the cable hole. To my surprise, I found a nice gift from the factory hidden under the seal. No big deal, I can add a little bit of 3M sealant to patch that up. Then install the RJ45 connector, left picture is from the outside, right is from the inside. This is what it looks like after putting back the cover. Next is to fish the cable from attic down to the belly near the furnace and pull it along the back and plug into the RJ45 inside port. You will have to cut the cable and install RJ45 male connectors. There are a few video on YouTube about this. Then plug it in at the RJ45 female at the inside of the inlet. The cable end from the dish will be on the outside. Plug the router in and enjoy fast Internet!
1 point
-
I have never checked these before in five years, I guess that was a big mistake. My right jack bound up so hard that it would neither raise nor lower under a load. I was able to free it up - see this thread: https://olivertraveltrailers.com/forums/topic/6811-how-to-lengthen-your-emergency-jack-handle-so-it-will-fit-the-rear-jacks-with-the-gearbox-removed/ I discovered that the top of the jack would flop around with no weight in it, I am not sure how I could have missed that, I found the two lower bolts, that go through the frame, to be loose one full turn. Tightening all four (both the left and right jacks) to 43 ft lbs using a 3/4” deep socket removed the movement and both jacks run better now 😳 I started a service ticket, I need to know the specified torque. I used a standard value from a table. The two upper bolts on each side were fine. Does Oliver recommend a periodic inspection for these bolts? I don’t recall seeing one. Is 43 ft lbs OK? The front jack bolts loosen all the time. Thanks. John Davies Spokane WA1 point
-
Agree, they have beautiful falls and places to hike & golf:1 point
-
The idea is that if moisture builds, it will form between the hull and the air gap on the bottom of the underlayment. The underlayment is a vapor barrier so that no moisture can penetrate through to the bottom of the cushions. I have a dehumidifier that is always on set at 50% or below so that should quickly remove any condensation that forms. If not, I'll add another section along the walls behind the upper cushions to increase airflow and give any moisture another route to escape. This underlayment is also a thermal barrier so moisture shouldn't ever build in the top pockets. "Shouldn't", we shall see..1 point
-
A nice campground east of Nashville and only about 5 miles off Interstate 40 is Edgar Evins State Park. About $35/night with water and electric at the site plus a dump on the way out. Clean bath houses and many sites are right on a lake. Its about a two to two and a half hour drive from Hohenwald. Bill1 point
-
I use these also, not always, but when I know I’m going to stay a few days and the TV is disconnected. I place them under the forward Jack points, snug them up. I use a square chunk of rubber on the top of each so as not to scratch up the frame. This mitigates the rocking when someone goes up and down the stairs. I store them in the storage basket on the front.1 point
-
We use the same setup , the Camco jack stands, and X-Chocks. The Camco jack stands really firms up the trailer. You barely even notice any movement with someone coming in the trailer. If I am only staying 1night I don't worry about the jacks Any longer stay I put them up. I really don't like to be woke up at night when my wife has to use the Lou as the trailer rocks slightly walking back and forth from the front. I am a light sleeper. As far as the X-chocks, If I am unhooking the the trailer for more than 1/2 hour, The X-chocks get put in place. I have never really go without them. For me they are extra protection for having the trailer roll ( I still use regular chock blocks), and I figure it is one more thing a thief will have to deal with when attempting to steal the trailer (along with several other locks...)1 point
-
With the newest design (black aluminum collar with seal around the base of the ball) the old binding problems have pretty much vanished. This really old thread does apply to old hitches, but the very best option in those cases is to upgrade and then not have any more cone worries. You can and should lube the ball and coupler connection. Use a grease so the two parts don’t rust and wear excessively. That also allows better up and down motion when you go over dips and bumps. Also put a little between the nuts and washers where you adjust the chains, as they describe in the instructions. Is there some reason you want graphite? That is very messy and stains your hands. It would not be my first choice, tho I use it on the lock mechanisms. John Davies Spokane WA1 point
-
and also Reacher1 point
-
Three point vs four point jacking does affect stability. If it’s excessive, JD’s recommendation is right on. Mike1 point
-
Even if the tires are off the ground it’s technically not too much. Although Oliver no longer recommends it, there are owners (not me) who use the jacks for changing a flat tire. The weight rating of the jacks (3,000 lbs. for each jack) is sufficient.1 point
-
Pineapple-Carrot Coleslaw. 3 cups shredded cabbage 8oz can unsweetened crushed pineapple (drained) 3/4 cup carrots, peeled and shredded 1/3 cup Mayonnaise 1 TBS sugar 1 TBS white vinegar Mix together cabbage, pineapple and carrots in a bowl. In a small bowl whisk together remaining ingredients. Pour over cabbage mixture; toss to coat. Cover and chill for 2 to 3 hours. Enjoy!😋1 point
-
I've really searched for that information. Even though I don't have a dog in this race, I tried. Apparently the locked rotor amp (start-up amps) are not published. The running amps are as follows. Low speed = 9.4 amps AC (or 104 amps DC) Medium speed = 9.6 amps AC (106 amps DC) High speed = 10.5 amps AC (116 amps DC)1 point
-
Sales told me that the folks at Truma had said that if the MICROAIR Easy Start system was installed in one of their AC units that the warranty would not be honored. This is the reason that it is not offered as an option. I copied this from this Site: Will My Generator Run a Truma Aventa RV Air Conditioner? You’d need a 3,000 Watt generator (or a 3,000 Watt inverter) to operate either model of the Truma Aventa. This is due to the power surge required at start-up. We have no information as to whether the Truma Aventa is compatible with something like our Microair EasyStart 364 to handle the initial surge, but that would be a good question for Truma!1 point
-
Did Anita happen to tell you how much generator power is needed to start up the Truma Aventa Eco, without the Micro Air Easy Start?1 point
-
This is incorrect for all brands of lithium RV batteries. I don’t camp a lot of days, but toward the end of my second season with 200 AH of Battle Borns, they have only had 15 actual cycles…. because I rarely run the State of Charge very far down. Usually the panels catch up each day after a minimal discharge overnight. For a residence that has daily deep cycles from its solar installation, the cycles can add up very fast indeed. Going by the above chart an Ollie owner could expect six YEARS of once a day deep discharges before it deteriorates to 80% of its original capacity. I expect my BB batteries to essentially outlive me 😬 This is just one reason switching to Lithiums makes so much sense for owners when their lead acid batteries die, especially if they expect to own the trailer for more than three or four years. John Davies Spokane WA
1 point
-
Rivernerd This is very helpful information. I will work with my salesperson in getting these answers and I will post back my findings as you suggested. Thank You very much for your comments.1 point
-
Not exactly. The numbers you used to arrive at this conclusion are accurate: 10x the voltage, 10x the amperage. But, the voltage output from the generator is supplied to and used by the trailer's onboard battery charger. The amp output of the charger determines how many amps are going into the battery.1 point
-
Kimberly and I have had our inaugural road trip… and feeling pretty good about my understanding of the various systems of our new Oliver. A big thanks all in the forum! IMG_5046.MOV1 point
-
I was looking for a simple way to use my rear storage compartment (the one that opens from the outside) to keep my Starlink router out of the elements / simplify setup and teardown. Running a new AC outlet from the main panel to the trunk is a straight shot but I wanted to review the electrical diagram before potentially ruining something. I contacted support for an electrical diagram and they still don't have one. They mentioned a third party was responsible for the design and this former employee/contractor is unable to provide it to them. They made it sound like Oliver doesn't even have an internal diagram. They did say ones coming off the line today will come with a diagram. For anyone that wants AC in the trunk and has a Xantrex XC inverter installed, I found this part: Xantrex 808-9817 which allows a GFCI outlet to be installed in the back of the unit. It was a nightmare to install but it works after you get the tiny screws back in... It ground faults without the screws and it seems to cut power to the outlet if the panel isn't flush with the unit (safety switch?). The installation requires the removal of the entire inverter or laying on your stomach and reaching deep under the seat to do a blind one handed installation. I opted for the blind install. Amazon link to part: https://smile.amazon.com/Xantrex-Freedom-808-9817-Electrical-Equipment/dp/B0756FZFZJ/ref=sr_1_1?crid=LV42YTTEUUIQ&keywords=gfci+outlet+xantrex&qid=1654812380&sprefix=gfci+outlet+xantrex%2Caps%2C90&sr=8-11 point
-
We did it! We thought we'd keep the factory company while the rest of you were at the rally and we picked up our Oliver on Friday, May 20th. Her name is Luna, and she's gorgeous.
1 point
-
Or ---- You could simply ditch the white window molding and get the black. Once and done versus dealing with the funk and grey. Bill1 point


.thumb.jpg.e34bf01ef7f7d5e99ad31856d45afbeb.jpg)


-
Recent Achievements
-


")


