Leaderboard


Popular Content
Showing content with the highest reputation on 08/04/2023 in Posts
-
The app is very useful and reasonably easy to use in practice, for monitoring the solar and batteries performance. The settings however are confusing, and you should always, ALWAYS refer to guidance from your battery manufacturer. These settings optimize performance and battery life and should never be altered randomly. For example, for my two 100 AH Battle Borns: The default log in password is “000000” (six zeros) and this shows every time on the initial page when you open the app. Whenever you do a firmware update, you will get a prompt to change it. Or you can change it any time in the Settings menu. I suggest your birthday; eg 082153. If you camp by yourself all the time it won’t really matter, but in crowded commercial campgrounds, it can be potentially hazardous! A nearby clueless coach owner may see your device or network and connect to it. If he sees a bunch of different settings, he could panic, thinking “My system has been hacked!” and start changing them!!! The hackee becomes the hacker 😉 This could possibly be very bad and damaging for your expensive system if it involves charging voltage and battery type! The alarm settings are not as dangerous to your $$$ parts, you can tweek them up or down a little. For example the Low State of Charge buzzer. Change the name of your devices to something logical to YOU, such as Oliver Battery Monitor or Rooftop Solar, this will add a layer of defense against your neighbor’s unwanted advances. As a final note, with this knowledge you could wreak havoc on your neighbors if you were feeling mischievous! Please avoid the temptation! And if you know which rig has the 000000 password, you could tell the owner nicely that their system is at risk. Help them alter it and you might get a free doughnut…. John Davies Spokane WA
 7 points
 -
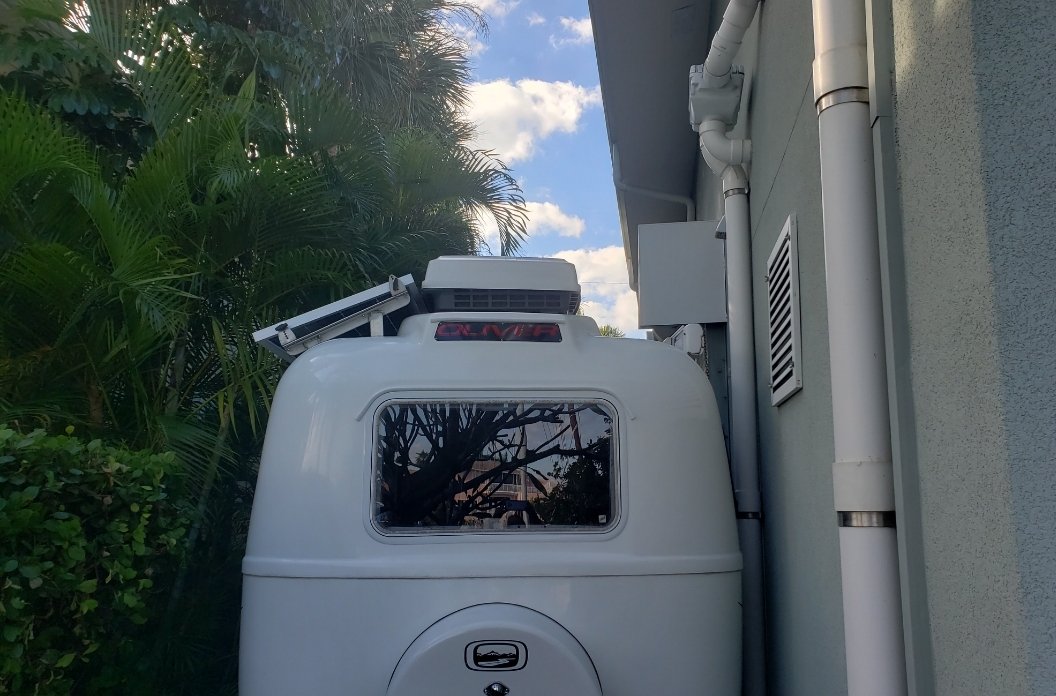
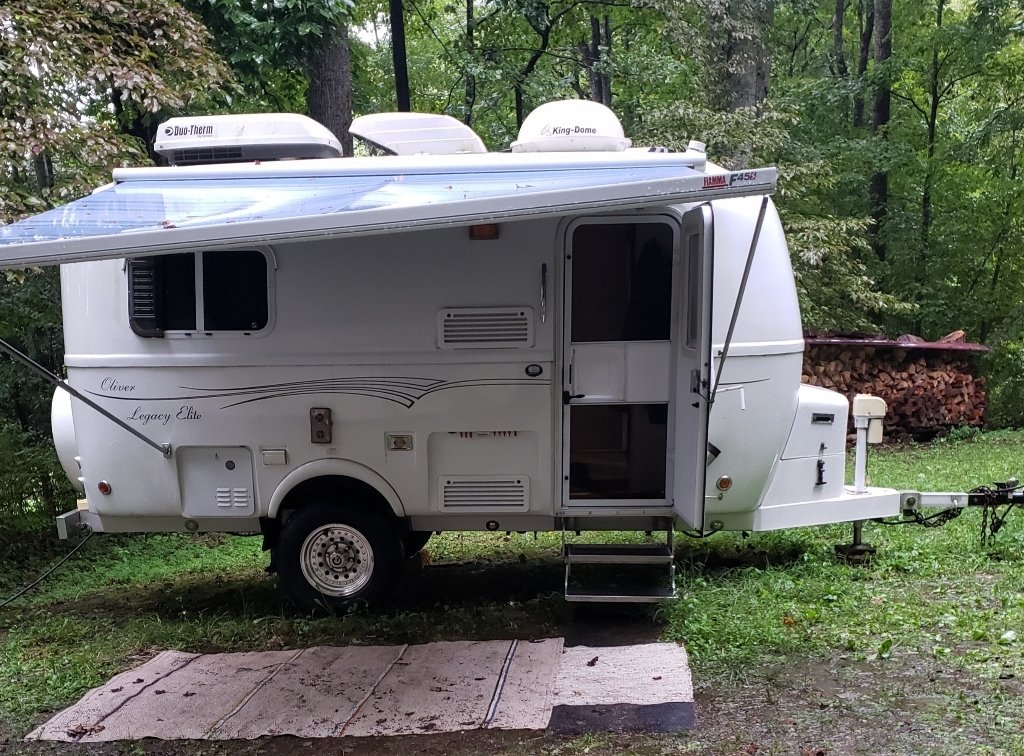
Almost 16 years, @Patriot. We brought it home, February, 2008. I'll look for a few more. You can see my trailer in every update post we do. These are from 2020, I think. You can see the yellowed jack head. My bad. We should have covered it.
5 points
-
Keep in mind, unlike Battleborn batteries, the Lithionics batteries have built in BT so I can always check the SOC for each battery individually if I think something is not working properly. BL4 points
-
Yes, I agree and I keep mine topped off when camping. I installed an RV electrical panel on my shop so it does stay plugged in most of the time. The Xantrex Charger/Inverter will keep them topped whether I like it or not while at home so I occasionally un-plug and run the a/c to "exercise" the batteries. The Smart Battery Sense only applies to the solar charging. The Xantrex uses its own charging profiles. BL
4 points
-
We keep a PEX repair kit with extra pipe, inner & outer pre-packed wheel bearings & seal, and small tool box for mechanical/electrical repairs on the road. Used to carry some things we did not need, so that stuff now stays at home.4 points
-
Sugggest getting three solid concrete blocks and burying them in the floor of the barn so that about an inch extends above the dirt. Place them where you want the jacks to be when stored. This gives you the "perfect" target year after year and keeps mud from rusting out your jack plates. Also, I suggest covering your OTT with a less expensive cover. Mostly to help defend against mud dobbers and hornet nests. Finally install a screen over your heater exhaust. GJ3 points
-
I will say that if I am going to waste money on Victron gear, I hope it's only $40! Mossey3 points
-
And your question was also answered by the installation manual. Mossey For banks of batteries Smart Battery Sense may be connected to any one of the individual batteries.3 points
-
This is an update to the continuing saga of shutdown issues with our Xantrex Freedom XC Pro 3000 Watt inverter. In short, several days after the first hard reboot, we again began to get inverter shutdowns under heavy load. A second hard reboot also produced good short-term results, but did not "stick" long term. Earlier this week, Jason Essary authorized me to drop the Low Battery Cutoff (LBCO) level from the default 12.0V advised by Lithionics to 11.5V. I then ran another 4-minute test using 12V battery power through the inverter to run the microwave at 100% (with a pitcher or water inside to protect the microwave), at various SOC levels from 97% down to 22%. Although the Xantrex remote continued to report DC voltages as low as 11.8V during this test, the Seelevel "Batt" gauge reported DC voltages no lower than 12.2V. And most important, my trusty multimeter reported actual battery voltages (at the battery bank) no lower than 12.7V, with the microwave on full power at 22% SOC! So, under 11500+watt load, there was a 0.4V variance between the DC voltage perceived by the inverter and that perceived by the Seelevel monitor, while there was a 0.9V variance between the voltage perceived by the inverter and actual DC battery voltage verified with a multimeter. To me, this confirms that those expensive Lithionics batteries are not at risk under these conditions, since actual DC voltage did not drop below 12.7V. It appears to me that setting the LBCO at 11.5V compensates for the fact that, when under heavy load, our inverter misperceives the actual battery voltage by as much as 0.9V (12.7V actual -11.8V perceived=0.9V). It still concerns me that our Xantrex inverter misperceives DC voltage when under heavy load, but this new "workaround", i.e., setting the LBCO artificially low, enabled me to run heavy wattage loads on inverted power even at lower SOC levels, as the system was designed to do. With the LBCO set at 11.5V, even though the Xantrex inverter perceived DC voltage of 11.8V, there, of course, were no inverter shutdowns or LBCO "[01]" warnings. With that setting, it appears we can use high-wattage appliances on inverted power at least down to 22% State of Charge (SOC). This is encouraging. My wife and I are boondocking this weekend. We plan to use high-wattage appliances, including a hair dryer and the Truma AC, as needed. I will update this thread after that "real world" test .3 points
-
Very ironic/timely comment here. A few months ago, we experienced the launching of our middle right galley drawer onto the deck after perhaps taking a few windy curves a bit too fast and having WAY too many cooking pots/pans inside of it. The forces ripped the locking mechanisms from their mounting positions underneath the drawer held there by two (IMO) very small wood screws. The "toothpick temporary" fix was executed in situ while camping that afternoon. Until just yesterday, we removed all the drawers to inspect for potential water damage as suggested by another forum thread, only to find that the toothpick fix was not holding. So we removed the short factory-installed drawer screws and replaced them with 3/4" wood screws that reach into the drawer fronts. It's suspected that the factory builds the drawers, installs the rail hardware before they attach the drawer fronts - makes sense to use shorter screws that don't penetrate the drawer box. But who knows? The longer attachment screws are just another effort to achieve a "peace of mind" knowing they'll last a bit longer. IMO, the longer screws with the Raingly Footman Loops/straps make the drawer system more bomb-proof when towing. My $0.02.3 points
-
I was asked about this issue and gave this answer. Unfortunately, a full size tire will NOT fit under the older tire covers. The recess in the back that receives the tire has been redone to be larger in the newer trailers. The tire cover has also been reworked to fit around a standard size tire. Both of these modifications required a major re-working of the plugs and molds. John Davies was not satisfied carrying a small tire as a spare and simply removed the tire cover and replaced the tire with a standard size leaving it uncovered. Not the most pleasing esthetic, but probably the simplest solution for an owner. Now, if you don't mind doing some reasonably extensive fiberglass work......3 points
-
That's great news, and I'm glad you'll check everything. Zamp port +zamp panels "should be" plug and play. But, if never used, I'd check. As you may have noticed, I often play "devil's advocate " and sometomes ask perceivably "dumb" questions, because I know our posts live on, for a long time. I have seen posts where folks considered "reversing wiring" to compensate for zamp's port reverse sae polarity. For anyone buying a used trailer with a zamp port, I'd check it, before use. Fwiw, my husband and I make some mods, but we label everything. Not everyone does. I'm glad you are following a prudent path, @Wandering Sagebrush.3 points
-
My valves are Shurflo brand (Trinidad style) the same manufacturer as our water pump. These are very similar to the Scandvik brand if not identical. I actually did not buy the valves because I had the Oliver folks do the modifications before we took delivery of our trailer in 2017. I would imagine that we could buy direct from the Shurflo folks. Also, we don’t leave the shower head hanging while traveling. We wrap the shower head in a towel and then lay it on the floor.3 points
-
I literally bought myself a 1/2" Allen wrench today, at a local hardware store. The fix on that is SO easy; I went through all my hose connection ports and every one of them needed to be snugged down. No leak now. Just remove the screened-gasket and you will see the hex-shaped backflow valve mentioned by @topgun2 above.3 points
-
The kitchen drawer latch (not latching) is one of the issues I've encountered as well. The first time, I called OTT service and Mike walked me through the fix over the phone (how to remove the drawer from the hardware rails, how to check the latch and how to fix it -- THANKS MIKE!)... In my case, the latch was missing a screw and replacing that screw fixed the issue. But I find it tricky to get the drawers 'secured' back on the rails (making the rails snap into place on the drawers). In a month, I've had to fix latches on 3 drawers; each time they seem to be missing at least one screw that holds the latch securely in place (thanks @John E Davies for the latch photo provided above). Maybe they need to be using longer wood screws? Or glue and screw? My friend taught me her brother's "fix" for re-installing screws into small holes in wood when they basically won't take a bite: put wooden toothpicks and wood glue into the hole, let them set, cut the exposed ends off flush, and then screw back together. So far, so good. I've never had anything come out of my drawers, and I'd like to keep it that way. I'm going to have to visit the hardware for extra screws to finish securing these drawers.3 points
-
Grand Codroy RV camping - Very nice private park, would recommend staying 2 or 3 nights to see the area. Sandbanks Provincial Park - The road from Hwy 1 to Burgeo has a lot of pot holes and takes a long hour. This was our first real excursion off Hwy 1, it doesn’t seem so bad now that we have experienced a wide variety of the roads in Newfoundland, it’s not hard to find worse roads. The campground and surrounding area is very nice especially if you like sandy beaches. We stayed 3 nights which was the right amount of time for us. Blow Me Down Provincial Park - We stayed 4 nights at the park, for us it was the right amount of time we like to hike and there are several nice hikes in the area Gros Morne National Park, Berry Hill Campground - We stayed 7 nights here, there is a lot see in the Gros Morne area. Pistolet Bay Provincial Park - We booked 7 nights but departed after four. The park is very remote with no services, but nice enough campground. There is a nice little beach to swim at. We enjoyed L’Anse aux Meadows and the town of St Anthony. Mountain Waters Resort - We stayed one night here to recharge our batteries. We visited Port au Choix which is worth seeing, there is a private campground on the ocean I think I would stay at if I did this again, It’s much closer to Port au Choix and far fewer bugs. Sir Richards Squires Memorial Provincial Park - We stayed 2 nights which was plenty unless you are an avid fly fisherman. It is a nice campground like all the Provincial Parks we stayed at. There are two roads to the park, 422 west of Deer Lake is a partially paved long road with many pot holes. We didn’t enjoy that drive so tried the other “road” out that intersects with 420 just north of Hwy 1. I strongly recommend not using that “road” it’s more like an off road trail in many spots. Crescent Lake RV Park - We stayed 3 nights here at this top notch private park. Very nice trail around the lake it’s on. The owners are very friendly and helpful. ***** Run Provincial Park - This is a beautiful park, the only downside is it’s about a 15 minute drive to Twillingate which we really enjoyed. We stayed 7 nights here there is a lot to see in this area. We took a day trip to Fogo Island the main attraction are the historic buildings on the island. Tera Nova National Park - Newman Sound Campground - We ended up canceling this reservation due to electrical issues at the park and our batteries were low after a week in ***** Run without any hookups and not much sun. We stayed at Shriners RV park which had full hookups, good cell and WIFI service. We spent 4 nights at this campground which was adequate to see the area. Lockston Path Provincial Park - Long 5k gravel road to get to the park entrance. Once there the park is nice similar to a lot of other provincial parks. The Bonavista Peninsula covers a large area, the highlights were Trinity, Cape Bonavista and Tickle Cove. Four nights gave us enough time to see the sights but does require a fair amount of driving. Butter Pot Provincial Park - Decent campground very similar to other provincial parks, clean, well maintained, nice sites. We stayed 4 nights which was plenty for me. I am not a big fan of cities and crowds. Most of St. Johns is like any other large city, except for the downtown area. Heading Home from St John’s we stayed at: Notre Dame Provincial Park - Beautiful provincial park with sites backing up to a very nice lake, good cell service, sites have electrical hookups. Barachois Pond Provincial Park - Another beautiful park, one of my favorites There is a lot to see in Newfoundland, highlights I wouldn’t miss are the Gros Morne National Park, Twillingate area, Bonavista Peninsula and St. John’s downtown area and signal hill. There are many other very nice places to visit if you have the time, just not quite as spectacular as the above, depending on what you like to see and do. There is much of Newfoundland we didn’t see. There are many RV campgrounds not on any maps I had, plus boon docking opportunities. We did not have any issues making last minute modifications to our schedule and finding places to stay. I reserved all of our camping for the entire trip, if I had to do it over I would probably have a less rigid schedule of reservations. We never found any campgrounds to be completely full, but you will need reservations for the prime sites.3 points
-
Weighed the rig last year with a newer tow vehicle.
3 points
-
This is an excellent thread on "how to weigh." Do note that @rideandfly purposely put his Ollie on a severe diet, and you won't find many (or possibly any other) e2s under 5000 pounds, loaded for camping. His trailer weighs just a bit more than my elite 1, and I thought we were minimalists. 😀 (Hat tip to @rideandfly) Most e2s will likely weigh in north of 6,000 pounds, or more, loaded for camping. Many discussions on this on the forum, over the years. Here's one.3 points
-
We have our hull number. It is 1423. We pick up our Ollie next Wednesday, August 9. It is about to get real!3 points
-
During our recent 3 month 10,000 mile trip to the North East, we stopped in Raphine Virginia at the Pilot Travel Store and weighted our rig. The procedure is to weight the total rig (3 zones), steer axle, drive axle, and trailer axle. Then weigh again with the rig disconnected so the trailer axle zone is the trailer disconnected and the axles and front jack are all on the 3rd zone. Then, you will have almost all the information you could ask for, including the tongue weight using a little math. FYI, my cost was $11.00 for the first weigh session, the $2.00 for the second. There was an discrepancy of 40 pounds between the two sessions, which is probably within the tolerances of the scales. Session One: Steer Axle 4,520 Drive Axle 5,180 Trailer Axles 5,880 Gross Weight 15,580 Session Two - Trailer disconnected: Steer Axle 4,800 Drive Axle 4,260 Trailer Axles 6,560 Gross Weight 15,620 So, bottom line, total trailer weight loaded is about 6,560, the tongue weight is about 680 lbs, and the axle weight is about 5,880. The easy way to calculate the tongue weight is the subtract the two different trailer axle weights. You can also examine how much weight is added to the rear tires of the tow and subtract the amount reduced on the front axle of the tow. (That calculates to 640 lbs, but remember the difference is weights due to tolerances. So a safe guess is about 660 lbs if we split the differences. This is fully loaded E2 with 4 flooded golf cart batteries, solar, extended twin beds, Honda generator in the basket, etc. Fresh water tank full, black and grey empty. So the tongue weight is about 10% of the total trailer weight. The rig tows beautifully with no sway without any equalizing or sway controls. The tow vehicle is a Dodge Ram 3500 diesel with the bed loaded. Brad - Santa Fe, NM2 points
-
Lithionics batteries have ON/OFF switches so you can turn the battery itself OFF for storage. I think that is a nice feature and it's good when you want to do work around the battery. BL2 points
-
For banks of batteries Smart Battery Sense may be connected to any one of the individual batteries. From the Victron users manual. Only need to wire to one battery to achieve desired results. BL2 points
-
For the Elite 1 Folks...... I too have been working with Jason E on this and have an Elite 1 with the 2,000 watt inverter. After changing the LBCO to 11.5 volts through the app and testing multiple times (4 cups water for 4 minutes in microwave), I was able to succesfully use the microwave all the way down from 100% SOC to 14% SOC with no alarms or overload cutoff. Happy with results.2 points
-
https://olivertraveltrailers.com/forums/topic/7276-lithionics-secures-access-to-their-batteries/ I can’t help otherwise. John Davies Spokane WA2 points
-
I'm sure there are some on this forum that have camped more than we have. But yeah, we've been at it for a while. Hands down Big Bend is the best! We lived near there (Ft. Stockton) for many years so it was a popular spot. We like our state parks! Mission Tejas Guadalupe river Tyler This is just a few that we really have enjoyed and stayed at multiple times.2 points
-
@Brian and Brandelyne, you are probably aware of the fact that Lithiums don't like to be kept at 99%-100% all the time like AGMs. You may be talking about your battery charge during camping (I keep mine full during camping trips) - not sure if you are keeping them fully charged even when you are not camping, but just in case I thought I'd mention it. Very cool device to assist your MPPT charger! Thanks for sharing!2 points
-
I'm looking forward to weighing my rig for the first time -- thanks for all the info about this. I'm curious how I'm doing, after having a spreadsheet prior to hitting the road (and then having to buy tools and extra equipment, LOL).2 points
-
I really look forward to the day (not that far in the future) that both my Jeep Grand Cherokee Trailhawk and Ford F-150 will be replaced by EVs. We are in the early stages of the development of this technology and as others in the past. Remember slide rulers and dial party landline telephones...?2 points
-
EVs….hmmmm? One has to ask? Who is fooling who?
2 points
-
We bought them from the Audi dealership in St John’s, they had them on several cars in the showroom.
2 points
-
I am not up to date on OTT's current solar equipment options, but it does seem that some trailers are equipped with some Victron gear. Does your Oliver have a Victron BMV-XXX to go along with your Victron solar charge controller? If so, couldn’t you have accomplished the same functionality by adding a temperature sensor to the BMV-XXX? Mossey edit: SeaDawg beat me to my question!👏👏2 points
-
I was somewhat saddened it wasn't 1492, but I can now take comfort in the English victory. Oh, wait, I do like France. We did take the factory tour. I'd say it was the final nudge to go with Oliver. Honestly, and I looked hard and really studied RVs, I can't say anyone comes close to Oliver in many respects.2 points
-
@JRK, I see you have a 2021, so it should have the extra latch on the drawers. Silly question, but do you give the drawers a little push in before you leave - to engage the latch? Also, we had one drawer that opened. It was my wife's plates/bowls drawer. The contents were too heavy. After we redistributed the load all the drawers stay closed now. As I've posted, we've also been frustrated by many issues with our Oliver, but there is hope. We just returned from 2 weeks of dry-camping and had no issues with the Oliver at all! It worked perfectly. It took us a year to get here but we're hoping the teething pains are over.2 points
-
My wife and I will be looking to get our degree! We plan to hit the wonderful state parks here in Arkansas first to get our RV legs. My wife loves the beach, and I love my wife, so Florida is on the horizon. From there we will follow the seasons.2 points
-
Next Monday is my last day to cancel my order without penalty. I think we are committed. It is a lot of money, but after studying RVs for over two years now, I simply do not see other brands being as well built and the culture there at Oliver in Tennessee seems to be all about building a good RV. I am excited, and to be honest a little nervous. My expected delivery date is early August. More about us. My wife and I have been married for a long time. We have two grown kids who don't live close by. I retired from corporate life about six years ago. We spent that time decompressing from suburban life and the demands others placed on us. We now enjoy the country life. Over the last six years we stayed close to the farm with our cattle and sheep. That really helped me come back to life after sitting behind a desk for almost 40 years. We sold the livestock last spring and are now anxious to hit the road and see this great country. I am learning patience. We are waiting to take delivery of a fully outfitted LE II. I hope to see you Ollies out and about. Stop by our camp and say hi!1 point
-
Looking super!! 👍🏻👍🏻 Nothing like a polished Ollie! 😊1 point
-
Thanks for the details, I saw the one about the BMV-712 and was looking into ADDING the temperature sensor (not included in the OTT install) and decided this was the easiest path for me. BL1 point
-
Thought I would add to @John E Daviesfine original post. I purchased a nice flag pole with tire foot for Ollie-Haus and wasn't thrilled with the options to secure with camper tire or tongue jack, so I decided to mount it to the front storage box. The foot fits nicely between the box and trailer tongue so I chose to bolt it to the bottom of the box with four pan head screws/nuts. After that it still seemed slightly wabbly so I decided to add a couple of pipe saddle clamp mounts to the mounting post. This turned out to be very solid and adjustable for plumb. The mounts are all stainless with silicone protectors to keep from scuffing the mounting post. I'm very pleased with the results and the quality of the pole. The pole is anodized aluminum and is telescoping and removes in seconds for travel. This is a high grade pole sold by a veteran owned American company that accommodates two 3'x5' flags. Flag Pole Kit: https://www.amazon.com/dp/B0BG6NBVC6?psc=1&ref=ppx_yo2ov_dt_b_product_details Light Kit: https://www.amazon.com/dp/B09XH4M1SR?psc=1&ref=ppx_yo2ov_dt_b_product_details Pipe support brackets: https://www.amazon.com/dp/B083FCV9FS?ref=ppx_yo2ov_dt_b_product_details&th=1
1 point
-
Thanks, for doing this and posting. Very helpful for the rest of us for various reasons.1 point
-
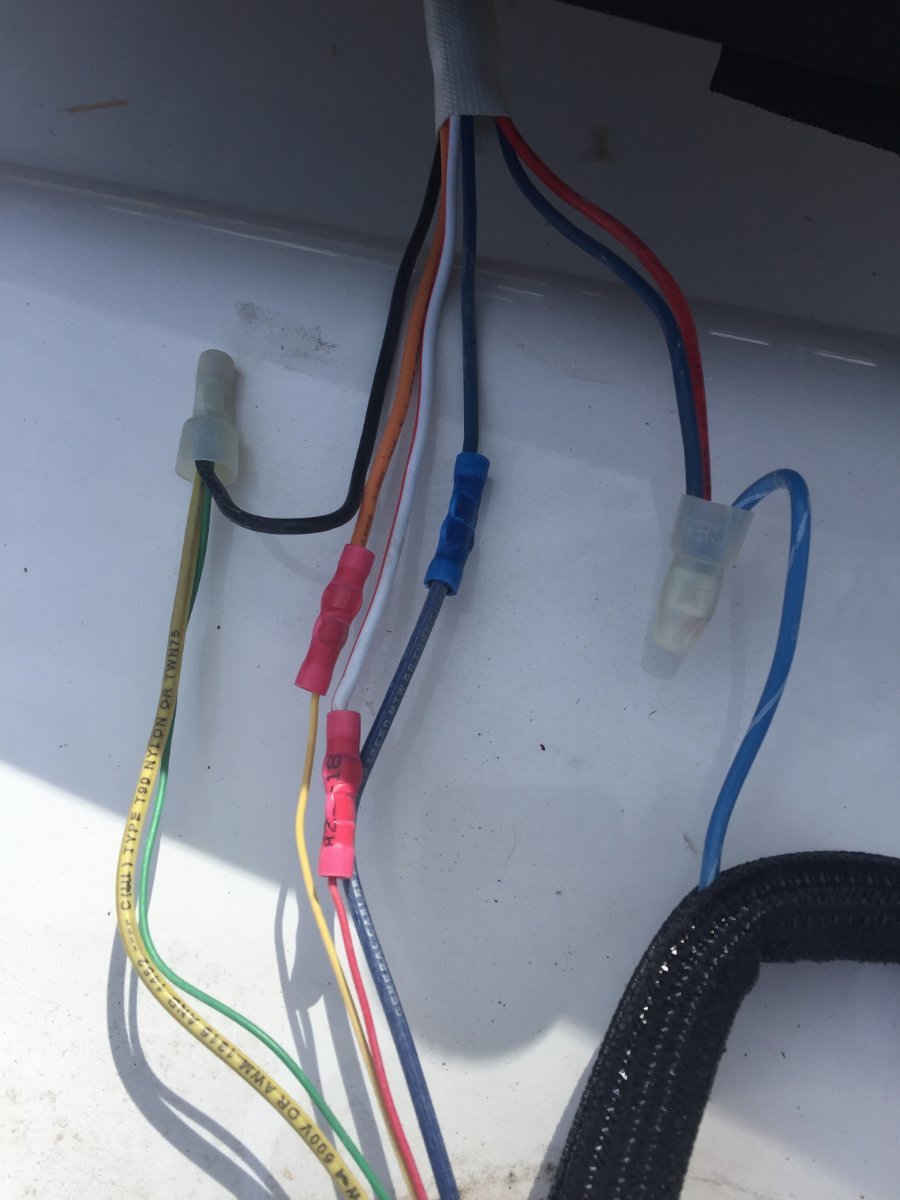
Sorry to hear about all of these problems. Can you let us know what you have done to get resolution? The drawer problem is common in earlier trailers and is easily fixed. I installed some stainless steel strap loops (from Amazon) at the top an bottom of each bank of drawers, run a tie down strap through them when traveling and they won’t open again. Is your city water failing or just lose? It can be tightened with the proper size wrench inserted into the connection. The shower hose kinking might involve taking off the front of the bath sink to access it. Not hard to do, you just need to cut the caulk and remove 4 screws. I would look for a good RV guy who knows electrical systems, I had some similar issues and my local RV guy found some lose connections behind the fuse panel and was able to resolve everything there. Check your water pump to ensure the two red wires are connected, if they are the issue might be related to all the other electrical problems. Intermittent lights flashing while driving sounds to me like something is lose. If you have specific questions ask away and someone will have a solution. Mike1 point
-
We love our EV and have taken many road trips in it. Just like any vehicle, you have to plan ahead and recognize limitations. But in general, we have found owning an EV to be an excellent experience — maintenance is a breeze, acceleration is other-worldly, and it’s just a hoot to drive. We know it’s not going to tow an Oliver, and that’s OK. Our TV is too large, and too much of a gas-hog, for every-day driving. It, like our EV, has a purpose.1 point
-
Yep. Tightened all the fittings and screwed down the hold-down straps. Very strange symptoms. When the pump is sucking air, you can barely hear it. If anyone keeps getting air in the lines the first time you use your pump on a trip, check those connections.1 point
-
This is an excerpt from our post on upgrading to Lithionics on hull 505. Origin was from a discussion with Jason Essary in Oliver Service. https://4-ever-hitched.com/ggs-blog/f/lithium-battery-upgrade Step 7; Disable the 7 Pin Charge Line: We will be installing a new DC/DC charger into our Oliver EII. But before we do that install we need to disable the current charging wire that runs from the 7 pin cable on the tongue of the Oliver. That 7 pin connector is the one that plugs into the back of the truck for lights, brake lights, emergency brake power. Inside the 7 pin cable there is a BLACK wire that provides 12V (B+ ) from the truck battery/alternator B+ all the way back through the trailer, through a 20A breaker and back to the batteries via the 12V Bus bar in the trailer. We will not be using that (Black) charge line for the trailer an longer. We disabled that line on the 7 pin connector by putting heat shrink coating over the screw terminal on the black B+ wire conductor and also taping up the screw lead the body. We reassembled the conductor and tested that no 12V was present on the wires inside the trailer. Wiring Digram for Oliver EII 7 Pin To disable the Charge Wire (BLACK) from the 7 pin, remove the cover and disconnect the wire from the connector by taping up the wire and putting it back inside the cover. Don't cut the wire in case you need to use it in the future. 7 Pin Connector from Trailer Craig Short Hull 5051 point
-
Our outside faucet has also been replaced. We didn't winterize, thinking we'd be ok, but not...so, oh well... C'est le vie. Our original was plastic, as well. No big difference. We rarely use it, anyway. Our interior bath scandvik is still good. A few tiny cosmetic spots that I could probably clear with some work. We'll see. The cheaper plastic set in the boat has some degradation. Florida weather. 15 years. I'll take it. Oliver chooses best stuff. We have been very happy with our gear, 16 seasons.1 point
-
This time will go by fairly quickly AND will drag by all at the same time. Use this time to learn all you can about your new baby. Between this Forum and the Oliver University there is more than enough to keep you entertained over the summer. Start planning all of those trips you've been wanting to take and things you've been wanting to see. Get everything else in your life ready so that you can not feel guilty about neglecting anything while you spend time pampering that shiny new Oliver and/or while you're relaxing at your favorite camping spot. Would love to do this - but - where might this camp be? Bill1 point
-
Consider taping the gel coat surface in the area of cutting. Charlie.1 point
-
Sure am glad about that - given the "camo green" color of the pool noodle I'm sure you could miss it.😁1 point
-
Here's a paragraph from Got Earplugs by katanapilot from My version of the Houghton AC install posted May 27. As a sidenote halfway through the install I thought of a different way of doing the wiring for the thermostat. If a person replaced the LCD thermostat with a older manual style you could do away with the LCD relay board. If you look at the first picture that shows a group of wires that are in a black sheath, these are the control side of the wiring for the AC. In that group of wires there are two blue wires one with a white stripe. The one with the white stripe is hot 12 volts DC and the solid blue is the wire that goes to the furnace relay board. So re-allocate the existing thermostat wires by doubling them up ,two of them hooked to the solid blue and the other two hook to the blue with the white stripe. Then at the wall hook the two thermostat wires that are hooked to blue with white stripe to the power in on the new manual thermostat and the other two to the power out. The reason I would double them up is because of they're small gauge. This would do away with having to pull wires and using the LCD relay board. Also save you having to toggle through the unusable modes (heat strip, cool) on the LCD thermostat to get to the furnace mode. By re-allocate the existing thermostat wires and doubling them up ,two of them hooked to the solid blue and the other two hook to the blue with the white stripe. Now you are able to utilize wires that are already there saving you having to run new ones. Simply switch out the thermostat with one that does not need a control board. Paul
1 point
-
I am seriously looking at the Houghton A/C sound numbers and they are "music to my ears"! From what I have read, the Dometic is 11 1/4" tall. The Houghton 13.5 unit is 13 1/2" tall. The Houghton 9.5 unit is 9" tall. My "dark barn" floor to rafters just barely allows the Dometic, but would not allow the larger (13.5) Houghton. Hence, I am looking at the 9.5 unit for my 2018 LE2. Some questions: A. When did Oliver change from the 13.5 Dometic to the 11.0 units? See later post with questions B. Does anyone have hot weather experience with the 9.5 unit in their LE2? Thank you, thanks for the correction. Please disregard this post.1 point
-
Yeah, carrying a giant bottle of urine to a public toilet isn't a glamorous affair, but you get used to it. I believe the toilet already has a flap of some sort so as long as the line to the black tank is fitted to the urine tank, it shouldn't vent any differently. I think the trick would be fitting a disconnect of some sort since you have to remove the toilet in order to empty the compost. Perhaps a short length of rubber hose that could be pulled off would be the way to go, or maybe garden hose fittings would work. I say go for it.1 point


-
Recent Achievements
-


")


")


")


