Leaderboard


Popular Content
Showing content with the highest reputation on 07/04/2024 in all areas
-
Good news, I just solved the electrical mystery about 1-hour ago. It turns out that one of the electrical connectors going to the master light switch had fractured and when I pulled on the wire the female end remained connected to the switch. I replaced the connector, reattached the wire and all lights are now functioning. I am so glade it was not a problem with a wire in the wall. Thanks to all who provided thoughts and recommendations. I am sure it is not the last challenge I will face given the Ollie basically experiences a 4 or 5 on the Richter scale each time it gets towed. Also, I have added a multimeter to my Ollie tool box. The forum is a great place to go to learn and find support.5 points
-
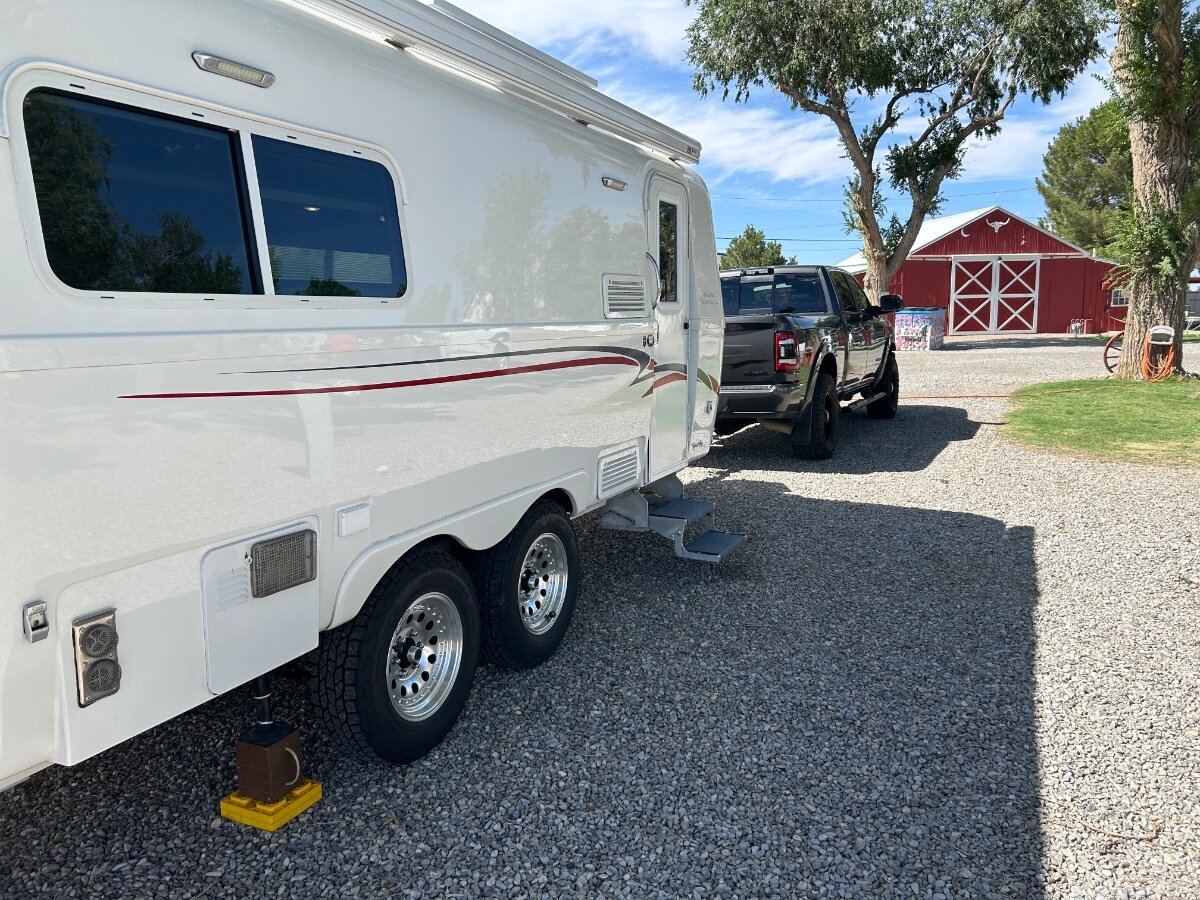
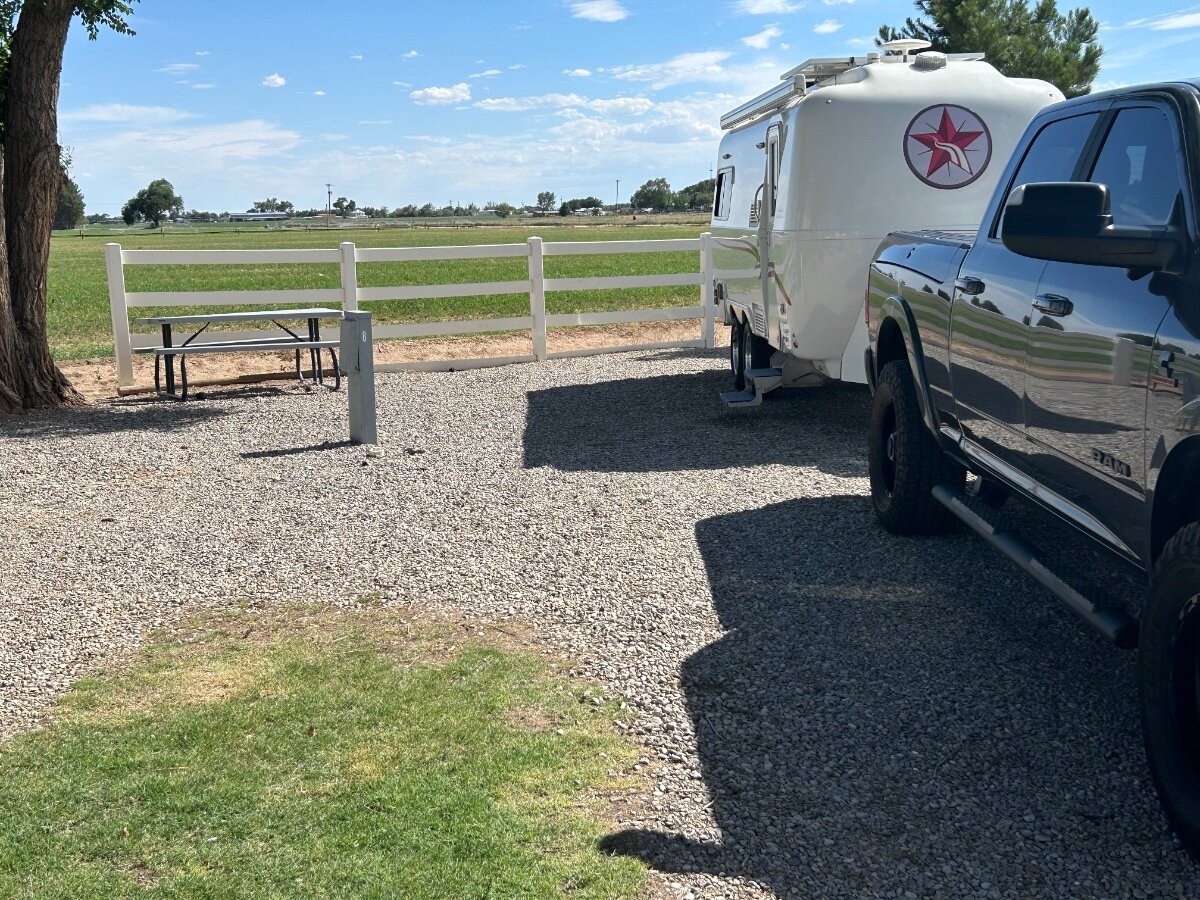
We’re on our way to Colorado to escape the south Texas heat. Overnighting in Roswell, NM which does not get us out of the heat! It was 106 when we pulled in to our campground. No sitting outside, we’re enjoying 70s inside with our loud Dometic AC. We’re at the Red Barn RV Park, very small but clean and convenient. We’ve stayed here at least a dozen times on our way to/from Colorado. Yes, that’s a Red Barn. It’s the office, rec room, rest rooms. She keeps a cooler there with bagged ice, food, ice cream and drinks. Farm field behind us, there’s only about 12 sites total and several are long term folks.
 4 points
 -
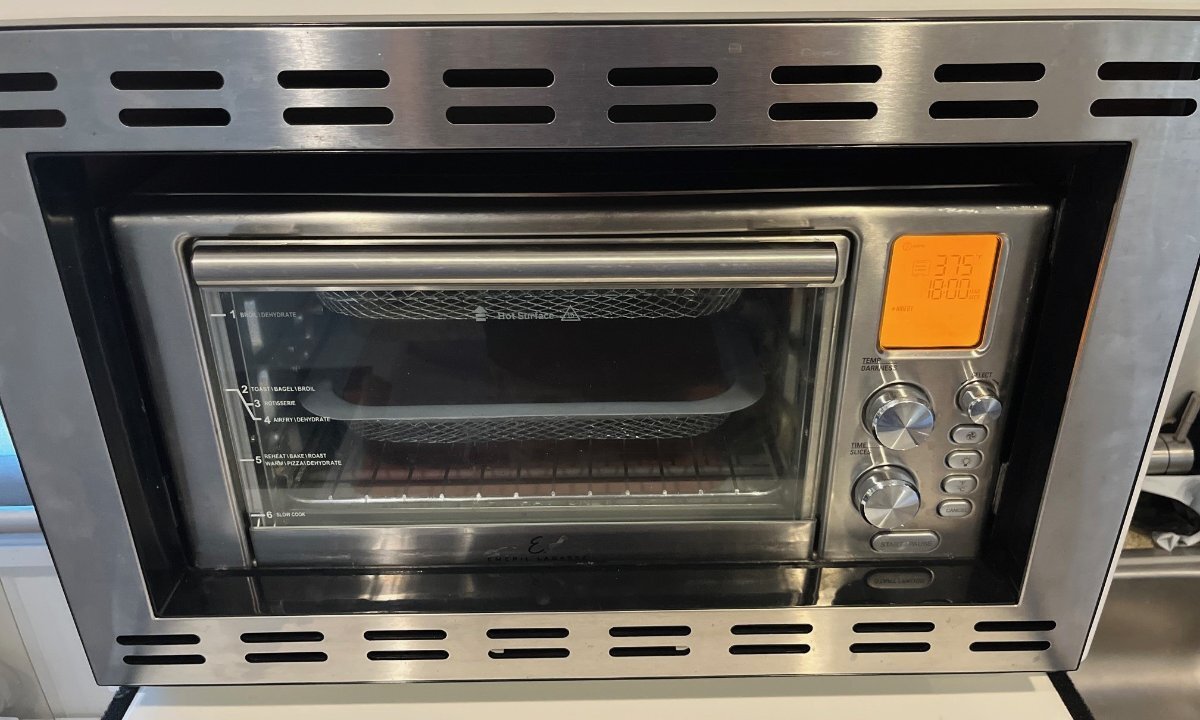
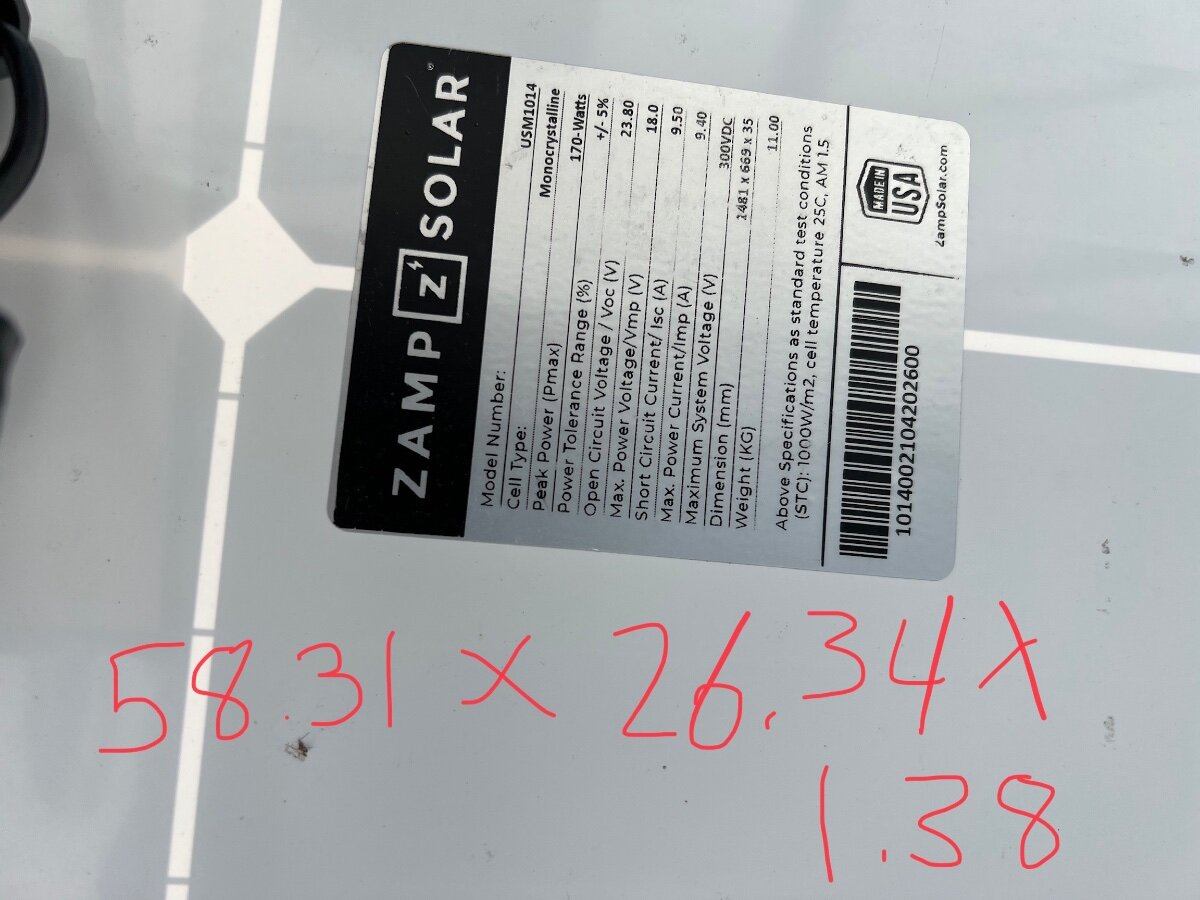
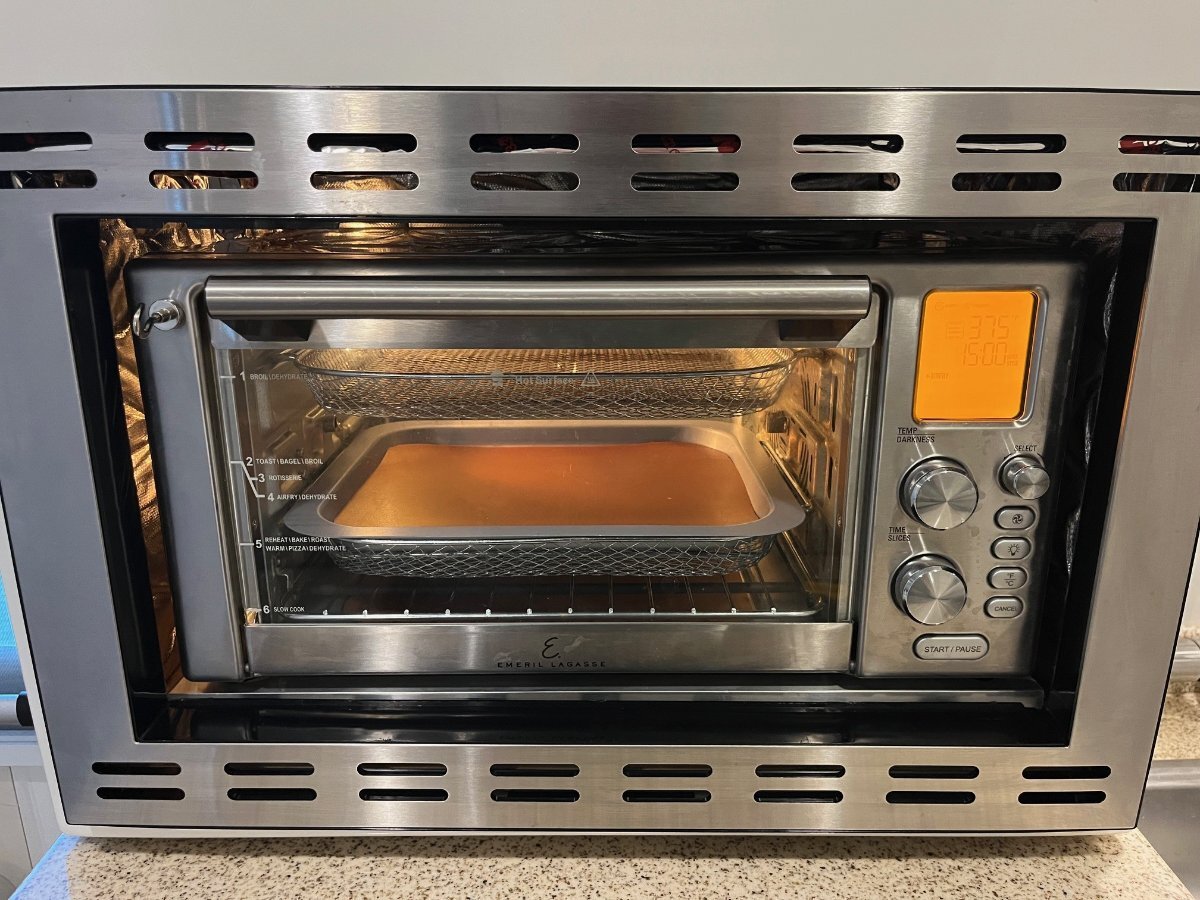
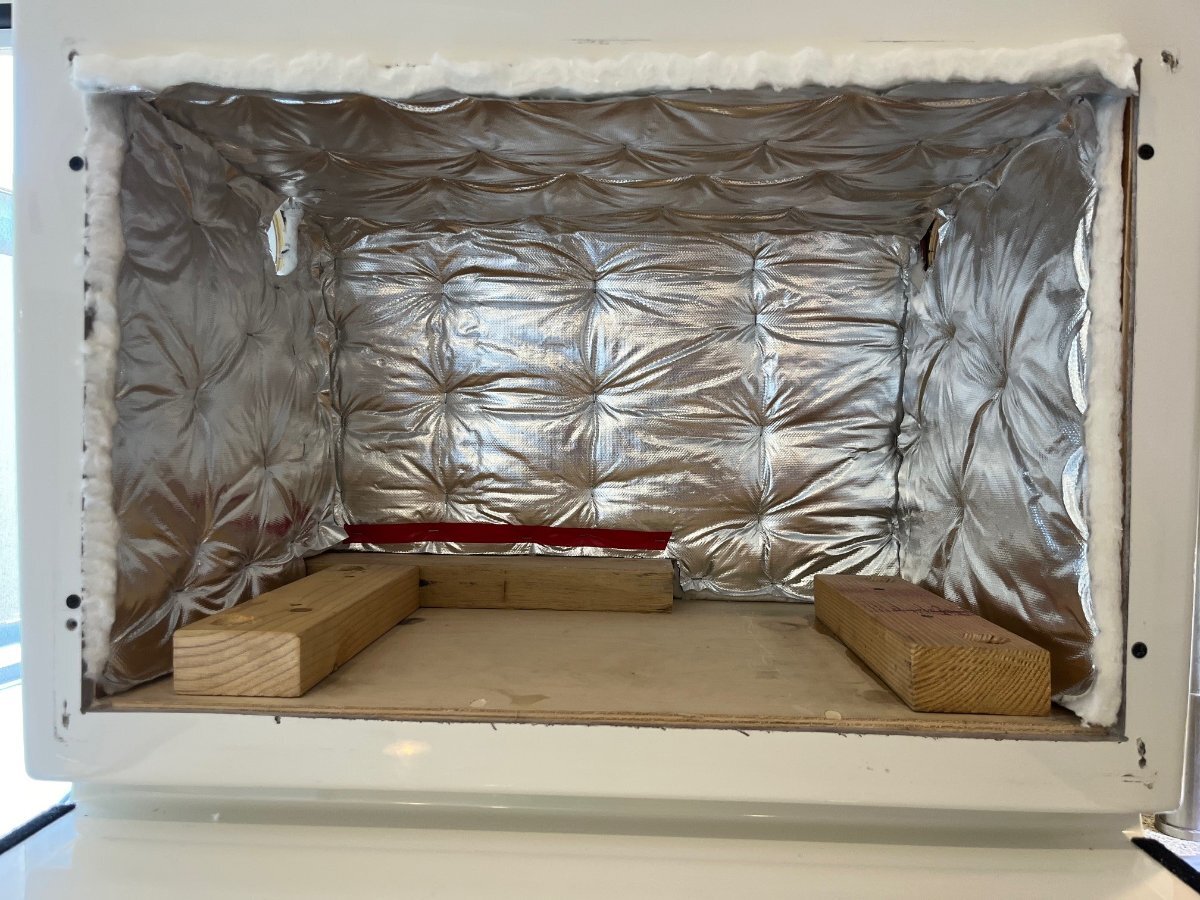
So, we've decided to do this one way or another. Don't need a microwave, as I can reheat my coffee on the stovetop and save the carcinogens of microwaves! Chris says they kill the nutrients in all foods, so she doesn't use one ever in all of her amazing cooking. Measured our small model Emeril Air Fryer and it is the exact same dimensions, all measurements of length, width and height. Yeah, there is a heat issue that I mean to overcome. Yanked the microwave out of our hull in about 20 minutes today. Connected the Emeril and ran the air fryer at 375 for 16 minutes today. It got hot in the end, but there is 4 1/2" above the oven and 2 1/2" left and right (thermostat wiring to the right). I will need to raise it about 3/4" to fit the surround, but otherwise fits like a glove. I will cut some plastic off each side for the heat. I plan to fit the opening top and side with ceramic insulation made for woodburning stoves which comes in many thicknesses. I am wondering re OTT installed convection ovens. Anybody have one? Is there any exterior venting? Hey @bugeyedriver, you wrote on Dec 19, 2023 "The Wonder Egg - Hull #14, has extra vents in the side walls behind the oven, so I have gone to the micro/conv. option." Can you show pics of this venting. This will be a fun mod for me, and Chris will love it when she gets back from her sisters visit! Check out this pic after an hour of work today!
2 points
-
Jason Essary gets the credit. He authorized the reduction of LBCO after consultation with Xantrex and Lithionics.2 points
-
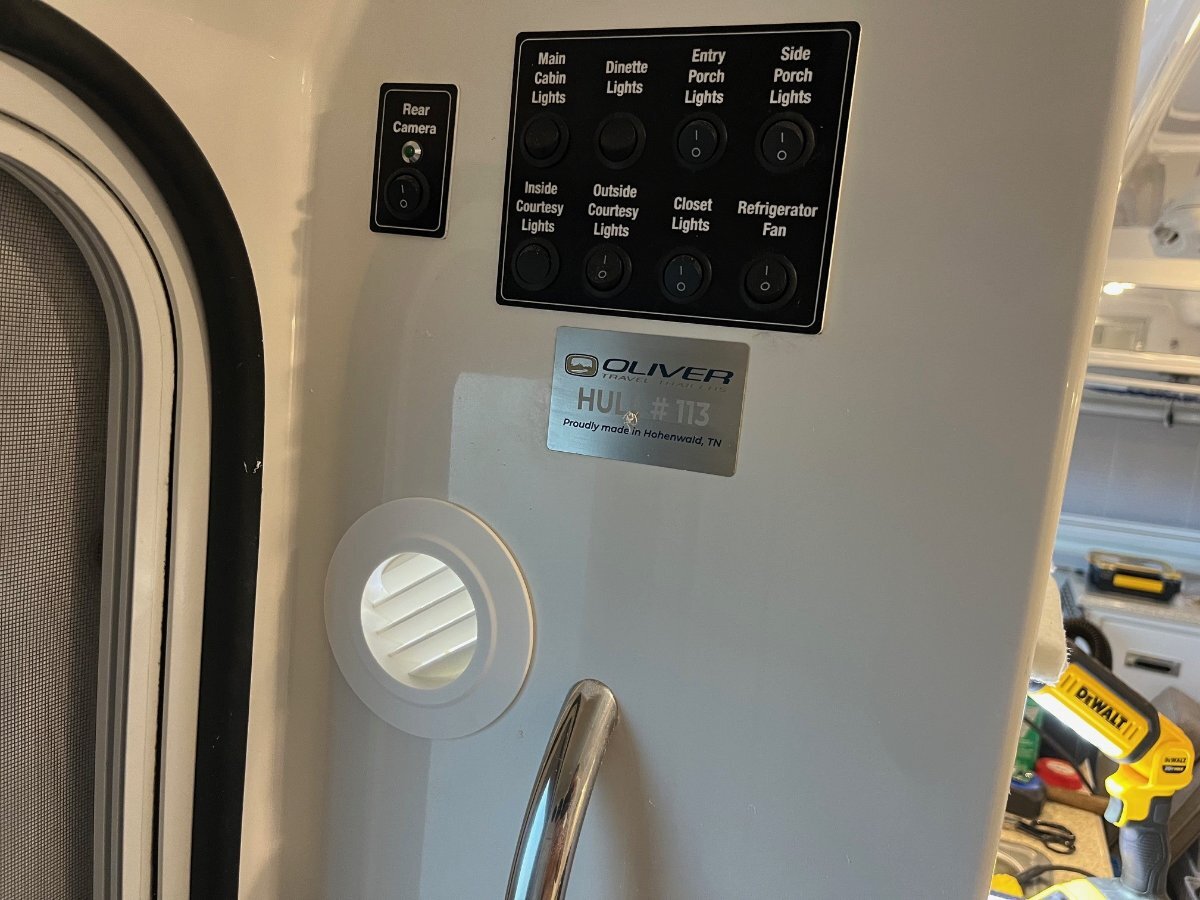
Sorry but I'm in the middle of preparing to leave for the Rockies. However - the reason for the switch is so that you can turn the fan off if the slight noise it emits bothers you while trying to sleep. Both Mossemi and I have replaced the original fan due to bearing failures in the fan and Mossemi also replaced the thermal switch. Hope this helps at least a little. Bill p.s. there are posts here on the Forum about both of these repairs.2 points
-
We camped at the South NP campground. The visitor Centre is there, access to the bottom of the canyon is also there. Beautiful campground and Loop B has electric. Access to Montrose is very close. If I remember the North campground and park access is off the beaten path. I chose South over North based on several recommendations, so I can't compare one to the other2 points
-
Your question made me curious so I researched some more..... RoadPass made an announcement back in 2021 about adding Campendium to their .... product line of apps. In that announcement, they stated, "Roadpass Digital is a technology joint-venture between THOR Industries and Tourism Holdings Limited. Roadpass Digital is focused on making it easier to experience, own, and maintain recreational vehicles as well as more easily discover, book, and navigate road trips. Roadpass Digital has offices in Chicago, Cincinnati, and Auckland. Learn more about Roadpass Digital and its Campendium, Roadtrippers, RVillage, and Togo RV products at roadpass.com." If you click the links in their announcement, you will find that "As of March 31, 2023 the RVillage website and mobile apps are no longer available and end user support for those products has ended." Also, for the Togo RV, "No more switching between apps. Togo RV is now integrated into Roadtrippers Premium!" (in other words, you have to buy the premium version to access it.) And RoadTrippers is "based on what we've learned from over 38 million trips" and "AI-base Autopilot".... Here's hoping that the continued use of Campendium apps prevents them from killing it off.2 points
-
Got everything done today on the air fryer installation. I put quarter-round along the base and 3M 3350 to seal all the edges and seams. Found a decent piece of angle aluminum as a trim piece to make the bottom opening look better and remounted the faceplate.
2 points
-
When returning home from the Oregon Coast this April, my wife and I boondocked at a Harvest Host site. That cold evening, we tried to heat water for hot drinks in the microwave using the inverter, but it shut down after just a few seconds. We were surprised and disappointed, because our Lithium Pro Package with Xantrex Freedom XC Pro 3000 watt inverter should enable us to use the microwave on inverted power for at least a few minutes. It had been a cloudy day so we got minimal solar recharge, and with our Nordcold fridge running on DC while on the road, our battery State of Charge was down to about 74%. When we submitted a service ticket, Jason Essary confirmed that we should be able to run the microwave on inverted power at 74% State of Charge (SOC), and much lower, down to 25-30% SOC. With Jason's helpful guidance, I then spent dozens of hours trying to troubleshoot the electrical system, both on the DC and the AC sides. The inverter/charger was charging as designed, and would run 120V appliances that pull up to 1100-1200 watts (including the Truma air conditioner, which pulls 1100 watts with the compressor running), but loads greater than 1400 watts (like the microwave or a space heater on a high setting) caused the inverter to shut down. Nothing we tried solved the problem, including replacement of the Optifuse 300A inverter breaker, which Oliver sent to me under warranty. I also spoke with a Xantrex customer service rep (after45 minutes on eternahold) who assured me the problem could not be with the inverter, so it must be in the trailer wiring. Jason then authorized me to engage an RV service tech at Oliver's expense to try to find a solution. But that was right before I had planned to use the trailer boondocking at the Lochsa River the week of May 15. I decided to engage a tech after I returned home. But while camping (and running the Lochsa river during the day) I happened to mention the inverter issue to another RVer. He asked me if my inverter is a Xantrex. Yup. He then told me he had been advised by an RV service tech to do a "hard reboot" of his Xantrex inverter to resolve a similar issue. He explained that this involves disconnecting both the positive and negative DC cables from the inverter, and leaving it at least overnight, then reconnecting. I determined to give it a try after I returned home, as it would be relatively easy to do. To my surprise, the "hard reboot" solved the problem. My tests have confirmed that we can now run the microwave on full power (1540 watts) for 4 minutes or more at a time, at SOC levels down to 35%. So, the Xantrex customer service guy was wrong--the problem was with the inverter. And, the solution was relatively easy to implement: turn off all batteries, and ensure that shore power is disconnected (so there is no power to the DC cables), then disconnect the DC cables from the inverter and leave at least overnight. I left mine disconnected for 3 days. Then reconnect, and turn the batteries back on. If your Xantrex inverter is not performing up to spec, try a hard reboot.1 point
-
We’ve done both and south is definitely better. You have good campgrounds, visitor center, hiking and more access to the canyon. We camped in B Loop when the weather was cold at night and we were happy to have electricity for our little electric heater. I was just pointing out that the north side is an option, especially if you’re staying at the state park.1 point
-
Are you depressing the thumb lever to open up the four jaws? Upon release the coupler should be locked onto the zerk, and should not leak or come off until the lever is depressed again to remove.1 point
-
What Houghton really should be doing is working on a new control board for these units. One with Dip switches to be able to select whether the fan runs or not with the compressor and the ability to use a standard wall mount thermostat. One for compressor run time would be a bonus, though that problem might solve itself with a standard thermostat.1 point
-
I installed a Houghton 2801 AC on my Parkliner trailer. The compressor also cycles on/off about every 4 minutes. I don't understand why. I'm wondering if one of the temperature sensors isn't calibrated or working properly and the AC thinks the indoor temp has been reached or coil temp is too low. I modified my AC to install a relay on the low speed fan to try and reduce the humidity, but with the short cycling it's not making much difference.1 point
-
John, Our 2015 LE2 has a thermal switch in addition to the panel switch. Remember seeing it while working on Ollie, but don't remember the exact location. Our fan will turn on when it's hot, the panel switch will turn it on/off when the thermal switch is closed. It's this style switch: https://www.amazon.com/dp/B0CVL972NC/ref=sspa_dk_detail_0?psc=1&pd_rd_i=B0CVL972NC&pd_rd_w=YtCZT&content-id=amzn1.sym.8c2f9165-8e93-42a1-8313-73d3809141a2&pf_rd_p=8c2f9165-8e93-42a1-8313-73d3809141a2&pf_rd_r=W3TQ15WD17HZ87NXG0PQ&pd_rd_wg=jbirw&pd_rd_r=0704ce1d-0f1c-4a7c-9ad4-84eb24a1bbf4&s=industrial&sp_csd=d2lkZ2V0TmFtZT1zcF9kZXRhaWw1 point
-
That is great news and as most expected it was a simple fix once it was found. Thanks for posting the resolution as I am sure it will help someone down the road - folks like myself.1 point
-
Nicely thought out project and installation. Well done. Enjoy your air fryer creations!1 point
-
You can access the canyon from the north side, near Crawford, CO. Crawford State Park is a nice little park and only about a 20 minute drive to the north side of the canyon. There is BLM camping there. The access is limited compared to going into the NP but it does give you the sense of the size of the canyon! Mike1 point
-
Thanks - I have not been there. I will add it to my list! **EDIT -The closures on Rt 50 that I mentioned are between Gunnison and Black Canyon of the Gunnison NP. While their website stated it would be open (one lane only) some other campers here went there 2 or 3 days ago and it was still closed. Be sure to check the road status before you plan to travel through that area.** It's possible to get there, but it might be the long way around. Sometimes that is the best way!1 point
-
If you have not visited it already, tour Black Canyon of the Gunnison NP. Breath taking!1 point
-
I have used Campendium (which I like pretty well) and when they sent notice that they were going to 'change' login requirements for Campendium to require a 'RoadPass account' I went ahead and signed up for a RoadPass account -- but I have never paid for any of it. RoadPass (the developer) has a competing app called RoadTrippers. The RoadTrippers experience made me want to vomit. It's like Travel Planning for people who don't want to think for themselves at all (sorry to be blunt) -- they create your route and tell you where to go and what to see. In fact, it seems to send you to all the most-crowded places (someone here can correct me if I'm wrong about that.) Ummm.... No Thanks. My Campendium app still shows dispersed camping spots, even though articles stated that the app would be disabled in a few weeks (reported in FEB 2024). I do NOT pay for Premium. Other people have told me that they don't see dispersed camping any more on their Campendium app, ever since RoadPass takeover (they use iPad). I use the iPhone Campendium app and am signed in using the RoadPass user account. I have since started using iOverlander. It's not as user friendly, imo. The maps are harder to read. I find iOverlander easier to use on a computer, and I have gained good information from users notes. There seem to be two different versions of iOverlander (on my iphone, one app is dark orange with white logo, the other is white with dark orange logo; I haven't been able to distinguish them.) Again, I do not pay for any of it. Neither of the iOverlander apps show the area where I am currently boondocked. I hope this helps.1 point
-
In our retrofit install of the tf130, we sealed both vents. (We had both.) We added insulation to the vents, and the sides of the cavity, still leaving an airgap around the fridge. Made sure we had more than 24 square inches of venting, to the interior. No more screening necessary to keep mud daubers out. We've never had an overtemp issue in ours. Normally run the fridge on 5 or so. But, we don't camp in 95 or 100+ degree weather, either. I leave that to younger, more heat tolerant folks. We do keep plenty of cold sink foods/beverages in the fridge. All fridges seem to work better when loaded, vs empty/lightly loaded. As someone else suggested, all the cold comes from the tiny freezer. I think the temp sensor is within the wall of the freezer, as well. There are some air slots at the back. Maybe move your fan from center to left, and try to draw more cool air from the freezer? You could also have a faulty thermostat. Isotherm sells a kit which includes a sensor in the fridge cavity, as well. Many boater use it. I think Overland installed it for his, maybe. I'll see what I find. The other suggestions of shading the fridge side are good. Wondering if you have a true 24 square inches of interior venting?1 point
-
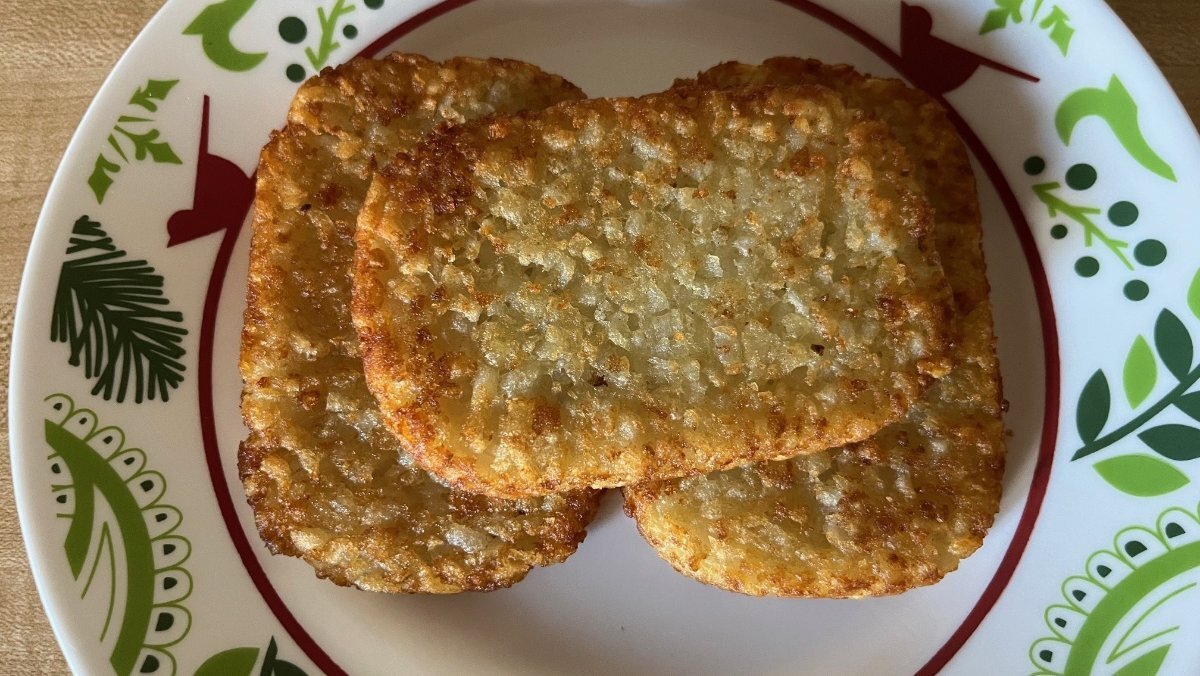
Ran a valid test today. Had to wait 24 hours for the glue to set on the vents. Cooked hash brown patties for our breakfast today. The Emeril was set on air fryer, 380 degrees for 21 minutes. The vents were just warm to the touch, not hot. The RUUVi sensor mounted above the Dometic thermostat on the right upper outer wall of the oven went up just one degree, kicked the A/C on. The cabinet facing, in front just above the oven, was a little warmer than the vents, yet I could still rest the back of my hand on it NP. The kitchen cabinet above was not hot at all due to the heat insulation wrap installed. I'd say this mod passed the test! 😂 We can now have crispy air-fried foods on the road, no setup time dragging a heavy oven out of storage, no extra time cleaning up. This way, we will likely use it daily when camping, like the larger Emeril we have in our home kitchen. Anybody else interested in this oven? Check out the Amazon used price at $80! They also list a "very good" one for $85, that is new but not in original packaging: Amazon.com: Emeril Lagasse Everyday 360 Air Fryer, 360° Quick Cook Technology, XL capacity,12 Pre-Set Cooking Functions including Bake, Rotisserie. Broil, Pizza, Slow Cook, Toaster and Much More, Stainless Steel : Home & Kitchen
1 point
-
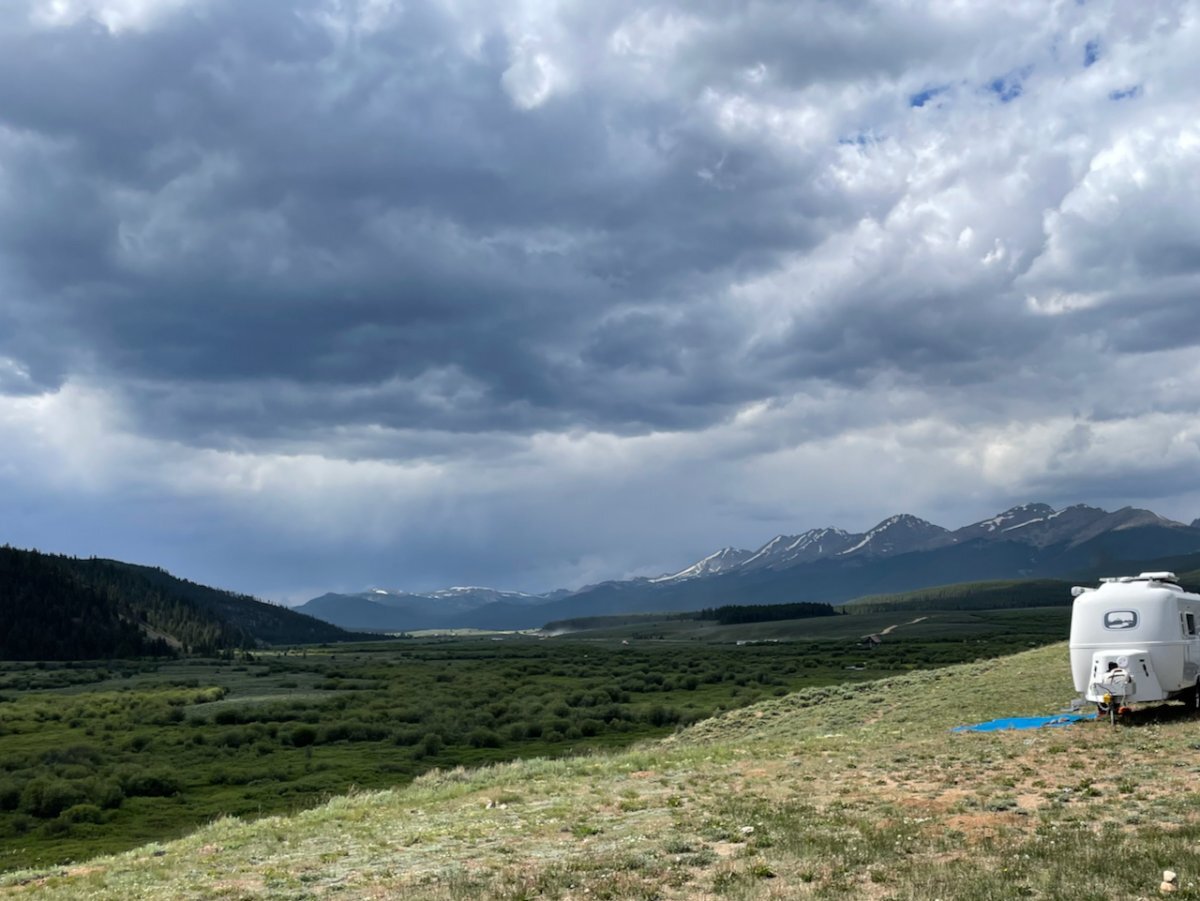
Happy 4th of July to Everyone! Gunnison NF, Colorado -- dispersed camping with weather
1 point
-
Check with Oliver, they had it on sale a few weeks ago.1 point
-
You can find some that have a mounting plate => [Upgraded Version] 12V USB Outlet Qidoe 78W 3 Port USB C 12V Outlet Dual PD 30W & 18W USB A Port with Voltmeter Lengthened Aluminum Body Switch Waterproof USB Car Charger Socket for Car Boat Marine RV https://a.co/d/07mCzHx6 The most I have seen using the ones I installed to charge an iPad is 4.5 amp or around 52 watts. I really just wanted USB-C connections since everything has switched over to that and to be able to fast charge my phone, iPad, etc. Of course the MacBook can charge easily from 50w as well. But I am not an electrician and routinely do things that are above my experience level so I will be the first to say don’t do what I do without doing your own homework.1 point
-
I was putting off the work of insulating the opening. I had never done such a task or worked with ceramic insulation before. Turns out this material worked well: Amazon.com: CeraTex 3180 Blanket with Aluminum Foil Facing, 8 LB Density, 1/2" x 24" x 60" (5'), 2300°F High Temperature Insulation for Kiln Stove Furnace Glass Fusing Pizza Oven : Arts, Crafts & Sewing After cutting the main section, top and rear in one piece, I used 3M spray adhesive to get it started and it worked better than I had expected. I finished with a power staple gun with 3/8" staples to secure it. I was afraid that the staple gun would pierce the foil layer of the insulation, so at first I used some electrical tape to help and then realized it was unnecessary (red tape at bottom). Then I cut the two side pieces which had a curved rear, following the curve of the Oliver upper shell. I placed these in position and used a Sharpie to mark the vent holes and cut these out with scissors. Glued and stapled the left side and went without glue on the RH side, since the thermostat cable is behind that one and I may need to service that with an A/C upgrade. Really happy in how it turned out, which is often the case after days of contemplation! I have one trim piece to fabricate which will hide the 2x4s below the oven and then remount the bezel from the original microwave, and she's done! Last step and pics tomorrow.
1 point
-
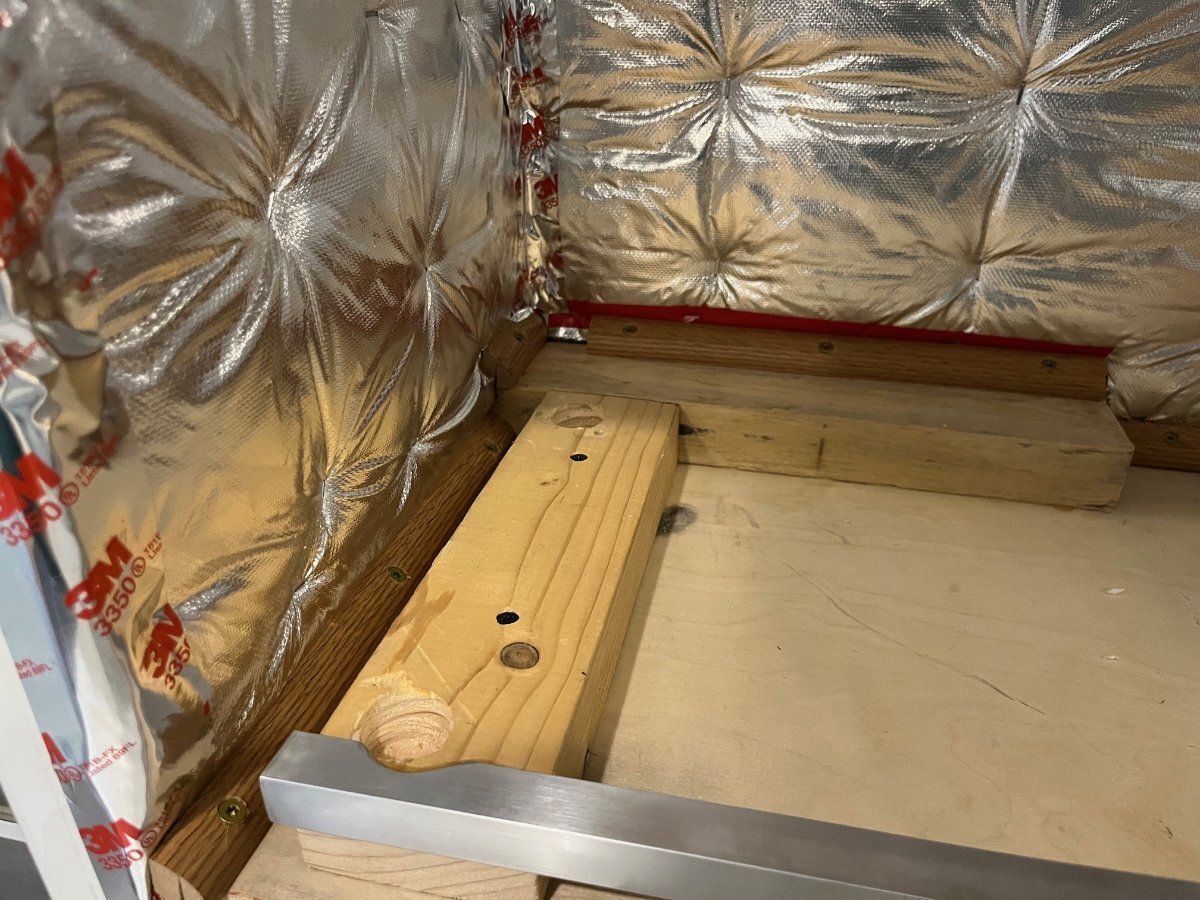
Next step was to drill the vents. I went 1/4" or so down from the ceiling of the opening and as far back as possible. One the left side, you could only go so far back because the entry door area is further in for the flat door frame vs. the other curved walls. Both sides took careful measuring. Used a 2 3/4" hole saw from the inside first for positioning. After making the center mark, I drilled through with a 1/4" drill. This way I could place the hole saw mandrel into the hole and make sure the hole saw was in the best position. I used the vent on the outside, to also see that the larger outside vent surface had adequate room. Here are the results.
1 point
-
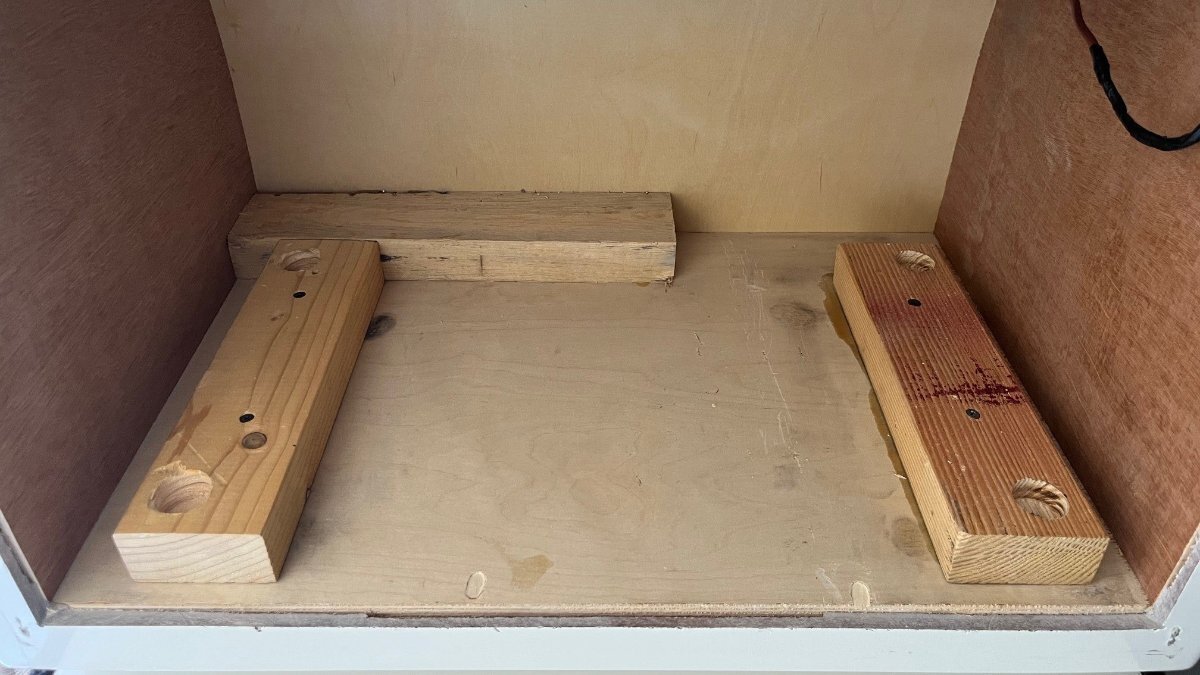
First step was to center the Emeril Air fryer. It needed to be raised about 3/4" or more, so I set it on two 2x4s with cutouts, hole drilled to hold the legs. This gave me the lift I need and a way to secure the oven. When I got the mount ready, I merely used some wood glue below and was able to then move the oven a little to get it exactly square. The next day after the glue had set, I added a couple wood screws to secure (the 2x4 in the rear was part of the original microwave installation).
1 point
-
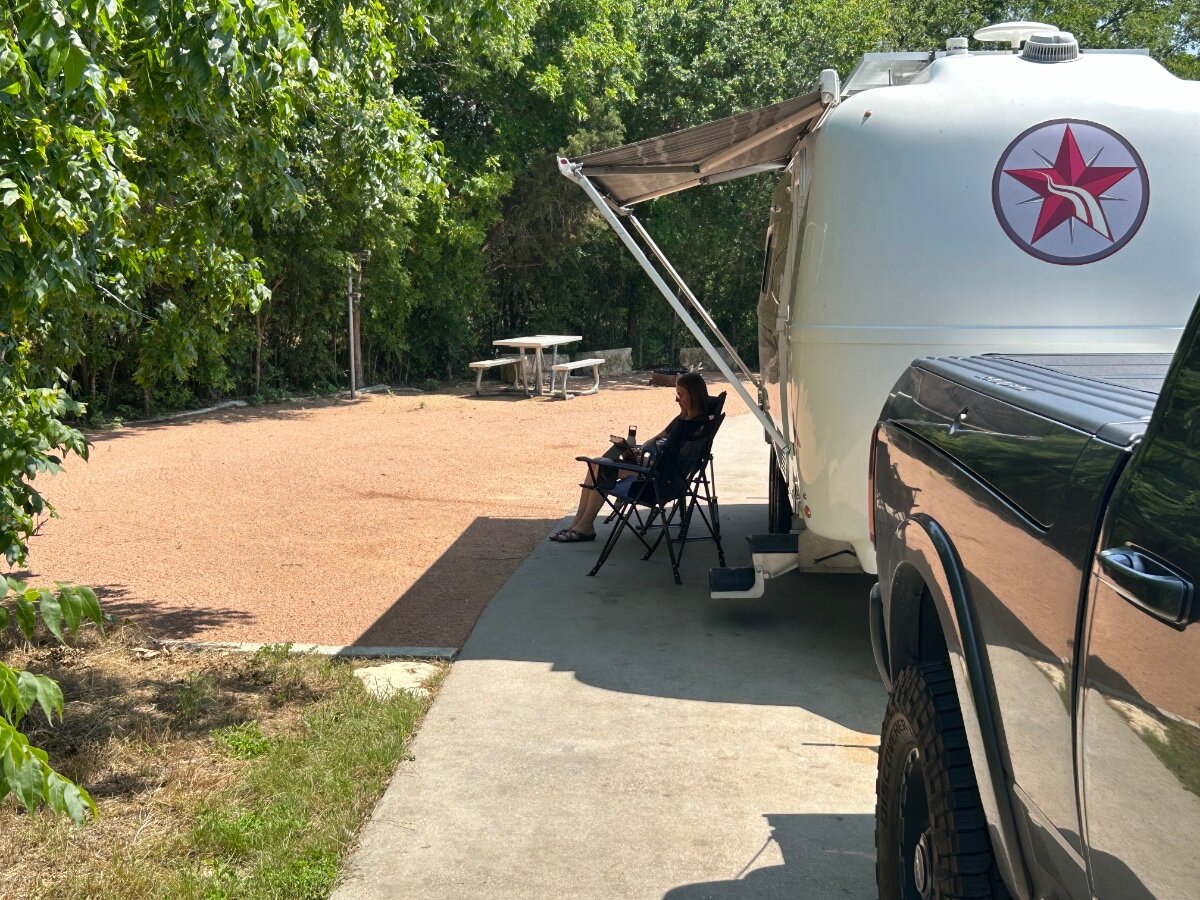
Mother Neff State Park is a nice little Texas State Park just south of Waco. The land was donated to the state of Texas by the mother of Governor Pat Neff 100 years or so ago. It was the first state park in Texas. We stop here often.
1 point
-
We decided to RO2N in Laurel, MS... Very "green" here compared to what we're used to in the SW! Headed to Dallas in the morning... Safe travels, All!
1 point
-
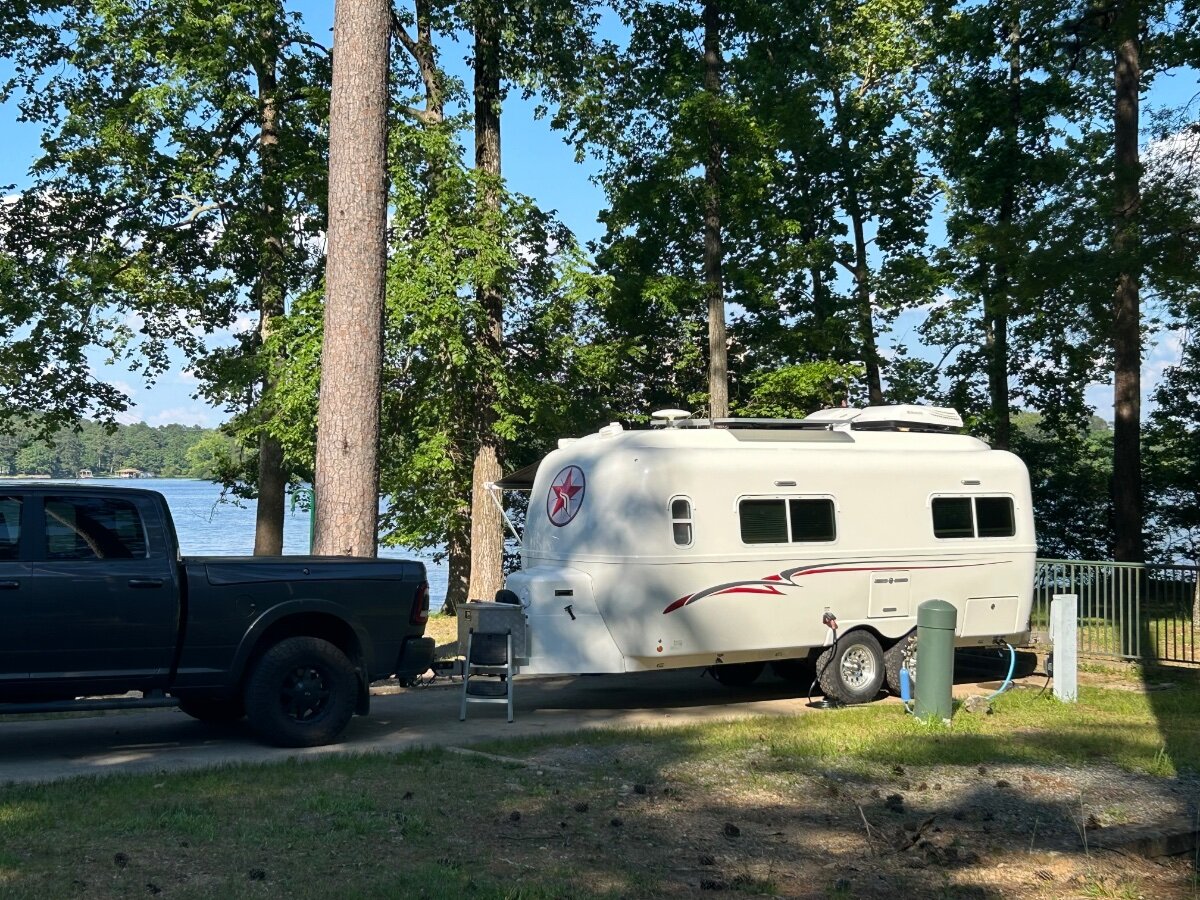
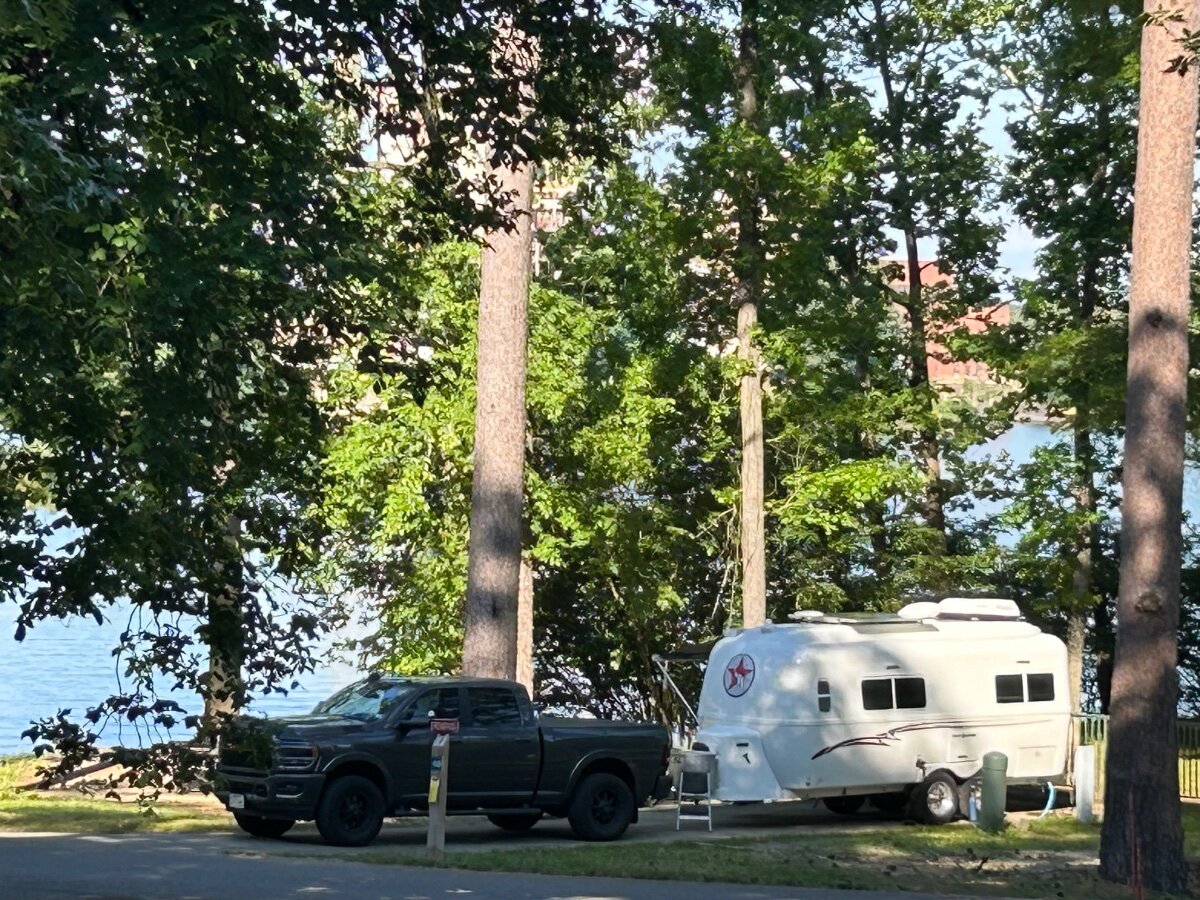
We’re overnighting at Lake Catherine State Park near Hot Springs, Arkansas. Like most Arkansas state parks this one is nice. There are wooded camp sites and sites right on the lake. It’s 12 miles off of I-30, we’ve stopped here several times when we’re headed east or on our way home.
1 point
-
Mike, I walked over this morning May 18 at the Rally and introduced myself as you were preparing to leave for home. I wish I had done it sooner and had seen this post of your visit to David Crockett BP SP. My home for near 50 yrs now has been in nearby Greeneville. If you two ever find your way back to this area, and I can lend any assistance whatsoever, feel free to call on me. Regards, Ron Williams1 point
-
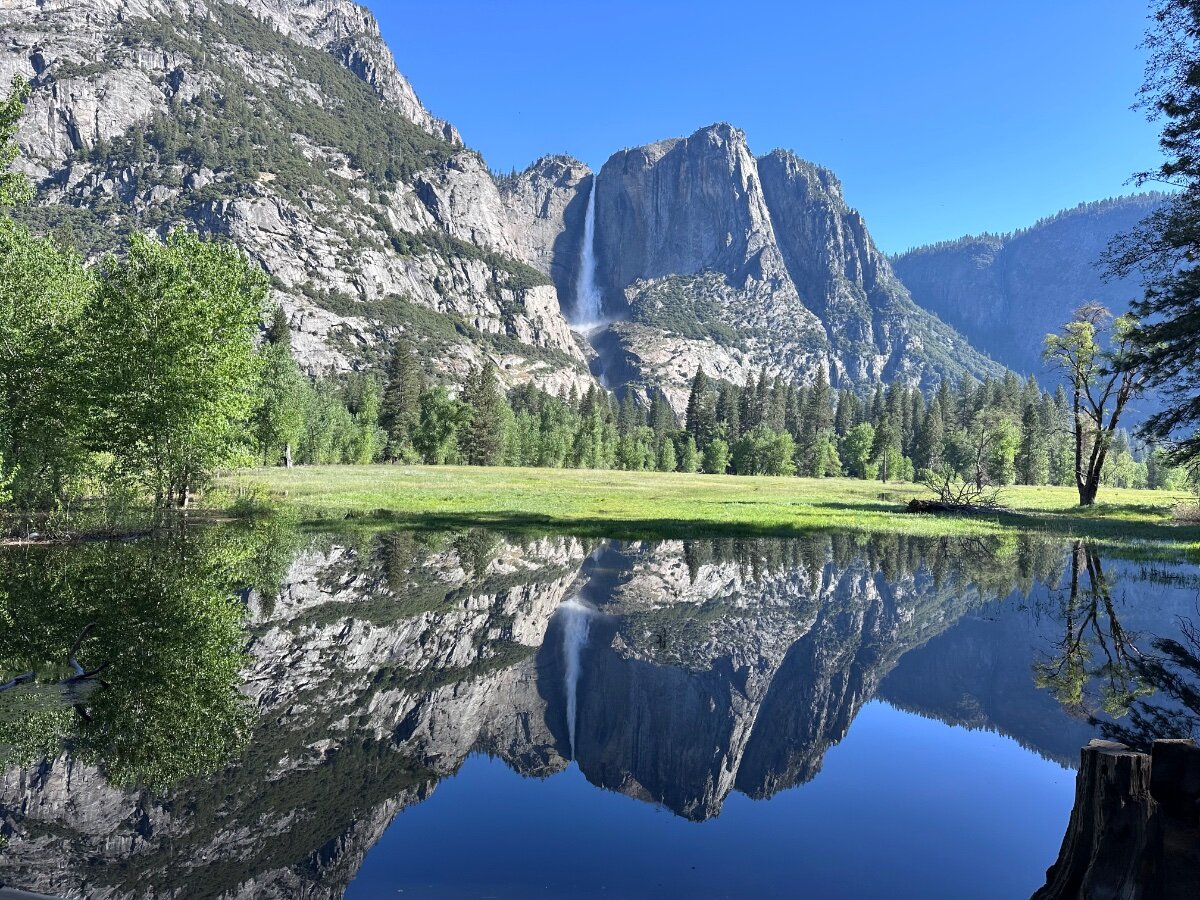
Yosemite today: The pond near swinging bridge was dead calm.
1 point
-
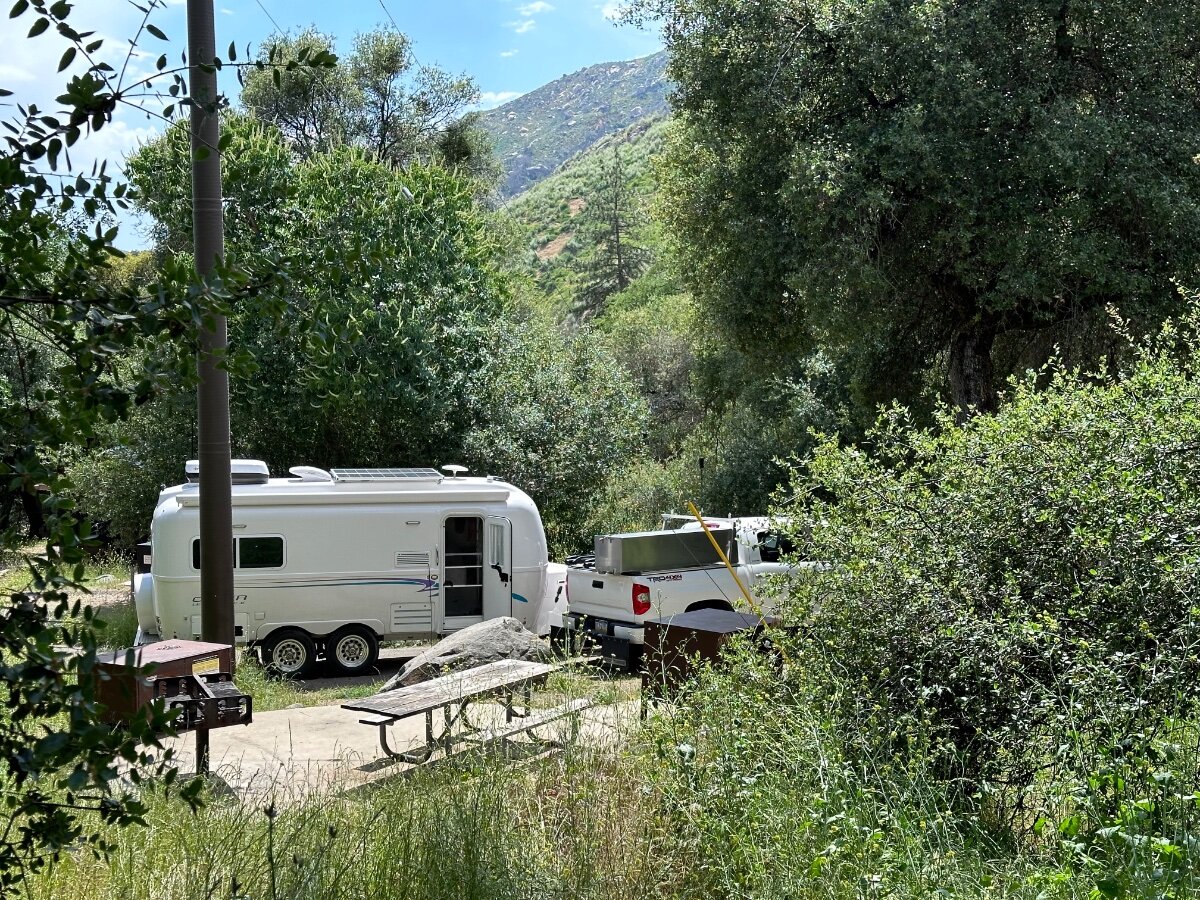
Two site pix from this week. Sequoia NP - Potwisha CG -Site 11 we saw another Oliver at the same campground. Hi to Marybeth & Neil pix below. Yosemite NP - Wawona CG -Site 74
1 point
-
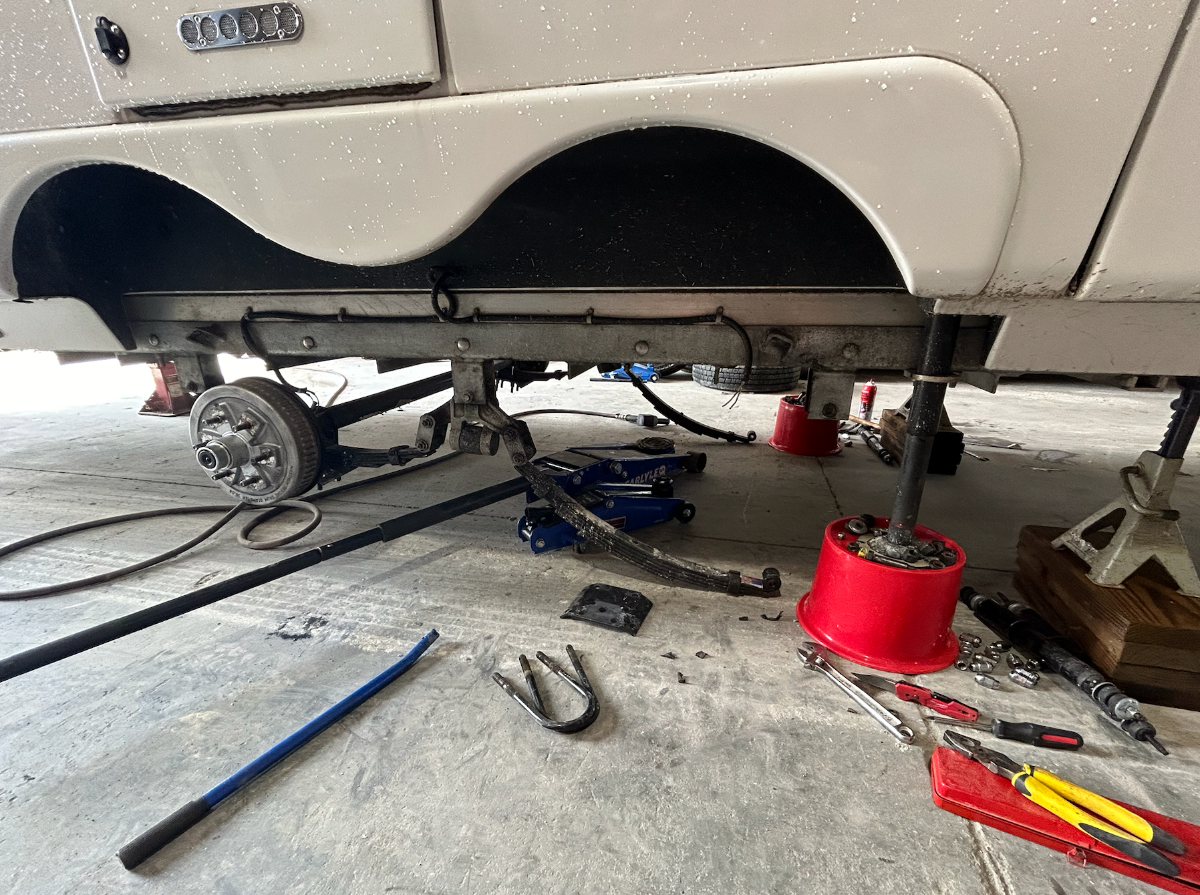
Made it through last night fairly "high and dry" - although there is a slight after-smell of wet huskies in the camper... Oh, well, it's how we roll. T-storms started again early this AM (0230) through about 0445. Nobody slept - coffee came early and prep for R&R operations with Dusten Bowden (18-year veteran of OTT). The Dexter Nev-R-Lubes swapped without even a hiccup... ABOVE: Removed and replaced the rear axle first then attacked the front... ABOVE: Note the size difference between the 12" and 10" drums... about 19% more braking surface area. ABOVE: Took about 3.5 hrs for the axle R&R, back on the road now and headed toward Nashville over the next several days. Had to stop for this pic - here's "3 hearty cheers" to Jim Oliver for designing what we consider the best TT for the money in the US RV market! Roll-on, regardless...
1 point
-
Same here in Hohenwald... Just finished up a rainy dog-walk as the sun set somewhere to the west, not viewable with the heavy cloud formations. We'll sit it out here at Camp Oliver unless the tornado sirens blast us out and into proper cover. Stay dry and sleep well...
1 point
-
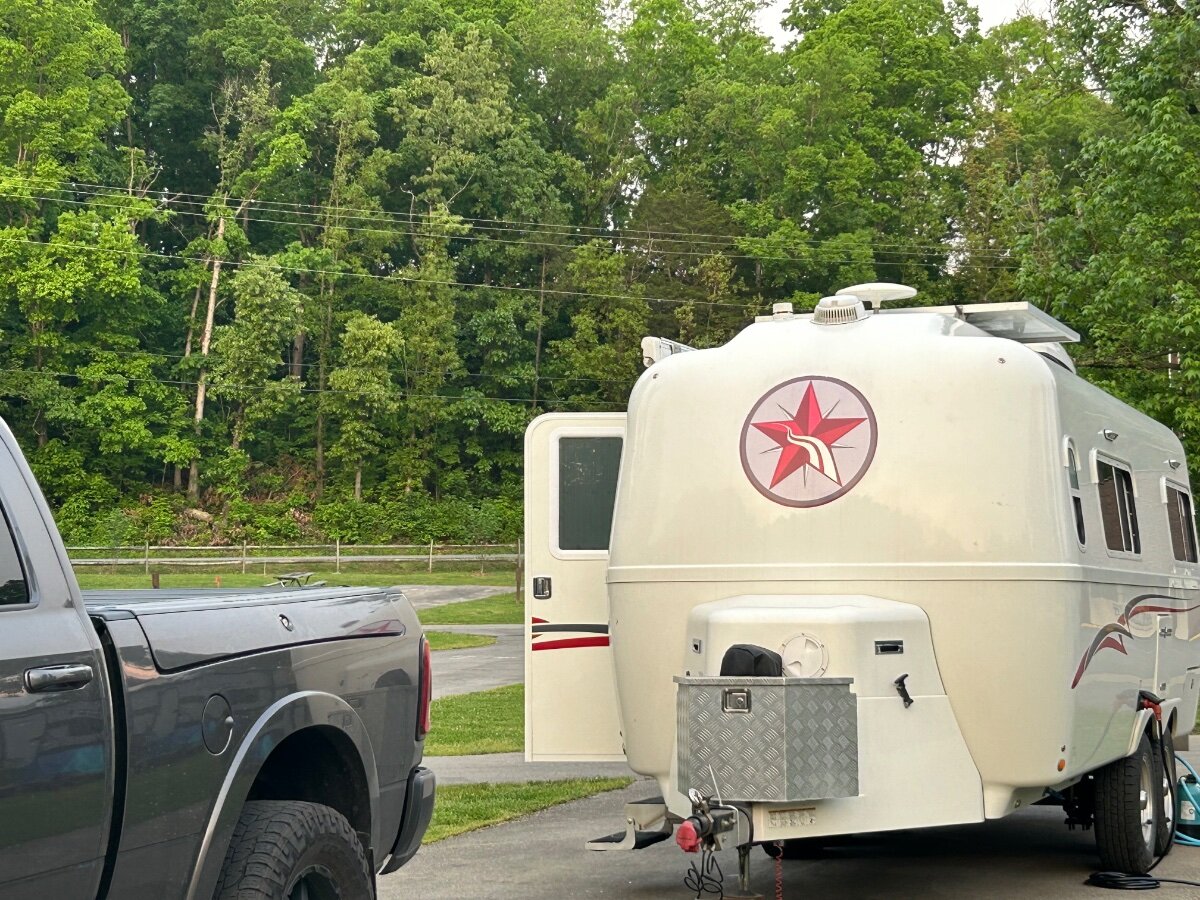
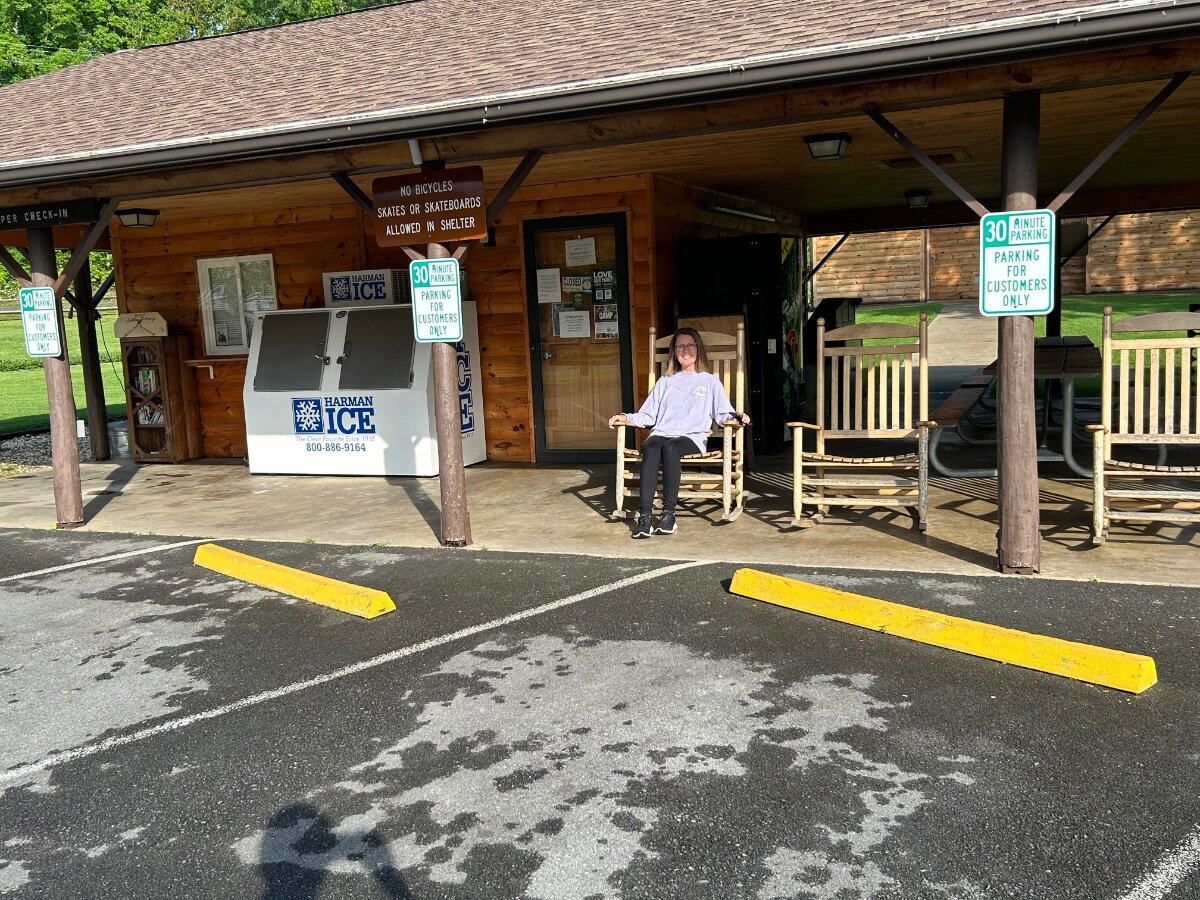
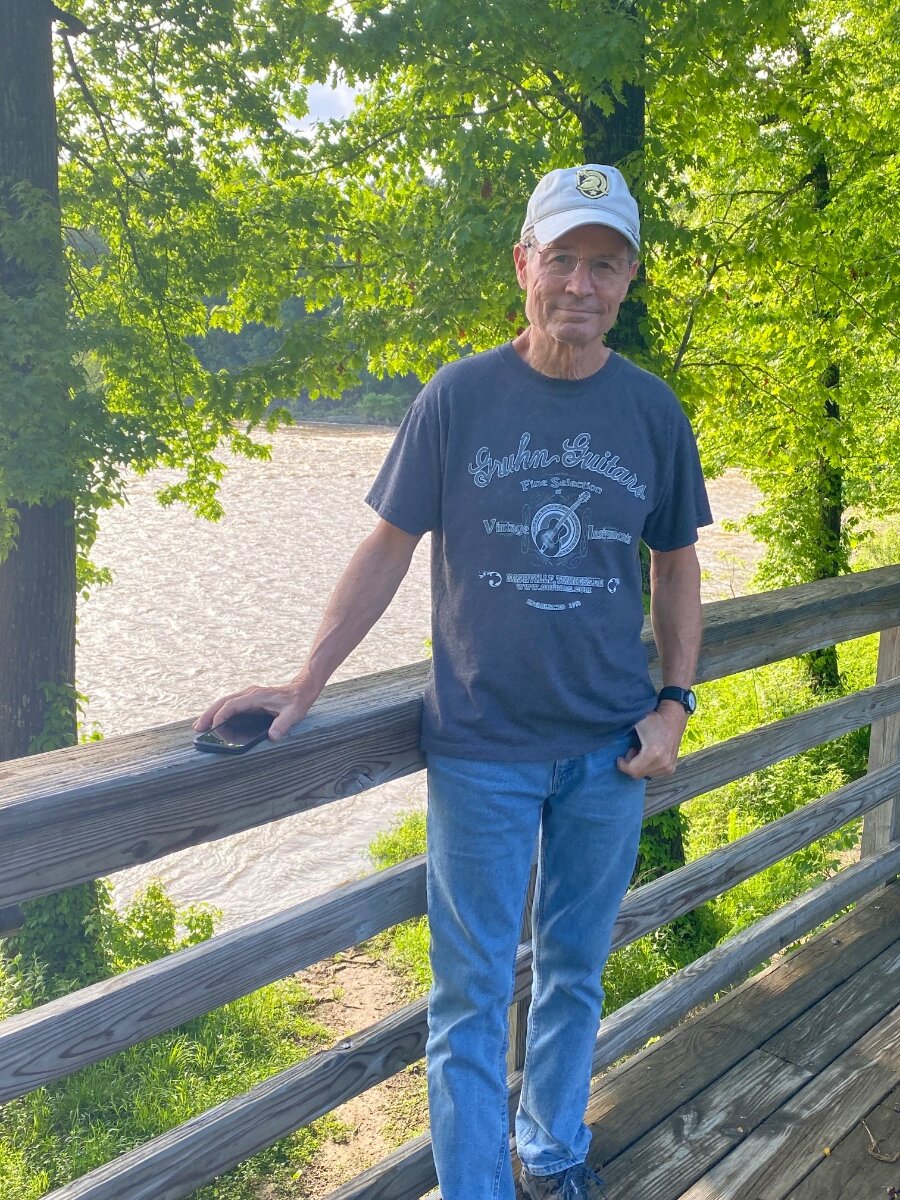
We’re camping at David Crockett Birthplace State Park until we head to the rally. This is a small park near Johnson City and is the childhood homestead of Davy Crockett. Only about a third full right now. It’s a nice park and a good location to explore East Tennessee. Campground Store The Nolichucky River runs right by the campground and it is running very high. The camp hosts warned everyone this afternoon to be ready to evacuate if the storms continue.
1 point
-
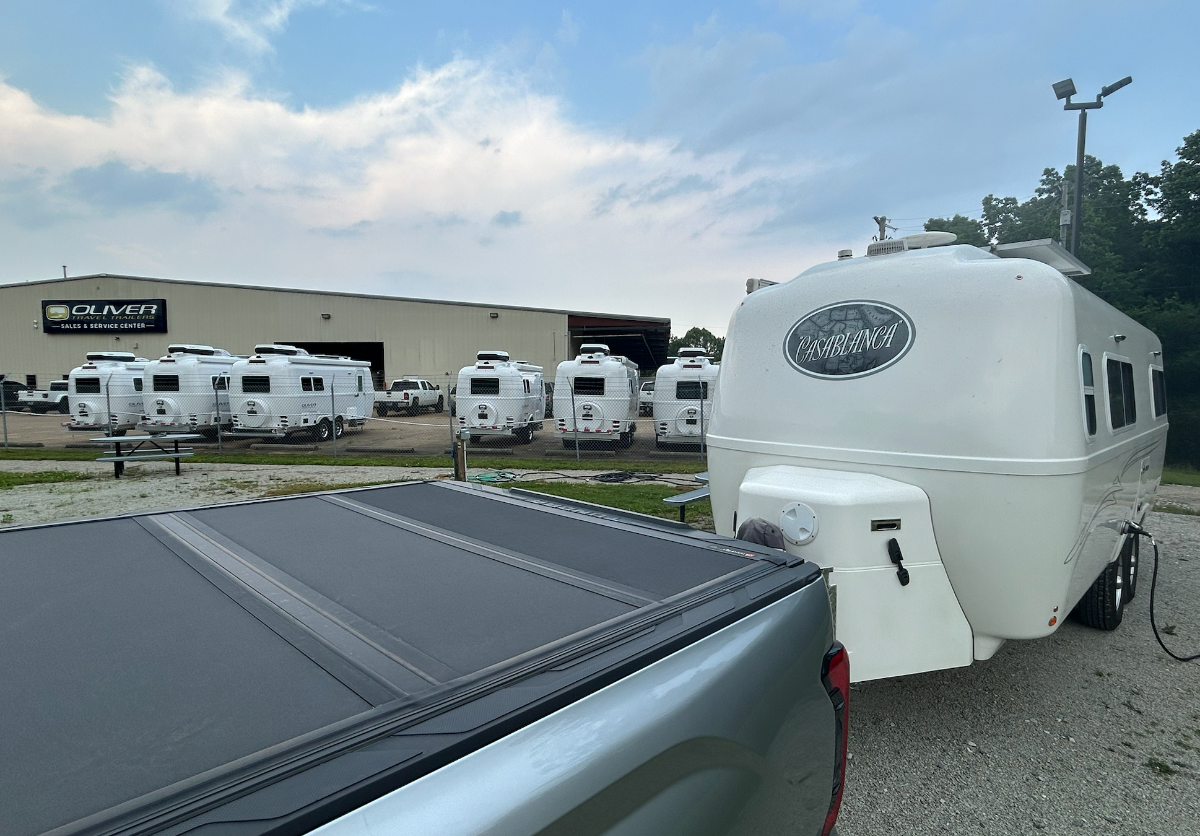
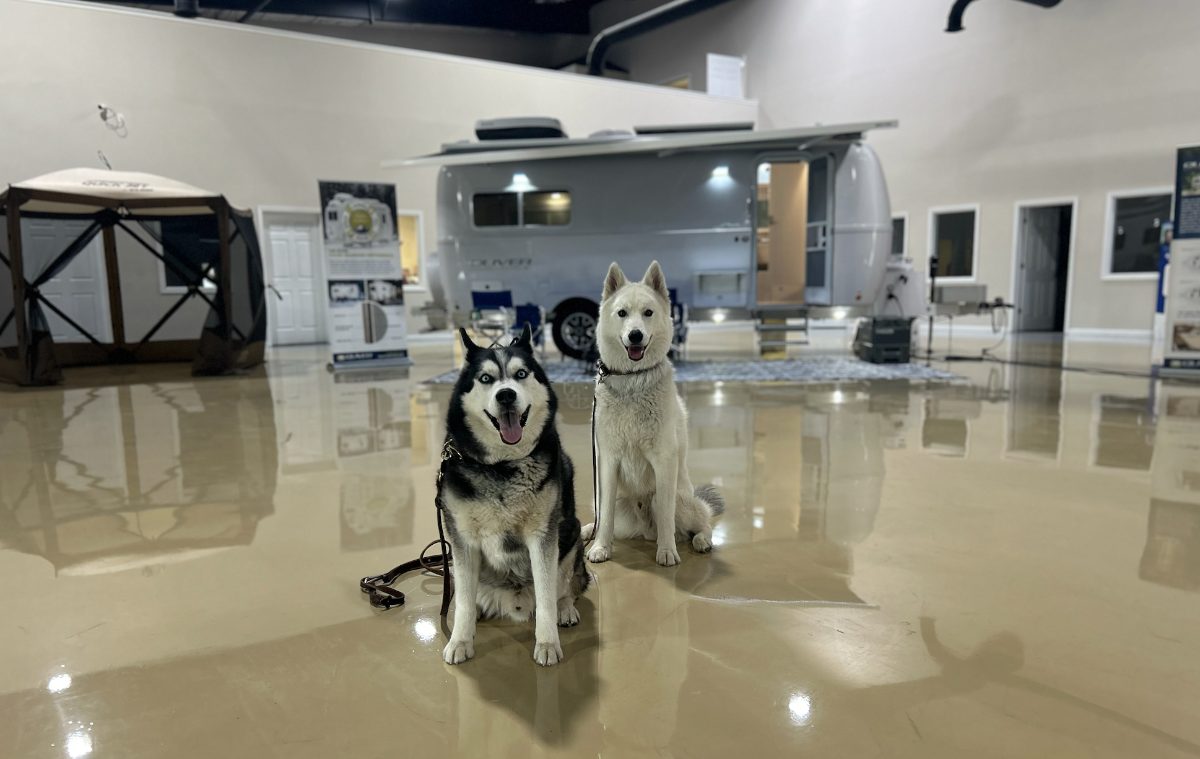
Arrived at the "Mother Ship" mid-afternoon today. Mike, by happenstance, we also found ourselves in Site #3, no one here -- perhaps because there's a major T-storm headed this way from the southwest. Flood warnings and possible twisters from now until about 1645... Maybe not as peaceful as when y'all were here! The boys liked all the attention from Sarah and Josh in the showroom: The new bathroom door/hatch is fantastic on the 2024's -- it would be cool to see if it's retrofittable in older models. Gett'n real rainy here! More later... Cheers!
1 point
-
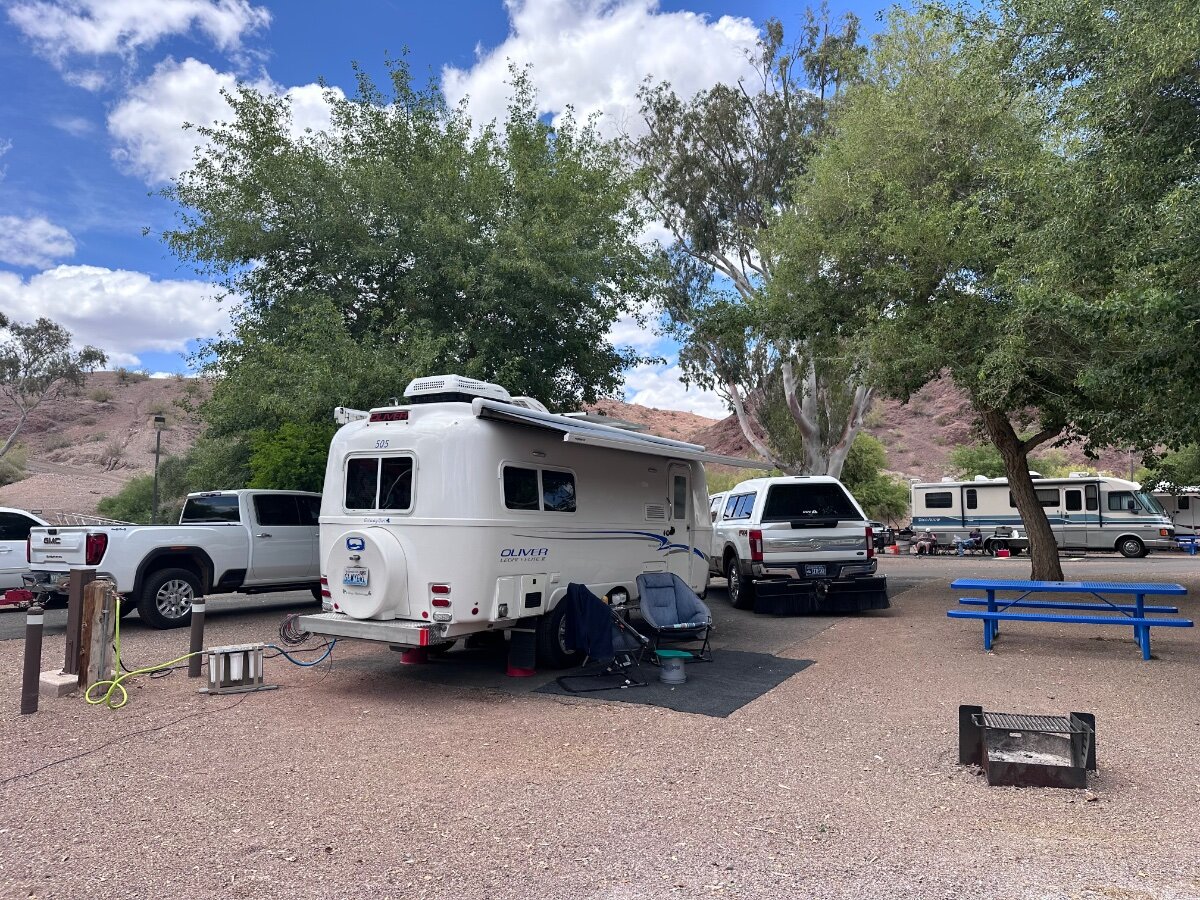
At Lake Havesu Az at Cattail Cove SP. Nice level sites with Wafter & 30 amp. Thd park he’s a beach, boat launch , small visitor's center and fish cleaning station. Bathroom and showers are clean and modern with high pressure hot water. We are in site 15.
1 point
-
There are 16 zerks (8 on each side), THIS video from Oliver (Jason) is a good reference for where the zerks are and how to apply the grease.1 point
-
So that really helped a lot. There is still one that will not respond. I will try again tomorrow when I am fresh and will not cuss it. ;-), thanks again for the help.1 point
-
Jack up the side of the trailer that the fittings are on that you are trying to grease. This will relieve any pressure being placed onto the wet bolts by the weight of the trailer. That usually makes it much easier to get them to take grease. You may never get it to squirt out both ends of the bushing equally.1 point
-
After using Roadpass/Roadtripper/Campendium on a recent 6 week camping trip I have decided to cancel my subscription. I found it exasperating to use in its newest format and I switched to a Allstays Premium membership in the middle of our trip. Allstays and Campendium used to be free to use and I used both. I chose Campendium's paid subscription to begin with and was a happy camper until they completed their app migration. Mossey0 points


.thumb.jpg.e34bf01ef7f7d5e99ad31856d45afbeb.jpg)


-
Recent Achievements
-
")


")


")


