Leaderboard
Popular Content
Showing content with the highest reputation on 09/19/2024 in all areas
-
This modification was a break-out from an old and long thread that Mossemi started: “Only one switch to operate streetwise and curbside lights . . .” It concerned a common complaint that the curb side porch lights can’t always be used because the street side lights also come on and they can annoy the neighbors. Mossey posted a new photo of the main switch panel wiring yesterday, and it showed a ground wire labeled “porch light”.” I hadn’t noticed it before, so I tried my circuit signal probe again and finally found where the circuit crosses over to feed the street side porch lights. It was in a sheathed wire bundle behind the attic side board, deep along the right bottom corner. It can’t be reached through the attic without disturbing the insulation, but it can be reached through the right rear speaker hole. The duct tape dust cover will have to cut open then re-taped afterwards. The wire bundle has enough slack to splice it though the speaker hole. I pulled the positive “red” wire out of the “split-sheath” wrap and verified it was the right one with a clamp-on amp meter. It read something like 0.9 amps with the lights on. I cut the wire, capped the end coming from the old switch, and spliced a new blue wire to the lights end. A Wago connector was easier than trying to crimp a butt splice in the tight space. The new wire was sheathed for extra protection and routed to the main switch panel. It was tie-wrapped to an existing wire bundle on the forward edge of the attic ceiling. With the left attic side board also removed (they are held by two small lag bolts), the wire can be passed into the left side upper cabinet. A short stiff wire will help fish it through. The upper cabinets have thin laminate floors fastened with a few Phillips screws. Remove them to expose a channel that the new wire can lay in all the way to the main switch panel. I also removed the microwave outlet for more room to feed the wire into the switch panel area; just snap off the cover plate, loosen the two mounting screws slightly so the wings fold in, and it will come right out. I had a round rocker switch in my stash, and they are also available from Amazon. I installed it in the blanked hole for the “Street Awning” switch, and blacked out the word Awning with a felt marker. The switch just says “Street” now, for the street porch light. Very unprofessional, but I hope someone will had a better solution. If you don’t have a blanked spare switch hole, then a switch can be mounted on the other side of the switch panel, on the inside cabinet wall. The switch was wired with the new blue wire going to the middle terminal, the red hot +12Vdc to the bottom, and the yellow ground to the top (needed for the blue neon indicator.) The other ends of the hot and ground wires went to existing six-port push-in terminals that feed other switches. There were some unused ports. This is easier than it sounds, but it’s good to have a clamp-on amp meter and/or circuit tracer to help find the street porch light wire. I included a photo and list of the tools I used. The inexpensive brands work well enough, and I’d recommend owning them for other electrical projects, troubleshooting and repair work: Digital clamp-on ac/dc amp meter, also a multimeter, can check your shunts and loads too! Circuit tracer for finding wires, shorts, and breaks Metal fish tape, I cut short pieces off the end for these kind of jobs Cable tie gun, you will wonder how you ever got by without one Auto wire stripper, just makes it easier Thomas and Betts crimpers, 50 years old and still my favorite go-to Inspection mirror Fluke multimeter, when accuracy counts Cheers, Geoff5 points
-
Our new-to-us OE2 came without the Anderson hitch so I had one installed at the factory. First let me say that I was very impressed with their excellent service. And the free, on-site campground was a very convenient plus. After hitch installation, Jason told me that on my Tundra the chain bolts would likely need to be loosened every time that I unhitched to provide enough slack to remove the sway control plate. This is a bit of a PIA and is just one of the many reasons why I dislike this hitch (I feel another post forthcoming). Anyway, he said to just count the number of threads on the bolts to get back to the same tension on the chain. I found that counting the threads was just another little annoyance and decided to make a thickness gage instead. After measuring the length of the exposed chain bolt, I cut a piece of ¾” Schedule 40 PVC pipe to the exact same length. The ID of this pipe just fits over the bolt and I can easily feel with my finger when the edge of the pipe is even with the bolt. I believe that this is easier and likely more accurate than counting threads. I hope this simple tip this will help others with the same issue. Now if anyone has found a way to attach a WDH with sway bars to their Ollie I would love to hear about it!4 points
-
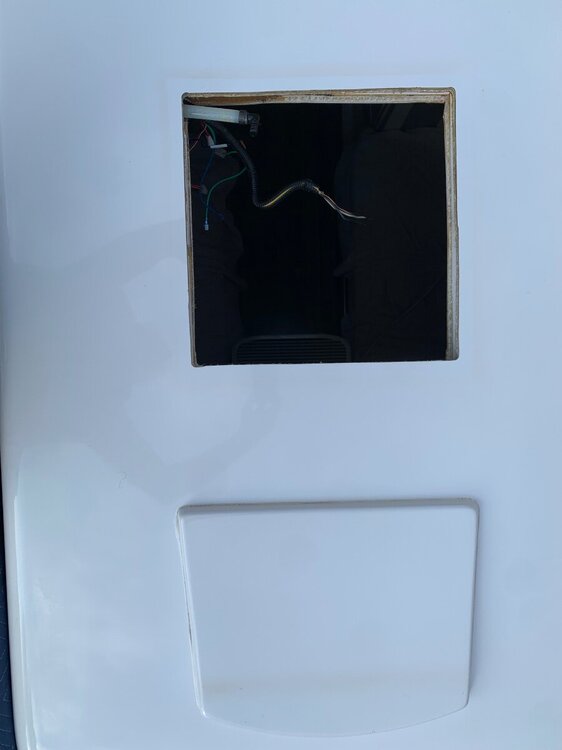
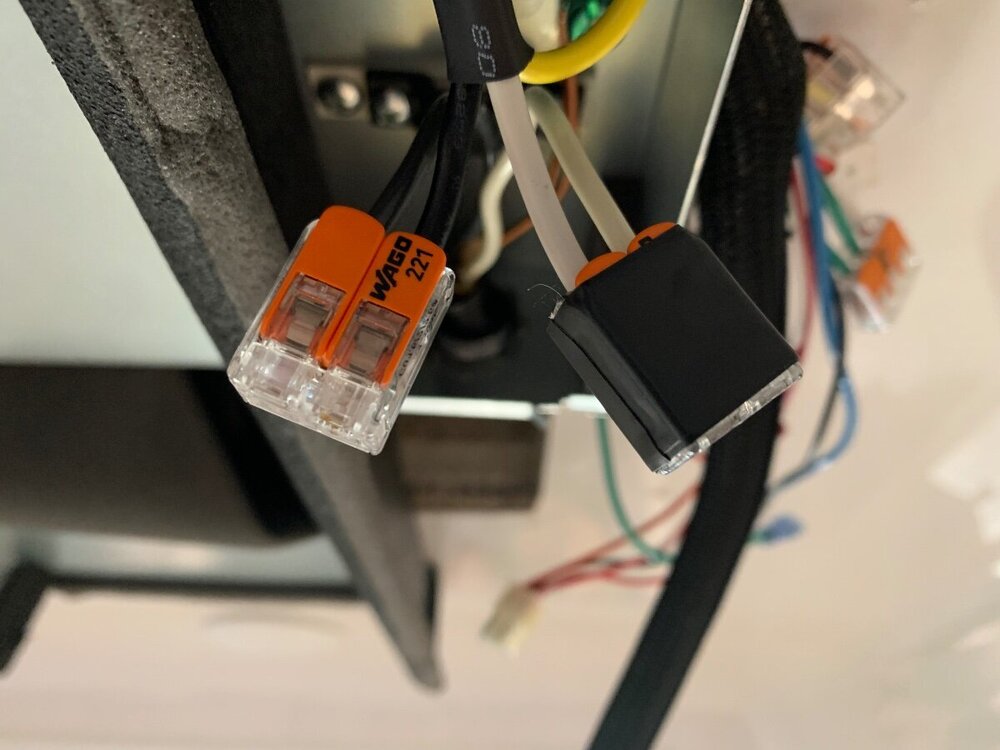
This long awaited swap-mod is now checked off my to-do list! Like many, I tolerated the noisy Dometic Penguin ll long enough; so glad I was finally able to take decisive action with this install. After a couple years of mulling over the various replacement models being marketed, a unit emerged that caught my attention; the newly available Atmos 4.4 seemingly met all of my expectations. I will forego the removal of the Dometic, here is how I proceeded forward: First and foremost, all AC and DC power sources were turned OFF! Scaffolding and equipment/supplies were then staged for Dometic ‘liftoff’ and subsequent Atmos ‘lunar landing’ (only appropriate since I live a couple miles from the NASA Mission Control Center in Houston). Roof area in need of cleaning. Notice the raised fiberglass landing on my year model and that the former condensate drain tube was simply disconnected rather than cutoff. Roof area throughly cleaned and prepped. I decided to adhere the square self-adhesive foam roof seal directly onto the fiberglass and then apply non-leveling Dicor around the cutout perimeter to further ensure the best seal possible. In positioning the foam seal, care was taken to center it as evenly possible, thereby allowing about 1/4-3/8” of exposed fiberglass to lay a bead of the Dicor and finger smooth to finish. Interior view of the Atmos being positioned over the roof cutout. Note the use of the mounting bolts as a guide, as recommended by SDG. Because the ‘rough cut’ edges of the layers of fiberglass (inner and outer hulls, and spacial filler) were inconsistent, I used the foam seal as a reference to accurately center and align the unit; distances measured to each respective bolt. Initially, installation instructions were followed by adhering the supplied straight piece of self-adhesive foam onto the bottom of the unit as a rear support, but it did not make contact with the roof due to relief of the aforementioned fiberglass landing. Alternatively, the foam piece was cut in half and each adhered onto the fiberglass, in like manner as the square seal, along the outer edges of said landing. This adaptation proved very effective in application and purpose, as the last of the next three pics demonstrates. Now that the exterior unit is properly positioned and supported, it’s back inside to further installation. As a side note, I made use of a portable a/c to buffer the heat and humidity of the day! Although my son helped with the heavy lifting and positioning, I cut him loose and completed the remaining tasks solo. Before proceeding, I used foil tape to treat the end of the aforementioned condensate drain tube and secure it to the side. Next the installation of the fabric air plate duct subassembly was started (provided Dreiha Atmos 4.4 Manual details the process). Note I used foil tape on both the upper (at Atmos bottom) and lower (at mounting frame) duct plates, even though most installs viewed applied to the mounting frame plate only. Between the upper and lower duct plate installs, the ceiling assembly mounting frame was bolted in place and hand torqued using a screwdriver only (torque specified in Manual). The AC power connection was very straightforward. The ceiling assembly’s junction box cover was removed, a strain relief fitting installed at one end (the other end had a preinstalled protector) and respective wires routed inside. I reused the Wago Lever-Nuts from the Dometic install, but first tinned the stranded wires of the Atmos lead for optimum assurance in application; electrical tape was used to further secure the Wago connectors. Ground wires were secured per the Manual. The junction box cover was then replaced, DC thermostat wire bundle loom wrapped and tucked away for future use, and ceiling grille fastened in place. . I’m very pleased with this mod, quality of the Atmos and ease of installation! I should mention that SDG preinstalled a SoftStartRV. I will provide an update once the furnace wiring and thermostat mount is completed. A special shoutout to @rideadeuce for forging the way with his install of an Atmos!3 points
-
You're most welcome. Try to keep that pin clean and have a light coat of lube (WD40) on it. That will make the in and out easier. I think you mentioned that you have had experience with other weight distribution hitches - I did with rigs prior to getting the Oliver and as I got used to dealing with the Andersen I've found that it certainly is no more difficult and perhaps its somewhat easier. At least there are no heavy, dirty, greasy bars to deal with and the Andersen is all but silent. Bill3 points
-
2 points
-
Replacing some of the extra chain links required to connect the Anderson weight distribution hitch to an Oliver Elite II with turnbuckles is another method that eases whale tail installation. I carry Robogrips in my Tundra to enable easy turning of the turnbuckles. The turnbuckles allow me to adjust chain tension without getting on the ground under the trailer. l generally favor Steve Morris' "move the tow vehicle" approach detailed in his post above, but there have been occasions when I was glad I had installed the turnbuckles. See the posts starting with one by John Davies dated November 26, 2022 from the below thread:2 points
-
Lots of ways to do it out there, but most common recommended is jacking up the front of the trailer (also lifting the truck) to provide slack. I did this for a while, but disliked the extra work the jack needed to do to lift the ass-end of the truck. Instead, I introduce slack by overlapping the hitch and ball. I haven't adjusted the nut since Chris Scarff did at the rally in May 2023. When you are hitching up, back the truck under the ball like normal. Then, back up another inch to inch and a half until the nose of the hitch almost touches the ball mount. Now you can easily slip the whale tail on without making any adjustments. It even works at odd angles (within reason) where other methods require dead straight. Unhooking is the opposite: with the hitch still on the ball, open the bail, raise the tongue until the trailer until the ball falls out, back up an inch or so, and drop off the whale tail. Done! Other than the time I needed to hook up almost 90° to the trailer, this method has worked every time. And no extra strain on the jack! I hope that helps2 points
-
You might also be interested in getting one of THESE hitch pins from Tractor Supply or Harbor Freight. The "handle" makes them much easier to grab. Bill2 points
-
@Galway Girl would you mind posting the contact info for new pins. I would like to order a few spares and surely others may as well. Many Thanks!2 points
-
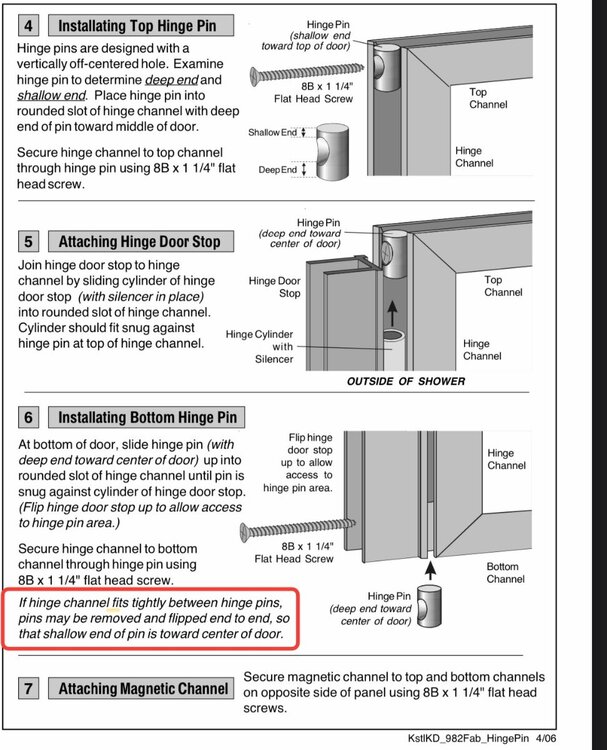
@Galway Girl Thanks for posting the door assembly instructions! @Corvus @Jps190 @SNY SD UP When I read the door installation instructions, there does not seem to be a wrong way to insert the hinge pins. They suggest putting the long portion of the pin toward the middle of the door, but then state that the hinge pins may be installed with the short end toward the middle of the door if the hinge channel is too tight between the hinge pins. It does seem that the hinge pins would last longer with the long portion placed toward the center of the door. Mossey2 points
-
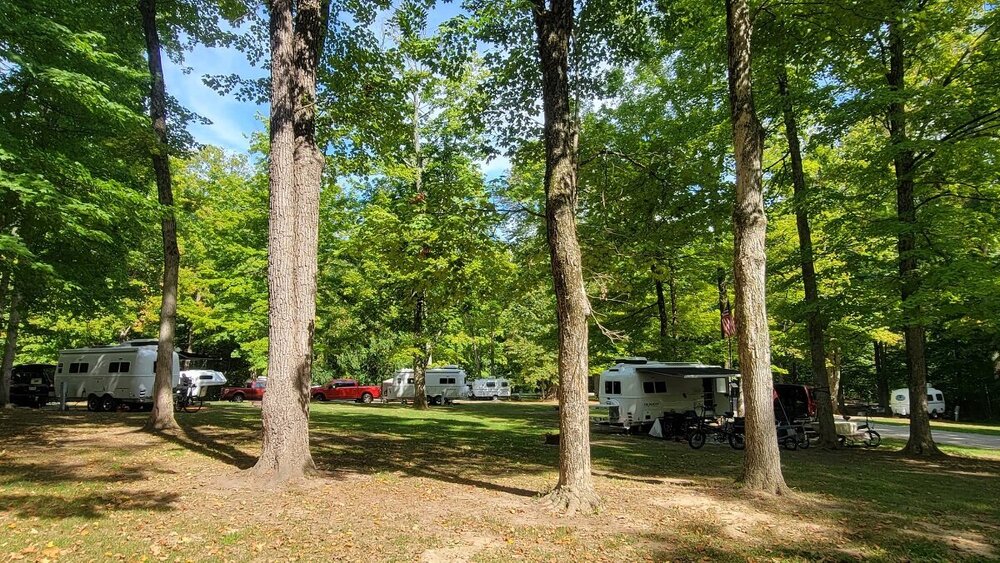
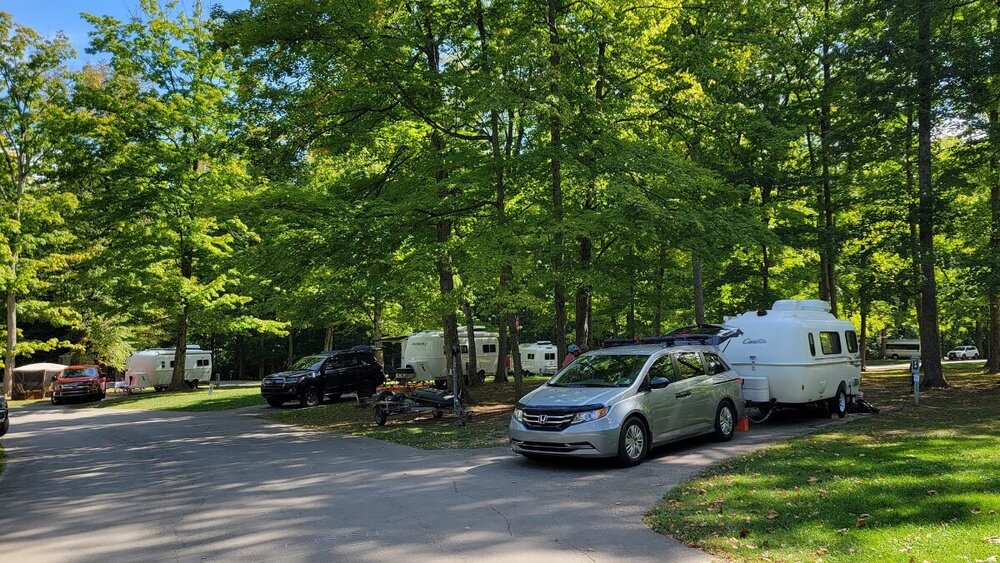
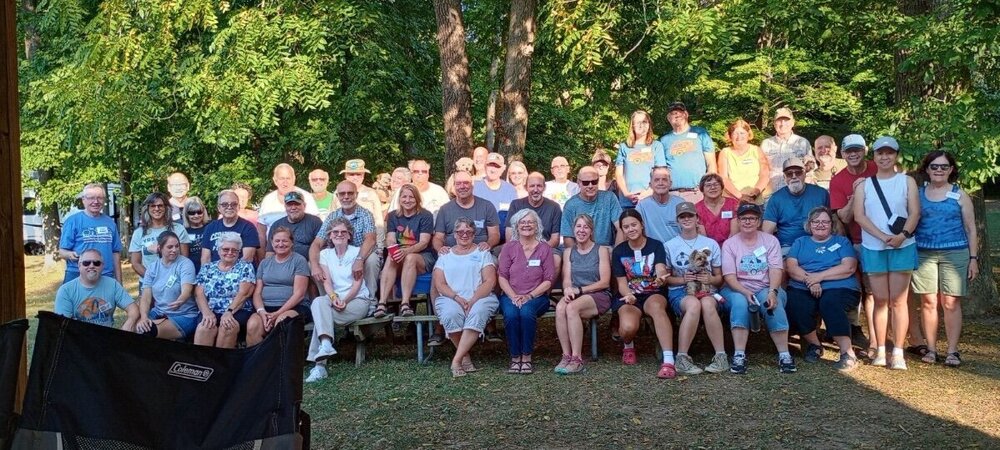
Three of the six Olivers in attendance at the 2024 Ohio Fall Annual Egg Rally, held at Cowan Lake State Park, in southwest Ohio. @Ollie-Haus @csevel Matt & Sue Jones, Deb and me, the folks with the micro-truck at the Oliver Rally, who I've *again* forgotten their name, and an unknown E1 that pulled in but was not found while riding around. Plus a couple who spent about an hour looking at our trailer and talking to Claudia, who have found a 2019 EII and are considering buying it. A fun time, and beautiful weather.2 points
-
There are some good comments so far. It was interesting to learn that some solar panels were not meeting their rated capacity, and the sun doesn’t always cooperate either. This is a positive for the DC to DC charger because they have a more reliable output. It was also good to hear that others run their ac off the DC to DC charger, this is a strong selling point IMO. Yes I was disappointed when the 50 amp Victron charger came out after I installed the 30 amp, it’s way improved in efficiency, thus reduced heat. I'm surprised that OTT is not using it. On the bright side, the 30 amp uses smaller gauge wire, but I think a cooling fan is still needed because it starts derating at 104 degrees. This could be less than ambient air temperature when you'd want to run the ac, and you could run down the battery faster if the charger output is not 100%. From what I've seen with the 50 amp specs, this should't be an issue. This raises another important point that trailer folks should be aware of. Most of the DC to DC chargers are used in camper-vans and boats with short wire runs to the alternator, and the multitude of videos and wire specifications reflect that. However, trailer installations have much longer wire runs, typically around 50 feet one way, so they will require larger wire to minimize voltage drop. Even the Victron 50 amp is sized for maximum #4 wire, which would be too small for most trailer applications. Alternator capacity was not something I've given much thought to, because mine was something over 200 amps. It’s good idea to check your'e alternator rating by looking up the alternator code or use an on-line VIN decoder. I believe most newer trucks are at least a 100 amps or more. TV voltage errors should’t be a concern because Victron has safeguards to shut down in low voltage conditions, and they are designed to work with smart alternators that are constantly adjusting output for better fuel economy. Cheers! Geoff1 point
-
Mike, I see you went with the Swivel Leg Mount Adapters. The roof in that area is not curved much so was that just because you wanted the mount/dish higher up?1 point
-
1 point
-
@Snackchaser Your persistence paid off handsomely. Thank you for the documentation! Mossey1 point
-
I noticed in review of @rideadeuce’s install post that his 2018 OLEll, #308, with a Dometic 13,500 BTU unit did not have that feature. In his situation the straight piece of self-adhesive foam was placed onto the rear bottom of the Atmos, as I initially did, and served its purpose to support and level. Oliver started installing DPll 11,000 BTU units in my year model (2020), which may have prompted a change over the former 13,500 BTU unit installs.1 point
-
Great work Ron! You have so many great upgrades and this is one, as you know, I’ve been waiting to observe! Got me thinking and will soon get on a ladder to see if hull 113 has that strange “landing.” I’m going to read this again and follow your thread. Sometime late winter we will work such upgrade. Thank you my friend! 😂1 point
-
Epoch Supp just replied to my request, "You can safely run up to 200A continuous." "Recommended" charging spec for these batteries is 50A and "Maximum" is 200A. Your Xantrex max charge rate is 150A and our Victron MP2 is 120A, so either full charge rate is fine for these Epoch batteries. What is the advantage? I do not like to run any motor or other equipment at the max rate unless required. A 50A charge rate (which will be our default), will cause less heat, less charger and fan noise and simply be safer. If we are going to plug into shore power overnight there is no reason to rush the charge at 150A, adding 150AH per hour. If we are making a short stop and we need to charge more quickly, I can connect laptop to the Victron ethernet/USB-C interface and quickly change the charge rate, if/when needed. You can choose any charge rate you prefer.1 point
-
The lithium batteries and solar are hands down the best part of our Oliver. Truly game changing for boondocking.1 point
-
The contact at the door manufacturer is mailing a couple of new pins. I’ll install them when I return home in December. In the meantime I’ll use some shims to meet the door from jamming. Craig1 point
-
I have been able to clear the code 20 this way: Disconnect shore power Turn off the inverter remote (button out) Turn off my three Lithionic batteries, and wait a couple minutes Turn on batteries Turn on inverter (push button in) Wait for remote to connect (60 seconds) If all is good, then connect shore power. Just because this was worked for me a few times doesn't mean it will continue, so I'm keeping my fingers crossed. The inverter spirits are unpredictable.1 point
-
@Patriot I can’t help but think that these MSRP markdowns to a lower NO HAGGLE PRICE as anything more than a marketing gimmick!1 point
-
My Pins are correct. Whilst on one of our many 'Shake-Down Runs', for lack of a real explanation as to how we shattered our bathroom door mirror. Gorilla Tape was our friend for the remainder of the trip. Later when it came time to remove the door, I opted to remove it by unscrewing the channel where it attaches to the rear facing dinette wall, so I did not remove at the 'pins'. Removal & installation was quite easy. This might be a way that would be easy for you to make repairs. IDK. B~OUT1 point
-
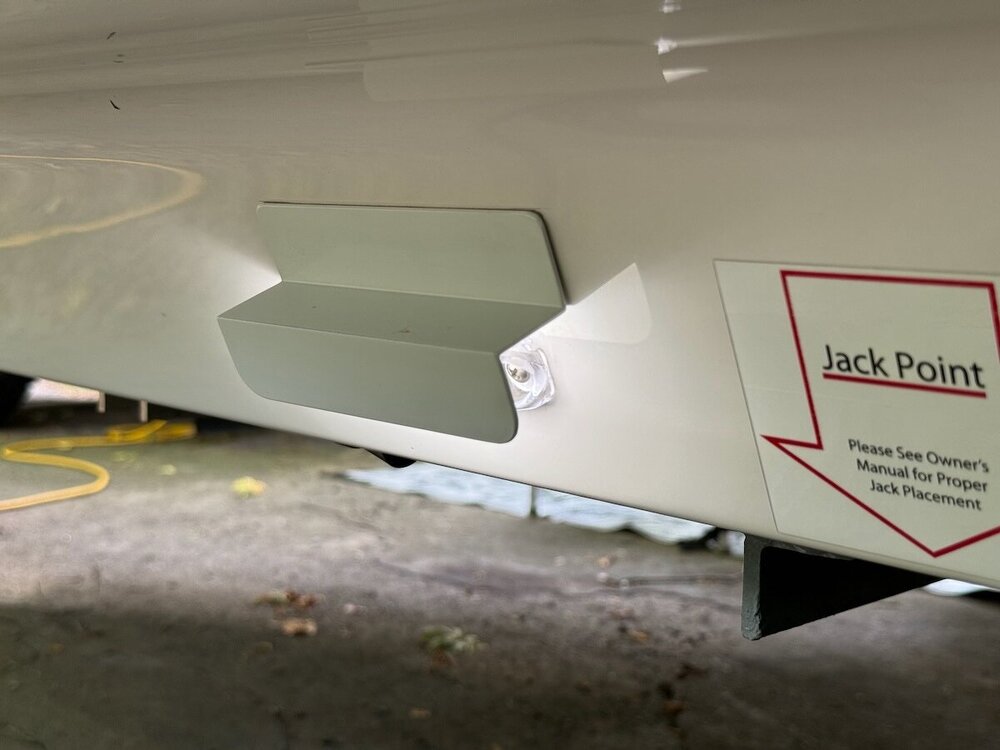
This doesn't solve the problem. But this past weekend, I got to see the modification that @Ollie-Haus made on his 2023. It is a 5"+ length of 1x1x1 aluminum Z-bar, painted white, and adhered to the trailer with double-sided tape. https://www.mcmaster.com/7062T15/ I'm going to do the same, but before mounting the shield, I will cover the lens with amber Lamin-X film (that I bought before getting the trailer but have yet to apply...) It makes a huge difference, and even while still a cool white, it is less objectionable than just covered with Lamin-X like the trailer beside us had. It was great to compare the two, which is what convinced me to do both!1 point
-
1 point
-
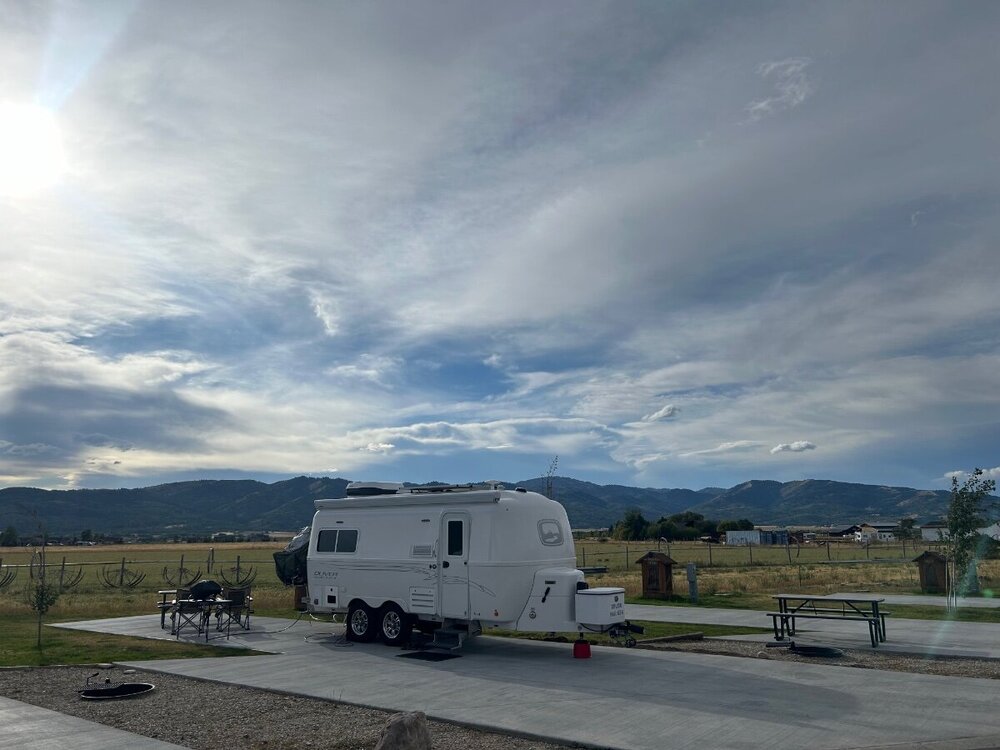
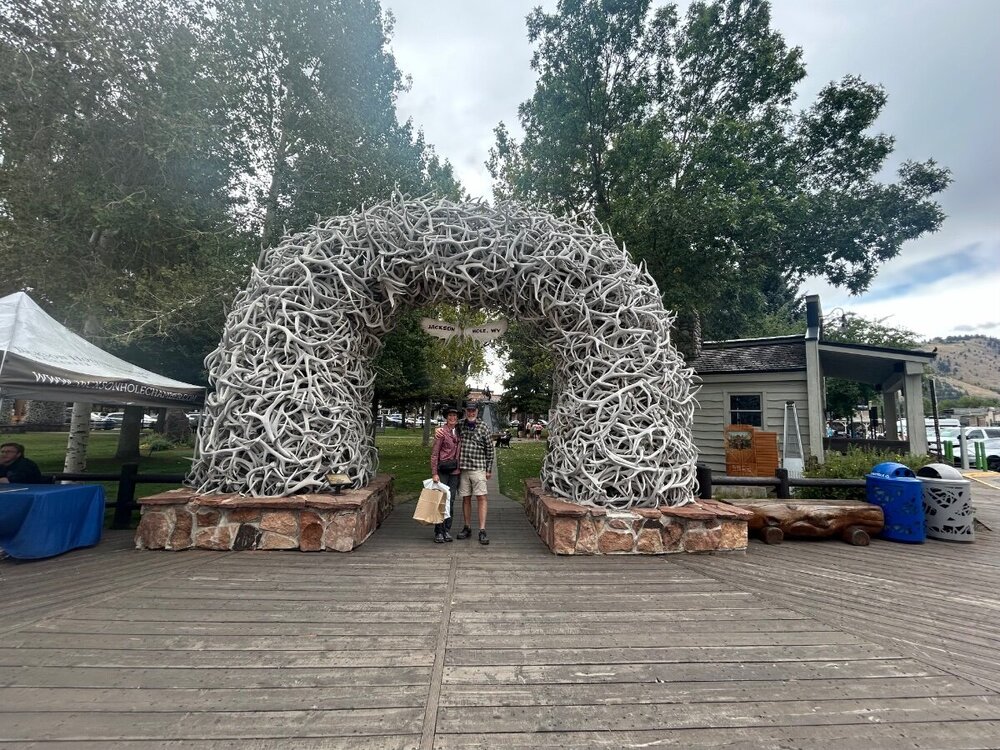
After a great nights rest at Teton Valley Resort here in Idaho, this morning we headed up to the Grand Tetons. Such a beautiful NP! We really enjoyed the scenic drive over Teton Pass. Soooo glad we have the diesel engine brake, as I rarely used our truck brakes at all. Ford nailed it with the 6.7 10 speed and diesel engine brake. After hiking up and around Jenny Lake a few hours we headed into Jackson Hole for lunch and of course hit a few T shirt shops and just walk around town. We walked into the Million Dollar Saloon which was kind of neat to see. We landed for lunch at place called “Hatch” Needless to say after a light breakfast we were both ravenous and the food was really fresh and delicious. We have 3 more nights here and plan to spend a lot more time touring and hiking in the Tetons before heading to Yellowstone. The temps are perfect! No AC needed at night as our low this morning was 49 and mid 70’s during the day. As you can tell by the park road entrance pic, it was not very crowded when we arrived, which is just the way we like it. Cheers and Safe Travels! Teton Valley Resort…nice digs and we are enjoying our stay here. It’s not very busy at all. The kinda road we like to see inside a NP. Less crowds, less people, less traffic on the road less traveled. We really enjoyed the cooler temps while hiking around Jenny Lake. Lunch at the Hatch… wow factor for the foodies we are. We were both hungry after our morning hike. The Elk Antler Arch… Our Beast of Burden doing Tremor things… The Beautiful Tetons are really amazing.1 point
-
Bill, I always look forward to your end-of-fishing-trip wrap up. Great pics and it sounds like the fishing was great! Mike1 point
-
As usual (19th year in a row), Twist spent two months in the western states enjoying the scenery while I enjoyed the fishing. This year I basically did a repeat of the past few years by starting the fishing west of Buffalo, Wyoming and exiting via Dubois, Wyoming. Stops (in towns) on the way included Ten Sleep, Worland, Meeteetse, Cody, Cooke City, Moran Junction, and Dubois. Rivers and Creeks included Ten Sleep Creek, Wood River, Greybull River, North Fork of Shoshone River, Elk Creek, Clear Creek, Clark's Fork of the Yellowstone, Beartooth Creek, Hoodoo Creek, Dead Indian Creek, Cantrell Creek, Gros Ventre River, Fish Creek, Torrey Creek, Horse Creek, Frontier Creek, etc. Trout landed ranged from 8 inches to 18 inches and were brooks, rainbows, brown, cut-bows and cut throat. Early in the trip at about 5:20am the Ollie started rocking! Checking to make sure I was alone I peeked outside thinking I might see a grizzly bear. Yes, the fur was black but it was only a couple of cows scratching their faces on the bumper. Here are a few pics from the trip. Bill1 point
-
1 point
-
Trip to Doughton Park Campground NC on the Blue Ridge Parkway. First camping trip to Doughton Park. Cost is $10 per night with the geezer card. All of the campground roads are paved. There’s no water or electricity at the campsites and their restrooms don’t have showers. They have a uphill dump station that makes dumping Ollie easy. When filling the fresh water tank could only fill to 70% due to grade at fill area. They have plenty of hiking trails. The picnic area was a beautiful place, especially for sunsets. We will be visiting again.1 point
-
Personally, I would hope that Oliver would "uncouple" the water heater from the Truma package. Imo, the standard six gallon is easier for metering/saving water, if the owners like to boondock. We have a tankless water heater (Girard), and it's never given us a lick of problems, but the former 6 gallon suburban was easy to use, and you knew when the water started getting chilly that it was time to quit. We'd turn it on for 10 to 20 minutes or so, use the hot water side only for showers. (Avoids the cold water sandwich.) I heat (to this day) dishwashing water in a teakettle, to conserve water. Heat water in a teakettle for birdbaths, face wash, etc. Truma and other endless hot water heaters are great for those who routinely camp with full hookups, imo.1 point
-
We have come to campers from a 30 year history of backpacking & water conservation, so YMMV. Our 2022 Elite II twin is our 4th camper since 2008. We spent 10 days in early July boondocking. Our biggest use of water is making 4-6 ginormous cups of good coffee daily. We have a composing toilet, which fits our wants and needs, so nothing goes into our black tank. We emptied the urine container about every 2 days, at about the 2 gallon level each time. After 10 days, the remaining fresh tank was 31% full, the gray tank 63% full, according to our SeeLevel II monitor…they aren’t dead-to-rights accurate.1 point
-
Recent Achievements















.thumb.png.fbbde3486e933f990ff511bff8d6bda0.png)
