Leaderboard
Popular Content
Showing content with the highest reputation on 11/29/2024 in all areas
-
6 points
-
Perhaps Black Friday is a good day to start a thread about 2024 potential gift items. I have used one pound bottles of propane for a long time but have always hated the thought of simply throwing them away when they were empty. Yes, I tried recycling them but found that difficult to do given the few places that will accept them. Yes, I tried connecting a hose to a larger tank but found that to be a bit cumbersome. Yes, I tried a five pound tank but didn't like it. Finally, a couple of years ago I saw a one pound tank (Flame King) that was (legally) designed to be refilled. But, there were a couple of design items of that tank that I didn't like. Finally, about a year ago the company that makes the Big Buddy/Mr. Heater propane heaters can out with a refillable one pound tank that seemed to be what I was looking for, so, I bought a couple - a Fuel Keg. To use this tank I also needed what they call the Refill Kit. I've now used these tanks and refilled each of them three times with no problems. It is a simple process that takes less than five minutes (from dead start to putting everything back where I got it). A full one pound goes into each tank during the refill and they work exactly like the old disposable tanks but you simply don't throw them away. Assuming that you can purchase the throw away tanks for $5.00 each and I refill each of the refillable tanks about ten times I will start to save money in addition to not adding to the landfill. There are a ton of review videos (like THIS one) or (THIS one for Flame King) on YouTube. Happy shopping! Bill5 points
-
5 points
-
4 points
-
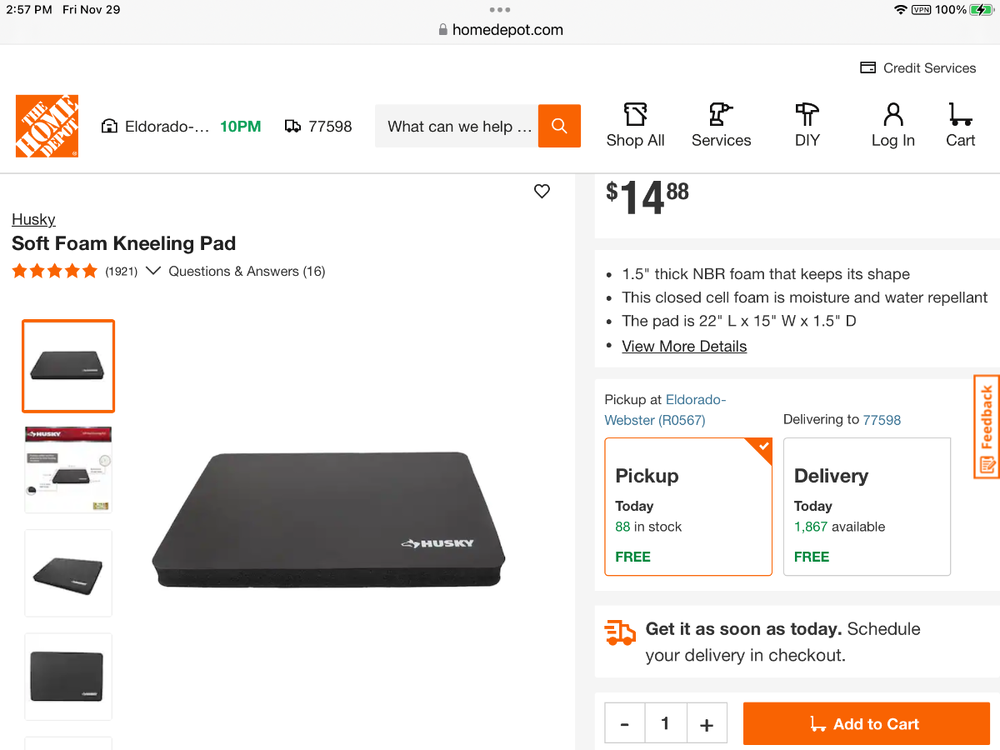
For anyone planning to recover their dinette cushions, and never has guests sleeping on that bed, I suggest making the seatback wedge shaped. One of my only complaints about the Oliver is how my bad back hurts after sitting at the dinette for too long. After only a couple outings, I added a length of pool noodle split in half lengthwise behind the bottom of the backrest. This 1-1/2" ish tilt made all the difference! Whenever we need to get the cushions covered, we will have the padding and covering made wedge shaped to match this angle.3 points
-
3 points
-
2 points
-
2 points
-
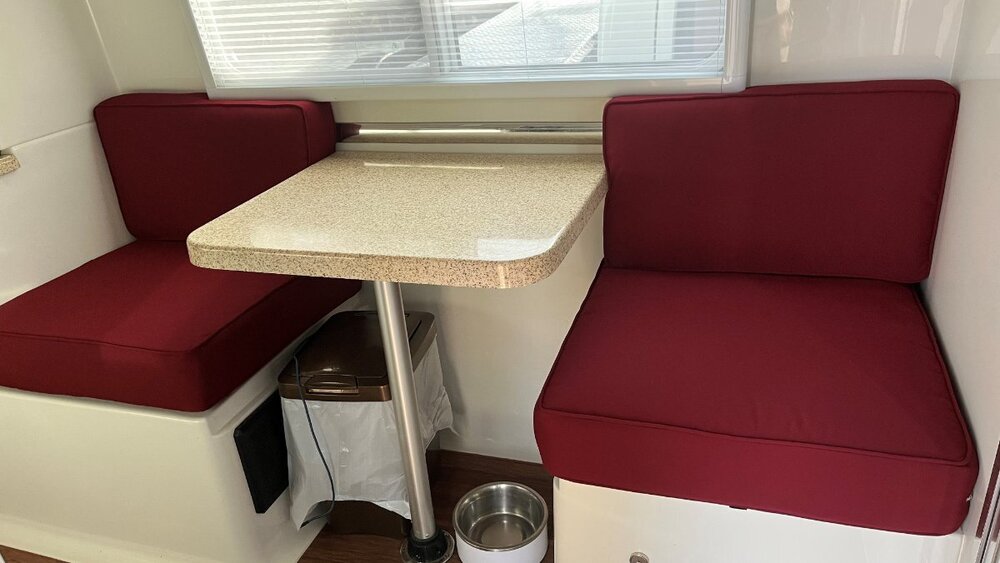
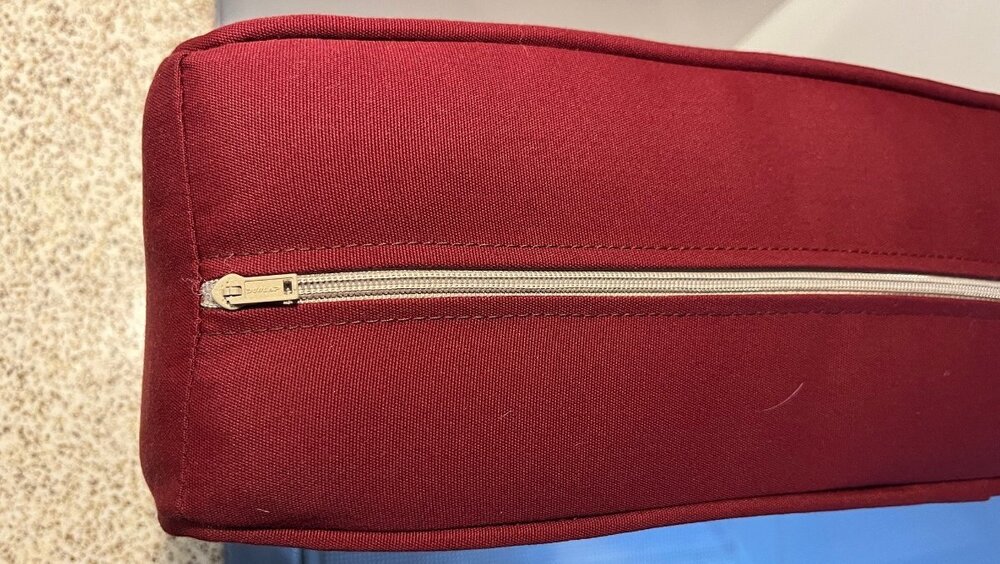
They put us on their November calendar. After running our trip, every time I sat on the old cushions, I thought it would be a shame to merely reupholster with new cloth yet keep the 9-year-old foam. When we dropped them off, I asked about new foam. He said the quality of foam for seating they carry is far superior to what we showed them in the old cushions. We went with 24x25" bottoms with 5" new foam (1" taller) and with the batting and fabric, the cushions are closer to 6" tall. We had 2" clearance under the window frames with the old cushions. The new ones just fill the opening and stay nicely. Went with the original sized 4" foam for the seat backs. All new foam, batting, fabric, zippers with newly corded edges. Chris loves the color given her Red, White and Blue Oliver theme! We spent just under $500 out the door. Which for me was better than the $350 for upholstery only. Soon, she will look as good as she tows or provides inverter power!2 points
-
Well, after a year or more of using towels to soak up rain water, I finally got the nerve up to take off the walk-in Lippert door from the trailer. The sealant putty behind the door frame, where the screws go in, had failed and leaked bad. This was an easy job! It only took me three hours and most of that time was prep-work and clean-up of old butyl tape (putty). I have a bunch of video clips to put together to make a YouTube video of the process, but I'm finding it difficult to organize everything. I need to re-shoot a better intro. I'm still learning. Anyways, the door & frame came off WAY TOO EASY. It appears that someone before me attempted to repair the leaks (left & right sides), but they did not cleaned off all the original butyl sealant/putty. Don't be lazy. Clean everything like new. Also, I used two layers of butyl tape in the middle area of the door frame, on the left and right sides of the door frame, due to the distance between the yellow straight edge (see picture) and the curved pieces of hull and where they meet up. I used a plastic scraper to take off the heaviest of old butyl tape from the hull and the door frame itself. I then used 3M adhesive removal and a rag to get the surfaces perfectly clean. (Wear gloves) Everything went back together quick and easy, no issues at all. I waited 18 hours before performing a leak test, to ensure all putty had warmed up in the sun and "squished" around as needed. I've done a heavy, heavy leak test and it's gone through one heavy, blowing rain storm and another lighter rain since completion, all without a single drop inside. YAY ME! You don't know how happy I was to see that I did it better than the last guy. The original putty(s) looked really bad and it did look like someone attempted to address the issue before I purchased the trailer. What a crappy job they did. Shaking my head. Also, in those middle sections of the hull, where I doubled up the putty, I noticed that old putty was not even remotely "squished" in by the door frame, indicating there was air gabs between the putty and the frame, or the hull. THIS WAS NOT A DIFFICULT JOB. I should have done it sooner! Many of the screw holes were too large for the screws used. Really, there were about 10 of the 23 screws which could have been removed by hand or simply pulled straight out of the holes. I Epoxied the worst of the holes and re-drilled. I also added a handful of new self-tapping screws to ensure the door frame snugged up tight to the trailer where needed (not in the middle sections of the left & right door frame). Remember, the door frame will not really "bend" towards the hull due to the door frame itself being so stout and with right-angles, hence the need for doubling up the putty in the middle, where the hull was too far way from door frame's edge, where the screw holes are located. As some of you know already, this door, I think, is custom made for Oliver, as my door did say Lippert, but the sticker essentially said, made for Oliver, mine was from a lot of 10 doors. I looked on the Lippert web site and I did not find the same dimensions of doors as Oliver uses, or I'm measuring wrong. The fan in the attached picture is where I was drying up the spray foam between the floor and the outer hull. Oliver used foam as a filler, likely to reduce movement, but my foam was soaking wet with rain water, so it sat and dried while I worked on everything else. Again, if your door leaks, but is not damaged and does not need replacing, this is a super easy job, and likely if you did need a new door and might be able to have it shipped from Oliver, it would still be easy. I say that because someone on Facebook just mentioned their door got damaged in a wind storm recently. This is a one-person job too, unless someone wants to help clean up old putty from the hull or door. That would save a lot of time.1 point
-
Happy Thanksgiving, all! Got the turkey on the smoker early this morning. Expecting a house full by noon. Hope everyone has a wonderful day. Mike and Carol1 point
-
I have the same one in my truck toolbox but after brake jobs and such mine is strictly for outdoor use! 🤣1 point
-
1 point
-
$1,600 for a replacement door? That's more than insane. What's even worse is buying from the same source that provided a badly designed door. Why not in place re-laminate the interior as suggested above? Can some of our plastic guys shed some brain cells on the concept. GJ1 point
-
Chris and I had a Thanksgiving drink in the Oliver yesterday! I was testing a new TV tuner and antenna earlier in the day and had the football game on. These cushions so much more comfortable! The foam is better quality, denser so you do not feel the hard platform anymore. The seats are 22" tall and I measured our dining room chairs and LR couches which all measure 20" high. I have short inseams for my height. When Chris or I sit squarely our heels would be 1" off the floor but when leaning back or forward they feel fine. The bottoms with 5" foam and with Dacron batting are 6" finished. The backs are 5" total using 4" foam. I believe for Chris, or for you and Brooxie new 4" foam (5" total) in the bottom cushions would certainly be enough for your weight. My weight is in my upper body, so the deeper bottom is great! If you make the backs deeper, you will lose an inch of seating area which might work well for you. Either way, it made sense for the extra money to replace all materials after 9 years as the old cushions had several stains and the old foam was no longer square. We bought this fabric at $42/yard delivered, buying it through our upholsterer. Comes in many colors, you will need 4 yards: Sunbrella Upholstery Canvas Burgundy (5436-0000) I added a picture to show the quality of the work.1 point
-
Mike, I use a five pound canister for our 30+ year old Coleman two burner stove. I have a short hose about three feet long that works. I have the quick connects front and back on our trailer, but this old stove works fine. I couldn't find a hose that would work with both the quick connects and the old stove, hence our solution to use the small tank. John1 point
-
1 point
-
Really sharp looking seat cushions, great design and color selection! Iv’e often thought about having a wider back cushion, since we both need some extra backing when dining, but now think a thicker bottom cushion or maybe just better quality foam may be good, as well. With Chris being much shorter than you, does the 6” bottom cushion pair well with her frame?1 point
-
1 point
-
1 point
-
1 point
-
1 point
-
1 point
-
Same here Bill, Possibly Lippert had a bad run at some point? It sure is a costly replacement for something that should last a long time. 😒1 point
-
1 point
-
1 point
-
Actually, it is a different design. I just remembered that I couldn't install friction hinges on ours since the hinges are built into the door frame and can't be replaced.1 point
-
1 point
-
This, to me, appears to be 'Plastic Degassing and Shrinking'. Not due to your misuse of the Oliver or Heat or something you Did or Did Not Do to prevent it. You are lucky if the cracks are... Horizontal. Left to right... fractures reduce the tension from the longer length of the thin door panel. The gap in between the cracks reduces the tension by cracking. You will probably get lots of them, but there is nothing that can be done. Another original sheet... will also do the same if it is Degassing. Nobody has explained this to me... as it is very common in plastics... and some, even thick items, can become brittle and crumble. It is a definite defect in the plastic being used and not of your making. Buckling... you would have to look at the entire door to understand that one I see photographs. The more small fractures, the tension is reduced. Although the plastic will still be brittle and if you hit it... it will crack into pieces. Again... this a manufacturing issue of the plastic being used. Not from your use of the trailer, weather, road vibrations... etc.. The Buck Passing AFTER Warranty is rather slick. It may take several years or longer... beyond Warranty... and now it is Your Fault and Responsibility. I recall plastic toys... that Degassed over time and became brittle and fall apart. I thought by now these poor products were extinct. Guess not. Try finding some site about Plastic Degassing. Finding one that makes sense... you are a lucky person. I see no good results by replacing the interior plastic with the same plastic. Just my opinion.1 point
-
Great high quality install JD! Love it! GJ1 point
-
@Steve-Gwenne, you're new to us, though in my memory, I have read your forum name in the past. Thank you and God bless you for your acknowledgement on my humble post! TY @Mike and Carol and @Derek B, we met just this October, my new BFFs and thank you too! Given the great central Texas and Louisiana, you should be able to build dinette seats at 60c on the dollar of AZ prices. Get er done. Derek work your LiFePO4 purchase first and asap. Love you, guys...1 point
-
GJ, I can chime in on this. When I replaced the window in my door with a tinted Zarcor window and Zarcor blind I saw a foam core inside. Patriot1 point
-
Precisely. Not real intuitive, but the button on the main inverter (under the street-side bed) must be in the "out" position, or off, to enable the remote (mounted on the wall) to control the inverter.1 point
-
It works fine. Been on for years. Our original seal around the edge of the propane cover departed this earth after only a year or so. (2016 LE2) It was a pretty flimsy plastic strip. The only problem now might be finding it in white. I did an Amazon search and there are some white edge seals (non trim lok) but only black from Trim Lok. You could measure the thickness and find one that you think will work and if it doesn't look good when it arrives send it back. Amazon is pretty good that way. Good Luck Scotty1 point
-
It's this stuff here, Dicor BT-1834-1 1/8" x 3/4" x 30' Butyl Seal Tape Here's my YouTube comparison on the two sealant tapes I had on-hand.1 point
-
JD: Tilt. After our Alaska trip from Houston, I would for sure use tie-down strapS. The Alaska highways were not bad, but the ones getting up there were in places were. So much so that I had to stop and aid a fellow RV traveler who had broken the frame on his trailer. Corduroy roads it is called when the logs they used to construct the road finally rot and the road sinks and rises accordingly to the individual logs used as a road base. Dishes flying and jumbled interiors for any RV driver that does not take it seriously. Thank God for John Davis drawer straps Mod! GJ0 points
-
I also really like the AAV's. I have them in both our bathrooms that we redid. But swapping out the vent for an AAV in the case of our Ollie's would cause me to pause.... for three possible reasons: A. I suspect that Mr. Oliver put the stack where he did to take advantage of the venturi effect of air rising up and over the front of the trailer when on the move. Doing so in a "Low pressure area" would act as a controlled venting of the sanitary systems. Thereby presenting a clean smelling cabin upon entry at your next stop. B. AAV's are basically an air/gas version of a water check valve. Yes doing so in Ollie would allow air into the system to aid in flow. But it would not allow sewer gas to get out of the system. As "stuff" in our tanks accumulates, it degrades "passing gas". With no vent stack it WILL pressurize the system and most likely leak past the toilet flush valves or thru the "P" traps into the cabin. The result will be you and your spouse looking at each other wondering what the other ate that was disagreeable. C. I'm not a RV code guy, but the National Plumbing Code requires at least one 2" vent on every system to address this issue I suspect. GJ0 points
-
Maybe I can glue some astroturf to the inside of the door. Or, use some of the rat fur that’s inside a Casita? We’ll probably just live with it. Mike0 points
-
Recent Achievements


.thumb.jpg.e34bf01ef7f7d5e99ad31856d45afbeb.jpg)


