Leaderboard


Popular Content
Showing content with the highest reputation on 02/06/2025 in all areas
-
We've had 4x 6vDC AGMs in our AS that lasted 5+ years. They're good but IMO not as good as the modern lithium options out there. We're 100% pleased with the performance of our 300A-Hr lithium bank, especially now with our 200W solar tracker. It behaves like a 400W module and our SOC is full by 1pm-ish even in the winter low sun angles of Quartzite. A very nice combo for our style of boondocking, FYI. But as @Mike and Carol stated previously, don't think solar is the same drill as a FHU when your boondocking. One still needs to keep a "weather eye" on the charging data and the camping conditions (i.e., WX) at the time... Just say'n Press on, regardless....6 points
-
As a new owner, in time you will know all there is to know about the wonderful "Gizmology" the new trailers can have. Until then the learning curve is high. But you have come to the right place as the above guys are razor sharp. But a simple "ole school" check out may clarify things to assist with the learning curve. Do adjust your charge current as suggested above first. I recommend using 15 amps as suggested for now. You can optimize it later. A. Hopefully you have a volt meter. If you don't i recommend getting one that is a meter and has a clamp for measuring amps. My favorite onw was suggested by John Davies. It is not that expensive but sure works well. More than a few OTT owners would agree with this choice. Don't get one that can only measure up to ten amps thru the leads. Having the clamp is essential. B. I would first manually check the as is battery voltage and compare what is says to what your Xantrex system says. Small step. Take a mental note of the as is battery voltage. If they are the same, then likely you know how to read the voltage and have confidence in what the Xantrex is telling you. Another small step. C. Then using just one generator, set it up without being connected to Ollie at first. Start your Honda not connected and put it into Eco mode. Let it warm up then switch it to regular mode and back. This step ensures you are familiar with the rpm of it loafing unloaded on Eco or running hard not loaded. D. Now connect one of your Hondas while in Eco mode and listen to what it does. If your OTT charging system is working, it will quickly transition from Eco to Run mode. If you hear it now working, take your volt meter and get clamp it around one of your battery cables. (Meter set to DC AMPs. You should get a reading pretty close to the setting you entered into your Xantrex... Report back here and the above guys will be on a track to ask some more questions knowing the status of your system. Once you get it figured out, then ask them how to set up your system for Honda and Companion Honda to charge at a higher amp rate. GJ5 points
-
Glitch has been repaired and Rally Registration is ready.😊4 points
-
I agree that I think your batteries have shut off due to being discharged to 10%. This is not a problem and the batteries have not been damaged. The shutoff feature is designed to protect the batteries in the event they are discharged to a low level. If you turn the batteries and discharge them completely they could be damaged, so first job is to get at least some charge in them I think a good place to start would be to install the Victron Connect app, the lithionics app, and the xantrex app on your phone. I would then pull your trailer into a sunny location on a sunny day and turn on both batteries by pressing the the power button on both batteries until it turns blue. Then make sure your xantrex inverter is not turned on at the wall panel, ie the button should not be depressed. Now, using the Victron app or the wall mounted indicator, make sure there is current flowing into the batteries. If the answer is no, check the large red and white switch in the overhead cabinet above the street side bed and make sure it is on. Under good sunny conditions I would expect between 5-20 amps to be flowing into the batteries, depending on the angle of the sun. Now that you have some solar charging occurring, I would make sure that all the apps you installed above are communicating with your batteries, xantrex inverter and the Victron shunt. Make sure you understand what they are telling you. Now would be a good time to try the generator. You can use one or two generators. For use of two, you will need to connect the generators together using the parallel cord from Honda. If you use only one generator you will need to decrease the breaker rating in the xantrex to 15-20 amps as I mentioned above. The batteries will charge faster using two generators and a higher breaker rating. The overload light I mentioned is on the front of the generator and is red on my eu2200. You should now be able to monitor charging by watching how many amps are flowing into the batteries using either the lithionics app or the Victron app and the battery state of charge using the lithionics app. The Victron state of charge percent may be incorrect until the batteries reach 100% State Of Charge, SOC. I know this seems like a lot, but once you are familiar with how things work, it is really pretty simple. i would make an afternoon of this project with a beer some music and enjoying your awesome new trailer. Last, there are a look of great video online explaining how trailer electrical systems work. good luck and I hope this helps.4 points
-
Most likely your Lithium Battery Management System has sensed a ultra low voltage (bad) and turned off the batteries. One of the above guys can discuss the process to bring them back on line as mine are different than yours. GJ4 points
-
Hello everyone; just a quick intro to say hello and to advise that I've joined the Oliver movement. I took delivery of a new-to-me Ollie LE last weekend; a barely-used 2022 model which the previous owner loaded up to the gills with all of the available bells and whistles. I was really fortunate to find it, and I demonstrated my interest by immediately flying to Florida from Texas two weekends ago to view it and subsequently "claim" it. I brought "Zuni" home last weekend, and now I'm going through the same growing pains as everyone else in trying to learn all of the on-board systems. So far, so good (other than that annoying water heater recall, for which parts are back-ordered for). I look forward to putting her on the road in another week, and I already have several long-haul trips planned for April and June. Stay safe, everyone!3 points
-
We've been using the Lippert friction hinges for a couple years now. We love them - it actually makes the lower "hook hasp" unnecessary. Some folks may say you don't need two - but we like the 2 hinge option especially in some of the winds we've experienced in the Rockies. The downside is some visitors to your rig may question why your door is so "stiff".... Oh, well.3 points
-
I agree with @Rolind. Sounds like your batteries are in low voltage shutdown. You should not do anything to drain them any further. Leave them off until you can get a charge into them, as soon as possible, following @Rolind's procedure. Once you've got them recharged, my next question would be, what caused them to discharge? I suspect something got left on in the trailer after you left it for the month. My first suspect would be the Xantrex inverter. It's easy to leave that on by accident. The little silver button should be in the "out" position whenever you don't need to convert 12v battery power to 120v household power for boondocking. It should be off/"out" every time you park your trailer between trips. Another possibility, considering the dealer winterized your trailer before this happened, is that the water pump was left on and has been cycling while in storage. On our 2022 there's a green LED above the water pump switch on the kitchen wall. (You can't go by switch position alone because it's a 3-way switch.) Make sure the pump's off during storage, too. Good luck. Let us know how you make out with the recharging.3 points
-
I’m headed in a different direction and wonder if the breaker setting on I assume your xantrex converter/inverter may be set too high for your generator. The factory setting for breaker rating on our xantrex is 25A, but this is too high for our Honda eu2200 generator. I usually set my breaker rating to 20A or less if charging from the generator. If I try to run the generator with the breaker rating at 25 A, you can hear a change in the sound of the generator as it overloads and stops charging and the overload red light on the generator will light up.3 points
-
Did you use a neutral grounding plug on your generator? Our EMS will usually but not always immediately block the generator from powering the trailer or charging the batteries. Not sure if your trailer has a built in EMS or not. If you provide a bit more info, such as hull number, battery type, solar present or not, the forum members might be able to give you more specific help. I hope you get this issue resolve quickly and it is something simple.3 points
-
@TxMN2020, I have just sent you a personal message which includes my phone number. I am offering my assistance to help work through the battery charging issues you have described. I have a 2022 Oliver Legacy Elite II, Hull 990, which is equipped with Lithionics lithium batteries. I live in North Dallas. Please give me a call. Don2 points
-
The "round" Victron "display on the curb side wall over the bed" shows present charging voltage, NOT State of Charge. Download the Lithionics app so you can use it to monitor State of Charge (SOC) of your three 130 Ah Lithionics batteries (390 Ah total), which is what matters most. For example, when a generator or shore power is connected to my Hull #1291 through the 30A connector on the street side, and the batteries are charging, the round Victron display reads: "14.6V". That is a proper charge rate for Lithionics 12V batteries. That tells me nothing about the level of charge in the batteries at the time, just the current charge rate (pun intended). To know State of Charge, or battery charge level at the time, I must consult the Lithionics app. The Lithionics app also advises whether the batteries are receiving charge at the time (Green) or being discharged (Red). This training was thoroughly covered during our orientation in Hohenwald. Sorry to hear you got limited orientation from your Oliver dealer at delivery. The electrical system is not affected by winterizing, and so should have been carefully covered. I recommend you file a service ticket with Oliver so they will know to educate that dealer.2 points
-
Thanks, @John Dorrer -- for tracking this one! See y'all there!2 points
-
Wow Hull 14. Hope to see you at the 2025 Rally in Guntersville state park. I’m site F272 points
-
Will do. Thanks2 points
-
I took a look at your profile. If you were to share where in Central Texas you reside, likely there is an owner in the area who may be able to assist. If that is not possible, then you should submit a Service Ticket for your 2025 OE2. GJ2 points
-
I think yes. A single near full stroke on the shocks will not do harm or heat it up much. But if you are hammering away down an Alaska Corduroy road, repeated full or near full stroke range cycles will definitely heat up the shocks. Keep going than the seals will become suspect and you have dry shocks doing nothing but enjoying the ride. GJ2 points
-
So, you have interior lights when the generator is connected, but no lights without the generator? If that's the case, I agree with @jd1923 that it sounds like your batteries are disconnected somehow. Could be a cable, cutoff switch, or 12v circuit breaker. More details needed.2 points
-
Given you did not work the winterizing, did they disconnect the batteries or do you have a cut-off switch for your batteries. No interior lights either? Hard to be sure from your description but it appears you have power connected to the generator and none when disconnected.2 points
-
WD40 is a very safe adhesive remover. I would try that, with a plastic razor blade scraper, before considering other products that could damage anything.2 points
-
As others stated, slowly, hair dryer, and plastic razor blades. I have no experience with using Goo Gone in the process.2 points
-
To remove our graphics I used a heat gun set on low while working the vinyl off slowly with a plastic razor blade. Not moving too fast was critical since whenever I tried moving a little faster the vinyl would end up ripping and coming off in small pieces which slowed the whole process down. Cleanup of the remaining residue was done with Goo Gone.2 points
-
When I removed the OTT front decal, I only used a plastic razor blade and a hair dryer, which is less hot than a heat gun. I agree with Patriot that a warm sunny day makes the removal easier. Make sure you get all the glue off after removal of the old decal and prior to installing the new decal. The plastic razor blade also work good to remove the glue.2 points
-
To avoid getting Goo Gone or any other cleaning solvent on the hull area around where you are working . You might consider using blue painters tape and some plastic to mask off the area under the decal you are working on ! Keeping any drips, runs, splashes directed away from the hull keep that stuff off of your hull where it is not needed ! Please let us know the results of the removal !2 points
-
Gary, I would suggest you try using a heat gun on low or hair dryer first. If that does not work try using Goo Gone decal remover or WD40 and a plastic razor blade, very carefully scrape away decal. A few years ago, I had to remove and replace a small graphic on our “grocery getter” older pick up truck. It was a tedious job to say the least, but the Goo Gone really did a great job of getting the residual glue off the painted surface and did not harm the clear coat. WD40 also works well with decal and adhesive removal also. Suggest then you throughly clean the area with warm soapy water, rinse, dry, wax and add ceramic coat to the area after adding your new graphics. I do know from experience warm sunny days are your friend when removing decals and adhesives. There maybe be other suggestions, but this method has worked well for me. There is also a decal remover wheel that you can buy and use with a hand drill. I have never used this method and not sure how it would work on gelcoat. It appears to have strong reviews. Drill decal remover wheel - https://www.amazon.com/Remover-Removes-Pinstripes-Graphics-Adhesive/dp/B0B42DWGJM/ref=asc Plastic razor blades- https://www.amazon.com/FOSHIO-Scrapers-Contoured-Refillable-Application/dp/B076BBW1WM/ref=sr_1_2_sspa?
 2 points
 -
Registration is now open. However there is a glitch that Oliver has to fix The arrival calendar is locked in on May 2024 and will not allow you to manually enter 04/29/2025. When you manually enter your arrival date the system rejects your registration. I spoke to Josh a few minutes ago and he said Matt would fix it when he gets in In the meantime I would sit tight and check back later today.1 point
-
I concur with JD on the Valterra being all or nothing. The description of the product mentions limit switches so you don’t have to worry about holding a momentary switch until it’s fully open or closed (like the Autovent in the closet). There’s no “center off” position on the included DPDT rocker switch, so if you’re not opening, you’re closing or vice-versa. Turns out the included wiring harness is only about 7 feet long, so too short to install the switch in the position of the original handle. I don’t see another good place to mount it that makes any sense. That means I get to make up a new harness as I don’t like to put splices in the middle of a cable run - especially where that might end up someplace inaccessible. I’m also going to upgrade from 18-3 cable to 16-3. Mainly because that’s all I could find at Home Depot - and because heavier wire on longer runs is just good practice. Anyway, until I do the rest of the surgery, I’m have to duck under the forward dinette seat to actuate the valve. Already had one mishap and one near miss where I either forgot to close the valve. (Yeah, messy) or, opened the valve before I had connected the stinky slinky. The saving grace with that is IF you realize it before you take the cap off inside the rear bumper, you can lower the nose of the trailer and take the cap off without getting a shower….1 point
-
🙂 Steph and Dud, Rivernerd, dhig: Thanks for filling in the details for the gizology of the new "Wonder Eggs". Way out of my wheel house. GJ1 point
-
Hulls # 1016 and 1045, no offense please, but y’all are pretty much kissin’ cousins! Your systems both 2022s, the installations should be very close, and Jay, John D can be a great resource for you. Welcome!1 point
-
Jay - Welcome to the Family! If you have not already been there it is in your best interest to become VERY familiar with the Oliver University - which can be found HERE. Being from TX it is a fair drive to get to Hohenwald, TN, but, if you can make it there and/or to the Annual Oliver Owner's Rally it would be time well spent. And, of course, there is the TX Owner's Rally that Mike mentions above. If there is anything that we can do for you - just ask! Bill1 point
-
Thank you all for your input. We have a legacy 1 so the battery compartment size is limiting. We’ve read Epoch’s great reviews. They not yet on Oliver approved list and we’re still under warranty. Still researching options.1 point
-
I knew I shouldn't have done it, but I decided to go down the rabbit hole of looking up the actual law in the CFR (Code of Federal Regulations) based on the DOT 4BA type tanks I have and found these recertification guidelines. Adds even more confusion, but I'm still having it done at 10 years anyway!
1 point
-
You could start a poll. You know my vote. Can’t wait to see your installation! Best wishes. JD1 point
-
I had the thought that adding the two friction hinges was the cause of our problem, because it took a lot more force to open the door....but I think our door had been flexed by wind events in the past and that may have started the problem and over time it just got worse. So my question and asking folks to vote: Do I put the door back on A) WITH" or B) WITHOUT.... the friction hinges.1 point
-
This truly makes sense! Our door would bang in the wind against that stop before you even got a chance to hook the door. Never since adding friction hinges. You must add these. Our door sits 90 degrees open, even in the wind, and never pushing on the stop. https://a.co/d/d1kftGz1 point
-
Spoken like a true Professional!1 point
-
Never discharge below 50%. 12.3 is a safe bottom number. It only takes one time to go below 50% to damage AGM batteries. They aren't forgiving. It doesn't mean they are toast. Fully charged then, remove them from the trailer and take them to a place that can conduct a load test. You have a lot of things going, fridge, furnace, inverter, television, and additional draws not mentioned. It doesn't take much for the deep dive.1 point
-
Rich, you caught me just in time! Leaving very soon to drive to Vegas (not towing today) to teach my PMP Prep class Mon-Thu this week. Next weekend heading to the Q with family and Oliver in tow! Hope to see you then. Turns out the Barker can be set at any height. You can ease it open which can be helpful when letting gray go in the BLM or NF lands (yes, it is legal when at a distance from others and water sources). Of course, when dropping the black tank into a sewer/septic system you would rather release all waste quickly, valve full open. Not the Valterra valve which is either all the way up or down. It must be due to the switch which could be replaced with another DPDT switch (pictured). The odd little breaker or reset button is odd. I would delete it adding a simple butt connector on the white wires in and out and wire a 5A fuse at the + bus. Without the faceplate this switch could be mounted where the pull handles are located, but I cannot determine if this switch is waterproof (unlikely). Barker has a 1 1/2" valve model and I have not been able to find one in the Valterra brand. I want to motorize all 3 valves, especially the 1 1/2" valve which gates the gray water from the bathroom. It will be great to merely push a button and remove the pull handle from the bathroom! I will do this work Feb-Mar, weather and time depending.
1 point
-
The maxxair vent and bathroom vent don't seal real tight so a fair amount of warm cabin air can leave through those vents when closed IF and ONLY IF there is a window open or as you appear to have discovered, a source of outside air entering your basement. I have never experienced condensation under the hatch cover above the furnace like you are so it seems plausible the cold outside air is coming into the basement in that area. Could it be possible that the outside air intake tube for the furnace has cracked or separated from the combustion chamber inside the furnace housing? That would allow outside air to flow freely into the furnace housing and then into the basement through the fan intake vents when the furnace is not running but the furnace would probably still work. It doesn't seem at all likely but that could possibly explain it. Just a WAG.1 point
-
1 point
-
You need to have windows cracked to allow airflow. You need to be using a dehumidifier. You need to use the trailer furnace to heat under the bed. This is really operator error. Please don't take this the wrong way. Worst thing to do is keep the trailer closed up. You need to know when it is time to move to the furnace. The furnace will also help to remove moisture When camping with temps below freezing we crack curbside and dinette windows, 1"+. We really have never had a condensation issue. Best of Luck.1 point
-
I’ve dealt with U.S. Truma on three occasions regarding warranty issues. Twice with our C73 portable cooler, both times they shipped out a new cooler no questions once it was determined the control system had failed. The third occasion was when the Aquago water heater outer cover plate had started developing cracks in various locations. They shipped a new cover plate and frame assembly immediately no charge. You usually have to wait in a queue for a while to speak to a representative, but they are more than happy to address your issue if possible on that call. Make sure to have your data plate information before you call.1 point
-
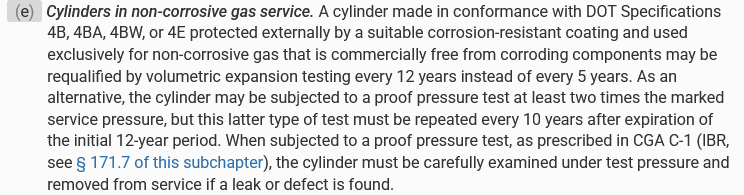
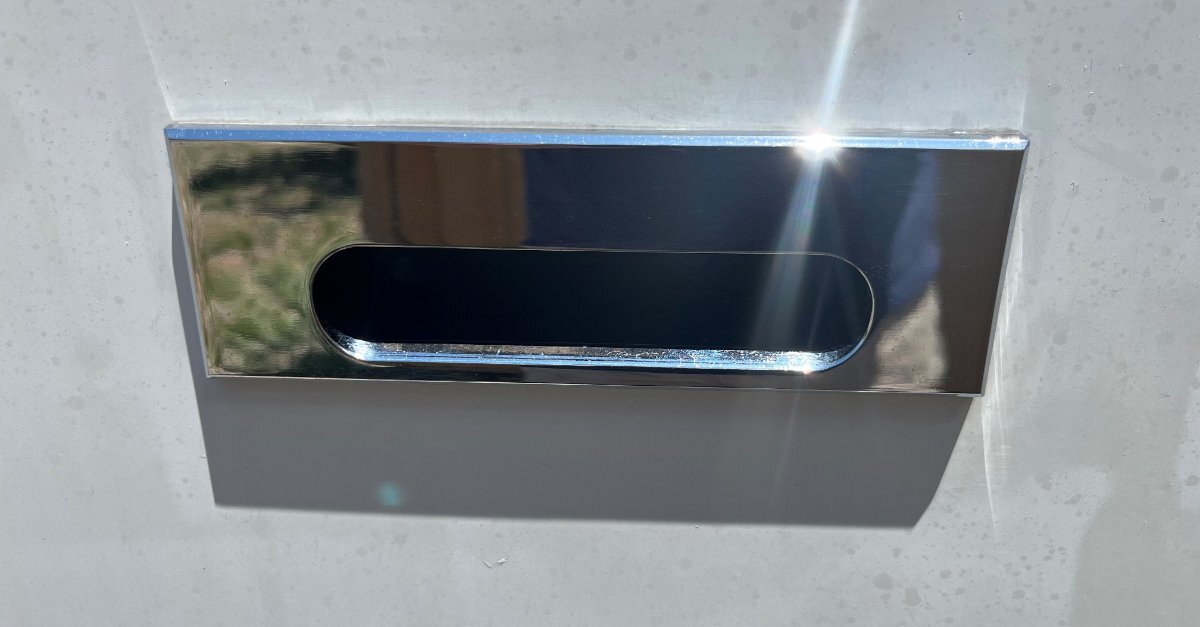
OMG Ken, wow! I see you are from the beautiful land of 10,000 lakes, frigid temps half the year and a whole lotta street salt! (This is one reason why I started the thread, re listing your location.) Good addition though. I would not think that part to be so easy to source. When I used to restore old cars, before working on the paint (which I jobbed out), I would remove EVERY piece of trim. Now it appears I am in the restoration hobby again with an old Oliver! The 2nd pic is the rear of my '59 300E (owned it 1992-2010). All trim, all stainless, all chrome, everything was removed. Then it only cost me $200 (1996 dollars) to get the paint buffed/detailed, on a 10-year-old lacquer repaint. It did cost 1000s more to rework the stainless, chrome the bumpers, purchase NOS lenses, etc. and likely 1000 hours of sweat equity (don't have that energy anymore, half-day labor now vs. a 10-hour day was normal back then). When I get around to paying $$$$ to get the exterior fiberglass redone professionally, I will remove many trim pieces like this, so they can hit the whole panel with a buffing wheel. Until that day, ours will get duller as I collect parts like these, prioritizing jobs like a new AC unit. Check out the doghouse handle on your hull a 2018 vs. ours a 2016 life in the southwest! I will remove these handles for the finish work, use a light polishing wax and remount them.
1 point
-
Good price. I bet the next Ollie they do will be higher. 😂🤣. I wrote back and forth to CGI and I thought since our trailer is #1290 that the prep would be very minimal. They said that they still have to prep new trailers so the cost wasn't decreased. I did put Rock Tamer mup flaps on and towing back to Oregon, it looked good. John1 point
-
Hi John, No, I had a local detailer here in Bakersfield, CA do it for us. I googled "ceramic auto coating" and received about 5 detailers in our area that professed to do it. After checking all the reviews, especially companies with lots of reviews, I choose my company. FYI: I paid $500 per coat (which I think was a very good deal - and the detailer confirmed it was far more work than he had anticipated). With the PPF film I paid $1300 for the entire job.1 point
-
We had our 2022 coated (with two coats - supposed to give 5 yrs of protection). It isn't necessary, but WOW what a shine and no more factory swirls! Also, VERY easy to clean. You can do it anytime, but it shouldn't just be coated. There needs to be a good polishing in prep. I am VERY happy with the result. Also had PPF put ont the bottom 1/2 of the front to protect feom gravel, rocks, etc. Waxing is ok, but every 6 months is too much work and not as much protection - in my opinion.1 point
-
Our trailer is 7 years old. No ceramic. I wash after each trip and wax 2 or 3 times a years. Still looks pretty good. I’m thinking I’ll do the ceramic thing sometime in the near future. Just have to find a window when we’re not out and about. Mike1 point
-
#3 - yes #2 - yes #1 - "necessary" - no Bill1 point
-
I wish I was next to Talli and Steve, but I am in F56. On a high note, my grandson, Nick, is coming with me. I will be excited for everyone to meet him..Georgia Southern marching band, 3.7 GPA, plays the drums for Compassion Christian in Statesboro, Ga, Eagle Scout, ..just a good kid.1 point


.thumb.jpg.e34bf01ef7f7d5e99ad31856d45afbeb.jpg)


-
Recent Achievements
-


")


")


")


