Leaderboard


Popular Content
Showing content with the highest reputation on 03/02/2025 in all areas
-
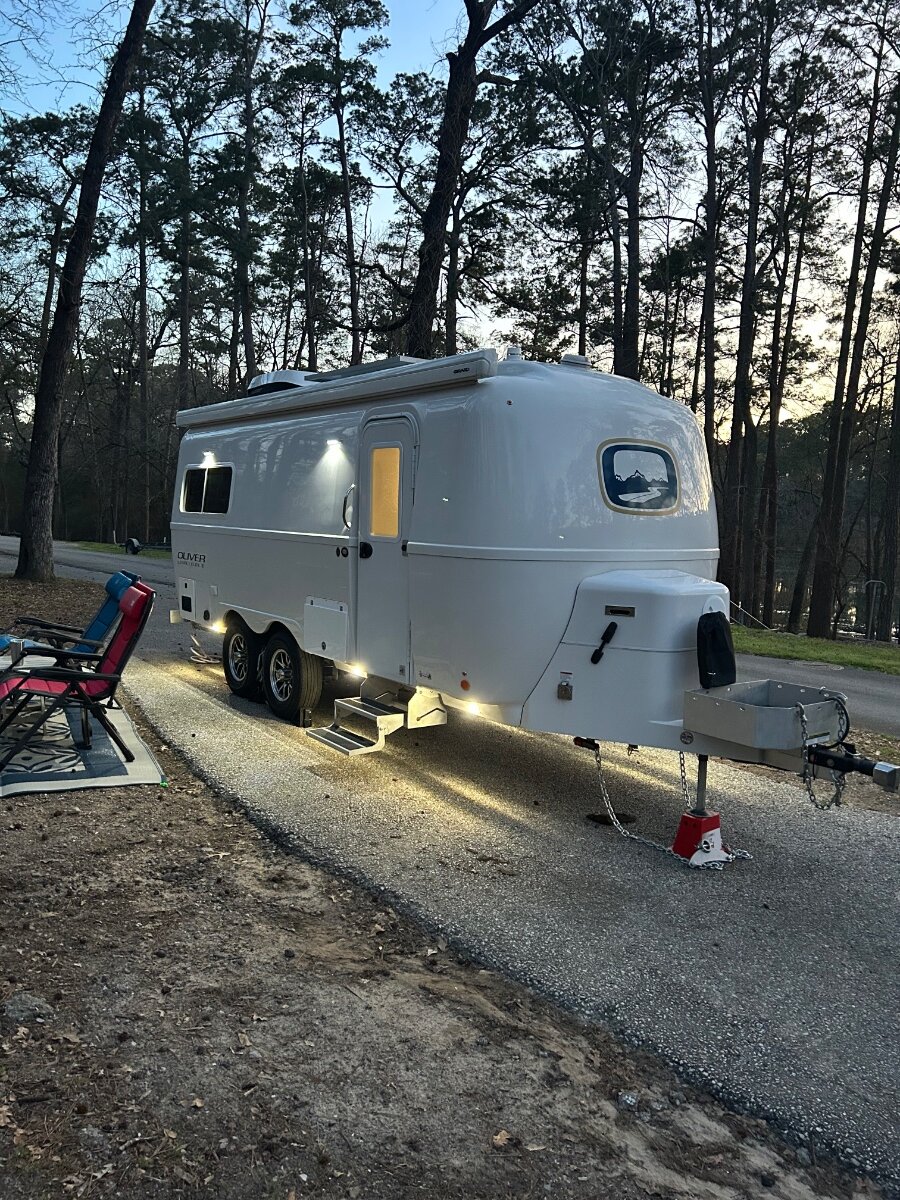
Excited to be a new Oliver owner. I have a lot to learn about my LE II and am sure this forum will be valuable in that process. Hope to meet some of you somewhere down the road.
 6 points
 -
I believe Oliver's only have 1/2" PEX, but I’m not assuming anything. I only carry 1/2" spare parts and pipe. I carry a SharkBite 90*, coupling, tee, cap. I also carry a PEX pipe cutter and a SharkBite fitting removal tool. A word of caution about SharkBite fittings in general, some of their fittings are reusable and others are single use, so pay attention to which you purchase. Although I have complete confidence in SharkBite fittings, I have never had one fail while in service. I have had installation failures of my own making. So read all documentation available and follow the methods outlined within and all should be good. I do have PEX crimp rings and crimpers at home and they are very hard to use for repairs below decks. So I don’t have any problem leaving SharkBite fittings in service, that I installed in an emergency. The last bit of advice that I have is, buy a reusable SharkBite PEX fitting and some PEX pipe and get busy practicing. Mossey5 points
-
Although I’m not sure how much difference it makes, maximum flow is important to me as well. With all the plumbing modifications I’ve made, I did’t want to introduce too many more restrictions in the system. I actually used 3/4” motorized ball valves, and SharkBite fittings wherever practical. I also heated and bent the PEX pipe instead of 90 deg. fittings whenever possible, and used 90 deg. plastic sweep clips to maintain the bend. Every little bit helps IMO!4 points
-
Welcome! Pretty soon the forum cops will suggest you add a signature including hull and tow vehicle info. Some write a book with all mods info… and others do something simple like ours. Very nice first pic!4 points
-
Pex tools used to be very expensive. Now for about the price of 3 or 4 shark bite fittings you can buy a complete set of tools and crimps from Amazon. https://a.co/d/fMcntAT4 points
-
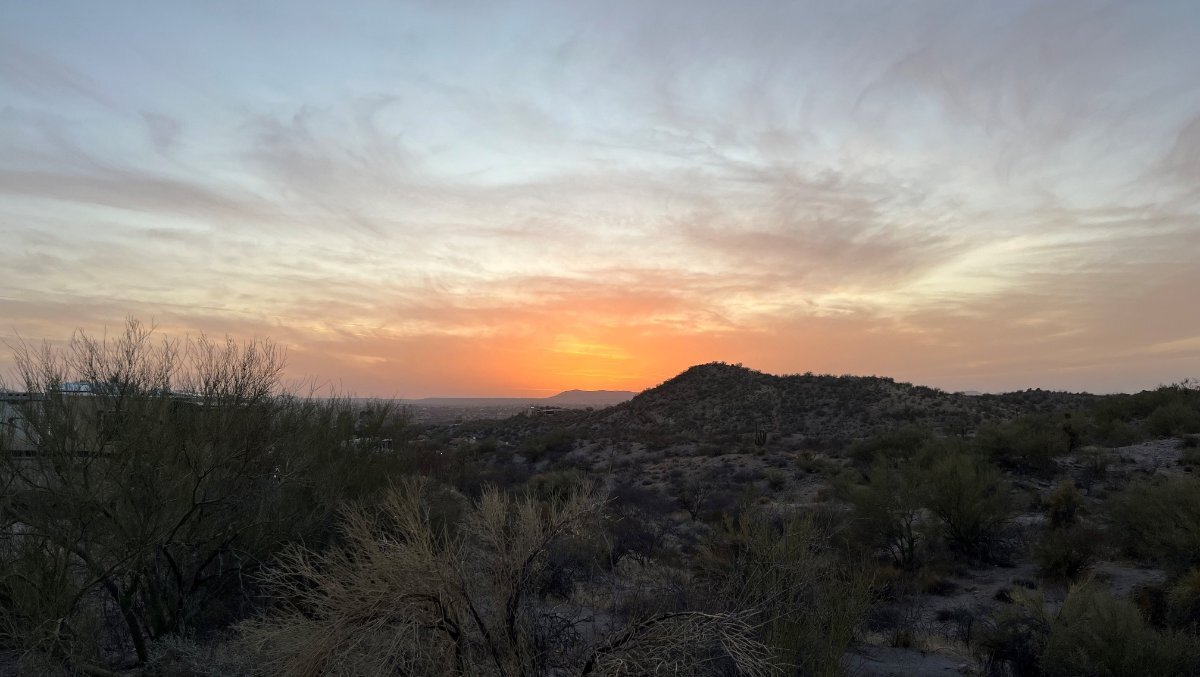
That was lucky! 4-5 weeks ahead I looked at both parks plus ALL of the Maricopa Regional Parks. There was not a single night available for the week of Feb 24th, in any local park between Prescott and Tucson. Then two weeks out a Thursday night at Catalina opened up and I grabbed it. A few days later the Monday night opened at Lost Dutchman. That was our first night out and I like when the first day is less driving, Lost Dutchman being half the distance to Catalina from our home. Then a week before Catalina had a Wednesday opening so we got 2 nights, at two different sites of course. I wondered, what would they do for a flood? Our visit to Catalina SP was OK, not great. After the first night we moved to the new site at noon and had the day to investigate. I wanted to see the town of Oracle AZ and drive into the north end of Coronado NF to take the back route up to Mt. Lemmon. We got a few miles past Oracle and there was an obvious Temperature Inversion. All of the dust from the dry conditions of the valleys were trapped so that we were driving through a huge cloud of dust! After sneezing a couple of times and the look of things we abandoned our trip. You could not see through the haze at all, not a single view of Santa Catalina Mountains while climbing up! One reason for your visit was to meet friends who had recently purchased a home in nearby SaddleBrooke Ranch. We played pickleball with them and others in the community on two evenings and had a great time. Dinner at their home the first night and a good strong hot shower the next morning! Drove up to Wickenburg for our last night, taking a detour around Phoenix to Gila Bend, Buckeye and up. We often prefer driving the back way up Hwy 89 to Prescott vs. I-17 (currently on a 5-year construction plan to widen it). This picture was taken from Constellation Park (found on Campendium $10/night) looking down at the town of Wickenburg. There was one site left available at 5PM! It was a short and sweet trip and we're back home today for the day of rest!
3 points
-
I always have to laugh when I see 1/2” or even 3/4” copper pipe going to a (land based) bathroom or kitchen sink - and then the supply lines are 1/4” going through valves with tiny water passages. When we had the farm, I replaced every hose Bibb with a 3/4” ball valve a GH adapter. When I wanted water, I wanted it NOW! 😋Nobody wants to stand and wait while a 5-gallon bucket fills at less than the maximum possible flow rate.3 points
-
Welcome! It looks like your Ollie is right where it belongs, is use and camping! Welcome3 points
-
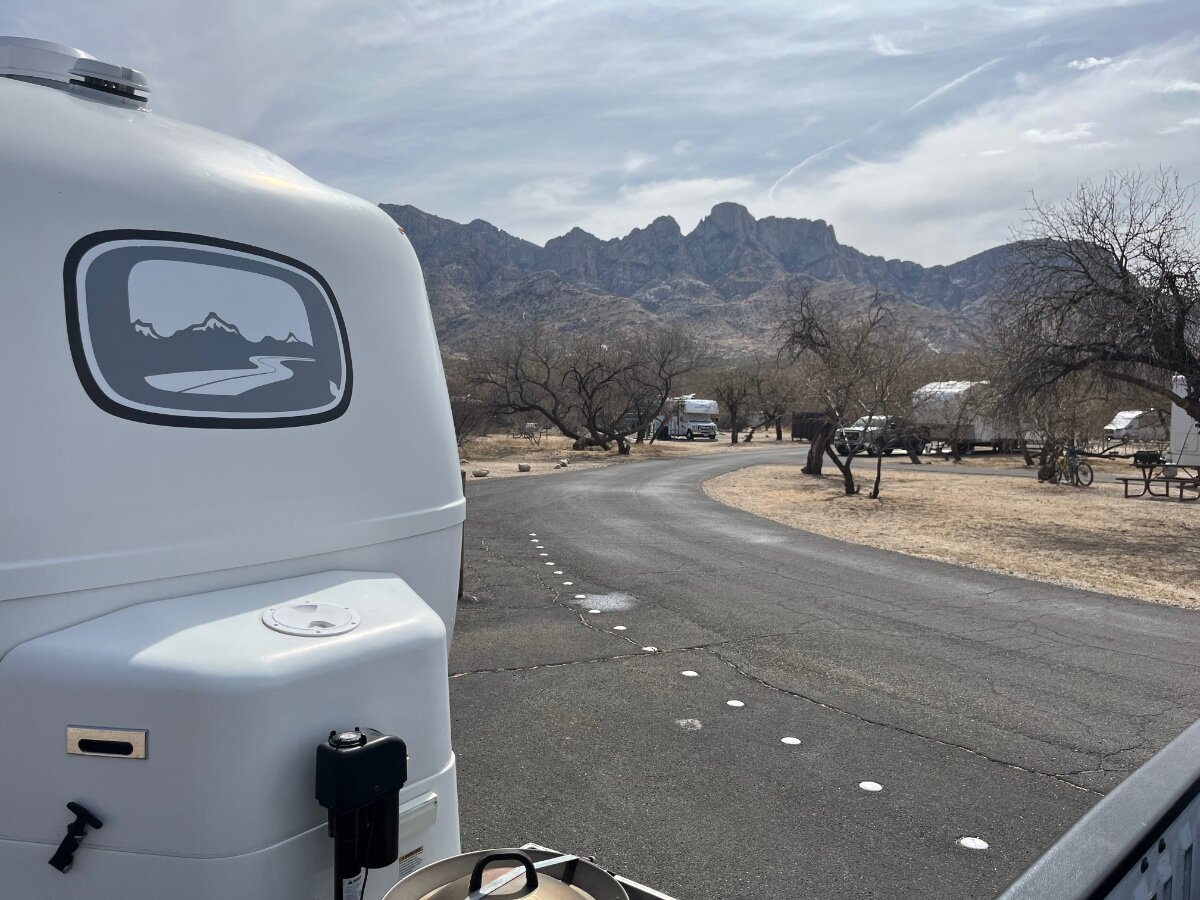
The Santa Catalina Mountains from the Catalina State Park of Arizona. Was dry as bone here, no real precip this season, daily highs in the 80s!
3 points
-
The Upper Steens Mountain roads are inaccessable until the snows melt - usually mid June or later. Depends on the snowpack and weather. Still the area surrounding the Steens has a ton of stuff to do including amazing birding on the Malheur Refuge. Wild horses can be found surrounding the Steens and great fishing in season. Do keep in mind that ticks and mosquitos are the dominant lifeforms in spring/late summer and can be rough on dogs as well as people - come prepared.3 points
-
Some years ago we had a discussion of this here on the Forum (I'm too lazy now to go look for it). In addition to what Patriot has above, a kit should include at least two shark bite 1/2 inch 90 degree elbows, two or three straight 1/2 inch shark bite connectors and one or two shark bite "plugs" to be used to cap off a water line. One might also include a small piece of 120 to 200 grit sandpaper for smoothing the exterior/interior edges of the pex. For those unfamiliar with shark bite fittings - these allow you to simply push them on (i.e. no clamping required). There was a whole discussion as to the appropriateness of shark bite fitting for RV travel. Even though I've never had to use my "emergency plumbing kit" it would be my intent to replace the shark bite fittings with something more permanent once I arrive back home. Bill p.s. I put all of the shark bite pieces, sandpaper, pipe cutter etc. in a plastic bag and then attached that bag to the lengths of pex with tape. Then I placed that "bundle" down in the area below the water pump.3 points
-
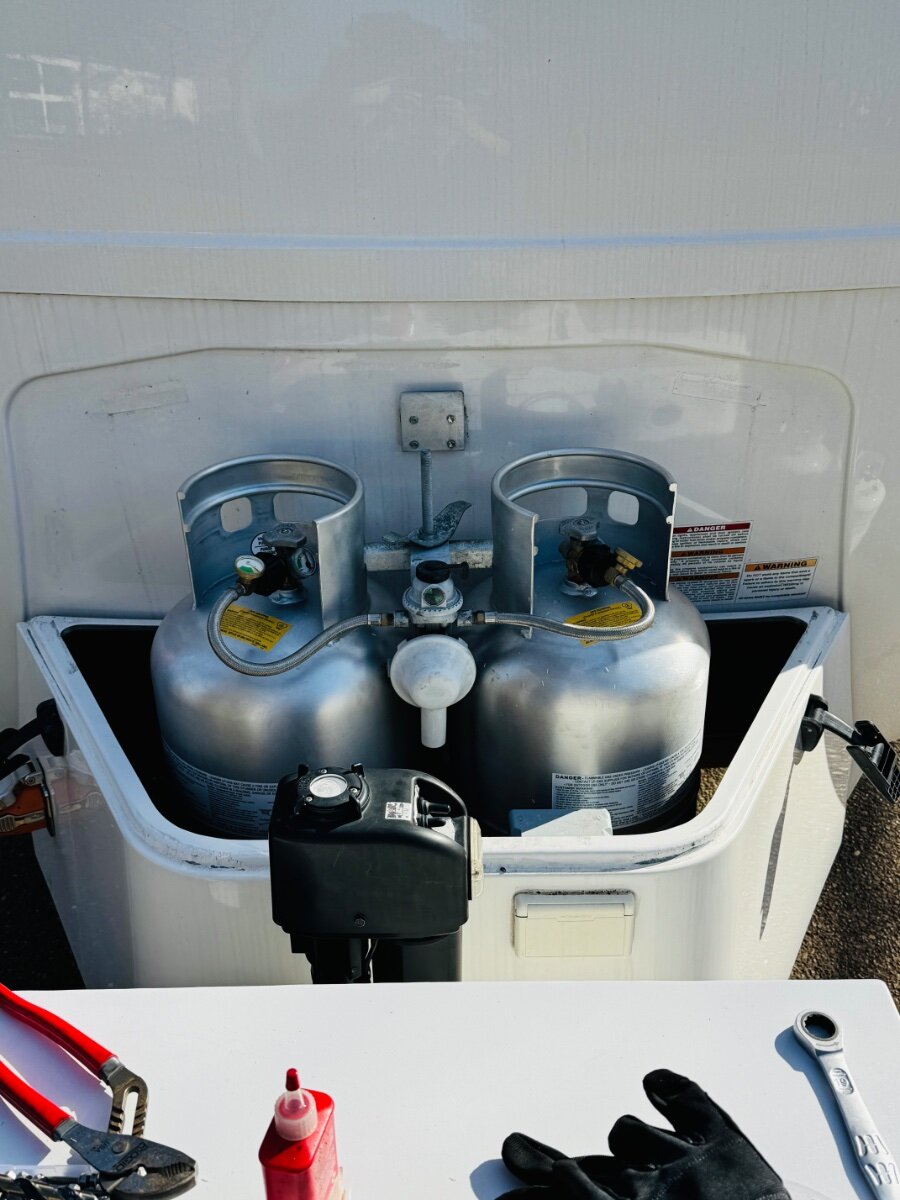
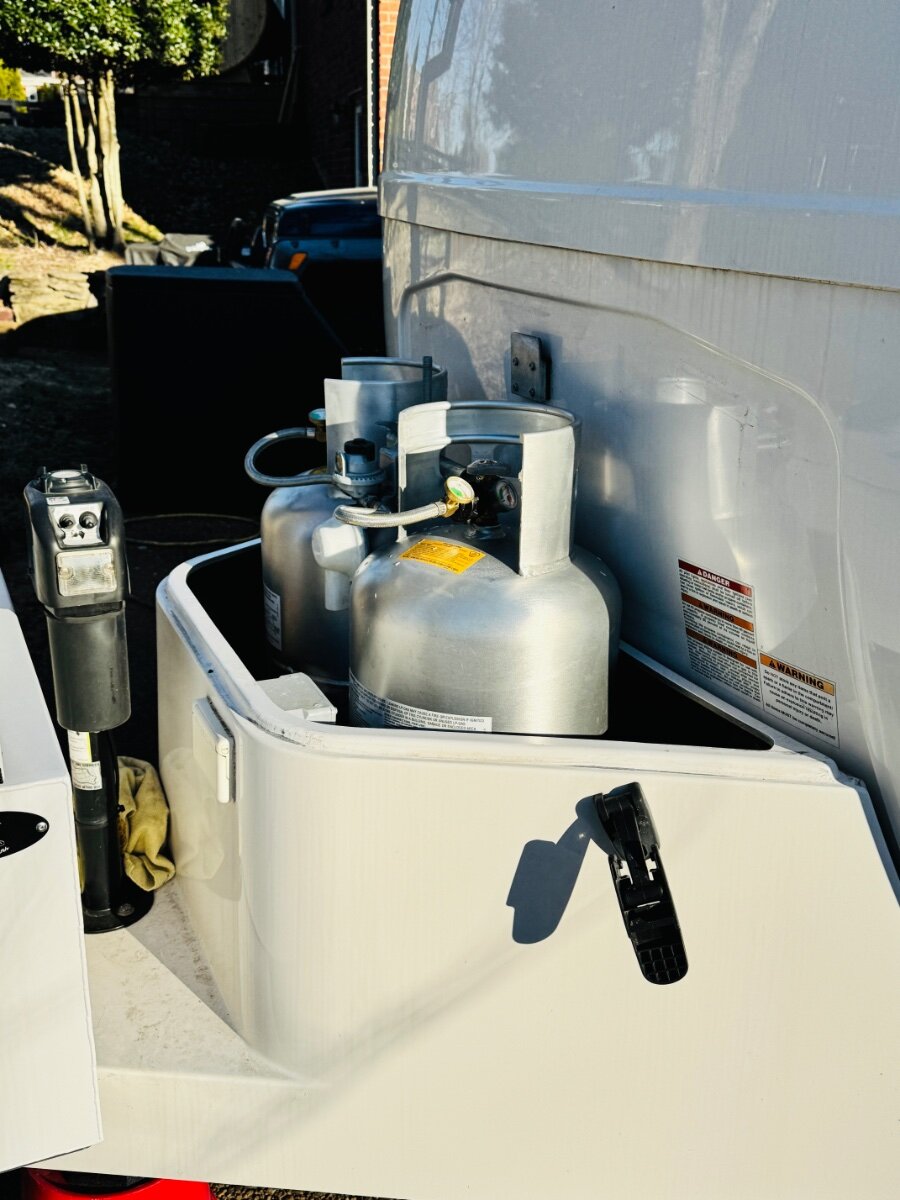
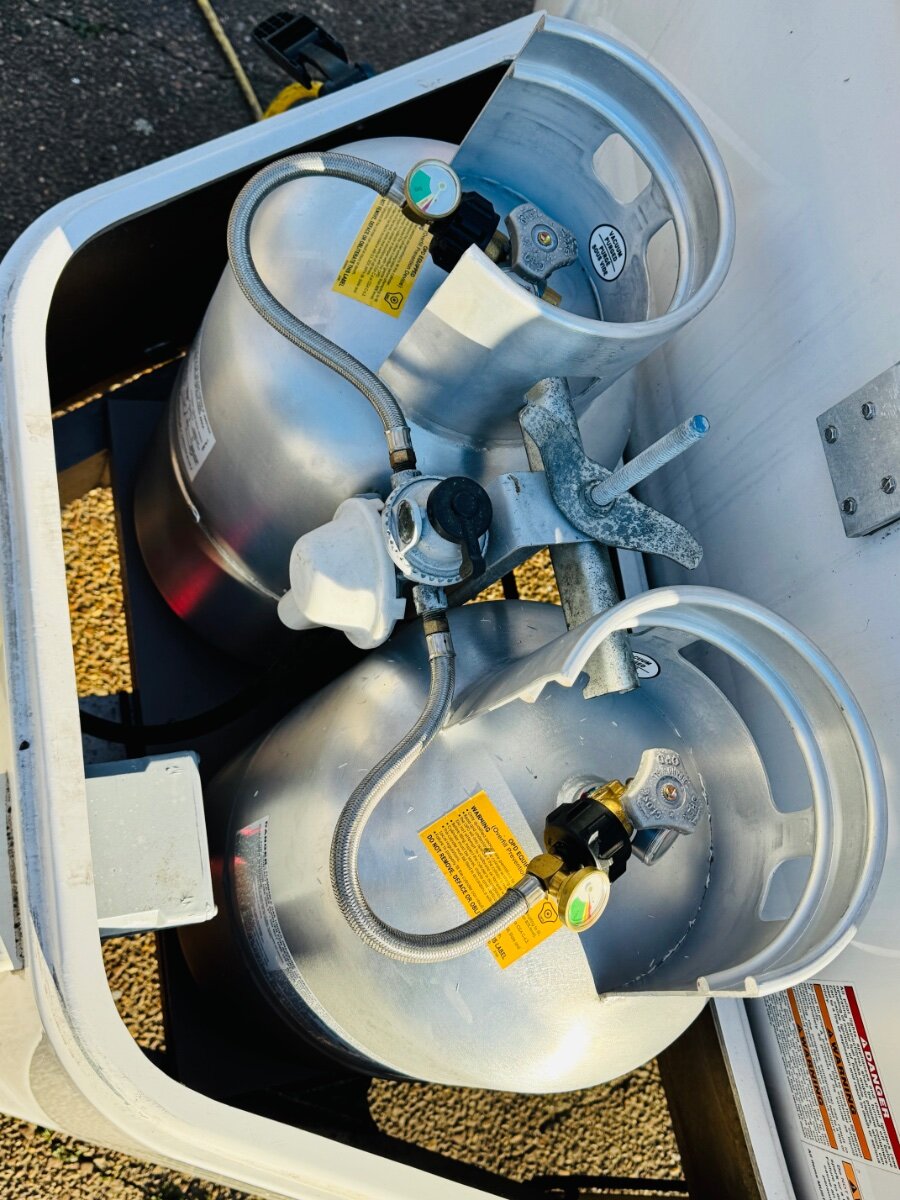
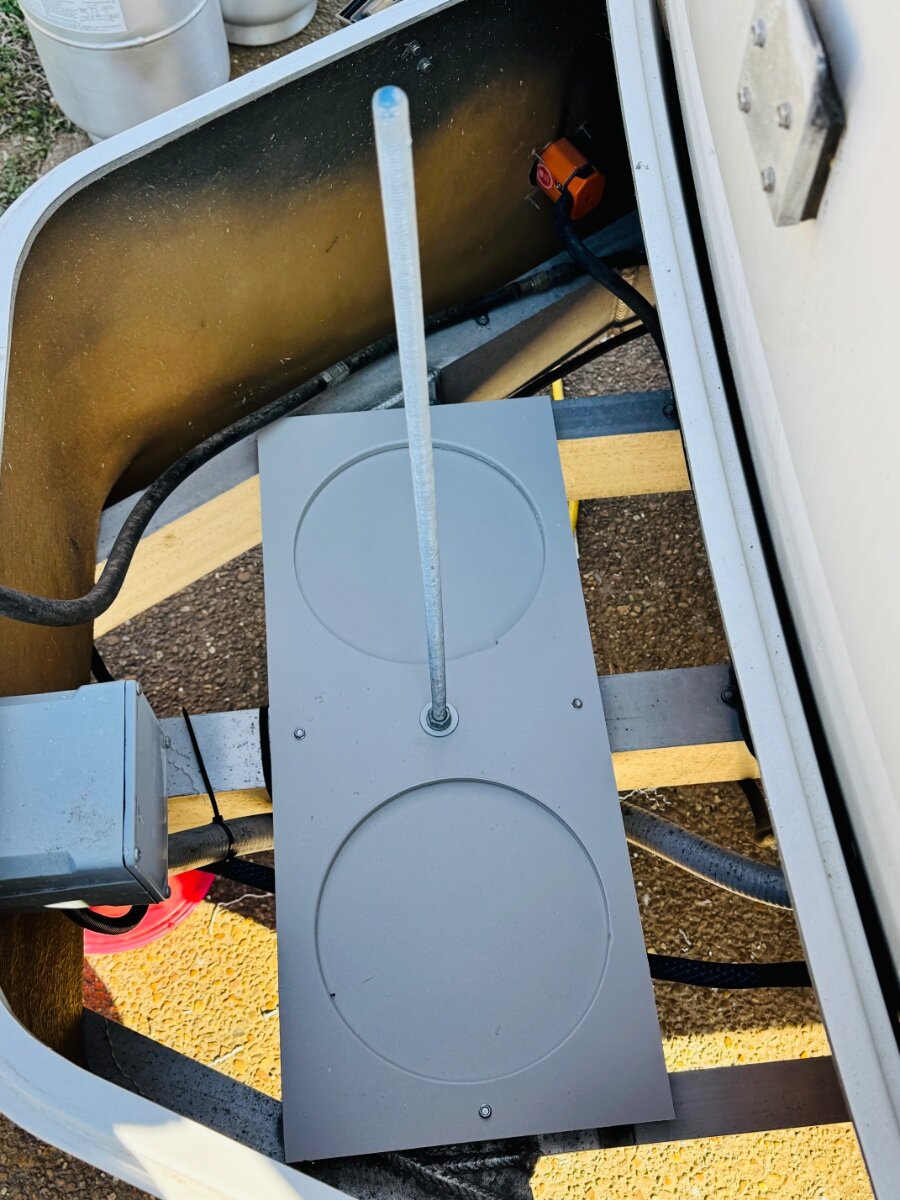
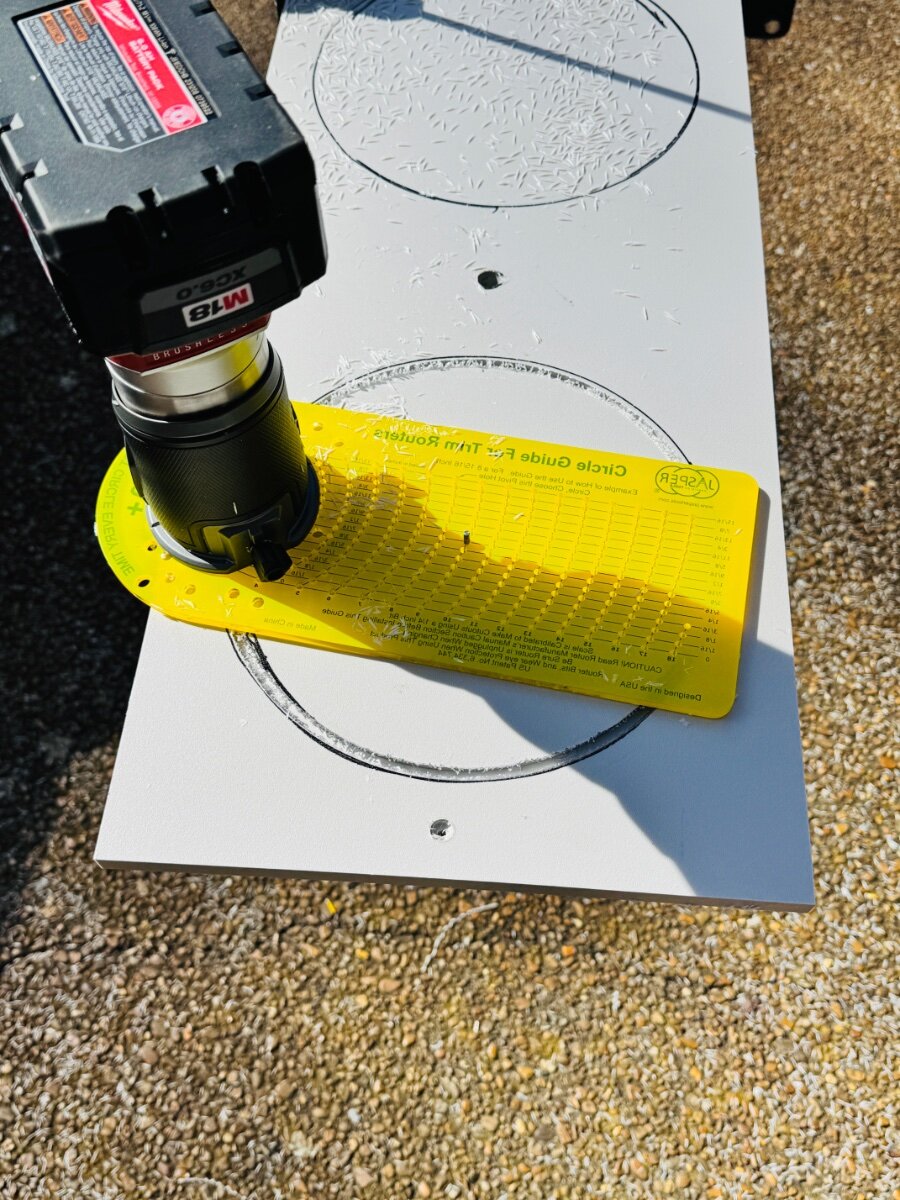
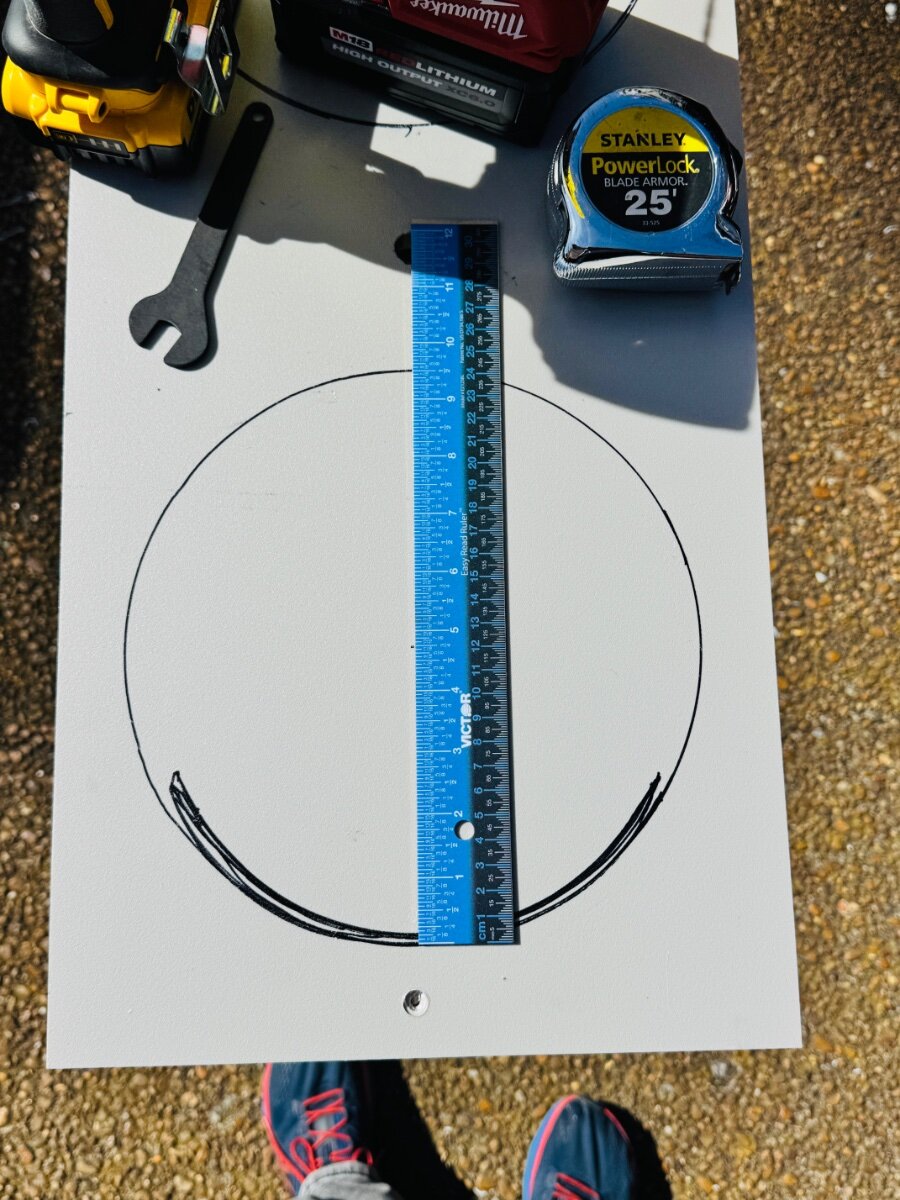
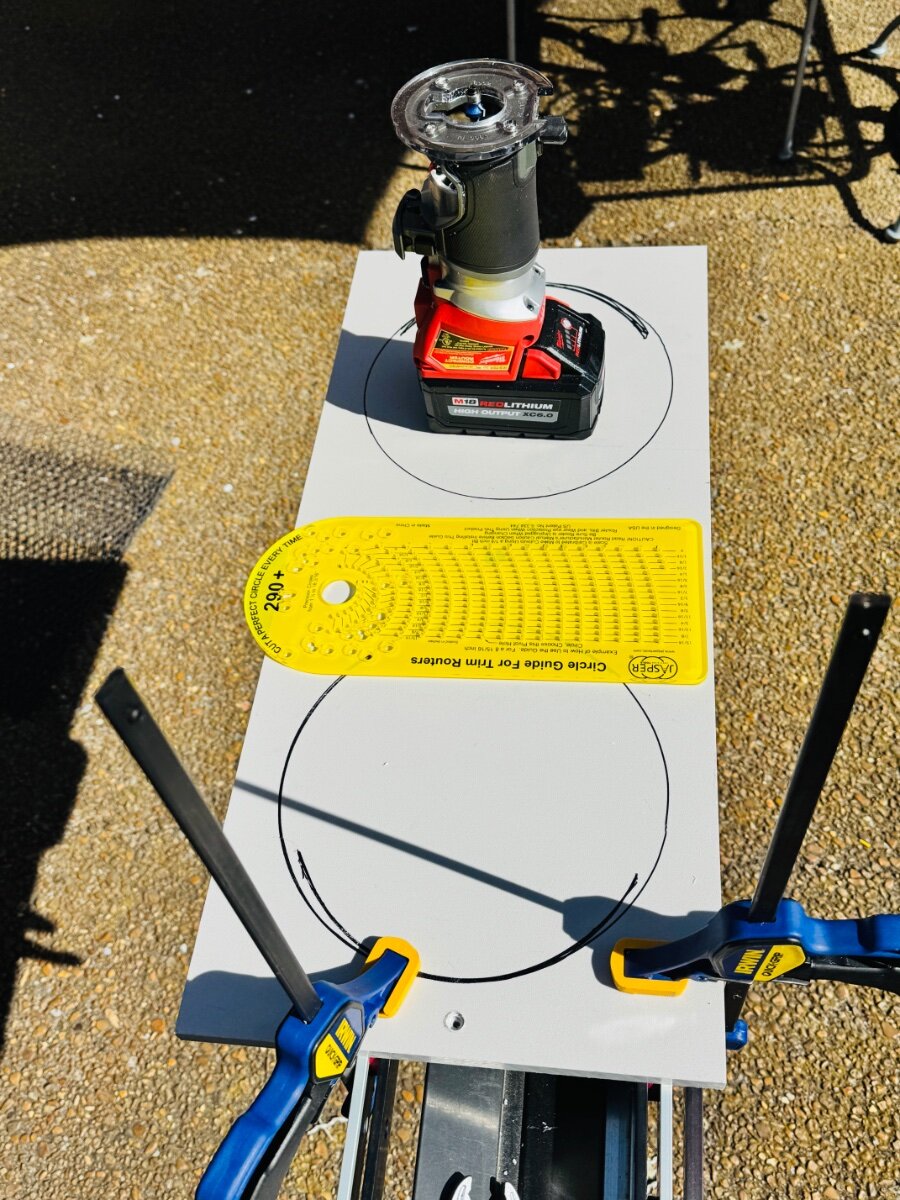
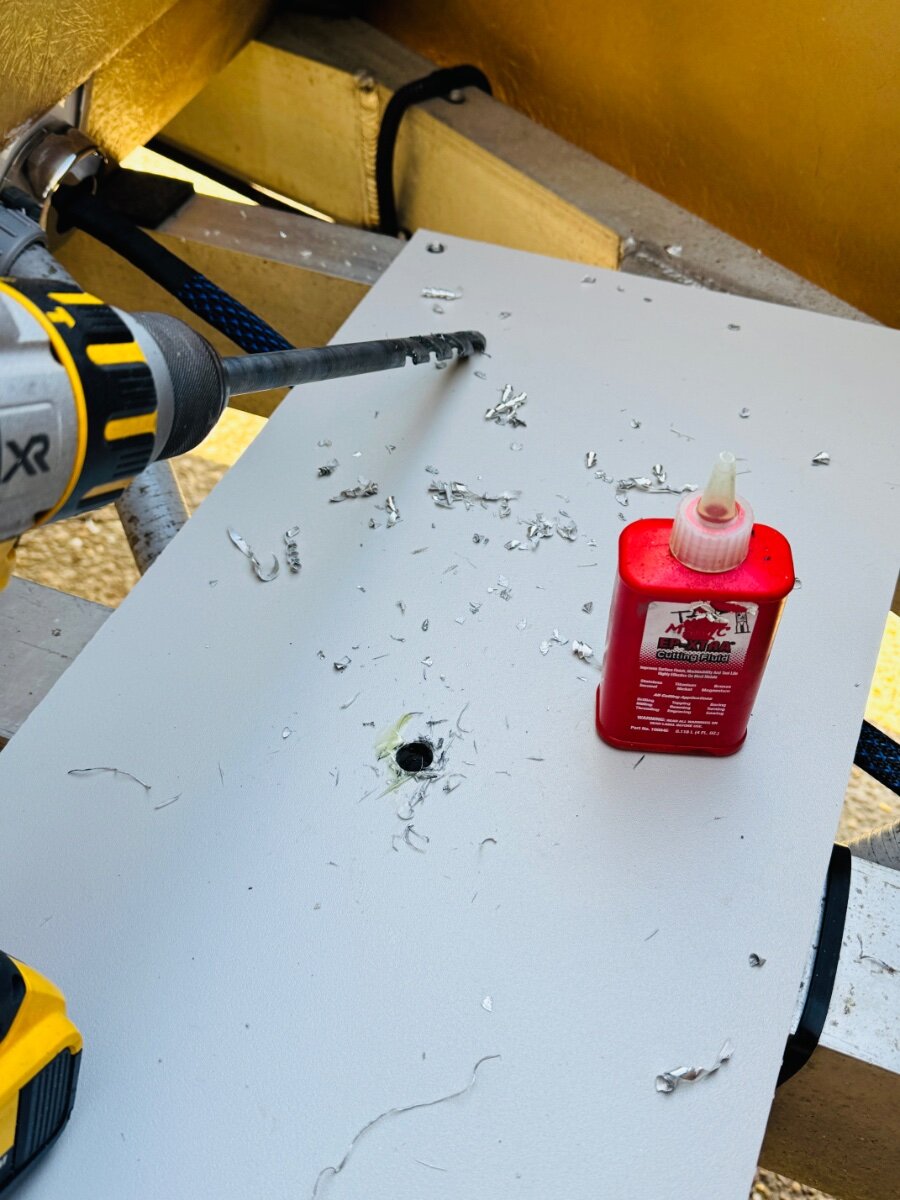
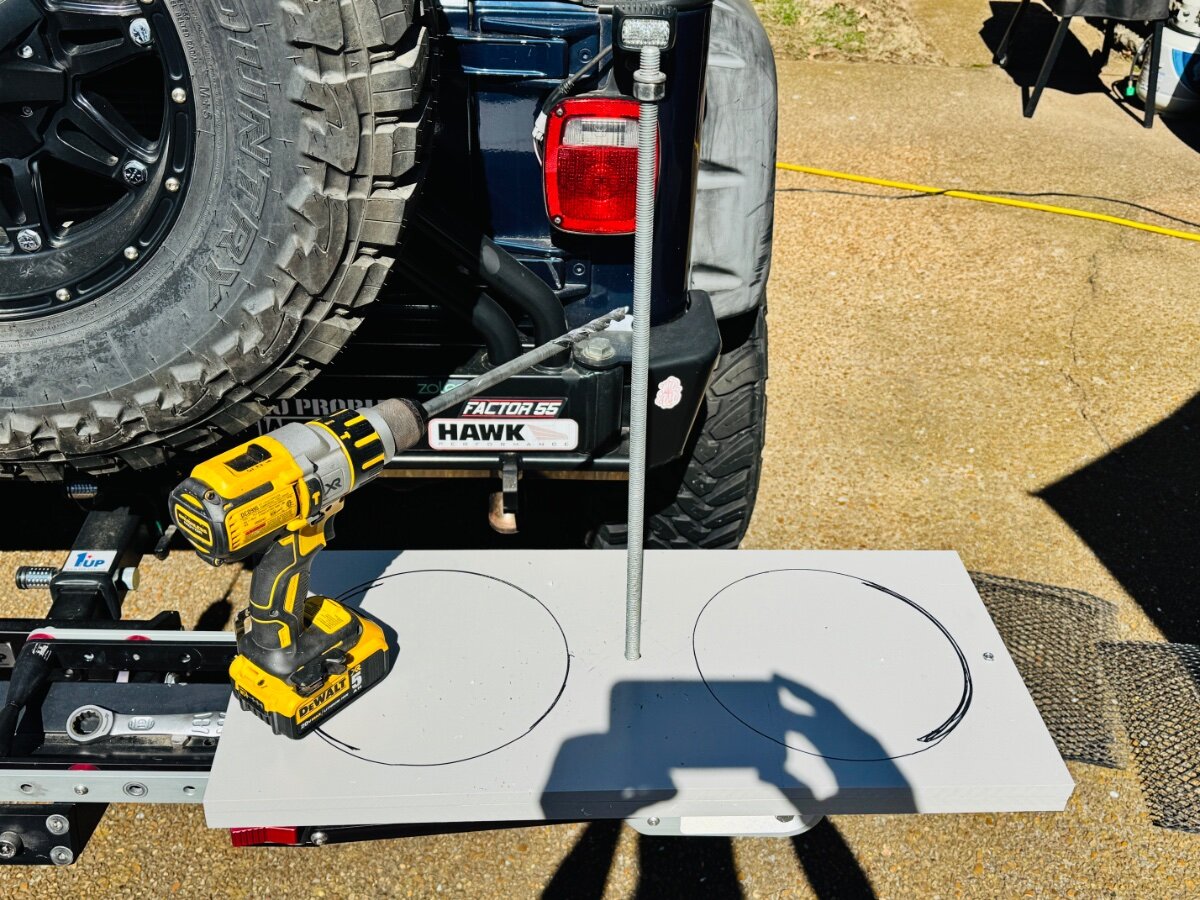
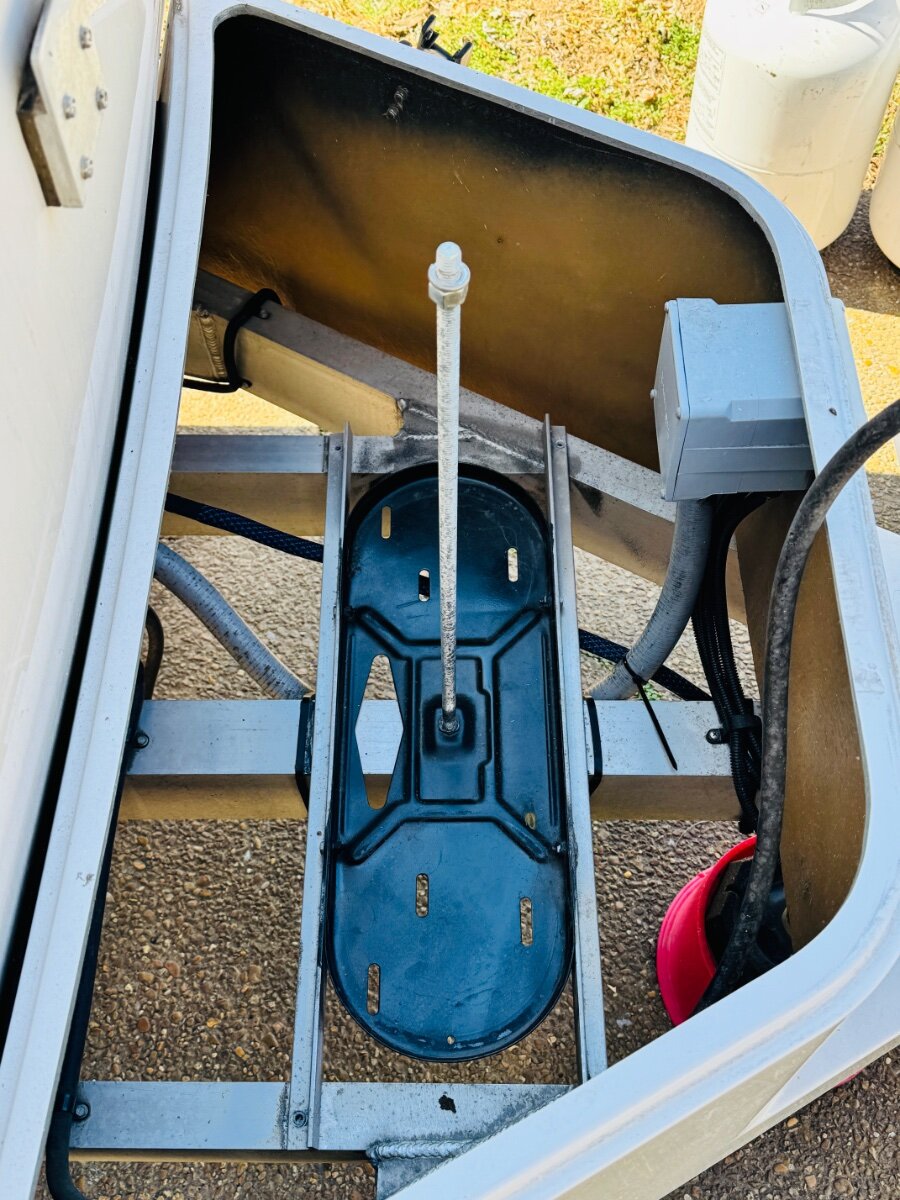
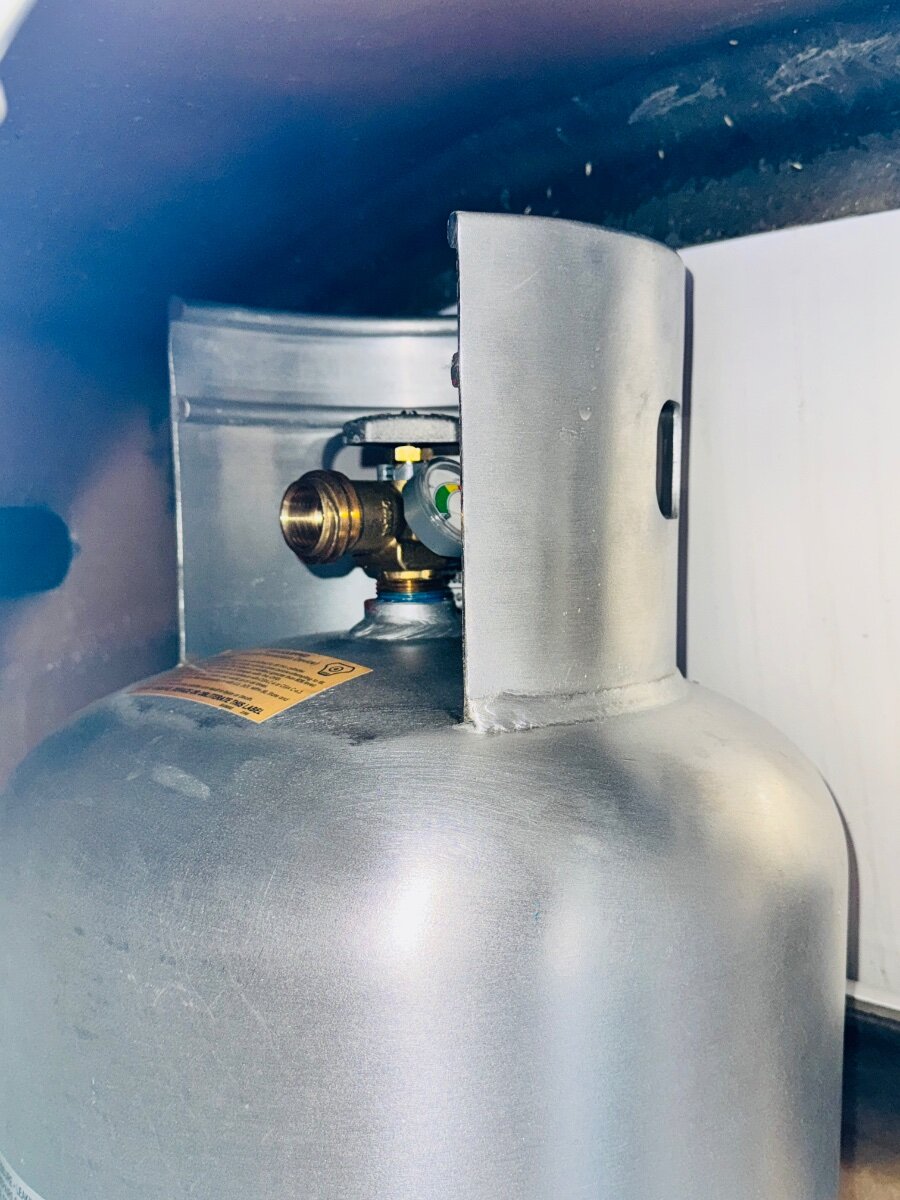
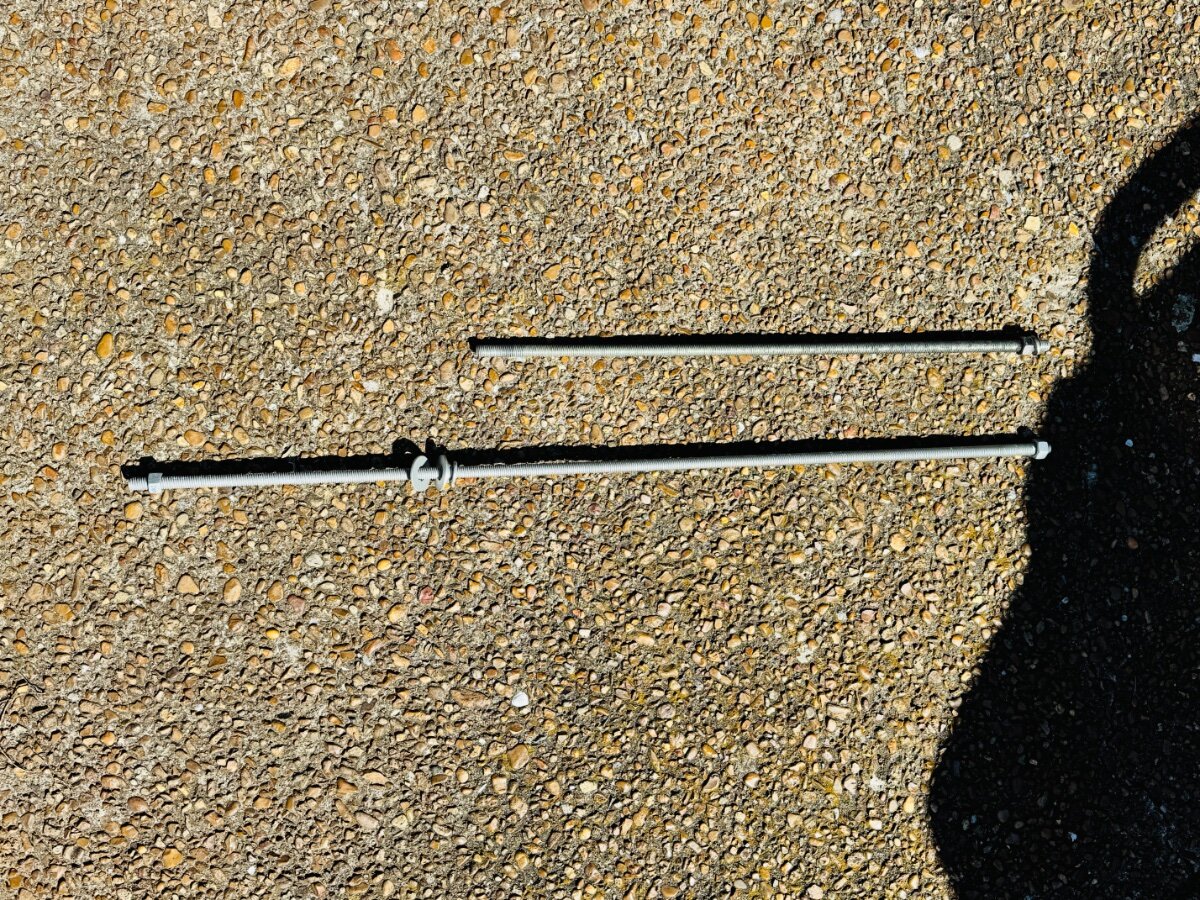
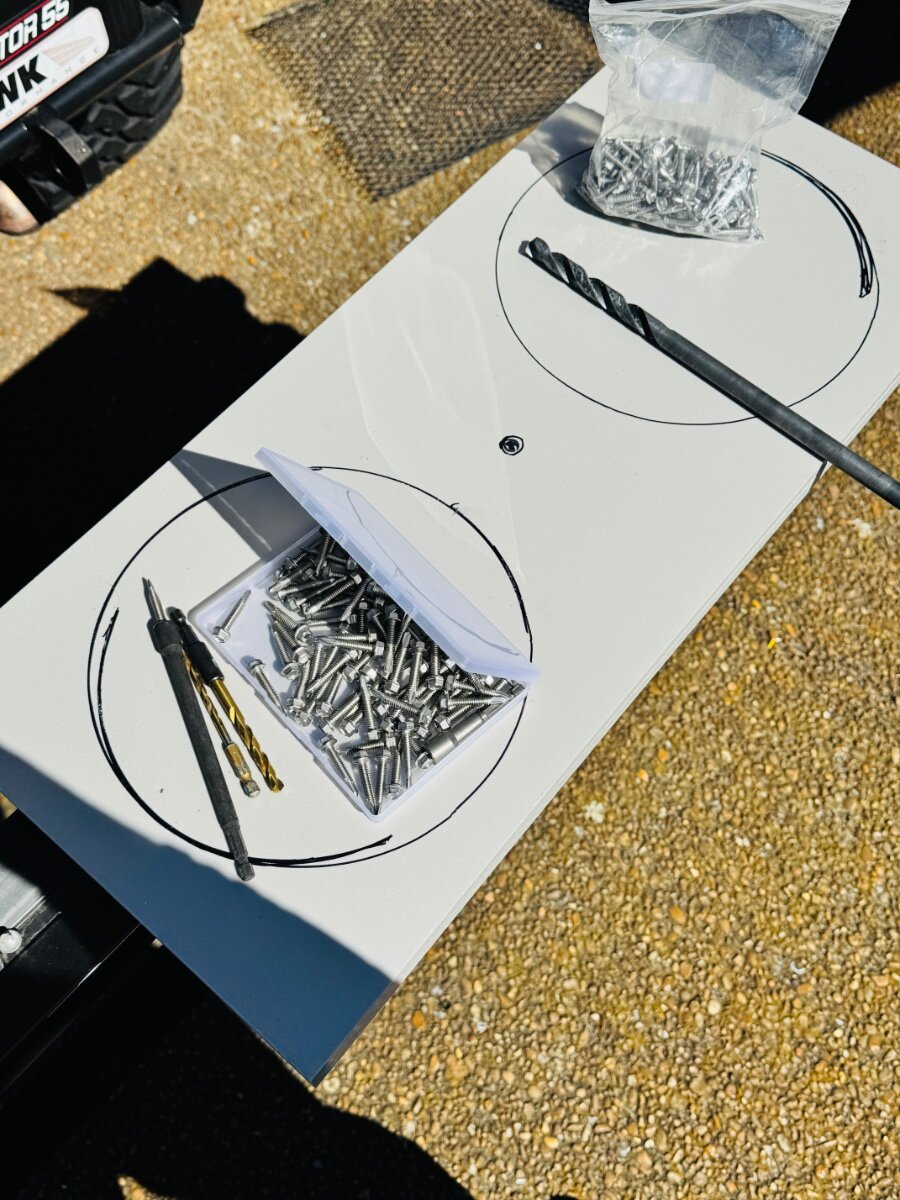
Finally got around to switching out our LP tanks for aluminum ones. 17 lbs vs 25 lbs. Supposedly holds 8 gallons of propane. We shall see. Had to make a custom tank mount due to bottom ring being too large for the steel tank mount. Made it out of HDPE 3/4 in bottom and top half with cutouts (9 9/16 in circle) was 1/2 in thick. Slight modification to center rod and large wing nut to secure tanks. Rod I used was 36 in. Needs to be long enough go through frame. Used my hand held router with a Jasper circle jig. Worked great. Very happy with the results. Couple inches to spare height wise with fiberglass shell back on. One of the last vestiges of steel removed from the Oliver. https://flameking.com/product/ysn330-copy/ Pre-purged vacuum ready for filling with propane 12x12x26.5 in 17 lbs 7-8 gallons OPD valve 3
2 points
-
I would wager it is well over $20K with materials, labor and at least $1 per hour for the PITA factor that we have endured. But that said, the learning curve was so satisfying ... when the job is done of course.2 points
-
The [20] error code on the inverter usually means low battery voltage shutdown, such as when an AC appliance draws more current than the inverter can supply at the time. This only occurs when you have no shore power, and are using the inverter to run a 120V AC appliance. I recommend you try turning your Lithionics batteries off, waiting 10 seconds, then turning them back on. Then ensure that the on/off button on the body of the inverter is out (off), and that the on/off button on the remote is in (on). [This is the "normal" mode for the Xantrex inverter--main body switch off, which enables the remote to control the inverter functions instead of the main body]. This has enabled my Xantrex Freedom XC Pro 3000 inverter to reset, making the [20] code disappear.2 points
-
The butane cartridges last a long time, so not a problem with me. I only use my lanterns as a light source, as needed, and not when combating biting pests; my headlights serve me better. As a cost saving measure I reuse the pads, they last a long time by recharging with a few drops of Pyrethrin Garden Insect Spray Concentrate; refresh as needed. I find a Thermacell effective within the 10’ radius they claim to protect, that area is extended with multiple, strategically placed units. Positioning them upwind increases their effectiveness. If dead calm, I set up a fan to help distribute the scent. I too am a ‘mosquito magnet’, has something to do with my O+ blood type! I spent most of my professional life out-of-doors in very harsh environments, including marshes, wetlands, bottomland hardwood forests, inland and coastal waters, and rainforests of Brazil for extensive periods of time both days and nights with a Thermacell strapped to my waist or backpack, they work!2 points
-
We were down in Cabo San Lucas last month and saw an Oliver parked on the beach! Unfortunately we were headed to the airport and couldn’t stop, but Iv'e been wondering who that was, and how the trip down Baja went? I’d love to make that trip in the Oliver too! But not without the backup and support of a large group.2 points
-
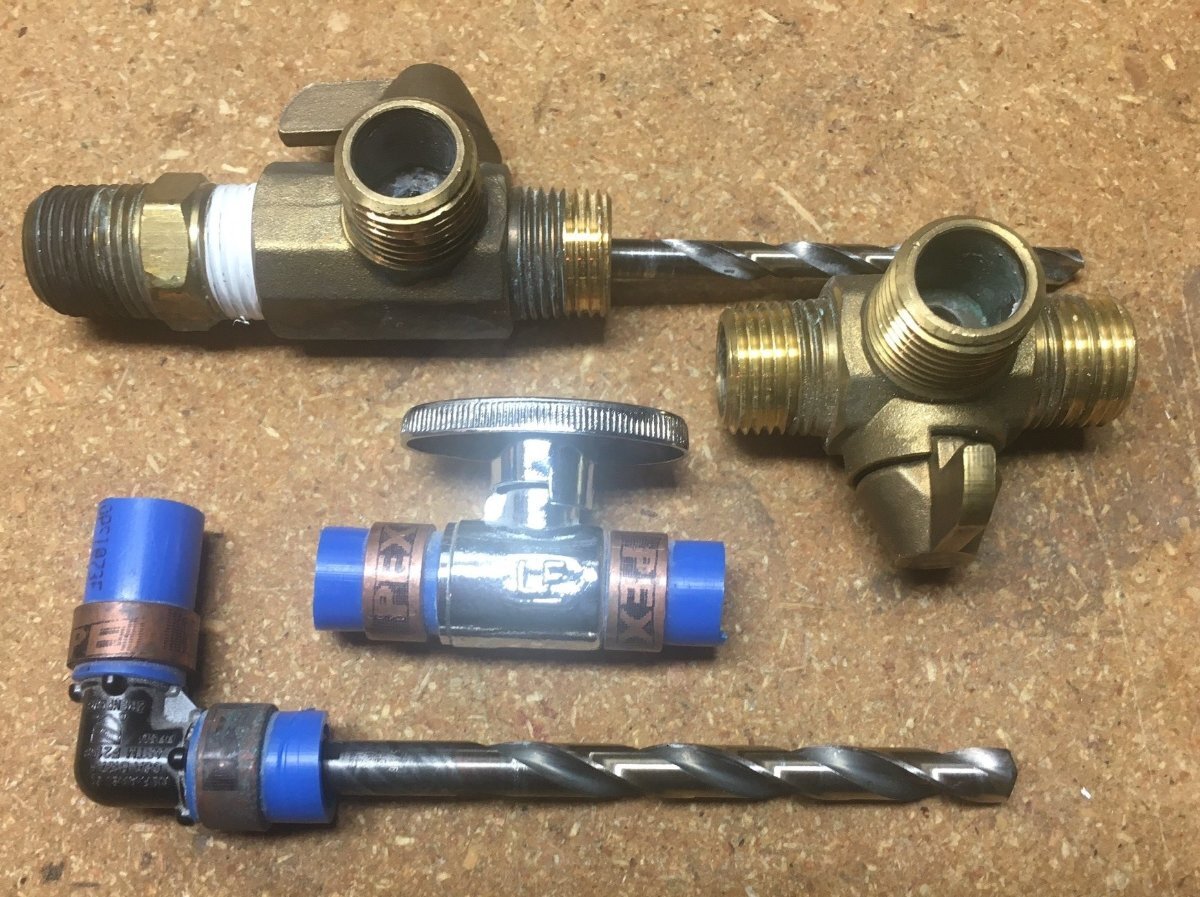
It's important to me. I've done a lot to improve water pressure and GPM flow rates. I replaced all OEM valves with motorized ball valves with true 12mm ID. The OTT installed valves were 1/4" ID (see picture, drill bits shown are 1/4" and 3/8"). Every 90 (too many of these installed) and ALL PEX crimped connectors have 3/8" ID. Newer hulls do not have the 1/4" ID brass valves but instead more of the other valves shown center of picture with 3/8" ID. The Oliver plumbing system is then a 3/8" system. If they had used SharkBite everywhere it would be a true 1/2" system.
2 points
-
Hey John we are just up the road from you…Indianola Beach! How long will you be there, we were thinking of taking a drive to Corpus Christi area, maybe we can swing by to say hello?2 points
-
A few years ago we were headed to Catalina from Rockhound SP in Deming, NM. We got a call that morning that the park was closed, the road had flooded (again) and was closed. They were able to get us in to Lost Dutchman so we just kept driving past Tucson!2 points
-
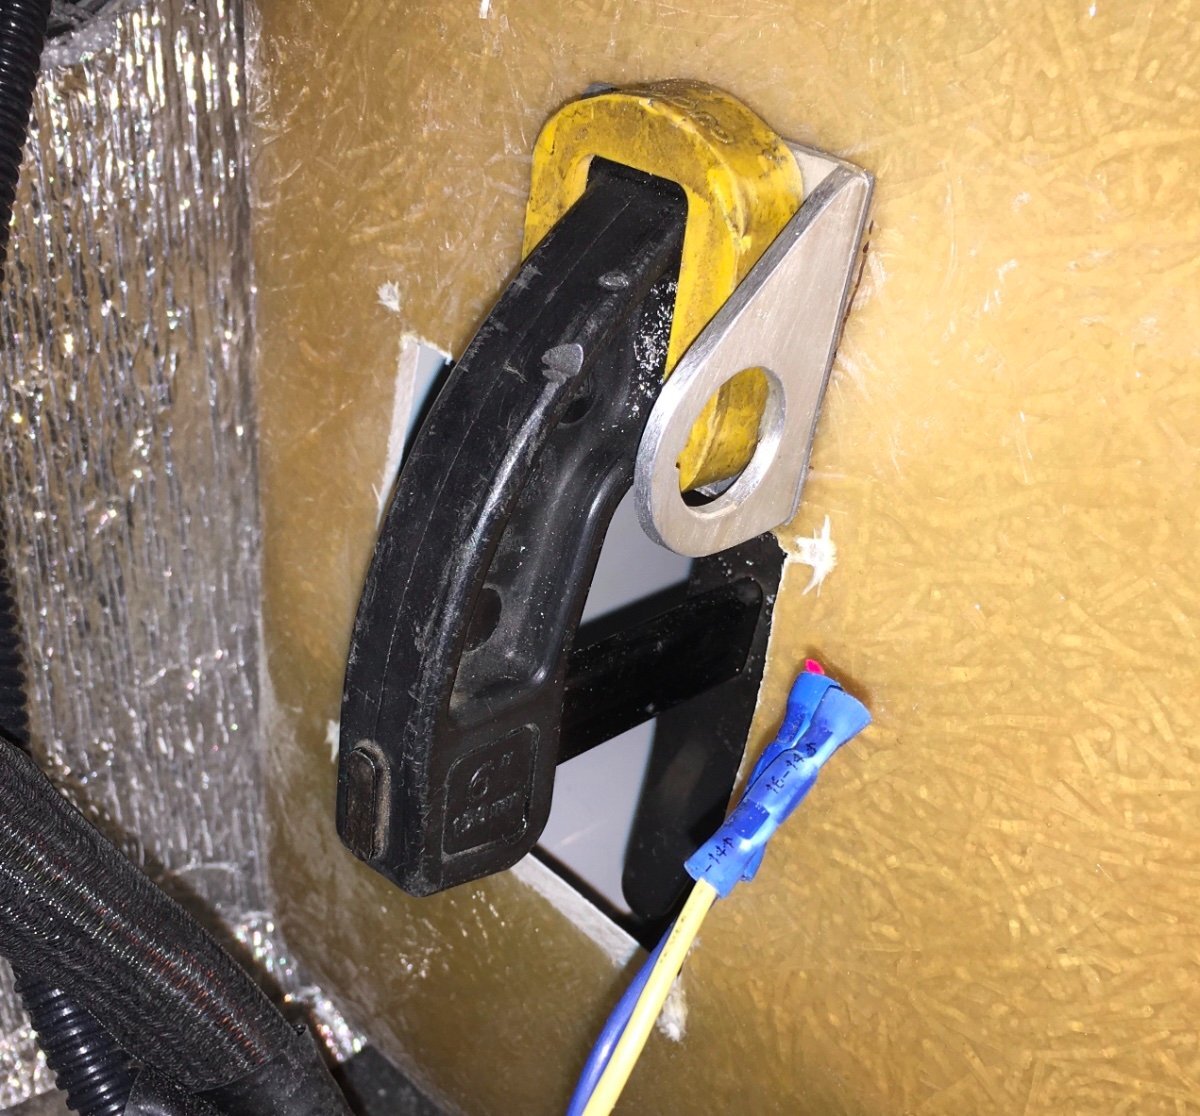
There's a thread here on the Forum that deals with the installation of an on/off switch for this detector. This sure does make dealing with that errant detector a 2 or 3 in the morning a bunch easier. Note that the pic below shows the bracket for the switch with the opeing for the detector in the background. Also note that it is good practice in using this switch you also have a method of warning yourself that the detector has been turned off and that there is actually NO propane and/or CO present. 2 inch square bracket for propane switch.PDF
2 points
-
Catalina is a beautiful park for sure. Those Oro Valley sunsets from the park are amazing. We stayed there in March 2023 and 2024. In 2023, we arrived just after the entry road reopened from a flooding event. In 2024, we were in the park and had park host informed us the road had flooded and we had to stay another two night or two. Darn 🤞2 points
-
I hope he is OK! Mossey2 points
-
Catalina State Park is one of our favorites. Looks like your at the site next to the trailhead?2 points
-
There is absolutely no reason to lube the inner tube.2 points
-
That statement is poor information. If fuses weren’t reliable why would they be in virtually every circuit in the world? Having two in a given circuit is a redundancy, but it’s never a bad idea and in many cases is actually a good idea as it protects the circuit from both ends. If you’re a decent mechanic you’d already know that there are two fuses and you will have to check both to find the fault.2 points
-
GJ, You bet! My kit is pretty basic and simple. Several shark bite fittings, a pex cutter from Harbor freight, two 3’ lengths of blue and red pex which I store in our Olivers closet. Naturally pex tubing can be picked up at Lowe’s, or most hardware stores in short 3’ lengths along with the below shark bite fittings and pex cutter. I just never like to be “flapping” if I can prep a little and fix it myself. Or even better, help someone else out. Two is one and one is none.👍🏻 Shark bite fittings https://www.amazon.com/s https://www.harborfreight.com/finger-release-ratcheting-pvc-pipe-cutter-62588. or here- https://www.amazon.com/Bates-Choice-Pro-pipe-cutters/dp/B09BVXZBLN/ref=sr2 points
-
I wrote a mod post on this. I strongly suggest moving the bus under the street side bed to the area under the rear dinette seat. Blow a fuse and remove a bed, what was OTT thinking?! 🤣2 points
-
I’d be curious to learn how the pedestal ends of RV “shore” power cables fare. Do they have the overheating issue? Do they occasionally charge or start on fire? Since the 30 amp receptacle on the pedestal likely gets a lot more use - and abuse - than the RV end - I would expect it to be an issue as well. I haven’t come across any burned-looking 30A receptacles in three years of camping at dozens of campgrounds across the country and into Canada. That’s almost counter-intuitive as they are exposed to a lot more hands, plugs of many different manufactures and condition - as well as the “attitude” effect of people often not treating other people’s stuff very carefully. Then again, I think the straight push-in style receptacle/plug are more rugged and intuitive than the twist-lock. I’d say all of the above is a factor as a reason sometimes mentioned is “Great, but what can you do about the pedestal end of the cable?” To which I’d say “Nothing really, but it seems to be less of a problem than the twist-lock end, and if something is gonna start on fire, at least it’s not on the side of your camper!”2 points
-
THIS is the stuff use on my cloths every year when going to the western mountains to fly fish. Once dry it doesn't stink or even smell at all, does a good job with ticks, black flies and mosquitos. Bill1 point
-
1 point
-
My best advice is long pants, long sleeves, light colors,a hat, and a high powered fan. I too hate wearing repellant, but I don't often spray my skin, I spray my clothes. So, they stink, not me. A fly_mosquito net can be necessary sometimes. At the Arctic circle some years back (def not a recommended road for fiberglass trailers, its a really, really crummy road), we took rapid fire photos trying to get one of us smiling. Not even the dog could smile, with all the mosquitos. We had intended to camp at the freezer campground, but opted to return to fairbanks.
1 point
-
And don't forget to remove the government regulated restrictor in the head of the faucet! When I used to travel for business a lot, I had a wrench and pliers in my suitcase so I could remove the restrictor from the hotel shower head. Got a decent shower instead of the designed trickle! Later I would nicely reinstall their device, prior to check-out! 🤣1 point
-
We use a couple of these “therma cells”. I can say they do work, and have served us well. Typically just turn it on set it next to our camp chair and no mosquitos. Strong reviews too! https://www.amazon.com/Thermacell-Cartridge-Repellent-Protection-Mosquito-Free/dp/B07JCQ8GQJ/ref=sr_1_2?dib=eyJ2IjoiMSJ9.1 point
-
Though it’s an old thread - looks like it’s already been re-opened. If anybody cares, these are the blocks/pads/stands we’ve been using for a few years now: https://a.co/d/6SwIden They’re rock-solid and spread the load out on softer surfaces. The main reason I like them is because at about 6” tall, they REALLY reduce the amount you have to extend and retract the jacks. All three of them. That not only reduces wear and tear - it really saves quite a bit of time when setting up or departing. Especially nice if you happen to arrive during a monsoon. (Which I got to do just last week!) In especially very un-level spots, I’ve had to skip the stand under the tongue jack to be able to drop the nose of the trailer enough to achieve level. Usually one of those “Oh Hell!” moments when you realize you’re out of jack travel and you have to jack the tongue back up, back up your TV again, retract the jack, pull out the block, extend the jack, move the TV -again- and re-level. In that case, I keep a lightweight “racing” floor jack for the purpose. A quick lift, pull out the block, and lower away. I also have three 12x14” 3/8” thick aluminum alloy plates to put under jack feet when on very soft surfaces. They’re actually company name plaques from former employers…1 point
-
Quite true. Never thought of that. I suppose if optimum flow rates are important to you, then this would be a factor. I would opt for ball valves in my land-based plumbing for this reason. I was always a little surprised that conventional valves had such small, restrictive passages. I’d bet that with all the fittings, valves, check valves, pump, accumulator, etc - there are already a ton of restrictions in Ollie’s plumbing system.1 point
-
Another "pro" for the SharkBite fittings is that they have a larger internal diameter. They go over the PEX pipe, where-as the crimp-on fittings insert into the pipe creating a slight restriction. Both types of fitting work fine, but I'd recommend getting a crimp ring cutting tool. They are inexpensive, and they make it easy to salvage crimped on fittings.1 point
-
Pros of SharkBites is that aside from a tool that cuts a nice, square end on the PEX tubing, you don’t need other tools. (You can use an appropriately sized open-end wrench to depress the locking ring on a SB connector should you need to remove it.) Cons - high cost. Conventional PEX connectors require a specialized crimping tool - though one that lets you use a ViseGrip Plier as the oomph will save you a few $$$ over a dedicated PEX crimping tool. If you don’t get a good, leak-free connection with a conventional PEX crimped fitting, you have to cut it off and start over. You can often salvage the connector by carefully cutting off the crimp ring. For a “lean” repair kit, you could probably get by with a 1/2” tee, elbow, and two straight connectors and a couple of feet of tubing. I haven’t priced SharkBites lately, but I’d guess that the above - plus the tubing cutter - could be had for about $50. (I remember SBs costing $10-$12 each for 1/2” ones - but that was two or three years ago.) You’d probably spend that much on a decent PEX crimping tool by itself. As someone else already mentioned, installing PEX “below deck” in cramped quarters can be a bear. (I think I just talked myself into SharkBites!)1 point
-
That's a good idea. Can you share what you have in the kit so we can replicate it? Thanks GJ1 point
-
@jd1923 Check ALL your white compression fittings. And like Mike said a blue paper towel is your friend and will really help identify the culprit. Before, after and even periodically while traveling I always make it a point to pull the hatches and check the compression fittings especially the ones that are in the very belly of the hull. Vibration is no friend to these compression fittings. Once in a while I will find that one or two not completely loose but do need snugging up by hand only. I also carry a shark bite and pex tubing repair kit. Good to hear that those stainless steel “scuppers” are doing their job allowing the water exit the belly of the beast.1 point
-
This was a reminder that some state and federal campgrounds have very small sites, particularly in older parks. Unfortunately it’s difficult to know that ahead of time. For instance, we’ve spent many weekends at Jedidiah Smith with our Elite II, and there are plenty of usable sites. However, you wouldn’t know that from the website, and the Rangers might try to discourage you because some people will block the road. We always drive the loop to see for ourselves, and we keep maps of every campground we visit with the best sites noted for future stays. Sometimes Google Maps (satellite view) is helpful to check-out the sites beforehand, as long as it's not forested.1 point
-
I've lived, worked or played in 51 countries. Wish I could do it all over again! GJ1 point
-
John, I had a small leak that caused drips from the curbside rear. With the water pump off and no city water I could see no leak under the bed in that area. Turn the water pump on and I found a leak (one drip every few seconds) from the T joint coming out of the hot water tank. It was a plastic joint and many miles of traveling obviously caused a very small crack at the bottom of the joint. I replaced it with a brass fitting and no issues since. There’s not a lot of room down there to maneuver tools and I had a sore back after I got it fixed. A blue paper towel helped in locating the drip. Good luck! Mike1 point
-
Late last year a number of us experienced the alarm going off after winterizing with RV Antifreeze. I purchased the same one and used small Wago connectors. The install was easy. However I must have touched wire ends, as there was no power to the unit. Turns out I blew the fuse for it. This fuse is under the street side bed, below the 3 jack fuses and is black. I also carry a battery operated one as back up.1 point
-
I don’t have a brick in this wall, a horse in this race or a dog in this fight, I just stumbled upon this “older” video from James of The Fit RV testing a smart plug…. so just an FYI!1 point
-
7 pin plug cradle (also keeps it dry).1 point
-
Ditto. I would only say "Danger Will Robins Danger". There is a good reason OTT cut off the corners of the front box. I and many other owners have the "witness marks" to prove it. 😞
1 point
-
Sea Biscuit Metal Designs has generator boxes that are enclosed specifically designed for Oliver TT along with other accessories. I know a lot of owners have them.1 point
-
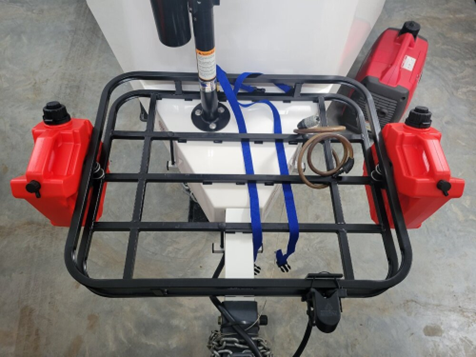
I would be more concerned when turning sharp corners or turnarounds with your setup; even backing up into a campsite pad could be challenging, which is usually not a straight shot! Aside from that, you’ve made good use of this valuable real estate; really like the gas can mounts. Many owners have added weight to the tongue and seem pleased, rear additions or not. Good luck with your endeavor!1 point
-
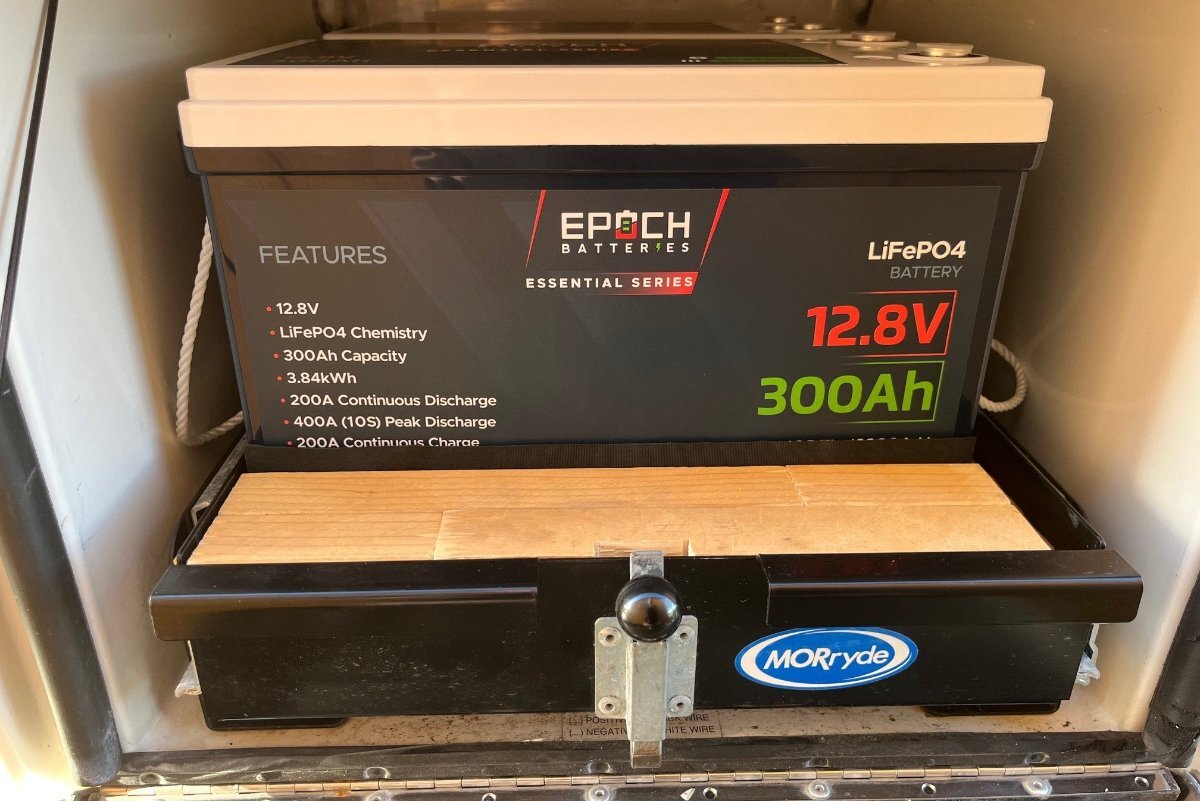
Good work and clean installation @Derek B! I can attest re Epoch. During our recent trip we parked at a friend's house in Ruidoso NM and spent two nights in their wonderful king bedroom suite! I generally check SOC and inverter status, Ruuvi temps and every related Bluetooth app 2-3 times a day when camping (not this time). The Oliver was out of sight, out of mind, as we truly enjoyed our visit. My friend asked if we wanted to plug in when we parked, and I replied, "We'll do it later." and then I forgot. We had the old Dometic absorption fridge on DC for the long day driving there from West Texas and the next two overnights. Forgetting all about it, 48 hours later our two 300AH Epoch Essential batteries were at 4% and 5% SOC according to the Epoch App. Plugged into the house 110V outlet at 5 AM and when we left by noon, we were up over 60% with the charge rate set to a conservative 50A on the Multiplus II (can be configured up to 120A and the Epoch can take an amazing 200A in or out). I've run ours on purpose down to 20% SOC many times in testing, by running the A/C for 4 hours, our new oven and other AC appliances. I would not think to run brand new LiFePO4 batteries under 10% SOC on purpose, but no apparent issues arose from doing so. We're loving the performance of these batteries!
1 point
-
Just installed the replacement Furrion shore power receptacle. It does appear to be wired with 8/3 AWG cable, the same black rubber insulated cable that I noted when installing the EMS in our Oliver. Not that you would need any for this task, but this is the cable: 10 Feet 8/3 SOOW Cable Cord Wire - 8 Gauge 8 AWG 3 Conductor 600V Portable Power Extension Cord Cable with Ultra Flexible CPD Insulation Jacket: Amazon.com: Tools & Home Improvement Replacement is truly straight-forward. They even mark the back of the unit with black, white, green circles to make wiring simple. Make sure you place the gasket and rear cover on the cable prior to wiring. I cut the wires back about 3/4" so that the connections would hold to clean copper (just enough length to do so). Oh cr@p, what happened to the warning labels!?! I swear there was one above the outlet and another inside the cover, wt. WARNING - possibility of bodily harm if you somehow position a body part between this receptacle and a power source! Instead, please use the power source without involving the manufacturer's product. WARNING - Those who admit to reading this may be held liable! 🤣 The shiniest new part (and 2 SF) of our Oliver!
1 point


-
Recent Achievements
-


")


")


")


