Leaderboard


Popular Content
Showing content with the highest reputation on 04/01/2025 in all areas
-
I just wanted to share the absolute amazing experience we had with David and Kristine Hess, Jeff and other team members at Sea Biscuit Metal Designs, Johnson City Tennessee. We had the Oliver rear basket installed today. What great service! David, Kristine and Jeff greeted me, and Jeff got right to work on the installation. The rear basket is extremely well crafted, made with high grade materials and expert craftsmanship. An awesome addition to the Oliver!! For those who do not have the Oliver OEM rear bumper receiver option (like us), no problem as Sea Biscuit will provide the hardware necessary to mount the rear basket. Now what happened next is service I have never experienced before! Long story short, after all the hugs from Kristine and David, (yes they love meeting and hanging out with their customers!) I hooked up the trailer, did all my checks, put the tv in drive and as I slowly took off I felt some resistance. Must be the emergency brake I thought, well, turned out I forgot to raise the tongue jack! Yes, I know, I guess I was just so impressed and excited about the new basket, and the excellent service that I forgot about the jack! I usually use 6”x6” blocks on all the jacks for 2 reasons, to avoid extending the jacks too much, and secondly for this exact reason, ie if for whatever stupid reason I forget to raise the jacks they will just slide of the blocks. Needless to say, the tongue jack inside shaft was bent backwards approximately 45° and buckled. Anyway, that’s when David, Jeff and team jumped in, Dave cut off approx. 4” where the shaft was bent/buckled, aligned the 2 straight pieces then welded them back together. This was shortly before noon, so the team worked into their lunch hour and David had to push out another appointment! I obviously offered compensation, but David refused! I cannot express my gratitude enough to David, Jeff and team! Sea Biscuit is a great company and David, Kristine and their crew are awesome people!!! Thank you so much again!
 7 points
 -
SOLVED - I think… Well, I feel a bit foolish, but the outside shower valves were open. They didn’t feel like it, but they were. Turning right (righty, tighty) there was considerable resistance, so I assumed (ass-u-ME) they were closed. Not the case at all he said blushingly. Dang I feel foolish! I believe a good test coming out of winterization, is to try and turn the shower valves on. If you hit a hard stop, they are on. A slight wiggle when turning right just may indicate an open valve. The temps went up to 96° before I turned the water off. The good news is the Truma is decalcified. Bad news is I am embarrassed.🙈4 points
-
I see now in the pix that your trailer doesn't have solar on the roof. Sorry I forgot to look closely. Yes...you'll be good to go with new batteries that are being charged with 45A when plugged into shore power as a first step. Future: Rewiring for new Xantrex 3000 to run your A/C When you upgrade in the future to a Xantrex 3000 Inverter/Charger that you'll also likely be wanting to have some of the wiring swapped around to enable you to run the Air Conditioner off of the inverter and battery. In older units (Pre 2021) the Xantrex 2000W Inverter only unit, the AC inverter outputs are routed only to the Outlets of the trailer plus the Microwave outlet. The older units inverter is not wired to a breaker to feed the Air Conditioner circuit. In the day of AGM's it wasn't really a viable option to run AC off the inverter. Those wiring swaps will happen on installation of your new Inverter/Charger, and most changes happen on the back side of the PD4000 breaker box under the dinette. You'll also be needing to find a location for the new Xantrex 3000 display panel once the new Inv/Charger is in place. For future reference, here's a picture of the area under the street side bed where our Old Xantrex inverter was and the new Inverter/Charger was placed. It's the exact location of our hulls original Xantrex 2000 Inverter. We had to remove the old inverter and install a new carrier board for the new - larger size inverter. I could have gone with an Xantrex 3000 but did my design as a drop in replacement as opposed to a full upgrade for running the A/C off battery. Battery Box: You may or may not need to take out the battery tray. It depends on the height/size of the new batteries. In our upgrade we put in 2 - 315AH Lithionics and they fit in the tray with some spacers to take up extra space. Other folks that have upgraded to the larger form factor >400AH batteries have needed to remove the tray because the new batteries wouldn't fit the tray. Final Cable Cleanup: At the time that you do the upgrade of the Xantrex, you may want to consider cleaning up all the various wires that come into the battery box. This is what our 4 AGM cabling looked like at the factory. After cleaning up and adding buss bars you'll only have big battery connection cables left in the box. THIS is completely optional and not necessary but clearing out clutter makes troubleshooting on the road much easier. To clean up the mess of cables you would have all the grounds run to a single buss bar (under the street side bed) and then just one ground cable to the battery box. Likewise for the + 12V cables (red) that run out to the battery box. Good luck on your journey to Lithium. CS
4 points
-
Hopefully you were able to check which PD Charger section you currently have and order the direct replacement. Oliver factory either put in a 45 or 60 amp charger. (Example: Our 2019 has a 60amp version - 4060CSV) Answer: YES - you can charge as large a battery bank (Pair) as you wish and it will simply take longer as it's only putting out 45A or 60A depending upon model. Example: Charge a pair of 300AH batteries (600AH total) from 50% to full charge) - you are essentially charging 300AH. With 4045CSV best case would take 300AH divided by charge rate of 45A/Hr = 6.6 hr. With the 4060CSV 60A model it would be 300/60= 5hrs. If you had a new inverter/charger and set it up for 120Amp charging it would take 300/120 = 2.5 Hrs. Solar Controller and charging expectations: For your specific trailer do you have ROOF Mounted Solar Panels, or just external on the ground panels? Roof Mounted Solar: If you have roof mounted solar on the roof then you should also have a ZAMP display and control panel on the wall of the trailer. The roof mounted solar panels provide either 360W or 380W depending upon unit Those panels on the roof connect directly to the ZAMP Charger/Control panel on the wall of the trailer and from there down to a buss bar in the basement street side...and thus to the batteries. On the ground panels: The Exterior ZAMP connector is connected to a buss bar which then connects with wires to the batteries. The solar controller is normally "with the ground panels". If you have only one 180Watt panel you'll take a very long time to charge. The ROOF mounted panels typically put out about 12 AMPS so to fully charge 300 AH that could take 300/12 = 25 hours with direct sun. A 180Watt ground panel typically will output about 6 amps in full sun and that would take 300/6 = 50 hours to charge. What we've found with our setup with >630AH total lithium, 380Watts Solar on the Roof: We we use about 100AH/day using all appliances, tv etc. but NOT using the AC off the battery. That means without any hookups we can off grid for about 6 days...before we are running low. Hope that helps. CS3 points
-
Thanks Bill, I’m just irritated at myself. But… some good stuff were a result.2 points
-
Thanks for letting everyone know! Relax in the knowledge that you are not the first and will not be the last to have this kind of issue. Certainly, I've been in that boat a bunch of times. Bill2 points
-
Decalcified the Truma, but it’s good news- bad news. The water is much warmer, but it’s in low 80s. The temp is consistent now, so I guess I’ll run the decalc process again. Almost had a genuine OH SUGARFOOT moment. I did the flush in the bathroom, forgetting to open the drain. It had about an inch to go when I remembered to hit the switch 😳2 points
-
When you look into the toilet bowl you should see a black "ring/gasket" around the outside of the rounded part that moves when you step down on the pedal to flush. This gasket can get "stuff" stuck to it. "Stuff" can be all sorts of things to include mineral buildup. After cleaning the toilet you should gently wipe that gasket feeling for any deposits. If you can't get those deposits off and/or if the gasket is brittle then it can be replaced. On the other hand - if it seems to come clean you can then put a small amount of plumber's grease on it to keep it mineral free. Bill2 points
-
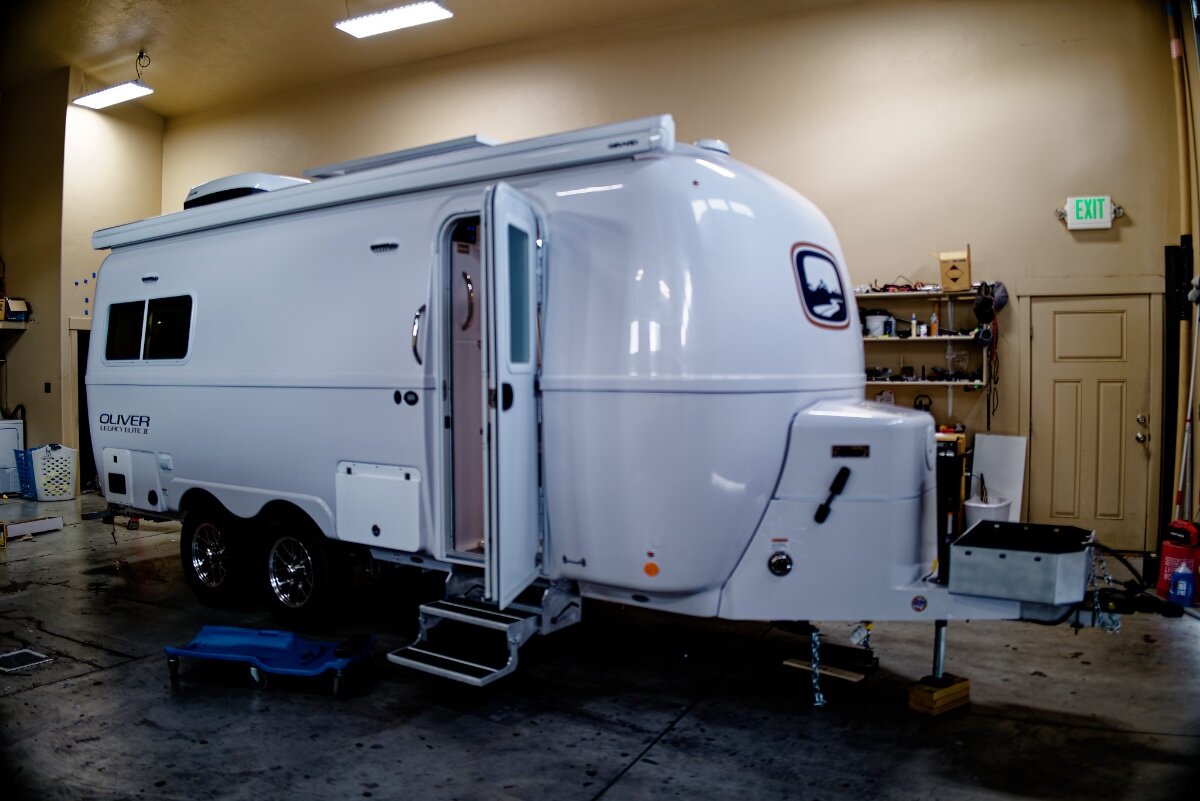
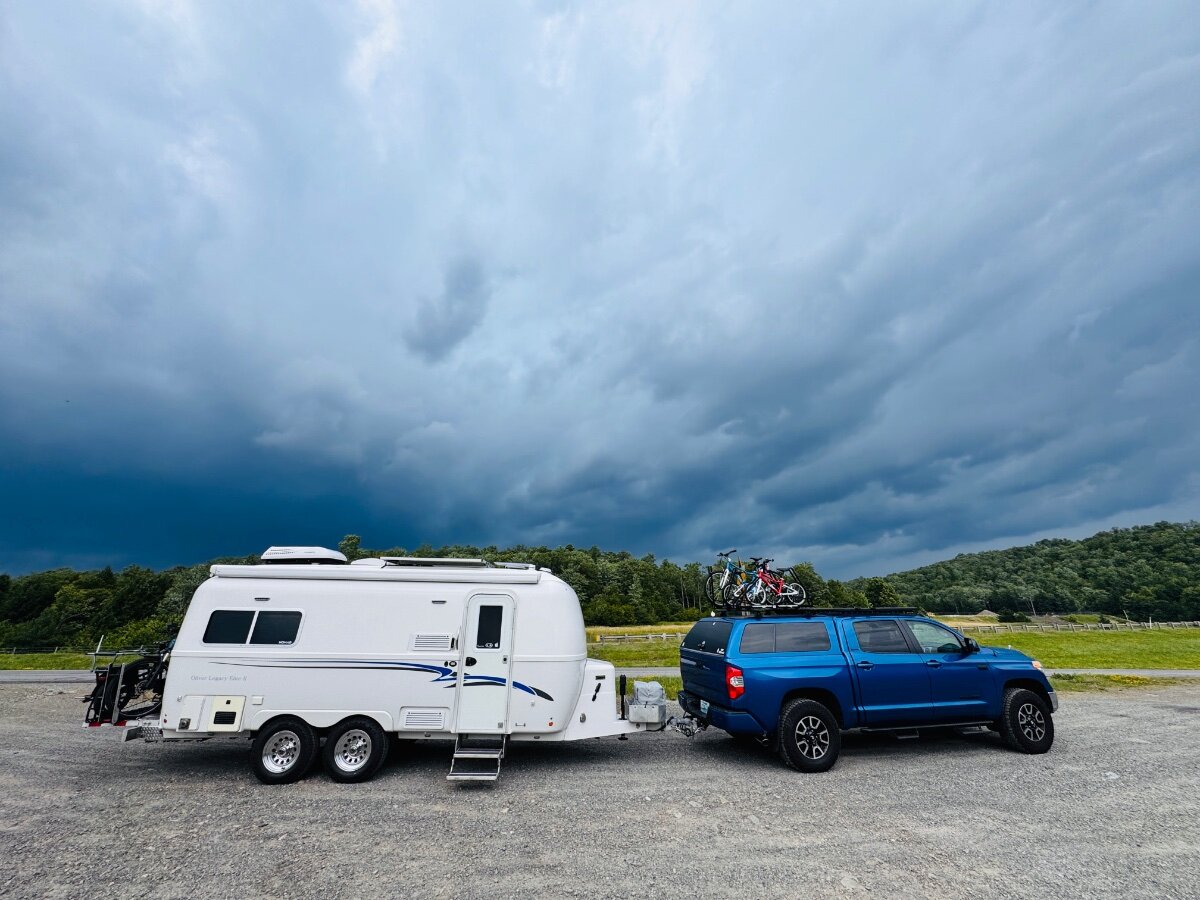
Thanks to Neil’s RV in Orem Utah! Our ‘shakedown’ trip completed (5000 miles over 18 days!) with 50-70 mph crosswind gusts… Very happy!
1 point
-
FYI - Garmin has released a map update for GPS devices (at least the 890 and the 2797 models). This update must be fair large in that it took about 45 minutes to download and install. Bill1 point
-
Removed: Old Xantrex inverter, transfer switch including ac legs IN/OUT, charger from PD4000, Trojan batteries, Battery tray Mods: Wired Outlet and microwave circuit directly to breaker, mounted pos and neg bus bars using Star board (heavy), Pulled all wires from battery compartment except 4/0 pos and neg, ran wires for Epoch battery remote battery on/off switch and external battery level indicator, COM port from battery to MP2, Re-used all electrical wire (Used some new lugs and heat shrink), removed 10/3 main shore AC from EMS to PD4000Installed: POS and Neg bus bar, (2) Epoch 460 ah batteries, battery wire zip tie holders Waiting on MP2 stand to give lateral support since it will be mounted horizontally. May still bond starboard to fiberglass wall to fixate MP2 but it weighs 49lbs so I want the extra support from stand. We shall see if it fits with some modified aluminum support for feet.
1 point
-
I tested the Truma yesterday, and only got lukewarm water from it. I haven’t dug into the manual yet, any ideas?1 point
-
The best news is everything works, so embarrassing ones self is a lapel pin we all wear. It is a club of honor.😊1 point
-
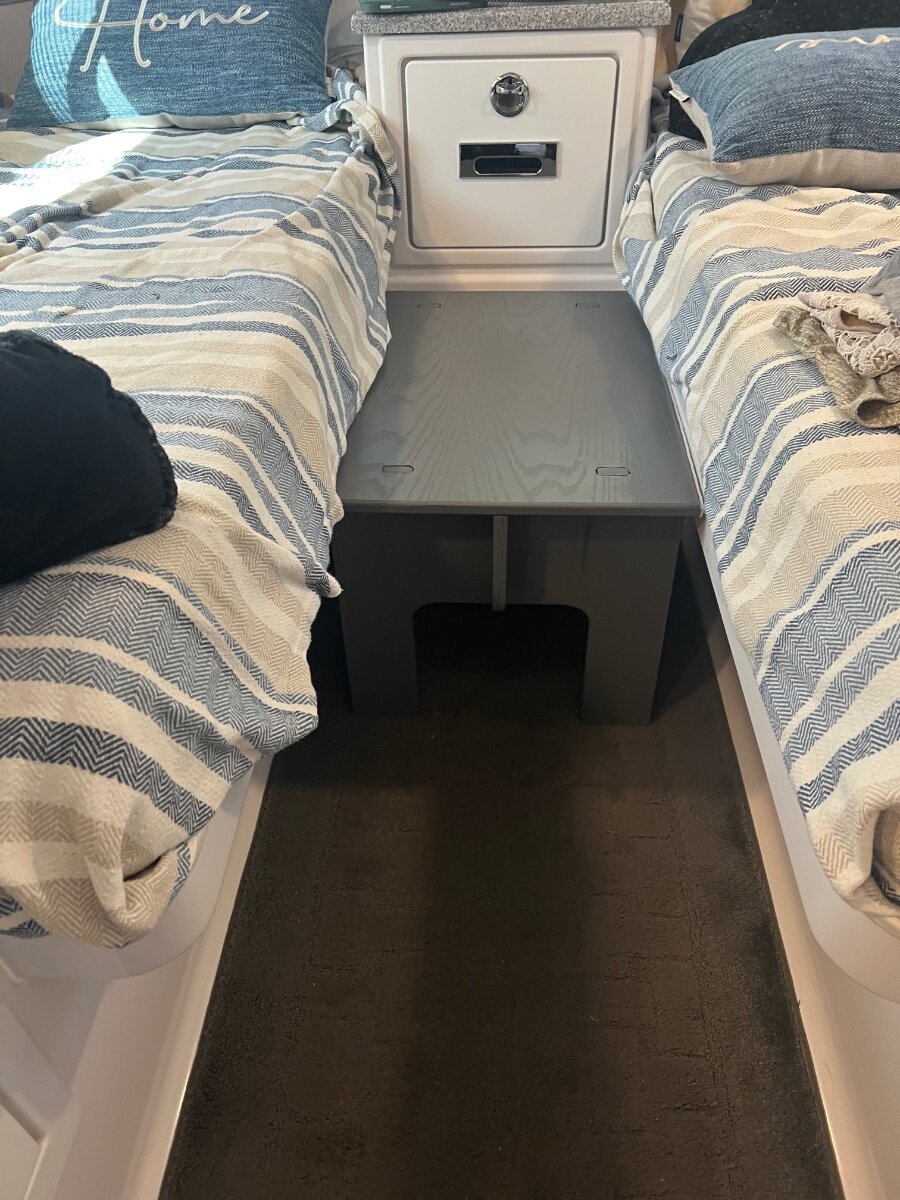
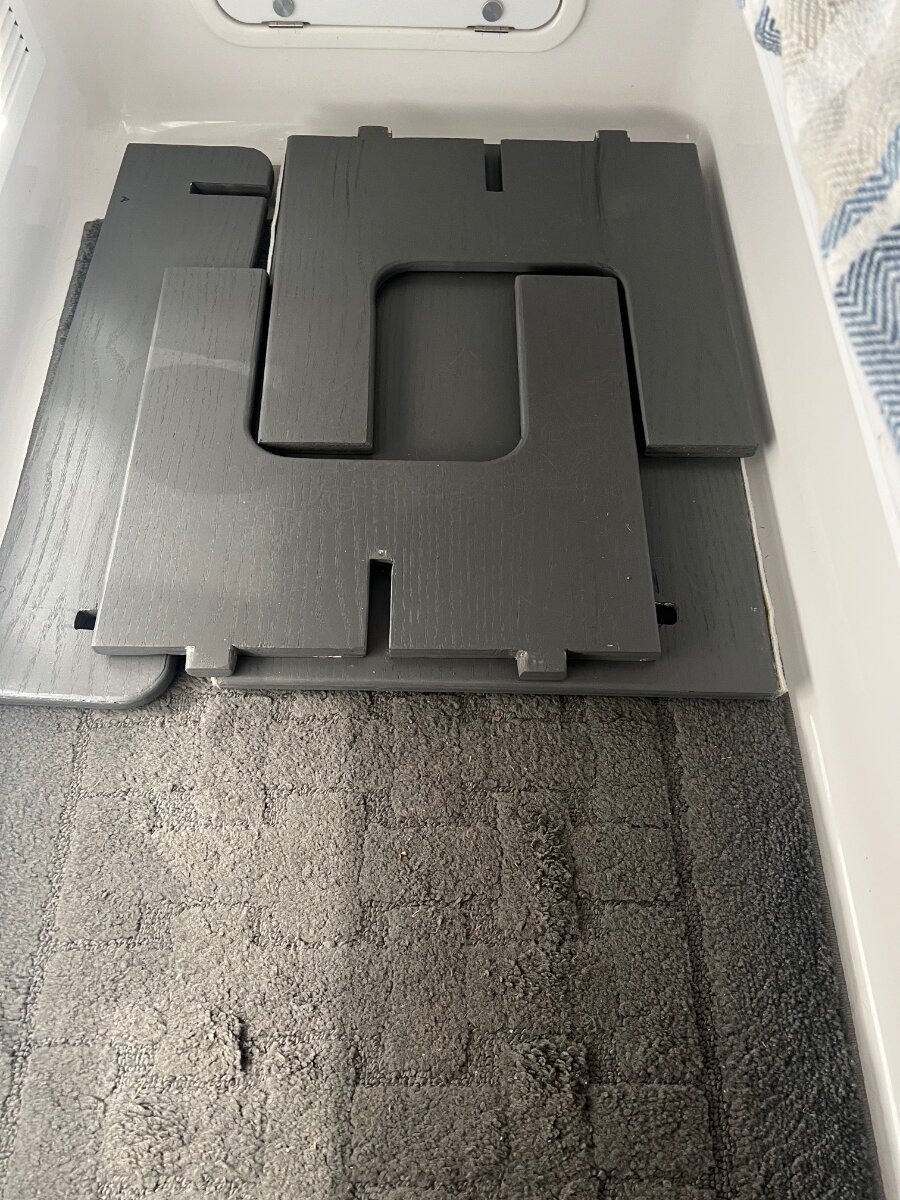
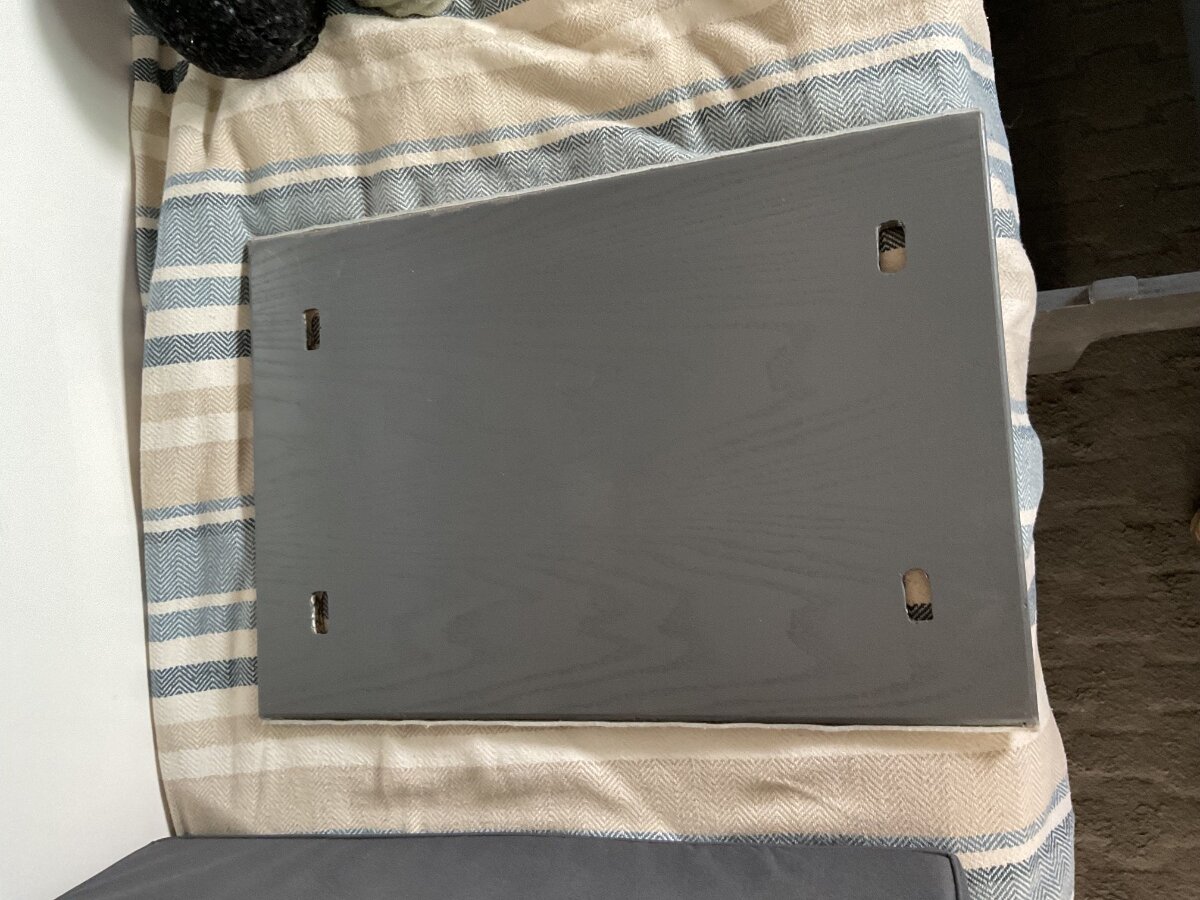
I wanted to construct a dog bed for use with the twin beds that was large enough for our golden, provided room to easily get in and out of the bed, and collapses to lay on the floor. The two cushions were made with foam from Amazon and the covers by an online custom cover supplier. The cushions can also be used for a backrest for both the twin beds while watching tv and when converting the dinette to couch. I attached felt to the edges of the platform and applied clear adhesive film to the fiberglass to prevent wear.
1 point
-
Where's the pic of the pup?😀 Bill1 point
-
I keep hearing nothing but good things about these folks and their company….1 point
-
Ron, Sorry, I asked about the Alternator before I scrolled down.1 point
-
Anita and I do love our Buc-ee’s adventure. Mad house, YES! And it drives me CRAZY when people get gas, leave their car for 20 minutes to go in and shop. OK, Rant over.1 point
-
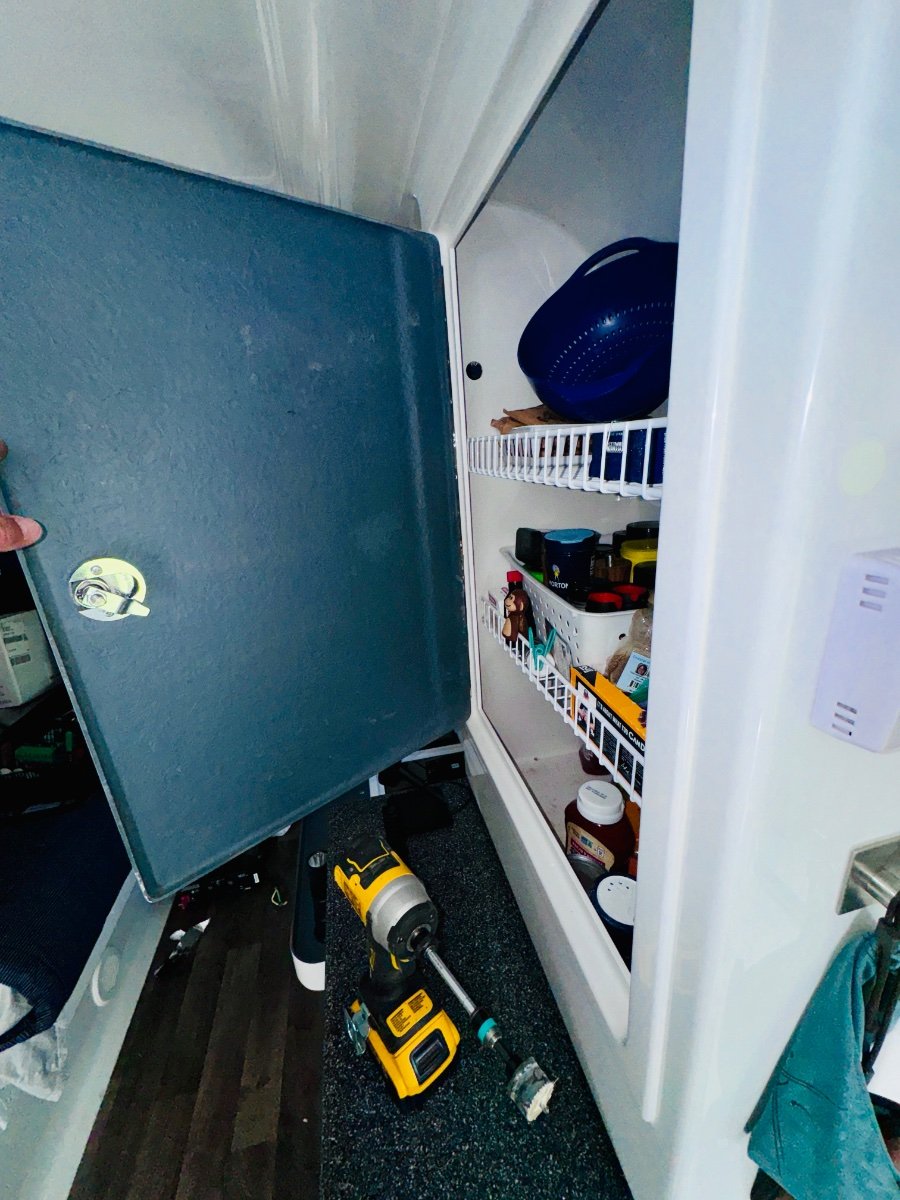
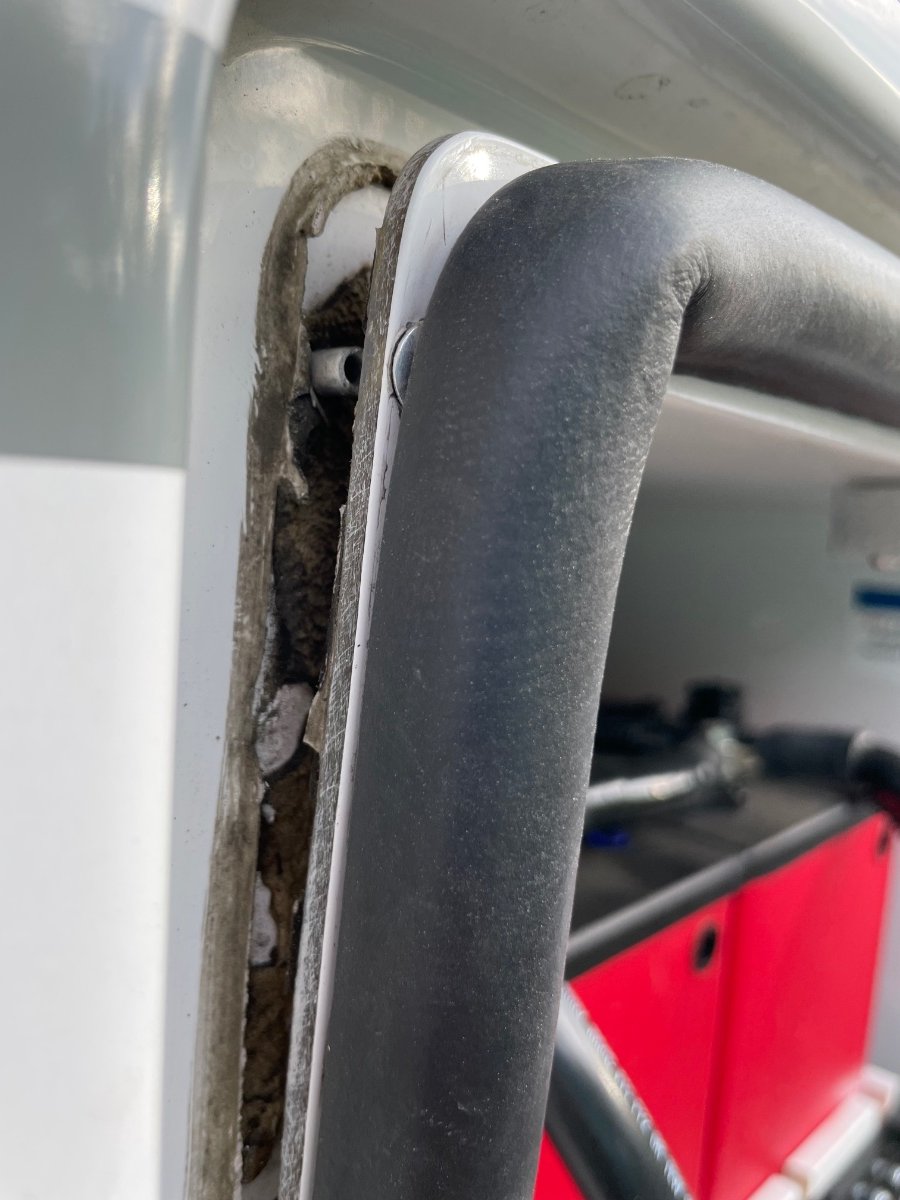
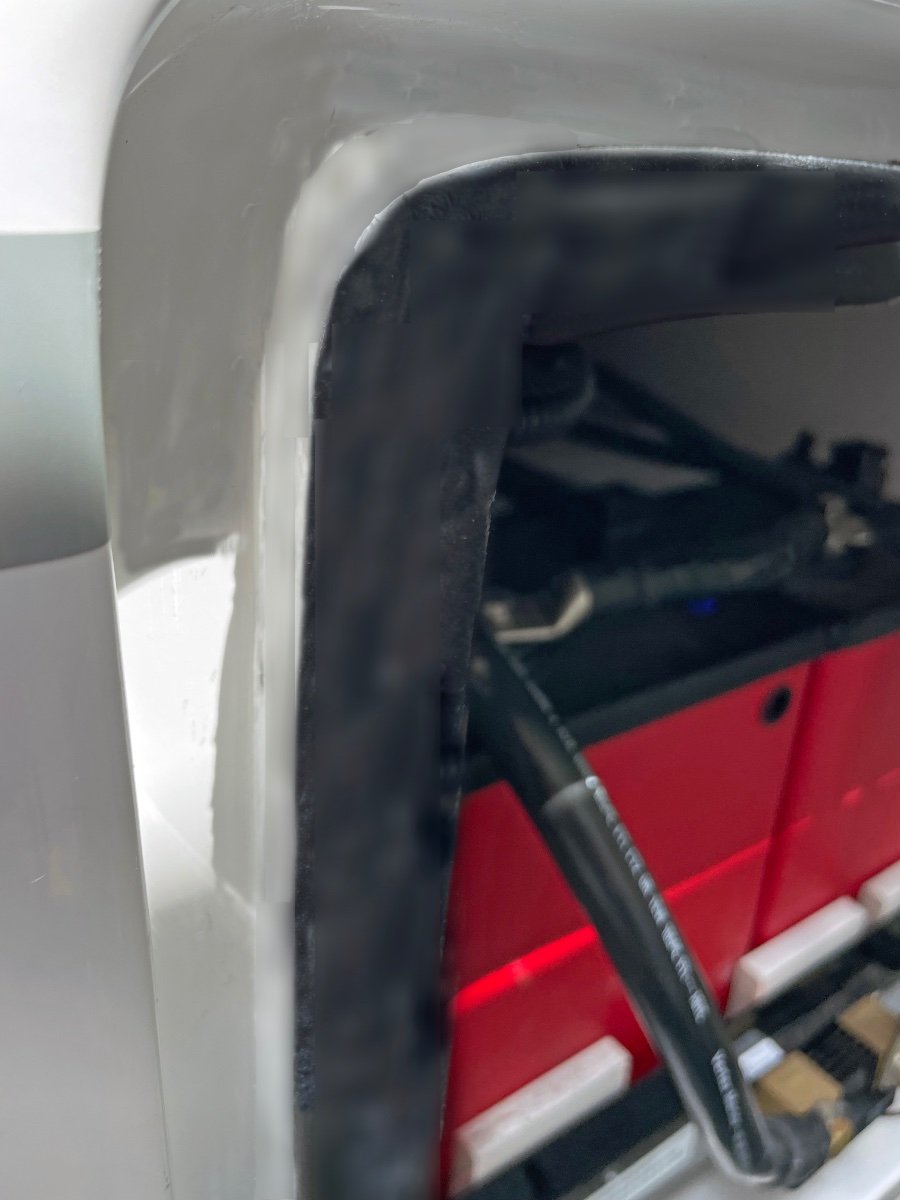
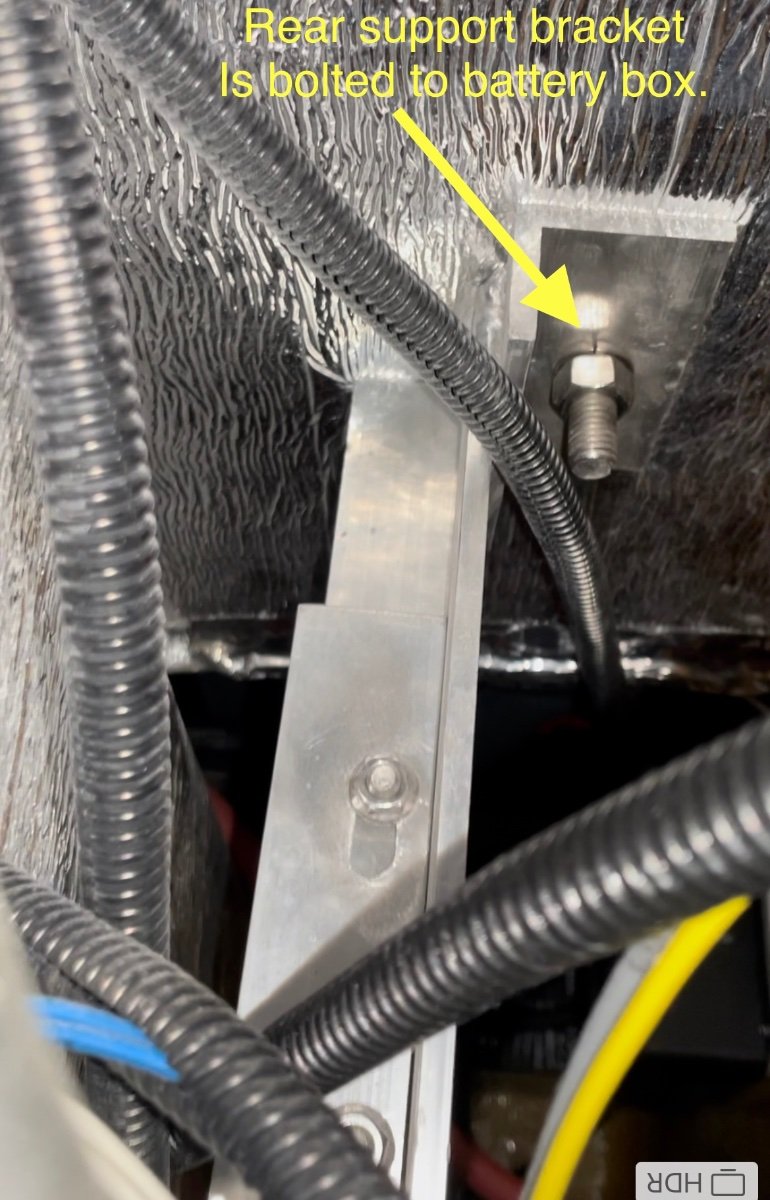
This spring as we were prepping for a new road trip, I noticed the battery box door seemed to be sticking out further than normal. I thought I would adjust the latch to pull the door in a bit tighter. What I found was that the battery box had started to tip forward away from the main hull as shown the pix below. All the rivets up both sides and all across the top of the box had sheared and the box was tipped out about 1/2". I contacted Oliver Support to understand how the box was designed, mounted etc. They cleared me for travel after having me check the support strut inside the trailer (under the pantry area) . After some further consultation I was able to perform a repair. Here's a sketch of how the battery box is installed in our Hull 505 (2019 Elite II) trailer. The repair steps I took following Oliver instructions were: 1) Remove the batteries from the slide tray to get weight off the box. 2) Drill out all sheared rivets. (3/16" bit) 3) Release the 2 support bracket bolts inside the trailer under the pantry (one of which is adjustable). (This step is a pain and requires some long extensions for the ratchet wrench to make reaching nuts possible.) 4) Tip box back into position. (Check that the box base still has a slight outward tip for water drainage.) 5) Re-tighten support bolts. 6) Re-rivet all around the perimeter. 7) Clean seams and add a bead of boat life white sealant around the battery box seam. (See pix below). Repaired Box Above: Door closes with a good seal all around and the box sealed to the body. We are going to keep an eye on this as we travel this next year, and make a trip to the Oliver factory for them to inspect and repair if necessary. I'm not sure of the root cause or mechanism by which the box tipped out in the first place. One concern would be that the box is putting too much pressure on the outer hull while bouncing down the highway. I don't see any indications of cracking in the glass hull or box at this point. Hope this helps if anyone else see's an issue. Craig Hull 505
1 point
-
Ran into problems with aluminum pop rivets often when I built and worked on boats. Aluminum rivets are very much subject to corrosion, particularly if used with a dissimilar metal (say stainless or bronze) or in the presence of moisture. Aluminum rivets are just plain weak, particularly around the heads. Stainless pop rivets are much stronger than aluminum and would be my choice, especially if unable to get any type of backer onto the rivet. Stainless 3/16" pop rivets do require some significant body strength to install unless you have a power rivet tool so invite your uncle Guido over for the install. If sticking with standard hollow rivets is your choice than adding quite a few more rivets around the perimeter will spread the load. If you can upgrade a smaller rivet to a larger one, say 5/32" to 3/16", this will give you a stronger fastener and help clean up any fractured glass/resin around the rivet hole as it will increase the surface area available to support the new fastener. I don't think the aluminum rivets would be cut or abraided at all by the glass in a layup ... particularly a chopper gun hull as used by Oliver as the percentage of glass to resin is very low and the glass strands are not oriented.1 point
-
One of my friends carries his own shower head in his luggage.1 point
-
ZLarryb, the plastic connector/tee fitting nut is the red notation. the black plastic tie-down is the yellow notation. the green arrow is pointing to the green "witness marks". Witness marks are sometimes used to mark a 2 part connection like a nut and bolt or in this case it marks both sides of the water pipe connection. It is marked during installation on both sides of the connection and it is a quick visual confirmation of a connector being in the original position or not. Due to the angle of your picture, I can’t verify its position because I can’t see both side of the mark, but you can do a quick verification. Mossey
1 point
-
Waiting may be good, but be prepared! I waited over four years and finally decided on the Atmos 4.4, no regrets! I especially love how quite it is; this ‘light sleeper’ no longer needs earplugs at night, and we can easily watch TV and carry on a conversation at the same time regardless how far apart or chosen fan speed. As for the continuous fan run when in Cool Mode, not a concern of mine. If ever a spike in cabin humidity is detected, Dry Mode is activated which rapidly drops the moisture level. However, a small room dehumidifier helps to mitigate such issue and high cabin humidity is a rare occurrence. I truly like the feel of continuous air movement via the ‘swing function’, whereby up and down circulation is felt at the furthest reaches within while factoring in the higher operating CFM rating of these units. The ‘cool breeze’ is an added comfort and talk of mods to make change are unnecessary measures IMO. Like others I too am disappointed in the cost increases and thus, so glad I didn’t wait any longer for the ‘ultimate’ unit that may or may not become available and at what price. ‘Nuff said!1 point
-
We just took the brackets off the wall and stored them 🙂 Didn’t let the anchors bother us. You could use a white square plate and a white flat head screw to fill it.1 point
-
Had that happen once...the cause was the exterior faucets were on (but the nozzle off) causing internal mixing of hot/cold water. The time I had winterized I forgot to turn off both the hot and cold taps. I didn't know they were on because the nozzle was clicked off. Once I made sure both hot and cold taps we're OFF, the unit heated right up. Craig1 point
-
Dunno why the mfrs of RV air conditioners haven’t included the features that even cheapo window units have. Though sometimes I like a fan running all the time just for circulation sake, most of the time I want the fan to shut off. That said, I want the fan to run until the evaporator coils have equalized in temperature before the fan shuts down. I forget what they called that setting on my last window units, but it was nice. If/when the fan and compressor shut down at the same time, you have all that nice cold just wasted there in the housing. May as well blow it out into the area you’re trying to cool, right? I think a lot of folks buy too many BTUs and it’s counterproductive from what I’ve read. If you cool the room (trailer) too quickly, you don’t move enough if the room air across the evaporator coils to adequately dehumidify the air. That’s (more than) half the battle in making interiors comfortable when it’s hot and humid. As I understand it, there’s a new generation of high efficiency a/c’s that use another method of reducing humidity.1 point
-
Same here. We fill our FWT w/softened water from our well - to include our 7-gal spare water container that lives in the TV. But on occasion, we find ourselves refilling with water of unknown pedigree while on the road - so we'll run a vinegar solution through the system (usually at some point over the winter months), FYI.1 point
-
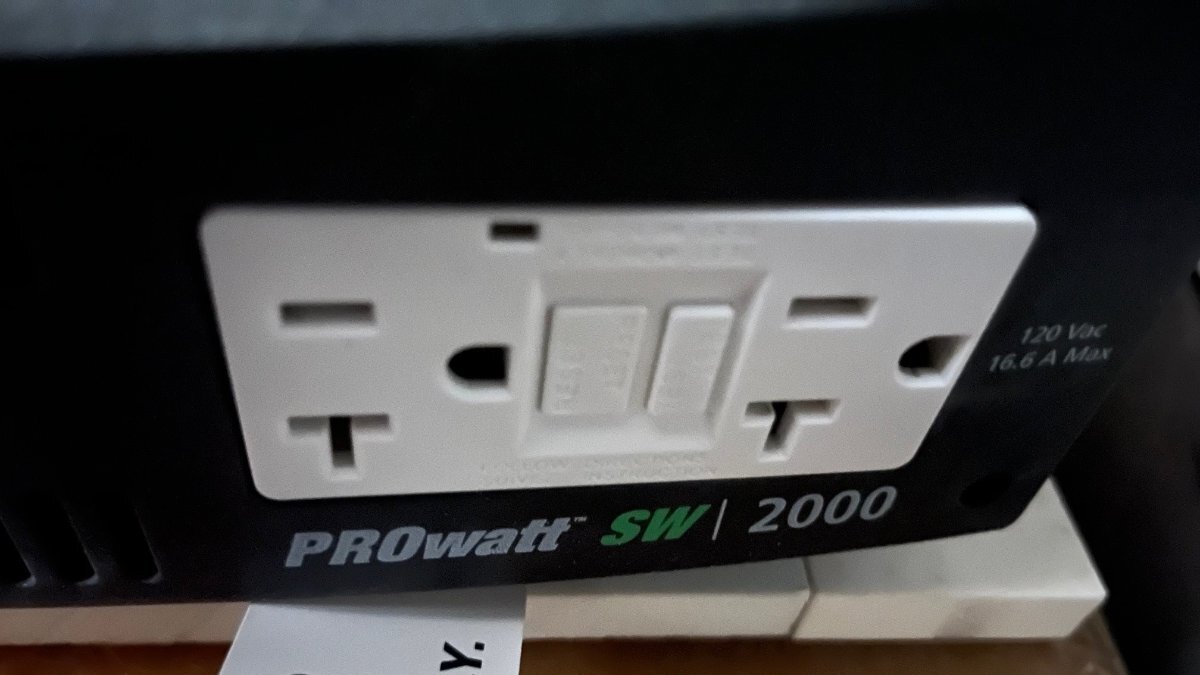
Same here and that means there is no GFCI unless running the inverter. It's also odd that Mike with hull 308 has a GFCI outlet and your hull 628 does not, like my old hull 113 does not. Why? I believe we have two generations of OTT hulls and Xantrex products, mine being a 2016 and yours a 2020. My 2KW Xantrex only has 6 possible connections. On the backside with the fans, there are 3 DC connections, B+ an and B- connected by 4/1 AWG cable directly to the batteries and a 6AWG(?) ground that connects to the yellow ground bus under the rear dinette seat. The front side does have a dual GFCI outlet, rated 120 VAC 16.6A, the monitor cable and LCD screen The older Xantrex in our hull does not have what you wrote "20 amp feed to the AC input of the Xantrex." Do you have the more modern look Xantrex, fully rectangular, squared edges painted gray? Or does yours look like mine, rounded edges metal looking black vinyl coated? I believe you have the newer generation Xantrex. BTW, who cares! I'm ripping mine out end of July, the Xantrex, the Xantrex ATS, the funky little electrical box stuck in the corner that connects inverter supply to most 120V circuits, all the but the A/C. I will show my work here and looking forward to seeing yours. All that matters, is... After all the old is removed, you connect the Victron MP to the batteries in the same way and to the ground bus. You connect shore power from the PD5100 ATS to the AC input and connect the 50A L1 output circuit to the entire Oliver 30A AC panel. This time including the 20A breaker for the air conditioner that was previously bypassed. Can't wait! Pictures to follow: 1) GFCI close-up on inverter 2) PROwatt SW, with junction box above and inverter below 3) Rear Dinette seat with PD5100, self-installed EMS, Xantrex 2KW inverter and self-installed KISAE TS20 switch for running A/C on inverter.
1 point
-
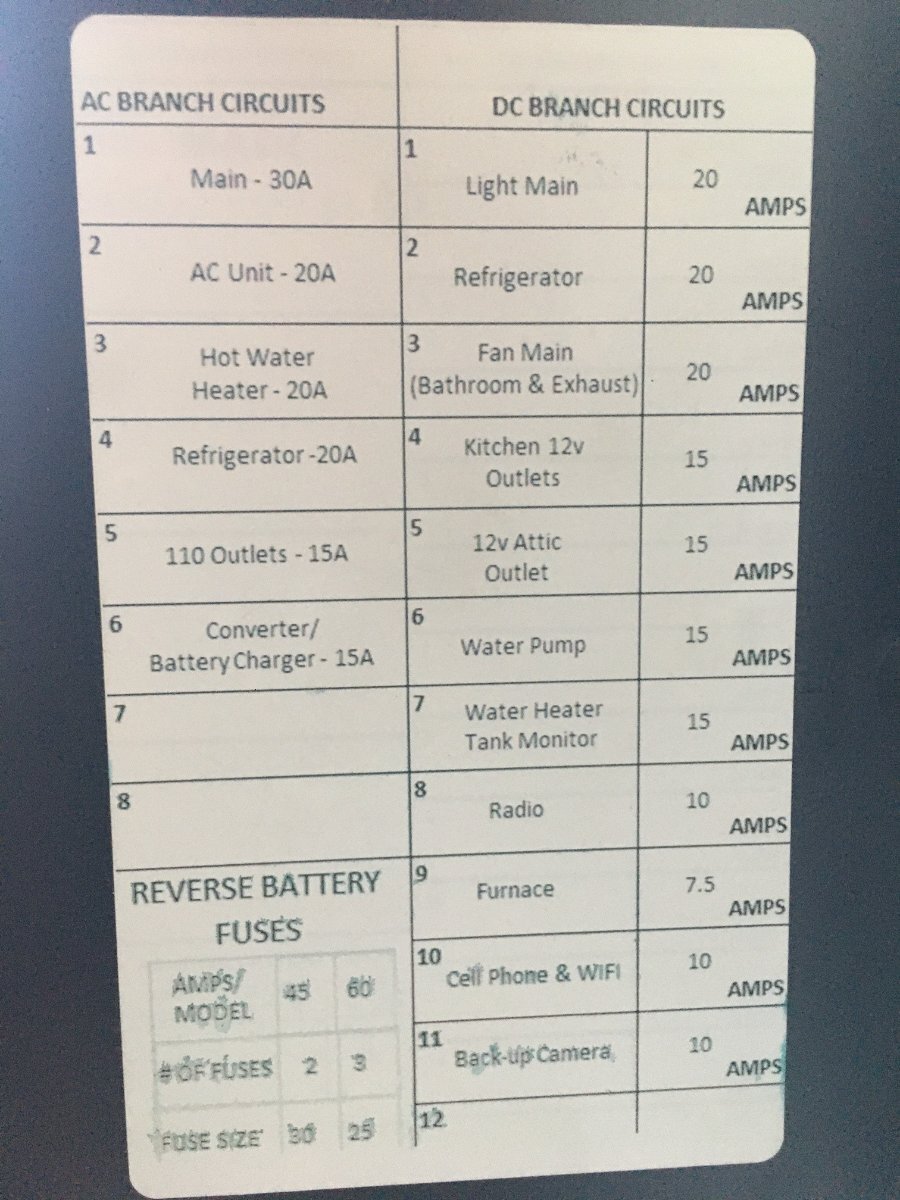
I have thought there is no GFCI protection on the Oliver. That's the way it appears to me. Given the Xantrex has GFCI outlet(s), you must realize that when on shore power that outlet is not utilized so you have no GFCI protection. Residential code (don't know for RVs) requires GFCI protection for bathroom and exterior outlets, for where water is present. You could replace the 15A breaker for "110 Outlets" with a GFCI breaker or replace the first outlet in line with a GFCI outlet. It's crazy that OTT strings all the 110 outlets including one for the microwave. There is an independent breaker for the fridge. All they needed is an extra breaker for the microwave and a parallel cable run to the fridge run. Not sure if a 15A GFCI breaker can handle the microwave and still be responsive to a fault at another outlet. When the microwave is running, there is only about 5A available. We have a 15A GFCI breaker at home. The builder wired 5 outlets in 3 bathrooms plus two exterior outlets on the deck. We added a flat grill on our deck. When the grill is running and Chris starts her blow dryer, we instantly lose power to all 7 outlets. Sometimes it blows without two heating appliances. It's 45 years old as is our house. I should buy a modern 20A GFCI thinking the cable AWG is adequate.
1 point
-
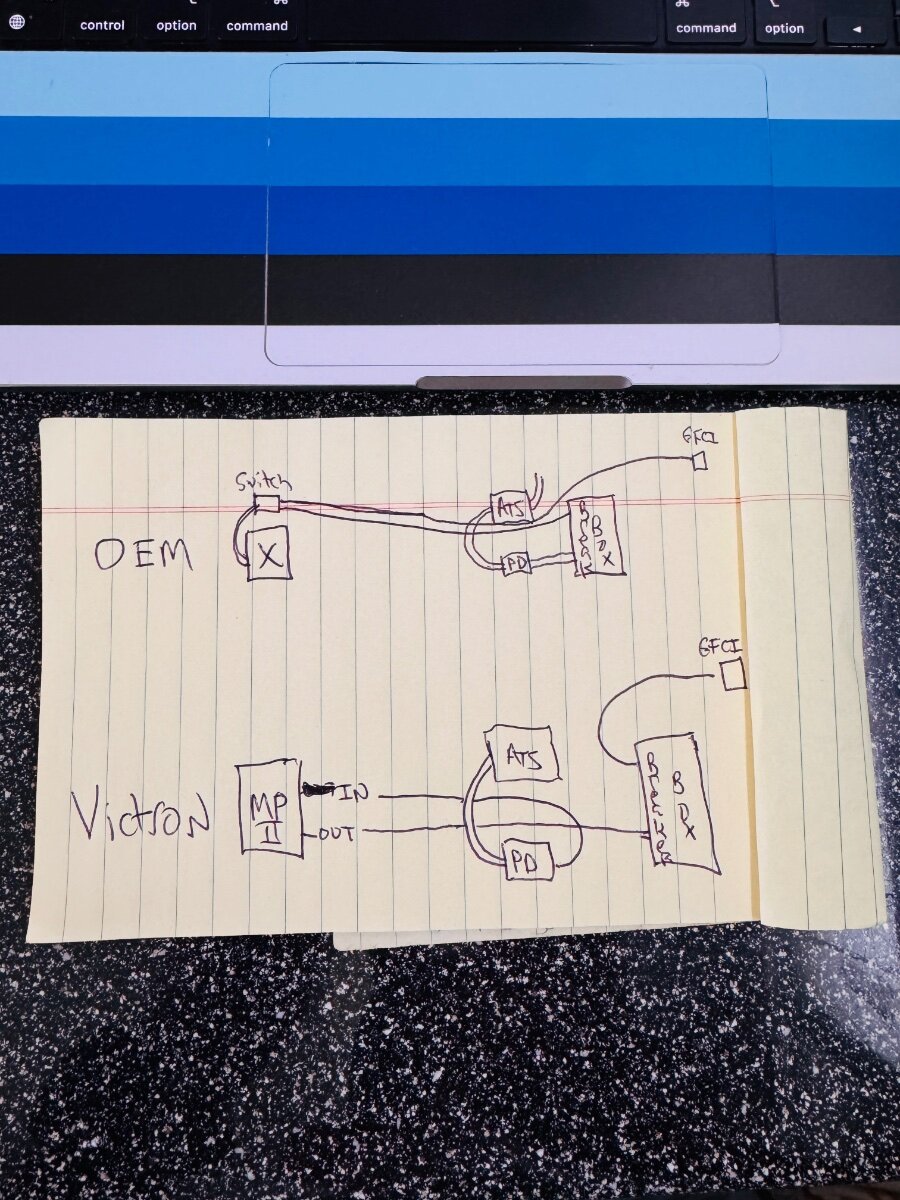
When I took down the Xantrex, I took down the input leg and then cut short the other run to connect to the output straight from the 15 amp breaker (farthest right) that powers the first GFCI plug (right side of dinette) that powers all the others plus the microwave I think. Then MPII Line IN from the PD ATS, then the Line OUT 1 from the MPII to the Main input at breaker box. Hope that helps. I am terrible and trying to draw diagrams on-line. Wish it was more clear. Mike I am on vacation, so doing this by memory but I believe this is correct.
1 point
-
We used a plug in "cigarette plug" charger for laptop. Don't carry one anymore. Phones and USB tablet are fine. We don't watch TV, so yeah, not an issue. I have 12v hair dryer (somewhere, havent used it in 20 years) and a 12v blender, from the late 70s. I cook on fire, grill, or lp stove. We're admittedly oddball. We camp to get away from the signals and entanglement, but keep a line open for family. I honestly don't care about ever getting another hard-wired inverter. But that's me. Everyone has a different camping style, and they should equip their trailer accordingly.1 point
-
I knew she was you Sherry, Jedi Master! You're the best and I am weak in my needs for my hi-rez TV monitor, with HD soundbar! 12V cannot compare for this and other needs. We must charge our laptops on the road, the Dewalt 20V charger for the many tools I use at home and some away (extra charger in the attic). Oh yeah, Chris uses a blow-dryer every few days when away and we will use our new oven likely every other day. We prefer to stay away from campgrounds, truly dislike RV parks, and soon will be able to do so more so with these batteries, an inverter/charger upgrade and other smaller upgrades as necessary. I would like to get to the point to lose the shore power cord. We avoid summer weather but run into it on occasion and want an efficient A/C and the ability to run it afternoons. This way we can travel anywhere in the west, spur of the moment, given the ample FS and BLM lands, camp almost anywhere without reservations and worry.1 point
-
Yes. I'm in that "no inverter " camp. I'm used to 12v life, for 40 + years. We had one, for a few years, didn't use it much, so removed it. Everyone has a different camping style. Pick your batteries and gear for what you need, and want. It's all good.1 point
-
Sitting outside at Taughannock Falls, NY in a primitive campsite with 25% battery life left (920aH bank). I have been running the AC off and ON for 2 days. First time I have had to put to use all of my battery backups (GZ4K, etc). And yes most of the AC run time has been for the 2 knuckleheads we enjoy so much. Mimi is expecting again! And, I agree, It just depends how much boon-docking you plan on doing. I wish I had 2000AH! Best, Mike Side note: Starlink is working great!
1 point
-
I had a chat with Renewable Outdoors today. They are responsive. Turns out the Epoch 460AH is approx. 9.5", Epoch website numbers are correct, their User Manual is wrong. Two Epoch Essentials 460AH will NOT fit in the battery bay, but as Mike has shown here, two 460 with Victron Comms (more $$$) will fit. I'm starting to think re two Epoch 300AH which will fit in the tray and likely 600AH is enough for our needs. Their sale is still on today, but not much longer.1 point
-
Solar input dropping was due to a loose post on the solar breaker (from over-tightening). FIXED!1 point
-
Keep in mind, when running AC, at 70 MPH down a highway, as tight as the Oliver hull is, you're POURING BTUs in the wake behind you! Sitting at a campsite would be say 1.5 less SOC loss and if sitting in the shade, 2x LESS. Hey @rideadeuce, Buc-ee's is a Texas on-the-road tradition (though I do agree with your sentiment)! When we lived in Georgetown TX, Chris' daughter and grandchild in Houston, we would meet at the Buc-ee's in Giddings TX, for the hand-off, so our grandson could spend a couple days with us! He loved the place. Giddings a great east TX town, great Mexican food and a Super Mercado to stock up the fridge! Ahh, great memories...1 point
-
Yes, we have some redundancy built in to monitor TT temps in cabin and fridge. https://a.co/d/fDlGGL2 https://a.co/d/4mDqwXo To monitor your Victron system you will have to setup some kind of cellular/satellite modem/router. You probably already know that but it is very useful. I will also be able to monitor and make changes remotely to the Victron DC to DC charger. NEway, HA, too much tech!
1 point
-
Important for Ekrano and EPOCH battery users: If you use or plan to use the Ekrano display with the EPOCH batteries and Victron COMMS you must go in under Settings and go to Services and change the VE.CAN 1 to CAN BUS 500. Works like a charm now but literally no-one at EPOCH or any installer I talked to knew how to do this. Once done the batteries BMS talk to the Victron Components and take over charging parameters/needs. If you are using the Cerbo GX just plug into Can Bus port.
1 point
-
The ring in the toilet is easy to replace and is available on Amazon. We use a little Vaseline on both sides of it after we dump and clean. Keeps it operating smoothly and helps it from drying out. I’ve only replaced it once. Mike1 point
-
So I think I have fixed 99.9% of my issues. After cleaning the flow restrictors/pressure regulators that helped a lot but I decided to replace them with a hollow pipe (got it at Home Depot, I'm sure there were other ways to do this but this was simplest for me) so there is no restriction. I purchased an external pressure regulator and have that set to 55psi and will use that going forward. I also replaced the faucet head in the bathroom and I have great flow/pressure almost everywhere now. The one place I think the flow/pressure could be better still is the toile. I did try cleaning the filter/screen as was suggested in an earlier post, but I couldn't figure out how to get the filter/screen out so I poured vinegar down the tube and let it sit for a few hours but it didn't seem to help. It's good enough though. The bowl doesn't hold water for very long so have to look into that. The last thing I found which I am sure contributed to a lot of my problems was the anode rod was way overdue to be replaced and water heater was full of scale/buildup. I flushed out the hot water heater, which took a while for stuff to stop coming out and the water to be clear then put in the new anode rod and tested the system and everything is working like new again. So what I have learned from all of this is it's very important to use a water softener and/or flush the lines regularly to avoid buildup. As I said earlier, I do think the cleaning the flow restrictors/pressure regulators made the most difference, when on city water, but I think its best to just replace them. That's probably why they don't have them in the 2018 and newer units. Be sure to use an adjustable external regulator just to be sure. When using the internal water pump cleaning/replacing the screens on the faucets or the faucet head itself made the difference. I did start with the faucets before moving onto anything else and that's what you need to do when diagnosing this kind of problem and remember to confirm you have the same problem on city water and you do with the water pump. I hope this helps someone who finds themselves in a similar situation.
1 point
-
Trying to understand just where the rivet failed. Hard to tell from the pic, but it looks like it failed just under the head of the rivet? If this is the case, then I would recommend 3 things. 1.Put a very slight countersink on the battery box rivet holes, just barely enough to break the sharp edge from the drilled hole. That sharp edge could wear away the rivet from vibration, especially if it's aluminum. If you removed the entire battery box, I'd soften that edge on both sides of the hole. 2. Use stainless steel rivets and not aluminum, they are stronger and I don't see issues with galvanic corrosion in this application. 3. Finally, back up your rivet with a washer of like material (if you can get to the back side of the rivet). Just my 2 cents. If I was designing this from scratch, I probably would have gone with rivet nuts (with backup washers), or a thru-bolt design, for a much more secure connection to the hull. But probably not able to use these as an after the fact repair. Looks like you did a good job. Hope it holds up for you! Dave1 point
-
++++++++++++++++++++++++++++++++++++++++++ Actually IF I were Dometic, with all the really bad publicity they sadly have received about A/C units that owners have despised so much.... I would wait about 5 years before introducing a new one in the USA. After that we all will have totally forgotten about our mutual bad experience and they will come out with an inverter unit with internal drainage, a fan selector switch tied to the AC Compressor run, and a remote T-stat/thermistor. In a lower profile unit using a brand new even more efficient refrigerant and sold at half the price of their competitors. GJ
0 points


-
Recent Achievements
-


")


")


