Leaderboard


Popular Content
Showing content with the highest reputation on 08/08/2025 in all areas
-
When my eyes are closed, I see no lights and sleep well. 🤣 So no issues here.4 points
-
We want to take a moment to address a recent change regarding our dealer network in Texas, and what it means for both new and existing Oliver owners in the area. No Current Dealers in Texas At this time, Oliver Travel Trailers no longer has any active dealer sales representation in the state of Texas. We understand this may come as a surprise—especially to those who purchased through our former Texas dealers. This was a business decision, and we sincerely apologize that a formal update was not sent to affected customers when this change occurred just a few weeks ago. Continued Service Support in Texas The good news is that warranty and service support remains strong in Texas. While there are no current Oliver dealers operating under our network in the state, both of our former dealer partners—Princess Craft and United RV—have confirmed they are continuing to service Oliver Travel Trailers, including warranty repairs, for owners in their respective areas. Additionally: Our factory-based Technical Support remains your go-to resource for any questions, approvals, or coordination related to warranty service. We also work with other reputable service centers where needed to ensure coverage in areas not directly served by Princess Craft or United RV. For those who prefer factory service, our Hohenwald-based Service Department is readily available to assist with scheduling and support.4 points
-
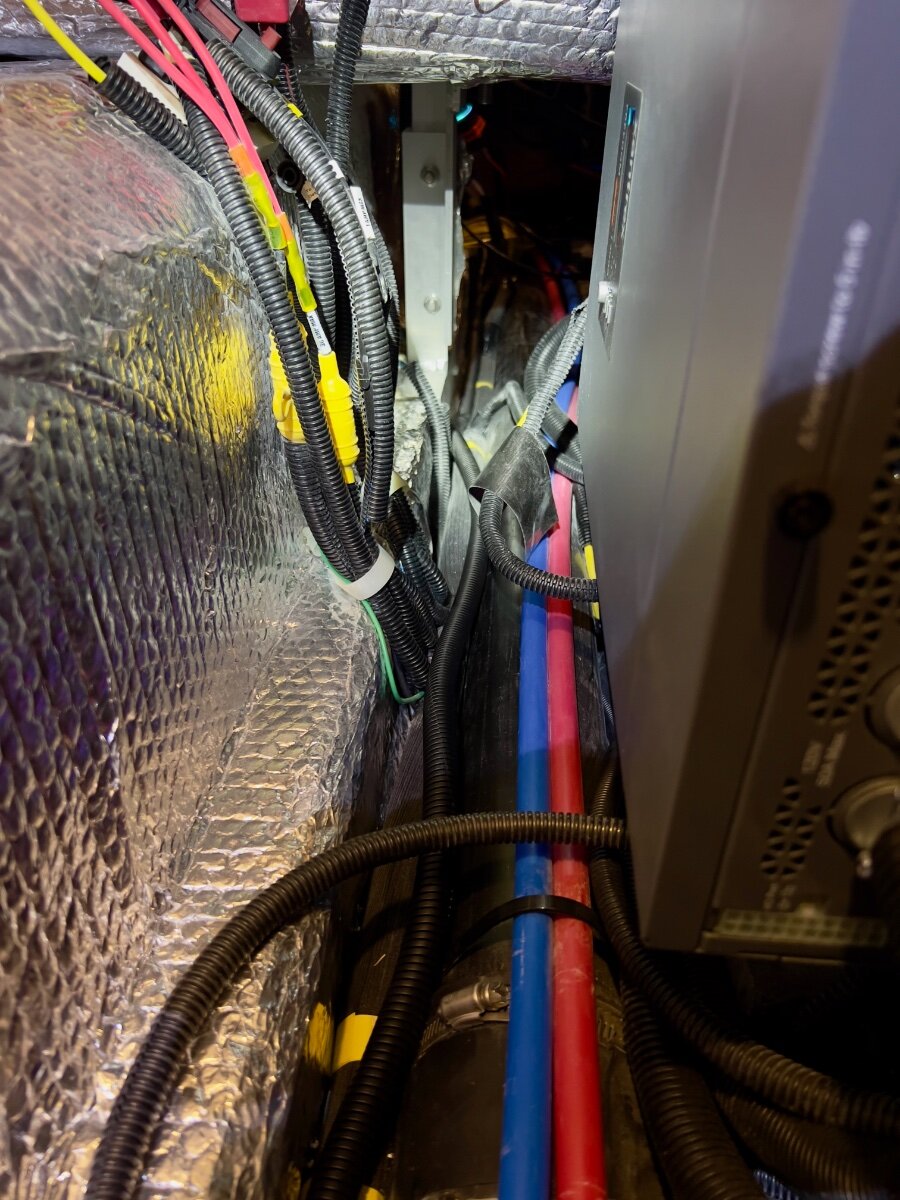
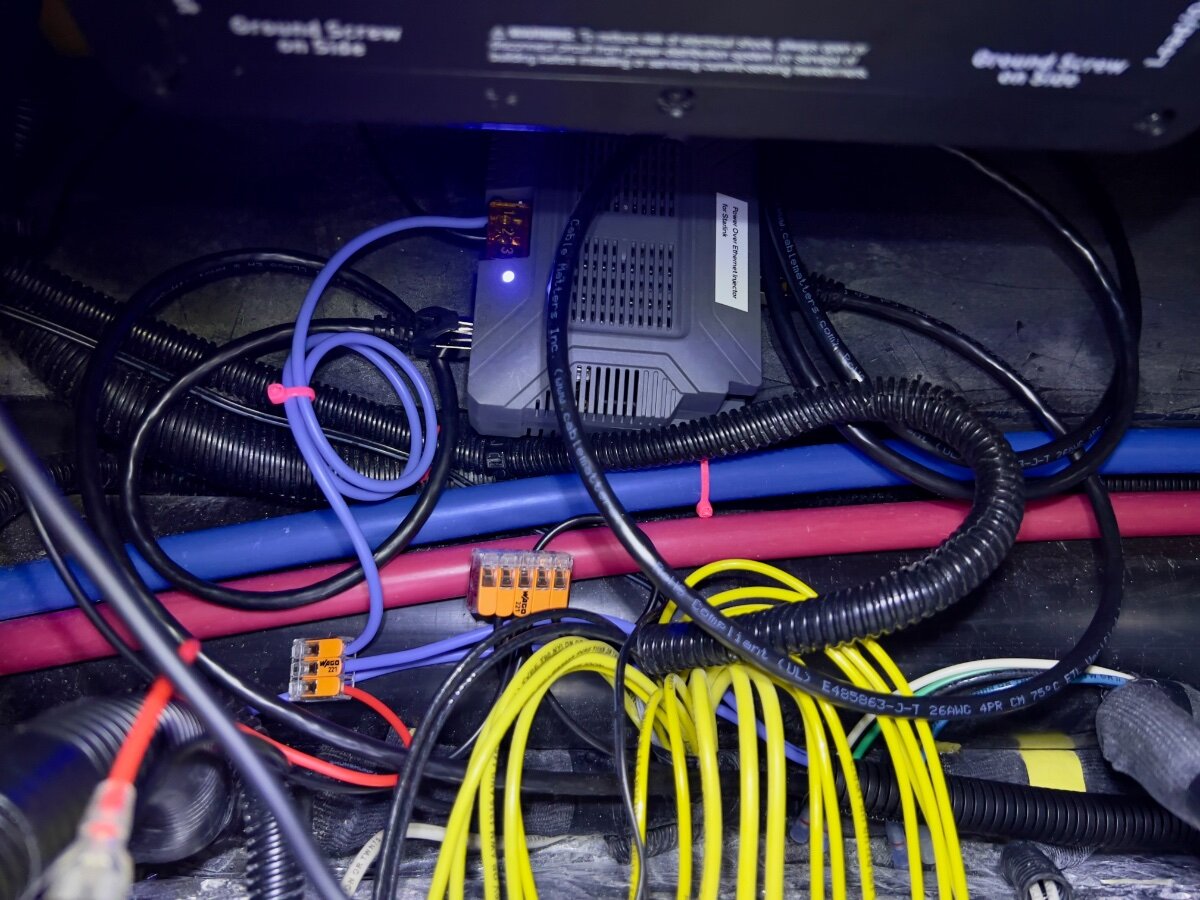
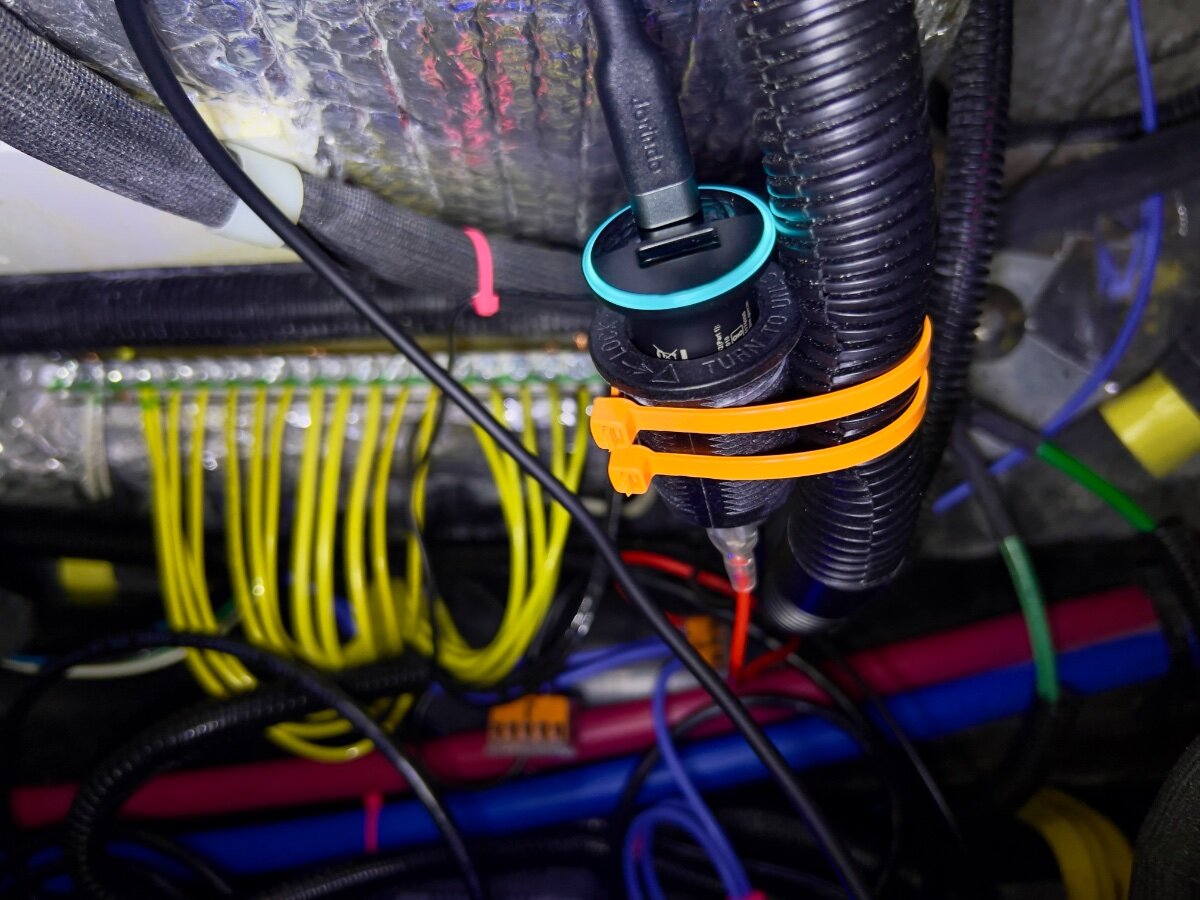
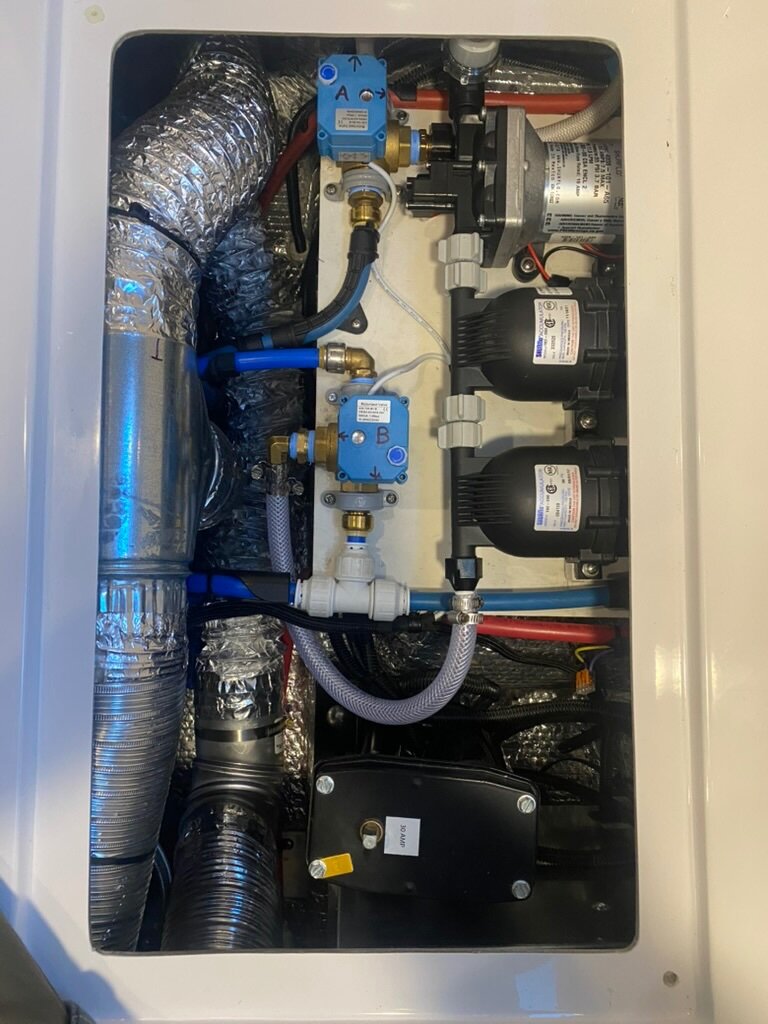
On a recent trip from Dallas to South Carolina we stayed in multiple locations with no (or very limited) communications capabilities (cell phone or WiFi). Over the three years we have owned our LEII, there have been many other occasions with no ability to communicate. As a result, we decided to order a Starlink Mini and a Starlink Router Mini to use on our trailer trips. I have been following Starlink related postings on the OTT Owners Forum, especially since the release of the Starlink Mini. I have found the postings by @Snackchaser particularly helpful in planning the installation of our Starlink system. I especially liked the use of a Power over Ethernet (PoE) injector to power the Starlink Mini and to provide an Ethernet connection from the built-in router back to the trailer, using a single cable. Installing the PoE injector and a DC powered router in the attic of the LEII seemed a reasonable location, being nearly directly above the exterior Furrion ports for connecting satellite and cable TV. So I planned to install in a similar location in the attic of our LEII, assembling a list of the components required. I ordered a PoE injector from MobileMustHave.com and the rest from Amazon. Once all the key components had been delivered, I began the installation, with the first step being to replace the Furrion Satellite coax port with an RJ45 pass-through connector and to fish an Ethernet cable from the basement to the attic. Replacing the Furrion coax connector with the RJ45 pass-through connector was no problem, even though enlarging the hole through fiberglass exterior shell was required. However, fishing an Ethernet cable from the basement to the attic proved to be a major obstacle. Although I have prior experience fishing wires through difficult spaces, I was unsuccessful getting a fish tape (or rods) from the attic to the basement. I could get the end of the fish tape rods down near the ceiling of the basement, where the interior shell ends and multiple cables run up to the attic area at the rear of the trailer, but not into the basement. As suggested, I tried following the A/C drain line and multiple other locations but could not get past the bottom of the inner shell into the basement. I tried running the fish tape/rods in both directions. No luck. Consequently, I began to ponder other installation locations inside the trailer for the PoE injector and Starlink Router Mini. After a couple of days, I had an Aha! moment- install the PoE Injector and Router Mini under the rear dinette seat. I inspected the space between the basement and the rear dinette seat, nearly all of which is readily accessible from the two rear street side hatches and the rear dinette seat hatch. Only the space under the battery compartment is not accessible from directly above, but is easily accessed from either side. I looked for any obstacles to using this location and found none. I could easily route the Ethernet cable from the Furrion/RJ45 pass-through connector forward to beneath the rear dinette seat. I located the PoE Injector atop the trailer frame member, just below the Progressive surge protector box, which is mounted on the aisle wall of the rear dinette seat. The PoE jack and the power terminals of the PoE Injector are positioned toward the front of the trailer. I connected a 20 foot shielded Cat 6 cable from the inner side of the Furrion/ RJ45 port, then routed it under the floor of the basement, around the street side rear stabilizer, then following the waste water line, forward to the area under the rear dinette hatch. About 3 feet of excess cable are coiled in the basement, concealed by the rear wall of the basement. I installed a lighted rocker switch through the forward basement wall, mounted high, almost directly above the side-to-side bubble level on the left side of the basement entry. This switch is to control 12VDC power to the PoE Injector and the Starlink Router Mini. Using 14 AWG silicone coated wire, I ran two purple colored wires from the space beneath the rear dinette hatch back to the rocker switch on the forward basement wall. A third, 14 AWG black wire was also run along the same route to the rocker switch. The switch has two terminals with red lead wires,: one to the DC power source and one to the load. The third terminal has a black wire, which connects to ground (the bus bar). The ground wire enables the light on the switch to operate when DC power is ON. On the DC power panel, position 15, I installed a 15 amp fuse. One of the purple wires connects to the 12VDC positive terminal on the PoE Injector. The other purple wire connects to position 15 on the rear of the DC power panel, using a crimp on connector. The single black wire from the switch connects to the ground bus located under the rear dinette seat. Another 14 AWG wire connects the PoE Injector negative terminal with the other end connecting to the bus bar. All wire-to-wire connections were made using Wago lever lock connectors. I also added a 12VDC auxiliary power outlet (cigarette lighter type) which is connected to the same circuit as that which powers the PoE Injector. An Anker 323 USB-C Car Charger Adapter (USB Power Delivery (PD) capable) plugs into the auxiliary power outlet. A USB-C to Male to DC 3.5 x 1.35mm Male Power Jack is used to power the Starlink Router Mini from the Anker charger. I found the Starlink Router Mini conveniently fits on top of the Progressive Surge Protector box. I later secured it with a releasable zip tie around the surge protector. The 20 foot Cat 6 Ethernet cable from the rear connects to the PoE jack of the PoE Injector. A 5 foot Cat 6 Ethernet cable connects to the LAN jack of the PoE Injector and to the WAN/Satellite port of the Starlink Router Mini. All Cat 6 Ethernet cables used are shielded. I believe this installation location approach has several advantages over an attic installation: Access is MUCH easier. Fishing wires is no challenge. A dedicated circuit from the DC power panel provides power to all Starlink related components. A lighted switch for the PoE Injector and Starlink Router Mini is located in the basement, near the exterior pass-through Ethernet jack. The PoE Injector is located where it cannot be covered by clothing or other cargo stored in the attic which might cause overheating. The VERY bright blue light on the PoE Injector is not visible in the cabin (always ON if power to the PoE Injector is ON). The Starlink Router Mini is located centrally in the trailer and should provide uniform WiFi coverage within the trailer. We have not yet taken the Starlink on a shakedown trip, but plan to do so at the end of August. Regards, Don
 3 points
 -
Please see Announcement:3 points
-
Have two 30lb tanks and never even bother to weigh them. Run one tank until it's empty , switch to the full one, and then just plan on filling the empty one as soon as I can.3 points
-
Your old 110/12v probably actually operated on 12v, just stepped down converted power. You'll likely never notice the difference.2 points
-
The mini is up and running with what came in the box (thanks JD). Will run this way for a while and find the best way to operate on DC only with minimal cabling. Wendy is very happy . And thanks, Geoff (and all) for the encouragement. I think I'm going to like going with the mini! John2 points
-
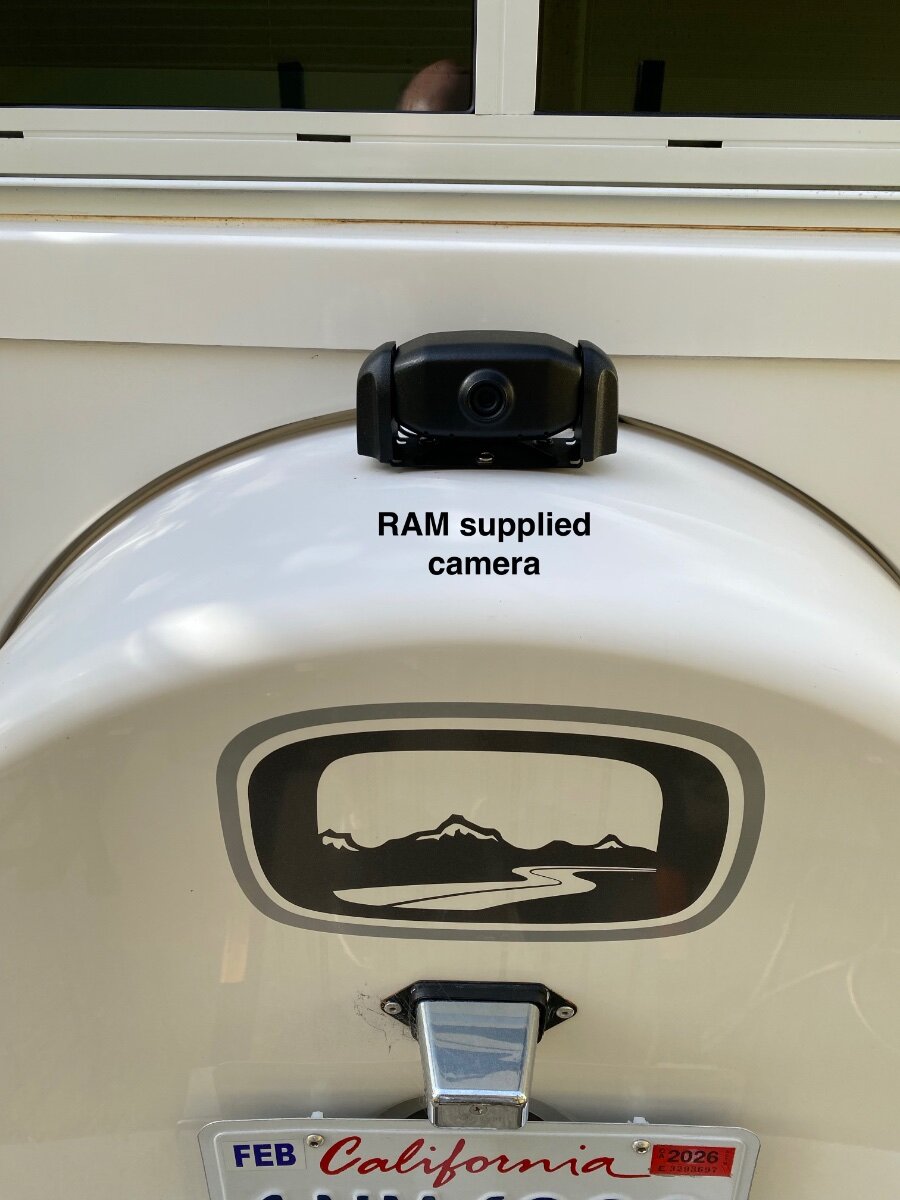
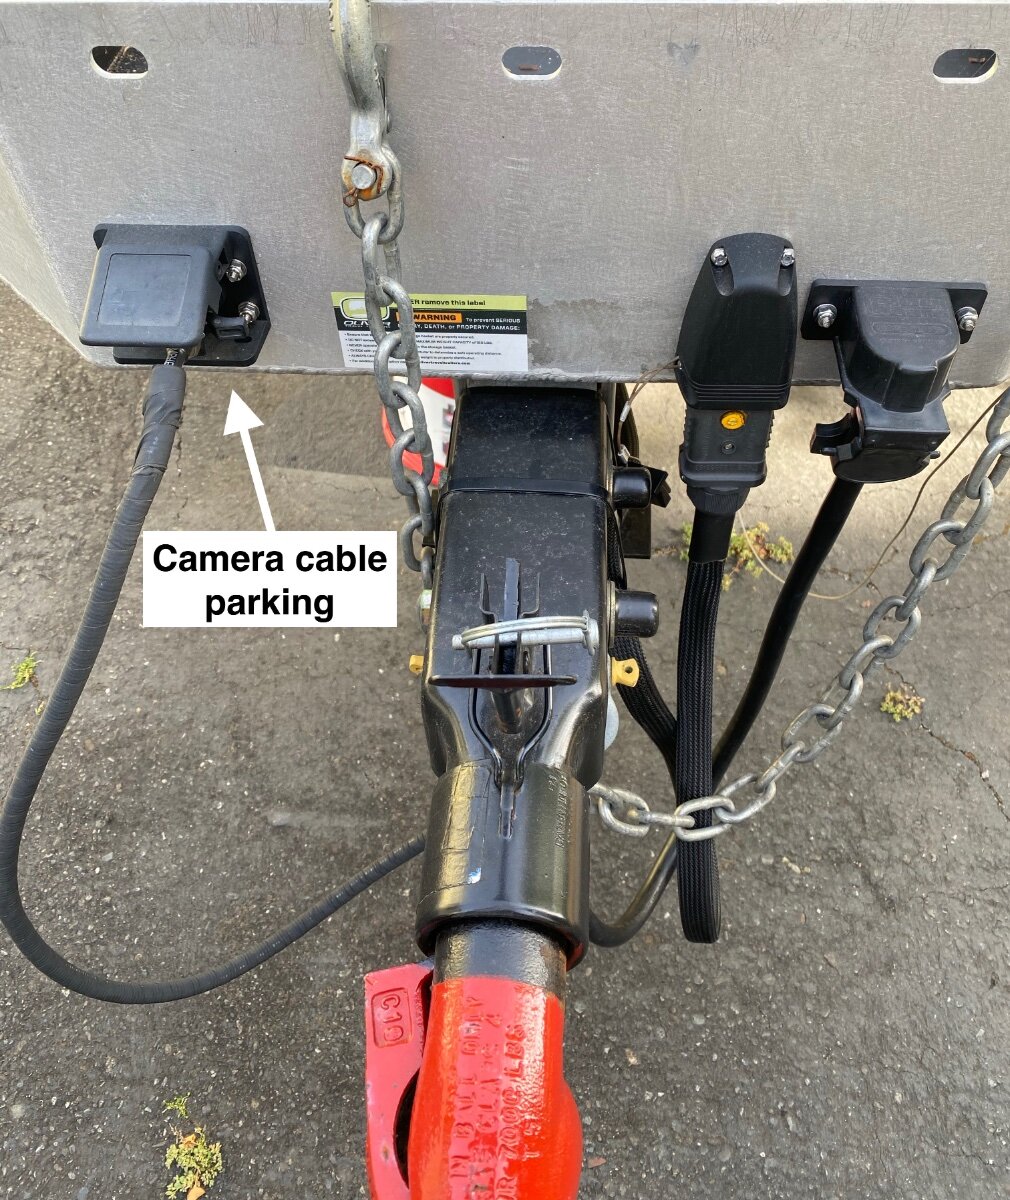
Camera is through bolted with nylock nuts as to not to chip the fiberglass, like happens with sheet metal screws. The very tip of a step drill works well for making holes in the fiberglass because it doesn't grab and chip like a twist drill. Cheers! Geoff
2 points
-
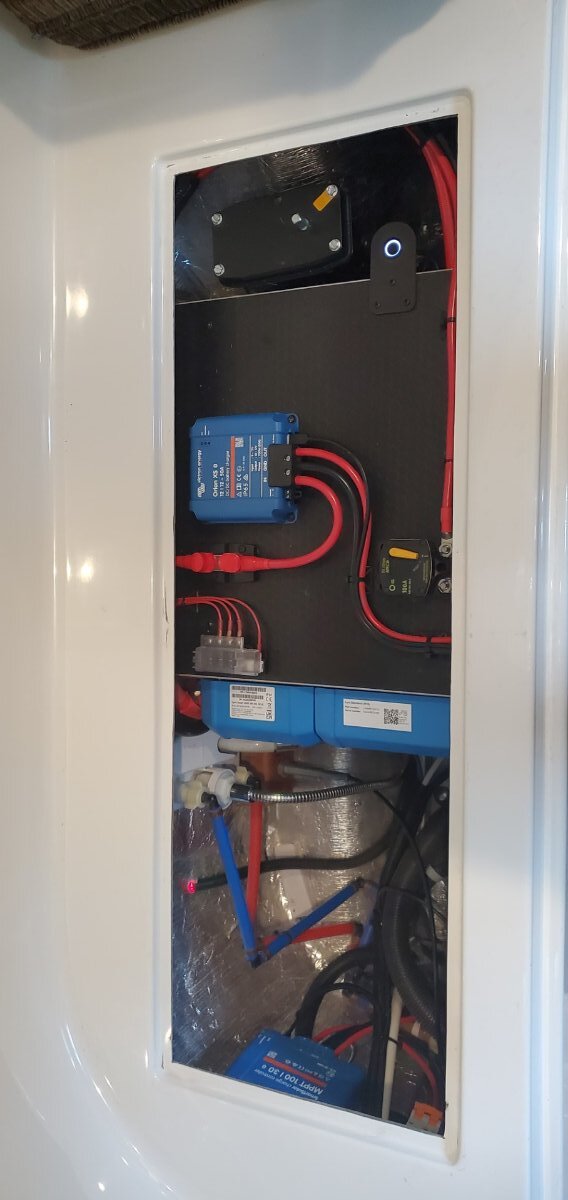
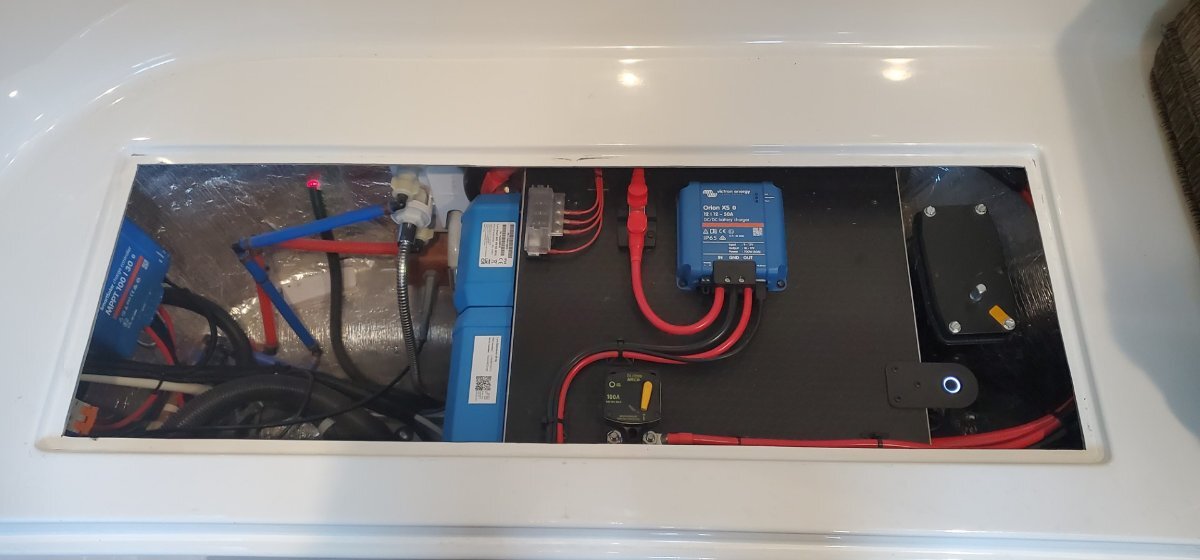
I just completed a Victron update to all the solar components in our trailer, including the Victron 50amp DC-DC charger. It has been great. I was originally thinking of doing the work myself but soon realized I was too far out of my comfort zone regarding the complexities of the install. This job I delegated! Expensive, yes. But The job as it was done went way beyond my expectations. I was very lucky to find an outfit locally that really knew what they were doing and take great pride in their work. The cost of the DC-DC charger was part of a much larger project so hard to break it out. There will be two sides to your install, the TV and your trailer. I found a way to fish 4awg cables from the streetside rear dining seat (where the battery box is) forward, under the bathroom sink, and then out the front of the trailer next to the 7-pin plug cable. The charger is mounted on top of the battery box. My truck luckily has a battery distribution fuse block with multiple fuses up for grabs including a 60 amp fuse to which the truck-side wiring was attached. The truck wiring terminated with an Anderson plug that was bolted to the underside of my bumper with a custom bracket directly under the 7 pin plug (which is next to my license plate). This location I highly recommend as it makes attaching your fairly large 7 pin and DC-DC charging cables nicely aligned and easier to manage. I'm getting similar charging profiles as JD iirc. For me, I don't like traveling with propane on, so I switch to DC mode on my fridge when under way. Always have full batteries on arrival! These new lithium batteries charge up fast if they can get the power and this little charger really delivers! Of course, it only works when your running your TV. So, as JD mentioned, this will be of no benefit if boondocking and stationary. That's where your remote solar panels come in to play if you have them. I suppose worst case, you could use your TV as a giant generator to charge your batteries but many campgrounds, especially in the National Park system, or in CG's that don't allow portable generators, this would not be allowed. Super glad I got the charger, no regrets! 👍👍 Dave
2 points
-
See now I must just be different? I like all the little lights inside at night... the way they reflect in multiple places, bouncing from curve to curve around the interior. I think of them as my Ollies star-lights! 🙂 That said... I really appreciate the nice neat daisy chained ground wires! Good job!2 points
-
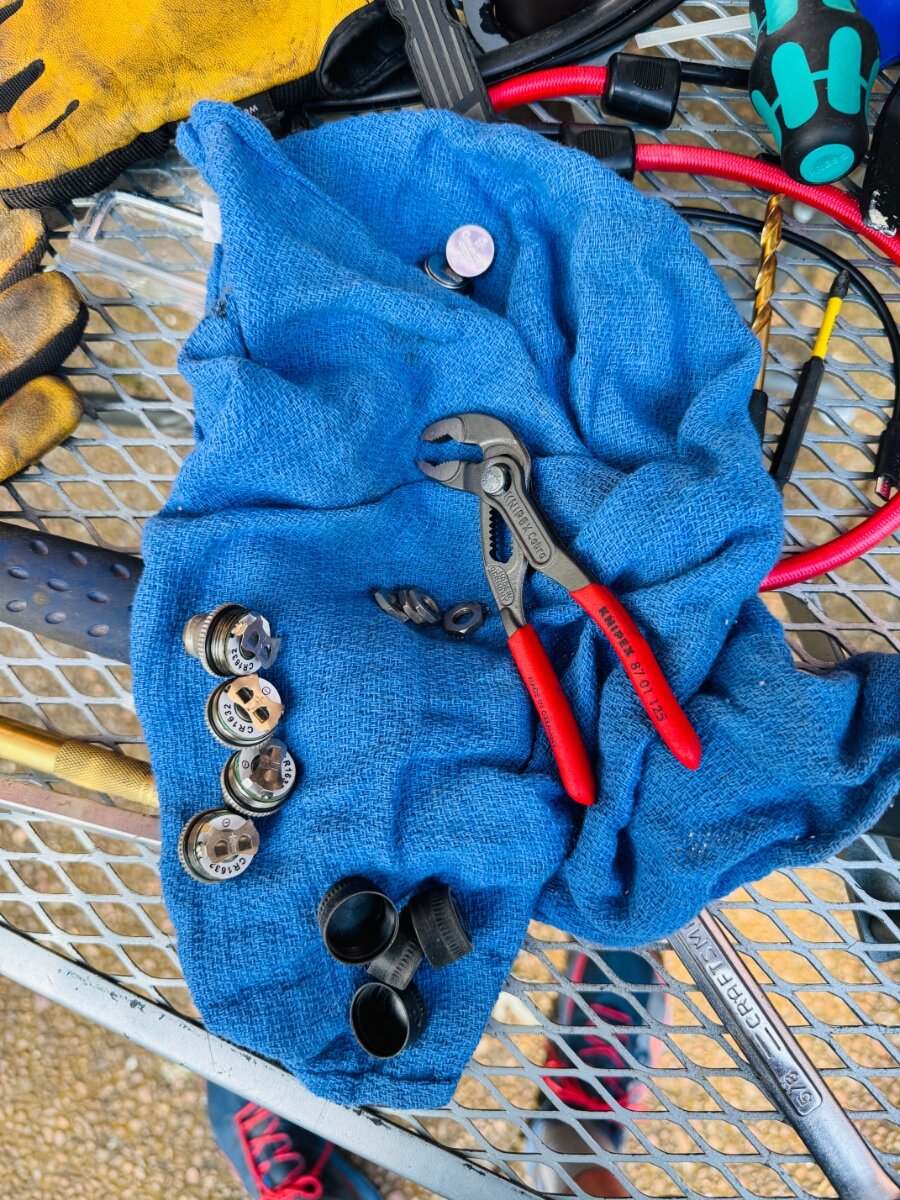
Like @Snackchaser, I use a luggage scale to get an accurate read on the propane level in the tanks. I purchased a pair of Mopeka sensors and found them to be unreliable and not very accurate. I had a couple replaced under warranty. They also seemed to have need frequent battery replacement. I would NOT recommend them. Amazon has a large selection of luggage scales for about $10, that are compact and accurate. With tare weight labelled on both tanks there is no mystery to the amount of propane when the total weight is known. Such as: https://www.amazon.com/Etekcity-Portable-Handheld-Suitcase-Temperature/dp/B082LYC2TN/ref=sr_1_7?crid=2PAZR2PQNSA24&dib=eyJ2IjoiMSJ9.lrxtiYiAaOxFumPFwJLLfi-V2pD7fJpKxfsl6UyzsKbSFL3YNBR0L1a7Px8SBzHhhW25VLBh912CrUyahxdkUjT1pqB3pRe933JDFfDr7ZaTgoTCb1mXdfINMMhl5OU0FibEUB2mMbq_9R89XeAeSb5MhrkSnnQ5YT6uUSpTQctrjSJqa-90Rcwkt-jGQLzD4jSFjCSRtp-YFlVIJhme_3etEGEES17uG605HrMmwLGyk2YZsL2lLr-nGzZUe7jC60bztrvKDpr9oVktN97bzUFLTJ8jfQEvF9T4OU-tq1A.NFHYzomQyFXtHPcZxq8NaPUGd5FyqkWMxZL0L2YMZgw&dib_tag=se&keywords=digital%2Bluggage%2Bscale&qid=1754537940&sprefix=digital%2Blugga%2Caps%2C138&sr=8-7&th=1 Don2 points
-
I've resorted to using a bathroom scale by taring my weight then lifting tanks to check their weight and several other valid methods. I prefer Mopeka for the convenience, but it's nice, and probably safer, to understand options. Having a way to measure the weight could come in handy in some situations, like boon docking or hurricane dodging.2 points
-
Looking at the Cielo website, they have several models. https://cielowigle.com/products/ Is it only the "Max" model that has the functionality to turn the fan off with the compressor? They also have Pro, Eco and Lite models.1 point
-
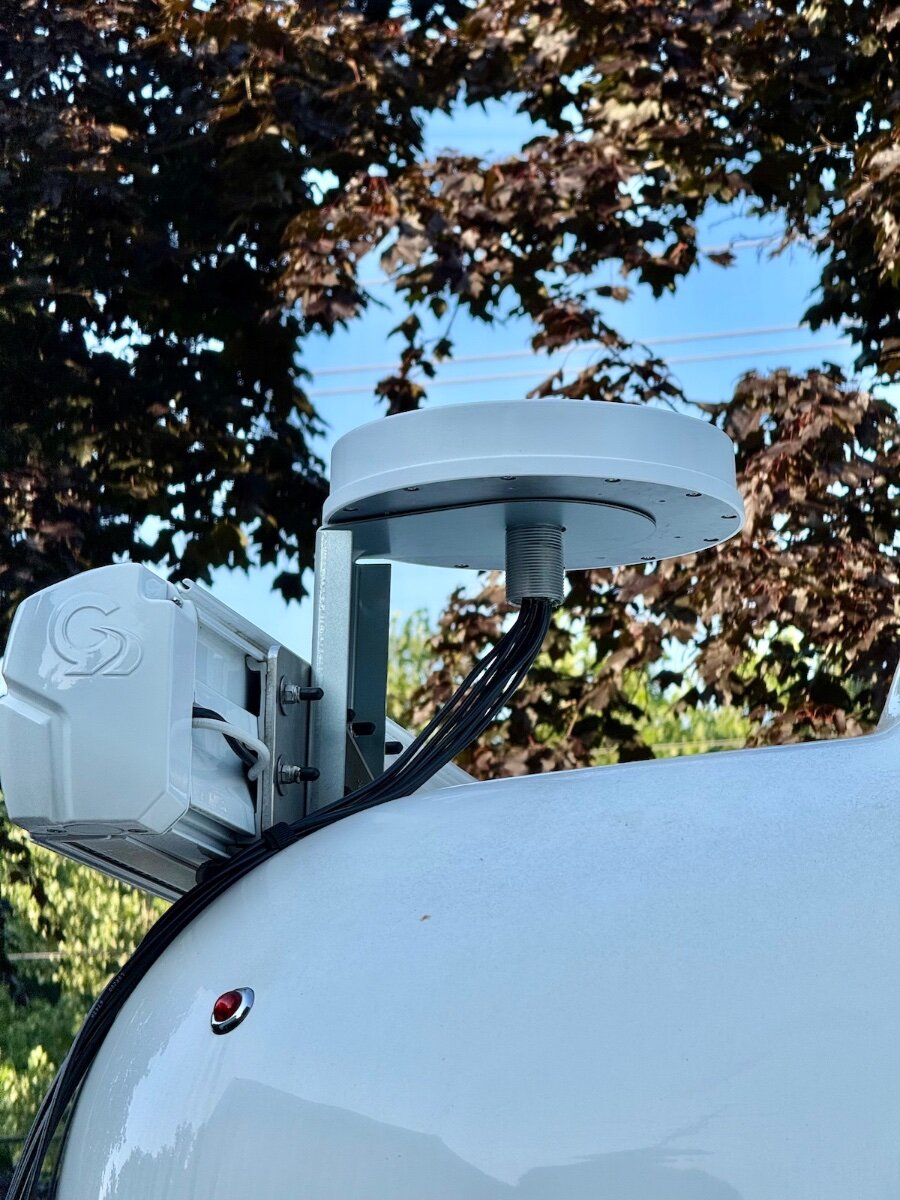
Don, Excellent timing on this post! After two years, I'm finally mounting the cellular/wifi antenna on my roof rather than rely on the stubby antennas on my Pepwave cellular router. At the same time, I'm adding the Mobile Must Have POE injector for the Starlink Mini, and converting the exterior port to RJ45. I'll be mounting the POE injector similar to your setup, and adding the power switch in the basement is a great idea, as you're already there plugin in the Ethernet cable. Nicely done. I'd really like to move the router to the same area, but there's no way I could route the seven antenna cables down there! Plus, they are not long enough. So I'll run a short Ethernet cable from the port to the POE injector, and then a longer Ethernet cable to the back of the basement, up along the nightstand somewhere, and then up behind the rear window shade and into the television port. Only a couple inches of the cable would be visible, which I can live with. It will then go into the WAN port on the Peplink to feed the Apple TV and security camera hub connected to the LAN ports. Any more, and I'm going to need a network switch! When I ordered the POE injector, I also added the optional Pepwave 12V connector, eliminating needing to power both devices separately. With the POE injector in the bilges, I won't be needing that connector, but gain the feature of the exterior switch to power the POE injector separately. That's even better! Thanks for the details. Switch and RJ45 port are on order now.
1 point
-
My eyelids must be thin, according to my husband. I'm another one who blocks out little lights at night. Fortunately, very few in a 2008.1 point
-
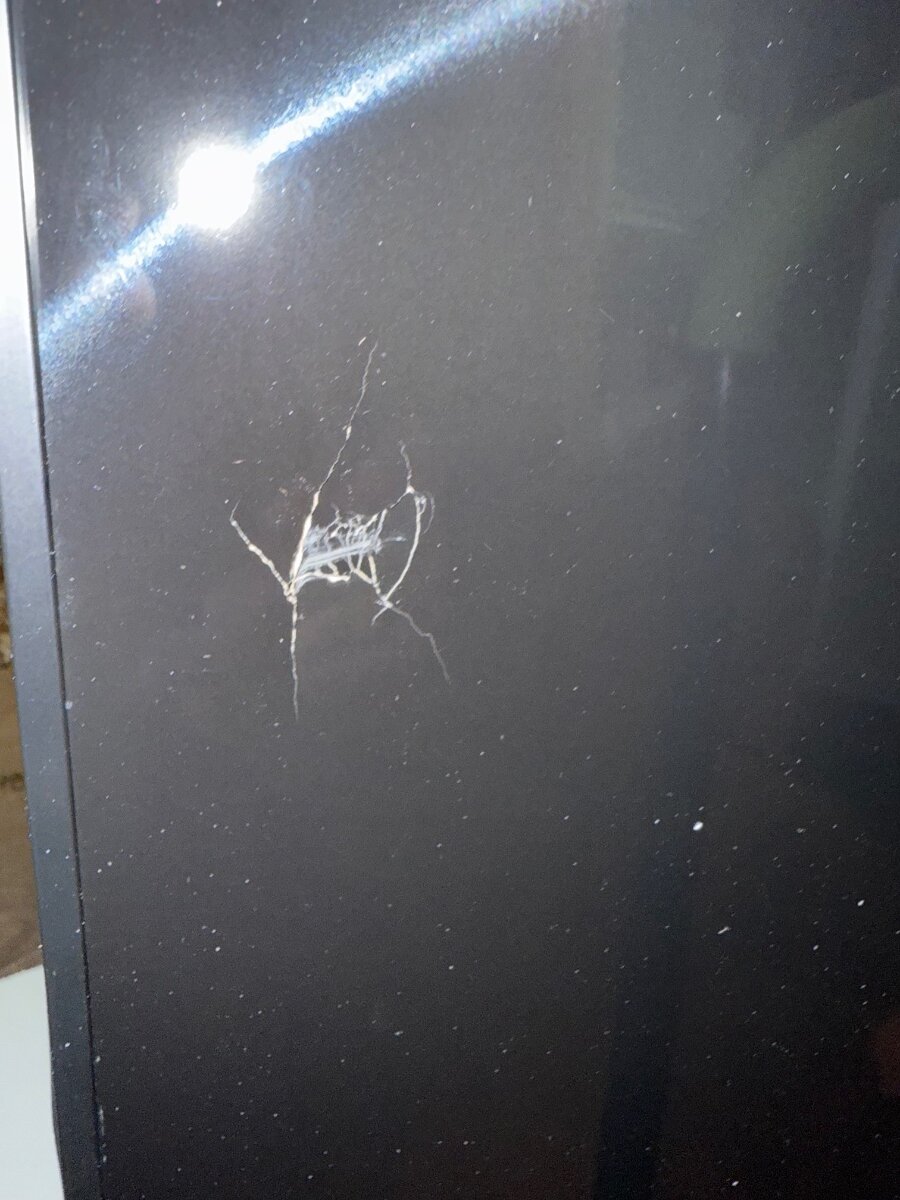
OK, better pic.....
1 point
-
We’re very happy with the electronics in our 2020 Ram 2500. The CarPlay works everytime, the camera views are great and the other electronic gizmo’s are nice. The big center screen for media and maps makes the driving experience enjoyable. I bet the new Rams are even better. Mike1 point
-
Thanks JD. Yes, if you disconnect the grounds the LEDs won’t work, but switches will still work. Also, if you want the blue lights, then you can replace your switches with LED types available at AZ. i like the blue lights, just not so bright! Geoff1 point
-
I like our 2022 RAM 2500 gasser a lot! Some of the many notable features that we like include Apple Car Play. It always synchronizes seamlessly, without the frustration we've had with other cars including our old 2016 Ram. We frequently use it to display full screen Google maps from the phone, and we can toggle back and forth to the RAM GPS which offers nice features too, like a side bar that shows upcoming rest stops, gas stations, etc.. My absolute favorite feature is the digital rear view mirror camera option. It's a high resolution and wide angle view that is way better than the standard mirror. Best of all, it has an auxiliary camera for mounting on a trailer, and the resolution is just as good. I think it's a fantastic towing safety feature, where you have an excellent wide angle view of directly behind and side lanes where there is normally blind spots. There is an outlet in the rear bumper for the trailer camera, and a cord garage for the trailer during storage. My camera is mounted on the spare tire cover. It also has a 5-camera outlet for a trailer surround and interior views, but we don't use those. Other features I like, are the side mirror sensors that warn of vehicles in side lanes. This can be adjusted for your trailer length. The self adjusting steering aggressiveness for highway and town is just right, and the lane departure steering correction is very suttle, even better than our Tesla that can startle you with aggressive corrections. I'm sure that other trucks have similar features, but I also have a personal preference for the RAM dashboard layout and controls. That my two cents worth! Cheers, Geoff1 point
-
You are not alone in enjoying the way light bounces across the Oliver interior.
1 point
-
Not feeling very confident to do any rewiring, I live with blue painters tape on a lot of the little lights inside my Oliver. Maybe one day I will find someone to help me do this project for reducing the glow.1 point
-
Do any of the RV AC Systems have a variable speed fan for pushing the climatized Air? I had a few mini splits in homes and I never saw one that had a variable fan for the climatized air. All were 3 speeds L, M, H and Auto. None shut off after the cycle completed. This is what makes the Cielo Breeze Max T Stat so good it shuts the fan off after the cycle completes if you want that to happen.1 point
-
Hey John, It might be worth checking out my post Bathroom Heat - a more direct approach! It's an easy and significant improvement to bathroom heating. It won't help with your dust issue, but it includes replacement of some of that problematic flexible duct. It would be near impossible to replace that long duct going to the bathroom, but I think with a filter installed the dust problem should go away. Since I've done that mod, I've added more semi rigid duct from the furnace to the kitchen. It's tucked up out of the way into the space above the return air register as seen in the photo, and it eliminated some restrictions and puncture hazards. I also cut a vent hole in the wall on the left side of the toilet through to under the dinette seat as others have recommended. It helped a lot! Afterall, bathroom heat is a nice luxury, and it helps with the wet bath humidity too! Cheers, Geoff
1 point
-
Anxious People (also by Fredrik Backman) Also my book club just finished this one, photo below. A murder mystery and a bit of a biography about Shakespeare. I don’t know if it is out on audio but a great read.
1 point
-
Concur 100%. That's totally an element of our planning process - it starts with Rule #1: "One is none, Two is One". Then we go forward from there anticipating where the weak link is in whatever "complex system" we're dealing with....1 point
-
I tried ORielly's for the bulldogs first. They took my money. Then, without telling me, cancelled the order about a week later. They knew then what I found out later. That Bulldog did not have the parts. I had to request a refund. This is not anyone's fault but mine. This is not 1974. This is 2024. Without getting too philosophical, the Oliver is a complex system. Complex systems do not survive incompetency. Whether it is a space capsule or a travel trailer, you have to anticipate incompetency and plan around it. Parts, service, whatever. Every aspect of your life. Plan for it. I made the mistake of thinking that the Bulldogs were just magically going to be available.1 point
-
We installed Bulldogs this year.1 point
-
In May before the rally, Oliver service replaced my springs, shocks, bearings and brakes. Jason did not mention any issues fitting the ALCAN springs I brought. I’m sure they used the stock Monroe shocks. I don’t notice my trailer sitting any higher, although I’m not sure I’d be able to discern a .5-.75” difference. After our summer trip through Colorado and Utah we didn’t notice any significant difference in the ride either. This should be a good setup as we start our second 100,000 miles. Mike1 point
-
I've been wondering... Some have reported that when upgrading to the Alcan spring it has increased ride height up to an inch and that there is more travel in the leaf spring. Should a replacement shock allow for the greater travel? The Monroe 555001 is the OEM spring. Monroe also has the 555025 model, which is the same overall yet slightly longer with greater stroke. I copied these specs from the 4statetrucks website, as Bulldog has aftermarket replacements for both models: Shock Specs 555001 555025 Compressed (in) 7.95 8.66 Extended (in) 11.97 13.35 Stroke (in) 4.02 4.69 Perhaps those who have installed Alcan springs can chime in? @Mountainman198 @MAX Burner @ScubaRx and @rideadeuce Did the shocks installed appear the correct length or would it allow for +3/4" in compressed length and +3/4"stroke be a better fit? Sure, the OEM length fit, but would +3/4" in stroke allow the slightly taller springs to perform without constraint? When I get the chance to make this upgrade, I would take before and after measurements on one side prior to ordering (let her sit on jacks stands a couple days to get the right part). I'm figuring 3/4" longer should be better. This has been a discussion on other TT forum websites. Stronger spring rate in the shock would also be preferred although Monroe does not list these specs. Either way I would choose Bulldog over the Monroe OEM brand. Bulldog describes their products as a "High Quality Aftermarket Replacement Part (Not OEM)." This is the ~+3/4" longer version: Bulldog HD RV Shock Absorber Replaces 555025 For Trailer Leaf Spring Retro Kit - 4 State Trucks1 point
-
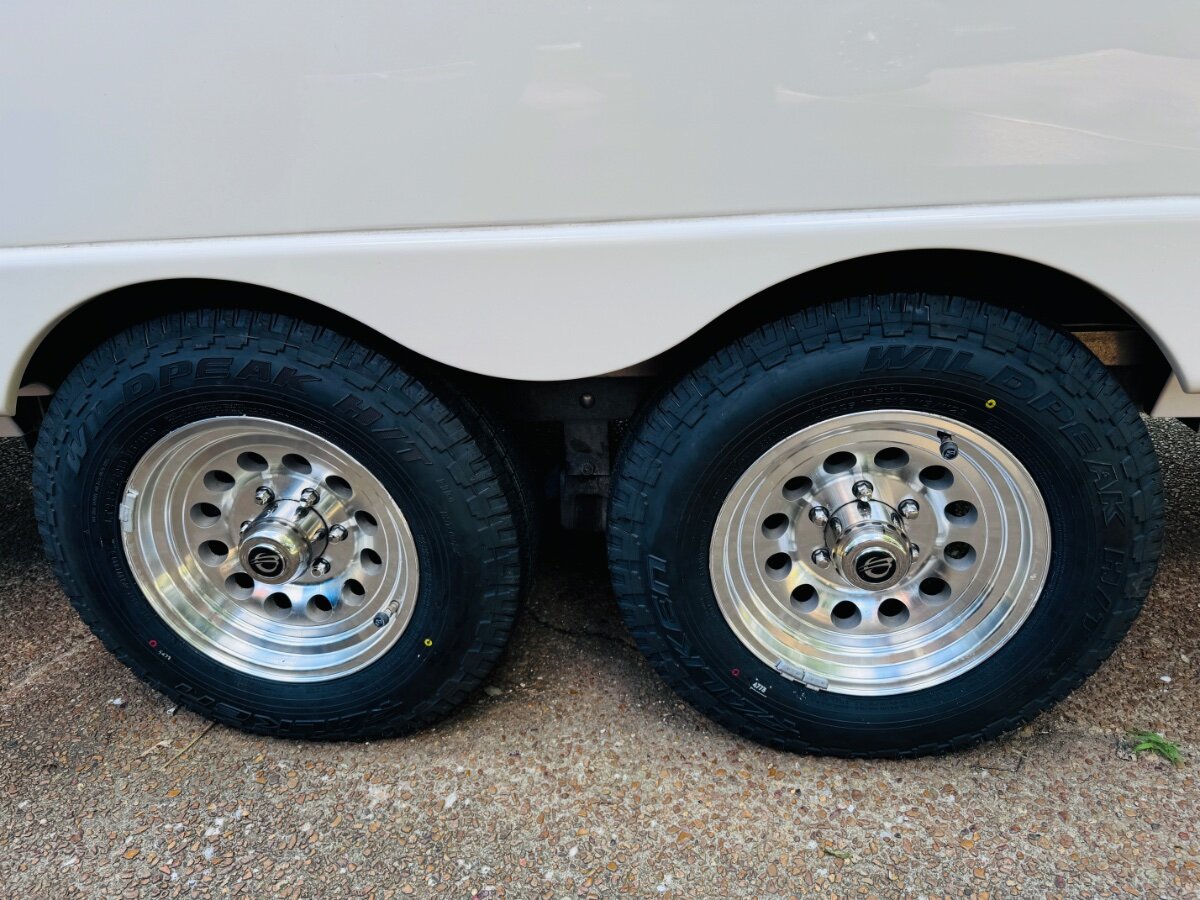
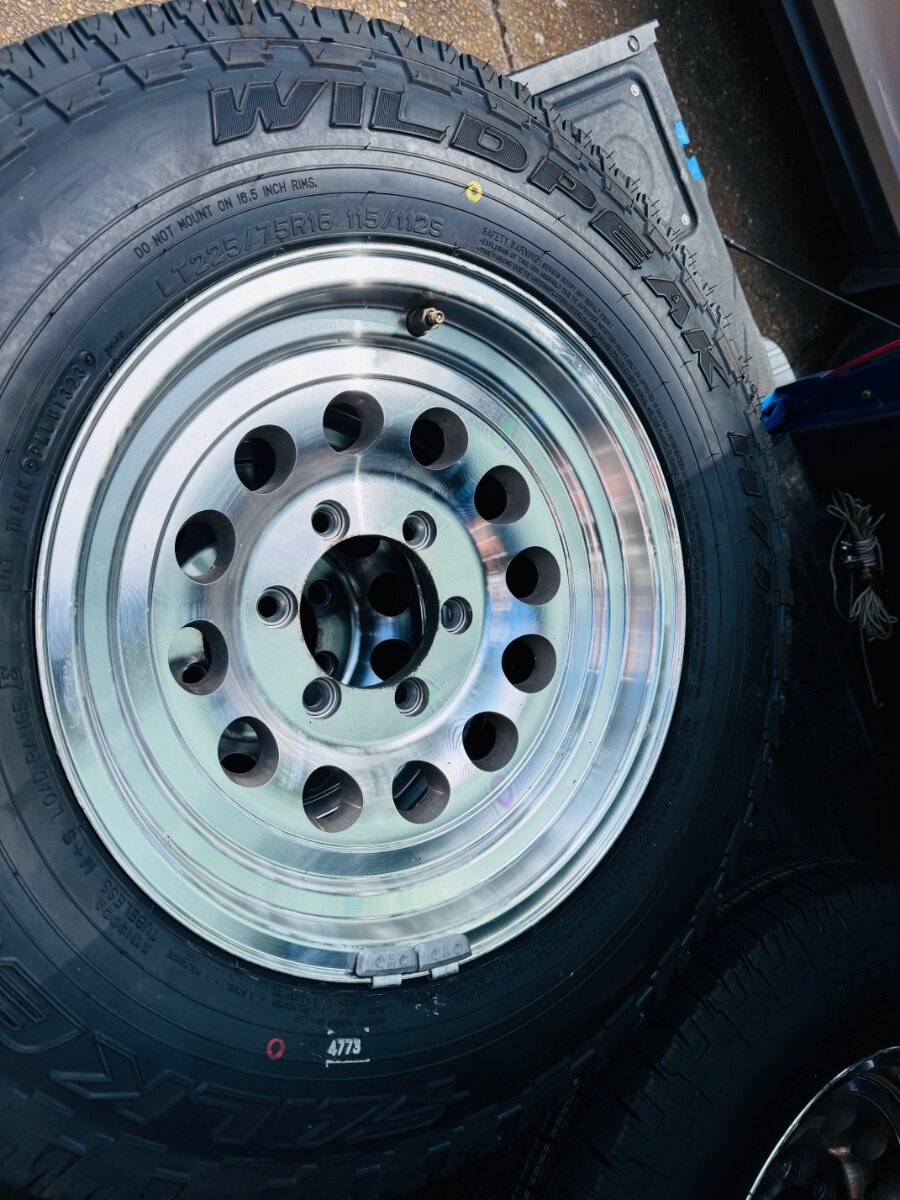
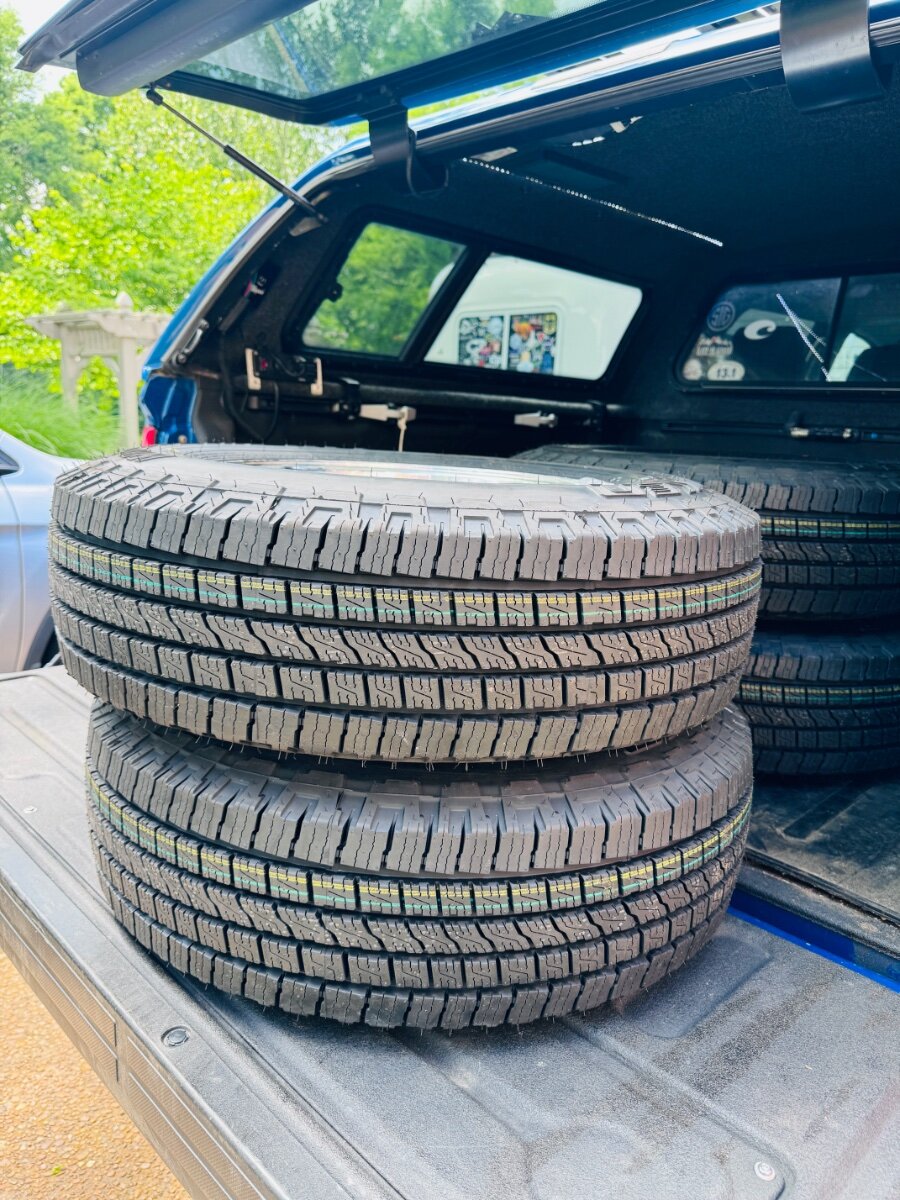
New tires after 6 years with the Michelins. They performed well just had some very small cracks starting to form on the side wall. Changed the TPMS batteries while I was at it.
1 point
-
Found our trailer outside of Seattle - a 2019 Elite II with the full bed option - which we wanted - in the classified section of the Forums. More expensive but very clean - no rust - housed inside - the owner (a mechanic) seemed very methodical - thanks for everyone's help! 🙂1 point
-
Thanks! That's good to hear as she has taken good care of it. We've found another trailer, though - it's newer and more expensive but is in superb shape. 🙂1 point
-
I specifically requested that Hull 218 have them facing inward. This was in 2017…. John Davies Spokane WA1 point
-
@Cort It’s without question the used Oliver in your OP has been really neglected. This is what you actually can see. The larger concern which should concern any buyer is what you don’t see? With the number of Olivers for sale lately surely the right one will come along. I think you are very wise to move on regardless of how nice the seller is. All the best and happy hunting! Patriot🇺🇸1 point
-
@Cort: Definitely take heed to John's earlier comments... "It's what you don't see that will bite you in the you-know-what." If you decide to buy this trailer be certain to use the apparent lack of preventive maintenance in your negotiation strategy and learn to spell, "Elbow Grease." Good luck!1 point
-
Cort - Is that "scale" on the aluminum stringer too? What does the aluminum frame look like? It appears as if this Oliver has the EZ Flex suspension. If that is correct, does it appear that the zerks have been used (i.e. did the owner ever lubricate this suspension?) ? Actually, even though the shocks look bad, you really can't tell unless you test them. The black rubber pieces at the top of the shock appear to be in good shape - particular for a 2017. Any idea of how many miles the owner put on this Ollie? Did you scrape any of that rust off? If yes, how deep does it go? For the most part it appears to be surface rust (i.e. no deep pitting). Certainly it would be a fair amount of work (assuming that it is surface rust) but it is possible that it could be brought back assuming that you are a bit handy with taking things apart, really cleaning them, and repainting them. Bill1 point
-
Hello all, We made it home safely, and have been recovering physically & mentally. I am currently working on 3 articles for the forum, one of which will be about our suspension issues.1 point
-
Not going to be one of those people who never closes out the thread… My adult supervision found out that the Dometic was not going to be available any time soon. (She really wants a working fridge.) She also had concerns about a situation where I was going to be in proximity to Hull 1364 wielding a jigsaw or an oscillating tool. (And I don’t even have an oscillating tool, so now I’ve lost my (current) excuse to get one.) So - after all my pledging to never own another Isotherm, I am now the proud owner of a new isotherm with a damaged in shipping door. At least they are going to replace that. Hopefully the information in this thread will be helpful to others. Watch for a new thread asking the smarter than me people on this forum questions about how to make my new Isotherm (which because of supply chain issues is 12v only) operate on shore power. 🙂
0 points
-
FYI. Bulldog has not made a run of these shocks in quite some time. If you order them from somewhere, make sure they actually have them in stock. Some places hit your card and then you wait until Bulldog makes a run and then Bulldog sends them direct. I was told my shocks should come this week. I ordered them a couple of months ago.0 points
.jpeg.799f3cf194b3b21d05b2a7bb19f728b1.jpeg)
.jpeg.dd379fc2e5087fa6910ce21b437441ad.jpeg)
forPoEInjector.jpeg.2ff4c7b3725adaf25e5bdfc30965ceff.jpeg)
atopProgressiveSurgeProtector.jpeg.5c03a313182d5fdb47bf1a254dec329d.jpeg)
.thumb.jpg.e34bf01ef7f7d5e99ad31856d45afbeb.jpg)


-
Recent Achievements
-


")


")


")

