Leaderboard


Popular Content
Showing content with the highest reputation since 10/07/2023 in Posts
-
To Oliver Owners and Valued Customers, As committed to several weeks ago, the Oliver Travel Trailers business owners and leadership team have discussed at length internally, with our dealer partners, as well as with Oliver owners and potential customers, the subject of continuing to offer service here in Hohenwald, TN. Oliver Travel Trailers has decided to leave our service facility fully operational for the foreseeable future. Oliver Travel Trailers remains committed to supporting and training our dealer network to provide exceptional opportunities to purchase and get an Oliver serviced as close to home as possible. The Oliver sales and service team remains available to assist with any needs or questions that you may have. Once again, Oliver Travel Trailers truly values the relationships we have with our owners, potential customers, and business partners. Thank you for the feedback and continued support. I look forward to seeing many of you at the Oliver Owner’s Rally in May. Best, Rodney Lomax Director of Operations Oliver Travel Trailers Sales & Service30 points
-
To Oliver Owners and Valued Customers, The Oliver team and family greatly appreciates and values our current owners and individuals that are considering the purchase of an Oliver. Without you the organization and Oliver brand would not be what it is today. As most of you know, Oliver Travel Trailers is going through a transition period and some of the decisions have created some questions and potential uncertainty as it relates to the direction of the company. Oliver is paying attention, listening, and monitoring all of the feedback and comments on the forum, social media, emails, and phone calls. Oliver Travel Trailers’ intent is to be very straightforward and honest with our owners, potential customers, and employees. Integrity is the foundation of the Oliver brand. Oliver feels an official company update is appropriate to help clear things up. The following are some key facts: The rumor that Oliver Travel Trailers is positioning the business to sell is absolutely a false statement. The Oliver sales team is still actively working with all new and existing customers to answer questions and assist in the purchasing process. If you are interested in purchasing an Oliver or have questions, please contact us directly. The Oliver service team is still actively providing technical support to our Oliver owners to ensure issues are resolved as quickly as possible. If you have technical support needs, please contact us directly for assistance. The decision to close the service department at this time has not been received well by many Oliver owners and potential customers. Oliver leadership is listening and plans to have discussions on this topic next week. Oliver will update our owners in the coming weeks regarding any changes. Again, Oliver Travel Trailers truly values the voice of our owners and potential customers. We’re listening and we care. Oliver Travel Trailers isn’t a prefect organization, but we are committed to ensuring our brand, our owners, and our future customers have a product and customer support that is the best it can be. Thank you for being part of the Oliver Family. Rodney Lomax Director of Operations Oliver Travel Trailers Sales & Service23 points
-
Like others, we’ve been disappointed with the lack heating in the bathroom. In our Oliver, even the kitchen had minimal air flow and hot air was blasting under the bed. When I took a closer look at the duct routing from the furnace, the problems became obvious. There were two 4” ducts coming out of the furnace, one from the front outlet facing towards the registers, and the other from the rear outlet facing away from the registers. The front outlet was connected to the bedroom register with one 900 bend. It had the shortest run with the least turns, and twice as much air flow as the other two combined. The rear furnace outlet was connected to the kitchen register after making a 1800 u-turn. From there it was Tee’d and reduced to 3” to feed the bathroom. The 3” duct then takes a long and torturous path to reach the bathroom. The resistance from over 2800 of turns, and the longer run, resulted in much lower air flow to both the kitchen and the bathroom. I also found a hole from where the duct had been rubbing on the hot water valve, and the kitchen had a restrictively tight bend at the register. Fortunately this was a relatively easy fix, and the results were significant. Our 2022 Elite II has the Dometic furnace, but I suspect that other furnace brands could have similar ducting issues and it might be worth taking a look. The sketch shows how the duct routing was modified for better balance to all three registers. The bedroom and kitchen registers now feed from the high resistance u-turn at the rear furnace outlet. The bathroom has its own feed from the front outlet giving it the minimal number of turns possible. This modification involved moving the Tee which is under the kitchen cabinet. There is an access port under the forward kitchen drawers to reach the Tee and kitchen register, and it’s best to pull them right out of the access port to work on them. The 3” bathroom reducer stays in place and it gets a new duct directly to the front furnace outlet. The bedroom/kitchen gets connected to the rear furnace outlet. Rather than using flexible duct to make the 1800 u-turn, I used two 900 rigid fittings for less flow resistance. All of the parts needed for this modification are readily available at hardware stores. They usually sell duct by the foot, I bought 5’. Use sheet metal screws and foil duct tape for the connections to make sure they don't come apart. The kitchen register can be screwed together from the inside of the register rather than trying to do it from under the cabinet. I used an anemometer before and after the modification to measure flow, and a on-line calculator was used to get Cubic Feet per Minute (CFM): Before After Bedroom - 4” 100.7 53.2 Kitchen - 4" 39.3 65 Bathroom - 3" 11.8 30.2 Total 151.8 148.5 Cheers, Geoff
 22 points
 -
I completed our new Nova Kool R5810 AC/DC refrigerator installation before our trip to the 2025 OTTO's Rally and the 3 week shakedown was everything we hoped for! I want to thank all of the early adopters, Try2Relax, MountainOliver, Geronimo John, Ty J and rideadeuce, who preceded my installation and shared there experiences. I have attached a few pictures that are similar to those that have already been posted. I would also like to shout out to David & Kristine Hess, Cooper Jenkins and the rest of the folks at Sea Biscuit Metal Designs for their help and creation of the upper and lower vents for my refrigerator installation. If you need something custom made from metal, they are my goto team! Mossey
21 points
-
I'm BACK Thanks to everyone for your thoughts and prayers - especially those that were specific to me and my family. We never lost power, satellite TV, or water/sewer in my sub-division. We had several trees down that blocked the roads into/out of our home but our City workers pushed those aside fairly early after the rain stopped and then my wife and I cleared the 95% of the mess up until I ran out of gas for the chainsaw. However, even though (as far as I know) the small town where I live "only" had relatively little damage, the storm had major effects on many areas around the entire Western North Carolina, north Georgia, and Tennessee. Specifically, the small town of Chimney Rock is basically gone. I don't mean damaged, I mean it is literally gone. There are highways that are gone, bridges gone, and, of course, buildings that are gone. I've heard varying numbers of deaths due to the storm but there are still areas that have not been visited because there is simply no way to get to them other than helicopter fly overs. Fortunately, these types of storms are not "normal" for us. Certainly THAT is good news. But, the bad news is that our infrastructure is not prepared for this type of thing. Also, our personal and governmental structure is basically not prepared. Curfews have been place since early on and I've not traveled so that the people, equipment and supplies that are needed can more easily get to where it is really needed. However, what little I've personally observed is amazing. We did get cell and land line phones back yesterday and just this morning slow internet is available. My wife went out early this morning in the hopes of getting some fresh fruit and milk. It took longer than "normal" but she returned with those supplies. Only one grocery store had those things in stock though and of the three stores she stopped into only one was accepting limited credit card payments. Apparently the local gas stations have received fresh supplies of gas but there are still long lines to get it. I'm guessing that by Friday things should be getting back closer to "normal". Unfortunately, I can't say the same for other nearby areas where I'm sure it will take months (if not years) to find any sense of "normalcy"😟. Bill p.s. I store my Ollie in a storage yard about 10 miles from my home. I'm assuming that it is still there and undamaged - I'll try to go for a visit by the weekend.21 points
-
I love my wife Chris, and as each year goes by it becomes ever more so apparent! We purchased our Oliver just days short of a year ago and we love being together in our travels, no matter where we camp for the night, good or bad. I share this thought today with my virtual Oliver family. I do my things and she does hers and the best things are the times we spend together. She often asks, “How’s the blog going?” She’s referring to this forum and she is always interested. I tell her stories regarding y’alls antics, often over a drink or two before dinner. She listens and smiles, what a smile. Today is a very special day for us, as it is our 30th wedding anniversary! I have a difficult job every year from June 1st to June 7th. Her birthday being the latter date. Last year, as you can see, it was easy as can be, as to her surprise I brought home an Oliver! 😊 What in the world can I do this year! Good thing we do not need to top the great times we’ve had and will always have together. I write this for my partner in life. Love you, Chrissy.
20 points
-
I have been chasing down the solution to a Norcold refrigeration problem for 18 months. My fridge worked well on AC, so so on DC and inadequately on propane. The best it would do on gas was 7-10 degrees in the freezer and only 50 in the fridg section. We do a lot of boondocking and really wanted to keep the gas option. Here are the various steps I took one at a time without success: Pulled the fridge and cleaned the burner tube, changed the thermistor (3 times), changed the main board, checked the gas pressure, changed the thermostat and added a dual extra fan to the top, changed the DC board (one to the right of the main board), changed the eyebrow board, added venting, added insulation. All of these steps were recommended by techs who I paid. The last tech I hired told me that I needed to replace the cooling unit since I was wanting to keep the existing model. Unfortunately, Norcold no longer makes the N412.3 model and replacement cooling units are out of stock. I was advised to find a cooling unit from a 3rd party, order it and then pay the tech to install it. The first cooling unit manufacturer that I contacted did not make units for this smaller fridge model and recommended talking to a guy in Olive Branch MS who rebuilds cooling unit. When I spoke with this gentleman in MS on the phone, he was far more than helpful and told me that my cooling unit was not the problem. He told me to remove my burner and soak the orifice in a high percentage alcohol for a few hours, then blow it out with a compressor and reinstall. Now mind you that my flame looked fine and didn’t seem to be a problem to me or to the two professionals that previously looked at it. 80 year old Mr. David Force, owner of Cooling Unit Warehouse explained that there was a paraffin buildup in my orifice and that although my flame’s appearance didn’t visibly change after cleaning it, the temperature of the flame had been slightly below the necessary temperature. He said that a 10-degree flame difference can change everything. Bottom line, I followed David’s advice, the fridge has been working like a champ for 50 hours on propane so far. I wish I had known this before I spent 18 months and 7-800 dollars on un-needed parts. Nevertheless I am thankful that it works like it is supposed to so that we can head out next week for a month long trip. I'm posting this in hopes that someone can avoid a refrigerator adventure.18 points
-
A few lessons learned from the recent storm here in Western North Carolina: 1: Get and/or make a copy of any drug prescription(s) you may have. A neighbor of our went to CVS to get a refill for one of his meds. Due to having no computer and/or internet access the pharmacy could not verify his prescription and, therefore, had to deny his request. They advised him to go to the local hospital where he could see a doctor to get a new script. 2: Keep a supply of cash (in small bills) on hand. Since power and access to computers/internet was lost in the region, the only way to get any services and/or products was to have cash. 3: Keep at least a 1/2 tank of gas in your vehicle(s) at all times. First the power went out. This caused the gas stations to not be able to pump the gas that they had on hand. Second, the power came back on but then there was "panic" buying and long lines to get gas. Third, when the gas stations were re-supplied there were still long lines due to the "panic" and uncertainty of when or if gas would be available in the future. 4: Keep bottled water on hand. Obviously the amount partially depends on the number of people, the area where you live - to include climate and time of year. 5: Consider some type of satellite communications device. This can be something as "simple" as a personal communications device like the Garmin InReach mini, a satellite phone, or Starlink. Bill18 points
-
OK... Been thinking of this for a while and with some encouragement from @Geronimo John - it's probably a good a time as ever to post this. So, last month the traveling Knuckleheads and I visited the "first come - first served" Oliver Campground for some maintenance activities. We pull in around mid-afternoon knowing there's likely to be some serious WX coming in our direction. Having never been to the much touted-about showroom and maintenance facility located in an industrial area "across the tracks" in Hohenwald, the puppies and I met all the fantastic people in the showroom and general workshop area. Josh showed us all the new upgrades to the 2024 models and Magnus and Oscar approvingly inspected every square inch of them. We were adorned with swag like one couldn't believe (albeit the coveted "Ravel Cups" were no where to be seen)... Retiring to the Casablanca as the only Oliver in the campground, we threw on some Chris Stapelton and settled in to chill for a bit. A few minutes later, a rap at the main entry hatch... "Sir, since you're still coupled, it would be advisable to bring your rig through the main gate and under the protective metal roof by the shop". Assuming he (I'm thinking it was Mike) knows the WX patterns a ton better than us - I "rogered-up" and by the time I managed to snuggle the Tundra under the awning, the hail went from pea size to "no SH!T" golfball size. Never experience hail balls like that. The noise was louder than sitting behind the JBD waiting to launch with an F-8 in full burner on the CAT! IMG_1665.MOV It lasted about 20 minutes or so... The Oliver folks literally save our Tundra from being destroyed by the storm's hail - our metal panels aren't like the thickness of trucks back in the day - they're very thin. Jason Essary came up during the deluge, explaining that they get this type of storm often and I asked about the 6 or 7 brand new OTTs in the parking lot totally exposed to the hurling ice balls like ours was... He said, "No worries, until those hail balls get to the size of frozen chickens, they'll be good as gold!" WOW! Our's was completely being pelted by the hail as Jason explained this and sure enough - no issues! We'd just like to take this moment to thank ALL of the OTT employees that were there that day, helping us save the mighty TV, our Tundra... Cheers, ALL!18 points
-
Camping at the Dinosaur National Monument, at the Green River campground, and couldn't eat on time because of the people wandering by saying "Is that an Oliver?" or "What kind of trailer is that?" I think most folks had already eaten and were doing their after dinner walkabout, but I got back late after hiking in the desert. Of course I'm not going to blow them off because I LOVE talking about my trailer. I had hoped to eat outside and watch the sunset but nope, by the time all the interested parties were gone, it was dark and I'm eating inside. I might have part of the blame for this.17 points
-
I've been a member watching from the sideline since February 21, 2018. Now, retirement is a week away and we pickup unit #1525 June 8th--EXCITED IS AN UNDERSTATEMENT!!! Delivery photos coming soon.17 points
-
Just some quick feedback after 5,175 miles on the Alcan leaf springs, and 1,500 miles on the D52's and new Monroe shocks: 1. We replaced the leaf springs just prior to the Eclipse Rally in TX last MAR and logged just north of 1,900 miles on that round trip from our home in NM. To baseline the structural frame support integrity, we photographed each of the aluminum welds visible from under Casablanca. The welds were in good order/no visible cracks before and after the Eclipse Rally. Nothing unusual noted in the interior of the camper during this first trip with the new springs. 2. We logged another 1,190 miles on the Alcans on our first leg of the OTT Owner's Rally from NM to Hohenwald arriving there 8MAR. We coordinated with Jason Essary to replace the Dexter D35 axles with the D52s Nev-R-Lubes with 12" drums. Dusten Bowden (18-year veteran of OTT and now owner of Dr RV Mobile RV Repair) and I swapped out the axles and mounted new Monroe's on 9MAR without issue. 3. Performed the U-bolt nut torque tightening protocol recommended by Alcan for the 9/16" U-bolts at 50, 100, and 500-mile increments. Arrived at the Owner's Rally on Tuesday last week after logging 265 miles on the D52s/Monroes. No issues noted after checking the U-bolts for proper torque. 4. Arrived home yesterday. 5,175 miles logged since MAR. The trailer pulls well in all the weather conditions experienced including strong cross winds through Amarillo on I-40 and some of the lousiest interstate sections we've experiences through northern Louisiana on I-20. Integrity of frame welds show no change since before changing springs, FYI. We're pleased with the running gear mods as they 100% meet our style of travel trailering... Cheers, All!17 points
-
Summary: Check under your kitchen sink I walked up to an Oliver at a campground one time to introduce myself. I noticed water running down the curb side rear stabilizer. After exchanging greetings I brought the leak to the attention of the owner. After looking under the curb side bunk and finding nothing I suggested that he look under the kitchen sink for the source of the leak. Upon removal of the drawers he found water soaked plywood caused by a loose coupling on the kitchen sink drain trap. Since then I have tried to check mine occasionally to ensure that it is tight and to look around for any other problems. Today I found that the quarter turn stop on the hot water was not completely open. It had probably been like that since we took delivery. Anyway, I opened it and improved the hot water flow at the sink. Occasionally remove your (kitchen) drawers and check on stuff down there -tightness of the drain coupling -quarter turn stops fully open -refrigerator plug plugged in -hose weight located between back of drawers and rear of cabinet carcass -hose not twisted -any sign of moisture -anything rubbing against something -and especially that blue clip on the faucet hose assembly. There was an owner that heard water running underneath her sink when she turned the faucet on. Turns out that blue clip was missing and the hose had completely separated. We have a 2018 OEII, hull 313. Some of this stuff has probably changed. The round port was added after production to access a loose clamp on the exit end of the fresh tank overflow hose. It sure is useful for checking below the cabinets. There is a plumbing vent under the back right corner of the range. It is supposed to let air in and not let grey tank smells out. If you are smelling something foul (grey tank odors, not black tank odors) and you can’t locate a leak you might have a bad plumbing vent.
17 points
-
This is a duplicate of a post I made on the Facebook Oliver owner’s page. I’m sharing here for those not on Facebook that may be interested in a dehumidifier option for their Oliver. We were experiencing rainy and cool weather at the rally and conditions in the Olivers were getting steamy. Facebook post: Temperature and humidity outside at Lake Guntersville state park are 62deg and 94% humidity this morning. Inside OllieHaus it’s a perfect 73 deg and thanks to our counter top dehumidifier, it’s a very comfortable 46% humidity with all windows closed. No heat or AC needed. Loving life in our Oliver!! Edit: Here’s a link on Amazon for the dehumidifier if interested: Dehumidifier
16 points
-
This long awaited swap-mod is now checked off my to-do list! Like many, I tolerated the noisy Dometic Penguin ll long enough; so glad I was finally able to take decisive action with this install. After a couple years of mulling over the various replacement models being marketed, a unit emerged that caught my attention; the newly available Atmos 4.4 seemingly met all of my expectations. I will forego the removal of the Dometic, here is how I proceeded forward: First and foremost, all AC and DC power sources were turned OFF! Scaffolding and equipment/supplies were then staged for Dometic ‘liftoff’ and subsequent Atmos ‘lunar landing’ (only appropriate since I live a couple miles from the NASA Mission Control Center in Houston). Roof area in need of cleaning. Notice the raised fiberglass landing on my year model and that the former condensate drain tube was simply disconnected rather than cutoff. Roof area throughly cleaned and prepped. I decided to adhere the square self-adhesive foam roof seal directly onto the fiberglass and then apply non-leveling Dicor around the cutout perimeter to further ensure the best seal possible. In positioning the foam seal, care was taken to center it as evenly possible, thereby allowing about 1/4-3/8” of exposed fiberglass to lay a bead of the Dicor and finger smooth to finish. Interior view of the Atmos being positioned over the roof cutout. Note the use of the mounting bolts as a guide, as recommended by SDG. Because the ‘rough cut’ edges of the layers of fiberglass (inner and outer hulls, and spacial filler) were inconsistent, I used the foam seal as a reference to accurately center and align the unit; distances measured to each respective bolt. Initially, installation instructions were followed by adhering the supplied straight piece of self-adhesive foam onto the bottom of the unit as a rear support, but it did not make contact with the roof due to relief of the aforementioned fiberglass landing. Alternatively, the foam piece was cut in half and each adhered onto the fiberglass, in like manner as the square seal, along the outer edges of said landing. This adaptation proved very effective in application and purpose, as the last of the next three pics demonstrates. Now that the exterior unit is properly positioned and supported, it’s back inside to further installation. As a side note, I made use of a portable a/c to buffer the heat and humidity of the day! Although my son helped with the heavy lifting and positioning, I cut him loose and completed the remaining tasks solo. Before proceeding, I used foil tape to treat the end of the aforementioned condensate drain tube and secure it to the side. Next the installation of the fabric air plate duct subassembly was started (provided Dreiha Atmos 4.4 Manual details the process). Note I used foil tape on both the upper (at Atmos bottom) and lower (at mounting frame) duct plates, even though most installs viewed applied to the mounting frame plate only. Between the upper and lower duct plate installs, the ceiling assembly mounting frame was bolted in place and hand torqued using a screwdriver only (torque specified in Manual). The AC power connection was very straightforward. The ceiling assembly’s junction box cover was removed, a strain relief fitting installed at one end (the other end had a preinstalled protector) and respective wires routed inside. I reused the Wago Lever-Nuts from the Dometic install, but first tinned the stranded wires of the Atmos lead for optimum assurance in application; electrical tape was used to further secure the Wago connectors. Ground wires were secured per the Manual. The junction box cover was then replaced, DC thermostat wire bundle loom wrapped and tucked away for future use, and ceiling grille fastened in place. . I’m very pleased with this mod, quality of the Atmos and ease of installation! I should mention that SDG preinstalled a SoftStartRV. I will provide an update once the furnace wiring and thermostat mount is completed. A special shoutout to @rideadeuce for forging the way with his install of an Atmos!
16 points
-
Last night was our 100th night in our 2023 Oliver Legacy Elite II “Curiosity”! While not a big deal for a lot of campers, it is a milestone for us. Thank you Oliver Travel Trailers for building us a wonderful home away from home!
16 points
-
We recently returned from a week-and-a-half-long trip through Glacier and Banff for my 50th Birthday. Farily last minute all 3 of my girls decided to join us on this trip. This created some logistical challenges we had to figure out. We got it all worked out but it left us with one night where no one had a place to stay except in the Ollie. That meant all 5 of us sleeping in the trailer! Who says it is just a couple's trailer, bring on the family camping 🙂 Not a great picture but had to share. The girls were great sports about it and we had a fun night hanging out and watching a movie. We ended up having a wonderful birthday trip through Glacier and Banff. It was our first time in Banff and it did not disappoint. An amazing hike up Avalanche Lake in Glacier. And then we got an amazing site in Banff Tunnel Mountain II Lake Louise did not disappoint either. We also had a great time talking with our neighbor, who was headed to Alaska in their EarthRoamer (pricey little machine)! Overall, an incredible way to celebrate a 50th birthday!
16 points
-
OK... You're boon docking in a remote area on BLM/Public land and you experience a critical medical emergency requiring local EMS response. A call to EMS on your commo device (either via local cell net, Starlink, PEPWave, SATPhone, HAM radio, or whatever) will require a hasty report with specific location information as accurately and efficient as possible. You may not have an accurate street address or may not know your grid/GPS coordinates. Even if grid/GPS coordinates are known, this data is a lengthy alphanumeric string of up to 17 characters which could easily be jumbled up or miscommunicated in the heat of the emergency, sending responders to the wrong location. Using the first 6 lines in a military-style "9-Line MEDEVAC" report is a good start to communicate for your EMS request. Line 1 of the 9-Line MEDEVAC format contains the most important data in the report - your location, expressed using either grid or GPS coordinates or a simple street address. Clearly, this critically important data should be quickly and accurately conveyed to the response team in a life-saving scenario. The problem is making this happen accurately from a remote location. An available free application has solved the problem - it's called, "what3words". While attending an amateur radio campout last week, "QuartzFest 2024", one of the EMS presentations introduced this application and how it can be used to more effectively vector-in a response team. At https://what3words.com/products/what3words-app you can learn what this app can do to accurately describe your location to an EMS team using only 3 random words. The developers of "what3words" have mapped the planet into discrete 3-meter grids, each of these grids is assigned 3 random words that never change. For example, sitting here in my living room, my "what3word" address is: "seamlessly.gossips.bottle". Should an emergency response be needed here, we could contact response personnel and pass along these 3 words to describe the location of the emergency. Provided the local EMS has access to the free app, many do, they'll be able to navigate their way to my living room. Responders across the country are using this app, as are companies like Amazon, Uber, and food delivery services, to bring their resources to a precise location without grid/GPS coordinates or inaccurate street addresses. The "what3words" address is compatible with many navigation apps and can be shared via text. Turns out, last year during the QuartzFest, an attendee experienced cardiac arrest. One of the HAMs contacted Quartzsite EMS, quickly communicated the specific "what3words" address of the patient's location and EMS deployed to that grid square using the app's navigation feature. We've got our family members up to speed on the "what3words" capabilities and would like to get the "word" out to the OTT RV community to consider using as part of their boon docking regimen. Stay safe out there! Cheers!16 points
-
How about an individually adjustable pneumatic airbag type suspension for Ollie? No axles - lighter, smoother ride - less damage to OTT and components, no more broken leaf springs, more ground clearance by adjusting air pressure, enhanced braking, and "drum roll" please.... no more zerks! ...screenshot taken from an earlier thread on "Aussie Quality RVs": ....just say'n
16 points
-
Tired of my books scattered all over the trailer and staring at the wasted space under the streetside twin bed “wing”, I installed three plastic bins that I found at Target ($6/ea) and installed using command velcro strips so they can be easily removed for cleaning. Now my books have a home, are easy to access while in bed and don’t fly around on rough roads. Bin dimensions/ea are roughly 5”Hx5”Wx14.5”L. I installed them about mid-way up the wall under the bed so there is still toe room underneath and books can still be removed easily.
16 points
-
***Long Post*** XPLOR Hull #634 Victron 3000 watt inverter, Victron 12v DC to DC charger and Epoch lithium battery upgrade. Note: To discuss options and pricing, please contact Jordan Hall at Inverter Services, White House, Tenn. Our OEM AGM batteries were getting long in the tooth and it was time to upgrade our batteries to a complete lithium battery system on our 2020 Oliver LE2. Our good friend, and former Oliver owner Jim Posey, highly recommended we speak with Inverter Services in White House, Tennessee. I called and spoke with Service Manager Jordan Hall and discussed our needs and options. Jordan and his team at Inverter Services were excellent to work with and have a lot of experience working on Oliver travel trailers. Our tech/installer, Easton Ford, kept us updated on our install progress with photos and discussions as needed. We found Easton to be extremely detail-oriented and dialed in and focused on our project. We were originally scheduled to have this work done next March. After returning from our 54 day New England and Canada trip, I decided to call Inverter Services and ask if they had any cancellations. They did and we immediately took the cancellation. They are typically booked 6-7 months out. So we hitched op Oliver and headed to White House, Tenn to leave our Oliver with the team for 2 weeks. Important note: Inverter Services supports the RV and Marine industry in ALL things lithium battery and electronics. This is one of the most detailed and thorough, cutting-edge companies we have ever done business with. I chose Inverter Services to do this install because this is not my area of expertise and it absolutely is theirs. These guys are experts in their field and I admittedly am still in the learning process. Based on our excellent experience, we highly recommend Inverter Services in White House, Tenn if you are considering a lithium upgrade. We chose all Epoch & Victron following products for this install. (2) Epoch 300ah lithium batteries (internal heating elements) -https://www.epochbatteries.com/.../12v-300ah-heated... *Victron MultiPlus-II 3000w Inverter/charger *Victron GX 70 Touch Screen *Victron Smart Solar MPPT *Victron Orion XS DC-DC Battery Charger **We also had the RV Soft Start installed on our Truma Aventa AC. Inverter Services provides tech guidance/support/firmware updates as long as we own our Oliver. I cannot stress enough the pride this company takes in their work. As I think most would agree, Victron components are a class all their own and leaders in the Marine and RV industry. Post install, we have on board 600ah of lithium battery power, and with our extra 90W Zamp panel now configured to lithium, we have approx 410 watts of solar. This will certainly give us more options on the roads less traveled and boondocking. Still lots to learn on this new system. Now having the 12v DC -DC charger I don’t think we will see a need to carry a generator any longer. Thanks to all those on the forum who made the Lithium upgrade happen. ⚡️ The information gleaned here helped me decide the direction I wanted to take this install. ⚡️Happy Camping and Safe Travels! ⚡️ A few install pics- The Victron GX 70 touch screen fit the existing opening with no cutting or trimming of the fiberglass. Our system at a glance. The touch screen nice option if no cell service is available for the Victron app. Although with our SL mini that’s not an issue. Very happy with the touch screen and the Victron app. We can set the screen to time out at 5 or 10 min or longer and then go dark for sleep mode. Zamp 90W suitcase. 12v DC to DC Andersen connector. On our way home we camped at Cumberland Mountain SP in Tenn and gave our new system a shake down. It’s nice to not have to plug in. 😊
15 points
-
Bulldog shocks are a bit beefier and look like they are well made. Easy swap. Leaf springs look good, still on the fence about upgrading to the Alcan 5 leaf springs. Clips were loose on both springs on the right. Center bolt nut on the left EZ flex was loose and about to fall off. All of the Monroe shocks seemed to be in good working order just rusty. Future plans include the ALCAN highway so trying to get everything done now. New tires in the morning. https://www.4statetrucks.com/bulldog-hd-shock-absorber-replaces-555001-19-050000007 Wildpeak H/T02 LT225/75R16 E/10PLY BSW *** Now back to torquing the shocks so that the cushion is the same diameter as the metal retainer but not larger. ***
15 points
-
After lugging around my old heavy Gen-1 Starlink for a few years, I was thrilled to get the new Starlink Mini. It’s small and light, and the router is built into the dishy. It speed tested at 202 Mbps, a very respectable speed, although not as fast as the Gen-3 which typically runs over 300 Mbps. The Mini comes with a 50’ x ~1/8” diameter power cord that has 5.5 mm barrel connectors on each end. It also comes with a 120 volt AC wall transformer that puts out 30 volts dc (vdc.) The Mini is rated to run on 12 to 48 volts vdc, and 25 to 40 watts. It peaks at 60 watts with snow melt on. The 12 Vdc rating is an attractive feature, particularly for Boondockers who don’t have inverters. However, when I first hooked it up to the Oliver’s 12 Vdc battery… it would’t work?? After some investigation, it turns out that it’s not so simple and I’ll try to explain why: Given that the AC transformer puts out 30 volts, and the power is about 40 watts, then it would be drawing 1.3 amps per Ohms law (40w/30v = 1.3 amps.) With the same calculation at 12 volts, the amperage increases to 3.3 amps. The resistance of the long thin power cord can’t handle this higher amperage and the resulting voltage drop puts it below the minimum 12 volts operating range. In fact, I did some bench testing and found it would only work at voltages over 18 volts. There are solutions to this issue including cutting the cable shorter, using a larger gauge cable, or increasing the voltage. Without a better option, I chose to increase the voltage. I looked at cheapie power converters that would probably work, but I wanted something more robust and higher quality. I found a Victron Orion TR 12/24-5, isolated, DC to DC Converter, and it was perfect for the job. It has a 12 Vdc (+/-) input and an adjustable output of 20 to 30 Vdc at 5 amps. Standby power is under 80 mA, and it has remote on/off switching capability. It comes factory set at 24 Vdc, but I adjusted it to 30 Vdc output with the potentiometer on the front. To connect the Mini to the trailer’s 12 Vdc power system, I installed a 5.5 mm female panel mount socket into the Satellite TV inlet. I removed the Coax connector and the 5.5 mm socket and nut fits perfectly in it’s place. Oliver conveniently labeled it “Satellite.” If you need the satellite TV, then install a third “Furrion” inlet as I did for my old starlink RJ45 connector. I mounted the Victron under the rear seat on the street side. The socket wiring was sheathed and routed along the ceiling of the outside storage garage. There are a number of options to pick-up 12 volts in that area, I took power off one of the circuit breakers. I ran the negative wire to the ground bus under the rear dinette seat. The Mini comes with both a snap-in kick-stand and a 2” pole mount, and they’re both necessary for optimum RV use. I prefer having it on a pole, but we often have to move the dishy away from the trailer for a clear sky view. That’s why it’s a bad idea to shorten the cord. It also has an RJ45 port that I suppose is for hardwiring without WIFI, but I probably won’t ever use that feature. I built-up some PVC fittings on my 10’ Electrical Metallic Tubing (EMT) mast to fit the Mini’s pole adapter. (See the post for Tacky Starlink Dishy Mast). A little sanding was involved, and the starlink mount uses a thumb screw to hold it in place. It’s better to turn the Victron off when not in use, so I recommend using the remote switching feature with a switch installed in an easily accessible location. I’m too forgetful to switch the Victron off every time, so I came up with a way to turn it on & off when the Mini’s power cord is plugged in & out. Read on if your interested in that part of the installation: The “three pin” 5.5 mm female socket sold by Amazon has a built-in switch that’s designed for appliances that use either batteries or a 120v transformer supply. When the transformer is plugged in, the pin-3 switch opens to disconnect the batteries. This is opposite of what’s needed for the Victron remote switch, but it can be used to trigger a digital relay and it’s actually easier than it sounds. Amazon carries fun little programable 5 &10 amp timer/relays for under $20. I already had the 10 amp version in the Oliver for a hot water recirculation pump timer, and it works great! The 5 amp is adequate for this application, and you will also need the $20 dollar re-usable Bluetooth programer. They use 50 μA of idle current, which is nothing, and they can be programed for delay-on, delay-off, flashers, dimmers, duck decoys, and more. But for our application, we’re just interested in the trigger functions, specifically the “ground-open” trigger. Before installation, the relay has to be programed from a smart phone or computer. It’ links by WiFi to flash the program into the relays memory. Use wire nuts to connect the timer and programer together, and power them from a USB port. Follow the well written and simple programing instructions using the settings shown in the screenshot below. The relay requires a timing function, so I arbitrarily used function #12, which is “delay-on.” I set it randomly to 1.5 seconds. The trigger is programed to use the “Trig Blue” set at #5, which corresponds to the blue wire used as a “grounded trigger.” The green wire trigger is disabled. My wiring sketch shows that the timer is powered with 12 volts from the Victron’s positive and negative inputs. The relay’s yellow output wire feeds the positive side of the Victron’s remote switch (the negative side is not connected). The Victron’s output feeds the 5.5 mm power socket, and the blue trigger wire goes to the 5.5mm socket’s pin-3. Use a continuity tester to identify pin-3, it’s normally shorted to the negative lead of the socket and it “opens” when the male connecter is plugged in. The socket barrel is negative, or ground, and the center pin is positive 12 vdc. There is one other step to make this work. This Victron model is “Isolated,” meaning that the input and output “negative” terminals are isolated from each other. It needs to be “non-isolated” because the timer is grounded to the Victron input, and the socket is grounded to the output, and the trigger needs continuity between the two. So remove the jumper wire that comes on the Victron’s remote switch, and use it to jump across the two negative terminals. Victron support confirmed that shorting the grounds is not a problem, it just un-isolates it. This works satisfyingly well! I checked out the power draw with the solar turned off, and while streaming a video. It was 2 amps, 27 watts (after subtracting the parasite load). That’s a huge improvement over my previous Starlink, and I don’t have to worry about running the inverter and draining down the batteries anymore. I hope someone finds this useful Cheers! Geoff
15 points
-
Been here for the last 5 days. Chihuahuan Desert, Big Bend NP
15 points
-
Just departed Bryce Canyon NP arrived Zion after a beautiful drive…. Safe travels and Cheers to all y’all road warriors! Best,, A & D (Magnus & Oscar, too — woof!)
15 points
-
I just completed installation of a Victron Smart Orion 30 amp isolated DC to DC charger after reading all the great information provided in this forum by MAX Burner, and others. I really appreciated all their groundwork and details, so I wanted to share some of my experiences in the hope that others will find it useful. I used #4 AWG wire for ease of installation and for better termination options. BatteryCablesUSA recommended their “Jumper Cable” wire and it was the best deal I found at $197 for 55’ x 2. It consists of a black and red cable joined together like zip cord, and it’s flexible enough to lay flat under it’s own weight. Their lugs and heat shrink were also reasonably priced. I sheathed the full length of the cable with 3/4” braided cable sheath for extra protection and good looks (Amazon Keko 100’ roll for $21.) I seized the ends with Amazon XFasten fabric Wire Harness Tape (5 rolls for $14.) BatteryCablesUSA also recommended Anderson SB50 connectors, instead of the larger #4 AWG rated SB120 connectors that I originally planned. They said that #4 AWG wire would fit in the SB50 #6 AWG contact pins, which it did. I used Trailer Vision covers for the Anderson SB50 connectors. A TV-201426-50 surface mount receptacle with hinged cover plate was installed under the truck bumper. It has a red LED power indicator that I discourage from connecting because it’s on all the time and annoyingly bright. They also offer a flush panel style mounting. The sheathed cord on the trailer side got the Trailer Vision TV-328993-50 plug cover. It has a protrusion that catches on the mating receptacle’s hinged cover to stop it from pulling out. It’s similar to how the 7-pin connector ports hold the plug in. It also has a LED power indicator that’s more useful because it’s only on when connected. It uses a compression gland for the cable that I filled with black RTV. Powerwerx company sells Trailer Vision parts, Anderson connectors, and other accessories for reasonable prices. Get at least 4 extra #6 Anderson pins for connecting to the Victron compression terminals as explained later. Powerwerx also sells the “PanelpodSB,” which is a surface panel mount Anderson SB50 housing for $11.99. I mounted one on the Oliver’s cargo box for “parking” the Anderson connector when it’s not plugged into the truck. It keeps with my existing theme of parking places for the 7-pin cable and RAM rear view camera cable. They also sell a tethered cap to keep it clean when traveling. The engine compartment wiring was straight forward. I connected the cable’s red wire to a 60 amp terminal post fuse on the battery positive. The black wire terminated to the battery negative. The trailer half of the sheathed cable went through a penetration behind the LP tanks. A hole was drilled through the trailer wall next to the existing penetrations with a 1-1/8” step bit. The sheathed cable passed though an Amazon PA66 1” nylon cable gland ($7.99 for two.) I used a short piece of heat shrink over the sheathing where it passed through the gland and filled the gaps with black RTV. The shelf under the bathroom sink has to be removed for access to the inside cable penetrations. From there the cable can be simply pushed under the floor to the rear dinette seat where the Victron was mounted. The Victron has some great safety features that will automatically reduce, or shutdown, the output if it gets too hot or the input voltage drops too low. It’s important to take this into consideration because it would likely happen while driving, and you wouldn’t know it without constant monitoring. Voltage drop especially comes into play with the new smart alternators that lower voltage output to save energy. The Victron’s default voltage settings account for this. However, due to the longer run of cable needed with travel trailer installations, the cable resistance can cause enough voltage drop where it can go below the default settings and cause the Victron to derate it’s output. I calculated the voltage drop for different wire gauges at 35 amps (nominal input current) and a cable distance of 53’ x 2. The results don’t include the connector and termination losses: 1.46 volt drop for #6 AWG 0.92 volt drop for #4 AWG 0.58 volt drop for #2 AWG Per Victron’s instructions, a 0.6 voltage drop can cause a “Voltage Lockout” with the default settings. There are many factors that can affect this, and fortunately the Victron defaults can be adjusted. To account for my voltage drop, I decreased the “Start Voltage” from 14 to 13 volts, and the “Shutdown Voltage” from 13.1 to 12.8 volts. These setting were recommended by “Offgrid Power Solutions,” on a You Tube video called “Victron Orion-Tr Smart DC-DC Charger settings.” Cooling is also an important consideration for the Victron because they create a lot of heat, and they derate charging current 3% for every degree above 1040 F. That’s almost 50% performance loss at only 1200. Maximum operating temperature is 1310, where I believe it shuts down completely. This is why I installed cooling fans (but also for the fun of it.) Amazon’s ”Sound Original” low profile blower fans (two for $9.99) were the right size, they had bearings, brushless motors, and a good mounting configuration for this application. The Victron was mounted on 1/4” standoffs to keep its cooling fins off the mounting surface, and it also helps the fans to distribute air more evenly. I used a Normally Open, 1040, 5 amp, thermostat switch to control the fans (Amazon Uxcell KSD9700 (2 for $5.49). The fans get power from the input terminals on the Victron so they can only come on if the truck is connected, and the temperature is over 1040. The thermostat switch resets at 860. The Victron was mounted on a painted plywood board that was attached to the forward battery compartment wall. It’s an easy to reach, out of the way location. I used 4 rubber well nuts that stay in place by themselves, but regular nuts and bolts could be used. The sheathed #4 cable was terminated to the Victron’s input compression terminals, with the fans power leads. I struggled at first with the Victron’s compression terminations, the wire wouldn’t fit, and I couldn’t find #4 square ferrels. So I was pretty pleased to discover that Anderson pins can be filed down to fit perfectly. Just be sure to cover the exposed barrels with heat shrink. The negative output of the Victron went to the main chassis ground post under the rear dinette seat where there is a 2/0 cable going directly to the battery negative. The positive output was connected to the line side of a Blue Seas 60 amp fuse block, from there it went to the line side of the existing inverter’s DC circuit breaker, which is jumpered to the battery positive with a 2/0 cable. With the TV at idle and the lithium batteries around 60%, the Victron output was 35.8 amps as measured by a clamp-on amp meter. The TV input was 42.5 amps. This calculated to 84% efficiency, which is close to Victron’s 87% claim, which I assume is under perfect conditions. I really liked the looks of the sheathed cable and Trailer Vision plug and receptacle,. The hinged receptacle cover will keep the dirt out when not towing. The plug and receptacle are locked together more securely with the Trailer Vision covers, otherwise the Anderson connectors can be fairly easily pulled apart and they might not stay together on a bumpy road. Cheers, Geoff
15 points
-
They put us on their November calendar. After running our trip, every time I sat on the old cushions, I thought it would be a shame to merely reupholster with new cloth yet keep the 9-year-old foam. When we dropped them off, I asked about new foam. He said the quality of foam for seating they carry is far superior to what we showed them in the old cushions. We went with 24x25" bottoms with 5" new foam (1" taller) and with the batting and fabric, the cushions are closer to 6" tall. We had 2" clearance under the window frames with the old cushions. The new ones just fill the opening and stay nicely. Went with the original sized 4" foam for the seat backs. All new foam, batting, fabric, zippers with newly corded edges. Chris loves the color given her Red, White and Blue Oliver theme! We spent just under $500 out the door. Which for me was better than the $350 for upholstery only. Soon, she will look as good as she tows or provides inverter power!
15 points
-
On the last leg of our summer family vacation we stopped at my dad's in MI. Next morning, I drove down to Elkhart, IN and had SDG install the Atmos 4.4. Guys were on time, efficient and knowledgeable. Installation went great! Pics below: They now offer SoftStart as an option on their website but I brought my own SoftStart Breeze (smaller version) . Atmos 4.4 Pics Removed the old Dometic Penguin II, cut drain line and plugged. Cleaned surface, applied very small bead of Dicor self-leveling on the inside perimeter of fiberglass 14 x14 opening Removed interior shroud. Penguin shroud was screwed to fiberglass ceiling, the 2 holes on each side will barely show after Atmos plenum installed. Fixed mine with a couple of the small glow in the dark dots we use on the ceiling to amuse the kids. Kevin was able to use the wiring for the original thermostat location to power the Suburban propane heater control. I may change or remove this later. They used Molex connectors instead of JXN box additional pics The new unit is a good bit quieter (6-10db) depending on mode and has around 40% less draw on the battery. On high it was pulling 1200 W vs 1800 W for the PII. Fan only was under 300 watts. They were done with the install in 2 1/2 hrs. App and remote are working well but still figuring it all out. I know this is short but on our way home to TN. I did find out that the Atmos 4.4 is designed so that the fresh air coming in and the exiting conditioned air is in a sealed unit and does not contact the outside (humid air). So running the fan only does not introduce humid air, it only re-circulates cabin air. Still awaiting answer on how exactly AUTO mode works. From the manual, it only states that it senses ambient air and automatically heats and cools but nothing about a parameter. You actually cannot set the temperature in that mode at all as far as I can tell. I did notice this unit manufactured 3/24 is using R-32 refrigerant. Best, Mike
15 points
-
This morning we had the 5 leaf pack installed on Hull #634 XPLOR at the Alcan shop here in Grand Junction, CO. We had an excellent experience from start to finish. We opted for the upgraded heavier duty wet bolts, nyloc nuts, Alcan HD 2 1/2” shackles. Our Monroe shocks are still in good shape with less than 2500 miles on them. Over all very happy with the work performed by Tucker at Alcan, he has installed the custom 5 leaf pack on a number of Olivers. Lew the owner was excellent to deal with and explained everything in detail. If you have questions about the install, parts or pricing, give Lew a call. Now we can get on with our trip to Utah, Wyoming and maybe Montana. Onward & Safe Travels! Drop off early morning - yes we hit the loves to top off with diesel, saving 76 cents per gallon with our TDS Open Roads Fleet card. We love LOVES. Ha! Thanking Lew 2.5 hrs later after the new leaf packs were installed. Gotta have a little swag.. Decal swag - Optional upgraded wet bolts. Torque specs -
15 points
-
Thanks to our salesman (Colton Laidlaw) & the folks at Southland RV, Norcross, GA for making the purchase of our new trailer a seamless transaction. I’d also like to thank our neighbors Steve & Tallie (hull #50) for stopping by to say hello. 😊 IMG_3726.mov
15 points
-
I spent all day yesterday installing Alcon leaf springs, Alcon U-bolts and new Monroe shocks on our trailer. I did the work myself and have to say that I recommend tackling it yourself if you have even average mechanical abilities and a torque wrench. I haven't had time to give it a test tow yet but am optimistic that the tow to the rally will be trouble free.15 points
-
I have a little experience with corroded stainless steel. My experience is from when I TIG welded the stainless steel brewing fittings together for my home brewery. I already knew how to weld mild steel, but had to research the specifics of welding stainless steel and how to maintain its stainless characteristics. Are you using a chlorine bleach based cleaner on your sink? Stop doing that. Chlorine can dissolve the protective oxides on a stainless steel surface, exposing the metal surface to the environment which leads to rust. How about cleaning the sink with steel wool? That's not good either. Iron fragments can get microscopically lodged in the stainless which leads to rust. Use a ScotchBrite pad or bronze wool instead. In order to passivate (establish the protective chromium oxide layer) the recently cleaned spot on your stainless steel sink, you need to use a product containing oxalic acid. As mentioned earlier, Bar Keepers friend is one product. Others include Klein King Stainless and Copper Cleaner, and Revere Copper and Stainless Steel cleaner. Bar Keepers friend comes in a powder and a liquid. I always make a paste out of the powder and scrub the area clean with a ScotchBrite pad to passivate any recently welded stainless steel fittings. A paste of Barkeepers Friend powder and a green ScotchBrite scrubby pad should take care of the issue on your sink. Just keep the chlorine bleach products away from anything stainless steel. HTH, Ken15 points
-
I’m sure everyone is aware of the flash flood we experienced here over the weekend. We’re soggy but okay. Our neighbors north in Comfort, Kerrville and Hunt didn’t fare as well. You’ve heard about the children’s camps along the Guadalupe River that were affected, there were also homes and a couple of RV Parks. I’ve learned that one RV park had all RV’s washed away, some campers got to higher ground, some didn’t. July 4 weekend, everything was full and the river came up so fast there was little time to react. There is a huge first responder turn out, church’s, and private companies also. Our local grocery store chain, HEB, was one of the first on site with disaster recovery products, supplies and food. HEB was founded in Kerrville. I know some fellow Oliver owners have camped at Guadalupe River State Park just 9 miles from our house. I don’t have a status on the park. Please keep this area in your thoughts and prayers. There are still a lot of missing people so the death toll will continue to rise. Mike14 points
-
I visited Alcan Spring today in Grand Junction CO. I was impressed by their operation and service, what they were able to accomplish on a minutes notice. As a medium-sized manufacturer and automotive service company, I quickly noted their company quality, efficiency and fully capable staff (see picture of a portion of their operation). I purchased leaf springs for our Oliver, including HD shackles, new wet bolts and U-bolts (pic2). Our Oliver requires the 50.00 length axles. They measured our Oliver. For comparison they manually measured their 50.50 springs which they stock for Oliver customers. I asked them how can I go about getting the correct D52 axles for our hull. They replied that the could special order axles for me and charge me the same price as the axles they stock and buy in bulk for Oliver owners. And that's what I did. Getting my special-order axles will take 6-8 weeks and they will ship to me when ready. I was out the door in an hour. Four staff members were working together to help me. Simply put, they were awesome! I had a smile on my face, the whole way to Montrose to see our friend Ken. He was happy to see the parts, since he has a full installation scheduled soon. RE the purpose of this thread. Alcan only sells the Dexter Nev-R Lube axles. They report good reliability with these sealed bearings, not hearing of premature failures. So they do not have experience with the EZ Lube product. When asked about replacement bearings for the Nev-R Lub, they replied they would ask their Dexter rep and get me a quote. @CRM if you have a link for the correct Timken brand replacement Nev-R Lube bearings, please advise. I appreciate that @John Dorrer has posted his experience so far, and of course if/when any of us have failures, we should read it on our OTT Forum. I'll be working my installation later this summer and will start a new post documenting the job. Like I mentioned before, it will be fun getting into this! 😂
14 points
-
10,000 mile update on Alcan springs: A year had passed since my dreaded roadside leaf spring break and 10,000 miles are on the Ollie with Alcan springs underneath so I thought I would provide my update. Ride height - rear bumper rides approx 1/2” higher than stock Ride performance - first 500 miles seemed a bit stiffer than stock with a few more items from counter and beds on the floor but the springs settled-in after that and there is no observed difference inside the trailer now (no additional stuff found fallen to the floor). Trailer tracks the same as stock, however visible jouncing (up and down) and side to side (roll) are observed to be less pronounced than stock. I also noticed when doing annual bearing maintenance that the spring shackles no longer invert when both wheels on the same side are jacked off the ground. Overall impression - had I known that a heavier capacity, 5-leaf spring, made in the US with US steel and featuring a design with the second leaf which extended all the way under each spring eye was available sooner I would have swapped sooner, just as I had previously done with solid stainless lug nuts and US made Timken bearings. No regrets on the upgrade from stock springs.14 points
-
We were on our Way home from the Hershey PA show when we stopped to stretch our legs. A couple came up to us and said they had been following us for about 20 miles hoping we would stop so they could see our trailer. It turned out they had a you tube channel. You never know who you might meet on the road. Bill14 points
-
@Mike and Carol Thank you Mike for your concern. As reported the Western NC foothills and mountain areas are in really bad shape in a lot of areas. A close friend of mine who works for Duke power told me it looks like a war zone. We did have had friends and neighbors check on our home and to our surprise we were spared and had no damage with exception of a few pines over on the ridge we live on. Sadly, this is not the same report for many of our neighbors. Our LNG Generac standby generator ran for 60 hrs before our power was restored keeping our home on 💯 full power. We are very grateful to say the least. All this said our hearts our heavy for ALL impacted by this storm. I40 which connects eastern Tenn with western NC is closed and it appears it will be for a long time. Our Starlink mini has been a game changer with regard to staying up to date. I have made several attempts to call and txt topgun2 and have not had any success. Mike I am glad hear you got through this morning. We are both relieved he and Sue are ok. I would ask everyone to take a moment and lift up ALL people impacted by this storm in your thoughts and prayers. David & Kathy14 points
-
Some pix from Acadia NP this week.
14 points
-
Whenever I'm in my Ollie, I find myself thinking, "This is a great trailer. I love it!" And then I read something like this: https://www.autoevolution.com/news/youtuber-goes-dark-after-getting-legal-threats-from-big-name-rv-brand-238585.html I know it's confirmation bias, but this article makes me feel good about my Ollie. I feel bad for those folks mentioned in the article, but I feel even better about my decision to drop the $$ for the Oliver. Yes, I've had a couple minor issues but really, compared to this article and hundreds of similar articles, my issues are nothing. And the best part is that whatever little issue I have, I can get immediate personal attention from the service department. It seems that a lot of people who buy SOB trailers have a lot of problems and when they try to get help, well, good luck with that. So, thank you OTT for selling me a quality product and keeping me far away from all those headaches.14 points
-
Our SL mini arrived today. Very impressed with the ease of a 10 minute set up including PW and latest updates. I think this will do the trick for us as far as comm goes. It even fits down in my Osprey Day Lite pack. Waiting on the Stiker protective case which is scheduled for delivery this sat. I will post up more user info once we get back on the road and put this tech to use. SpaceX we have a Starlink lift off!! 😊 Front yard initial set up. The mini fits easily in my Osprey Daylite plus pack.
14 points
-
We departed the ABQ area mid-morning and are now boon docking near Amarillo, FYI. Even saw another Oliver enroute, "Buck and Ollie"! This thread has been very informative for us regarding spring packs. Perhaps owners will become more attentive to the "dirty side" of their Olivers - as the undercarriage and specifically, the running gear, might be overlooked for some. It's definitely not as sexy as other areas of the OTT, for sure. But, it's where the rubber meets the road that concerns us. It would be good for everyone reading this thread to crawl underneath an learn what type of axles they may have. We learned that 3500# axles can be either 2-3/8" or 3" diameter at the same weight rating. Each takes a different size of U-bolt. As noted in an earlier post, each has a different torque specification as well. As responsible owners, we should know what U-bolts we're riding on and what the respective torque specs are. Here's a good one: During our spring-pack R&R, we noticed that on the last set of U-bolts, there weren't any washers! At some point in our Oliver's life, the U-bolt nuts were installed and torqued without them. You can't get an accurate torque value without washers. We never noticed this condition until just last weekend as we were finishing up. Just another thing to look for when you're crawling around under there... @Patriot's well thought out approach to have a spare spring pack/U-bolt kit on board is rock solid. Especially, considering the Dexter 5-year warranty implications. Good on you, brother. Please note: If U-bolts are replaced, either by emergency durning on the road conditions, or by modification/upgrade in controlled conditions - please mind the torque procedure. Specifically, re-torque after first 50 miles, then at 100 miles, finally at 500 miles. Check torque settings annually - easy enough to do at the same time you're servicing your EZ-Flex suspension, wheel bearings, and doing your shock absorber inspection. We completed the first 2 torque drills today while headed eastbound on I-40 towards Amarillo. New U-bolts actually stretch until finally torqued after the 500 mile check. We'll be doing the 500 mile check tomorrow. It's amazing how much additional tightening was needed to meet the torque specs on the first 2 inspections. Bottom line, loose U-bolts can cause spring failures. Very strong left to right wind conditions while towing today, the Casablanca was rock solid back there - like always. The peace of mind is well worth the effort we went through over the past several days performing this mod. Happy Campers all! Cheers...14 points
-
I would like to add that the value of this forum is as great as factory service in helping me solve occasional problems. For example, this past weekend I ran into what I thought was a serious issue but quickly found that someone else had experienced the same issue and provided the solution on this forum....and poof! Problem solved. Interestingly, the original problem while reported to factory service was only solved by the owner himself. Given the outstanding expertise of our factory service folks, this was a rarity but proved once again the value of this forum. Do we have RV tech shortages? Yes. Are RV techs typically paid poorly by dealerships with lack of training? Yes. Are there risks with the new service model? Yes. But, do we still have each other and this forum? YES!14 points
-
I’m new to the Oliver community, just 7 months into my new-to-me LE1, so take my thoughts with a grain of salt. I offer them with some humility, honestly. Here’s my thought: I'm surprised at the negativity about the developing Oliver sales and service model. My own service experience is quite limited to a week in Hohenwald a month ago - we’d timed it to launch our current 5 week camping trip. Our planning went back to a service request 4 months ago. When the date came, we traveled 2 days to get to Hohenwald, and then had to find accommodations for 4 nights for me, my spouse and our dog to wait out the 3.5 days our upgrades and annual servicing would take. We were happy with the results and the knowledgeable team we met, but would have been much happier if a regional Oliver dealer was available for a “drop it off and come back in a few days to pick it up” kind of servicing last winter. The jobs we had done (lithium & Truma AC upgrades & annual servicing) would have been well within the ability of a competent and well trained regional dealership. When the dealership expansion was announced, I did contact such a regional Oliver dealer in lower Va. They told me they had not yet been trained for servicing, so I kept my March appt at Hohenwald in place. I thought, “Training dealerships has got to take some time. Check back with the regional dealer in a year and they should be up to speed.” That seems (to me) a reasonable expectation for the Oliver community, with widespread benefits for Oliver owners like me in the years ahead. From what you all are repeatedly saying about the Oliver family and team, I’d have a high confidence that they share that goal. If everyone’s experience with the Oliver team in the past has been so widely appreciated, why not give them the benefit of the doubt? In the meantime, I feel confident that I have a backstop if I get caught - you all. I’ve been a regular reader (if an infrequent poster) in the Oliver forums over the last half year. I’ve seen you all step in again and again to help people like me, who are trying to make something work better, or fix something broken. The generosity, creativity, competence, and enthusiasm of the Oliver owners was a factor in my purchase. Were I in Oliver management, I would hope for your partnership in making this expansion as seamless and fruitful as possible. i suspect as a newcomer to the Oliver community I’m missing something here - maybe it’s the longstanding friendships that have developed in the Oliver community. Maybe it’s something else. I just hate to see a much loved team with a first class product and a devoted family of owners fracture like this when some (well deserved) trust and some months of patience and a “let’s do what we can to make this work” attitude could make a good thing even better.14 points
-
Ever since getting my Oliver I have loved modifying different aspects of it. I have done a bunch of stuff to the electrical system such as going mostly Victron for all components except for the inverter. Here is my latest mod which consisted of building an aluminum rack and adding 3 200 watt Newpowa solar panels for a total of 600 watts onboard. They will feed into a Victron 100/50 SCC. Just got the panels installed today and will be working on the connections tomorrow. I also need to fabricate a bracket for the front panel for a little more security but overall it is very solid. 😛
14 points
-
Good question, John. Due to prior commitments, the process is still underway, worked on it for a couple hours yesterday, plan to finish it up this morning. After speaking with Mike/Alcan, here's a high-level List of Instructions for the leaf spring R&R. 1. Break loose the wheel lug nuts on all wheels; 2. With the OTT connected to the the TV, raise enough that wheels are just high enough to spin and that 4 jack stands can be placed in front and to the rear of the running gear on the OTT frame; 3. Lower OTT onto the jack stands - wheels must still be able to spin; 4. Remove wheels; 5. Pick a side to start. Place a jack stand under front axle about 2 feet inboard of wheel assy. - use a floor jack under the spring plate to raise the axle just enough to adjust the jack stand under the axle, then lower the floor jack so the axle rests on the floor jack. There should be very little tension on the suspension at this point; 6. Remove the lower shock absorber nut and push the shock up and out of the mounting hole on the spring plate, use safety wire to hold lower shock outboard and away from spring plate - helps with aligning the spring plate later on; 7. Remove the 4 U-bolt nuts/washers; 8. Remove the spring plate (at this point - we wire brushed the plate, cleaned with acetone and rattle-canned it with RustOleum, set aside to dry for later); 9. Remove the forward wet bolt from the frame mount - this allows the spring pack to drop; 10. From the Dexter center shackle, remove the corresponding Dexter shackle nuts and the outboard connecting plate - the inboard connecting plate will be removed with the wet-bolts still "press fitted" into the plate. Keep as is and ChemKlean the shackle plates, wet bolts and nuts for later assembly; 11. Throw away the cheap-ass Chinese made spring pack. (OBTW: Our's weighed 10lbs even as compared to the Alcan 5-leaf spring pack of USA steel at 18lbs! We still have the fourth spring to replace today - but the three removed so far were definitely starting to flatten.) 12. Check the centering bolt head on the Alcan spring pack so it fits into the corresponding centering hole in the spring plate. We had to file the corners on a couple of the bolts to get the correct fitment. 13. Insert the "now cleaned" shackle components to the Dexter center shackle assy. Connect Alcan spring pack (this would be the rear-most spring pack bushing for the front axle), bolt on the outboard connecting plate. 14. Check the forward wet bolt after cleaning by connecting your Lock'nLube and squeezing grease through the journal (be sure to do this with all wet-bolts). Thoroughly grease the spring pack brass bushing and wet bolt. Ensure the wet bolt can fit through the brass bushing - tap in gently using a socket over the grease nipple. 15. Lift the forward end of the spring pack and place a floor jack under at mid-point (where the spring plate will be placed in a later step). Lift the Alcan spring pack up to the forward spring mount on the frame. Ensure the centering pin on top of the Alcan spring aligns with the centering hole on the axle's spring pad. 16. Insert the forward wet-bolt by raising/lowering the floor jack and tapping the center shackle fore/aft until the bushing aligns with the mounting holes. This is a step that takes some patience. We had to use an alignment bolt from the outboard side of the mount to get the wet-bolt through from the inboard side. (NOTE: The wet-bolts have splines near the head to keep them from spinning once tightened in the shackle plate - we oriented them so the grease hole on the wet-bolt faced "UP"). 17. Place your U-bolts in place over the axle (we painted ours just to keep the rust down to a minimum - plus it looks way cooler). Place the cleaned and freshly painted spring plate in place. Install new U-bolt washers and nuts - using an "X" pattern, tighten the U-bolt nuts slowly pulling the spring plate up and into position. Use a flashlight to check that the Alcan spring centering bolt is aligning with the centering hole in the spring plate. We tied the lower shock outboard and away to a wheel lug with safety wire to make this alignment easier. 18. Install lower shock to spring plate; 19. Torque all nuts to specs. 20. Move to same side rear assy. and repeat. 21. Move to opposite side and repeat front and rear like steps 1 thru 20 above. There's probably a few extra things I did (removed, inspected, and re-packed wheel bearing, for example) but these are the key steps. Very satisfying procedure. It's worth the peace of mind knowing your running gear is in order! More to report later after complete and test driven. Cheers!14 points
-
Hi Everyone, we just bought hull #1147! We spent the past few weeks cleaning and performing some minor maintenance on this LE2. We just went on a weekend camping trip to Larabee park in Bellingham WA and it is such a nice little camper. Our kids have grown up and left home and this new to us camper is going to be our getaway plan for weekends and vacations! Anyhow we are looking forward to getting to know and learning from you all.
14 points
-
I most certainly will. Waiting to see and touch them first and confirm the measurements and specs are right (should be no issue). Once I have confirmed this I will share the info and contact details.14 points
-
I took the time and read up on the 'Smart' Plug. I didn't find any evidence that the Smart Plug is a better product than the power receptacle that was supplied when the Oliver was delivered. But, wanting to give it the benefit of the doubt and in the interest of sharing accurate and reliable product information, I offer the following information: From their website, under the heading About Smart Plug: Our vision... Smart Plug Systems is a privately held manufacturing firm specializing in power delivery systems. It was founded in 2007 and is located in Seattle, WA. Its flagship product, the SmartPlug, is a patented device positioned to replace the current power delivery system for RV’s, Boats, and a variety of specialty vehicles and miscellaneous industrial applications. Every corporation has to have a Vision Statement, Right? Designed to be versatile Developing and providing innovative world-class solutions that make power delivery safer, more secure, and easier to use. Continuing our aggressive growth strategy and expanding far beyond the domestic recreational power delivery market to industries and geographic locations that can leverage our technology. We’re just getting started Establishing strategic partnerships and building long-term relationships with our suppliers, customers and the consumer. Sustaining a preferred work environment that will create positive share-holder value while maintaining a high level of innovation, quality, and customer service. This nothing but corporate techno-babble and tells us nothing about the Smart Plug. Here is additional BS from their website... Contrary to popular belief, the #1 cause of shore power failure and fires is not electrical shorting, but rather overheating caused by poor electrical conductivity. This is very true...but, on our Oliver’s, not for the reasons stated below How does this happen? The problems with many plug designs are that the shape of electrical pins allow for very little contact area, and the pins themselves are also largely responsible for bearing any physical stress placed on the cord (from constant movement of the boat, someone tripping on the cord, etc…) This is partly correct. There is plenty of surface contact area on the standard Oliver supplied power cord. Last I checked these are NOT boats moving around while attached to shore power. This results in the pins working loose, further lessening the precious little contact area they had to begin with. Furthermore, such loose connections allow for moisture intrusion and ultimately corrosion of the pins. This does Not apply in our situations. Arcing occurs and the connection heats up, scorches, and in some cases, catches fire. Because the current draw is unchanged, all of this happens long before a breaker or a GFCI can cut the power. Additionally, the old design can be very difficult to use in low light or hard-to-reach scenarios since the “L” shaped pin must first be located and then oriented before connection. The actual #1 cause of shore power failure and fires is not electrical shorting, but rather overheating caused by poor electrical conductivity, not from the pins in the connectors but from the screw connections between the pins and the supply wires not being tight. This has been the source of the problem in every overheating situation I’ve seen or heard about concerning Our Oliver's. Then I decided to go right to one of the vendor’s that supply this product for their say in the matter. In about an hour long chat session, this was revealed... Ashley: Hi! Can we answer a question for you? If not, feel free to close out this box. Steve: I am curious about your Smart Plug product. I am familiar with the plethora of other "smart" products like smart phones, thermostats that can be adjusted via an app on my phone, Alexa etc. What is it about this product that makes it Smart? 'SMART' OBJECTS Ashley: Hi Steve! Let me get you some information for you Ashley: There really is no "Smart" Feature as you are thinking about, but here is the description: SmartPlug is the highest quality electrical plug in the RV industry. This is the ultimate solution to replacing your standard twist plug, and it completely eliminates typical heat issues due to poor electrical contact. The standard twist plug that comes on many RVs has problems with electrical transfer because of minimal contact from the plug to the inlet. The SmartPlug has 27 times more contact and this makes for efficient electrical transfer and drastically reduces the heat on the plug. If you have a standard twist plug on your RV then you need to get that changed to the Smart Plug today! Steve: What is the amount of surface area that is contained in the Smart Plug in square inches? I'm confused about how their contacts are 27x larger than normal. Ashley: Let me see if I can find you a video I am going to post a link below to one of our Installation videos. Let me know if it helps https://www.youtube.com/watch?v=jTkd_nMW-sw Steve : Let me take a quick look at the video. I have other questions. Ashley: Ok, sure Steve: This appears to be nothing more than an installation video. Can you tell me more about the claim that this product has 27x the surface contact area of other plugs. How was that determined. For instance, if a standard RV plug has say 2 square inches of surface area spread between the contact legs then your claim would be that your plug has 54 square inches. How is this possible? Ashley: I am not exactly sure why the manufacture claims that. I am trying to find some more information on it. Steve: OK, Thanks... Ashley: "27x more electrical contact than the old twist type connector" This is all I can find; I am unable to get an exact explanation. Steve: Thank you for all your help Ashley. But can we agree that this plug is really no better or worse than a standard plug and there is no way to cram in 54 square inches of contact surface area? Yes, No? Ashley: Apparently, they are claiming that is 27x more that the "Old Twist Plug" According to your logic, no it does not make sense. However, I couldn't find enough of an explanation to really say one way or the other what exactly they are comparing it to. Steve: Ashley, I want to apologize to you for putting you on the spot like this. I realize that you could not possibly know all the technical details of the products your company sells. I just could not find this information published anywhere, and I wanted to see if there was information I was missing. I'm sorry. You're a good sport. Ashley: Absolutely! No need to apologize, I couldn't find it either and you brought up a very good point. It is extremely vague about what they are comparing it to. I would like to think I know enough about what we sell but sometimes, unfortunately, I met my match. Is there anything else I can help you with today? Steve: No, we’re good. Ashley: Ok! Have a good day! I didn't find any evidence that this is a better product than the power receptacle that was supplied when the Oliver was delivered. If any of you want to change your plugs out, go ahead. Or, you could just make sure the screws are tight instead.14 points
-
I've said this before in another post... but at the risk of repeating myself again... Oliver is not a "club" or like most of us, a bunch of retired people who have already accumulated enough wealth to sit back and be philosophical about how we would do it. It's a business that has several hundred employees who come in everyday to the Oliver factory trying to earn enough money to get to the place most of us owners enjoy right now. Warranty work (every dime of it) is anything that fails or wasn't done right the first time... it costs the factory money and is a cash drain. Service work could and probably is somewhat profitable and self sustaining part of the Oliver business, but the real cash cow that the owners and every employee counts on (remember they have their own life dreams too) depends on selling new Olivers. With hull numbers around the 1500 mark they have likely picked the low hanging fruit. Now they need to dig deeper into the existing marketplace to fulfill the burden and obligation to pay for tools, equipment, buildings, benefits, healthcare, wages and everything else that those several hundred people working there are depending on so they can make their house payments, buy groceries and maybe even someday own and Oliver and travel around the country seeing and doing everything we all are doing right now. Growing the business by selling new product doesn't mean forgetting the customers that have already purchased Olivers, rather it is doing both in a way that is fulfills everyones goals. It's not easy. Sometimes feels like a balancing act. There will be the occasional mistake... but I'm counting on the Oliver management to provide that "North Star" to keep the companies core moving in the right direction. We were just recently in the extreme north west and several times had conversations with folks who might have been prospective buyers... they just rolled their eyes when I said you could only buy and pick them up at the factory in Tennessee. All of us need to remember that if we want an experienced service team that is equally invested in our Oliver the factory where they are built needs to survive and grow. Otherwise, "who ya gonna call"?14 points
-
After ~5 wonderful years with our Ollie and many adventures around the United States and Canada, we are moving on to a new phase of travel in our lives (overseas, cruises, etc.). So our much loved Hull #461 has been sold to a new owner. This forum has been great for support and sharing among the Oliver owners community, and a thank you to all for the great discussions and information shared over the years. We are definitely going to miss our Ollie, but she is going to a good home with a new owner that is very knowledgeable about trailers in general and also Olivers specifically, and I expect he will be joining this forum (he might already be a guest member). Thanks again to all. I'll still hang around/lurk here on the forums, and safe travels to everyone. Frank14 points


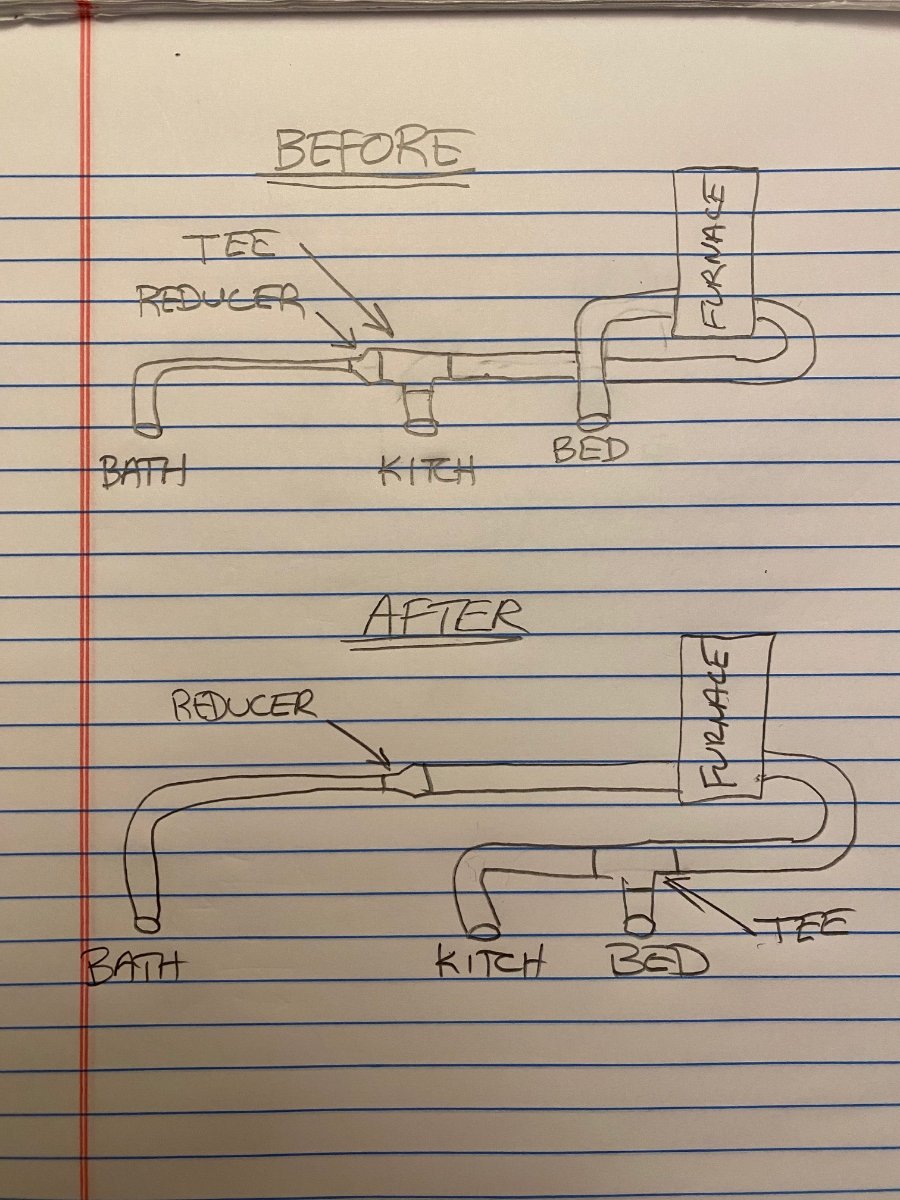
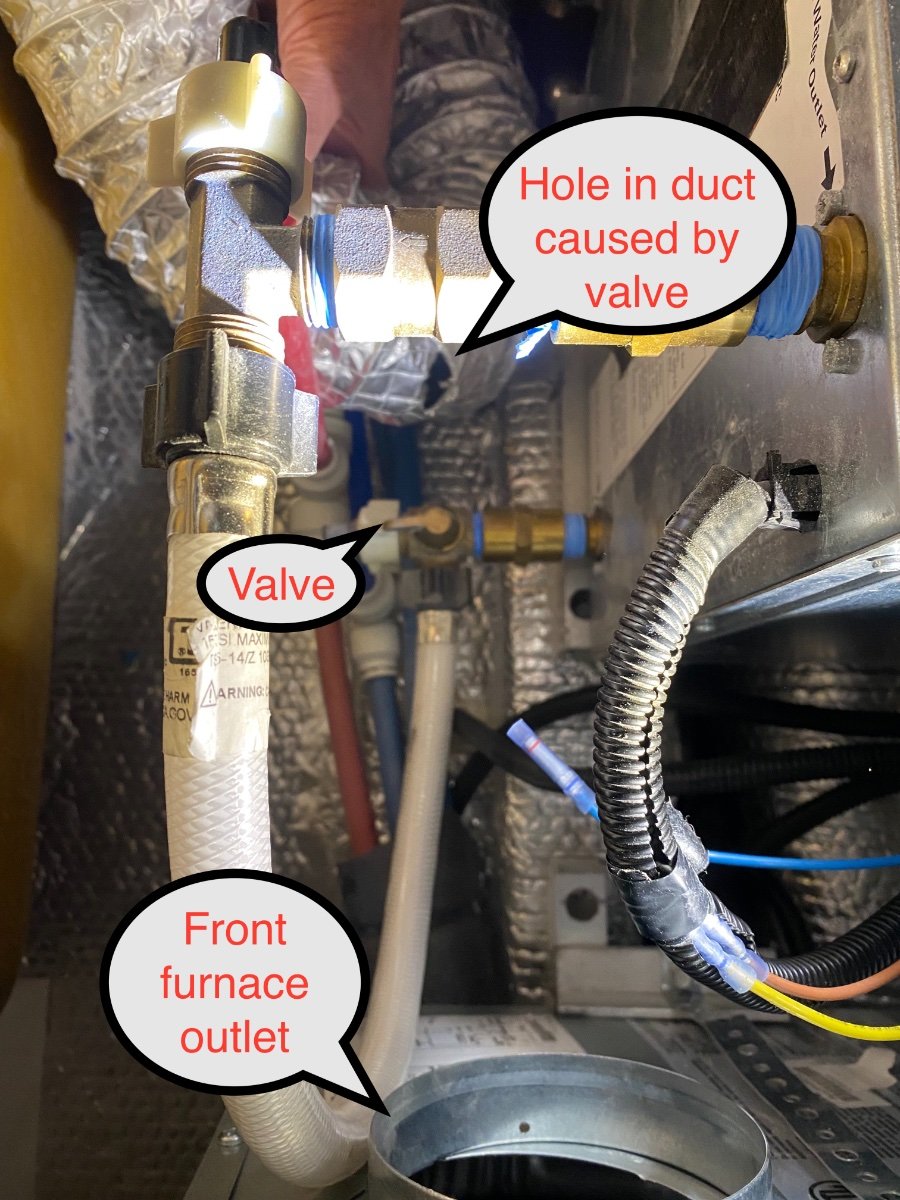
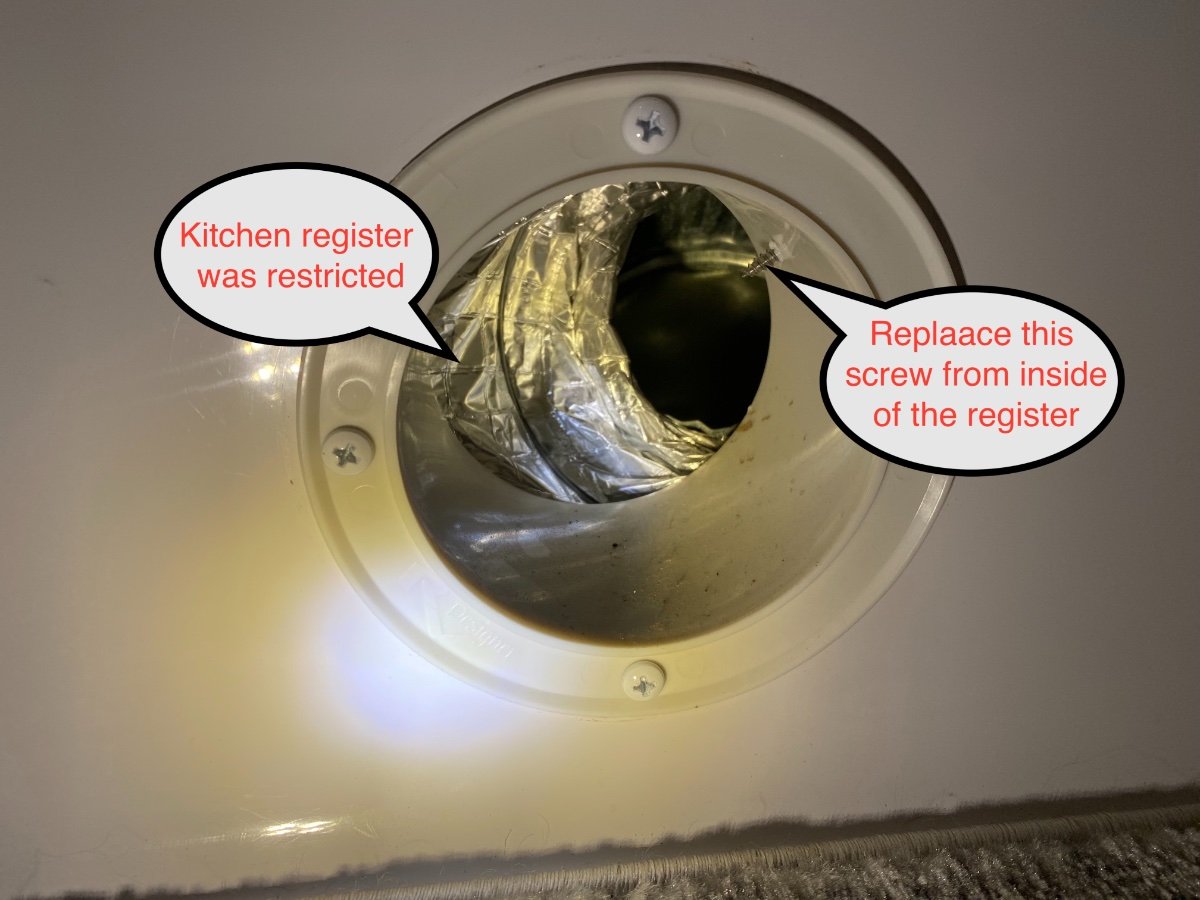

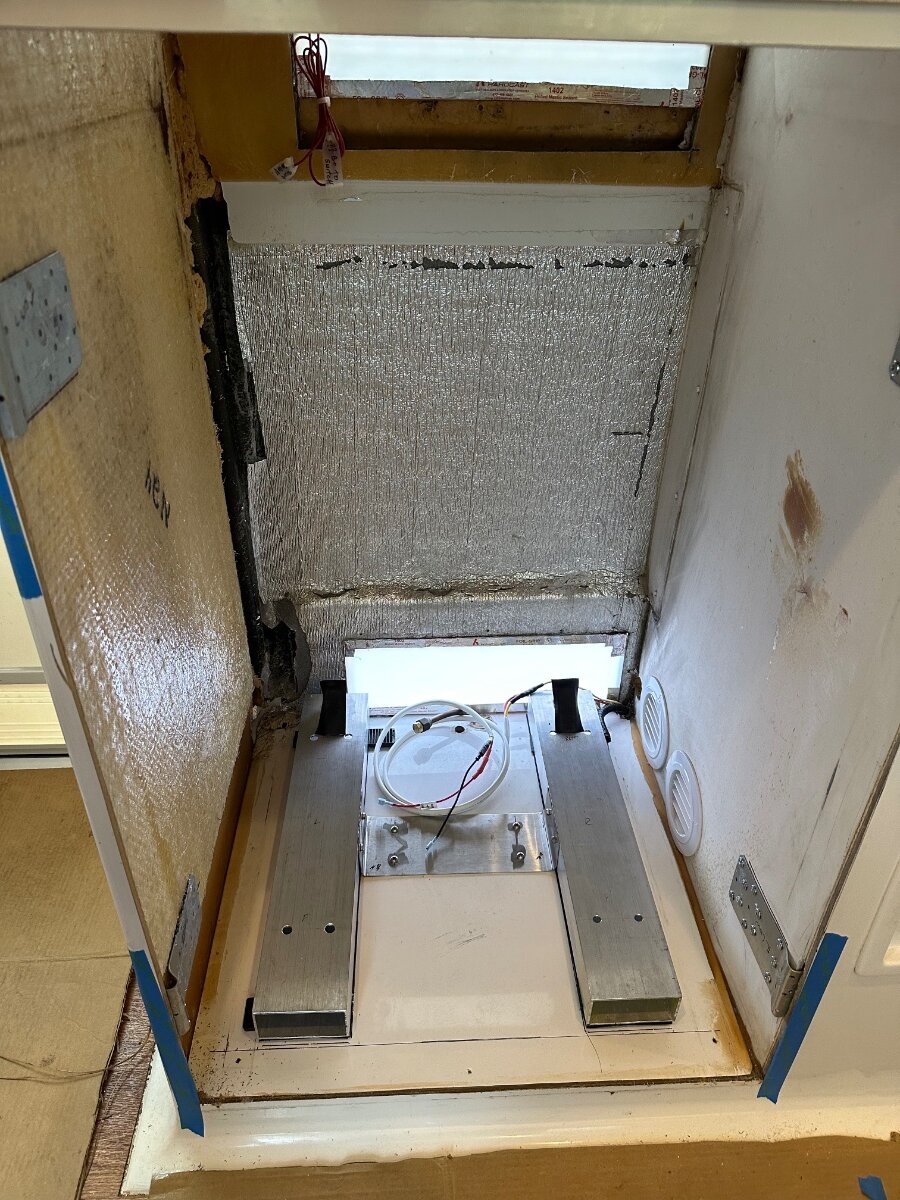
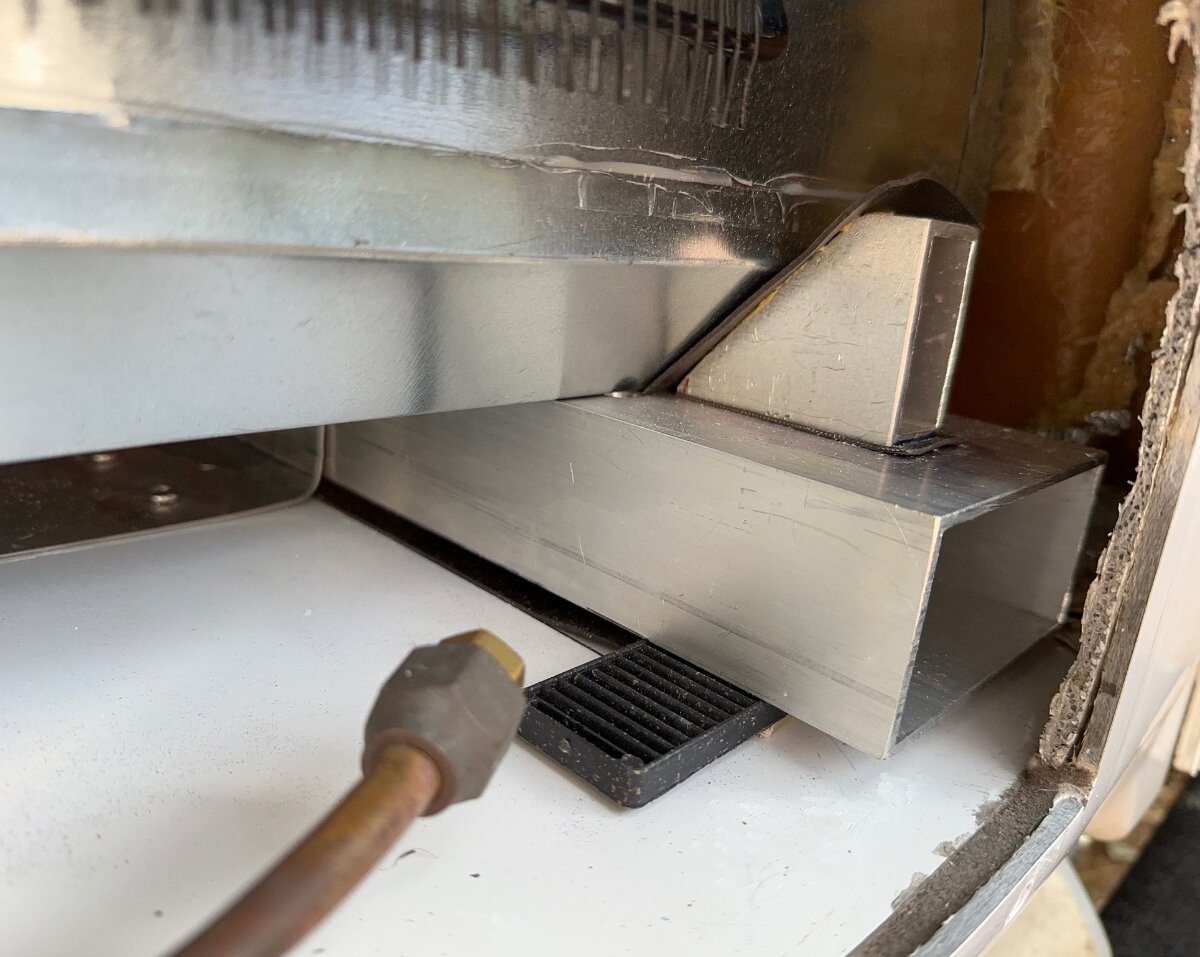


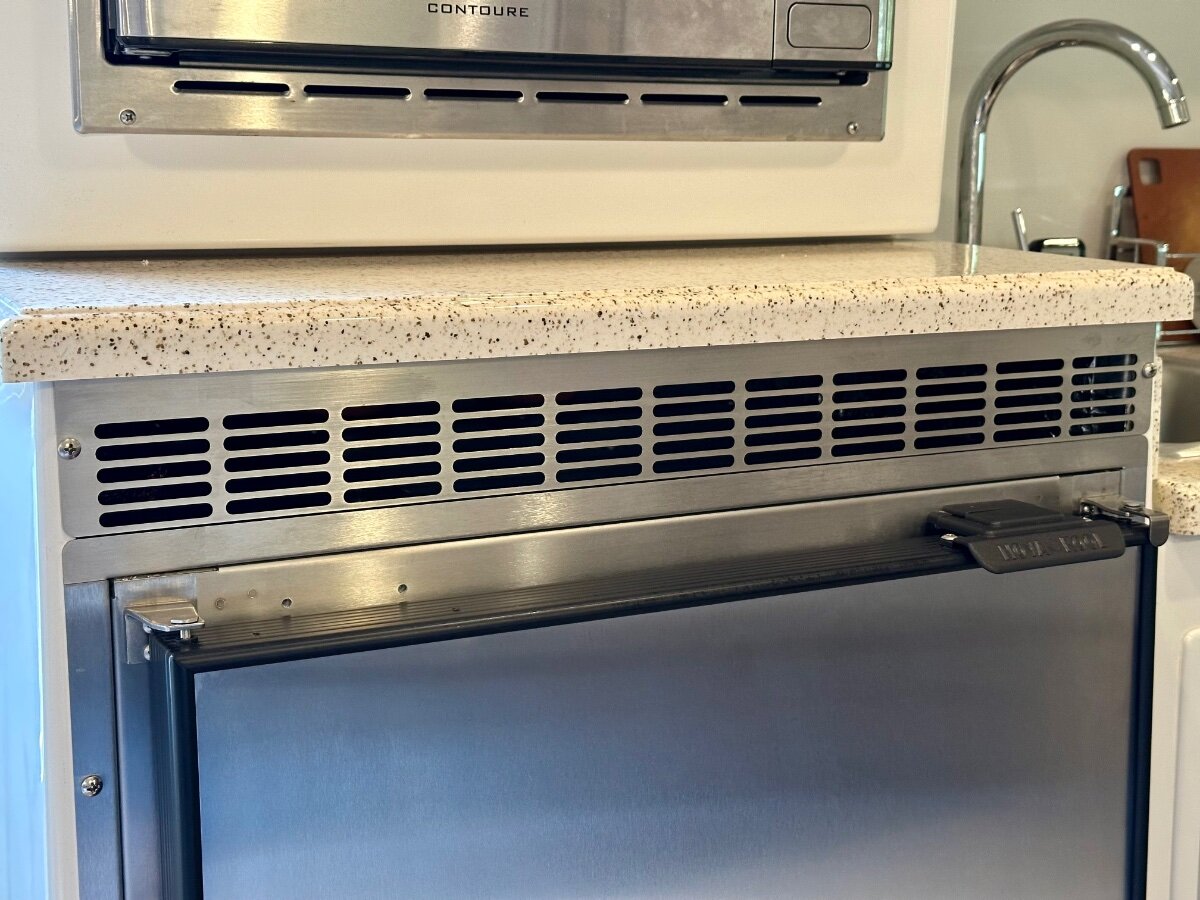


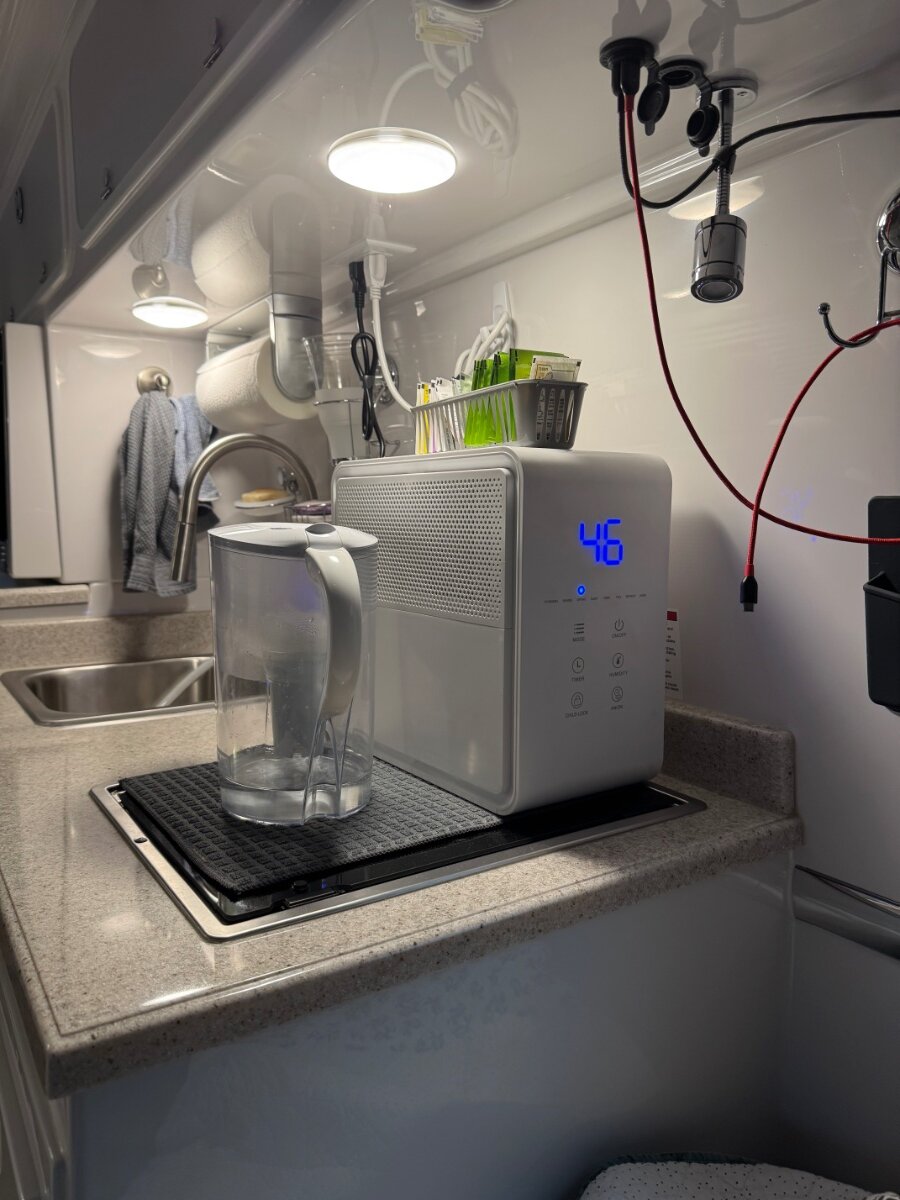

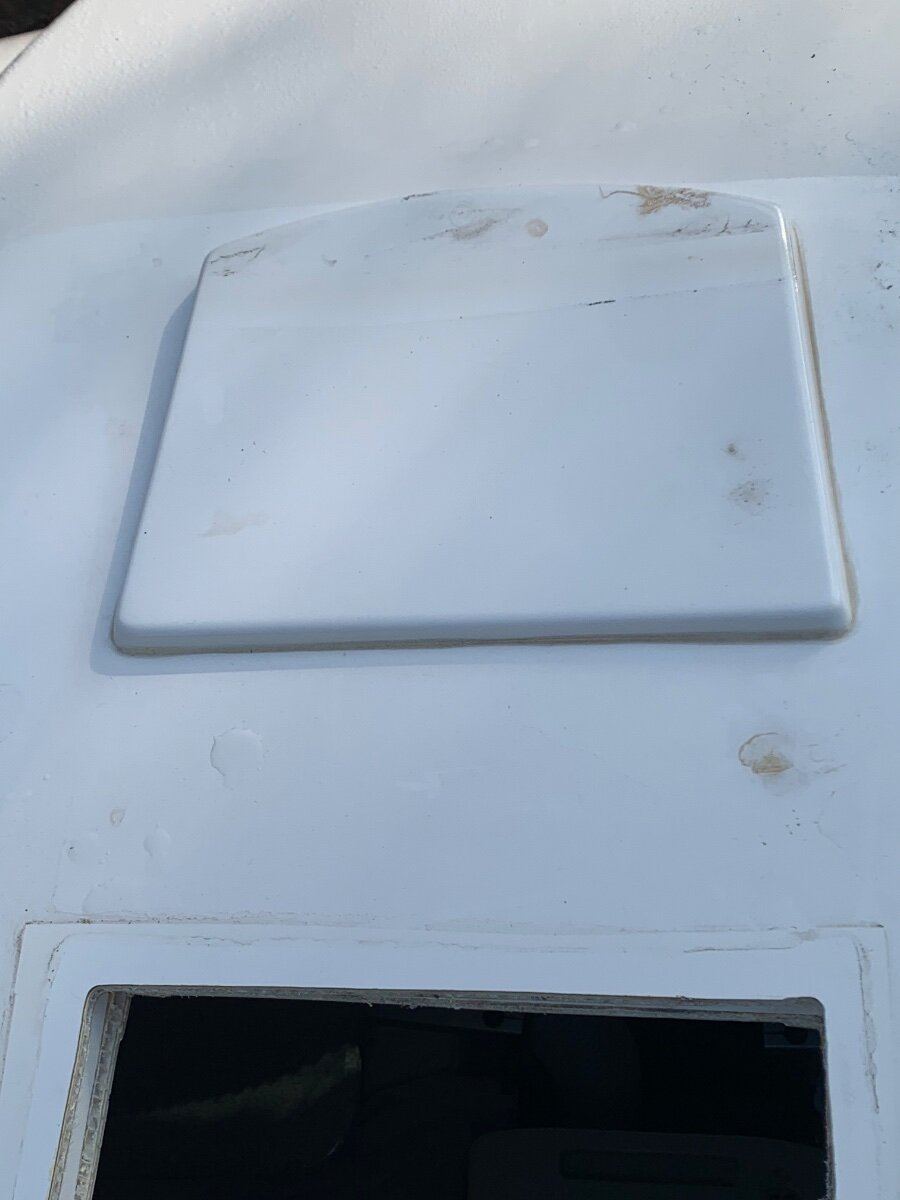
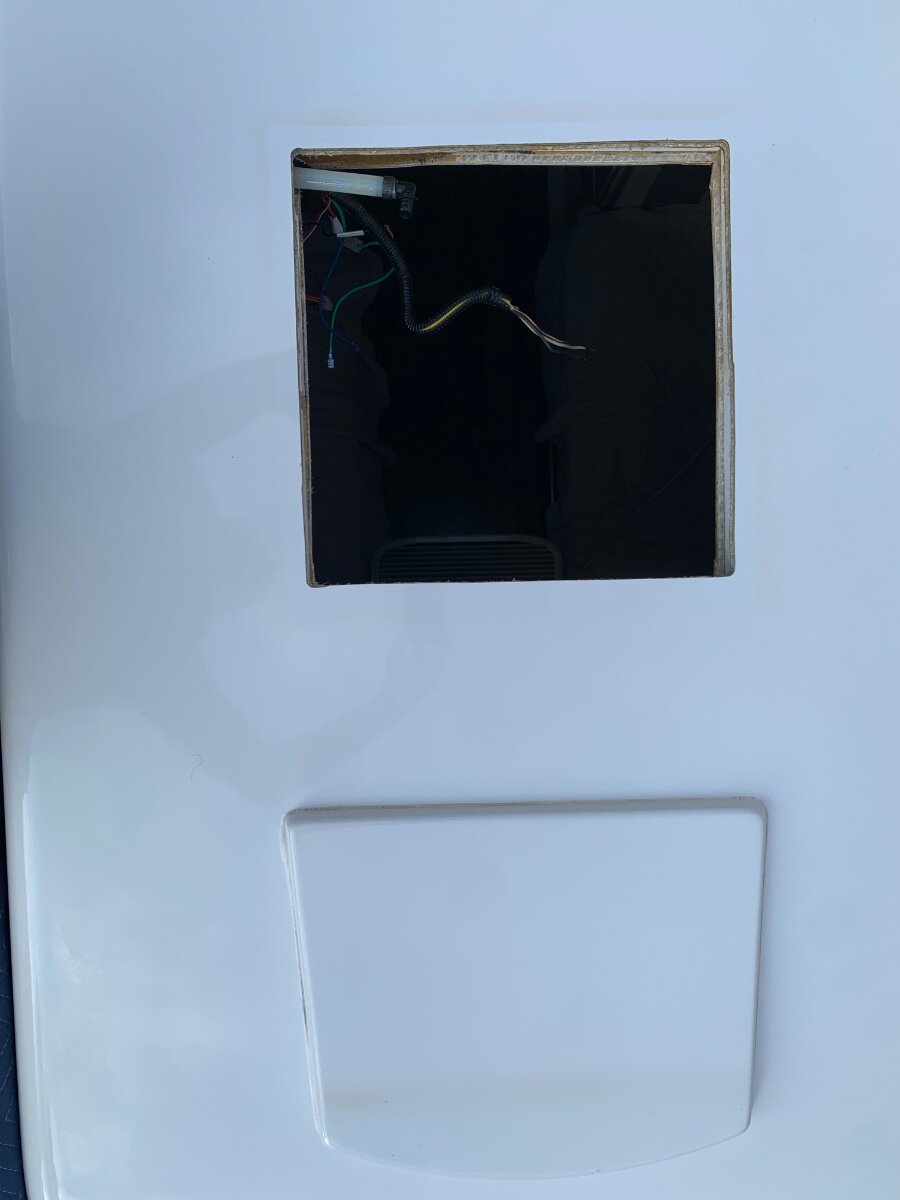

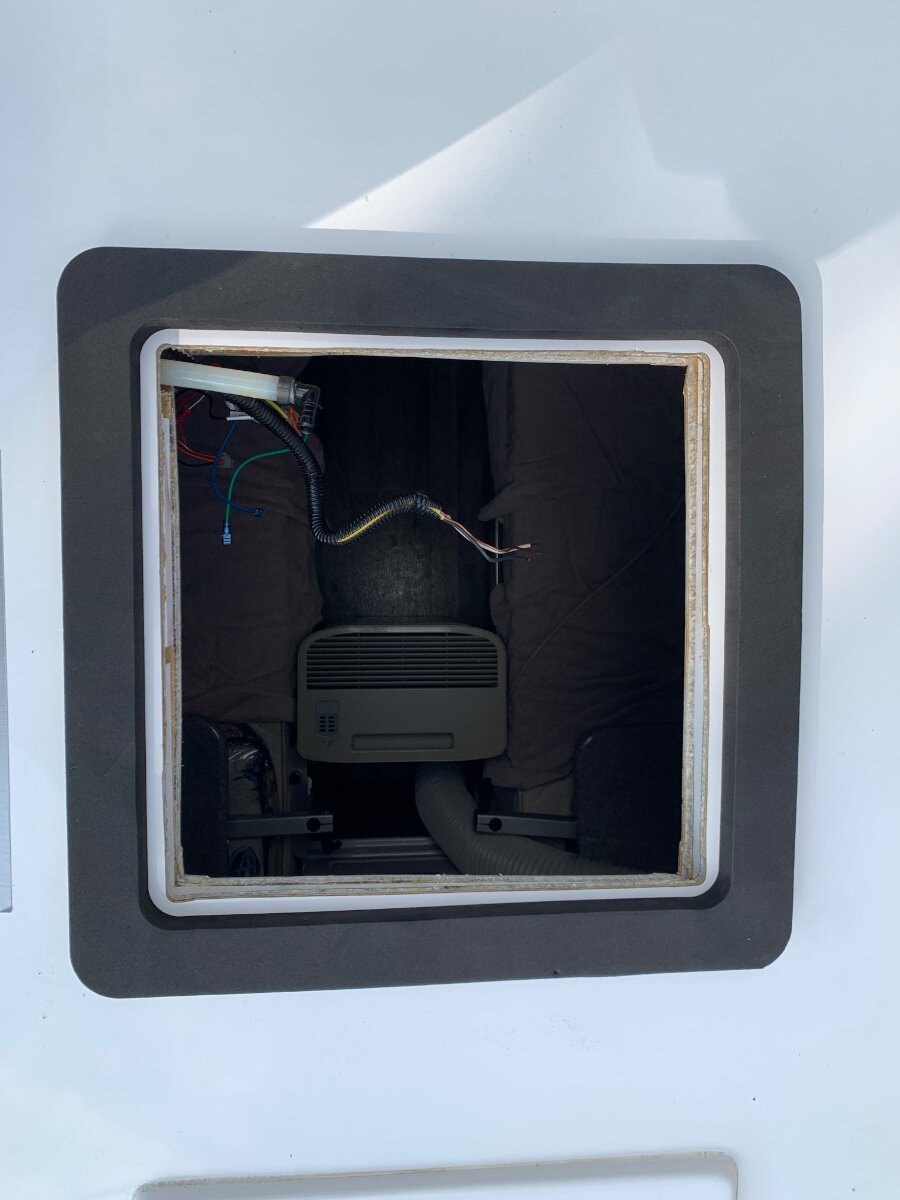

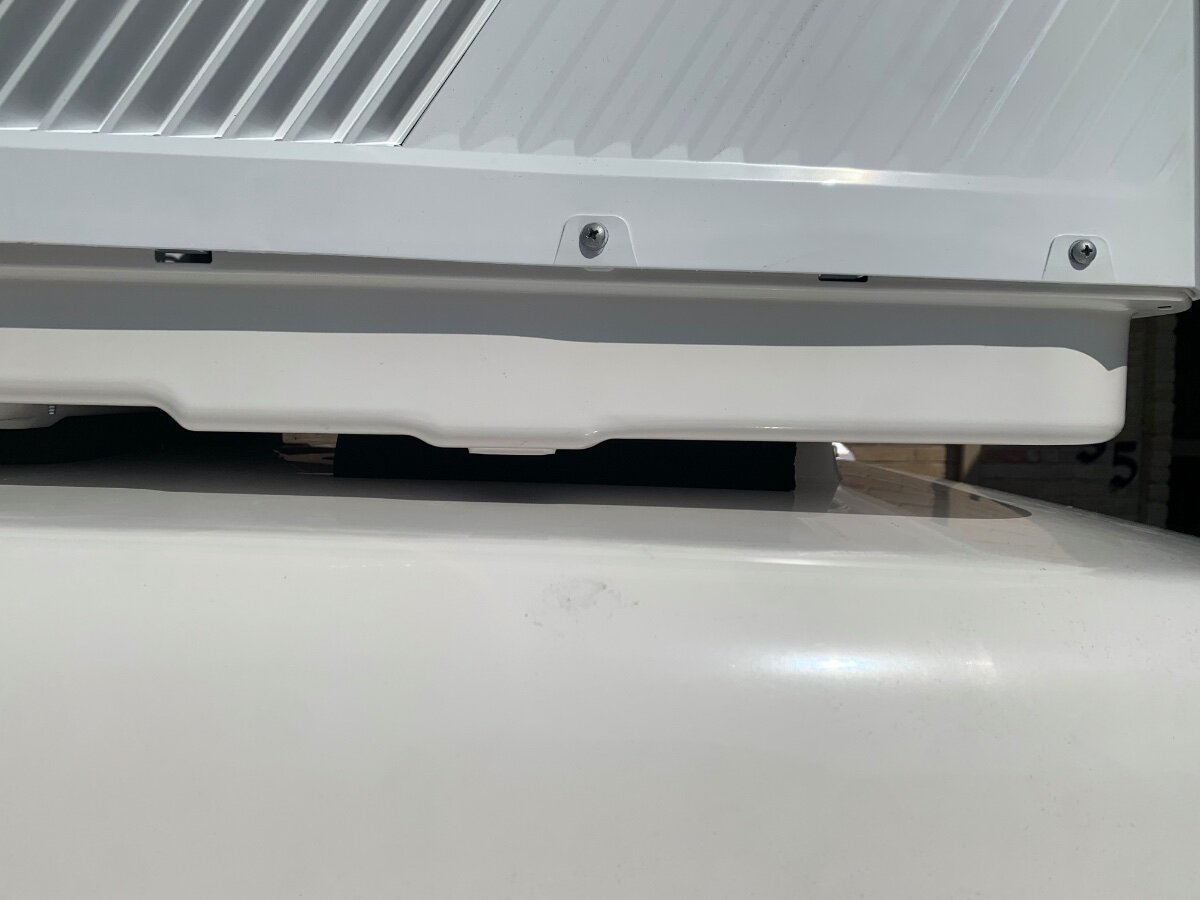


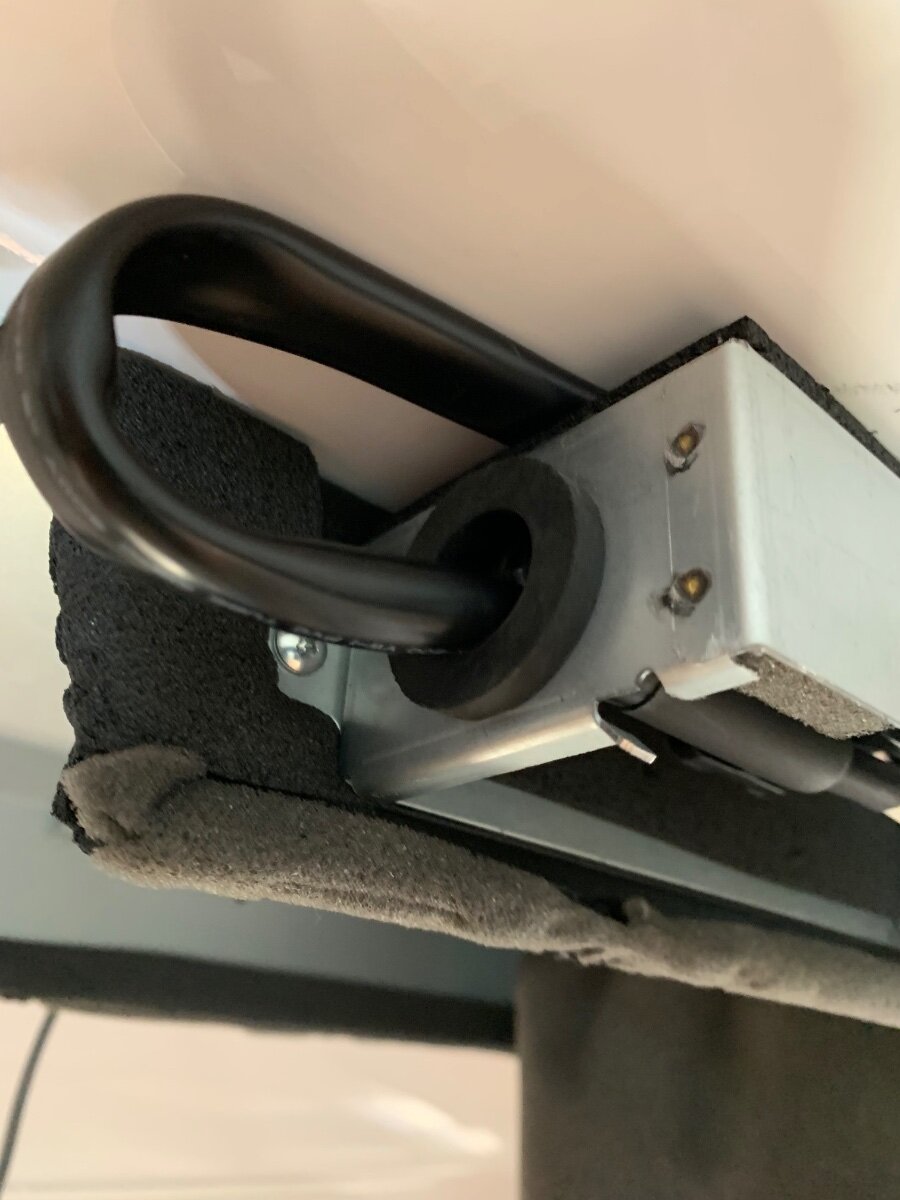


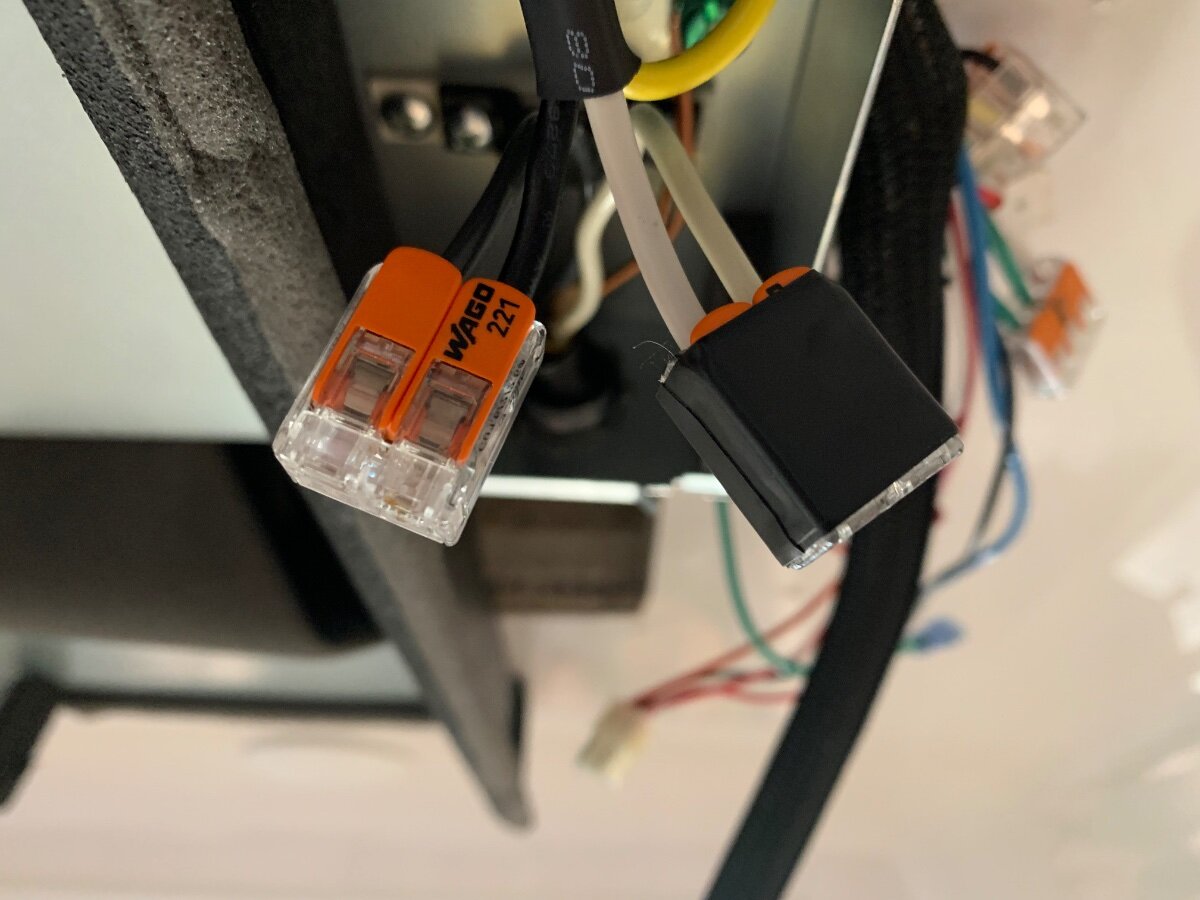


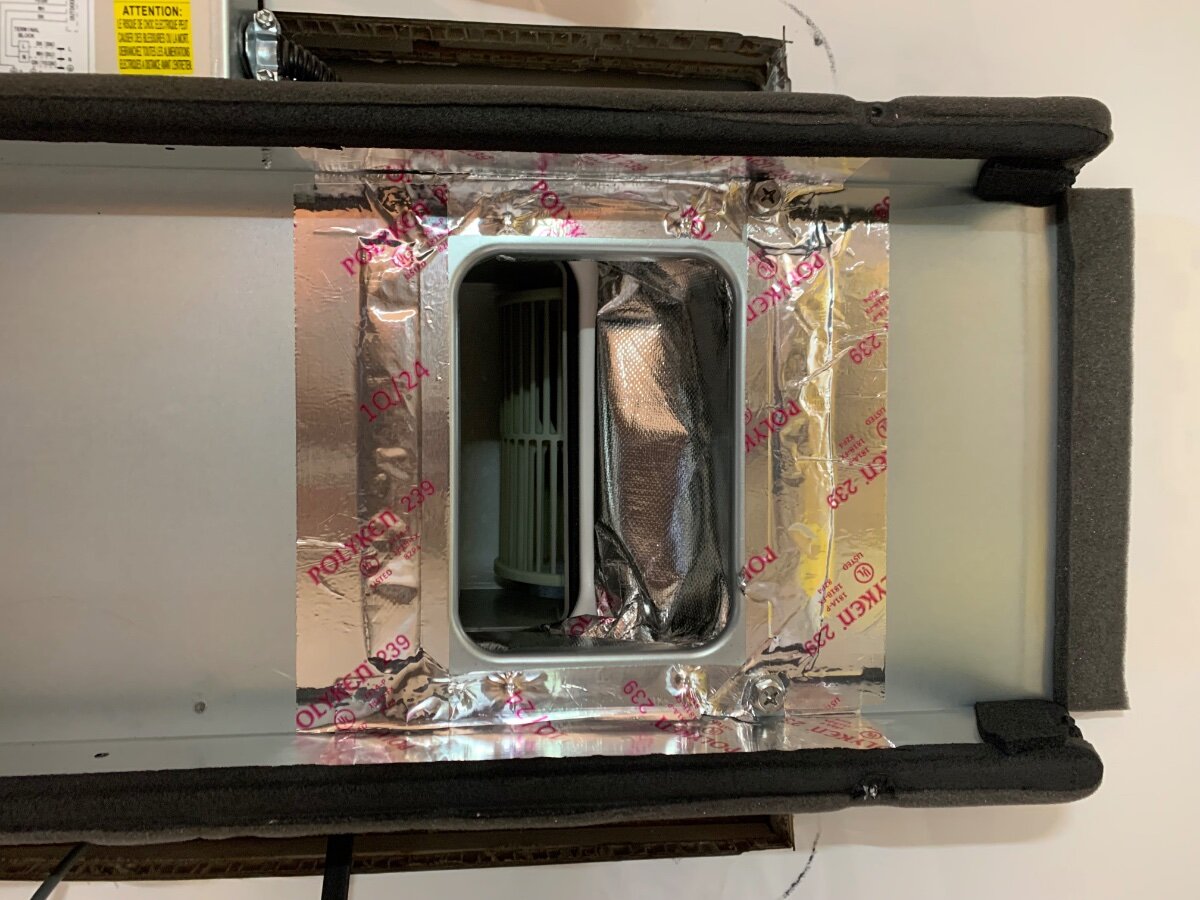

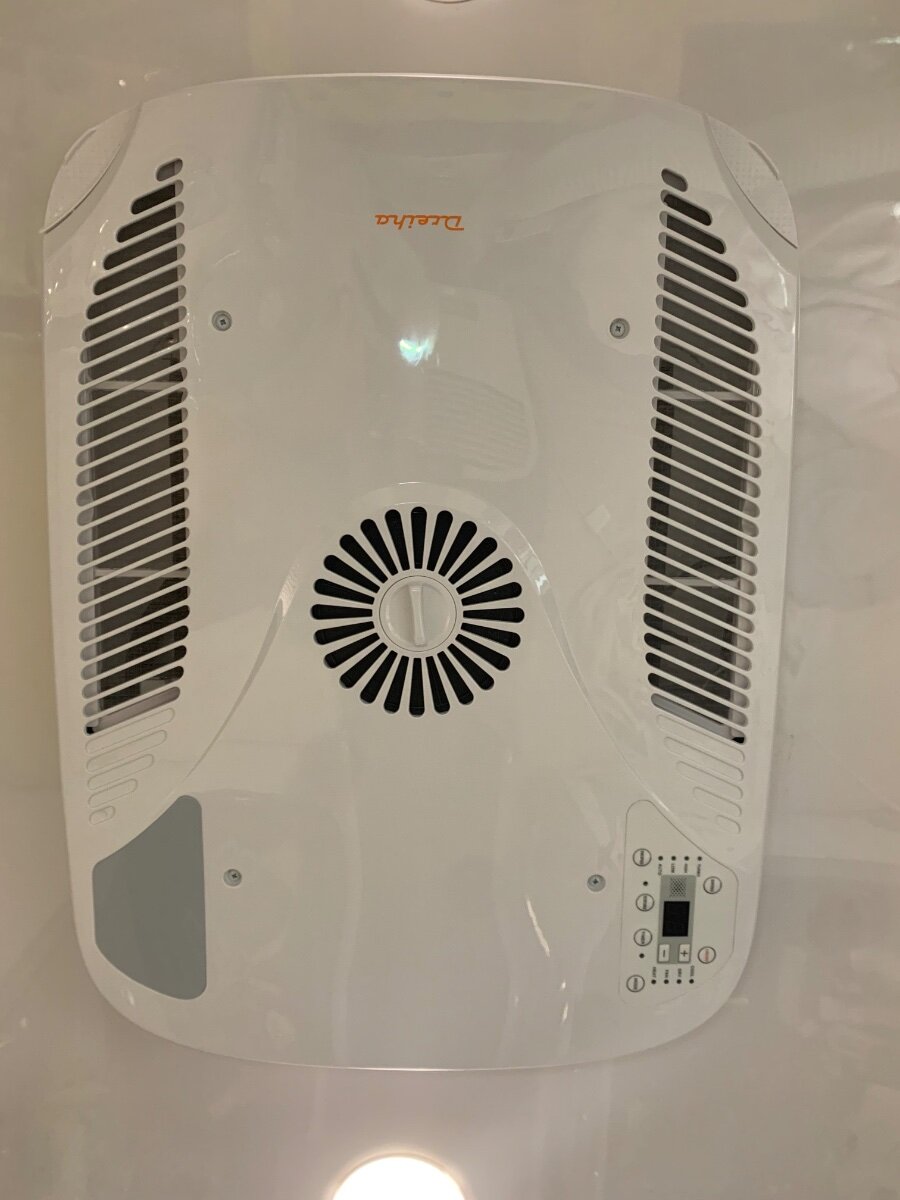


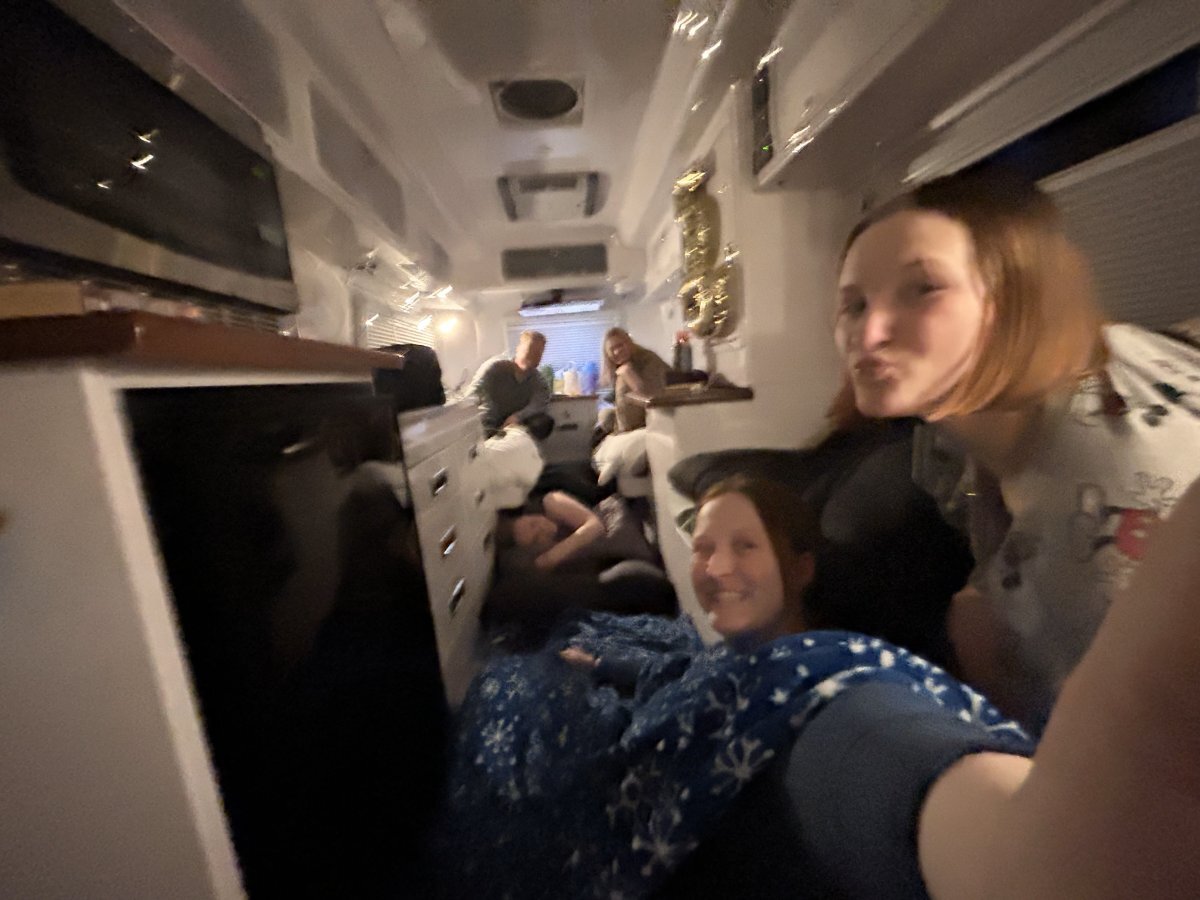

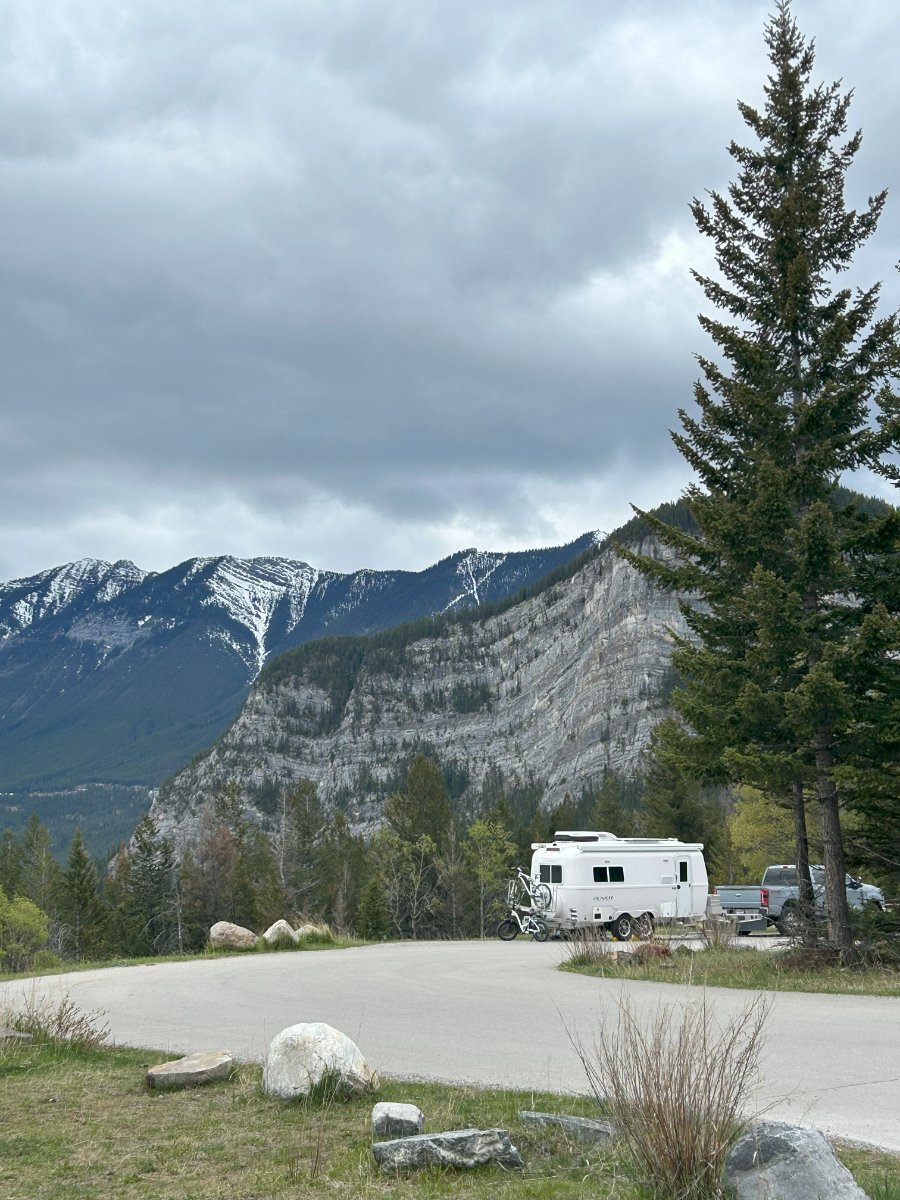


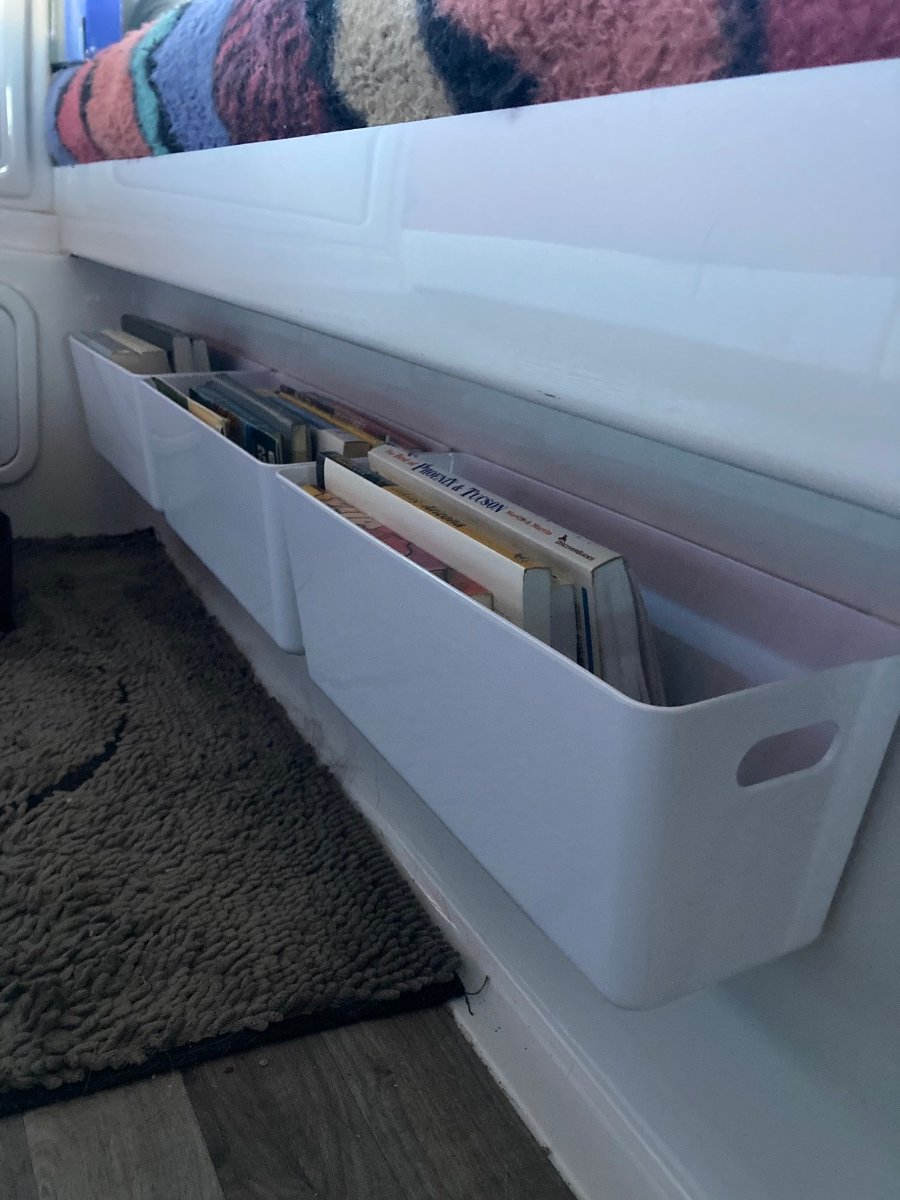
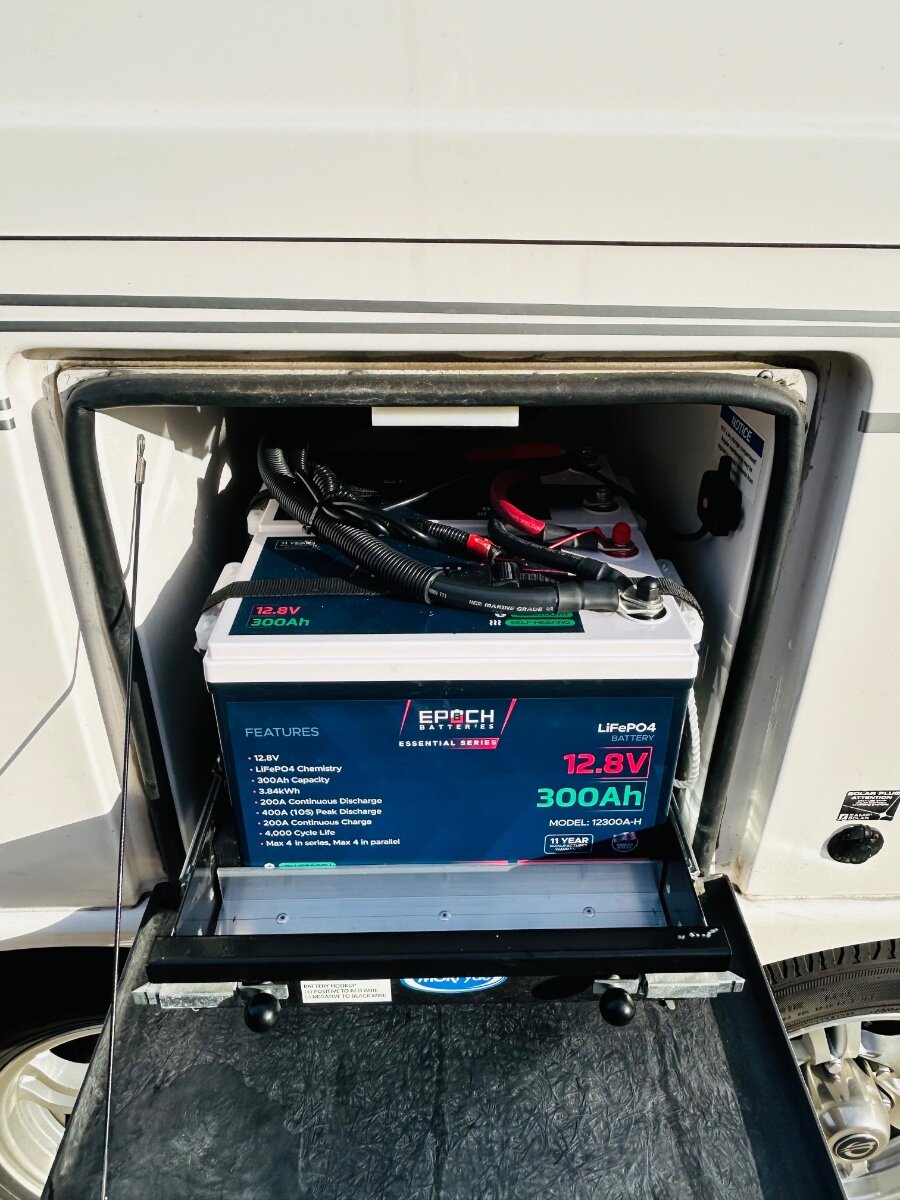
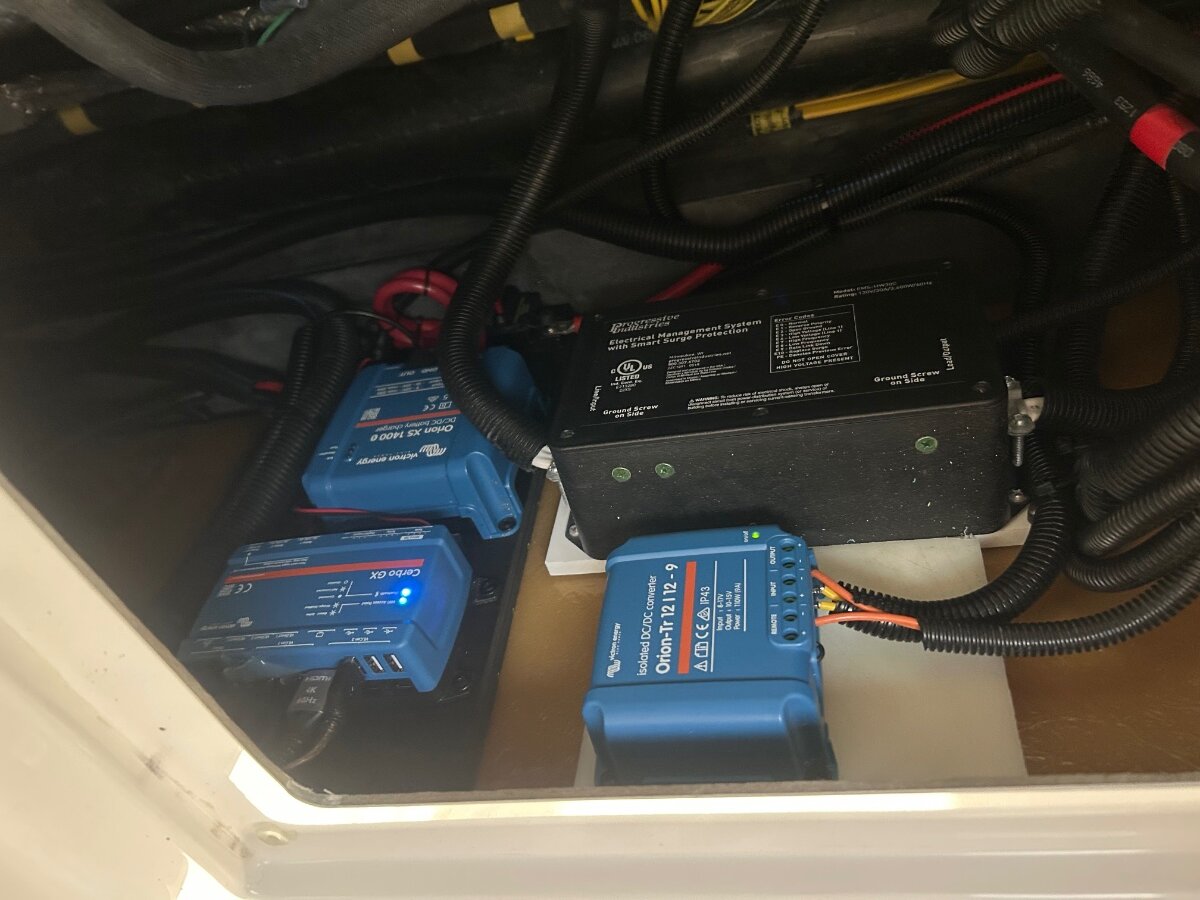
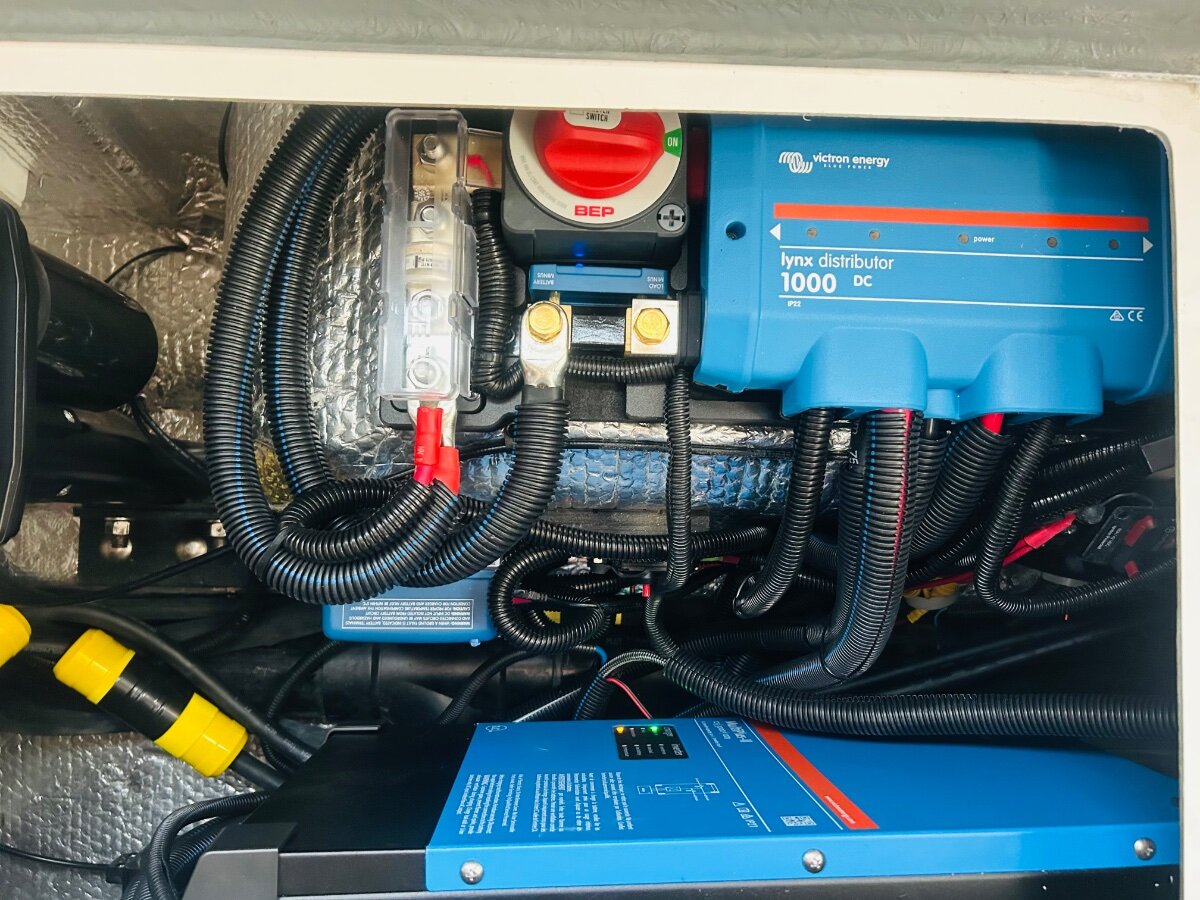
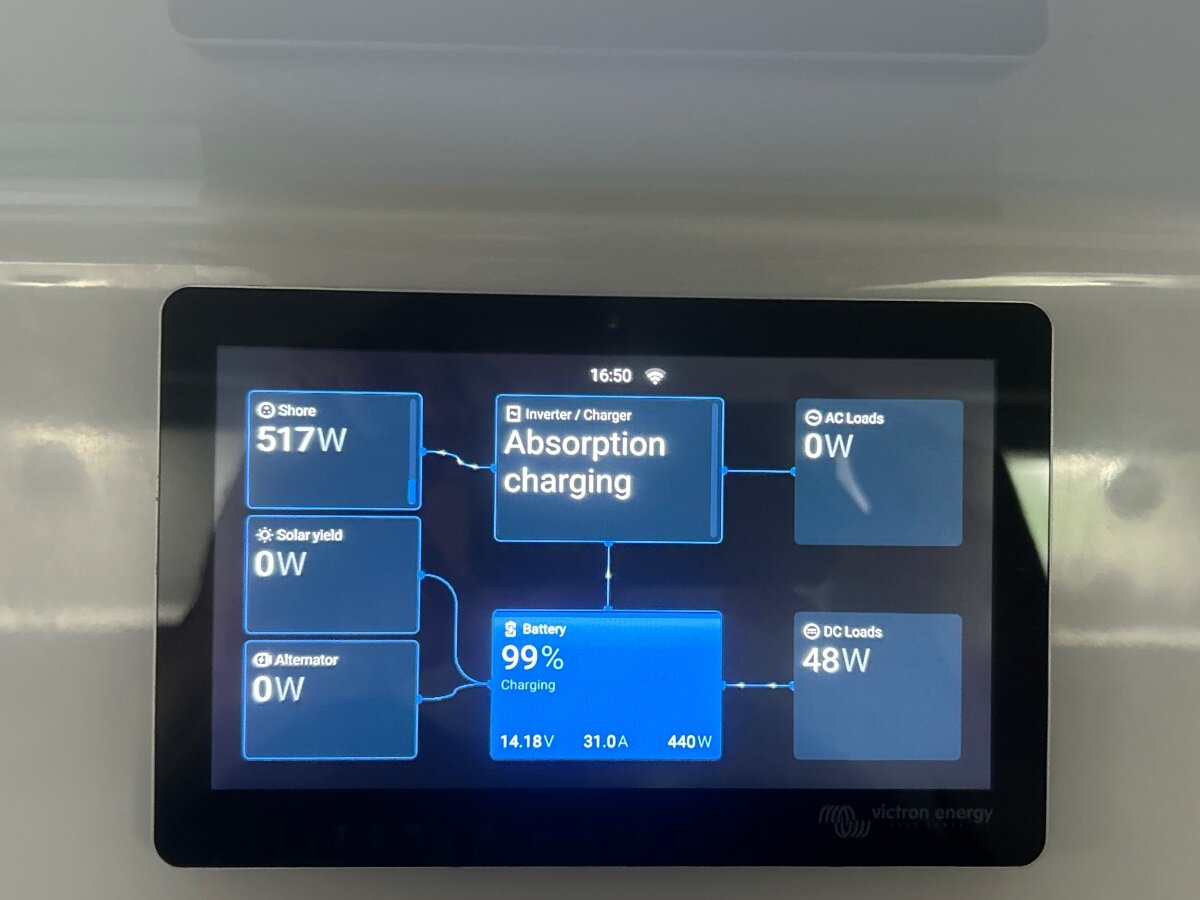
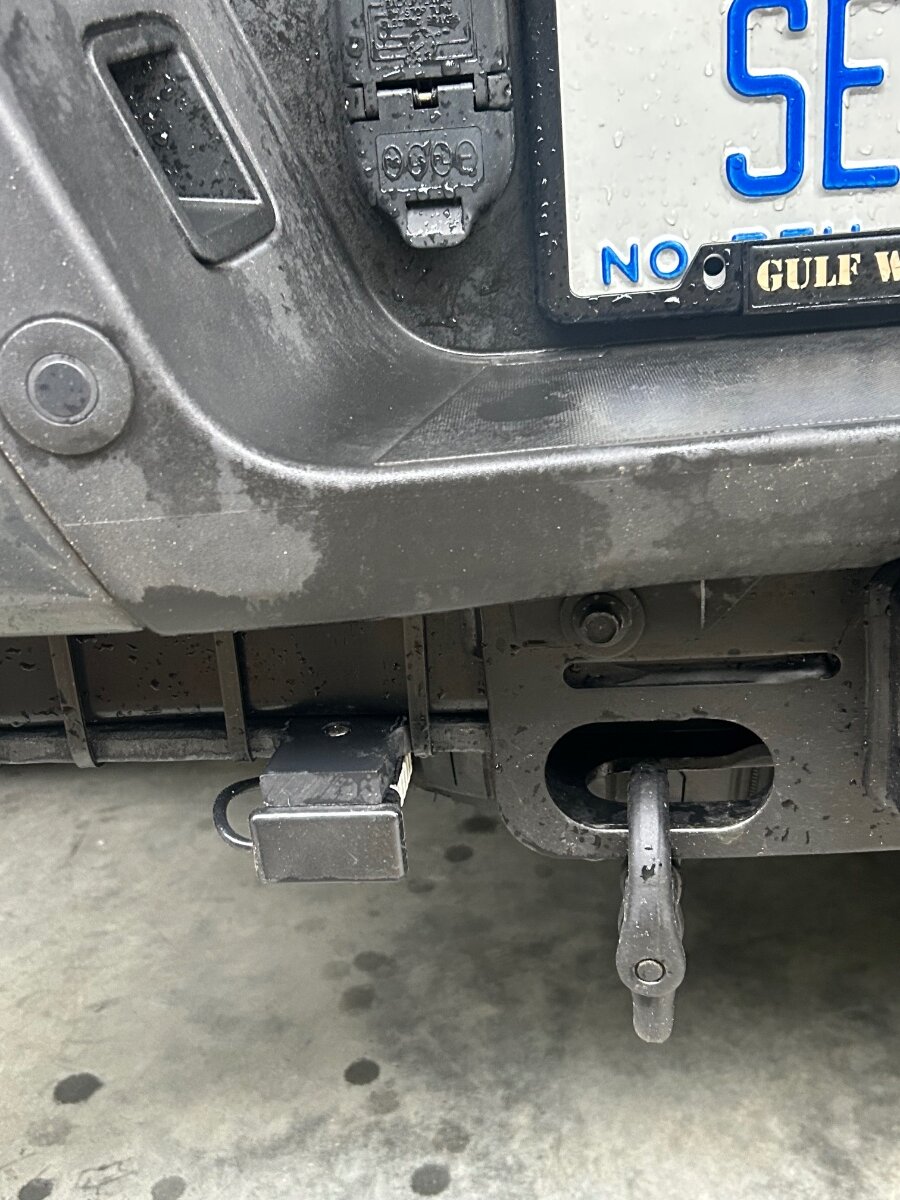
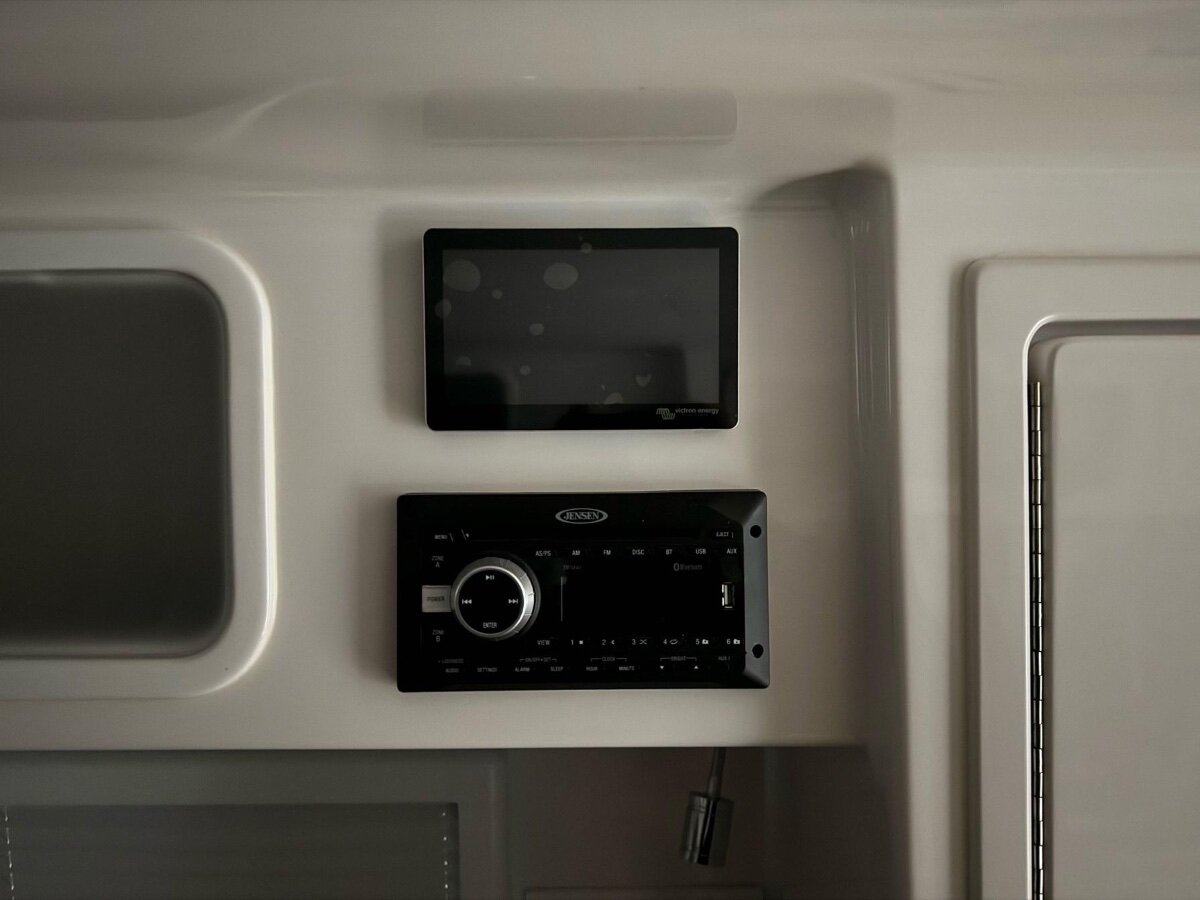
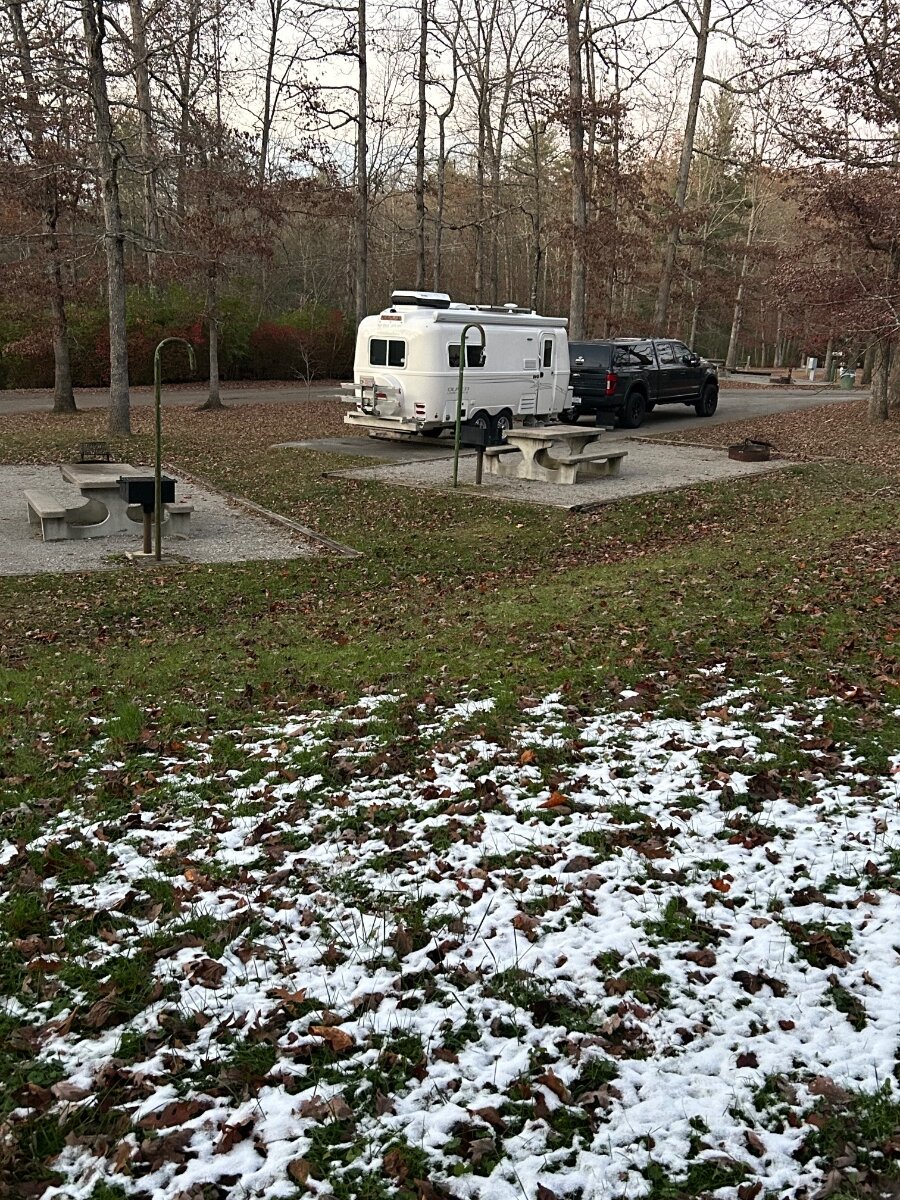
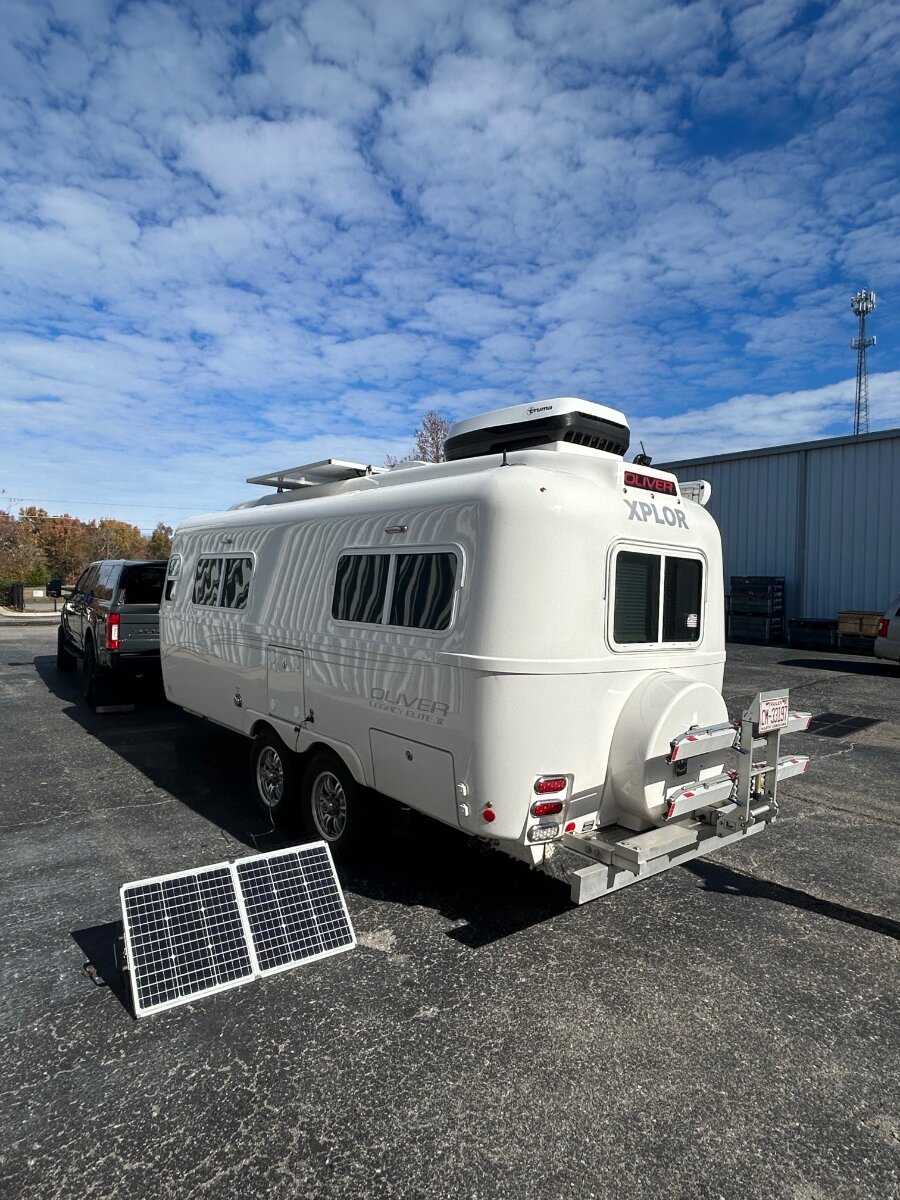

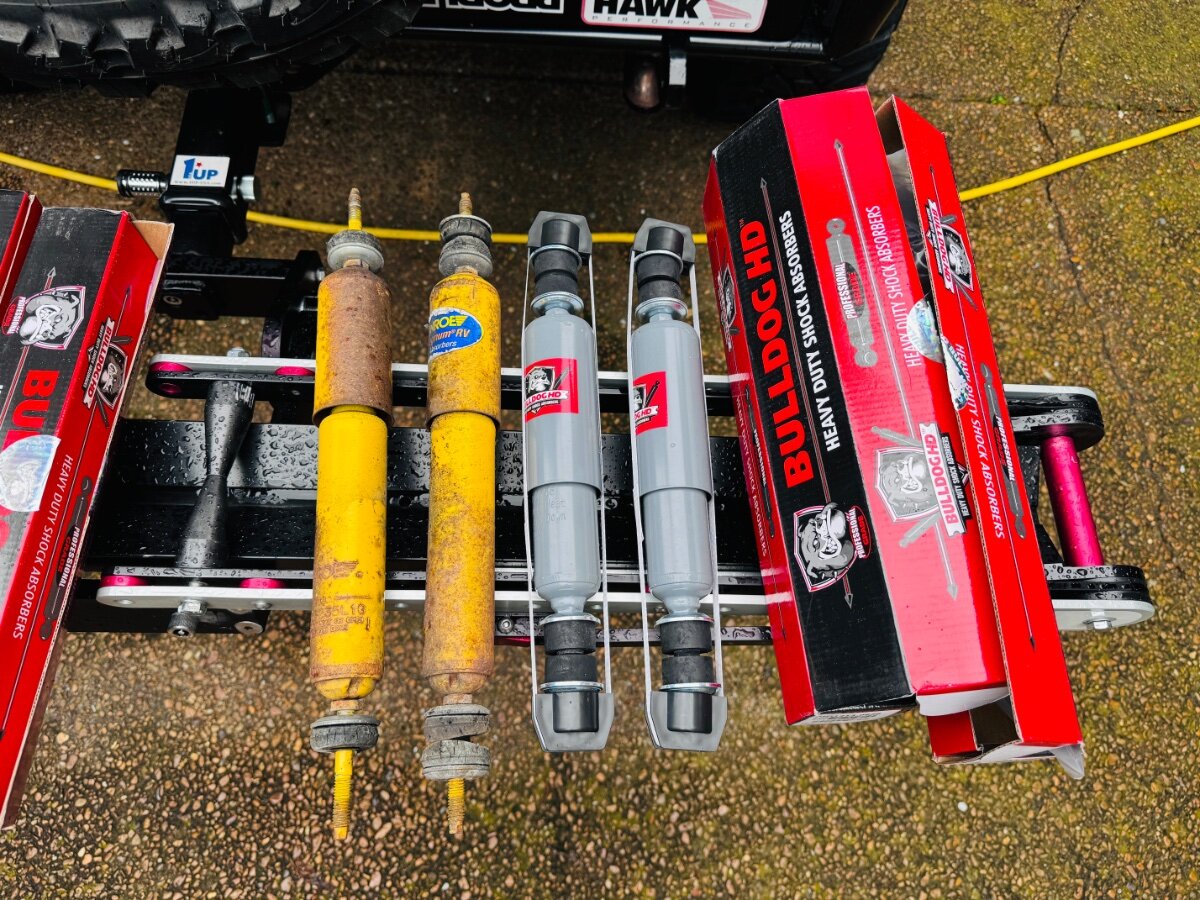
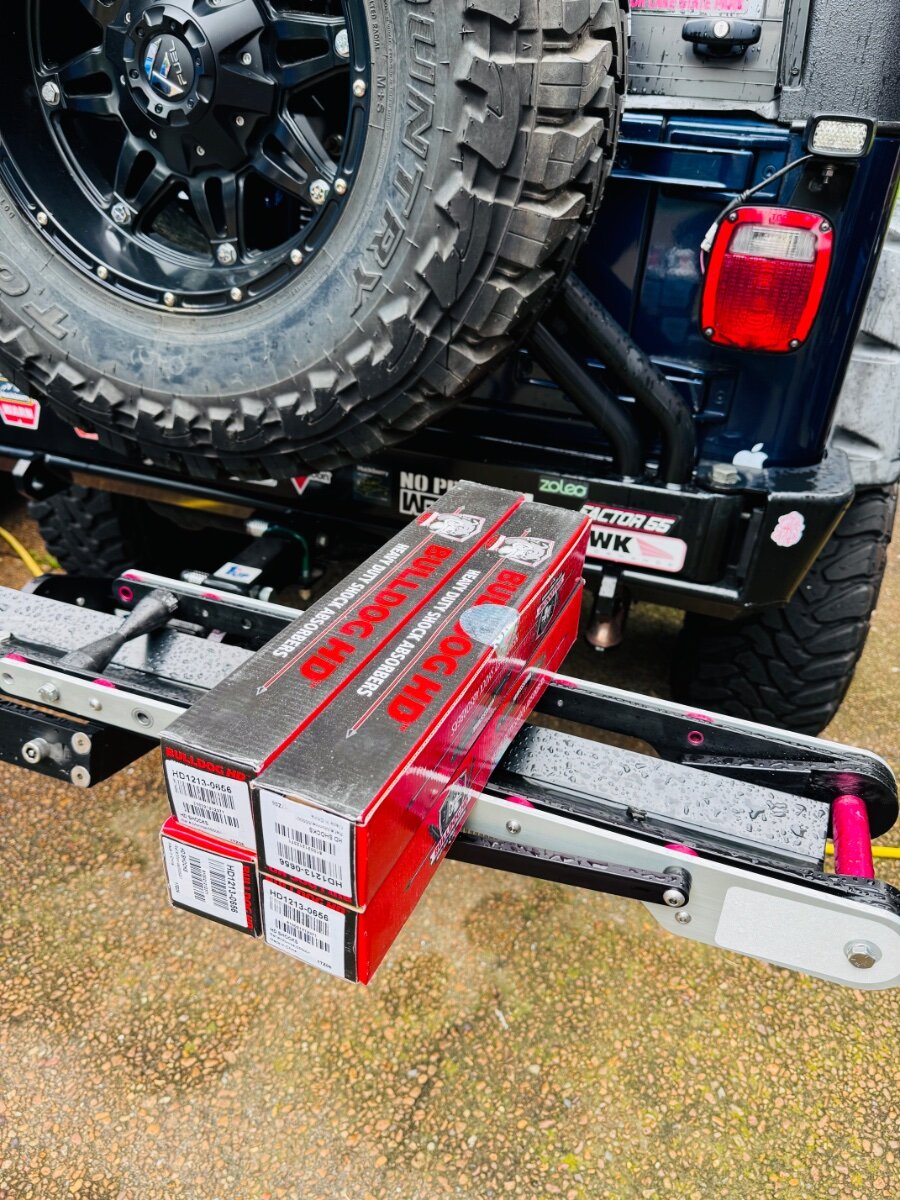
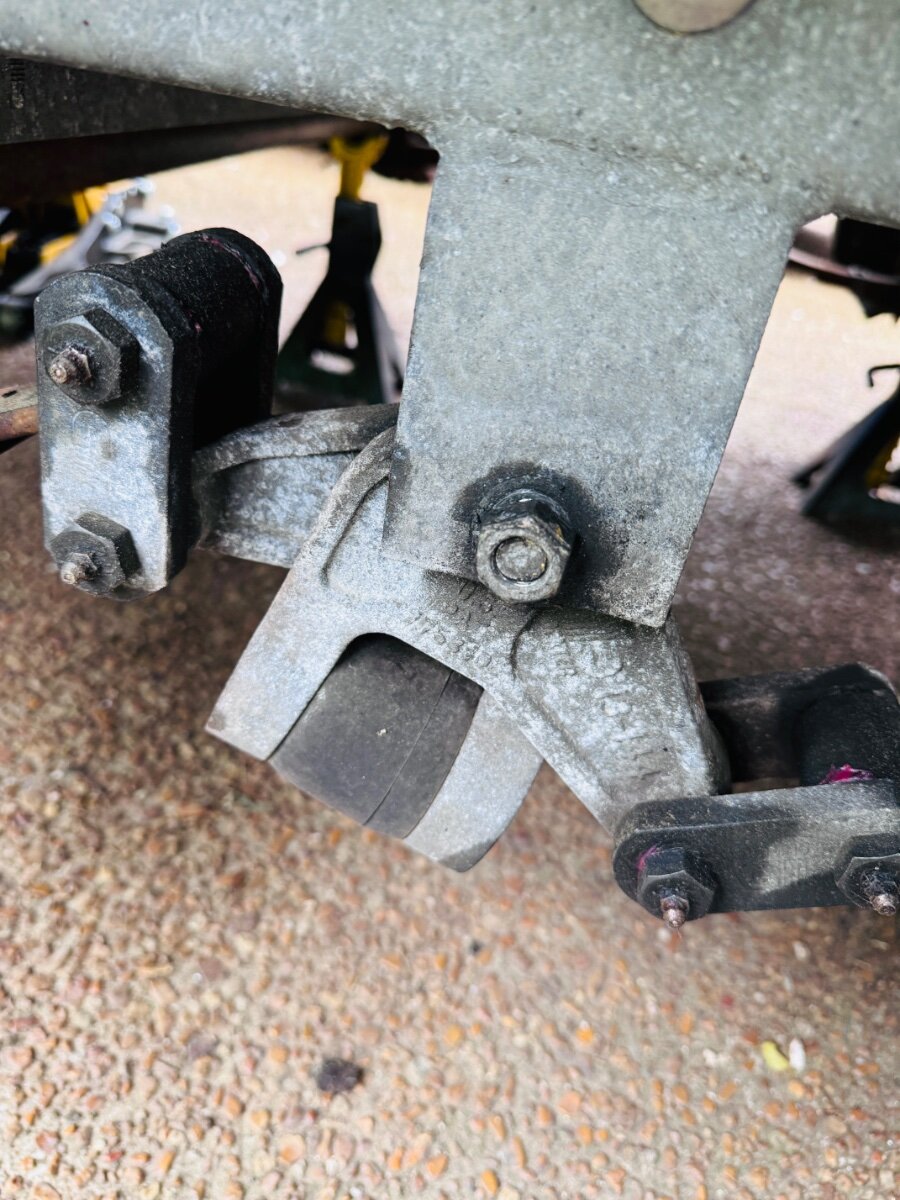
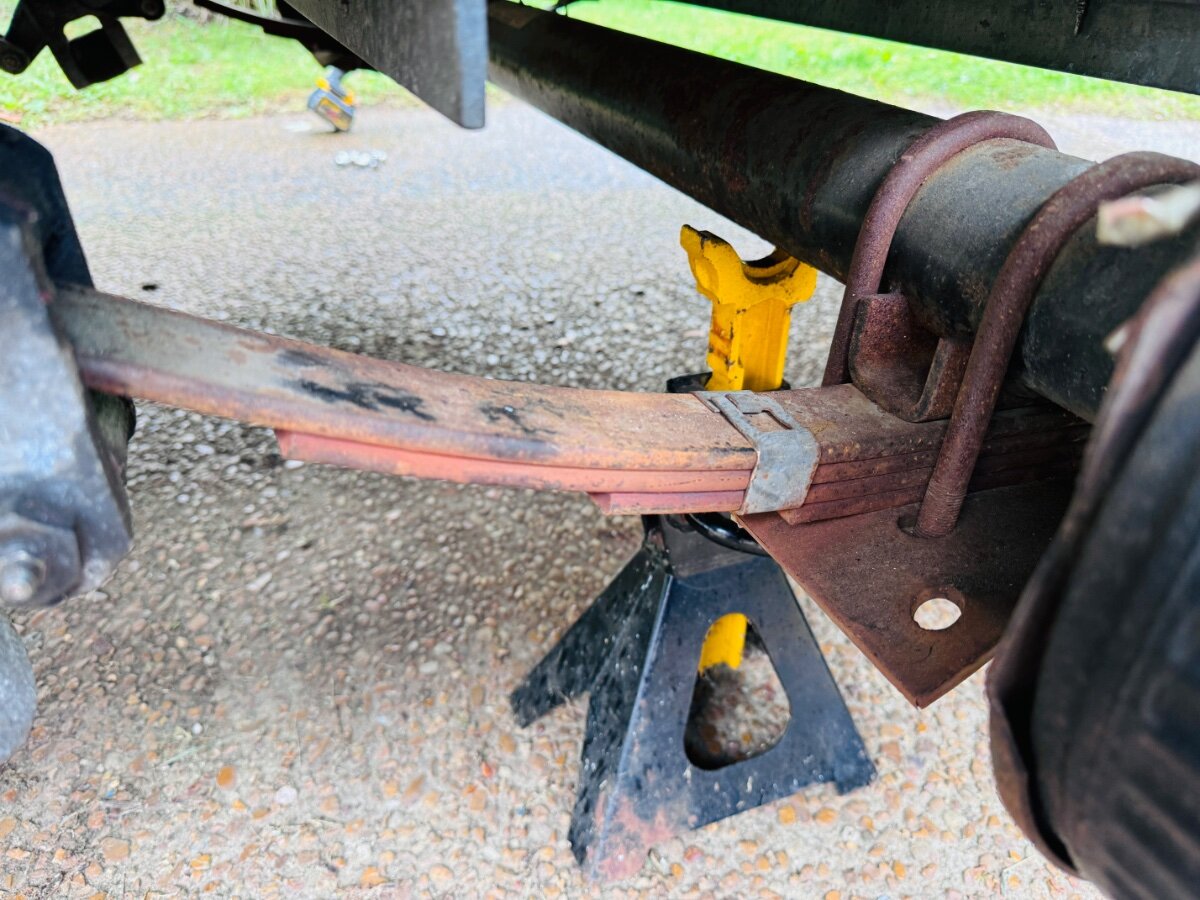
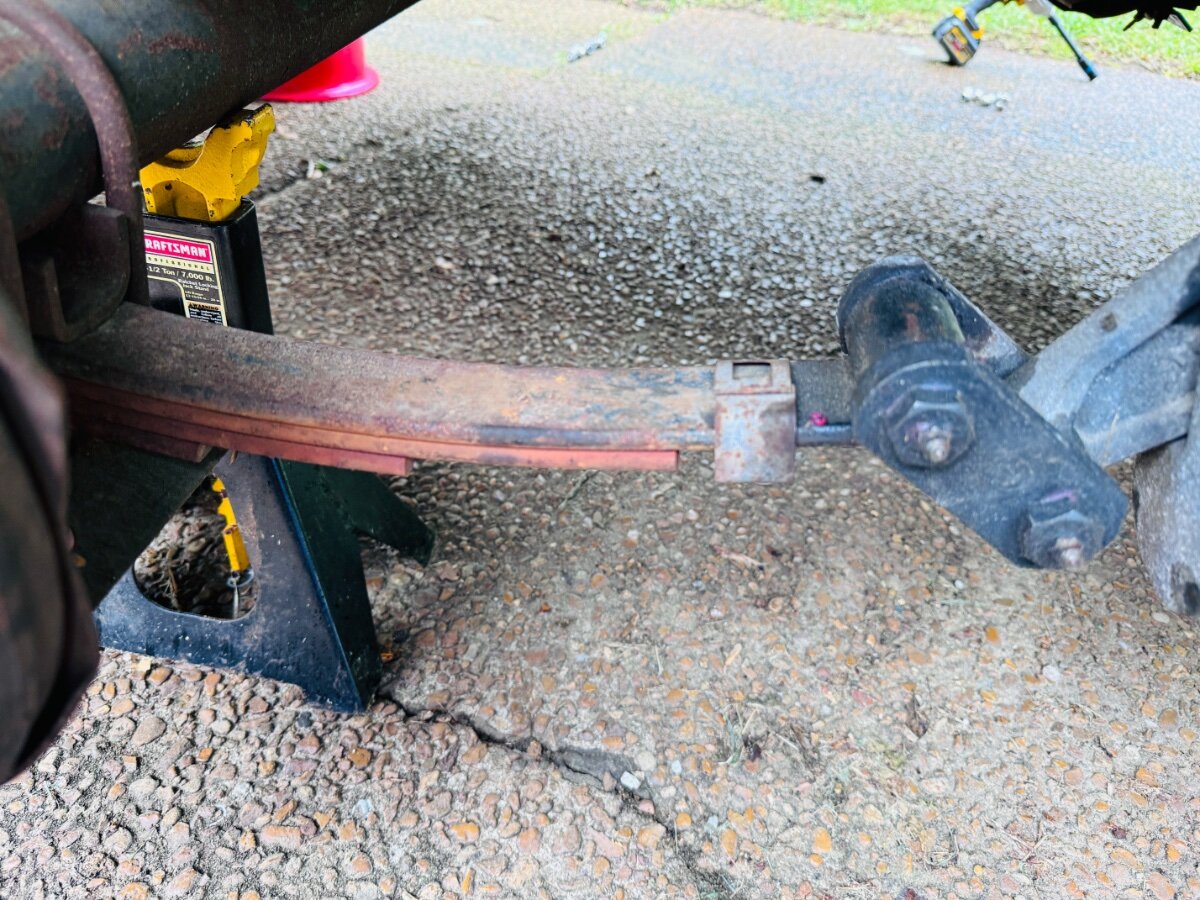
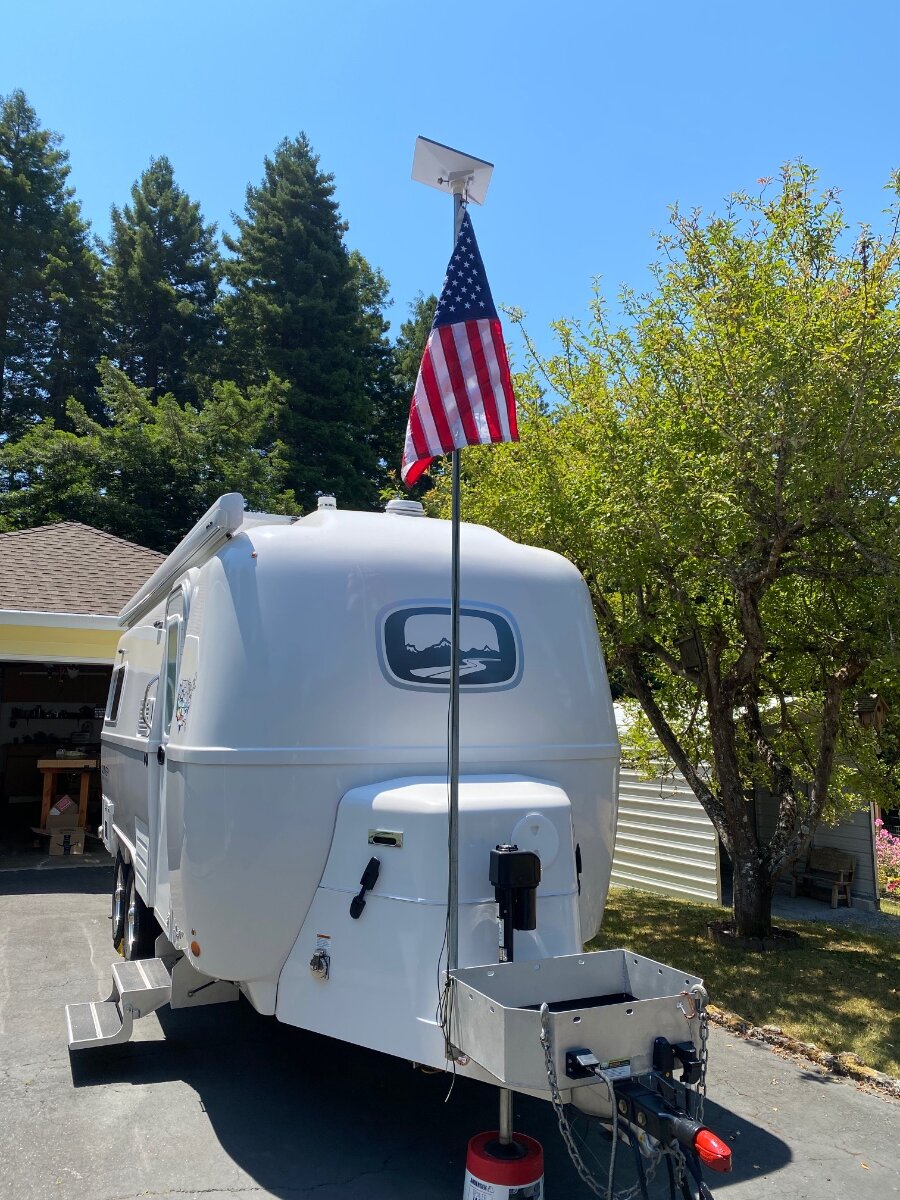
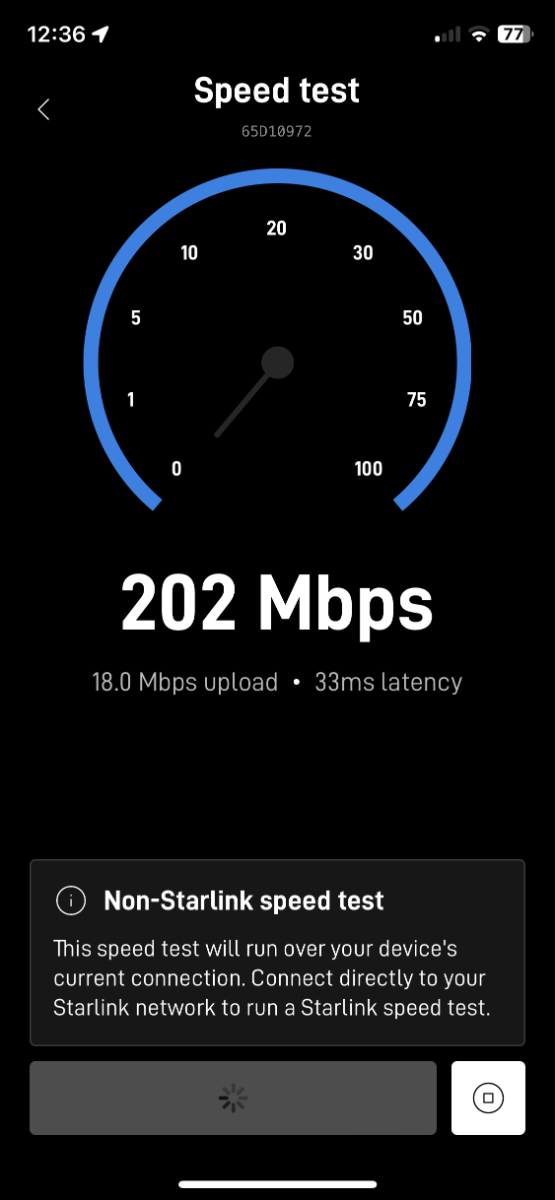
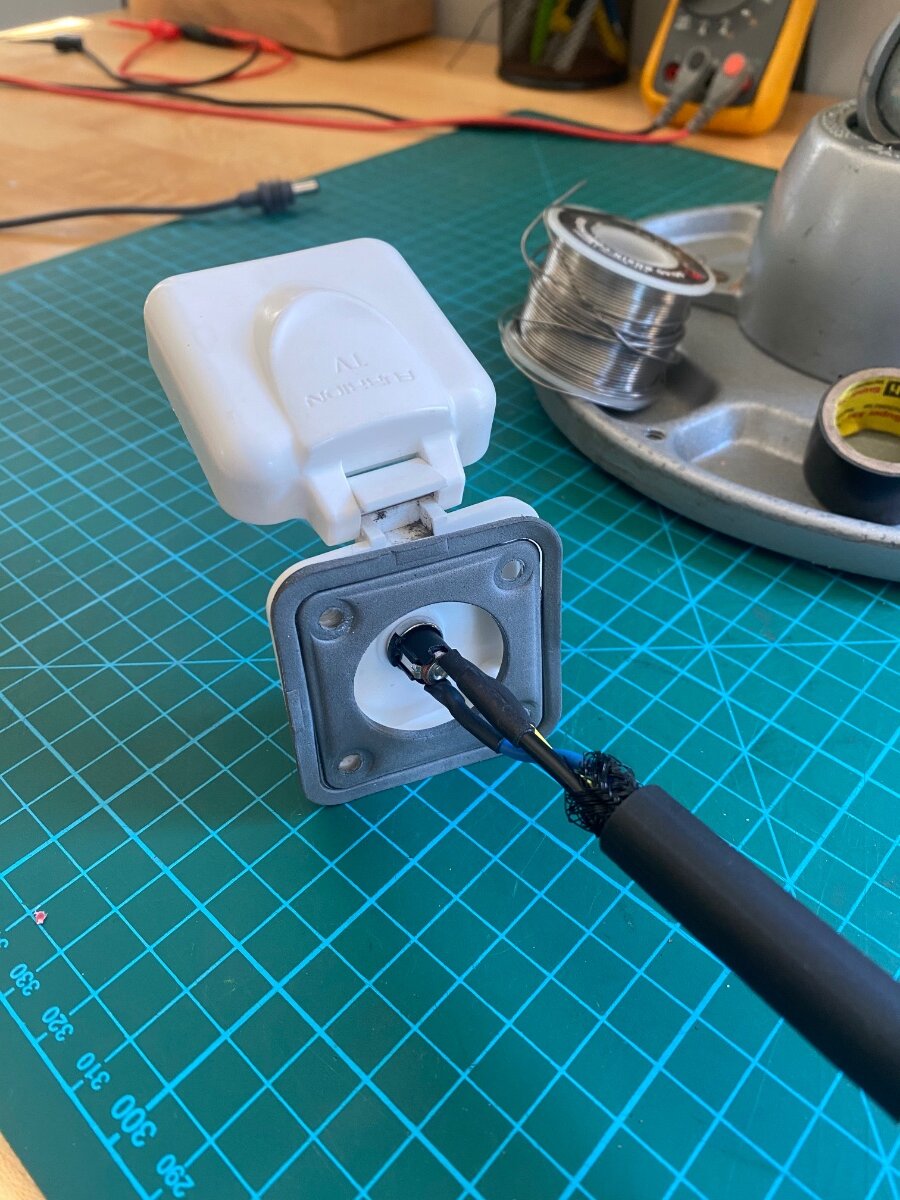
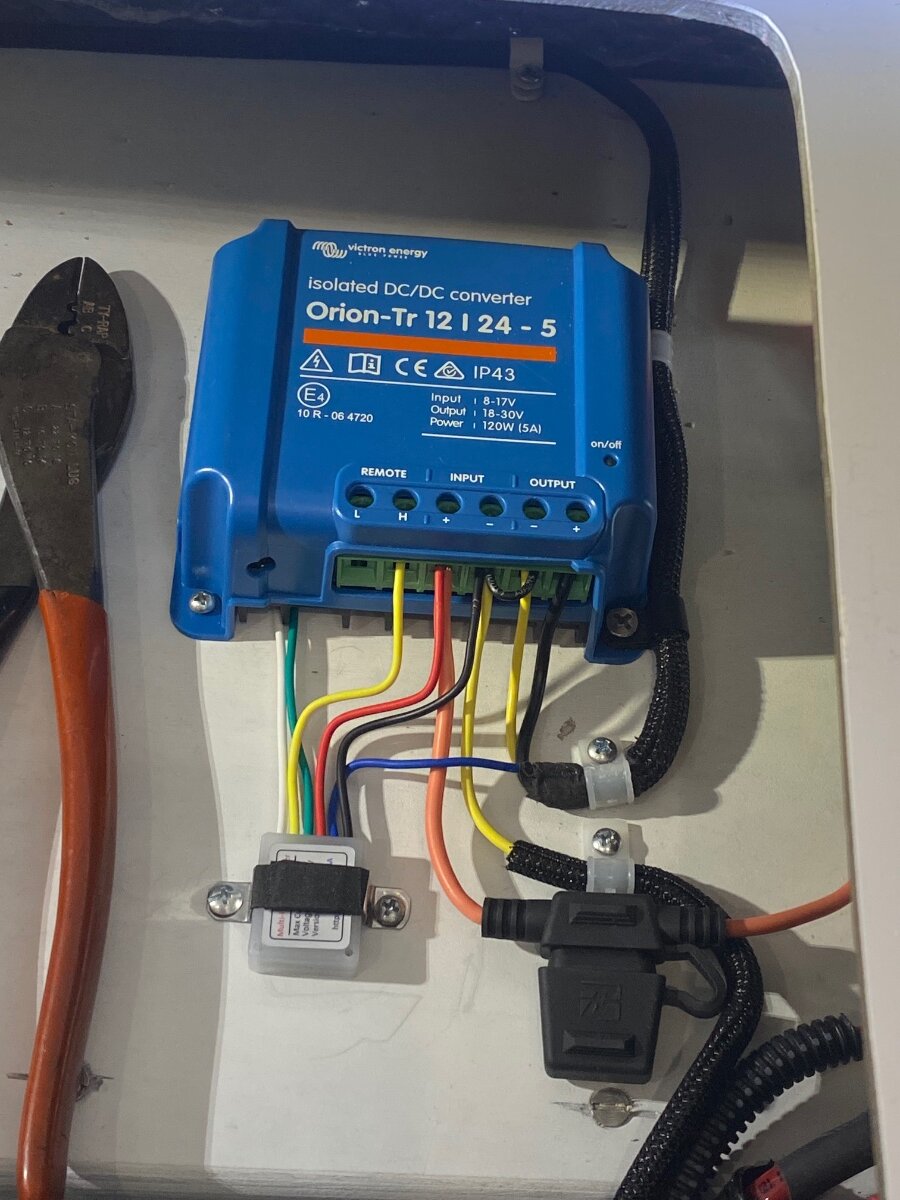


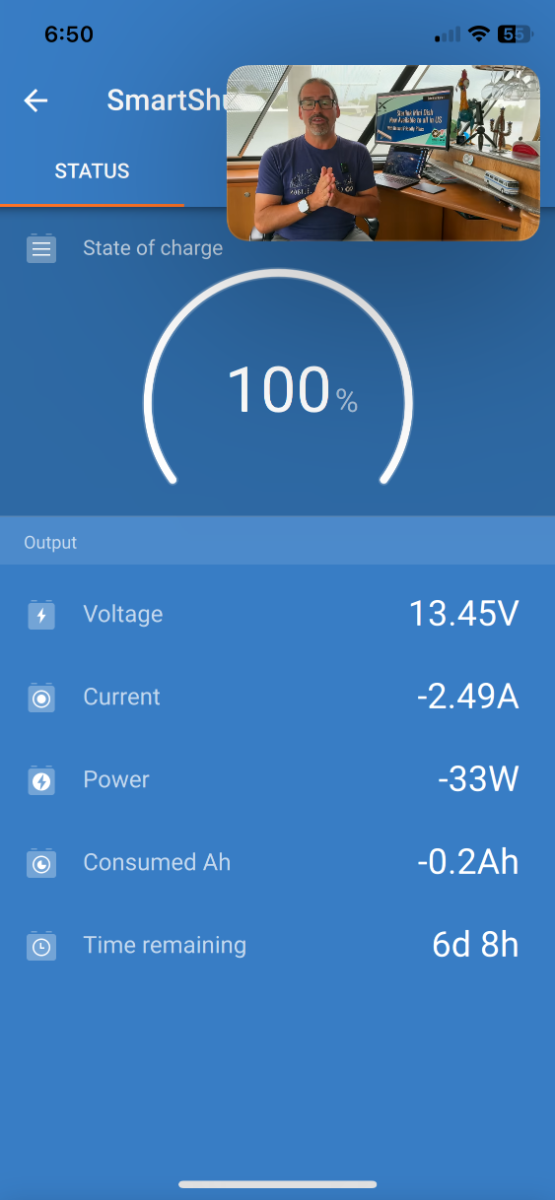


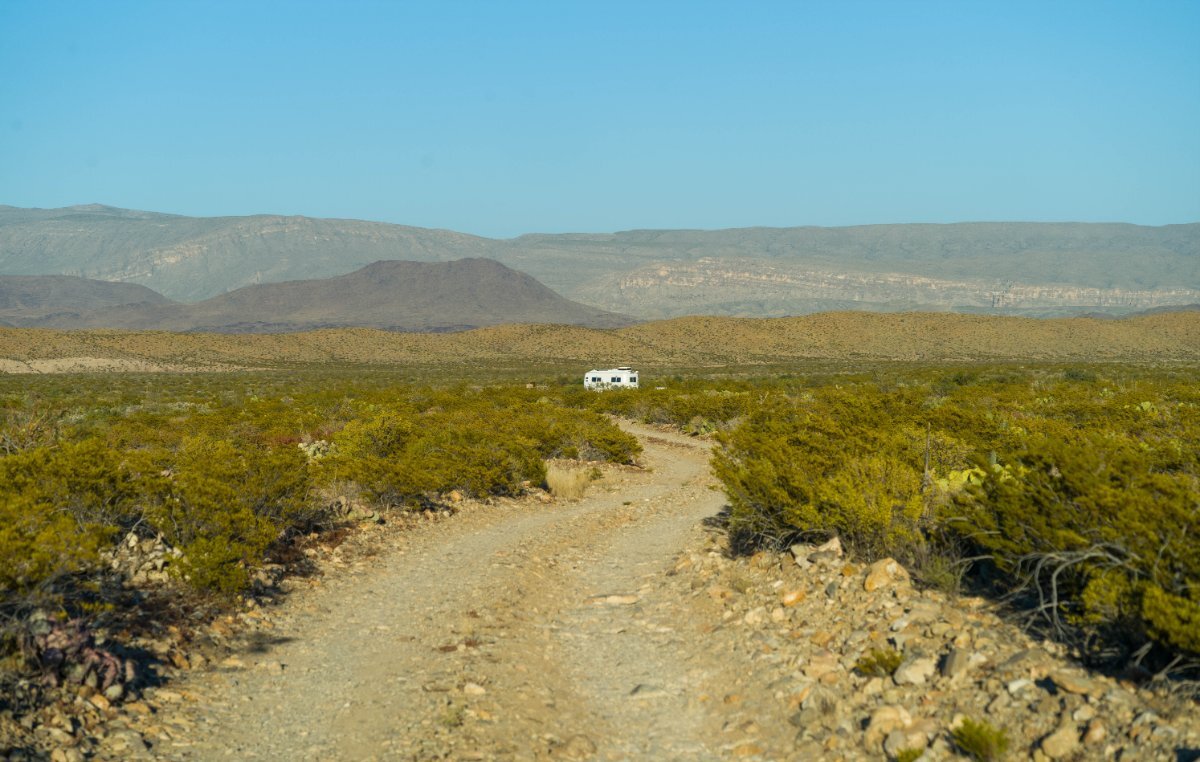
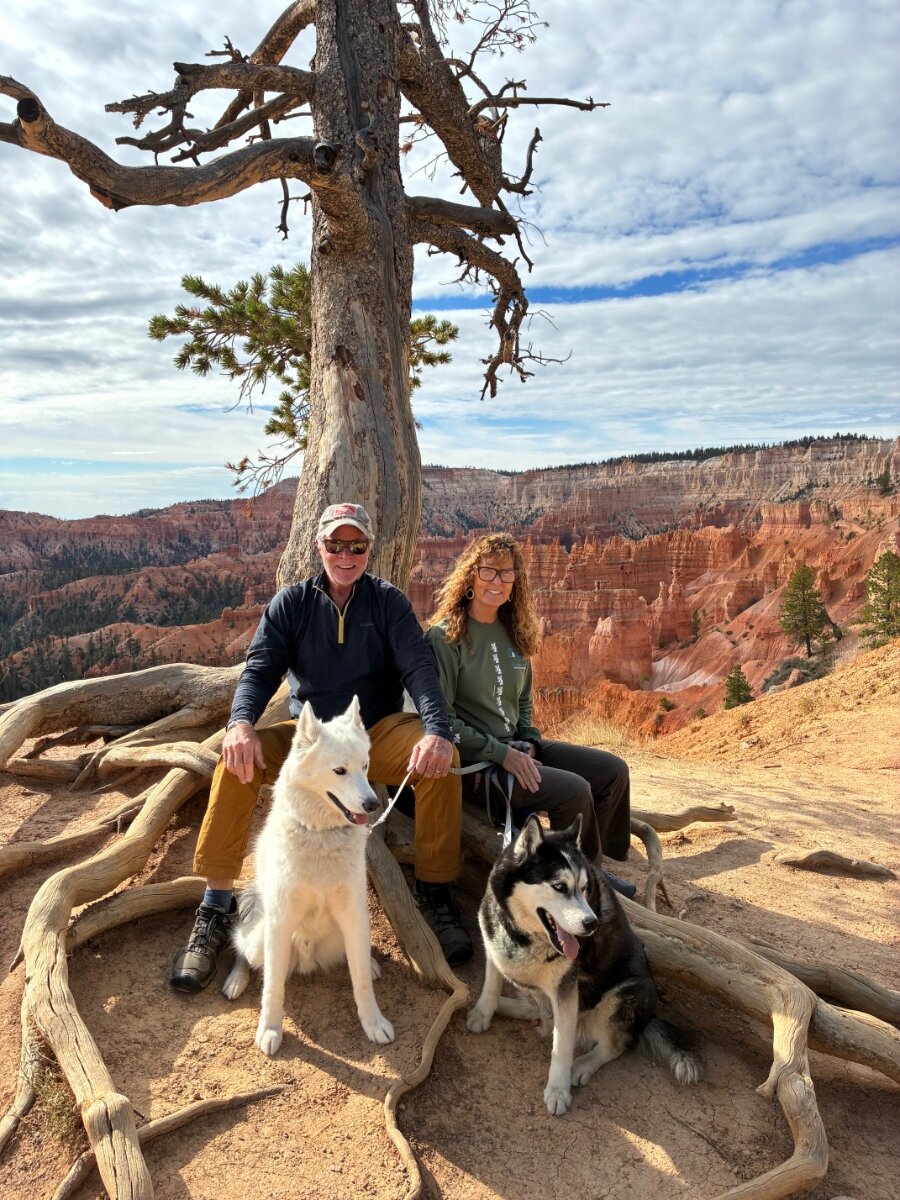
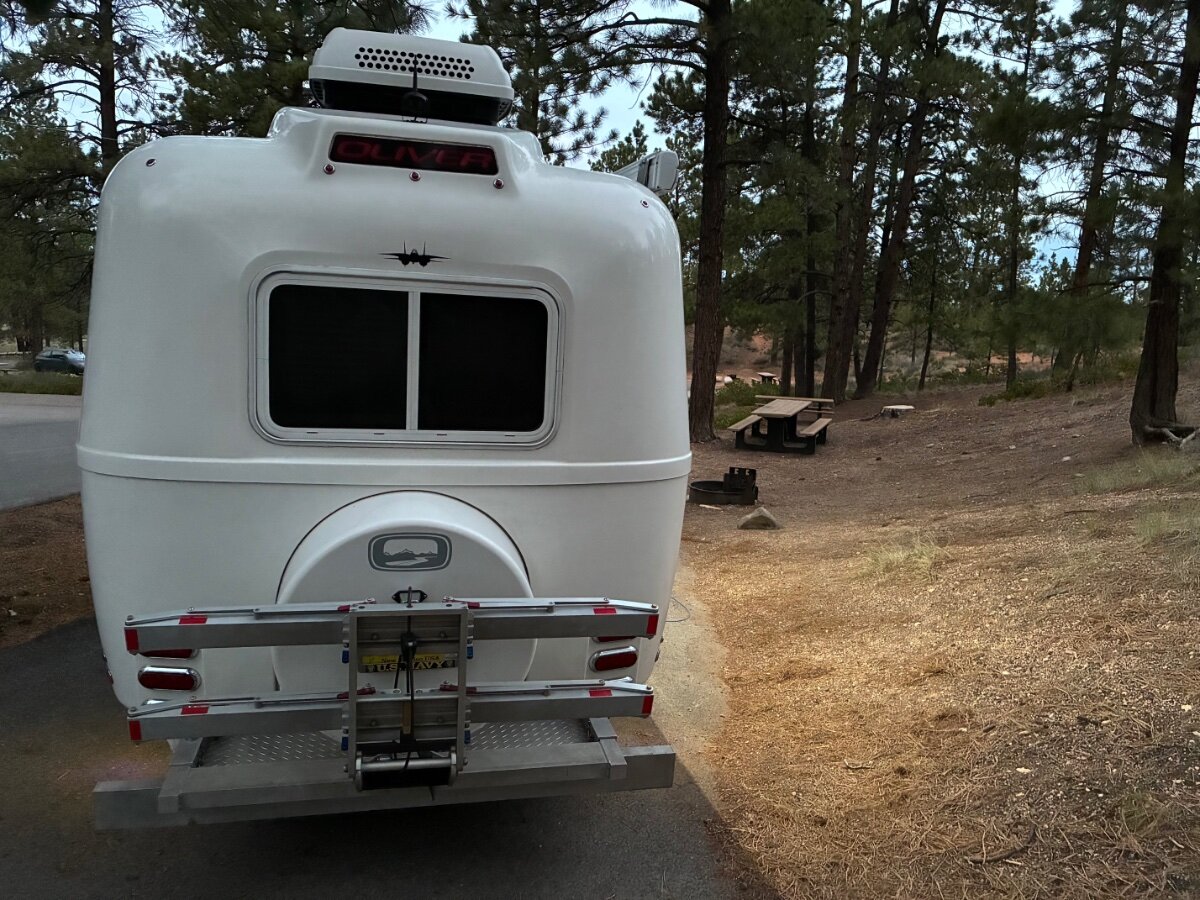


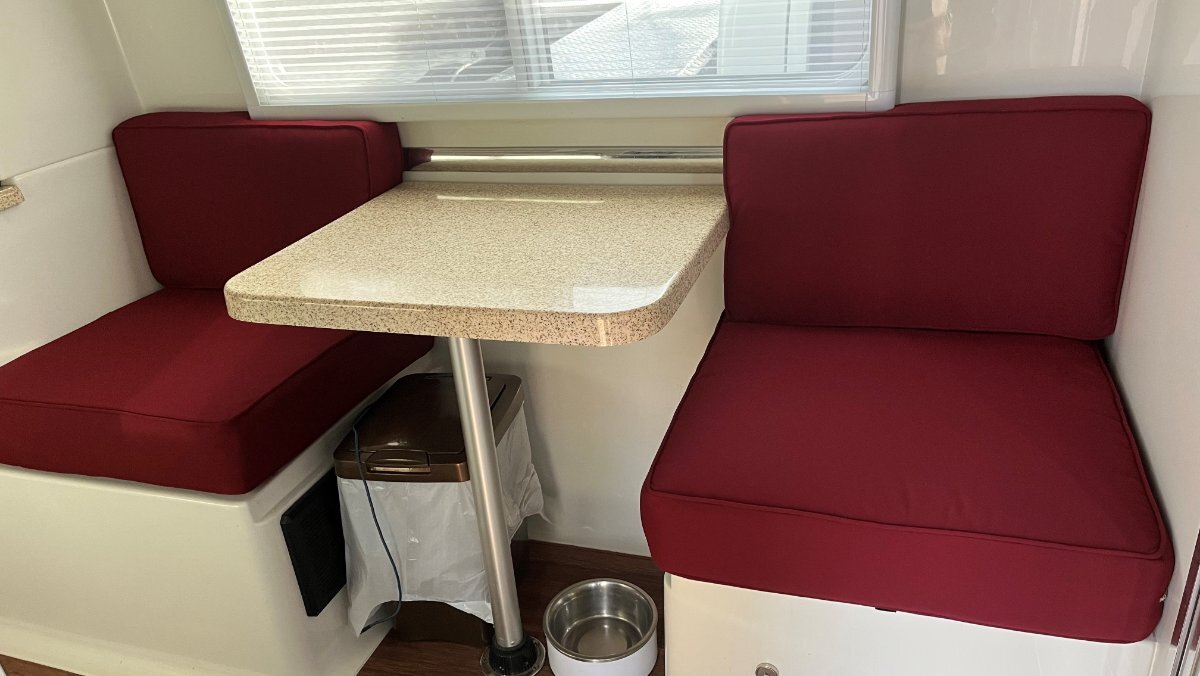


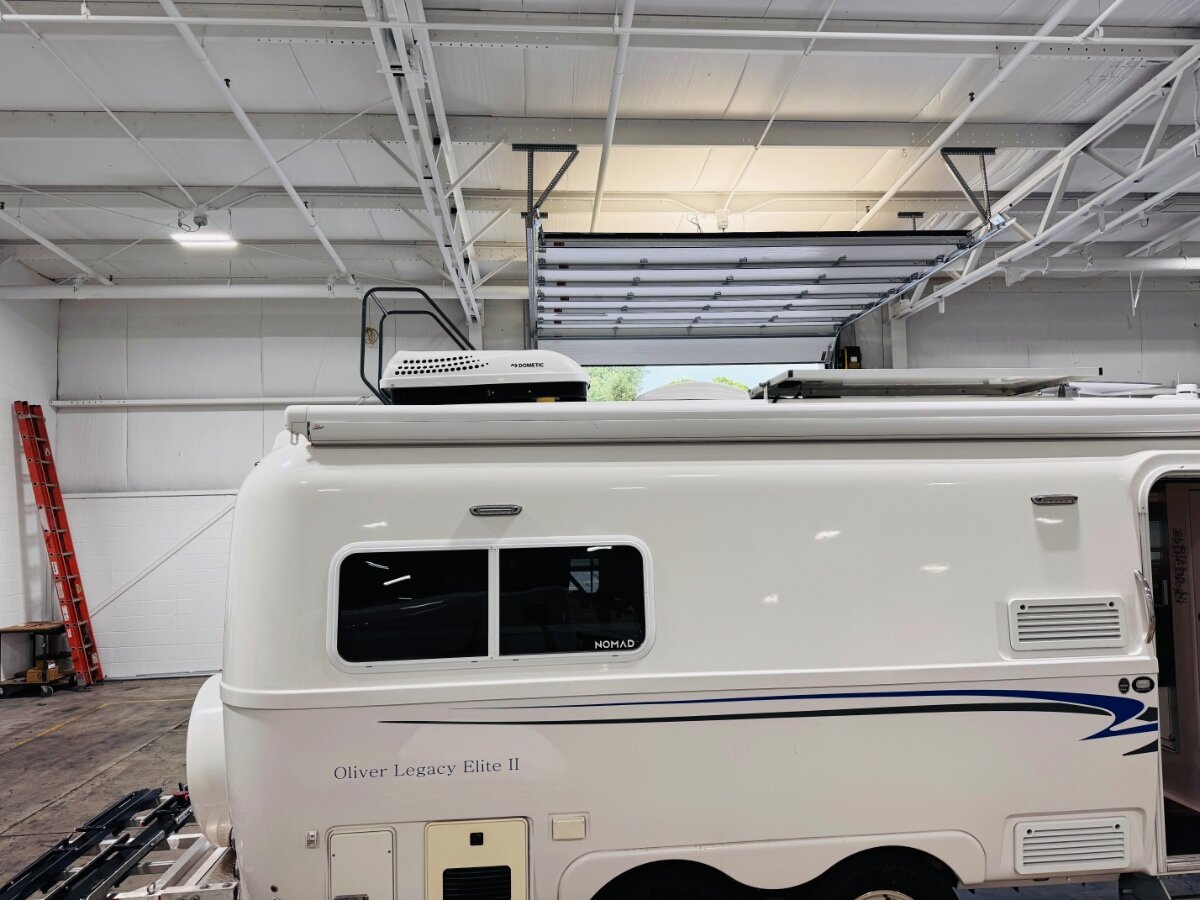
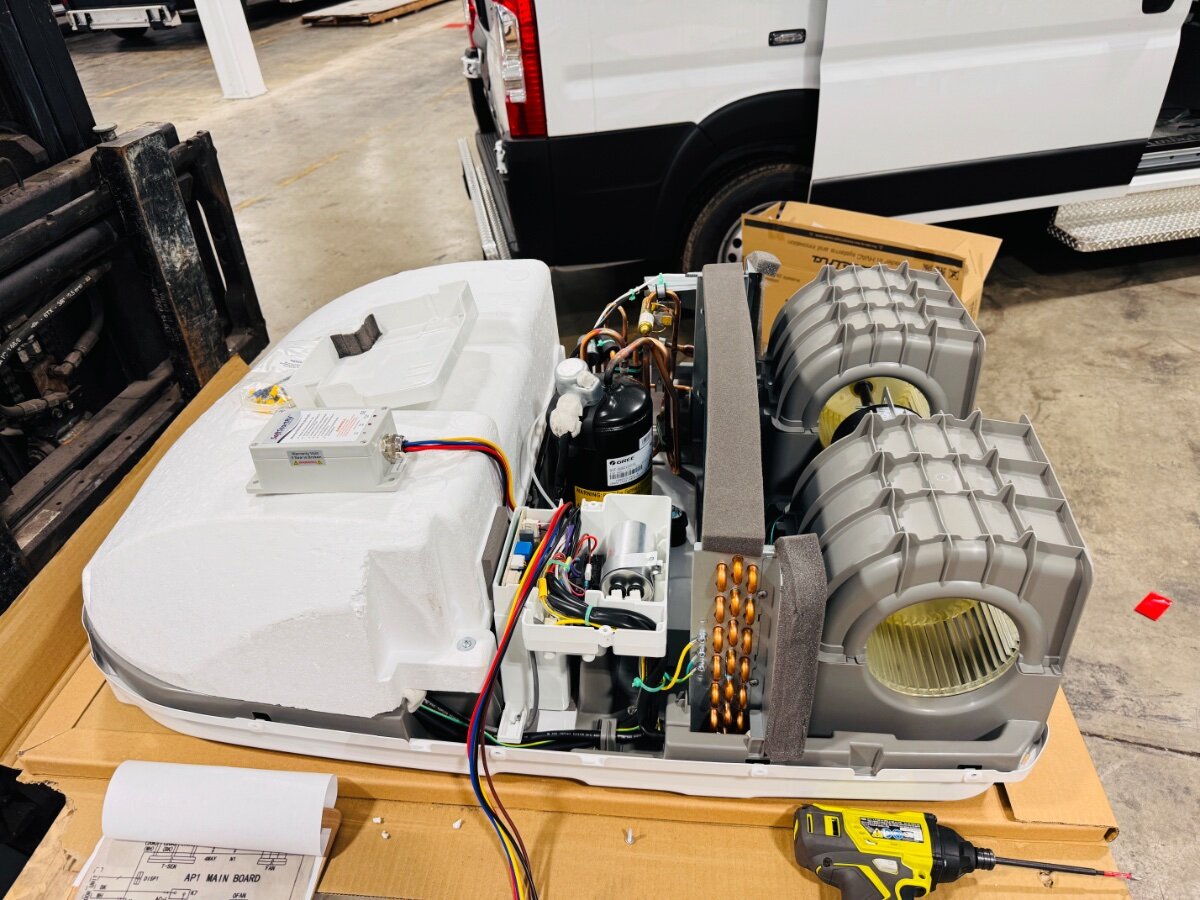
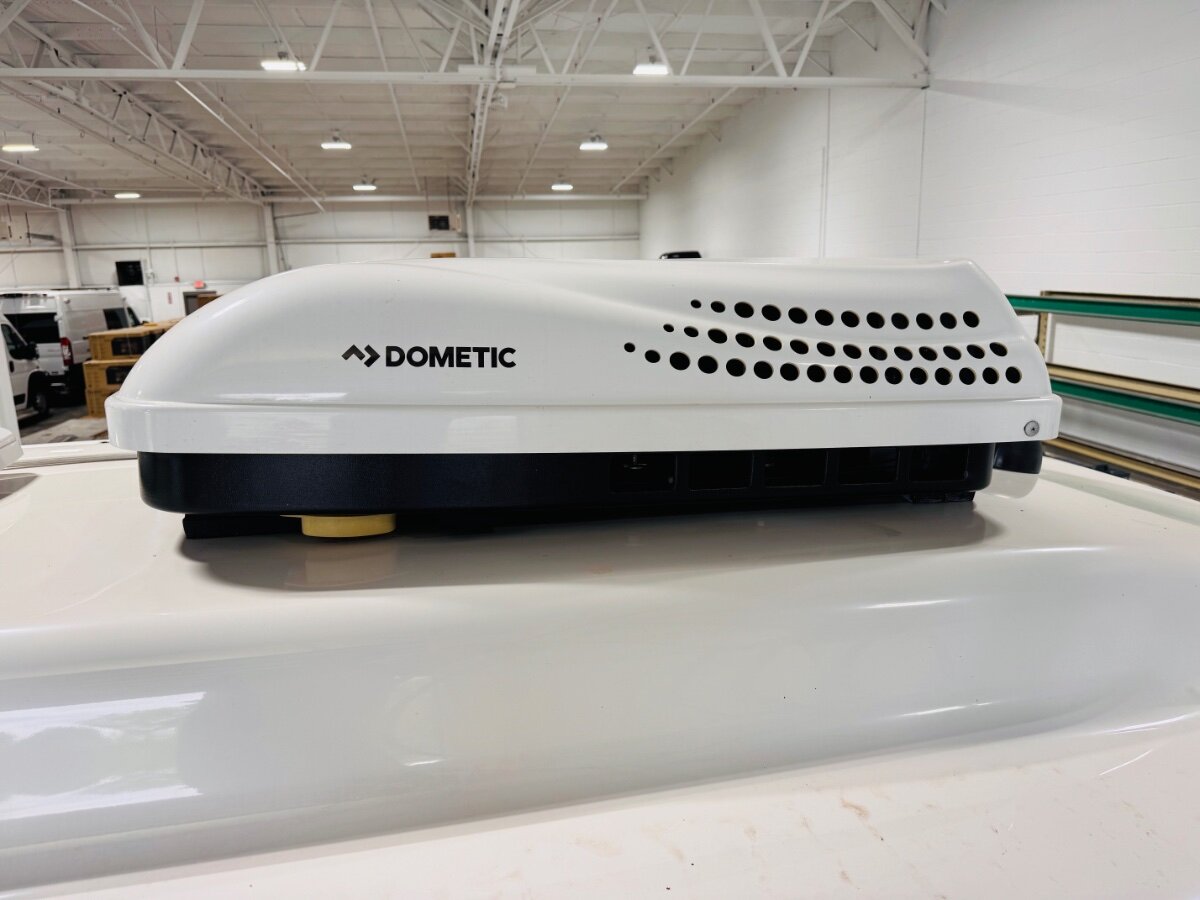
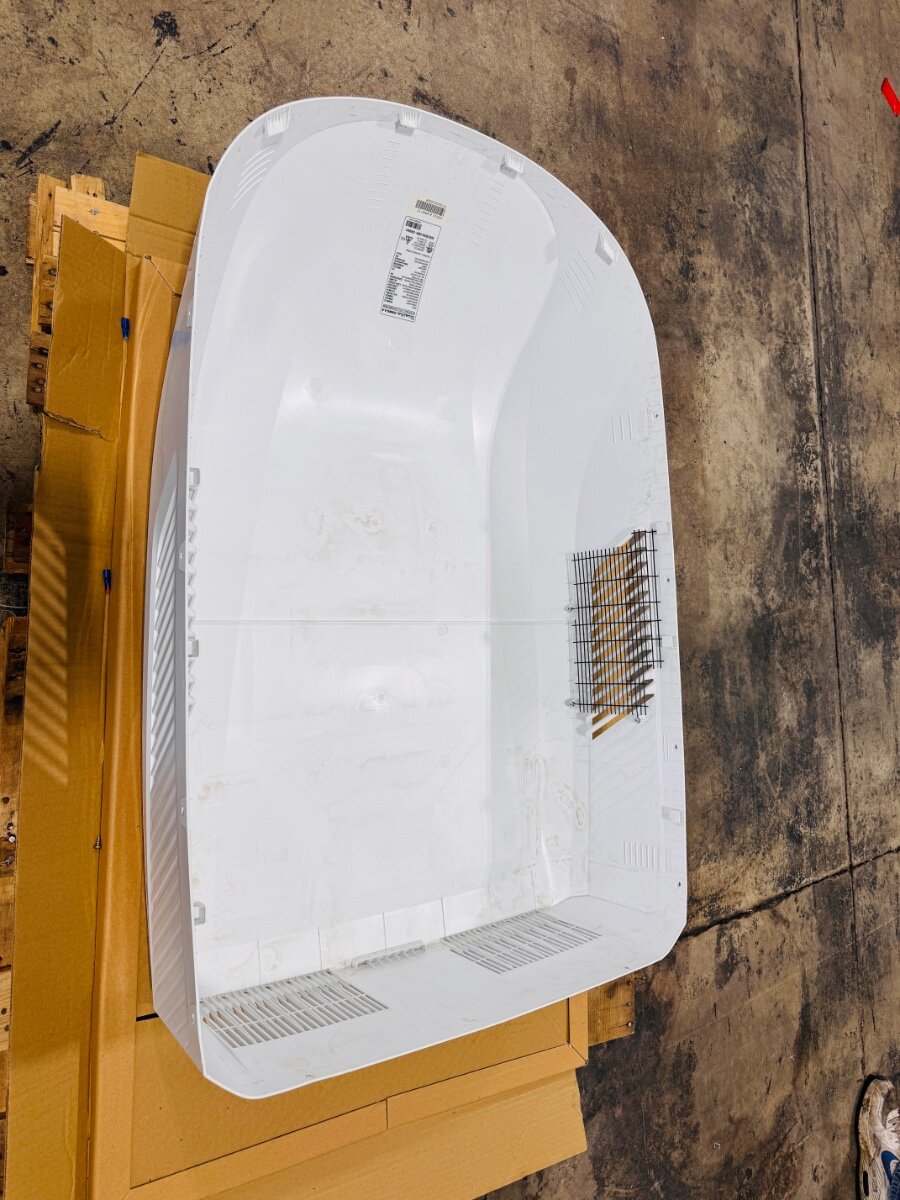
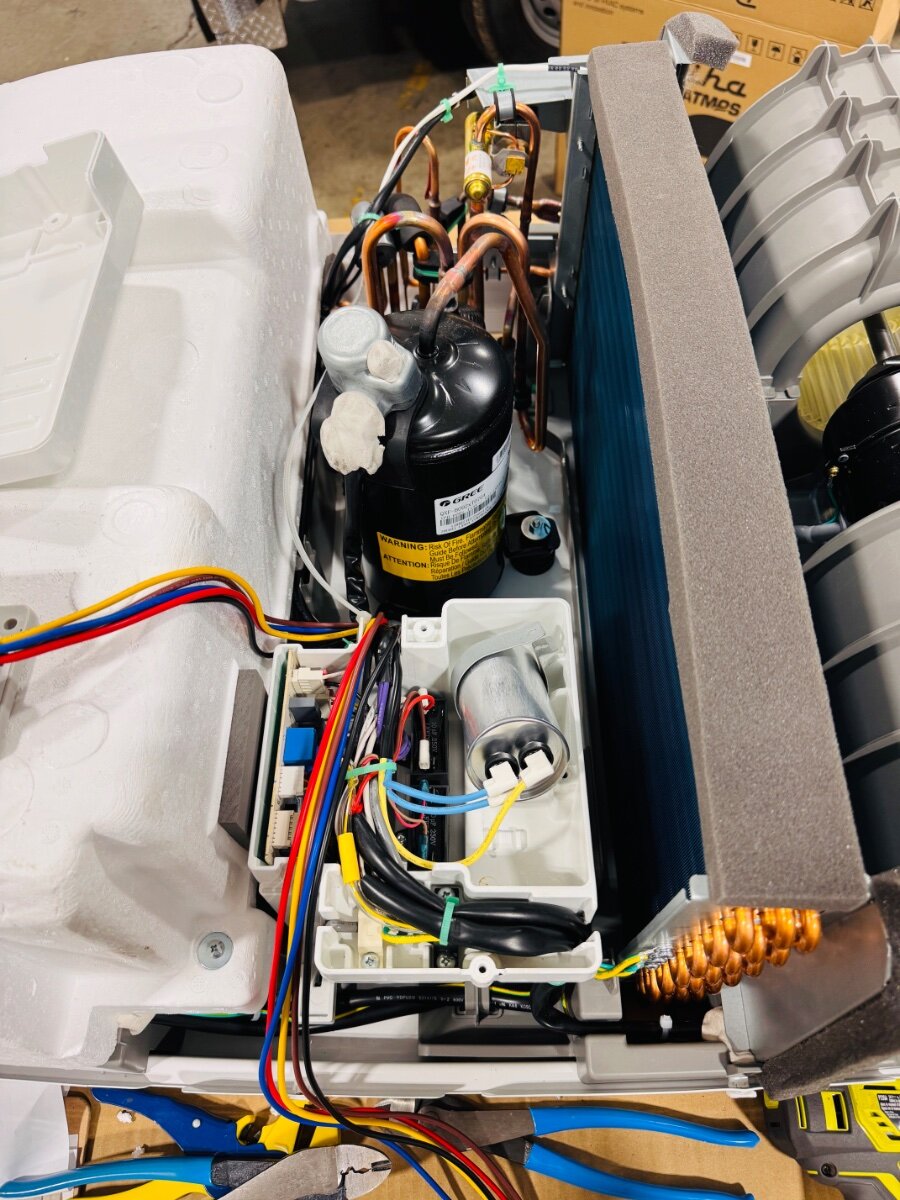
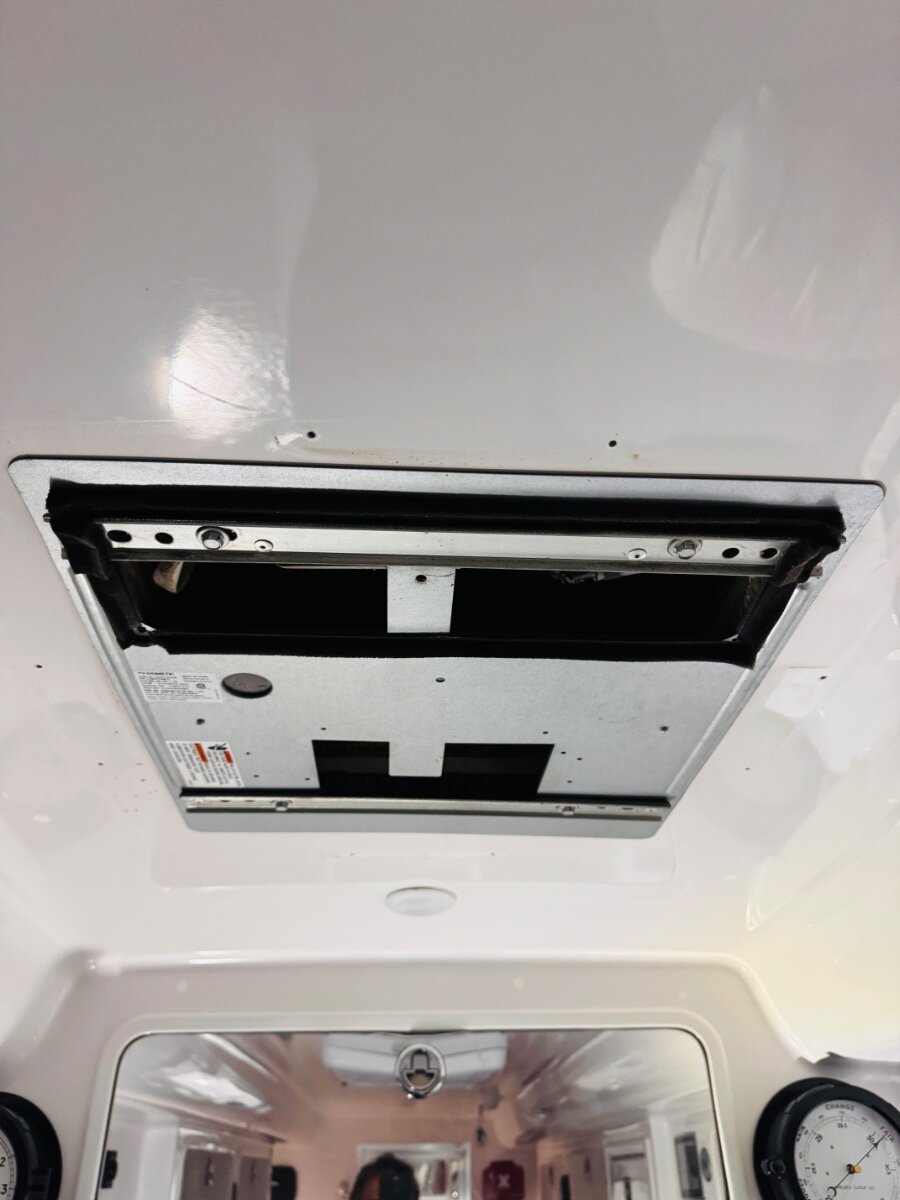
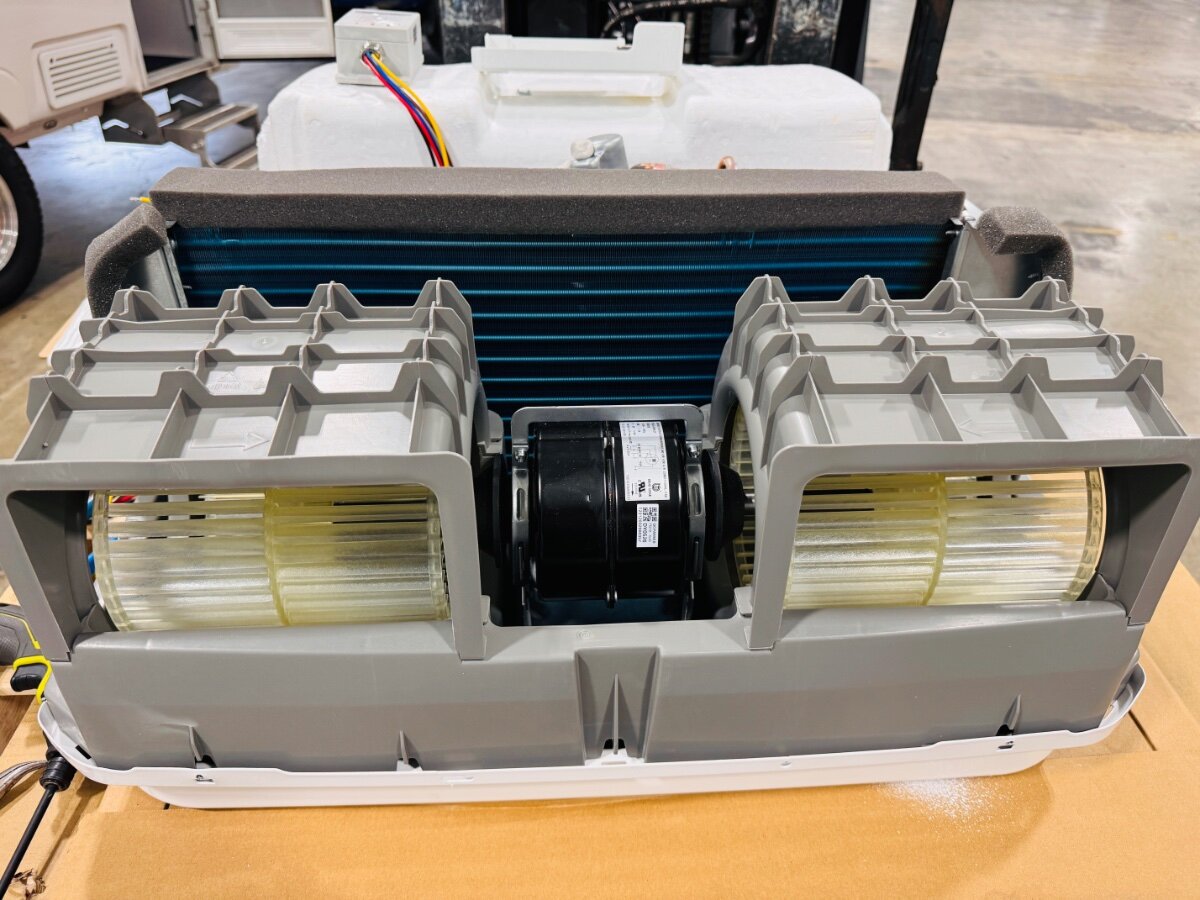
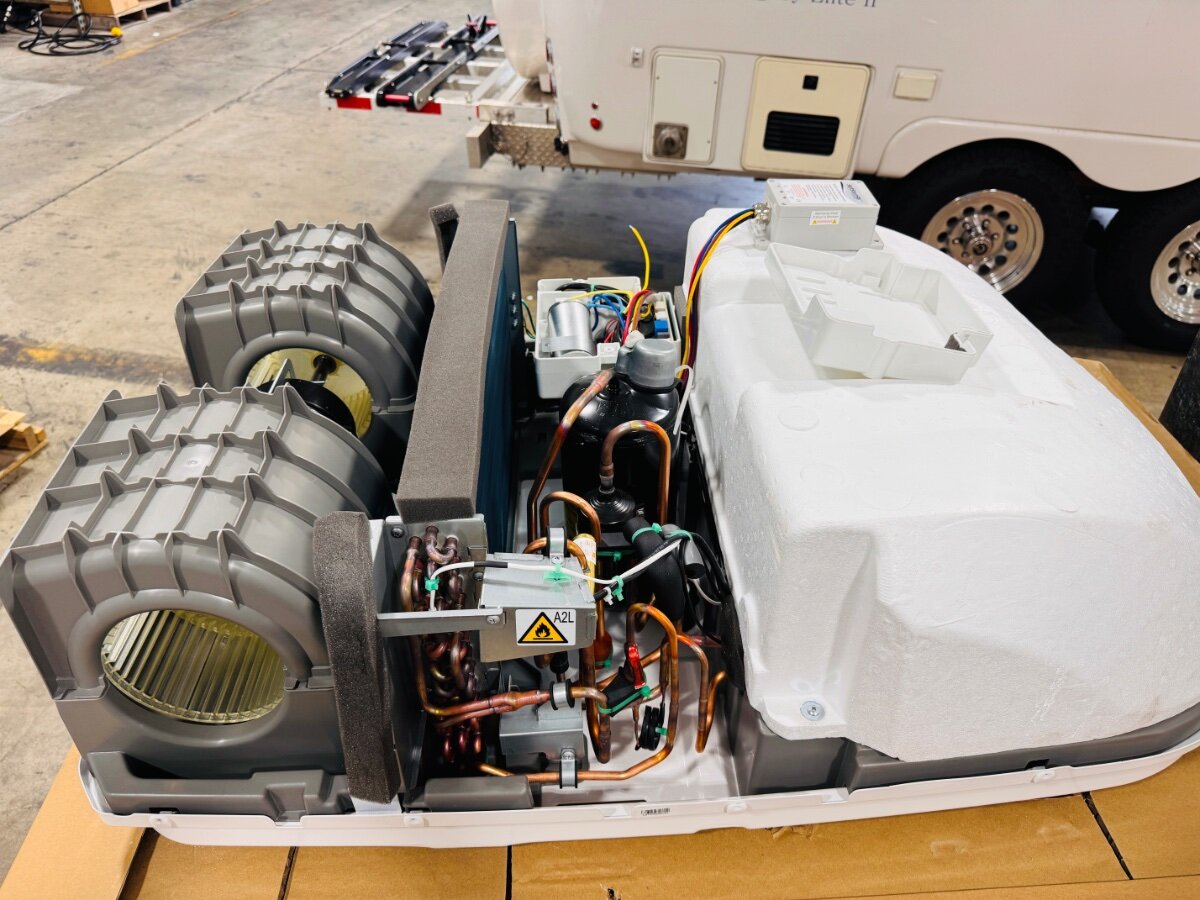
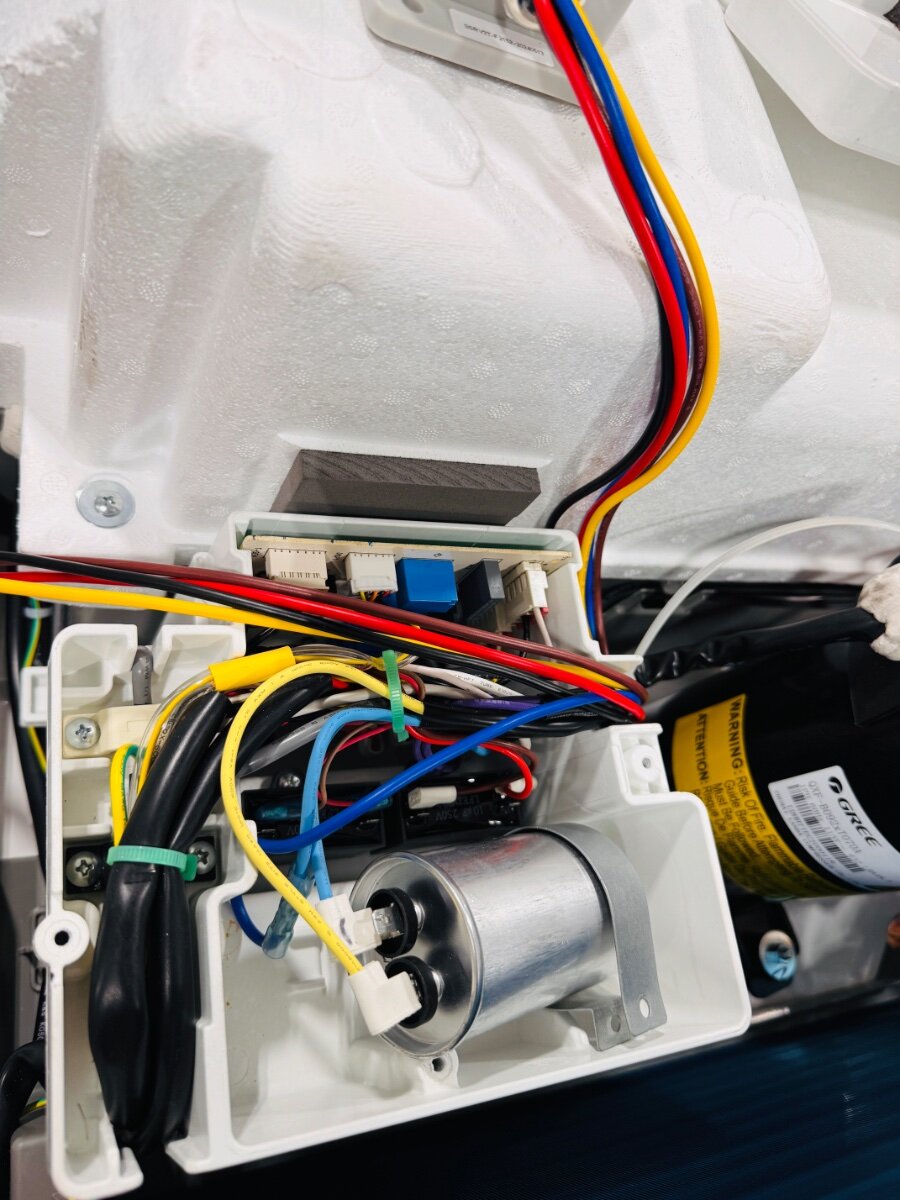

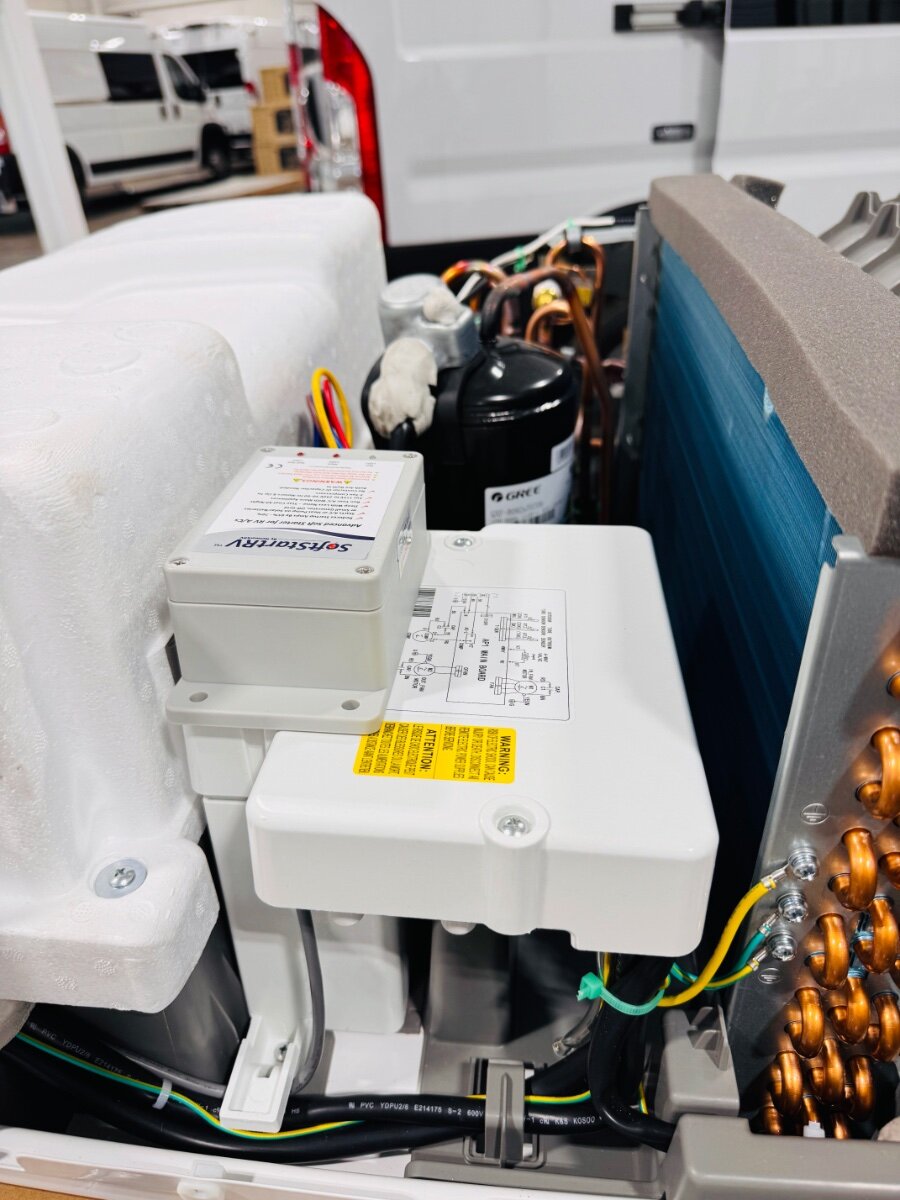

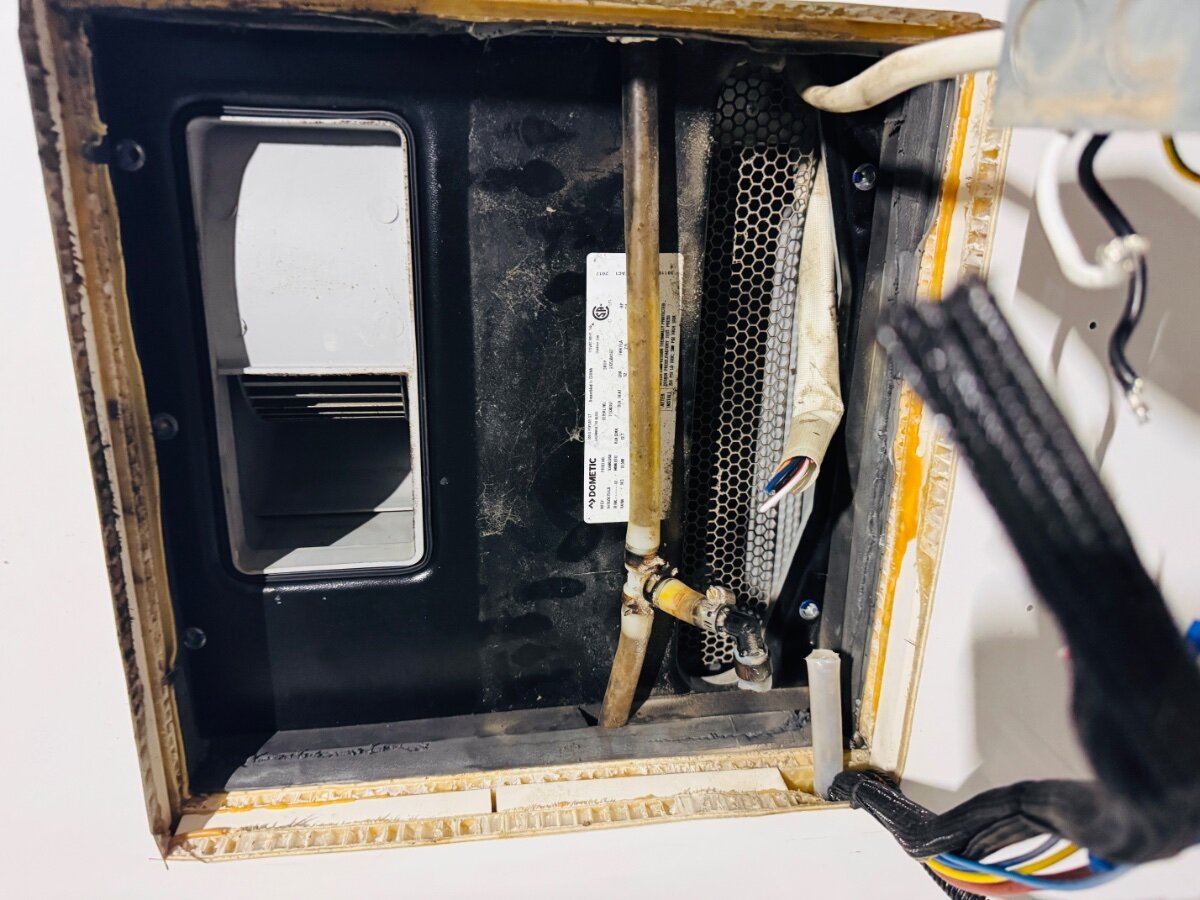
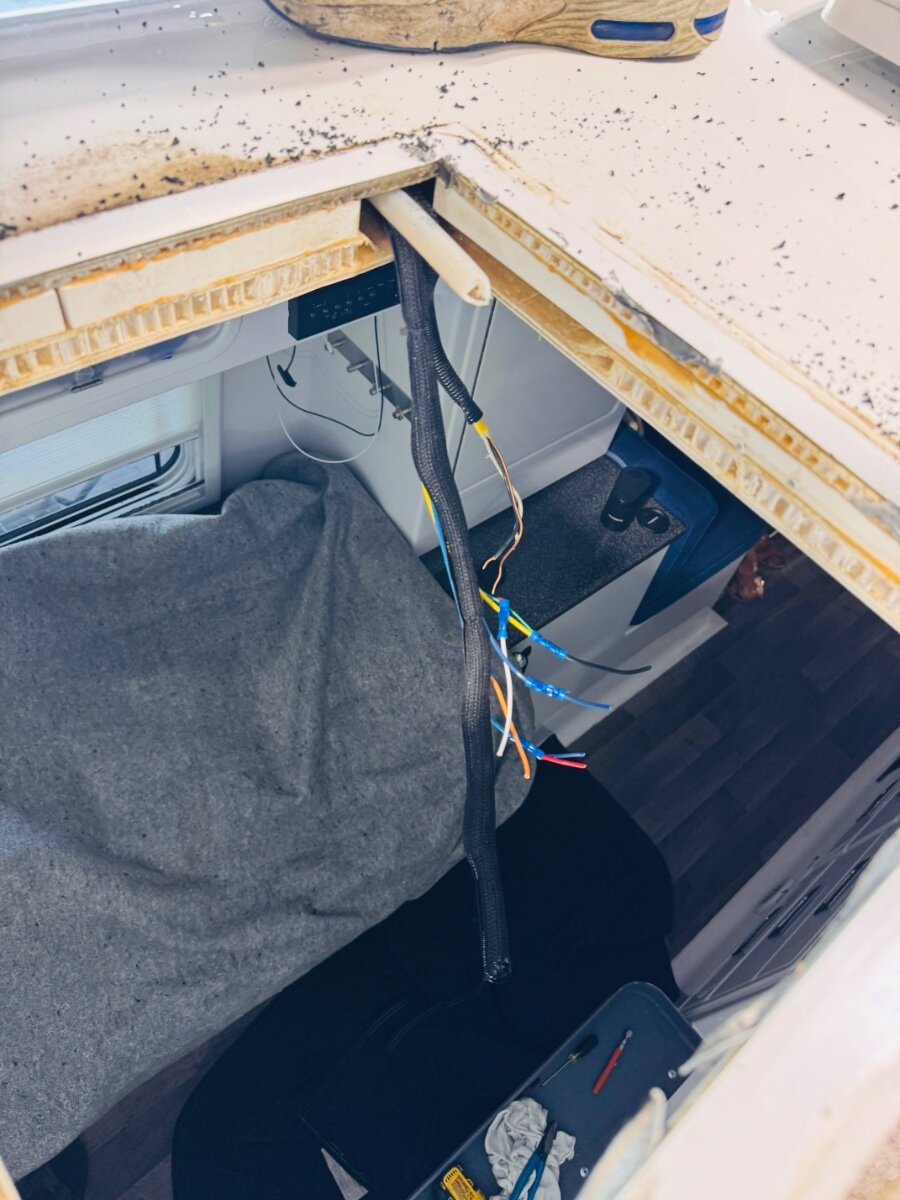
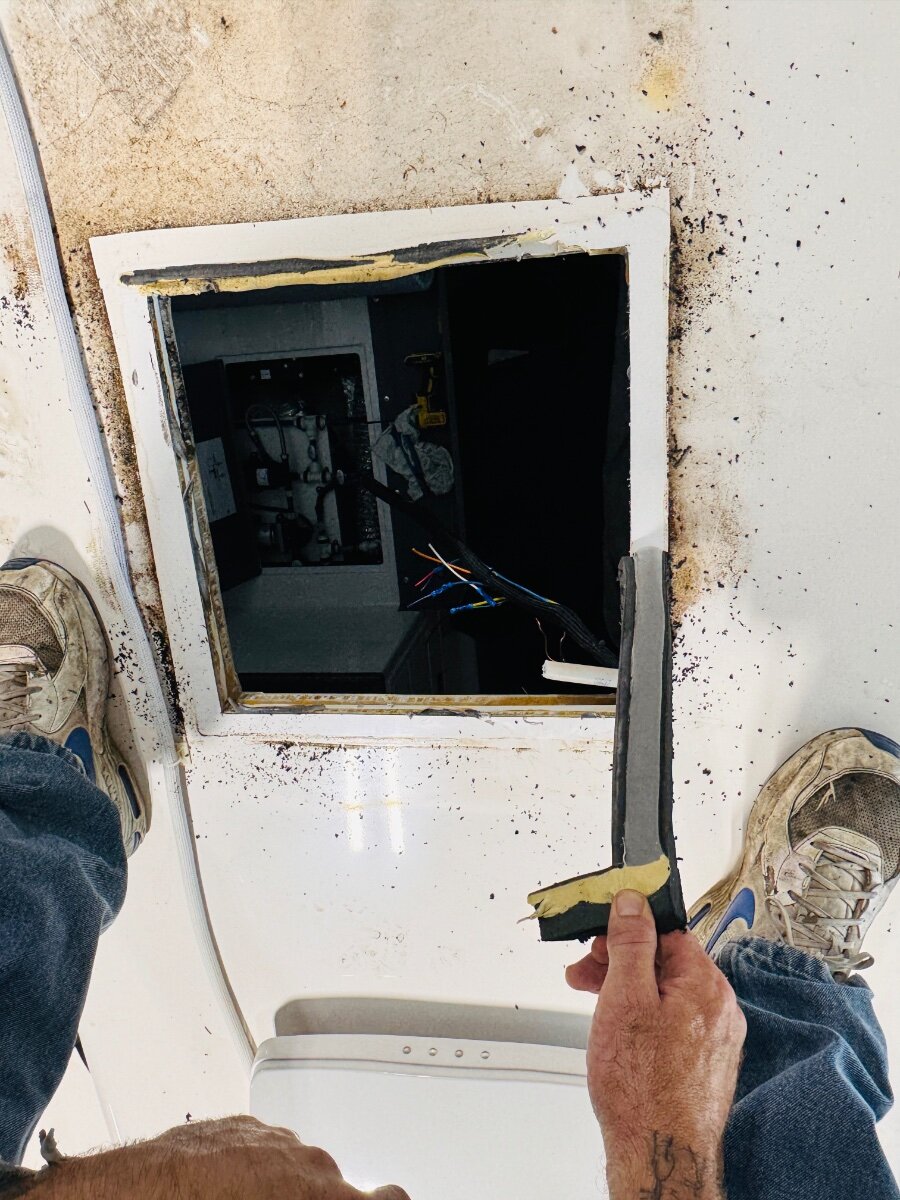


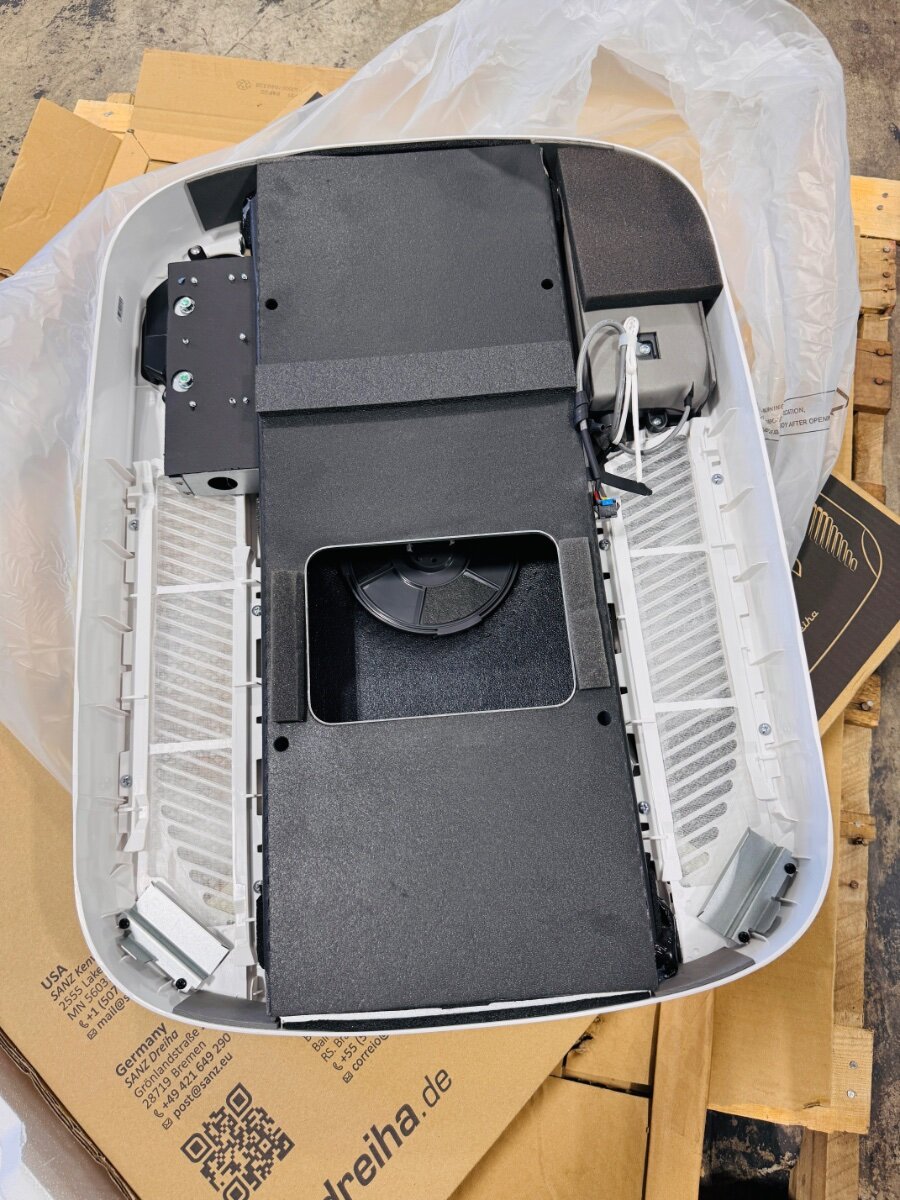
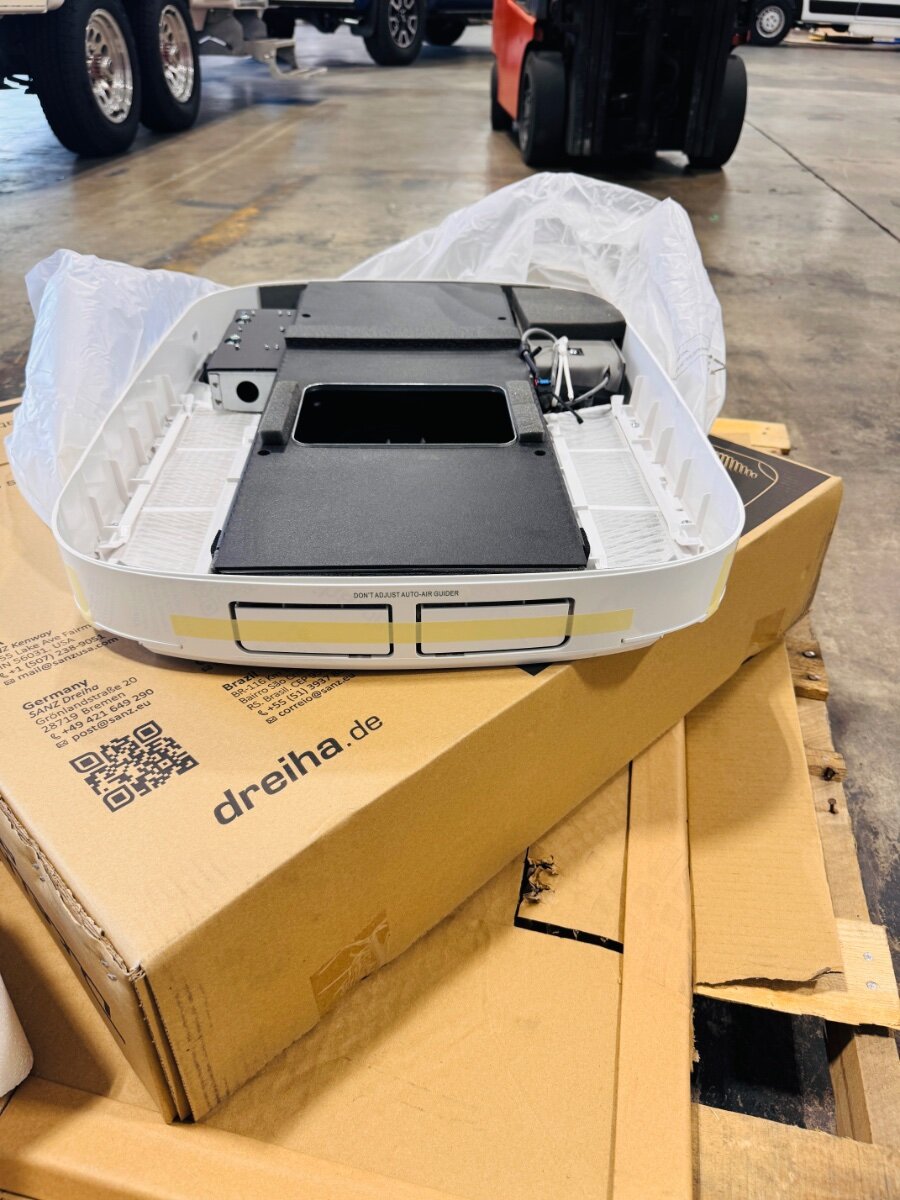

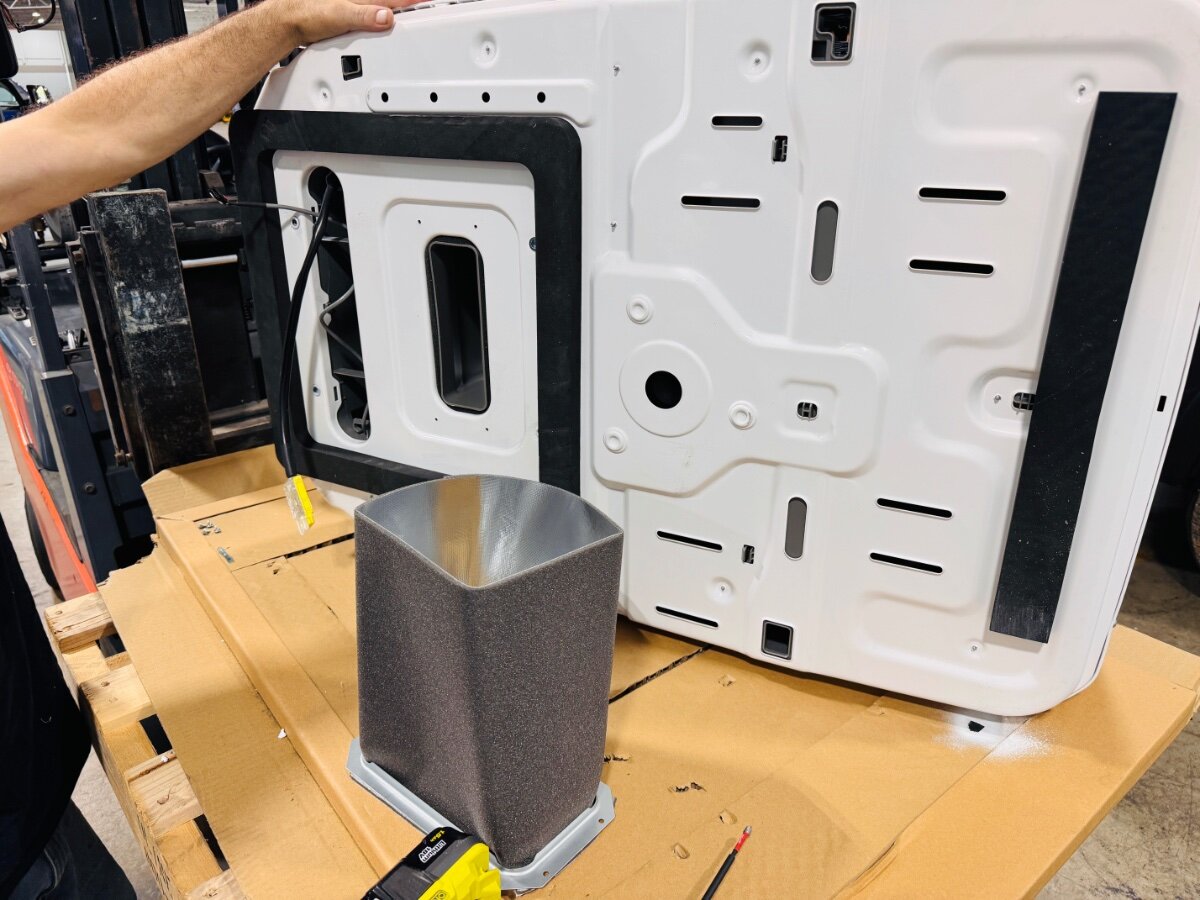
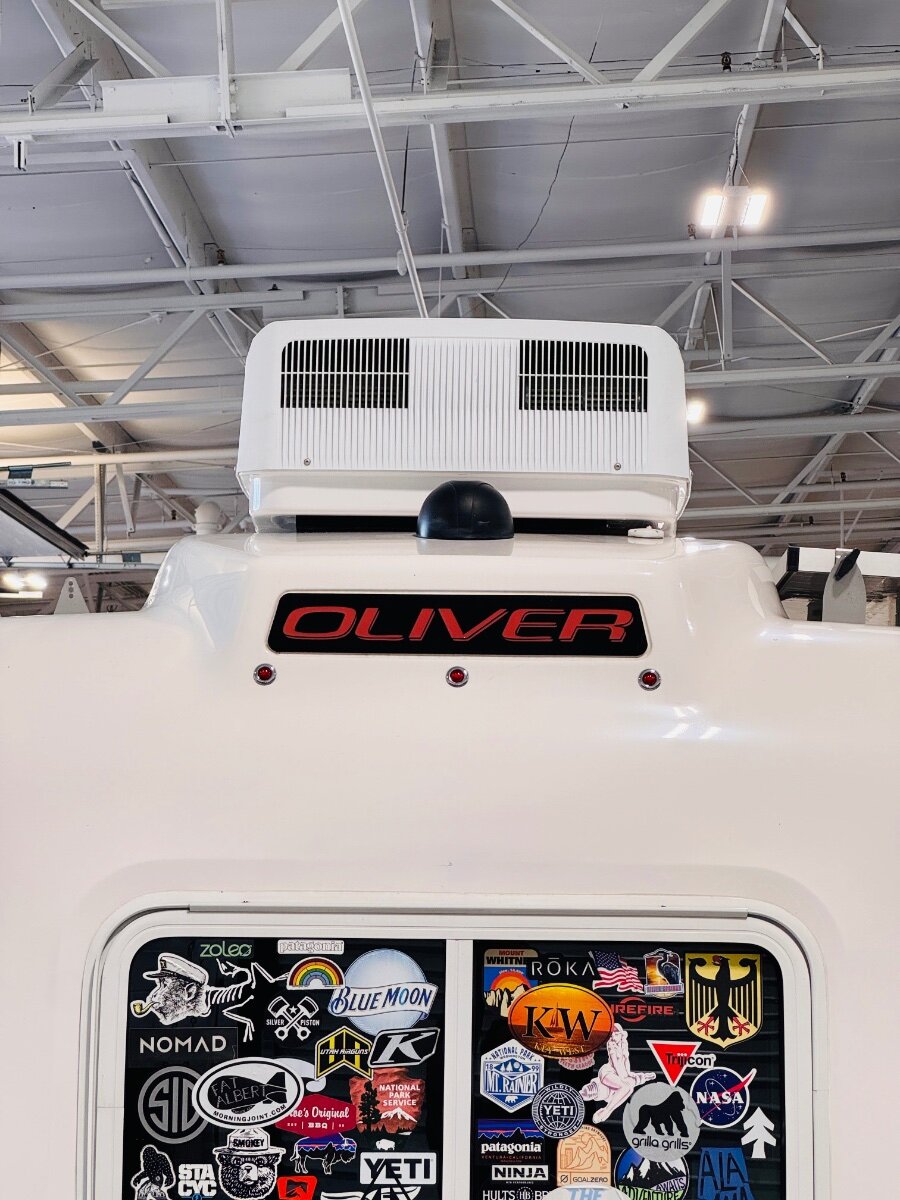
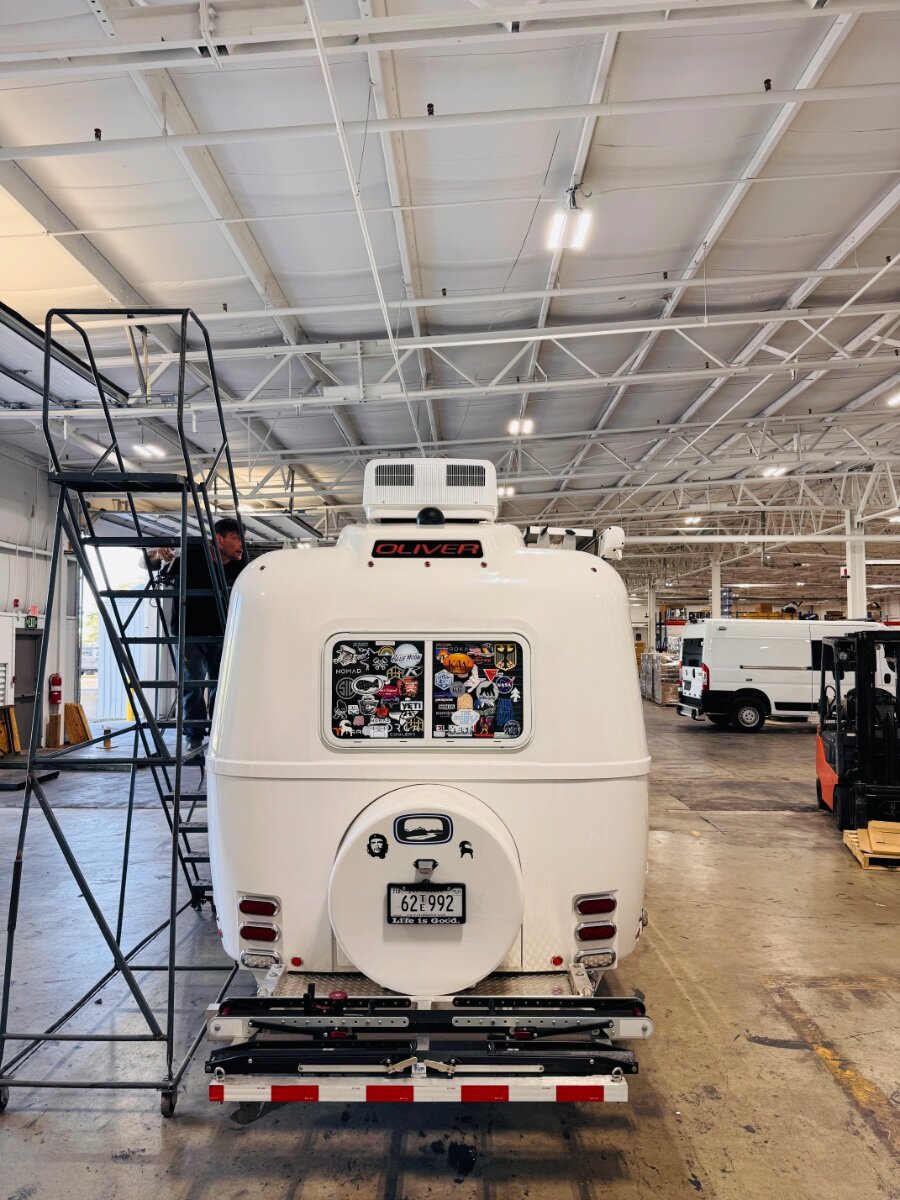

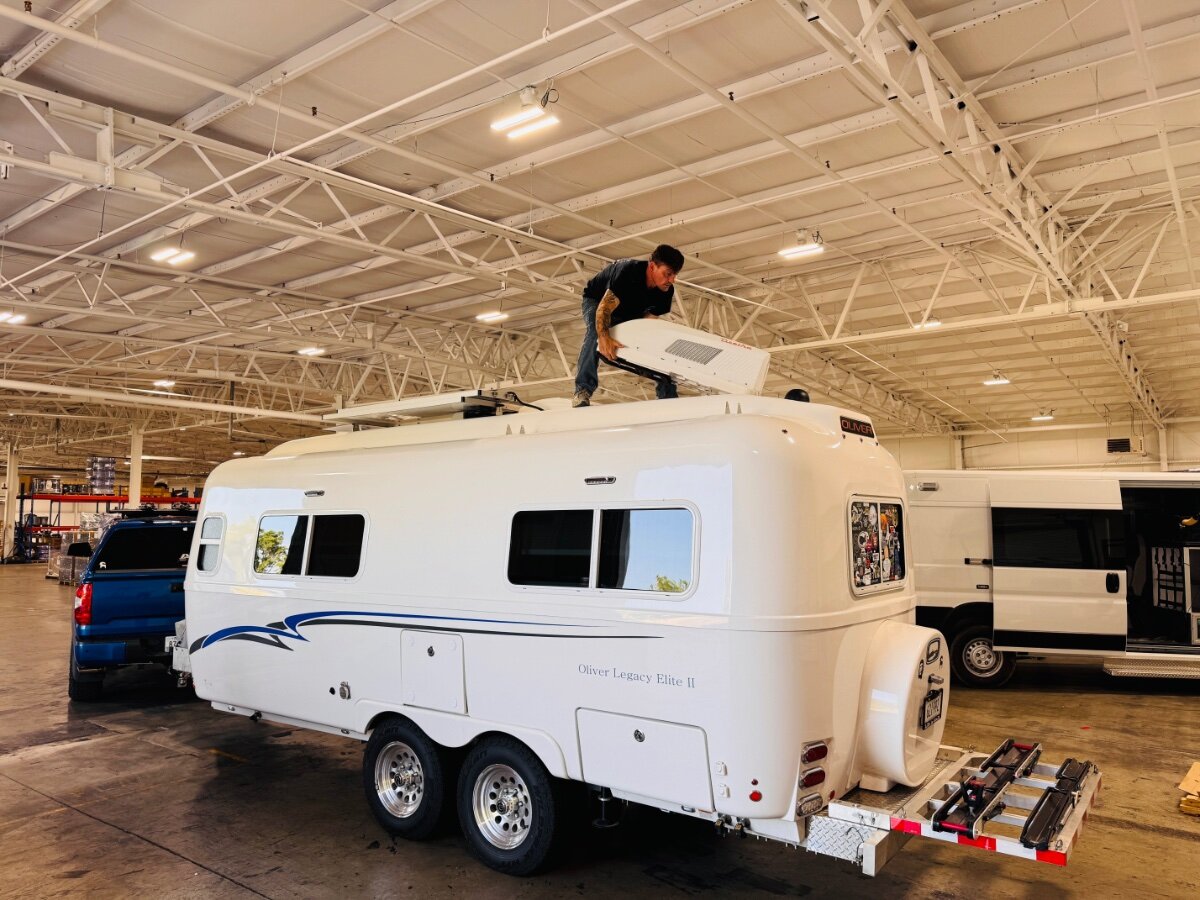

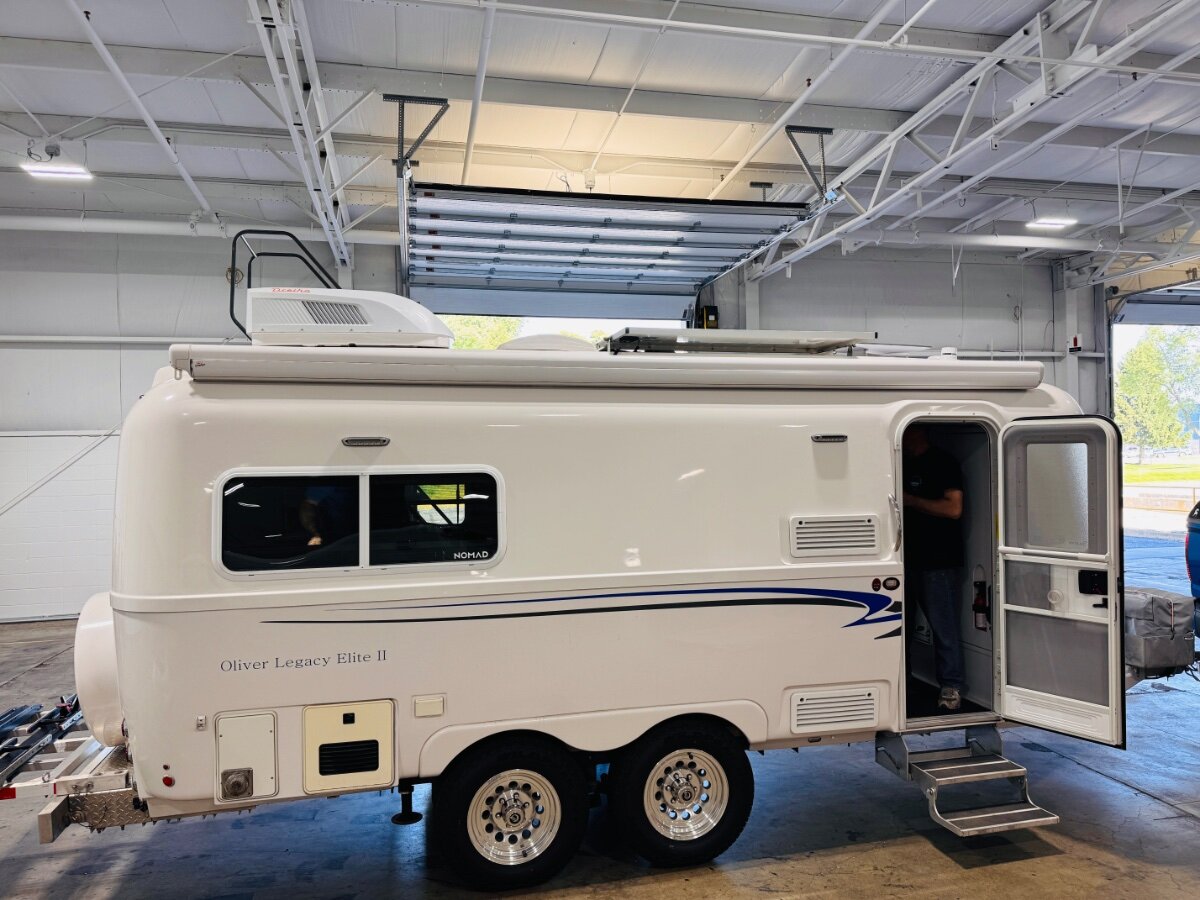
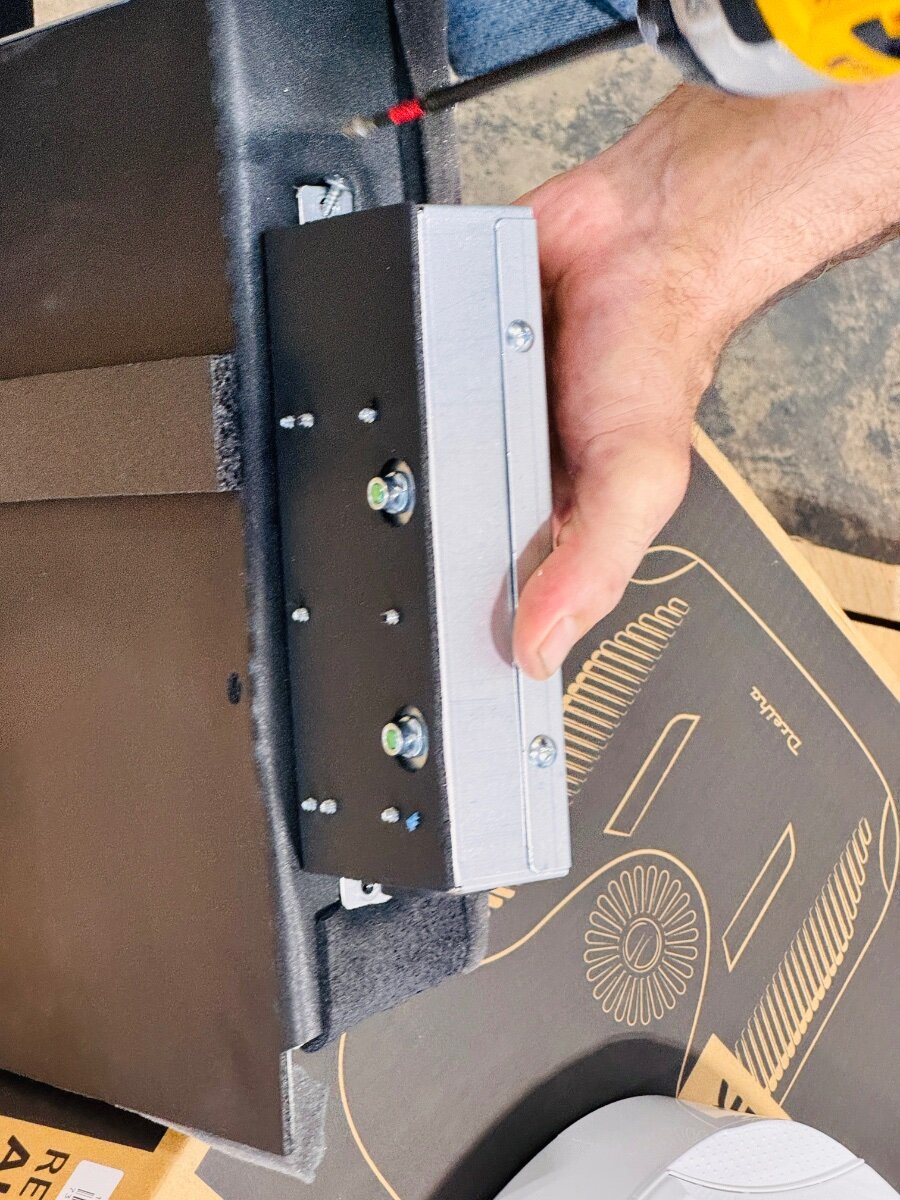
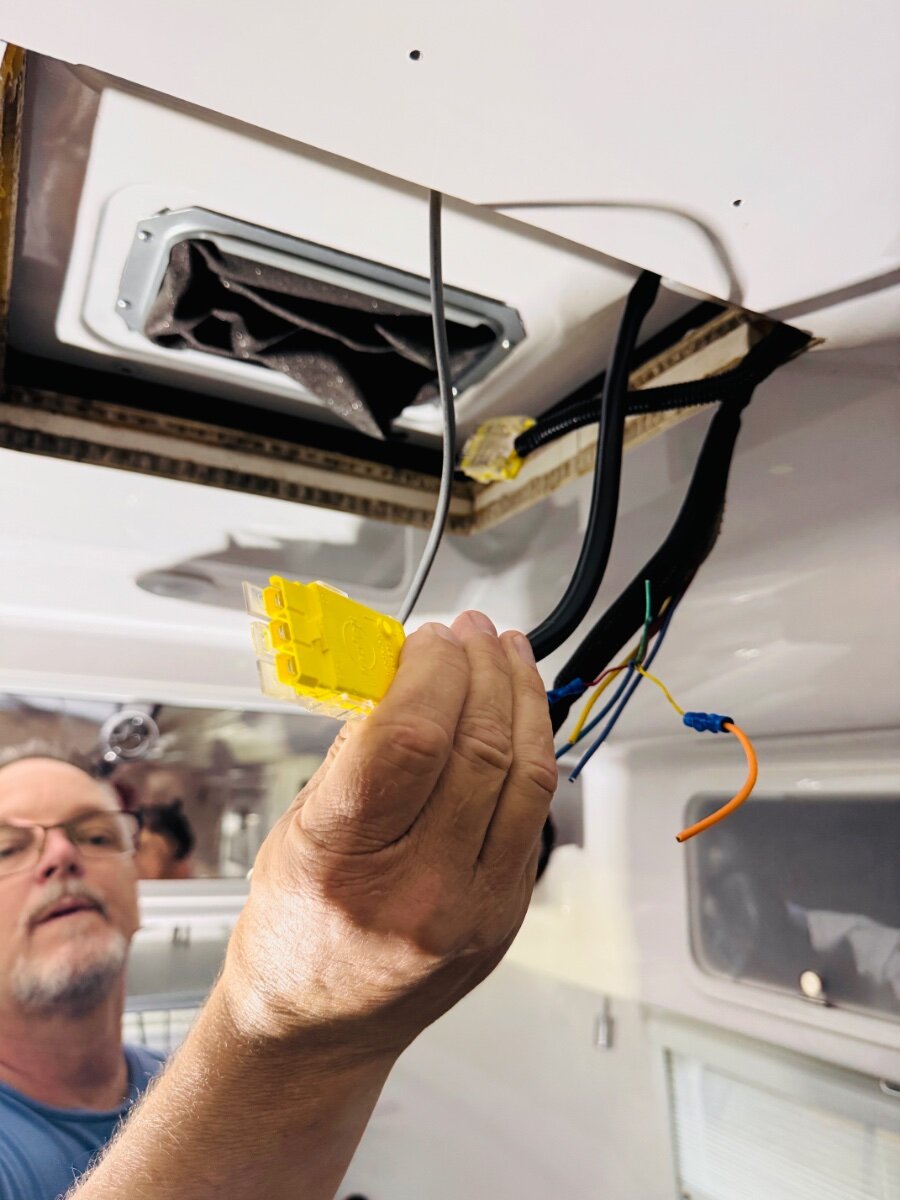
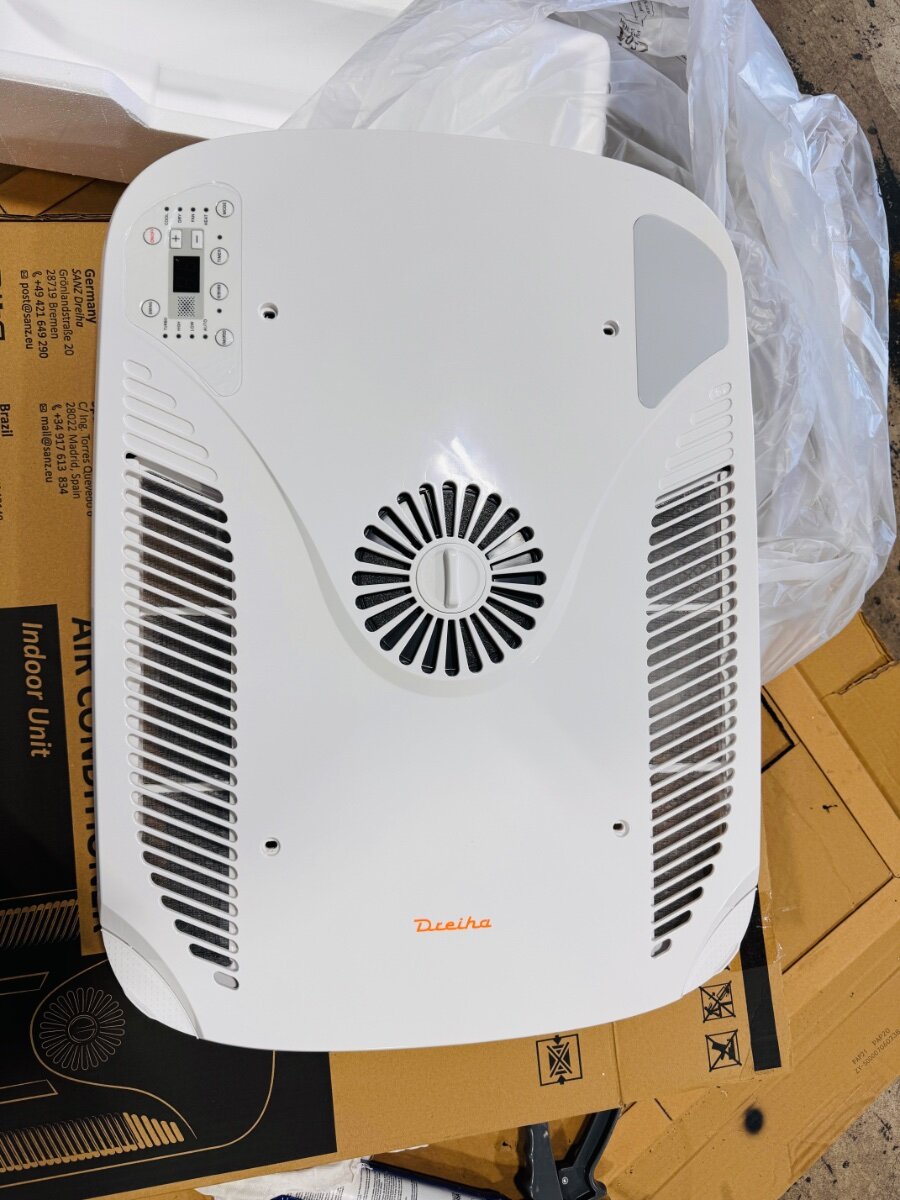
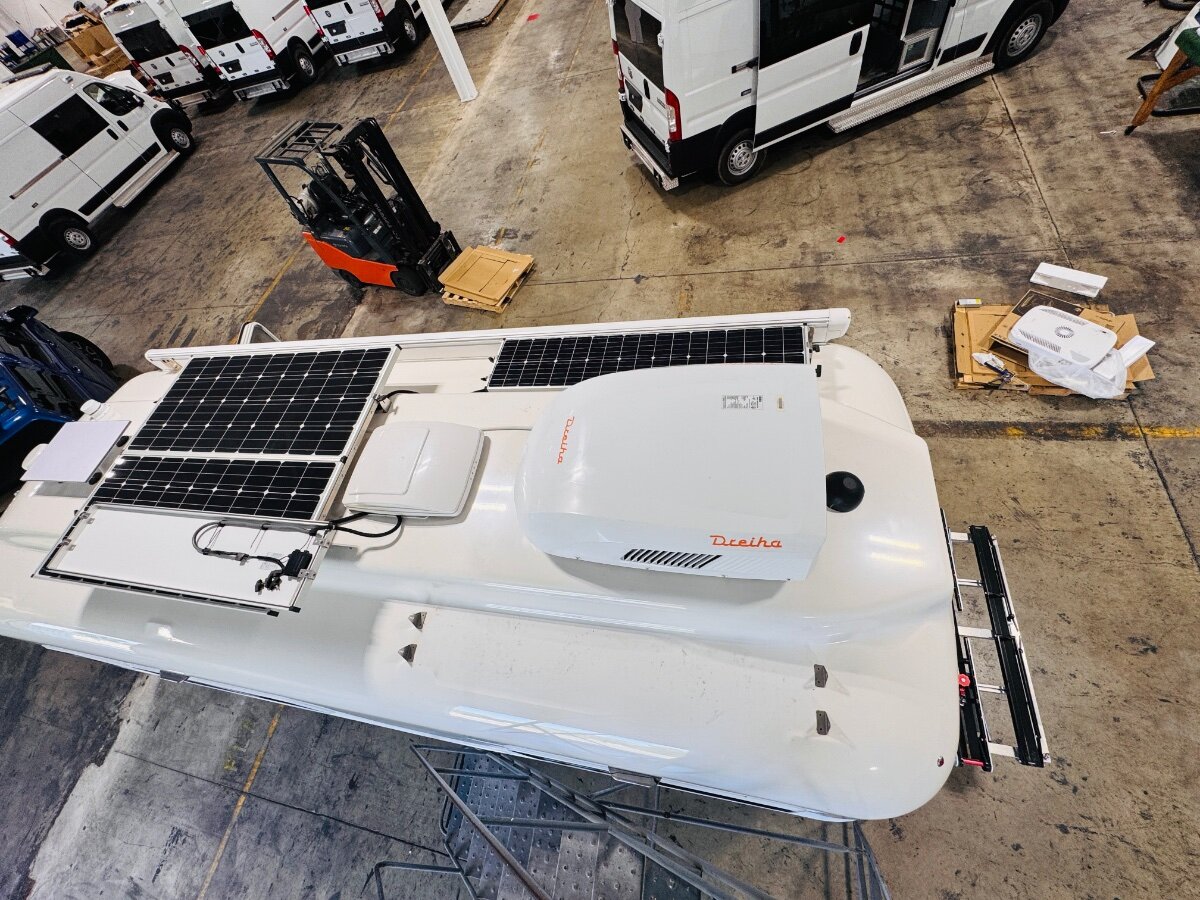
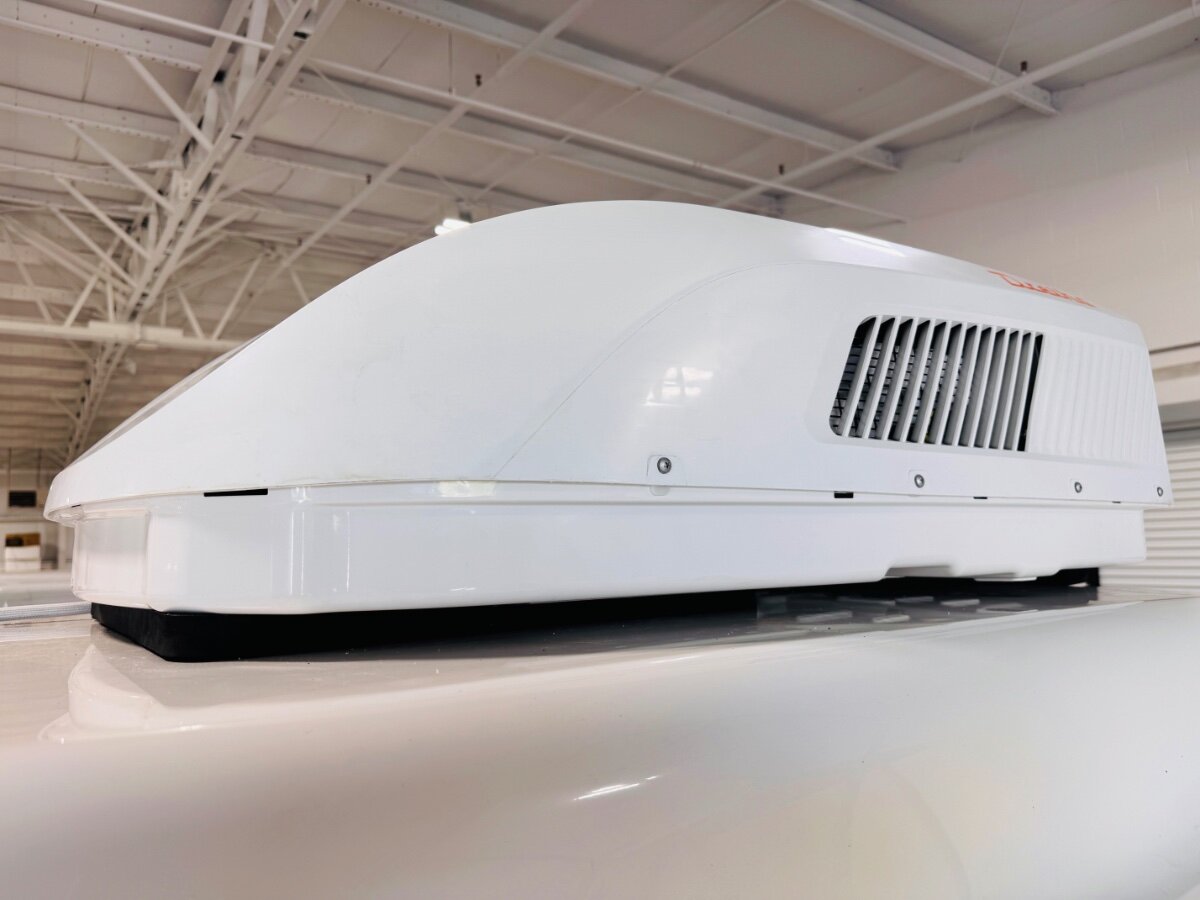
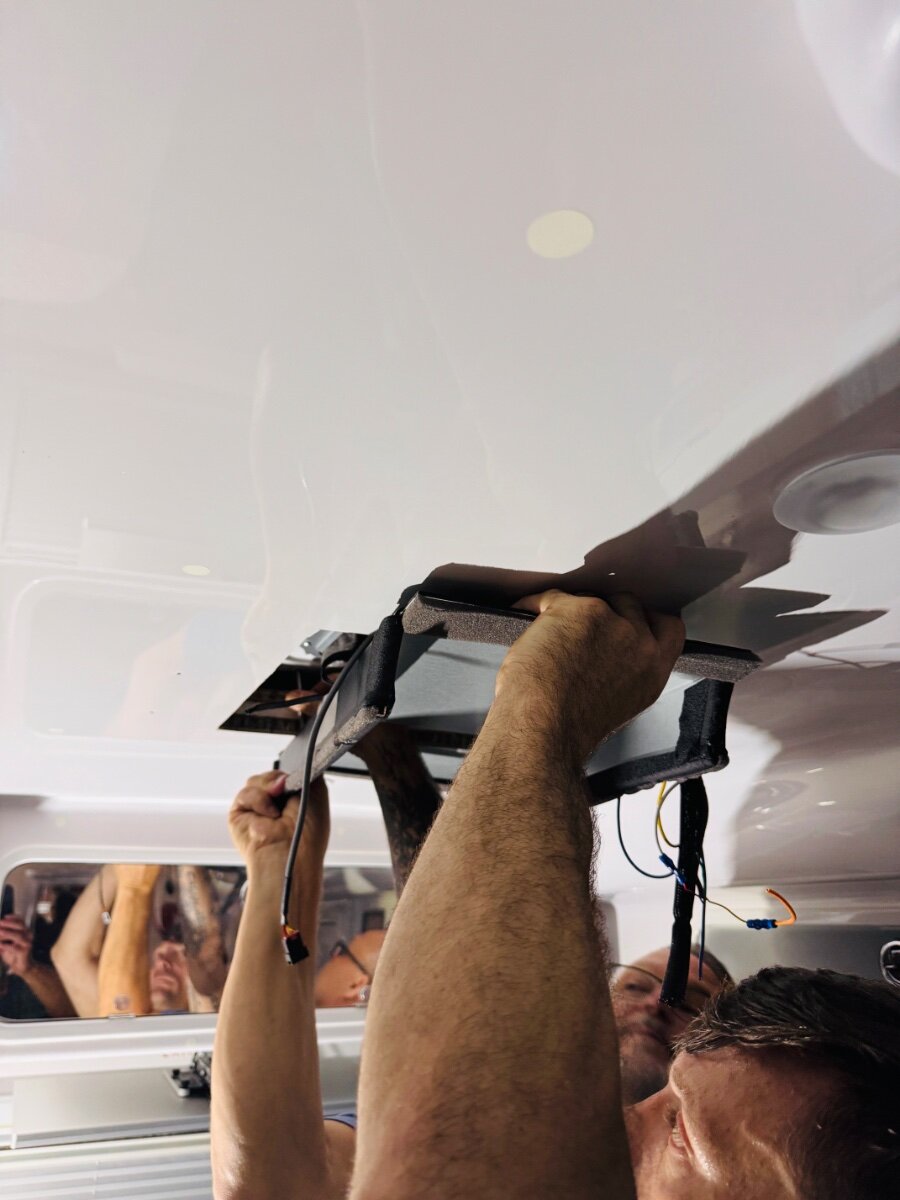
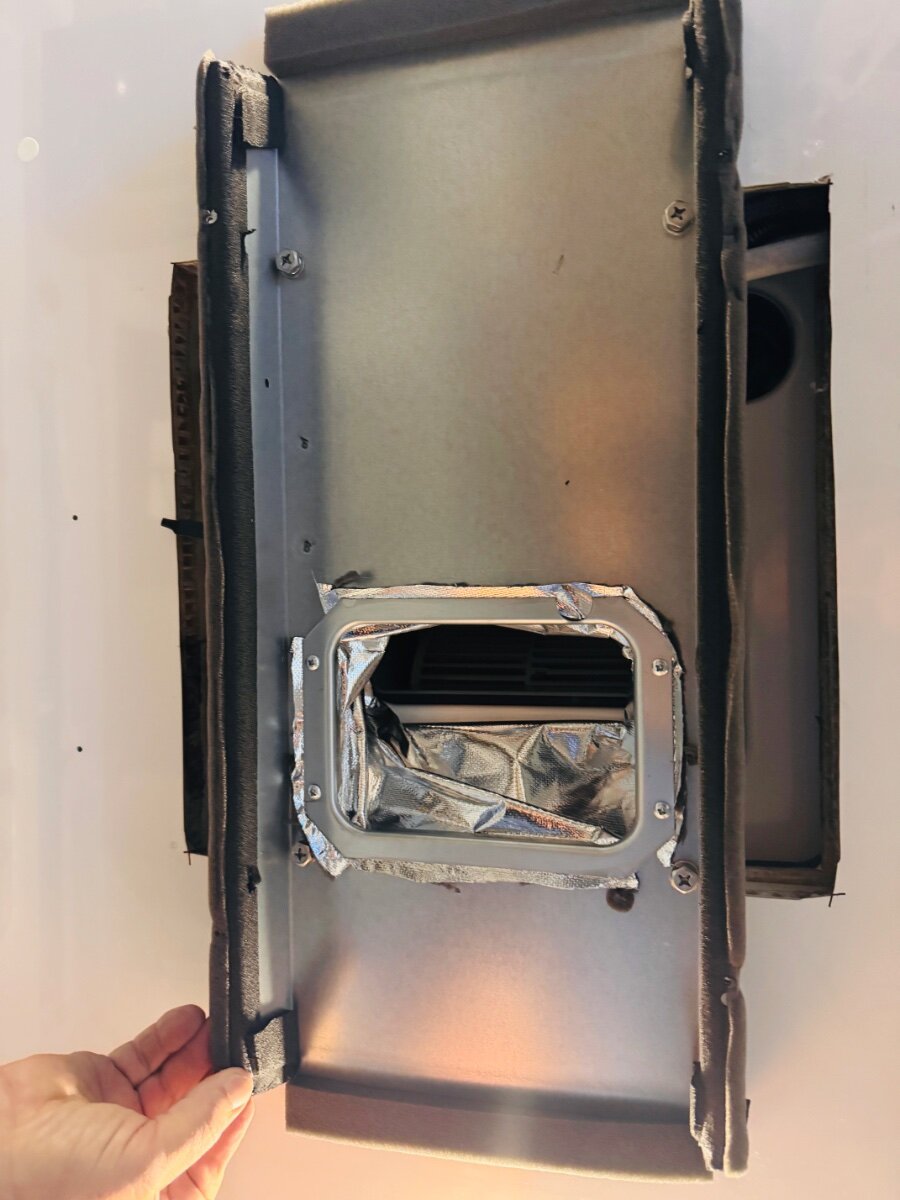
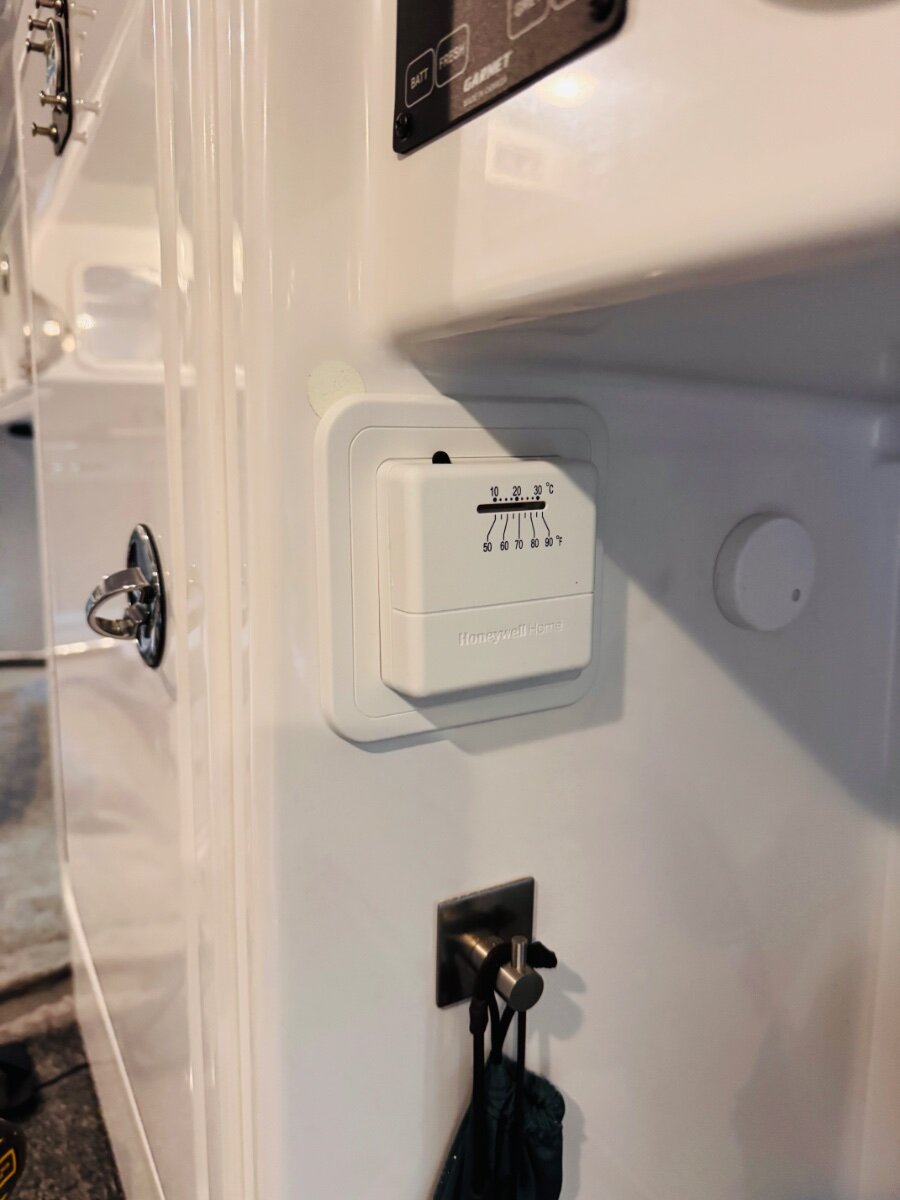
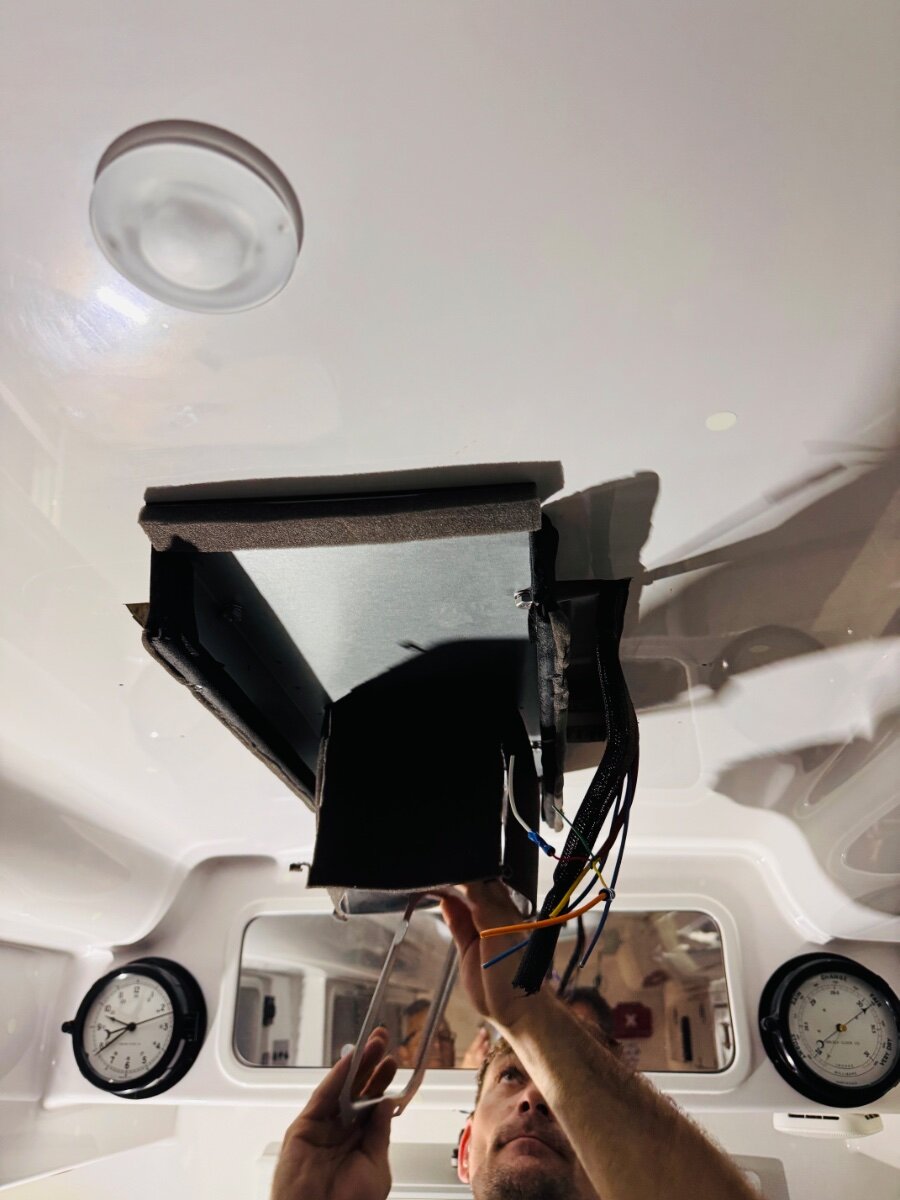
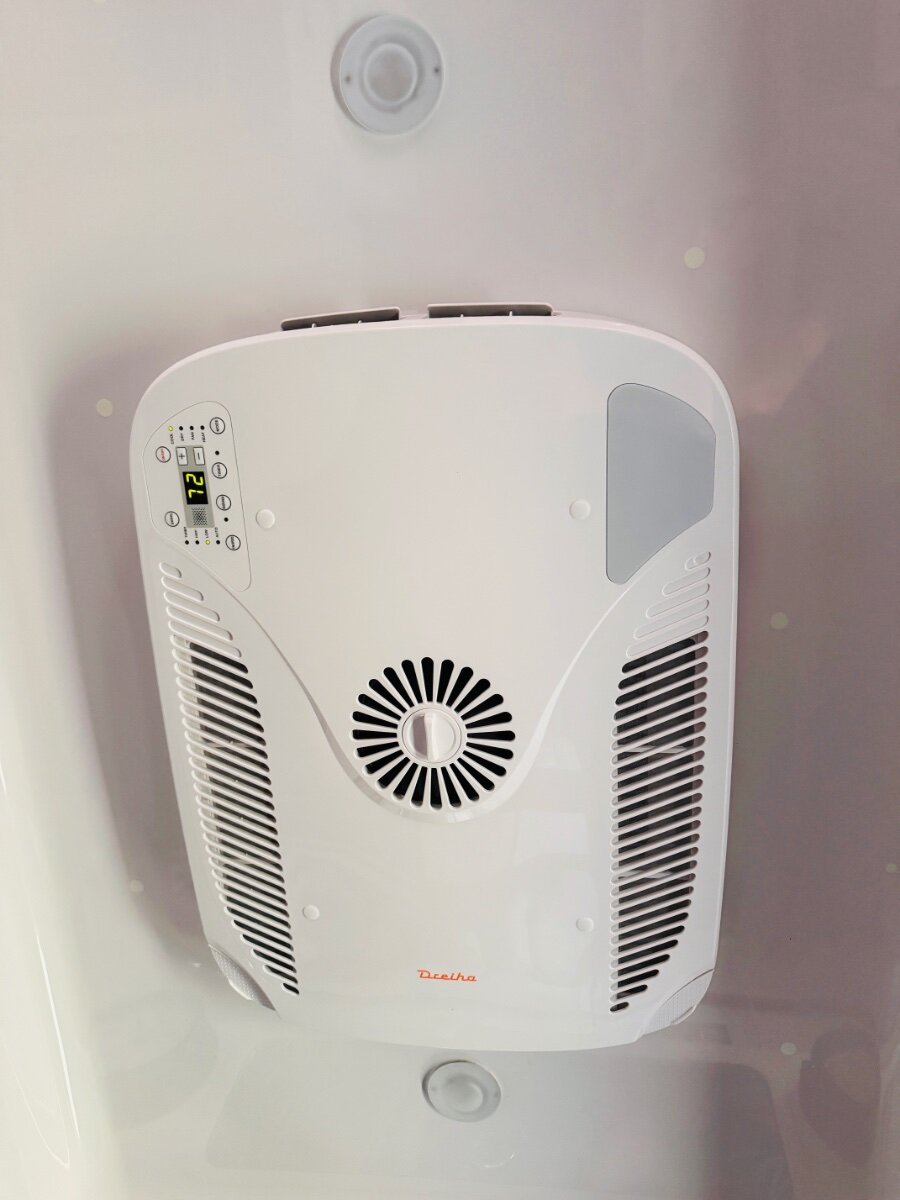
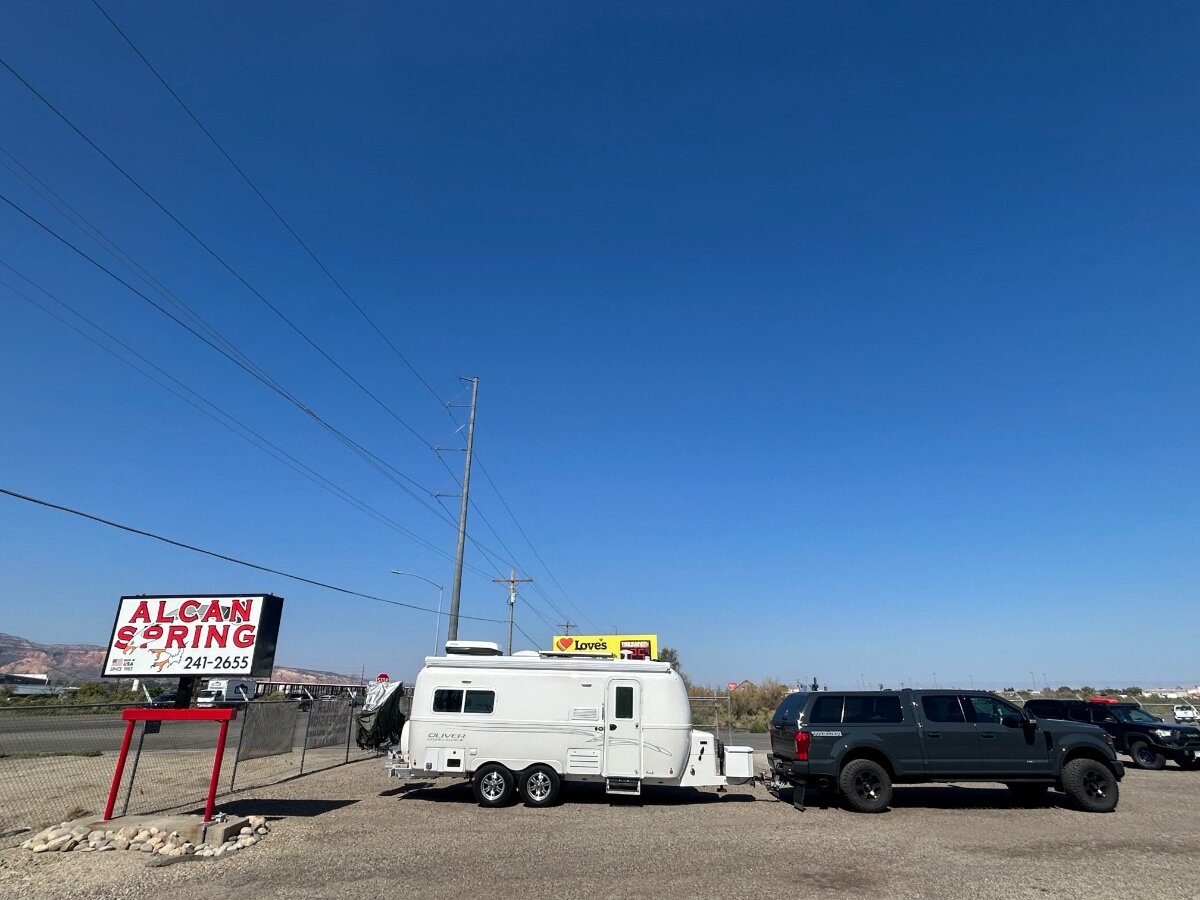

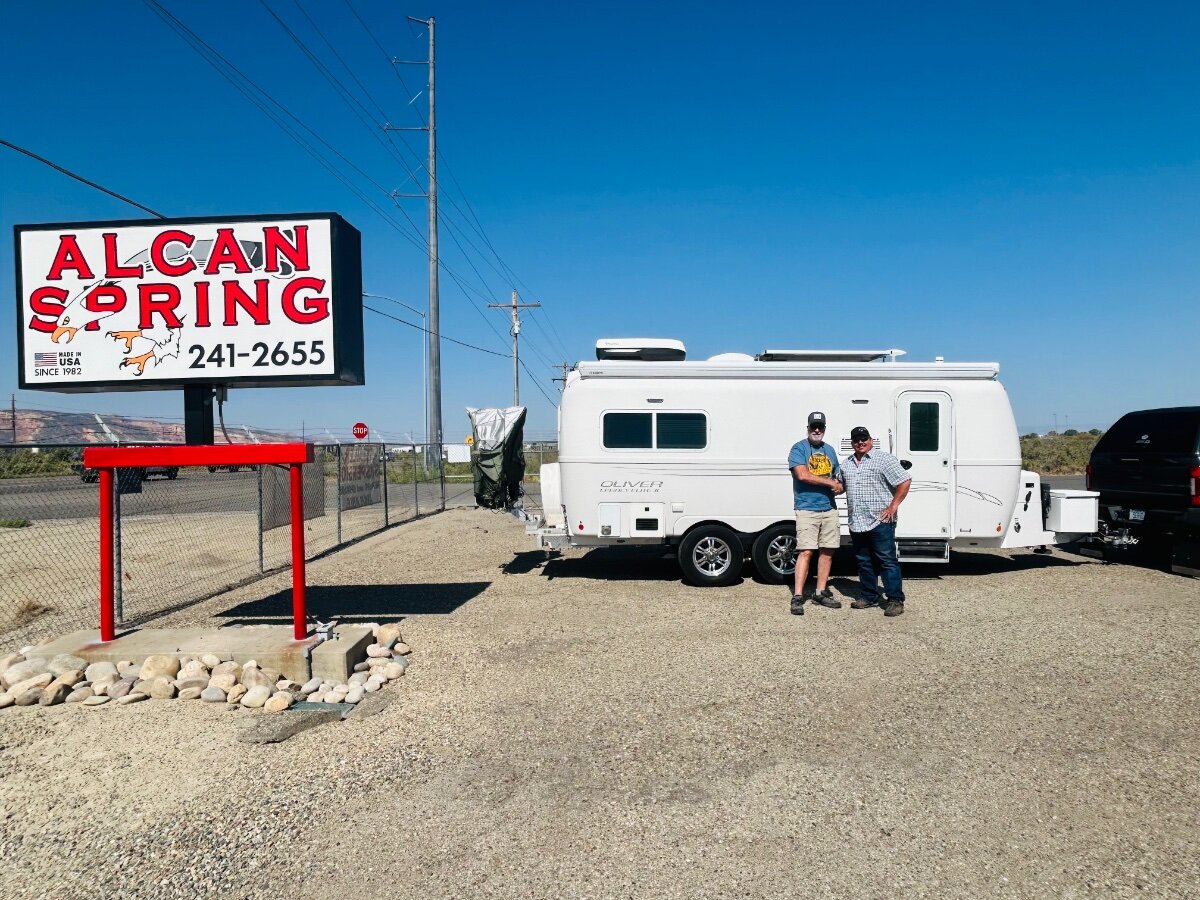

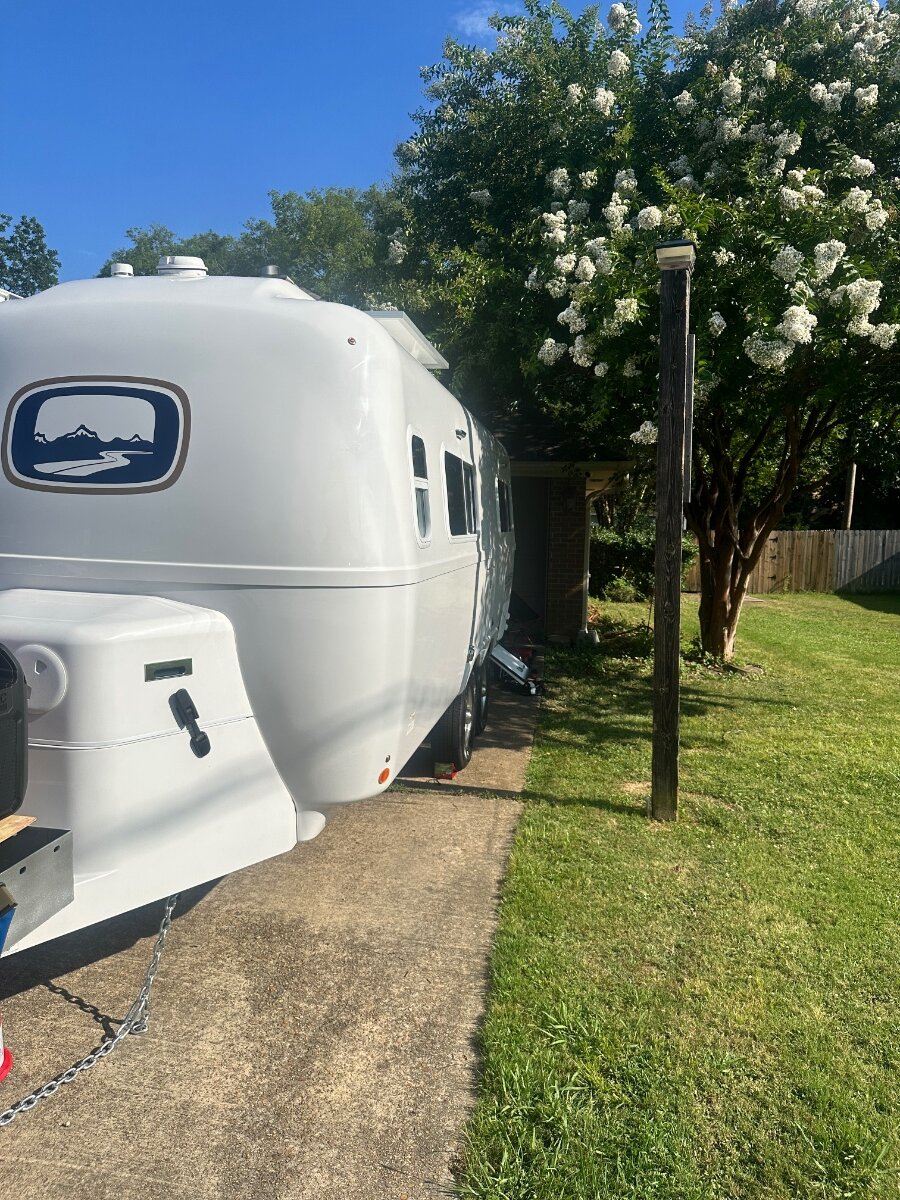
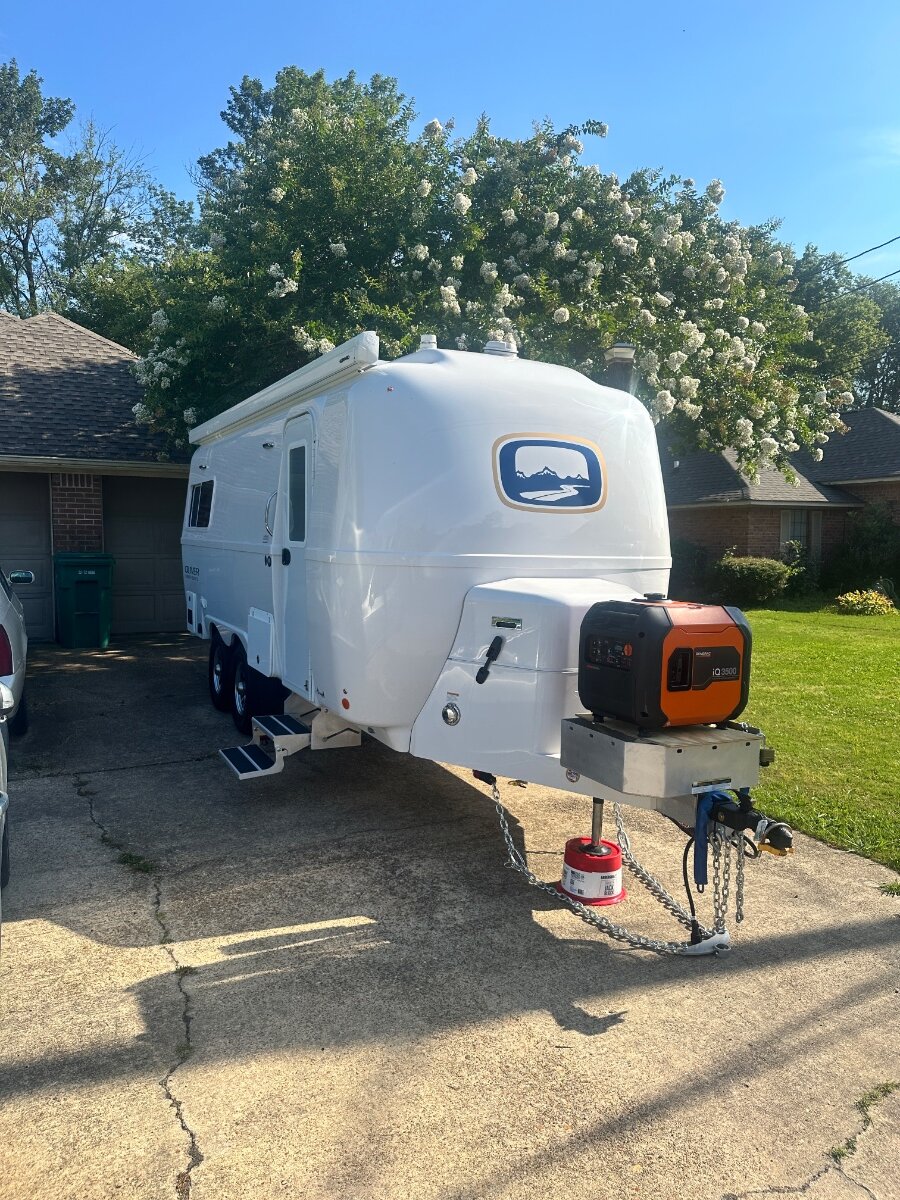
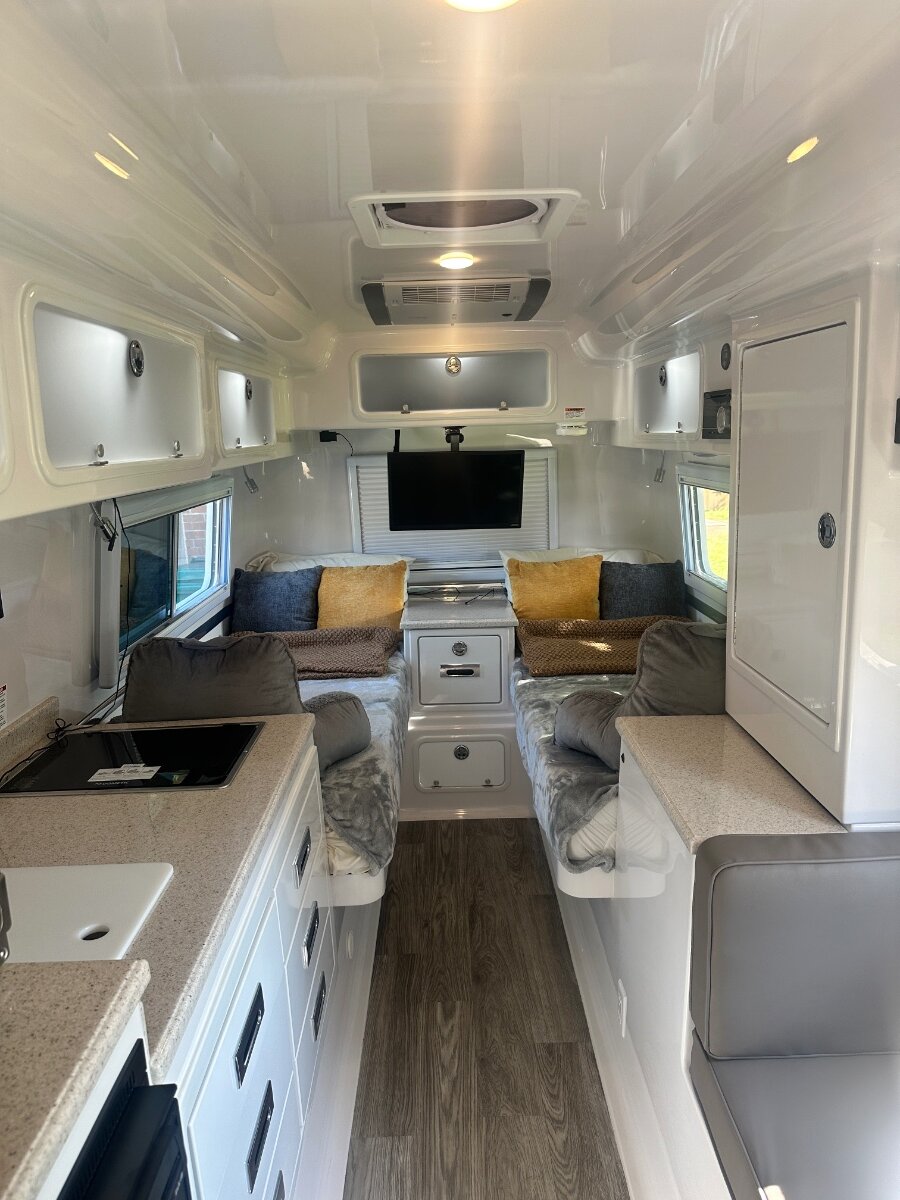


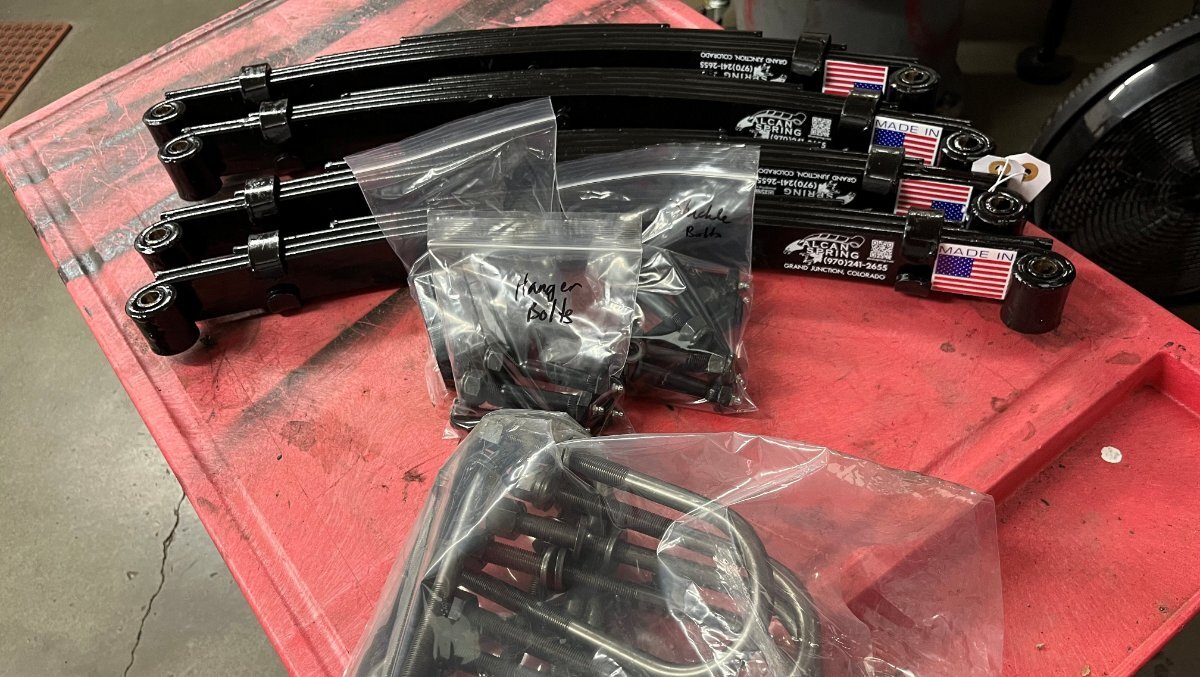


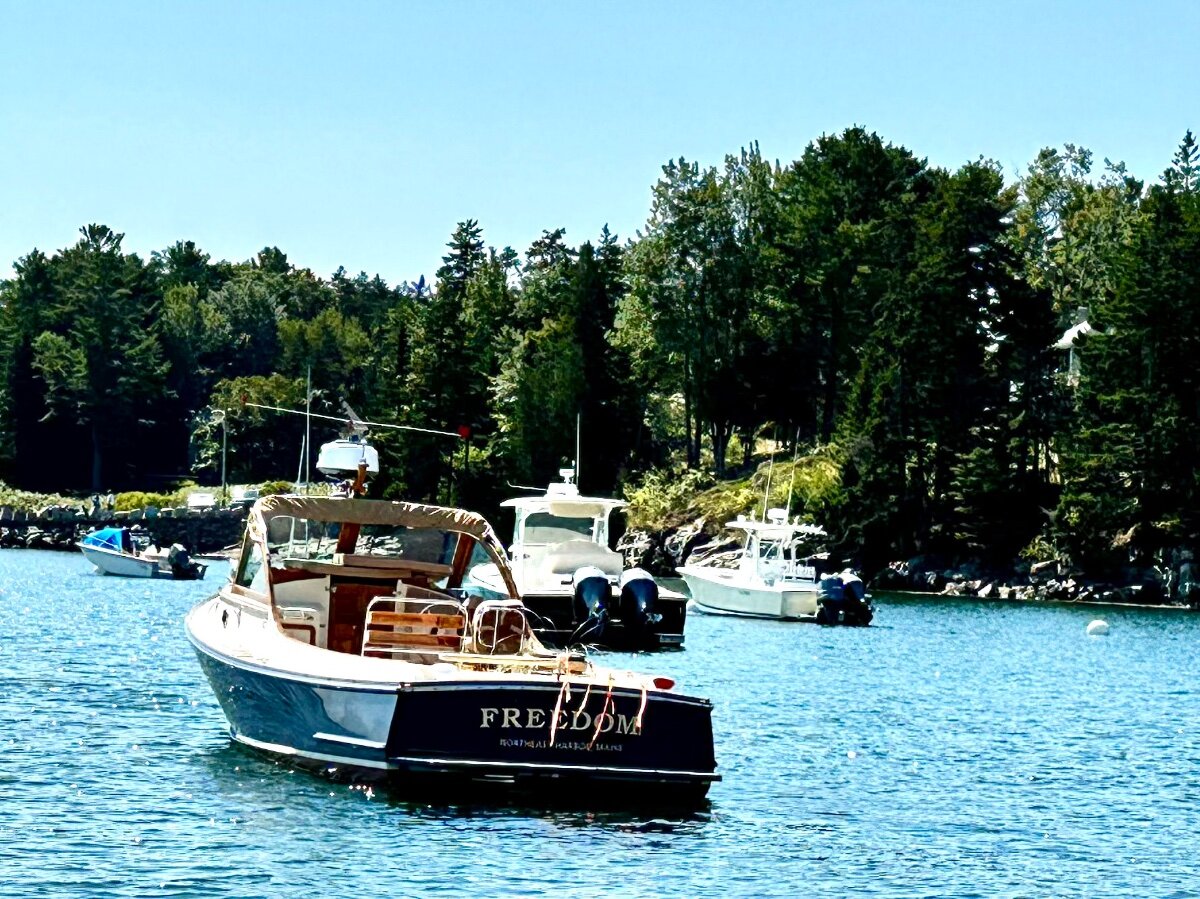


-
Recent Achievements
-


")


")