Leaderboard


Popular Content
Showing content with the highest reputation on 06/25/2022 in all areas
-
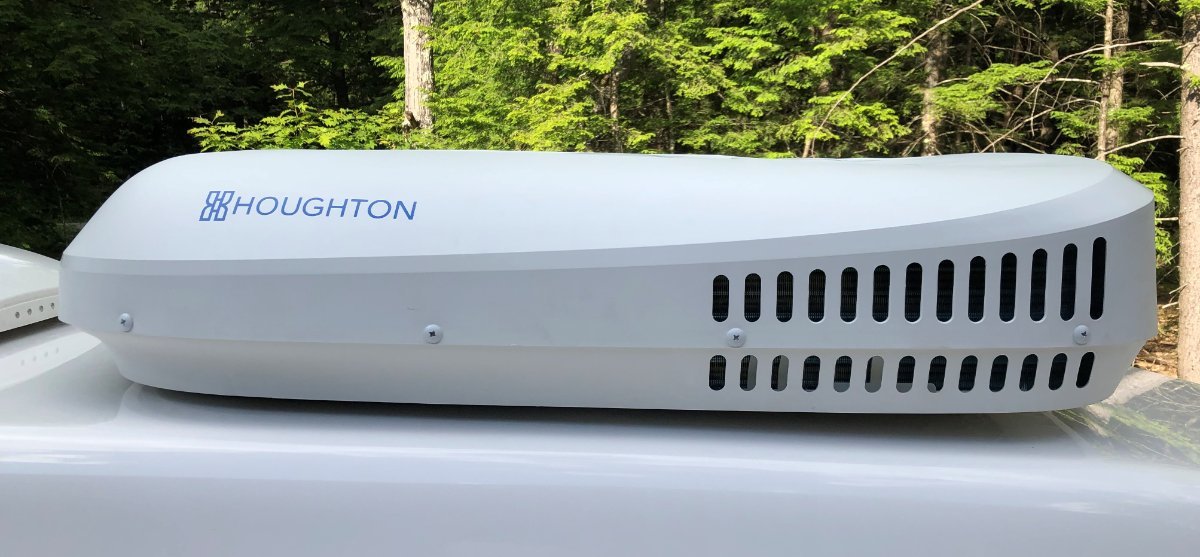
We just replaced our Dometic today with the Houghton 3400 and we are very pleased with it. Exponentially quieter than the Dometic and the install, according to the tech that did it, was very straightforward. I have not used a generator for shore power yet but I have run the AC off of the (Lithionics) batteries and did so with no issue. It was suggested to me to do the install without the micro air easy start so I did not have it installed. I'll report back if I run into any issues but, as mentioned, it ran just fine today from battery power. Tomorrow I will run it with my generator to see how that goes and also check it for water leaks by simulating some rain. I just need to get the screw covers to fill the holes. I also did not need the thick roof kit. Ric Brady, I will post if I run into any cycling issues you have had. I just came in from running it for 25 minutes and there was no excessively cycling. Dropped the temp in the trailer from 83 degrees to 69 degrees in a reasonable amount of time. I need to thank all of the people that installed this same AC brand on their Olivers and subsequently posted a ton of helpful info into this thread about their installation.
 7 points
 -
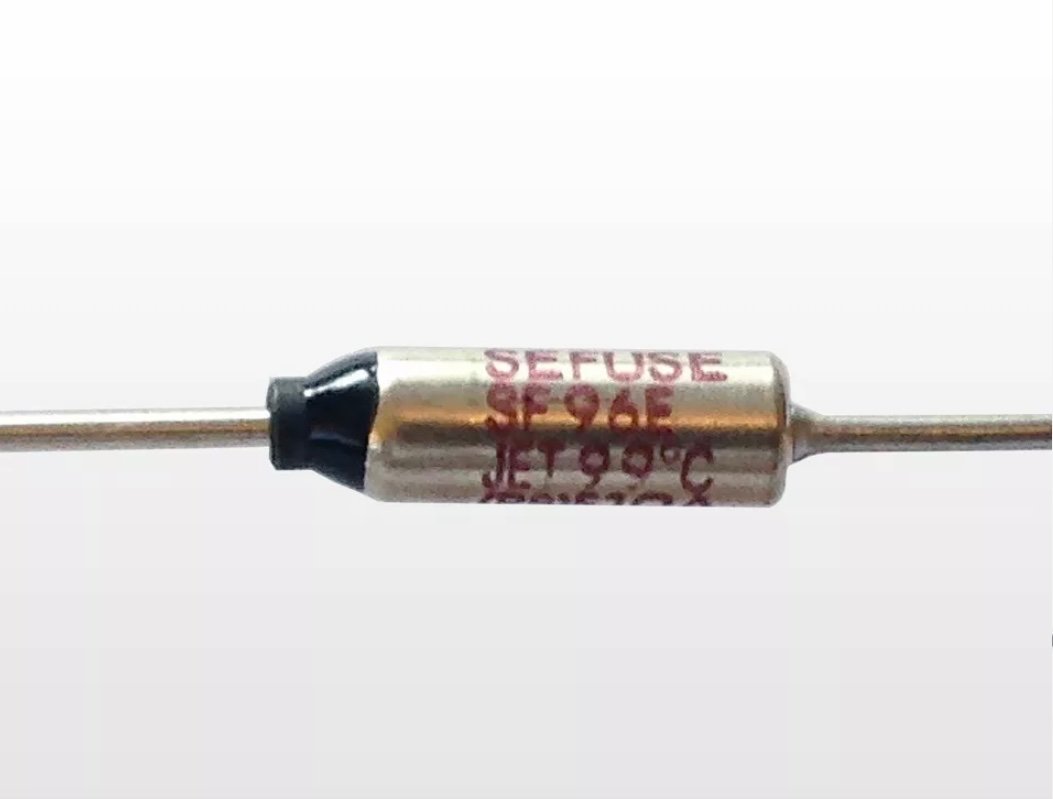
The fuse is the fat part of the wiring in or near the fan assembly. The fan is also the best place for voltage, just check on both side of the fuse. The MaxxAir fan runs on the same circuit. Is it working? The thermal fuse looks like this. And if I remember correctly, it is enclosed in shrink wrap. Mossey
4 points
-
Don’t try it without one of these. Read my posts in this thread
3 points
-
I guess we never worry about our bathroom vent popping open as many times I’ll leave it open with the rear windows open a bit to let air flow through while traveling down the road.3 points
-
Well my 2022 Silverado 1500 is on of the new ones with a tow pkg which includes a 377 axle and a high tow rating. I left our house in Michigan to go pick up our new Oliver after selling our 25ft Airstream on June 20th. We where load to the max in the back seat of the crew cab and some stuff in the bed . Traveled at 5 over most of the trip we averaged 66.5 miles per hour over the 694 miles when we checked into our hotel . We averaged 31.2 mph on the dash and we i topped of the tank it confirmed just a little bit better at 31.6. Picked up the trailer on Tuesday stayed overnight, load all our stuff into the trailer installed the hitch . Next morning headed home 734 miles away. This truck is a LT Crew Cab ,shortbox, four wheel drive. Got up to Nashville outside temp was 100 , on to Louisville temp 101 in stop and go traffic. Head to Cincinatti, hit a strong 30mph head windy all the way home to Port Huron MI. Averaged 16.2 on that 724 mile return trip . Compared to my 2014 Chevy 1500 with a 5.3 I got 48% better milage on the trip down and 55% better towing with the 3.0 Duramax., and that was towing the same weight with the Airstream. If i was only towing the Oliver or the Airstream both around 6500Lbs load I would have passed on the Max Tow Pkg and probably got better milage, but I do tow a boat that goes 9400 lbs so Max Tow was the only choice. Love this motor I found myself creeping up to around 78/80 mph and the Oliver towed super.3 points
-
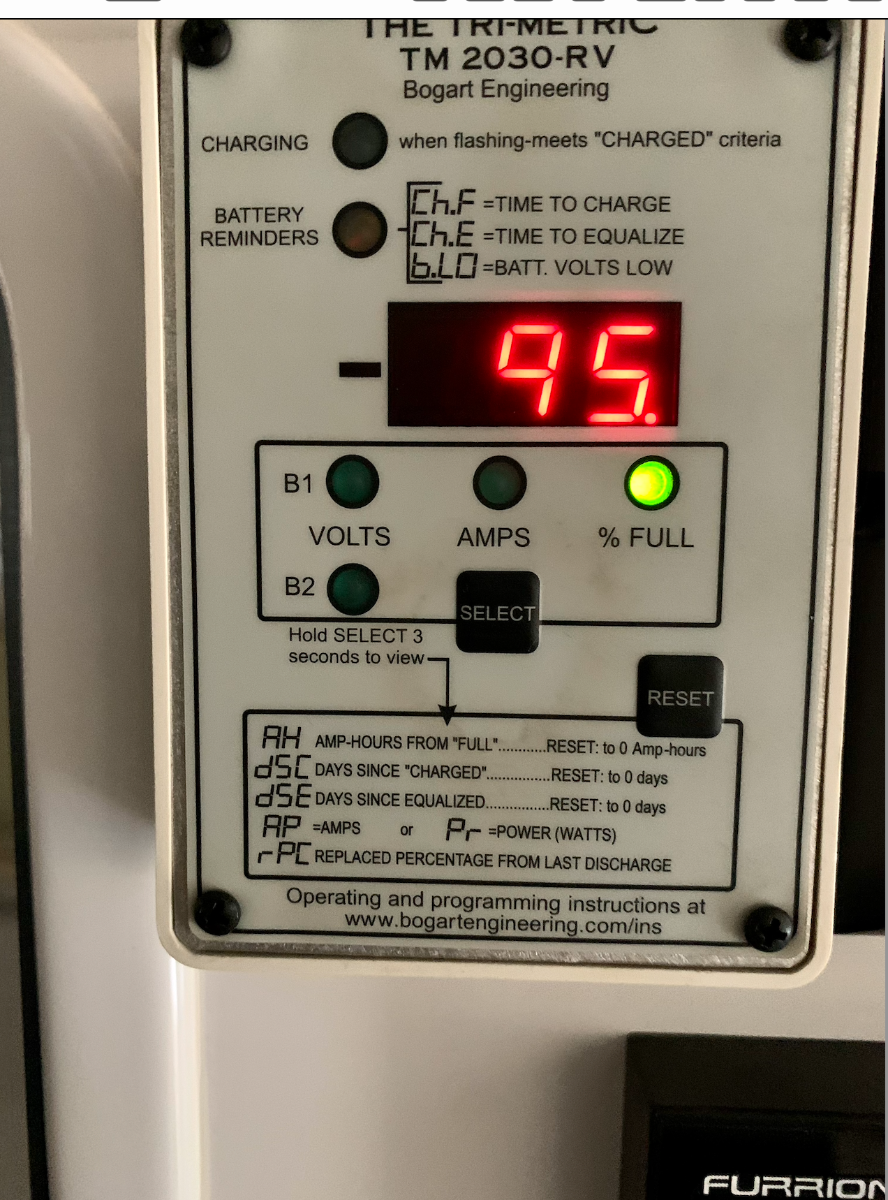
Our 2022 LEII, Hull 990, is equipped with the Lithium Pro package, which includes three Lithionics batteries. These batteries have a built-in battery management system and an iPhone/Android app which connects to the batteries via Bluetooth. I use the iPhone version, Li3 Battery, which I downloaded from the Apple App Store. The Li3 Battery app provides a great deal of information about the batteries, their charge level and general state of health. I don't know there is any additional information I could possibly need to know beyond what this app provides. Obviously you need to be within Bluetooth range, approximately 10 meters, for the app to connect with the batteries. So far, I am impressed with the capabilities to monitor the batteries.3 points
-
I thought I was fairly knowledgeable about DEF, but I learned a few important things, like don’t store a spare gallon long term in more than 85 degrees or it will degrade. Here are a few interesting facts. “the typical average light duty truck will consume 2-3 gallons of DEF per 800 miles. However, most new trucks with an average miles per gallon rating of 20+mpg will go roughly 8,000-10,000 miles on a tank full (10 gallons) of DPF. Each truck is different, The only cons to DEF include the additional upfront cost to the truck, added nominal weight and some additional room to store an extra gallon of the fluid. The pros are better fuel economy, increased horsepower, more optimized combustion, fewer regenerations issues, less wear on the engine and in addition it only releases nitrogen and water vapor into the air. Manufacturers have found that engines containing SCR technology oftentimes get better fuel mileage compared with other smog reduction internal systems. Fuel mixed in with the SCR finds an added source of elements to burn. Fuel mileage can be improved by as much as 5%-7%” https://www.capitalremanexchange.com/20-facts-you-need-to-know-about-diesel-exhaust-fluid-def/ Sort of related: https://www.rvtravel.com/good-news-def-head-alternatives-coming/ None of this makes me want to buy a diesel truck….😳 John Davies Spokane WA2 points
-
Do you have a fuse? If your in Florida, stop by. If not, I can send you one. Mossey2 points
-
Thanks a lot Patriot! Your post was actually helpful to me so thank you again.2 points
-
I would hope anyone looking at a Jeep Gladiator EcoDiesel is not looking at saving money, for me it's a "Jeep Thing" and the V6 gas in a Gladiator is useless in towing the Oliver. Thanks John for your response trainman2 points
-
“You can make many upgrades to your battery system, but one of the simplest and most useful is adding a battery monitor. Let’s take a look at what a battery monitor is and how it can help you get the most out of your battery system.” https://battlebornbatteries.com/what-is-a-battery-monitor/ John Davies Spokane WA2 points
-
I've got the Xantrex app and the Lithionics app on my Android phone. Both work great and give me all the info I need. The Xantrex app was VERY important in my initial shakedown of the trailer when I learned that I didn't have the correct firmware. I was able to correct it via the app. The Lithionics app is very accurate in showing me how much juice I'm using, and how fast I'm recharging either on shore power or via the solar panels.2 points
-
There is much to be desired in the design and operation of those brakes, especially after they get some miles on them. I suspect you have nothing wrong with the brakes since they are still relatively new. The brakes adjust themself by applying short pumps on the brake at lower speeds. I would guess it may take 15 or 20 slow speed brake applies to get the adjusters to set in correctly. You mention that the brakes seem to perform better after you had used it, and that is the self adjusters at work. The entire brake assembly inside the drum will actually try to rotate front to back inside the drum as you apply and release the brakes…….each time that assembly rotates during brake apply, a ratchet adjuster moves to shoes out towards the drum closer. This will happen until the brakes have reached their optimum adjustment and then they no longer “rotate” enough to ratchet any further. As the shoes wear, the adjuster will once again ratchet a click or two in an effort to self adjust the brakes. Under ideal conditions and when the brakes are still relatively clean, rust free, and have enough lube on the small metal pads that hold the shoes out away from the backing plate, then the brakes can work fine. My Ollie has about 25,000 miles on it and is an older model……so when I went to replace all the wheel bearings and races this past winter, I discovered my brakes were doing the same thing (unequal braking on each wheel). I quickly found out how the brakes worked and spent a good bit of time to completely disassemble the shoes, springs, and adjusters to clean and lube the points that needed to move in order to adjust. I used a good high temp silicone based brake grease on all the stamped pads in the backing plates, as well as all the contact points for the adjusters, springs, etc. The brakes are once again working fine, however I suspect that I will need to give those brakes a good inspection each time that I grease the wheel bearings. It was a bit of a puzzle for me to understand exactly how the brakes worked and self adjusted…..but one I did, it was not an extremely difficult effort to clean, lube and adjust the brakes once again. I had very little brake wear on the drums or the shoes…..but I suspect that most of the braking was done by one or two of the wheels. By the way, you can adjust the brakes manually if need be. There are a few posts from the past on how to do that. There is also an electromagnet that must be checked as well (an easy thing to do). That magnet is what actually makes the brake assembly want to rotate when the brakes are applied. I would suggest that you take your Ollie out for a low speed ride and apply the brakes a good number of times, and relatively hard apply at slow speed. This should allow each adjuster to reach its optimum point of adjustment. If i were to order a new Ollie, I would get the standard brakes and just live with adjusting them once or twice a year. That is much less complicated than the Nev R adjust brakes. In my opinion…….a very poor design. It would also be suggested that you order the small rubber dust covers/plugs to protect the back side of the backing plates where the adjusting slots are located. There are two of these slots on each wheel. In Dexters infinite wisdom, they decided not to install the rubber plugs at the adjusting slots any longer. I guess they just assume that dirt, water, etc getting inside the brake assembly is not critical. That or they just want to save about .80 cents per axle. Good luck and I don’t believe you have anything serious to be concerned about. Just do the hard brake applies a good number of times at slow speed and you should be ok. If not, then you will need to remove the brake drum and get inside each assembly to find out what is not working correctly. Steve2 points
-
Now that I've installed a Houghton AC to replace the Dometic, I need to sell the Dometic but I cannot find the Dometic model number. I have looked in the owner's manual and Oliver University but cannot find the actual model number. For anyone that has a 2021 Elite 2 and you know the Dometic AC model number, would you please share it with me either by responding to this thread or PM'ing me. Thanks.1 point
-
Have you tried to twist off the brushed chrome cap that sits on top of and around the cartridge? It may be threaded onto the housing below it. On some faucets, that cap holds the cartridge in place. Try twisting the cap counterclockwise to remove it. You may need a gripper to give your hand traction, like this: https://www.amazon.com/Regent-Multi-Purpose-Gripper-Bottle-Opener/dp/B019R5TSYW/ref=asc_df_B019R5TSYW/?tag=hyprod-20&linkCode=df0&hvadid=193124190188&hvpos=&hvnetw=g&hvrand=1108655480944362344&hvpone=&hvptwo=&hvqmt=&hvdev=c&hvdvcmdl=&hvlocint=&hvlocphy=9029558&hvtargid=pla-311177149643&psc=1 DF-NMK852 looks like the correct model number for the faucet you have. If you download that owners manual, the brushed chrome cap is depicted on the parts list on Page 5, with the cartridge shown right underneath it. This suggests that the cap must be removed before you can access the cartridge to replace it. Good luck!1 point
-
Lee and Terry Slusher.1 point
-
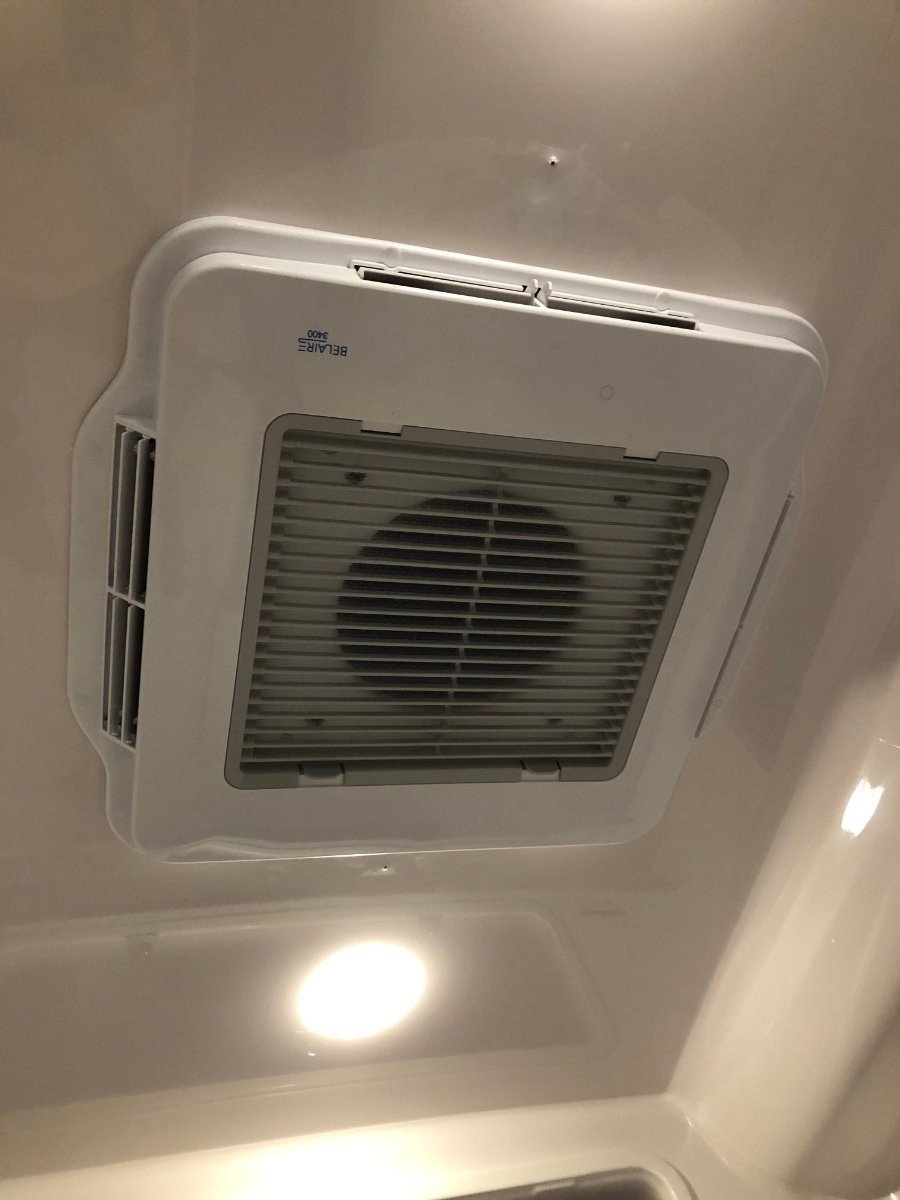
The little drain hole on the exterior of the fan is the perfect size for the mud daubers. I am going to glue a little piece of screen over that now.1 point
-
Thanks Mike the problem was the thermal fuse.1 point
-
Love those Mud Daubers, I've got screens on just about every air intake on the trailer, well I thought I did until the bath fan came up. trainman1 point
-
Thanks Mike I will check this before I order a new motor1 point
-
Mud daubers built a nest freezing the fan and burnt out the motor the next time I tried the fan and left it on accidentally. I found the fuse in the attic.1 point
-
GM started using the eco (tech) name around 2000 ish. All diesel engines over 25ish hp have some sort of filter on the exhaust. Those that are above 75ish hp are also required to have def.1 point
-
Or - You can have a few brews and not really care about being clean.😁1 point
-
I use a cutoff piece from a pool noodle, or pipe insulation, works great and does keep pressure on the vent to keep it closed when traveling. trainman1 point
-
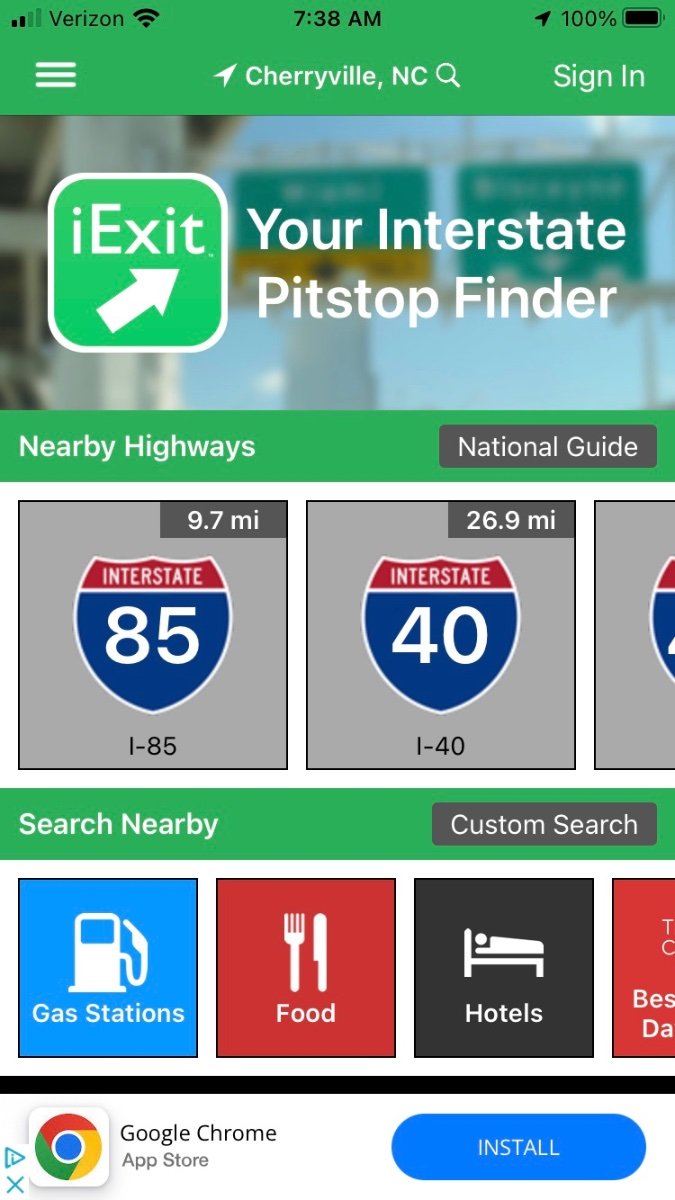
Here is a free app we find very handy when deciding on fuel stops. It works great if we are traveling on the superslab which we do try to usually avoid. We typically prefer the roads less traveled. It’s called IExit.
1 point
-
Ours (2008) had a tag visible from under the indoor unit. Look there?1 point
-
Man in this case, although Stephanie was the one who noticed it was still short cycling so she gets some credit, too.1 point
-
One of my first upgrades was a BTM.
1 point
-
I can’t comment on future hardware that might be installed… . And Oliver keeps changing their battery supplier, so I am not familiar with all the variations. I do think that Oliver should include a central monitor as standard equipment, because a battery specific app that only sees what is inside the batteries is just not good enough. John Davies Spokane WA1 point
-
Made me wanna throw up watching all that. Approx 1 mile/Kw, Over an hour to get enough juice to go another 100 plus miles, having to unhook in most cases. I'll stick with our big boy diesel. I'm not really concerned about the price of fuel, I planned for this lifestyle for nearly 20 years and calculated fuel at $5.00/gal into those plans. Load up....1 point
-
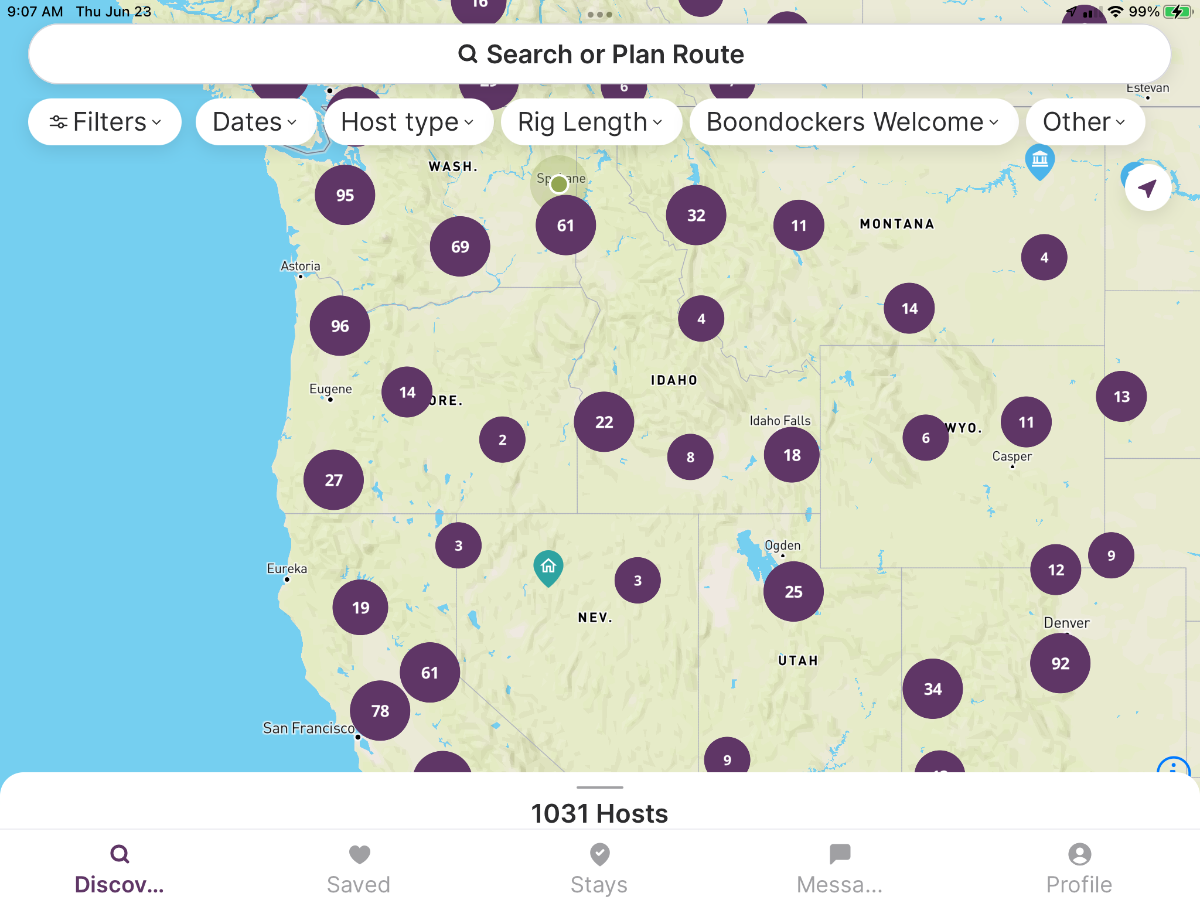
“Free” camping, though in fact the code of conduct requests that you to buy something to support the host, a $20 minimum purchase. If you are at a winery and don’t consume alcohol, or an air museum and don’t like airplanes, or the potato museum, or the vacuum cleaner museum, that can be a big problem. Even if you drink wine, it gets old buying more bottles or cheese than you want to consume. If they have a cafe or snack bar, you can eat there and tip well. https://harvesthosts.com/code-of-conduct/ Boondockers Welcome has no $ constraints, but the likelihood of having a poor experience is higher because these are just folks letting you park in their driveway or vacant lot. Sometimes the drive in is rough and dusty, or muddy. Because they are doing this for free, they seem to be lonely older people seeking company, who want to talk and talk and talk….. Of the two, I tend to use the BW sites, unless there is a particularly enticing commercial spot at a HH. If you join both the map shows all the locations with color coded icons. These sites do help you to save money, when gas prices are so horribly high. But they tend to be clustered along the major highways in populated areas, and if you are headed to the Nevada boonies, don’t expect to find many choices. John Davies Spokane WA
1 point
-
I've had one of THESE fridge thermometers for a number of years. I found that it really didn't take long to learn to ignore the old style thermometer - it simply became part of the general landscape. Unless there was a problem and by then it was usually too late. With the "system" above you can set both high and low temps and the readout unit will give you an audible warning when the sensors have recorded any temp outside the range that you set. It is this audible warning that catches my attention and I don't have to be worried trying to remember to actually look at it. Bill1 point
-
Thanks for all the tips! I'll report back after our next trip.1 point
-
We use: 1. Harvest Host for free camping sites at breweries, winerys, farms, golf courses, etc. This is a web based site and there is a membership fee for this site. 2. Rvparky which is a web based site and free. We plan out our trip before leaving home, add in our anticipated stop locations and it will tell you the miles and extimated travel time between locations. At each stop you can click on camping locations and there is a list of a lot of camping sites listed, including Walmarts, Costco's, TA locations, rest areas, etc. 3. A Garmin 890 GPS which has camping sites and points of interest that can be accessed at each location.1 point
-
@Allen Lee Rohner Yep. Always tow my Oliver in Tow/Haul Mode. As @Cameron said above, Tow/Haul mode enables the whole GM towing tech system including the trailer mileage tracker, TMPS (I have the GM sensors in the Oliver wheels), trailer circuit detection, engine braking, camera views, trans temp on the cluster, etc. I've been very happy with it. Just returned from my 3rd weekend boondocking trip in a row (Yay!) up in the mountains of Colorado. This trip I again got 18 MPG towing on 360 miles round trip so that's been consistent. DEF is more expensive now along with diesel as @Cameron said but I still feel like I made the best choice for me...deisel engines perform well at high altitude and I've towed up to and over 9-10k feet the last three weekends. It jams right up the long inclines and then the automatic engine braking is fantastic when coming back down.1 point
-
We're fortunate & have a slot in door for mail. "USPS Informed Delivery" sends an email daily that has images of what's being delivered that day. All bills paid electronically so there is rarely anything important. A good friend stays at our house a few days a week. House looks lived in & she runs appliances, toilets etc. The best part is she deep cleans the house. A neighbor drives our other vehicle to work a couple days a week and parks his car in our driveway. Yard service, yes. HVAC Thermostat & irrigation controllers on wifi. Emergency contact list contains names of people we trust to make decisions re emergency house repairs. Plumber, electrician, carpenter ... Keyless entry on back door so repair people can get in. ♡ Harvest Host.1 point
-
Is what it is. Relative to the 70s, probably not so bad. We'll get through it. We always do.1 point
-
I am a retired attorney. Among other things during 35 years of practice, I defended many auto accident cases where my firm was retained by insurance companies. Insurance companies look for any viable reason to avoid paying claims. This includes failure by their insured (you) to follow safe practices, particularly manufacturers' recommendations. The owners manual for my 2019 Tundra, with the 5.7L V8 and the towing package, requires the use of a weight distributing hitch if towing more than 5000 lbs. I will be amazed if the owners manual for a current model Ford Ranger doesn't include a similar requirement. I hope you are never involved in an accident towing your Oliver with a Ranger. But it if happens, even as the result of another driver's negligence, you will be substantially exposed if you don't have a WD hitch. In that event, $800 spent on an Andersen WD hitch could save you $500K to $1M in uninsured, personal liability when your insurer declines to pay a claim because you failed to follow the requirement in your owner's manual. I will be using an Andersen WD hitch when towing my Elite II with my Tundra.1 point
-
Thank you everyone for your input, I do agree the Ranger is too small to pull the E2, so after additional research, and all your input, going to order an F-150 w/2.7 V6 and 3.73 axle ratio w/"Payload Package" (and use a WDH) and with this configuration this will get me up 10k towing capacity (per Ford towing guide). And with 2,480 lb. payload for the 4-door crew cab (and max 3 passengers with gear, 490 lb. tongue weight + (2) 20lb. propane, and no aluminum box) the math says this should absolutely work.... This is such a great forum here with very helpful information... Looking forward to more discussion and thanks to all for your time.. Best John1 point
-
Standard mud flaps help, but if you want real protection you need something more elaborate, like Rock Tamers or the Rockstar mentioned above. I’ve had regular mud flaps on all four of my tow vehicles, I’ve also got a bunch of chips! They aren’t too noticeable unless you get real close! Mike1 point
-
Kirk: Based on a recommendation from IL-Travelers on this forum, I have already installed a Rockstar full-width mud flap on our Tundra tow vehicle. IL-Travelers reports being very happy with the way it protects their Oliver. And, judging from the amount of dirt already collected on the front side of the Rockstar, it should protect the Oliver from most road debris after we take delivery in September. If you go with the Rockstar, I recommend the 2-piece "Adjustable" version over the Standard 1-piece. The adjustment is in how far the flap hangs down when you install it. You set that distance depending on where you secure piece #1 to piece #2 during assembly. For any off-pavement driving, I expect it would be better to have the flap hang down further than the non-adjustable, standard version.1 point
-
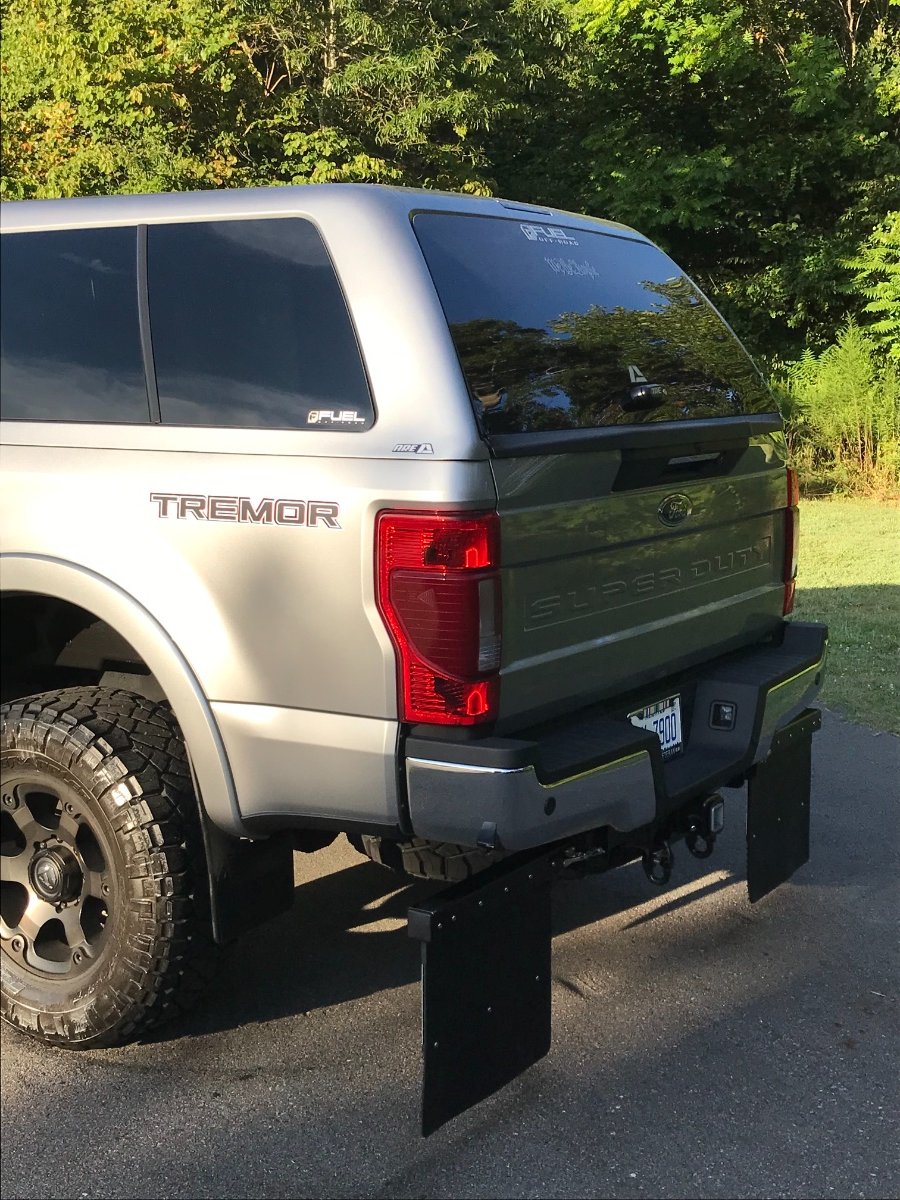
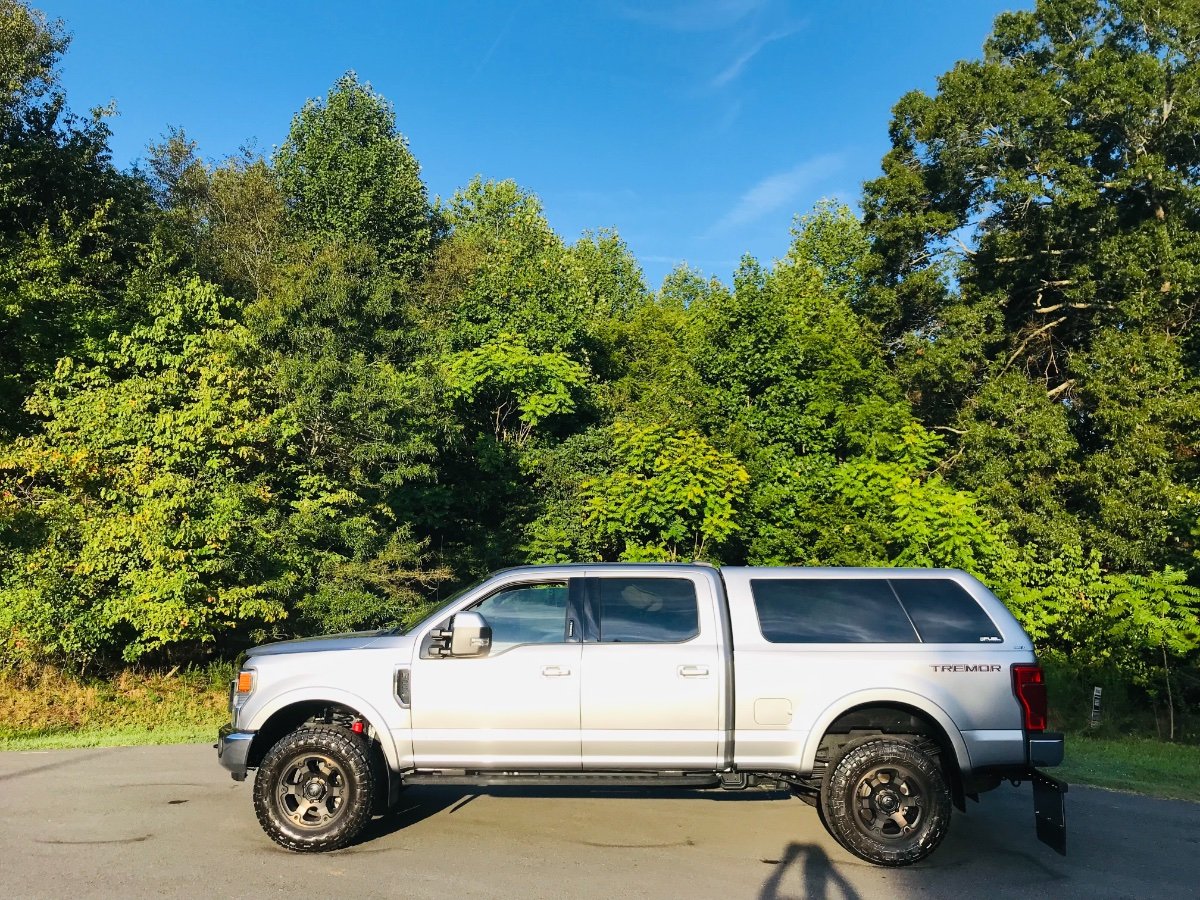
In an effort to reduce any nicks or dings to the front of our Ollie we had 10 mil XPEL paint protection installed on the front corners, dog house etc. I also recently custom ordered a set of these “rock flaps” for our F250 Tremor TV from a fabrication shop called livelymachine.com. I just was not overly impressed by the other brand of rock tamers or rock stoppers that mount to the hitch for a number of reasons. These rock flaps mount up underneath the bumper directly into the receiver left and right side square openings on our F250 Tremor. A really nice fit and finish and very well made with aluminum powder coated tubing and all stainless hardware. Once mounted they are not going anywhere. If you are interested in pricing and shipping costs or have technical questions about rock stoppers please contact livelymachine.com. Cheers and Happy Towing!
1 point
-
Hey Bill, Thank you and I appreciate it! The shake down last week went great, no issues and a clean Ollie when we got home. David note- Not recommended if your TV is an SUV. 😉😂1 point
-
David, David, The SS plates and hardware are a fine finishing touch on the rock flaps, great job!1 point
-
Looks like the Yukon gave your Aussie Stone Stampers the test...1 point
-
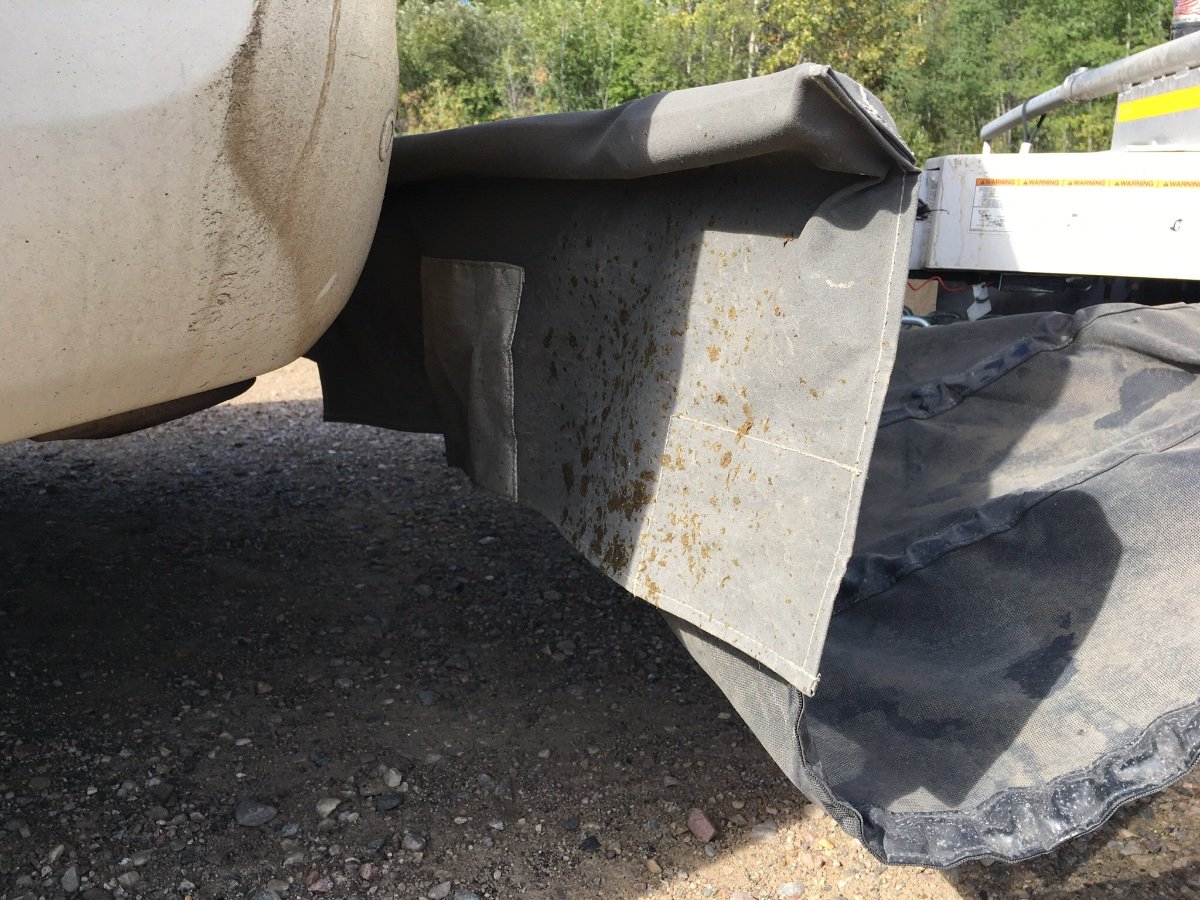
I would be a little cautious, they actually should sail back at an angle. The Rock Tamers I have (hanging on my wall gathering dust for four years) are a very similar design, the Australian instructions say they should be rotated to give a static angle of say 20 to 30 degrees at the top of the flaps, so that they will sail at a 45 degree angle at highway speeds. That way stones will be deflected down to the ground instead of bouncing straight back onto your truck bumper and bodywork….. The USA instructions are completely silent about this, and most Rock Tamers I have seen here are installed dead vertical. It is just something to be aware of and to keep an eye on, it may not be an issue with yours. But if you see gravel lying on top of your bumper, and tail light or tailgate paint chips, that is why…. https://www.clearviewaccessories.com.au/wp-content/uploads/2019/03/RT_MANUAL.pdf Plus if you are towing on gravel, or fresh chipseal, and you pass over a deep dip, they may hit the surface and throw up a ginormous rooster tail of gravel right onto your Ollie. That unfortunate characteristic is unavoidable with this design, it is what it is. You need to go with a completely different design like a Stone Stomper to avoid that. Which BTW is also effective against Wood Bison manure from the highway (Yukon Territory). Notice how much cleaner (relatively speaking) the A frame of the Ollie is, in relation to the truck, flaps and the cloth mesh, which very effectively keeps all the “chaos” at ground level, as well as off the rear hatch and glass. In pouring rain at 60 mph the back glass stays practically dry… 😳 John Davies Spokane WA
1 point
-
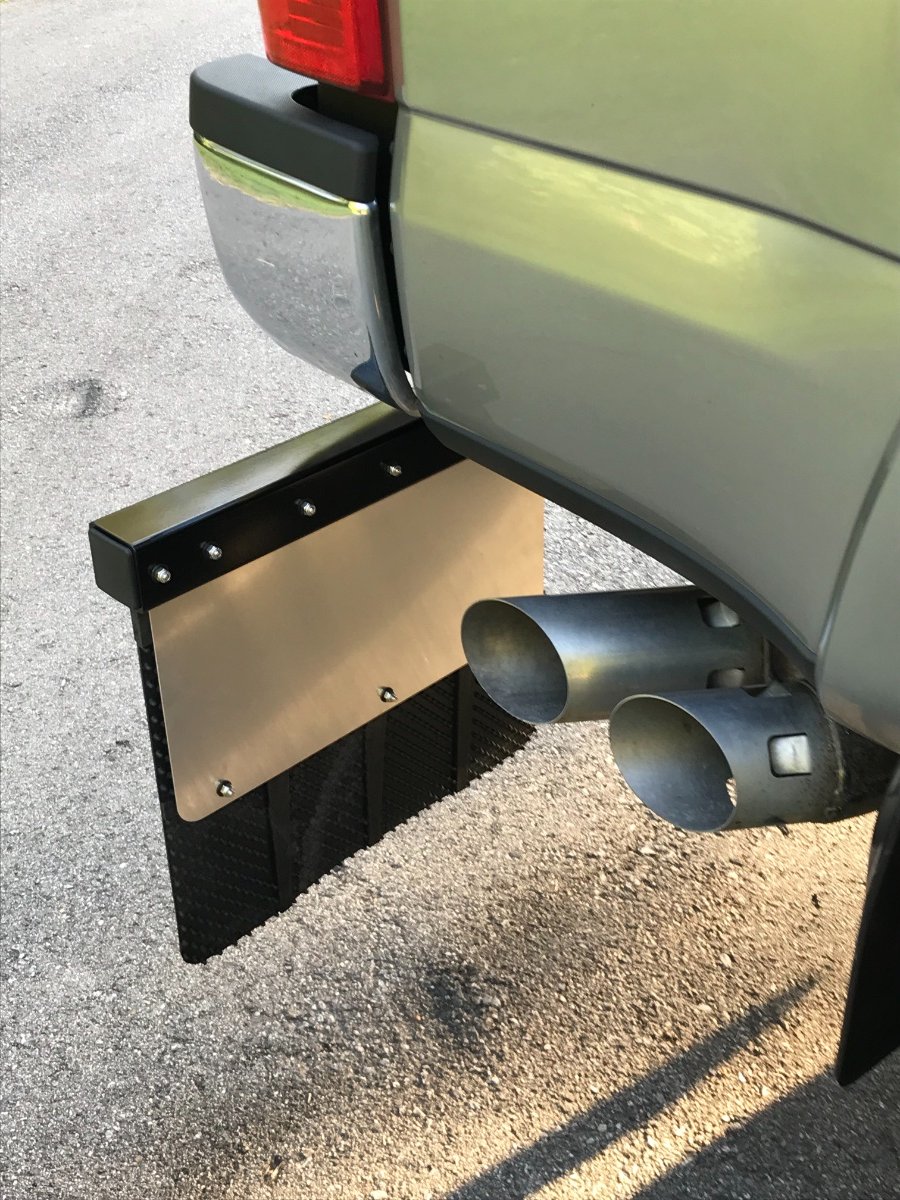
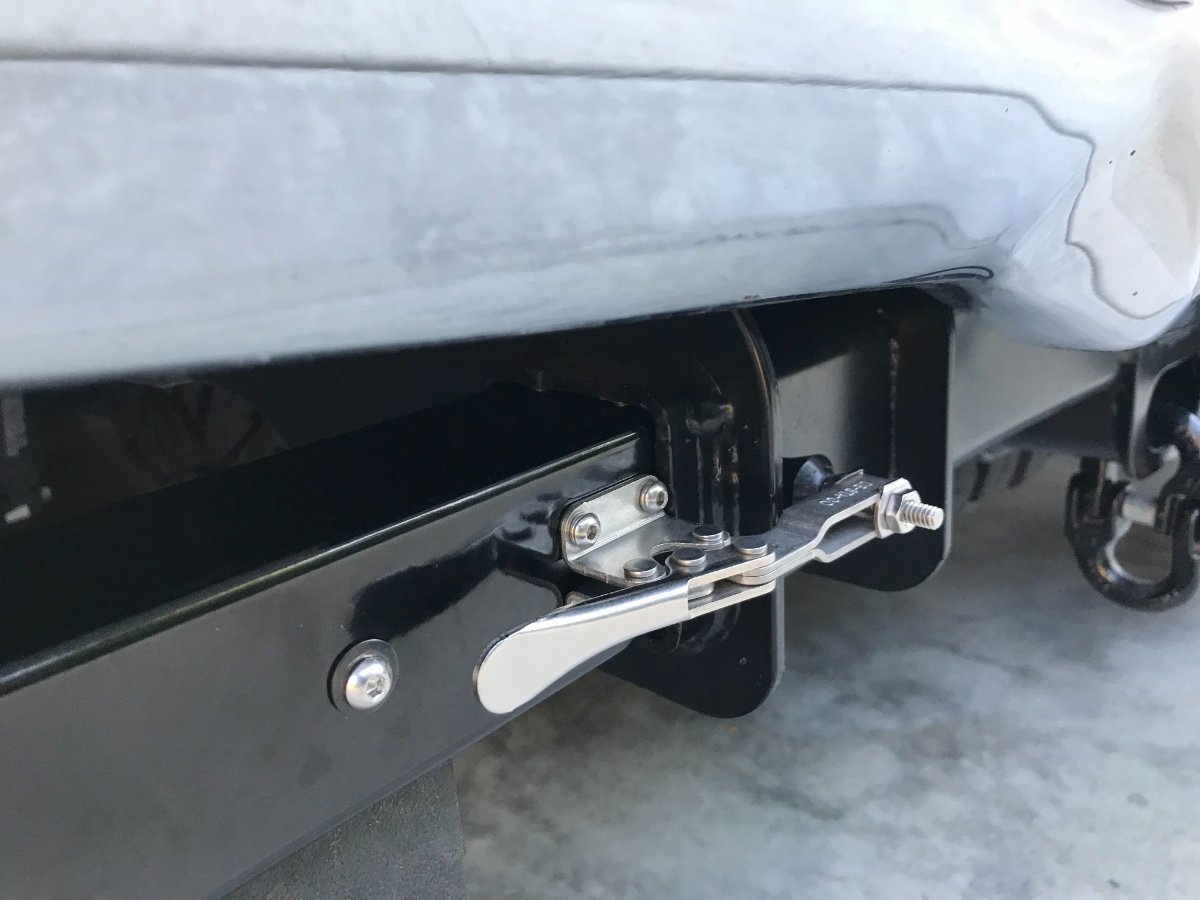
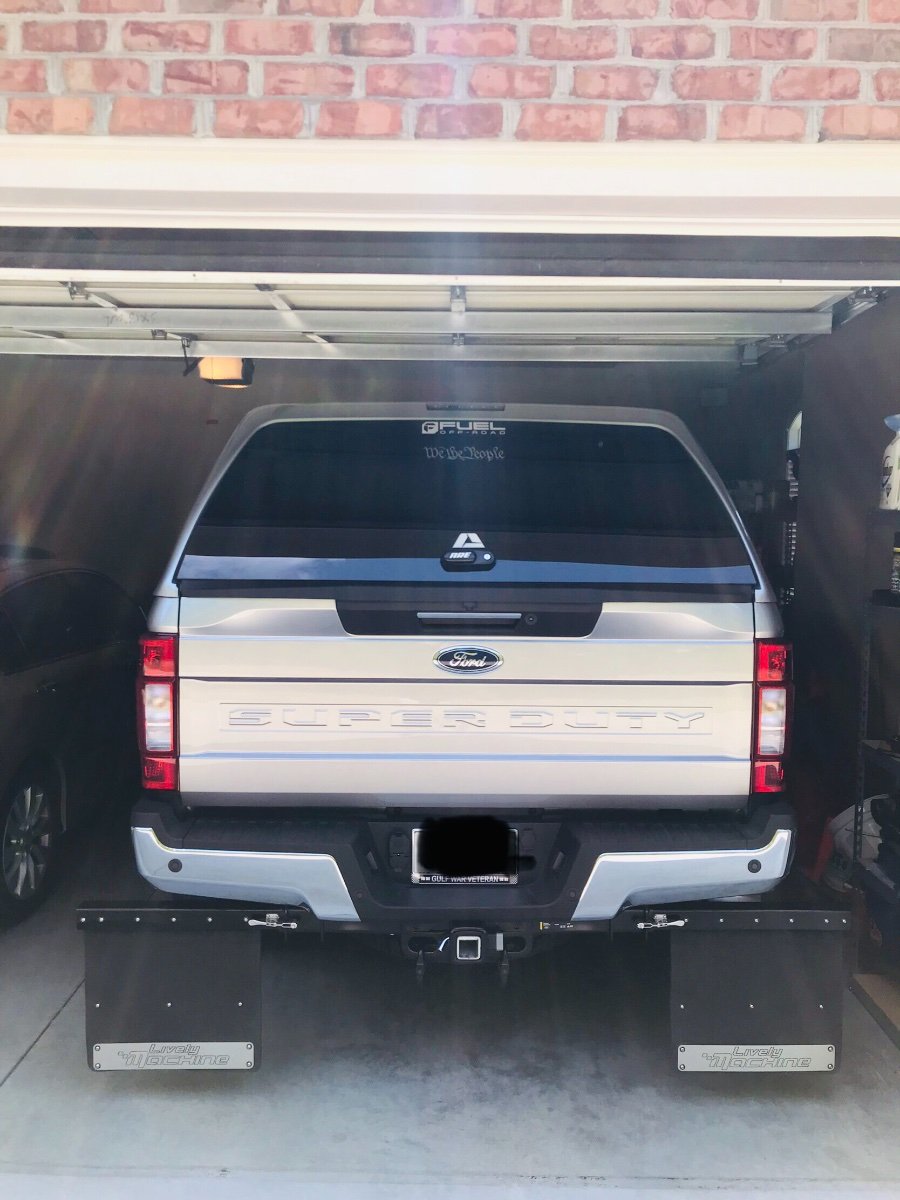
Update on my rock stoppers. I had livelymachine send a set of SS plates and SS mounting hardware to preclude any upsailing from the flaps at highway speed. Very pleased with how clean the front of our Ollie looked after our trip. These are providing the protection I had hoped for.
1 point
-
@IL_Travelersdo you have more pictures of your loaded and hitched truck that show how far that Rockstar full width flap is from the ground? I like that style flap because I also have a Duramax and I like the way the Rockstar handles the exhaust.1 point
-
David, Very nice and sturdy Rock Flaps! Great work!1 point
-
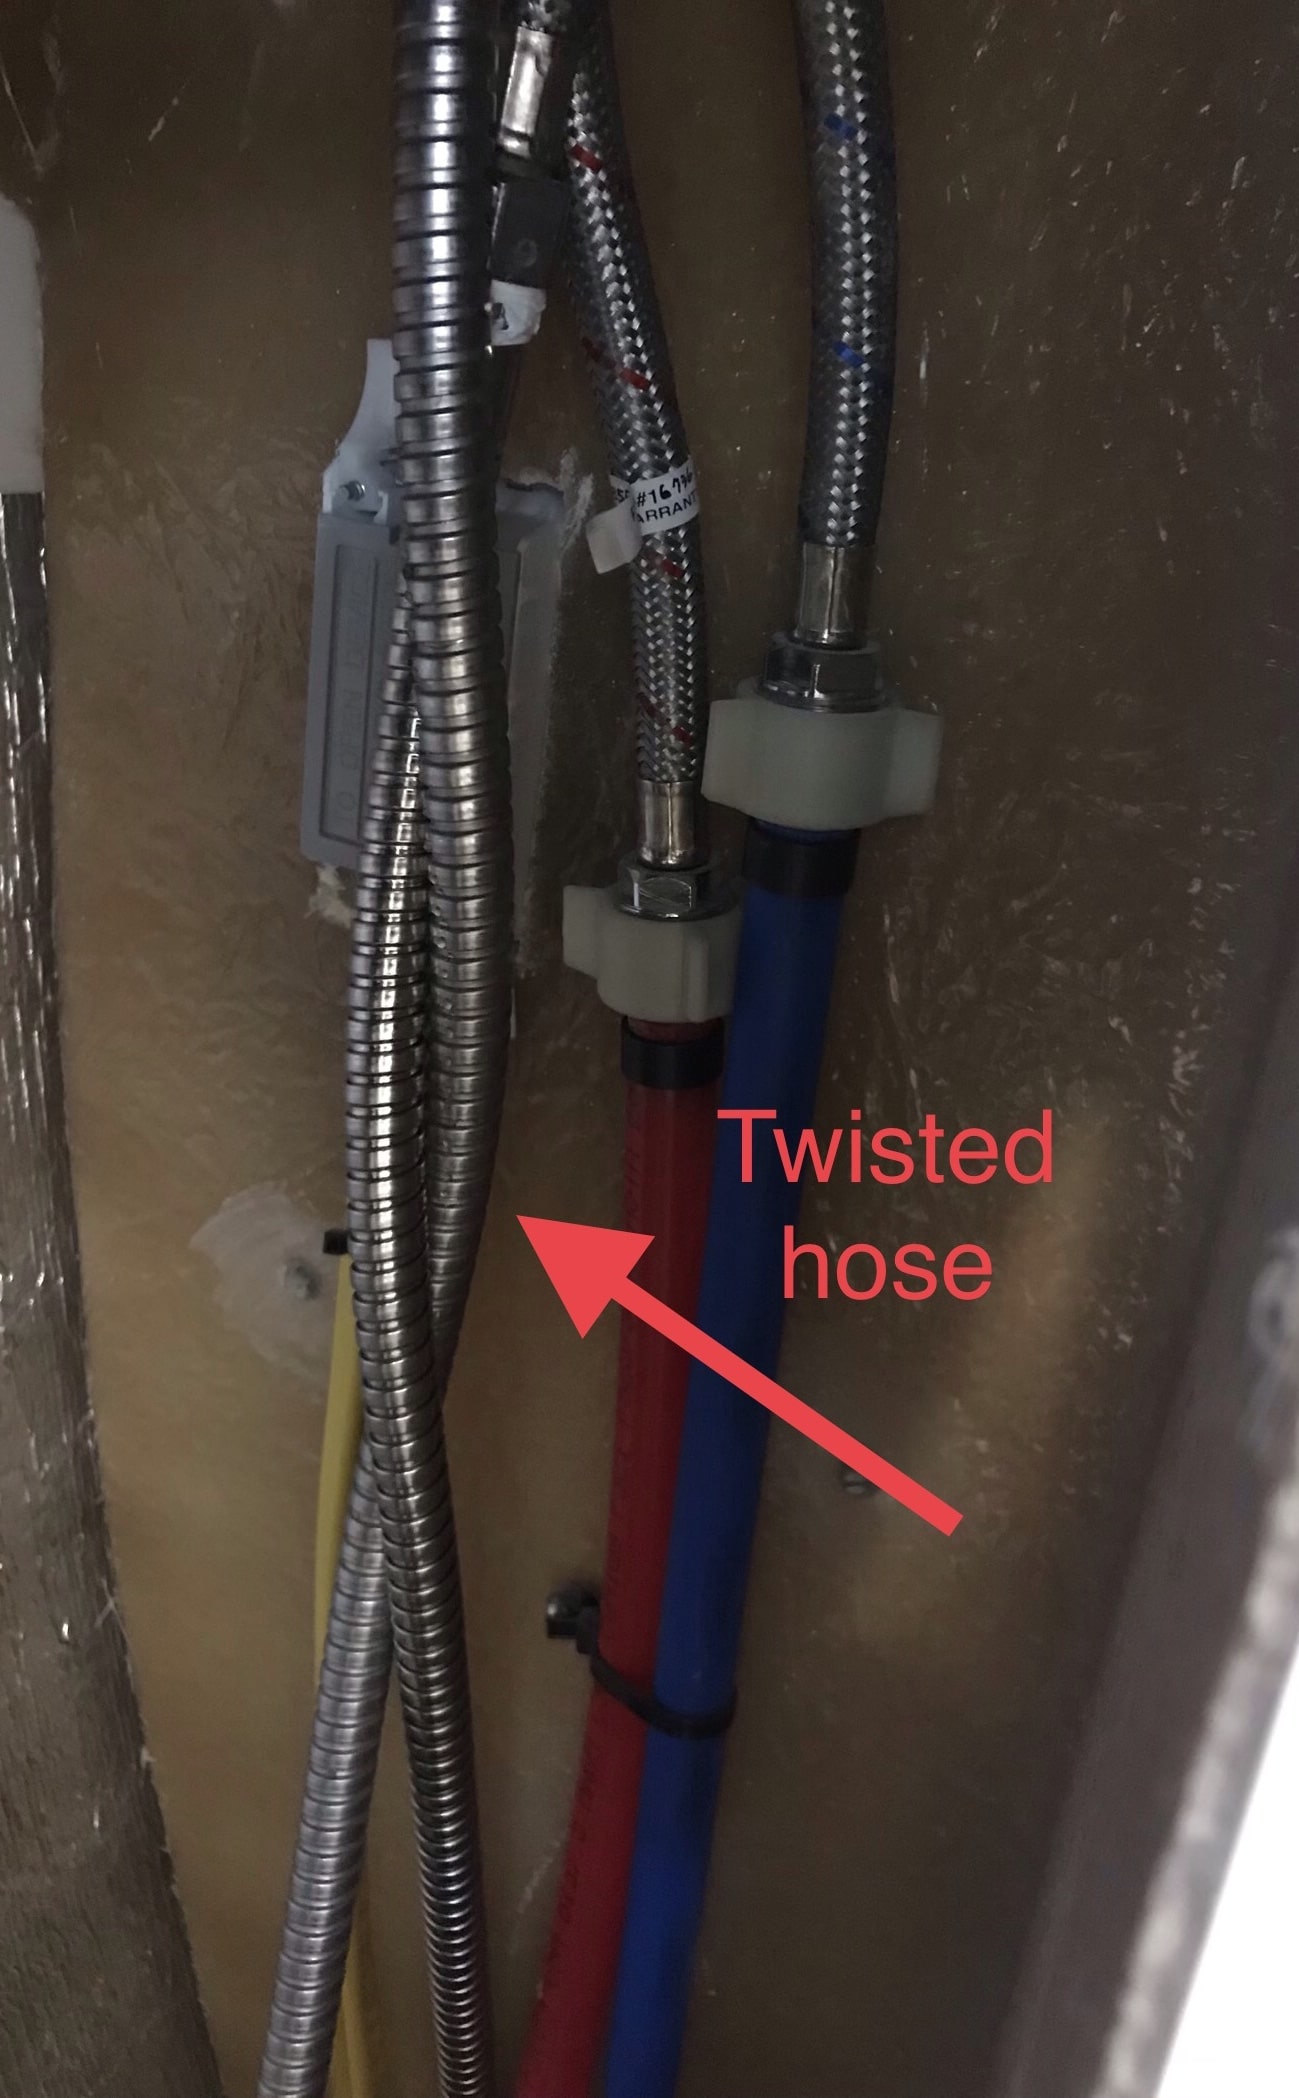
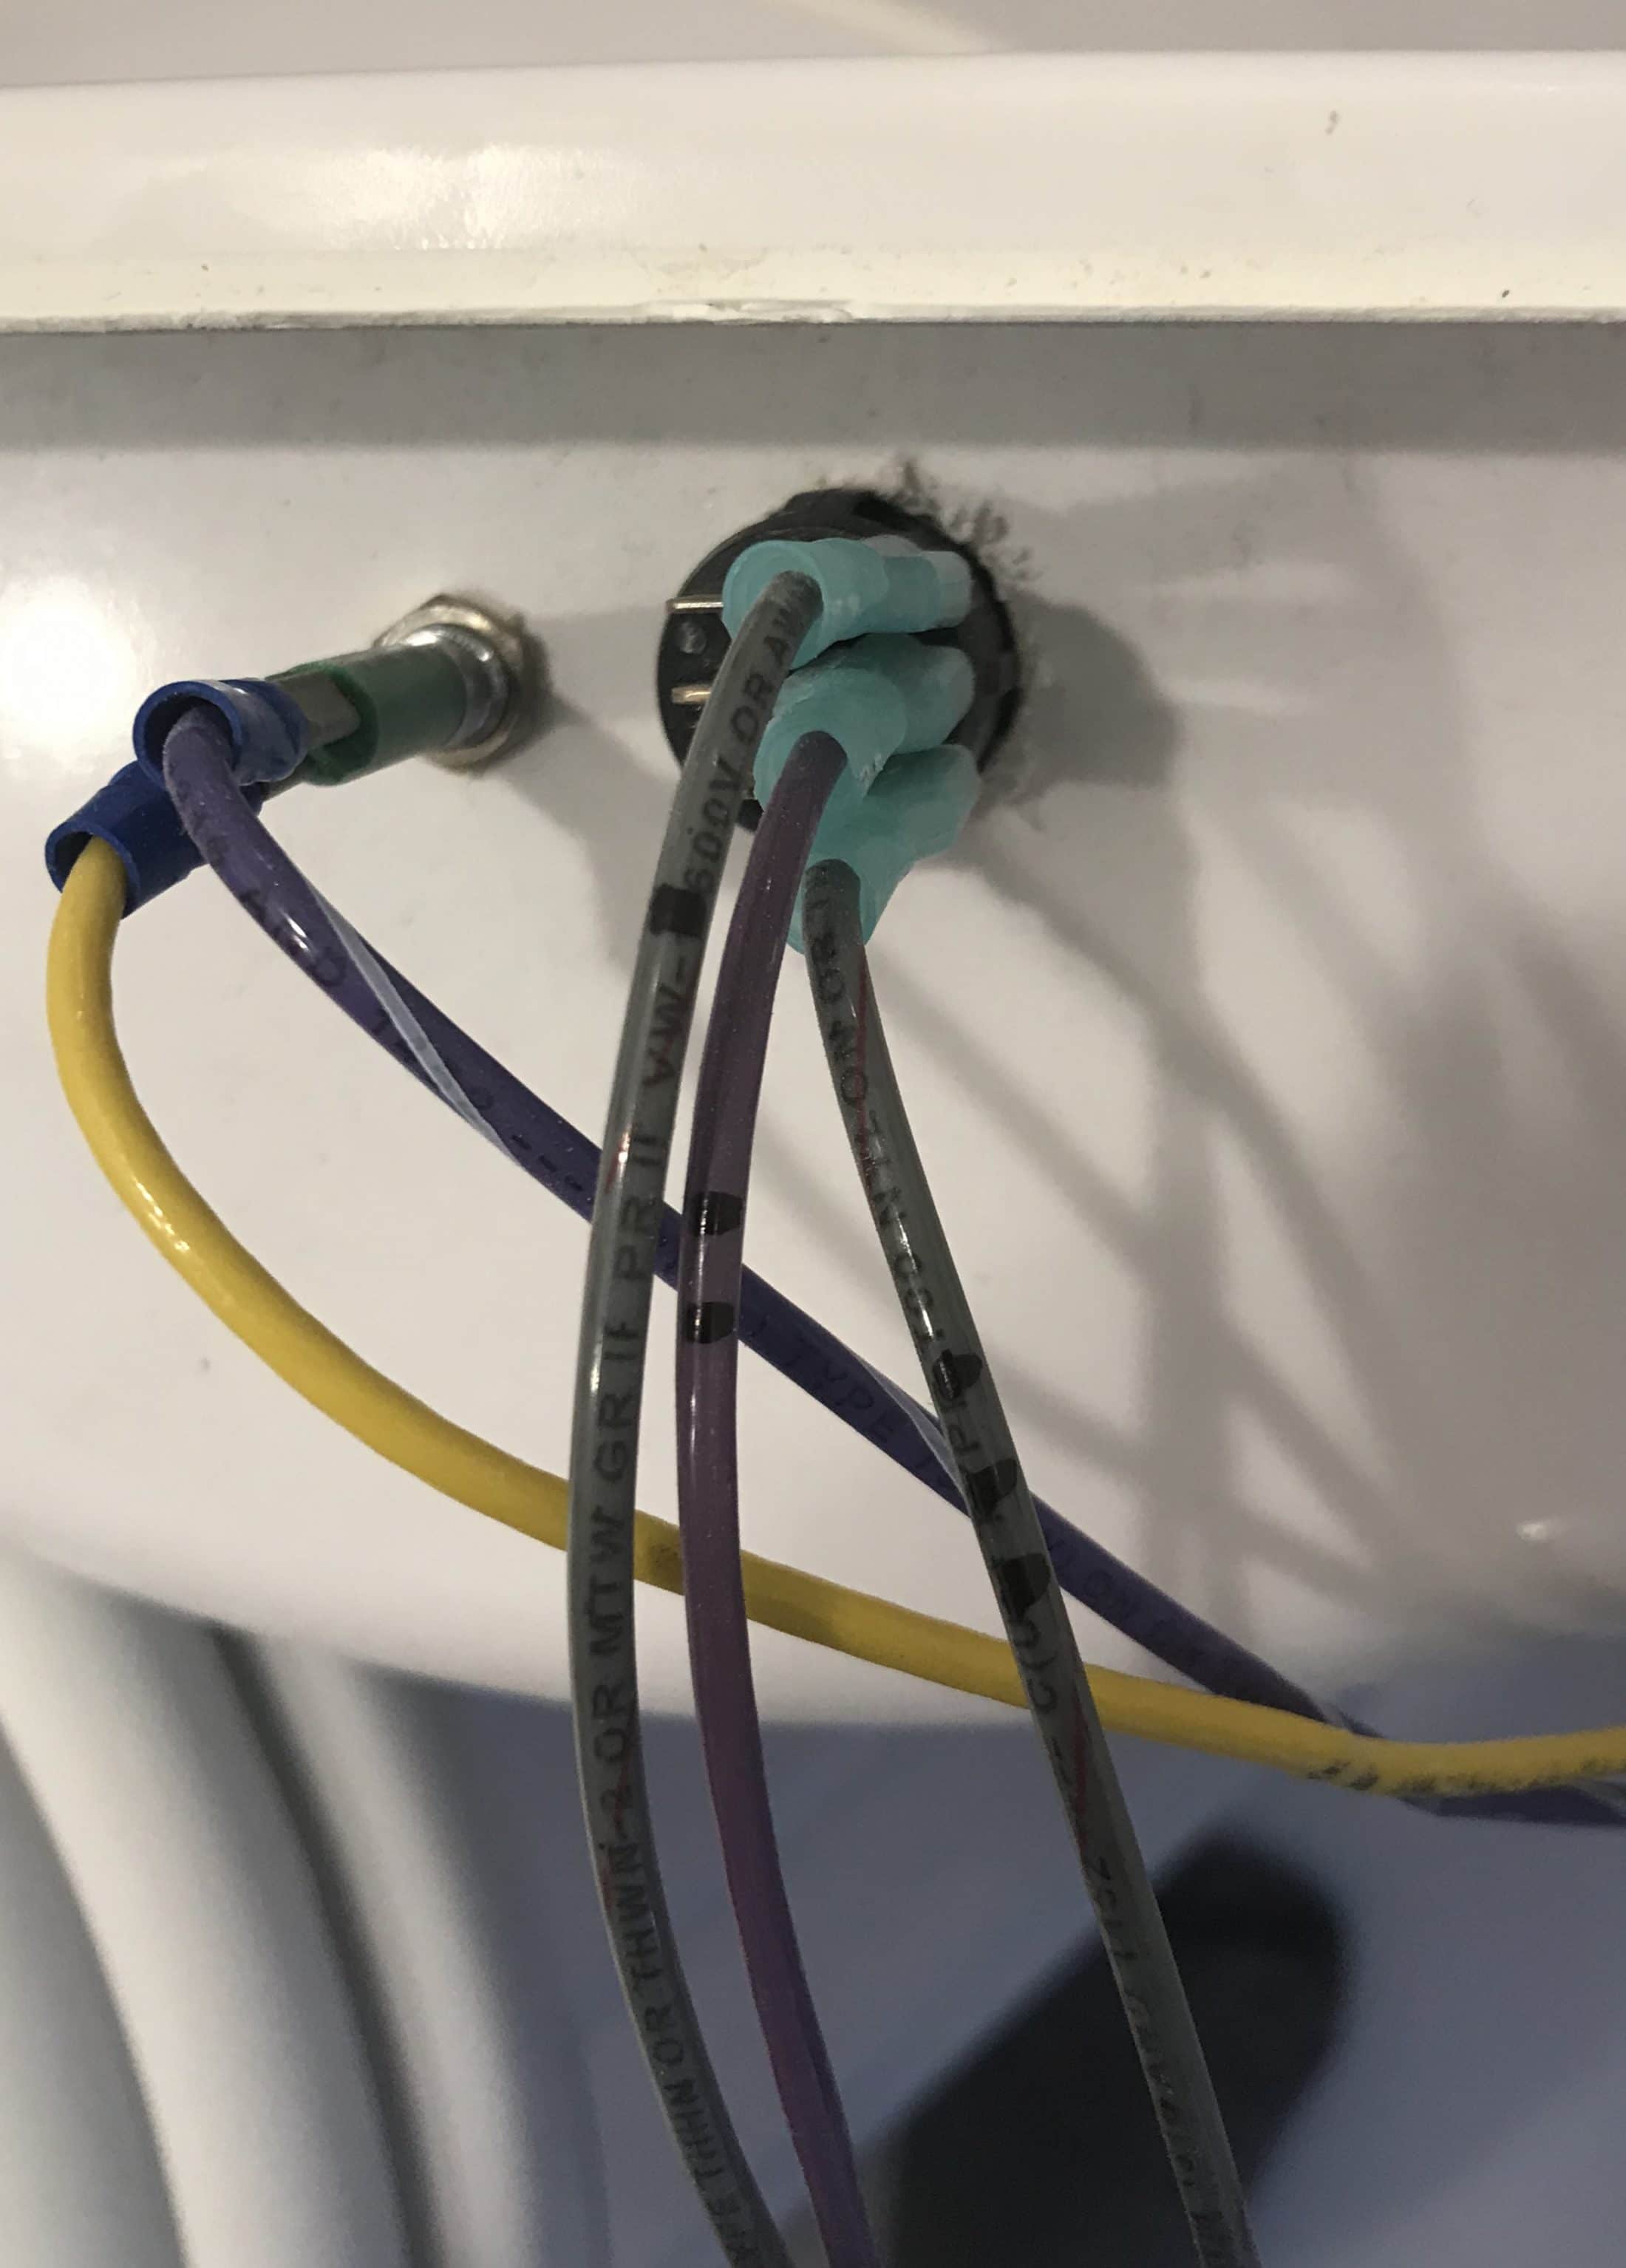
Make sure hose is not twisted. It will pull out and go back in much easier. Mark these wires before you unplug them
1 point


-
Recent Achievements
-


")


