Leaderboard


Popular Content
Showing content with the highest reputation on 10/06/2022 in Posts
-
I received a nice little graphic in an email from BB this week that can help with a cost/benefit analysis. Battle Born's reliable, safe, and non-toxic LiFePO4 batteries last 10x longer than lead acid. They are 1/5th the weight for the same amount of usable power, charge 5x faster, require zero maintenance, and are backed by an industry-leading 10 year warranty.
 4 points
 -
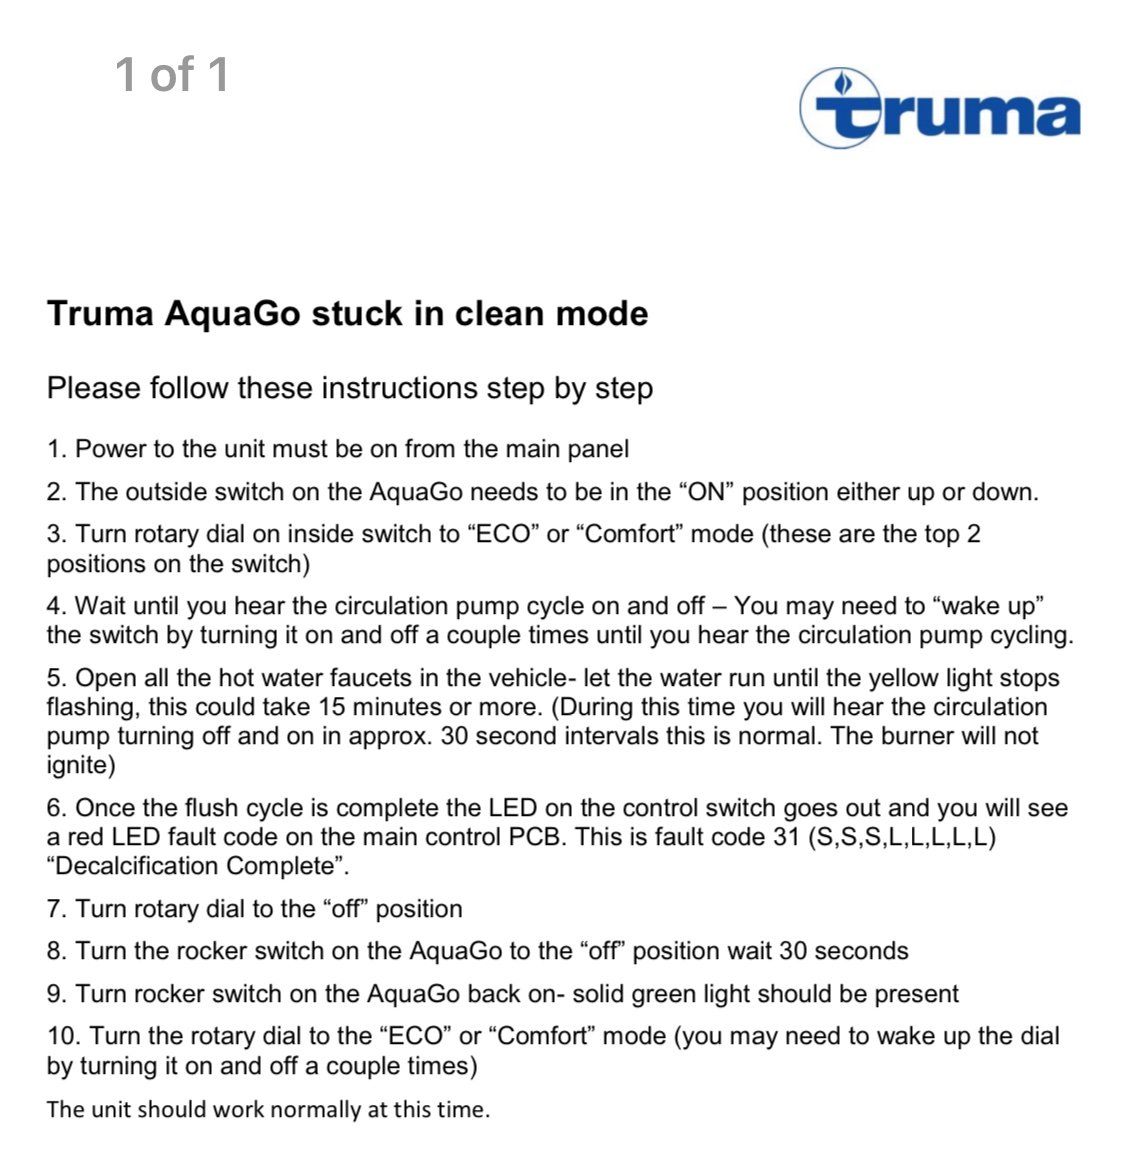
Did you accidentally put the Truma into Cleaning Mode? If so there’s a procedure to follow to get it out of that mode. Here’s what Truma sent me to get the unit out of cleaning mode. And note that propane should be ON when doing this process.
4 points
-
Not sure which lithium batteries you have. I’ve been considering upgrading my lead acid wet cell batteries to lithium and have been looking at manufacturers specs. The BattleBorn lithiums state a 100% usable depth of discharge (see data sheet). The battery has its own built in battery management system to protect it from damage. I’d probably never go that low, all the way to 0%, but nice to know it’s not a problem if it ever does happen.
4 points
-
We have the Houghton and I do find everything in this video to be accurate (I also have data to confirm this). We do use a dehumidifier along with the Houghton to control humidity/dewpoint AND temperature. I think this is normal as an AC unit is specifically made to operate based on temperature (not humidity) and a dehumidifier is made to operate based on humidity (not temperature). I know lots of people in NC that have a dehumidifier in their home and run AC and the dehumidifier to control both humidity and temp. Auto on the Houghton does not stop the fan from running when the compressor is off. I thought it was just circulating the cabin air when the compressor is off, but if it' s mixing in outside air that may be something that could be improved with the design, but it still wouldn't control BOTH humidity and temperature. What I've found works best for us is keeping the temp set at the lowest point (60F) when cooling so the compressor doesn't shut off. The cabin cools quickly and the dewpoint drops dramatically just as quickly. Once we've got the temperature where we want it, we turn off the AC before it starts cycling. The dehumidifier then keeps the dewpoint in check so even if the temperature goes up, it's still "comfortable". If the temperature does get uncomfortable, it means waking up in the middle of the night and running the AC for about 30 minutes to get things comfortable again, but this is rare. On nights when I know it's going to get too hot, I've used the timer function to have the AC come on for 30 minutes in the middle of the night and then shut off again without me having to manually turn it on and off.3 points
-
I guess a double negative means you've successfully had multiple jury summons rescheduled - good for you if that's what your goal is. I chose to be honest and 2 planned camping trips and the Expo wasn't acceptable criteria. Not sure what you mean by your Covid comment being a personal choice, but it's not always my personal choice to have to pre-plan and make reservations pretty much anywhere we want to stop.3 points
-
Relative humidity is a pretty worthless measure of moisture in the air as it changes with ambient temperature (rh is the amount of moisture, or vapor pressure to the amount of moisture or vapor pressure at saturation) and warm air can hold more moisture than cold air. I am a big fan of dewpoint (temperature at which moisture condenses in the air) which doesn’t change unless you get a different air mass. I suspect the issue is running the fan constantly versus on auto so unconditioned air is being pulled in. We run our dometic on low (not auto) so the startup of fan/compressor isn’t so alarming. I do notice an immediate change in humidity with our domestic when the compressor turns off (but fan still runs). With a quiet AC it would be better to run it on auto so that the fan is not running when the compressor is off. So I am thinking it is not so much to do with the manufacturer/unit as it is the mode of operation.3 points
-
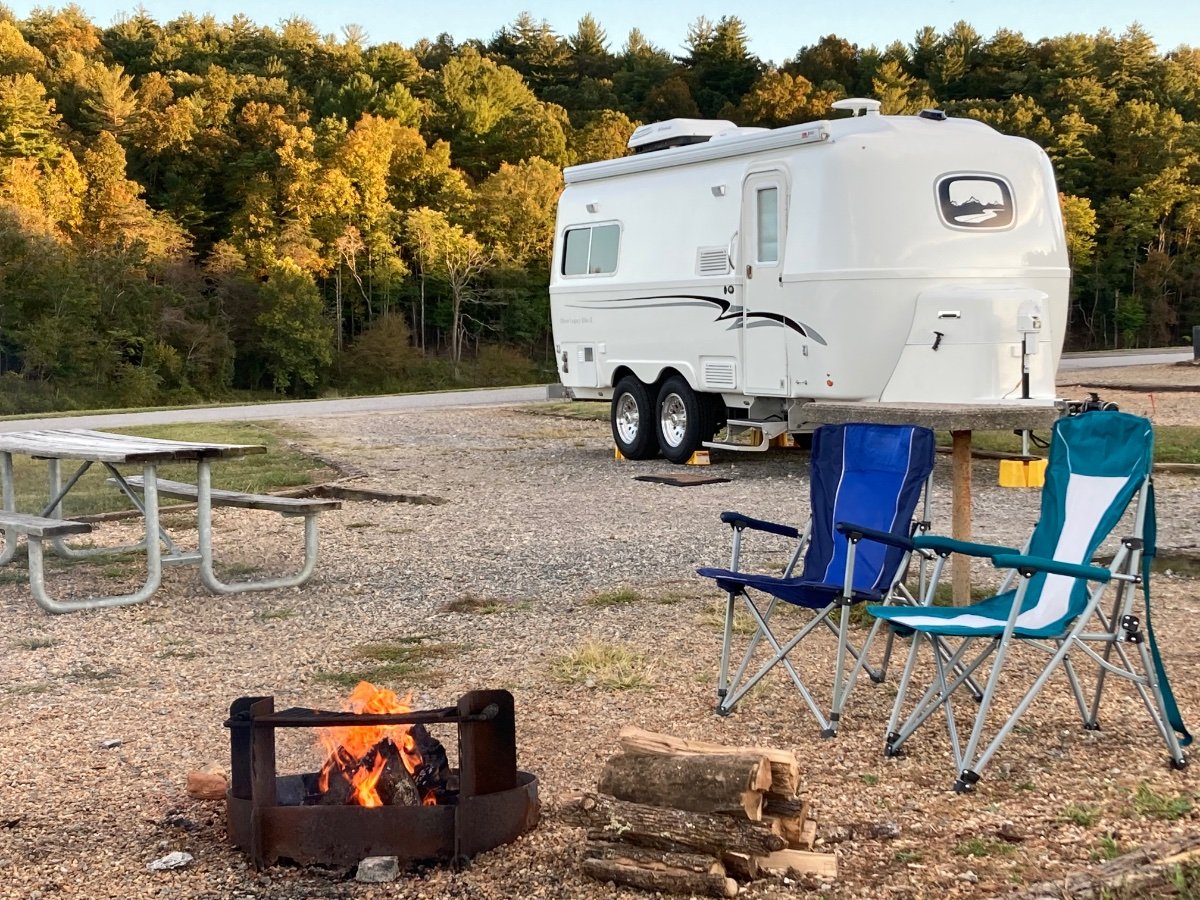
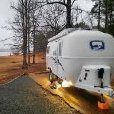
Here’s our favorite campsite at COE Bandit’s Roost campground Wilkesboro, NC, site # 28. This site is hard to get, someone must have canceled, allowing us to camp on it earlier this week. It’s been 70’s during the day and upper 40’s at night. The Blue Ridge Parkway is not too far away for a day drive, too. 🙂 Blue Ridge Parkway NC
3 points
-
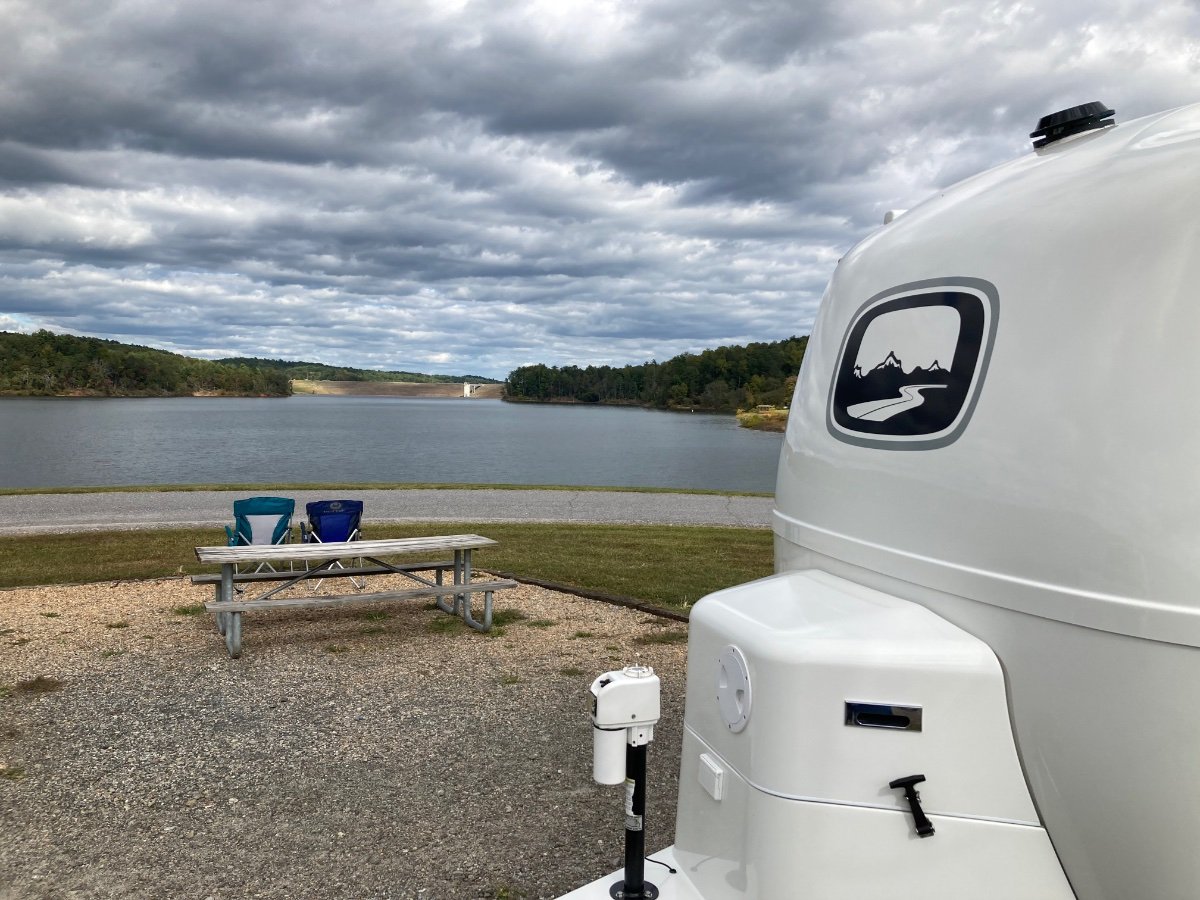
We’re heading north to Kansas City for a few days before we head to Tennessee. First stop on our escape from Texas is a nice COE campground near Gordonville on Lake Texoma, Juniper Point Campground. Nice concrete pads on the lake. Very pleasant overnight stay on our way north!
3 points
-
Beautiful sunrise as this freighter passed by us on the Saint Clair River at Algonac State Park.
2 points
-
Every jurisdiction has at least slightly different rules for excusing or postponing jury service. In my county court, we're typically allowed a one time postponement, no questions asked. For a federal court summons, I had to provide dates and reservations, etc., and wait for a response to be able to postpone. There's no easy answer. I'm really disappointed and surprised in Overland Expo's response to your request for a refund, because you're fulfilling your civic duty. I'd be tempted to take it "up the chain."2 points
-
Update - issue resolved. I changed the temperature differential on the thermostat from "d1" to "d2". As described in the owners manual, when the system is off, push the down arrow and power buttons at the same time and adjust from d1 to d2 setting. I have no idea why the system would try to cycle the AC while in furnace mode, but this resolved my issue. Thanks to Mike Wyant on the FB group for the solution.2 points
-
According to Battleborn, you won’t harm the batteries, the BMS will cut it off. The problem is the voltage will drop below “usable” for some circuits. According to their manual, there is a curve showing the voltage of 12V at 9%, so the 10% rule of thumb mentioned by Steph & Dud B is acceptable. BB 100AH Manual BB has a YouTube video explaining this subject. BB Discharging Batteries to 100%2 points
-
As always, follow your manufacturer's instructions, but you can take lithiums down much farther than lead-acid or AGM. Usually down to around 10% is acceptable. The Lithionics manual is in Oliver University.2 points
-
Sorry that the Jury Duty thing got in the way of going to the Expo. And, sorry for the way you are being treated by the Expo management. But, thanks for doing your "Duty". Bill2 points
-
OMG... Don't know how many of you have had extended trips on our highways lately...but it looks like a "war zone" in some places... Cannot believe the bumps, holes, patches, dipsey-doos and just downright poor condition... If we didn't have an Oliver I think I would have left several hundred parts and pieces on the roads ! Hohenwald to Bellingham WA...I don't think we will ever take a trip that long again- maybe on the "back roads"... Just be careful out there !1 point
-
Thanks so much for your photos and details. I installed my Houghton a few months ago but at the time didn't bother to wire the furnace. Your info made the job super easy. Thanks again!1 point
-
I am glad you made it home. What tire pressure in the Ollie? Please add trailer and tow vehicle info to your signature. What is next for you? A four week jaunt around Olympic NP? 😁 John Davies Spokane WA1 point
-
I agree. We take interstates sometimes when it makes a big difference and we know the general condition. More often than not, we take back roads through farm country and small towns. Slower speeds and less traffic make for a less stressful trip. When we head west to AZ most January’s it’s I-10 most of the way. Not a lot of other options. Mike1 point
-
That sounds like every highway in Ohio and Michigan. Glad you made it home safe.1 point
-
I will say this about Separret. The plastic they use is smooth, white, and easily cleaned. I had originally lobbied for the new "tiny", which is probably as close to looking like a modern , attractive toilet as any compost toilet out there. In the barn, we had room for the 9215, with its extra capacity, so that's what we bought. It's still a decent looking more "residential " style design. I still think it's ridiculously overpriced, and I wouldn't buy it again. (Overpriced portapotty, imo.) Another issue, you would still have to raise the seat to empty the pee bottle, if you didn't send pee to the black tank. Even with the bigger 9215, this is light and easy to do, but it does expose the ick of the black deposit bucket... I'm not particularly squeamish, raised on a farm, so no big deal, but might be for others.1 point
-
Marty, In addition to what was said above, we had two 100AH AGM batteries weighing in at 67 pounds each replacing them with one 100AH Battleborn lithium weighing in at 31 pounds to do the same job as the previous batteries. This change reduced battery weight with improved battery performance with faster charging and can discharge the Battleborn well below 50% as discussed above. https://www.batteriesplus.com/product-details/marine_rv/battery/duracell-ultra/sli27magmdc https://battlebornbatteries.com/product/12v-lifepo4-deep-cycle-battery/ Very pleased with the Battleborn 100AH battery performance.1 point
-
Their humidity problem is undoubtedly being caused by either the unit being oversized (my guess) or they aren't running it in dehumidifying mode or low speed fan setting (if that unit has such features) while operating in humid conditions.1 point
-
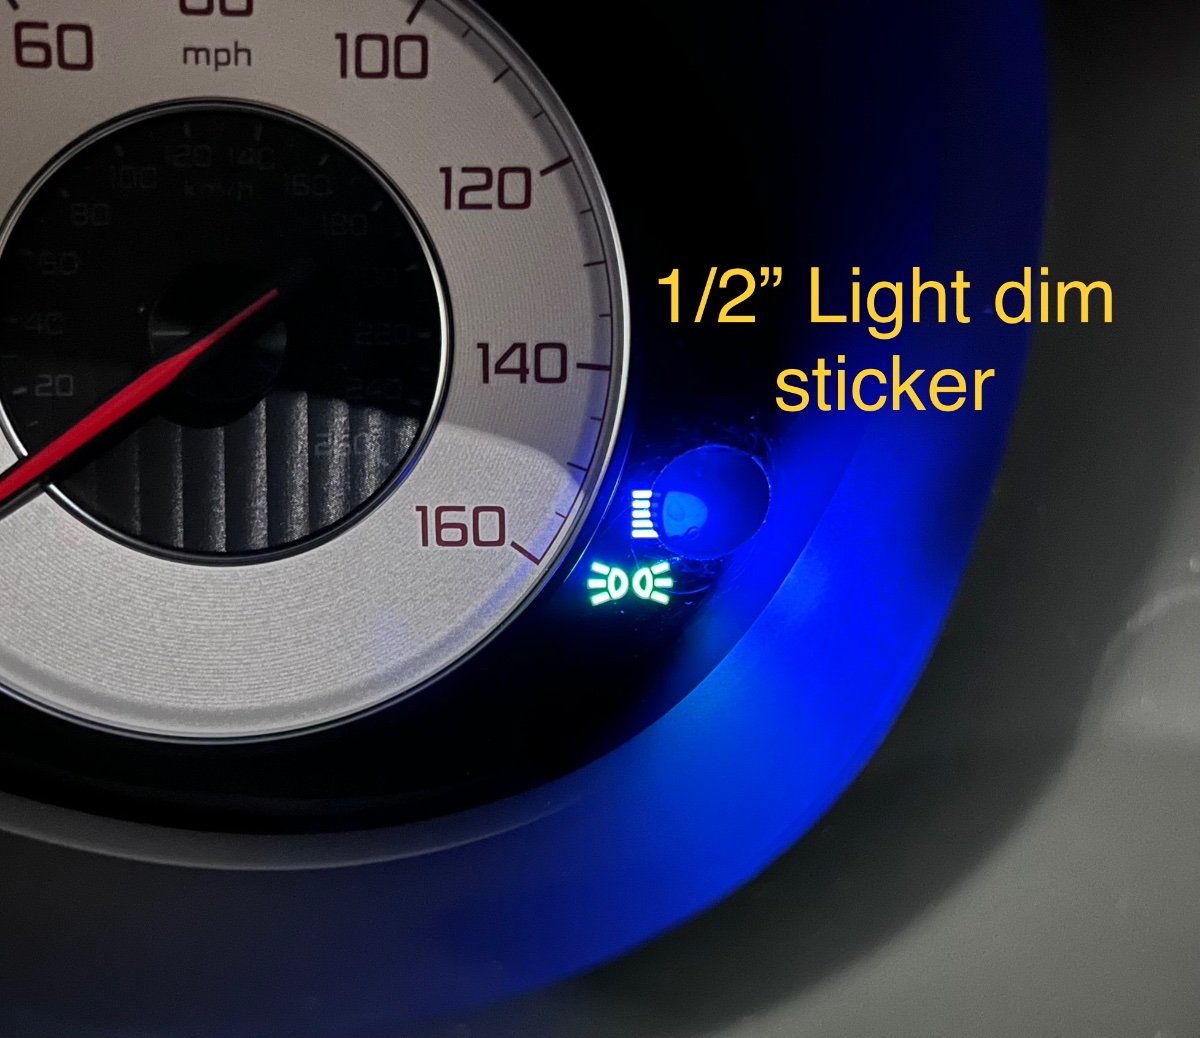
My wife’s new Acura RDX has a crazy bright hi beam indicator, it is simply blinding at night on a deserted road. One would think that the dash programming would dim it when it is really dark outside 😳 I added a single dot over part of the symbol, it should be less bothersome now. If it still is too bright I will remove that and put a bigger dot over the entire symbol. I really like these dots, highly recommended! John Davies Spokane WA
1 point
-
Oops. Thanks for the catch. See what I get for speed reading with too little caffeine... I fixed my post. I think I now understand why the folks in the video might have run theirs on high... when it made no sense to me...1 point
-
This actually talks about sweating in a low humidity environment, not high.1 point
-
I just bought both locks that you wrote about. I pick up the trailer in a month. Thanks for your recommendation. I do have a stainless steel locking pin to attach the hitch to the tv. I hope that's all I need. Proven sells a pin too, but I am not sure how much better it is than mine. John1 point
-
Here’s a link to the Truma site for a PDF copy. https://www.truma.net/sites/default/files/inline-files/AquaGo%20stuck%20in%20clean%20mode.pdf1 point
-
In all honesty I've been impressed with the basic set up right from the factory as far as solar goes. Only add ons I've done is bogart btms so I could gauge my usage per day and a 200wt suitcase. Never crashed and burned and on more days than not my soc would be back at 100% and this is with a pwm charge controller.1 point
-
I was just passing along BattleBorns Marketing info, I’m not an electrical expert and cannot vouch for their data. Apologies if this was taken otherwise. Perhaps I don’t understand, but I think your comment above is valid if you interpret their performance claim as the rate of charge. I interpret the performance claim of 5x faster refers to the charge efficiency, ie the time to bring a discharged battery up to a full charge. From what I’ve read, for any charge current (amps), a LiFePOH battery can fully charge up to 4x faster time than a comparable capacity AGM. That depends on many factors of course. Is this incorrect? If so, please explain. This detail is a huge benefit to those of us who dry camp and rely on our solar panels to recharge.1 point
-
Is their KBB dealer rating 4.4 out of 10?1 point
-
No thanks…. John Davies Spokane WA
1 point
-
Frank.. ( this is David now). Thank you so much for that life saving piece of info! No where in the Truma manual did it say that there was any other alternative other than completing a full decalcification process. I will be sure to print that page off and insert it into the Truma section. I hope others will learn from this and do the same.1 point
-
Battle Born's reliable, safe, and non-toxic LiFePO4 batteries last 10x longer than lead acid. Probably correct, I believe this to be true. They are 1/5th the weight for the same amount of usable power. Correct as written, but a lithium battery will still weigh 1/2 of what a similarly sized lead acid will weigh. They charge 5x faster. They CAN charge 5x faster IF you have a charger that can put out 5x the amps of what you currently have. require zero maintenance. NOTHING requires ZERO maintenance. and are backed by an industry-leading 10 year warranty. True…1 point
-
Problem solved! You are a lifesaver Frank. Thank you so much. This forum is invaluable. David read through 40+ pages in the manual and it never talked about this. Now for my shower 🥰1 point
-
@shalliwgal, we also use windy, along with three other weather apps, if we have cell service. Nice boots, and nice Cantori impersonation. 🙂1 point
-
Austin Service Center is a remote truck as Mike mentioned. Service Tech is doing mine onsite in three weeks, unless magic happens and he squeezes it in before our upcoming Alpine trip, but looks unlikely. Anyone want to buy a Dometic as a spare? 😉1 point
-
Congratulations and Welcome to the Oliver Family from Hull #1182!! We live in SE Ohio between Athens and Marietta.1 point
-
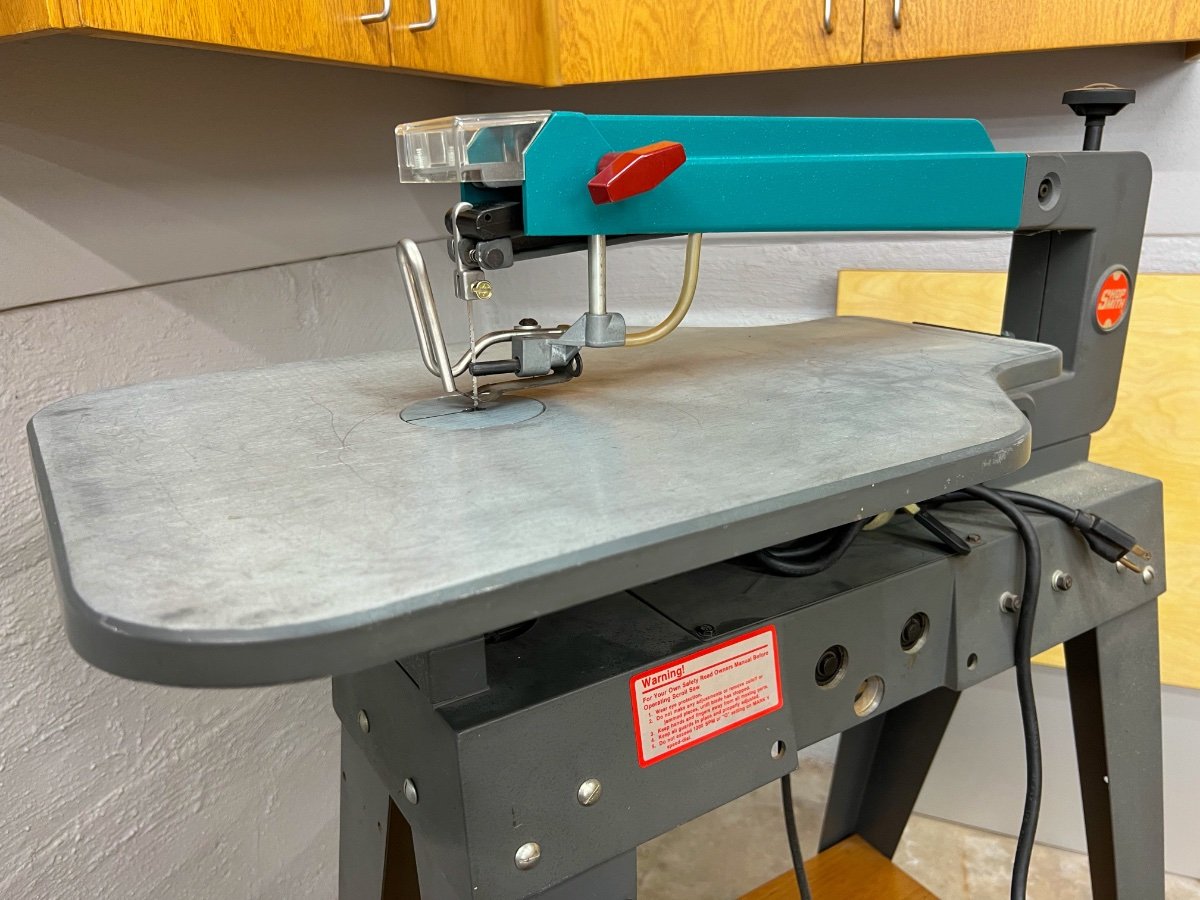
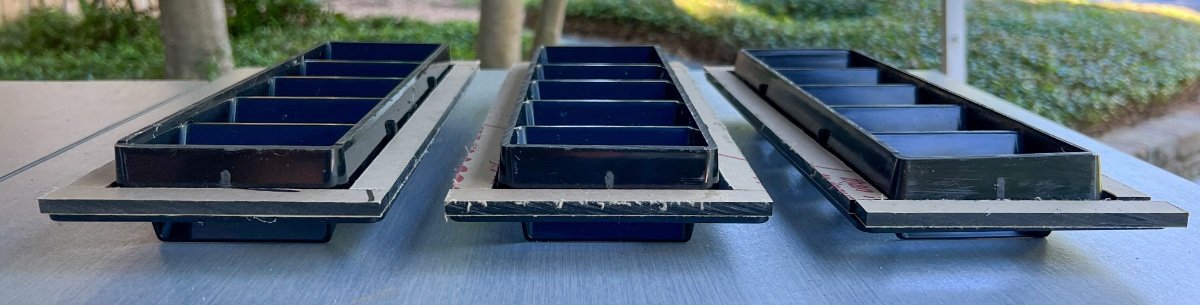
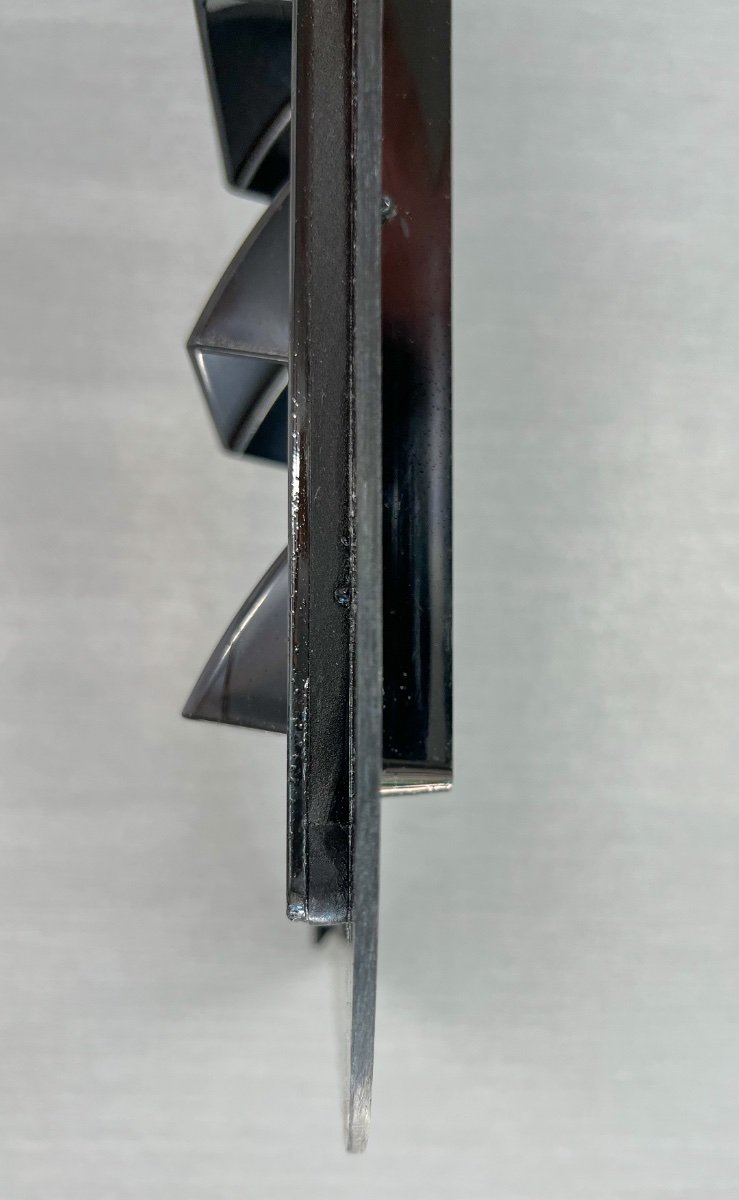
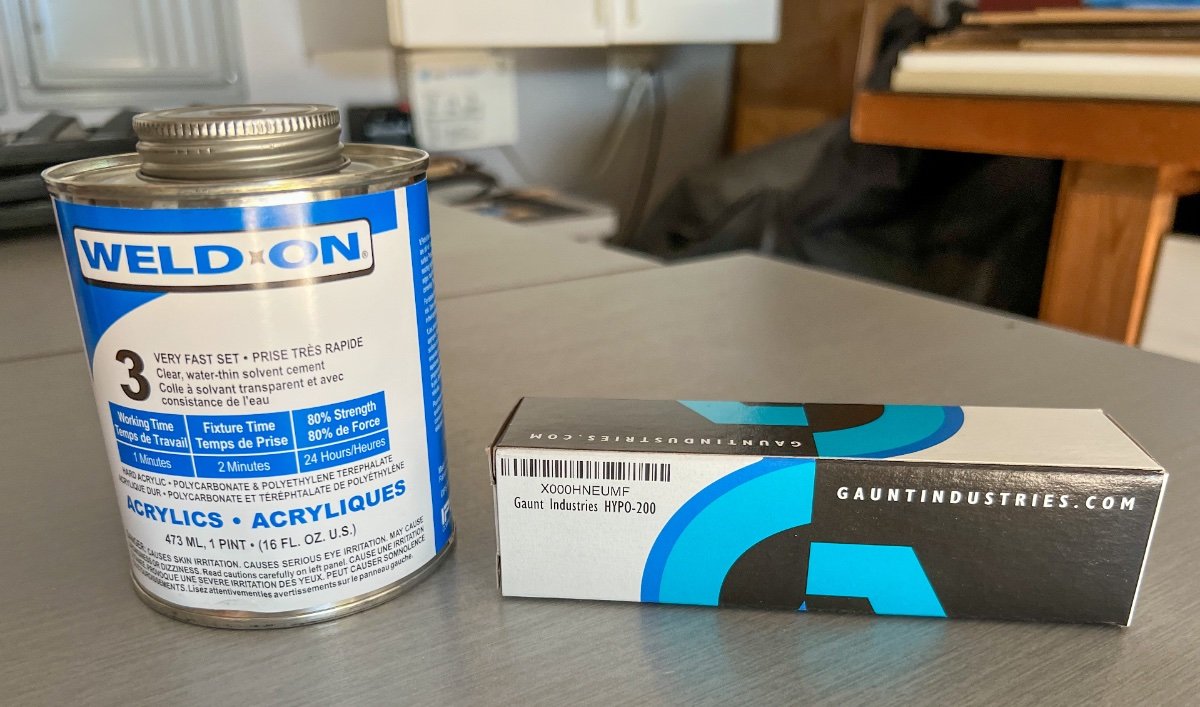
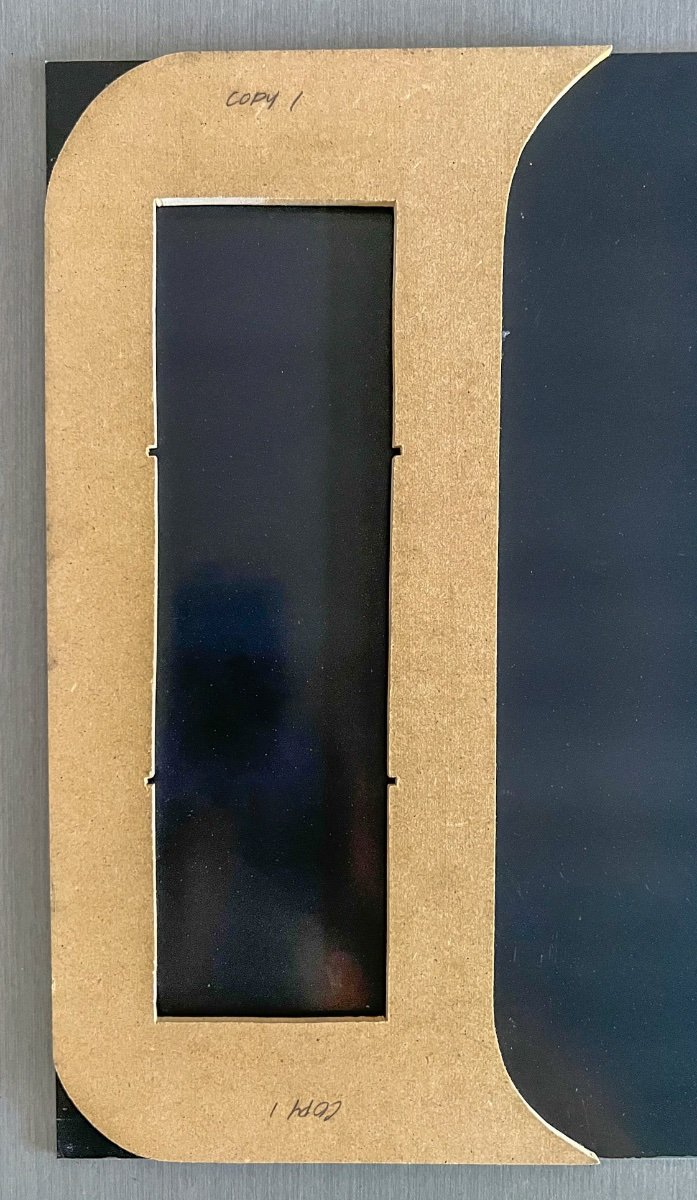
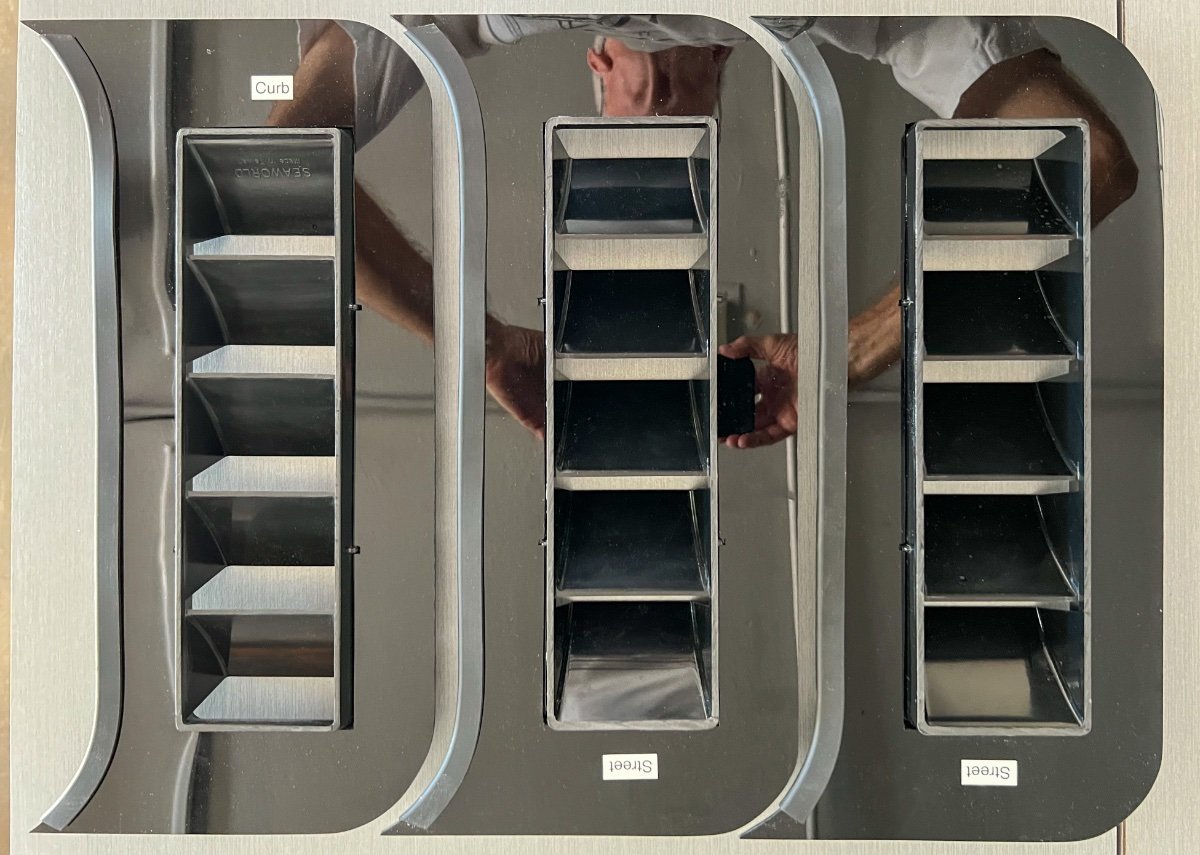
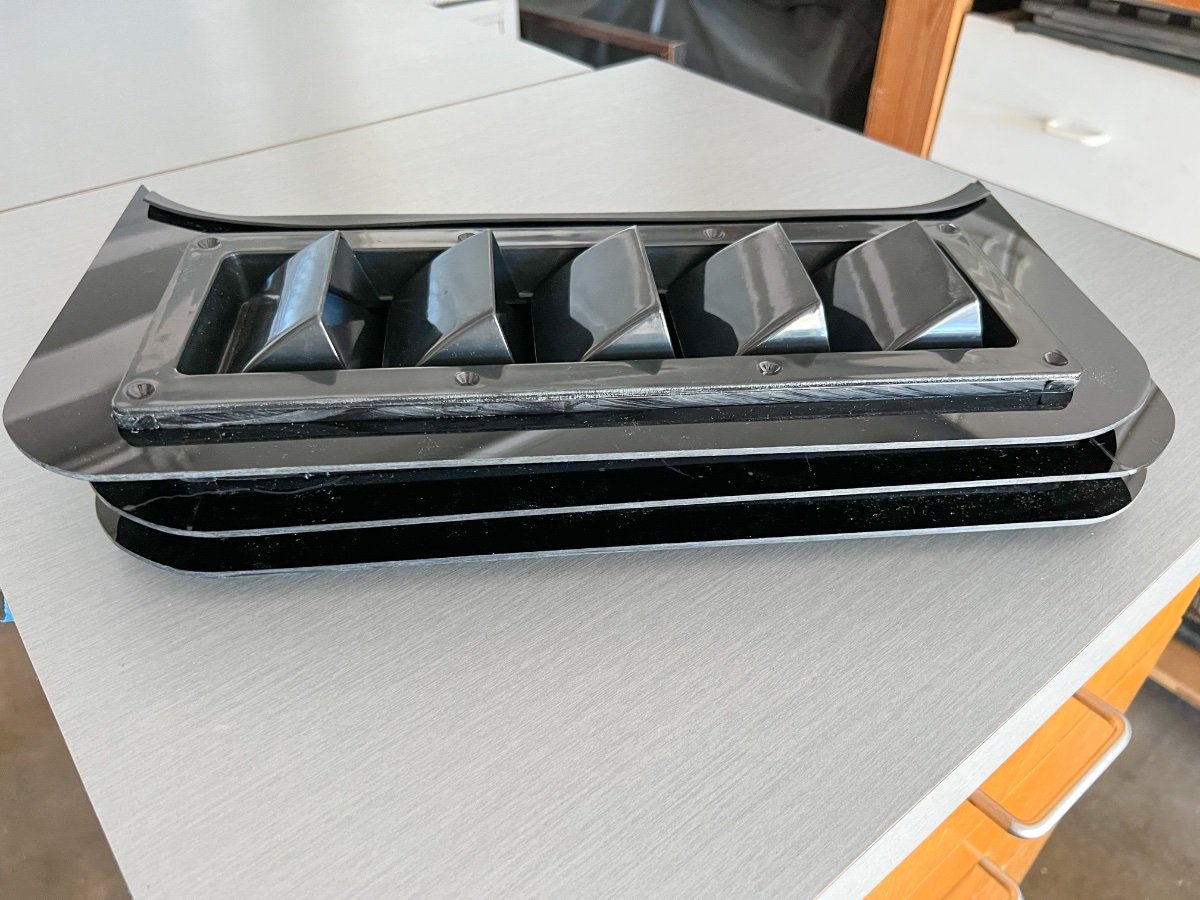
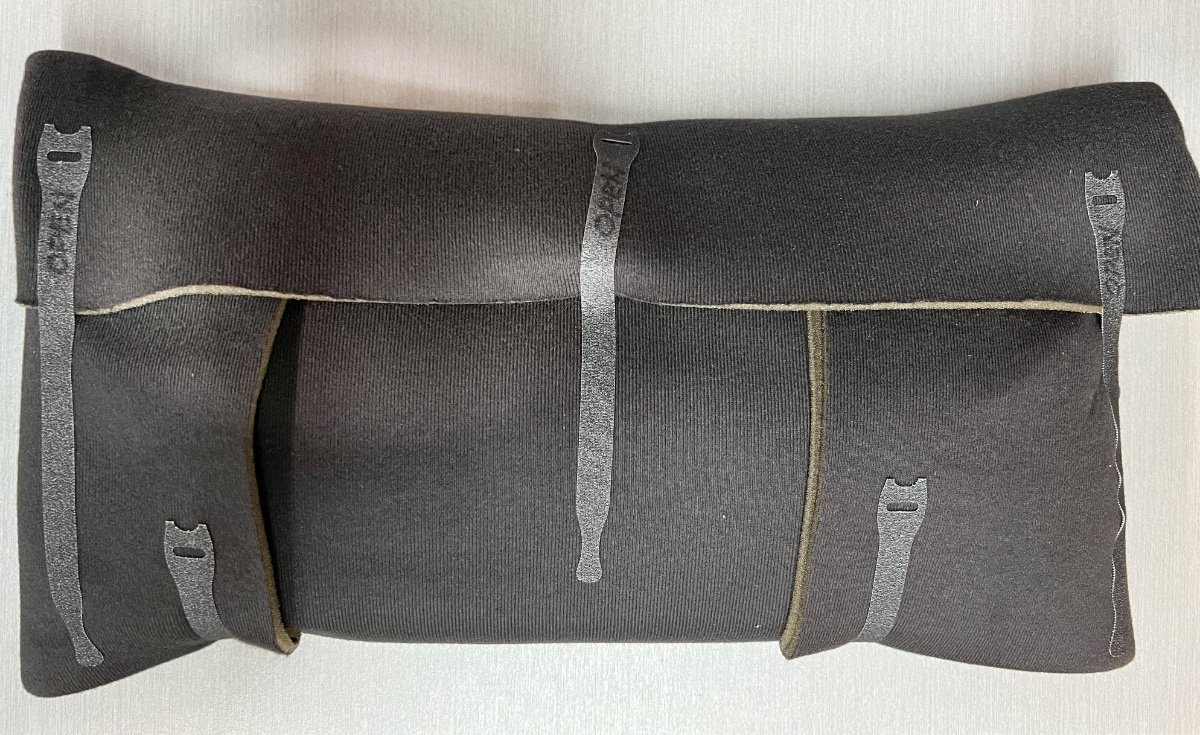
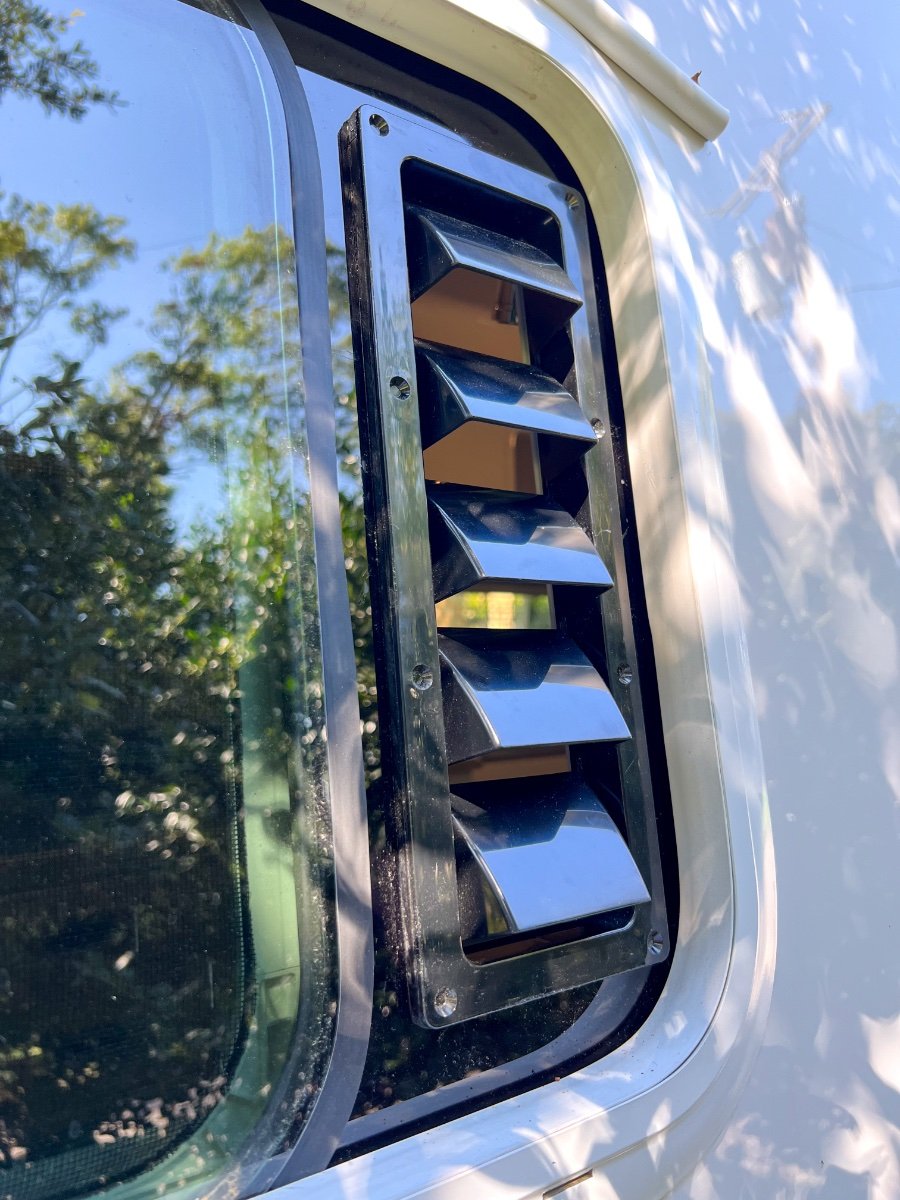
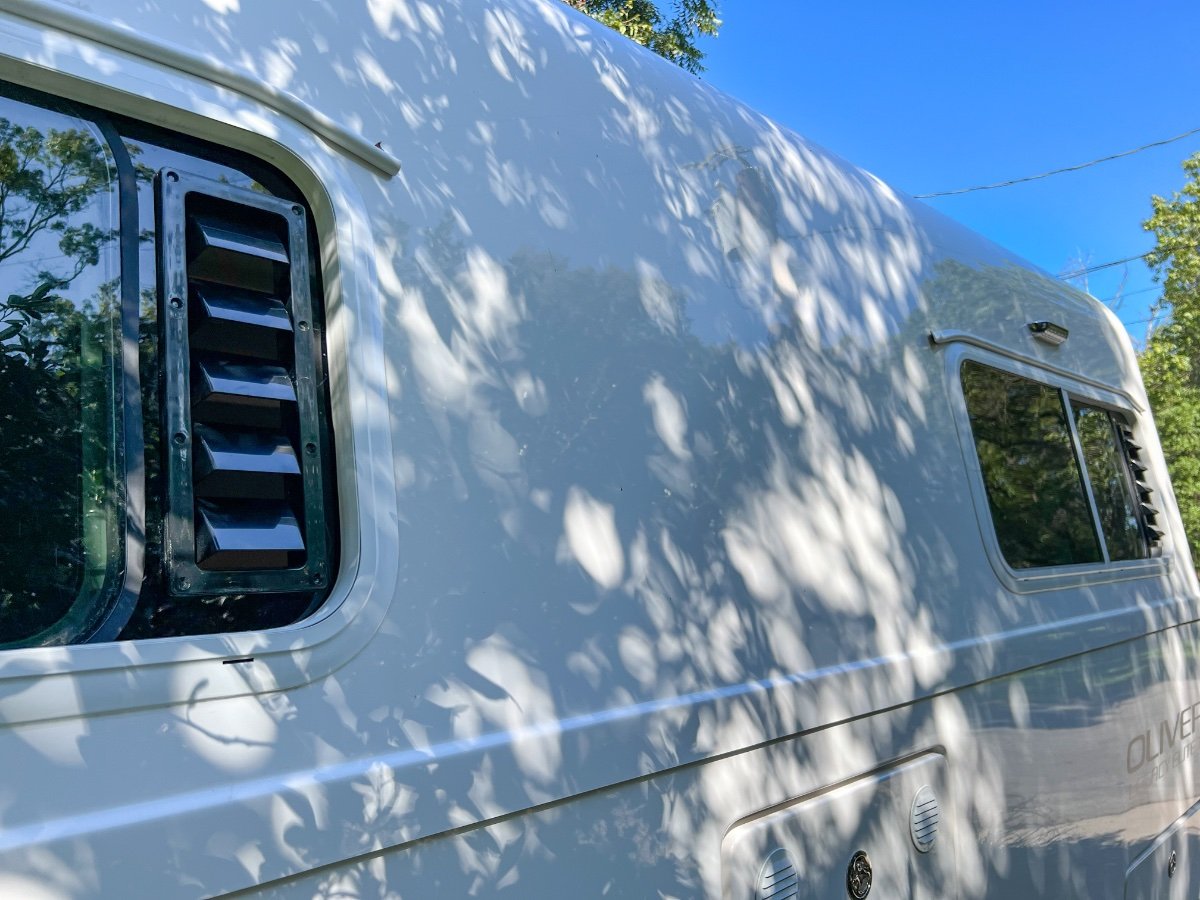
I recently undertook fabrication of a set of louvered ventilators for the three side windows of our LEII, following the excellent design posted by @csevel. I want to share some lessons learned for others who may want to fabricate a set for their Ollies. The window vent consists of two main parts, a purchased louver ventilator and a custom made acrylic mounting plate, shaped to fit a partial window opening, into which the louver is mounted. I executed the fabrication a bit differently from @csevel. Since I wanted to produce a set of three louvered ventilators, I made a template using 1/4" medium density fiberboard (MDF) for the mounting plate. I, too, used one of the window screens as a guide for the edge contours of the template to match the sliding windows and frames. The final mounting plate template is 16-3/8" tall and 6-5/8" wide at the midpoint. The rectangular opening is 3-½" wide x 12-1/16" tall. After tracing the screen contour for the vertical edges of the template, I clamped the window screen to the MDF and used the screen as a template for my router to follow, to cut the shape. Cutting external edges of MDF template I had purchased the White Water Plastic 5-Slotted Louvered Ventilators from Amazon, although they are now shown as unavailable. I recommend searching for other sources, such as West Marine. It appears the same product is sold under multiple brand names. I used one of the purchased louvered ventilators to determine the size of the rectangular opening required in my MDF template and centered the outline for the opening. Note the rear of the louvered ventilator is tapered, so the opening needs to be large enough to accept the entire rear projection through the MDF mounting plate template, with the flange of the louver meeting the mounting plate. The rear projection also has two reinforcing ribs on each of the long sides and one each on top and bottom, which require notching the sides of the opening for clearance. To cut out the rectangular opening in the MDF template, I first tried to use my router, but found it very difficult to control the router and tried various guides, unsuccessfully. Achieving accurate cuts freehand with the router was also very difficult. In retrospect, using a router table to cut the opening rectangle would not be too difficult if done with straight outer edges, prior to cutting the outer edge curves. Frustrated by my lack of skill with the router, I switched to using a scroll saw to cut the rectangular opening in the mounting plate. This requires drilling a starter hole inside the rectangle, then inserting the scroll saw blade. The scroll saw proved very useful in making accurate cuts to make the MDF template. I tried to cut the rectangular opening as accurately as possible, which was relatively easy to do. If a scroll saw is not available, I recommend using a high quality hand held jigsaw as another option. After cutting the outer curved edges and rectangular opening in the template, I sanded the edges smooth and inserted one of the louvers into the template to test for fit. I used blue painter's tape to hold the louver in the template while testing the fit in the window opening. Test fitting the MDF template and louver I inserted the MDF template and louver into the window opening to verify the curved side abutting the window fit closely, with as small a gap as possible. I made slight adjustments to the template with a belt sander mounted upside down on a work table. I also verified the template could be inserted into the window track while inside the trailer, without requiring removal of the window shades or screen. While inside the trailer, position the mounting plate and louver through the window opening and tilt the top topward the upper screen track. The mounting plate is first inserted into the upper track of the screen, then placing the bottom of the plate into the lower window track, then moving the top of the mounting plate from the screen track into the window track. Sounds confusing, but works easily after a few tries. When the mounting plate template is inserted into the window track and pressed against the window edge, there is space above and below the plate and the window track. Once the mounting plate template is in the window track, it should be lifted slightly as the window is moved to shut against the plate. This should result in the curved edges of the mounting plate mating closely with the curved outer edge of the window, top and bottom. Closing the window against the mounting plate secures it in place, seated against the vertical edge of the track and the edge of the window. After several trial fittings and minor adjustments to the template, I was satisfied the template mounting plate would fit snugly to minimize the chance of water leaking in at the junction with the window. I did all of the trial fittings on the street side window above the bed. Only then did I test the template in the other two similar windows, which is when noticed the edges of the three windows are not uniform. The street side aft window had some black sealant projecting from between the two panes of glass. On the other windows, the sealant material does not extend from the edge of the two panes of glass. When fitted against the outer pane of glass in each of the three windows, the mounting plate template proved to be a snug fit, when carefully inserted. As a final test of the fitment of the mounting plate template, I tested to verify each of the window screens would close. Initially, they would not. The rear of the louver ventilator projects one inch from the rear of the front flange, causing interference with the screen and preventing its closure. Since the louvers do not have any screen built in to prevent entry of insects, operation of the standard window screens is essential. @csevel indicated her screens would close with the louver in place. I suspect my louvers and hers may not be exactly the same depth. Or, since our trailers are five model years apart, there may be differences in our windows. My solution to resolve the screen interference issue was to reduce the rear projection of the louver ventilator 3/8" by: Removing 1/8" off the rear projection of the louver ventilators using a table saw; Fabricating spacers from 1/4" thick acrylic sheet to insert between the mounting plate and the front flange of the louver ventilators. Removal of 1/8" of depth from louver ventilator 1/4" Spacers dry fitted to rear of front flange of louvered ventilators In the photo above, all three louvered ventilators have had their depth reduced by 1/8" and 1/4" spacers dry fitted prior to cementing in place. The spacers are 9/16" wide, surrounding the rear projection of the louver ventilators. (The protective paper coating is still in place on the spacers in the photo.) Side view of spacers bonded to rear of the flange of a louver ventilator The spacers were bonded to the rear of the flange using acrylic cement applied using a small application bottle with a needle applicator (from small box in photo below). After dry fitting, I cemented the spacers to the louvers, starting with the top and bottom, while the side spacers were in place loose, without cement. After the top and bottom spacers were firmly cemented, I cemented the side pieces. I found using spring clamps to hold the spacer pieces in place worked well while the cement set. I test fitted the louver ventilators inserted into the template mounting plate to verify the interference problem with the screen was resolved. The screens cleared with very little space to spare. Fabrication of Mounting Plates Having completed the mounting plate template, I next made a copy of the template, also from 1/4" MDF, as a backup in the event I damaged the master template. Making a copy also served as a dry run for routing the acrylic sheet. Using double sided woodworking tape. I fastened the template copy to a sheet of 1/8" black acrylic sheet, in preparation for cutting the first mounting plate. (Use the woodworking tape sparingly- 6 pieces 1 inch in length is sufficient. Otherwise, it can be difficult to remove, with adhesive left behind.) MDF template on acrylic for routing From experimentation cutting scrap acrylic sheet with the router, I had found the router bit would quickly melt the acrylic sheet. To avoid melting the acrylic sheet, I removed the excess acrylic material from around the template and the rectangular cutout, leaving only 1/16" to 1/8" of material to be removed by the router bit. I was then able to obtain smooth edges following the template for final trimming with the router. With the template attached by woodworkers tape to the 1/8" acrylic sheet, I used the scroll saw to cut the acrylic, keeping the saw kerf 1/16" to 1/8" away from the template. This freed the first piece of acrylic from the larger sheet and removed excess acrylic material from around the template. I mounted my router, with a 1/2" flush trimming bit, to a small router table. I then proceeded to trim the remaining acrylic sheet from around the template, both the outside edges and the rectangular cutout. After routing the first mounting plate, I repeated the same steps two more times, attaching the template to the acrylic sheet, trimming away the excess material using the scroll saw, then making the finish trimming using the router mounting in the table. When I had routed all three mounting plates, I lightly sanded the edges of the acrylic mounting plates to remove the sharp edges. Assembly of louver ventilators to mounting plates The louver ventilators with spacers attached are dry fitted to the mounting plates. Once satisfactory fit is verified, the parts are ready to be cemented using the acrylic cement. NOTE: The louver ventilators for the Street side windows are oriented opposite those for use on the Curb side. Position the mounting plates properly to abut the windows and insert the louver ventilators with their louvers on the outside and the louver openings facing down. I found it easiest to start by cementing one of the short ends of the louver ventilators to the mounting plate, using a couple of spring clamps to hold the parts together until the cement formed a firm bond, which takes about 5 minutes. Proceed to cement successive sides of the louver ventilator to the mounting plate, one side at a time, applying spring clamps until the cement cures. Use the needle applicator to apply cement at the intersections of the parts. Allow the cemented parts to cure overnight. The acrylic cement is very effective at welding the acrylic parts together, producing a very rigid assembly. Completed set of louvered ventilators and mounting plates After assembly, I added the same rubber edge trim recommended by @csevel to the edge of the mounting plate which meets the window edge. This trim seems to conform well to close any gaps between the windows and the mounting plates. The completed units are quite rigid and nest reasonably well. I set the width at 6-5/8" for two reasons: To yield three mounting plates from a 24" x 24" sheet of acrylic To keep the mounting plates and louvers as small as possible to facilitate storage in the trailer. I made a pouch to contain the louver ventilators to make it easier to store them without concern for damage to them or to other parts of the trailer. I had leftover car headliner material, which is relatively thin, with a foam backing, to which Velcro straps readily attach. Summary This project, which I first thought rather simple, provided several challenges. I spent much more time than expected to achieve an acceptable result. Given the extended drought and high temperatures in Texas, I have not had an opportunity to test the effectiveness of the vents, nor how well they keep rain out. In a week we depart for a two and a half week trip to Colorado to photograph fall color. I expect we will encounter some test conditions in the mountains. I hope this information is useful. Please feel free to contact me with questions. Regards, Don
1 point
-
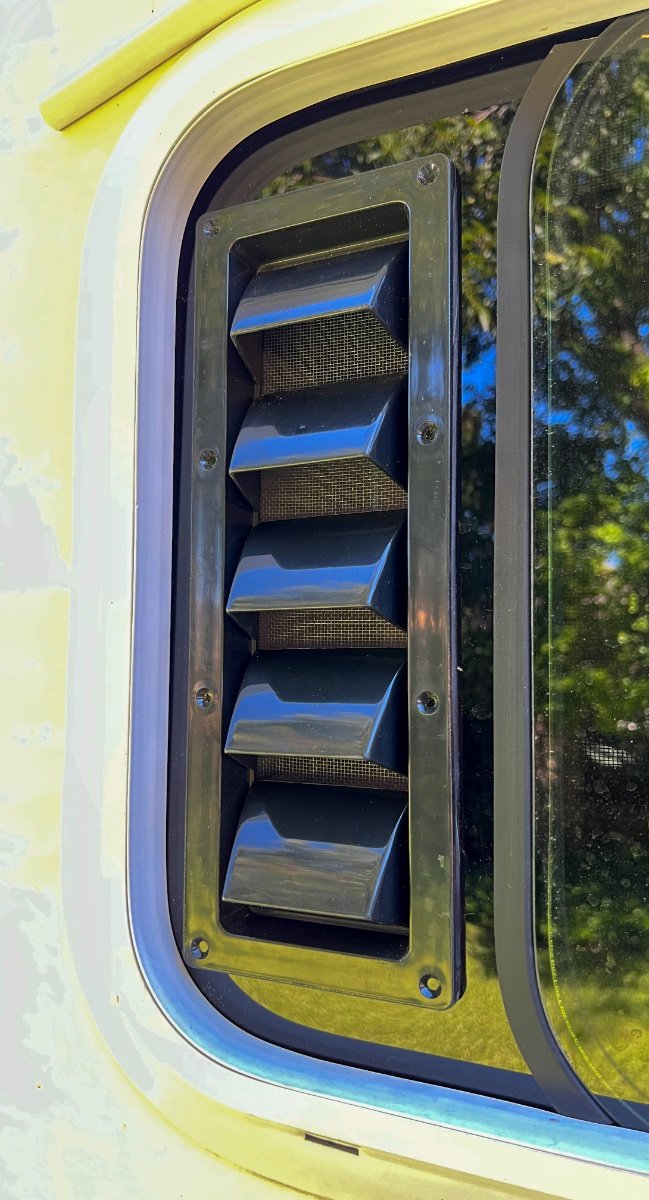
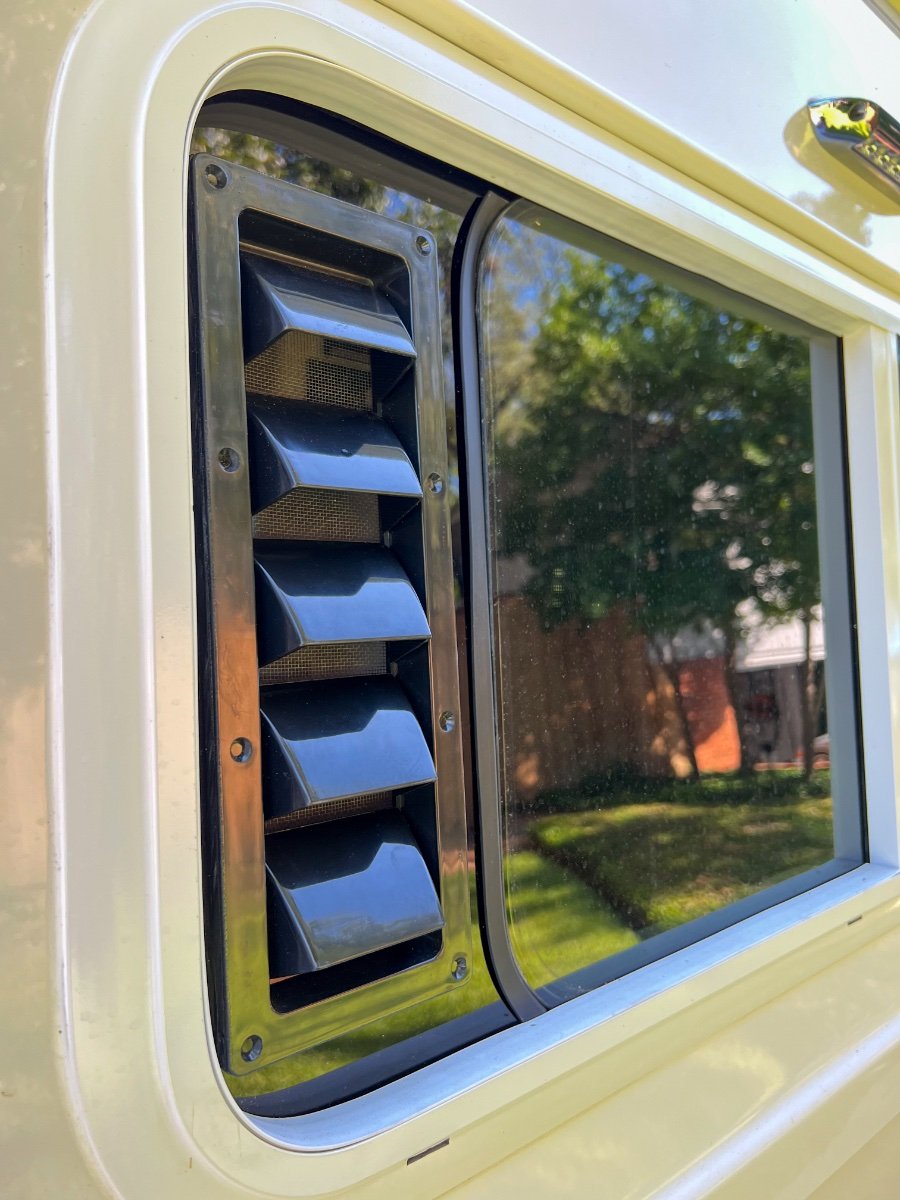
@hobo, my apologies. Please see photos below. Note the screens are not in the fully closed position in some of the photos. As I mentioned, there was some variability on the edges of the sliding windows, however, the rubber edge trim conforms reasonably well to close small gaps between the mounting plates and windows. How effective this is in preventing water penetration remains to be seen. I anticipate we will have opportunities to conduct field tests during our trip to Colorado over the next 2-½ weeks. I would not rule out the possibility for the vents to be mass produced, but I have not had any opportunity to test them across model years of LEII trailers. The most critical dimension to control is the depth to which the rear of the louver vent projects inward, toward the sliding screen, before there is interference. There is space above and below the mounting plates. The vertical position of mounting plates is determined by the match of the upper and lower curves of the mounting plate fit with that of the windows. I have no idea how much dimensional variation there might be in windows installed by Oliver over the model years.
1 point
-
I haven’t found it to be but: In 2018 when I ordered, the awnings were manual and, having the additional “street-side” awning, my sop is to extend both 12-16 inches. This is enough to provide both rain protection and midday shade. Wind damage has not been an issue and I’m typically where much of the “agriculture” theses days has three-blades.1 point
-
Yep, but pretty common with Toyotas these days. I got my 2021 Land Cruiser $9000 under sticker. Three months later, they were selling ( not asking) for $30,000 over sticker, until every last one in the US was gone. Crazy time! Which is why used cars are going for more than they cost when new.1 point
-
One slightly off topic comment….. for five camping seasons I have been hating the back lighting on my Furrion radio head. The normal mode is very bright, when I switched it OFF by pressing the POWER button It dimmed a little and showed the time. I have been pulling the circuit breaker for it sometimes….. until I finally read the @#$&* operating manual, a week ago. Does a long press sound like a logical design? Not to me. But now the display goes completely black when I turn it off. John Davies Spokane WA
1 point
-
There are other options. I use Fort Knox locks. Not as expensive as Proven Industries. But robust enough for me. https://ftknoxlocks.com/shop/ols/products/bulldog-lock1 point


.thumb.jpg.e34bf01ef7f7d5e99ad31856d45afbeb.jpg)


-
Recent Achievements
-


")


")


")
