Leaderboard


Popular Content
Showing content with the highest reputation on 04/13/2023 in all areas
-
Following our first substantial (approx. 6,000 miles) road trip with our 2022 Oliver the Andersen Weight Distribution/Sway Control Hitch began making noise. Following a communication with Andersen they quickly sent a new friction cone at no cost under the lifetime warranty. Upon receipt of the new friction cone it was apparent that the old damaged friction cone was not going to come out as removal was impossible. Another phone call with Andersen, the same day as receiving the friction cone, Andersen committed to send a new hitch (again at no cost under the lifetime warranty) via three day UPS delivery. The replacement hitch arrived today and installation is complete and all is well. This post is NOT a complaint regarding the Andersen Weight Distribution/Sway Control Hitch. This post is to publicly recognize & share the quality and timely customer service of Andersen. I have share my thoughts and thank-you with Andersen.8 points
-
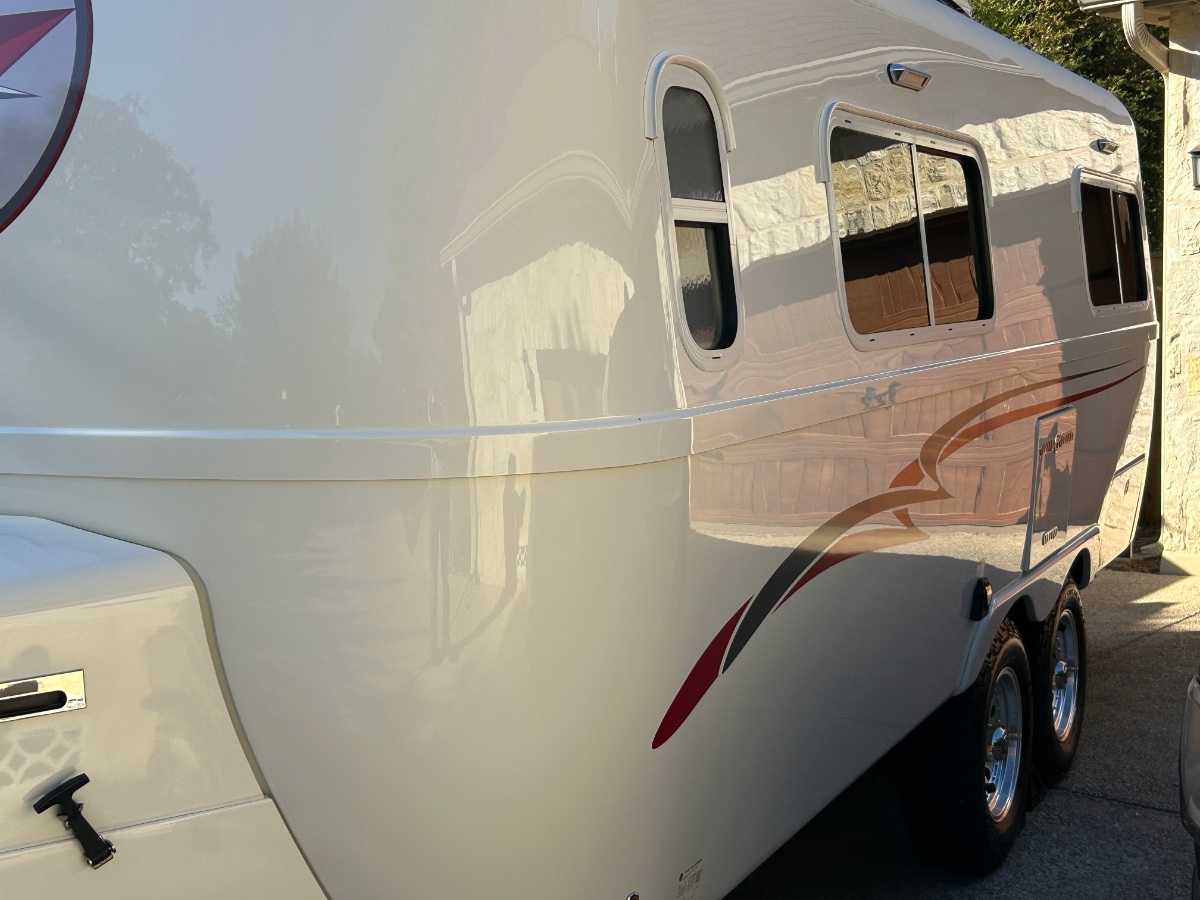
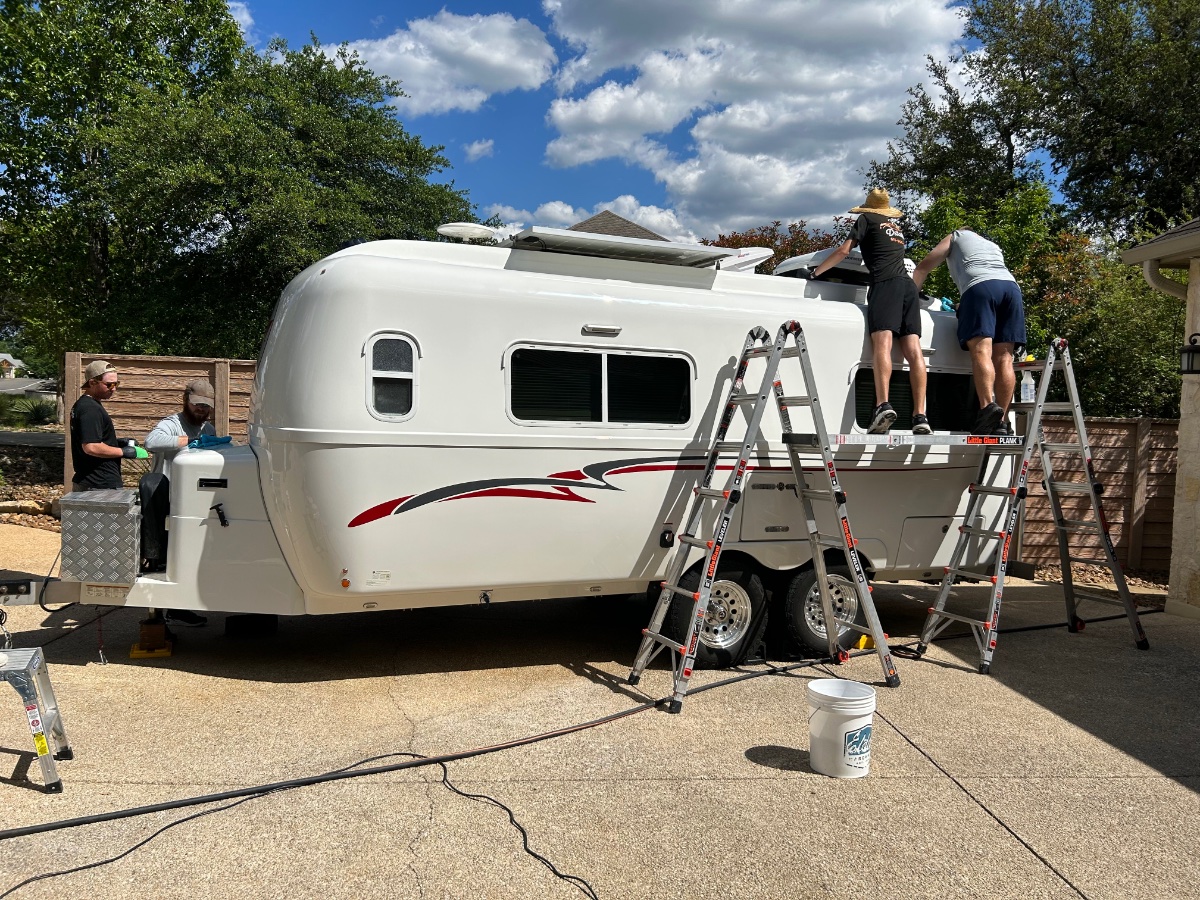
The CGI guys worked almost 12 hours straight yesterday to get our 7 year old trailer looking better than the day we picked it up!
 6 points
 -
I see absolutely nothing inflammatory about the above threads. If a forum member sees any of these posts as inflammatory it’s because they make a clear obvious choice to look at it this way. These posts are merely respectful greetings of the love, joy and the everlasting peace of celebrating Easter and greeting each other. He is Risen!! Patriot🇺🇸6 points
-
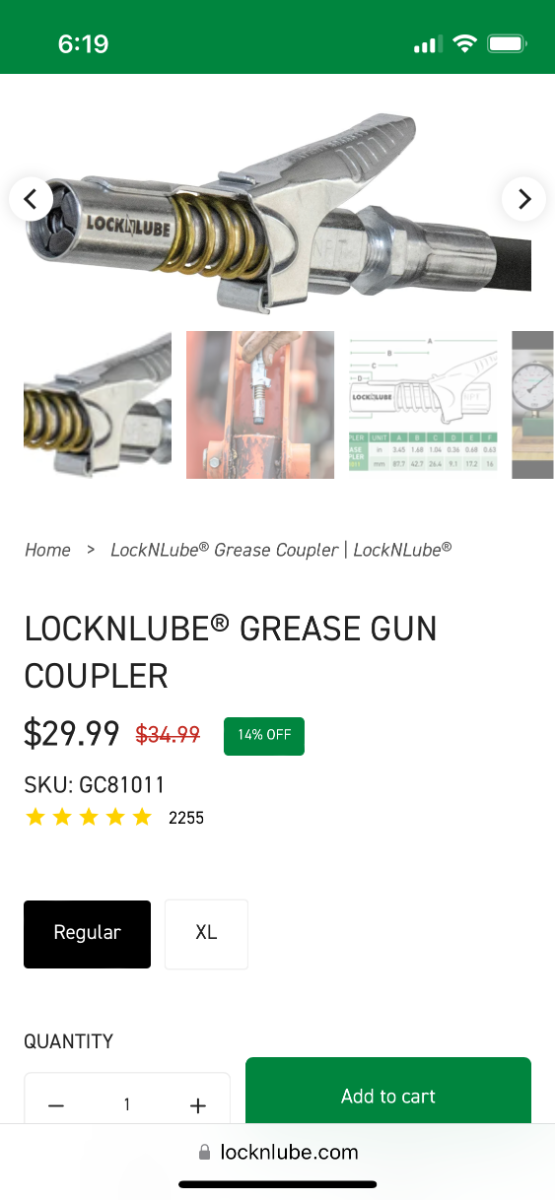
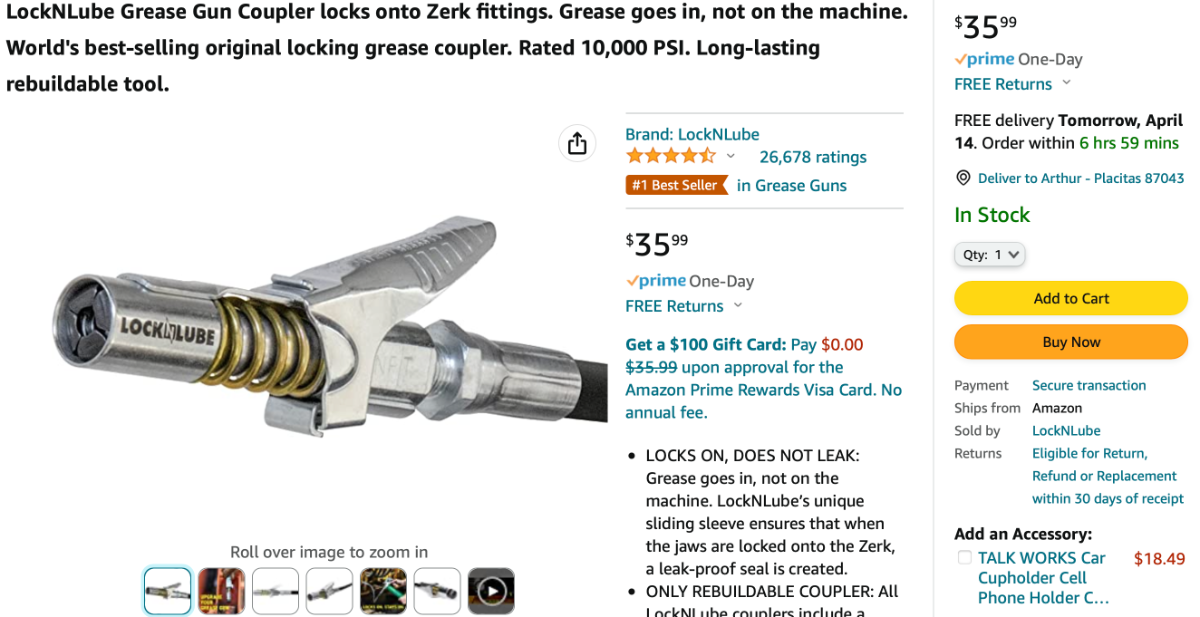
Yep, it is worth twice that, you can buy the fitting direct too, ships free. https://locknlube.com/products/locknlube-grease-coupler?variant=32586284204116 I have used one for years, I have been reluctant to recommend an attachment that costs more than most grease guns. But OTH I also use an expensive pneumatic gun. Just buy it and enjoy it. John Davies Spokane WA
4 points
-
I noticed that the awning on our 2014 Elite II sometimes takes a while to get it fully retracted. On closer inspection, I’ve discovered that Tali’s arm was giving out at about half way and she was having to rest a while before finishing winding it completely in. Glad it wasn’t something more serious.4 points
-
The ceramic coating sure looks great on H-#135! "WAX-ON, WAX-OFF" FYI: We took a couple days on H-226 to get a baseline wax job done. Phase 1: We start the 3-phase process with a general cleaning using a very diluted Simple Green wash-down. After the wash-down, I complete the cleaning phase using a "ceramic mitt" which removes any oxidation and generally cleans the gel coat to prepare it for waxing. The mitt is kept moist by a continuous spraying of the Simple Green solution. The CGI guys use the ceramic stage as well in their process. Phase 1 takes about an hour. Break out the elbow grease. Phase 2: Applies a synthetic wax material which is an advanced polish and buffing creme. It removes any staining and oxidation from the gel coat not removed by the ceramic mitt. It's very similar to McGuire's RV polish (which I used previously). I apply this material with a Cyclo Model 5-Pro, a 2-head polisher which saves tons of time. The buffing creme goes on with the yellow-colored foam pads which are a bit stiffer than the green-color pads used in Phase 3. Phase 2 takes me about 4 hours. End of Day-1: Break out a beer (or 3) and enjoy the Ollie Shine. Phase 3: You'll think you're done after Phase 2, but my professional auto detailer buddy insists that the buffing creme should be stabilized and "fixed" with an application of a high-quality carnuba/polymer high gloss creme wax, called, "Banana Creme Wax." Switch over the pads and away we go... 4 hours later and the beer appears. I start from the top and work my way down to the LED courtesy lights. I'm impressed with the final outcome and according to my buddy, the Phase 2 product will last a year provided a couple applications of "Banana Creme" is done. I can live with a half-day of polishing every 6 months. It sure makes washing an easier endeavor after this coating is on. As you see in the pic, both products are made by an outfit called, "Auto Brite." FULL DISCLOSURE: As a former vintage AS owner (both a 25 and 31-footer), maintaining the Ollie's gel coat in this manner is ahelluvalot easier than keeping the mirror shine on those babies! And, oh, that Cyclo in the picture, it's my second one - burned out the first one on the 25-footer, HA!
3 points
-
@MAX Burner 👍🏻🙏🏻👍🏻🇺🇸 Safe travels on your trip to Mexico and please post up pics of your adventure! We all like Ollie in the Wild photos! 😊 Patriot🇺🇸3 points
-
I am fairly certain that it is welded at the upper mount. You might have better luck fitting rubber motorcycle fork or 4x4 shock booties. https://www.amazon.com/Supreme-Suspensions-Universal-Lifted-Trucks/dp/B07K4CSQSD/ref=sr_1_18?crid=FQ28L7L7JFB6&keywords=motorcycle+suspension+rubber+boot&qid=1681360885&sprefix=motorcycle+suspension+rubber+boot%2Caps%2C211&sr=8-18 Clamp the top to the upper mount with a plastic bushing, cut off the bottom and let it dangle down over the shock body. leave the bottom open for drainage. I’m not saying that would work, but I think changing the steel ones is a non starter…unless you are a skilled welder. John Davies Spokane WA
3 points
-
I might order both shocks and see what kind of a mess I'd get into if I tried to retrofit the shield from the Monroe. It's unfortunate that there isn't a better option out there. Ultimately, I'm sure I'll end up ordering the Monroe's and keep my fingers crossed that I get 4 decent ones. Thanks for the clever idea GJ!3 points
-
Amen Patriot!!3 points
-
That is an impressive shine you have on that Ollie! Nice work! 😊2 points
-
Mike, Hull #135 looks amazing! CGI does nice work! Patriot 🇺🇸2 points
-
Thanks for the vector, John. Getting one today....2 points
-
Anyone tried this grease gun? Looks promising....
2 points
-
@Patriot: Couldn't have worded it better, brother! Enjoy the rally - wish we could join you there! 😅2 points
-
Could you rob the shield off the Monroe shocks and use it with your KYB's and reuse the old Monroe cupped washers too? GJ2 points
-
When this happened to me a few years ago - I simply went looking for a tool that was just the correct size to use in spreading the clips (gently) a bit further apart. Don't overdo this - you will know when you get it right. Those shades should be tight and should be able to be set properly with a sharp "wack" with the heel of your hand. Bill2 points
-
@rideandfly@MAX Burner When the time comes for our shocks to be replaced I will consider a set of these for the new shocks. They are likely to last a lot longer than the cheap rubber bushings - https://www.summitracing.com/parts/ens-9-8101r?seid=srese1&gclid=CjwKCAjwrdmhBhBBEiwA4Hx5g1EmNbsDrEQeAq0_LONOYG_UhdlvY6ePhChw2orxOwCvV5eUD0qi7hoCoC0QAvD_BwE Patriot🇺🇸2 points
-
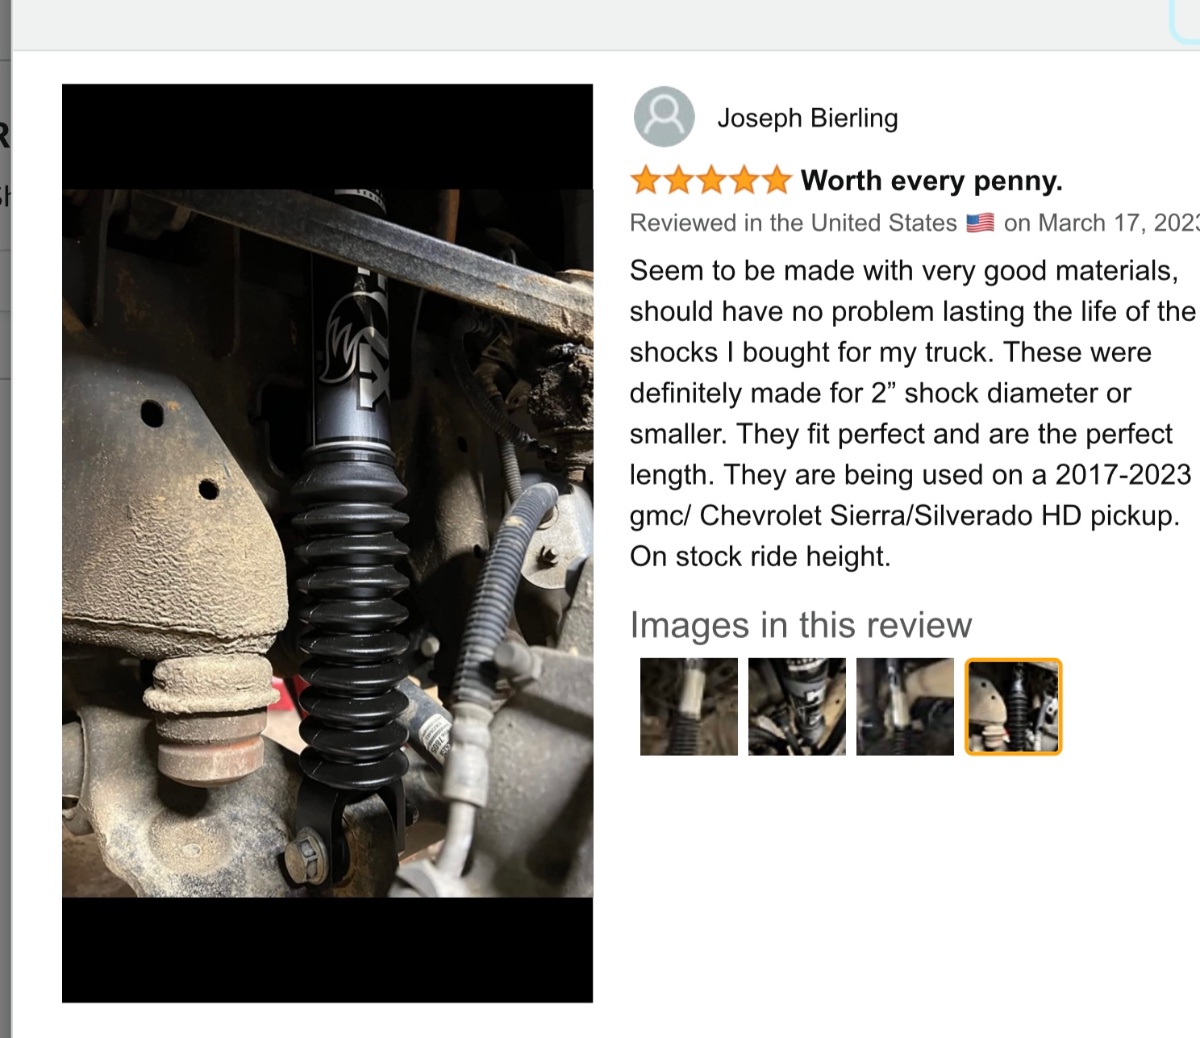
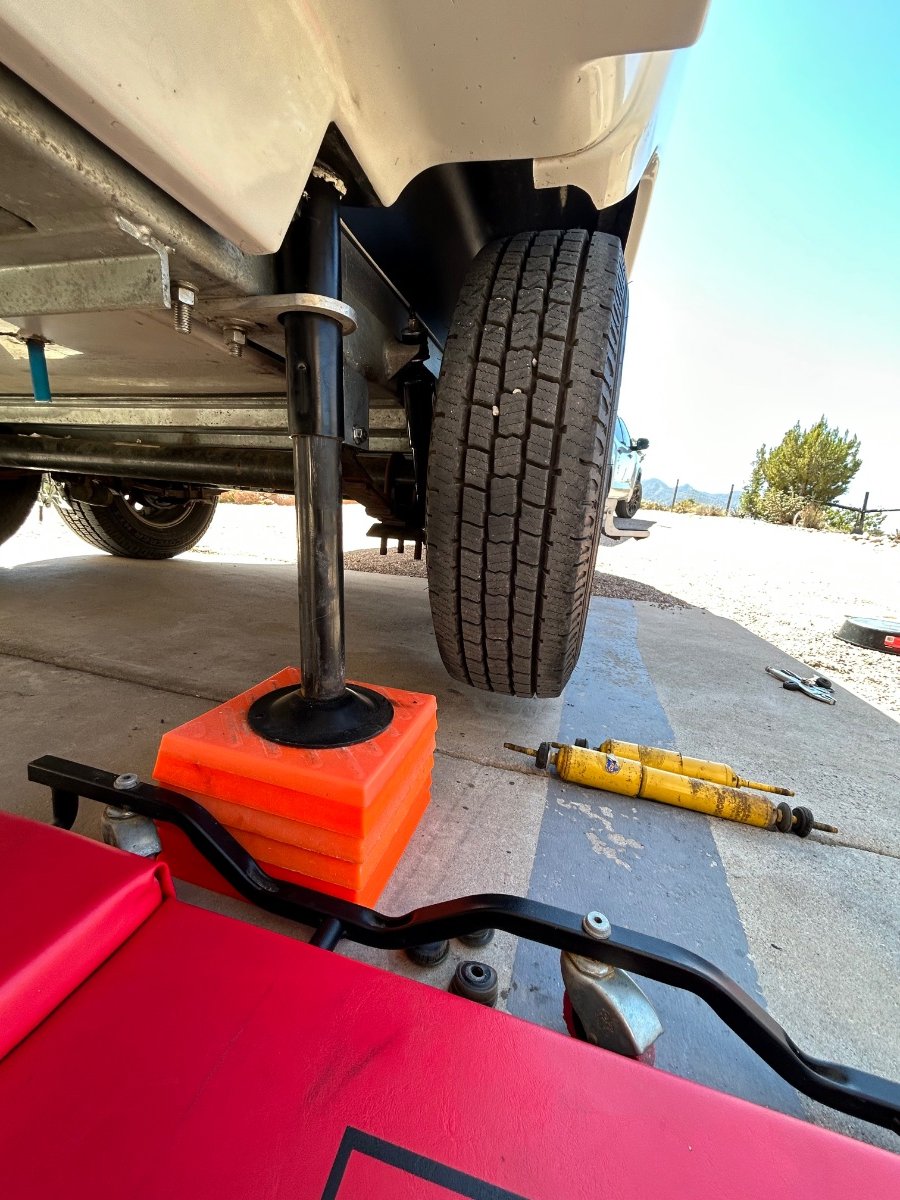
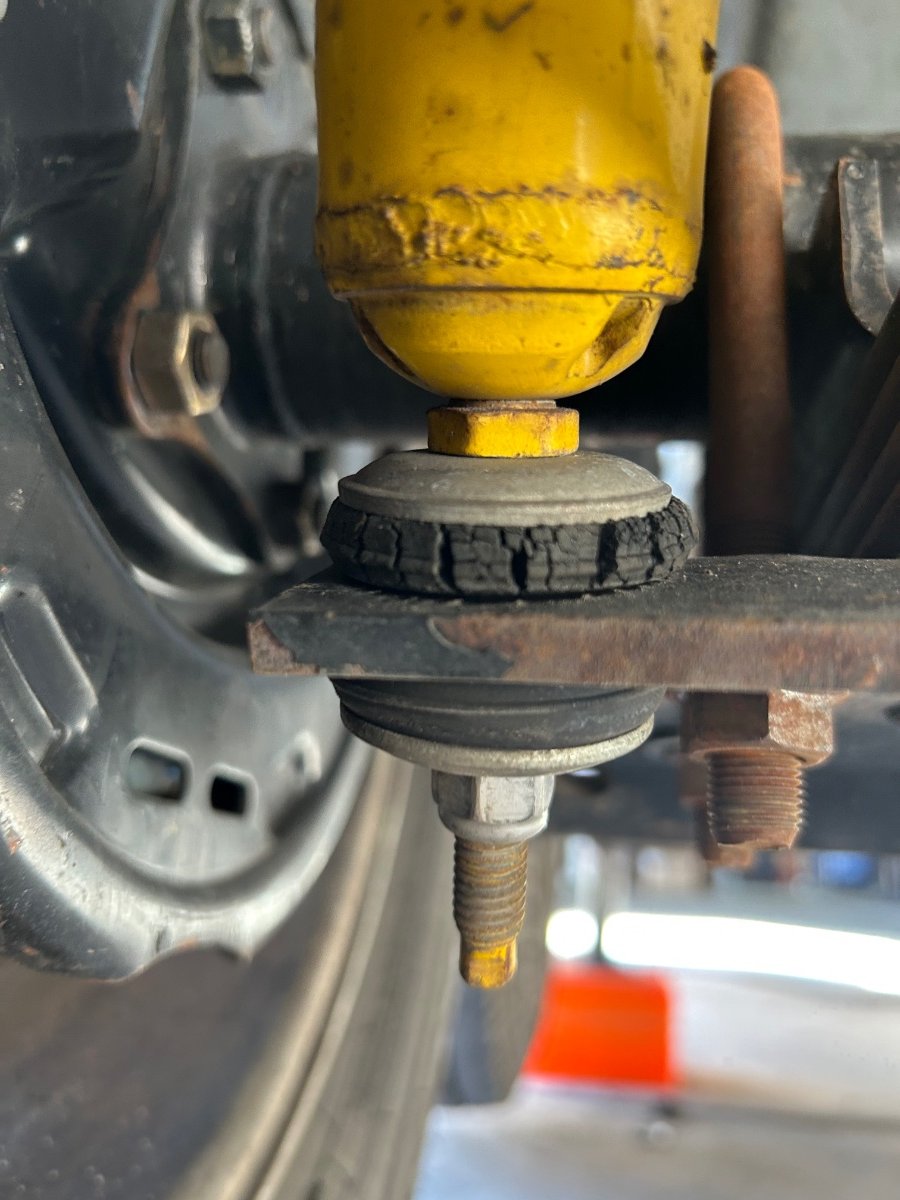
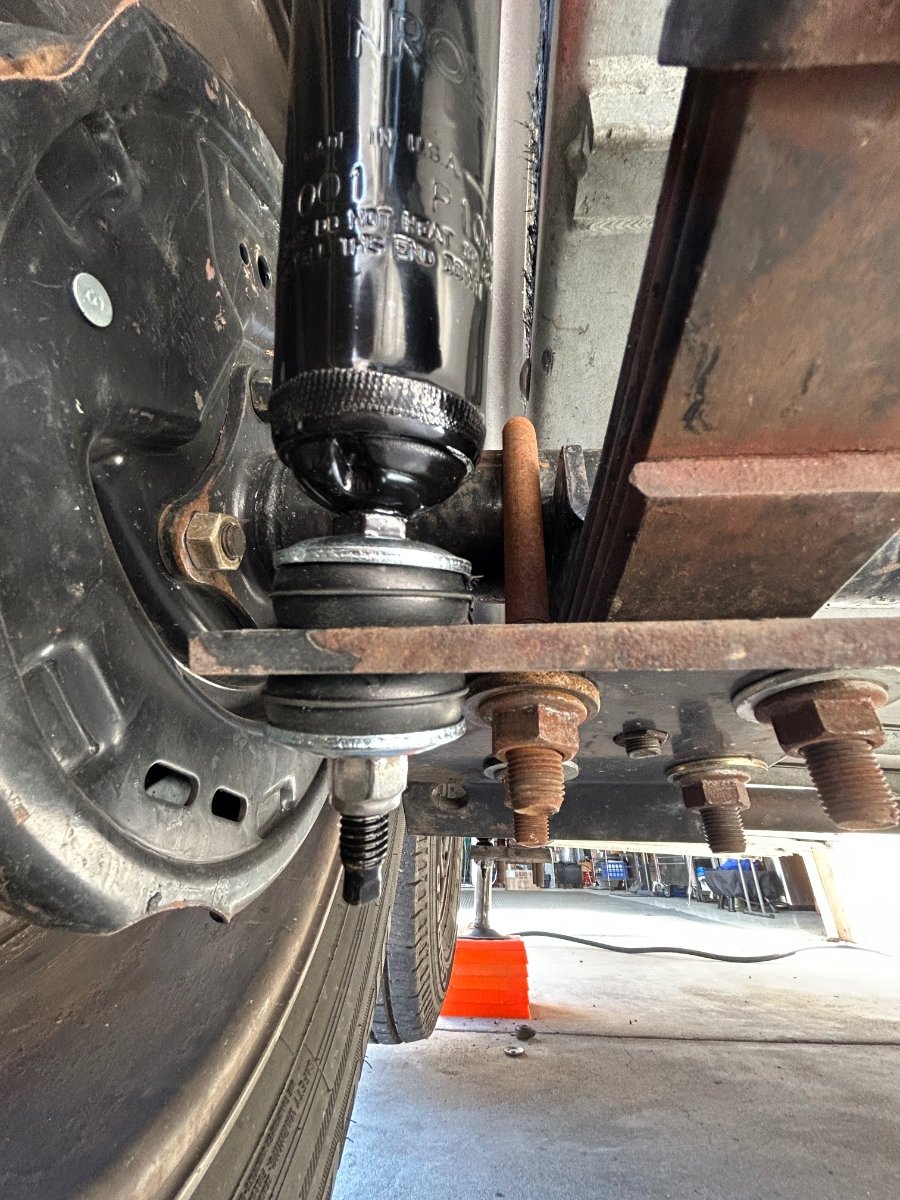
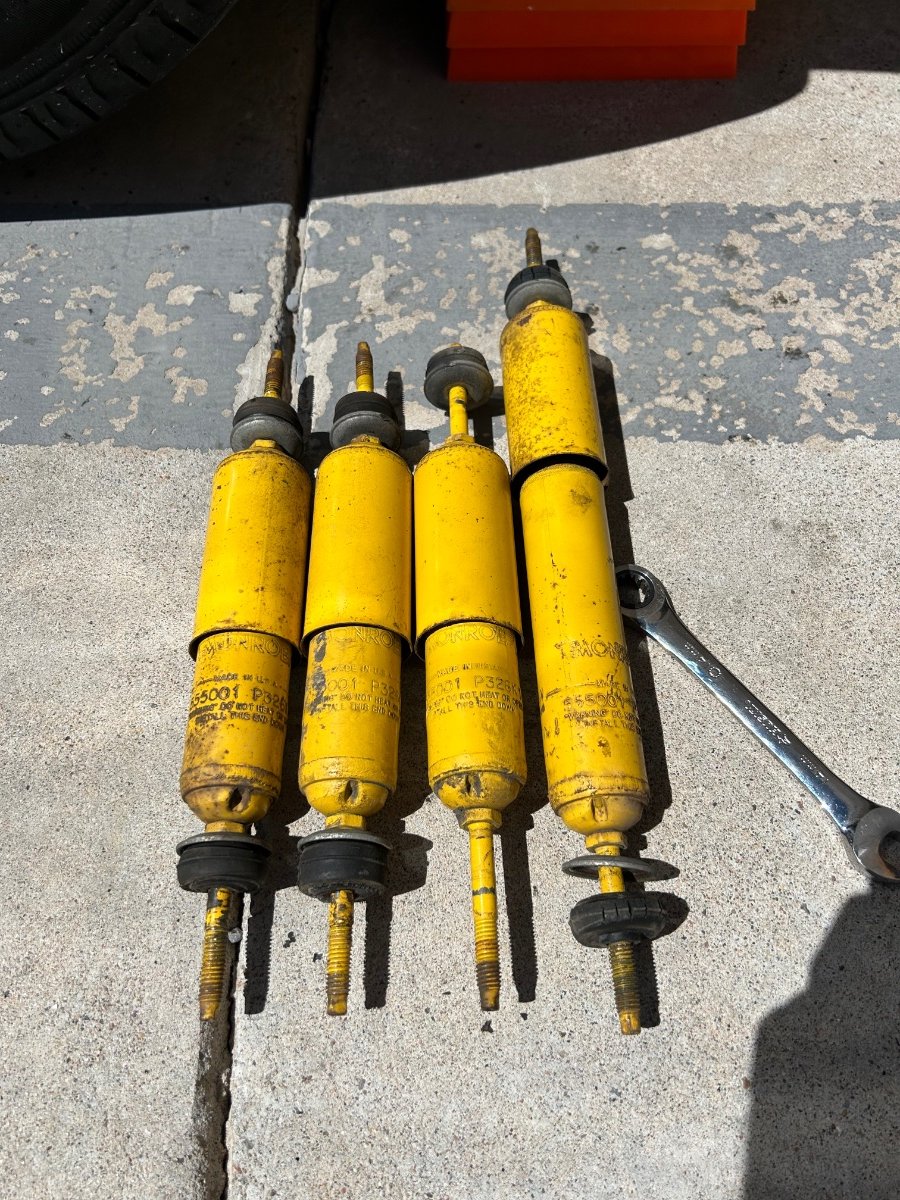
OK... SHOCKS. Back story: I noticed last week that we may have a couple of leaky Monroe shocks after doing a fairly major undercarriage power wash of our Ollie's running gear. That said, I ordered 4 Monroe replacements last Thursday and we wandered off for an extended Easter weekend at a lakeside state park in southern NM to get into some warmer climes. Anyhow, that was a 380+ round trip drill, right? So, as I was cleaning the rig this morning, FedEx arrives with the replacements - perfect frigg'n timing. I jacked-up and jack-standed the Ollie and commenced the shock R&R drill many of you have done over the years. Here's the deal... I'm fairly certain the shocks I removed on this drill were originals from the Oliver factory. The R&R went smooth as it could have. The only modification was adding fender washers on the upper and lower brackets and fresh nyloc nuts. At the end of the day - uplifted peace of mind regarding the running gear package. As it turned out (see pix) 3 of the four Monroes were Tango Uniform - they were just along for the ride and not providing any stability to the overall suspension system. A functional shock when compressed will expand to its fully extended length. The pic shows 3 of the removed Monroes compressed and not extending. Only one was marginally operational. Not good, IMHO. RECOMMENDATION: I believe these units were at least 5+ years old. So, if any of y'all out there are kinda like me and can't sleep at night when you know something's "not quite right" - and you may have 5+ year old vintage shocks, take a couple hours and check 'em out before your next road trip. Granted the Ollie suspension isn't "bomb proof" but it is somewhat robust as compared to other SOBs. With dual leafs and the Dexter coupler, the shocks contribute to stabilizing g-forces and actually aid in reduceing tire wear while being towed. That is... if the shocks are working as designed and not blown out. I'm planning to check them annually when I do my wheel bearings... Just say'n. Safe travels --- looking forward to seeing y'all down the road, until then; Cheers!
2 points
-
All of my zerks are oriented to the inside of the frame. So I use a creeper and the only trouble spot for me is getting my belly under the axles.🤔 Mossey2 points
-
1 point
-
Joe - congrates on the Oliver. I too have the 4 six volt Trojan T-105's and they were original equipment on my 2016 Elite II My watering system is similar to yours. Whenever my Ollie is in storage I keep it covered with a CalMark cover and simply hook up the batteries to a single 25 watt solar panel. Over the past 7 years this has maintained the batteries at full charge with no issues. However, as these batteries are now at or beyond their "normal" life, I'm keeping a very close eye on them because I know that the end is neigh. I suspect that your batteries may have already met that "neigh". Bill1 point
-
Mark - I've never felt the need for a sway bar for my F-150 and I have both the max payload and max tow packages on my FX4. Ford does require the Andersen weight distribution hitch (WDH) because the hitch weight will be over 500 pounds. For what its worth - all of the other 1/2 ton trucks also require a WDH. While the Andersen does have an incorporated anti-sway function I'm certain that you will never use it since Olivers do not sway. Bill p.s. as far as wiring series versus parallel - simply Google it and you will get a bunch of diagrams showing you the way this is done.1 point
-
@Patriot 🙌🏼👏🏼👏🏼👏🏼❤️❤️❤️1 point
-
The only weight distribution hitch that works with the Elite II is the Andersen. I expect your F150 owners manual requires a weight distribution hitch when towing over 5K lbs. If so, you need the Andersen. We use an Andersen with our 2019 Tundra tow vehicle. Once you get used to it, easy-peasy.1 point
-
Hi Mark, I tow with a 1 ton F350 so I can’t really answer your question. Our truck does not require the Andersen weight distribution hitch or any other modifications or upgrades to tow and LE2. @topgun2 or @mossemi both have F150’s and may be able to chime in. Patriot🇺🇸1 point
-
Hopefully the CGI guys didn't use up all of their polish on 135 - I'll be getting Twist done in about 3.5 weeks by these guys back in Murfreesboro, TN. Can't wait 🙂1 point
-
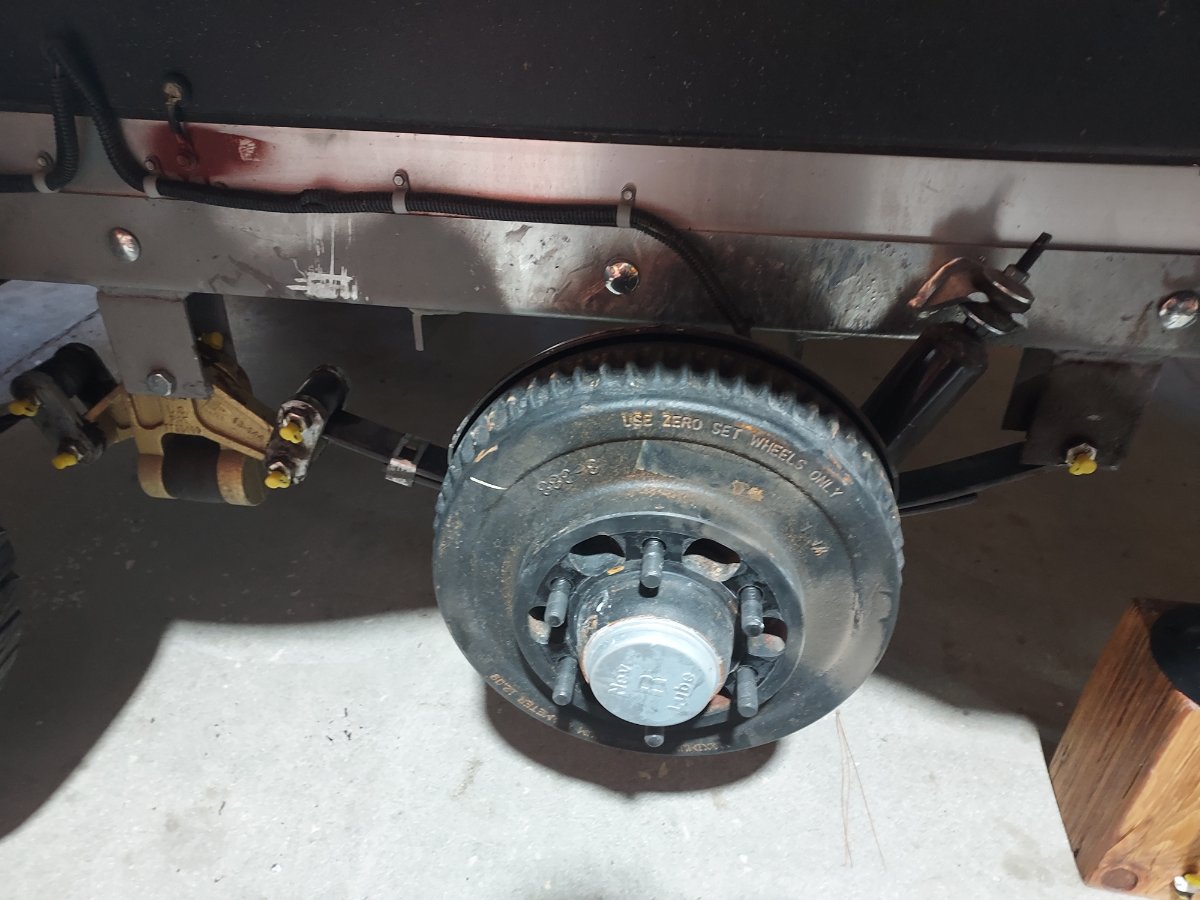
Those who do their own maintenance may wish to simplify periodic greasing of the suspension by installing zerk caps. The caps keep road grime from coating the grease zerks, so you don't have to wipe them off each time you grease them. The zerk caps on my tractor have saved a bunch of time, so I installed them on my Elite II suspension as well. You must remove the wheels to install the caps, so they are most easily installed when already doing regular maintenance. Zerk caps are available for $11 from Amazon, or from the manufacturer, LockN Lube. Amazon link below: https://www.amazon.com/dp/B0779K66DW/ref=dp_iou_view_item?ie=UTF8&th=1
1 point
-
TKX, Brother! Will do...1 point
-
OK... We are very "jelly" that y'all will be attending the O-Rally... we'd love to join, but we're previously committed. That said, are there plans to have Jason's presentation recorded somehow so those of us who can't attend will be able to glean from his information?1 point
-
@ADKCamperI'll constantly work on bullet #1, HA!; great advice on bullet #2! Thanks, brother!1 point
-
F250 diesel. Have a longbed with a 50gallon auxiliary tank. Tows great up and down hills. I can be picky when and where I fill up With an 1100 mile range.1 point
-
I thinking that vast majority of OTT owners would not need or want such a heavy, complex, costly to purchase and install, and expensive to maintain suspension. GJ1 point
-
A reminder to all: In our Guidelines, it mentions the forum is: a great place for Oliver Travel Trailer owners and future owners to interact, share knowledge, solve problems, and most importantly, to develop friendships. Respectful and considerate responses help build this community. It also says: Some inflammatory topics to avoid include religion and politics Generalized Christmas or Easter greetings to fellow forum members could be considered a way to develop friendships amongst owners. May we please remember to always be respectful and considerate to all and do our best to avoid the topics of religion and politics. Thanks, and see you at the rally, Pete & Bosker1 point
-
Best Idea I have heard all day! Bravo! GJ1 point
-
Thanks to a member of the forum, I was put in touch with some folks at the Red Bay, Alabama Girard plant. Once I explained my problem, they knew exactly what the problem was. Fortunately it was a 5 minute fix! The motor/spool assembly is held in the cassette by three phillps head screws on each end. They are visible once the end caps are removed. He said the roller assembly fits inside the cassette with very little clearance. Sometimes the screws are tightened enough to slightly torque the assembly causing it to rub inside the cassette. The solution is to loosen the screws by about one turn. I tried this and it worked immediately. His suggestion was to leave the screws in that position with no worries of them loosening further. He also confirmed that the spring arms do all the work when extending the awning. All the motor does is spool out the tarp. Thanks again to Geronimo John and dewdev for their responses. I now know more than I ever wanted to know about the operation of the Girard 750!1 point
-
I would like to see an Oliver video of wheel bearing replacement - the complete process from start to finish. I know there is a Dexter video to watch and it's good but I don't think it's complete. I'm also aware that there's a very helpful thread about this that's about 5 or 6 pages long but I still like to see things because I'm a visual learner. Would also like to learn more about optimal Xantrex inverter settings when not connected to shore power. Specifically, how to adjust the settings to charge (or stop charging) the batteries but also, at the same time, run an AC off of a generator as an example. There are some good threads about this already but a little more depth and detail about how flexible the Xantrex is might be helpful. Lastly, it would be great if Oliver focused on a few (like 3 to 5) of the most common yearly maintenance tasks that owners can do themselves (low skill level items) and showed videos of these...or one video that captures these 3 to 5 tasks. Because Oliver has done these tasks so many times, maybe they can show us some time saving tricks to make these tasks easier or more effective. I find the Educational Shorts videos helpful. They don't need to be long but they should be very focused. As a reference to the above, when I've done my winterizing and de-winterizing I bring my laptop outside and watch Jason go through the steps. I can pause the video so that I can "catch up" to what's he's done. Makes the task at hand super easy. Jason speaks in a very clear and deliberate way and, maybe most importantly, he makes no assumptions about people's skill sets. I hope he continues to do more videos.1 point
-
Shades - we had some issues with the shades falling off when in-transit when we first picked up our Elite. Upon further examination, several of the windows had broken clips (only one side of the clip was there, the opposing side had broken off). We have been able to resolve this issue with a combination of actions: Replace all broken clips (Oliver sent us a handful of new clips) Be very careful how we press the shade frame into place, ensuring that both sides of all clips are aligned with the slot on the back of the shade frame Lower the tire pressure from the 80psi used at delivery More experience avoiding curbs and potholes😜 (still working on this one) Opening the shades while traveling, so that if one does pop off, the shade fabric is not damaged We have not had any shade pop-offs in quite a while now...1 point
-
Woke up early this morning @ 2:30AM and checked to see what was on the forum (true story). After seeing your post decided to order a set of shocks for our 2015 LE2 Ollie. Got back to sleep easily after making that decision! 😁1 point
-
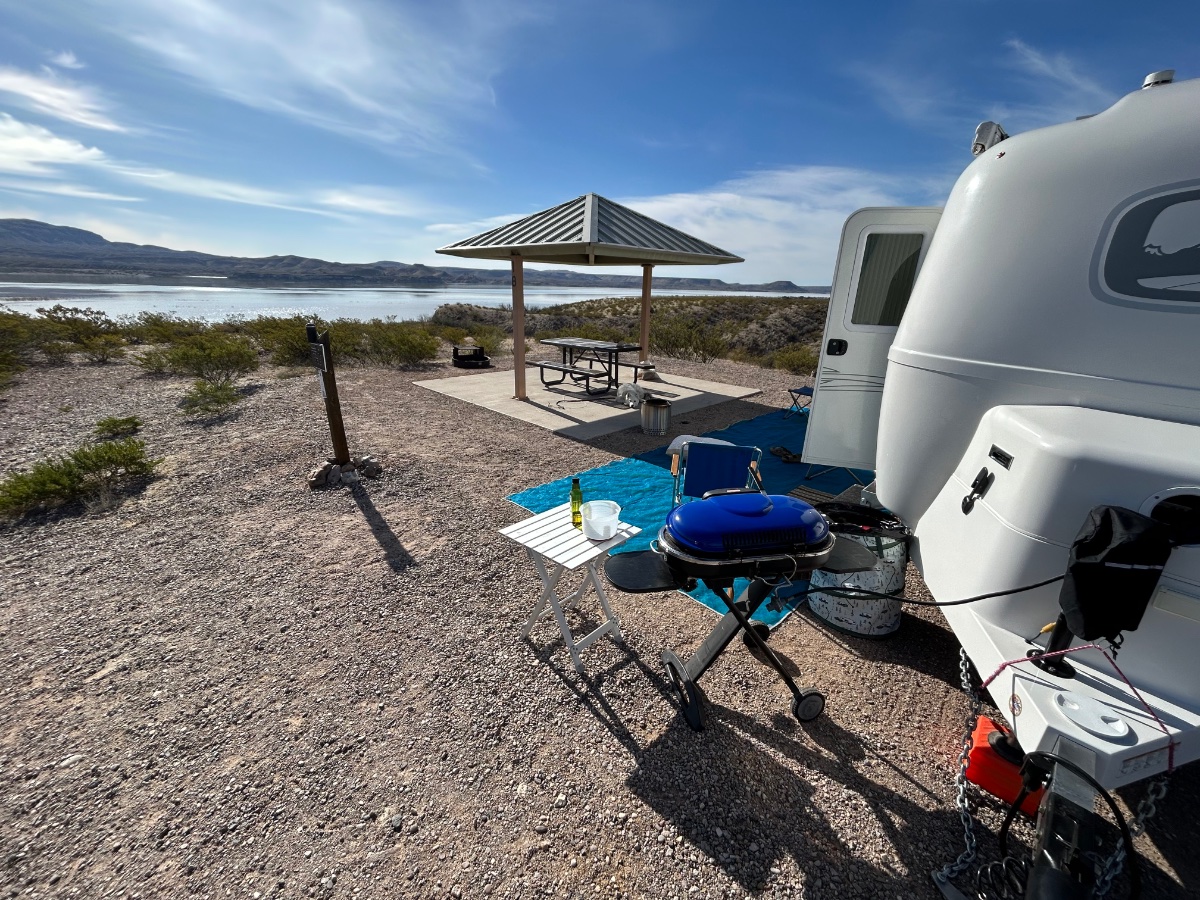
Happy "late" Easter Sunday from Elephant Butte Lake State Park - New Mexico.... 1st "official" camping trip with our new-to-us Hull #226...
1 point
-
May the Blessing of Easter fill your heart with love. Happy Easter!1 point
-
Certainly just one of the many reason that I have to work harder to make anything near me look good.😁 Besides - someone has Bosker's cuteness to draw attention away from a lack of altitude.😇1 point
-
You'll be very pleased with the outcome. The Wonder Egg's owner isn't nearly as old as Twist's owner, and he looks much better. 🙂1 point
-
All good ideas Chris however paint protection install really requires a learned highly skilled technician. Then Oliver would likely have to warranty the install. The only PPF I use is 10 mil XPEL and I have had our both our Ollie corners, dog house and bottom quarter panels done. It’s expensive but it does protect the gelcoat. I would be surprised if Oliver would begin installing PPF. Having had most if not all of our vehicles professionally covered with XPEL.com my guess is Oliver would leave that up to the owners to have it installed. Your idea of mud flaps seems plausible! I would like to see this offered as an option. Naturally these options would further drive a new Oliver to an even higher price tag. I could go on, but I do not want to derail the thread. All this said, it never hurts to ask! 😊 Patriot🇺🇸1 point
-
Sorry I didn't see this when you first posted. As you've probably realized by now, it's not the converter, it's the transfer switch and is only included if you order the front generator hook-up port. The problem arose because the screws in the connector block had loosened over time and a loose connection will build up heat due to the increased resistance. As far as any concerns with the converter goes, you do need to make sure the wiring connections are all tight there as well.1 point
-
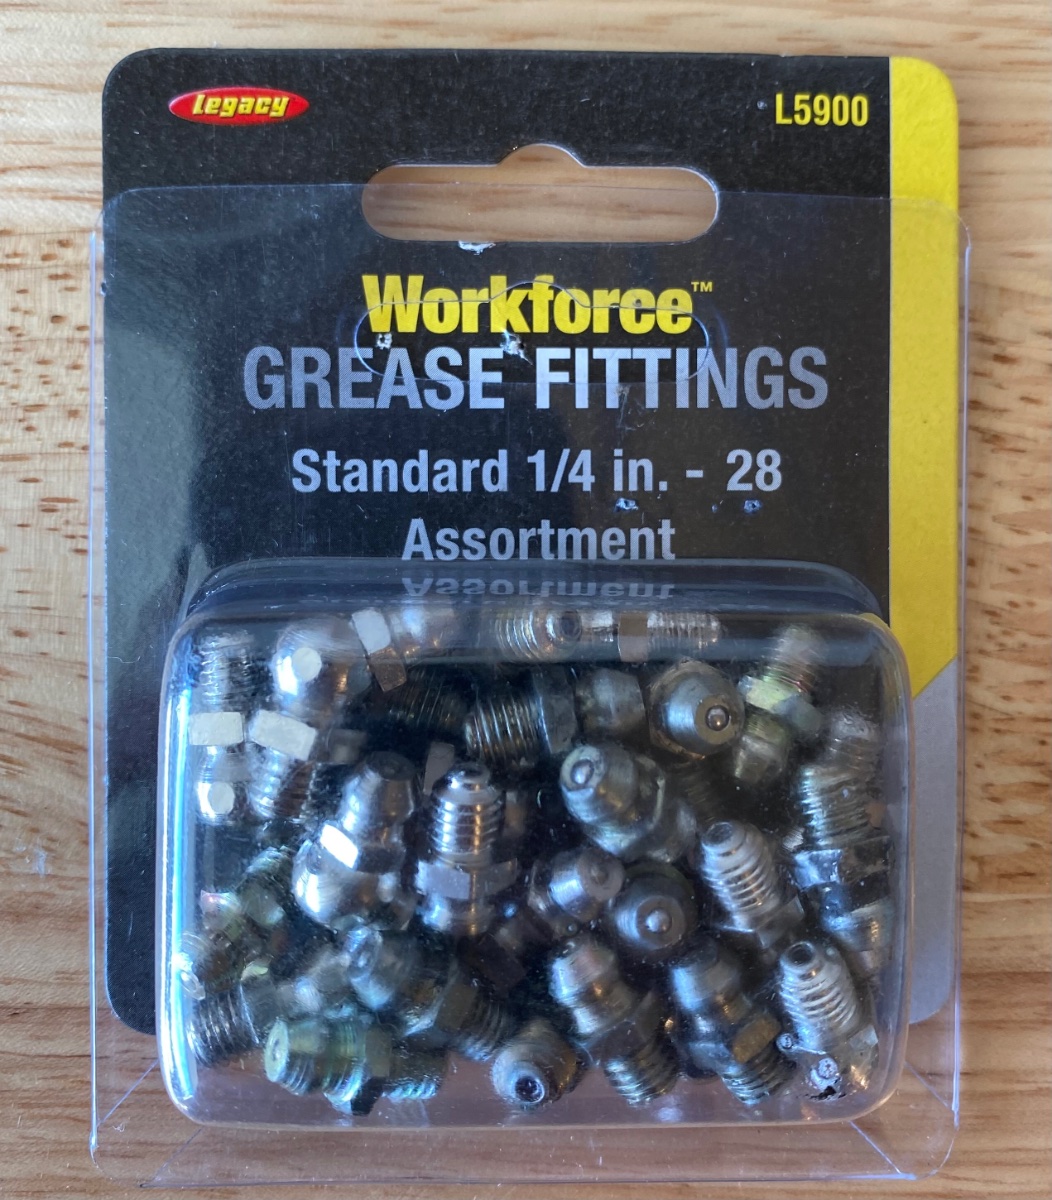
Our Oliver had 1/4-28 thread size Zerk grease fittings but this may not be the same for all Olivers. I think some owners have found that their Dexter suspension assemblies have a 6mm-1 metric size Zerk. Best to remove one of your existing Zerk fittings to confirm the thread size.
1 point
-
It’s not as easy as it used to be, but I can still do it!1 point
-
Like @Frank C we also changed our zerk fittings. Adding the zerk caps seems to make greasing a much easier task to ✅. Thanks @topgun2 for the suggestion at the time on the caps. -Patriot 🇺🇸1 point
-
Everything oxidizes when left outside and in the sun, so not doing anything will defiantly speed up the oxidation process. On ours I buffed in once a year with a good marine fiberglass compound and our trailer after four years looks just like new, yes it does require getting up on some scuffling (ladder not recommended) with a buffer and buffing it, not a fun job. Like I have said many times, being a retired body shop manger for some 30 plus years there is no miracle product that will stop oxidation, but removing it is possible and that's buff it off. The ceramic coatings my be the best way to go for some, but for myself, it's just a coverup and in time your will still have to have it buffed to get down to the original gel coat finish to get the original luster of the trailer back to where it all started. I realize this process may not be able to be done by many, so I would do what works for you, a nice metal building would also work, plus it does bring value to your property. trainman1 point
-
#3 - yes #2 - yes #1 - "necessary" - no Bill1 point


-
Recent Achievements
-


")


