Leaderboard


Popular Content
Showing content with the highest reputation on 04/24/2023 in all areas
-
We use the X-Chocks... BUT you must retighten them after the tires cool! Charlie.9 points
-
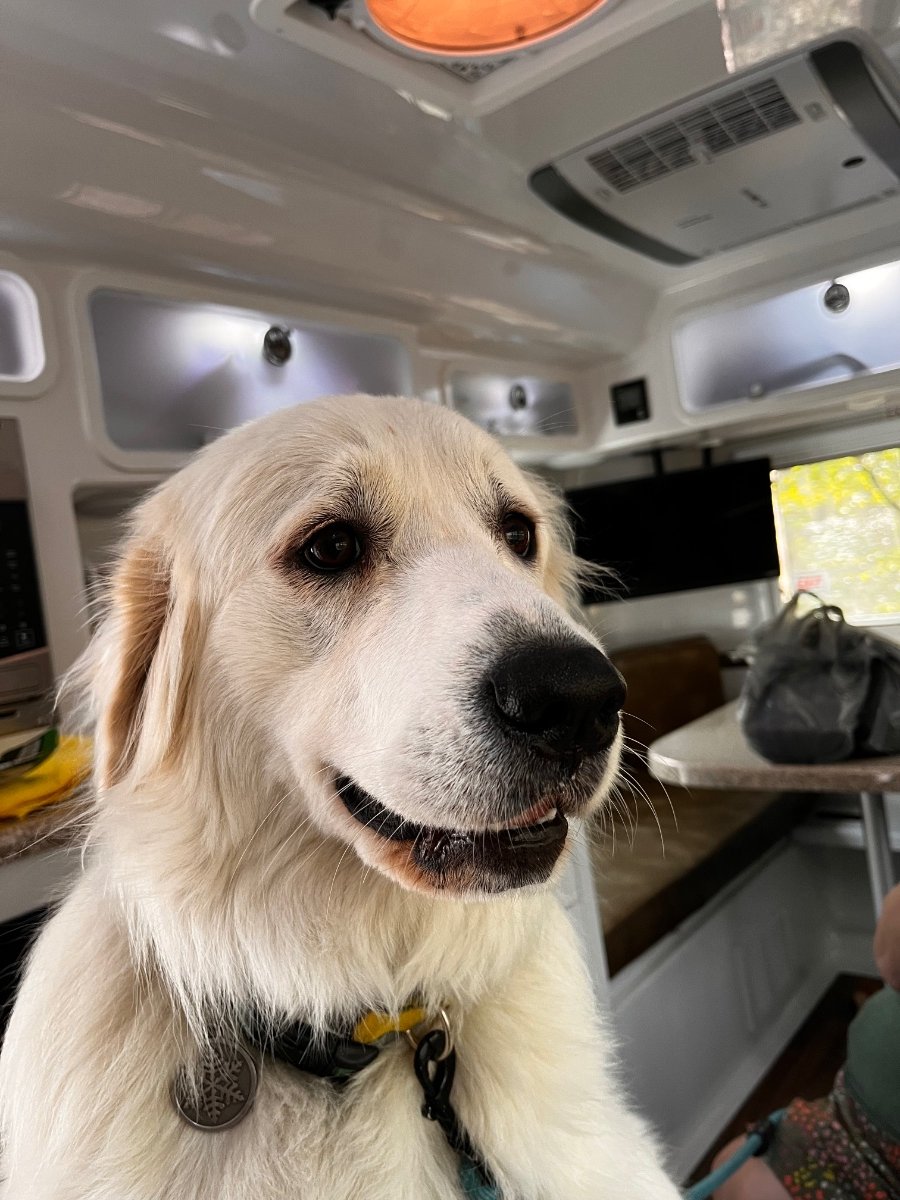
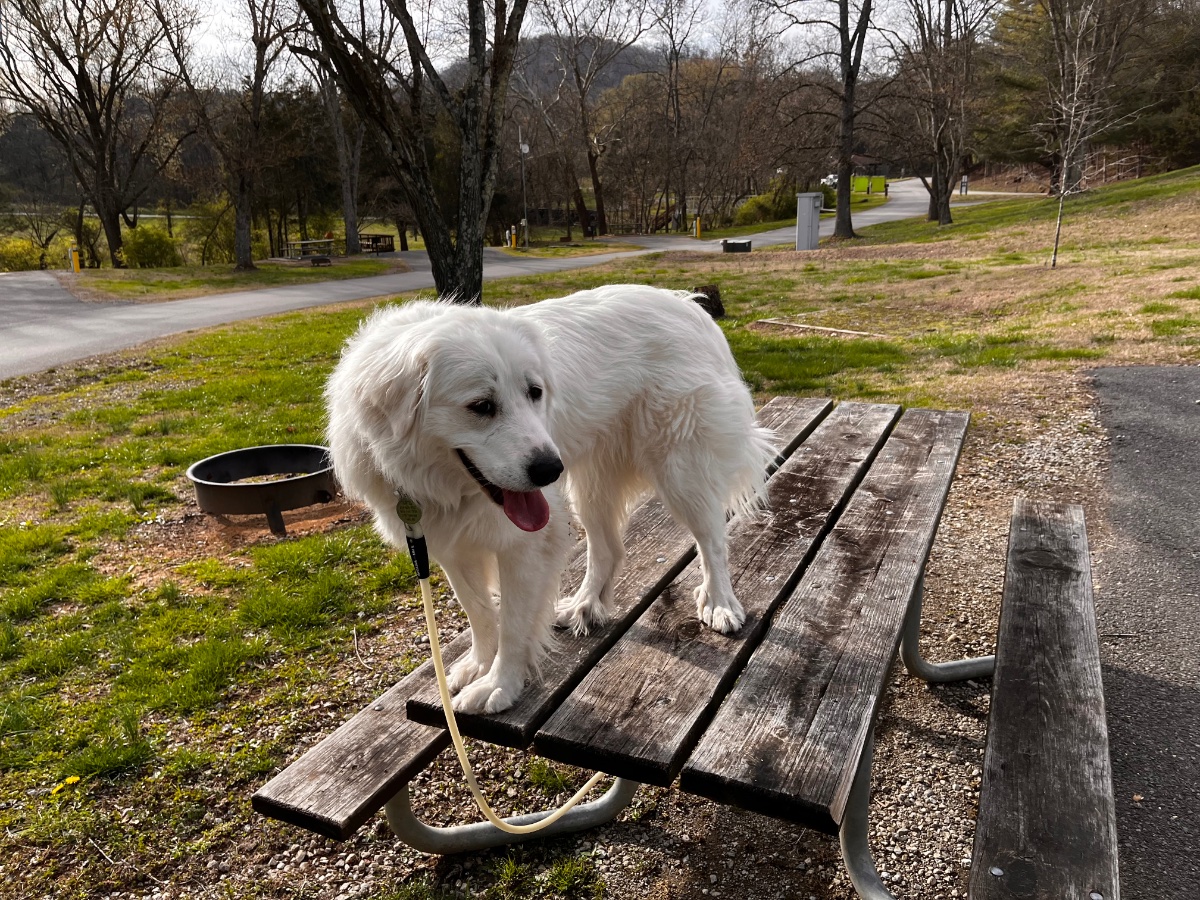
Meet Tilly! Our Great Pyrenees. She loves going places, and is becoming a real good camper. She loves walking on footpaths in the woods. We’re teaching her to not bark at everything that moves, and she’s getting better every trip. At night she curls up by the door, out of the way in our Oliver. In the car, she has the back seat area all to herself (we took out the rear seats). 22 months old, and is pretty good girl' but sometimes behaving like a moody teenager. She never goes off leash outside, and wears a “FI” tracking collar. She thinks everyone is here to give affection and belly-rubs. Pretty chill dog overall.
 6 points
 -
I spoke to Anita yesterday and passed on everyone's well wishes. For some reason she is unable to access the forum inside the facility so she's not been able to respond here. She is currently in a step-down rehab facility in Columbia, TN. She states she is still in a lot of pain, but she is very appreciative of all our thoughts and prayers. She thinks she may be there several months. I'm hopeful that won't be the case. She did say that she is able to get into a wheelchair for short periods of time. They do not want her sitting up too long at this period of her rehab.6 points
-
Not at all. I have the 10 speed transmission (a collaboration between Ford and GM) and generally use it in ECO - Mode when not towing. Around town I get around 13, highway I get around 15 and towing I get around 11-12 unless I am in the mountains and it goes down considerably. All this will likely change now that my total rig weight is 2,000 pounds lighter than towing the 30’ AS. BL5 points
-
I bought a set of X Chocks in anticipation of the new camper. They add stability to the camper when walking around inside, but they will also add a measure of safety in the situation you have illustrated. X-Chocks5 points
-
I have been in that situation, one time only, and I hated it. There was no other site available and the nearest other CG was up a long steep nasty dusty gravel road Wheel ramps or big rocks are best, if there are any around, use them to elevate the lowest side as far as possible, USE A SPOTTER. Chock the downward sides of all four tires. Kick or hammer them in tight. * Let the trailer roll back solidly against the chocks! * If you don't do this, it will bind up the ball and the trailer will roll back when it disconnects. Unhitch but leave the safety chains attached until you are sure it is all stable. Level the trailer. Go to the host or park ranger and complain heavily, there is no reason for a developed site to be like this. Ours was in Great basin NP, we had it paid for three nights. The next day we left it and went to the nasty CG and found a more level spot. Discretion is better than valor. If you think the situation is dangerous, leave. John Davies Spokane WA5 points
-
This may be a consideration if you choose to go that route. The integrated washer is a clean look with more surface for support. Box of 10pcs McMaster Carr https://www.mcmaster.com/97654A265/5 points
-
You are on the right track by being proactive. Eventually, those things that are glued to the vertical inside walls are going to fall off, especially the heavy electronics now being used. The way they did theirs is the best way to go. It will require a little swallowing of pride however. Since your unit is still attached, your "fix" should be much more simple. 1 - Remove ONE screw holding the inverter to the PVC backer board. Using that hole as a marker, drill from the inside completely through the fiberglass out into the aisle. 2 - Place your SS bolt into the hole from the outside and put a washer and nylock nut on the inside and tighten it down. 3 - Repeat for the other three screws, one at a time. Yes, this requires drilling a hole through the fiberglass. There goes some of that pride I spoke of. You'll survive, and I promise it won't fall off the wall now. If you wait, it's gonna be a lot harder and the end result will still be drilling those holes. I really don't understand why they don't do it that way at the factory.5 points
-
John D & GJ, How did you both through bolt your PVC board for your inverters with that wall of fiberglass in the way? What am I missing? I'm having a separate issue with my inverter and stumbled upon this thread. I just looked and confirmed that my inverter is held in place on that white PVC board with the 4 small sheet metal screws and I agree that the unit is too heavy to be held up by just those. But I have no idea how you're able to through bolt that board back on. Where/how are you accessing the washers and nuts? Or are you just through bolting the inverter onto the PVC board and then reattaching the PVC board (with the inverter mounted to it) to the fiberglass wall with longer/better/more screws? I'd like to be proactive and get something better in place and I'm considering just longer, beefier screws that will go into the fiberglass in the existing 4 holes that the small screws occupy now. Any chance you took pictures?5 points
-
I carry a milk crate full of 2 X 6 blocks. I use three under all my jacks to act as a shear-plane. Should for some reason the trailer moves, I'll hear a clunk and recall that I failed to use my check list. In your hill park picture, I see you are doing your best to keep Ollie in place. You even have a block to act as your shear-plane if it moves. Bravo! The two suggestions would be to: A. Use a line and tie off your brake emergency cable to a tree. If the trailer moves at least your Ollie brakes will activate. B. Bring more 2 X 6 blocks and shorten up the lever arm of the jacks as much as possible. GJ says: "Jack up Ollie as you need, but keep the jack extensions as short as your pre-planning will allow"4 points
-
I agree with @John E Davies assessment. IF you really wanted the new Ram engine, don’t buy it first year. Having said that, I bought my F-250 Godzilla 7.3L V8 in 2020, the first year it came out. The reason behind my decision was Ford’s exhaustive testing of that engine and the fact that it was essentially a replica of some very successful engines they have fielded in the past. Ford tested this engine in Class C RV’s with Bob Tiffin for a year before announcing they would replace the V-10 that was being used in all those vehicles. They also deployed it to several metropolitan areas in utility trucks without revealing that it was the “NEW” V8 and logged over a million miles with the engine just in that category. I have 55,000 miles on the truck now and over 30,000 of that was towing! We lived full time in our Airstream for over a year and we never had any issues with low or mid range torque or HP climbing passes out in CO or WY. Best of luck in whatever you decide. Brian4 points
-
You only have the 15 amps the gen plug outputs. You wouldn't be able to run high amp appliances. Some folks only use the smaller gen for weight savings and charging bats. If you want to run the larger appliances you need a gen with 30 amp plug and 3000 watts or more give or take. Depends on the appliance. You have to allow for start surge.4 points
-
My F250 is my first truck and my OEII is my first RV. I have to admit that getting used to truck bed storage took quite a bit of time. At first it seemed daunting, but now it's second nature. Even so, access is not as convenient as I would like. I can only get to some items stored in the middle of the truck bed by climbing in and moving things out of the way. Your storage solution has to consider possible water penetration as well since truck beds are not weather sealed. A decent cap or tonneau cover mostly eliminates this problem, as well as providing security for your valuables. We have been through heavy rains, both moving and standing still, and have not had any water issues with our Diamondback cover. Our cover opens at the cab and tail ends of the bed, allowing me to get most items without gymnastics. Regarding space, the F250 has a coated 6'9" bed. We can easily store all that we want to bring with us with room to spare. We use plastic storage bins to contain and organize smaller items. However, we are not full-timers. If we were, I might have gone with a cap and possibly sliding storage racks. The cap would have had opening awning style flip-up windows allowing easier access to everything in the bed. A cap just about doubles contained storage volume over a tonneau cover, and relaxes the height restriction. I realize the difficulty in selecting a TV for your application. For me the (re-)search was fun and rewarding with the knowledge I gained. I hope the same is true for you, and am sure that you will find an excellent solution for your situation.4 points
-
I check mine a couple times a year, anytime I have the trailer jacked up with the wheels off the ground, for doing bearing maintenance and suspension greasing. And the mechanic checks it as well during the annual Pennsylvania state safety inspection required on trailers here in Pennsylvania. I think the official recommendation is to test it before every trip, but I doubt most owners actually do that. It is an easy test though. Just pull the cable until the black plastic pin comes out of the breakaway switch. That activates the emergency brakes. At that point you should not be able to spin the wheels. After you test them, just make sure you put the plastic pin back in place correctly, otherwise the electric brakes will drain the trailer batteries. Once the pin is reinserted, that shuts off power to the emergency brake circuit and the tires should spin freely.4 points
-
Our dog Liv (means life, in Norwegian) and Bosker are good camping buddies. She's looking forward to camping with Bosker again. (As are we.)
4 points
-
We've been using X-Chocks for over 10 years now, they are a game changer in terms of eliminating a lot of movement when folks are walking back and forth inside the rig. They can be used with conventional wheel chocks if the situation dictates so. We carry both types because my crystal ball is real foggy when it comes to predicting what the campsite configuration will be on a given trip... just say'n.3 points
-
If you do not need to use your truck than set truck brakes and leave it tied to the trailer with a substantial nylon line at least 1/2" diameter. Tensioned slightly, the truck will keep the trailer from getting a running start. Just remember the line is there so you do not trip over it in the dark.3 points
-
My LE2 was built in late 2015, and I thought that Oliver used 3M 5200 to attach the white pvc board to the inside fiberglass surface. (hard to be sure, none has loosened or fallen off) For anyone that’s used 5200 for marine applications, you know it’s a PERMANENT attachment. Do not use it to seal anything that you might want to remove at a later date. (3m 4200 is semi-permanent and can be removed, with some difficulty) It’s not cheap stuff, and once it’s opened, needs to be used within a short period of time (day or two) before the remainder in the tube hardens. I just used it to attach a piece of pvc board for an accumulator tank and worked great. You do need to clean the surface of the fiberglass with acetone, NOT alcohol for it to harden properly. It takes 24 hours to cure.3 points
-
For indoor target practice I always enjoyed a Blow-Gun. It takes air to operate it so I don't feel like I'm hi-jacking the thread. I would practice for hours at home nights in the wintertime. I'd set up a cardboard target across the room in front of the wood stove fireplace insert and tape a kitchen match to it. I finally got to the point that I could light the match from about 15 feet away. Not a particularly useful skill I'll admit but you never know when a match wielding thug might break in and need to be rapidly dispatched. If I can hit a match head, surely I can hit a person. You have to be careful though. You wouldn't want to shoot his eye out.3 points
-
I really don't think RVIA cares what lettering is placed onto the upper light. The reason it is no longer a brake light (and hasn't been since 2009) is it is against the standards set by RVIA. Oliver has nothing to say about it. As far as custom lettering went they would put anything you asked them to on it. We had "Outlaw" on our 2008 Oliver. I forgot to tell them during our 2013 build to do the same. As delivered in 2014... They re-cut the overlay to say "Outlaw" and installed it for me a few years later. It basically boiled down to who you asked.
3 points
-
I realize this is very contrary to what most people think of or recommend when attaching something to a surface in the Oliver. The first hole you drill is always the hardest. After that first one, you'll feel more at ease drilling the next. I've drilled so many in mine through the years, I've probably lightened it a couple of pounds. You really will be pleased with the stability as a result.3 points
-
My 2022 Elite II is the same as your 2021. I am following this thread with interest, because I am having issues with my inverter as well, and may end up replacing it. Yep, drilling through that nice gelcoat into the aisle, and leaving four less-than-attractive bolt heads visible on the aisle side is just what is being proposed. I expect Oliver doesn't do this during production because it would significantly degrade the appearance. I hope I don't have to do that to our Ollie. But, we leave the bed made up most of the time, so the bolt heads would rarely be visible.3 points
-
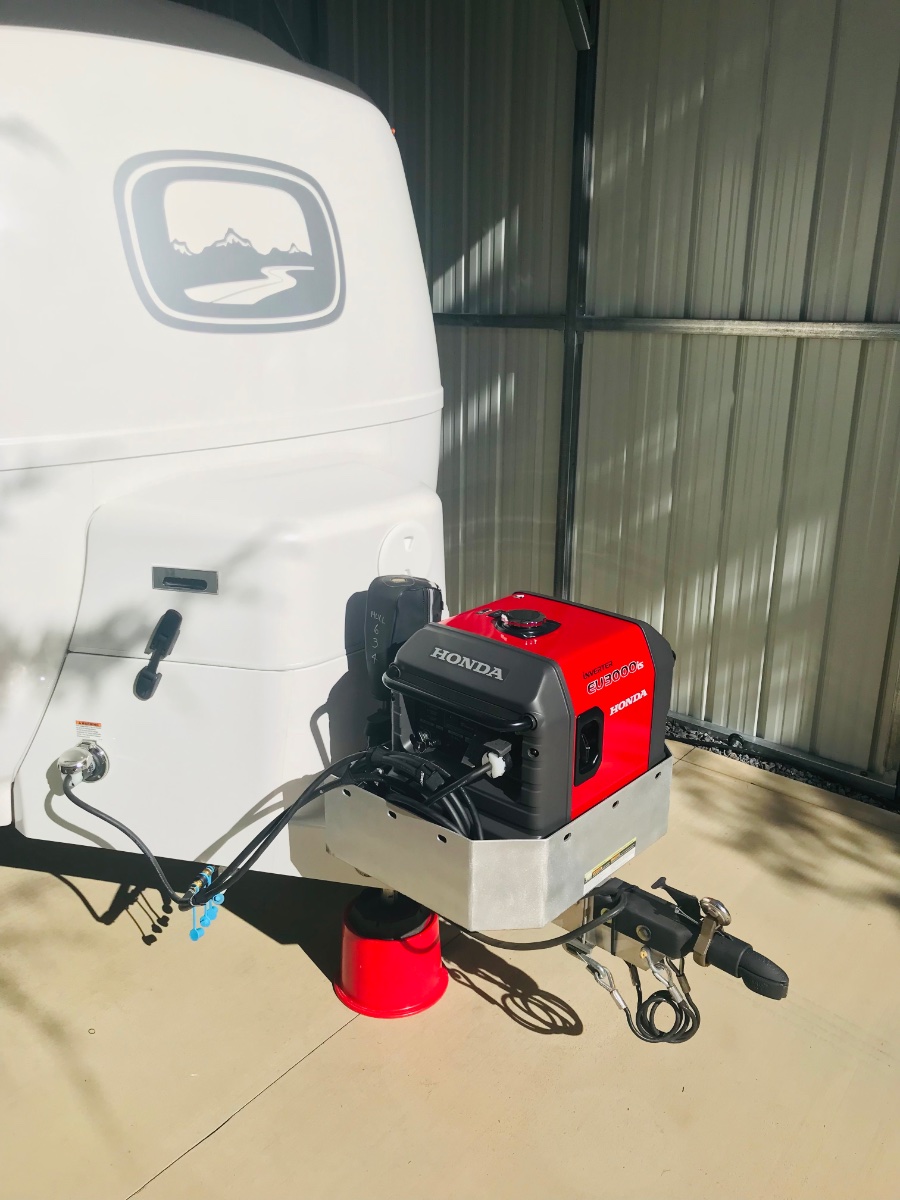
We discovered a long time ago that if you lower the tongue as far as the front jack will go, you hardly have to lift the generator at all to get it into the basket. 😊 I do like your hydraulic lift table though.3 points
-
Actually, RE: Champion 2500 Watt Inverter: When the 1.05-gallon tank of gasoline is full, the 79cc Champion engine produces 2500 starting watts and 1850 running watts and will run for up to 11.5 hours at 25% load. When using a 20-pound propane tank, it produces 2500 starting watts and 1665 running watts and will run for up to 34 hours at 25% load. Be aware that all generators will lose 10-15% of their output using propane. This is due to the differences in BTU's between gasoline and propane.3 points
-
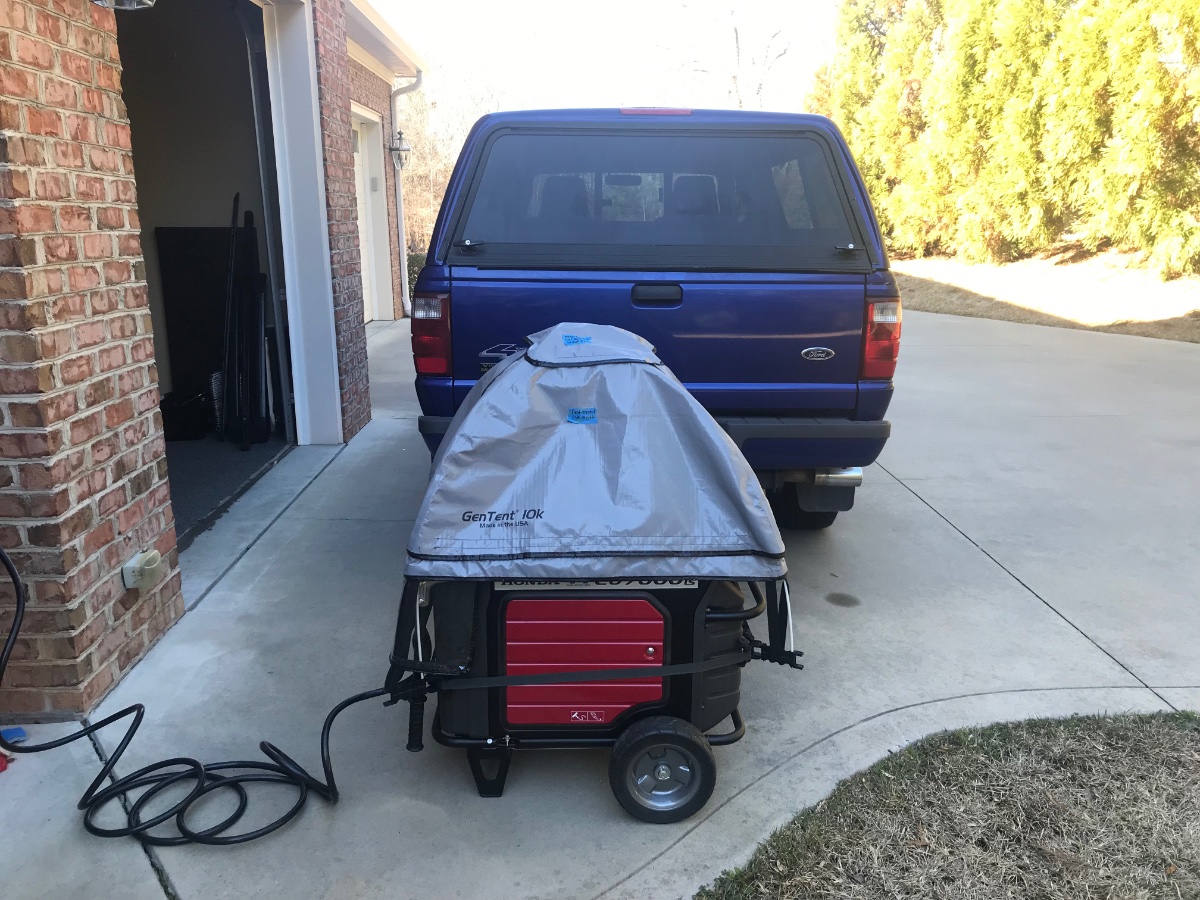
@Patriot, that looks really awesome. Looking forward to your review, when you've had time to put it through the paces. I'm not as strong as I used to be, but I could still manage that one. I think. Honda price tags suck, but the longevity is there. Honda 1000 genset, 15 years old, going strong. Honda Rancher 350 atv, 25 years old, going strong. So much so, we just bought a Honda pioneer 520, side by side. Guessing the Honda stable will outlive us. Hope so, anyway.3 points
-
I test mine before every trip. And I am pretty anal. I use my VictronConnect app to watch the amp draw change, the load should increase by “about” 11 or 12 amps, full current is flowing to all the magnets. BTW, you are not supposed to use it as a parking brake! But in a true emergency, go for it. If you want an actual parking brake, you can install backing plate assemblies that have that feature, they are quite expensive. John Davies Spokane WA3 points
-
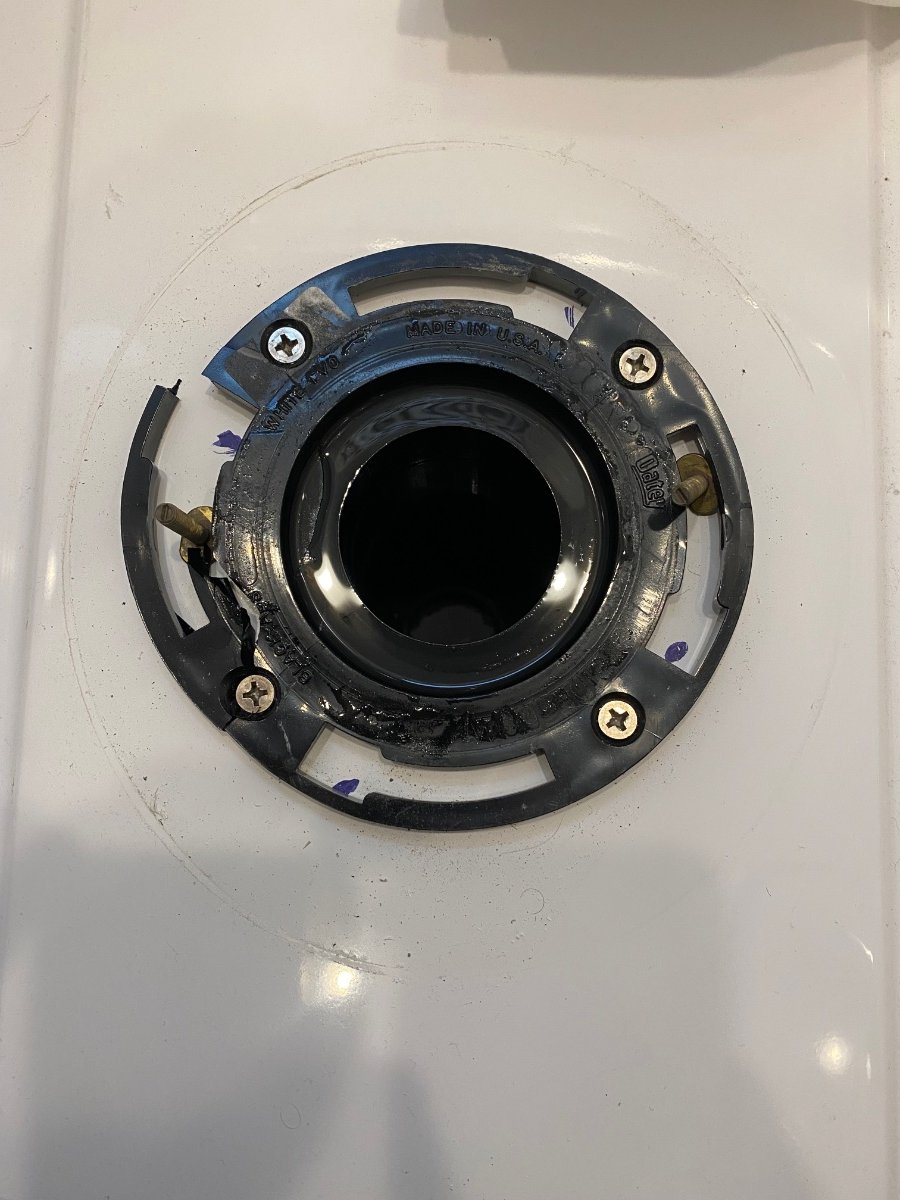
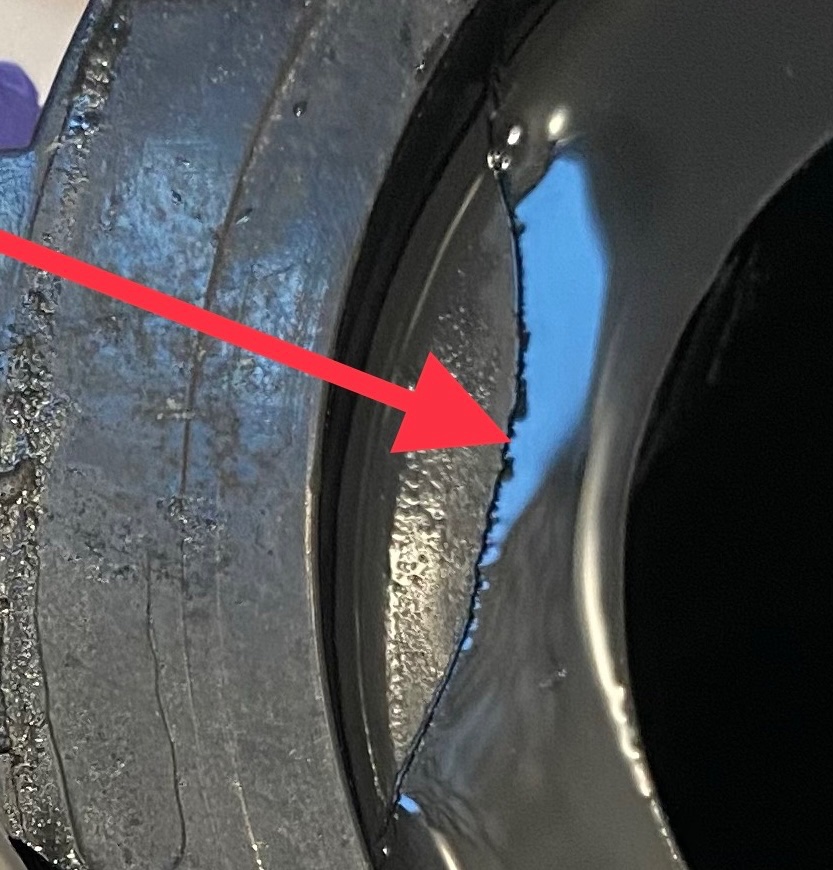
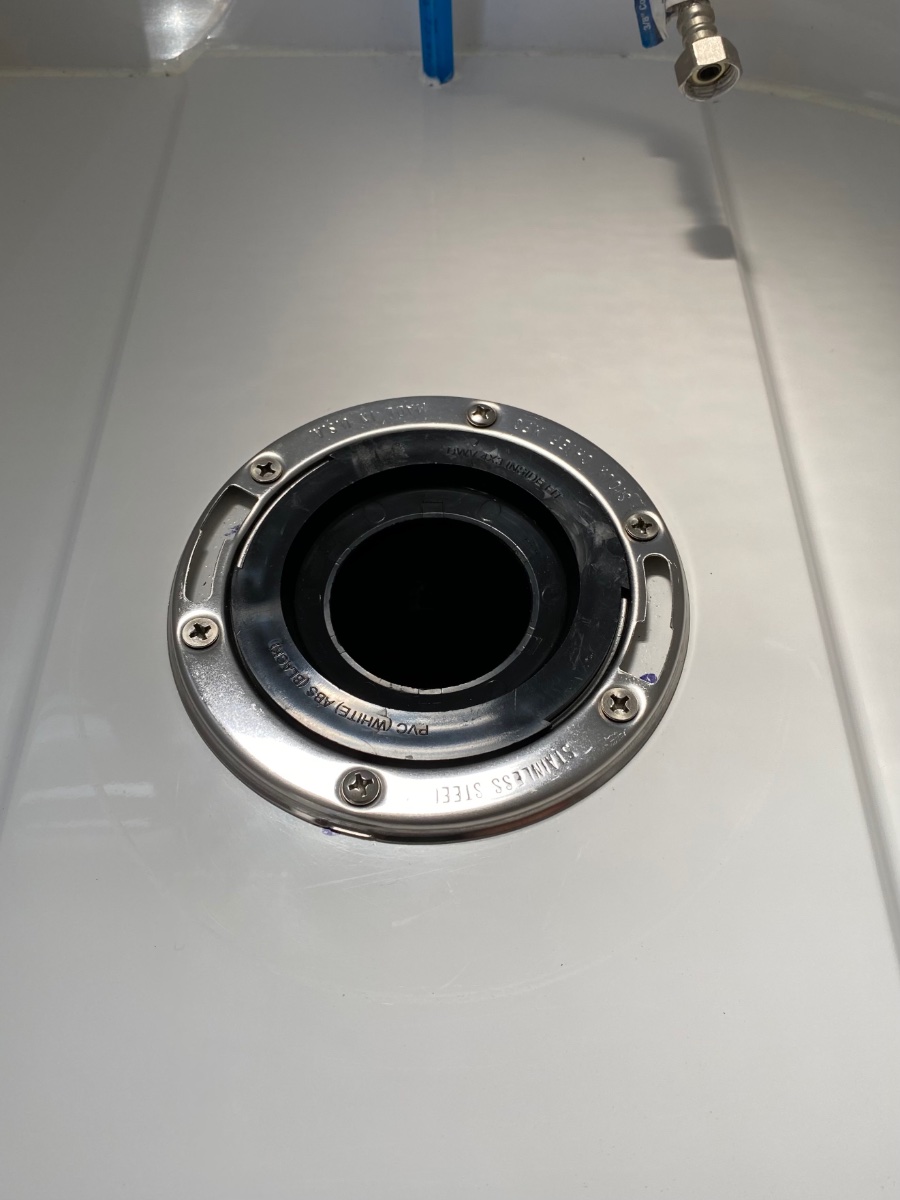
There normally shouldn’t be any odor. As suggested, check all the vent pipe connections, and you may also want to pull up the toilet and see if the mounting flange is broken. We had an odor issue and traced it to a broken toilet mounting flange that was creating a small leak into the hull area under the bathroom floor and onto the top of the black tank. Oliver uses an all plastic toilet mounting flange that seems prone to breakage. I replaced it with a metal ring toilet flange. Problem solved, no more odor. Fortunately we only use the camper toilet for #1. #2 is done at campground facilities or roadside rest stops, so the clean up and repair wasn’t too disgusting.
3 points
-
A few years ago, generators were all over our forum. Nearly all portable generators were of standard Motor/Generator design. I refer to them and my Dometic Penguin AC as "Hammer Mills". Then Honda came out with their inverter line. Super quiet, fuel efficient, and their EU 2000 watt unit with an EzStart would run our A/C units. The vast majority of us purchased the Honda inverter 2000 or 2200 units. But they were, and are pricy. Time has passed and most of us still have the Hondas that you could not pry out of our dead hands. But much less costly Champion, Yamaha and Predator inverters (to name a few) have come into play. With the OTT production rate acceleration, I suspect we have many new owners that likely would likely benefit from a revival of the topic. This thread is intended to hear from our owners their thoughts about their generator. Please touch upon the below as well as your experiences: Generator Name and Model Cost of Purchase Power Output (Rated Full Load) Ability to handle our A/C cycling while switched to "Eco-Mode". Please specify if you have an 11K BTU or 13.5K BTU A/C. Decibels idle and full power Ease of use Maintainability Reliability Durability Number of seasons used Thank you! GJ2 points
-
Recently, my inverter stopped working and wouldn't power on. Here is what I found so far (long story, feel free to skip and go to installation section below) The trailer was parked in at my property with shore power and the inverter was working when we were back from camping trip a few weeks ago. Over the weekend we found that the breaker was tripped and narrow it down to problem with the inverter. When on shore power, either the breaker at the shore power or main breaker underneath the dinette seats would trip unless switched the breaker of the inverter to off. The inverter screens didn't show anything for both remote and on the inverter itself located under the street side bed. When not on shore power, inverter didn't power on. Checked the voltage at the DC positive and negative terminal at the inverter using digital multi-meter and confirmed that there's ~13V at the terminal. Tried to reset the inverter by cutting DC power using the 2 red button switches near the inverter and confirmed using digital multi-meter that there was no DC at the terminal. This also didn't work. The inverter wouldn't power on when restoring power to it. I decided to submit a ticket and Jason and I agreed that there's an issue with the inverter itself and I had to contact Xantrex. After submit a ticket to Xantrex, the technician recommended updating firmware and that didn't help. Xantrex agreed to send me a new one because it's still under 2 year warranty. Installation I got most of the information below from Oliver and it's specific to my 2021 LE2, please contact Oliver to confirm if you have a different model year. Disconnect Shore Power from the camper. Flip the 30A Main Breaker to the OFF position (located in the AC Breaker box under the Dinette) Flip the 25A Breaker for the Inverter to the OFF position. Trip the 200 or 300A Inverter Breaker located under the street side bed access panel area. The breaker is located up & under next to the side of the battery box. Remove the inverter cover in order to gain access to the wire connections. The 120V wires on located on the left with the 12V connections on the right, pictured below. Once the cover is removed you will need to disconnect all 4 wiring connections inside the inverter. As a precautionary measure, do not let the wires contact each other. With shore power removed & the Inverter breaker tripped there shouldn't be any power but it is best to be safe just in case you got in a hurry and skipped or missed a step. Make note of the 120V Wires once you disconnect for which one is the AC In and which one is the AC Out Disconnect the ground wire located on the top edge of the inverter. Remove the screws securing the inverter to the white AP1 board. There are two screws located on the bottom and two located on the top. You may see other screws that are securing the wires to the white board but it is not necessary to remove them when replacing the inverter unless you are installing new wires. See screws pictured below as reference. Follow the steps in reverse to install the new inverter. Mount the inverter on the white board & secure with the 4 screws Connect the ground wire Connect the 12V Wires. Red is positive & Black is Negative. Connect the 120V Wires. Be sure to connect the AC In & AC Out wires correctly. Reinstall the cover Reset the Inverter Breaker by pressing the leg by in. Turn inverter on at the inverter itself (not the remote display) and verify 12V to 120V operation through the inverter. Turn the inverter off at the inverter Flip the 30A Main & 25A Inverter breakers back to the ON position. Connect shore power to the camper and verify charge state through the charger to the batteries. It may take a minute or two for it to engage. Once the inverter has been installed you will need to check the settings and set it based on your battery type The only settings that are changed by the Oliver factory are: #02 ,#05, #20, #24 & #28, based on your options, and are in bold font below Xantrex Customer Support: 800-670-0707 Oliver Service Department: 888-526-39782 points
-
Great minds, and all that. I had just gone to McMaster-Carr to find the link for those flanged button head screws, as I've used them a lot on other applications. They are great where you want to spread the load, have a nicer appearance, and also for sealing, as it is easier to seal one large surface instead of between the surface and a washer and the washer and a screw. I used them on all exterior holes on my Hiker.2 points
-
Also, place some painters tape or masking tape on the gelcoat.2 points
-
Bosker and Dolly have not met yet, but it appears they are kindred compact companions, like Liv.2 points
-
Does Dolly know Liv and Bosker?2 points
-
This is Dolly. She loves camping and knows how to relax after a day of camping!😂
2 points
-
I don't know if conner77 will have it ready before the end of the rally. We plan on leaving the Alabama Oliver Rally and immediately start slowly heading North to the Maine Oliver Rally. But, I'll be happy to show you how to do it while we're in Booth Bay in June, maybe others will be interested as well.2 points
-
NObody is making you put ugly hardware store hex head bolts there, you can buy expensive chrome ones at Ace Hardware (they keep them locked up or else kids would steal them) or use a nice looking satin stainless button head screw like this. I do not recall the size I used for my inverter repair, but they are scattered all around the interior of “Mouse”. They look perfectly fine. I think they look custom and classy. Do remember to countersink any holes that go through gelcoat to prevent chipping and cracks. I used six of these to through bolt the new wood fridge frame I built, you can see them here. Yes they are visible, no they don’t look at all bad. Make very sure they are lined up and parallel to any nearby edges, if at all possible. Measure thrice, drill once…. John Davies Spokane WA
2 points
-
Mystery solved. I wasn't thinking that the screws would actually be going through the gelcoat into the aisle but you and Patriot have educated me that this is exactly what is being proposed. Thank you both.2 points
-
Thank you Steve. This is on my to do list tomorrow morning.2 points
-
Bosker is a rare breed MIKI, and at 9.5 Lbs, he is a perfect fit inside my 2008 Elite. I often tell fellow travelers that for me, "It's all about the dog". Just ask him and Bosker will proudly tell you he's the center of the universe. His picture adorns the front of The Wonder Egg. We'll be at the rally this year, Stop by and meet Bosker, but look out, you may sucked into his orbit!
2 points
-
Aspen - getting introduced to our new Ollie. She is a rescue and still very high strung but with time we hope can calm down and not go on alert at every sound she hears outside the Trailer.
2 points
-
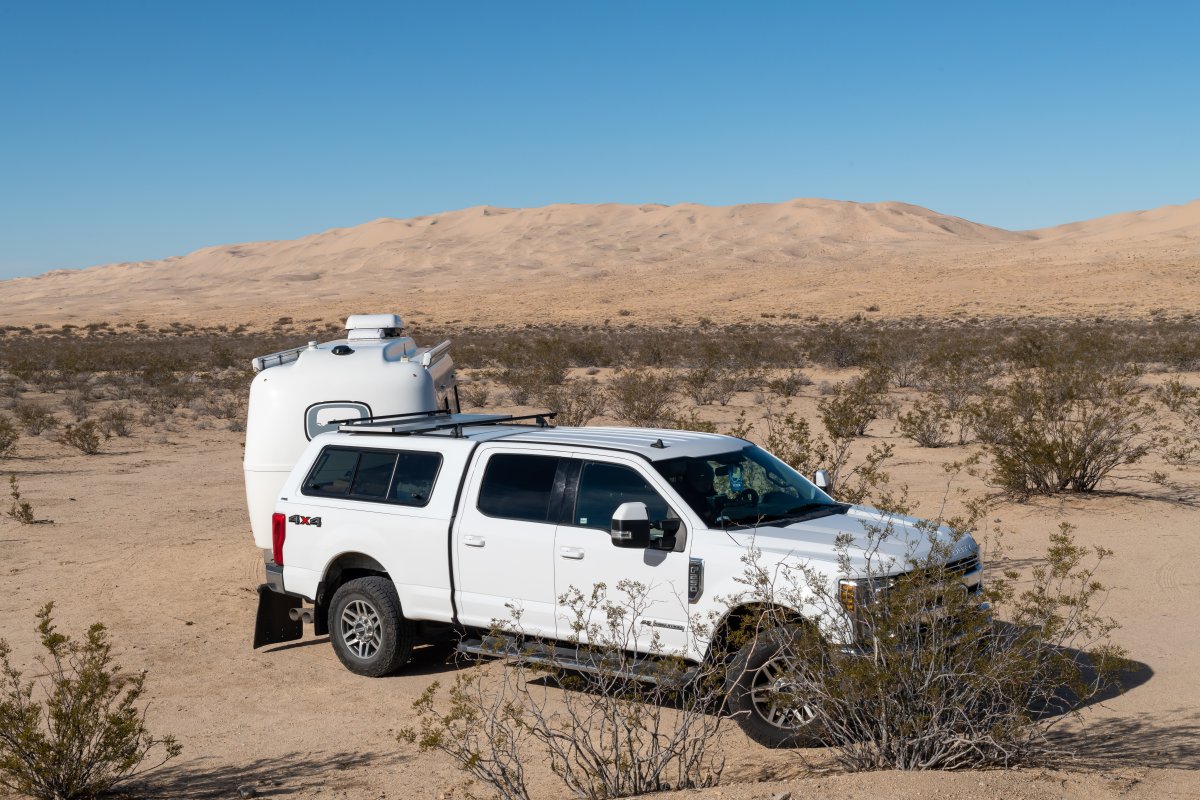
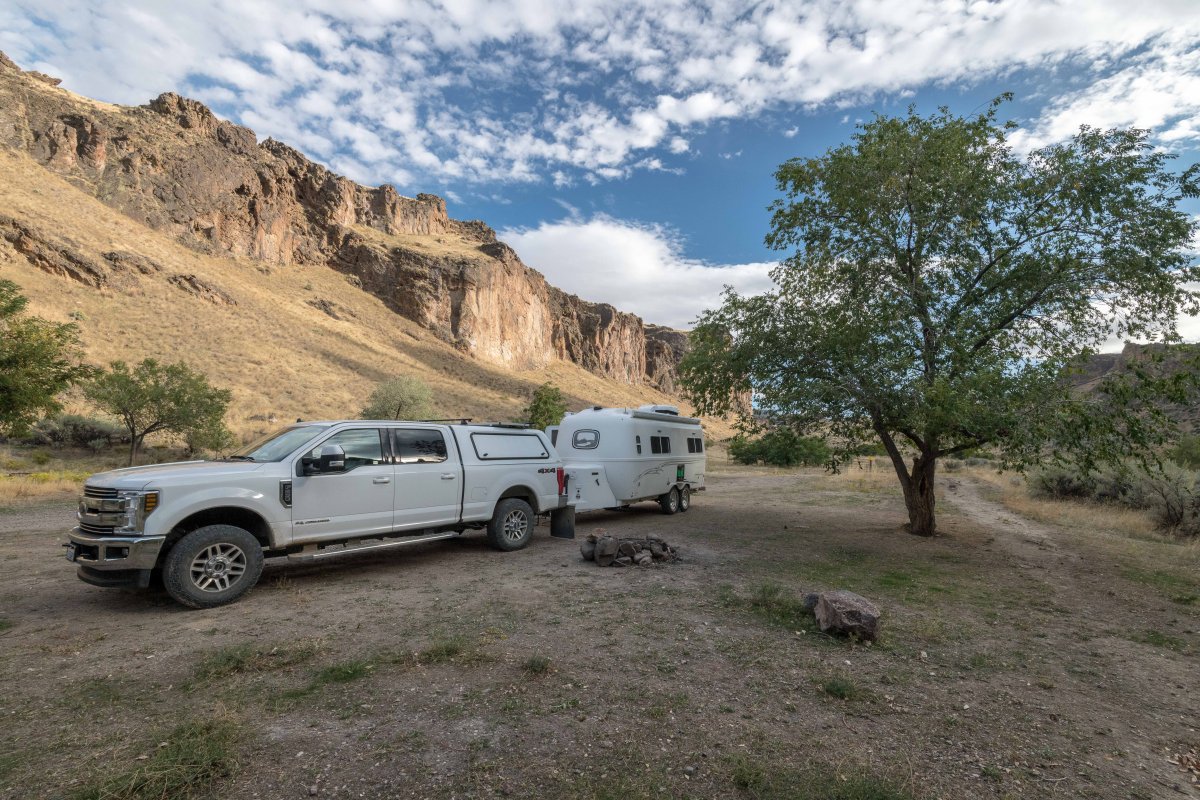
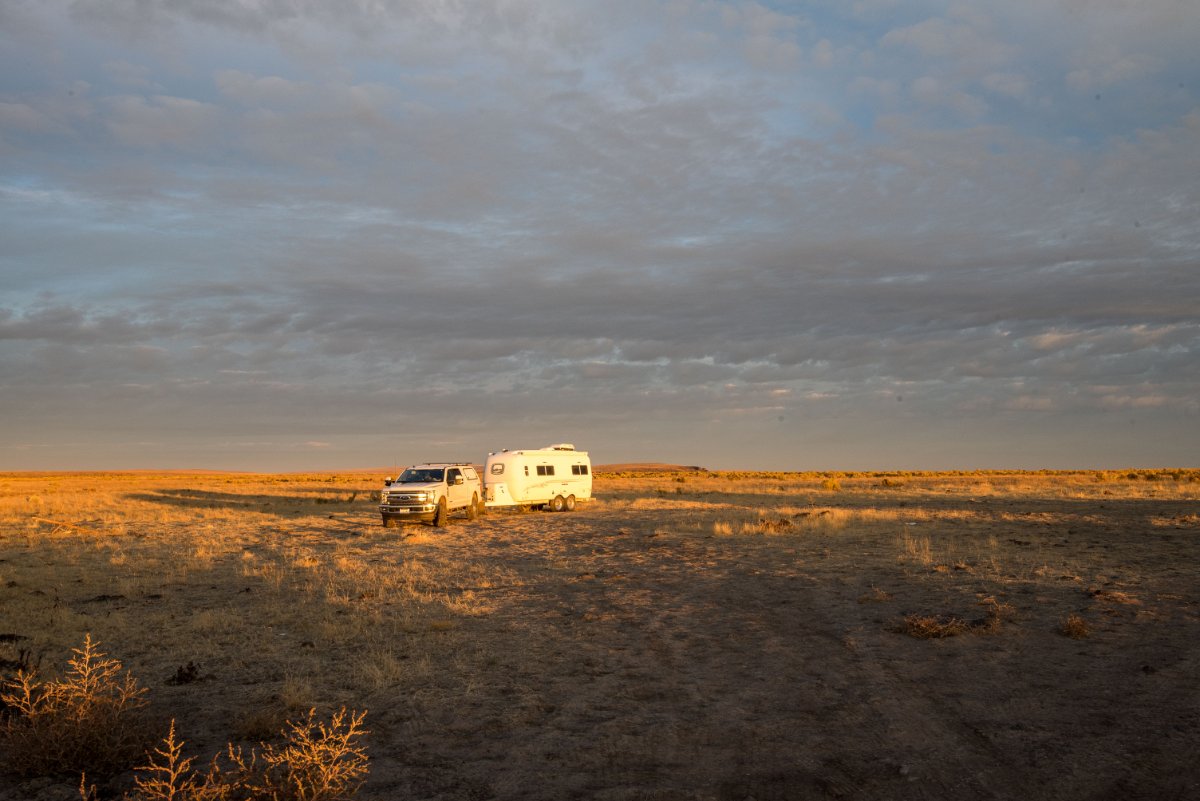
Mojave Desert/Kelso Dunes Dec 2022 our Christmast tree dec 2022 Owyhee / SE Ore Succor Creek / Owyhee Canyon Lands, Ore Plateau above Three Forks / Owyhee Canyon Lands Taylor Lake/ Plumas county California ... up Beardsley Grade.. should have believed unimproved road sign.. a couple of hours in 4 wheel drive low at 2-3 mph.. very challenging getting turned around.. fantastic location, great alpine lake / fly fishing but not recommended for towing
2 points
-
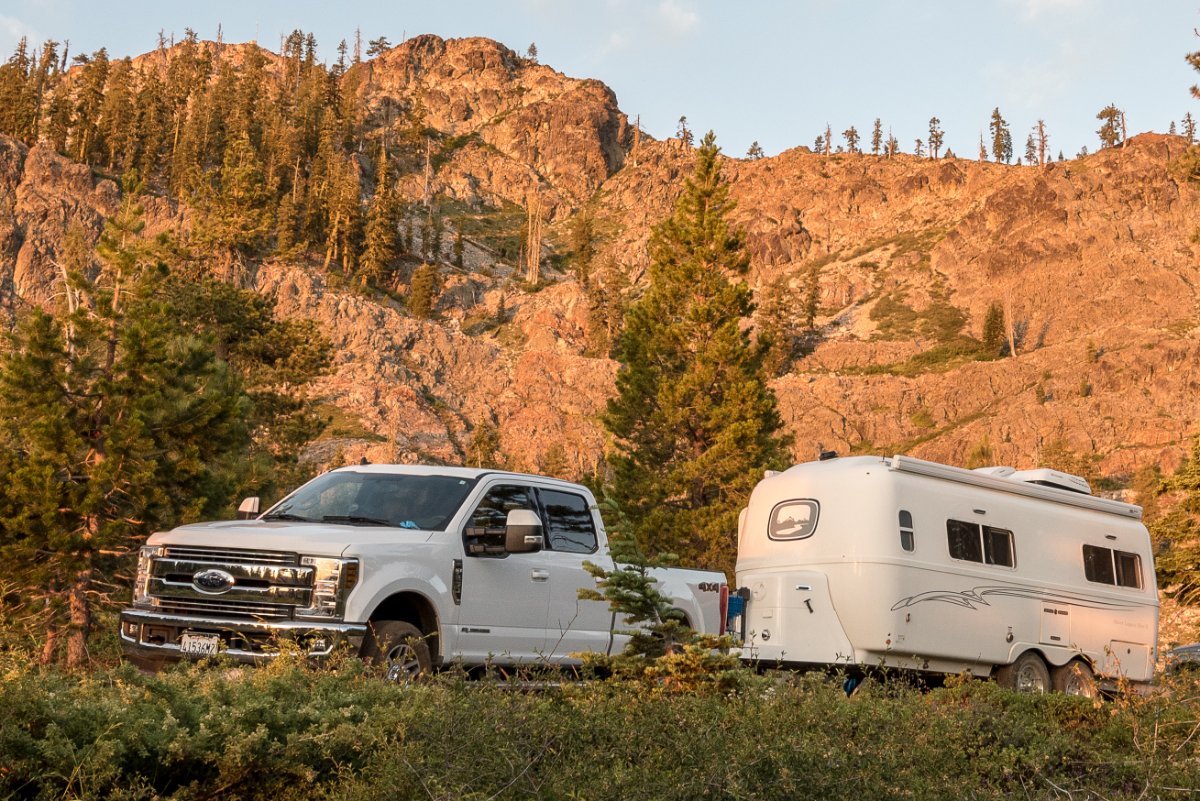
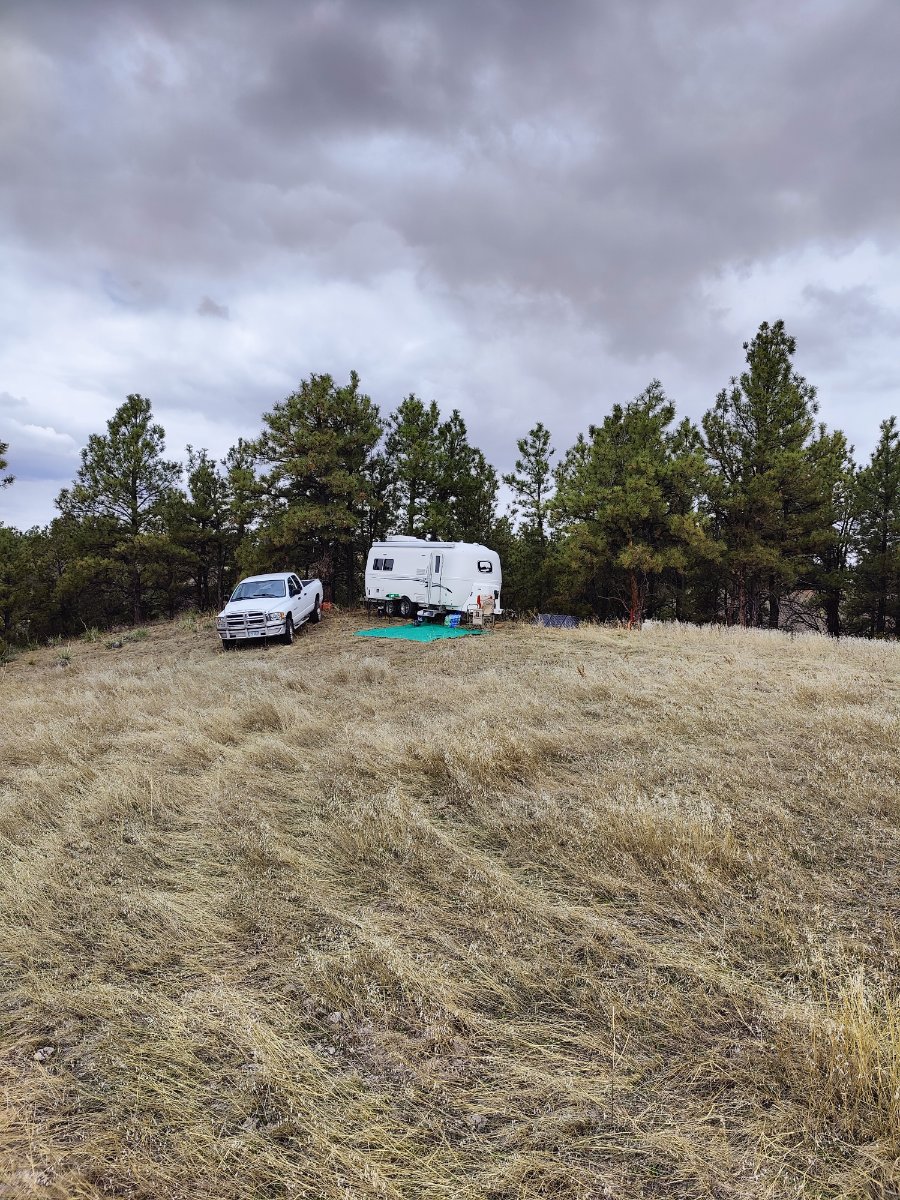
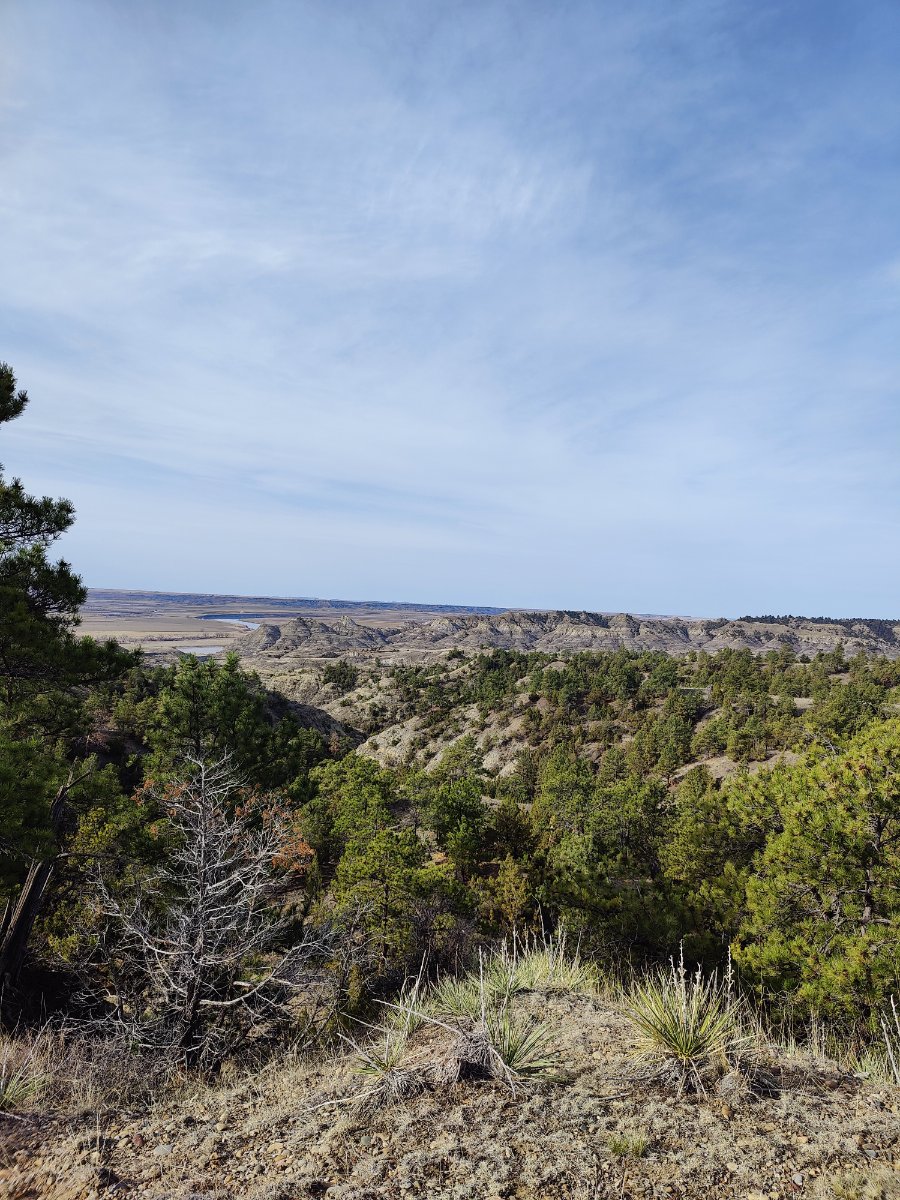
Finishing up a week of spring turkey hunting in the Montana badlands. Endured a couple of nights at 24° F. Our Ollie performed flawlessly. Couldn't be happier.
2 points
-
I did some searching for a thread of this type and didn't really find anything, so I thought I would start one. The idea is just a place to share photos and stories of your favorite traveling companions, Dogs, and stories that tell about your traveling pet experiences and methods. There's a thread like this on another forum I've been a member of for a few years and it's been continuously popular over the years. So, post up your pooch pics and tell us what you love about them, how you acquired them and what it's like traveling with them. We currently have two registered Border Terriers. The each weigh between 15 and 20 pounds and pretty much go everywhere with us. Cohen is a six year old male and Hallie is a seven year old female. Each came to us as nearly grown pups and have been through the whole obedience training thing. They're great travelers, and know no strangers. They love kids and love to explore. Unlike many terriers, they really don't bark very much and are quite pleasant to be around for most people. Cohen on the left, Hallie right. Independence Day attire Come on dad let's hit the road
1 point
-
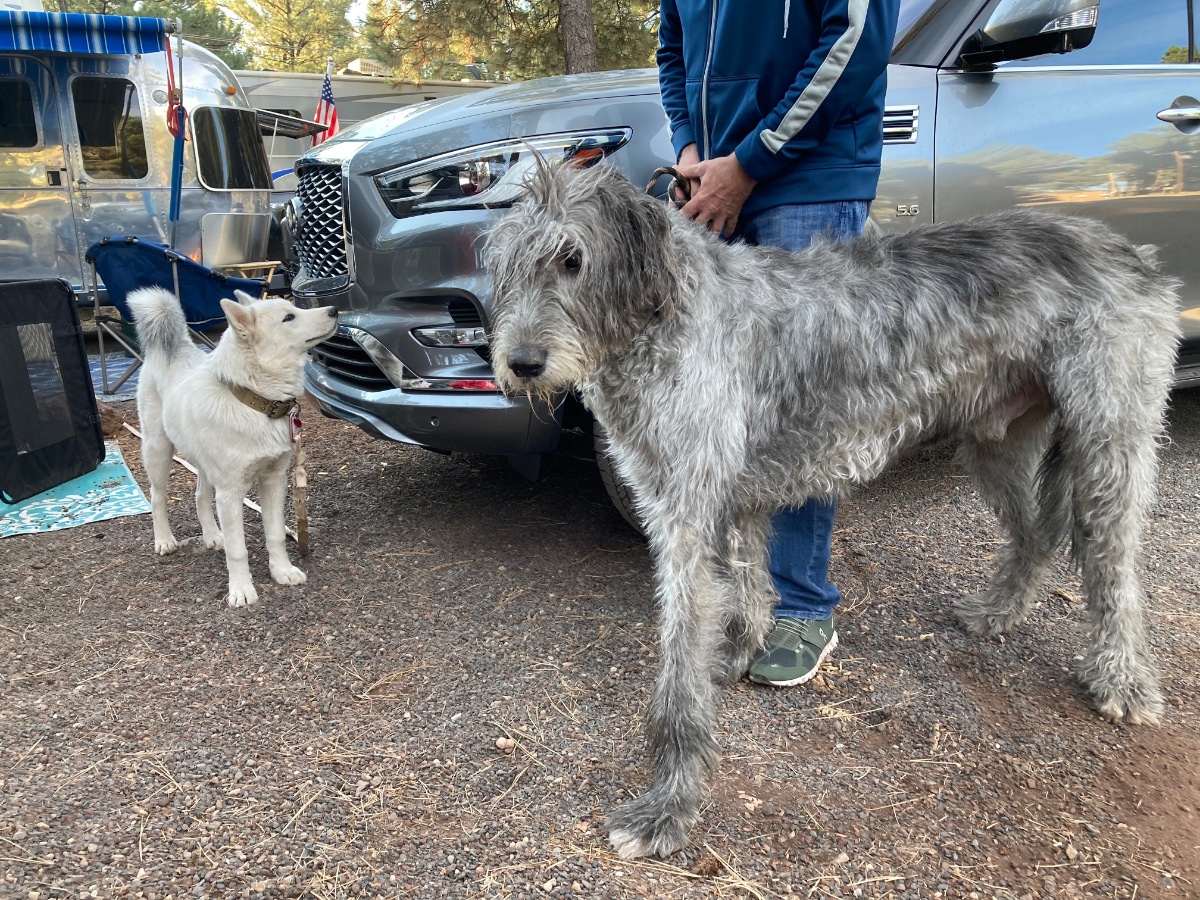
Great idea, Ollie-Haus! We take our "Fur-Baby" everywhere. Although we're new to the Ollie family, for sure - we've been able to transition 25+ years of RV'ing, backpacking, and general out-of-doors puppy practices/experience to make it work as comfortably as possible for Magnus in our OTT. We've met a ton of Fur-Baby RV'ers over the years with dogs, cats, dogs 'n cats, birds, pigs, and even a monkey! I'm thinking we pet-lovers all have many things in common, but in particular, an underlying theme: We tend to gravitate to RV'ing/camping because we can accommodate and have our pets during our road trips without the expense of a "Puppy Hotel" while being away. It may take a bit of pre-trip planning is all, right? FYI, here are some of the aspects we always consider: 1. What are the pet "Rules" at the destination(s) - are they even allowed?; 2. Pet food/water/treats, etc. - enough for the trip duration?; 3. Collar w/tracking device (we use Apple AirTags), campsite lanyard (20-foot), floatation vest (if needed), boots (if needed), 4. "Service Dog" vest, if so trained; 5. If other families are joining in a "caravan" - are their Fur-Babies compatible with ours? There's probably more than those listed above - but y'all get the idea.... Cute Story: We're camping in Flagstaff, AZ - Magnus is maybe 8-9 months old and we met an Irish couple there with their wolfhound that was the same age as ours. Check out the size difference! For us, our pets literally bring us so much happiness an fun that being without them on a trip seems like a foreign thought! Cheers/Woof!
1 point
-
My wife wanted pup to be able to travel up front with us. Built a platform between the truck's front seats that wraps behind the driver's seat (L shaped). Covered the platform with a custom shaped dog bed. This makes my wife happy, pup would be fine hanging in the back.
1 point
-
Having such a wand greatly improves the process. If you have an old 1/2" garden hose that should be in the trash pile, you can make one really easy from it and some scrap metal tubing and a hose clamp (El Cheapo GJ style). Or just buy a nice one with a valve on it. Either way good purchase suggestion1 point
-
I just had a nice long conversation with John about this hobby. The average distance used for pinpoint accuracy competition is 11 yards, about 33 ft. Some folks who live alone may even set up an indoor range within their home! Even though Bosker is a tiny short fella, my main concern would be his great big radar ears picking up too much noise, even with the suppressor that comes mounted on the airgun. (Guess I could always keep him downstairs as I plinked.) The "deer blind" he uses is for keeping him warm in the unheated shop. A small ceramic heater keeps him cozy as he hones his skill, mid winter in Washington state. As with any hobby, it is a potential money sink if you opt for some of the higher end equipment. What a fun looking hobby. I'm always looking for new ways to spend my kids inheritance! Don't worry Bosker, I'll get you ear muffs.1 point
-
@Patriot the eu3000is is actually the ideal generator with it being quieter and having electric start. I just couldn’t get it up into the bed of our 1 ton. Do you find it vibrates the trailer while running it in the basket? Nice setup!1 point
-
We opted to roll with a Honda eu3000is Inverter. This past summer, we converted this inverter to Tri fuel (LP,LNG, gasoline), installing the HutchMountain LP conversion kit. I think we paid right at $2400 and change with my military discount at Northern Tool. I don’t have a lot run time since the unit is brand new. We did a shake down here at home this past summer and really were impressed with how super quiet the unit was in eco mode while running our OLE2’s 11.5 btu Penguin. The front quick connect made for an easy fuel source delivery from our 30# tanks. This coming May right before the rally, we are having the 13.5 BTU Truma Aventa AC installed by Oliver Service. Since the Aventa has no easy start available, we are glad we now have the eu3000is inverter. Pros - It’s a Honda and it is really whisper quiet and Hondas have a very long history of being extremely reliable, clean energy, electric start, manual cord pull back up, super easy to maintain. No more carrying, treating or dealing with smelly gasoline. With the LP kit it’s a much cleaner burning engine with regard to exhaust fumes/emmisions. It’s not as portable as the smaller Honda inverters also meaning it cannot be just randomly picked up and stolen. So I list this as a Pro. (Yes I know if someone wants it bad enough, they will figure out a way). Our 1 ton TV cargo capacity can easily handle the weight of this inverter without any concerns. Strong owner reviews of the eu3000is and HM LP conversion kit. ✅ Cons - So yes, it is heavy weighing 130#. My bride/navigator and I can manage lifting this inverter off our TV tailgate into the gen basket relatively easy. It is on the higher end of cost for a generator including the LP conversion kit. A link to this LP conversion - https://www.hutchmountain.com/products/honda-eu3000is-propane-natural-gas-gasoline-tri-fuel-conversion-kit Note- installing the HM LP conversion kit you will loose the Honda warranty since it’s not a Honda product. The customer service at HM is 🌟🌟🌟🌟🌟 in my experience. I highly recommend this company. A link to the Honda eu3000is - https://powerequipment.honda.com/generators/models/eu3000is We also own a Honda eu7000is we purchased new which serves as our home portable back up generator. This pic is actually from yesterdays 3- hour power outage here in Western NC. We rolled out the eu7000is and it just purred along and kept us with all the power we needed to stay warm and continue on. It’s a Honda, super quiet, and extremely reliable in our 7 years of ownership. Edit 4/23/23 We sold the below Honda eu7000is after having a 24KW LNG whole house generator installed. The 24KW LNG standby aka last Jan.
1 point
-
It’s been talked about before, but it’s good to have it brought up again for people who haven’t experienced it. It is odd to go out and see your trailer lights mysteriously glowing. If it’s any consolation, Airstream owners consider this a ‘feature’ and they’ll even purposefully short out the plug to keep their exterior lights on.1 point


-
Recent Achievements
-


