Leaderboard


Popular Content
Showing content with the highest reputation on 05/24/2023 in all areas
-
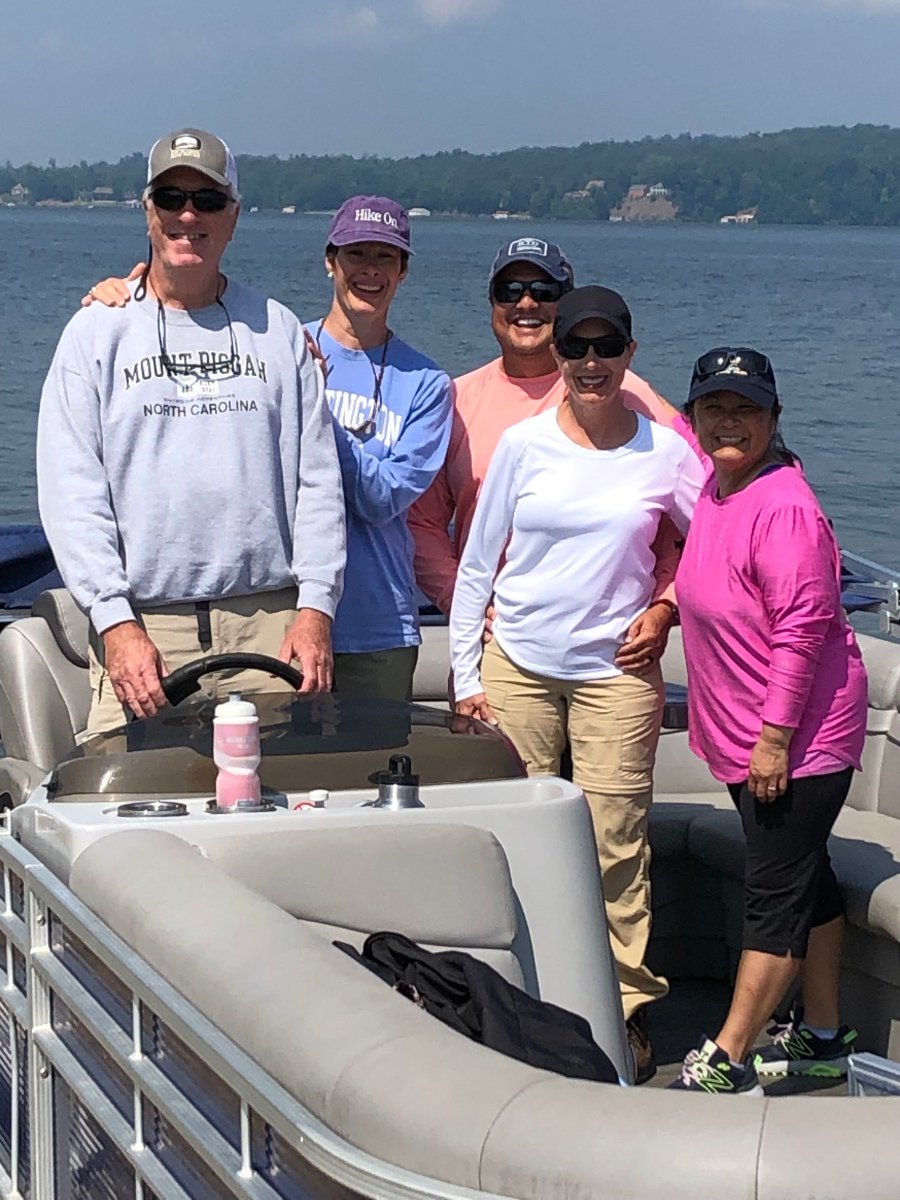
The Oliver Owners Wild Pirate Pontoon Gang! 😂 An amazing morning out on the lake with awesome friends! Making great memories is what the rally is all about!
 7 points
 -
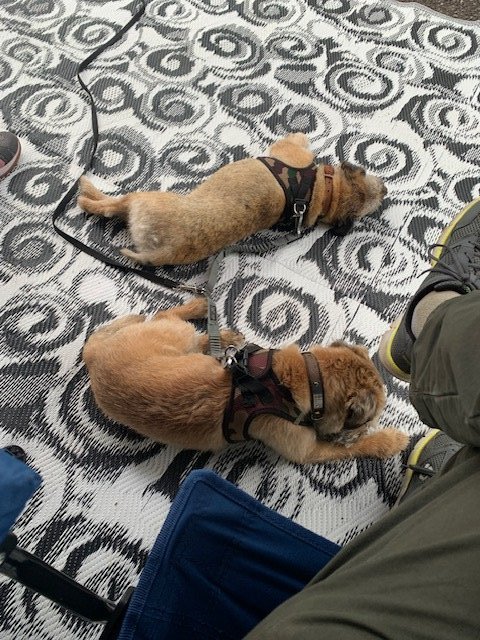
A few more pics: The rally was exhausting for the little brown dogs........
5 points
-
Hull 607 and 505 Re-unite at a historic marker. We were on the eastern slope of the Cascade Range, stopped at a historic roadside for lunch...when another Oliver pulls up beside us. To our surprise Paul and Hull 607 (who we showed our Oliver to as a prospective customer) dropped in. Paul was coming down from Lake Conconully SP and we were on our way to the same park. Small world.
5 points
-
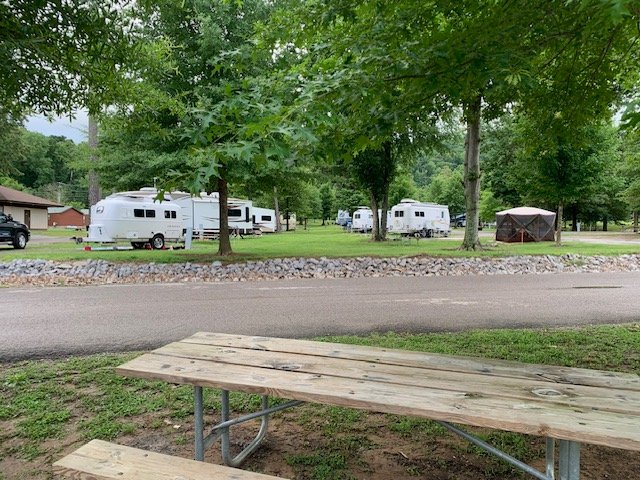
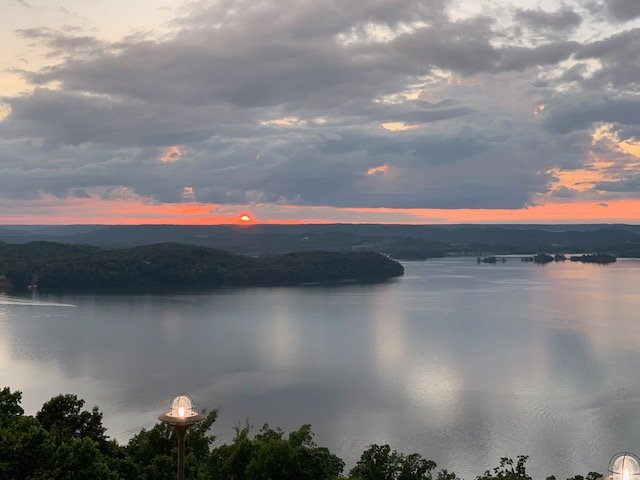
I didn't take a single photo all week! I finally grabbed the camera Monday morning before we left, so here are a few from G loop. The sunset photo was Deb's phone on Wednesday evening.
5 points
-
Rocky Point, MEX last weekend... Magnus' first ever salty experience - he loved it! He really liked running the beach down there...
5 points
-
@jhull61 😳 Glad it passed through your Olivers plumbing system. You may want to just pass this photo and a short write up on to Oliver Service that you discovered this in your tank. This should not have happened and they can pass this information along to the plant to preempt future issues and sharper 👀. It could have resulted in a costly repair. Patriot🇺🇸5 points
-
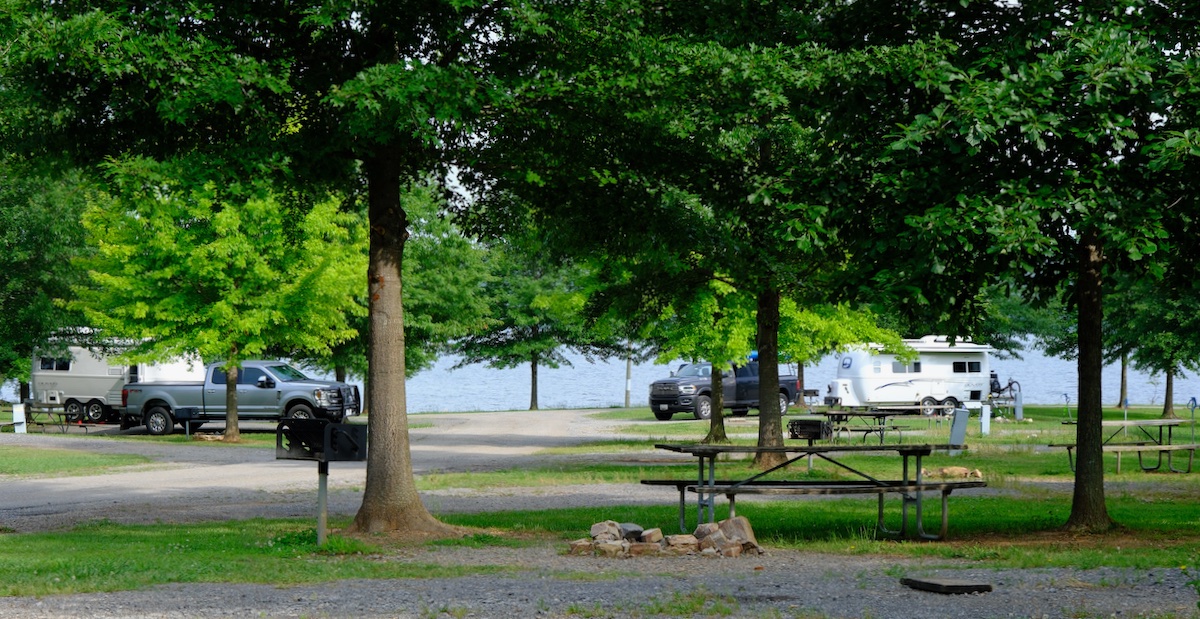
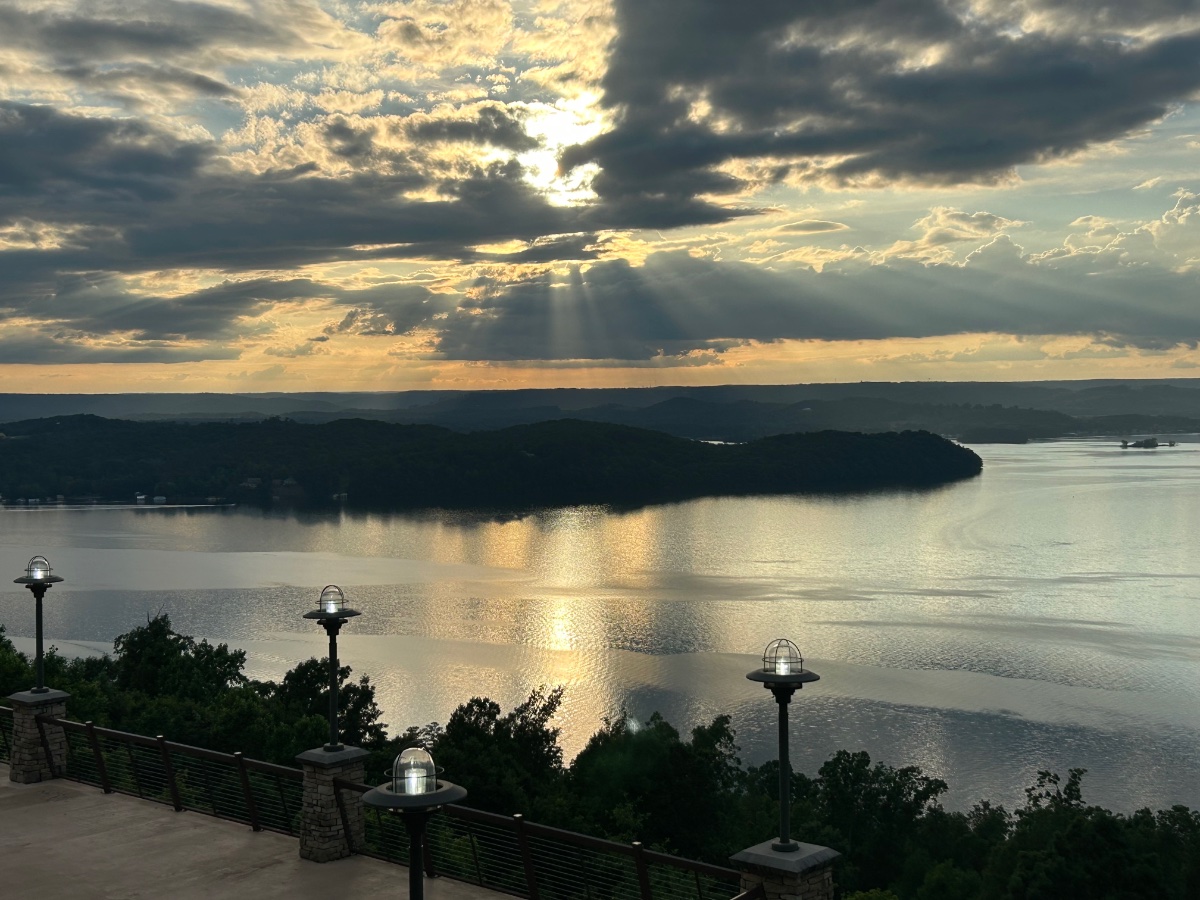
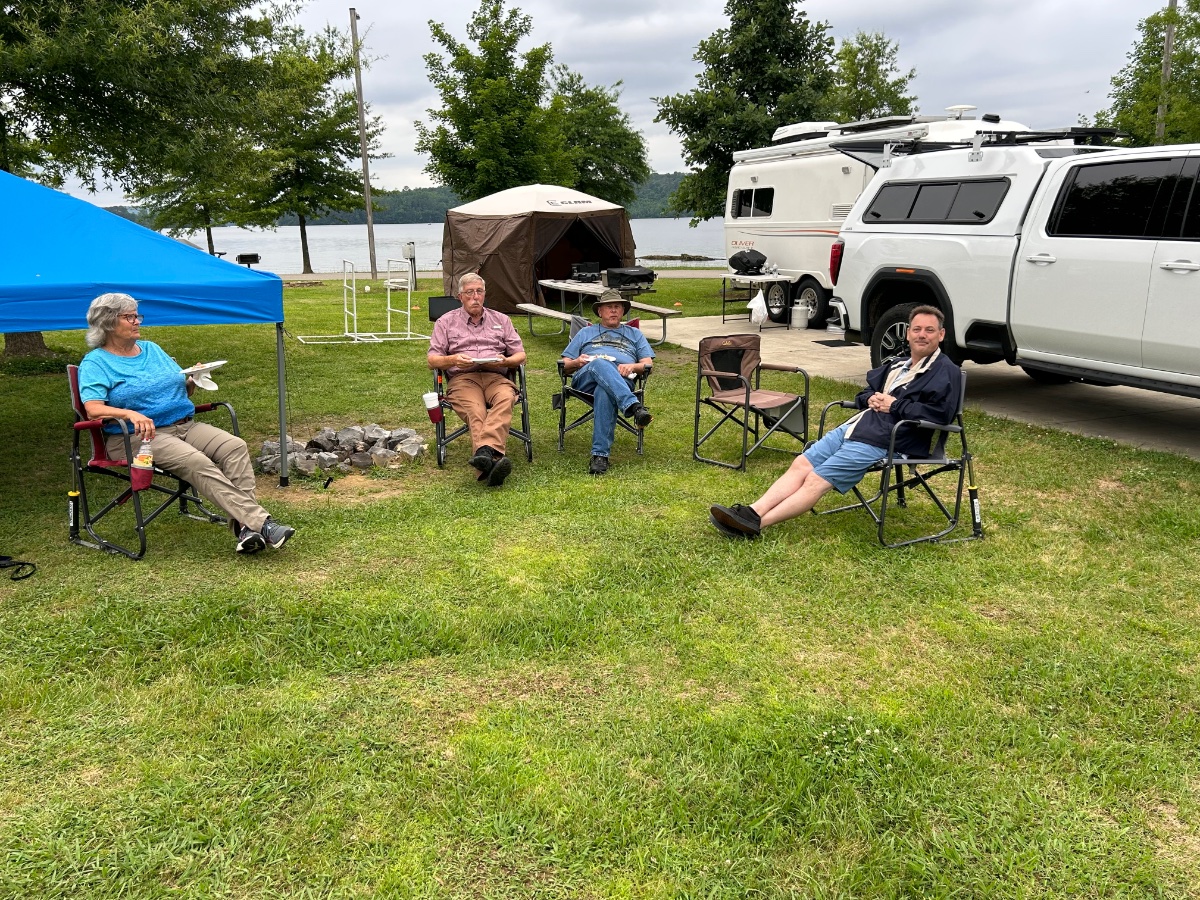
Great rally this year! Thanks to Scott Oliver and his staff and the great folks at Lake Guntersville State Park. If you have pictures this is the place to post them! Here’s the sunset from the lodge after Wednesday’s dinner. One of the best rally activities, sitting around talking! Right to left - Scott Oliver, Ken Cvacho, Lee Slusher and Terry Slusher. This group grew as the evening progressed! Trailers with a view of the lake.
4 points
-
It was a good rally. Time to learn stuff and time to socialize and meet new friends. See you next year!4 points
-
Here is a link to my project to add storage behind the propane tanks. I had to move my tanks forward somewhat to get as much room as possible. This has been made harder now with their mounting of a junction box in front of the tanks. I did this sometime in mid 2016. After seeing this post apparently there were requests made to Oliver and they asked my permission to copy what I had done. I believe this was done to a few trailers, possibly John Davies' trailer4 points
-
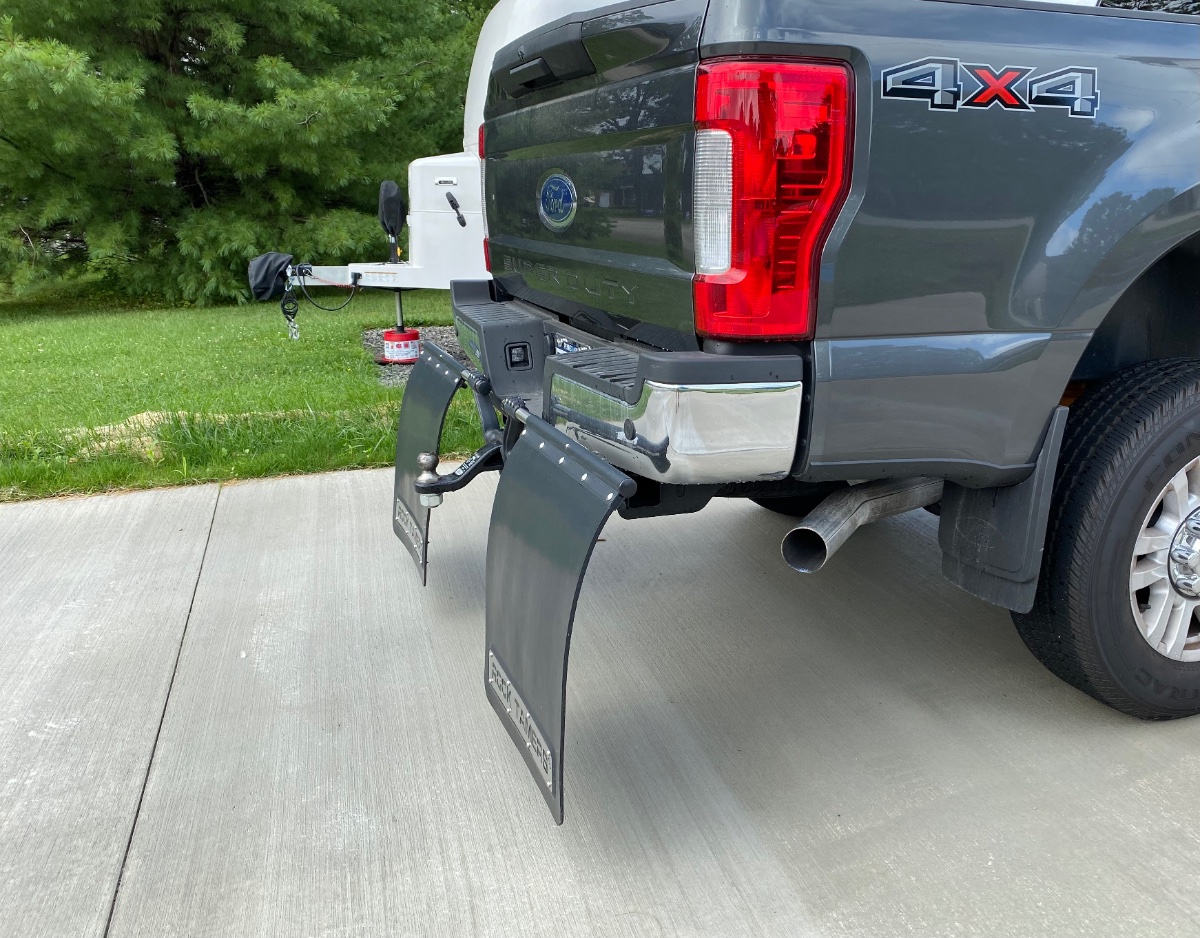
I use Rock Stoppers by https://www.livelymachine.com for a custom cleaner closer to the rear wheel fit and finish. These are Super Duty specific fit. I will never pull our Ollie with out them, they work great. Best of luck in your choice! @HDRider Please add your TV info and Oliver Hull # in your signature line. It will help better answer your questions. Patriot🇺🇸
4 points
-
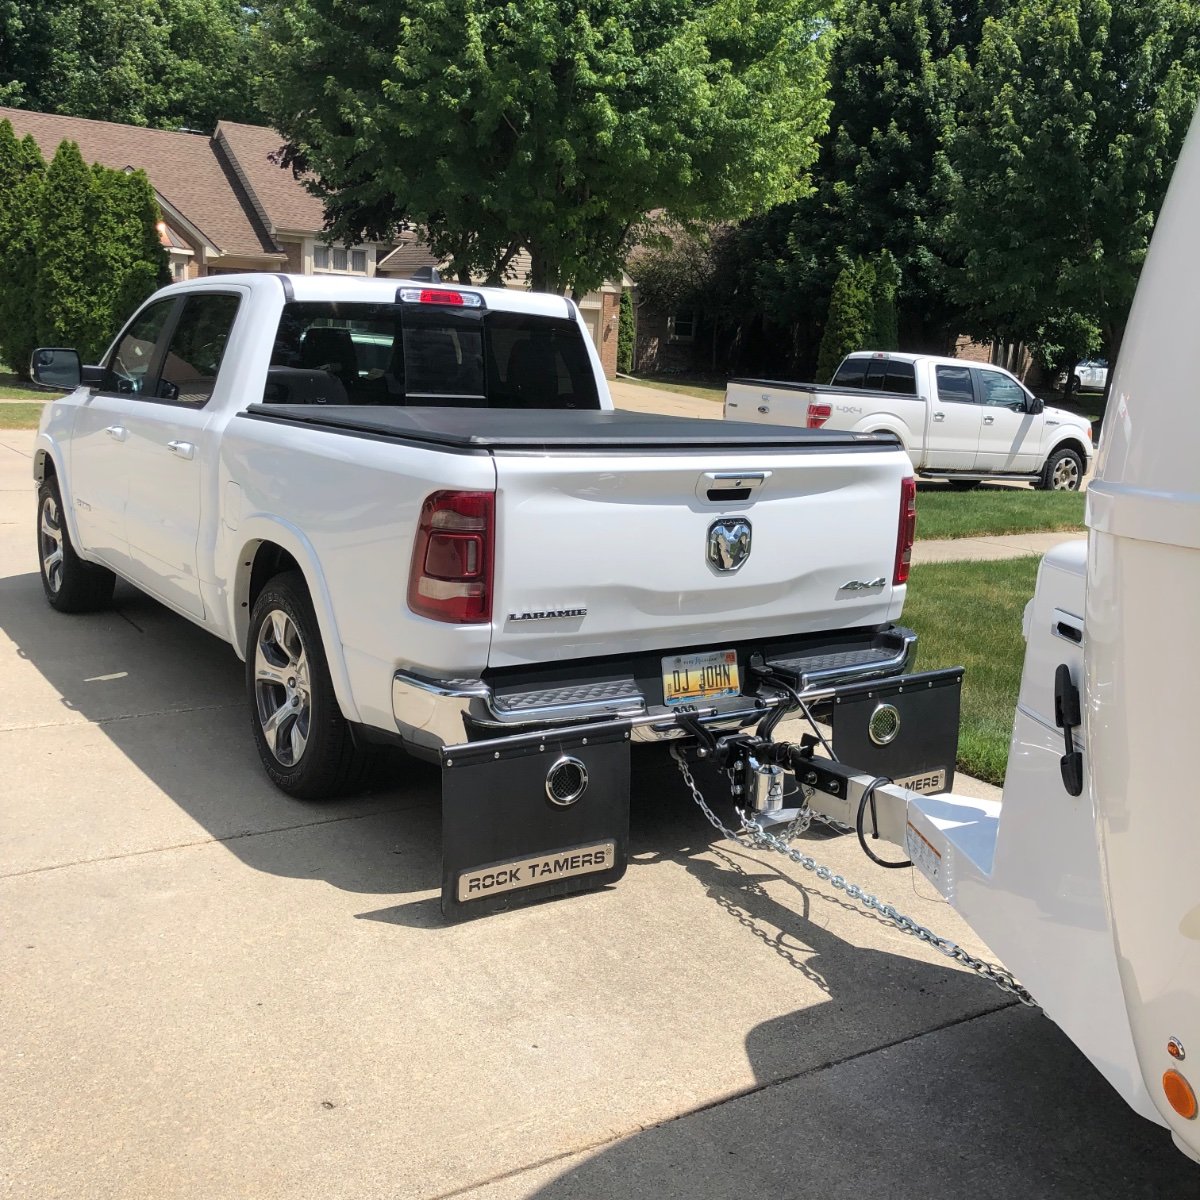
I too have the Rock Tamers like Frank C and concur with his comments. Patriot has a different brand that looks relatively good. Search around and find the ones that work for you. Bill4 points
-
I have the Rock Tamers. After 4 years they’ve worked well to prevent any rock dings on the front of our Ollie. The standard truck mud flaps just behind the rear wheels don’t stop rocks from being thrown rearward towards the trailer
4 points
-
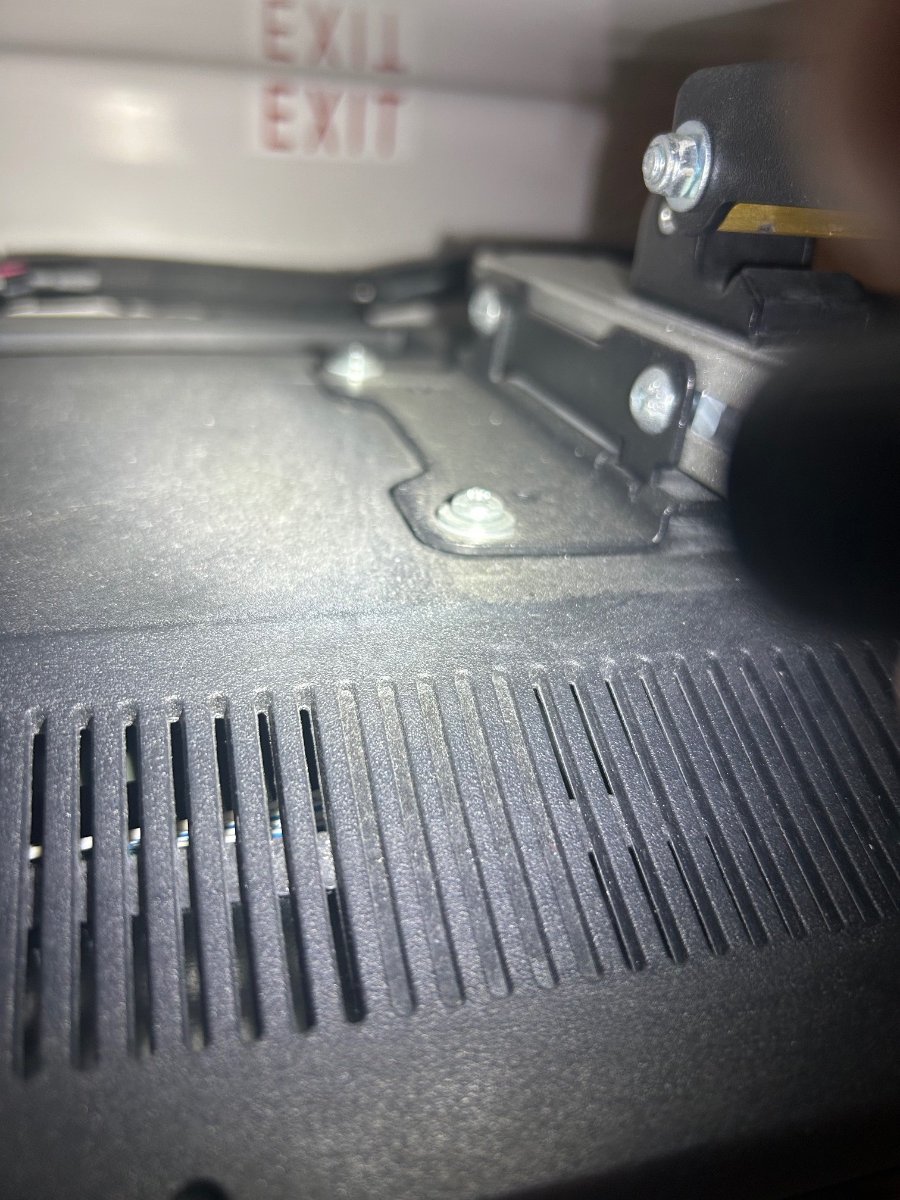
Shortly after arriving home I noticed our TV in Hull 1373 was mounted at it's lowest point on the arm. When in the up position for travel this maximizes the dynamic of bumps and just any up and down movement. I decided to adjust the TV up the arm as close to the mounting base as possible to reduce the length of this "lever" and hopefully reduce the stress to the TV and the under cabinet mount. You can slide the TV up 2-3 inches and it will still hang vertically without touching the bottom of the cabinet overhead when in the viewing position. I don't know if this will significantly reduce the stress on the mounts but it seemed like a good effort at least.4 points
-
I would honestly suggest that you hire a local tech, if you are reaching out with questions. If, you're not familiar with higher voltage wiring.. and, have him/her check the rest of your wiring. This is not, imo, an amateur project. No offense, if you are a pro. My husband was licensed. Many of the contributing members here are, or were.4 points
-
This still needs to be reported to Oliver, We inspected ours and found all ok! Thank you for posting! Edit- We did lower our tire pressure right after pick up. Patriot🇺🇸
4 points
-
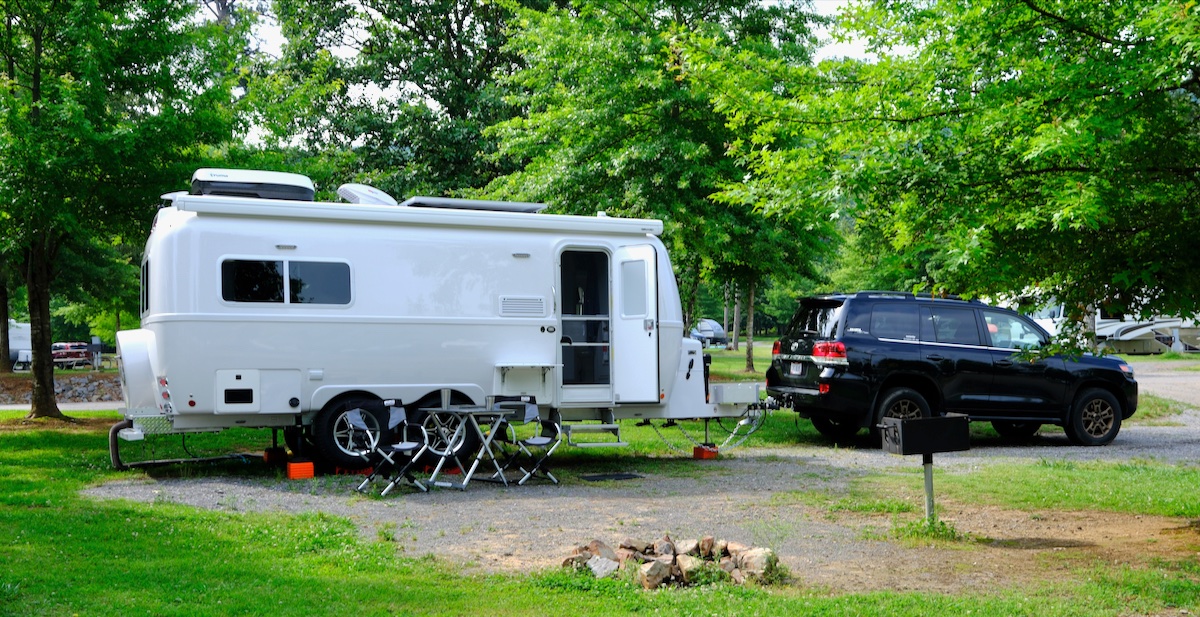
I just got #117 ceramic coated by the great guys at CGI detailing - as with a number of the "older" hulls my Twist now looks even better than it did the day it was hatched! Just why is it that the Oliver looks new - but - the guy looking back at me in the mirror doesn't? Bill p.s. maybe I should have been the one that got "detailed"?4 points
-
Sure looks like everyone had a real blast at the rally - we hope to join y'all next year, for sure... 😎3 points
-
it's the smallest one from Furrion, if its like the one I just got on mine 3/14/23. Very limited mounting options. It has a ball socket in the rear of the monitor, butits an odd size, and I cannot get anything to fit except the included windshield suction mount. Instead, I glued a neodymium magnet to a small board that clipsinto a cellphone holder I already had. The magnet sticks (barely) to the back of the Furrion display (not much metal there). Also, please note, the power supply for the Furrion monitor is 12 VDC cigarette lighter style, which takes up precious dash accessory slots. I really wish we had the option of specing a larger monitor, both the 5 inch and the seven inch monitors from Furrion have more standard mounting options.3 points
-
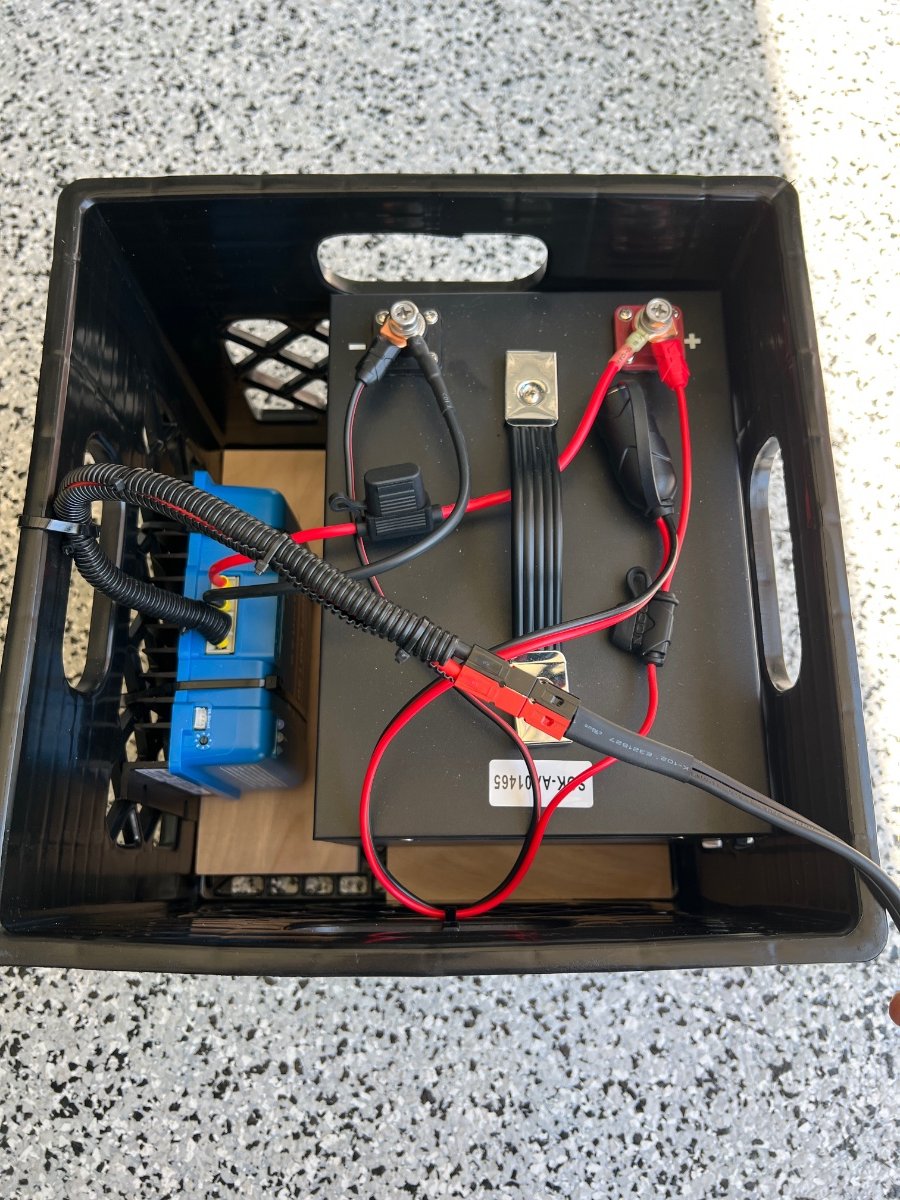
Big Cat: Kindly first add to your signature block your trailer and tow vehicle info. It is kind to do so. I see from your profile you have a 2018 OEII. Same as ours. You have some really nice gear you appear to be adding (Solar, Litho's and 3,000 w inverter). Individually they are easy to replace like for like. But likely you are in an upgrade effort and that changes everything from a hazard perspective, as my above fellow owners have conveyed. If you are in an upgrade mode, I agree with the above posts in that this is not a simple plug and play effort. If you are not experienced, get some help. If you are a technical and can figure it out, then at least document your plan with specifics and post it back. Critical elements are cable sizes, terminal connection process (Solder, Crimp, Both?), fuse protection devices and their protection levels, MFG and model of all components need to be shown if you want real advice on the safety and effectiveness of what you are planning to do. The primary concern for the DC side is that you have a potential in your Litho's to sustain 300 amps each = 1200 amps towards the trailer loads. Instantaneous discharge can be MUCH higher. That mandates your verification that your trailer fuse is a 300 Amp fuse and that your cables are sized as such. Some other considerations: If you don't have a master battery cutoff switch, install one! I recommend the BlueSeas 350 amp model. Wear face shield and have have your fire extinguisher handy when working any electrical. Think through you use of the extra power from a larger 3,000 watt inverter. For example, are you upgrading from the stock 2,000 watt inverter to safely allow you to run A/C off your Litho's? If so, I strongly recommend that you install a separate power transfer switch dedicated for the Air Conditioning load. Otherwise you will ultimately overload the existing switch that is either a 15 or 20 amp 120 Volt rated switch. Just a matter of time before somebody turns on a heavy load (Think hair dryer or microwave) while the AC is running. The 3,000 watt inverter is much larger and heavier than the stock 2,000 watt unit. This requires special techniques for mounting. All of the above extra efforts are well documented in our forum by owners who know what they were doing. So, please be cautious and think of your entire electrical system before making modifications to it. Upgrades are not "just a plug and play" effort. GJ3 points
-
As an update to my previous post, after a email discussion with Frank C, we noted that the existing wall was too thick to accept the specified barrel nuts and let the thumb screws go in straight. I contacted McMaster and they did not really have any good option with a barrel nut that had a larger gap, I took the vanity cover apart and removed the barrel nuts. I then used a grinder on the inside of the wall to make the area where the barrel nuts touched thinner. Using new barrel nuts, the installation was a lot better with the thumb screws going in straight so that the washer set correctly to seal off the opening. Hope this helps anyone that will be making this modification.3 points
-
Awesome post @Katjo - I'm particularly impressed with the side doors and the expanded metal floor inside the doghouse.... Great additional storage for lighter/non-bulky items, brilliant!3 points
-
Further info: both fractures are on the passenger side of the TV - the same side the cable bundle rests on while the TV is folded up. The cables aren't very heavy, but wondering if that's enough to accelerate the damage on that side. Now convinced the TV should be in the down position while traveling.3 points
-
I would suggest you go check out this YouTube channel. You will find detailed instructions on every part of a mobile electrical system. He also has wiring diagrams that you can follow. You are messing with large amount of electricity so you need to understand all aspects. Your inverter will require 4/0 cable. https://youtube.com/@EXPLORISTlife John3 points
-
Maybe you should tell us your hull number and what brand and model inverter. It should have wiring instructions for the DC and the AC parts, that list cable sizes and other important specs. A 3000 watt inverter requires very heavy cables that you will probably have to make yourself. .John Davies Spokane WA3 points
-
I have a 2022 LEI. Monitor is 4 inch screen measuring diagonal.. out side measure is 3 1/16 X 4 3/4.. if this helps..That last month will go by guick..2 points
-
Yes - Your Oliver Sales Rep. Give him/her a call because Oliver can (and does) change specific items/options from time to time. Bill2 points
-
Definitely a "non-trivial" installation to get everything just right. E.g., correct cabling, safe/effective mounting, adequate ventilation (3kw inverters generate HEAT), etc. It's more than, "how to wire an inverter", IMO.2 points
-
I always try and carry several heavy moving blankets to lay over the hood and maybe roof. I am not advocating this is going to prevent all hail damage, but it’s better than nothing if you know hail is on its way. Naturally timing is everything and staying weather aware as much as possible. Patriot🇺🇸2 points
-
While at the recent rally we spotted a Truma service van driving by our site and stopped the van and asked the tech a few questions. We were interested learning a little more about the remote control operation of our new Truma Aventa retro fit. The written instructions are translated from German to English and are not that good at all. After answering our questions we then began talking about the Truma frig/freezers. The tech just happened to have a couple brand new C30’s and (2) new C36’s in his service van for sale. He mentioned to us that the Truma had a promotional sale price on the C36 which was 45% off and the cover was included at no extra charge. Long story short, we purchased a C36 at the sale price. When empty it weighs 50# which will be more manageable than a heavier unit. We understood from the Truma tech the sale price was also offered on line but you have to add it to the cart in order to receive the discount. And you either get free shipping or a free cover not both. With a 10% Ala sales tax we paid $755.00 total for the C36 and under the Truma promotion no charge for the insulated cover. 45% off seems like a pretty good deal with the normal price approx $1300 plus tax.
2 points
-
💯 spot on!2 points
-
It is a big decision. We've maintained our Oliver with two coats annually of good quality marine wax, and even though it's a 2008, it looks great. (,(I also wax the interior, annually. ) It sits outside, 24/7/365. It is undoubtedly not as showroom shiny as ceramic coated, but it beads water, and cleans up shiny. It is, however, a lot of work, to wash and wax, and the ceramic alleviates that work for several years. Many of us are not so inclined to crawl around (and especially above) the trailer, in our "retired" years. It's kind of a "pick your poison" situation. We hired a guy to wax the trailer this spring. He did a good job, used our products, and, it will be fine. It wasn't terribly expensive. It also wasn't "clay bar" prep. C'est la vie. Works for me. Ps, any kind of trailer requires work (wash and wax) to maintain the exterior. Molded fiberglass, with marine gelcoat, like our Ollie, is good for decades, instead of years. Our 40+ year old fiberglass sailboat still looks like it's pretty new. Our 25 year old power boat, ditto. Take care of your stuff. It takes care of you.2 points
-
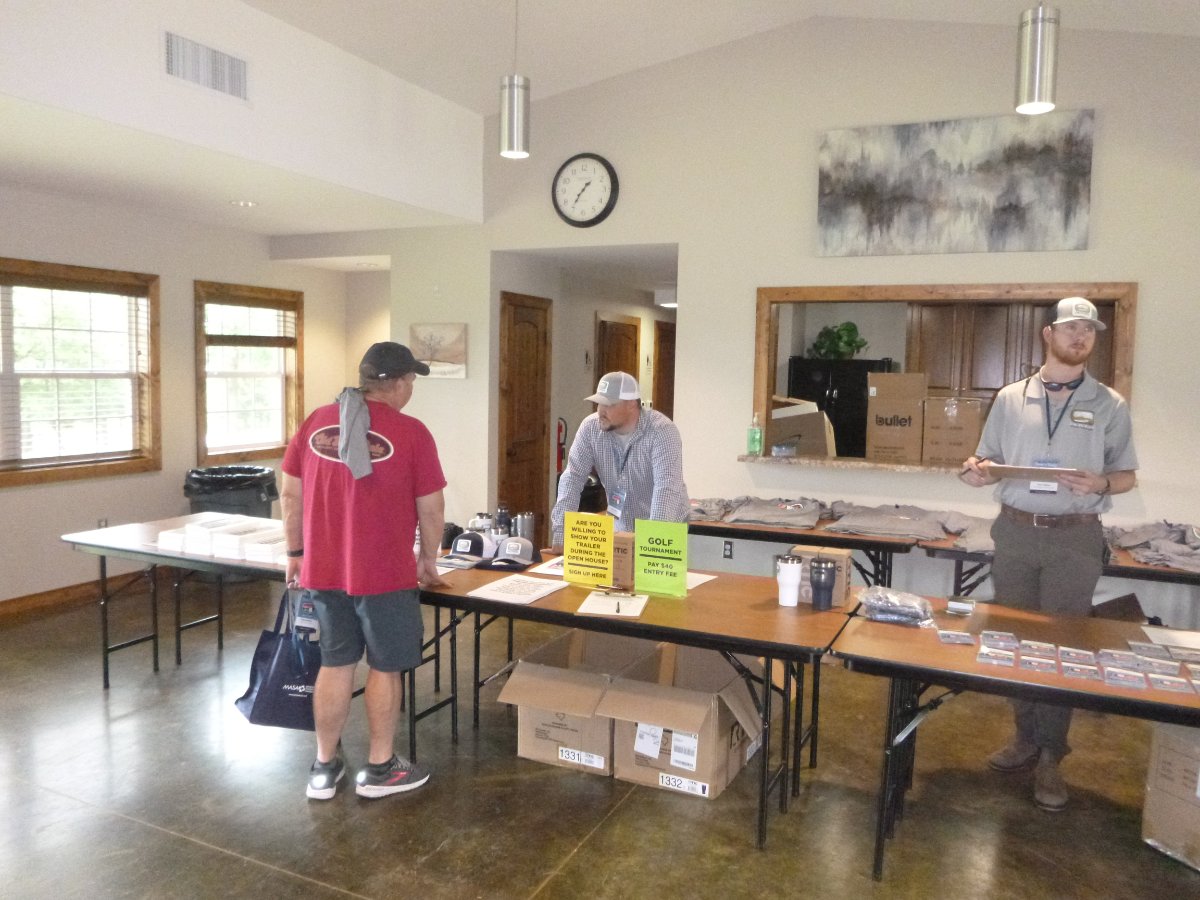
Just got to love those legs on Mr. Oliver!😁 Here's Registration with Phil and Arron manning the desk in great fashion.
2 points
-
We are currently at a USFS campground in Oregon, fortunately we will be moving on to a state park next week. The Feds might decide to close and lock the gates on all the USFS, DNR, BLM, etc campgrounds after telling all the campers to leave… Maybe, maybe not, but if you are at one, you should probably make contingency plans. But if we do default, camping is going to be a pretty minor issue. John Davies Spokane WA2 points
-
Oliver Service did that as a factory option in 2017, one on each aide, they don’t do that sort of stuff to new trailers coming off the production line any more, but I am sure they would do it for you for time and materials cost. Anybody who can cut and drill fiberglass can easily install the doors. The floor should be done by a skilled aluminum welder IMHO and tacked down to the frame in a few spots to keep it from moving and damaging the hull. John Davies Spokane WA2 points
-
That's like saying your expenditures will always rise to meet your income! BL2 points
-
I've had the Iceco VL75Pro for about a year. Works great, has the danfoss compressor and I paid about $870 bucks with a coupon. I have a similar setup to Steve with solar to charge a battery in the truck bed that then powers the fridge. With partial sun it will run indefinitely.
2 points
-
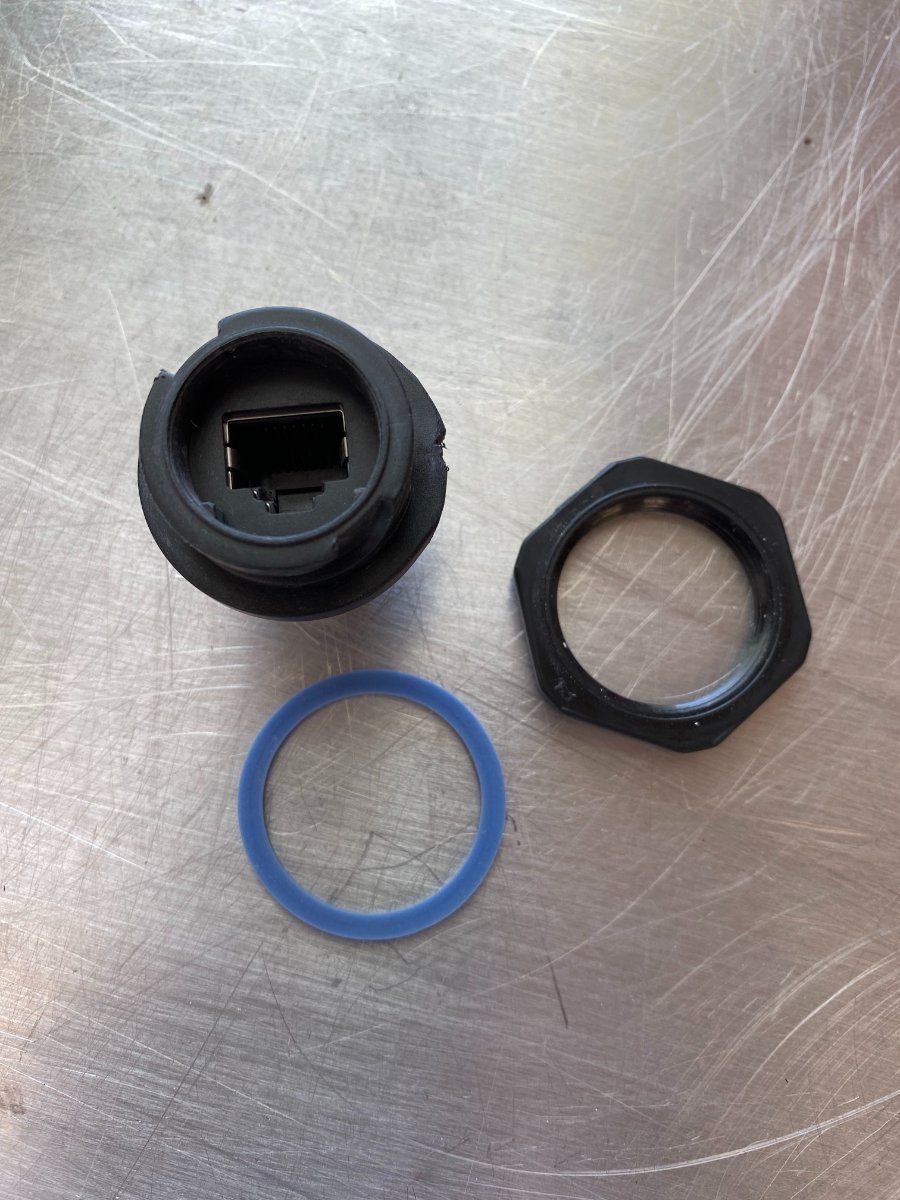
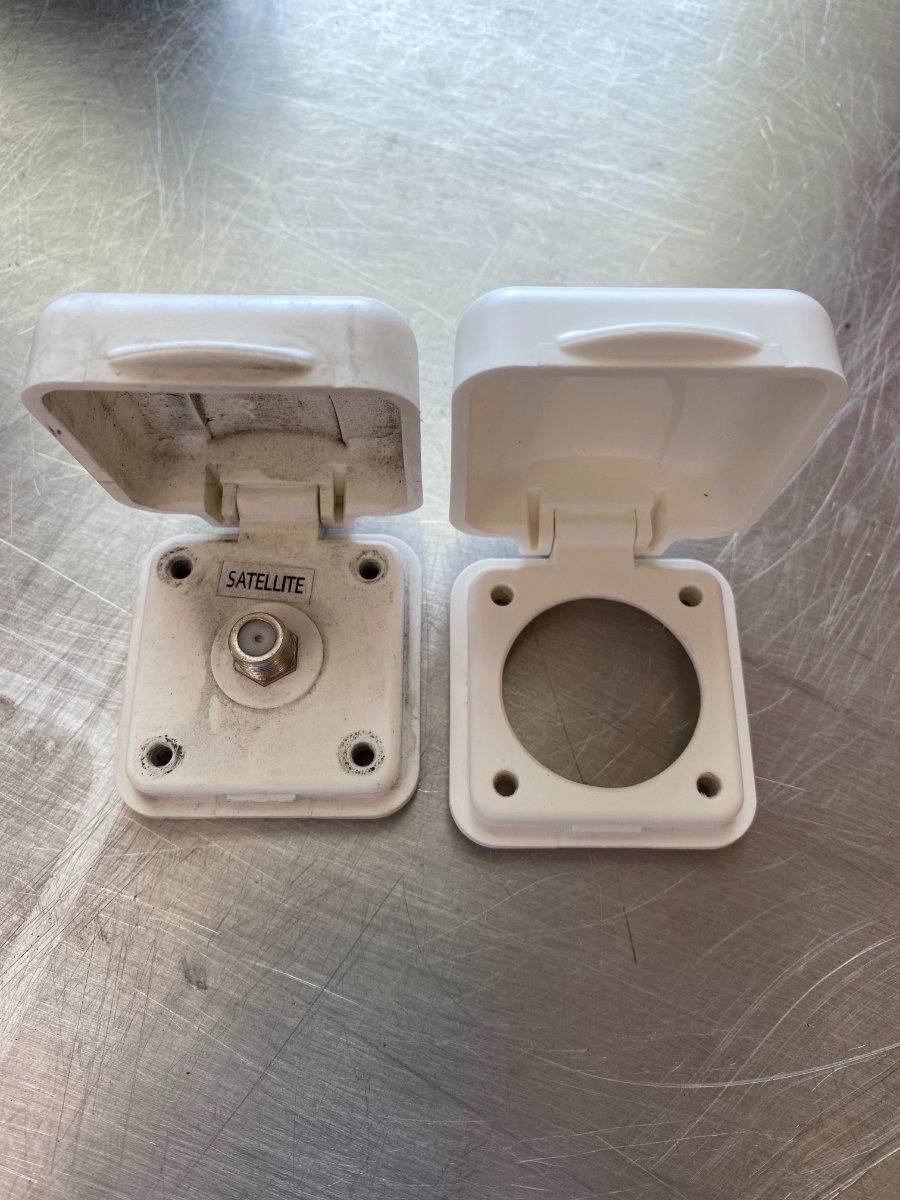
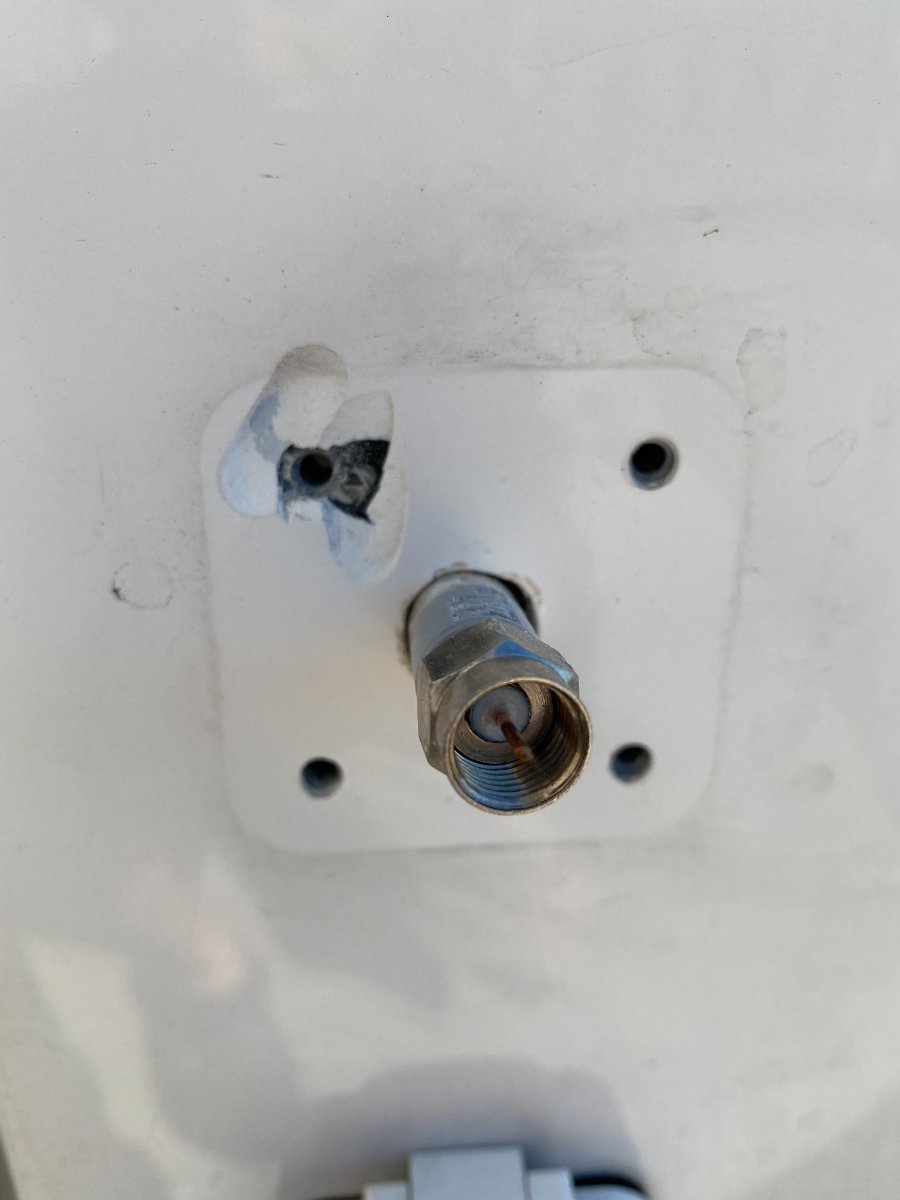
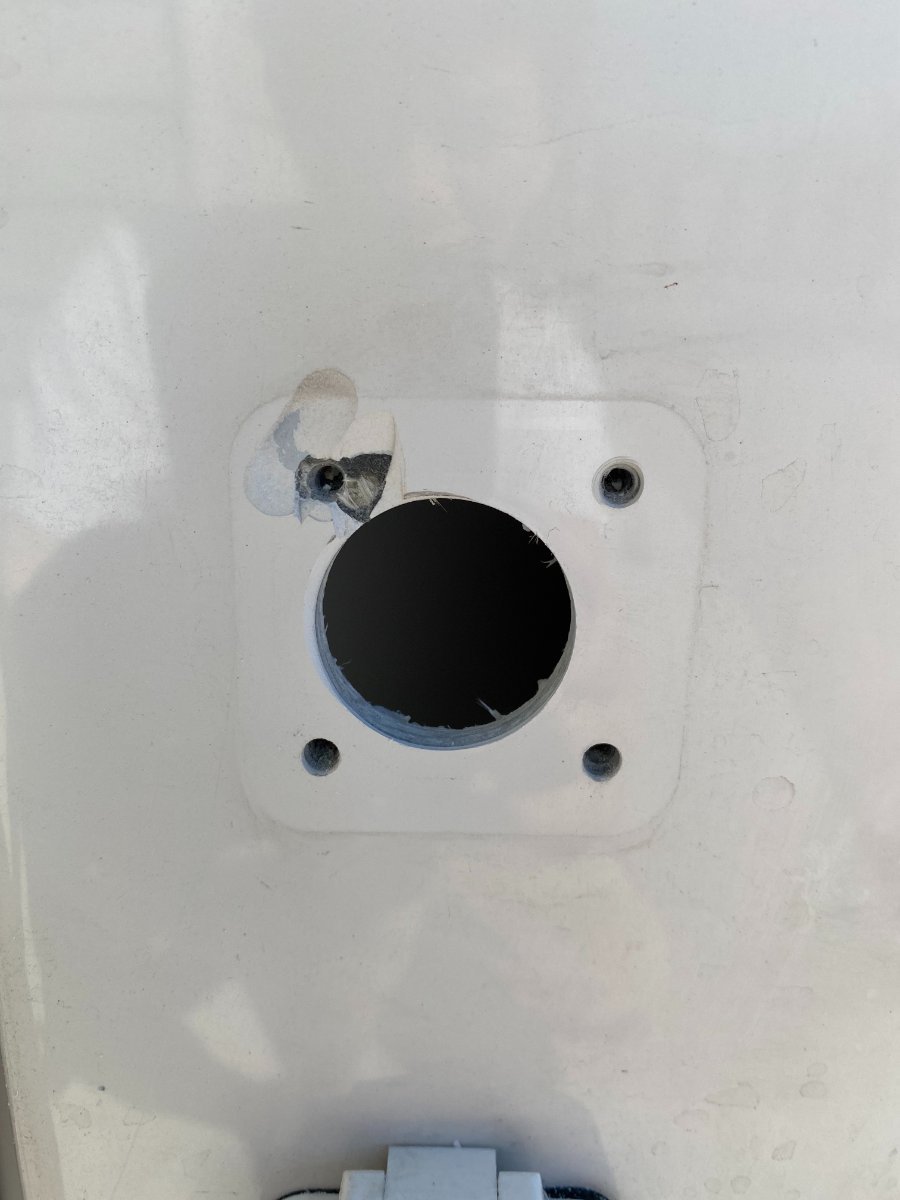
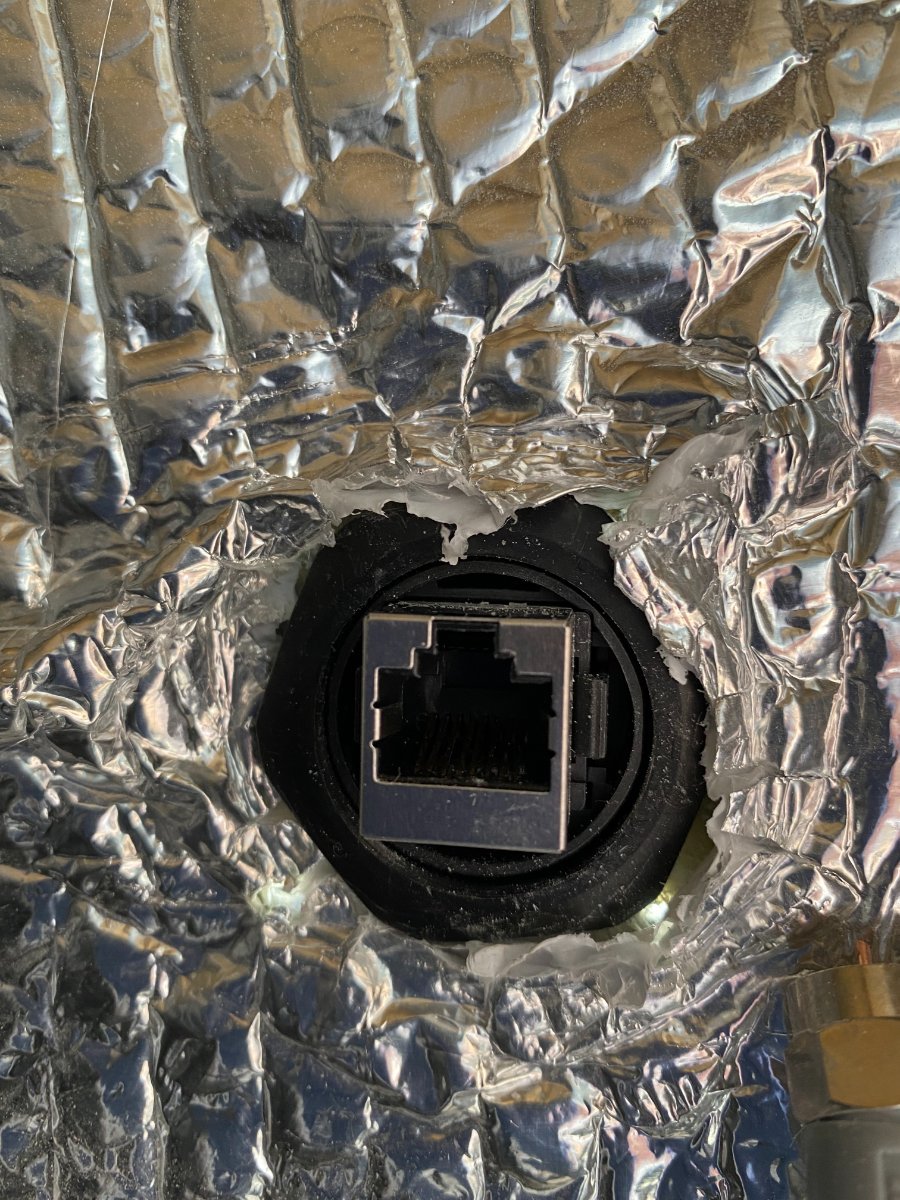
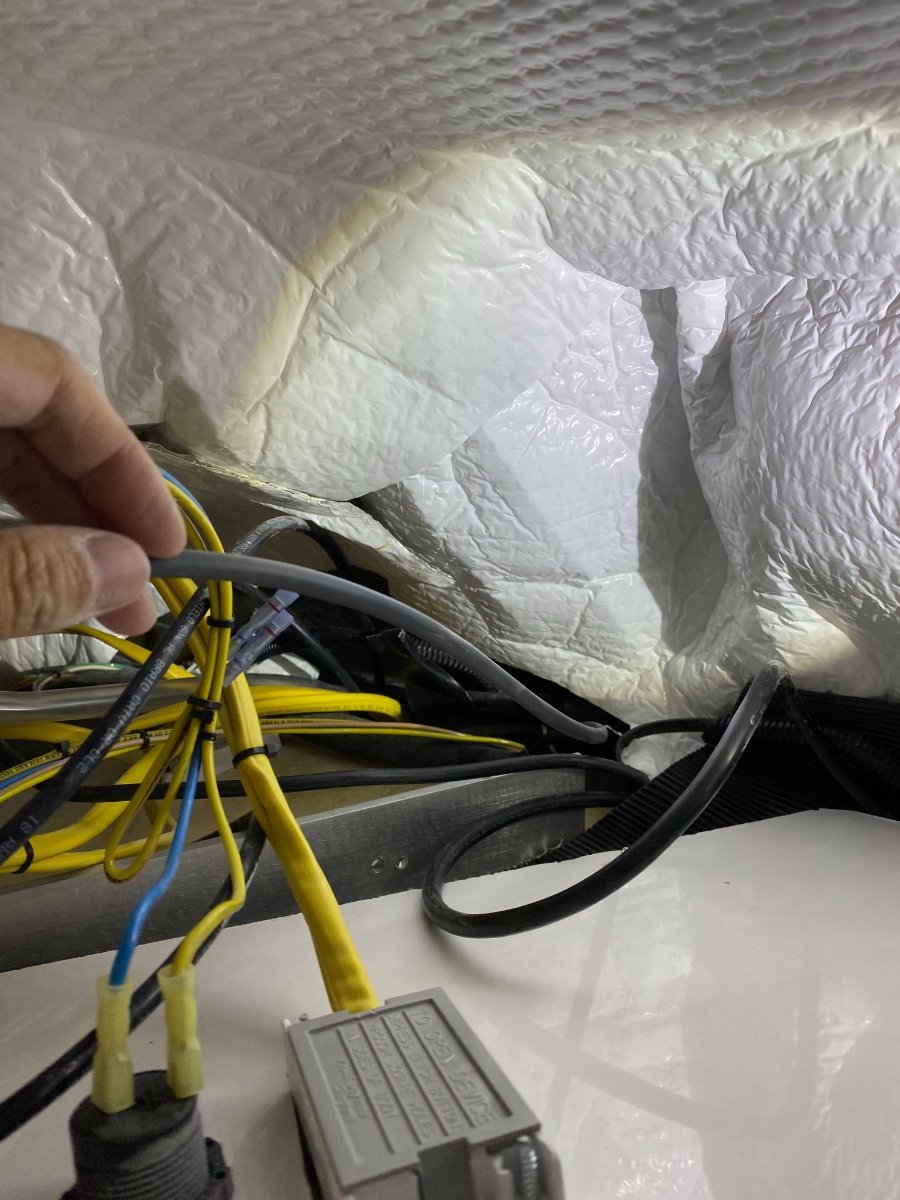
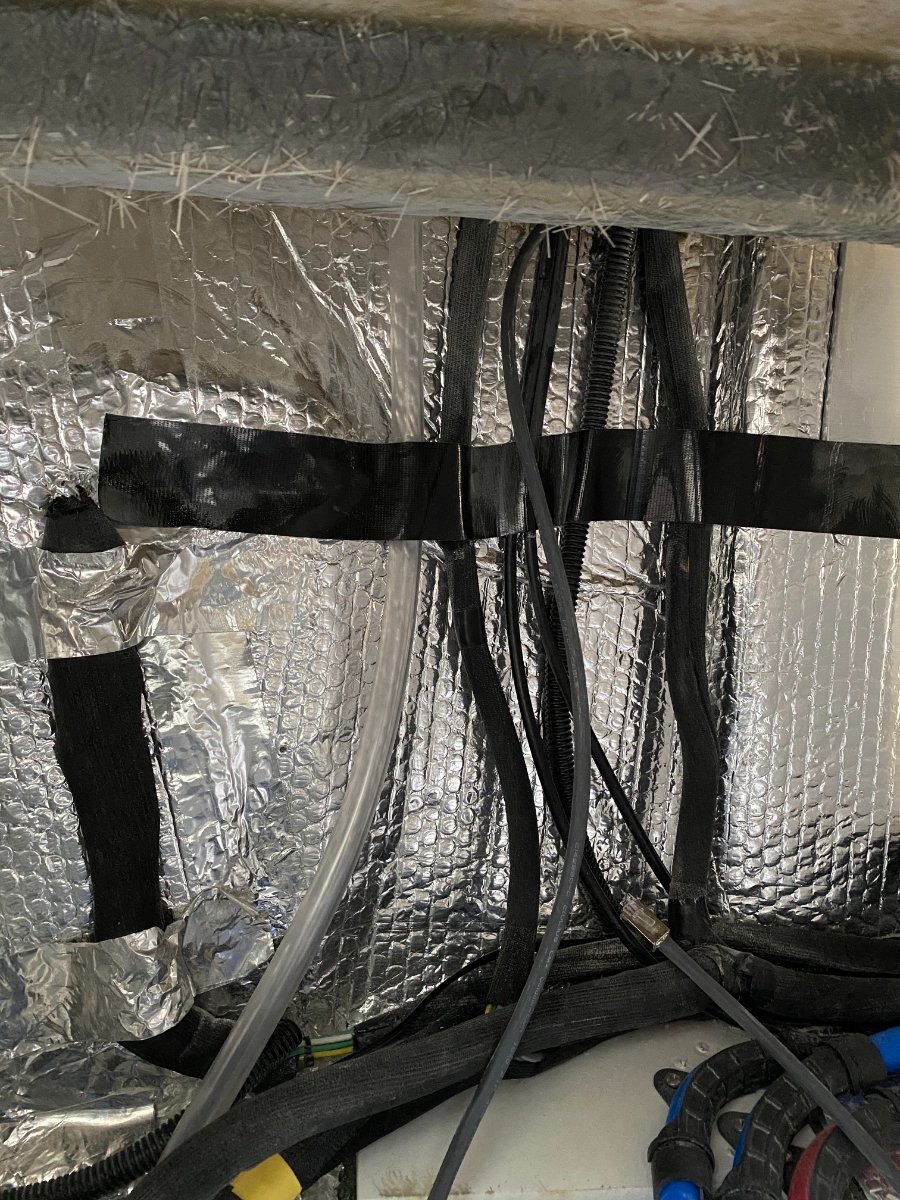
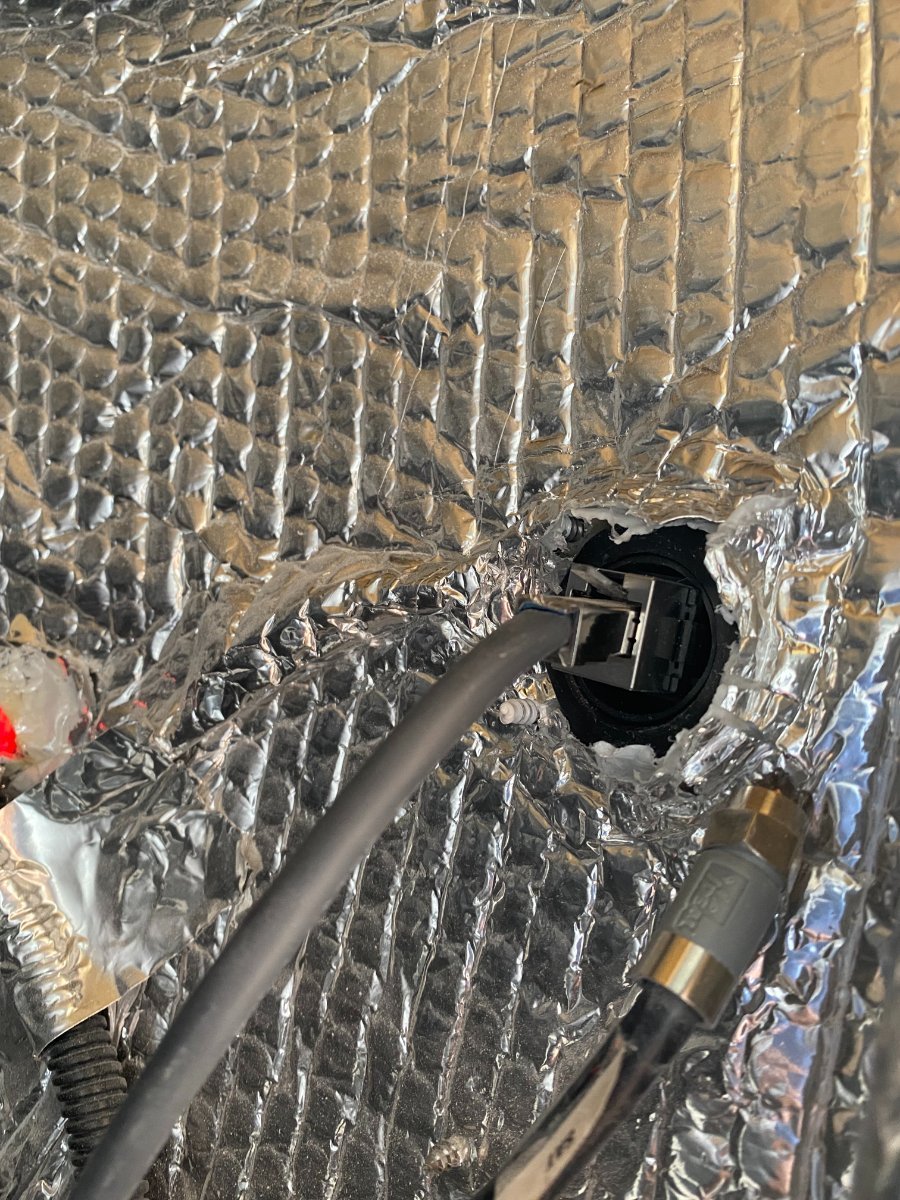
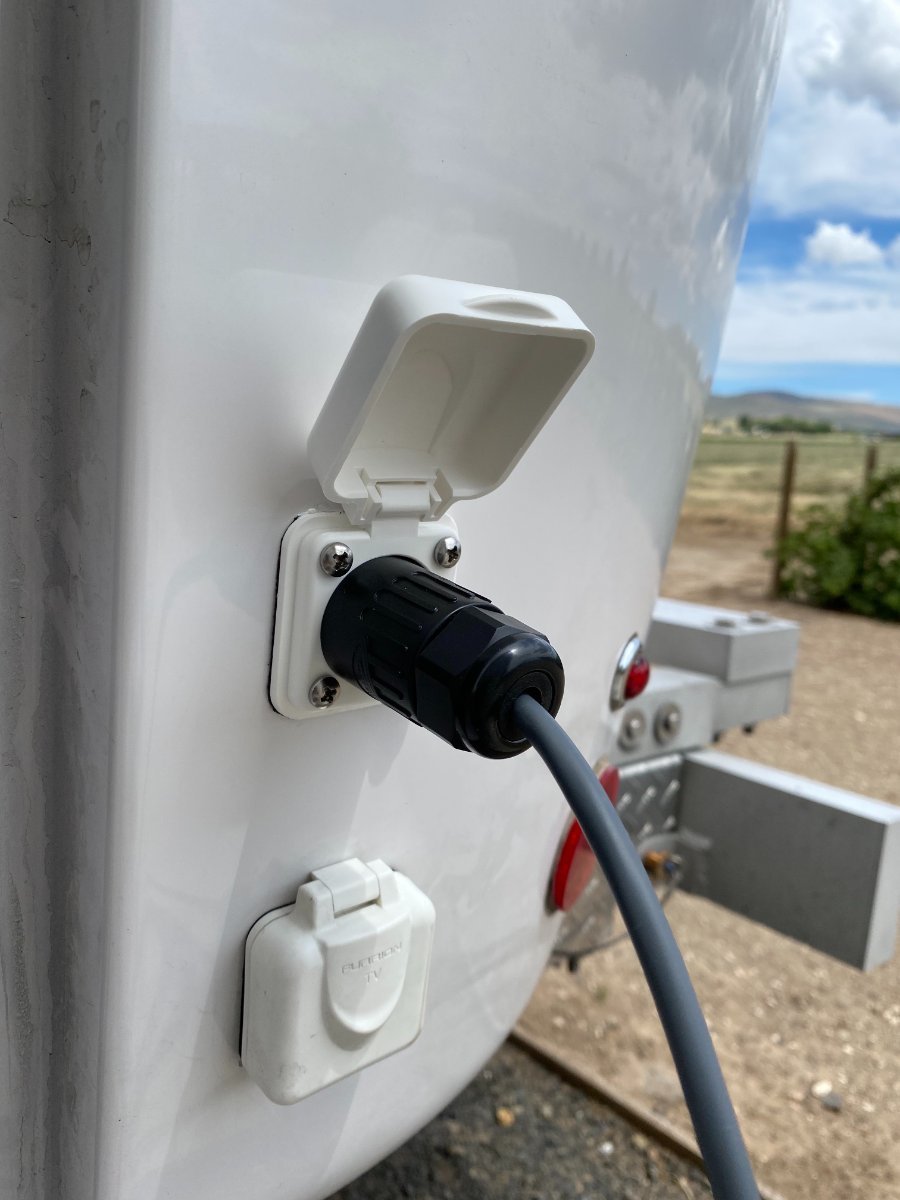
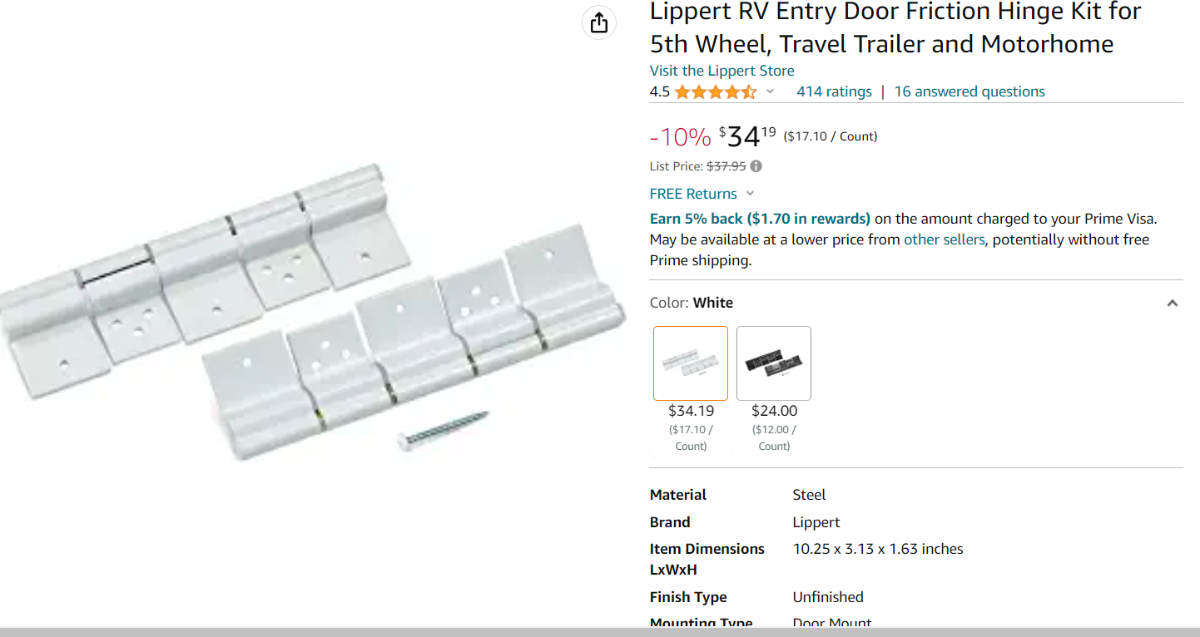
This project is to create an inlet port for Starlink cable into the attic where I put the Starlink router. I decided to repurpose one of those TV/Sat ports. Below are the pictures of the Furrion coax inlets. The left picture is the original and the right one is modified by drilling a big hole using hole saw. This is the waterproof RJ45 inlet port I got from Amazon. Next steps are removing old Furrion and enlarge the cable hole. To my surprise, I found a nice gift from the factory hidden under the seal. No big deal, I can add a little bit of 3M sealant to patch that up. Then install the RJ45 connector, left picture is from the outside, right is from the inside. This is what it looks like after putting back the cover. Next is to fish the cable from attic down to the belly near the furnace and pull it along the back and plug into the RJ45 inside port. You will have to cut the cable and install RJ45 male connectors. There are a few video on YouTube about this. Then plug it in at the RJ45 female at the inside of the inlet. The cable end from the dish will be on the outside. Plug the router in and enjoy fast Internet!
1 point
-
We thought it would be interesting hearing general information about TUNDRA/Oliver experiences... Stuff like tire selection, rear air suspension bags, bed covers, performance data while OTT towing, hitch selection, etc., would be good to share. So, here's some performance data on a recent Ollie adventure: We drove using the tow/haul mode (which increases RPMs in our truck by approximately 2k), A/C on in "Auto", and cruise control set at 65mph. Our starting elevation was 5,550' MSL - while ending elevation was Sea Level. Our pack-plan used roughly 80% of our available useful load. Our trip was 1,435 miles R/T and our mileage on the outbound leg was 13.4mpg - inbound leg dropped mileage to 12.6mpg (likely due to head-winds and elevation gain). Our truck averages just north of 22mpg on the interstate when not towing, FYI. We relied on the mpg readout - but also calculated total mileage manually and calculated 12.9mph (111.2 gallons regular fuel used over 1,435 miles). I didn't get a chance to weigh the ensemble, but will do so next time.1 point
-
We really love our Rocktamers. We’ve had them for 3 years (previously on our AS) they’ve held up really well.
1 point
-
Amen, Bill :)1 point
-
Or the only recourse for some.1 point
-
Bill, Yes, I sent you the FB post before you went to have the CC done by CGI. The bottom line… heck it’s only a $1200 difference. If you’re happy that’s all that counts! 😊 Shine On!! Patriot🇺🇸1 point
-
Oh wow, that’s horrible! It sure can do a lot of damage.1 point
-
https://www.amazon.com/gp/product/B08R7VF5FX/ref=ppx_od_dt_b_asin_title_s00?ie=UTF8&th=1
1 point
-
I was using this tool ordered from Amazon. The order of wires is actually on the tool itself, easy to identify. I'd recommend buying extra Cat 5 and RJ45 connectors and practicing on those first before cutting the actual Starlink cable. That what I did and I had no experience with this before. There are lots of videos on YouTube. The difficulty for me was fishing the cable through the attic space due to tight space but it wasn't that bad. Good luck!
1 point
-
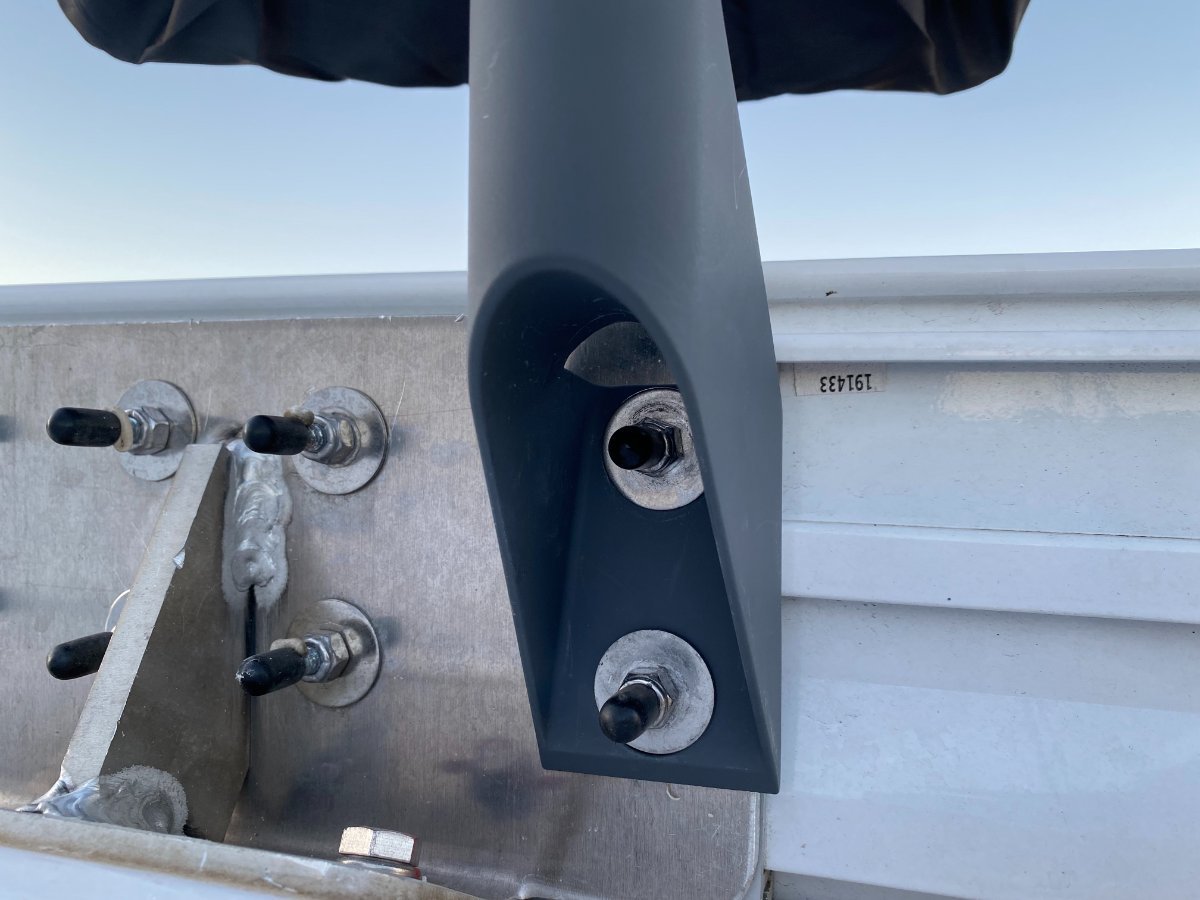
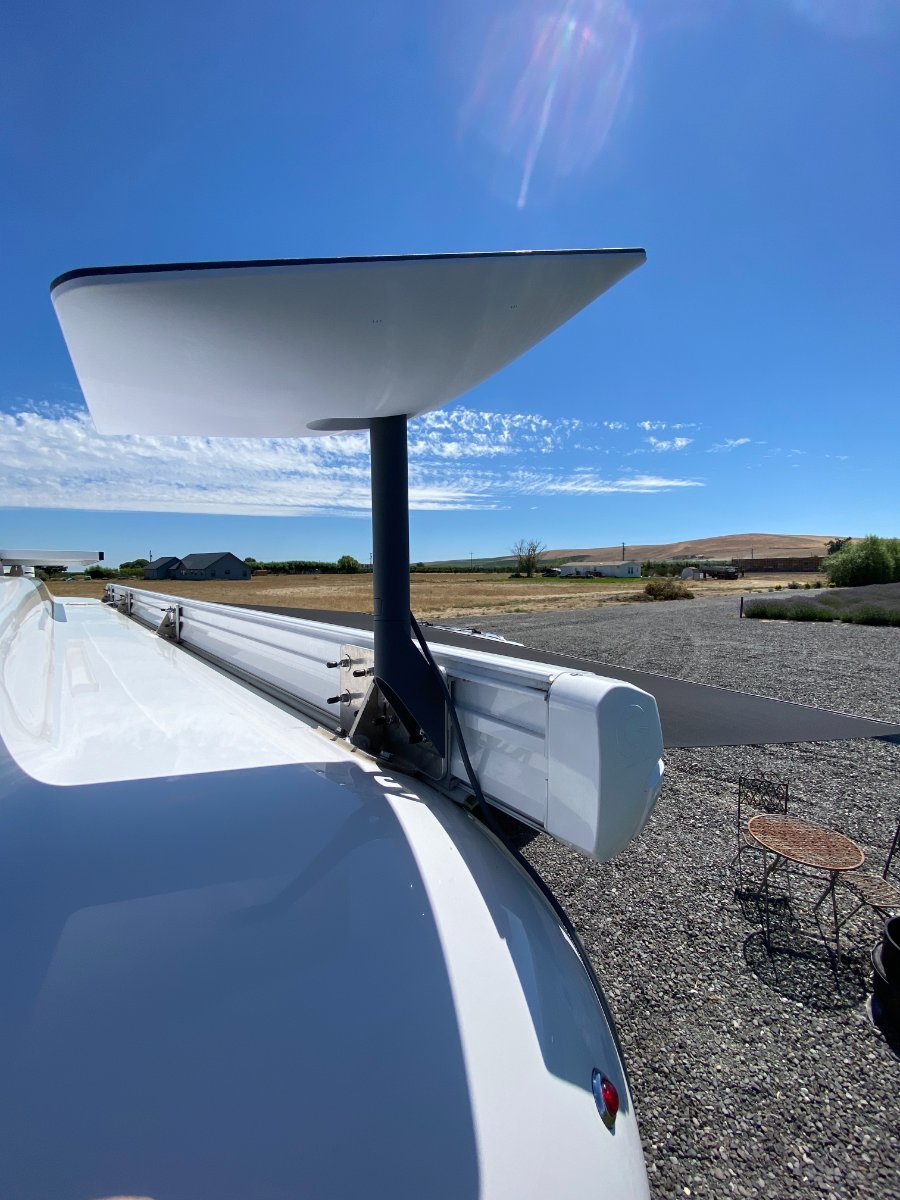
I finished the roof mount over the weekend. Luckily, it was super easy than I thought. The 2 holes of the Starlink short wall mount fit perfectly into the existing awning screws on my Girard. I am not very tall, 5'4", and need a ladder or climb the rear bumper to connect/disconnect the dish. I always take the dish downs when towing. Question: should I be worried about galvanic corrosion. I don't know what kind of metal the mount is but the awning bracket looks like a stainless steel? The installation manual, Short_Wall_Mount_Guide_Rectangular.pdf.pdf, doesn't say much about the mount itself.
1 point
-
Update on Disc Brakes: It has now been more than 7 months since my install. We have pulled the OO-II about 13000 miles since then. From here to northern Washington and from here to extreme eastern Tennessee and a couple of trips back and forth to the factory with two different tow vehicles. The brakes have performed flawlessly. I did have to adjust the on board brake controller down a couple of points to keep them from locking up all four wheels at one time. I have crawled under it several times to make sure there were no fluid leaks. I had a problem at the initial install with a fitting leaking and it took replacing the fitting to get it to stop. Apparently, it was defective from the factory but it made me a little gun-shy about leaks. Not a drop since. I am happy with them.1 point
-
Steve, Excellent installation and photos. Like the parts list breakdown, too.1 point
-
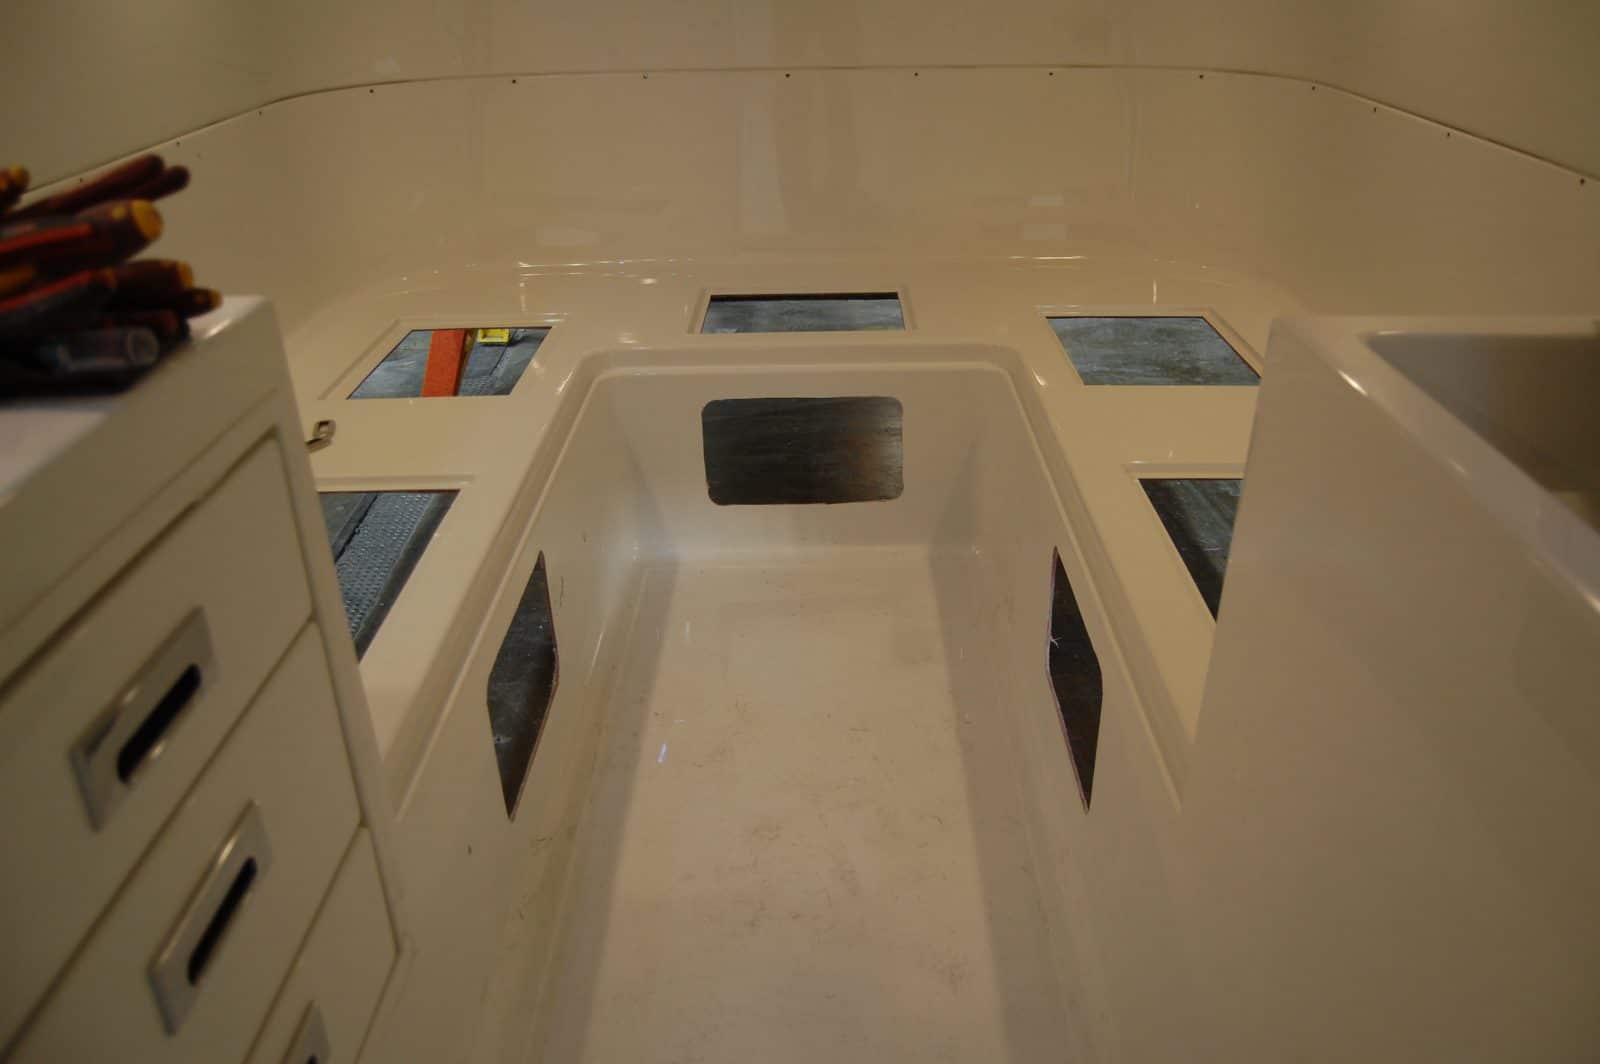
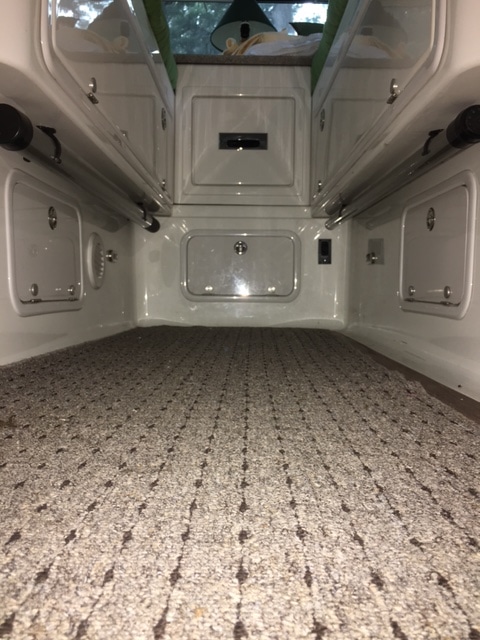
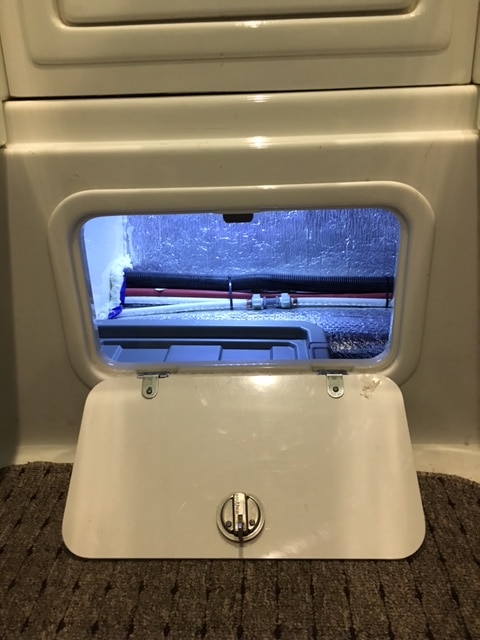
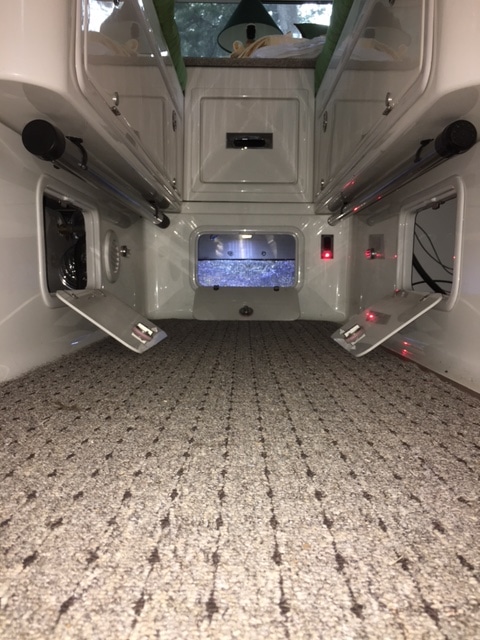
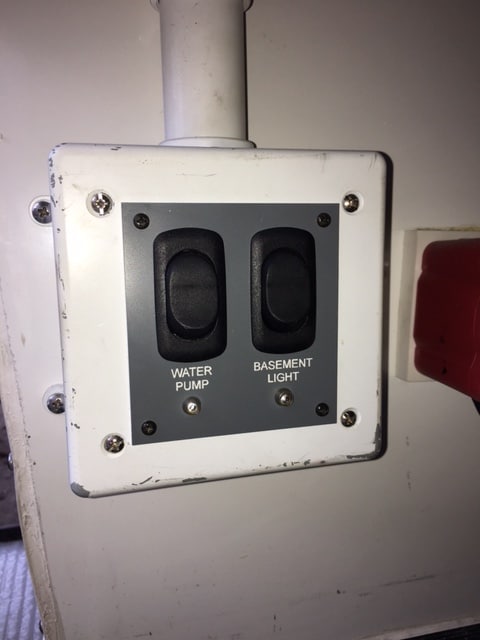
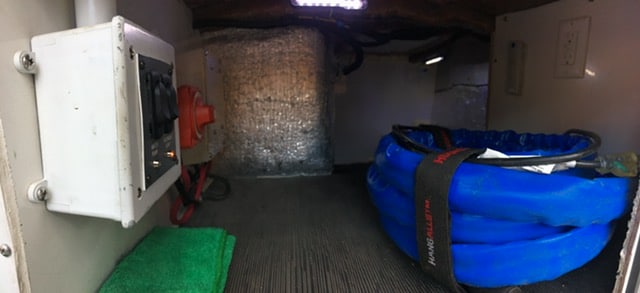
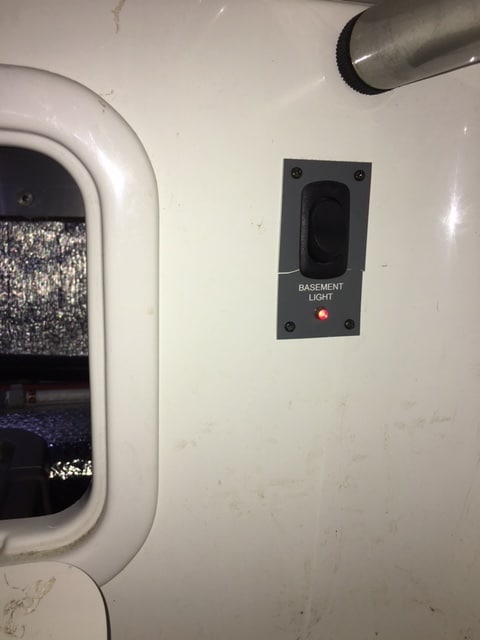
Buzzy, thanks for the inquiry and the interest. I did these mods to the basement a long time ago. Some were actually started during construction: Here you can see where we cut holes in the inside bottom shell to receive hatches (again, these are the same as that one in the bathroom.) The one in the rear under the nightstand is to access the basement. The one on the starboard side is to access the valves at the pump that control the alternate tank fill system and the valves at the floor that drain the water lines. The one on the port side is only to satisfy my OCD Libra need for everything to be symmetrical and balanced. I added two lights to the basement area. They are controlled by a set of 3-way switches, one located right inside the basement door: and the other located to the right of the interior hatch on the inside under the nightstand:
1 point
-
Steve, Wow, beautiful work!!!!! Very creative and will get the job done!1 point


-
Recent Achievements
-


")


")


