Leaderboard


Popular Content
Showing content with the highest reputation on 07/13/2023 in Posts
-
Thank you Bill, for your very kind offer! 🙂 Turns out, I'm good now. Please allow me to start by apologizing for wasting the time of those reading. I should have thought to reboot first, like when your PC is acting up. The reset function only resets the fan turn-on temp to 78. So, I climbed down to lay on the floor (Why did OTT mount a power panel, designed with the door opening in the wrong direction? Where you can only see and access the 12V fuses with your head down by the table post?). Quite painful. So, I pulled the 3rd fuse, and power to the fan cutoff. Laid there another half minute and installed the fuse. When I got up, I was very happy to see that the remote was able to power the fan and all functions worked! Set the turn-on temp and fan speed and it appears all is working again as designed.6 points
-
Your can check to see if an IR transmitter is working with many cell phone cameras. In a dark room, point the remote at your cell camera and press a button. Most cell phone cameras can see IR light. FYI, another thing to watch with MaxxAir fans: some cell phones have a IR transmitter on the screen side. (It's used to detect when the phone is near your face, so your face doesn't press buttons while talking on the phone.) In our last trailer the fan was over the bed. If we left a cell phone face up on the bed the IR from the cell phone would interfere with the MaxxAir remote. (Took me forever to figure that one out!) I imagine the same could happen with a cell phone by the stove or pantry in an Ollie.5 points
-
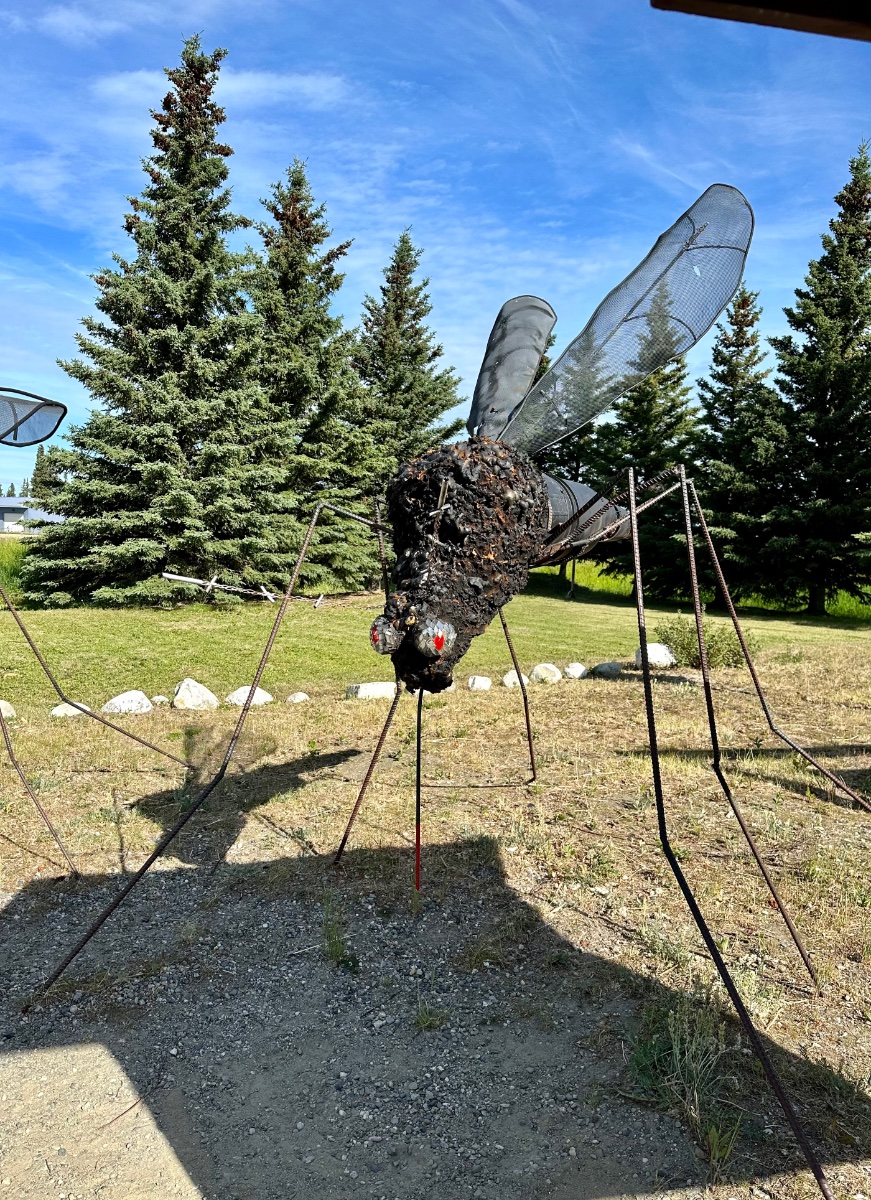
A few pictures as we move forward in Alaska. Now at Fairbanks for a few days. Any attractions that are “not miss”? Chime in…
 4 points
 -
That's great news! Happy Camping!4 points
-
If you need a remote control, I have a spare that's 5 years old and it's free. Tested it a few minutes ago and it works with a late model 7000K MaxxFan deluxe. I can send it USPS. Please send PM if you need it. Bill4 points
-
We've got the factory Dometic Penguin II AC unit on our rig, and I'm told by my better half that our's is pretty loud. A great working AC unit otherwise, IMO. The integrated MaxAir Soft Touch 'stat was a game changer mod for us...FYI. However, working around loud sounds my entire life, has left my hearing WAY less than adequate. Add to that a nice layer of constantly screaming tinnitus, and its not motivating me to swap out our fine-cooling 'Ol Penguin because its "too loud" - largely because I don't hear how bad its noise really is. But, that said, I take everyone's word how the Penguin got its moniker, "NoiseMaker"! Especially, D's! We've replaced several AC units ourselves over the years high atop Vintage AS rigs - these replacements were because of an INOP/unservicable unit, not because they were "too loud." With all this into account, I'm detecting another AC replacement on my radar screen. We too, look forward to the jury's decision regarding the Freshjet's performance - as it would be nice to have a relatively straightforward AC R&R effort. Changing out a Dometic for a Dometic sounds appealing rather than trying to engineer a size 13D foot into a size 9B boot. We shall keep a weather-eye on Dometic Freshjet posts! Not so quietly staying cool, A & D3 points
-
I had a similar problem with a 6 pack of tablets that I had for couple of years. It seemed as if the had swollen up and they were also a little more likely to crumble. I just threw them away and the newer package worked fine. So my take away was to only buy them when needed. Mossey3 points
-
We spotted an EII with the name Miss Bertie on the Alcan Hiway 124 km south of the US /Tok border entry point. Hull 505 - Galway Girl3 points
-
The lack of a low temp charging cutoff wouldn't deter me from buying this battery. That problem can be easily solved by insulating the battery box, adding a heating mat underneath, or adding a low temp cutoff circuit to your charge controller (if that feature is available). Even if a battery has low temp cutoff built in I'd still have a heating mat under it and insulate the box if I lived or camped in cold weather environments.3 points
-
I have had a pair of the AmpereTime 100Ah batteries for over a year now and I've used them for "extra" battery capacity. I do not use them inside of my Ollie, but I do put them outside and use them with a DC to DC charger that's installed inside to add time/life to my on-board lithium batteries - especially boon docking at night during quiet times when I want to run my A/C without the generator. I also use one of them in my small bass fishing boat to run my trolling motor. So much better than the heavier AGMs! The BMS seems to be working well as I've drained them to 0% quite often - no problem charging them back up to 100% and using them again so far. It's only been a year - and in lithium battery life that's not much but so far so good. But...in my opinion - not sophisticated or time tested enough to put in my Ollie battery tray.3 points
-
Well, two things. On old school push button phones, stuff would get gummed up, over time. I'd unplug the phone, and push sharply and repeatedly on keys, and try again. Usually worked. (Worked on my mom's TV remote a few months back.) If that brings no joy, open up the battery compartment, remove batteries, and clean the contacts. Reinsert batteries, and see if you have success. If that doesn't work, if it were me, I'd be ordering a new remote. Then again, could be the receiver in the fan...3 points
-
Those RV'ers entering into the camping community during the C-19 debacle are no longer interested in camping saturating the used market by selling their 2-year old rigs - softening the pre-owned market and driving down first-time RV buyers, IMO.3 points
-
Thanks guys, I guess I was not wasting your time. We all love writing and talking about our toys, the Ollie being new for me, for sure! I wonder could the IR from one of our cellphones (mine is a years old iPhone, but Chris has a brand-new Samsung) was what caused the MAXXAIR to get confused in the first place?2 points
-
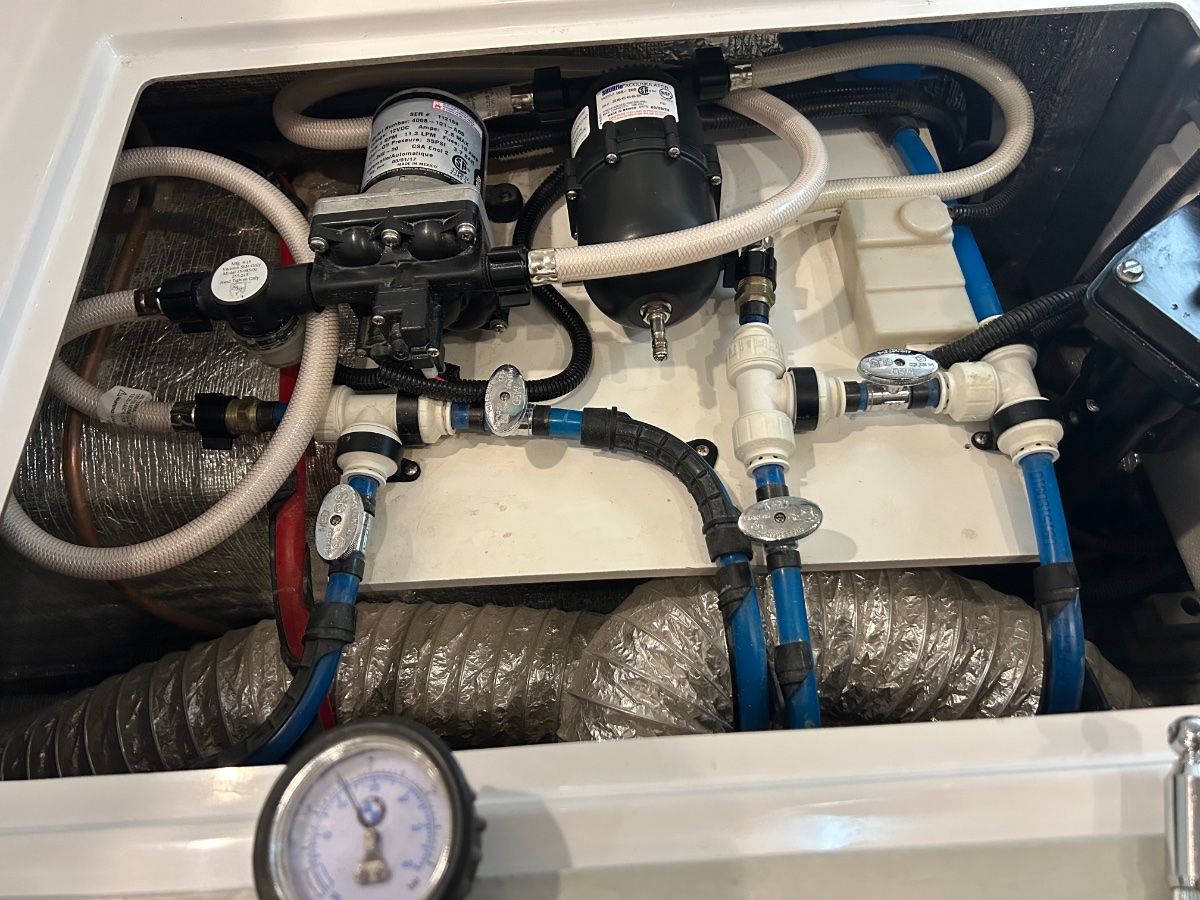
We don't have a need to winterize, so we installed the accumulator horizontally with access to the Shrader valve. Easy install including the longer ShureFlow hoses for the "quiet modification." We've mounted a small mountain bike hand pump on the underside of the forward curbside hatch cover for easier accumulator bladder air adjustments. We've played with air pressure settings between 20 and 40psi; settled on 30. With this pressure, water seems to flow longer from the kitchen sink before the pump starts. FWIW: It does seem to run a bit quieter, according to D. However, I can barely hear it at all... Cheers! A & D
2 points
-
Good to know I’m not the only one. I do think moving the temperature probe helped with the cycling. Yesterday I installed a relay which shuts off the interior fan when compressor shuts off. So far in testing, it doesn’t cycle nearly as much. I’m also hoping this will address the humidity issue we have at night. The consensus on the Houghton unit regarding humidity is that the interior fan never shuts off, thus reintroducing humidity back into the cabin. Can’t wait for next trip to try it out.2 points
-
On my 22 it would cause it to retract any time the lights of the truck came on such as opening the doors or locking/unlocking it. i suspect its tied to the trailers running lights as those would come on as well.2 points
-
John, Thanks for your comment. I agree, without replacing the external Zamp connector and fuse inside the trailer, one seems to be limited to approx 10 amp/140 watts max given the internal fuse limits (connector limit <=20A, inline fuse 10A, 10 AWG wiring should be good for 30 amp given the short runs inside the trailer). 😁Hoover factor is high with MC4 and SAE/Zamp style connectors compared to Powerwerx/Anderson style connectors you suggest. For larger panels/arrays it seems that in addition to replacing the Zamp connector, the internal 10A fuse would also need to be changed up to 400-500 watts - or - simply go straight to the battery as you outlined in your article. Victron has a cool spreadsheet to help size their MPPT controllers given your own panel specs (spreadsheet attached). I use Southwire's wire sizing tool here. Thanks again! VE-MPPT-Calc-4_0.xlsm2 points
-
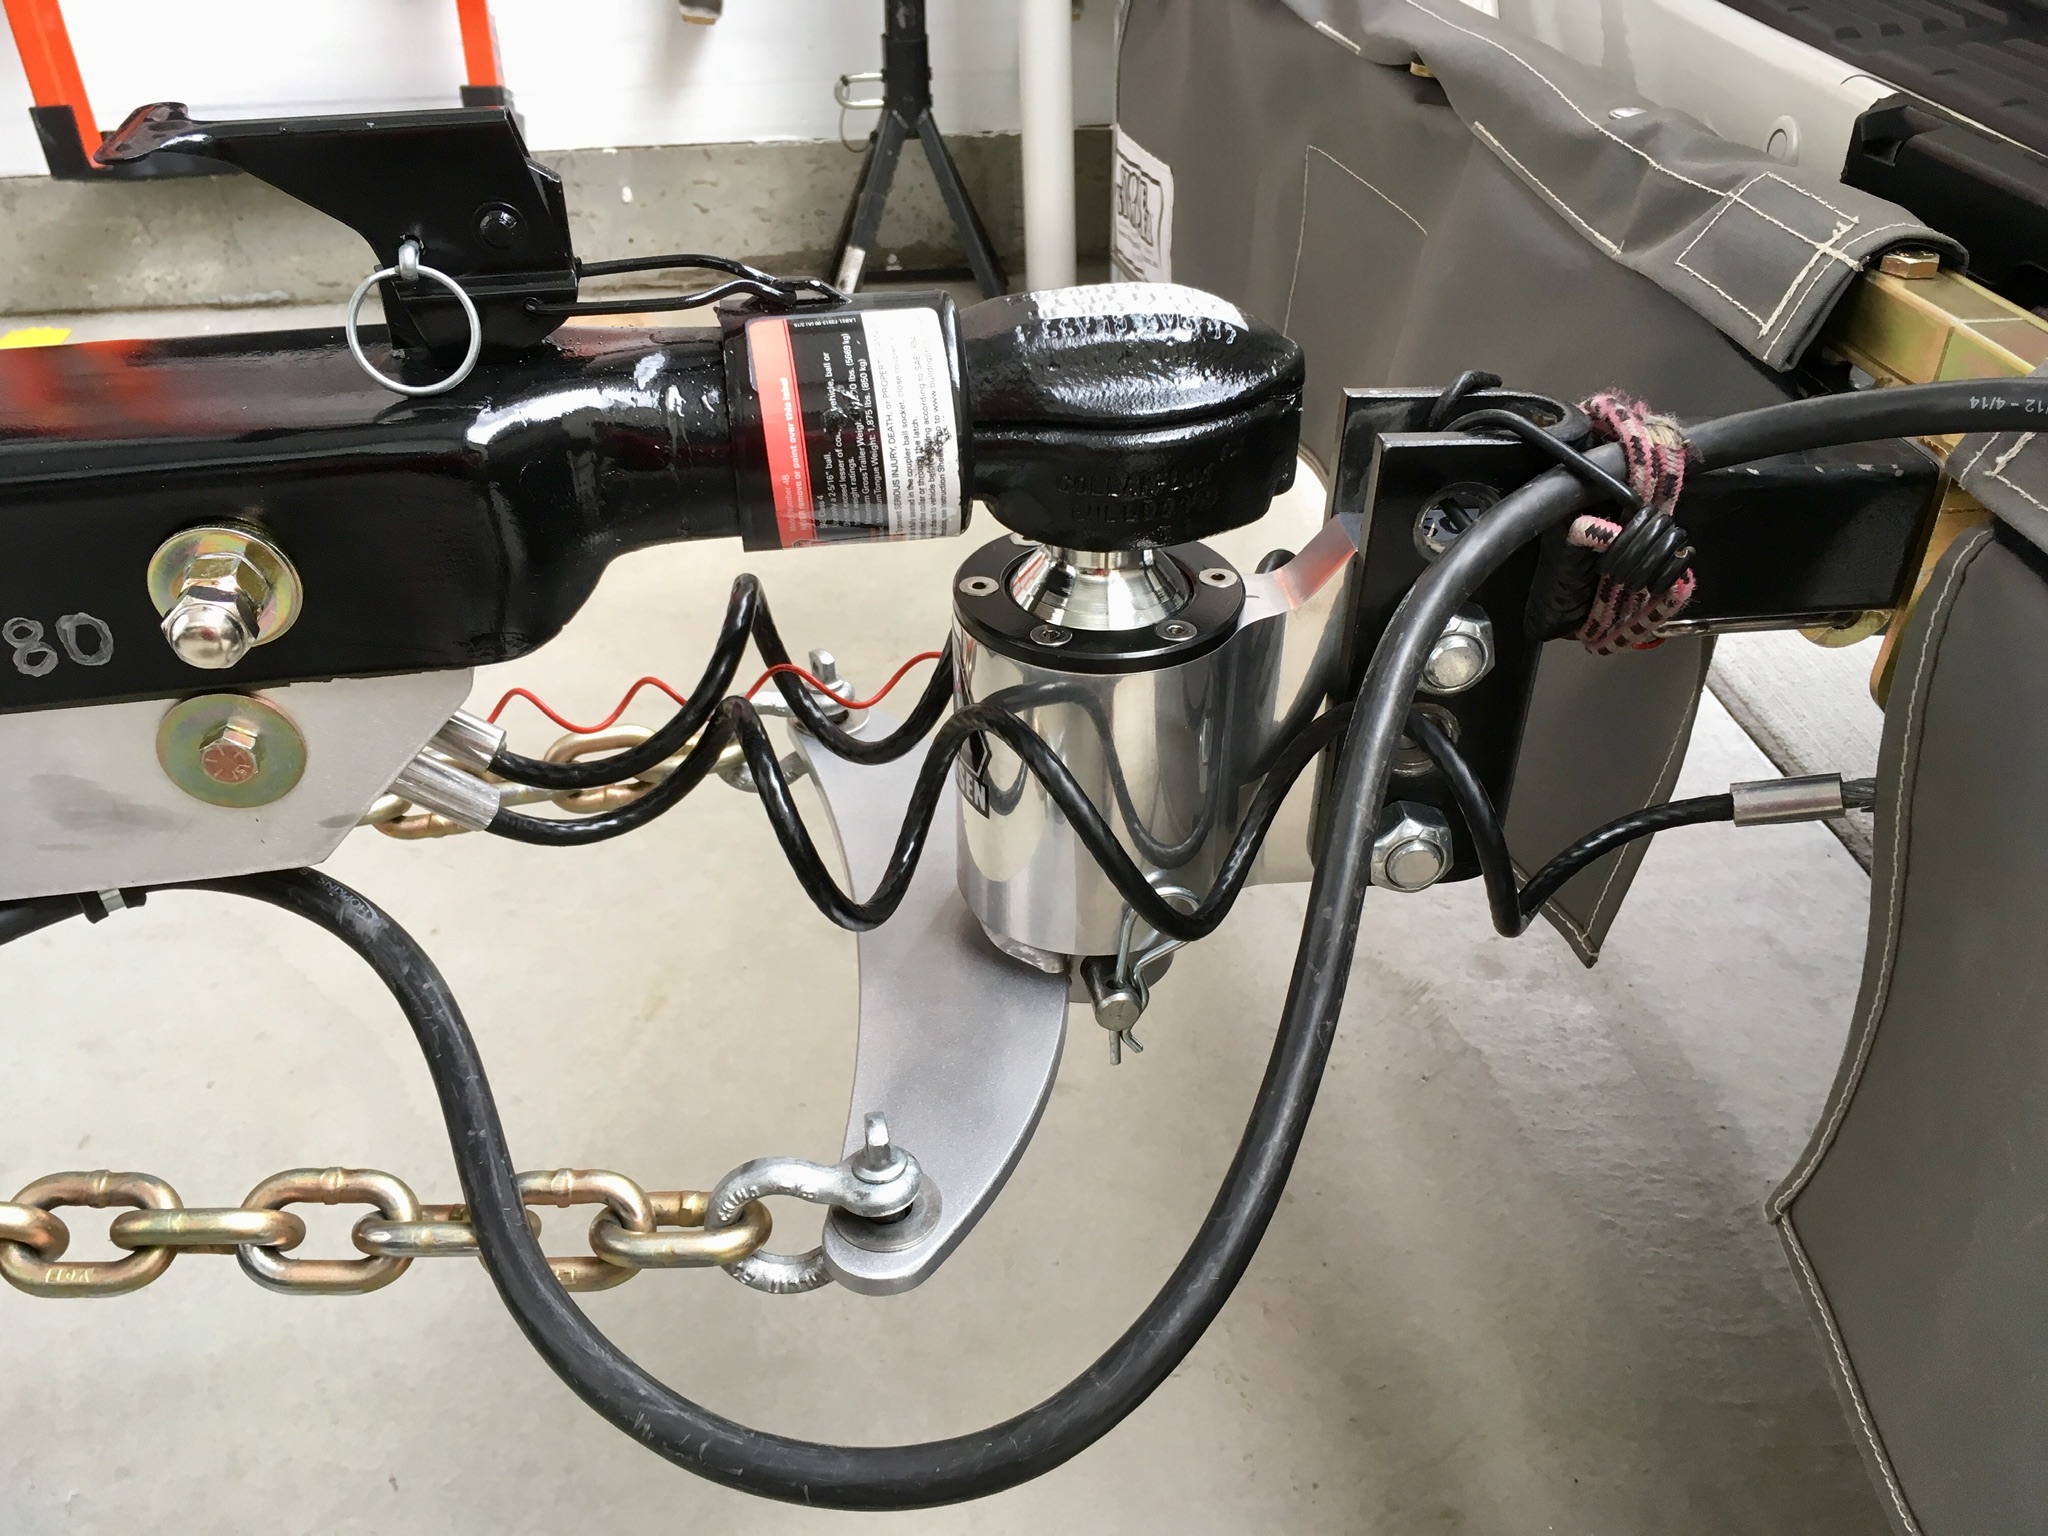
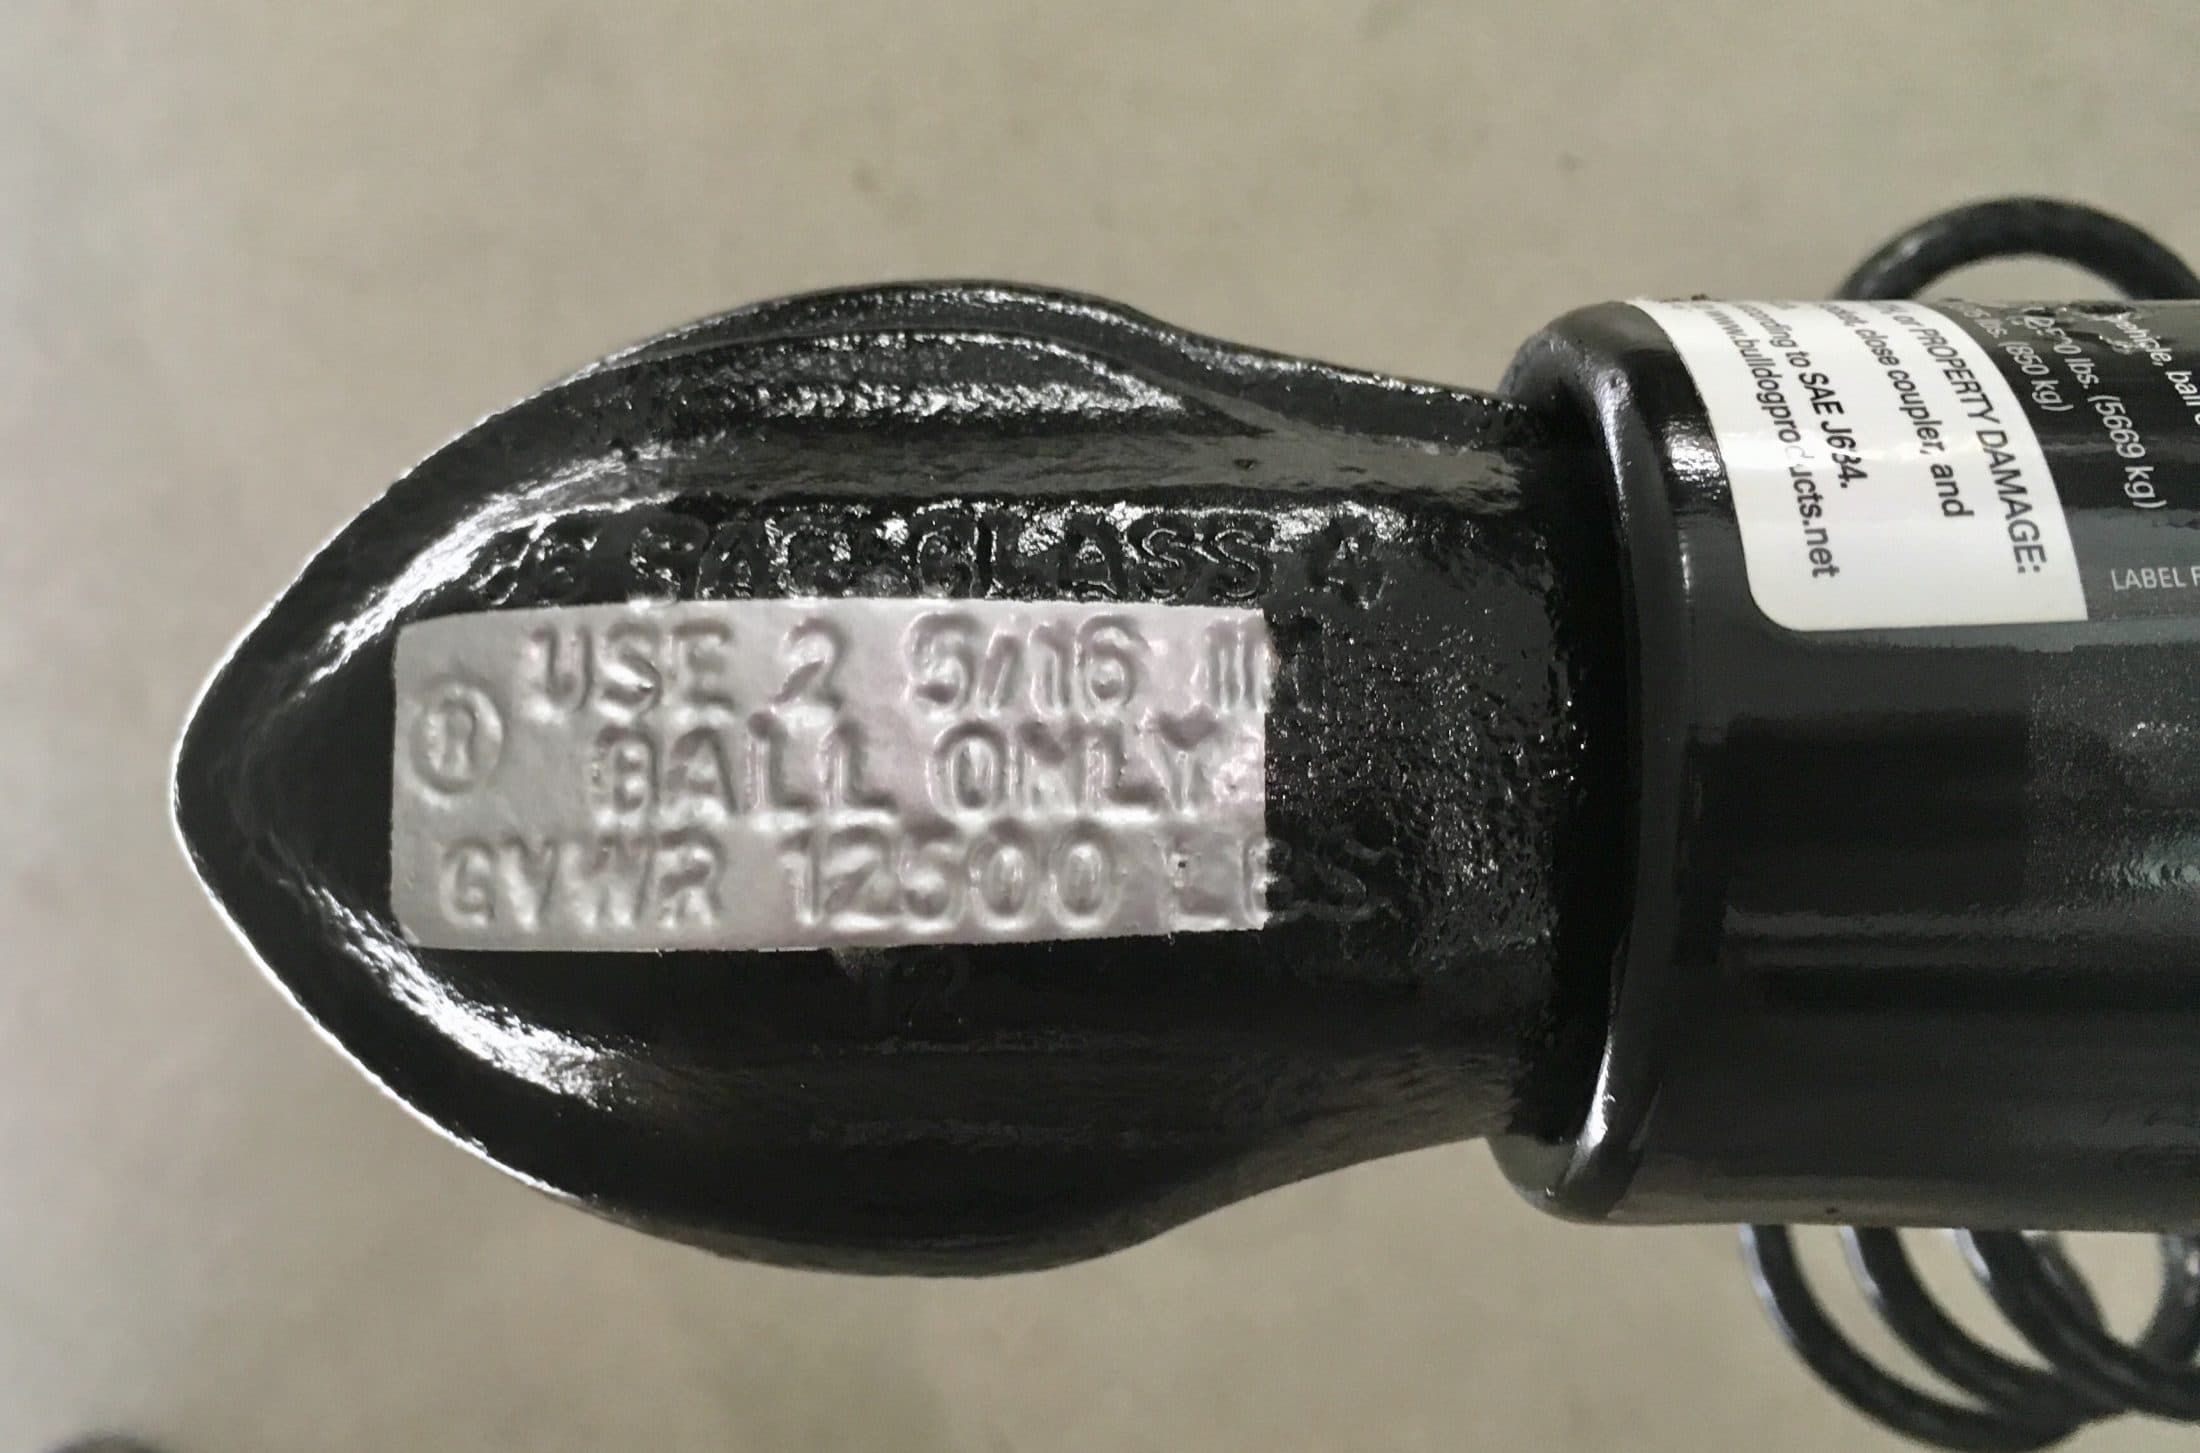
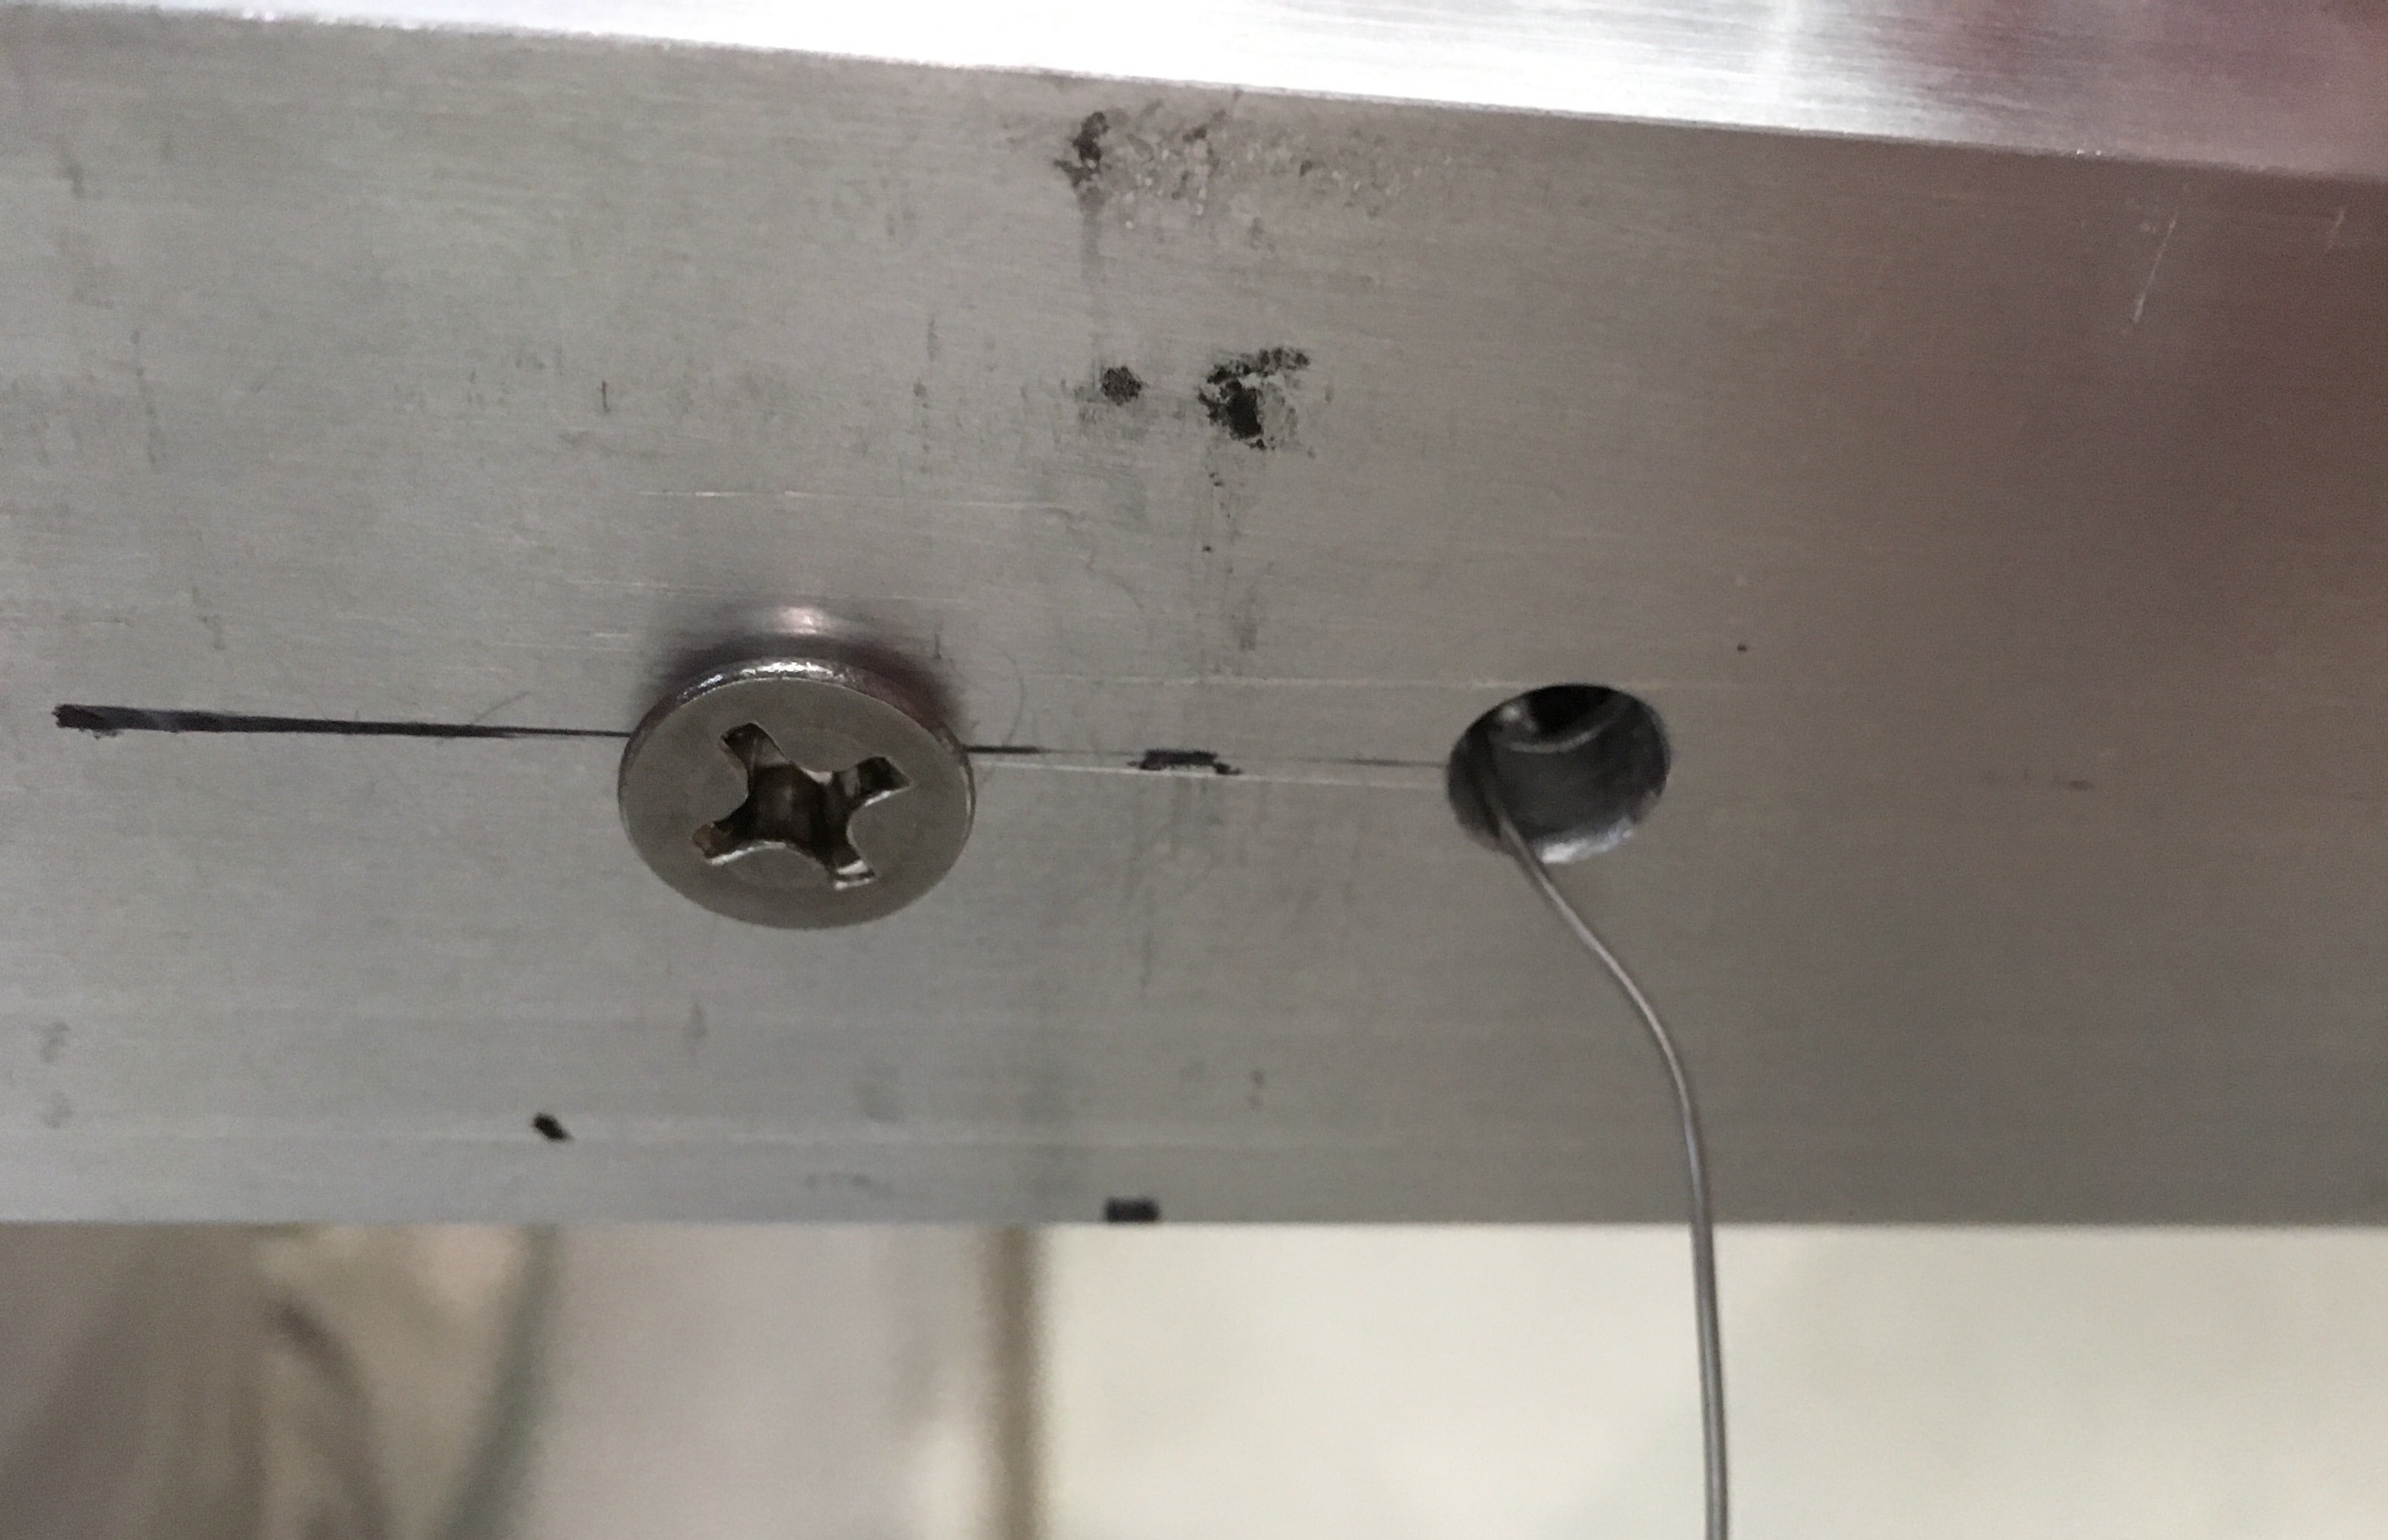
FYI: I've noticed that the Bull Dog rotates UP slightly when raising the front of the trailer while attached to the TV hitch. I've torqued the nuts to 93ft-lbs, but it still literally "pops" up about 3/16" when raising. Not a good sign. I'm planning to remove the Bull Dog this afternoon to inspect the holes as you've shown here....2 points
-
Another secret incantation to remember! I would not have thought of that, thanks for sharing!2 points
-
Thanks for your post. I thought the same thing about the forces. Abundance of caution seems like very good advice. I was thinking that the main force would come from behind the rear axle, but you also mentioned the movement at the tv hitch in the front of the trailer. I would think that those of us that use the Anderson hitch have some more moderation of movement than without the Anderson. John2 points
-
Thanks SeaDawg, I appreciate your help and quick response! Of course, you're not here and cannot see what's going on, but I don't think it is the remote, unless the IR output of the remote has failed. The remote is extremely clean, no dust around the buttons, like it has hardly been used at all. Every button works, and as you click the various buttons the large LCD screens respond in changing the icons and numbers up and down as it should. When we got home, it was the first time I used the buttons on the fan to control it. I was wondering if there is something I could have done, in working the main controls to disconnect the fan from the remote. Is the remote not sending the IR signal, or is the fan not receiving the IR signal? I get no fan control from the remote, but it makes the changes on the screen, and I get no fan beeps in using the remote. I've read some issues here with the control board of these fans. I'm going to try a fan reset. Though, it is 95 degrees here today at 5400 ft in Prescott AZ, so I will have to brave out and run the "got earplugs" AC for a while first! Not sure a reset will change things. I'll pull the fuse too. Keep you posted and other ideas are certainly welcome from all! Thanks again.
2 points
-
Yes, it looks a bit crude, but he did remark on the strength of the case, which in other teardown hasn't been so good. Kind of irrelevant, since case looks different, two year later. Since we often camp in cool weather, and sometimes into below freezing temps, wouldn't probably work for us. Unless, we monitored (yet another thing!) carefully, and disconnected from charging below freezing. Price is great. For folks who don't camp in cooler temps, might be ok. Idk. I really respect Will's opinions. I'm surprised, actually, that they haven't added a low temp cutoff.2 points
-
His teardown technique is a little crude 😂. But he does point out a big missing feature. No low temp charging cutoff. And looking at the Amazon comments, it looks like that still hasn’t been addressed with the name change.2 points
-
Made it to Congdon Creek CG on Kluhane Lake -Yukon A beautiful campground. Starlink is working great at our site 7 because the trees are a bit back from the trailer.
2 points
-
***** Run Provincial Park Beach that was a short walk from ***** Run campground
1 point
-
When you fix it, be sure to put an upwards load on the front using a jack stand or the hitch ball, to take out the slack. Then tighten. Post pics of what you find please!. John Davies Spokane WA1 point
-
Which way are you going from Fairbanks? In town, Cookie Jar restaurant is great. Excellent, really. Just outside, in Fox, Silver Gulch brewery. There's a good viewpoint stop along the way, explaining the oil pipeline. https://www.roadsideamerica.com/tip/15097 Fairbanks is a nice small city. There's a lovely park just outside of town. The campground in town can get kind of buggy . Enjoy your stay, and resupply here. Better, and bigger, stores than you'll find til Anchorage. Two Fred Meyer stores, and a Costco, also. Every service you can need, in other stores. There's a really nice car wash by the close in Fred Meyer. If you decide to visit the arctic circle, I'd really recommend leaving the trailer at the campsite, and drive up and back, get rhe obligatory photo (batting the bugs away), and drive back, same day The cg at the arctic circle isn't much, and really, really buggy when we were there. I think it was free, and worth exactly the price.1 point
-
What brave Oliver owner wants to be the first to try this brand of Lithium ion battery? On Amazon for $319, less than half the price of comparable 100Ah BattleBorn. Surprisingly it has very good reviews. LiTime 12V 100Ah LiFePO4 Battery Built-in 100A BMS, Up to 15000 Cycles, Perfect for RV, Marine, Home Energy Storage https://a.co/d/eK940j31 point
-
FYI, this is about a firearms company, not about firearms per se. How America’s Oldest Gun Maker Went Bankrupt: A Financial Engineering Mystery When a secretive private equity firm bought Remington, sales were strong and the future bright. A decade later, the company couldn’t escape its debts. I am sure we could perhaps maybe draw some comparisons. John Davies Spokane WA1 point
-
So, KV is looking for a president to "prepare the company to be sold..." Hmm, sounds like a temporary position.
1 point
-
I’m hoping the Dometic Freshjet works out, it sould make switching to a quieter AC easier.1 point
-
Thank you, Mike & Carol. I get it now. This also validates my wanting to purchase a new AC unit to install ourselves.1 point
-
Oliver hasn’t tried to install the Truma on Ralph’s trailer, it was a Truma installer.1 point
-
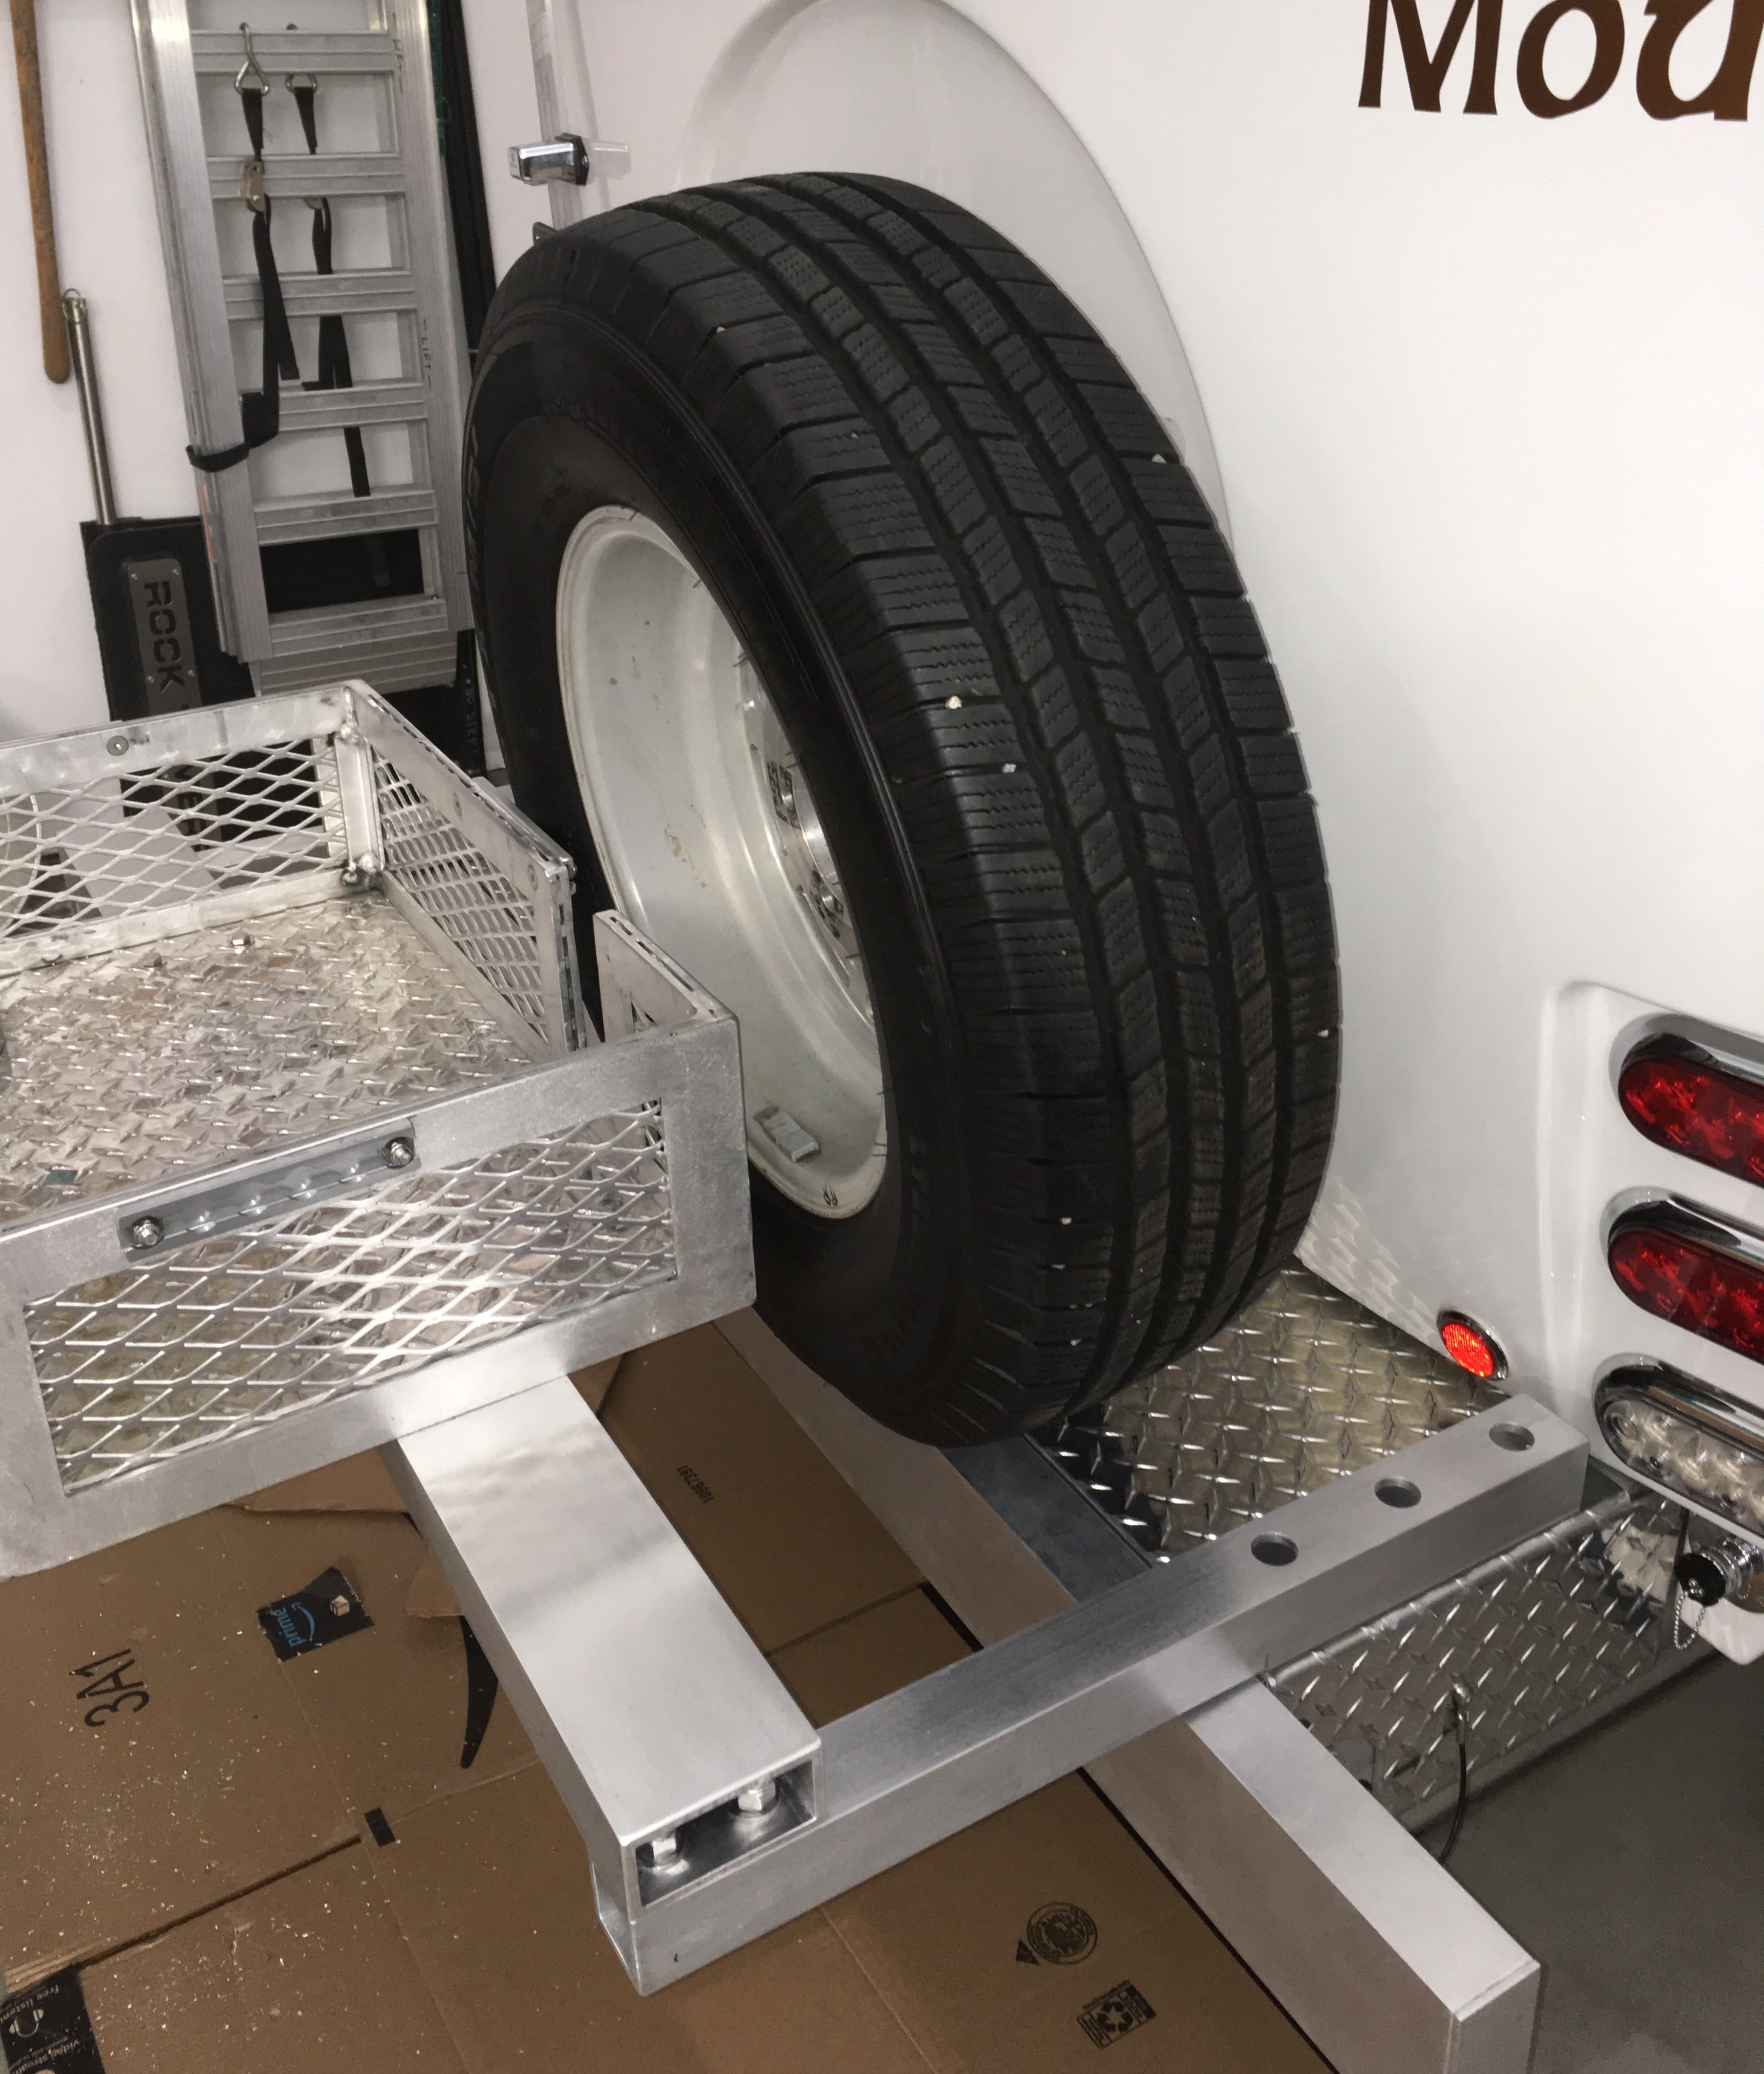
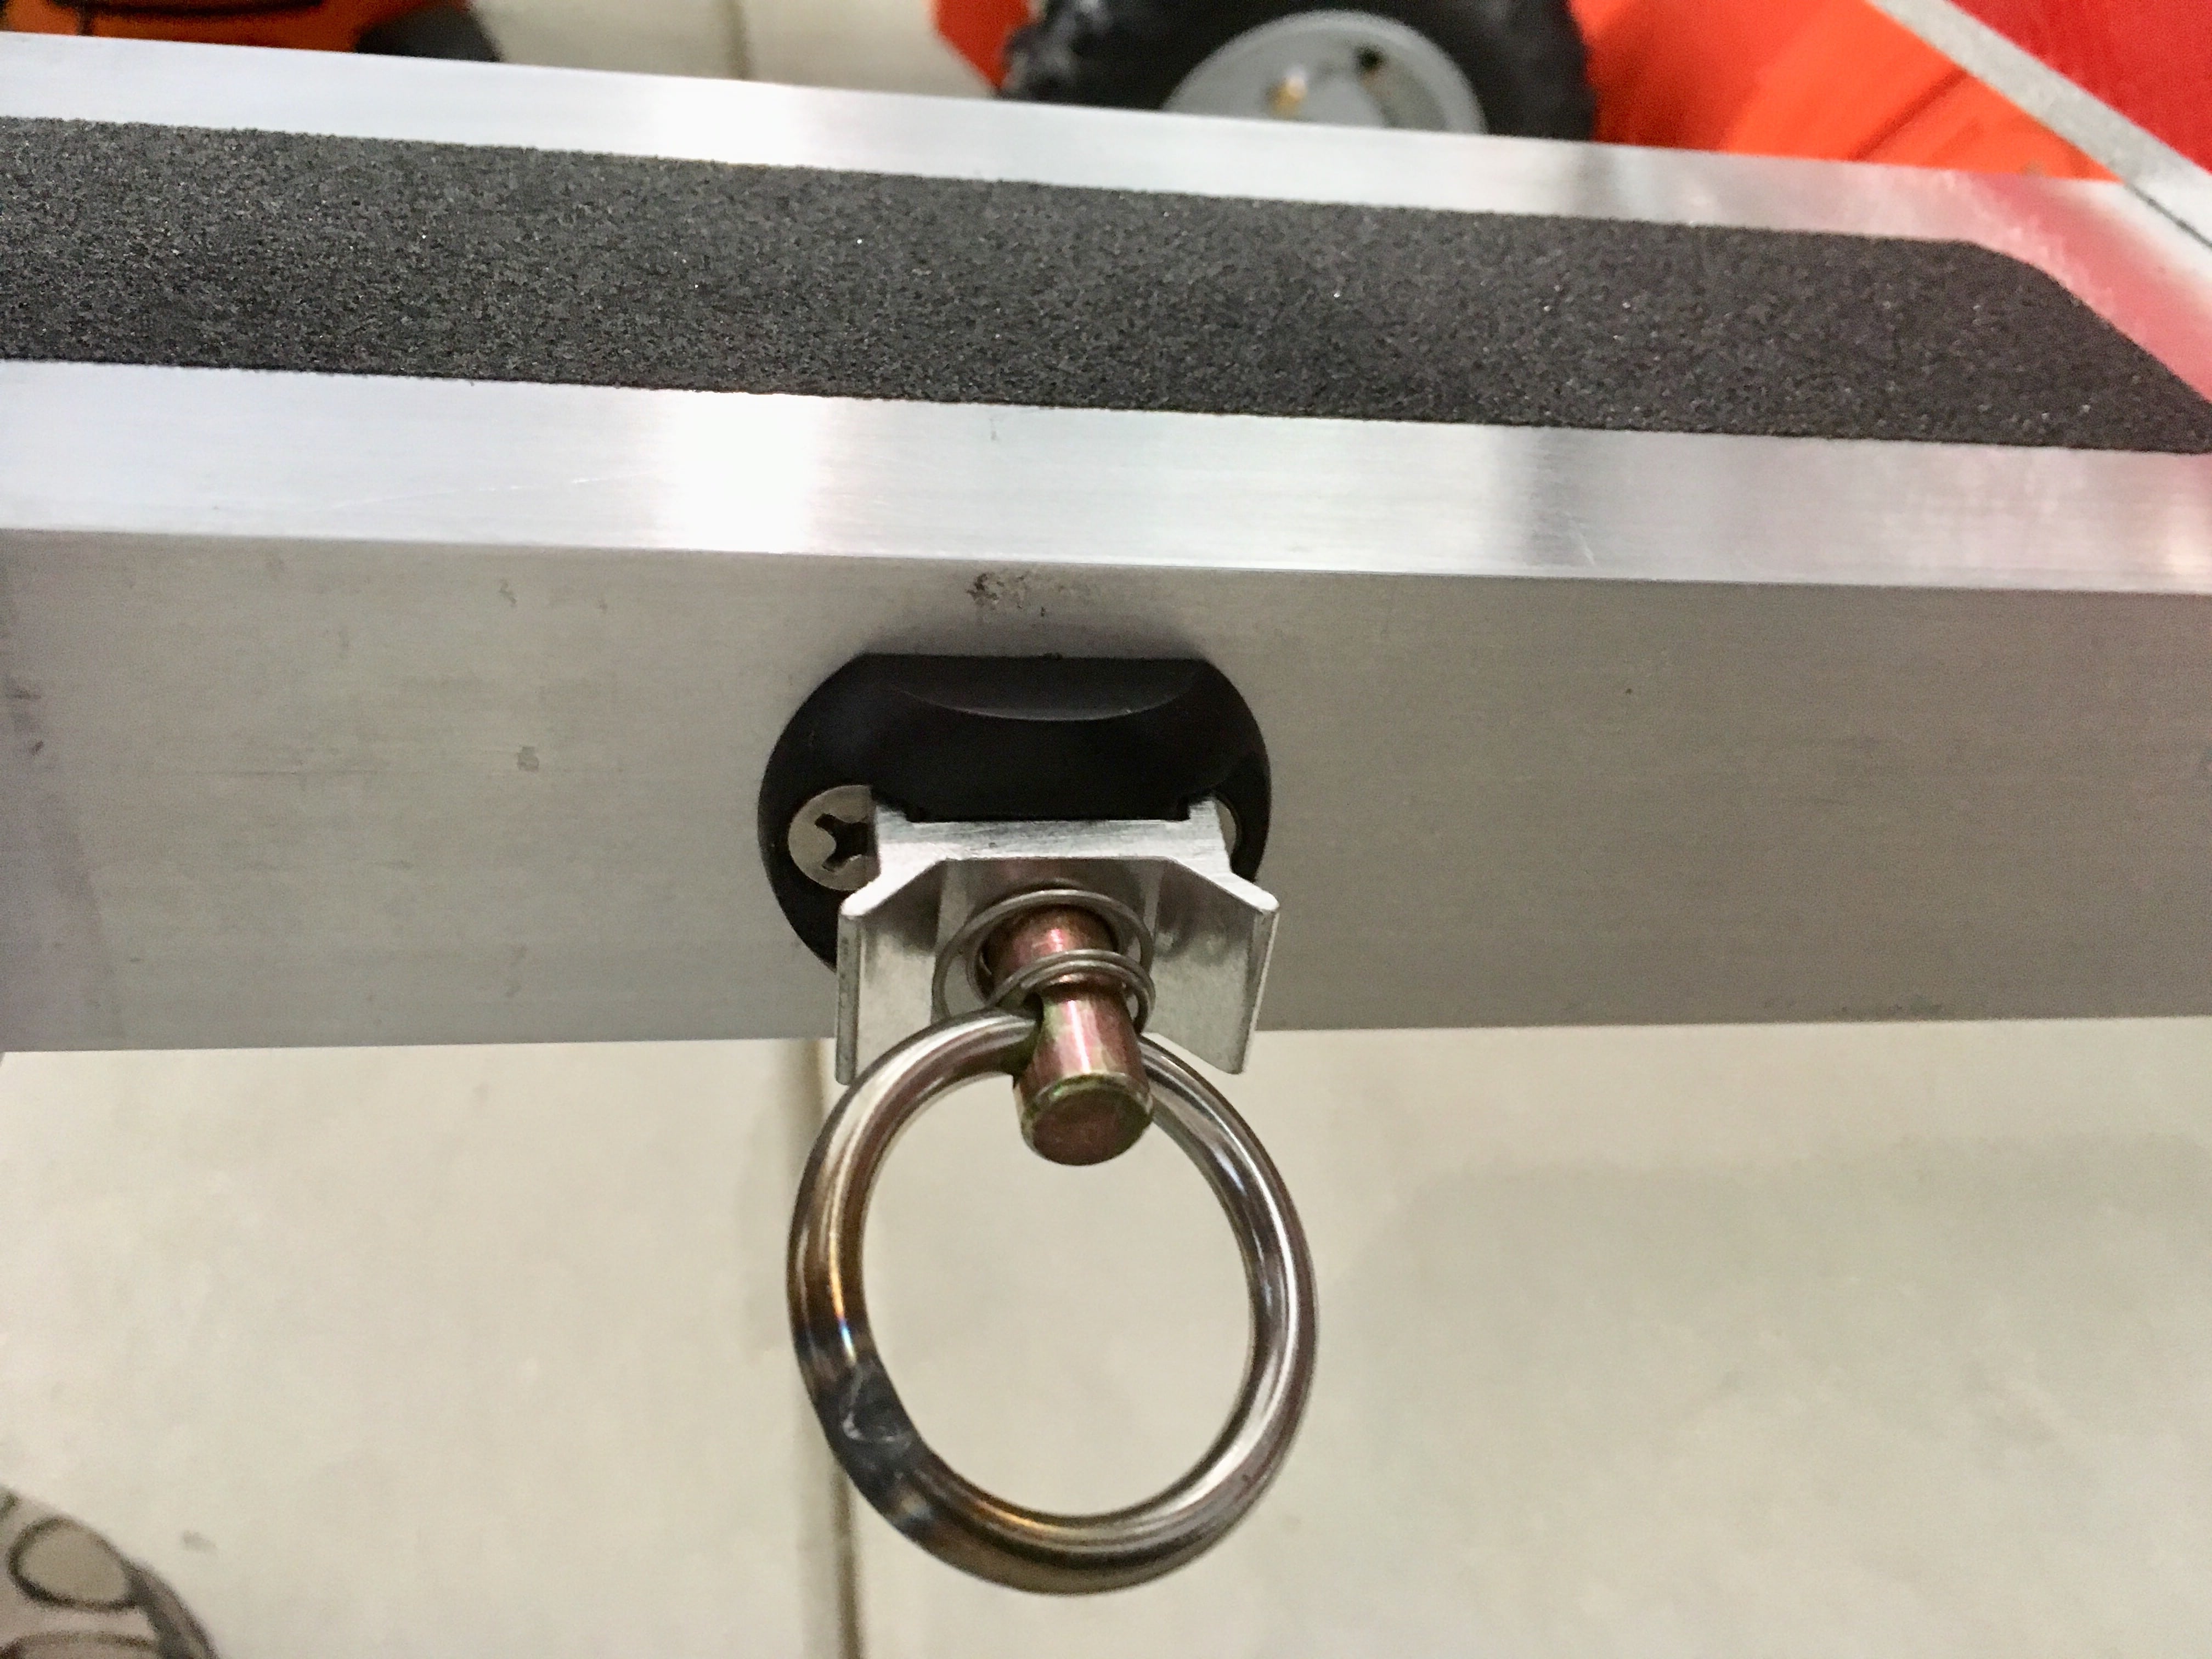
I haven’t yet removed the box from our Ollie, but I’m estimating it to be under 50 pounds. It mounts to the two receivers shown in your photo with the bike rack.1 point
-
Hello Ollie. Saw you at Grand Rivers, KY. We were camping not too far away at LBL. Stopped for a burger at Green Turtle Bay, but kinda wish we were having Conch fritters at Green Turtle Cay. Safe travels.
1 point
-
I saw several of these overloaded diesel crew cab DRW 4x4 3500 trucks in the SW this past Winter. Many had huge, tall truck bed campers with substantial rear overhang (some with slides on rear and both sides), some even with long stinger hitches, hauling dual axle toy haulers which likely had over 750 lb tongue weight. Saw one with all of the above at Walmart in Deming. The poor truck was squatting and they were not running any type of weight distribution hitch. Must have been like a carnival ride going down the highway. I much prefer the balanced, easy to tow experience of the Ollie for enjoyment of the trip down the highway.1 point
-
I have respect for the elegant and creative solutions on these mods. I have given my voice on prior mods to the trailer bumper rack system. I spent 20 years as an executive and partner at Yakima Racks and can speak from experience. There is a good reason for the factory set weight limit. The length of the back half of the fulcrum (trailer axles to the trailer bumper) is many times greater than from the axles of any TV to its bumper. Not to mention the forward distance from trailer axles to the bulldog hitch. Consider these distances and the vertical distance the bulldog hitch instantly travels up and down when your rig encounters dips, rises, steep driveways and potholes. The results of these encounters are nothing less than absolute violence at the trailer bumper. The forces applied at the trailer bumper are magnitudes greater than almost all receiver hitch systems are designed to withstand. Of the many receiver hitch mounted bike systems Yakima produces, only one is approved to withstand the extreme forces of being mounted to an RV bumper. I cannot judge your mods and if they will withstand the test of time. The test of time being constant vibration, sudden jolts, and that once in the life compression or frost heave that rocks your rig like never before. The scope of actual experience of trailer bumper systems within Oliver users is very small as there are 1,200 +/- trailers on the road compared to the well more than a million Yakima systems on the road. I can only advise to operate with an abundance of caution when modifying your bumper system and or exceeding the factory load limit.1 point
-
We picked up our LE II in July 2022 and have logged over 10,000 miles across the country, through the rockies, now in the Northeast. Next week we're going from Massachusetts to Key West. Our Ford F 250 without a WD hitch has been fantastic, no need for a WD hitch at all. I have a Weigh Safe hitch and we have never reached 700 pounds on the tongue. We added a (probably too) large generator to the front basket (>150 pounds) from California to Mass since the temps over the summer were exceeding 105 degrees and our plan of boondocking through the desert suggested we would need more air conditioning than the lithium batteries were able to provide, and still never hit 700 pounds on the tongue. I recommend against the Anderson (or any other) WD hitch for your 2500 until you've tried pulling without it. I doubt you'll spend the money once you've towed your Oliver. A stock 2500 is a perfect vehicle for this trailer. (IMHO) 🙂 albert1 point
-
I tow with a Ram 2500 and feel no need at all to use an Andersen. For almost 6 years my tow vehicles were a Tacoma and two Ram 1500s, I used the Andersen with all three. With this 2500 no need at all. Mike1 point
-
Yup, my wife thought it was someone from the rally, but told her it was probably you. 🙂 I was trying not to rearrange the concrete construction dividers The Bluebonnet was OK, but the owner of the sole Elite 1 I wanted to see left Thursday before I found his site…well camouflaged by all the Casitas 🙂1 point
-
The Oliver LEll owner I have spoken with the same rack and mod actually carries (2) much heavier ebikes with a total weight on the rack of 130#. He recently put 1000 hard miles on his Ollie with bikes loaded and there are no visible signs of aluminum fatigue, cracking etc. Zero issues with the 1Up Super Duty rack which is encouraging news. This mod is absolutely worth keeping an eye on for sure. Just like all the other inspection checklist areas on the Ollie, I will inspect it before, during and after a trip. A great question would be with over 800 plus Ollies on the road, how many actually use the bike rack and for those that do how many catastrophic failures have occurred with the bike rack? I have not read about any reported failures which is a good thing!1 point
-
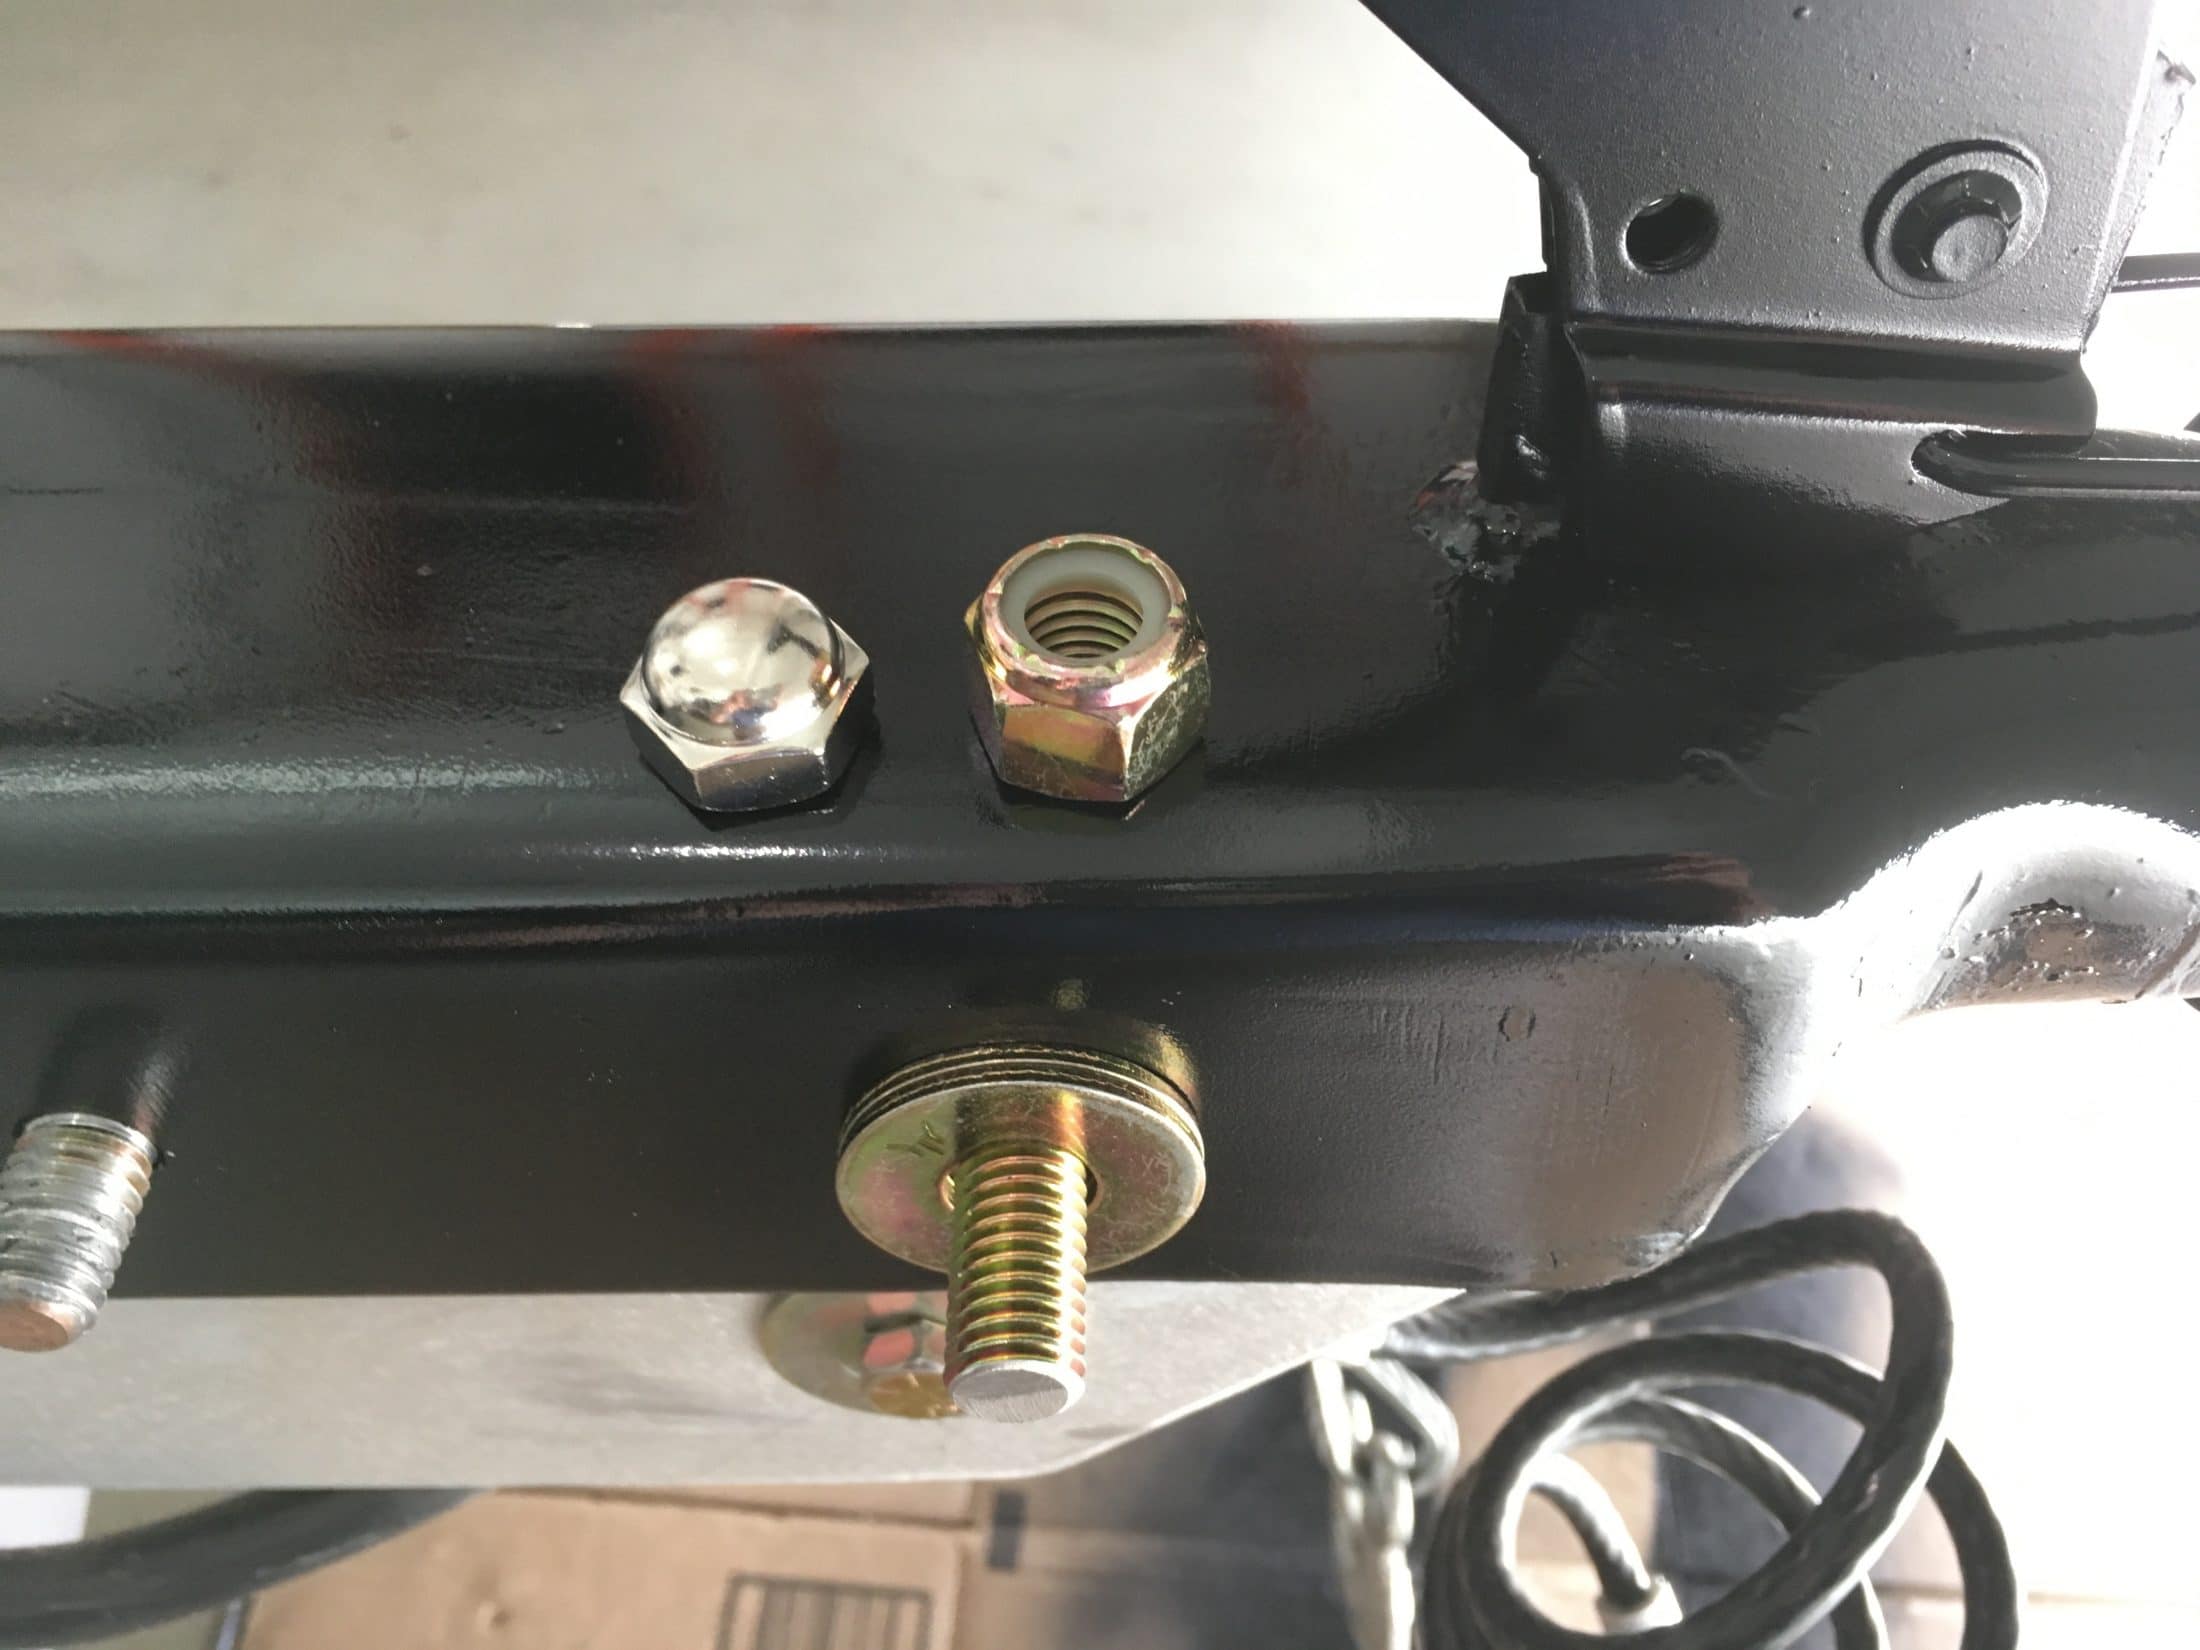
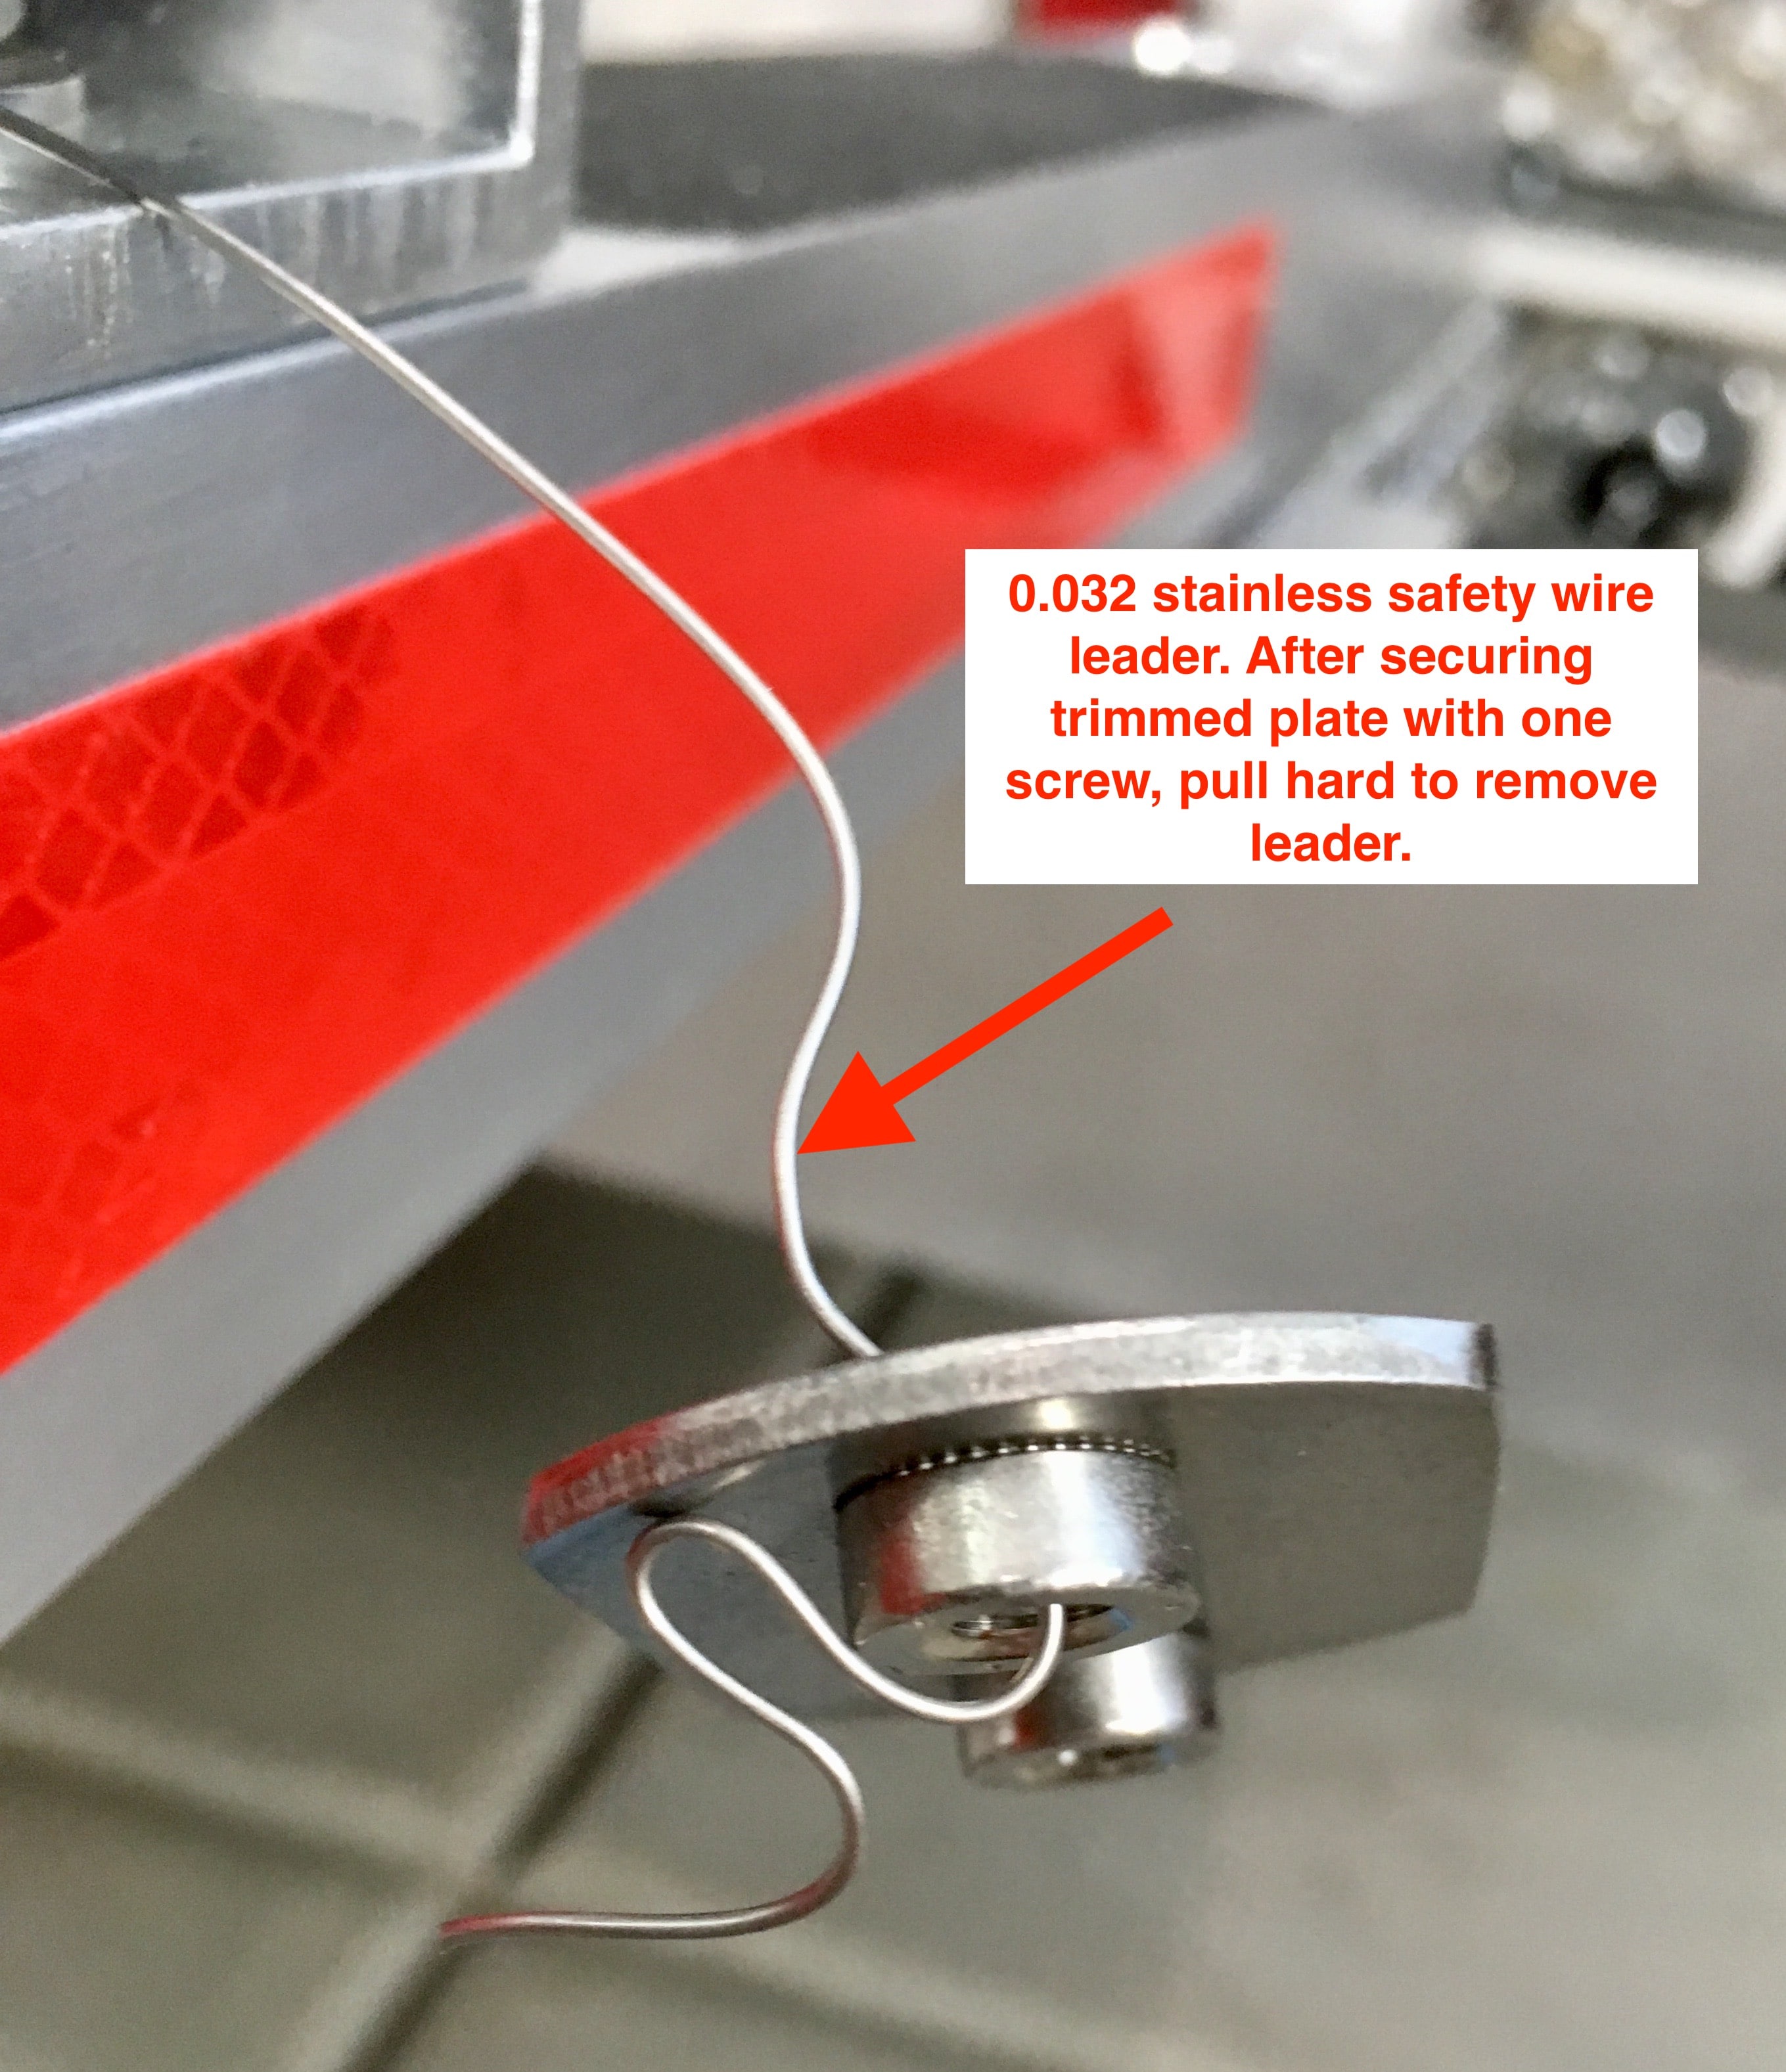
Had a bit of a delay coordinating with a friend to use his drill press. With the aid of John’s detailed instructions, here was my installation. First a couple of pics of the receiver, showing how the steel channel sides are not strictly parallel and the top is slightly bent or shallowly “U” shaped. Another pic shows the weld at the rear of the reinforcement steel tube. That weld prevents the Oliver aluminum tongue from sliding forward to directly contact the steel tube within the receiver hitch. If you force the receiver onto the aluminum tongue the forward section of the receiver is raised by the height of the weld. Good luck getting accurate measurements for drilling if that occurs. To measure for drilling I set the receiver onto the tongue in a stable manner then scribed lines onto the aluminum tongue along the bottom and rear edges of the receiver. Measurements to center of the bolt holes were then made and recorded. After a friend drilled the receiver holes with a drill press, I found that the rearward holes lined up well but the forward holes were ~2 mm off on street side and ~1 mm off on curbside. Then it was a matter of enlarging the holes for a proper fit. Once aligned there was priming, final paint coats and installation. Thank you, John Davies for this two year old valuable thread.1 point
-
If you are NOT using the Andersen hitch, the 2” ball is fine for both trailers. But there is not enough surface area for the unusual and rapid wear that the chains apply ... they jam the back of the Bulldog hard into the back of the ball. It is made worse in dirty conditions. The Bulldog is designed for a strictly vertical load. Just look inside the opening to see why. It is the combination that is not good. The small ball just makes it worse. It is the Achilles heel of the hitch. The appalling Wake the Dead Spawn of Satan noises it makes sometimes is hopefully cured, time will tell with this redesign... Thanks for the kind comments. John Davies Spokane WA1 point
-
It had about 5000 miles, and I had flipped it around at about 4500 so that the fresh side would be taking the thrust load from the coupler. It still had a lot of life left, I just could not deal with the squealing and popping when it got wet. I had used four inserts in that time, attempting to keep it quiet.... John Davies Spokane WA1 point
-
INSTALLING THE ANDERSEN BALL MOUNT: Follow the Andersen instructions, apply an upward load (to remove slack) if you plan to keep the chains tight. If you are running them loose like me, as a dead weight hitch, you can let gravity pull the mount down. Torque both big bolts to 150 ft lbs. **** RECHECK THE BIG BOLTS FOR CORRECT TORQUE AFTER TOWING ***** Since the new ball is taller, and the new coupler cavity is at about the same horizontal position as the old one, the tongue will sit a little higher. My tongue was already a little high. so I was able to drop down one set of holes and ended up with a very nice alignment. Trailer level, truck level with 10 psi in the airbags, chains just snug. I REALLY think that these trailers should be delivered with the larger couplers installed, the cost is the same and it is a much better setup for the Elite II. For the baby Ollie, the smaller coupler is fine.. John Davies Spokane WA
1 point
-
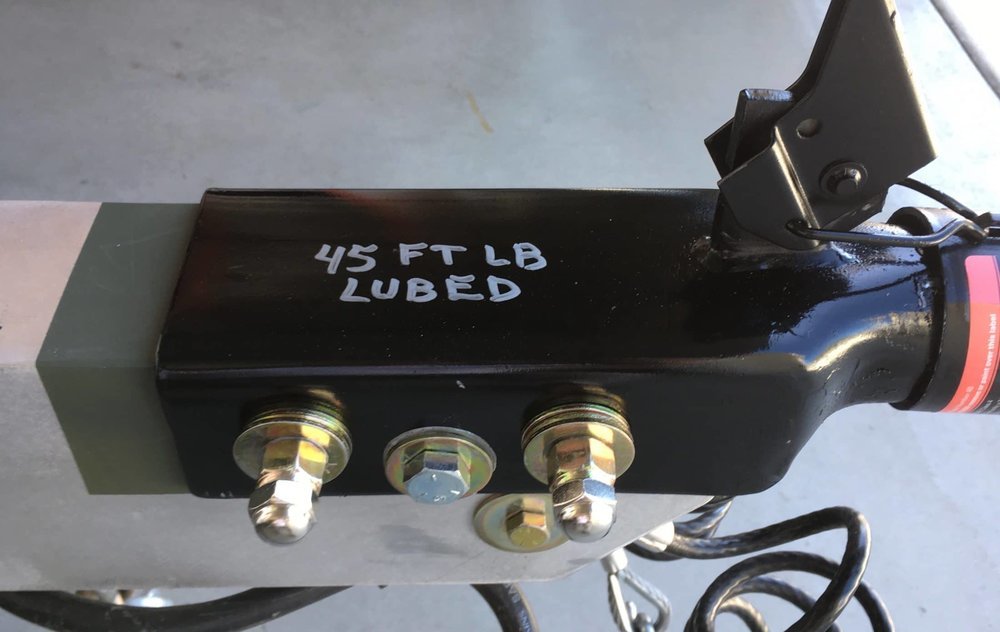
Clean up the coupler and paint it inside and out, at least two coats. I used Duplicolor Brake Caliper Paint gloss black. It requires no primer, is super easy to apply and it is extremely durable. Clean up the tongue, sand down the rough bits and prime with several coats. I used Duplicolor Self Etching Primer, which is specifically OK for aluminum. (Many primers do not work well on AL.) ... https://www.amazon.com/Dupli-Color-EDAP16907-General-Purpose-Self-Etching/dp/B002984MU0 .... I primed a little beyond the new coupler since there is wear there from the bungee cord I use to hold up the Andersen chains. Here is the new hardware, make sure the bolt is GRADE 8, GRADE 5 and has at least a 3.5" unthreaded shank. NO threads should be inside the coupler or frame rail.Cut off the excess so you can install a cap nut. I added an extra washer under each nut, since the factory nuts were cutting into the shank. EDiT 08/23/20. Replaced Grade 8 bolts with Grade 5 - IMPORTANT, PLEASE READ THIS: .... Coat the bolts and threads with anti-seize compound and insert: Apply an upward load on the coupler. I used a jack stand and retracted the electric jack. Torque gradually to 80 ft lbs 45 ft lbs if lubricated. Alternate back and forth, keep tightening until there is no further nut turning. The sides of the coupler will draw in tight against the frame. When done, add the stainless cap nuts to make it pretty and keep from scraping your shin. ***RECHECK THE TORQUE OFTEN WHEN TOWING UNTIL THE NUTS NO LONGER MOVE.*** Optional: paint a bright stripe on top of the coupler, it highlights the ratings label and makes it easier to see in your tow vehicle camera when hitching up. I used silver caliper paint. Done! John Davies Spokane WA
1 point
-
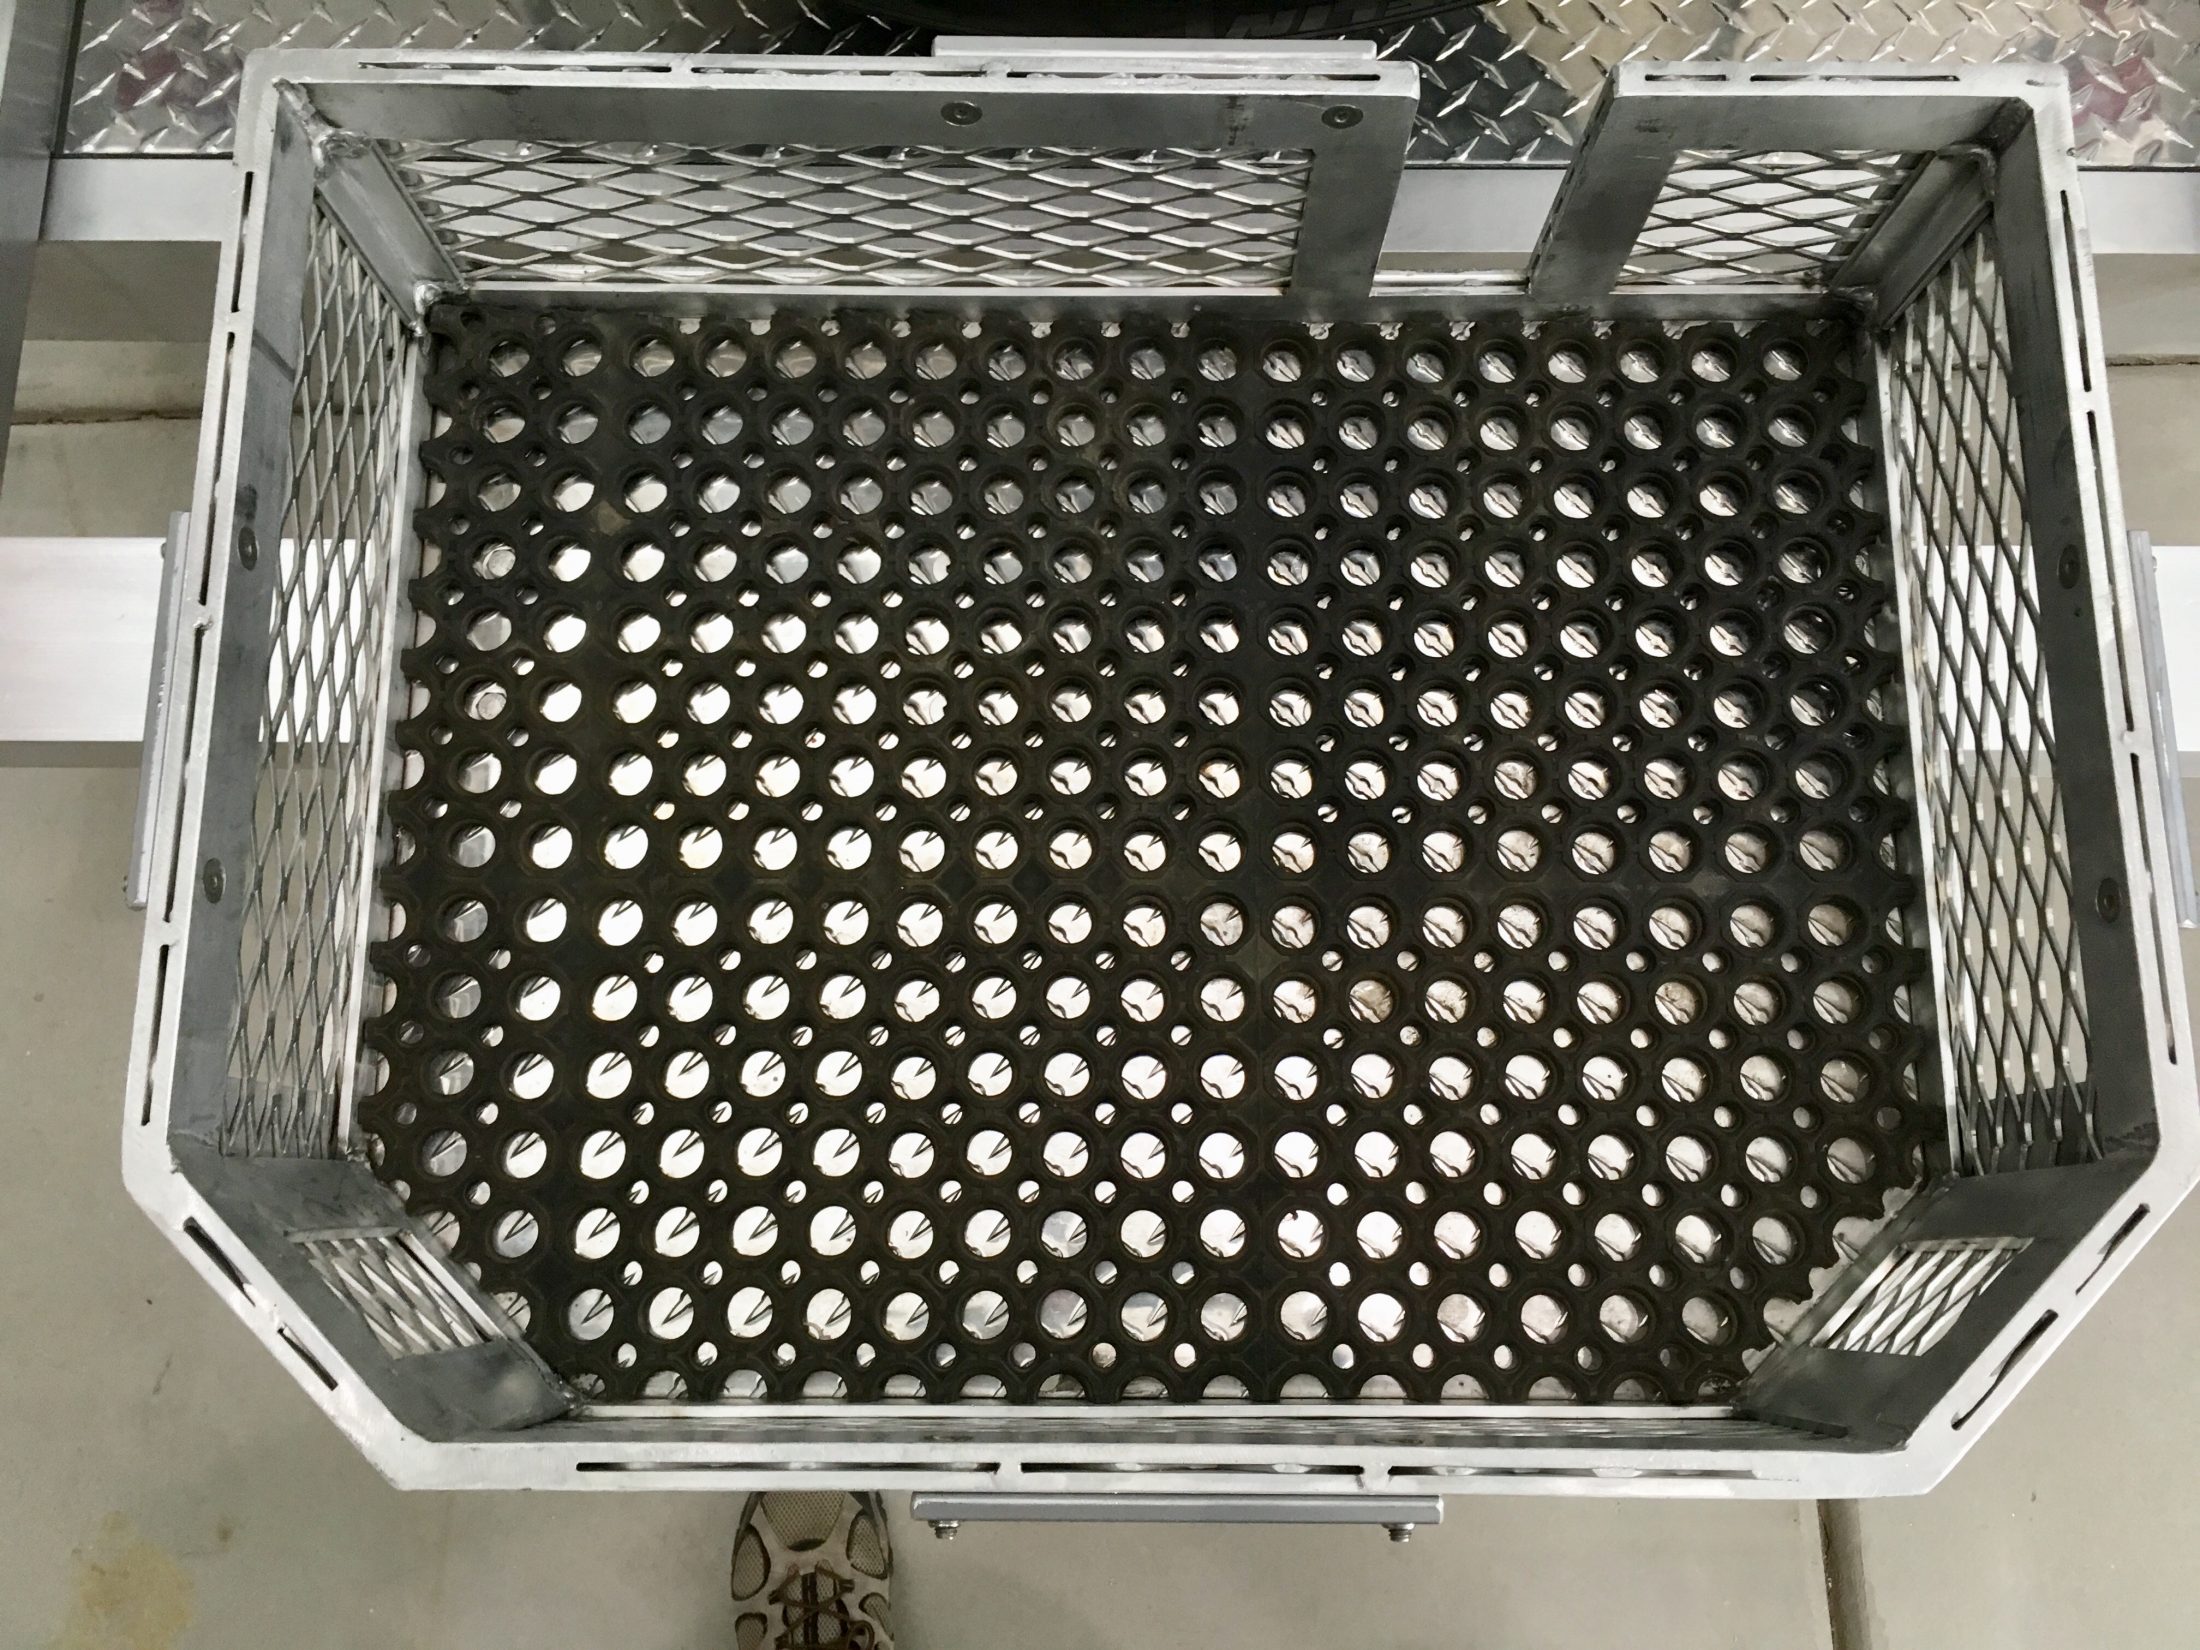
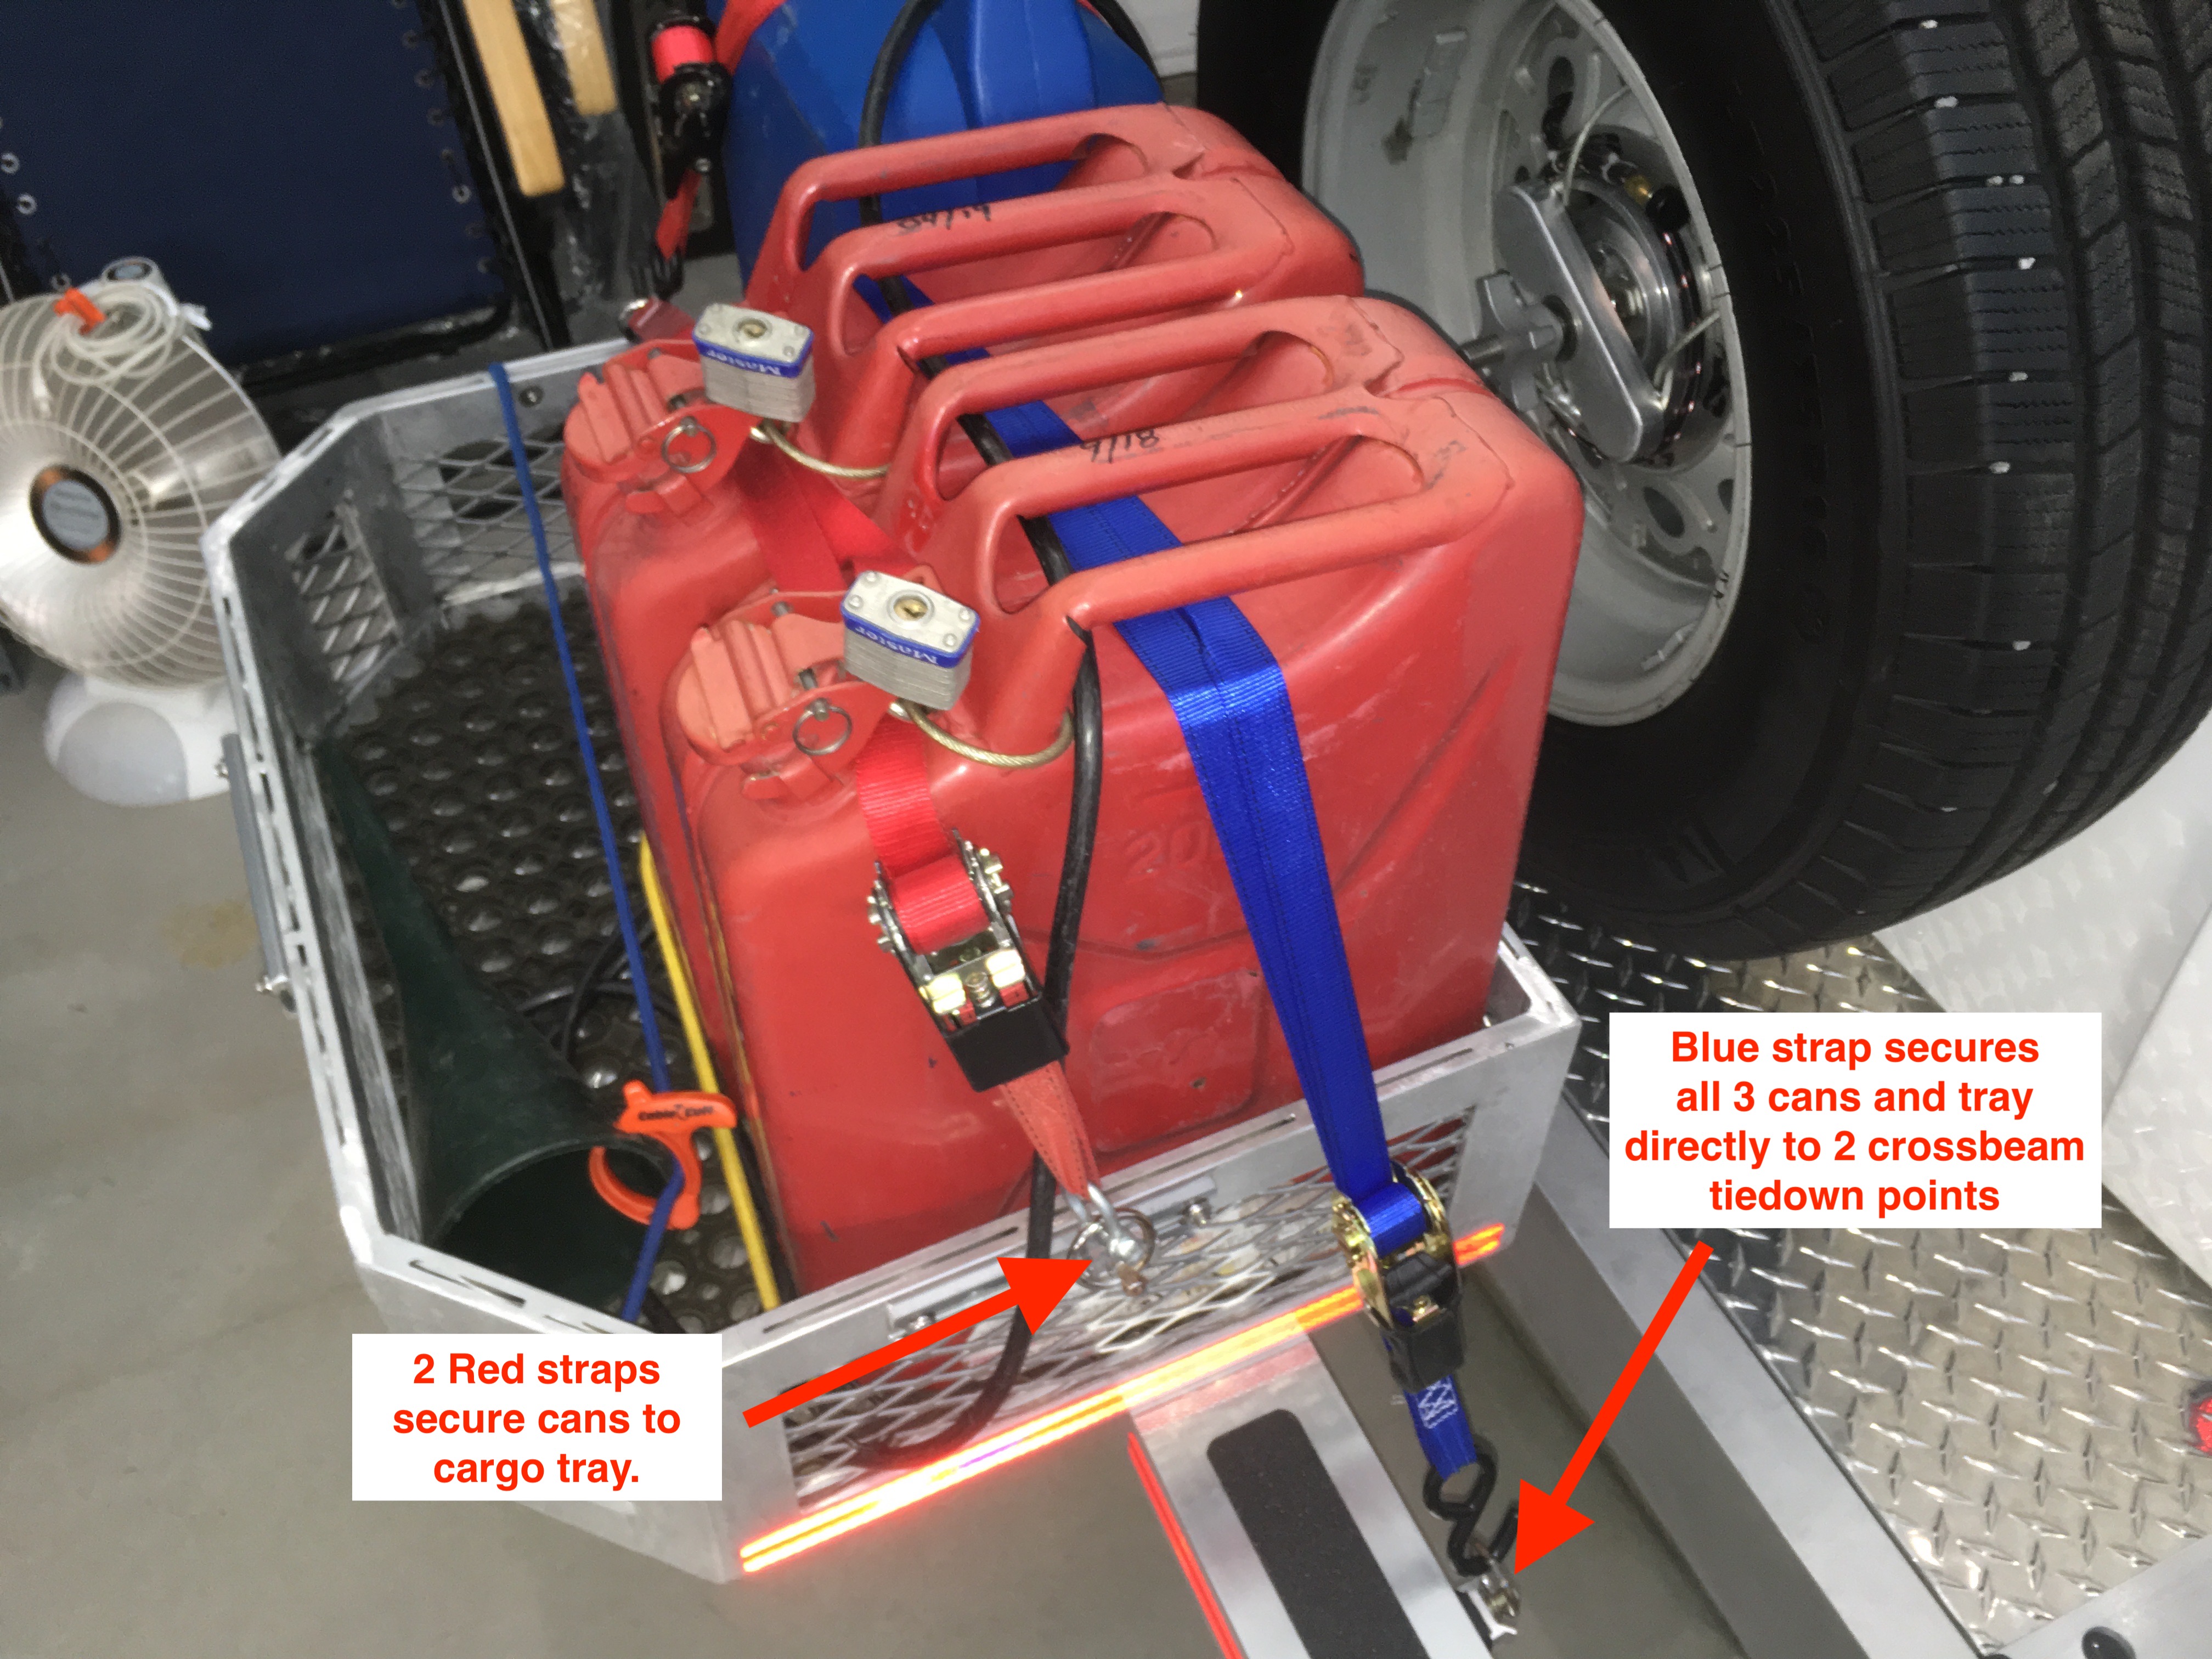
The spare tire will simply roll out to either side after you remove the big threaded rod in the center of the mount. You do not have to disturb the rack or any cargo. This will NOT work with a tire cover installed, for obvious reasons. It is hard to see here, I was able to position the eight tray 3/8” holes so that the washers fit neatly between the raised diamonds, not straddling them, which is not so good: [attachment file=IMG_8171 copy.jpg] John Davies Spokane WA
1 point
-
Personally, I wouldn't worry about it, but the only places I can think that wouldn't be covered by the bikes would either be on the rack itself or up above the window. A few of us have the license plates mounted to the side, but I think they'd be no more visible there. The 1up rack on my truck completely covers the license plate when it's folded. You can't even tell I have one. But I've only gotten pulled over once, in Hohenwald. I said I was going to Oliver and he said in that case no problem sir nice truck. Not sure how far outside of Hohenwald that trick works.1 point
-
The problem is all that mass bouncing around at the end of that long skinny arm. Not good. I did read that the recommended Thule (?) standard bike rack for the Oliver mount has a 100 pound limit in this application. My suggestion is to build a custom one without a central mount. Bolt the trays directly to the rack. Overland built a nice one with the excellent 1-Up Super Duty trays, which would work great for your ebikes. Remember you can always take out both battery packs to reduce the weight by 15 or 20 pounds and also to discourage thieves. John Davies Spokane WA1 point
-
I would worry more about the bike rack, must be a special bike rack to hold that kind of weight. A lot of racks in small print will say do not use this bike rack on the rear of a trailer. Double check your manual.1 point


.thumb.jpg.e34bf01ef7f7d5e99ad31856d45afbeb.jpg)


-
Recent Achievements
-


")


")


")


