Leaderboard


Popular Content
Showing content with the highest reputation on 07/22/2024 in Posts
-
Life on the road sometimes requires stopping to do laundry! Here in Cody, WY the best laundry is the Cody Laundromat. Now that this chore is done and restocking at Walmart is done the regularly scheduled activity of fishing at a higher altitude is to be resumed. A special hello to the Ollie II that was headed east towards Cody last week after they left Yellowstone National. Bill
 6 points
 -
On a 2-year-old jack adding grease has nothing to do with this. Don't think it's about maintenance you could have done. Many run these VP-3000 jacks for many years ignoring maintenance. I would check the switch. Given it works to lift the trailer, the mechanics of the jack are working. As it takes much more work on the motor to lift vs. lower. If you are in a fix while traveling, you can pull the switch to find three wires. Connect the center wire to one to lift and the other to lower. Hope this helps!6 points
-
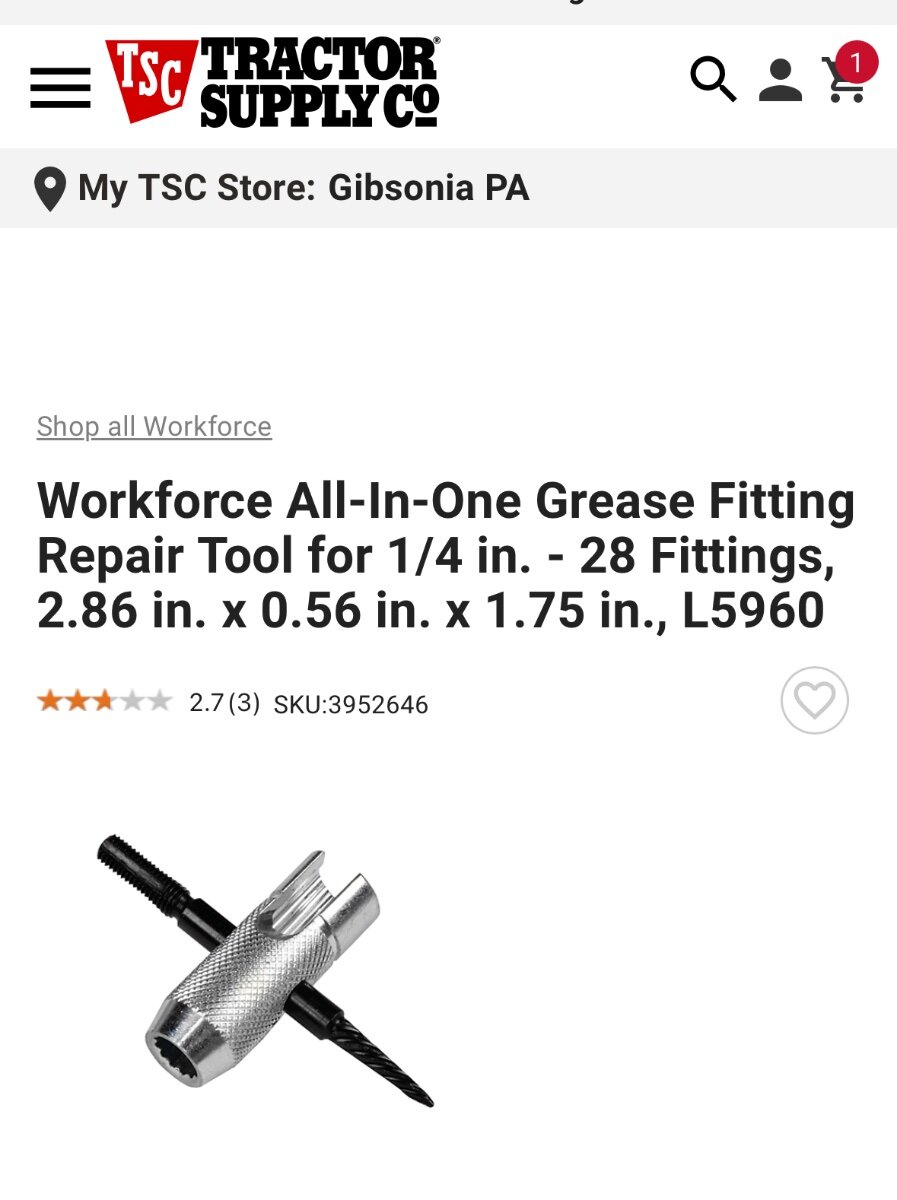
There are zerk fitting repair/extractor tools available at most auto stores & Tractor Supply. It’s a combination wrench/tap/extractor. I’ve used one in the past. If the fitting is broken off but the threaded part remains in the wet bolt, the extractor (the pointy tool) should allow you to unscrew the threaded portion. https://www.tractorsupply.com/tsc/product/workforce-all-in-one-grease-fitting-repair-tool-for-1-4-in-28-fittings
6 points
-
Good luck with the fishing and cooler temps! It was 56 here in Lubec, ME, this AM :)3 points
-
I purchased John Davies 2017 Oliver LEII,3 points
-
Well, I finished putting on new connectors on all the brake assemblies. Much like @John E Davies article in 2018, I also saw a marked voltage improvement at each assembly, at least 100 mV or better. I have gone for two 20 mile test runs with the rig and no errors from the RAM and I've been able to reduce the brake controller gain from 8.5 to 6.0 or 6.5. Will continue to fine tune that in up coming travels.3 points
-
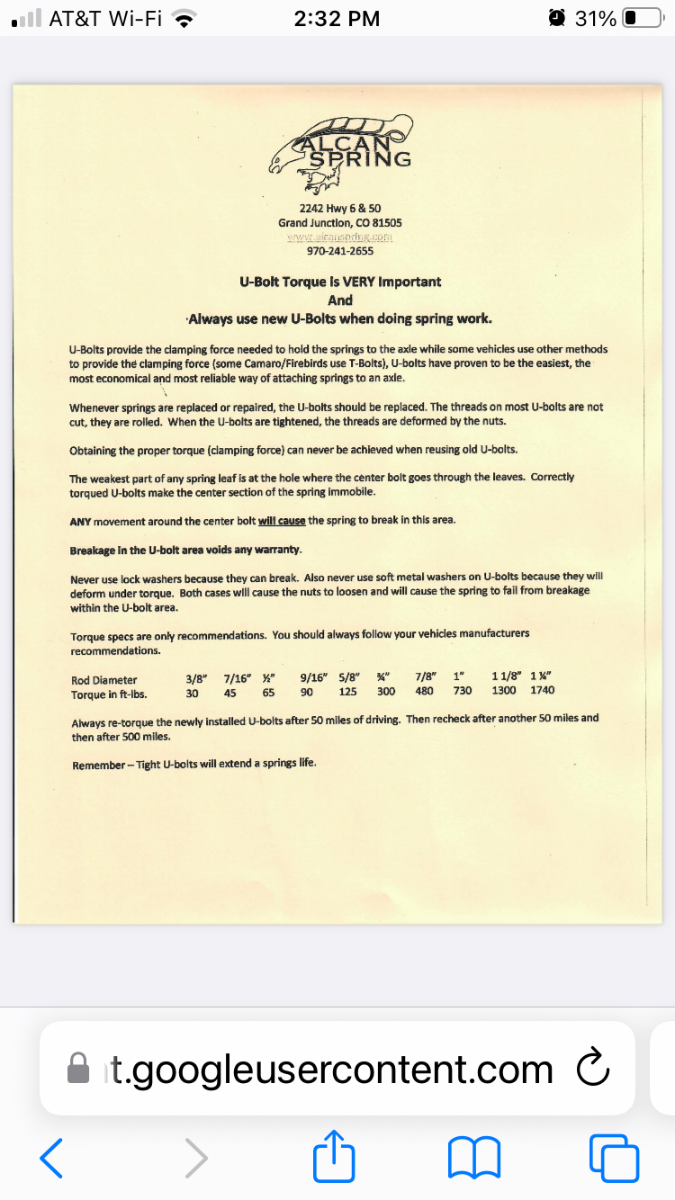
I've been following the number of broken springs for over three years. All were four leaf springs and all have broken in exactly the same place and manner. Being a moderator here on the forum and an admin on the primary FB page, I've heard about or seen probably 30-40 reports of broken leafs. But because only about 10% of the owners are active on either or both platforms, I suspect the number of spring failures that have occurred is actually much greater than has been reported. There are well over 1600 Oliver TT that have be built. Elite I's comprise about 16.5% of them. Since they have always had the heavier 5-leaf spring pack and the 5200 pound axles they are the least likely to fail. I've not heard of any so far. That leaves nearly 1400 trailers that have the weaker springs all of which are subject to failure. As everyone knows, all the Elite II's built since 2022 have come with 5200 pound axles BUT they are still built with the 1750 pound 4-leaf spring packs. The springs are the weakest link in your suspension systems. I can not tell you that you WILL have a spring failure. There are many that have not. But I will promise you that, if you do, it will NEVER be in a convenient, dry, warm or cool, flat, smooth place. It will be on the side of the road or in a parking lot somewhere. Replacing one at home with all the tools you need is a challenge. Replacing one while you are on the road with no help will be daunting, dangerous and all but impossible. You WILL need more tools than you likely brought along. And all that's assuming you have all the proper parts with you in the first place. I've replaced a bunch of springs in the last few years and have some owners coming to Tupelo in the next few weeks so I can help them replace theirs. It is not an easy job but it is easier to be pro-active rather that re-active. If you are so inclined and can afford a set of the Alcan's, I highly recommend them. If not, buy a pair of cheap replacements to take along with you and some extra $$ to pay someone to install them for you. Don't forget to have a full set of new U-Bolts also as they are a one-time use only item.3 points
-
Love camping in Canada. With the exchange rate prices aren’t bad. We’ve been from the west coast to “Lake of the Woods” near Kenora. A lot of public parks have power as an option at your site which takes away the loathsome generator serenade. Grasslands National Park in Saskatchewan was not crowded and enjoyable. Banff is Canada’s version of Disneyland but incredibly beautiful. I agree that most border crossing problems are coming back into the good ol USA but.. One story - during the tail end of the Vietnam War some friends and I were crossing at Vancouver to get over to Victoria and go camping. We were only 18 or 19 and they were still worried about draft dodgers. I could hear the other three being interviewed - swearing that they didn’t smoke or drink, etc. I was last and the old guard wasn’t sure about us. He asked me the same questions and I said that while I had smoked marijuana, I really preferred beer. He smiled, said “Laddy, don’t we all”, and stamp, stamp, stamp we were in.2 points
-
With our Xantrex Freedom XC Pro 3000 watt inverter, the button on the main unit (under the street side bed) must be in the "off" position (out, not pushed in) for the remote panel (next to the pantry at about eye level) to function. To turn on the inverter from the remote push the spring-loaded silver button in. Silver button out on the remote, like the main unit, is the "off" position. If the silver button on the main unit is pushed it, you can only operate the inverter from the main unit, which is a pain because it is under the street side bed.2 points
-
The L&L head opens the jaws to allow for much easier placement and removal. It also grabbs on better allowing you to "FORCE" grease into the wet bolt. It certainly makes greasing much more efficient with a lot less waste. I know it is expensive, and I "resisted" for years. But after using one of my friends.... I was sold. No regrets. GJ2 points
-
I originally thought I was mistakenly shipped 1/2" u-bolts but after I learned that I should be measuring the diameter of the threaded section, not the smooth section, I realized that I received the correct parts.2 points
-
One of the best investments I have made is the Lock-N-Lube grease gun head. It works wonderfully and eliminated the forces that break zerks. Highly Recommend! GJ2 points
-
@jd1923 the Google interwebs revealed that at least going back to 2018 RAM owners reported their trailers clicking. And yes I am a RAM owner. eTrailer explains that this is the truck ensuring the magnets are working and could use the brakes if needed. And as I learned, if the trailer has some questionable grounds or connections, the truck thinks there are no brakes, and gives up trying after a while, sometimes in the disable state. I'm not sure that's good logic or bad to disable the brake altogether. I rather just have the message remind me to check my brakes instead of completely turning them off. This could be my last RAM.2 points
-
No, the only spring they make for these axles is the 2750 pound version. I changed out our original 5-leaf springs for the Alcans and I honestly can not tell any difference in the ride or the handling. Tali did most of the towing during our recent 5000 mile trip up to Maine and she said she could not tell any difference either.2 points
-
@Boudicca908, PEI is still on our list. As is Newfoundland and Labrador. We loved rugged and beautiful Nova Scotia.1 point
-
Camping on Prince Edward Island and Nova Scotia is also amazing -- or was when I was there tent camping back in 2012.1 point
-
There's been a lot of blowback from Canada on the dog policy. I think it's being relaxed. We'll see. Both our countries are low risk for rabies. Vancouver is beautiful. Camping on Vancouver Island is quite amazing. We've always found our neighbors to the north to be very good campers. We've enjoyed every trip.1 point
-
John, Yes If you are going to order, I know you will check the specs & cost with Dexter first and what is or is not included. I cannot speak to bearings, new or old style, the Dexter distributor can answer this. Dexter 3" U bolts are 1/2" and off the shelf 5 leaf springs are 1 3/4" wide. Not current on Alcan spring replacement specs. Springs, mounting hardware, EZ flex, handling & shipping are extra. I looked up the Dexter distributor for my zip code on the Dexter website and called them, Redneck Trailer Lincolnton, NC to get the information I posted above. Also posted the build sheet for one of my axles earlier in this thread.1 point
-
I concur. I bought Lock'NLubes for both of my grease guns for the many zerks on my Kubota tractor many years ago. Now I use them for the Elite II suspension. Overpriced? Yes. Worth it? Yes.1 point
-
Sorry for the late reply, but we were traveling in our Elite II this past weekend! I did the firmware update. I have had no [20] inverter error codes since then, but the battery State of Charge also has not dropped below 50% during that time either. I recommend you do the firmware update. Available here: https://xantrex.com/library/firmware-updating/1 point
-
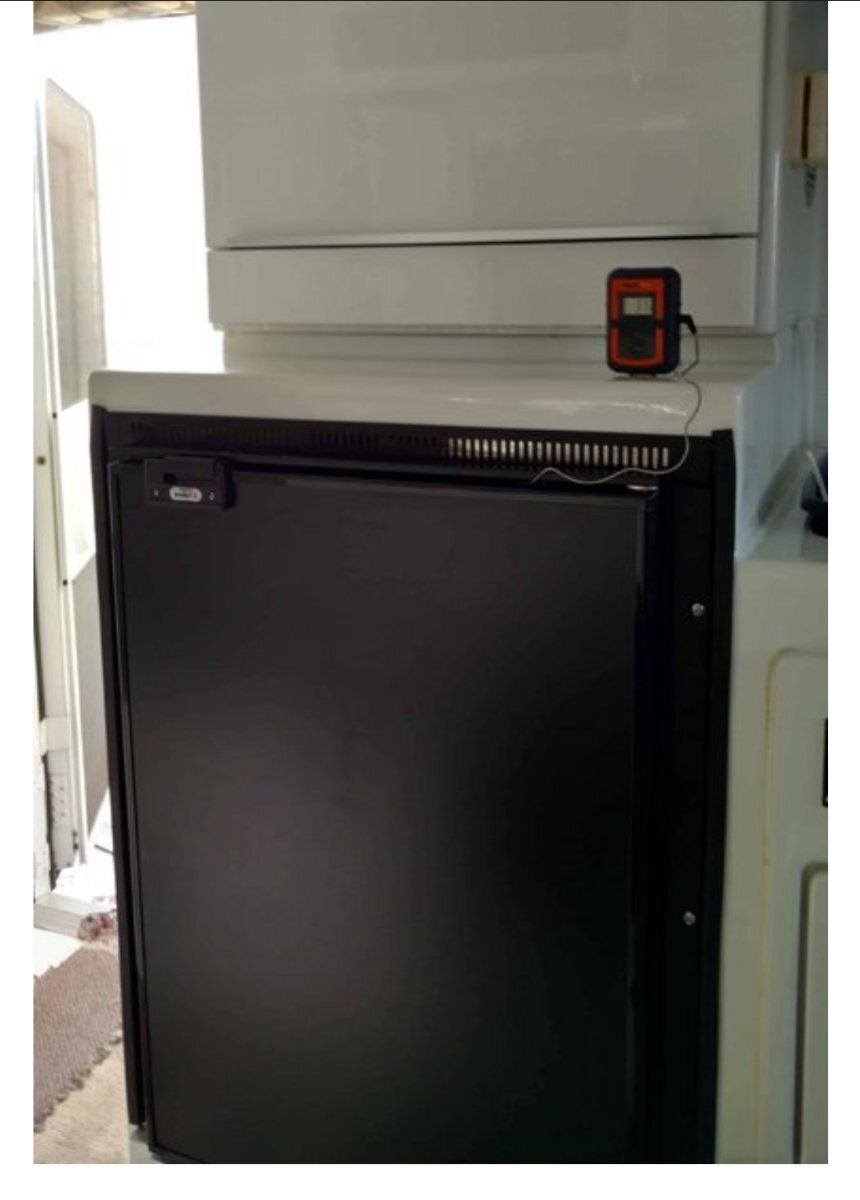
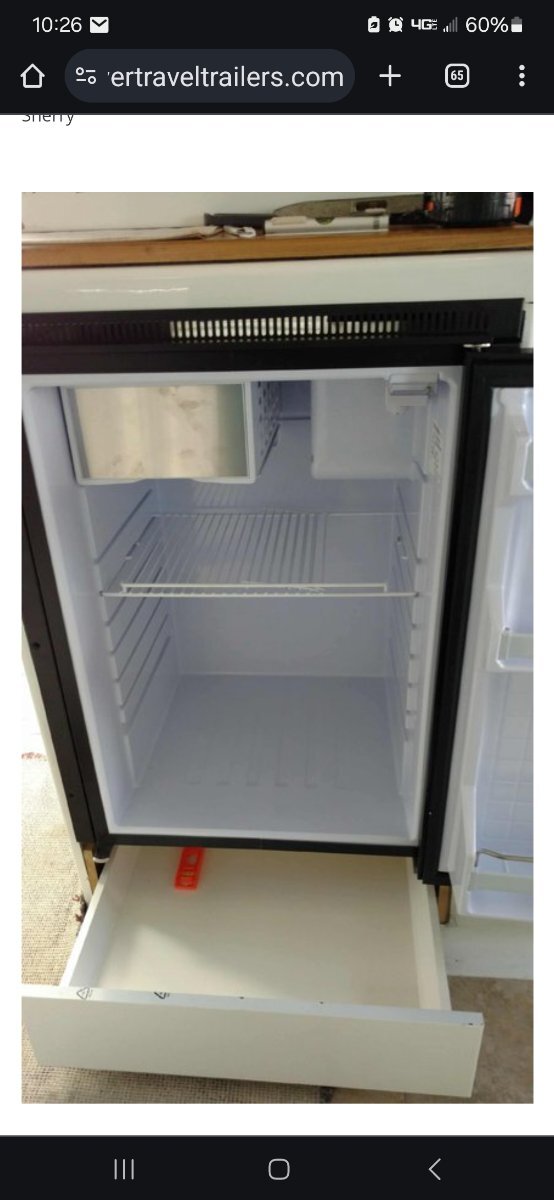
@Kathy Tewart The Isotherm Cruise 130 has functioned well. As reported by several Oliver owners, the freezer is small but it meet my needs. I have the Norcold in my 2017 Navion 24V and the Isotherm is much preferred. Temperature remains +or - 3 degrees F. I purchased a portable refrigerator as an adjunct to the Isotherm that travels well in my Ford F-150. The portable is capable of zero (0) degrees F however I have found I do not require the freezing temperatures as the portable keeps the Beer at the perfect temperature of 50 degrees F. The Isotherm Cruise has been employed by many in Power and Sailboats. John Davies did a spectacular job engineering and installation of the Isotherm. I would suggest that you take the John Davies installation documentation to various installers and get a quote on the installation. West Marine sells the Isotherm and surely they will assist if finding an installer.1 point
-
Yes, it broke off at the threads. Thanks Geronimo I will look into the lock-n-load. JD1923 , I didn't use a hammer but thanks for your advice!!!1 point
-
That's new. Thank you. https://www.cbc.ca/news/politics/u-s-border-dog-rules-new-1.72660311 point
-
An update on the required documents. There is an online document you must submit, including attaching a photo of your dog. The documents must include the dates of travel and should be submitted just prior to your trip. Then there is a document that must be filled out by your vet and you need to have that document when you cross back into the US. The document must include the micro-chip # and the rabies vaccination # and must have an ink signature by your vet.1 point
-
Going to call Dexter tomorrow to see if the 5200lb is available with our HF (hub face) 68.75" and SC (spring center) 50.0" specs off the shelf or if ordered how long of a lead time is needed. Will see.1 point
-
All the U-Bolts supplied by Alcan have been 9/16". The OEM's (at least on mine) were 1/2". It is very important, if you buy the Alcans, to know before placing your order the diameter of the axles on your trailer. Most will be 3". Some of the earlier builds will have 2-1/2". One owner told me his (used) trailer had one of each. This, most likely, was from one having been replaced prior to his acquiring it. I'm not totally confident in the report that one owner said his axles were 2-3/8", but who knows? Measure them to know for sure. If you don't have a caliper or a micrometer or don't know what these are then you may have to result to the string method (but this does require some math.) You could use a C-Clamp as a poor man's micrometer. Just tighten it up on the axle just loose enough so it slides off, then measure between the jaw faces of the clamp.1 point
-
Good point, about half of mine took a smidge of a turn the first time. Maybe two on torquing the second time. I've called it good as they have over 5000 miles on them now.1 point
-
Agree! Be sure to re-torque after road miles as suggested by MaxBurner and others. It is normal for the U-bolts to strech. Mine got an additional 1/2 turn on the first re-torque and a 1/4 turn on the second. Will check one more time in 500 miles and suspect it will be nill. GJ1 point
-
Your passport gets you in, and back out. If you are traveling with pet(s), make sure vaccinations are up to date, and carry a copy of their record(s). Don't carry weapons (or ammo) of any kind, as Canadian border patrol asks a lot of questions, and weapons are very restricted. Easier to leave them home. Check the latest rules on foods you can bring in, and amount of wine/beer/alcohol. (This is also true on re-entry to US.) We've done the crossings many times, and only once been searched (I think the border patrol had never seen a trailer like ours.) But, be prepared to be honest, and stay within published limits. There are still "random" checks at times that can take awhile. Usually, after a few questions, you'll quickly be welcomed to Canada by professional and courteous border agents . The folks around Montreal drive pretty fast, in my experience, but quite safely. Don't miss Quebec City. Camp somewhere nearby, and spend at least a day. It's historic, beautiful, and elegant. Like going to Europe for the day. https://inspection.canada.ca/en/food-safety-consumers/bringing-food-canada-personal-use1 point
-
If it came out completely it can merely be replaced. If it physically broke off leaving the threaded portion, you have to remove the remaining piece without damaging the internal threads. In this case, I would remove the bolt so that the work can be done in a vise. You may have to drill it out and/or use the right size easy-out. Something like this, but caution as this is a job for the experienced DIYer: Easy Out Screw Extractor 5/32" To 7/32" | Aircraft Spruce1 point
-
Can you provide a picture of what remains of the zerk in the shackle? This will help in diagnosing and recommending a solution (e.g. ez-out vs wrench vs?)1 point
-
1 point
-
Thank you to everyone who has shared their thoughts in this thread. I'll admit that I knew very little about leaf springs until one of ours failed last week on our 2019 LEII. What can I say? I'm the wife and am not too interested in discussing the mechanical operation of things but I am also the detail-oriented and "let's make sure we have all the information before making a decision" half of this team. You all educated me on this topic and I appreciate the knowledge as we decide what springs to go with moving forward. For the record, ours broke in the same trouble spot as many of the other Dexter 1750# 4-leaf ones and we have done mostly highway driving. I would venture to say, since there were 5 of us in the span of a few days who reported broken springs, that this is likely more common than some may have thought. I'll be submitting a ticket to Oliver just so they'll have record of the break. Mindy1 point
-
Axle weight rating is 5200lbs/axle, spring weight rating is 1750lbs (x 2 = 3500/axle, hence the 7000lbs GVWR), GVWR of 7000lbs is based on the weakest link, ie the springs1 point
-
Just as an interrogative comment and question on the subject: New OTT owners may still have spring issues with 2024 model year and forward rigs even though the new OEM axles are D52s. When we replaced our axles last May at Hohenwald, I noticed that our D52s were configured from Dexter with 1,750# 4-pack leaf springs. Since we had already installed Alcan 5-packs a few weeks prior, the OEM Dexter 4-packs were not used and stayed in TN after our D52/Alcan installation. @rideandfly - Bill, y'all seem fortunate to have your #75 rig come with the LE configuration running gear (D52s plus Dexter 5-packs)... It's my understanding that there has yet to be a reported any 5-pack spring failures. My question is, why doesn't the factory order the same axle set configuration for both the LE and LE2? Wouldn't this simplify supply from Dexter, inventory stocking, removing possible installation errors (as with 5k#/7.5k# Bulldog couplers), and ultimately do away with the 1,750# 4-packs which have a history of failing?1 point
-
That little plastic tray under the freezer is a drip try. There is no condensate tube (at least not in mine.) It should be checked every day or two, and dumped. Defrosting is required in mine every week to 20 days, depending on humidity, and how many times a day the door is opened. I don't find defrosting to be a huge pain. I do it the day before grocery shopping. Turn off fridge. Empty contents into a cooler. Cover cooler, and shove it down the aisle. I have an old Tupperware "bread saver" that I full with warm/hottish water. Stick it in the freezer. Put the veggie bin up on the top shelf, put a towel on the shelf below. Depending on ice buildup, maybe replace water in the Tupperware once or twice. A microwave towel to wipe interior a few times, a dump of the veggie bin, and usually in 15 to 20 minutes, max, my fridge is ready to load. 45 in the veggie bin is actually good for many veggies. I got rid of the glass shelf. I have wire shelves everywhere. Don't hang too much heavy stuff on the door. Check seals. Dollar bill test. I routinely push in on the bottom frer corner when I close the door. A tight seal every time means less air intrusion, less frost buildup. I have a mental map of fridge contents. My husband is not allowed to open the door, leave it hanging open, and search. I'd rather get it for him. (Same at home.)1 point
-
@rich.dev, I've wondered the same, as you see above. Our danfoss/secop fridge was a retrofit. We installed extra insulation on sides and top of the cavity, still leaving lots of air circulation space, plus a drawer beneath. Our fridge sits on epoxy tabbed in 2x 3's, above a drawer. We also have air infiltration on the sides. I can, and do , open the drawer many times a day, and could leave it ajar a bit for a ton of extra air, if necessary. I "think" if the standard ollie installed requires more lower air, there's usually an access from beneath the drawers. Open it up, and see how/if it helps. The fridge cavity used to be sealed, for three ways needs. N9 longer necessary. We did seal the outside vents, to prevent intrusion from dust/dirt/ mud daubers,etc.
1 point
-
Sorry for the delayed response, I missed this post somehow... We're seeing 26 - 28.5A (max so far) from the Orion unit with SOCs in the mid-60% range. The 50A model would be nice, we would've probably got one, but they weren't available yet when I dropped the hammer on getting our 30A unit.1 point
-
Last year, I found that the toggle switch on my lithium battery blanket was faulty — it would easily trip to “ON” with the slightest bump — meaning any road vibration could trip to ON position. It didn’t seem to trip to the OFF position . I asked OTT to service, when I passed through at the end of my trip last fall.1 point
-
The BMS can limit, but note your MPPT solar charger is offering 33A, that's 48A total if I'm reading this right. 150A on the truck alternator is good number given it is in good condition, many are rated lower. Try running your test again, with your batteries needing charge (<80% SOC) and your MPPT solar charger turned off. This will show what the Tundra alternator and DC-to-DC is capable.1 point
-
So went out for lunch and the Orion seemed to be maxing out at around 15 amps. Still double than what I was getting yesterday. The cool thing is I figured out how to remotely monitor the Orion through the Ekrano WIFI instead of the online VRM which is hard to see what exactly each device is doing. But if I go to the Victron Connect app and go to VRM => devices. Each device shows up individually through the Ekrano display, which is nice for monitoring while traveling down the road. The bluetooth direct connect does not work for me in TV, just out of range while driving. I wonder if the Epoch battery BMS which is controlling the charging may be limited charging? 2016 Tundra's 150 amp alternator may be getting tired? Mike
1 point
-
Running a dedicated 4 AWG ground wire directly from the TV’s battery to the rear bumper Anderson port, then continue the run of same size cable directly to the DC-DC would likely solve your problem.1 point
-
First day towing on Alcan springs update: -500 miles (Ubolts re-torqued at 50, 100 and 500 miles intervals to 90 ft lbs). Decreasing amounts of adjustment required as mileage increases) -ride slightly harsher during first 100 miles, harshness decreasing as mileage increases (finding nothing returning to the floor at 500 mile checkpoint). -running 45 psi in tires (was running 55 psi with stock springs). Monitoring tire wear at each stop. Likely will increase to 48psi at next stop. -less observable side to side (roll) movement. Very stable while underway (drove in high winds thru Kansas yesterday) -so far I am happy with the new springs I am very interested in reports from early hull number E2 owners who have purchased the Alcan springs. Wondering what their observations are as compared to stock heavy duty 5leaf springs they are replacing.1 point
-
I'm unclear why you would think that. Your wheels have you at 7.8K pounds, well above the stated 7K GVWR. Which tires, axles and spring packs are riding under your Hull #045? How much does your trailer weigh full of water, gear and ready to camp for a 3 month long foray? The wheels and tires under my Hull #050 have a load rating of just over 13K pounds. The Axles are rated at 10.4K pounds. The Alcan springs can support 11K pounds. The Outlaw Oliver has always weighed well over 7000 pounds in its natural habitat. And, it has traveled over 100K miles, most of it with the tires sitting at 80psi all without a single issue. I'll be forever grateful for Jim Oliver's guidance and assistance in designing the most over built Oliver rolling down the road. But, there are those here that think I tend to over-engineer everything.1 point
-
Well we got off to a rather late start - forgot I had a 9am PT session for the rotator cuff repair from a few months back. Anyhow, didn't get the shop opened until 1030-ish. Thinking about JD's old-school suggestion using clay - which seems brilliant, I came up with an alternative. Short of buying an accelerometer from Amazon and obtaining objective data of the suspension system - mounting my GoPro to the undercarriage amidship seemed to be a logical path forward costing $0. We do "cheap" and "free" like champions. So, instead of having D drive around the neighborhood with me in the back playing the "rock and roll rider" - went ahead and captured GoPro video of the curb-side forward wheel assembly while trying to hit every pothole in the area. The thought process is that traveling over the same route at the same speed with the 4-pack springs first, then the 5-pack after the install might show a different deflection of the suspension.... Not 100% objective but comparative for sure. Just need to upload two comparative vids of the before and after... Started off by degreasing and painting the new (one-use) U-bolts, nuts, and washers with a healthy coat of RustOleum to keep things tidy underneath. For the most part, this is a straight forward plug-and-play R&R effort. The new springs are several pounds heavier and definitely a bit higher drop than the Chinese-made 4-packs: So, the street-side springs are successfully replaced with the new 5-packs... The curb-side springs go in tomorrow - then we'll follow-up with a short before/after GoPro ride vid. ...but now, its time for a cold one! Cheers, ALL!
1 point
-
Just FYI: Our Alcan springs arrived this afternoon - just from observation, definitely a big difference in quality between the Chinese-made Dexters and these new ones. Measured eye-to-eye dimension to verify 25.25" across the board w/3" drop - all good there. Planning to have D drive Casablanca around some of the rather "rutty" roads in the neighborhood with me in the back to (hopefully) get a feel for the "before and after" install ride inside. Spring R&R will begin in the AM - we'll for sure keep y'all posted on the effort... Cheers!1 point
-
Just keep in mind that Art has exquisite tastes when it comes to beer! GJ1 point
-
Unfortunately I have had the right rear spring break last year, but with approximately 80,00 miles on said spring I’m not dissatisfied with its service life. You can get an replacement spring overnighted from etrailer, however I have had good experience with St. Louis spring. They will custom make whatever you want, in the past they fabricated two springs for a 52 year old boat trailer to my specs (1 one extra leaf,1 inch increased arch)& I was very happy with their service.1 point
-
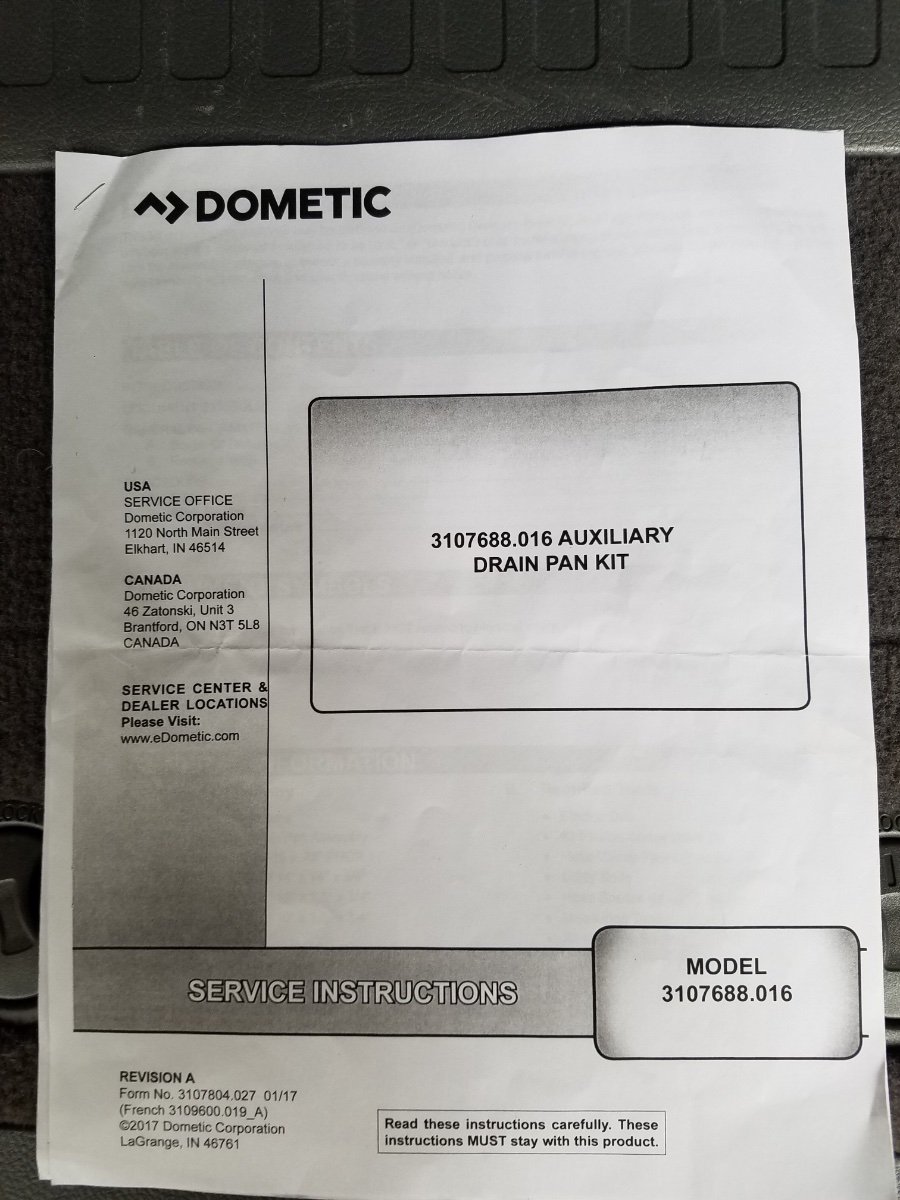
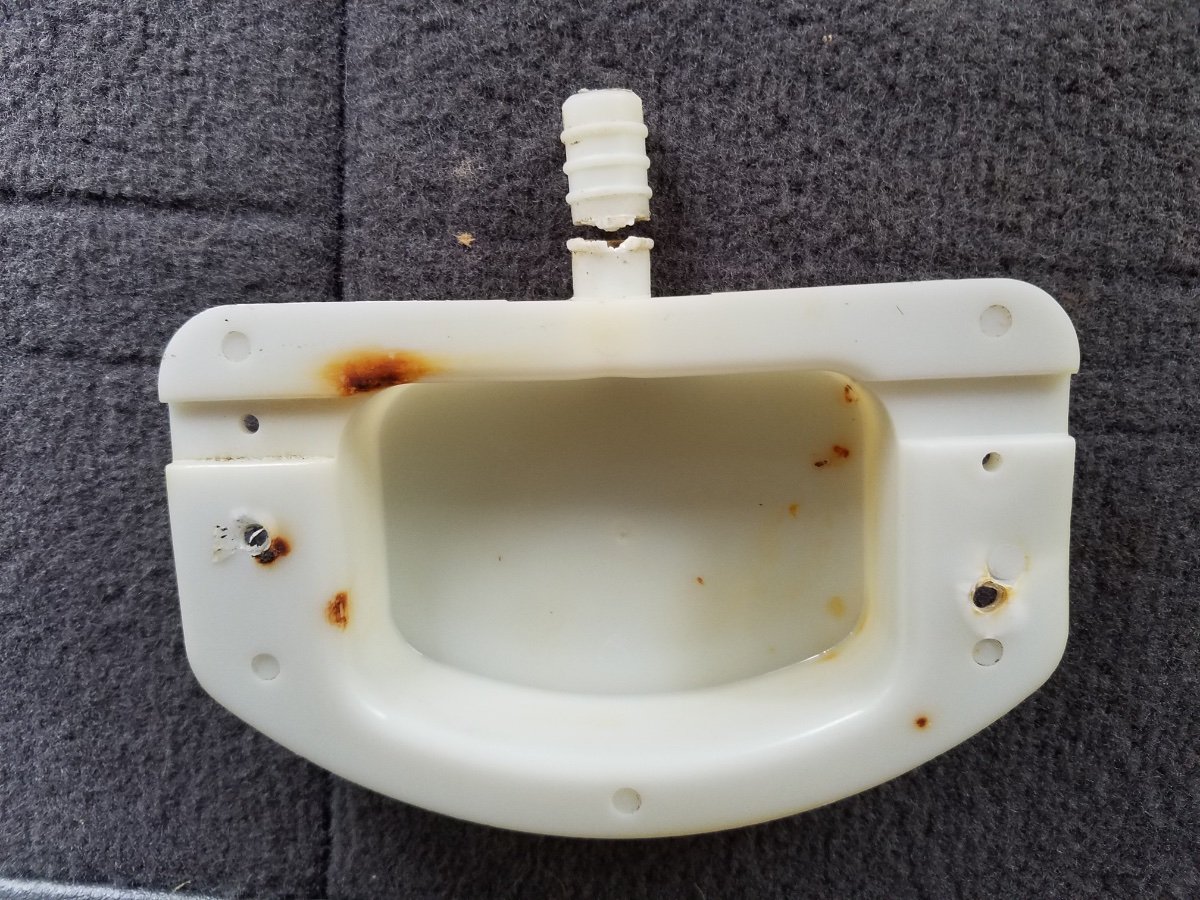
While camping in Arkansas in May of 2019, I found a fair amount of water running off the rear curbside roof while the AC was running. I figured out that if the lowest point of the Ollie was the curbside, then the condensate water rain off the curbside roof. If the low point was the street side, the condensate drained through the internal drain tube and out under the Ollie as it should. That allowed us to manage the condensate water drainage as needed. When I finally got around to troubleshooting the actual problem I found out Oliver had installed a Dometic accessory drain kit which consisted of 2 white plastic cups and vinyl tubing and 4 screws and 3 or 4 hose clamps. There is an accessory cup on both sides off the AC unit that receive the condensate from the steel drain pan built into the the base of the AC. The drain kit tubing connects the accessory drain cups to Oliver’s internal drain tubing. I could see the internal drain pan after pulling the AC shroud and a few other parts off. Without the accessory drain kit the condensate would exit the drain pan and onto the roof through a drain hole on each side. So RV's with the Dometic AC but without the accessory drain kit would experience water running off the roof under normal conditions while running the AC. Some Oliver owners on the forum have replaced their Dometic AC's and report that the condensate runs off the roof and down the low side of the trailer because there wasn’t a option to connect the new AC to the internal Oliver drain system. After an initial inspection of the drain system, I leveled the Ollie side to side and front to back and began adding water to the condensate drain pan. The result was that some water ran off the roof on the curbside and some drained through the Oliver internal drain on the street side. That result caused me to consider that perhaps there was a blockage in the curbside drain tube, so I disconnected the curbside tubing at the tee fitting that separates the accessory cups and used a can of compressed air to verify the tube was clear and it was. Then I lowered the curbside side and plugged that tube and then added water to the main drain which resulted in water leaking onto the roof. The accessory drain cup and tubing connection is not really visible with the AC unit mounted but it did seem to me the water was leaking from that connection. So I ordered this kit and a second AC mounting gasket because the kit comes with one and two are required to raise the AC unit high enough to allow clearance for the drain cups. I then sat on the repair parts for months waiting for an opportunity to obtain access to an air conditioned shop a friend has access to. That happened this month and the repair is complete and the drains work as they should. It did require removing the AC and flipping it onto it’s back to remove and replace the old gaskets and drain cups and that did make the broken cup connector visible. Here are few pictures for everyone that stayed awake during this dissertation. This last picture makes the original break visible by the discoloration on the bottom and sides of the connector. The lighter portion of the break was on top and still connected when we flipped it over and snapped it off completely. Mossey
1 point


-
Recent Achievements
-


")


")


")

