Leaderboard


Popular Content
Showing content with the highest reputation on 06/02/2025 in all areas
-
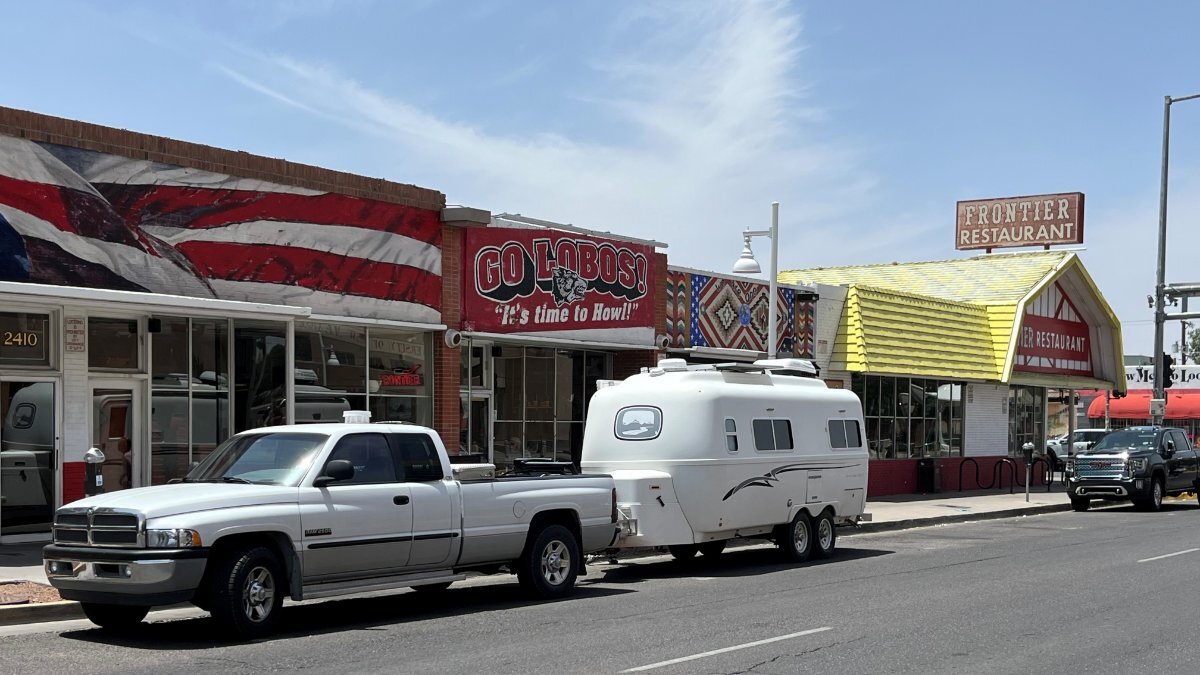
New Mexico is a wonderful state in its hidden treasures from the area NE of ABQ (where Art lives) up to Santa Fe and to Taos NM, then further up to Raton NM for the Santa Fe Trail Balloon Rally (we just happened by this rally when moving from VA to AZ back in 2005)! Then there is Ruidoso! It's Gods Country in Lincoln County NM of Billy-the-Kid and Smokey-the-Bear fame. Don't travel across southern NM without spending some time here. The area is named the White Mountains of NM, wild elk and feral horses walking the city streets daily and so many cute carvings Smokey is shops everywhere. If you're ever traveling through Albuquerque and need breakfast, lunch or dinner, or just great sides to go, like their amazing salsa and beans, Mexican meats and stews and much more, you've got to stop at the Frontier Restaurant. Just one exit S on I-25 of I-40, head a few blocks east on Central. This is my 4th visit here but the first time I parallel parked with an Oliver! (There was a car behind me when I parked and just a narrow alley in front). It worked out great and we could even keep an eye on our rig from the window seat! Chris had the Taco Salad and I enjoyed the Frontier Burrito, pints of salsa and beans to go for upcoming campsite dinners!
 7 points
 -
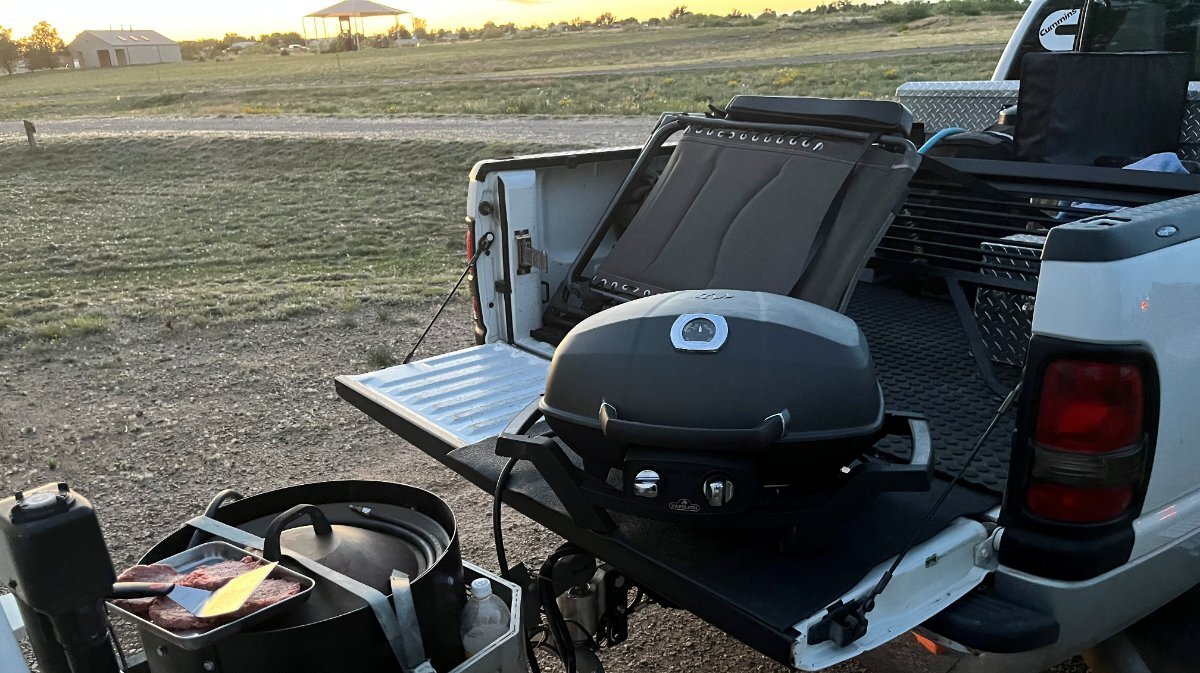
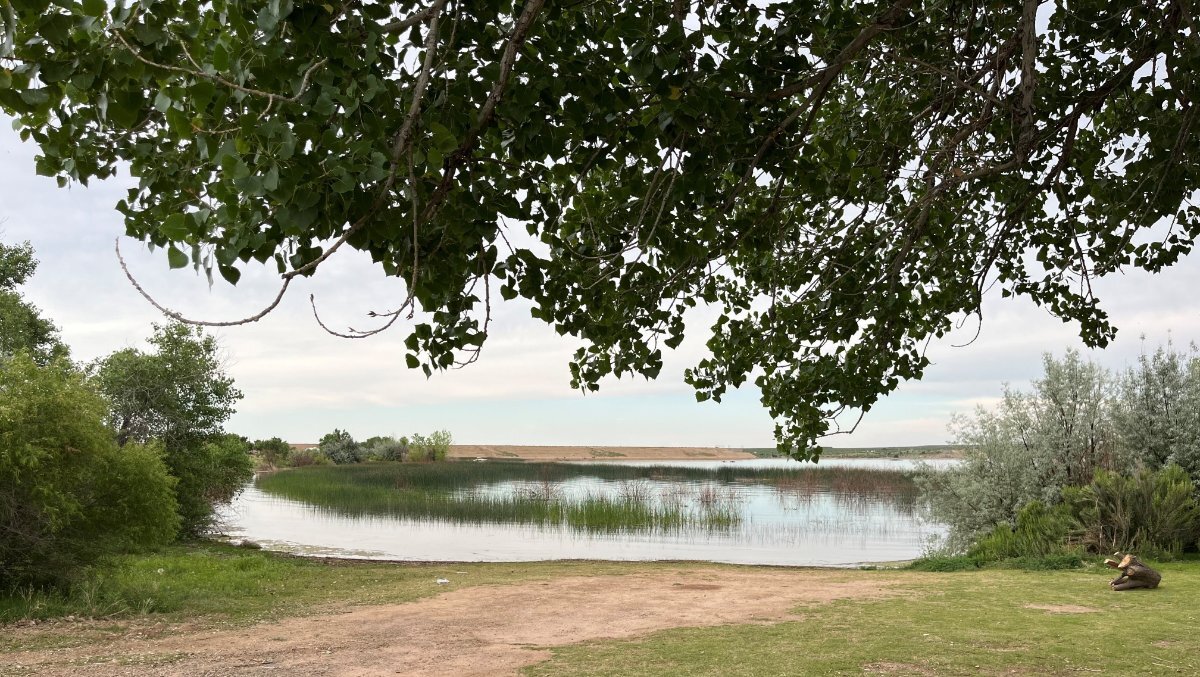
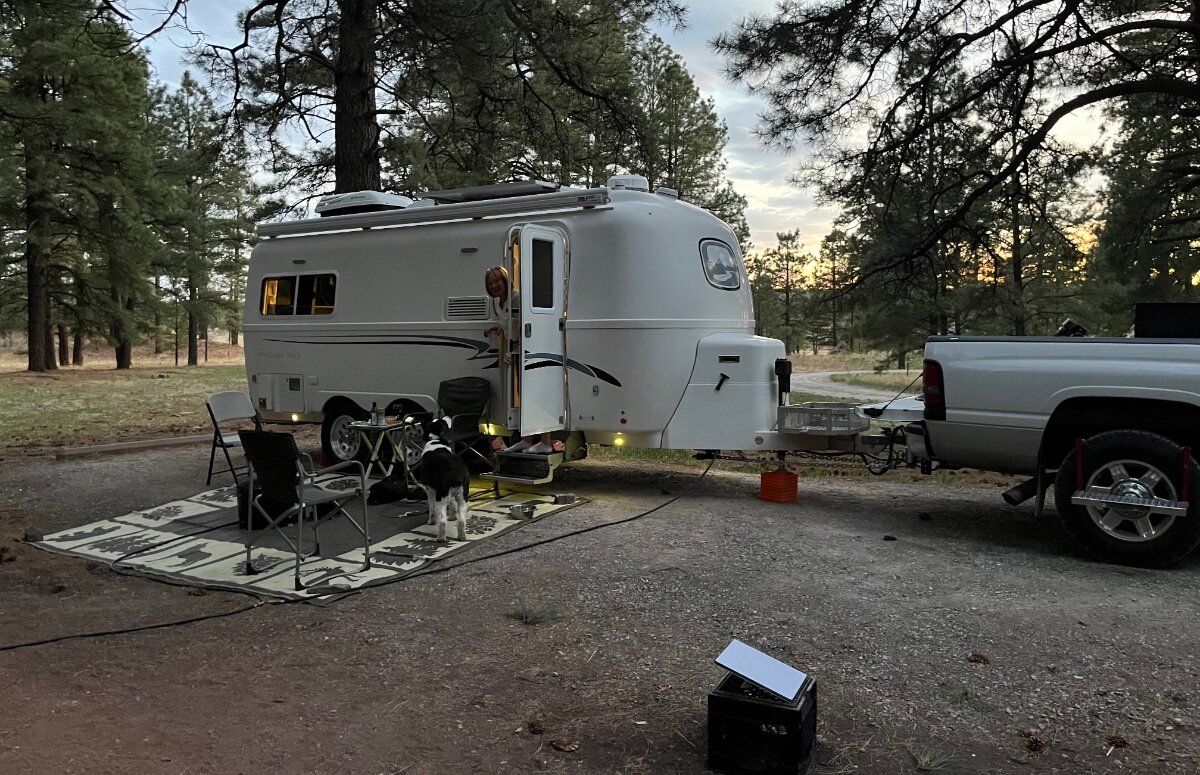
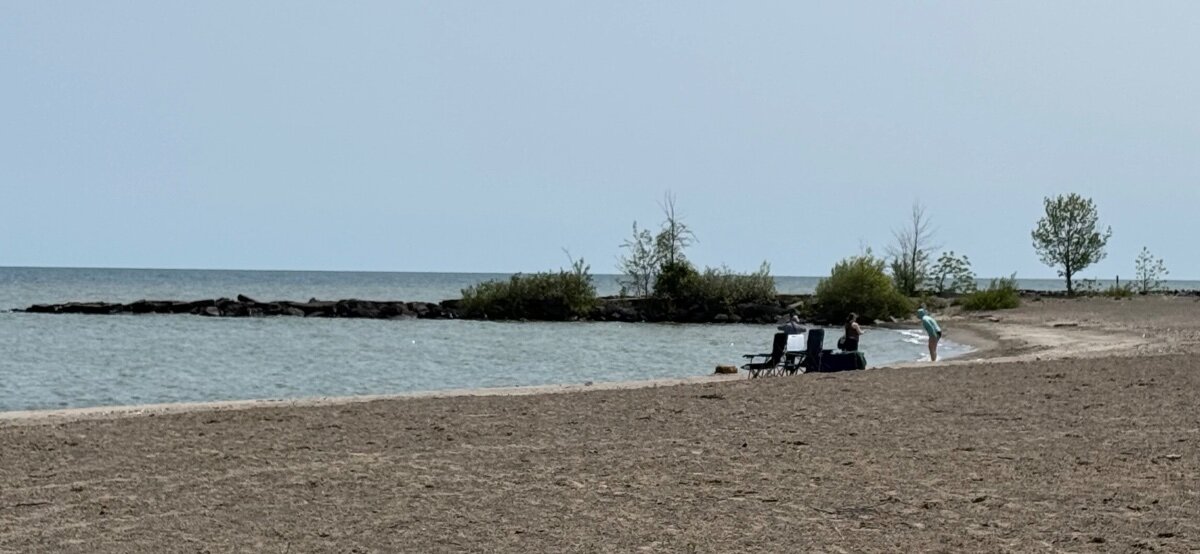
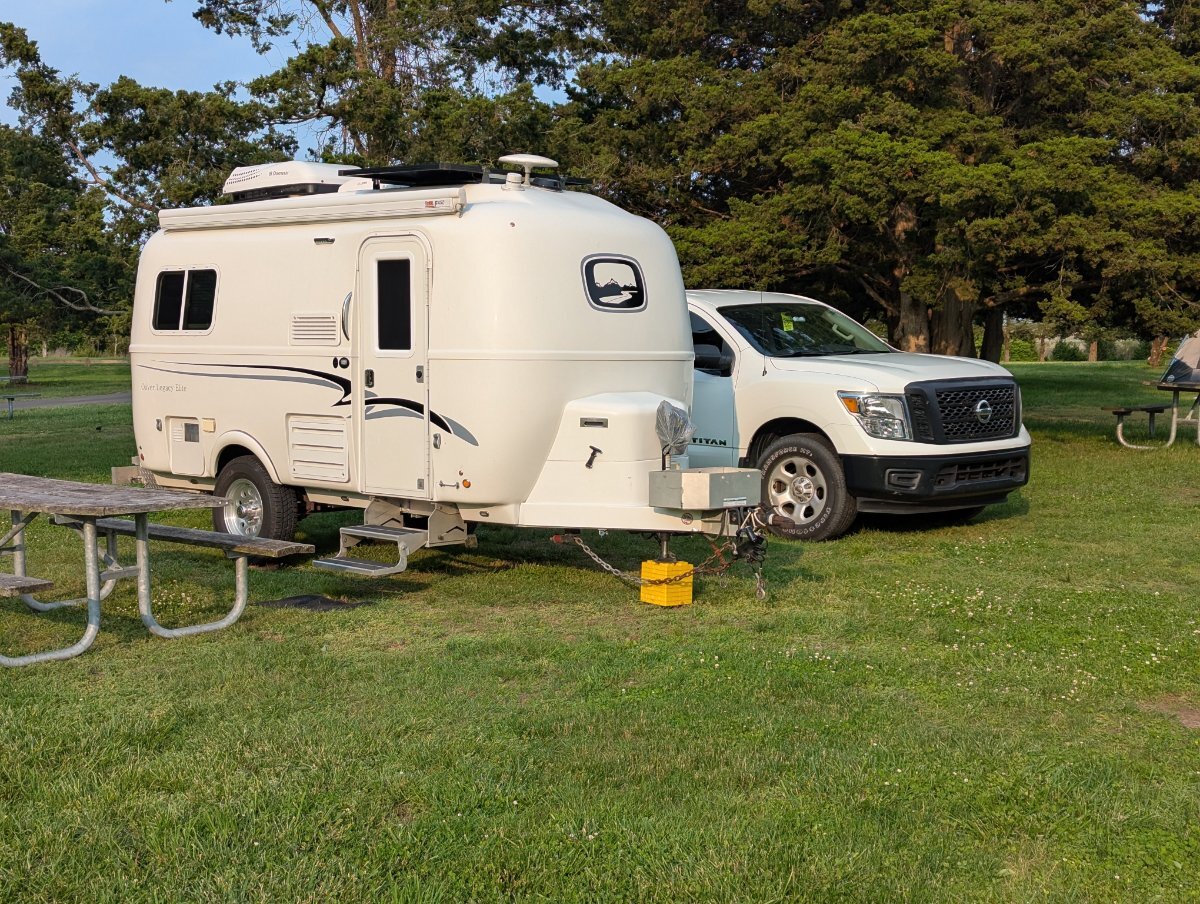
I do have one major gripe re New Mexico and you can keep all the National Parks with the word sand in them. Like White Sands NP and the Great Sands Dunes NP in CO (seen them once is enough)! Though you don't have to visit one of these parks to get caught in a New Mexico sand storm. I believe we've been caught in a half dozen of them over the last 20 years! It wasn't even that windy but from Gallup to well past Albuquerque the sky had a brown haze, not good air to breathe, both of us had sinus headaches by lunchtime, not fun. Years ago on our AZ move, with fully-packed 26' enclosed trailer we got caught in a full-scale July sand storm, being difficult to see just 100 yards ahead. Then the rear awning mount failed from heavy winds and it opened up like a large gull wing! Had to strap it down anyway possible to continue down the road. A long day stuck on I-40 to Tucumcari and then up to Ute Lake State Park. We booked via Reserve America for NM SPs while already parked on site #5 in their New Cottonwood section. Couple pictures of our site and the water pic is campsite #7 which was open but marked unavailable. Our plan is to do mostly 2-day stays on the way up to Minnesota and 3-day or longer stays on the way back. But we're not fisherman nor water-sports enthusiasts and it was going to be hot there the next day. This is my new definition of a “One-Night Stand!” The original one-night stand went out with the carelessness of the 80s! When we stay one night, we keep the trailer hitched if possible and why not a quick tail-gate? Overnight it just got cool enough to sleep, but humid cause of the lake. Thank goodness I had just installed the Sirocco II fan for Chris (or I certainly would have heard about it)!
4 points
-
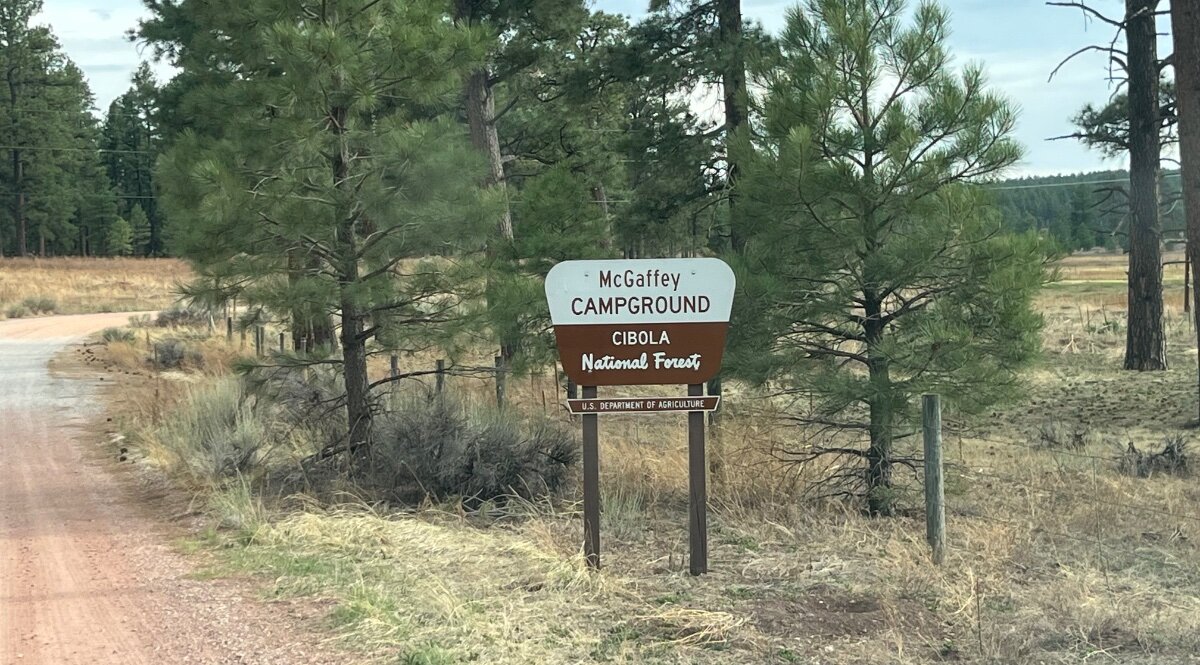
This will be a first for us, though common to many of you who have more time for travel. I have 6 weeks off work, for our personal longest camping trip ever. I was inspired by a post our friend Steve @ScubaRx made last year where wrote that he and Tali often travel across country without reservations! This is difficult for the Project Manager in me, but should make for a spontaneous and exciting adventure! First stop just 5 hours from home, we’ll stay 2 nights up at 7760 ft in this beautiful McGaffey Campground SE of Gallup NM.
3 points
-
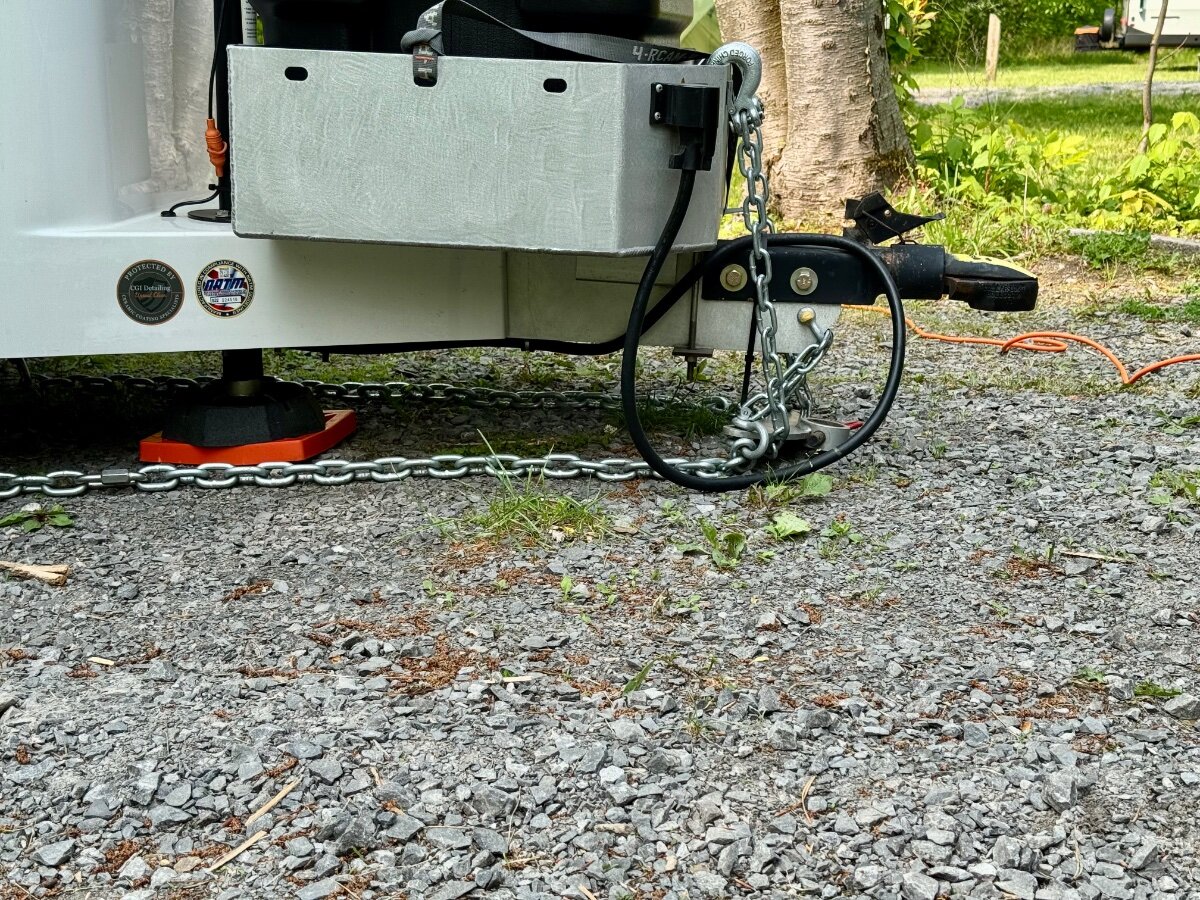
I had to replace the ball/shaft and the body. I waited too long and the friction material wore enough that there was some metal-to-metal contact that galled the aluminum body. The friction material was worn completely through at the lower, aft end of the ball shaft. I was able to smooth it out a bit, but felt more comfortable replacing both metal parts along with the friction material. Probably why I was asking about “preventative maintenance”. Apparently three years exceeds the service life of the friction material. It would be nice if the Andersen folks were a little more forthcoming about service lives, actual PM schedules, and other specifics. I guess I have nothing to complain about. We’re pretty much “full-timers” 8-9 months of the year and put almost 80,000 miles on the TV over those three years. I purchased (another) friction cone and snap ring and I’ll just make it a practice to check/replace it every season. Perhaps rotating it 180 degrees if it looks good. Again - I’m pretty OCD about parts that create ugly scenes should they fail. I had actually considered replacing the Bulldog couple and the hitch ball every couple of seasons just to be as safe as possible. (Pilot mentality) I don’t want to test that old rule of thumb about crossed safety chains “catching” the trailer tongue should a hitch component fail. I also had to dig out my old BIG snap ring pliers as the cheapo Ace hardware ones don’t have the oomph to get the big snap ring off and on. It’s been added to my “trailering” bin.3 points
-
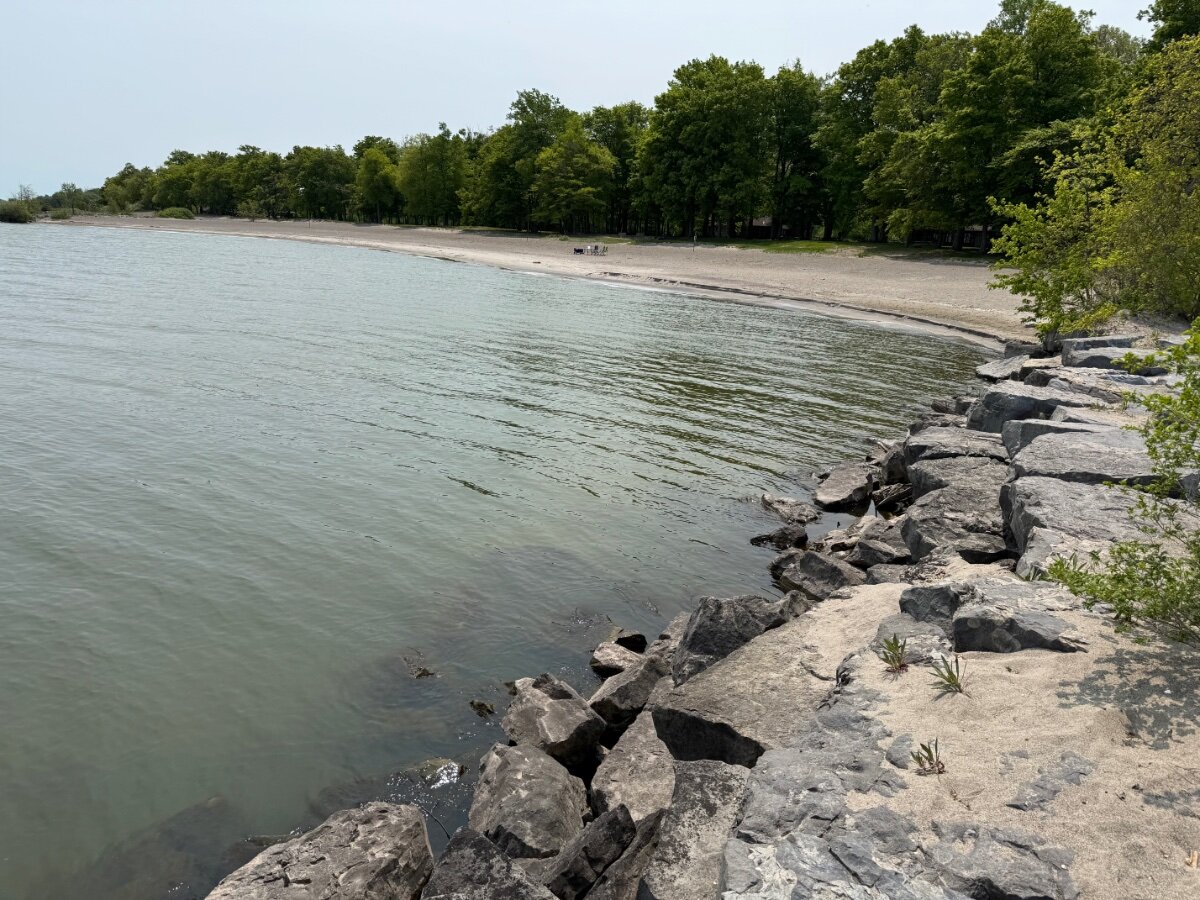
Lowrider! We are currently at Hamlin Beach State Park, in New York, on the shores of Lake Ontario. On the way here, I realized that I’d never seen this Great Lake before, despite several trips across New York over the decades. It is a very nice park, with brand new bathroom/showerhouse combos, and lots of beach, shelter houses, laundry, playground, etc. Tomorrow we leave for Fish Creek Pond in the Adirondacks for the six night TearUp ADK rally.
3 points
-
For any Oliver owners that have an interest in rear mud flaps. I sent David Hess at Sea Biscuit the info on this thread about rear mud flaps for Olivers. I would not be surprised if Sea Biscuit starts fabricating and selling a nice set of rear mud flaps for our Olivers. @connor77 has also been instrumental working with Sea Biscuit to possibly get this mod into production. 👍🏻 Stay tuned! 🇺🇸3 points
-
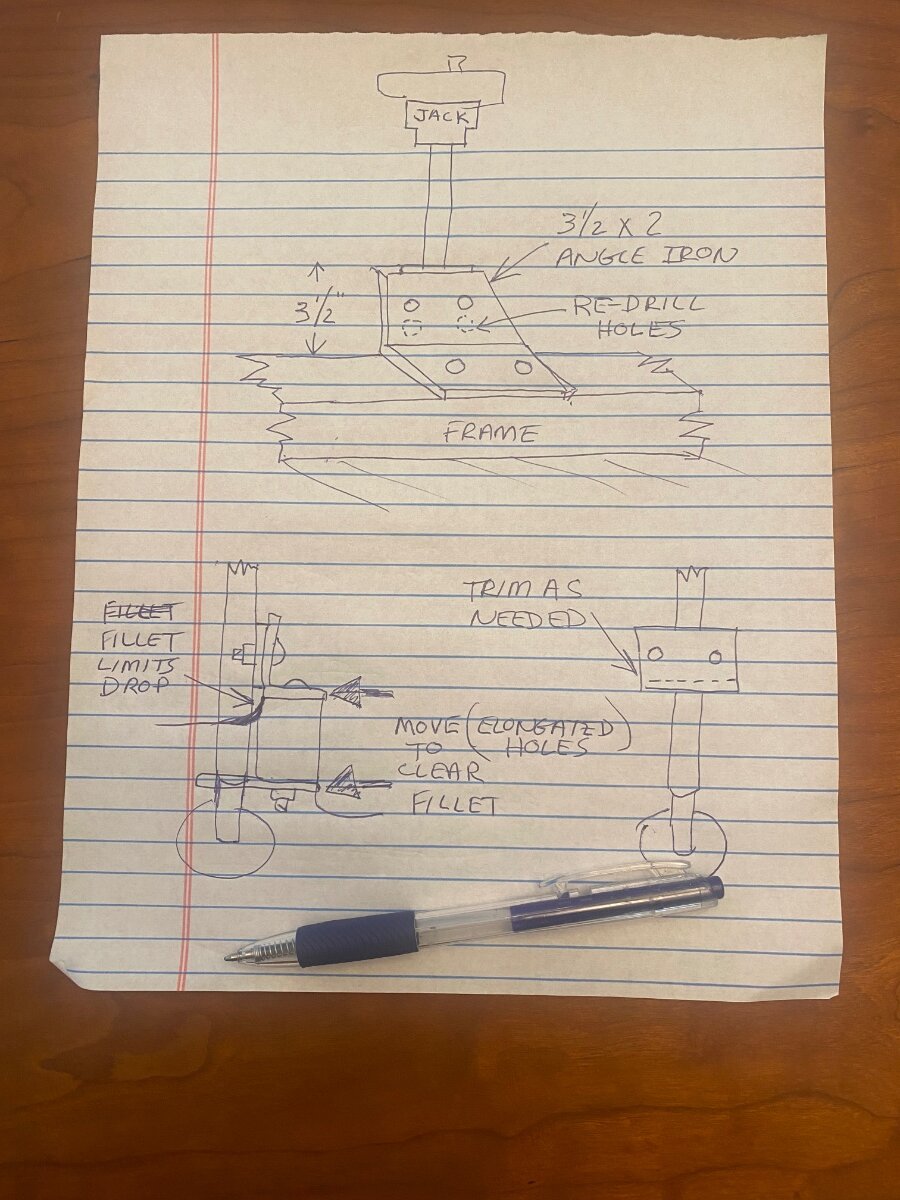
I totally agree that the mounting bracket was probably welded in the wrong position, and I’m sure that they will somehow make it right for you. But I also think this could be fixed with a drill and angle grinder without disturbing the weld. The jack needs to be lowered about 1” to match the other jack, and probably less than that to clear the lid. On my trailer, it looks like there is enough room to achieve that. There is plenty of space to drill new holes in the 3-1/2” x 2” angle iron to lower the jack by up to 1”. However, there is limited room to lower the jack before the welded bracket hits the floor. It looks like the jack could be immediately lowered about 1/4 to 3/8 without any interference, but then it’s hindered by a fiberglass fillet where it transitions from the frame rail to the floor. This could be enough to gain the clearance you need, but you'll need more drop than that so the proposed new holes don’t overlap with the existing holes. Or fab a new piece of angle iron, I'm sure you could source it locally. You could probably gain another 1/8” or more drop by re-positioning the angle iron and (outside) aluminum bracket to clear the obstructing fillet. The mounting holes of both brackets are elongated, and the hole though the fiberglass is oversized, to allow for truing the jack angle. These brackets are held by the long bolts that go through the frame and you can loosen them just enough to tap the brackets over to help clear the obstructing fillet. If still more drop is needed, to avoid overlap of the new holes, then you can slightly trim the bottom edge of the welded bracket with an angle grinder to make up the remaining distance. Before drilling the new holes in the angle iron, I’d experiment lowering the jack to assure you can get adequate drop and hole separation. This shouldn’t impact the structural integrity and it I personally wouldn’t hesitate doing it. I'd ask Oliver to reimburse me for fair value of a new jack. Sorry for the crappy drawing, but hopefully it helps clarify my suggestion. Cheers, Geoff
3 points
-
I hope you have a great trip. I would love to travel without scheduling everything to a gnat's ass. Wave if you see us. We leave Sunday for six weeks
3 points
-
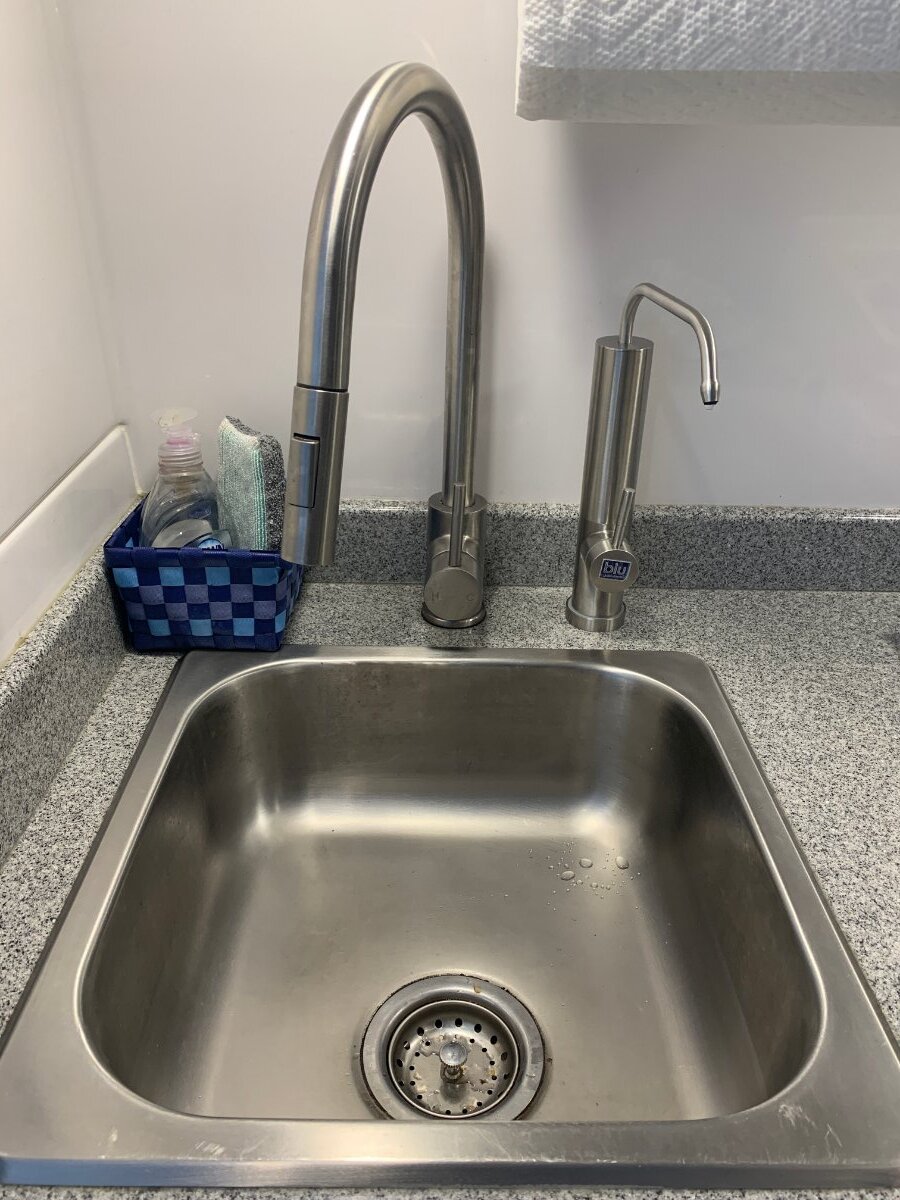
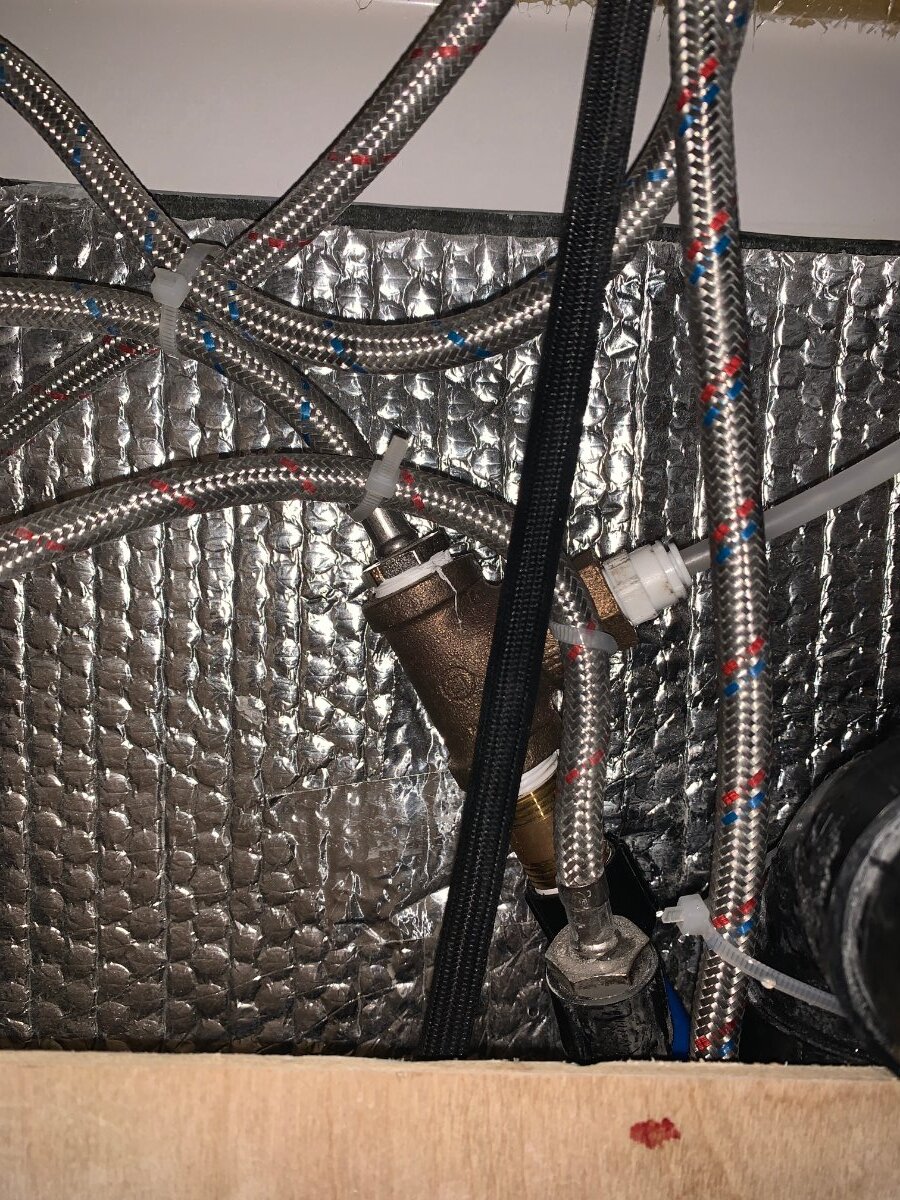
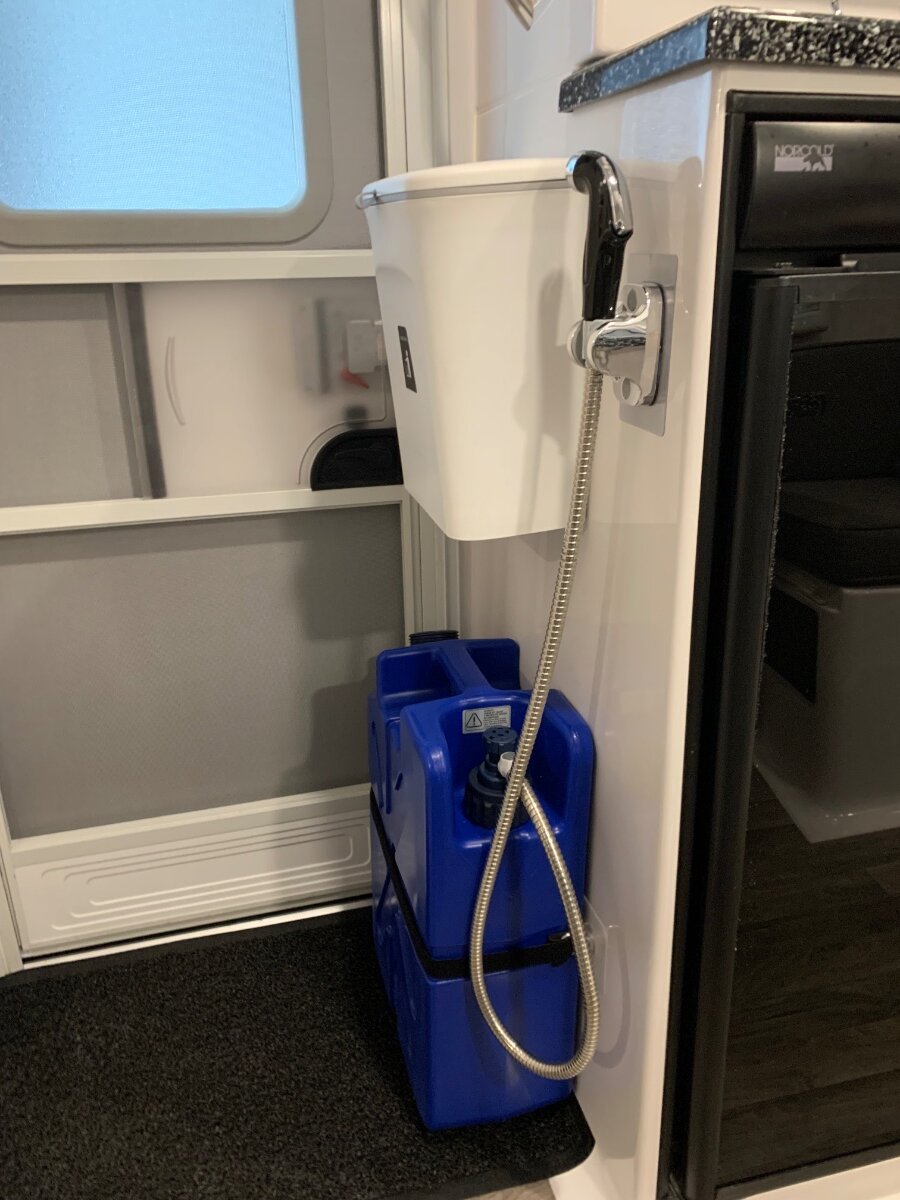
We have a Clearsource Ultra water filter and Blu Tech water softener mounted in our TV. We rarely connect the trailer directly to city water and instead fill its fresh tank with filtered and softened water. We've been wanting to add a UV water filter for drinking water, but until recently haven't found one that uses 12v power that we liked. Blu Tech recently introduced their UVC Purification Faucet and it's just what we were looking for. UV water filters haven't been discussed very much on this forum, and since this is a new product there's not much information about it on the internet. We decided to go for it anyway. This YouTube video review was posted earlier today, about a week after we bought one. You may ask, why do we want a UV filter? It makes sense for us because we don't want to carry around disposable bottles of drinking water. We want to be confident that our filtered and softened tap water is safe for drinking. Since our "pure" water sits in a reservoir for a week or longer, even if unlikely, microbial contamination is still possible. The UV filter is our final defense against pathogens. The install in our Oliver was very easy. It does require drilling a hole in the countertop, but the Blu Tech UVC faucet looks like it belongs there. The kit came with a 120 volt AC adapter that supplies the UVC faucet with 12 volts DC at 2 amps. We don't always run the inverter and we're not always on shore power. For our install we ditched the AC adapter and purchased a DC5521 connector so we could wire directly to a 12 volt circuit. The Norcold refrigerator is on a 20 amp fuse, so we tapped into its power supply and added a 3 amp fuse at the splice. Blu Tech doesn't supply a separate DC5521 connector for direct wiring, and we didn't want to cut it off from the supplied ac adapter in case we need to send it back. Besides the DC connector, we also had to purchase the parts to tie it into our freshwater line. The faucet requires 1/4 inch PEX. We inserted a threaded t-connector with a 1/4 inch PEX fitting in-between the existing cold water PEX to braided stainless faucet fitting under the sink. After installation I saw that the counterweight for the kitchen faucet hose bumped against the new t-connector. We used zip ties to hold the water lines away from the counterweight when it goes up/down. So far so good. A blue light glows at the faucet base when the water is running. The style of the faucet is a close match to the original.
2 points
-
For what its worth - there is also a "red" friction cone. Bill2 points
-
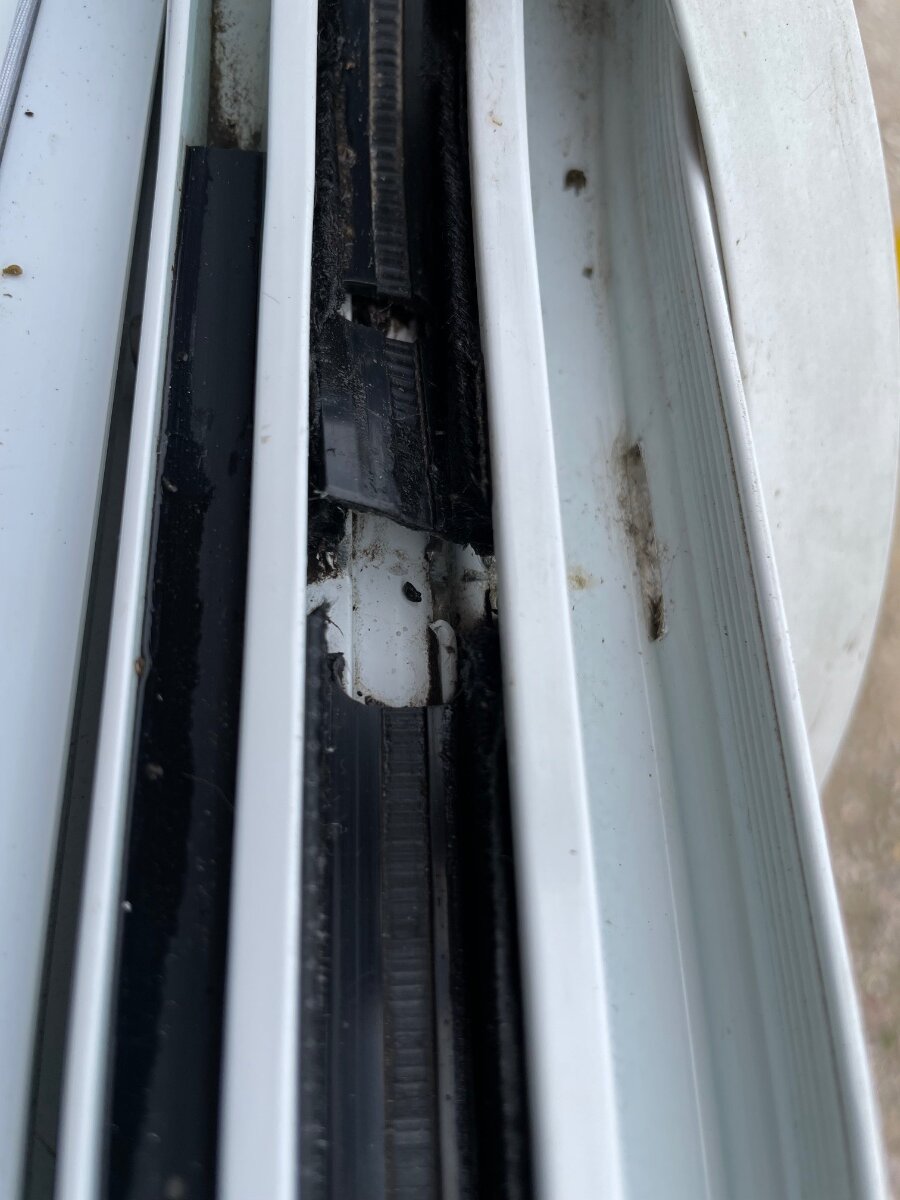
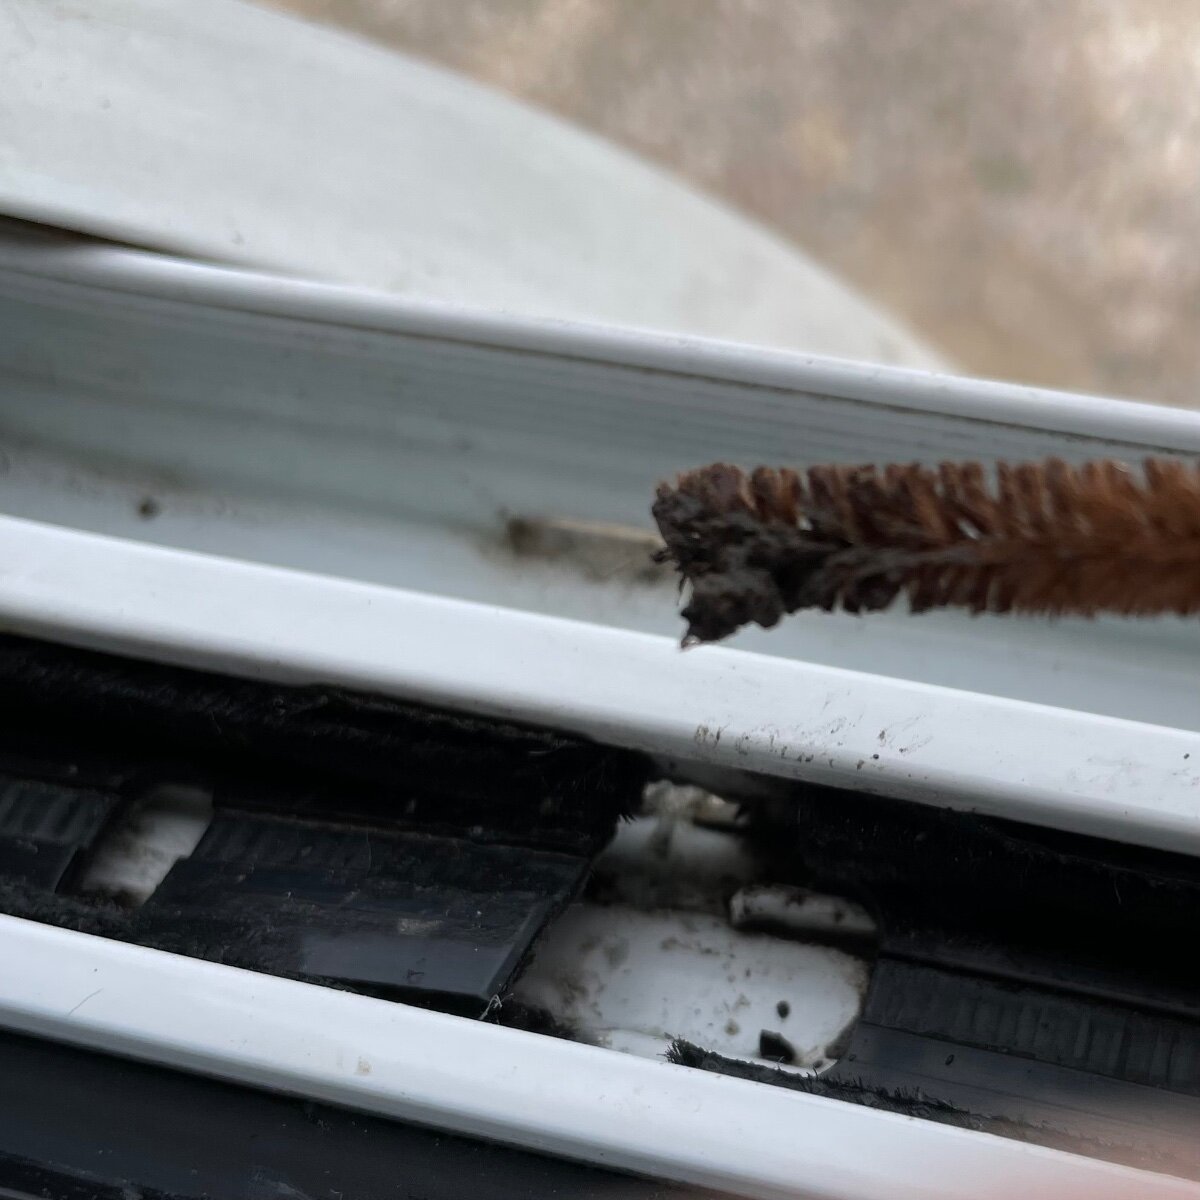
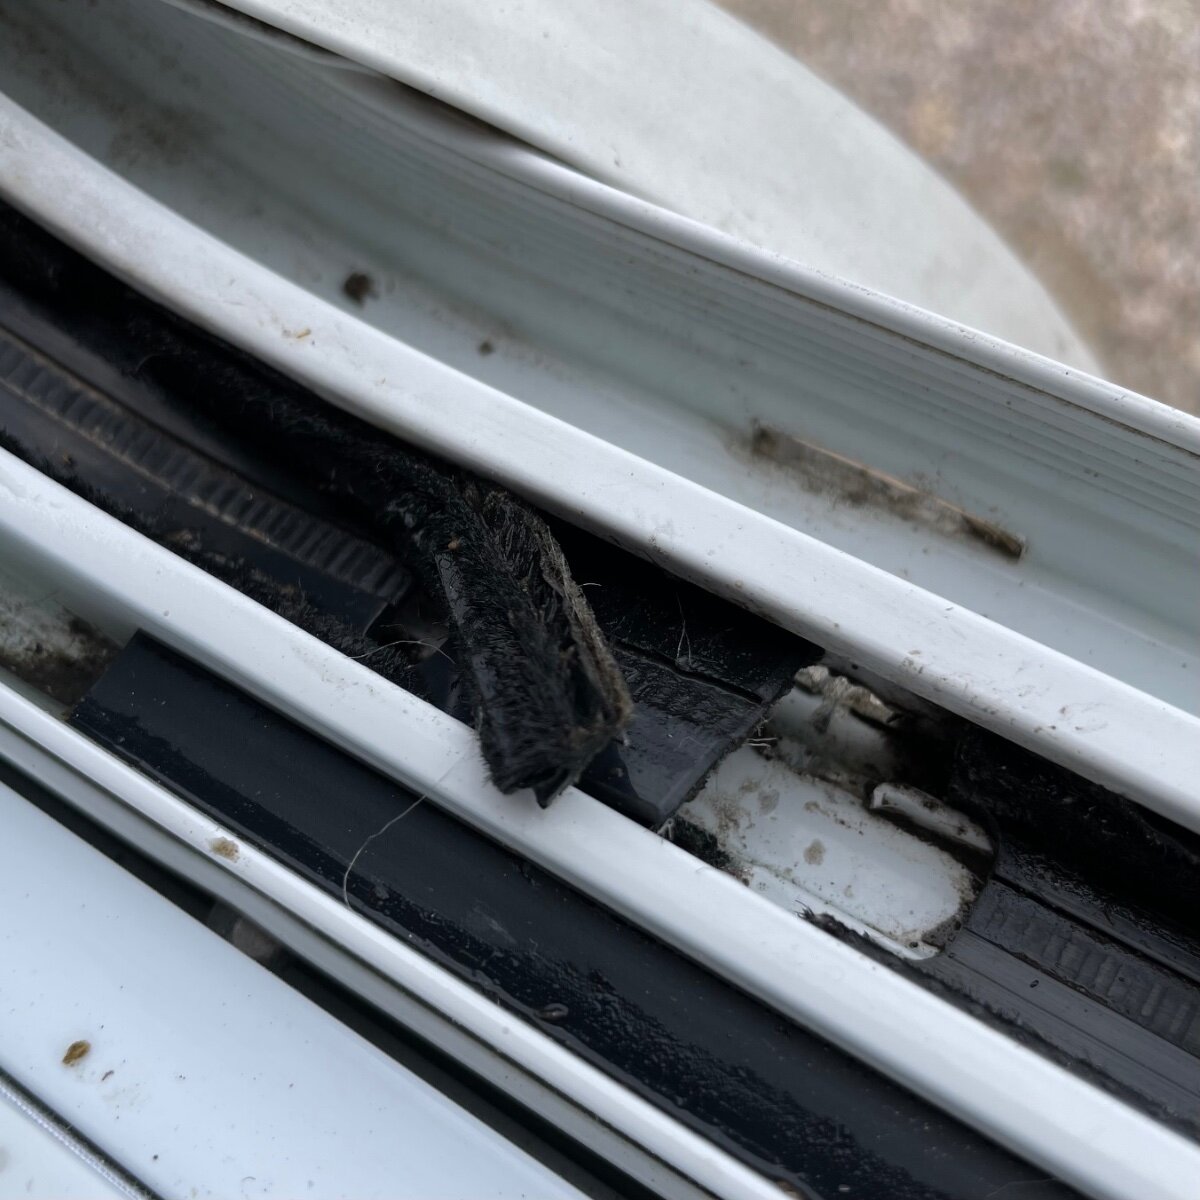
Chris — you posted an excellent video and it’s very much appreciated. My recently cleaned window tracks managed to get so full of “muck” (the perfect word) that I had water intrusion last night. A first for me! UPDATE: My little black flexible pieces (with the oval holes, that sit in the window track) are not nearly as flexible as what I see in the video. And the vertical sides seem to be separate, or have split from the horizontal section (I only pulled up about 1/2 inch). This made me wonder if my track liners were different from the video. After speaking with OTT Service Team, I decided not to remove those sections. At least not now, while I am on the road in remote areas. I’m going to finish cleaning the weep holes as much as possible, and when things are dry, use compressed air to blow the dust out. All photos are taken from inside looking out… Thanks to the service team for their support today.
2 points
-
This very same thing has happened to me! Thanks for posting this! I had no idea why my water pump wasn't working...until I found this. I'm a newbie and trying to sanitize my freshwater system before filling the freshwater tank. I'll be camping somewhere in a couple of weeks with no access to city water. Thank you, thank you, thank you!! Lisa Jones and "Columba", Hull #14752 points
-
Hello to the Elite 1 in Hammonasset State Park. We're on the other side in Area 1, T11. Feel free to stop by!
2 points
-
Thought this might help someone else out. The water pump was not working. The main switch light was on and functional. The bathroom switch was functional. No noise from the pump at all. I opening the compartment and immediately saw that one of the wires had come loose from the pump. I plugged it in and all is well. I think I will go back in and try to tighten the connection. Hull 1467
1 point
-
This is neither Mechanical nor Technical, but more maintenance. Not sure what other channel to place this. Hope it helps our new-comers. Someone on the Oliver Owners Facebook page saw my first video and asked me if I could video record actually how to clean the tracks under the windows. So, it was a beautiful day and I figured I'd see if I can clean and record at the same time. This is kind of new to me. https://youtu.be/-oEpon3iaPc1 point
-
Craig: I got 40K Miles out of our OEM Monroe shocks. All four of them were fine. With tires off they are a snap to change, I would do so when doing the springs. But a lot of others have gotten a lot less miles on their OEM Monroe shocks. I have no experience with the Bulldog's, but from this forum it appears they are doing well. How well vs. cost? How about it fellow "Bull Doggers" Any shocking experiences so far? 🙂 GH1 point
-
Nice tailgate party you have there! While on my long "walkabouts" with The Wonder Egg, Bosker & I seldom make reservations in advance, unless I'm traveling on a holiday weekend, or near a huge tourist location. (I'm sorta burnt out on tourists, having lived in both Myrtle Beach and Orlando) Not being in any rush, with months for the sojourn, I don't usually get on the road until 9-11AM and usually stop between 3 - 4 PM. Most others are still on the road at that time and usually the campgrounds will have something available for 1 - 3 nights. When I come across a picture perfect, quiet location with great weather, we'll hang out for up to a few weeks before moving along. I may have a final destination in mind, (this year - Whitehorse YT) and meander a long a winding pathway, simply in the general direction, without detailed planning. As Patriot says, keep those great pics coming!1 point
-
How in the world does that little lady eat all that food? Looks good though. Bill1 point
-
My solution, Lifesaver Jerrycan for drinking water and ice. It can easily be refilled from the freshwater tank during extended travels, but in a pinch designed to adequately filter the worst of waters (think survival situations).
1 point
-
Home safe. 1,600 miles in 36 hours (including food and sleep) on the last leg. Damn, the US is big. But the drive was about as easy as I can imagine (basically I20 and I75). Ollie behaved wonderfully the whole way. Now it's time for a well-earned bath (Me first, then Ollie).1 point
-
First, PLEASE replace your CO alarm if you have any doubts. Especially for a trailer that has an ammonia absorption refer. For these class of machines, the front of the refer cabinet must be sealed from the cabin, regardless of the brand. Aluminum foil tape is what I would use. I personally believe that running a condenser fan 24/7 to help scavenge air from the back of the refer and out the top outside vent is a good idea. It will tend to draw in good air at the bottom and exhaust whatever is in there out the top. In the process it may put this area under a slight negative pressure... further helping keep the family safe inside the trailer. GJ1 point
-
That's what we did Dudley. I sent you a PM. 2 years later and the fridge still works fine. I would do again! John1 point
-
Very wise! Absolutely possible. Barker has built thousands of jacks using the OTT bracket. They would have a jig fixture to weld the OTT provided bracket to the jack. So this could be a new guy mistake. Frankly it is time for you to just remove BOTH rear jacks from the trailer and bench inspect them side to side. Photo what you find. Doing so gives you the facts. It also puts you in a position to say it is "Obvious" and also if It is a Barker or OTT issue. Then you can politely share your results. It would also be a great opportunity to figure out how//if you have a bent jack leg. Once again JD is on point.... With an intact and relatively straight jack leg, I think you would either dig a deep hole below the jack to remove the leg down. Or likely easier, remove the jack foot and pull the jack leg up and out. Also, as JD mentioned, use Lock-Tite Blue on the jack foot bolt when reassembling. I have found that with facts, both OTT and Barker are stand up and make it right teams. Get them the facts and I'll wager you get a new jack and bracket free even though it is out of warranty. Why? That would be the stand up make it right answer. GJ1 point
-
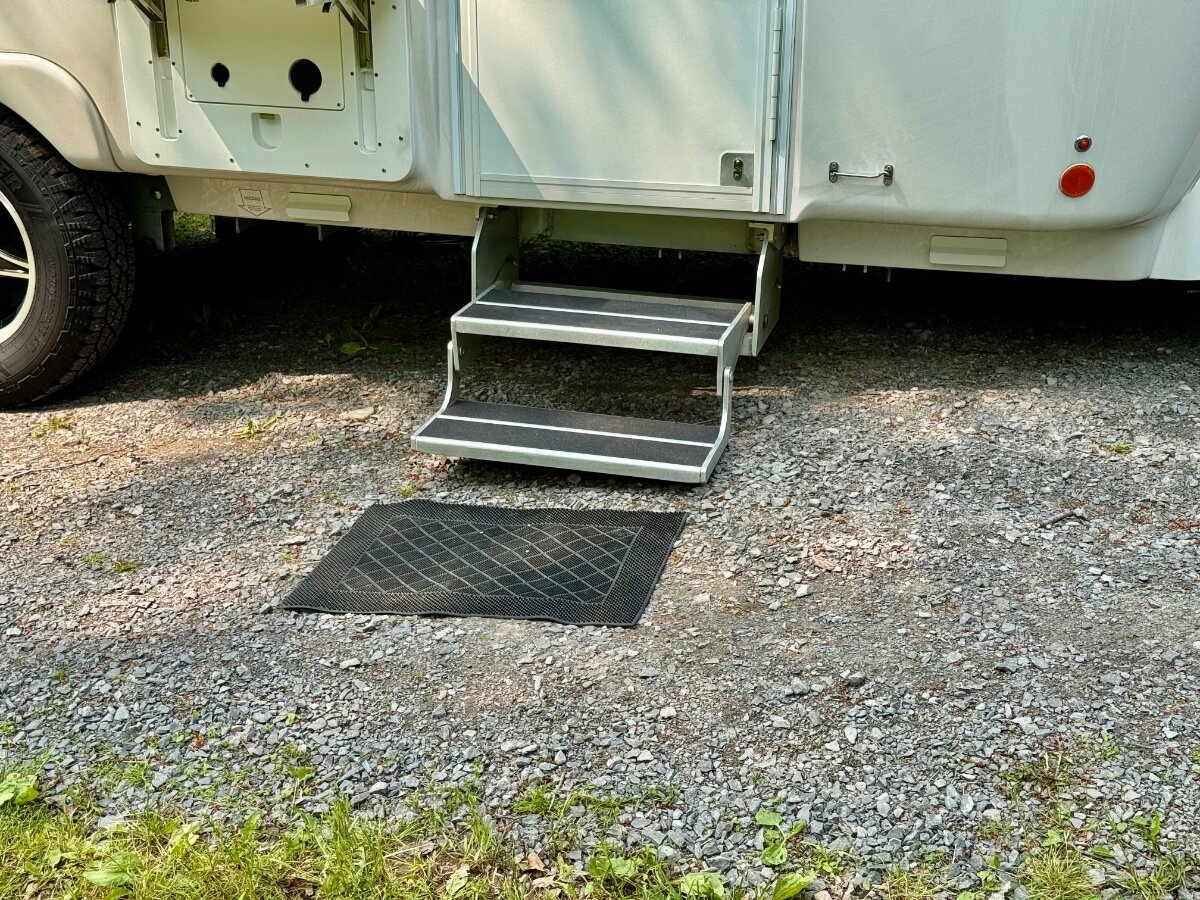
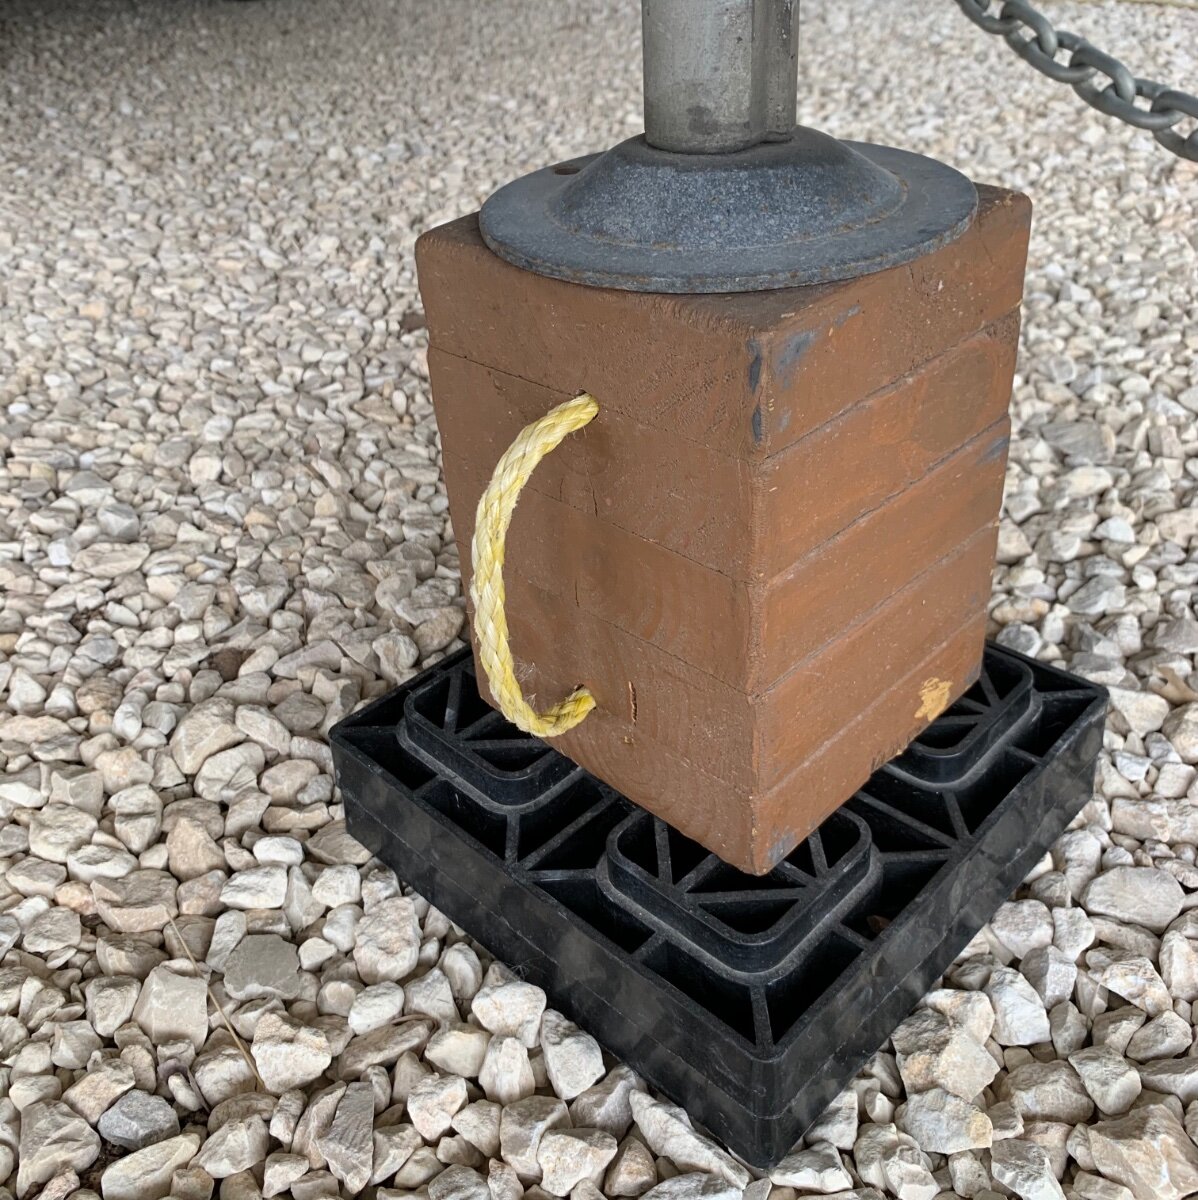
Wood blocks and legos… my jacks rarely extend more than 6” or so. Less is better. If I do drive off while they are down chances are they will just slide off the block.
1 point
-
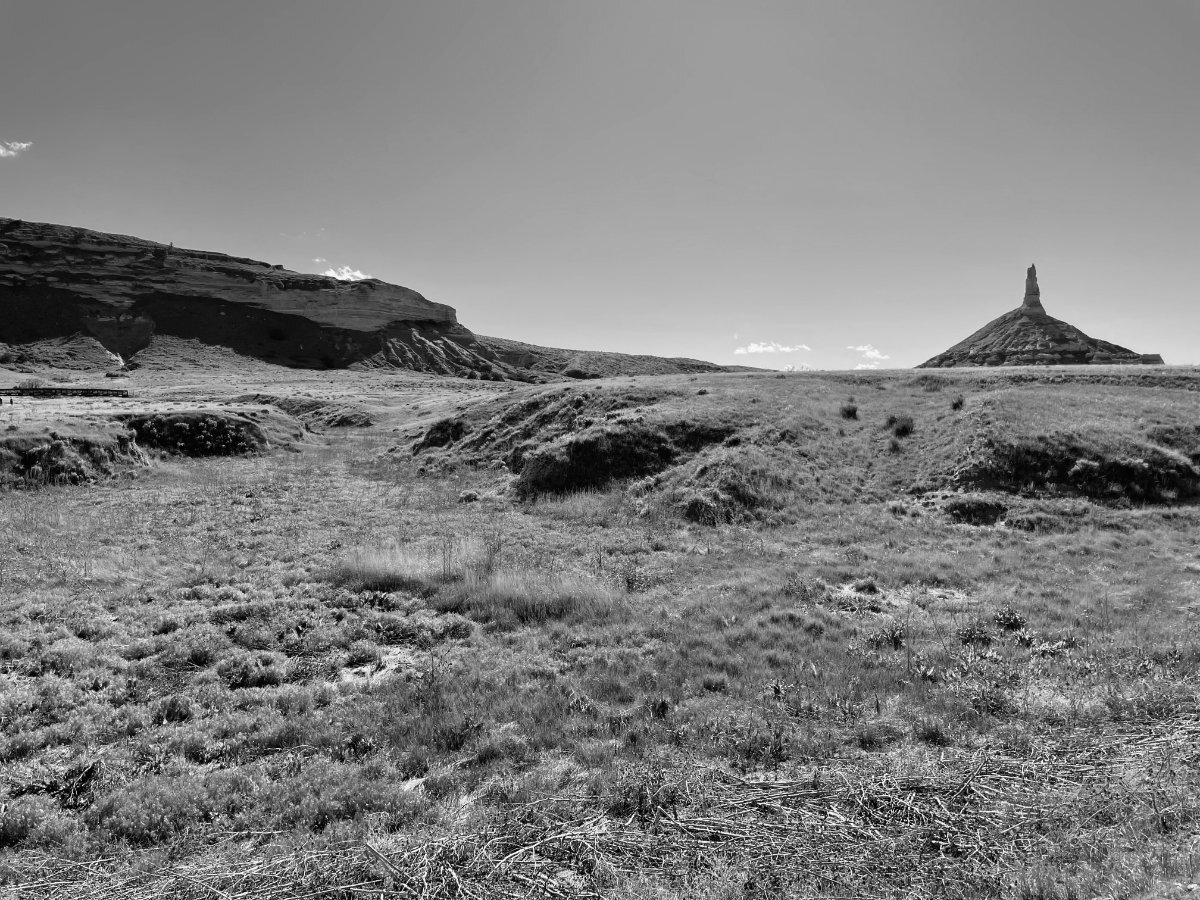
I've been traversing the southern section of Nebraska this week, following along the Platte River, and parts of the Oregon Trail / California Trail / Mormon Trail and it's .... very different from the Sandhills or the Badlands. I stayed at Pawnee SRA (State Rec Area); Windmill SRA; a freebie (if barren) spot in Bayard City (2 nights free with power and water, additional nights for a fee; one of the power poles wasn't working); and Riverside Campground in Scotts Bluff (which turns out to be part of a fairly large city park with a lot of amenities for locals). The landscape is dramatic. Pawnee SRA (the prettiest of my spots in NE); Buffalo Bill's Ranch NHS; Chimney Rock; Scotts Bluff National Monument
1 point
-
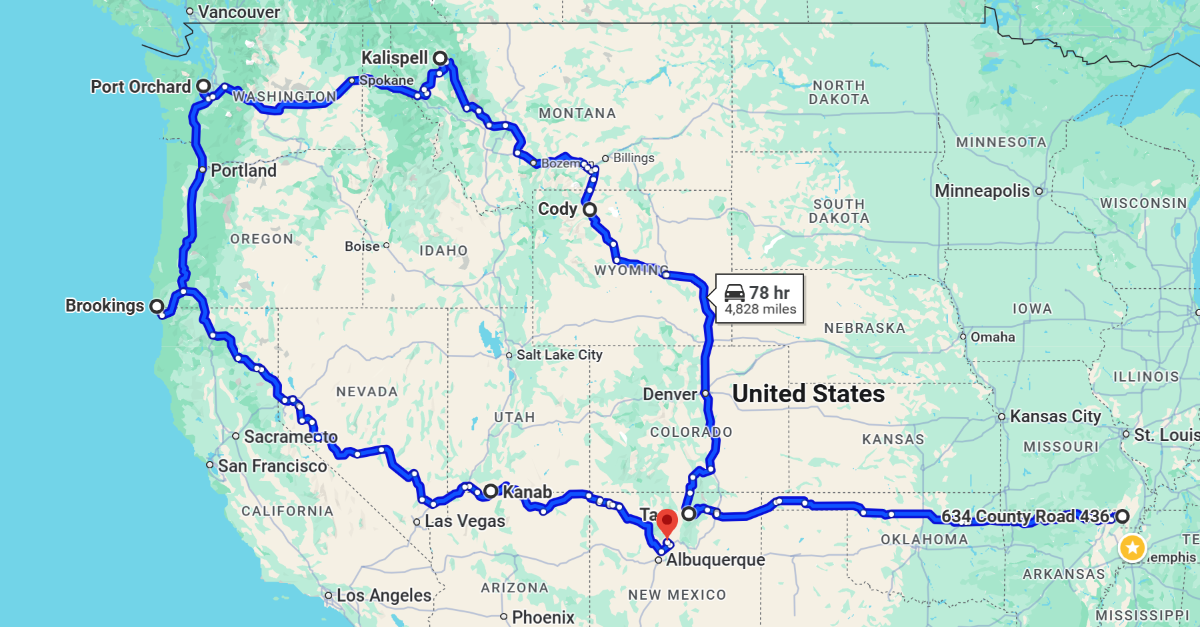
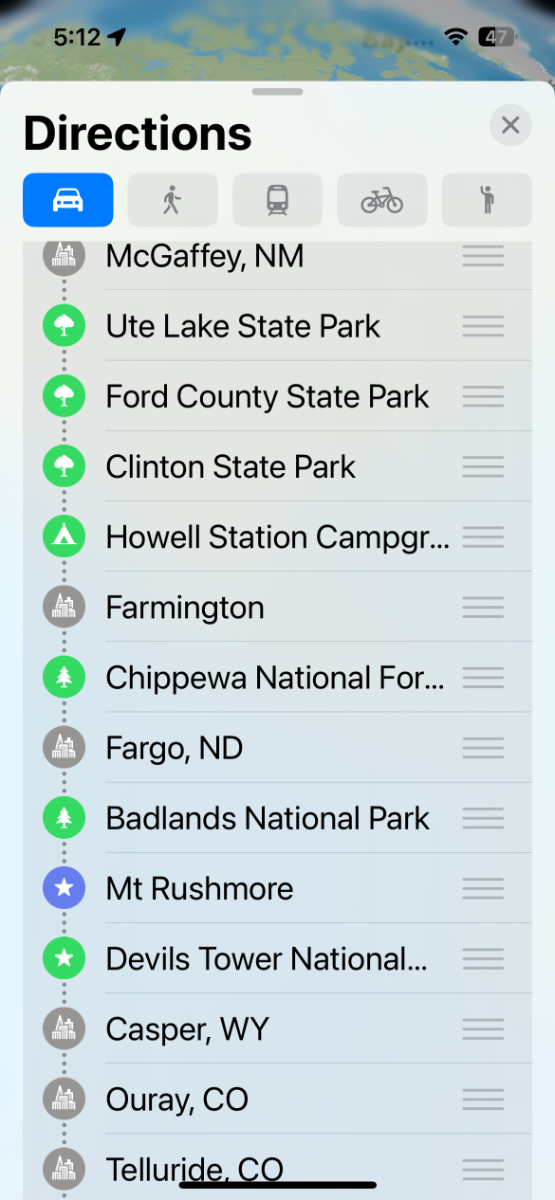
Our paths will cross, but at different times. Apple Maps not so good at visualizing the route but this list is what we have in mind, actual route TBD!
1 point
-
We did our spring trip to the southeast central US this year without reservations more than 1 or 2 days in advance. Mix of Harvest Hosts, state, federal, and a few commercial campgrounds. Worked out fine.1 point
-
Please note If anyone is looking for the posts concerning the possible new Oliver windows for 2026, that portion of this thread has been moved to a new thread titled: New Windows for 2026? Bill1 point
-
OK found the On Ramp back to the topic of maintenance of the Andersons........ I'm going to replace my Anderson Cone and Ball Assembly at 60,000 Ollie miles. So I'm about two years away. I seem to recall that such parts from Anderson were being provided to OTT owners at no cost. Am I dreaming again? GJ1 point
-
I'm not so sure about that. The whale plate and the ball shaft and ball are pinned. They turn as a unit. The friction takes place on the lower end of the ball shaft. Grease makes no difference. In the below video you can see how they are made. First, the ball does not spin. It rotates with the whale plate. The whale plate rotates with the chain attachment points. This is why the ball wear always looks like this video opening shot: If the ball was spinning, you would have wear all around the ball. It does not happen. Since the ball is not spinning, the wear we see is typical of "contact patch" friction induced wear. Wear does not occur unless there is contact between the two objects. By lubricating the contact patch you likely would not reduce the wear of the ball. But you would reduce the wear of the cone. Some have suggested getting a metallurgically harder ball. Bad idea. The ball is a softer material than the Bulldog for safety reasons. GJ
1 point
-
Unnecessary with the Anderson as the Ball & Ball-pin rotates together in turns, as intended with the anti-sway friction provided by the pin sleeve. Anderson expressly says not to grease the ball, and since there’s no movement except vertical it’s hardly necessary anyhow. As for me my truck has rear steer with built in anti-sway; the rear of the truck wiggles if the trailer waggels. So don’t really need hitch provided in anti sway but OK.1 point
-
Headed to Old Mexico Thursday, we'll be walking the border crossing at Columbus over to La Paloma. Pancho Villa State Park is still having issues with their septic system so there's been no dumping allowed for almost a year now -- no biggie, as we'll only stay for 3 nights. Pix of the knuckleheads to follow, FYI...1 point
-
ZLarryb, the plastic connector/tee fitting nut is the red notation. the black plastic tie-down is the yellow notation. the green arrow is pointing to the green "witness marks". Witness marks are sometimes used to mark a 2 part connection like a nut and bolt or in this case it marks both sides of the water pipe connection. It is marked during installation on both sides of the connection and it is a quick visual confirmation of a connector being in the original position or not. Due to the angle of your picture, I can’t verify its position because I can’t see both side of the mark, but you can do a quick verification. Mossey
1 point
-
Always nice to pass along a quick fix! Thanks!1 point
-
= Regulator. if you mean to NOT have the automatic change over feature of this Regulator engaged then this "little lever" should point to the tank that you would like to use. When that tank is empty then simply move the "little lever" such that it points to the other tank. Bill1 point
-
Yep, AI will only allow the young to be lazier than how they've been brought up! Teaching my class this week, one new student logged into the Zoom meeting with an AI interpreter of some kind. I'm willing to bet, that she by counting on technology, will learn and retain far less than the average student! Give me a break! "Just Say No" when anything pops up on your screen! I've never noticed anything colored green on the tank selector. Am I missing something or perhaps our older hull is different. I turn it left until the first tank is empty or near empty as shown on our Mopeka sensor, then I switch to the RH tank. Never noticed a color, or maybe I'm colorblind!1 point
-
Just an FYI. We purchased hull #49 about a year ago and have constant issues with water in our dinette window. I did everything possible that the forum suggested to no avail. After more investigation I took a little pick and ran on the inside of the window tracks and the pick kept grabbing on something. Turns out the drains were stamped but not completely out. After some luck I was able to get all 4 drains clear. Not sure if this was an issue with earlier models or if we just got lucky! 😂 We have not had an issue since, knock on wood. Oops that's fiberglass.
1 point


-
Recent Achievements
-


")


")


")

