Leaderboard


Popular Content
Showing content with the highest reputation on 02/14/2022 in all areas
-
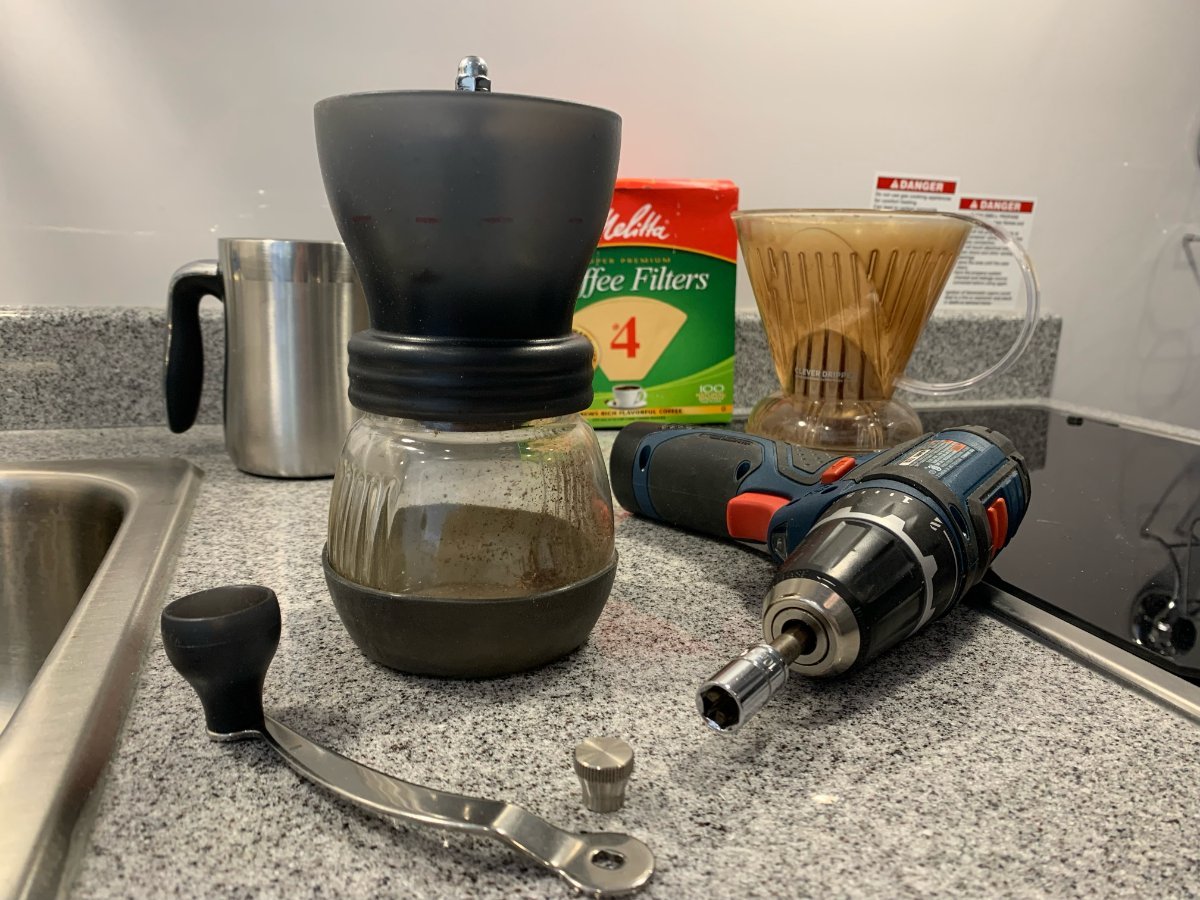
X2 on the Clever Dripper. It's what I use to fill my travel mug daily before heading to work. It's perfect for making one mug at a time, and it works well for camping. I use an old Hario burr grinder too, but slightly modified. I replaced the knurled nut and hand crank with a 10mm acorn nut. We keep a small cordless drill on board anyway, so might as well use it.
 6 points
 -
All, Talked with Progressive Industries tech support this morning and they are sending me a replacement unit as it has failed. Great support with a response to warranty request within about 10 min. I hope to get it within a few days. I have the trailer out of storage right now so the batteries are staying charged via the solar and we don't need the A/C this time of year. Think I will carry a couple of WAGO 221-612 lever-nuts with me on future trips just in case it ever fails when on a long trip so I can wire around it without much difficulty. And to the questions above: Yes unplugged and plugged back in with several sources many times (30 amp, 15 amp, generator (with neutral plug) and same result as failure appears to be the lugs not pulling in (Solenoids) as designed.4 points
-
We are in the San Antonio area and are picking up our LE2 in June. Hopefully, soon, we'll have enough Ollies for our own little rally down here in South Texas.3 points
-
I know nothing specific about Champion dual/tri fuel generators. However, I do have to use a "demand regulator" downstream of on-board regulator when we converted our Honda generator to use LP from the trailer's external LP connections. Again, I don't know if Champion's need this or not but Honda conversions do need it. On the subject of GasStops (which we give 2 thumbs up) - while they won't necessarily shut off in a slow leak situation, they do provide the capability of a good slow leak test. Start with tanks being turned on - gas in all lines. Turn off all gas appliances (water heater, cooking stove, frig, furnace, etc.). Turn tanks off. Watch indicating gauges on GasStop(s). If they move towards red area after a minute or two, it indicates a small gas leak in system. If they don't move, you have no leaks. I have this little test on both our pre and post checklists.2 points
-
Research the failure mode and replacement co$$$t before you get too excited. Purchase and carry a spare bearing, so a machine shop can fix your bad one….. if it doesn’t wipe out the drum, brake and spindle at the same time. If the spindle goes, you need a new axle and a new pair of brakes and drums…. You can’t replace it without a press. They are not completely maintenance free, you need to check side play, if that starts to increase the bearing is going Tango Uniform. I suspect that most failures on the road are due to neglecting this step. And you still need to do brake inspections. and make sure the inner seal is not leaking. I personally would consider these bearings to be a major liability, unless the axles had slip-on disk brake rotors. Then I would carry a 10 pound spare hub assembly and just swap out a failed hub in half an hour, and get the bad one fixed when I got home. John Davies Spokane WA2 points
-
I have my monitor mounted away from the door. Part of long ago training you don’t want to be standing in a doorway if the bad guys are on the other side of the door. You want to be away from the doorway, there are more advantages this way. No I’m not paranoid safety first 🤪🥸2 points
-
I have a Champion 2500 watt dual fuel inverter/generator. It came with a 1/4" RV quick connect fitting for the generator end, and an ACME female fitting with a regulator, for connection to a bulk propane tank. To use it with an Oliver quick connect, you will need a different hose which has only the second regulator of a two-stage regulator. See Galway Girl's post dated March 27, 2023. This is because the Oliver propane tank outlets are already regulated down to about 11 inches of water column (an appropriate LP gas pressure) by the regulator on the tanks. I believe you will need a propane hose with only the second stage regulator, and 1/4" RV quick connect male fittings on both ends, since the Oliver quick connects are 1/4" female and the Champion generator connection is also 1/4" female. Again, see Galway Girl's more accurate, and precise, post dated March 27, 2023. FWIW, I considered getting the quick connects on our Elite II and doing what you plan to do, i.e., run the generator from the trailer's propane tanks. But, I finally decided to carry an extra 5-gallon propane tank in the bed of my pickup to run the generator, to preserve the fuel in the trailer's propane tanks for heating, cooking and water heating. An added benefit is that I can place the generator farther from the trailer without a long propane hose. So, I plan to use the hose with regulator that came with my Champion dual fuel inverter/generator. Hope this helps.2 points
-
Hello everyone, I'm new on here and excited to be a part of the community. I just placed an order for a small 2500 watt dual fuel Champion generator and plan on running it off of the propane quick connects. Will i need to get a diaphragm regulator? Anyone have advice and/or photos of their setup? Thanks, Happy Camper1 point
-
Val and I are excited about our trip to Hoenwald next week to pick up our LE2 on Dec 8th! I’ve appreciated all the advice/information from owners via the forum. I had planned to send our first post with pics of the new Ollie, but I’m not sure whether I’ve set up my account correctly, so thought I’d send this introductory post first. Frank TV-2020 F250 Power Stroke: LE2 #9641 point
-
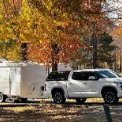
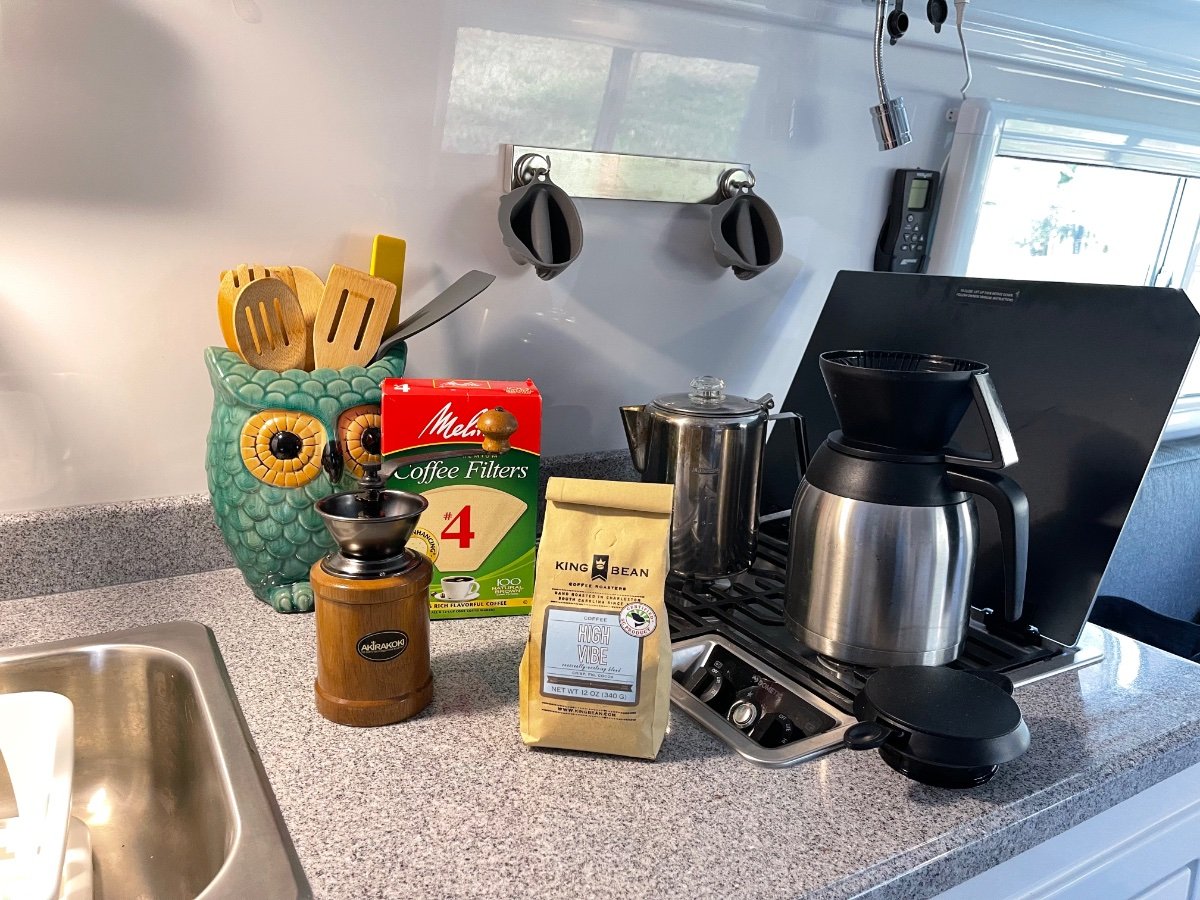
Hello fellow coffee enthusiast! We wanted to share with those of you who like to camp off grid or find yourself often without shore power how we make copious amount of coffee with no battery impact. We drink A LOT of coffee and for fear of an intervention we will just leave it at a lot, so we needed to come up with a way to make a large amount of GOOD coffee. We started with a large French press. It was a water consumer when trying to clean and we were spending a lot of time making coffee instead of enjoying our time enjoying the scenery. Pour over was the next option but it too took a lot of “preparing” time UNTIL we found the melitta 60 oz carafe and pour over basket. We have a traditional percolating camping coffee pot. But is used for boiling water and only use it to make coffee in an emergency. It was hard to be consistent with taste and strength and keeping warm without “burning” it was an issue. I have attached pictures of our system. Hope this helps our fellow boondocking coffee drinking camping enthusiasts. Finding joy in every moment,
1 point
-
Hello, I'm a current Nucamp Tab 320 owner and am considering full-time travel. There are only a few tt that I'm interested in and the Oliver is at the top. Resale value is a big motivator. But I love the looks and the build quality. Four season is another reason. Hoping to learn here and maybe even get lucky to find a used one in the classifieds. Thank you. Julia1 point
-
Team, We just returned from an uneventful trip this weekend and upon arriving home we went to plug the trailer in as normal. All readings on the Progressive Industries EMS-HW30C read as normal (122V, 60HZ, 0 AMPS and no errors) but no power was reaching the trailer. Checked the out legs on the EMS and confirmed no voltage on the output legs of the unit. Tried the bypass switch but it did not solve the problem. The red light on the board is illuminated and the remote display continues to function without issue. Has anyone else had their EMS fail? If so, what resolution were you offered either from Oliver or ProgressiveIndustries.net? It is the weekend right now so I will reach out to discuss with Jason and his team in the morning but thought I would see if others had experienced this type of failure. Would defiantly be a bummer if we were out on the road as there is no easy way to bypass the unit without wiring around it. I will report back with our findings and ultimate solution once we hear back and get the issue resolved.1 point
-
Given that there has been at least one Ollie owner that camped there with two good sized pups - I don't see why not. However, just to be absolutely sure, you might want to contact Oliver Service. Bill1 point
-
True. But these still work with the "regular" spindles we have on the Dexter axles. Without the tool that JD shows above, the "normal" way to seat spindle caps is to place the cap on/in the hub, then place a 2x4 block of wood over the end of the cap and tap the block of wood with a hammer. If the cap is square in the hub then you have no problem. But, I've always found that this takes some luck and some practice to get these caps started into the hub. Once started then getting them fully seated usually isn't a problem. I've found that the caps with the center rubber plug are made from a bit heavier metal and given the "edge" around the outside of the cap, they are easier to tap into place even without the block of wood. Bill1 point
-
$15: https://shop.redneck-trailer.com/p-958-excalibur-wheel-accessories-1986in-dust-cap-driver-290-991.aspx I installed stainless versions of yours, intended for boat trailers, the steel is much stronger and won’t rust, but the tool is needed on those for sure. It gets them secured with no fuss, bad words or damage, and removal is even easier, just rock the handle sideways and wiggle off the cap. The tool nests neatly inside a hot water heater pressure relief tool in my spares kit. The cap will ooze a little grease where it meets the hub, just add a small amount of clear RTV silicone sealant on the last 1/8” of the surface, drive it flush, wipe off the excess. It stays clean, and it looks perfectly fine to me, as long as the visible part of the hubs are painted black. John Davies Spokane WA
1 point
-
Yes, I didn't initially like the rubber inserts in the centers either. But, in thinking about it, these are for "emergency use" and since these rubber caps are always hidden from the sun the rubber should last a long time. I did look into a tool that is used to seat the caps with the "full metal jacket" but it was $60 on Amazon - simply not worth the price given the number of times this has been an issue. Bill1 point
-
Happy Camper - Perhaps another way to "attack" your concern would be to install a couple of THESE on your tanks. Note that if there was a "slow leak" these GasStops possibly would not work but they would work in the event of major failure. Bill1 point
-
Spike I really can’t answer that question I don’t know. Maybe a call to Oliver can help. I’m sure if its left on for months/years maybe time will tell. The Velcro I have is clear not that noticeable. A full strip of this Velcro is over kill. i plan on removing the strip off the Ollie and just attaching two small squares which should be more than enough to hold. It’s only been a few months I don’t expect any damage to the gel coat .1 point
-
Those will certainly work well. I just like having a "Full Metal Jacket". 🙂1 point
-
Yep, we are very happy with this one also. It keeps the coffee hot, easy to pour, and a nice clean appearance to match the interior of the Ollie.1 point
-
Thanks for pointing that out Frank. In retrospect, knowing that there are two E-Z Flex links per side I should have looked further. I had seen an earlier post about zerk fittings that mentioned a total of 14 and figured that "Hey, I found the two hidden ones!"1 point
-
I received the Whistler WBU-800 yesterday. It seems to be working well. Still need to attach the camera where Landrover attached his, but I DID purchases it for much less-- $38.19--on ebay. Figured at that price I could take the chance. The only drawback I see now is that the monitor needs to be plugged into one of my Ollie's automobile auxiliary power outlets. I would like to be able to mount the monitor near the door, but it looks like my options will be limited to near where Landrover shows he has mounted his or on or near the dinette table.1 point
-
It helps keep the coffee grounds together. If you're tempted to give it a try someday, here's a recipe: https://www.thespruceeats.com/egg-coffee-29526481 point
-
Not noisy at all.... when compared to an F-14 on a full afterburner climb out. Seriously though I think we may be in for some relief. I don't have any insider info but looking at what is happening in the RV industry I believe we will see some changes in RV air conditioners. Houghton and the Truma Aventa are low noise alternatives. Dometic would do well to take their newly purchased Atwood technology and incorporate it into their line. If they don't I predict a competitive disadvantage for them. A low noise A/C is something the RV consumer will soon be demanding... (previously asking). Lithium batteries will drive demand for reduced power as well. Five years ago only the technically advanced tinkerer would experiment with battery run A/C. Now it's becoming an advertised feature. For existing owners an upgrade to Truma or Houghton is available now. Some Oliver owners have replaced with Houghton (search the forum). And there is at least one Oliver with the Truma. (unless we have been fooled by a photoshopped pic)1 point
-
After you've had your Oliver a bit, I'll look forward to your comments on both heating systems. I've never had a hydronic system, like the alde, in a camper. But, I have had Radiator heat in homes in the Midwest not glycol, though. There are pluses and minuses, and I truly look forward to informed comparison. Sorry for the thread drift, jules2go, though maybe it's not? Important to compare all features.1 point
-
I just sold my nuCamp TAB 400 Boondock Lite and will get delivery on an Oliver in September. Davies is correct the Alde heating is very good and I do not look forward to force air. However we plan more colder shoulder season camping and we are giving Oliver a go as it appears better than my TAB 400. If we wish another change we can always go back to nuCamp in a couple years. nuCamp and Oliver are both are such a higher quality overall than so much of the rest of the RV world.1 point
-
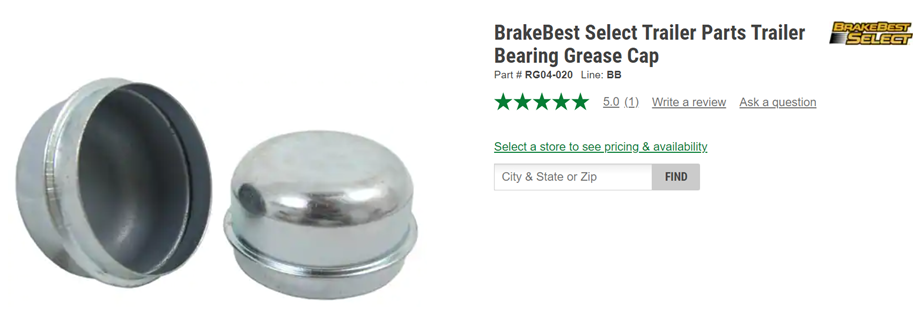
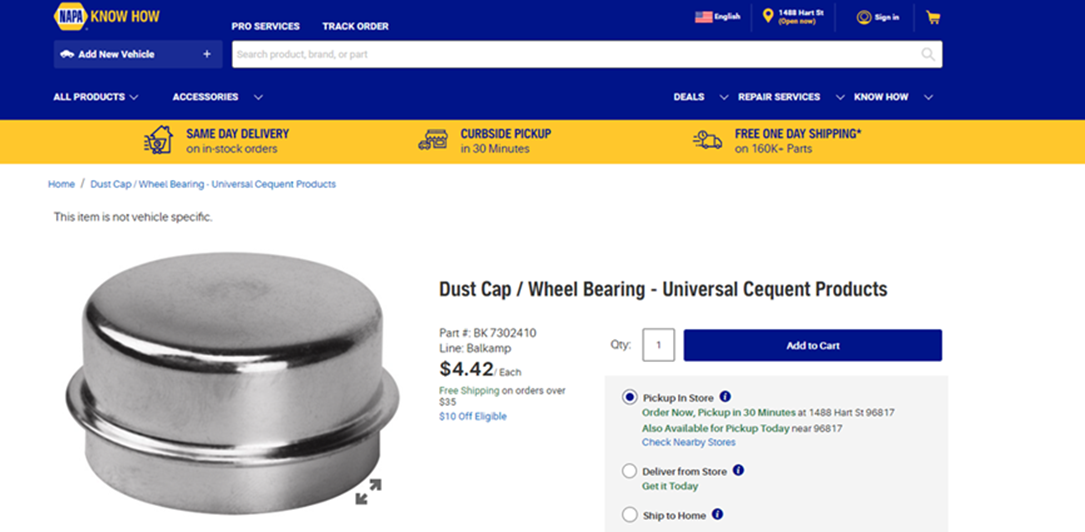
Bill: I also lost two of my "Hub Caps". The grease caps should not be coming off. I spoke with the Service/Warranty Department at Dexter about grease caps. They are aware of the wimpy metal of some of their grease caps. They are stamped from sheet metal that is either .021” or .029” thick. The thinner ones have been known to come loose. I have the .021” and two of them fell off after my fourth annual bearing service effort. Recommendation from Jason E. is to replace them with a heaver metal grease cap. I looked at dozens of grease caps, often having to call the manufacturer to get the metal gauge. So if you have experienced this problem, below are two that I would consider using. The BrakeBest is .030" .027", and the NAPA is .032". 16 FEB 2022: JPR UPDATE: Just got a follow-up E-mail from Reiley. They stated that the BrakeBest Select Trailer Parts Trailer Bearing Grease Cap thickness is .027". As such, if you have "loose caps", I would recommend the NAPA version.
1 point
-
Welcome. This is a good place to learn and have your questions answered. Mike1 point
-
Welcome. Lots you can learn here. We've been researching since the fall and have a deposit down on our Ollie.1 point
-
The mixed reviews on these scissor jacks on Amazon always keep me from buying one. A lot of good reviews but also some scary failures. I’ve been using a leftover scissor jack that I still have from my old Dodge pickup truck (the truck is long gone). It’s worked really well, very thick metal parts. Might be worth checking scrapyards to find an old factory scissor jack from a full size truck. I’m skeptical of the imported jacks on Amazon.1 point
-
Try starting HERE. Then you might want to go to the Oliver University where there are videos on what to expect at/on Delivery Day. Included in those vids are items that Oliver includes. Let us know if you need something else. Bill1 point
-
I did see it on the forum awhile ago. Did you try using the search function here. You could also PM one of the Moderators here on the forum and they can help you. If you can not find it, contact Oliver and they can get it to you or tell you where it is.1 point
-
I am not sure if it is on the forum but I know that several post on FB have list of items.1 point
-
Thanks John. It was a fun evening - and I was lucky to be there for it! I did not bring my Oliver down there. I had been planning to take 3-4 weeks and drive down and check out places like Death Valley etc. on the way to and from a photography workshop I signed up for at White Sands (a great place for such a workshop, in part because the workshop organizers were able to get an early entry permit that let us go into the park at 5:45am whereas the general public was getting in at 7am (right about sunrise time when I was there) so we could park, walk way out to find the unmarked dunes we'd scouted, and be shooting from twilight to a bit after sunrise when the light got quite harsh. But life changed my plan - I had some shoulder issues that led to a frozen shoulder in October, and by the time of the workshop in early December I'd realized I needed to minimize time away from my osteopath and physical therapist. Thankfully my shoulder is fairly close to normal now I think thanks to a "capsular distension" procedure plus way too much painful stretching - it apparently often takes 1-2 years for a frozen shoulder to resolve even with the PT so I think I'm lucky (plus I think the somewhat new capsular distension procedure is worth investigating with your doc if you ever have a damn frozen shoulder!). So to make a long story short, I flew down (right as Omicron was starting to spread in the US - yay!) and rented a car in Albuquerque. After going there, I think I'd park the Oliver outside the park and not bring it in - there's no need to have it in there other than not wanting to leave it somewhere else while there. There's no camping there other than backcountry camping out in the dunes (which is still closed as part of COVID adjustments at the park or I probably would have spent a night out there if I could score the permit). There's a fair stretch of driving on the gypsum which is either going to be wet and prone to caking on or dry and prone to invading every tiny crack and orifice. Or some of both.1 point
-
Melitta Thermos Filter Cone into good ole Stanley Thermos. Makes great coffee and very little mess. for a single cup I use the Aeropress
1 point
-
We use a budget version of the same, last ten or 12 years. We use an old stainless carafe from a dead home coffee maker, and the bigger #4 filter size pourover cone. We used the tiny #2 for a couple years, straight into the mug. Still use it (actually a collapsible silicon version which i still carry when we rent campers outside the USA) I love the coffee. So does Paul. I think he'd be happy if I replaced our more expensive home coffee maker with the carafe, cone, and tea kettle. It's the very best. But, at home, he's usually up first, and makes our coffee. Camping, he still gets up first, but takes the dog for a walk, while I get dressed and make coffee. Life is a bit different, at camp, but it's simply wonderful, for us. I'm counting the days to camping season, and camping coffee. The trailer smells so good when coffee is brewing!1 point
-
The wheel center caps are made by Lionshead. Mine were chrome plated steel which rusted and pitted in six months. I replaced them with the stainless steel version.1 point
-
Certainly there is nothing "wrong" with removing these hub covers/caps and there are many trailers going down the road with the hubs "bare". And, as has been pointed out, the removal does make checking the hub temperature a bit easier particularly if you have a laser guided temperature sensor (better known as a thermometer). However, there have been two occasions where these covers have come in handy for me when the grease cap at the end of the hub came off. When the first one came off I assumed that the shop where I had my bearings repacked simply didn't re-install the cap properly. But when it came off again (after I installed it) plus another one came off, it became apparent that I had received a couple of caps that were not up to specification. Upon getting four new caps I have never had another problem. When these caps came off there is nothing keeping dirt and junk from getting into the grease/bearings. Until I could replace those caps all I did was put some tape over the end of the cover to help keep things in there cleaner. While I did lose the little cap at the end of the cover each time, I didn't lose the actual grease cap given that it was caught by the cover. Bill p.s. Just another reason why a tire pressure monitoring system (TPMS) is a good thing to have - it allows you to keep an eye on tire/wheel assemblies even while driving down the road.1 point
-
No matter what power source you use, 30a shore power, generator or inverter/battery power, you should better understand power management. Your Oliver camper was designed with the 30amp power in mind so your factory installed components are designed to work within the constraints of 30 amps. The inverter option that we currently offer can provide about 15 amps of power to the 120v receptacles before it will max out and shut down. Generators can vary based on their rating but they will be constrained to the 30 amp max that the camper is designed for. How does this impact you or your style of camping? Campground Camping with 30a Shore Power What happens if you go over the 30 amps? The breaker will kick just like at home if you turn to many appliances on in a single room. This situation typically will only occur when you are plugging in high power demanding appliances or devices in the camper. Every appliance that you want to add to your camper should first be checked to see how many amps are required to power it. Many hair dryers can pull 1800 watts of power which will immediately take up about half of your available power. Add in a space heater and it may just put you over the limit. What this means is that you must be conscientious of what is plugged in and pulling power. The worst thing that could happen is it would kick the breaker and you would simply reset it and turn some things off that aren’t being used at the moment. Boondocking with Generator Power When you are connected to a generator power source you are limited within the 30 amps but also the max amp that the generator will put out. A typical 2000-watt generator will only supply 15-16 amps of power so this means the max power is limited to the generator and if you are demanding more than the generator can supply it will kick the breaker on the generator. The generator may continue to run but will not be supplying power into the camper. Some of the components in the camper like the Dometic Penguin II A/C will demand much of this power especially when the compressor engages (Start Phase). The optional MicroAir Easy Start does help to contain this short fast burst of power to about 11 amps but that is about 75% of what the 2000-watt generator supplies. Once the compressor moves into the run phase it requires less power and drops to about 9 amps. The compressor will continue to run until the cabin temperature reaches the requested temperature on the thermostat. The compressor will then disengage or shut down. Once the cabin temperature drops below a certain threshold the compressor will once again enter the starting phase which requires 11 amps of power. This is where you may run into an issue that is normal. You may have a coffee maker running or a laptop plugged in or a combination of any other type of added appliance that under the compressor running stage falls just under the max 15-16 amps provided by the generator but when the compressor re-enters the starting phase it can cause it to jump over the max long enough to kick the breaker on the generator. No worries, all you need to do is practice power management and unplug something temporarily and reset the breaker. TIP: When using a generator, the surge protector may see it as an ungrounded power supply and stop all power from entering the camper. The best resolution for this is to plug in a neutral ground plug into the 120v receptacle on the generator. Boondocking with the Inverter The optional inverter is a 2000-watt Xantrex inverter but it actually only supplies about 1800 watts of power. If you remember from earlier, we mentioned that many hair dryers require 1800 watts of power. Power hungry appliances they are! This means you are even more limited to what you can use at the same time or even by itself. The inverter is connected to the 120v receptacles and also the microwave. The microwave by itself will pull most of the power supplied by the inverter so when running the microwave on inverter power be sure not to have other things plugged in and running. Also keep in mind that the inverter is dependent on battery power. The inverter pulls battery power and converts it into 120v power. So, with this option you must manage both the available battery power and inverter power. For instance, the microwave under 120v power uses 12 amps but the converted rate from 12v battery to 120v through the inverter actually means you are using about 135 amps. Has this gotten a bit confusing yet? Putting it simply, you manage the 12 amps required by the microwave from 120v to the available amps of 15 amps provided by the inverter. With the 135 amps you simply need to know that this is draining the batteries at a much faster rate as they cannot sustain that rate of power consumption for too long before loss of 12v power would occur. However, the inverter will shut down before total power loss from the 12v battery system will occur as it requires at least 10.5v for it to operate. The good news is that the microwave is usually only used for short periods of time. You would however want to apply this way of thinking to other appliances that you may want to use while on inverter power so that you better manage the available power.1 point


.thumb.JPG.dd838cdb3df463dab6a16861fa23a319.JPG)


-
Recent Achievements
-