Leaderboard


Popular Content
Showing content with the highest reputation on 05/01/2022 in all areas
-
An hour ago, we gained member number 7,000! Welcome to the board, @SusanJ. And thank you, to all the folks here who make this forum such a great place to learn and share.
 6 points
 -
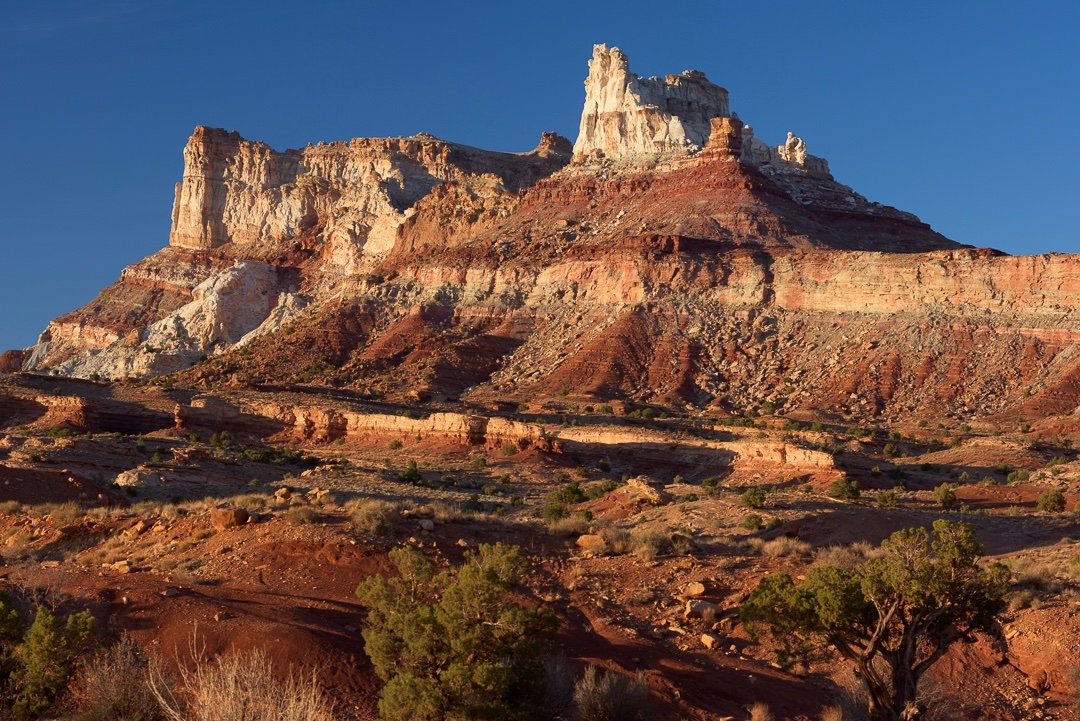
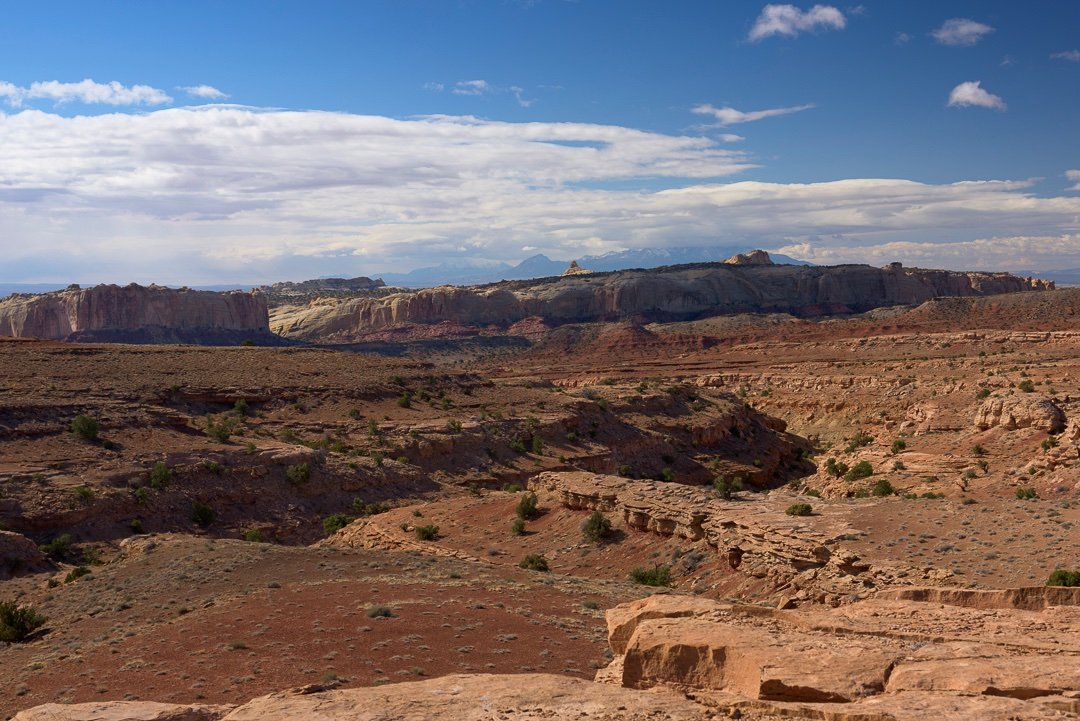
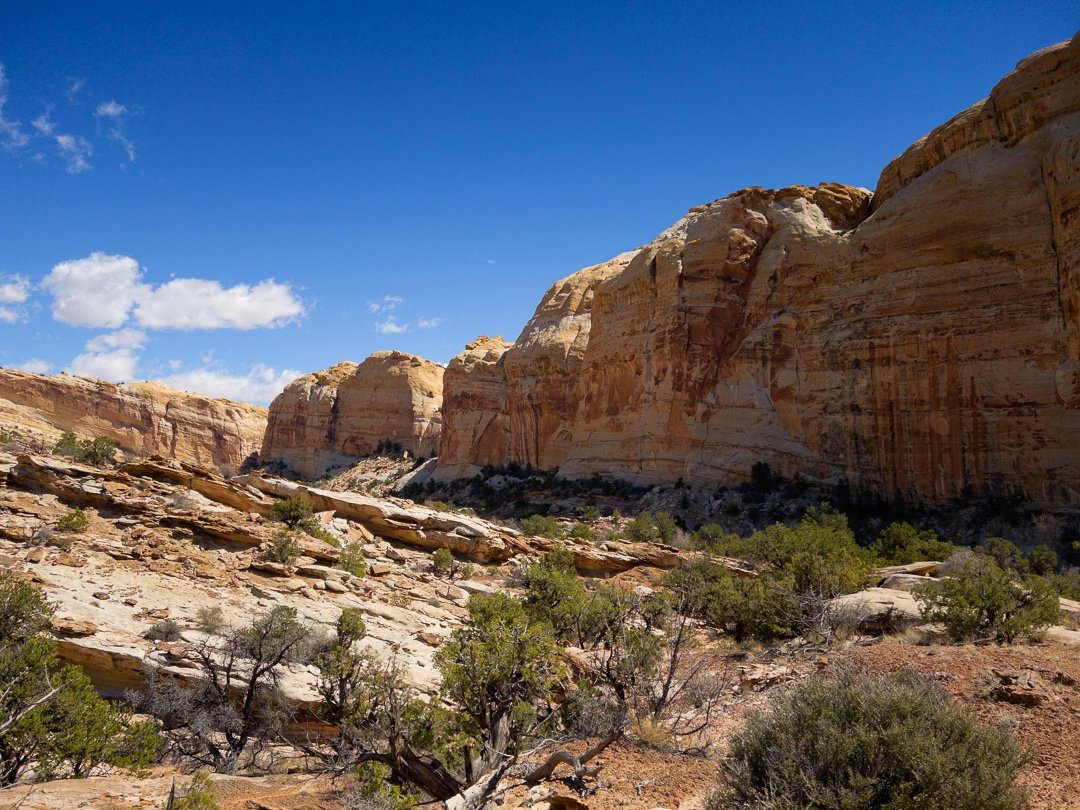
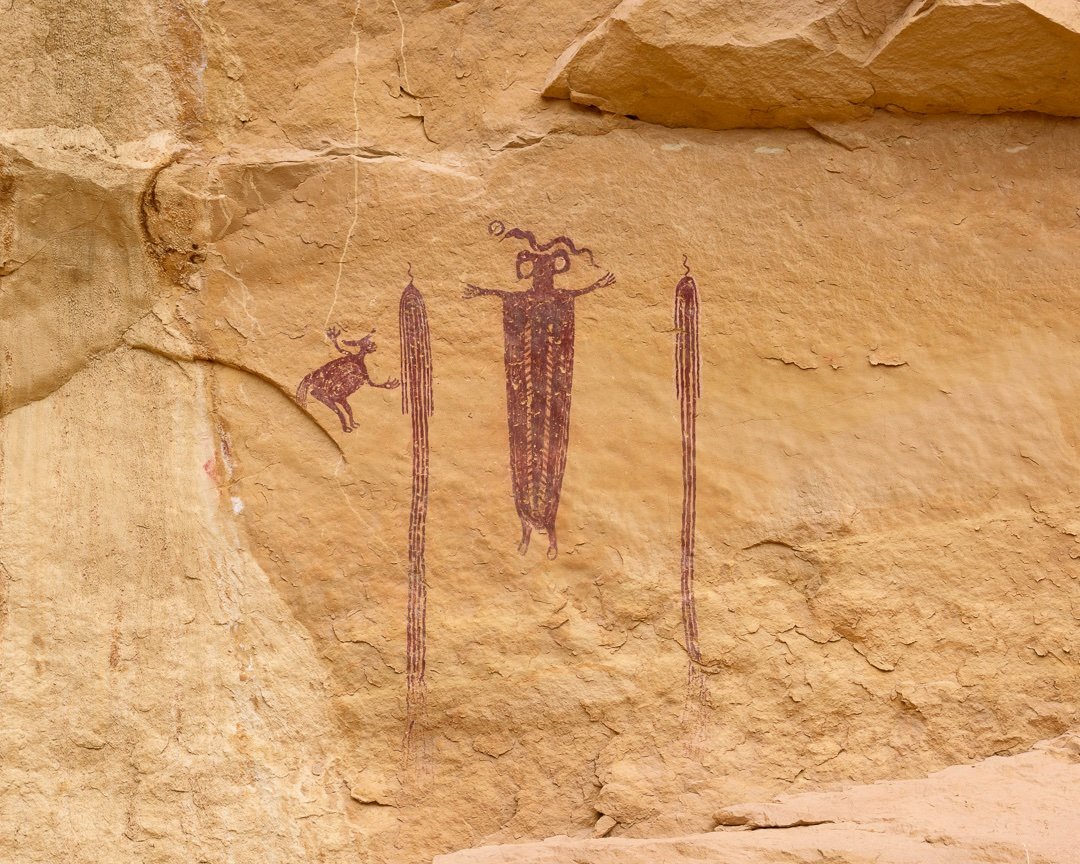
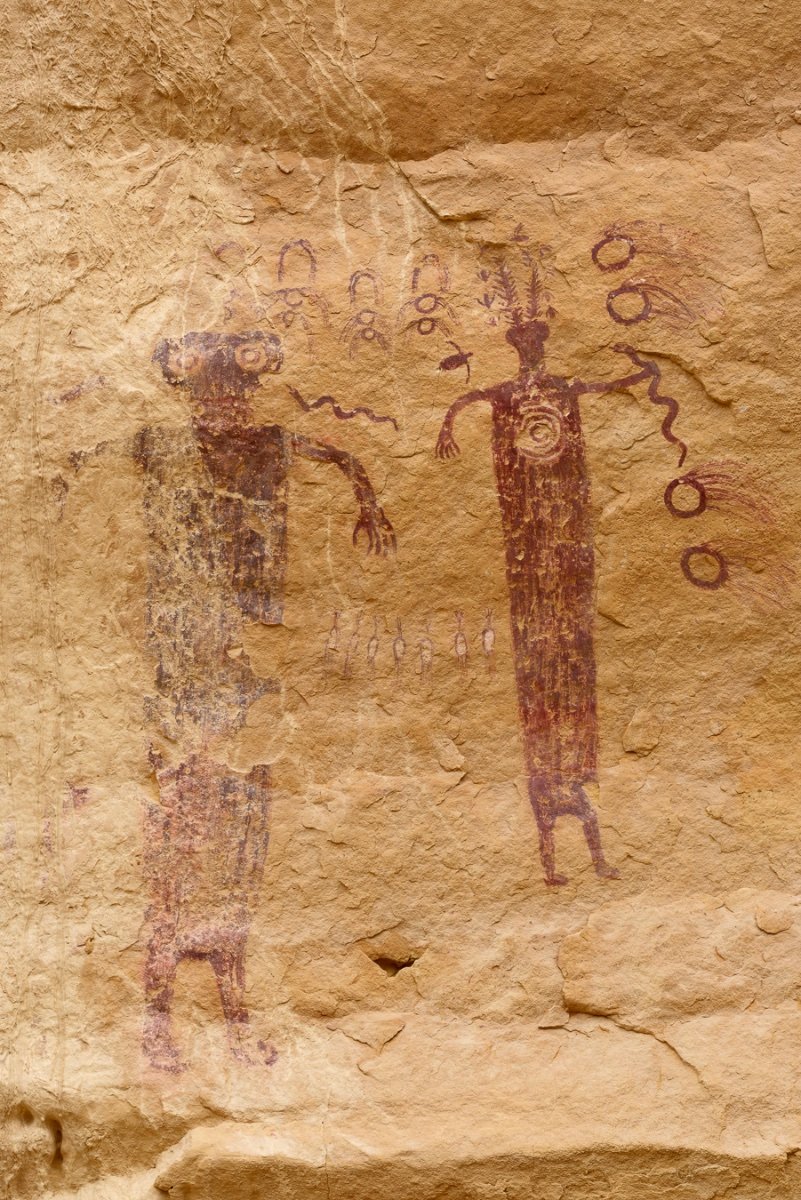
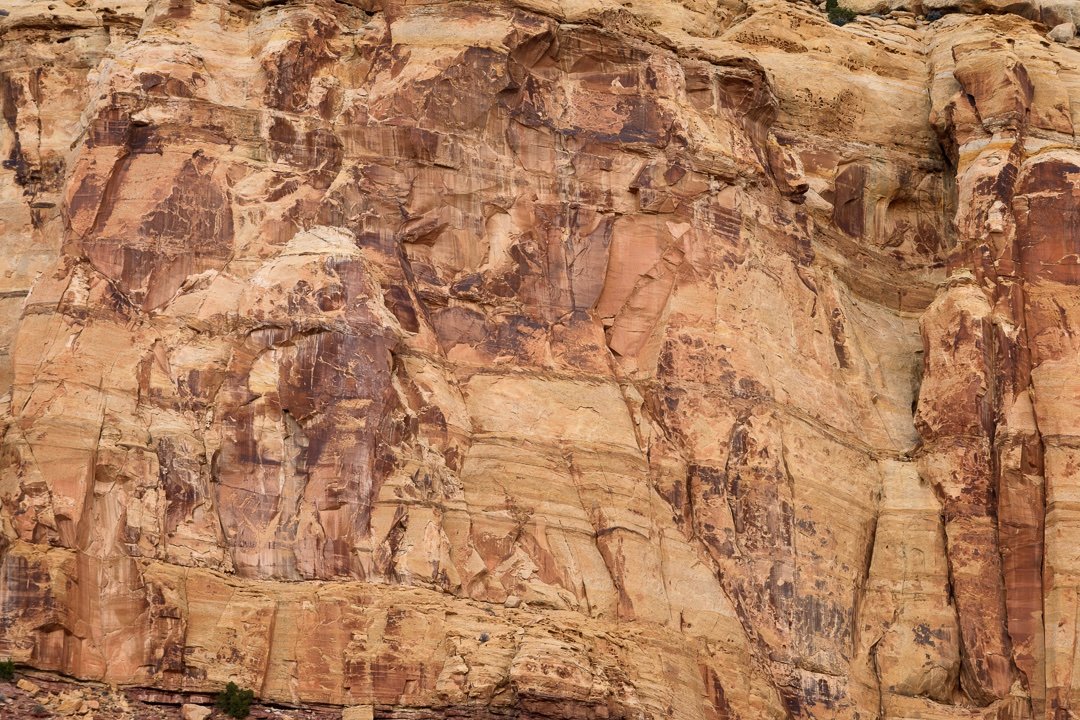
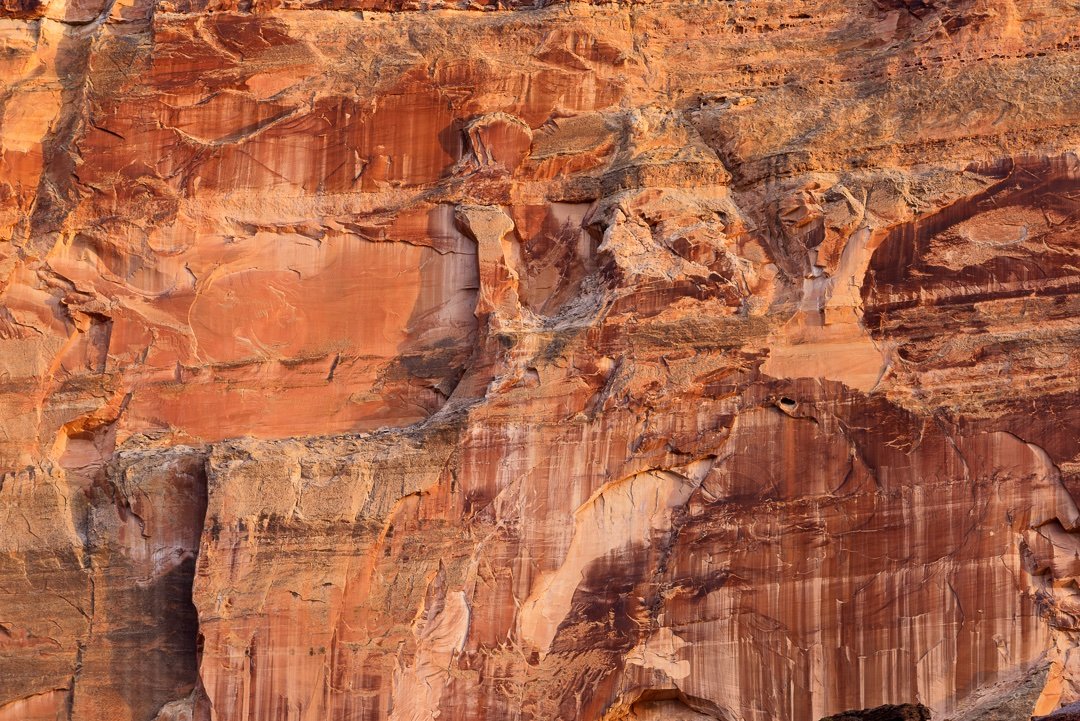
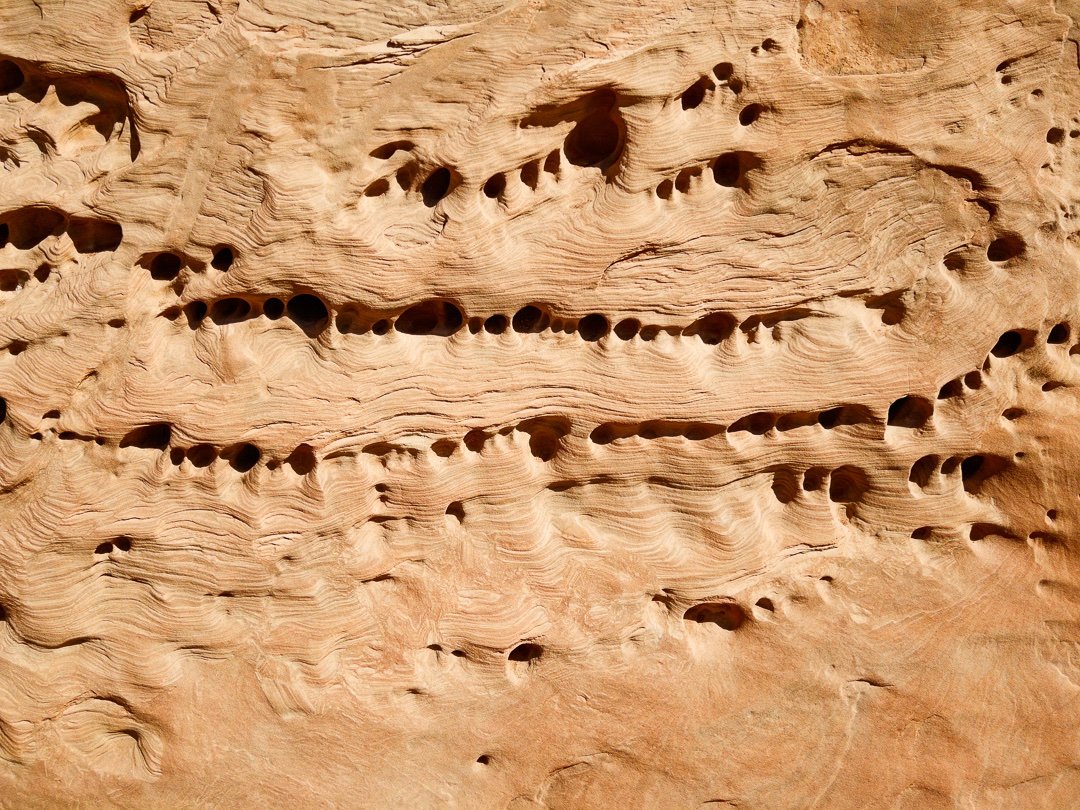
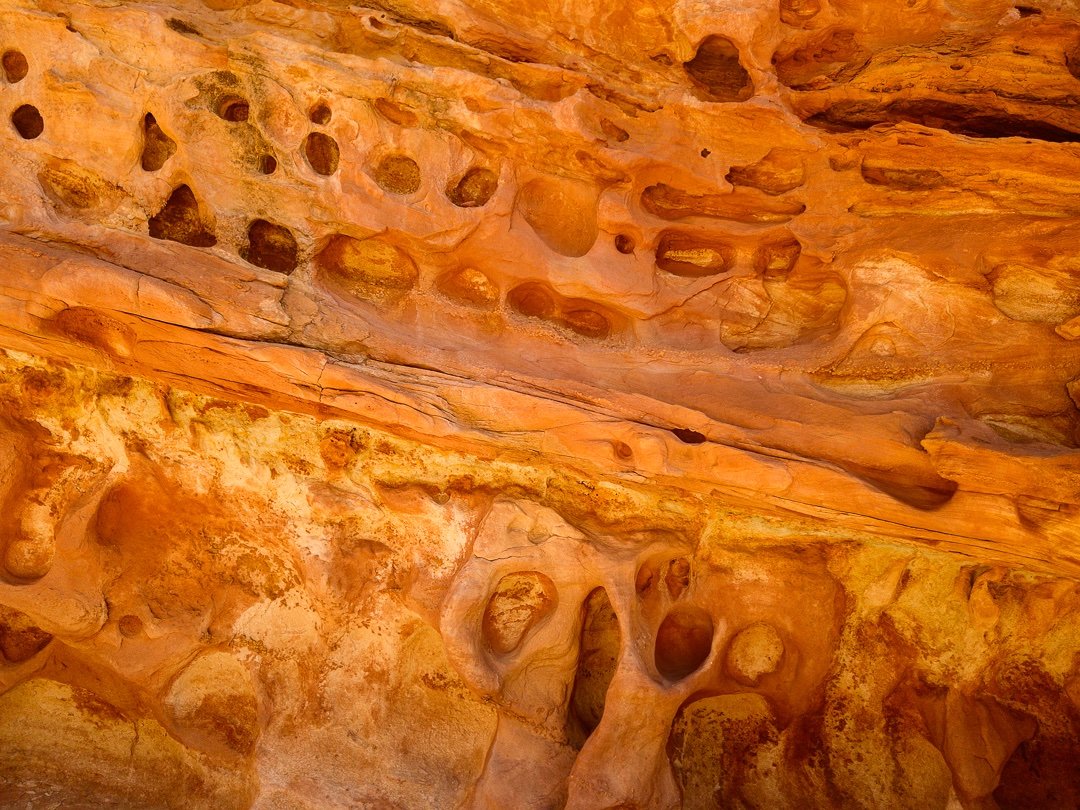
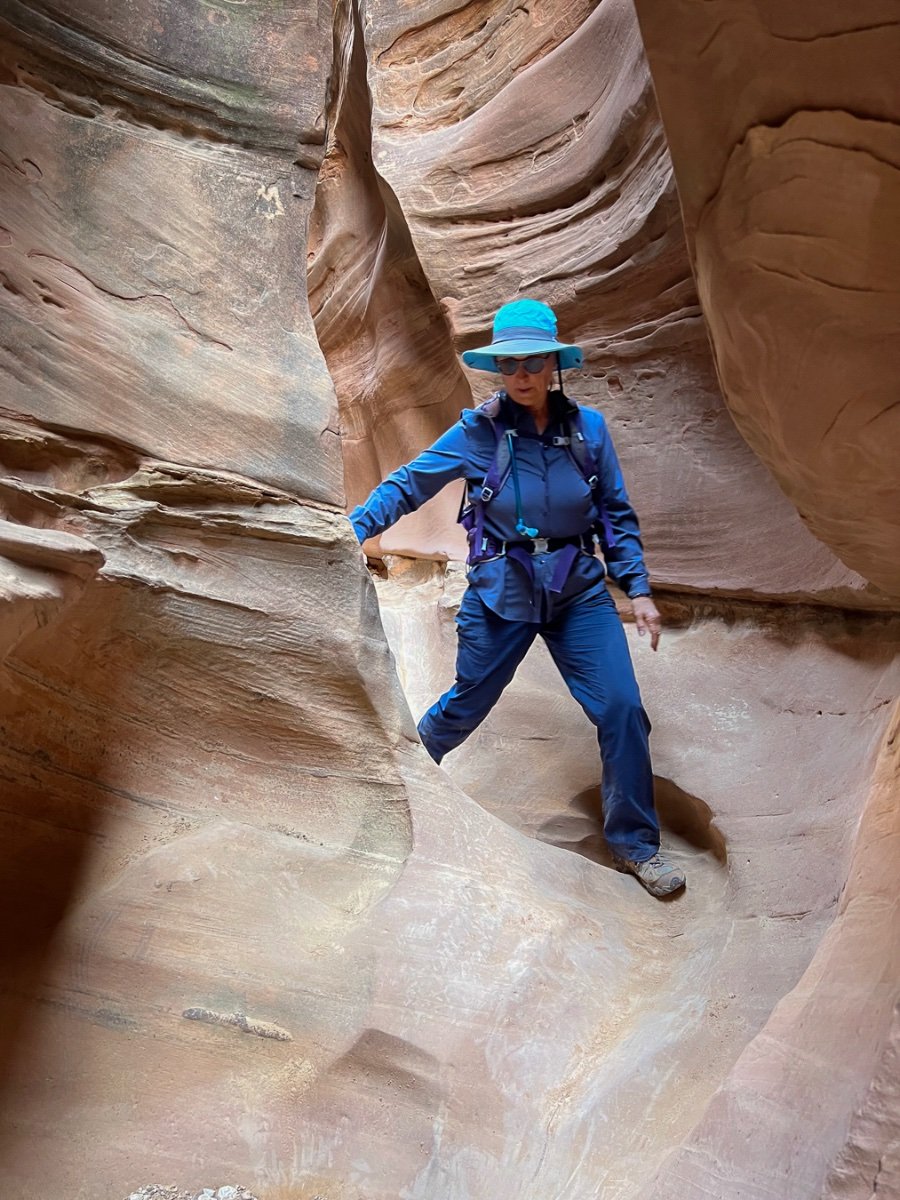
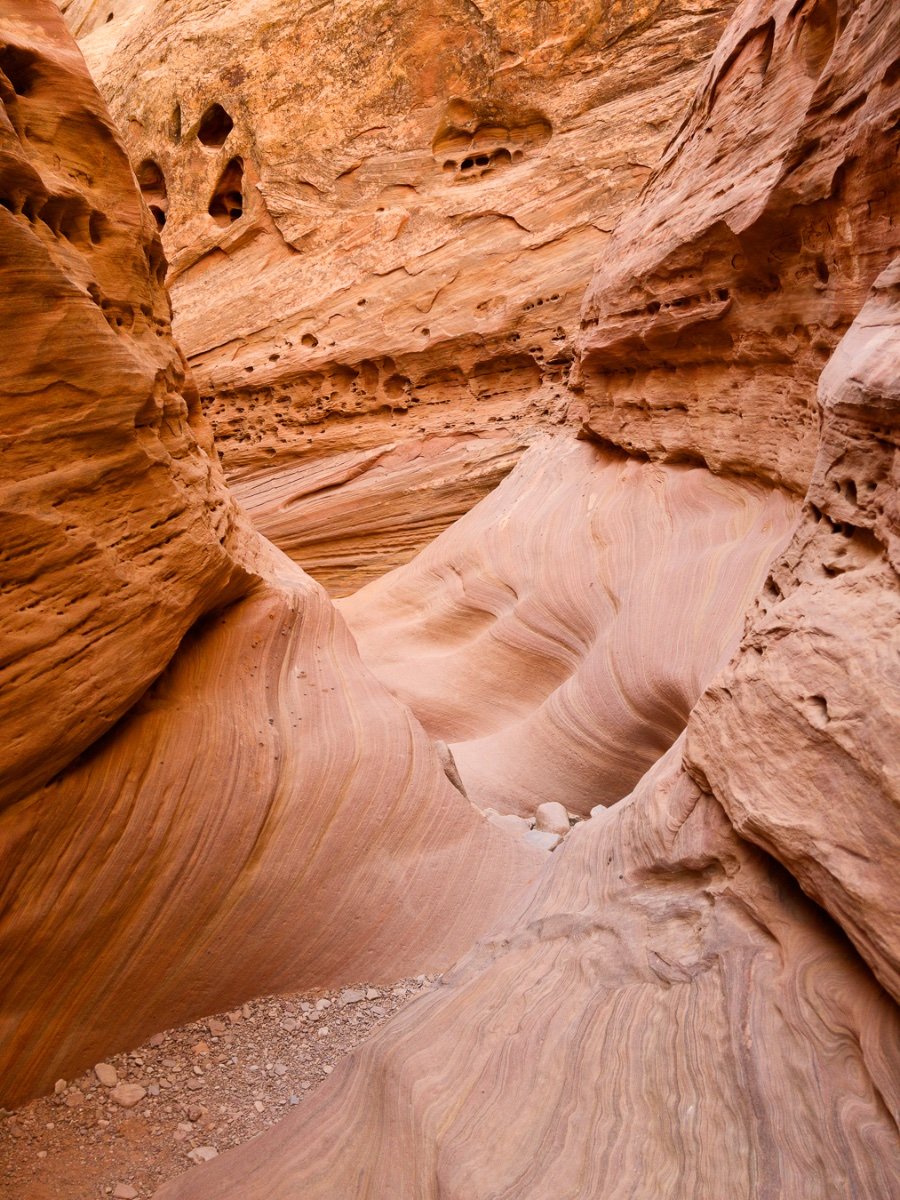
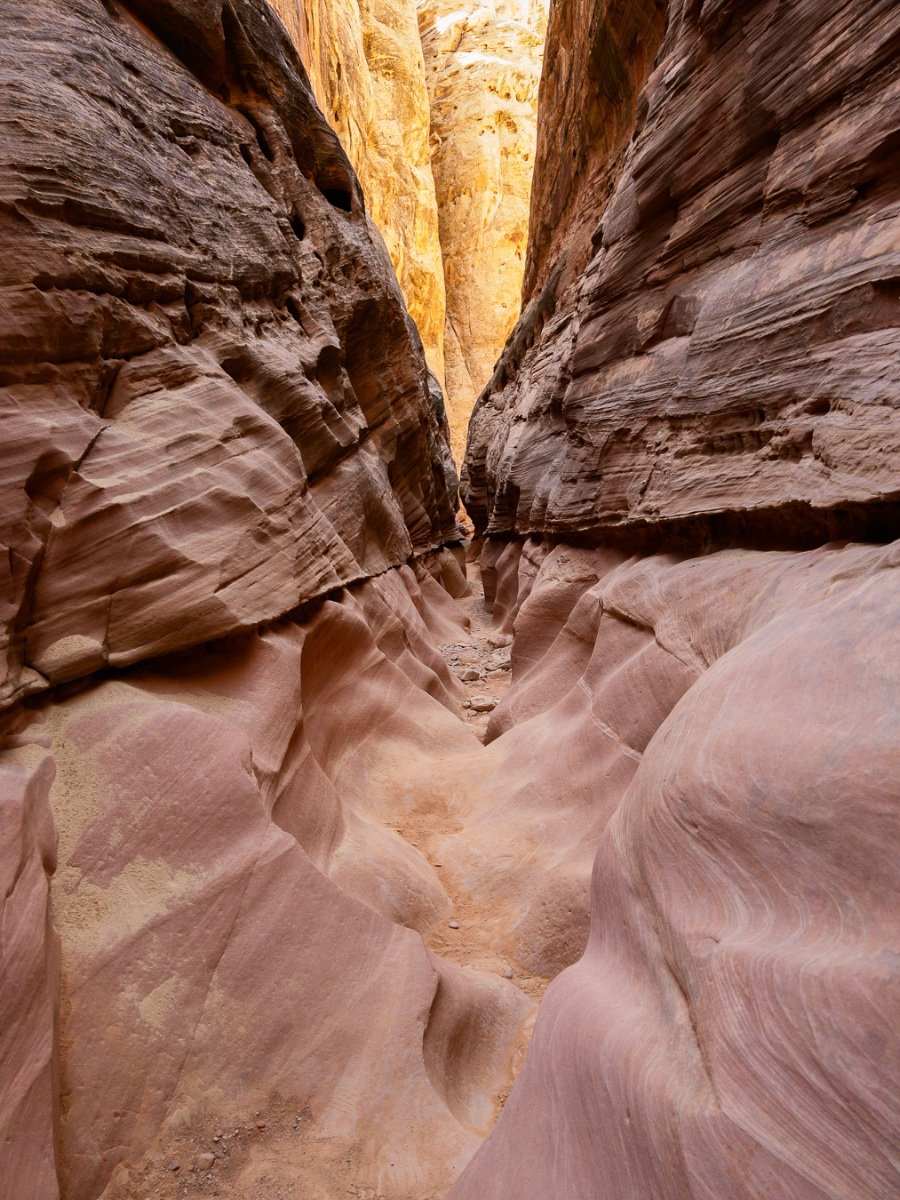
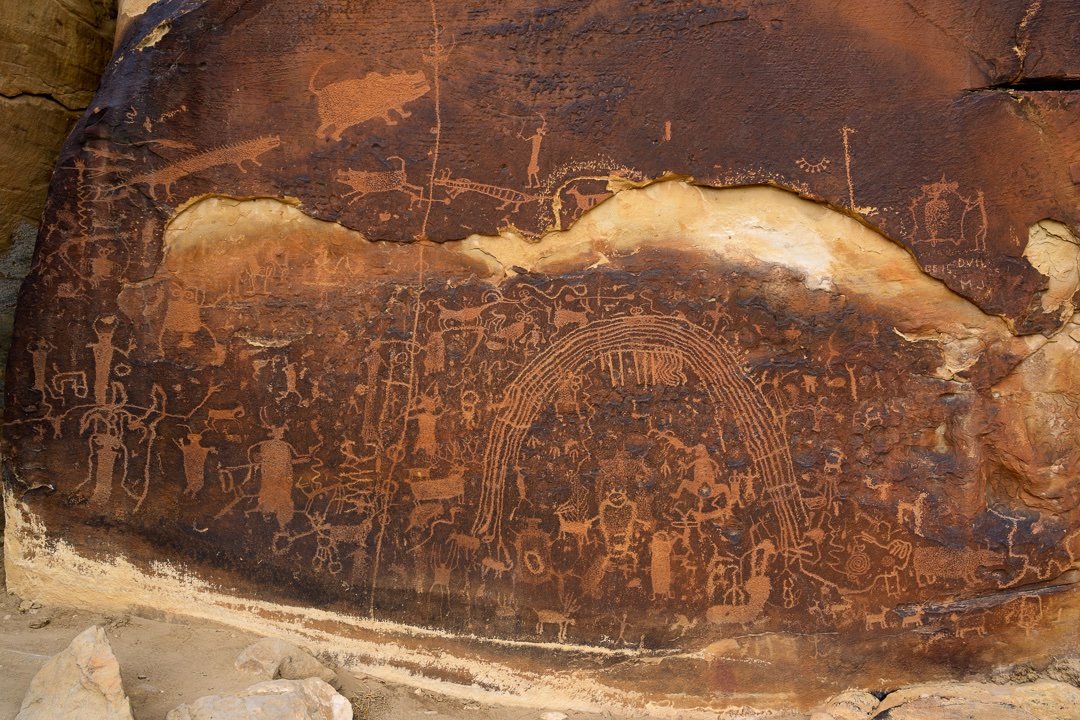
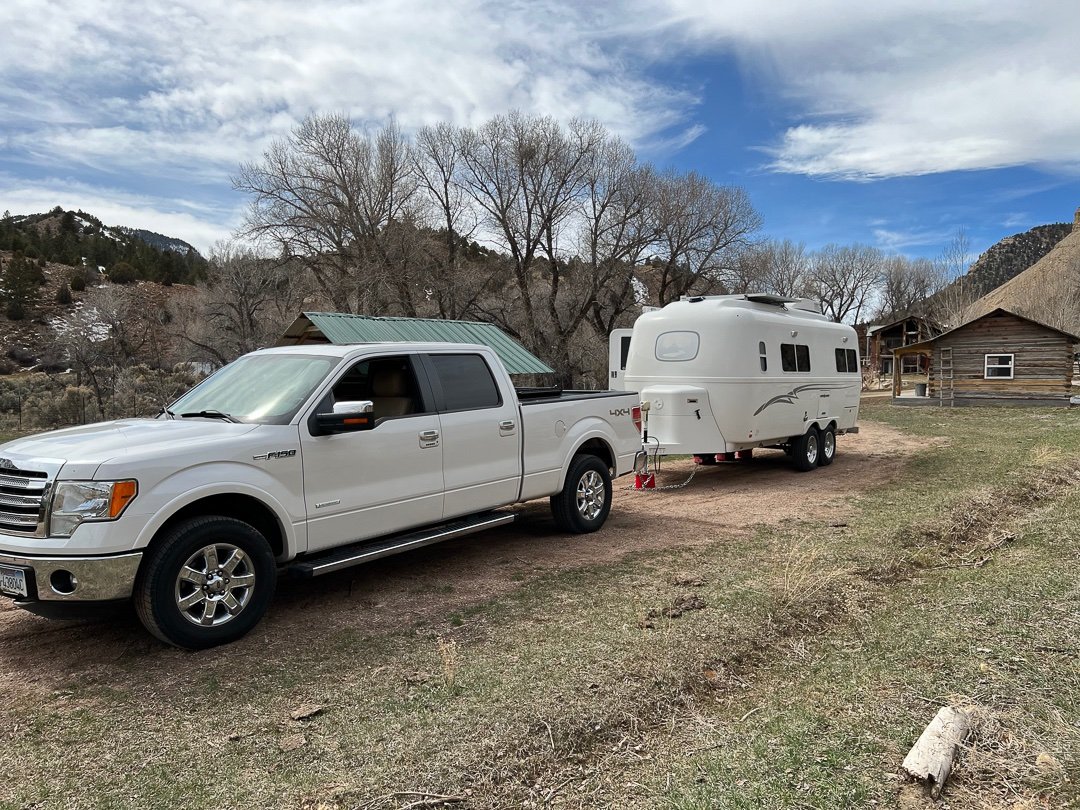
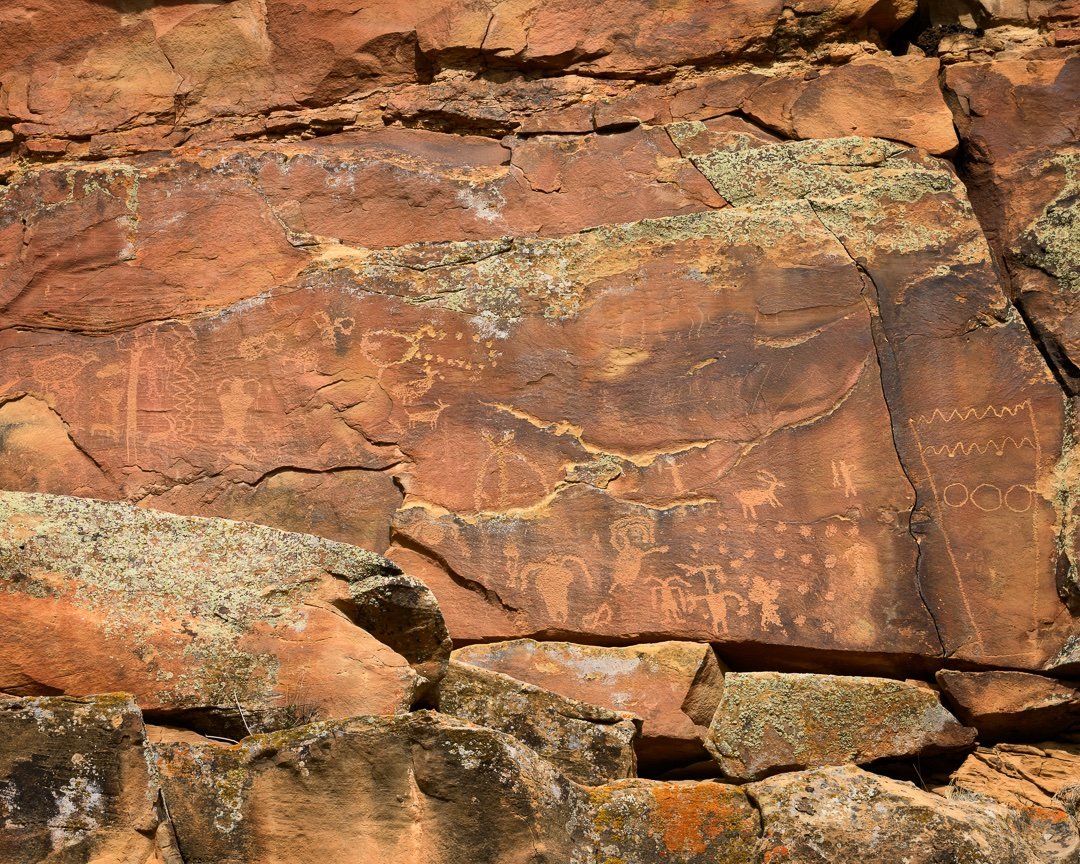
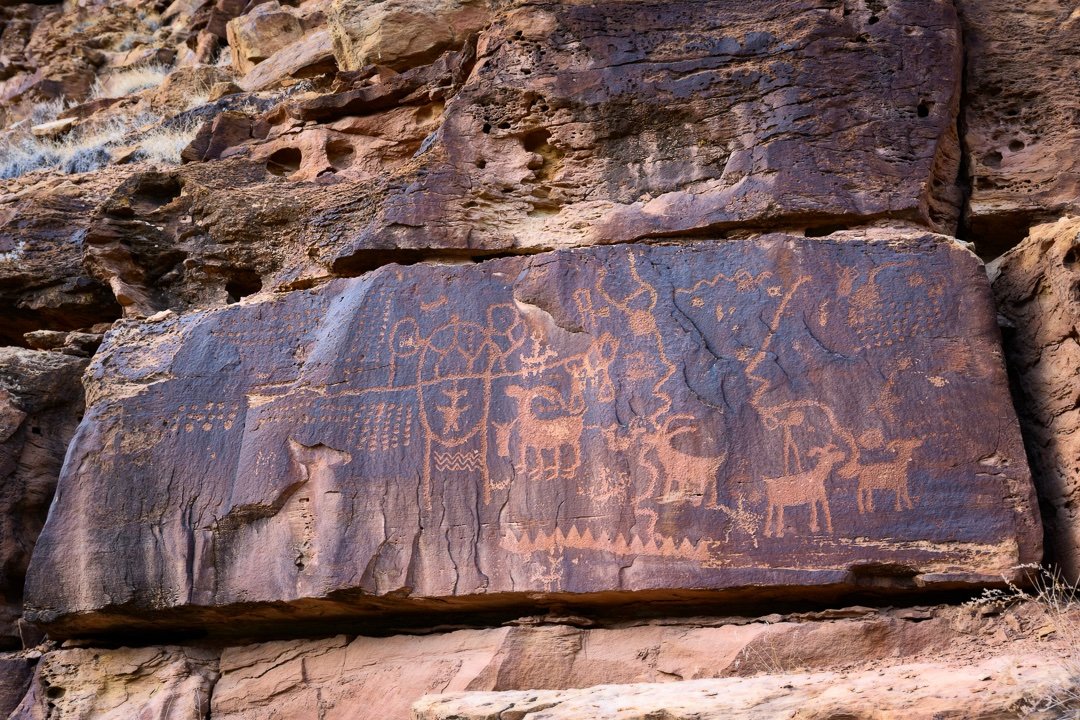
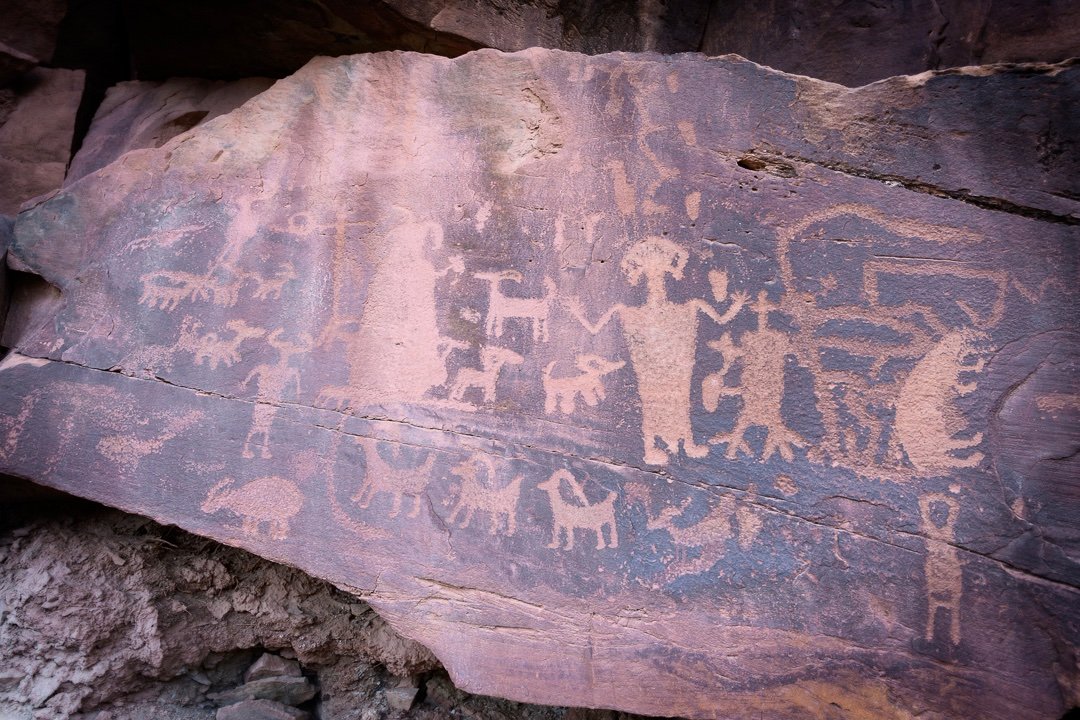
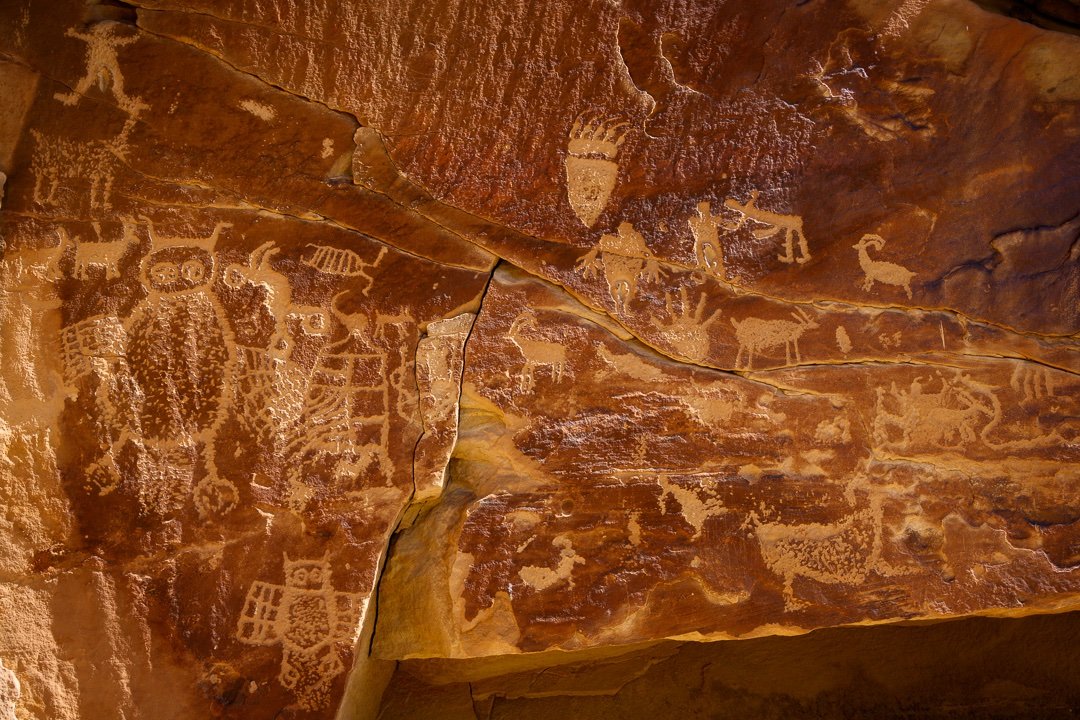
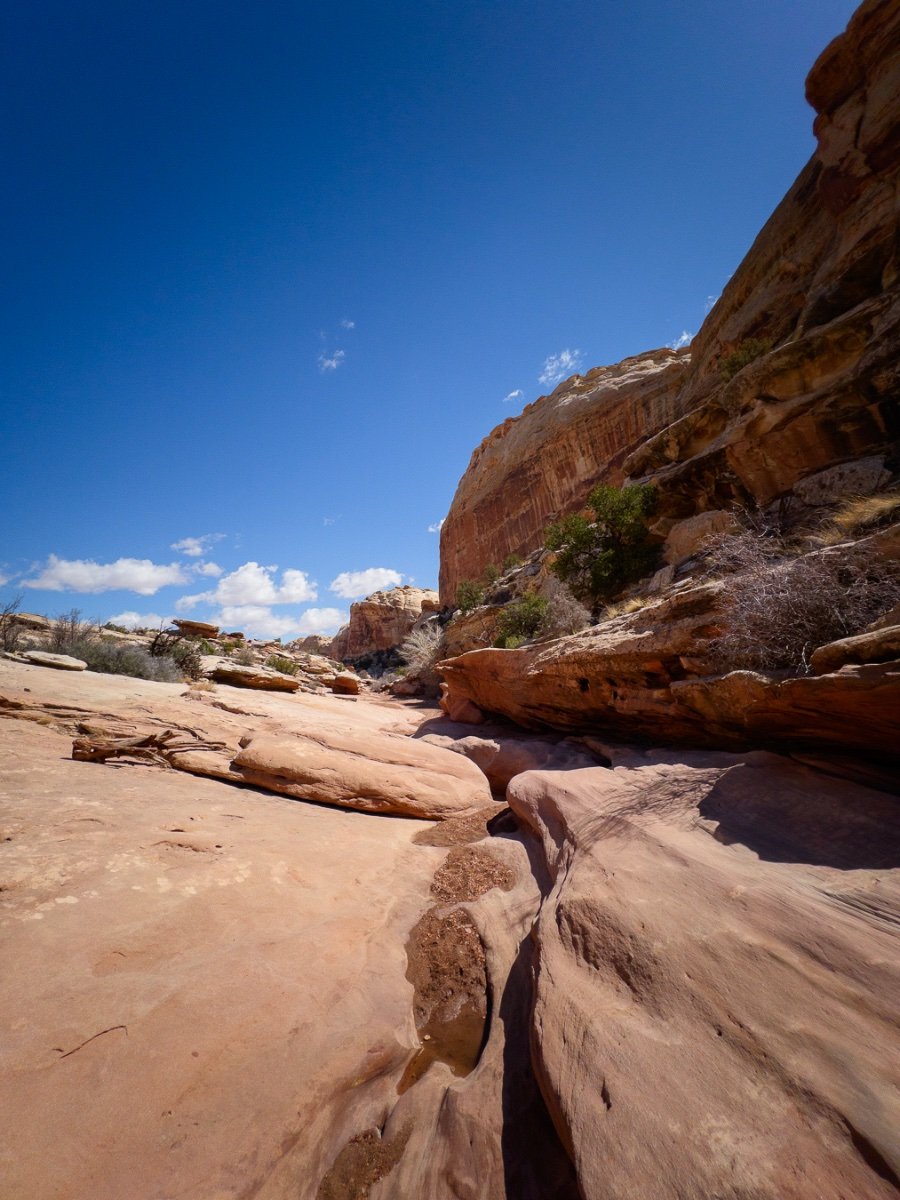
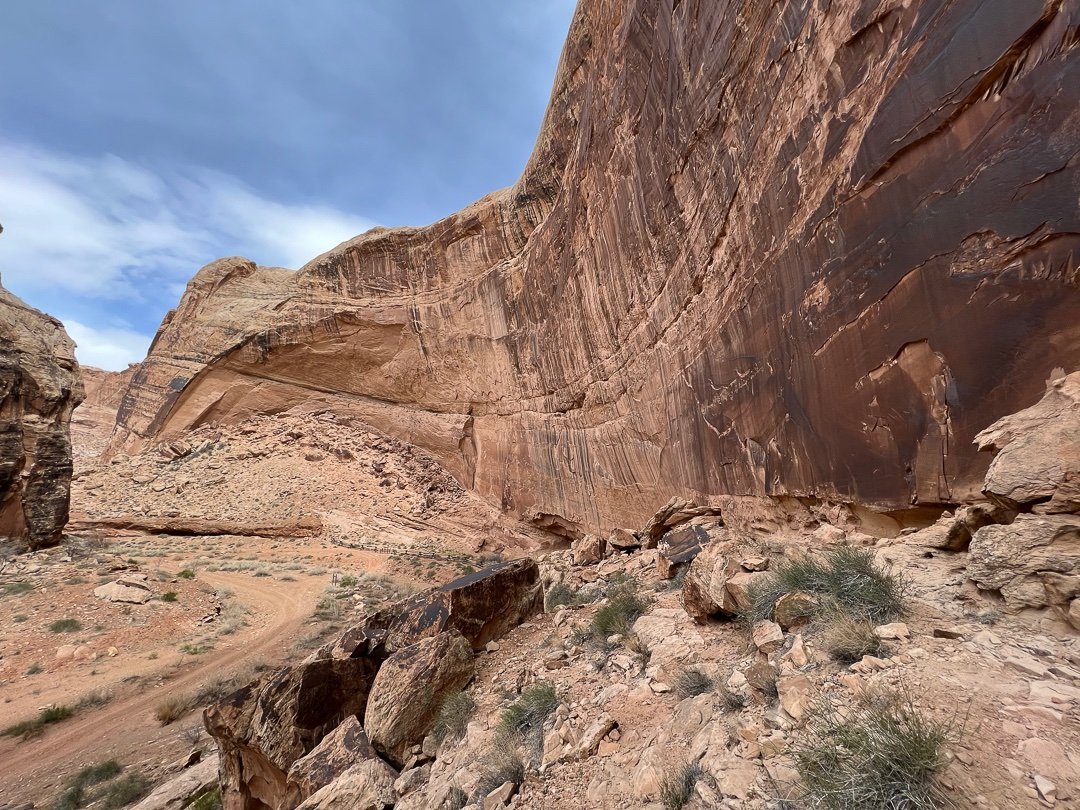
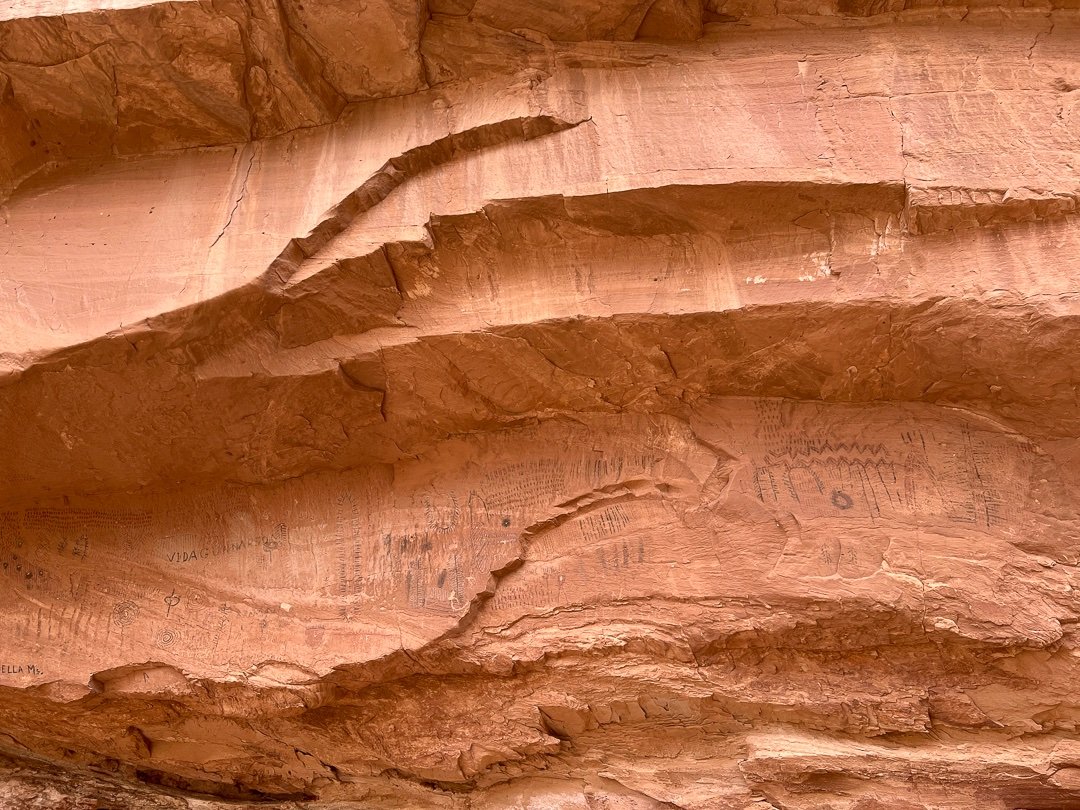
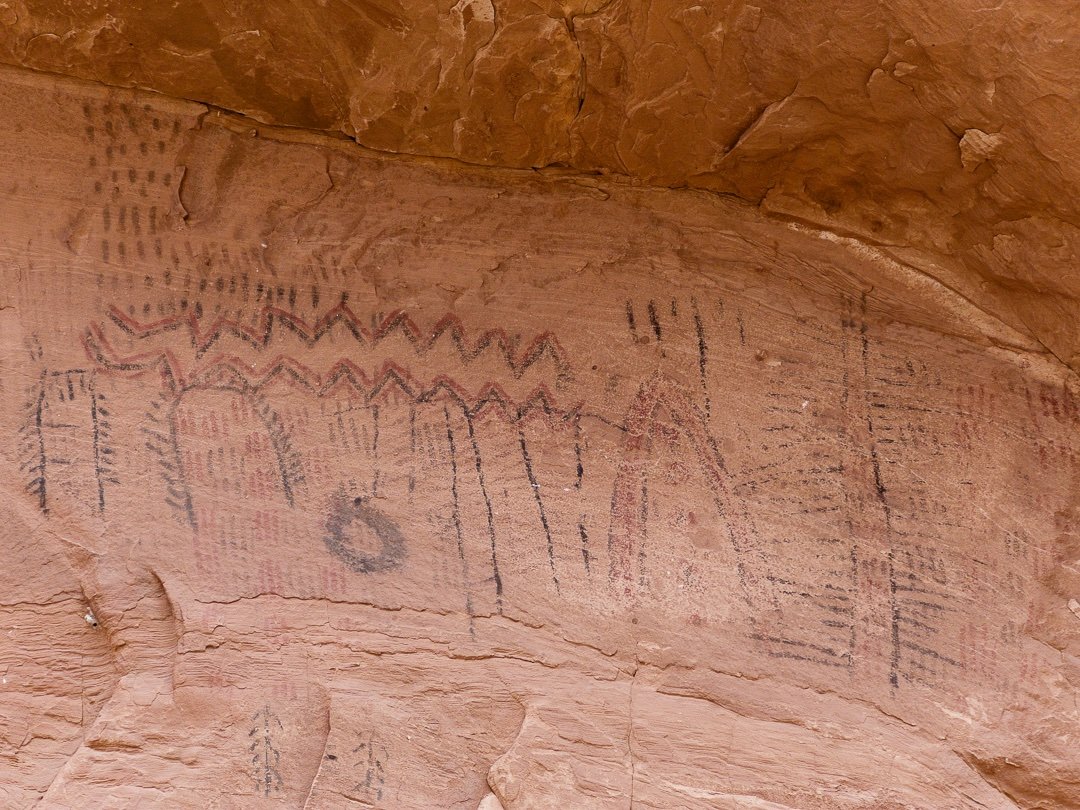
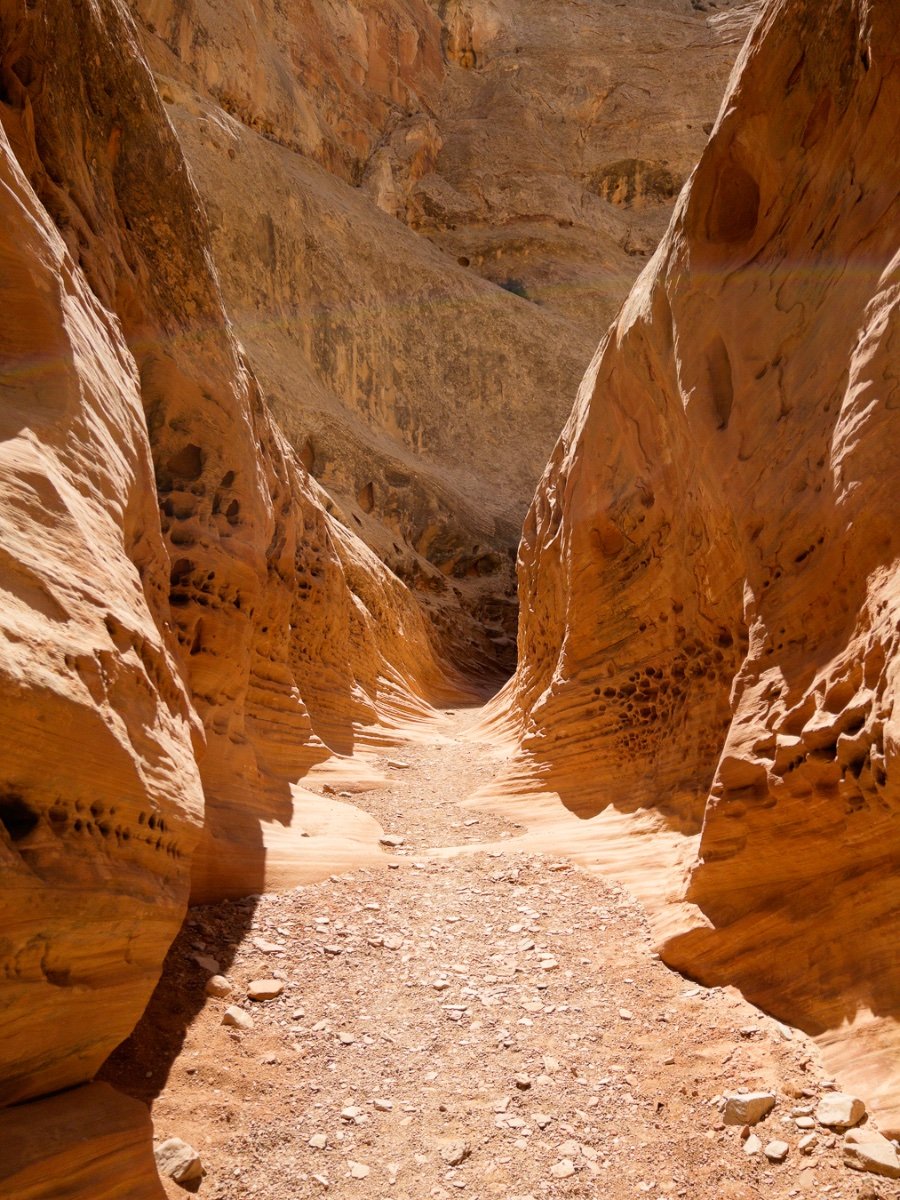
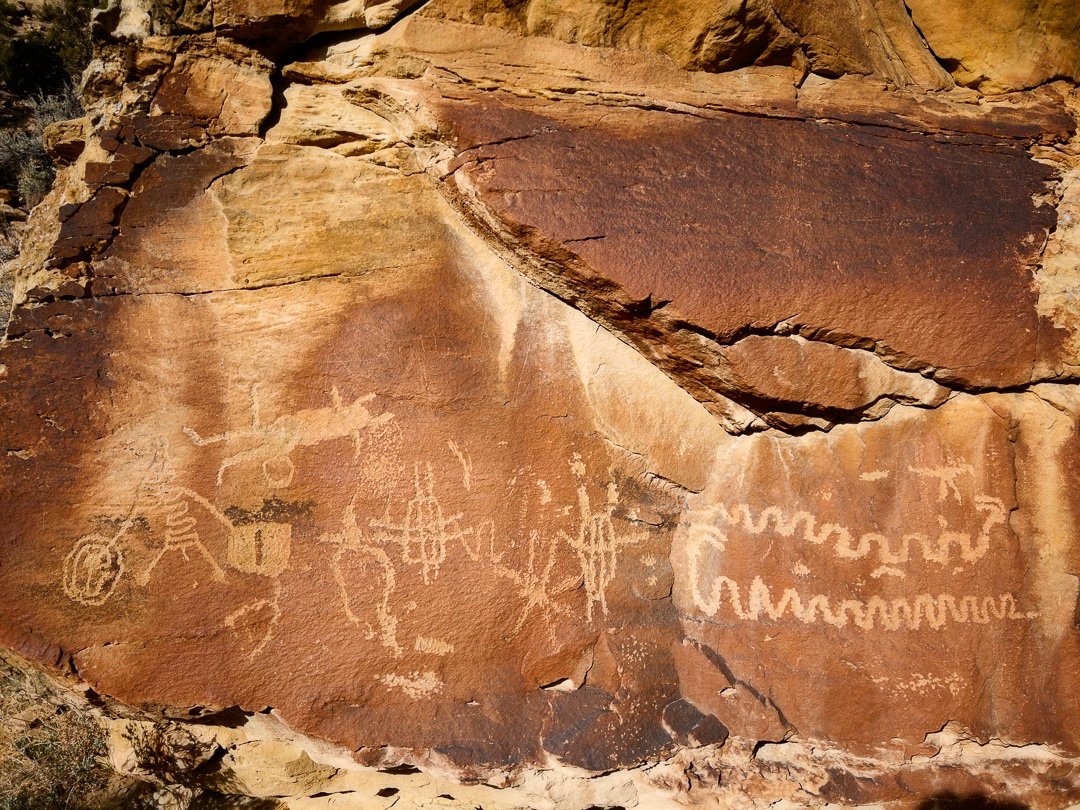
Returned a few weeks ago from a trip into Utah again, this time hitting a few places that have been on my bucket list for years. Weather was not ideal but we made the best of it, great hikes and adventures with some photos. Thanks for looking. Boondocking in the San Rafael Reef Formation known as the Temple Mount, San Rafael Reef View looking southwest to the Henry Mountains and San Rafael Swell & Reef Trudi peeking out of Oliver Hike in Wild Horse Canyon, San Rafael Reef Head of Sinbad Pictograph panel, San Rafael Swell Another view of the same panel above San Rafael Reef canyon wall, land of the tortured stone More tortured stone from San Rafael The textures in some of these rock walls is amazing from centuries of weathered torture 😂 via hike in the Little Horse Canyon More rock walls from Little Horse Canyon Trudi hiking through the slot canyon section of Little Horse Canyon More slot canyon views from Little Horse Canyon A geologist dream scape I suppose, most slot canyon of the Little Horse The Rochester Panel Detail from the Rochester Panel
6 points
-
routlaw Those photos are amazing. Thanks for sharing. Hard to believe the painted objects stayed this long. What kind of temperature did you encounter there in April?4 points
-
I hear you @SeaDawg on occasion you can find some of these amazing pieces of rockart in pristine condition but its not usually the case. The thing is it still goes on. If you dig around on the internet for locations normally you'll find post people keeping these a tight secret, under lock and key so to speak and for good reason. The people on this forum I would trust a considerably more and thus provide some general info about where they are, but if posting on Instagram and Facebook I do not provide one hint about there location and that includes even very well known ones such as the Rochester Panel above. Thanks3 points
-
Beautiful photos and just love the title “enough tech talk - go camping”. 👍🏻😎 Thank you for sharing as we are reeeally looking forward to mid western travels.3 points
-
Assuming that you used a mild bleach solution when you sanitized your system and only left it in the hot water tank overnight - it is highly likely that you have no permanent damage to your system (and tank). If I were in your shoes, I'd only make sure that the tank is thoroughly flushed. Actually - to over do it a bit - I'd probably pull the anode rod and flush the tank with one of THESE. Bill3 points
-
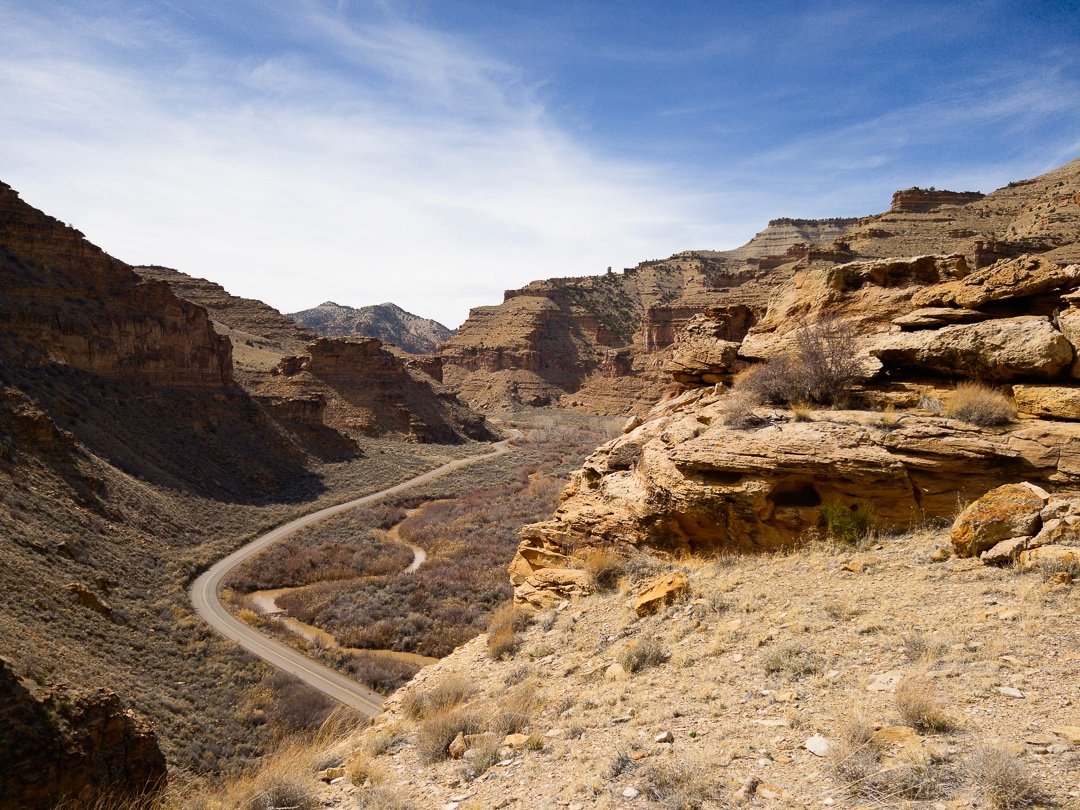
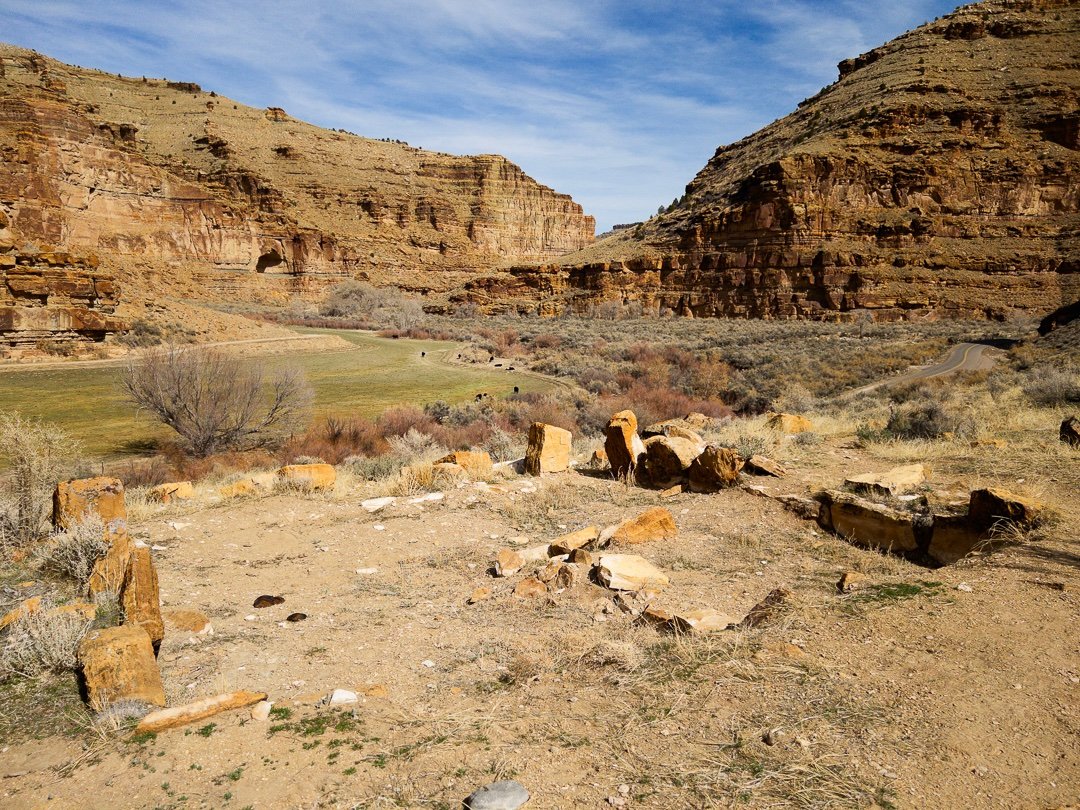
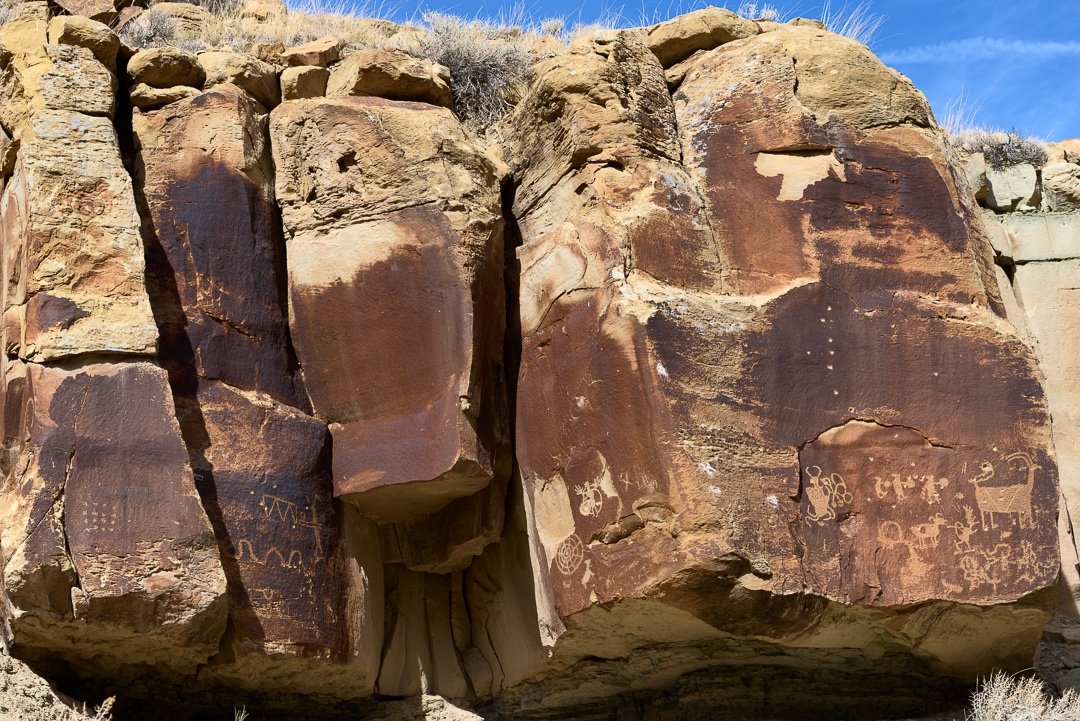
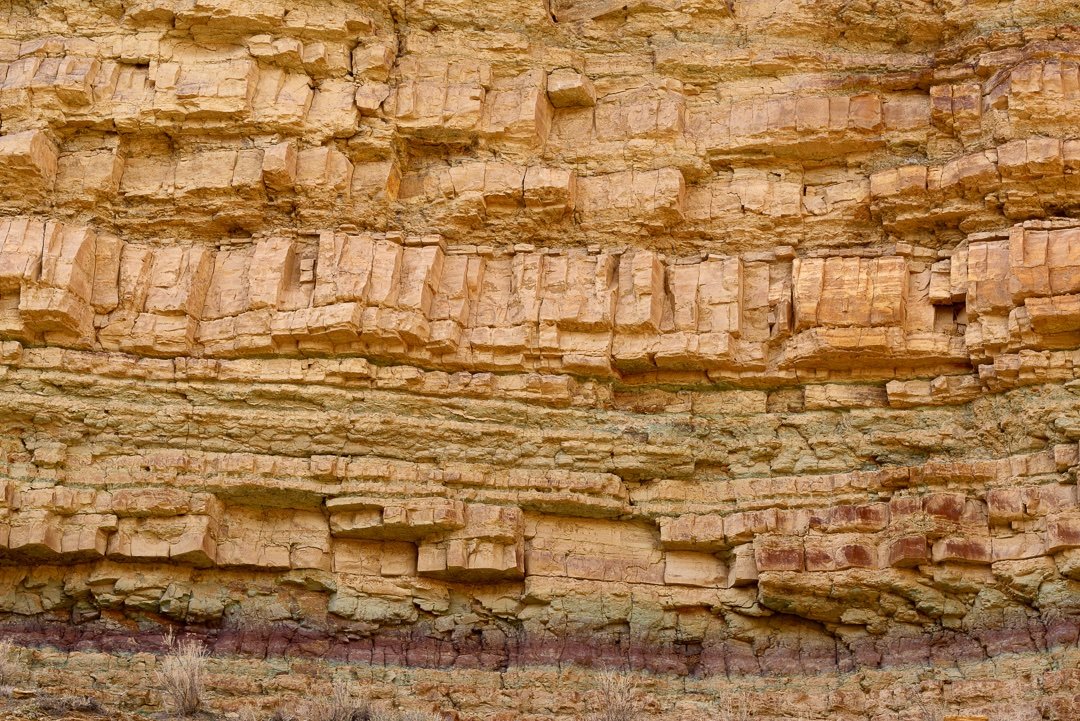
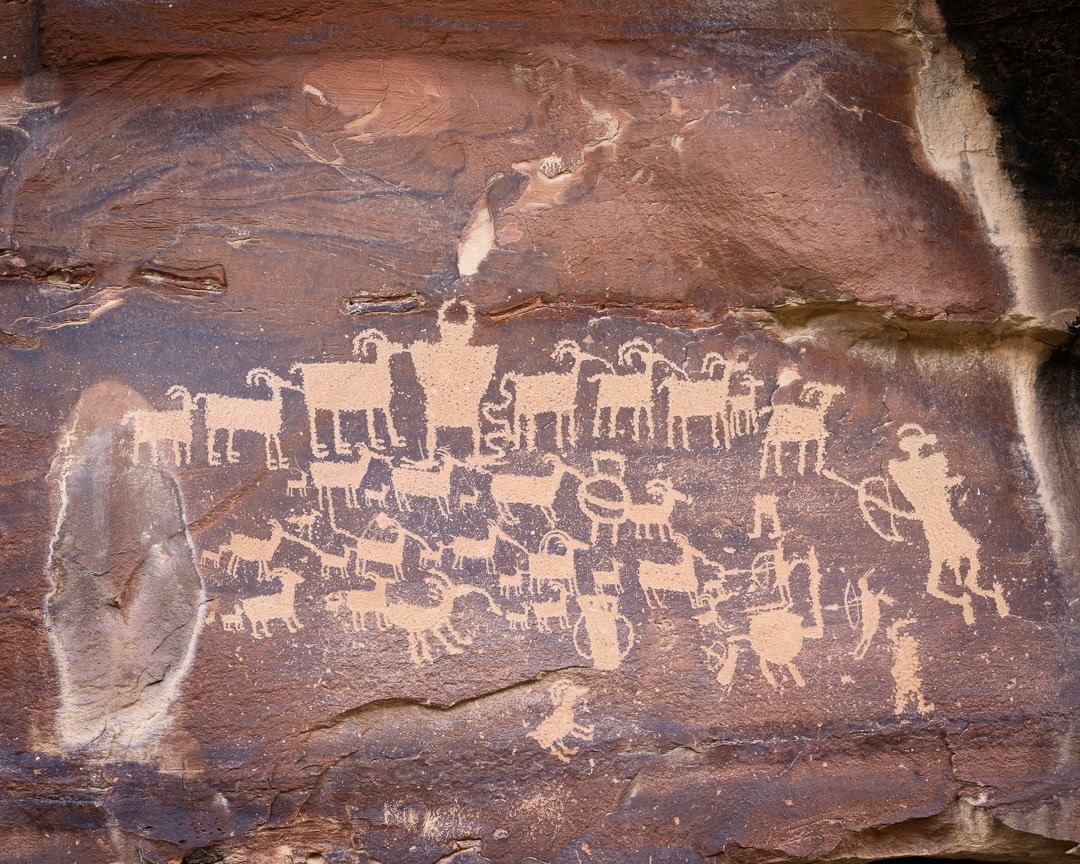
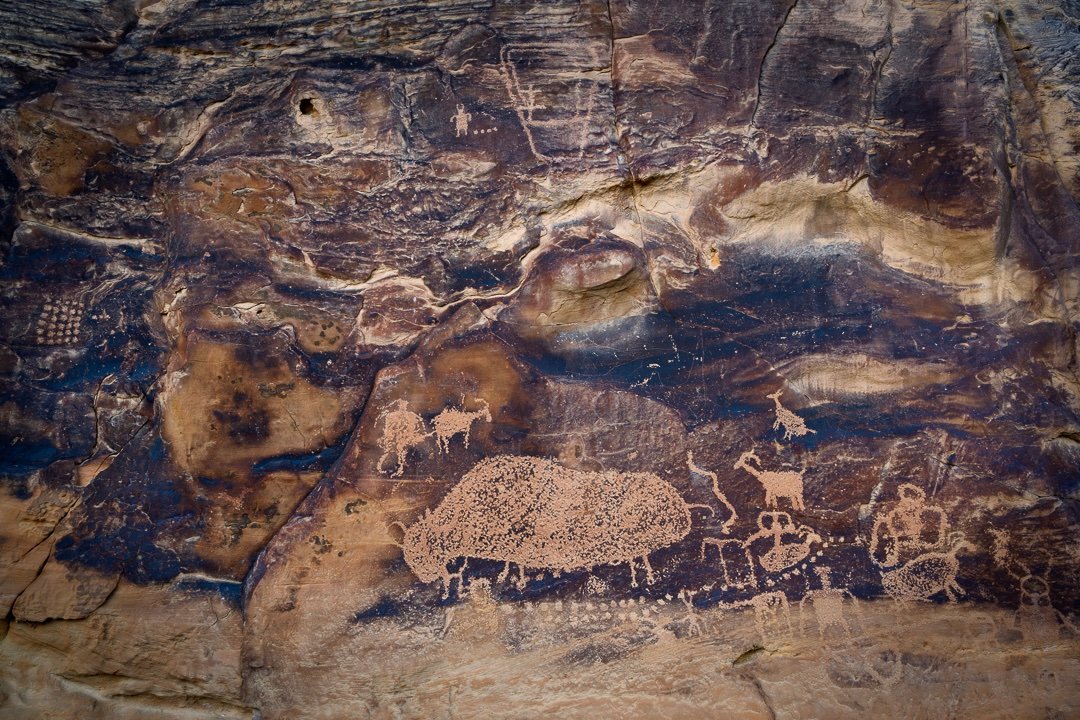
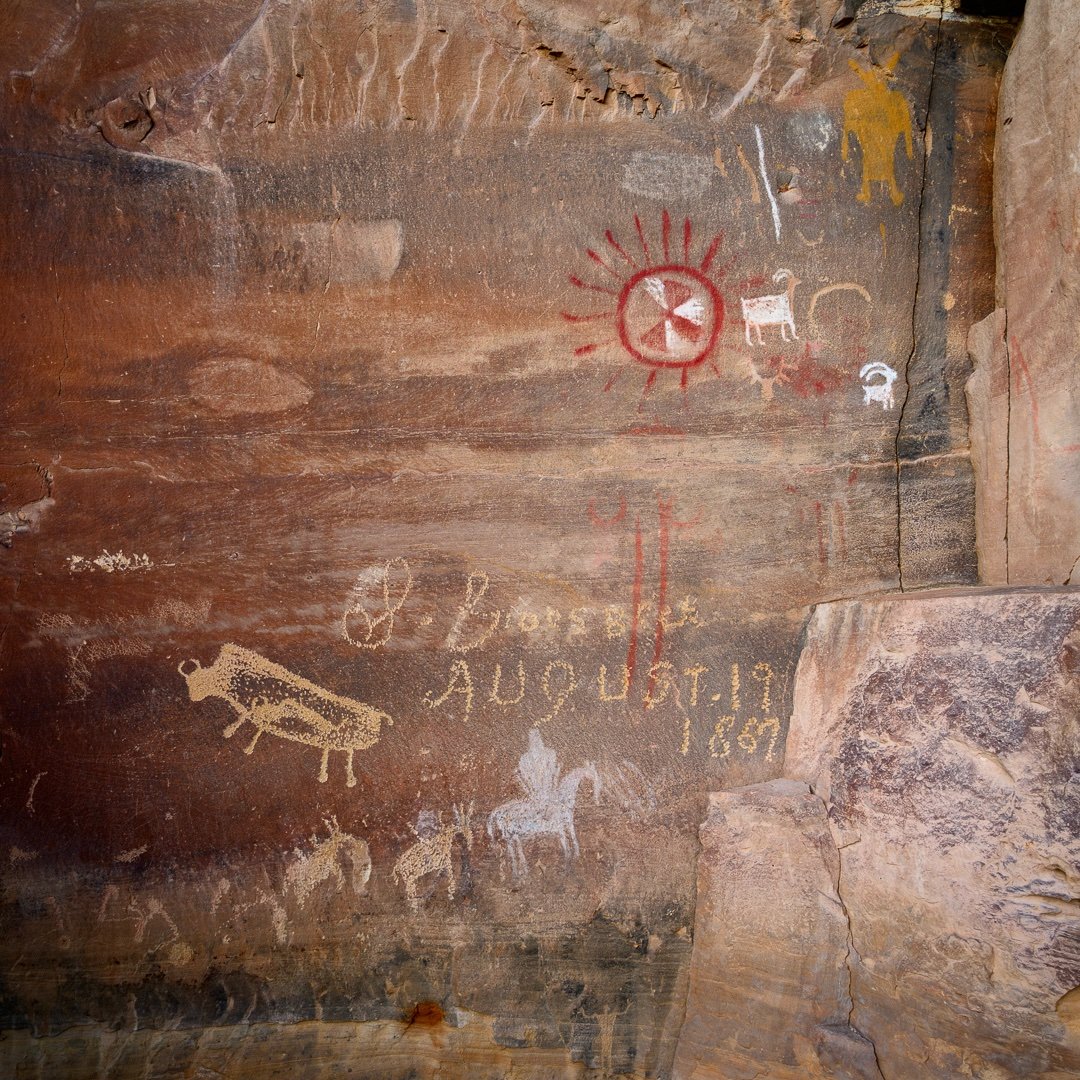
Adding a few more from the trip mostly from Nine Mile Canyon in the Book Cliffs area. Stayed a couple of nights at the Nine Mile Ranch which is around 7,000 feet elevation and were told we were the first campers as they had just opened for the season. They do have cabins and bed & breakfast facilities here. Very nice people, seems to be well run but you wouldn't mistake it for a 5 Star facility, considerably more rustic than that. No cell service in here and it is NOT nine miles long, nor 9 miles from anything. No idea where the name came from. All BLM land interspersed with private ranch land and very undeveloped. There are no other camping facilities throughout the canyon and apparently pull off camping is discouraged however there are some gravel roads that intersect from the paved canyon road where boodocking is a possibility. The canyon road itself is smooth as a baby's butt, but go slow there are numerous large dips due to flash floods from adjoining creeks should anyone decide to go in here. Nine Mile Ranch camground View of the Nine Mile Canyon looking west Ancient Freemont Culture Village Petroglyph Detail of Book Cliffs geology and rock formations The Big Hunt The Big Bison petroglyph pictograph Larger view of pictograph above with more recent cowboy inclusions Known as the Owl petroglyph Wild Horse Canyon view Large group site in the San Rafael Reef area, not recommended during the weekends. Note the only facility are a few picnic tables and pit toilets. NO WATER anywhere within miles. Bring your own. Black Dragon Canyon Large Pictograph in Black Dragon Canyon Detail from above Another detail Little Horse Canyon in the slot Another long view of the Blue Mountains and San Rafael Swell
2 points
-
Thanks SeaDawg. You found the thread that Patriot started that I was looking for.2 points
-
Also just a quick word about the camera gear sensing that many on this forum have a deep interest in photography to one degree or the other. These photos were taken with either a Nikon Z7 mirrorless, Nikon D810 or my iPhone 13 shooting in RAW and developing in Lightroom then off to Photoshop for final edits. For the iPhone I use either Pro Cam or Halide for the app to capture in RAW, the difference between either of these two and the built in camera is night and day but does require some post production work. Hopefully this will be helpful for those interested.2 points
-
That is so sick, and makes me very sad.2 points
-
Thanks @dewdev and @Patriotto answer the question the temps and weather were unseasonably cooler than normal. We arrived the last week of March and returned around April 4th I think. Night temps were below freezing every night with a couple into the 20's. The highest temp my truck recorded for outside was 61º but that only lasted an hour or so. Most hikes in the 40's to low 50's heat of the day with wind, and in those slot canyons those temps with wind can be cool. A couple of days it poured rain, buckets and sheets coming down from all directions which kept us off some back roads in the northern part of San Rafael area. I've learned my lesson when it says not passable when wet they are not kidding. We got out of the area where the Sinbad pictographs are just in the nick of time too. The road bed there is very soft deep sand, looking at torrential downpours in our rear view mirror on that one. The pictographs generally represent hunter and gatherer societies, nomads on the move and tend to be roughly 2,000 to 10,000 years old but this particular panel blew us away due to its pristine condition. Petroglyphs are more recent normally considered 700-1400 years old. Sadly many of these ancient archives have been vandalized severely, everything from bullet holes to spray paint. Brought shorts, never put them on the entire trip, LOL.2 points
-
A couple threads you might find interesting2 points
-
Oliver did try to set us up with a showing of a unit near us. The owner did not respond. I actuly spotted the E2 in our negborhood but knowing the owner did not want to be part of the program I did not want to pester... Thanks!!! to all of you who have offered to show your Oliver. I think I have watched every video and factory tour avalible online. Heading to Hohenwald in September to pick-up our E2.2 points
-
Hi Conner77, This is what I use, works well. Mopeka 024-5002 LP Check Tank Halo from amazon. Good luck 🙂2 points
-
Zamp says it is perfectly OK to use a mild automotive soap and water, which is what I have always done, I scrub the panels with a soft brush and a pole when I wash the trailer. They also say: “Do not use any harsh chemicals or a power washer when cleaning the panels as this could damage the anti reflective coating applied to the glass.” https://www.zampsolar.com/blogs/solar-101/how-to-clean-zamp-solar-panels But a whole lot of solar specialists say never use soap to clean a panel, the soap remains behind as a film and attracts more dirt and can harm that anti-reflective coating. Here is one article, these guys have developed specialty equipment using deionized water and rotating brushes. It is quite interesting, but there is no way a home or Ollie owner is going to do that! https://www.solarpowerworldonline.com/2020/05/pro-tip-never-use-soap-to-clean-dirty-solar-panels/ I just finished completely detailing the roof of “Mouse” and I used a car detailing spray (Griot’s Speed Shine) which has no waxes or silicones in it. It is perfect for prepping the surface with a clay bar before applying a carauba wax or a coating like Rejex. There were a whole lot of hard water spots on the panels. I used an artificial clay bar with Speed Shine and also scraped a couple of nasty sap deposits using a wet plastic scraper. The panels look great, the spots are gone. BUT did I damage or remove that coating? Are my panels screwed up? Comments welcome, do you clean your panels, and how? https://www.griotsgarage.com/speed-shine/ https://www.griotsgarage.com/brilliant-finish-synthetic-clay/ BTW that bar is truly brilliant compared to a real clay bar. It works great to take off bug carcasses and small sap drops. Really large sap tends to clog it up. I use a plastic scraper with Speed Shine to get those off. If you drop it, wash it off in a bucket of water and carry on. OTH, a genuine clay bar should be thrown out if dropped. One bad thing about the Griots one, it is round, so if you lay it down on the roof it can roll right off and go half way across your garage floor. 😳 John Davies Spokane WA2 points
-
Let me see - wind, rain, hail, sand, dirt, bugs, gloom of night, harsh sun, tree sap, repeat (not necessarily in that order) - what could go wrong? "harsh chemicals" - define please. For what its worth, I don't usually consider anything that I can leave my unprotected hand in for an hour unduly "harsh". But, then again, you should see my hands 😁. "power washer" - do they mean that poor pathetic electric power washer or the 5,000 psi job that will take your skin off? In any case - is it ever wise to use a power washer of virtually any sort on electrical equipment? I wash my solar panels with the same stuff I use for the rest of the Ollie and for my cars and for my truck. I don't see any difference. But, then again, my eyes are getting to be a lot like my hands 😇. Bill2 points
-
I'm sure you'll be fine. We mostly let the rain and wind take care of debris. In pollen/whirlygig season, I brush off with a soft brush or mop, if we're camped long enough to collect them. We've used mild carwash soap on the trailer, and panels,, for 14 years. No issues. At home, we've never cleaned the house panels, and never seen an issue. (Of course, we get average of 34 inches of rain, and plenty of wind... no smog.)2 points
-
This is unverified and open for corrections: In order of production model years: Icon (2014-2016), HiSpec (2017-2018), Sendel (and/or) Tredit (2019), Lionshead (and/or) Sumec (2020-2023). Maybe OTT could provide validation and resolve by production VIN.2 points
-
I’ve always just used the wash product I was using on the trailer with a good rinse. So far, so good. I like Griots products and will try their synthetic clay bar. I’ve done cars before with real clay but not my trailer. It’s probably time, but… it’s a lot of surface area! Mike2 points
-
Those who really want an Oliver usually will go out and find them, they will not be on every street corner as many other manufactures of travel trailer are. Oliver's are not for everyone, price is probably the number one reason for many, build wait times, and a dealer network are just a few reasons for Oliver's not attracting new customers. Oliver is a very different type of trailer and most campers just want a roof over there head for less money, that's understandable. trainman2 points
-
Well, I actually had to go outside and look...not something that had registered in my brain. Vents are there, and I'm glad. Even though it does get cold in CO, our Platinum package has the built-in heater. It is more the sometimes blazing hot summers I will worry about. mb2 points
-
1 - take the four screws that hold the remote panel off and gently remove the panel. There should be a phone style connector in that back of that panel - unplug it and re-plug it in three of four times - and - do the same thing where the other end of the wire goes into the inverter. 2 - Check to make sure that the wires (both ground and positive) going into the inverter are tight. 3 - now re-try the remote switch. If it works you are done. If it doesn't work - do what they said. New remote panels are not all that expensive on Amazon but, hopefully, you don't have to go that route. Bill2 points
-
Purchased white plastic kitchen cutting board from Walmart (UHMH Plastic sheet can also be used) and used a 1 1/8" hole saw to cut out 1" OD plastic plugs to fill the existing ventilation holes in the battery compartment door in our 2015 LE2. Didn't want to mount these plugs permanently, sealed with clear RTV silicone for easy removal.2 points
-
Aaron: I will be coming south from Alaska 3rd week in August. Then near Moore, Idaho at the KMFP for about ten days. Then heading to SLC after that. If any of that is close to you, feel free to PM me. Geronimo John2 points
-
Seeing one that "lives" in Garden Valley, Idaho convinced us to place our order. According to our Oliver salesperson, there are several Olivers owned by Idaho residents, in addition to the one in Garden Valley (where we live). There are a couple in the Boise, Nampa area. And, I know of at least one at lot closer to Moscow, in Spokane. There is no substitute for seeing, touching and walking through one. I recommend you coordinate with your Oliver salesperson, and make the trip. But, promise me you won't sue the owner if you take a fall! Oliver doesn't "backstop" owners who show their Olivers in the rare, but possible, event of an injury during the showing. This was discussed in an earlier thread on this forum, causing some to opt out of the "show your Oliver" program. Just be careful, and make the decision that you will return the courtesy of showing you the trailer by taking responsibility for your own safety.2 points
-
I did what Bill suggested and ended up needing a replacement. Got it from Amazon.1 point
-
I recently installed the Houghton 9.5 in my Elite and later decided to move the temperature probe located inside the a/c so that it protrudes about 3 inches into the cabin. The set temp now correlates almost exactly to actual cabin temp. Before, if I wanted the cabin temp the be maintained at 72 degrees I’d have to set the temp well below 72. Much more pleased now on how it functions.1 point
-
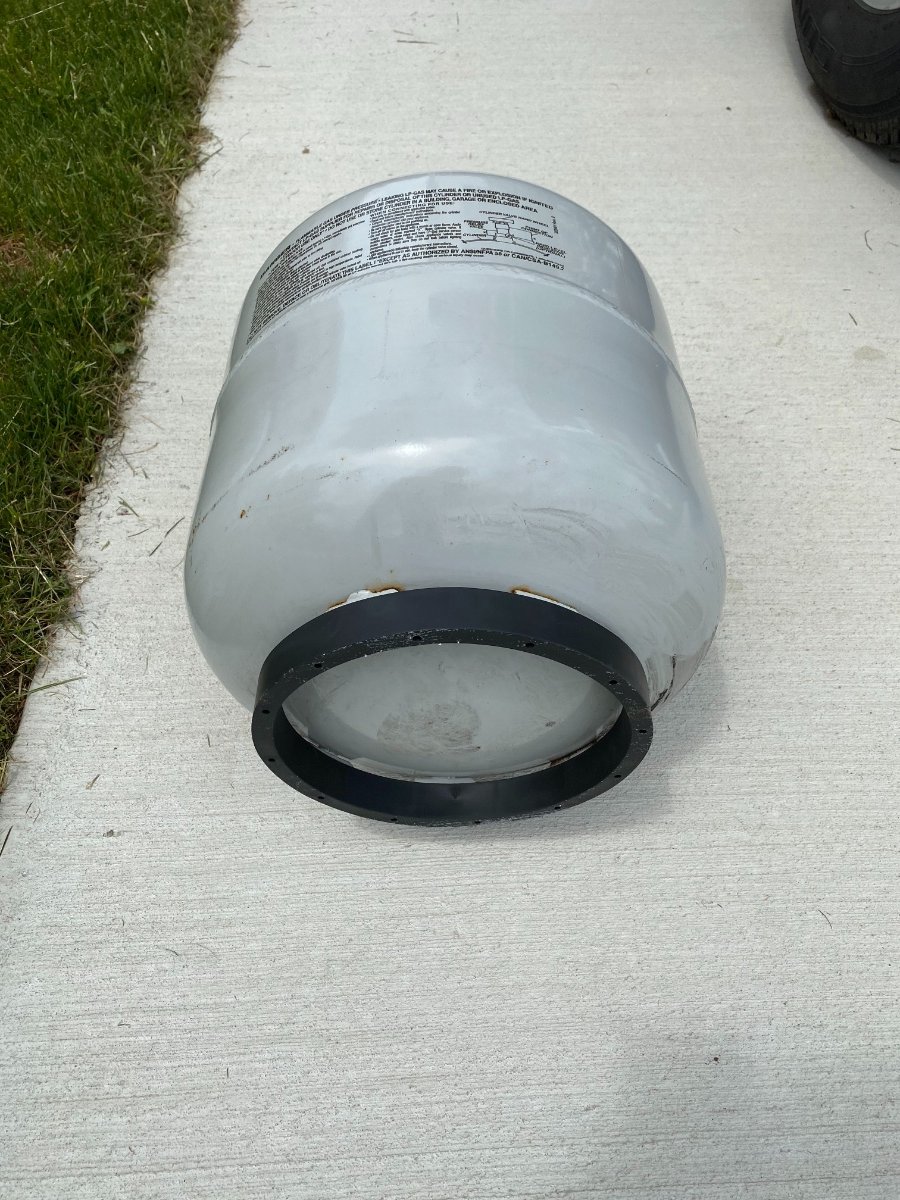
KenB: Thanks for the suggestion; I will. They do sell most parts as I did contact the company and asked. I wish I could (Identify) and see the carburetor. I tired looking for it with the side panel removed and followed the gas line from the tank, but could not see it. I guess I will have to take off the entire outside plastic casing to get a better look.1 point
-
I work on a lot of small engines and motorcycles professionally and as a hobby. Here in Minnesota they get stored for an extended period annually. The number #1 reason they won’t run in the spring is a gummed up carburetor due to evaporated gasoline, especially ethanol. If you’re a non mechanic, consider sinking $20-$30 on a brand new carburetor. They’re cheap on Amazon, eBay, and small engine sites. You’ll spend hours unsuccessful attempting to clean/test/clean/test your old carb and you’ll still end up buying a new one. I have an ultrasonic cleaning bath, chemicals, tools, and experience and I spend very little time cleaning carbs anymore because the new ones just bolt right on and off the engine fires. Take lots of pictures of the linkage routing. Unbolt the old carb, bolt on the new one. It’s going to take longer to find which one to order than actually replace it. HTH. Ken1 point
-
We'll look forward to that! Great photos.1 point
-
@Kirk Peterson thanks, glad you enjoyed them. Will post a few more later.1 point
-
Last May Oliver service replaced our awning seal under warranty and they also drilled out our awning brackets so they drain properly and they now do. The new awning seal was installed just low enough that there is no longer an issue with water puddling and water drains off as it should. When washing the roof of our Oliver I did not see any water puddling along the awning seal or brackets as it just drains off the rear of the trailer as designed. When I wash and detail our Ollie I usually have it a little nose high to facilitate water draining off the roof area. The water also drains off when the Ollie is level. I am fine with how the new seal works now. Regular washing keeps the seal and roof area nice and clean.1 point
-
An update from Jason. Apparently in 2016, OTT was instructed by the rim mfg to increase the torque from 90 to 120 ft-lbs. He is going to check back with the MFG on this. More to follow....... GJ1 point
-
I'd add to my comment above that I took the Oliver specific pages and placed each one in a protective sleeve so that they would not become worn and/or the holes for the binder would become torn. An added benefit of this was that I could simply slip any additional notes or changes in specifications right in with the original. Bill1 point
-
We’ve been hauling our Oliver around now for 6 years without one and have done fine. Since we like many of the public campgrounds (National and State Parks, COE, BLM, FS, etc) we often have to manage our black tank use. We’ve had to unhook and go dump and then return a number of times. Seems like a tote would be handier in those cases. They do take up space. Just something I’m considering. Mike1 point
-
Bill, Northern tool might have what you are looking for. https://www.northerntool.com/shop/tools/category_tires-wheels+hand-truck-utility-wheels1 point
-
Curious what did you use? Hard to tell from the photo. Even though I swore I wouldn’t do it, but am on the verge of springing for the lithium batteries right now and planning out various ways to insulate and seal.1 point
-
We replaced our lead/acid batteries with a lithium battery and plugged/sealed Ollie's battery door vents.1 point
-
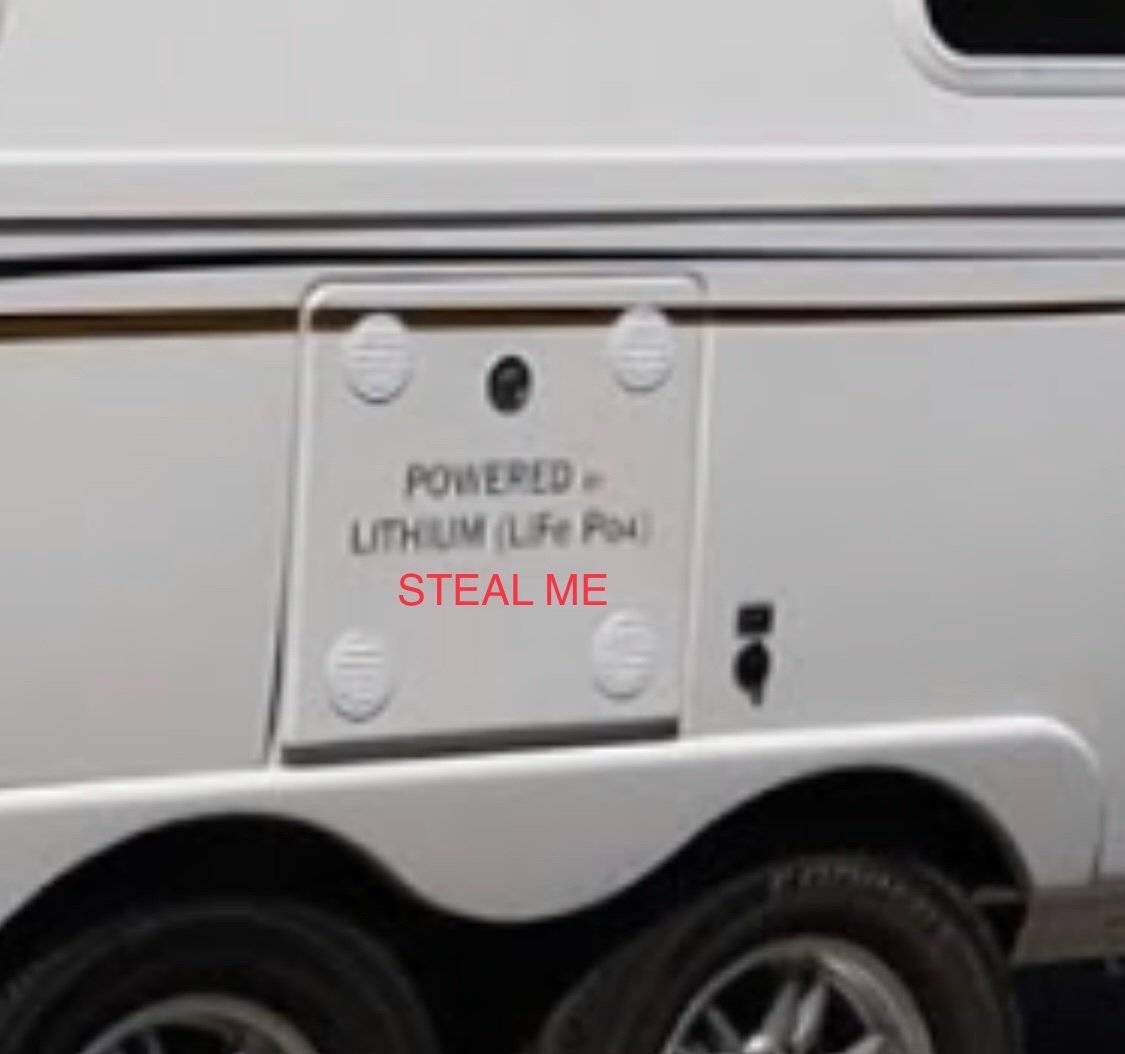
I fixed your screen capture. I think I would be out there with a plastic scraper taking off that stupid decal the very first night…… does this advertisement come on all the lithium optioned hulls? 😳 The vents are RV code, Oliver cannot leave them off..I think the white discs are very unsightly, the earlier hulls had pretty Perko chromed brass marine locker vents.I suspect that those were discontinued, I may have bought the last stock for $15 each….https://olivertraveltrailers.com/forums/topic/5301-how-to-lithium-battery-powered-vent-system/ John Davies Spokane WA
1 point
-
Yes they do. Our 2021 has the vents even though we chose lithiums. I would think, from a liability standpoint, it makes sense to leave them in place. If a change is made to standard wet cells, lack of ventilation could result in an explosion. Easy to add a layer of insulation inside the cover panel eliminating the ventilation and providing additional insulation to the lithiums in freezing weather. My plan is to use closed cell foam insulation attached to the cover with velcro so that the insulation can be easily removed. Our low temp over the winter was in the mid teens F and the battery temp never got below 40 degrees F. That with a small space heater set on low in the main cabin. We powered up the battery heating pad although I do not know if the BMS ever sent power to the pad. Also kept the Truma heater on during cold weather.1 point
-
Hmm, seem odd. There a few in Montana including mine. Yeah with LiFePO4’s you most likely wouldn’t want vents in the battery compartment especially up here in the northern hinterlands. Better to keep them insulated and warm than cold. Don’t know what part of ID you’re in but PM me if you would like to see ours.1 point
-
I wasn't sure myself and found an excellent article that pertains exactly to your question. The determining factor is whether you have an internal "bonded" neutral and ground... or not, which is called a "floating neutral". Check out this article and you might find it helpful. I did. An interesting thing is that two major inverter generator manufacturers (Honda and Yamaha) have floating neutral which means you need to put on an external bonded plug. Many of the others have internal grounding hard wired inside the generator. It would be worth your time to read the attached article. https://www.rvtravel.com/rv-electricity-generator-neutral-bonding-basics/1 point
-
The short answer is yes. Here a little helpful info - https://www.rvtravel.com/rv-electricity-companion-bonding-plug/1 point
-
Many of us just call boondocking "camping". We've rarely had hookups in 14 seasons. The Olivers are great off grid trailers, properly equipped and maintained. As you can guess, we're very happy with ours. However, if you're thinking about rock crawling, or extremely rough overlanding, you may want to look elsewhere. A couple folks on here moved on from Ollies to more expensive Aussie built Overland trailers. (Actually, they're each on the second Aussie trailer, so you'd definitely get some brand comparisons. ) You could look at posts from Raspy and DonThompson to see their reasons, and if they line up with yours. However, both are still members here, and I suspect would tell you what they loved about their Olivers, if you reached out to them. As far as leaks, pretty much every camper of every brand will leak, someday, somewhere. The difference is in the resulting damage Good luck with your decision.1 point
-
TomW - a personal tour, or better yet, a factory tour, will show you how fine these Ollies are. Water leaks happen, but on a scale of 1-10 they are a 2 at most. More a minor annoyance, to be fixed when you get back home, rather than a “OMG a leak, the walls are going to rot, we have to stop this right now!” Which is a 10, and very common to 99% of the other trailers in the market. Even the glass egg trailers like Casita have major worries, because they use SO much wood for the interior. Do read other brand forums for a true perspective !!! There are so few truly big problems with our trailers that we have to talk about the little stuff to stay busy…. Do keep in mind that most appliances in all trailers will not be remotely up to the standard you expect from your home units. Which is a shame, but to be expected for their cost, and the fact that the whole trailer gets rattled and shaken over tens of thousands of miles. Your home furnace could not withstand that. BTW there are a few Ollies with way more than 100,000 towing miles. Stick and staple trailers fall apart long before that. Often on the first trip. Google this term: “travel trailer broken frame tongue” or “Airstream popped rivets” or “Airstream hail damage” and weep. John Davies Spokane WA1 point
-
Any travel trailer is going to leak at some point, because roof penetrations are unavoidable. The more critical question is: "What will get damaged when a leak occurs?" We have an Elite II on order precisely because we are concerned about water damage inside the trailer. My wife and I were persuaded by the Oliver double-hull design, complete with scupper holes in the bottom hull to allow any water that gets between the two hulls to drain out. We also like that there is little wood inside the trailer (just the galley cabinet) to be water damaged. We considered an Airstream, but were not interested in the plywood subfloors still used on many models, along with the much more extensive use of wood inside the trailer. Like all trailers, Airstreams have roof penetrations for AC, fan, vents, etc., so leaks will eventually develop. Once wood products behind walls get wet, they will develop mold and rot. Google "replacing an Airstream subfloor" to find out how many Airstream owners have gotten to deal with mold and rot in their subfloors. No thanks. Check out forums for other travel trailers, and you will find hundreds of horror stories about water damage resulting in rot and mold in the mass-produced "stick and staple" trailers. You will also learn that post-sale customer service from those companies falls far below the high standard set by Oliver's outstanding Customer Service Department. The results of our research persuaded us that if potential water damage, including avoidance of mold and rot, is a top priority the Oliver is an excellent choice.1 point
-
Since you are still under warranty, I'd email, call or submit a Service ticket and see what they recommend for reattaching that seal. Bill1 point
-
I just received and installed the tank “halo” rings today (purchased from Amazon). They fit perfectly on the tanks and in the tray. I considered the idea of the rubber mat but I think that will have an issue with moisture/road-spray getting trapped & retained between the mat and the tray. I’ll check these rings & the underside of the tanks occasionally to see if any water gets caught inside the rings. They do have small weep holes molded in, hopefully that avoids moisture buildup. Mopeka 024-5002 LP Check Tank Halo https://www.amazon.com/dp/B07HQZRR9F?ref=ppx_pop_mob_ap_share
1 point
-
There are a lot of unnecessary parts listed in that kit, some you can't even use. All you need are the bearing cones and races and a grease seal. Everything else can be reused unless you damage or lose something. The bearing sets are available for $5-6 and a seal is around $3-4. Those bearing part numbers listed are correct for your axles but they are also industry standard numbers that every bearing manufacturer uses. Timken specific numbers to search for a cone and race set are: SET17 (for the inner), SET4 (for the outer), and then 473336 for the seal, which may be in either a National or Timken box.. Sometimes pricing will vary between buying a SET part number and the individual numbers. For instance: SET4 versus L44649 and L44610.1 point
-
You drive out the rear seal and bearing to service it (clean, inspect, and grease it) and replace the seal with a new one every time. If either bearing is bad, you drive out the races and install two new bearings and races. Never change just a bearing or race, they are matched sets. Never change only one bearing set if it is bad, the metal particles have already damaged the other set. You can carry a complete spare hub assembly with bearings, it would be very awkward and heavy. When you install a new drum, the worn shoes will not match the curve of the new drum, so that brake will never work right. If you replace a drum, both drums on that axle should be replaced AND both brake assemblies. $$$$ This is why disk brakes make so much more sense.... they have none of these “mismatched” wear pattern issues, and are super easy and inexpensive to service. John Davies Spokane WA1 point


-
Recent Achievements
-


")


")


")
