Leaderboard


Popular Content
Showing content with the highest reputation on 05/02/2022 in all areas
-
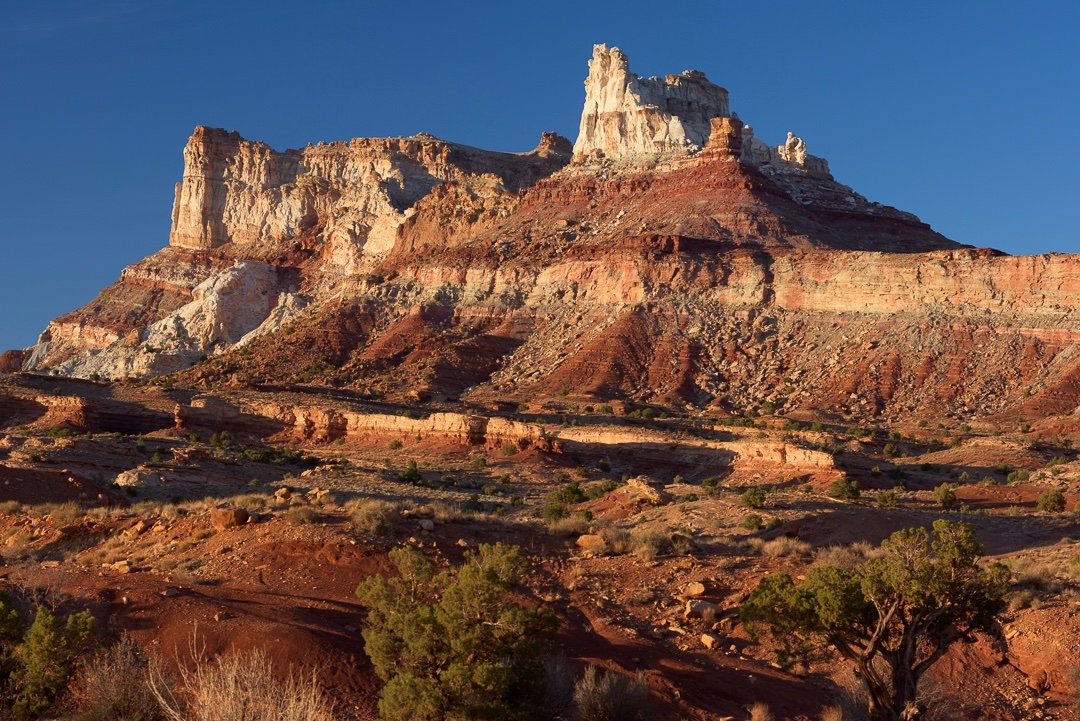
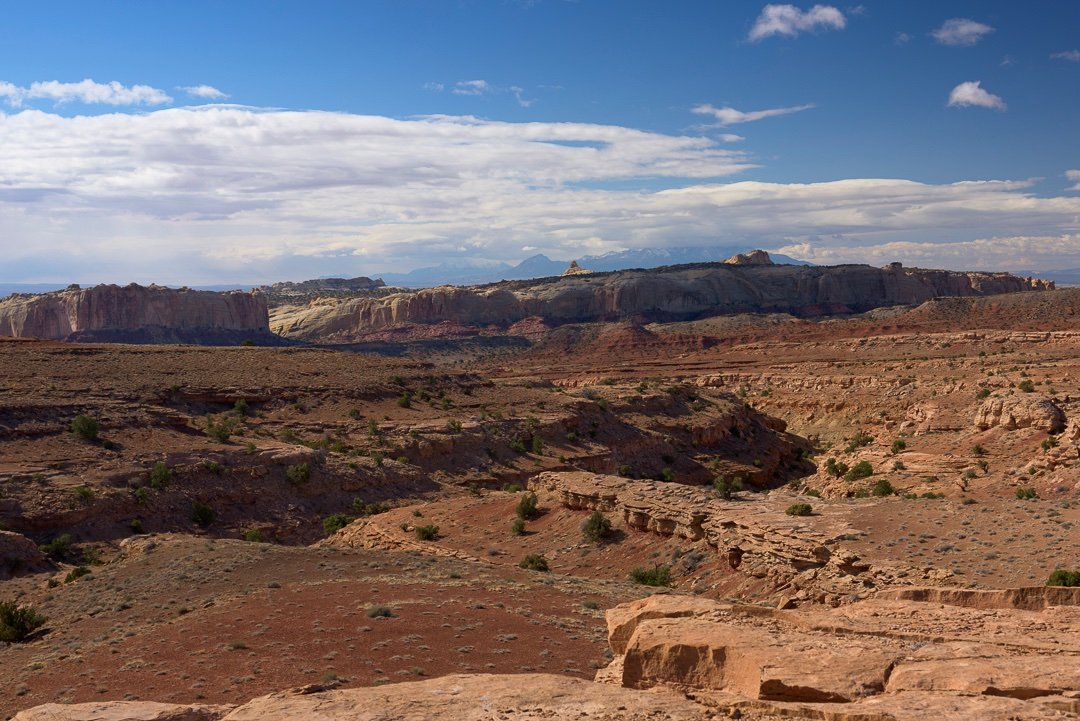
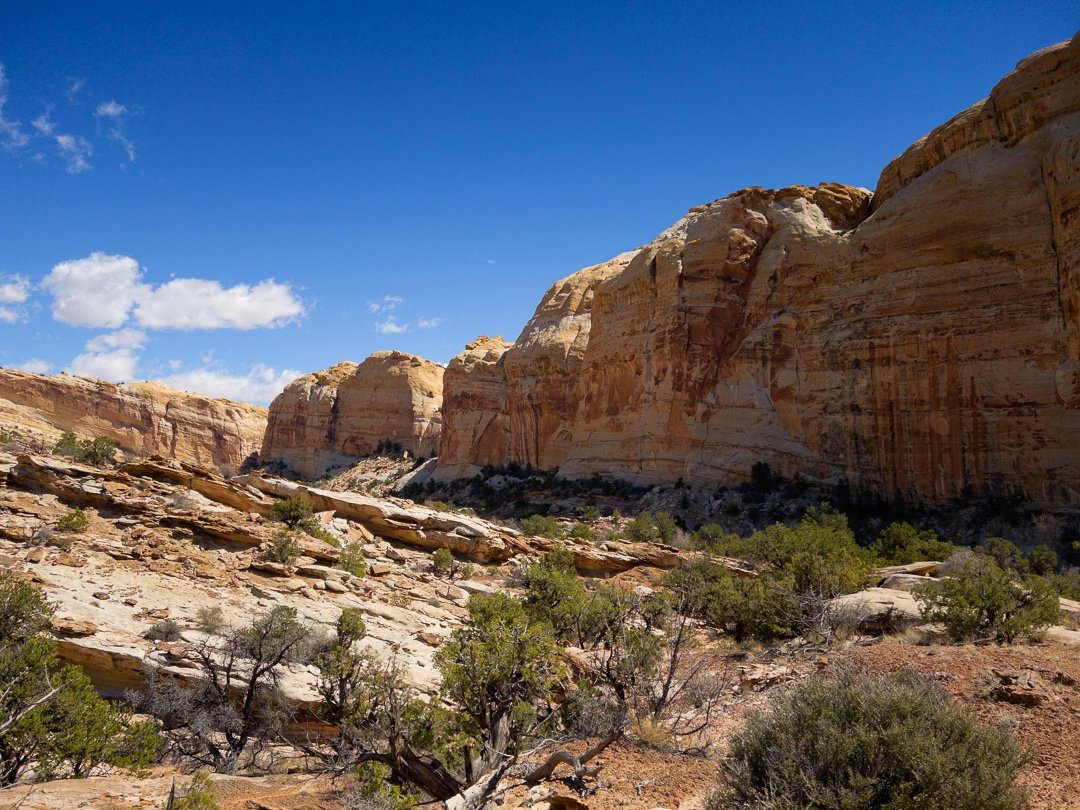
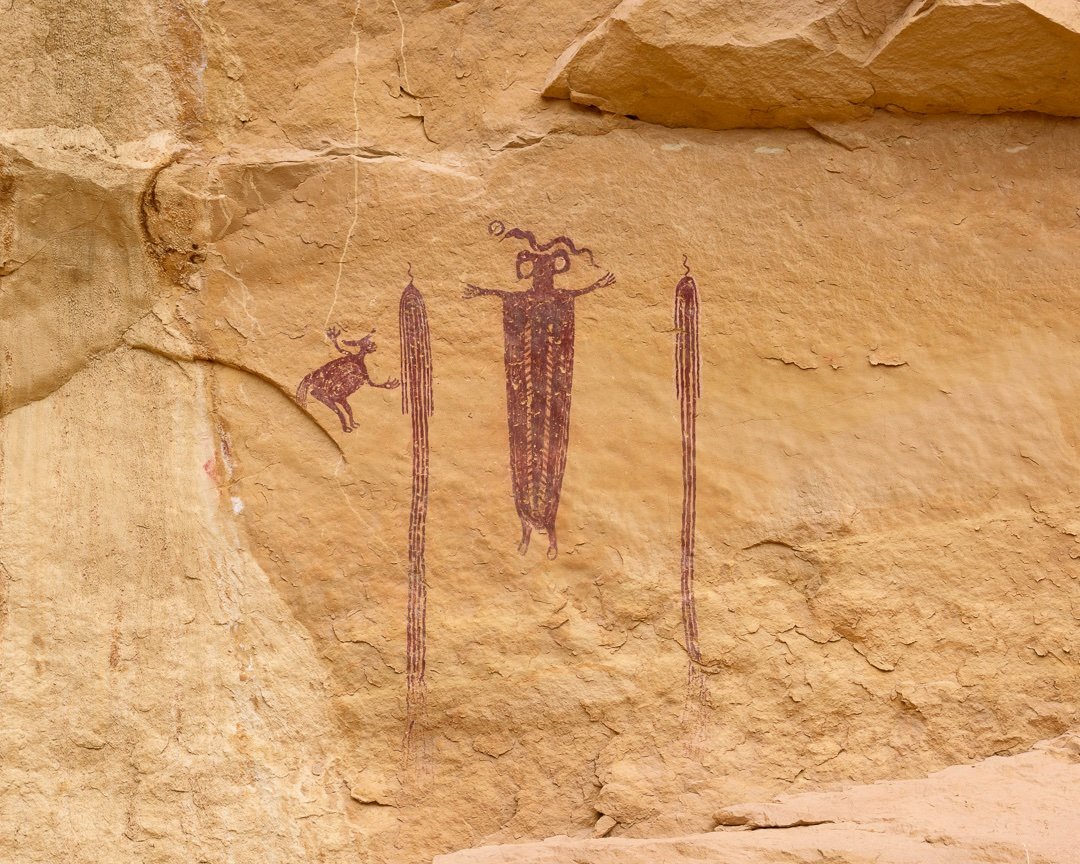
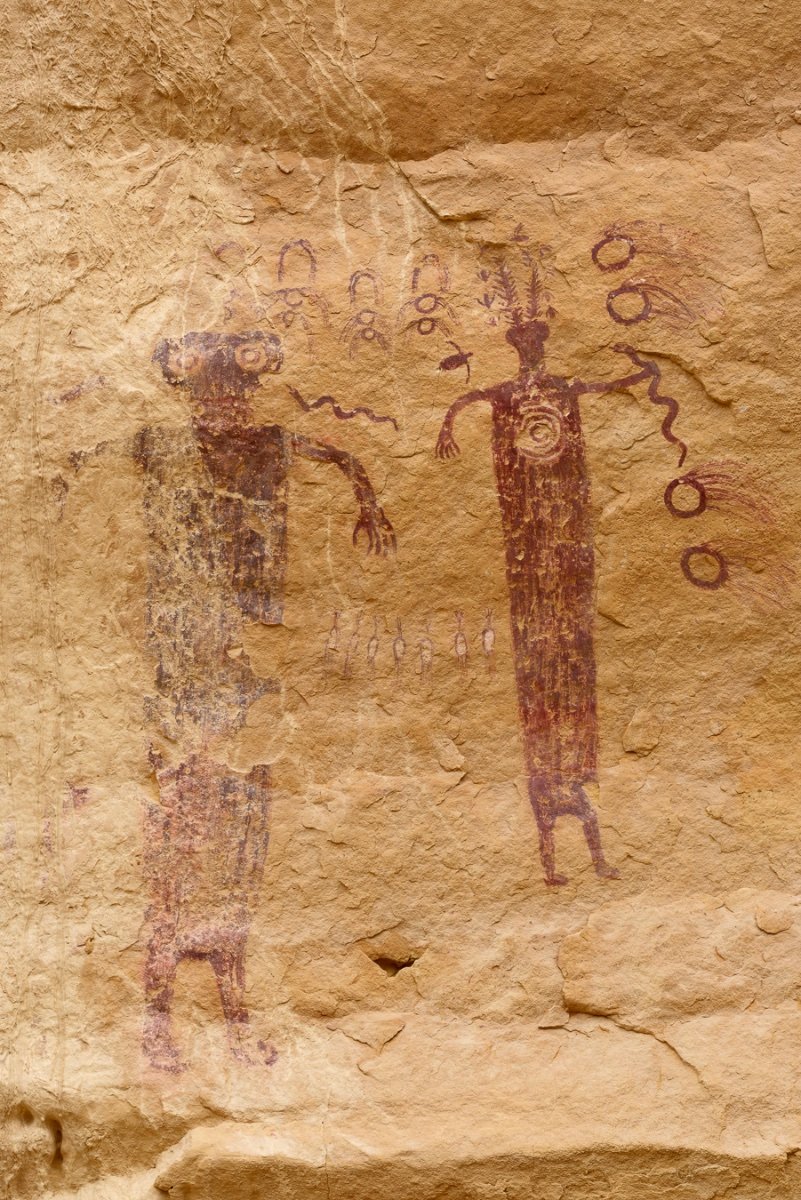
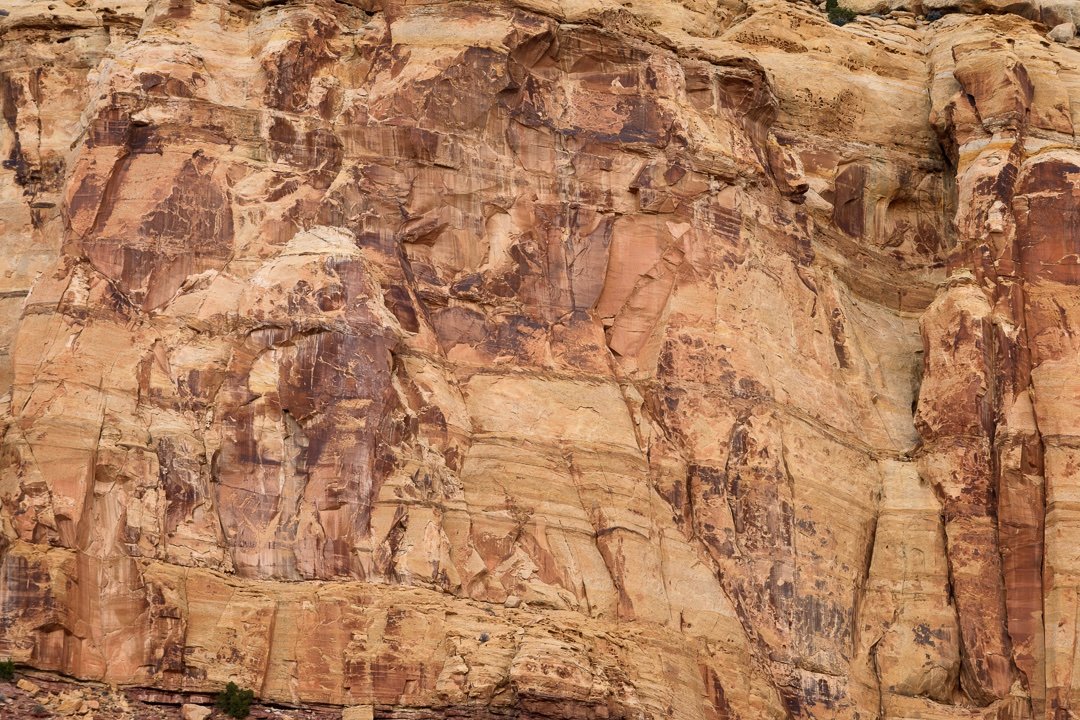
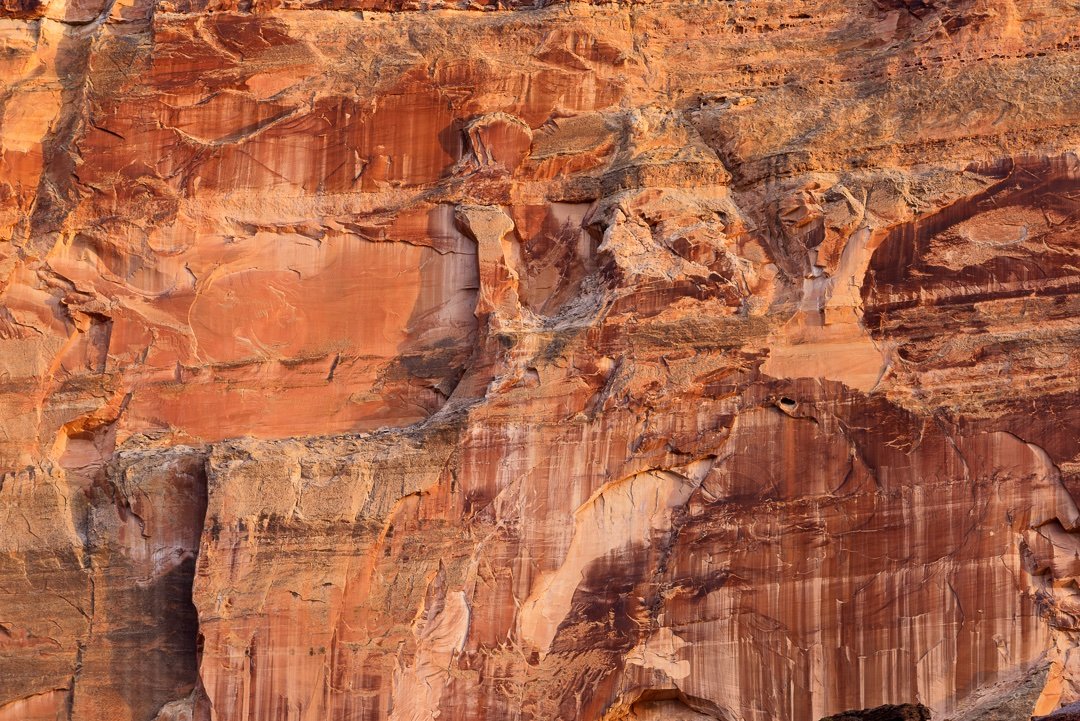
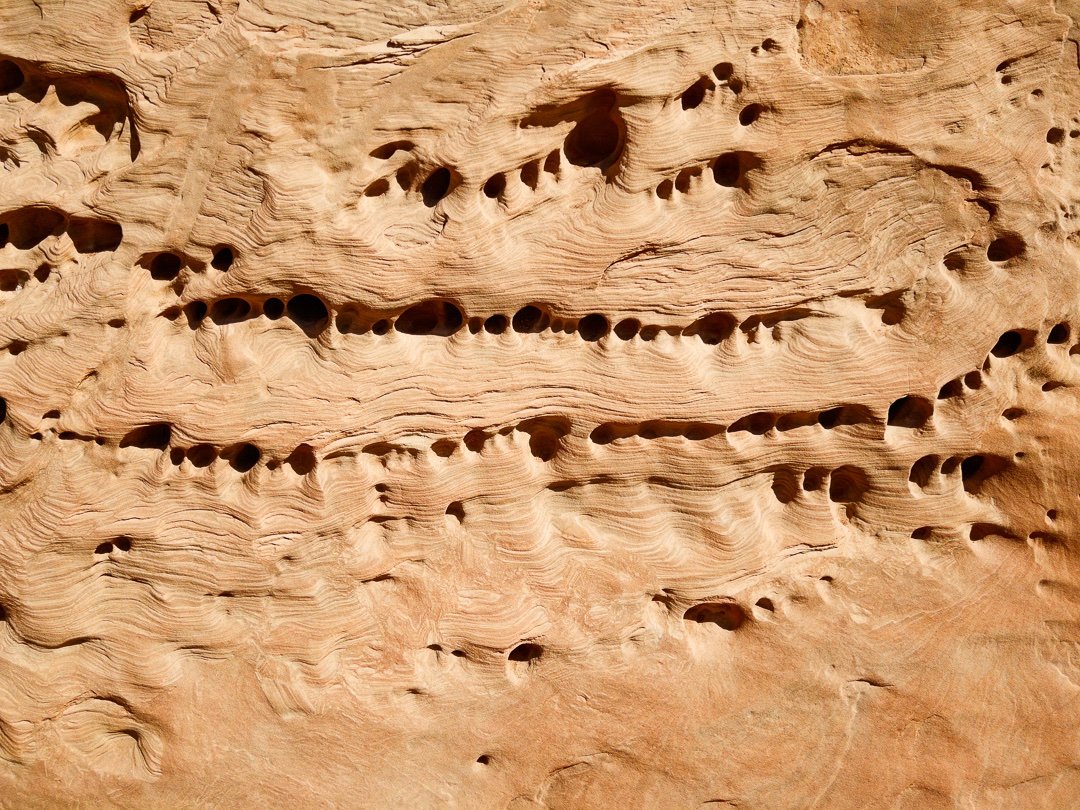
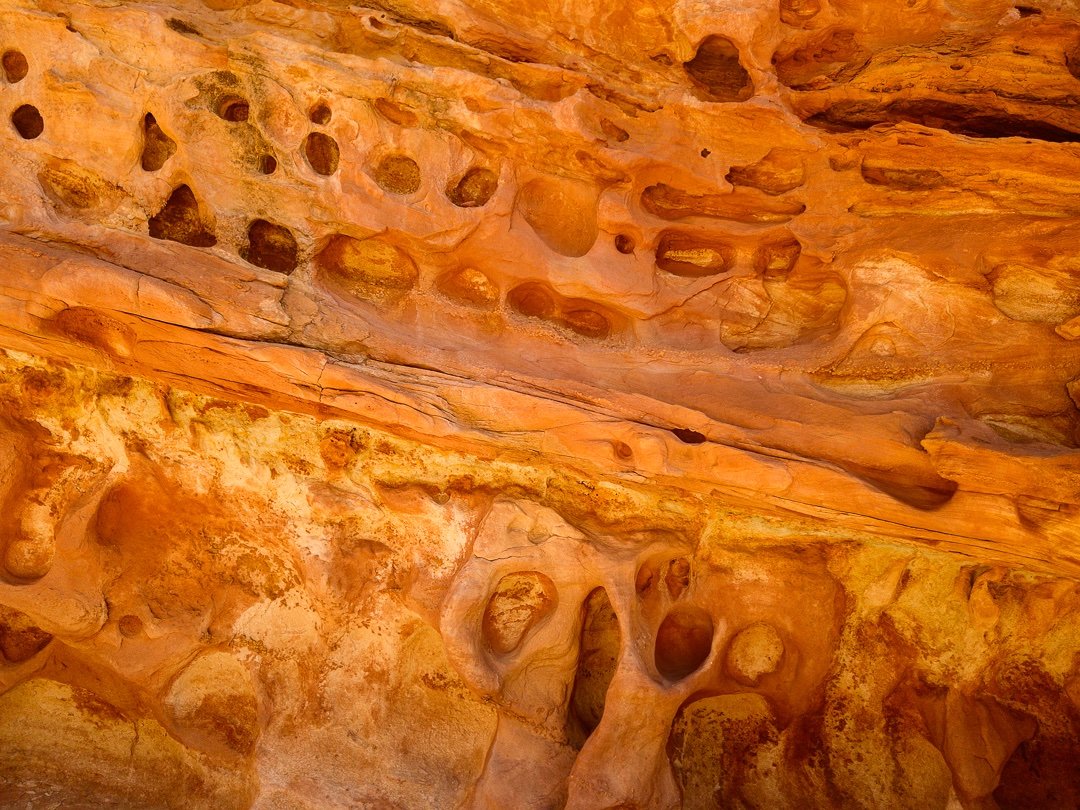
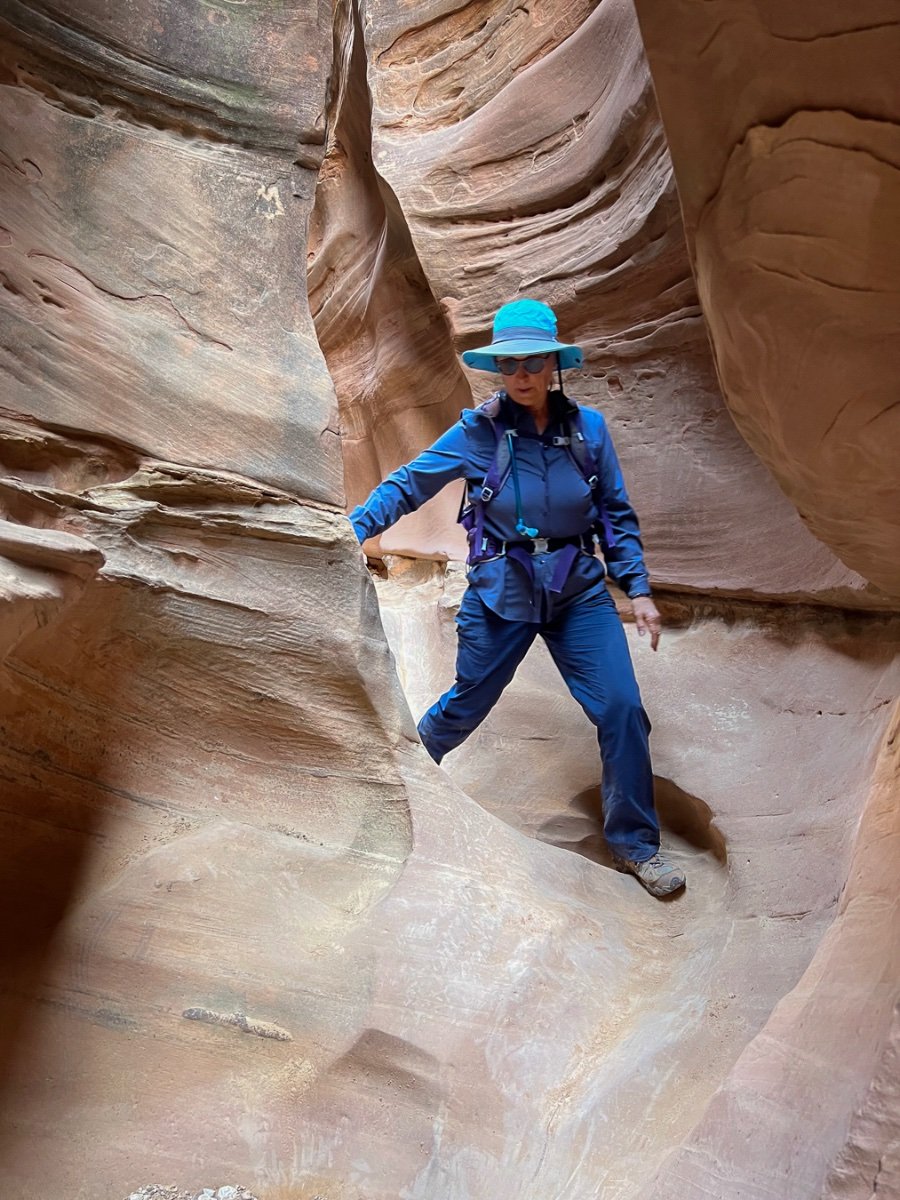
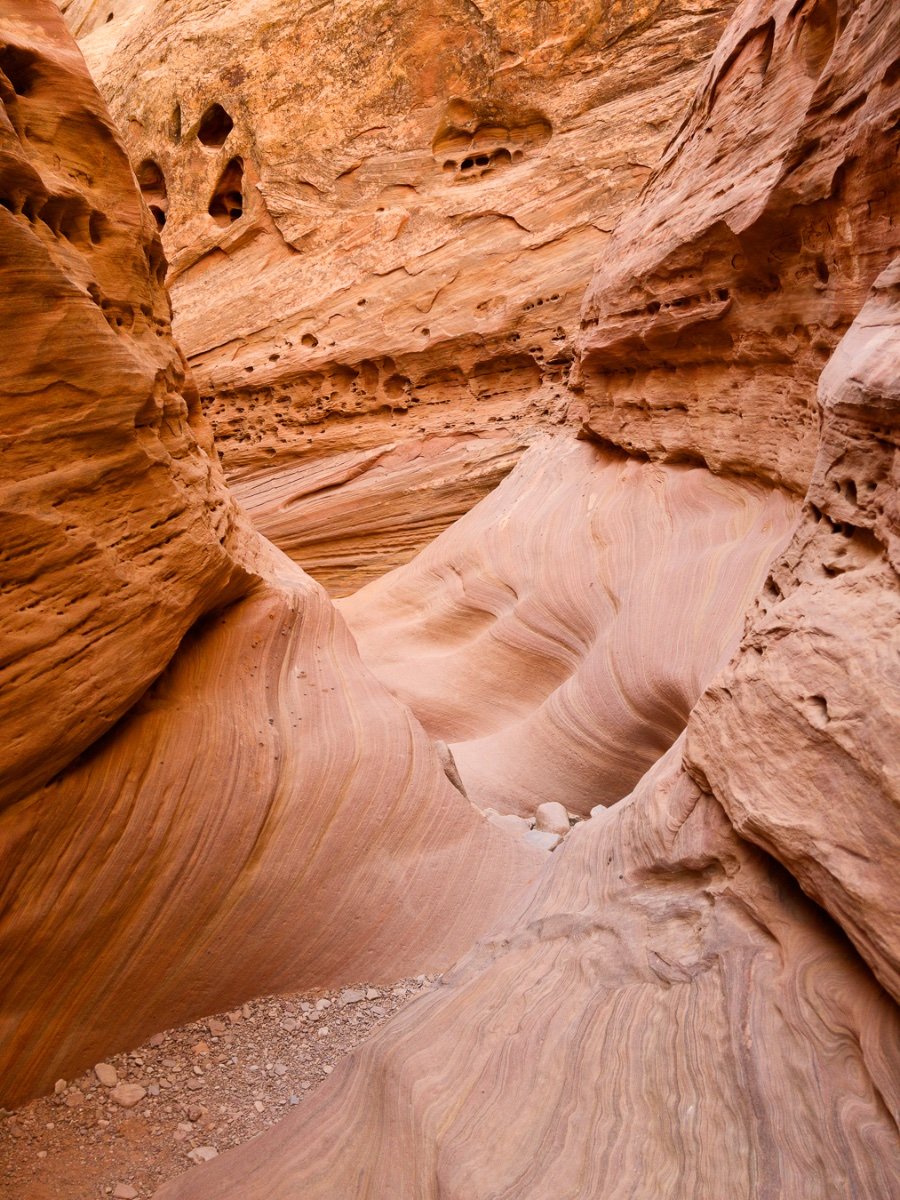
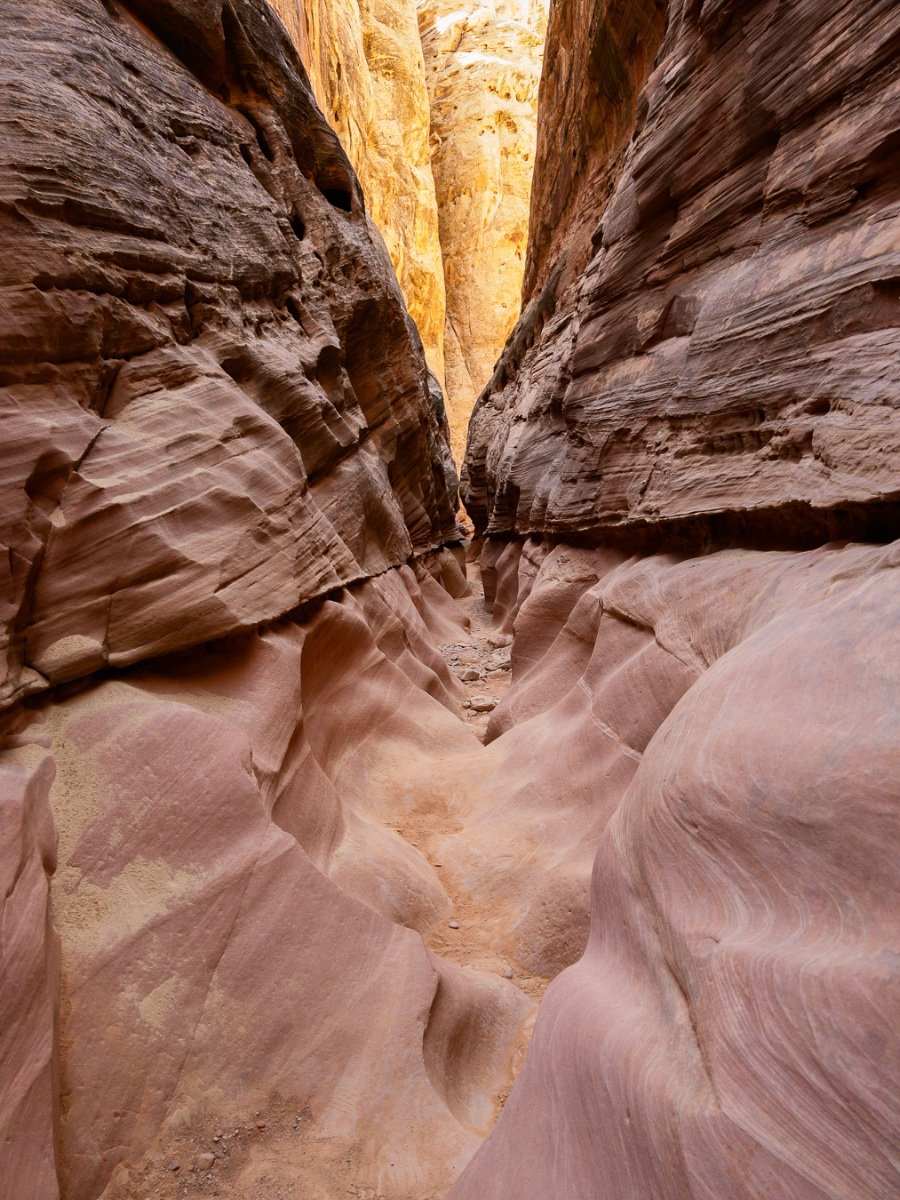
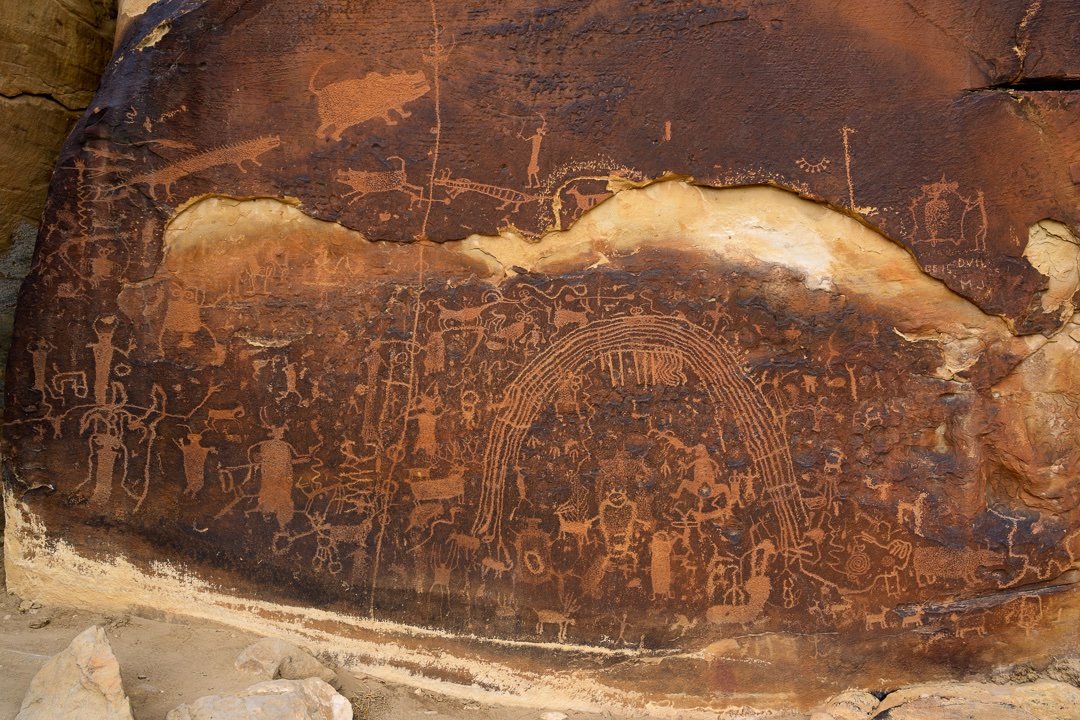
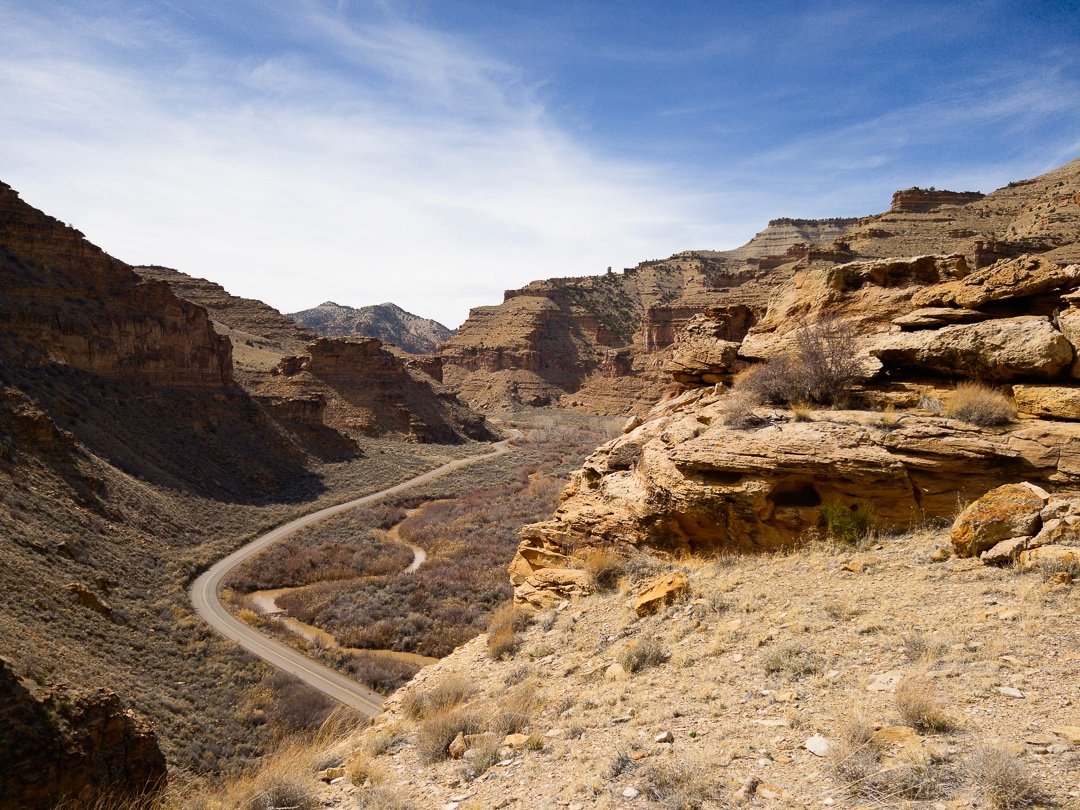
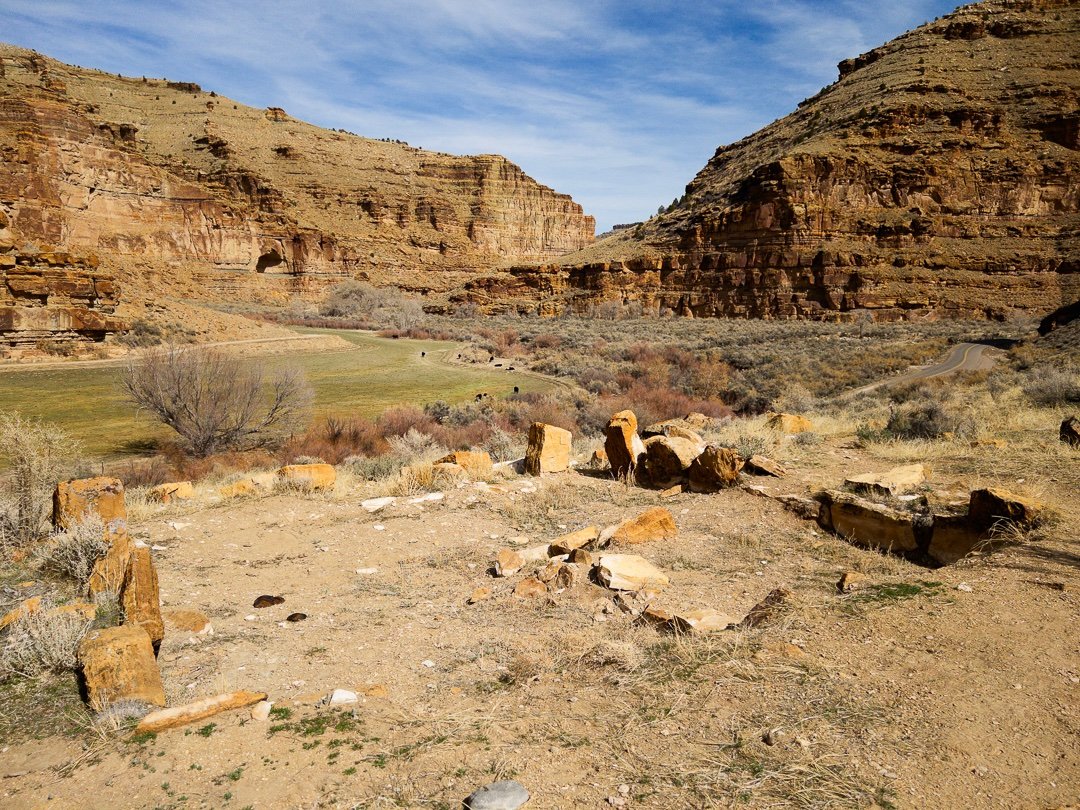
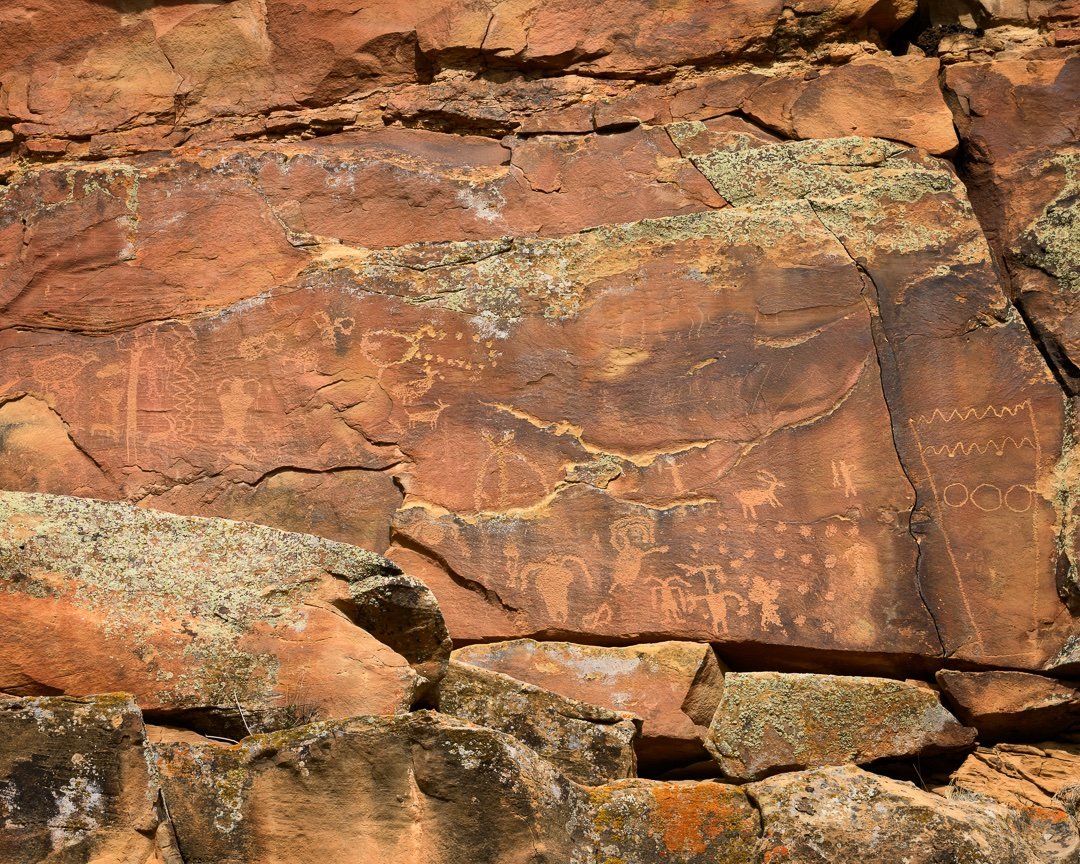
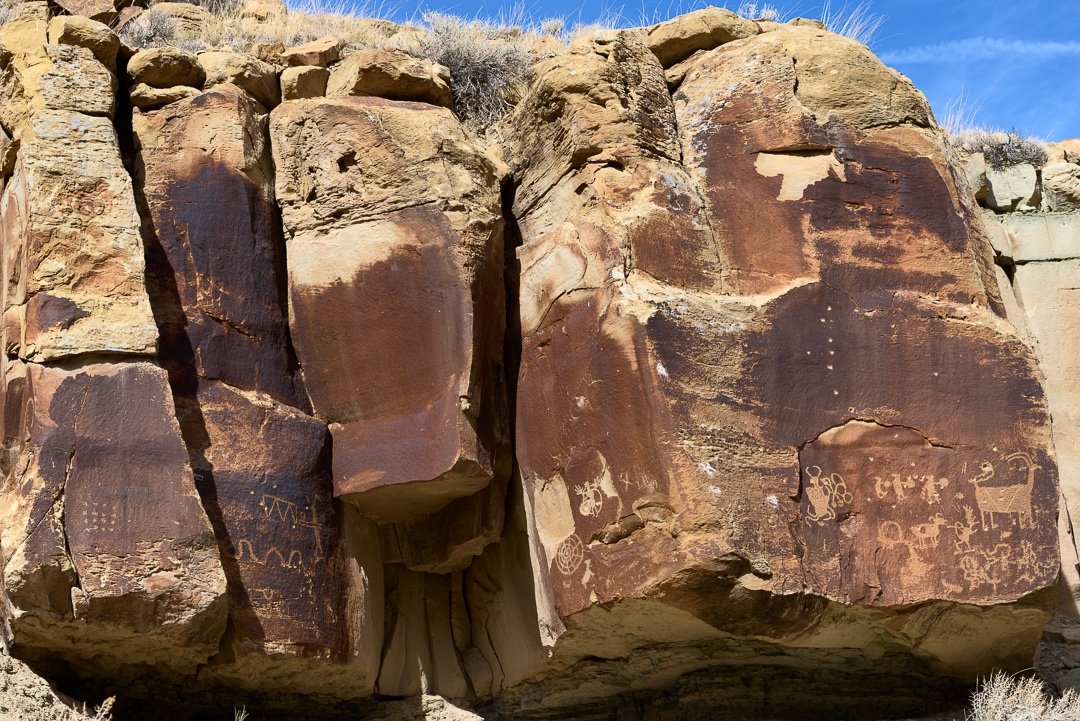
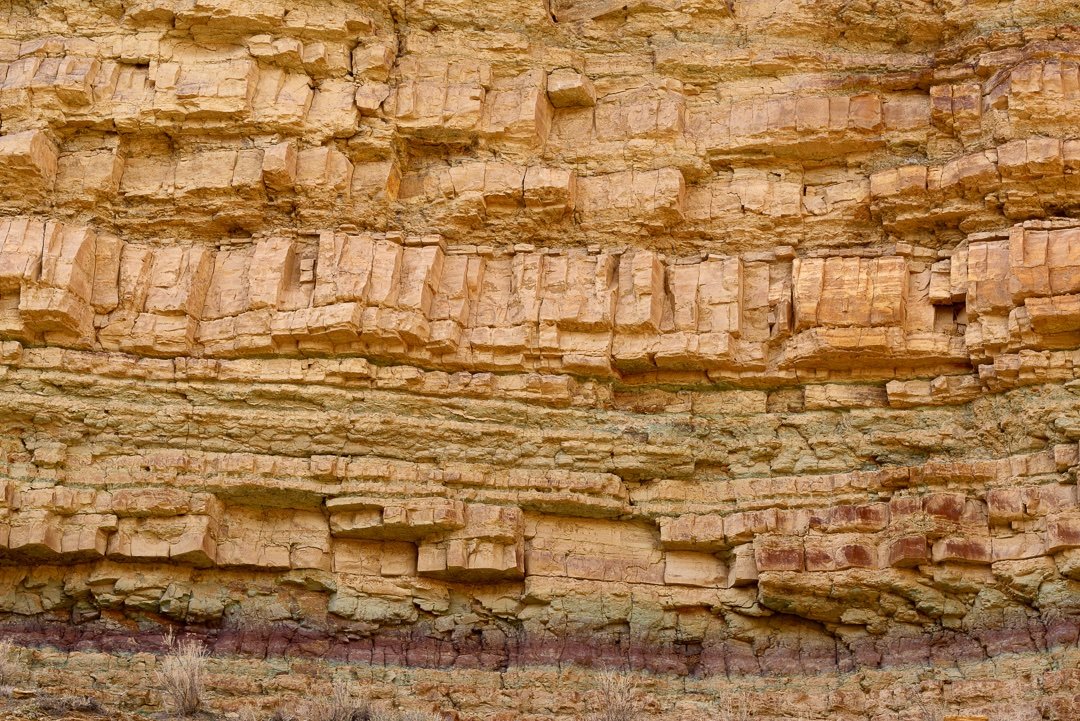
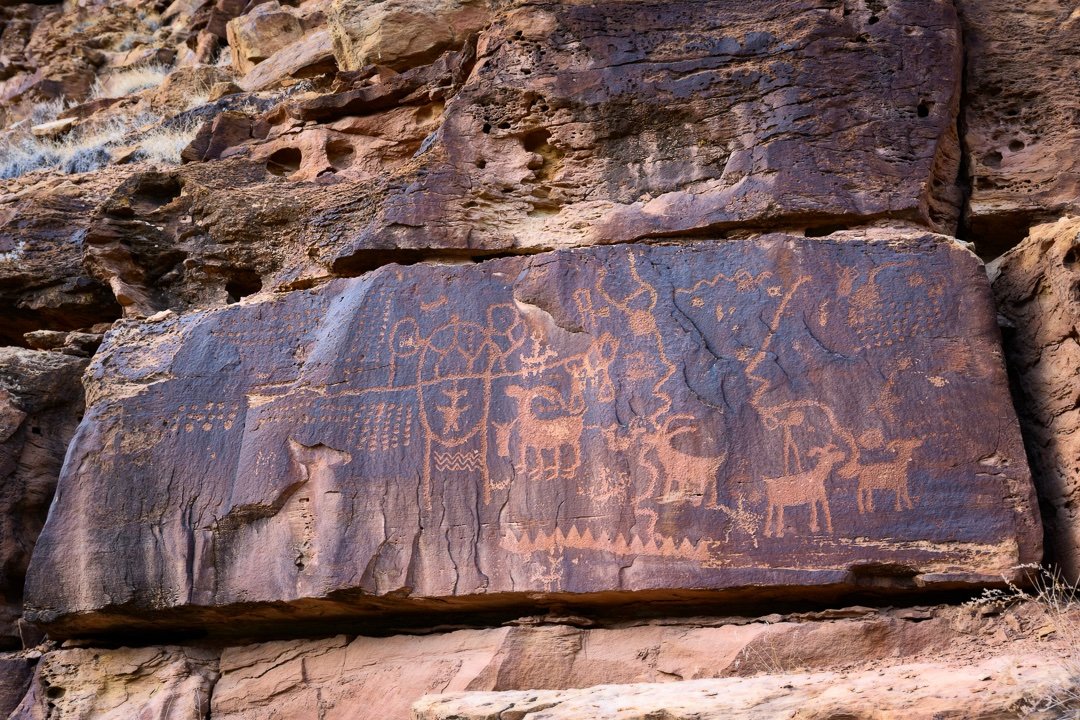
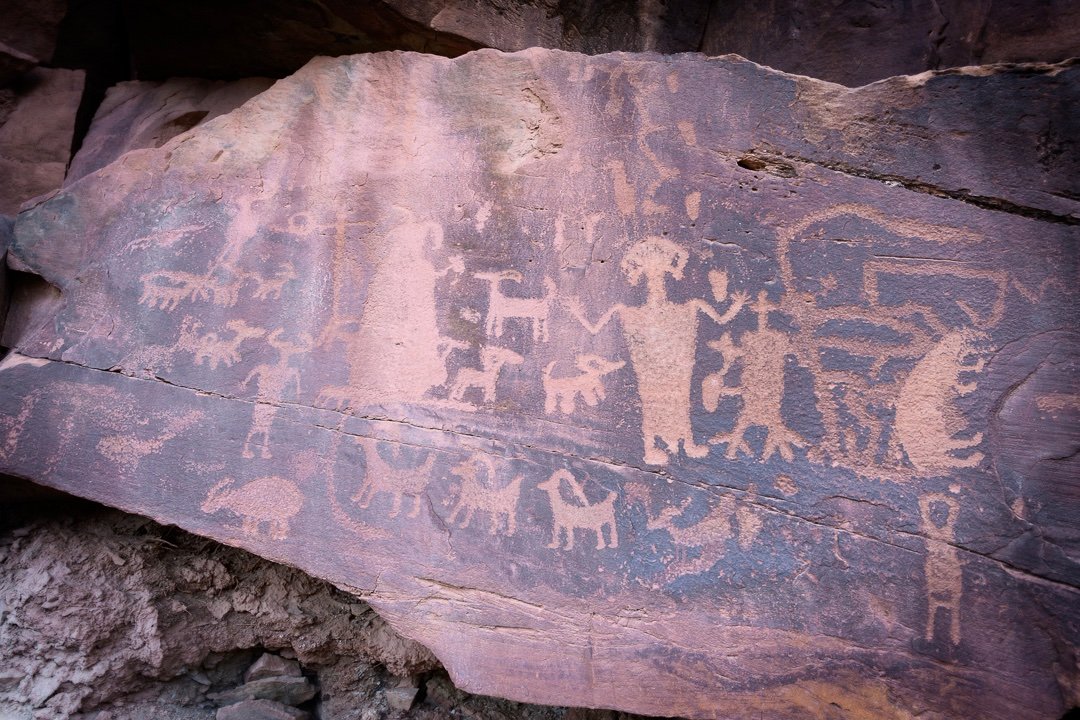
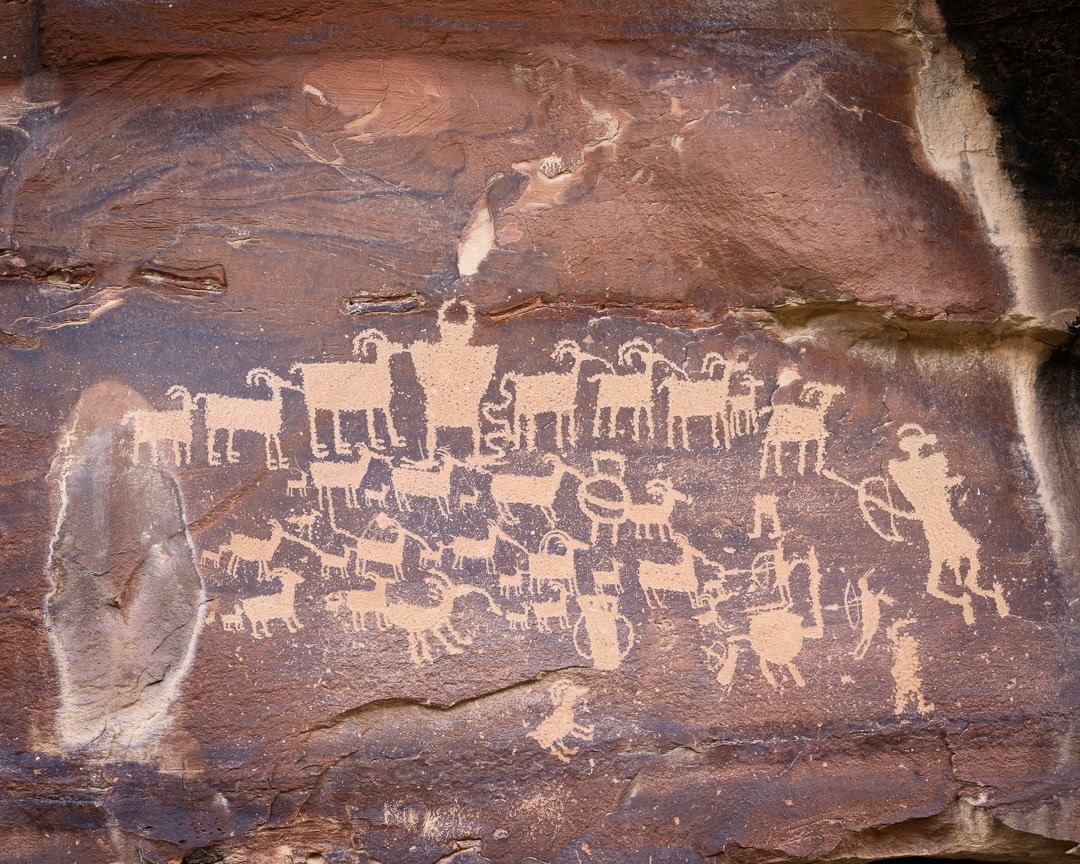
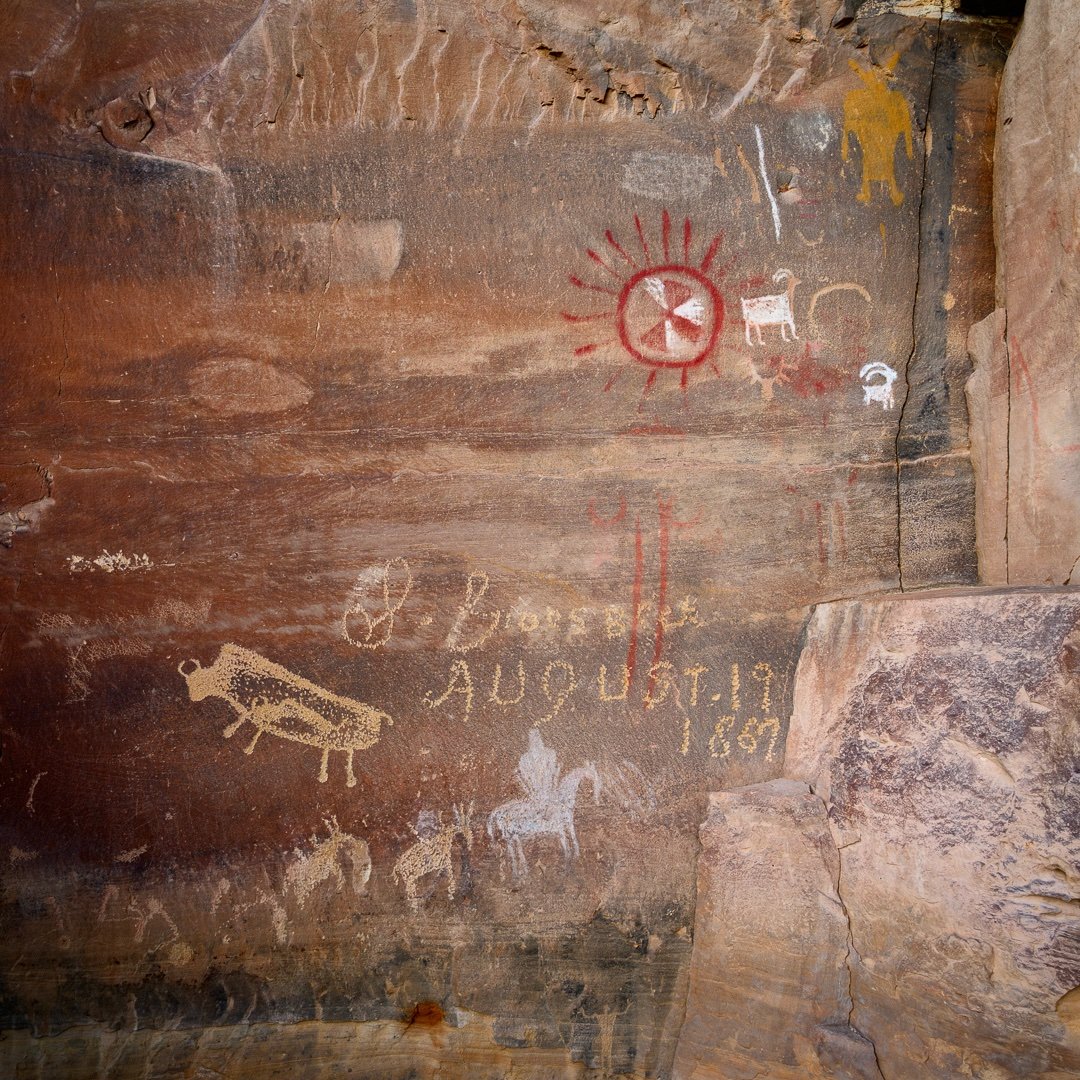
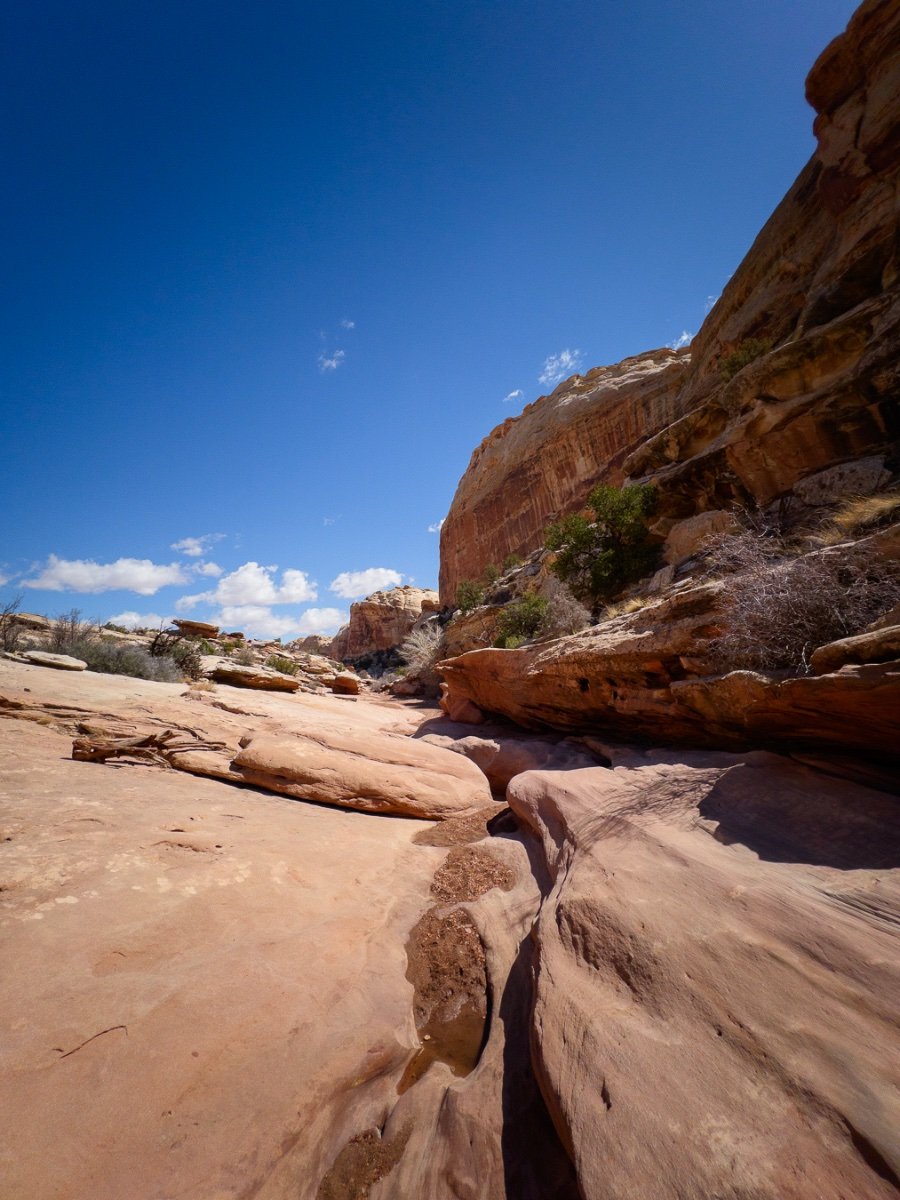
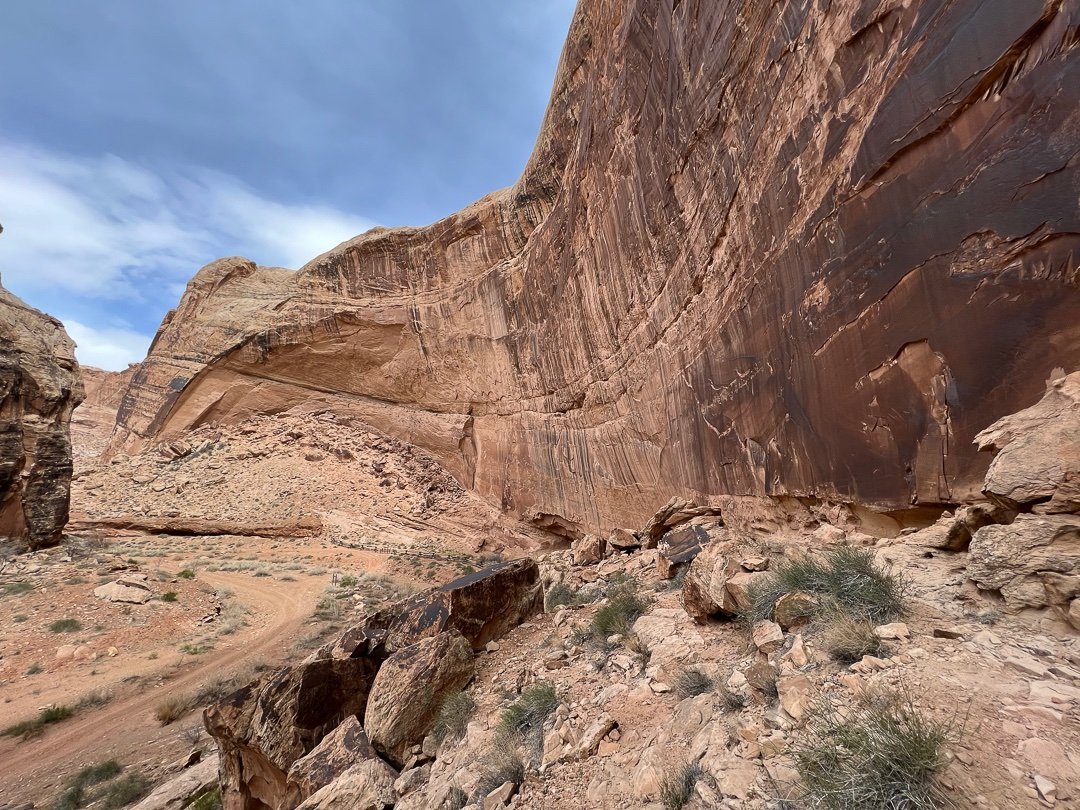
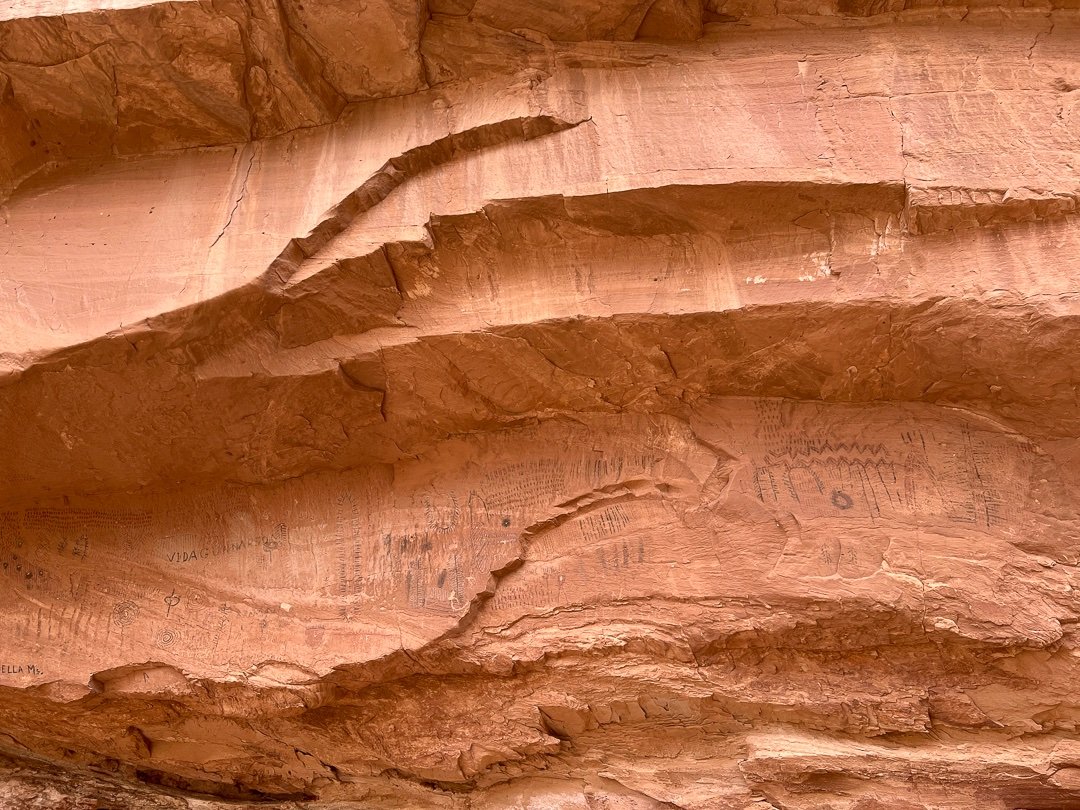
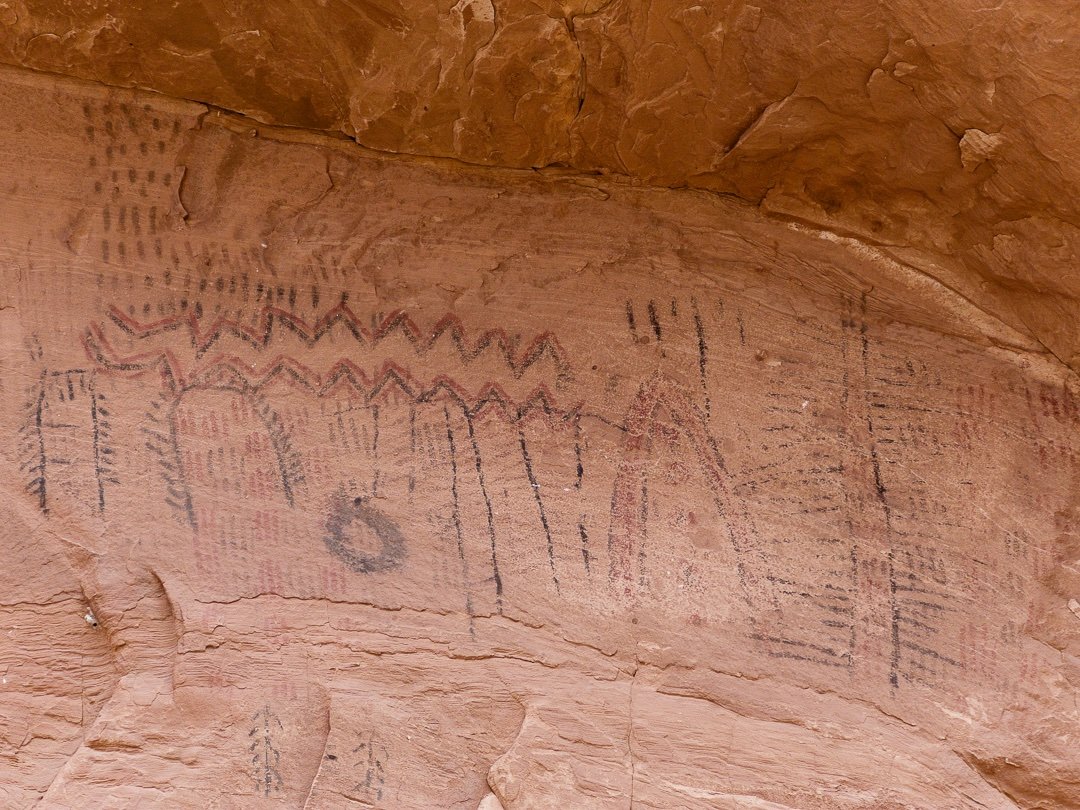
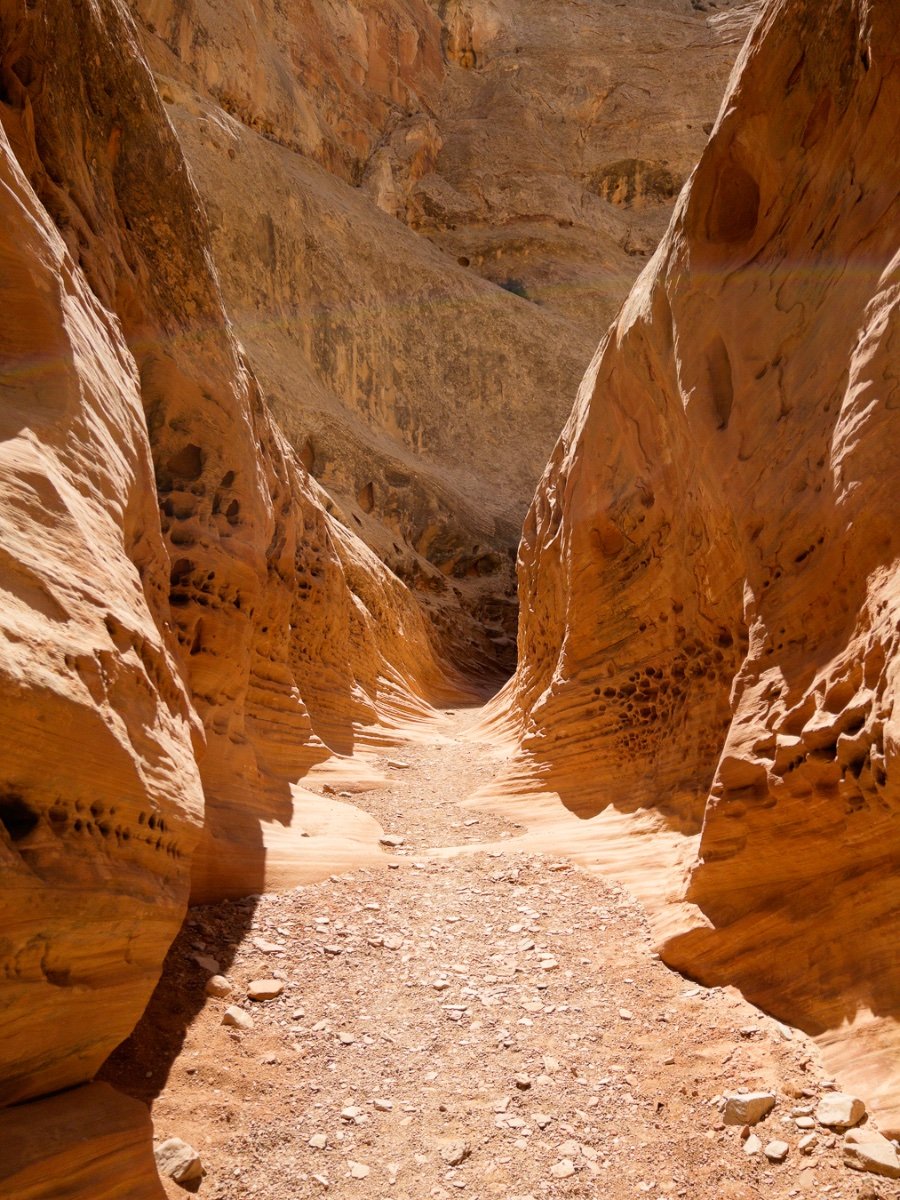
Returned a few weeks ago from a trip into Utah again, this time hitting a few places that have been on my bucket list for years. Weather was not ideal but we made the best of it, great hikes and adventures with some photos. Thanks for looking. Boondocking in the San Rafael Reef Formation known as the Temple Mount, San Rafael Reef View looking southwest to the Henry Mountains and San Rafael Swell & Reef Trudi peeking out of Oliver Hike in Wild Horse Canyon, San Rafael Reef Head of Sinbad Pictograph panel, San Rafael Swell Another view of the same panel above San Rafael Reef canyon wall, land of the tortured stone More tortured stone from San Rafael The textures in some of these rock walls is amazing from centuries of weathered torture 😂 via hike in the Little Horse Canyon More rock walls from Little Horse Canyon Trudi hiking through the slot canyon section of Little Horse Canyon More slot canyon views from Little Horse Canyon A geologist dream scape I suppose, most slot canyon of the Little Horse The Rochester Panel Detail from the Rochester Panel
 5 points
 -
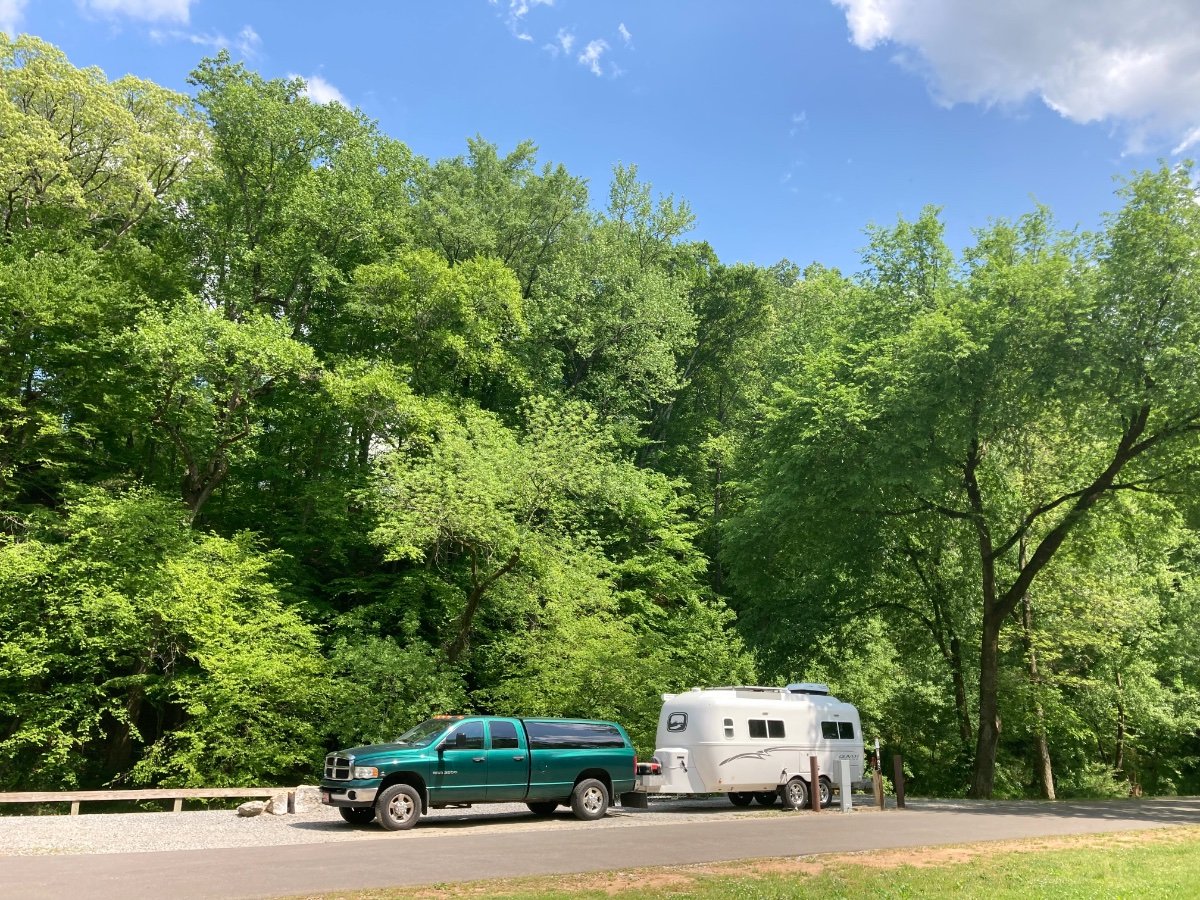
1300 miles later and we arrived to a spot most of you will recognize. David Crockett State Park. Heading to Hohenwald for service tomorrow and will stay at the campground at the Sales Office. Trip was uneventful, here are my observations towing with the diesel vs. Tundra: 1) MPG - 16 total trip. As high as 16.4 in Kansas with a side wind. Even with the higher cost of diesel, I figured I saved about $15 in the cost of fuel on this trip. If You had to buy DEF it would be less. 2) Ride - a bit stiffer than the Tundra but not bad. Zero jounce as could be expected 3) Braking- much better with the Dodge but not for the reason I expected. The aftermarket brake controller I had installed in the Dodge worked far better than the integrated unit that came in the Tundra. Much better adjustability and much more power. I could never get the trailer brakes to lock up with the controller in the Tundra but it was easy with the aftermarket controller. Tundra forums cover this issue if anyone is interested. I will be ordering a aftermarket controller for the Tundra when I return home. 4) Transmission - towing with a stick is great. Made me wish that Toyota offered a 6 spd manual. Oh well. 5) overall - The Dodge is way more truck than I need for towing the Elite II. While a fun experiment, the Tundra will get put back in place soon as the Dedicated TV for the Ollie. The Dodge will go back to towing the car hauler. I can see where if you were hauling a lot of gear in the bed the 1 ton ( or a 3/4 ton) would make a lot of sense or if you towed a lot in the mountains a diesel would make sense or if the cost of diesel ever comes down it would make sense for the fuel economy but since the Tundra can’t tow the car hauler and Dodge no longer makes diesel trucks with manual transmissions, its back to the Tundra for towing the Ollie. Oh, and we stumbled across the worlds largest ball of sisal twine in Kansas. Clark Griswald was nowhere to be found.
5 points
-
Having an off-season can have advantages. Draining and storing with dry tanks appears to extend the life of tanks and components. We camp any time of the year so there is no off season. I do drain the fresh tank if it’s going to sit for more than 4 weeks and clean out the hot water tank annually, otherwise everything is full and ready to go. Mike5 points
-
Any wet tank will corrode. Just a matter of time and the rate. My industrial water treatment background taught me that the best way to prevent corrosion in a tank that was not is use is to drain and air dry it. Hence, at the end of the season, with a cold hot water tank, I close off the bypass valve, relieve the pressure at the Temperature/Pressure Relief Valve, remove the anode to drain the tank, and flush the tank with my home made flushing wand. I do not re-install the anode to let the tank air dry. No water, no corrosion, no anode oxidizing away for no purpose. Next season I briefly flush the hot water tank, reinstall the anode, open the bypass valve to fill the tank (With the Pressure/Temperature Relief valve open, and flush out all air. Then reset the valves and move on to having fun.5 points
-
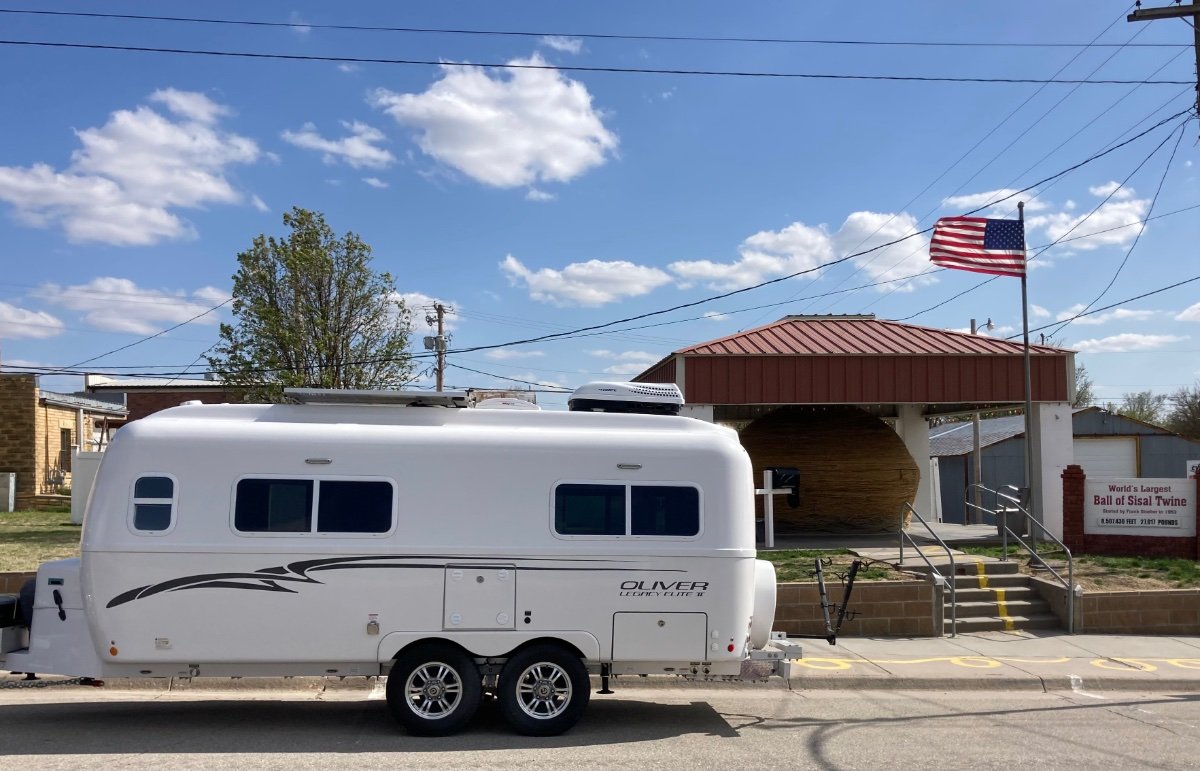
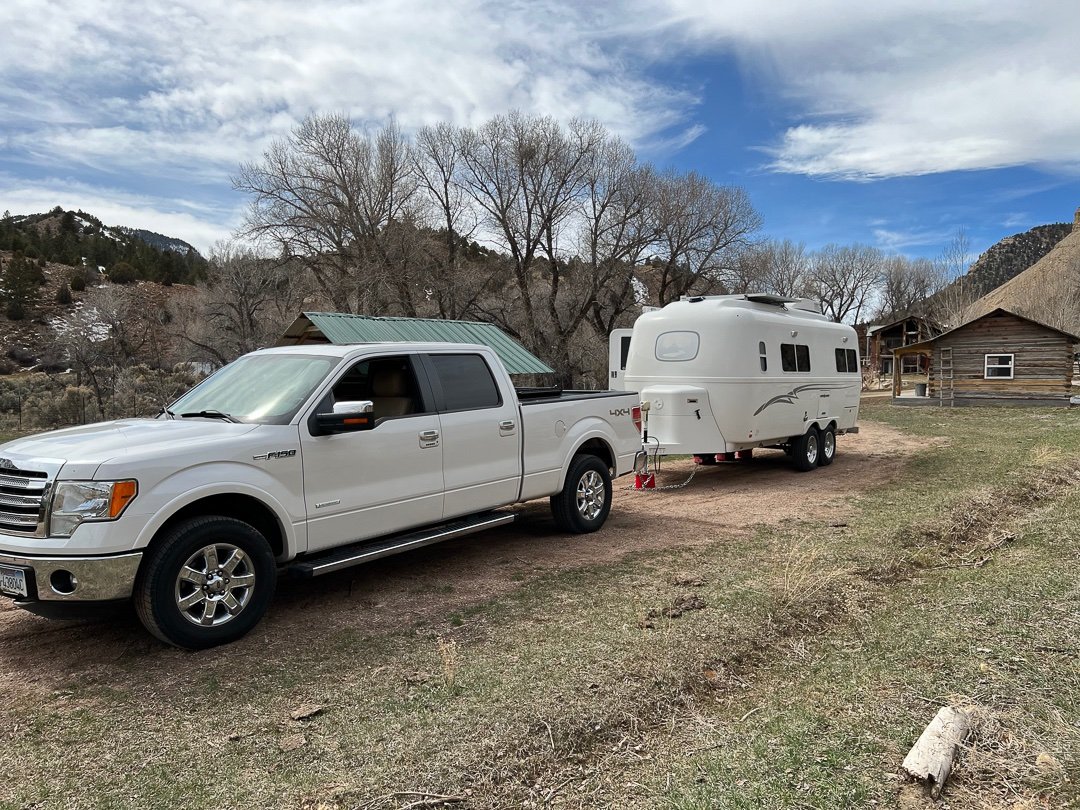
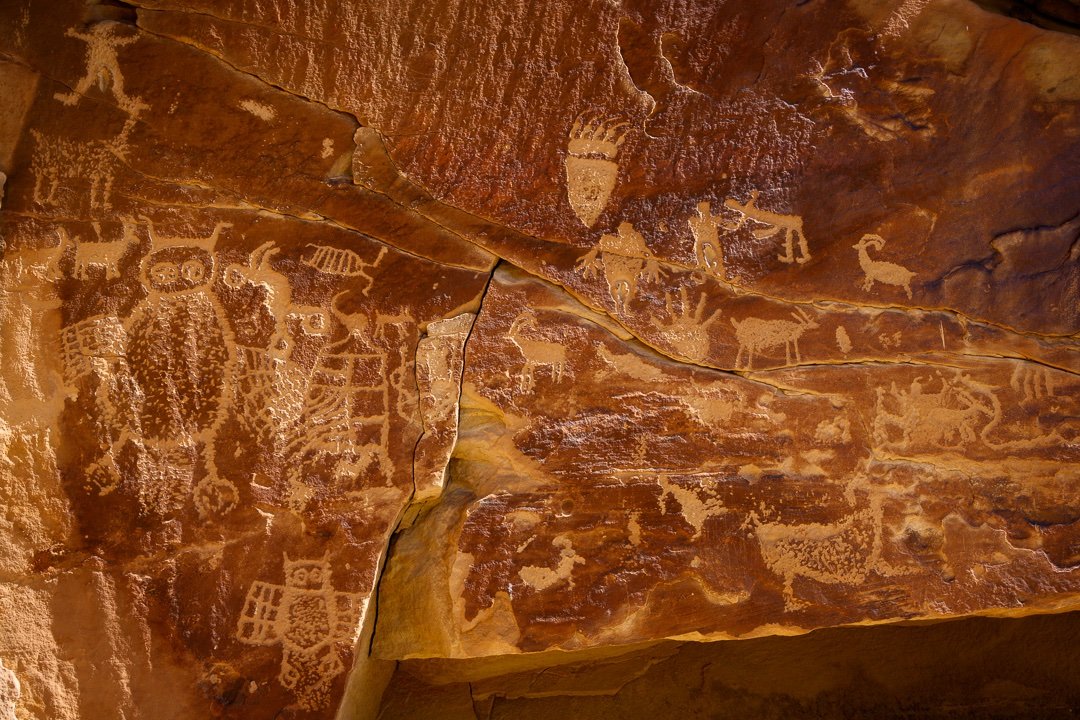
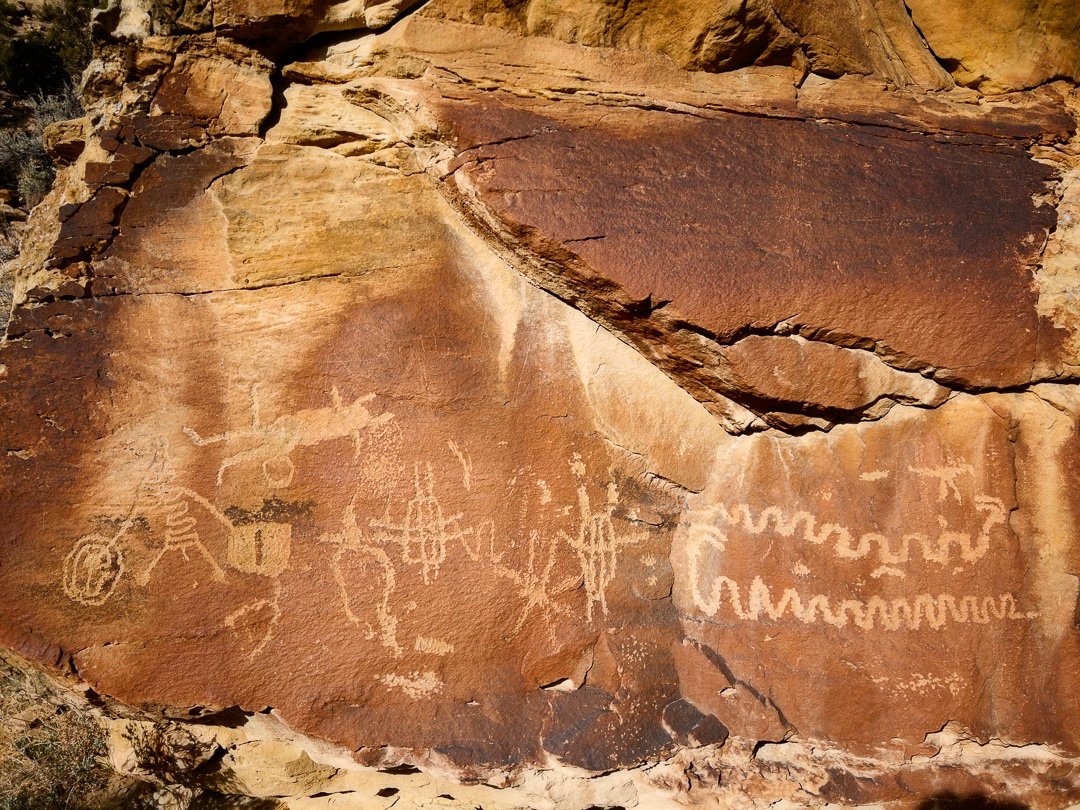
Adding a few more from the trip mostly from Nine Mile Canyon in the Book Cliffs area. Stayed a couple of nights at the Nine Mile Ranch which is around 7,000 feet elevation and were told we were the first campers as they had just opened for the season. They do have cabins and bed & breakfast facilities here. Very nice people, seems to be well run but you wouldn't mistake it for a 5 Star facility, considerably more rustic than that. No cell service in here and it is NOT nine miles long, nor 9 miles from anything. No idea where the name came from. All BLM land interspersed with private ranch land and very undeveloped. There are no other camping facilities throughout the canyon and apparently pull off camping is discouraged however there are some gravel roads that intersect from the paved canyon road where boodocking is a possibility. The canyon road itself is smooth as a baby's butt, but go slow there are numerous large dips due to flash floods from adjoining creeks should anyone decide to go in here. Nine Mile Ranch camground View of the Nine Mile Canyon looking west Ancient Freemont Culture Village Petroglyph Detail of Book Cliffs geology and rock formations The Big Hunt The Big Bison petroglyph pictograph Larger view of pictograph above with more recent cowboy inclusions Known as the Owl petroglyph Wild Horse Canyon view Large group site in the San Rafael Reef area, not recommended during the weekends. Note the only facility are a few picnic tables and pit toilets. NO WATER anywhere within miles. Bring your own. Black Dragon Canyon Large Pictograph in Black Dragon Canyon Detail from above Another detail Little Horse Canyon in the slot Another long view of the Blue Mountains and San Rafael Swell
5 points
-
An hour ago, we gained member number 7,000! Welcome to the board, @SusanJ. And thank you, to all the folks here who make this forum such a great place to learn and share.
3 points
-
Now I see why your pictures are so amazing.3 points
-
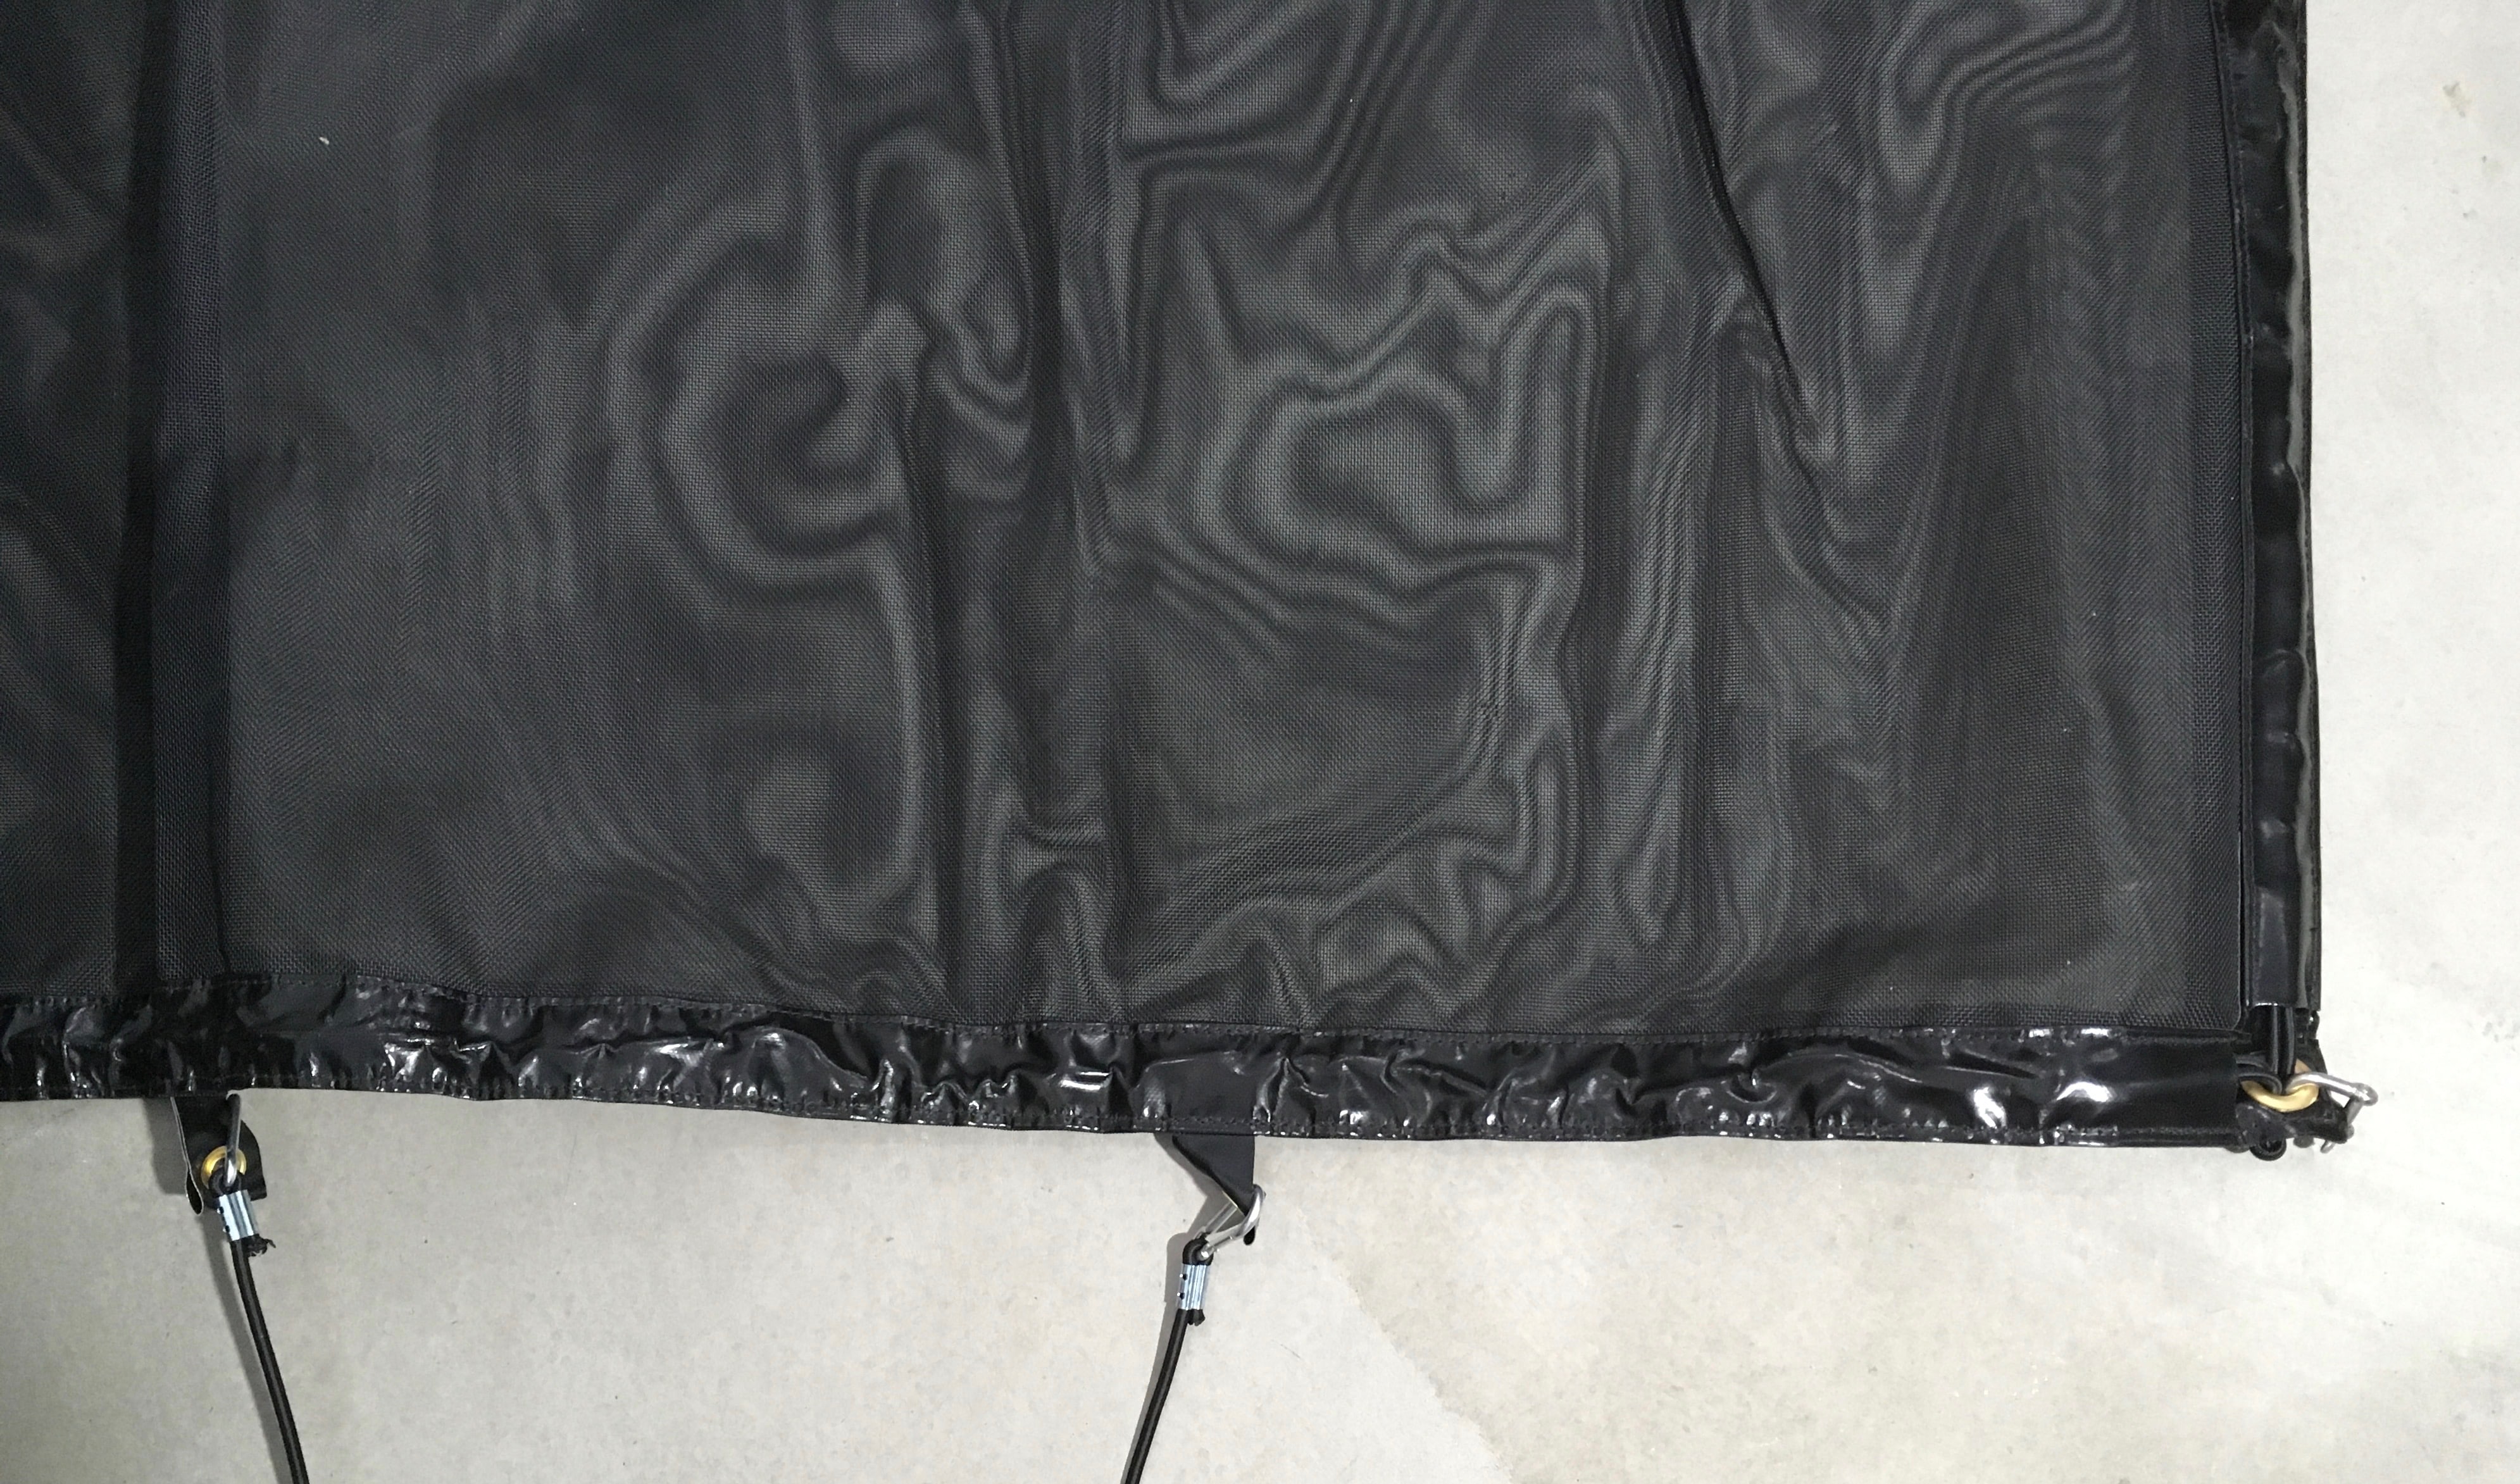
I agree. I spoke with the company directly on Friday and the material on the vertical mount is "loose" to avoid debris bounce. And the wings will have flex as they are only attached in the center, which should absorb impacts from anything larger than a pebble. But well see. I might take the plunge and test it out. If it doesn't work/fit as planned ill try to sell it to a someone with a boat.3 points
-
Thanks, and agreed its impossible to get enough of this place. True about the Olivers as well, very easy to get into almost any space and back country roads as long as they don’t too extreme.3 points
-
No, not going to make the Rally this year, heading to MI for a few months. Hopefully will make it next year and meet many more Oliver owners then.2 points
-
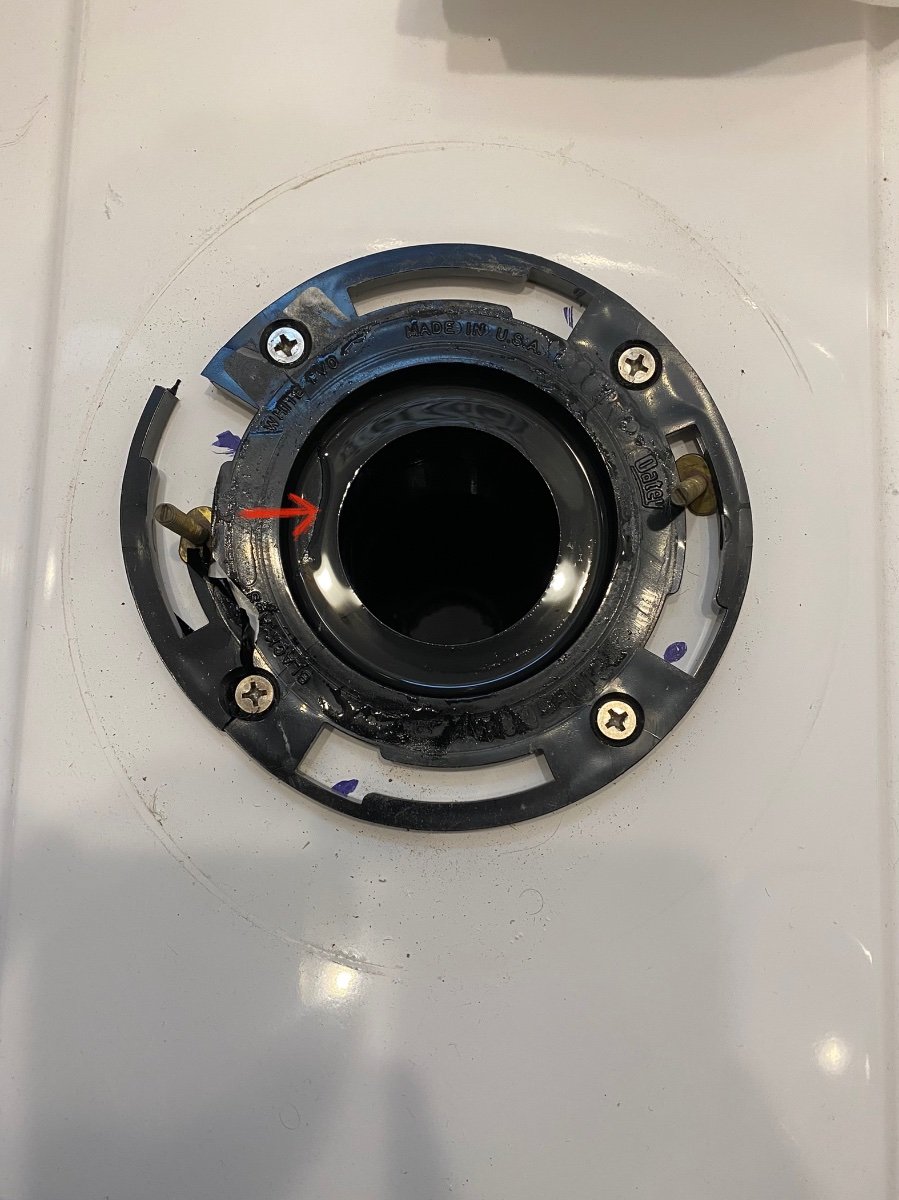
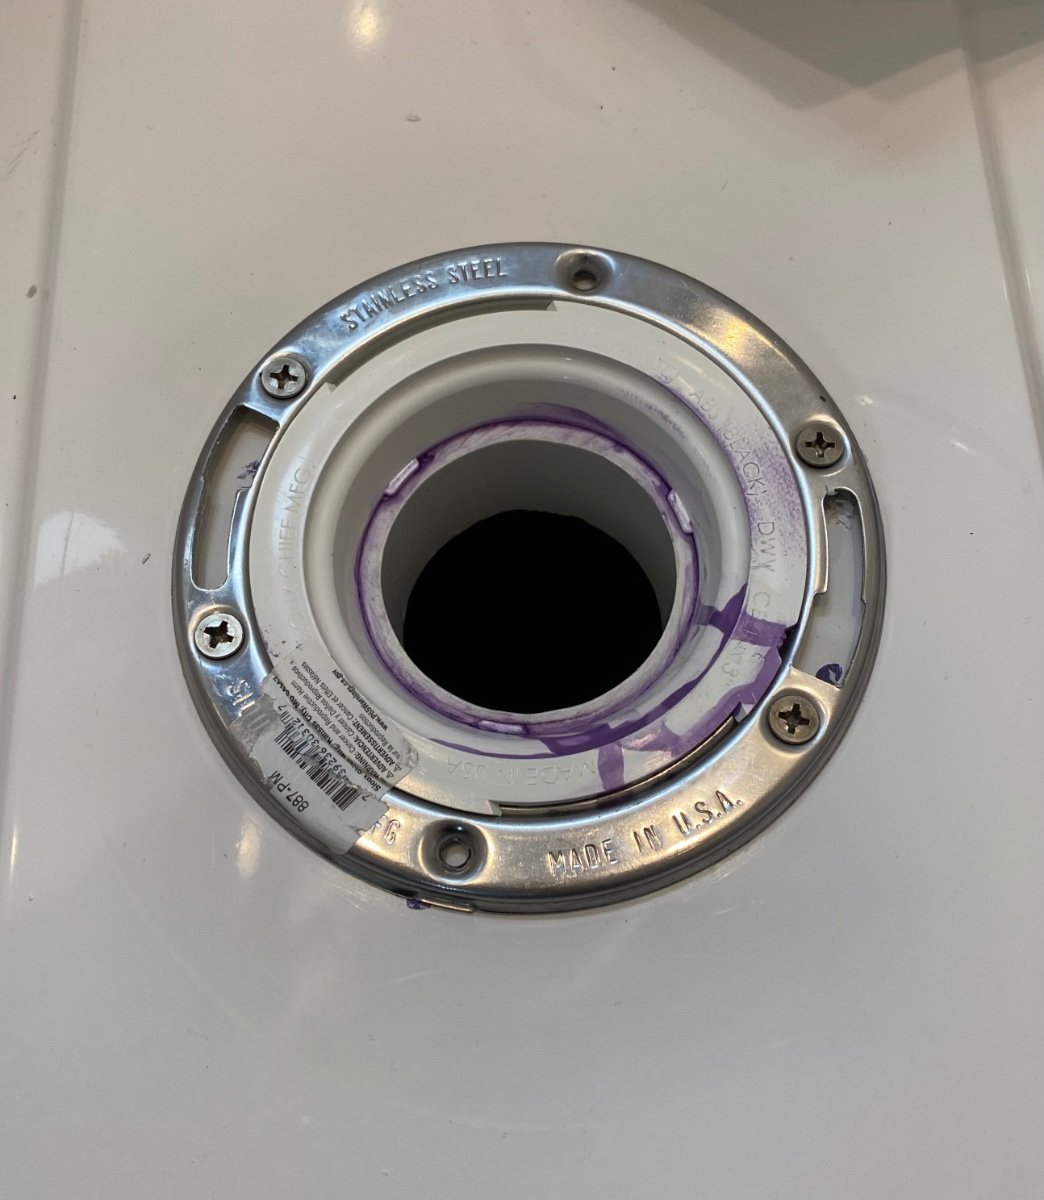
Removed the toilet and the first photo shows what the original all plastic flange looked like, cracked and broken in multiple places, including the countersunk screw holes in the plastic flange. Might have been over-stressed when initially built. I removed the old flange and replaced it completely with an upgraded flange with a metal mounting ring, shown in the second photo. Had to drill new mounting holes in the floor, and because of the limited distance between the floor level and the grommet on the top of the black tank, it took some cutting of the flange collar on the underside of the flange to shorten it up a bit, and then solvent welding to adapt to a short piece of 3” PVC pipe that gets forced into the rubber grommet on the top of the black tank. The purple streaks are a bit of dried residue from the primer used on the PVC for solvent welding. Hidden by the toilet once it’s back in place. This fix took care of the rocking toilet and also the small leak that would happen only when the toilet was flushed. Water was seeping between the toilet/seal/flange/floor because of the broken/cracked flange. The red arrow in the first photo shows the crack in the flange collar itself. That crack was letting water leak onto the top of the black tank and then down between the hulls, and then dripping out the forward street side weep hole scupper under the hull. The drip only happened when the toilet was flushed. It was good to see that the floor itself under the toilet is a very thick built up panel with fiberglass over a thick core material, so the flange screws thread directly into that very well. This is a pain in the butt project that I’ll bet eventually all Ollie owners will have to do. Your toilet flange is either already broken and you don’t know it yet, or it’s about to break.
2 points
-
OUTSTANDING!!! Thanks for sharing these photos and your adventure. You surely inspired some folks to get back out there.2 points
-
Richard...outside, and clear of flammable items: I have tried a little gasoline in a triggered oil can. Once you have identified the carburetor, spray just a little gas into the top opening of the carb. This is assuming you have spark. I have been lucky a couple of times by doing this that the engine sucks enough fresh gas on it's own to start and run. I have to say that I agree a new carb is the easiest and least frustrating solution. It sure teaches you to use a gas storage solution at the end of the season, and then drain the gas to boot. Glad you got it free.2 points
-
Unfortunately the last I heard, Matteo (sp?) is no longer with the company. Hopefully Micro-air will have another employee attend our Rally in the future and it would certainly be nice if the new employee is as helpful, kind and hard working as Matteo. Bill2 points
-
The aluminum water heater tank and anode are the only components that can be adversely affected by a chlorine solution. Unless you can remove the safety relief valve, the only practical way to induce a solution into the water heater is to pump it in using the winterizing valve settings. I would premix the solution in a large enough container and draw it into the water heater this way. Beginning with an unpressurized water system: 1. Start with all water faucets closed, the rear inlet capped, and the water heater bypass valve normalized. (Not bypassed) 2. Remove w/h anode for draining. 3. Lift to open the safety relief valve lever on the water heater to vent the tank and allow all water to drain. Note that this value must remain open until the very end . 4. After water tank has completely drained, reinstall anode. 5. Connect a drawtube from solution container to rear inlet and use water pump to draw solution in until it starts coming out the w/h safety relief valve. Note that the solution should only enter the water heater if all other water outlets are closed. At this point, how long you leave the solution sit in the tank isn't that important. Go ahead with draining and refilling the tank with freshwater finalizing by closing the relief valve lever.2 points
-
Great pictures! I’m motivated for a return trip to Utah. Our Olivers give us a lot of flexibility on where we can go and where we can camp. Mike2 points
-
Also just a quick word about the camera gear sensing that many on this forum have a deep interest in photography to one degree or the other. These photos were taken with either a Nikon Z7 mirrorless, Nikon D810 or my iPhone 13 shooting in RAW and developing in Lightroom then off to Photoshop for final edits. For the iPhone I use either Pro Cam or Halide for the app to capture in RAW, the difference between either of these two and the built in camera is night and day but does require some post production work. Hopefully this will be helpful for those interested.2 points
-
Let me see - wind, rain, hail, sand, dirt, bugs, gloom of night, harsh sun, tree sap, repeat (not necessarily in that order) - what could go wrong? "harsh chemicals" - define please. For what its worth, I don't usually consider anything that I can leave my unprotected hand in for an hour unduly "harsh". But, then again, you should see my hands 😁. "power washer" - do they mean that poor pathetic electric power washer or the 5,000 psi job that will take your skin off? In any case - is it ever wise to use a power washer of virtually any sort on electrical equipment? I wash my solar panels with the same stuff I use for the rest of the Ollie and for my cars and for my truck. I don't see any difference. But, then again, my eyes are getting to be a lot like my hands 😇. Bill2 points
-
You are going to love your new Ollie!2 points
-
Such a beautiful part of the country. Camped on the south side of 70 a few years ago and did some long gravel rides on the north side. Returning is definitely on the list!1 point
-
I used a file and chamfered the leading outer edge of the 3” pipe and then put some dishwashing liquid soap on the pipe and grommet and it went in with a little effort. The seal rests on the flat plastic ring that’s to the inside of the stainless ring and it seems to seal well. Unfortunately we won’t be at the rally this year though.1 point
-
I also installed the Micro Air EasyStart on my Houghton AC. I wanted to ensure that my Honda 2200 which is set up with propane conversion would be able to start the AC from eco-mode. In my mind it defeats the purpose of the the inverter generator if it can not function from eco-mode. I also think it's make or break when running off batteries with the 2000 watt inverter. The captured inrush amps before installation was 67.1 and 48.9 after install. Paul1 point
-
It's unnecessary as long as your power source can handle the inrush current, while also providing power for potentially other demands. I saw a Houghton table somewhere that the minimum generator size to reliably operate the 3400 was a 2200 watt class like a Honda or Yamaha. Key word being "reliably". A soft starter can still provide benefit.1 point
-
Thanks really appreciate it. Get out there is what its all about too.1 point
-
Houghton doesn't recommend an ez start. In fact, they state it is unnecessary: https://www.recpro.com/rv-air-conditioner-low-profile-13-5k-quiet-ac-with-heat-pump-remote-non-ducted/?campaignid=12146829544&adgroupid=117783579318&keyword=&gclid=CjwKCAjwgr6TBhAGEiwA3aVuIcKe6D0oigh3GDSNb4e9P00xo3AdmwiJYtowirJsZ5b0B_Ql9ESIoBoCwFEQAvD_BwE
1 point
-
For grins have you talked to the EZ-Start gentleman that has installed a bunch of them at the Rally's? Maybe he has already fried a Houghton and has since figured out the for sure THE ONE way to meet your goal of not "Frying your new unit". My approach comes from being a Mechanical Engineer. For electrical matters my wife June is about 50 years ahead of me and my slide rule. 🙂1 point
-
Wonderful pictures. Amazing rock art!1 point
-
Thanks a bunch, glad it was helpful. I will not be able to make it to the rally however. Good luck with your photography endeavors though.1 point
-
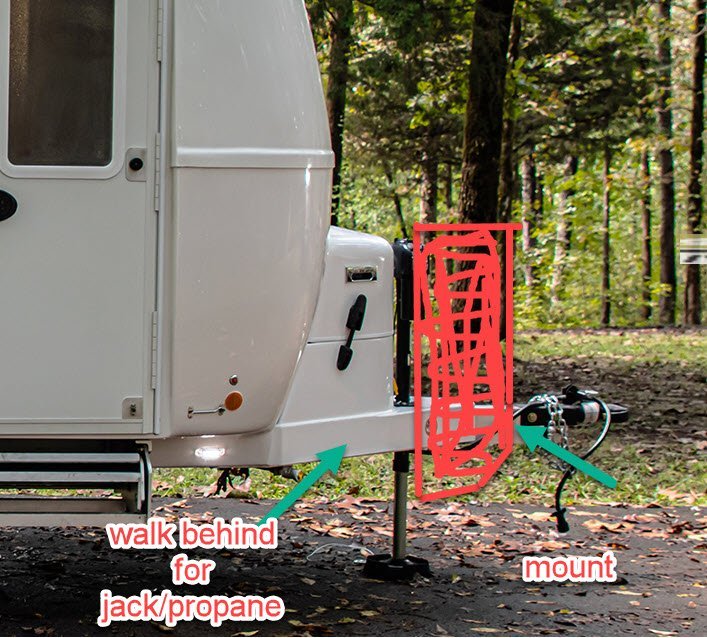
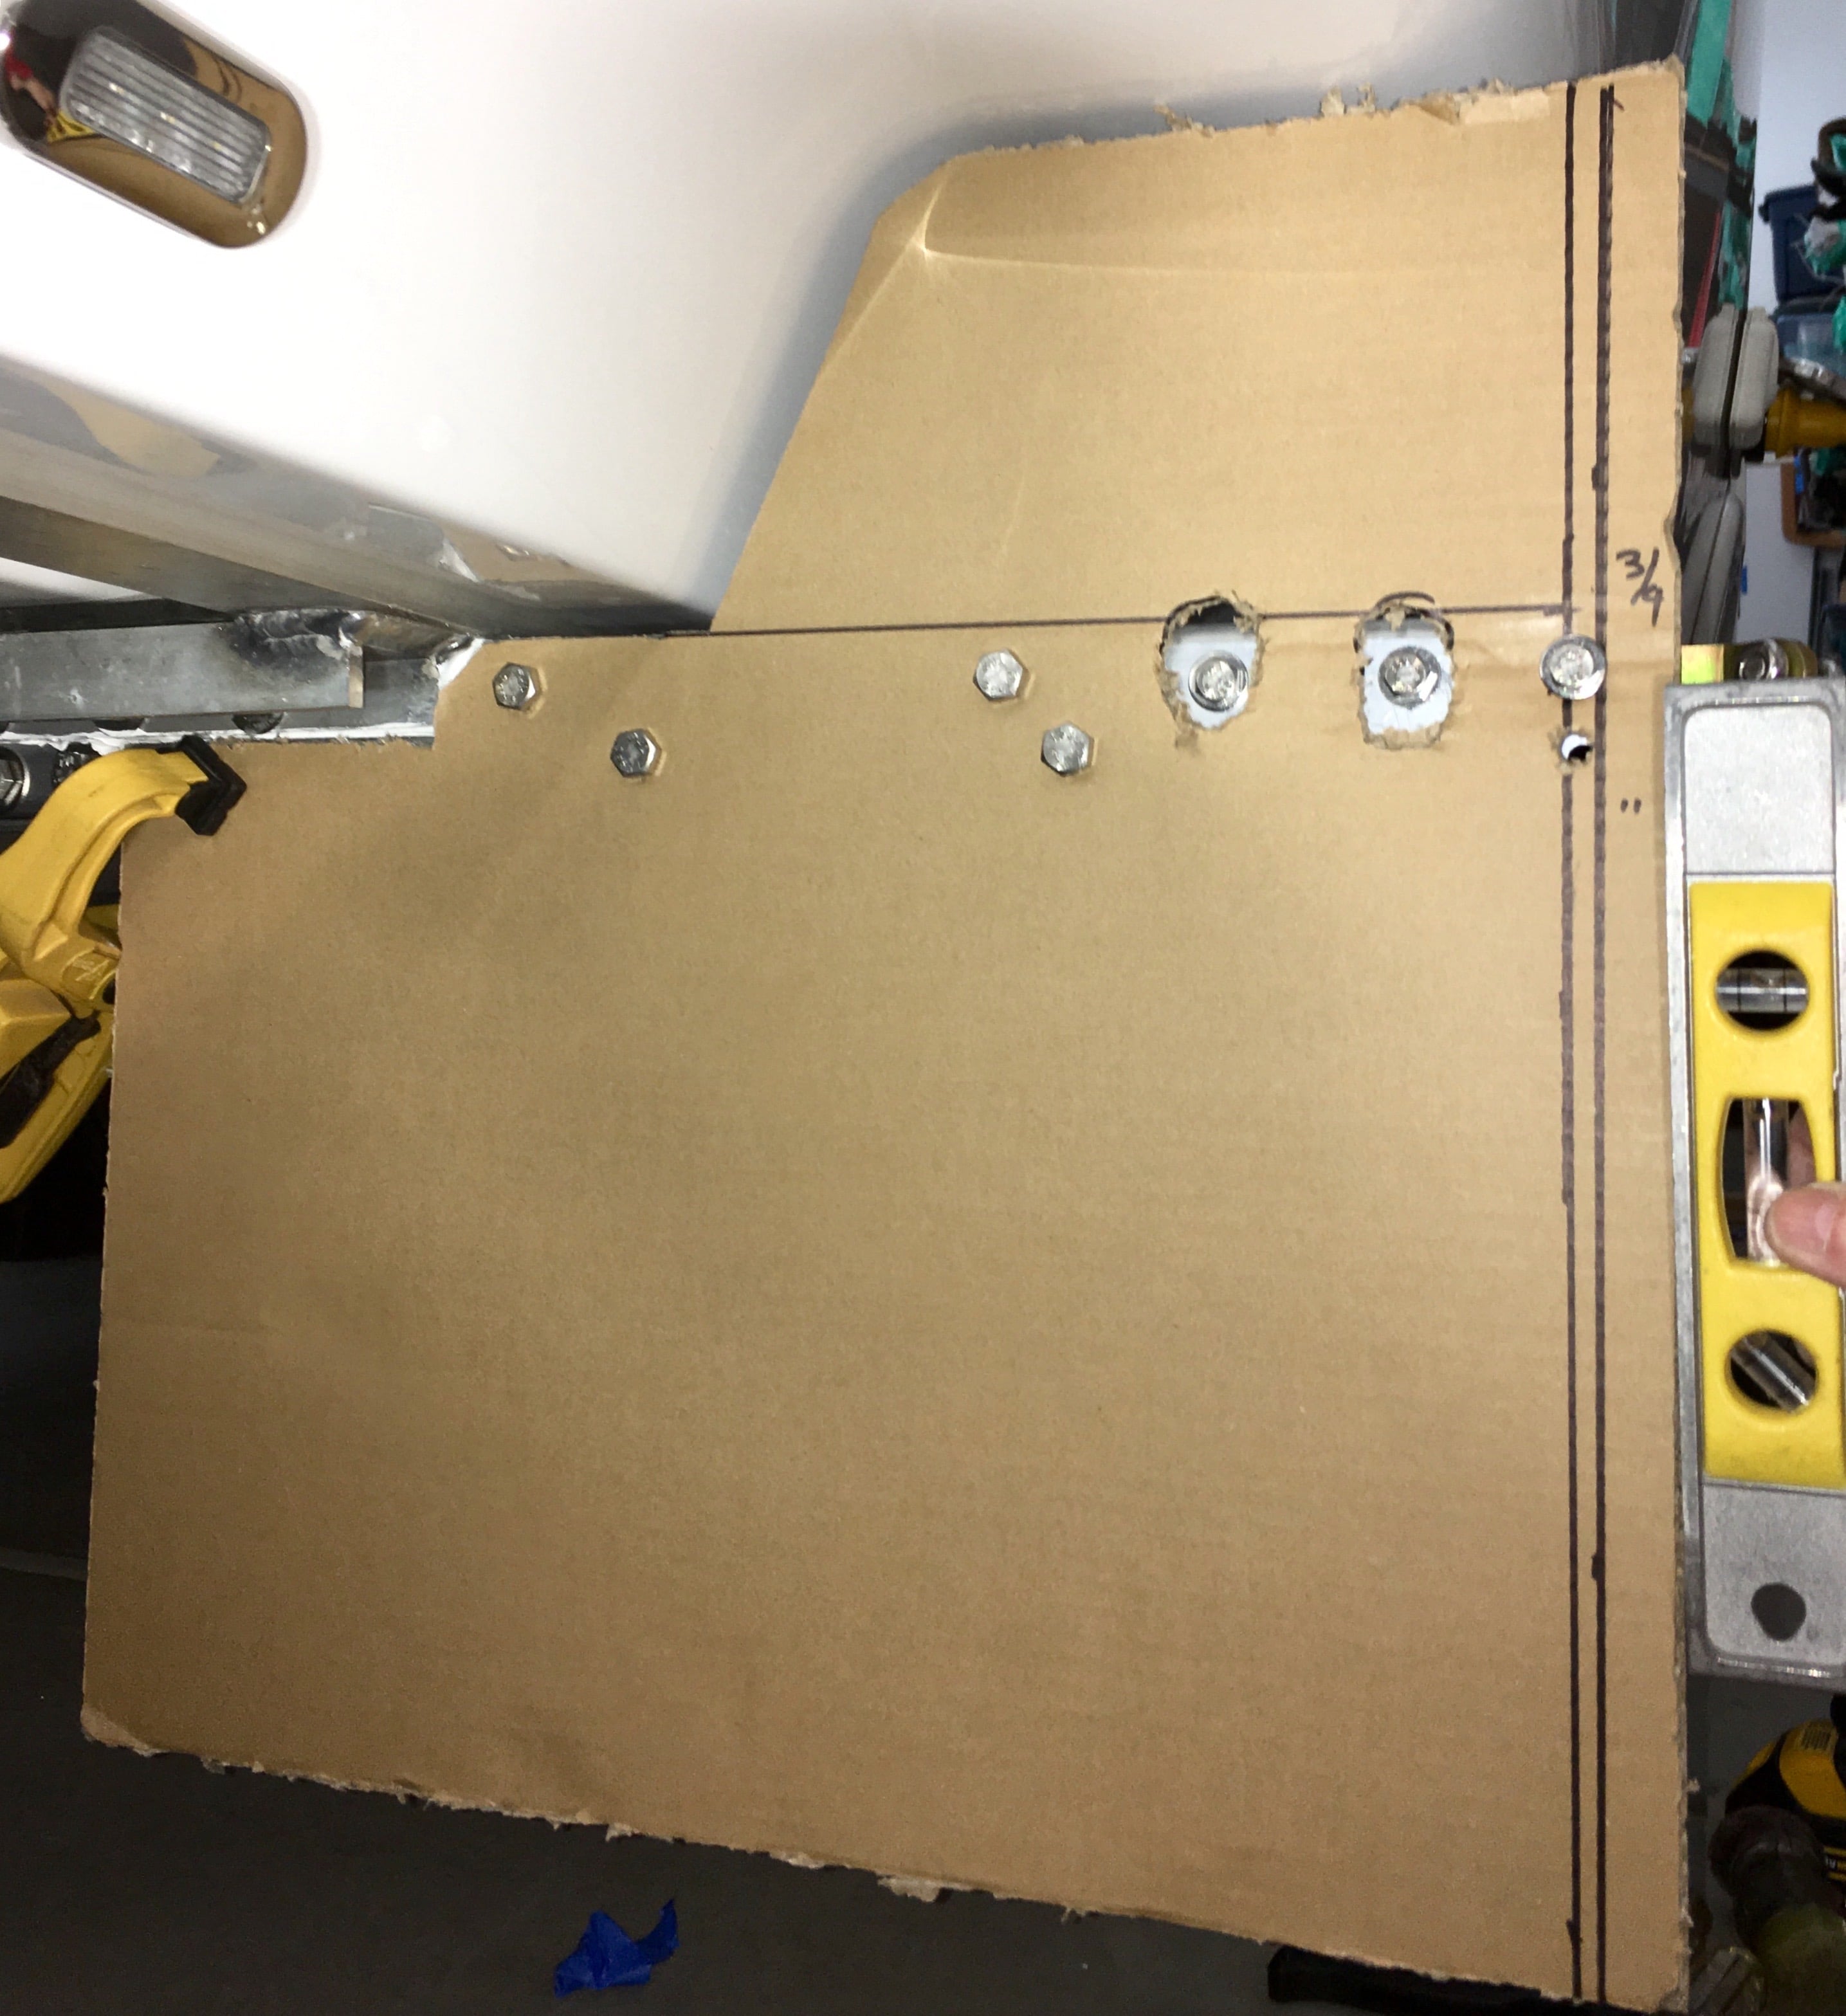
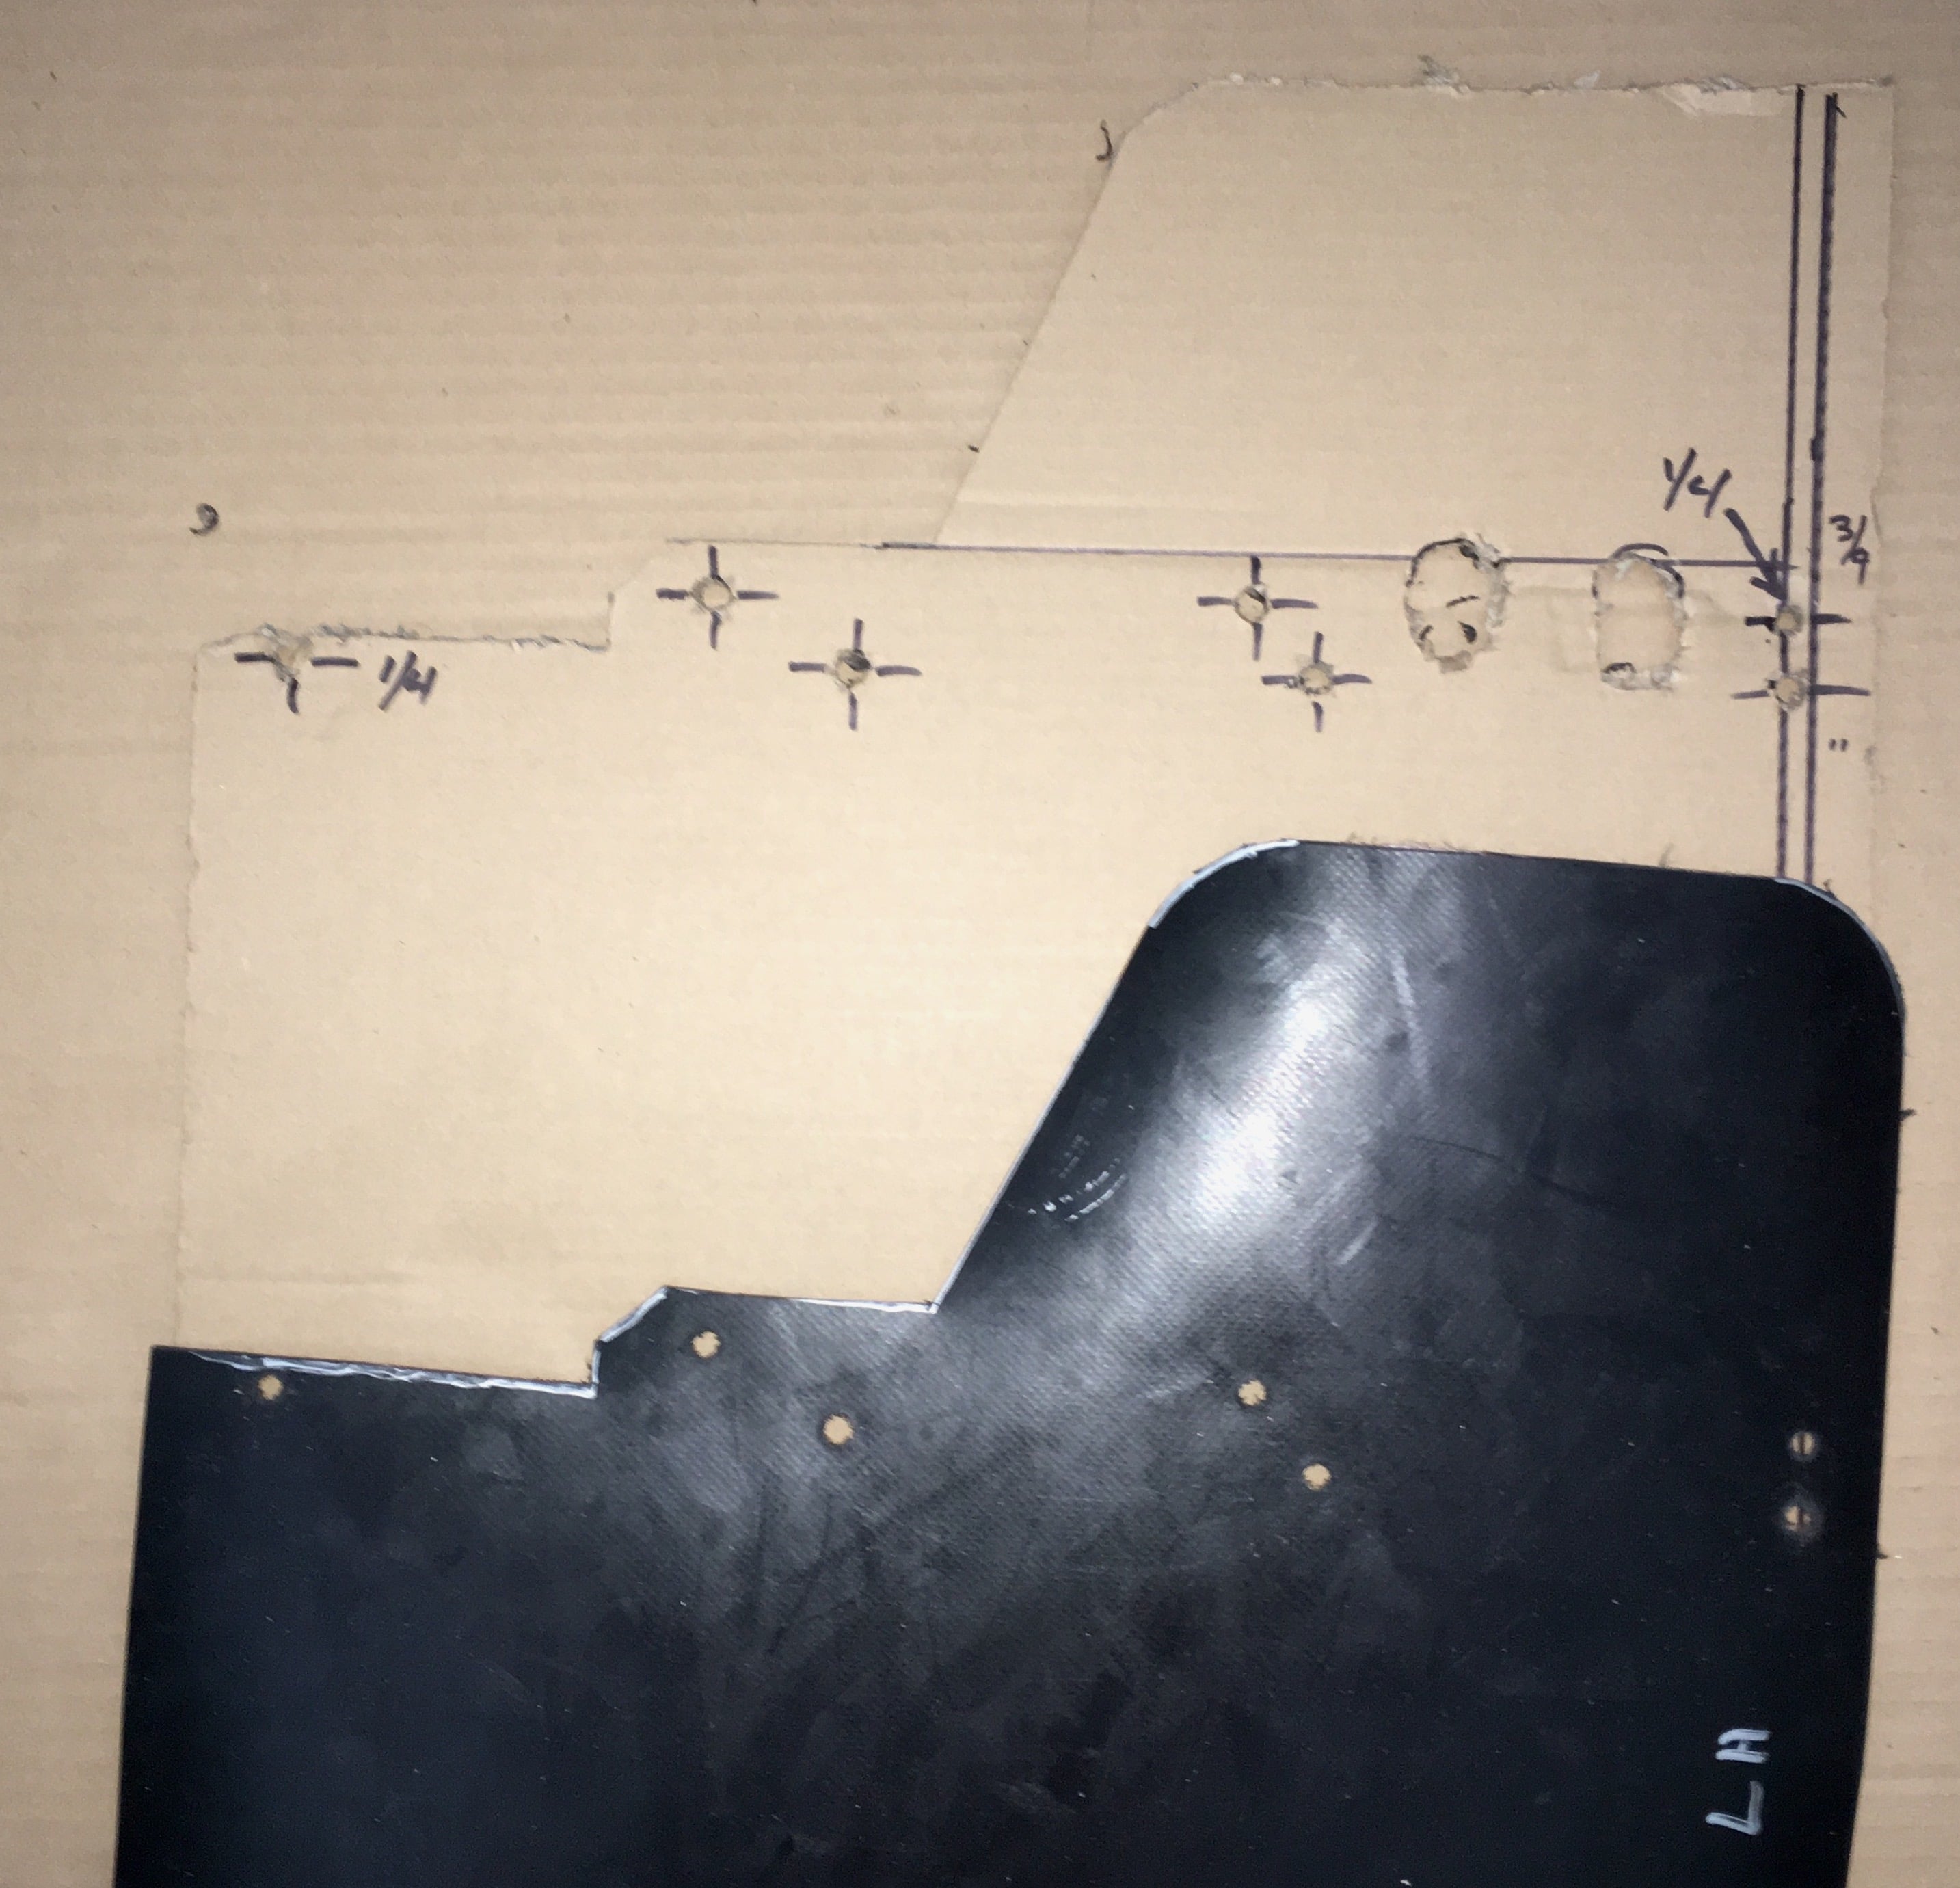
Excuse my not to scale illustration, but from my measurements/estimates it should leave plenty of space to access the propane/jacks. Assuming about 18"-24" sweep back and the 96" width... I'm guessing more than 24 Inches between the Bow Buddy wing tip and the hull; allowing plenty to walk behind to access the propane/jacks.
1 point
-
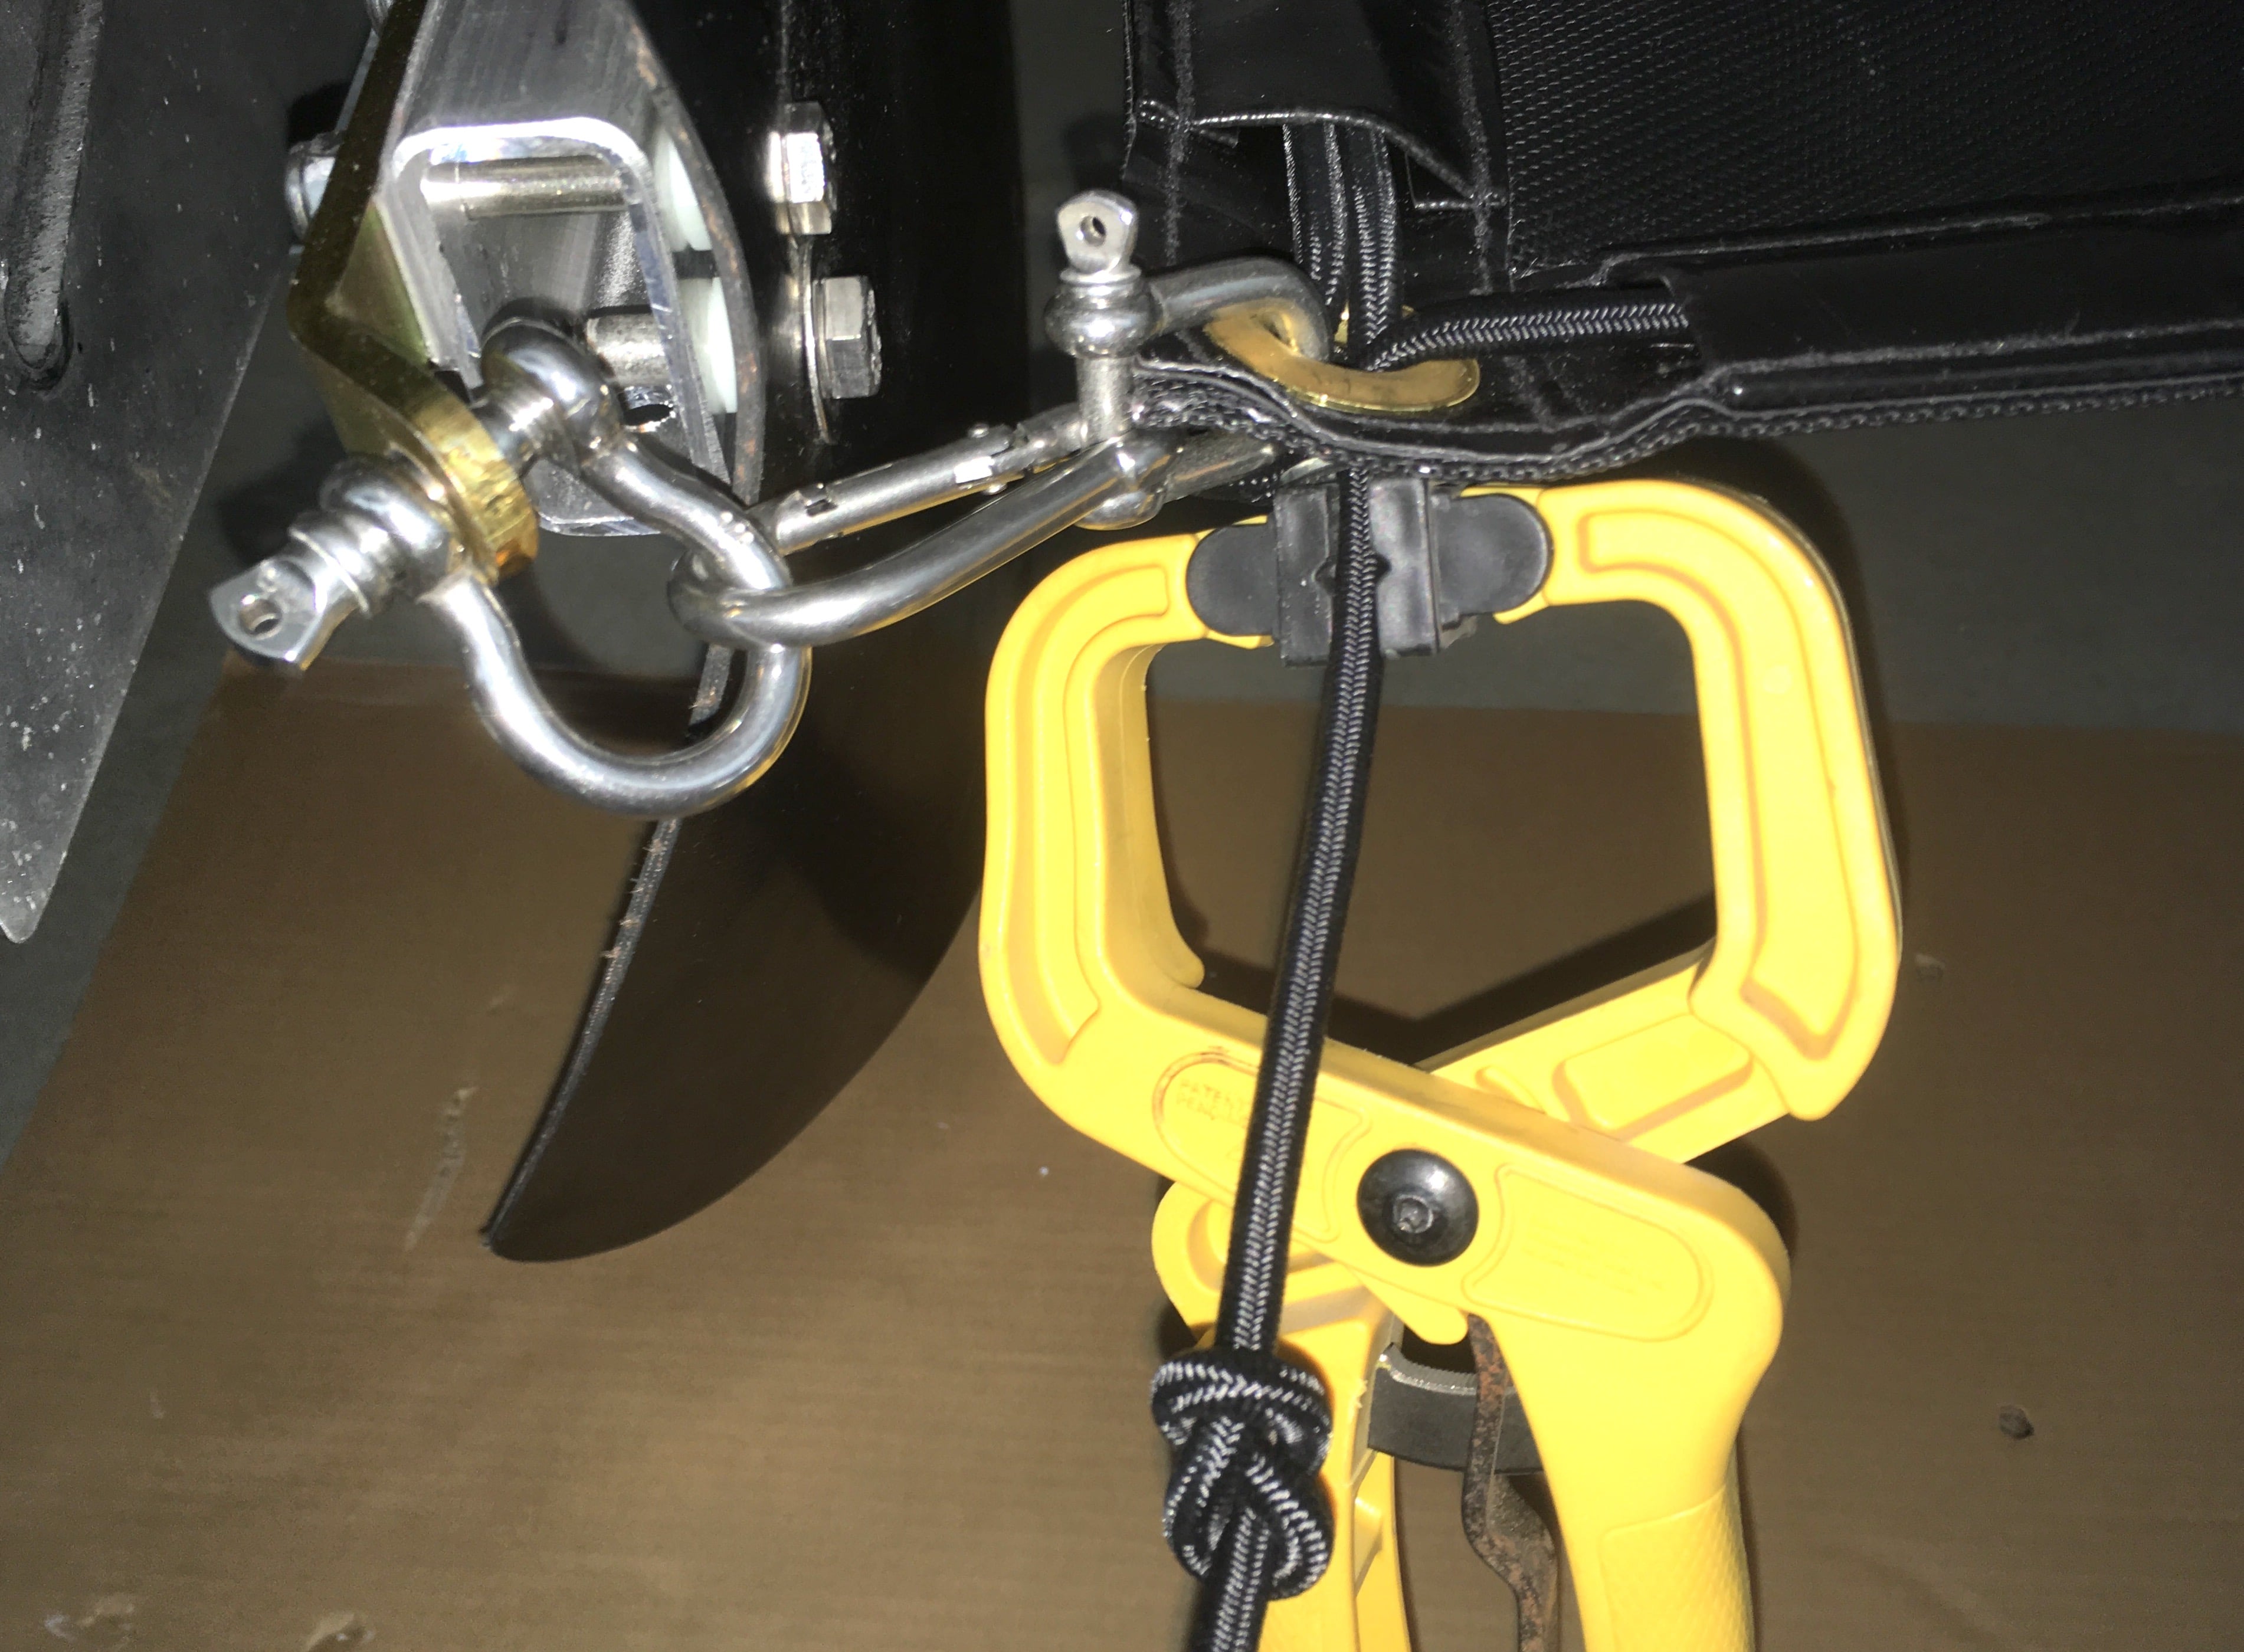
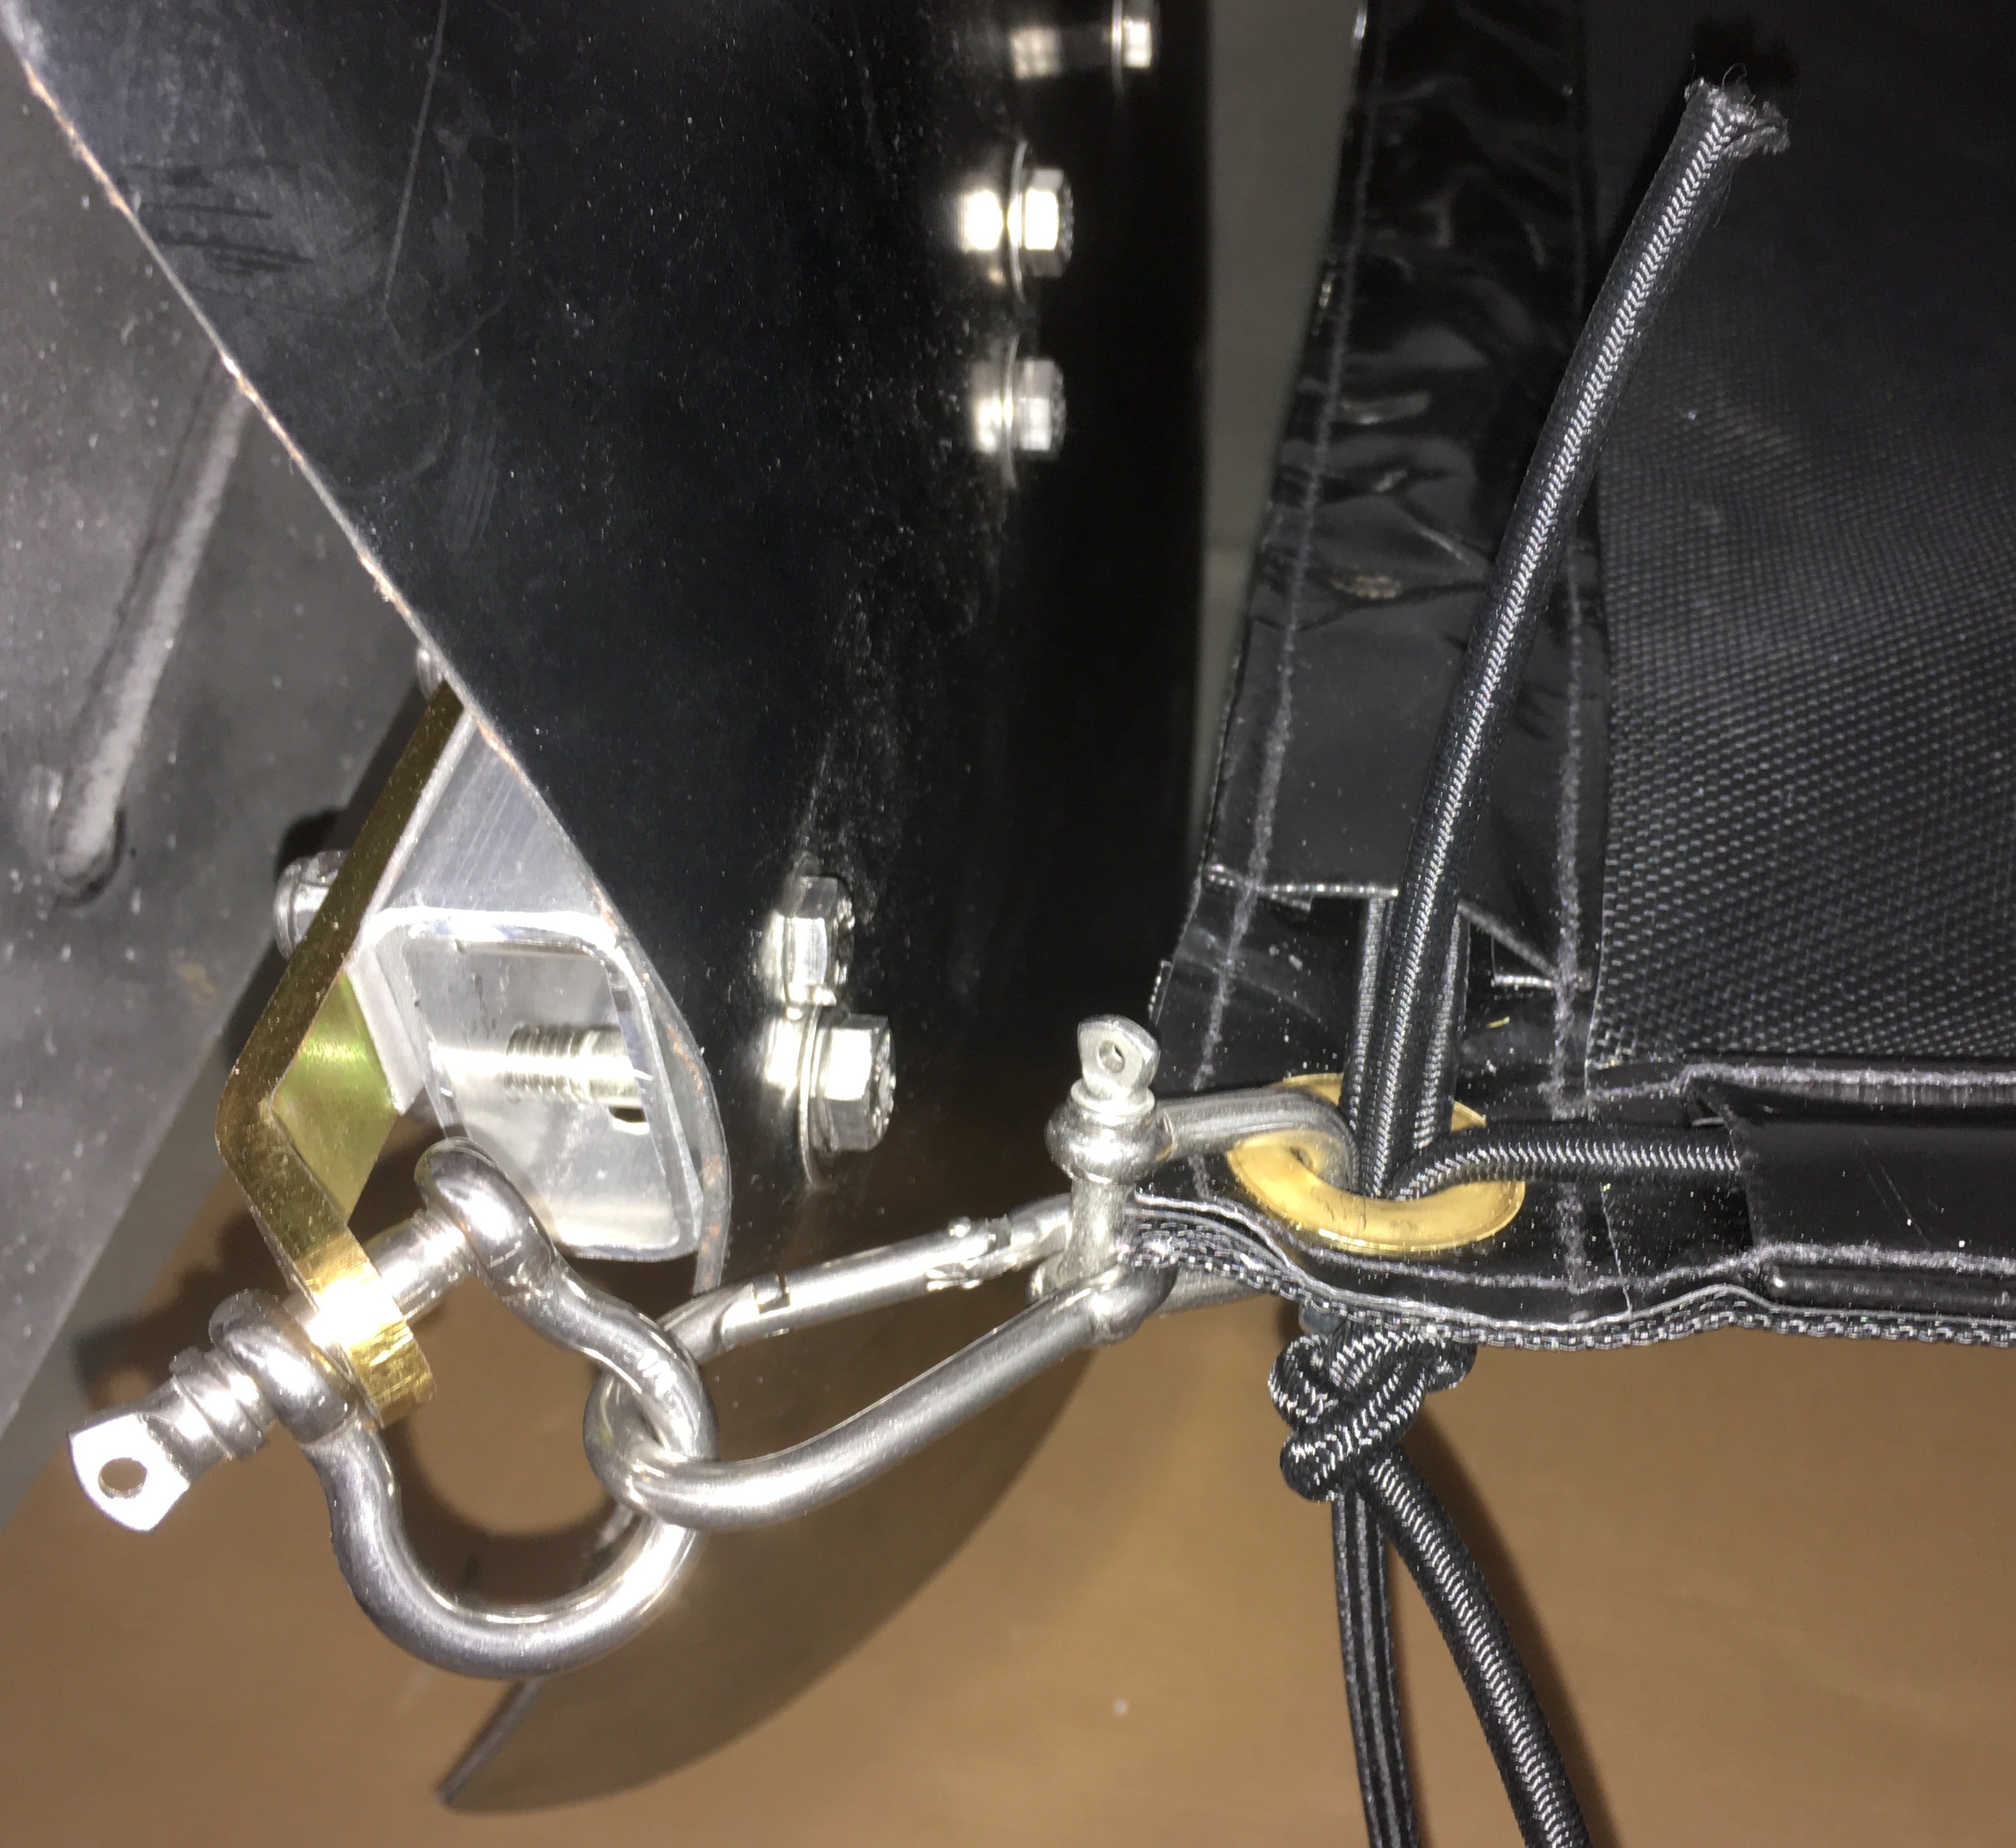
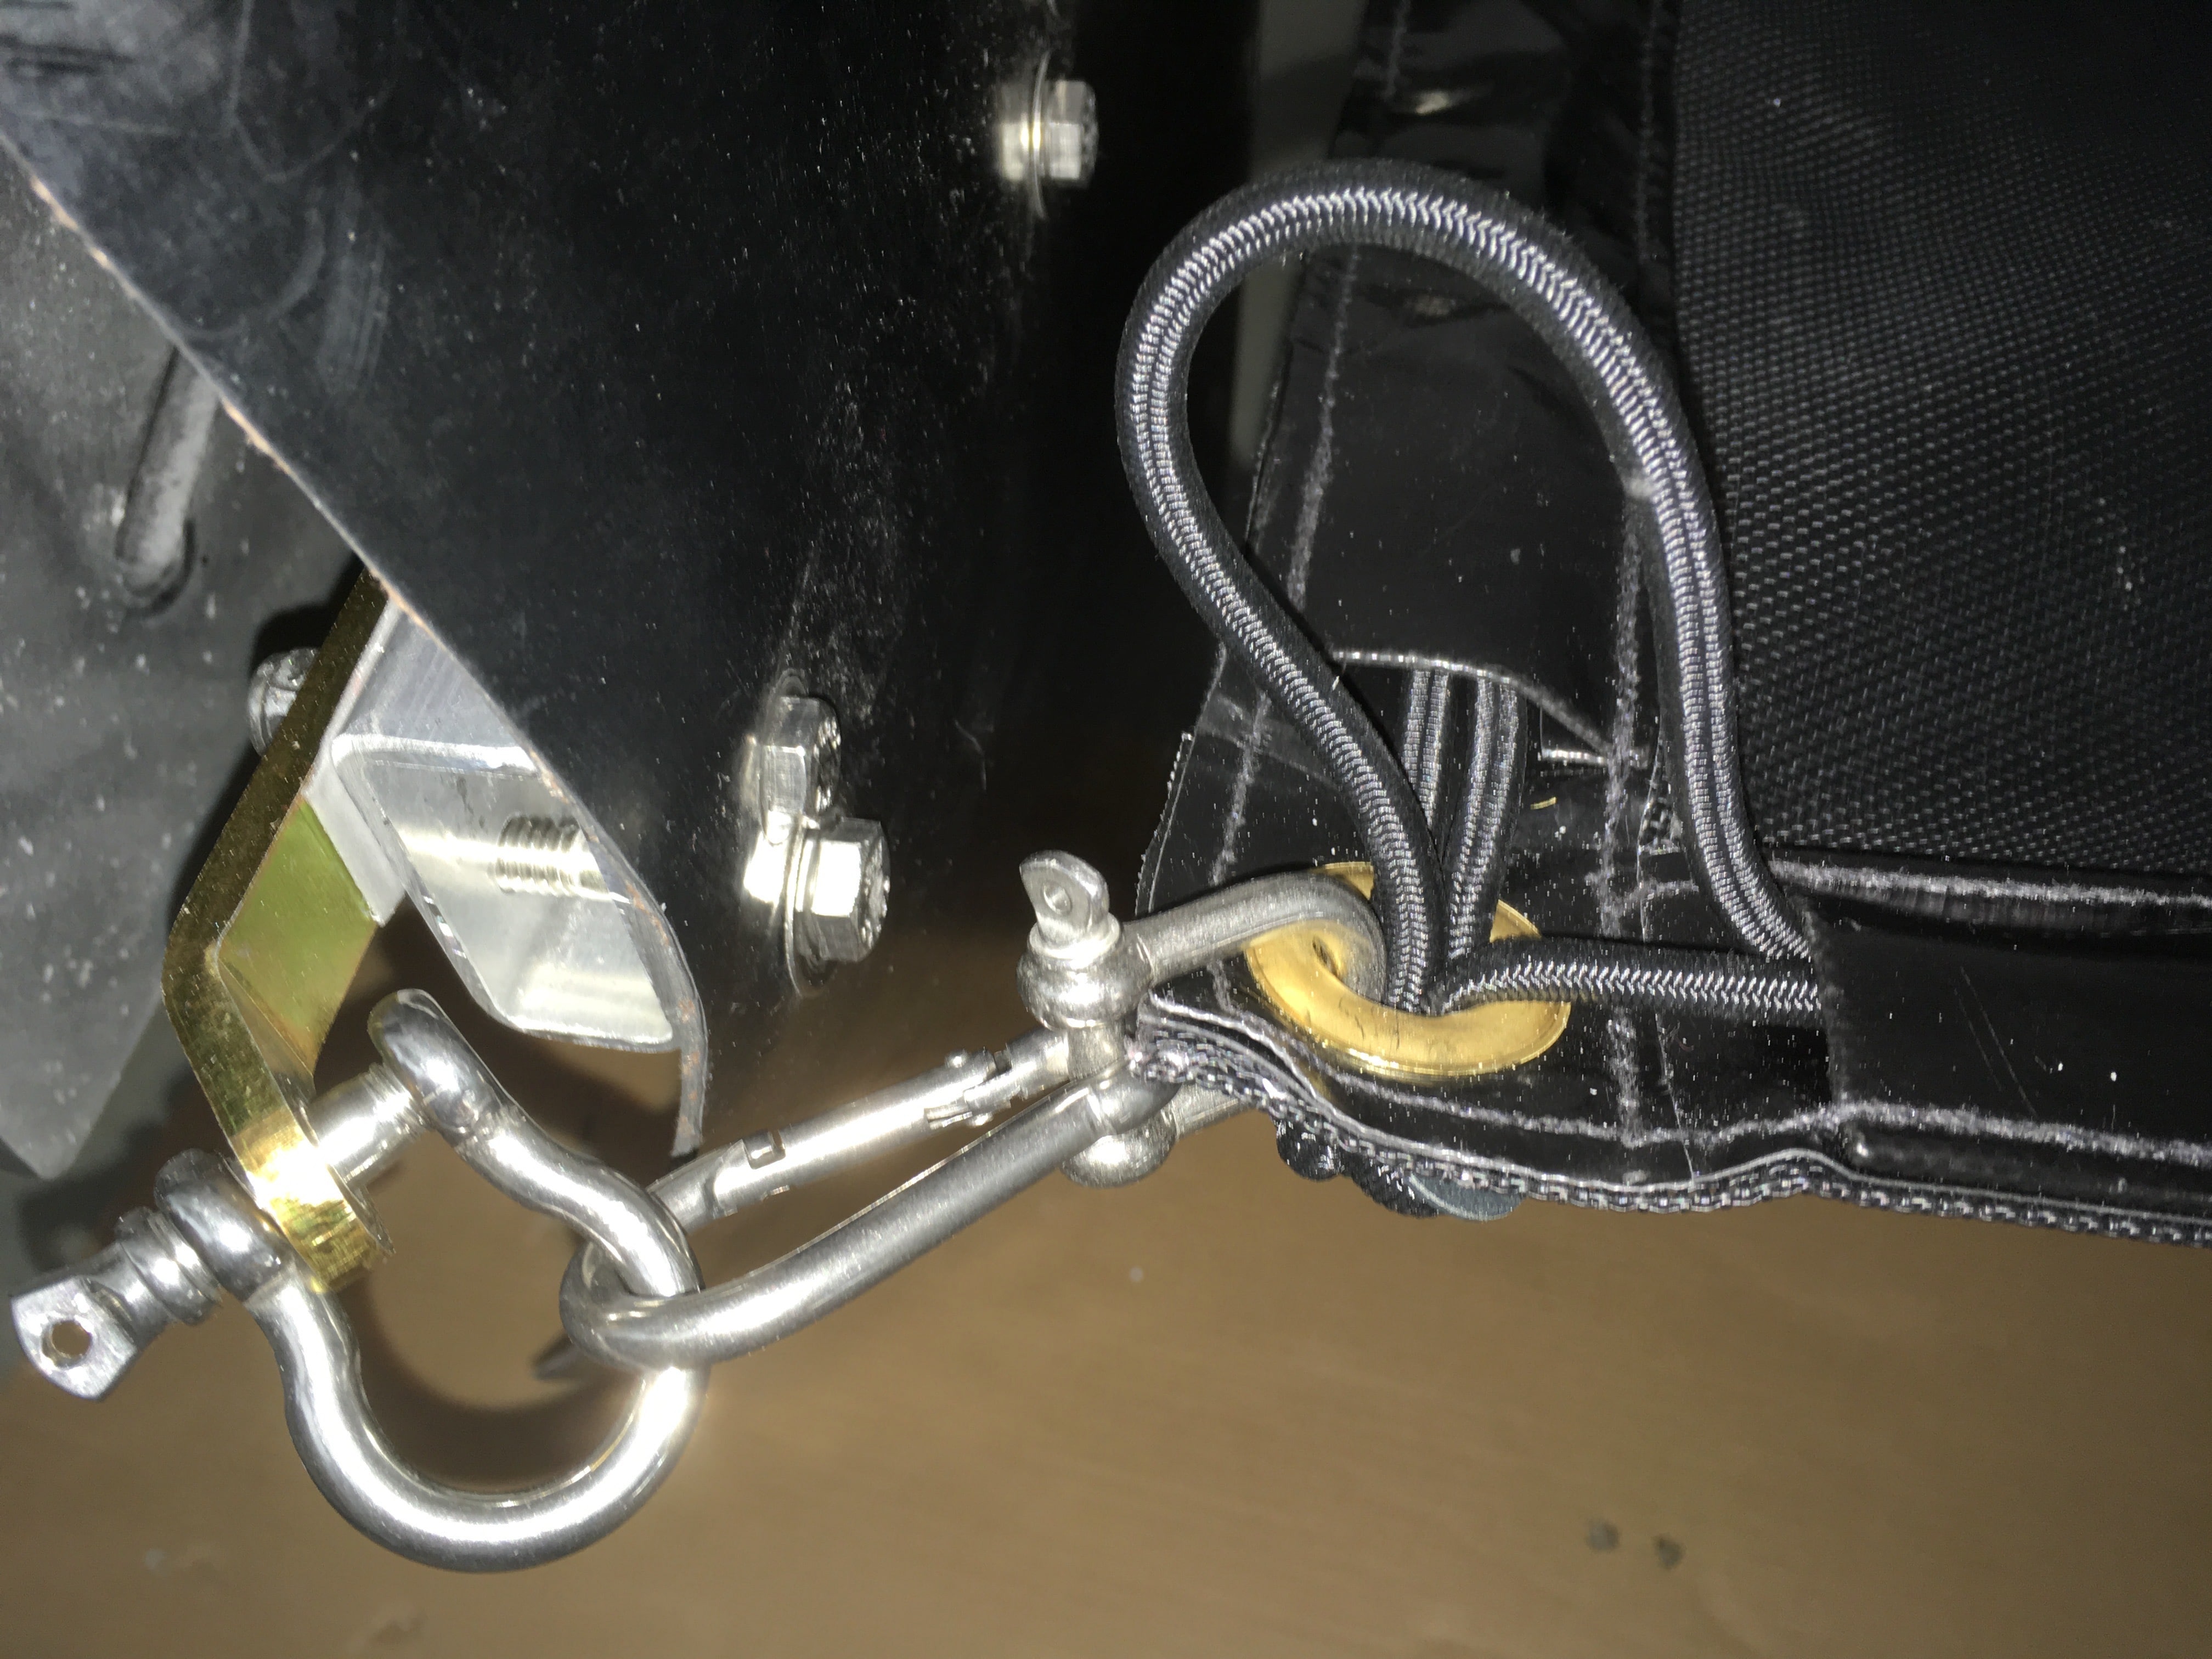
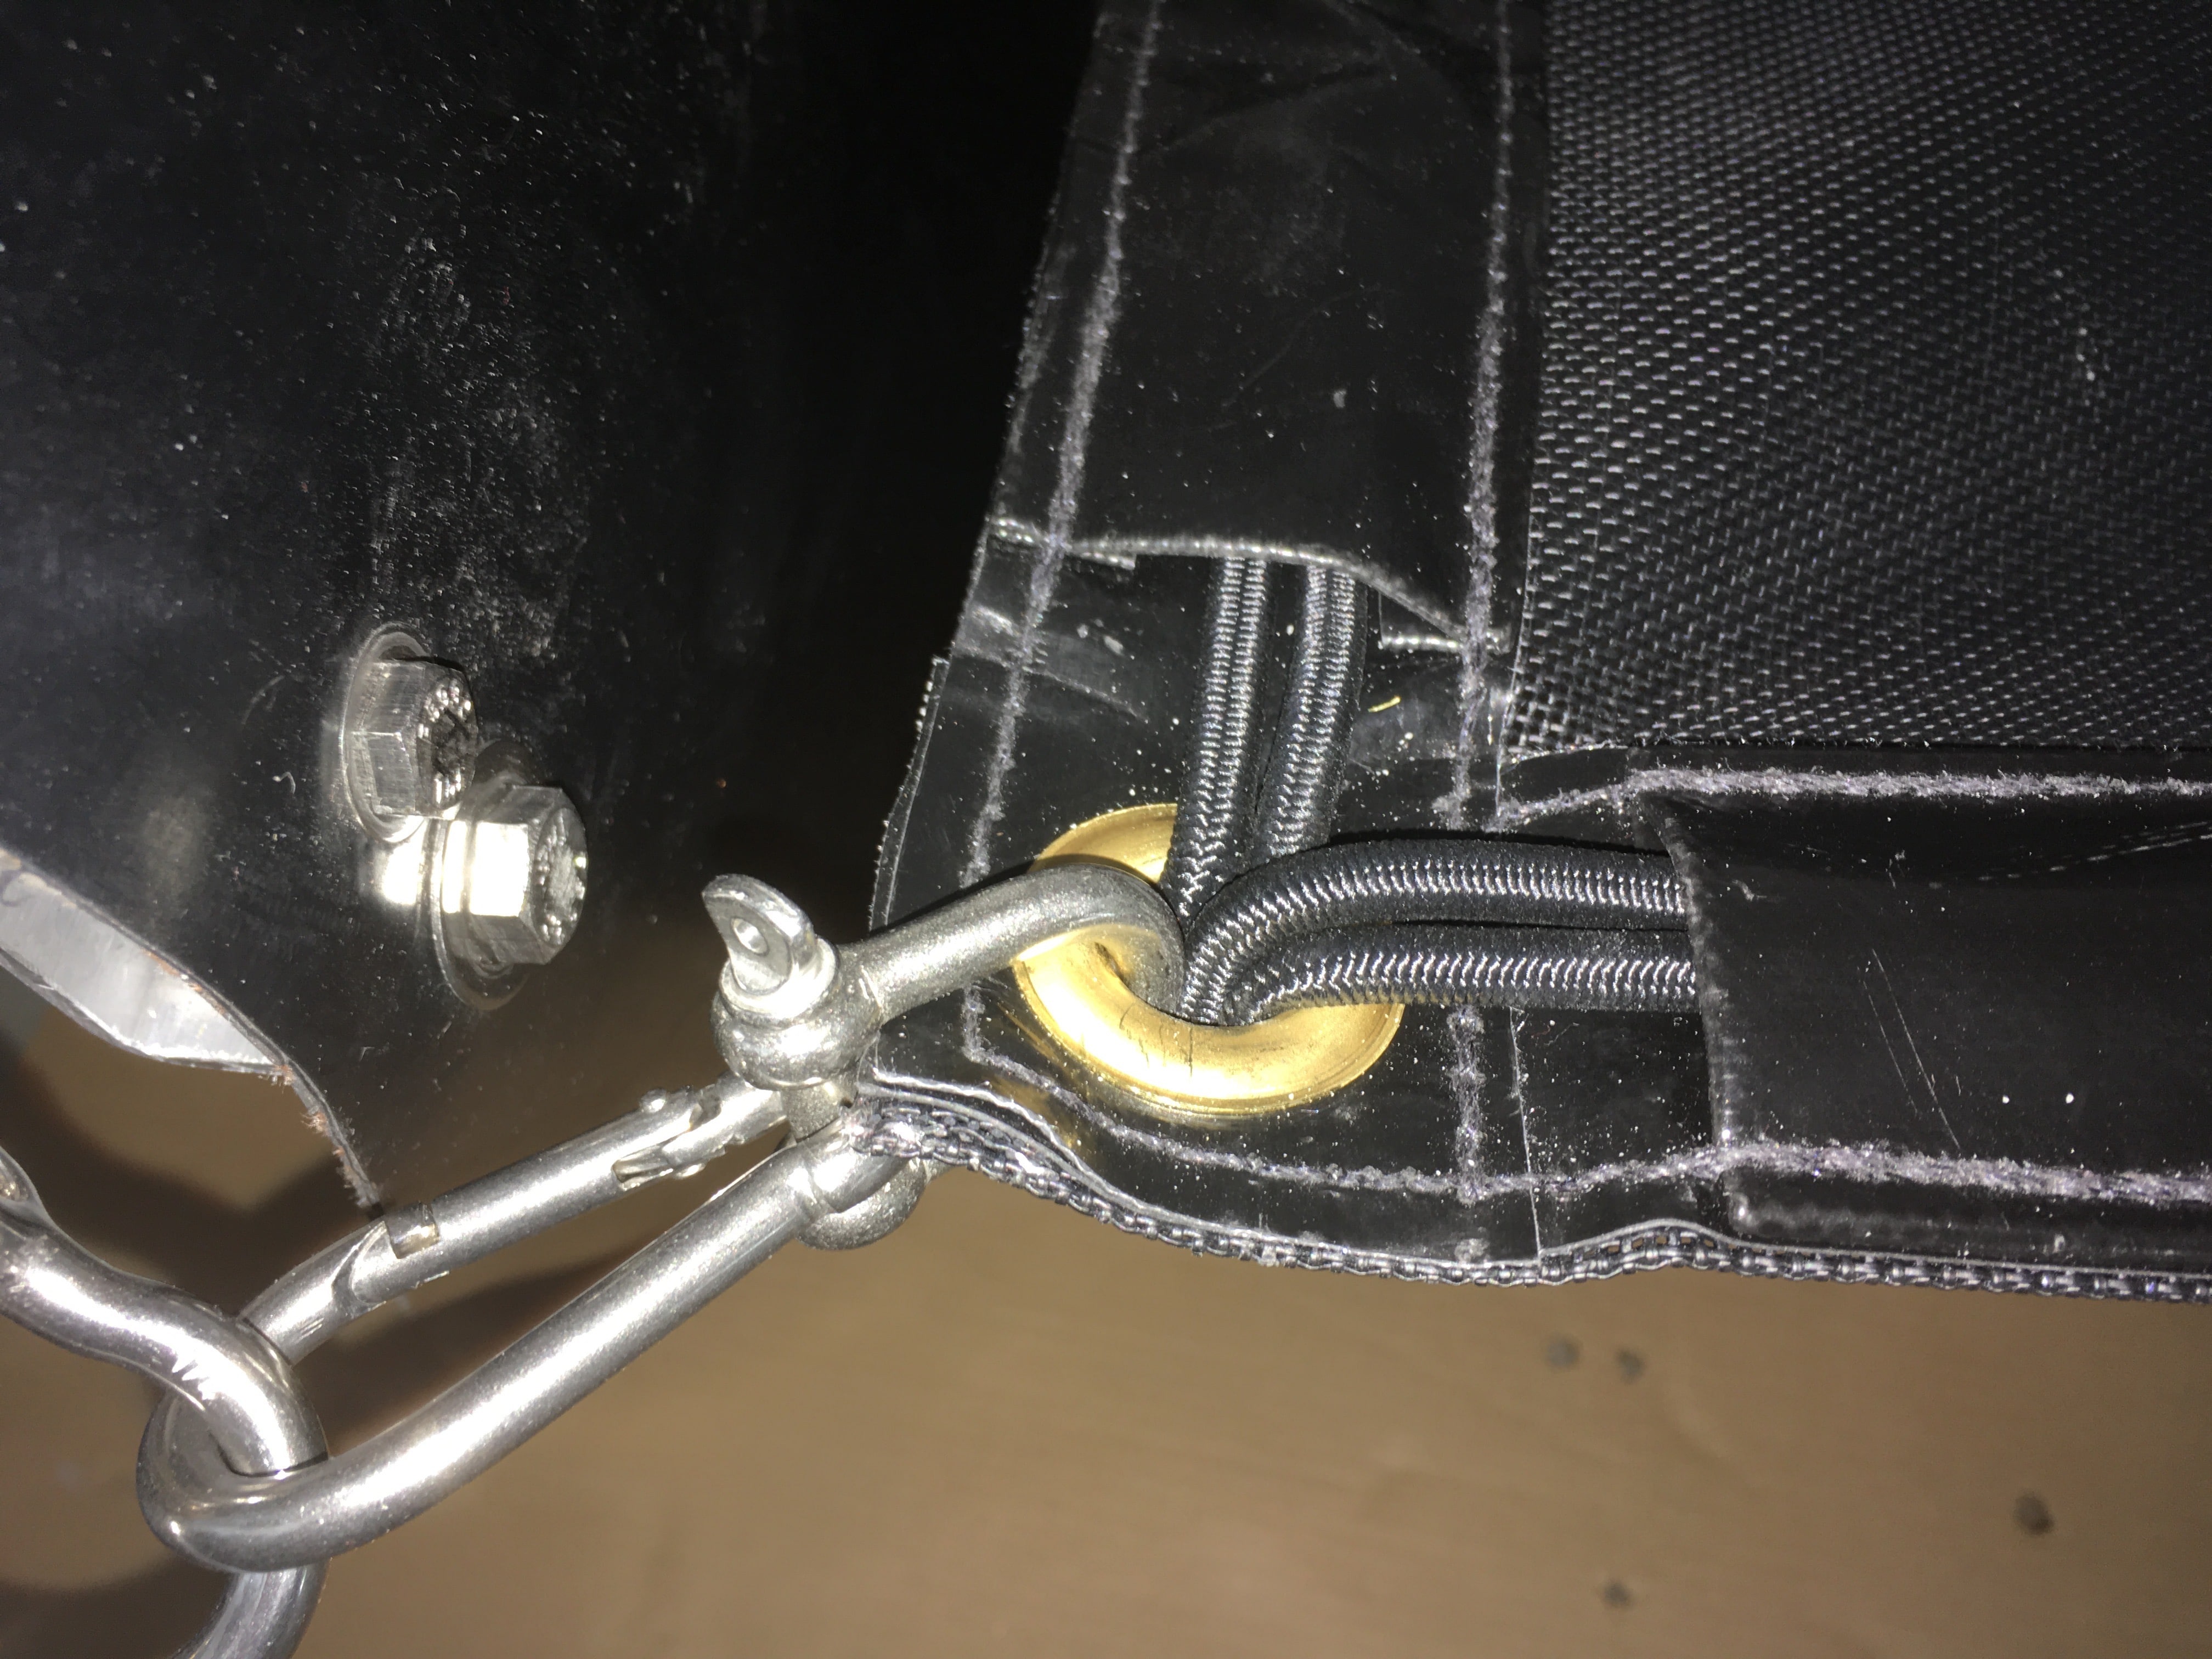
Yes, I've looked at your stone stomper post, and that is ideal. I'm just looking for a simpler bolt-on solution. These Bow Buddys are made in Canada, and not yet very popular in the US. Four Bolts clamp to the trailer. This is the only real demonstration I found online: They do offer a version angled forward like your photo, but the advantage of the vertical mount is that the post will not interfere with your TV's tailgate/hatch door. This is more pronounced on the Oliver due to the shorter tongue as apposed to boat trailers. Once you move away from the center point the screen is curved enough that debris should deflect to the left or right (into oncoming lanes of traffic) and not back at the TV.1 point
-
If your anode looks like half used at the end of the year, replace it, imo. One more year, and it's past done. They're not that expensive, and extend the life of your system.1 point
-
Thanks @dewdev and @Patriotto answer the question the temps and weather were unseasonably cooler than normal. We arrived the last week of March and returned around April 4th I think. Night temps were below freezing every night with a couple into the 20's. The highest temp my truck recorded for outside was 61º but that only lasted an hour or so. Most hikes in the 40's to low 50's heat of the day with wind, and in those slot canyons those temps with wind can be cool. A couple of days it poured rain, buckets and sheets coming down from all directions which kept us off some back roads in the northern part of San Rafael area. I've learned my lesson when it says not passable when wet they are not kidding. We got out of the area where the Sinbad pictographs are just in the nick of time too. The road bed there is very soft deep sand, looking at torrential downpours in our rear view mirror on that one. The pictographs generally represent hunter and gatherer societies, nomads on the move and tend to be roughly 2,000 to 10,000 years old but this particular panel blew us away due to its pristine condition. Petroglyphs are more recent normally considered 700-1400 years old. Sadly many of these ancient archives have been vandalized severely, everything from bullet holes to spray paint. Brought shorts, never put them on the entire trip, LOL.1 point
-
I agree with the advice given here. If you’ve never pulled the anode from your hot water tank and cleaned out the deposits now is a great time to do it. Inspect your anode to see how much life is left. Get one of those Camco hose attachments that you can stick in the anode hole and flush out the deposits. I don’t sanitize the hot water tank. I generally pour a half cup or so of bleach into my fill hose and then hook up to the water source and fill the fresh tank. I run the cold water until I can smell the bleach. Then let it sit a while before emptying and filling a couple of times. Mike1 point
-
I suspect you'll be okay if you thoroughly rinse that tank.. and drain and fill it a few times, before you turn on the heater.. I suspect a lot of people use more chlorine bleach than necessary. More is NOT better. It leaves a chlorine residue, and is more corrosive, with no added advantage . When I had my restaurant, I had one delightful health inspector who loved to teach. If he found an over-chlorinated sanitizer bucket, he'd ask everyone around to show how to achieve a proper level, and then stick his finger in the bucket and lick it, to prove proper levels were human safe, but effective, testing with ph strips. Great guy. We use purogene instead of chlorine bleach, in our trailer. I don't love the smell of bleach, and it doesn't agree with me. How much bleach did you use for sanitizing?1 point
-
I recently installed the Houghton 9.5 in my Elite and later decided to move the temperature probe located inside the a/c so that it protrudes about 3 inches into the cabin. The set temp now correlates almost exactly to actual cabin temp. Before, if I wanted the cabin temp the be maintained at 72 degrees I’d have to set the temp well below 72. Much more pleased now on how it functions.1 point
-
Would hauling it on the back bumper reduce tailgating? Honestly, We have never needed one either.1 point
-
Oliver did try to set us up with a showing of a unit near us. The owner did not respond. I actuly spotted the E2 in our negborhood but knowing the owner did not want to be part of the program I did not want to pester... Thanks!!! to all of you who have offered to show your Oliver. I think I have watched every video and factory tour avalible online. Heading to Hohenwald in September to pick-up our E2.1 point
-
Hi Conner77, This is what I use, works well. Mopeka 024-5002 LP Check Tank Halo from amazon. Good luck 🙂1 point
-
We feel that way, too. Best of luck on your pickup. I know you've done the research, watched the Ollie University video, and you should be ready. If anything crops up, we're here for you. Looking forward to your delivery photos. Safe travels, and hugs.1 point
-
You’ll get to know your trailer pretty quick. Each time there’s a little glitch you’ll dive in and learn all about it. We were new to RV’s when we picked up in May of 16 and the learning curve was steep but rewarding. It is our home on wheels. Don’t hesitate to reach out to all the experts here! Good luck! Mike1 point
-
My dometic dinosaur unot was well over a decade old, but still (loudly) worked. The exterior shroud was mostly tape, cracked in so many places. (Our trailer is outdoors, 24/7/365.) I offered parts here, then took it to recycling, with no takers. The 9.5 works well in our parking spot beside the house, and on house 15 amp. We have a smaller 2008 elite. We don't have lithium, or a way to run the ac from battery. My experience is strictly running it at home. We don't have (nor ever had) an easy start. It's very quiet. It works. In retrospect, since we rarely have power camping, I could have replaced the old dometic with a vent fan, and saved a lot of money. It is nice, though, to have the ability to have ac, if we need it.1 point
-
Our relationship with our Lance 1985 began in March 2017 and we enjoyed many good times together. But recently, and I must be honest, we began to see a better life with the Oliver Elite II. We haven't told our Lance (affectionately named gemütliches Wohnmobil) but will have that talk next month, as we're gussying her up for sale. It will be bittersweet but I'm thinking she'll be happier too. I like to think that anyway. Looking forward to this new, exciting trailer relationship and eager to meet other Ollie enthusiasts here! Denise1 point
-
Switched from an airstream to an Elite 2. We picked up our unit 9 days ago and have had everything from 90mph winds in Alabama to driving rains on 5000km worth of Interstate driving. As I type this we are sitting a the border waiting for import into Canada @-4c and we are nice and toasty off grid as nothing is open this time of year. All that mileage made use realise we made the right decision to switch💯
1 point
-
Thanks for the kind words FrankC, I see your Rock Tamers are rigged correctly - they should fly back at an angle, not straight up and down, so they deflect rocks down onto the pavement instead of back onto your rear tailgate and bumper. I had Rock Tamers before this mod, and they are OK, but they do not provide nearly enough protection for around here.... this part of the country has a gazillion unpaved roads, Spokane County alone has 4000 miles of them. FYI, an easy mod to help your RTs work better is to add strips of heavy mudflap material on TOP of the bars, trimmed so that they press against the chrome bumper. They will stop the few stones that do flip back up in that direction, and the rubber won't damage the finish. Plus they will dampen any side to side rocking of the arms. John Davies Spokane WA1 point
-
Wow! Thanks for the detailed project report. I don’t plan on doing anything like this (yet) but I enjoy reading about your modifications, and the thinking, materials and fabrication that goes into it. We tow pretty much on all paved roads. The only place we encounter gravel is usually on the roads inside the KOA campgrounds, and we’re driving very slowly (5mph) at that point. I’ve had the Rocktamer flap system and after 2 years of towing, no stone chips at all on the Ollie, or the back bumper of the truck either, but again, we are on paved roads pretty much all the time. As we explore more, maybe getting to more of the unimproved road areas, I’ll keep your design ideas in mind.
1 point
-
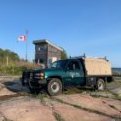
More 8 - Unboxing. This is the last section, feel free to comment but I may not be able to respond for a while. John Davies Spokane WA
1 point
-
1 point
-
1 point
-
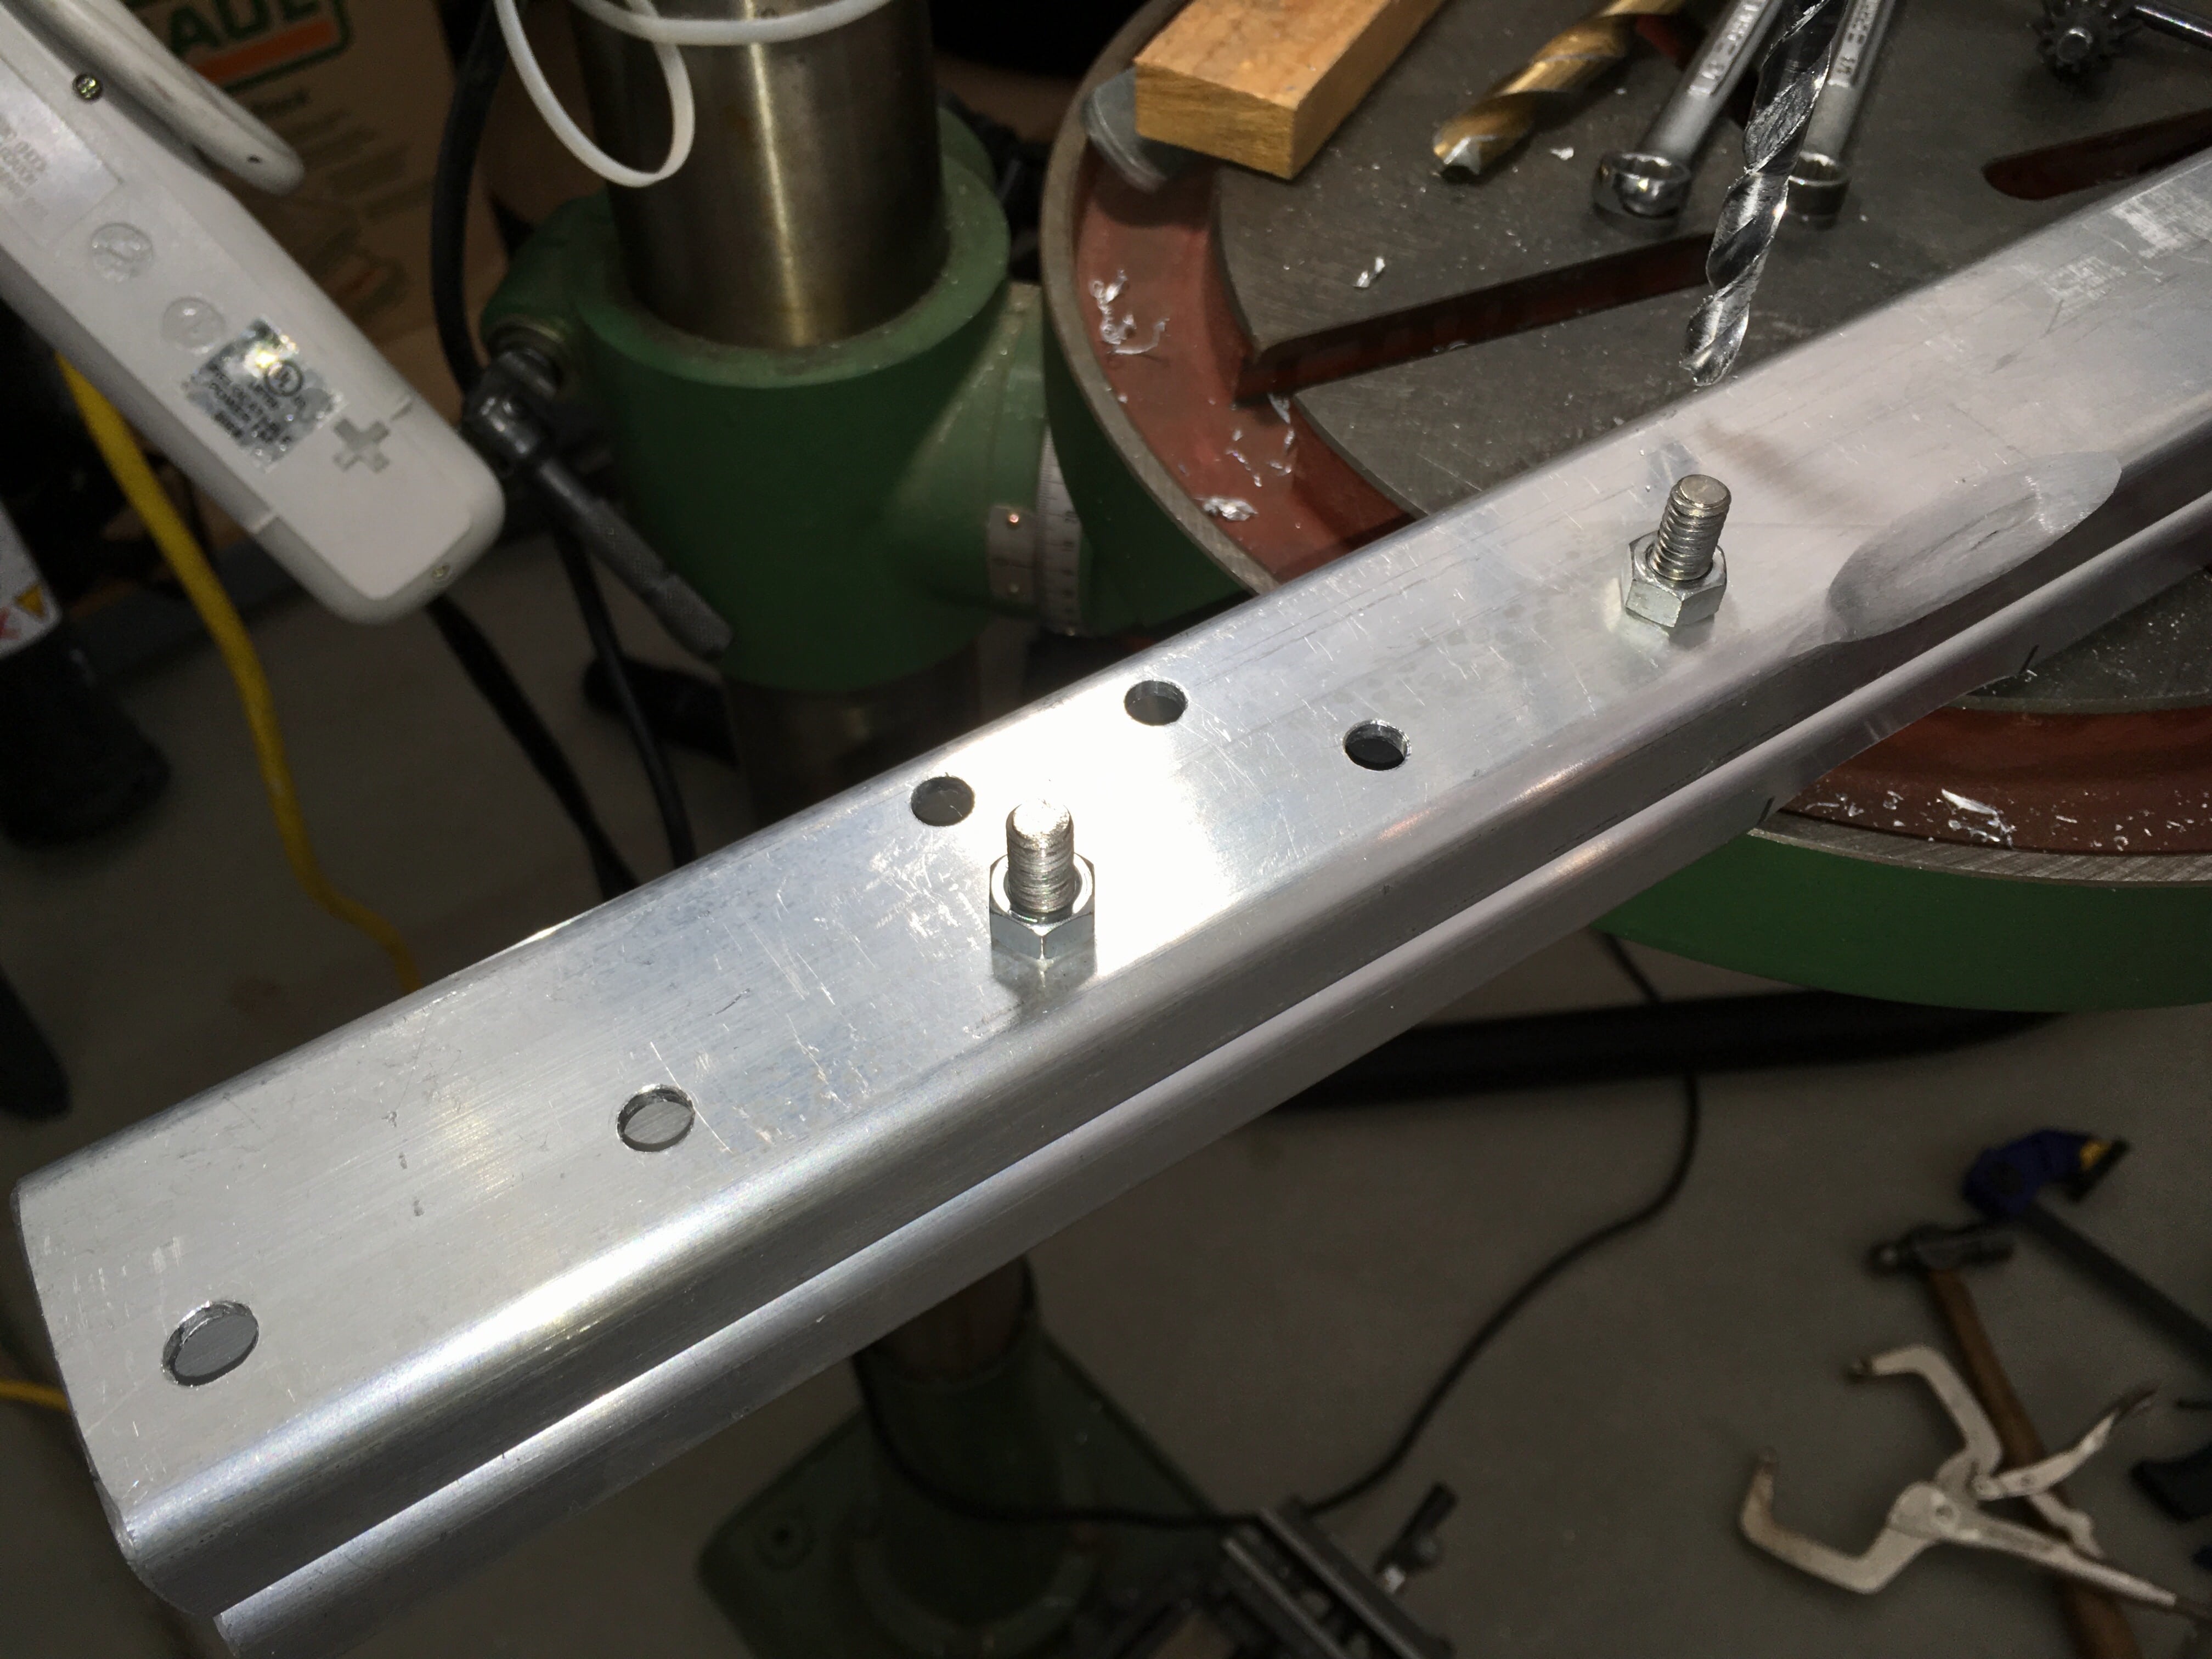
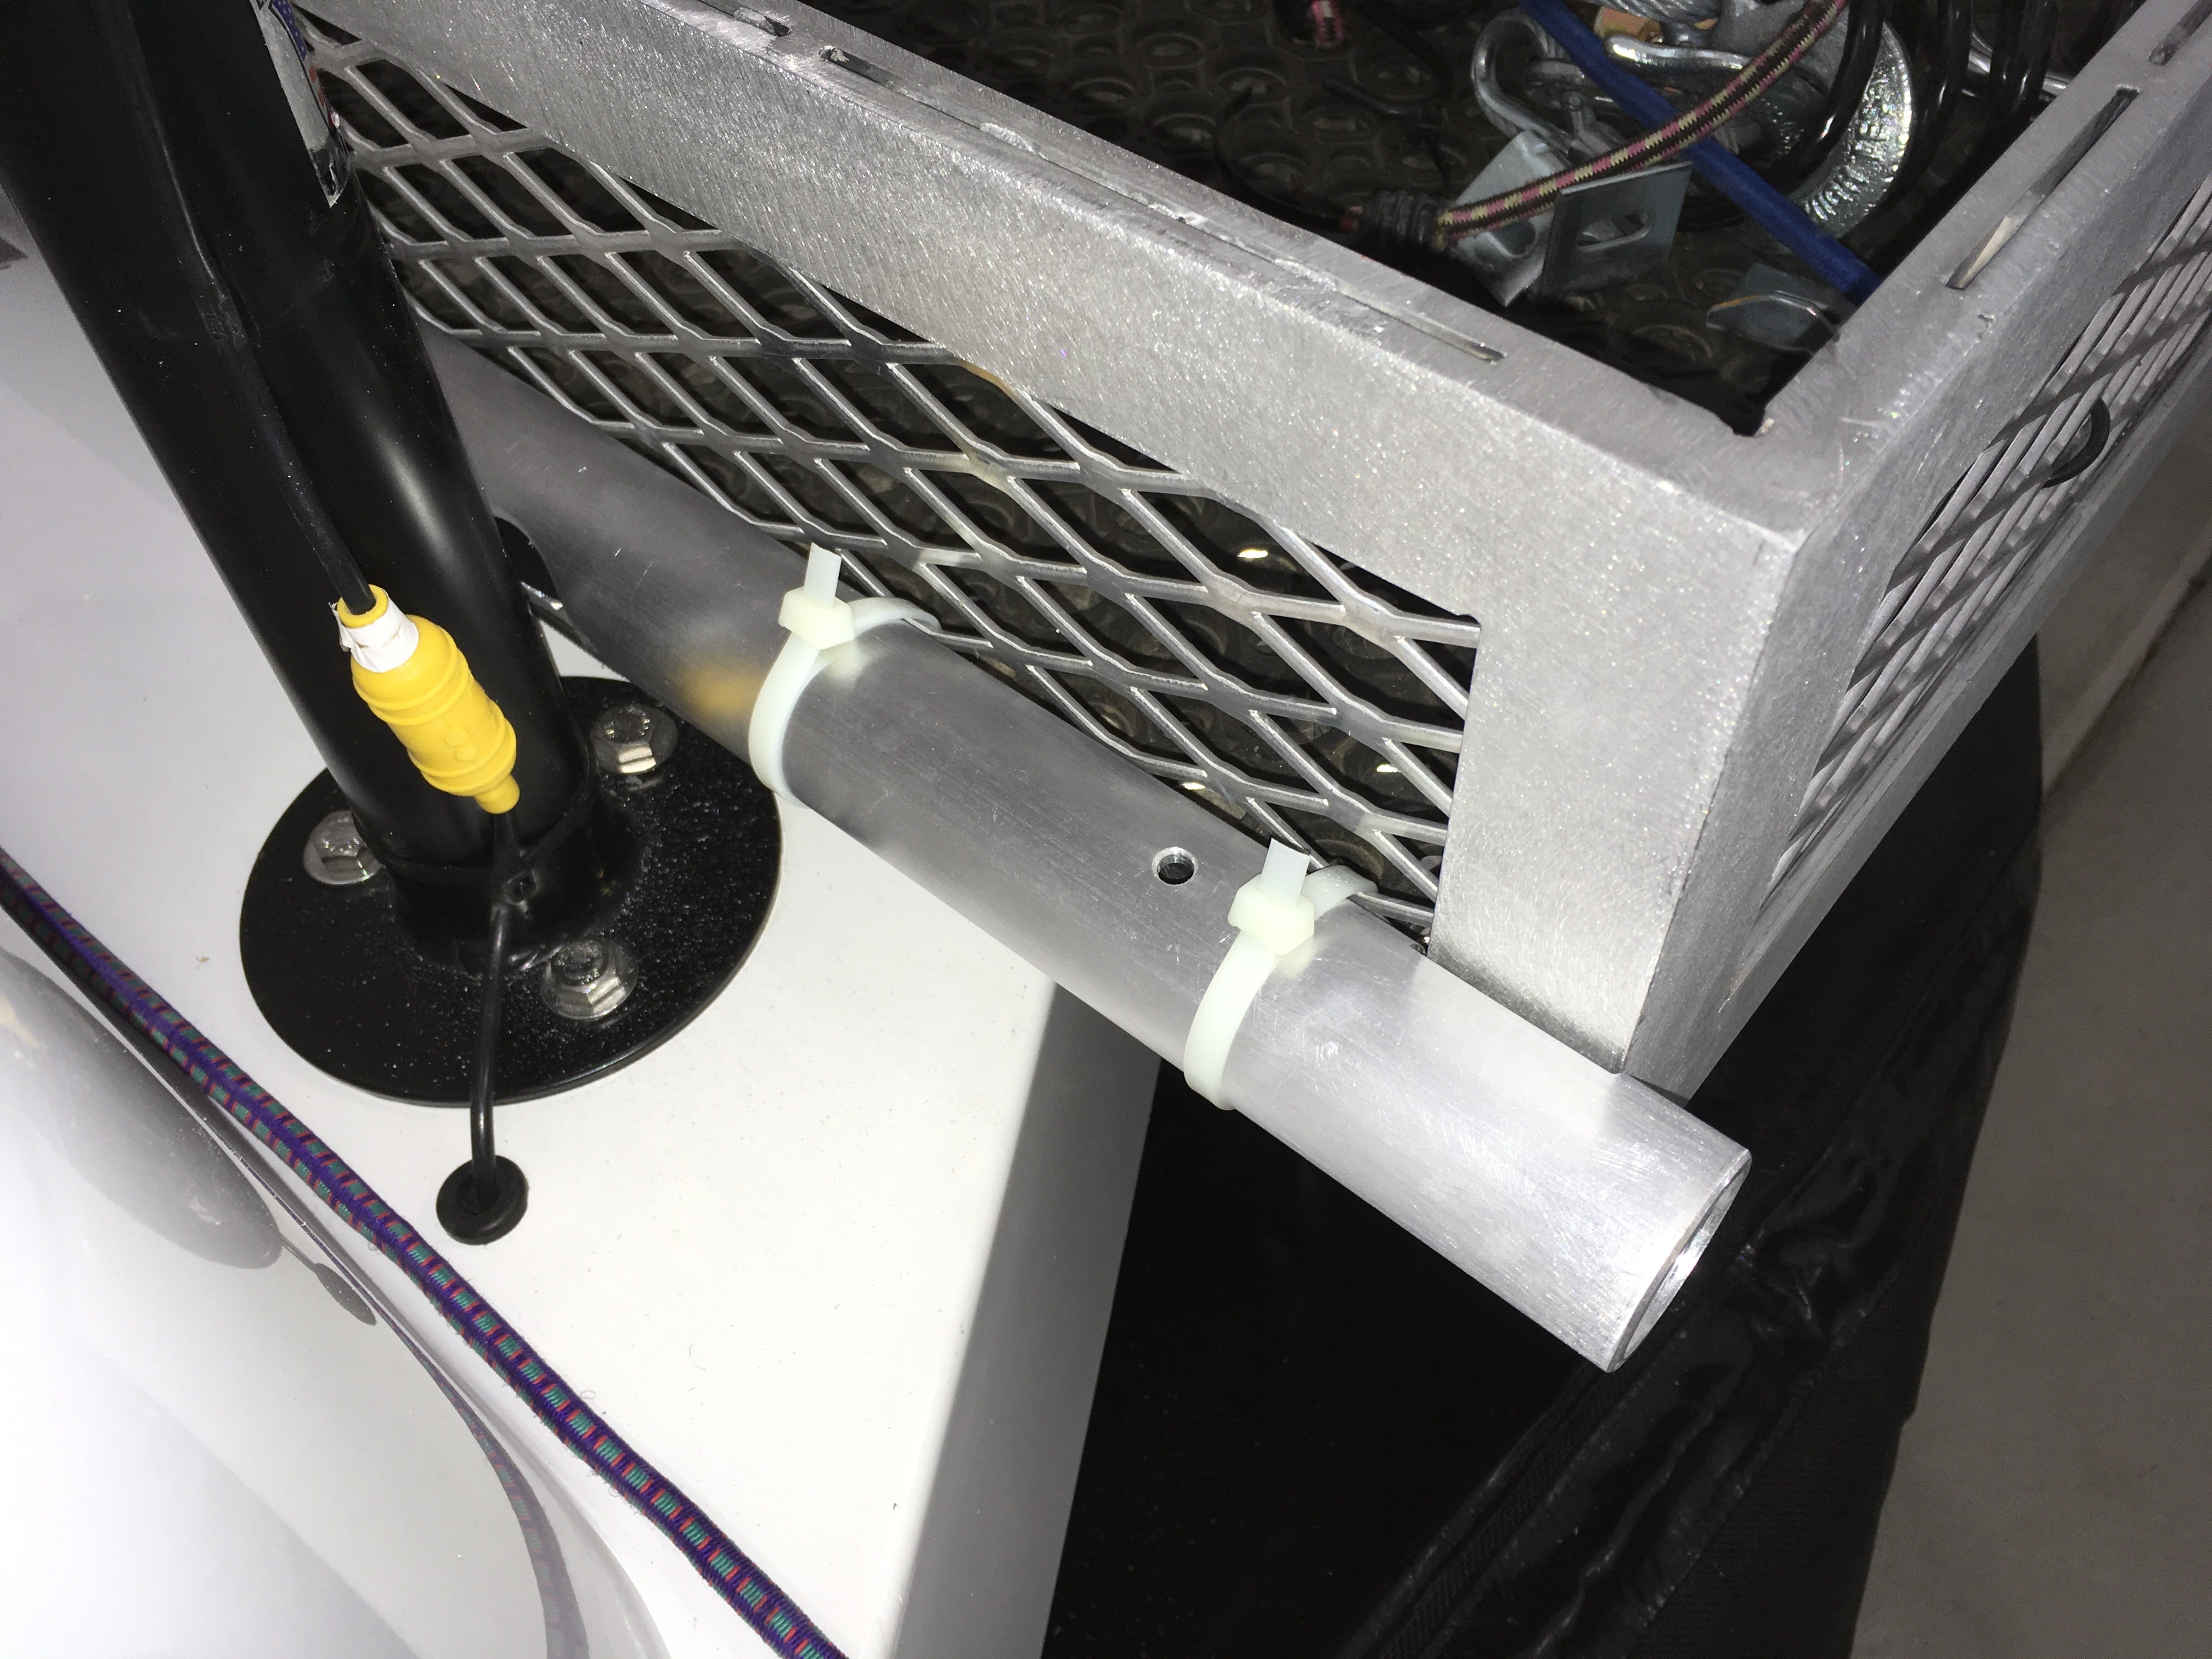
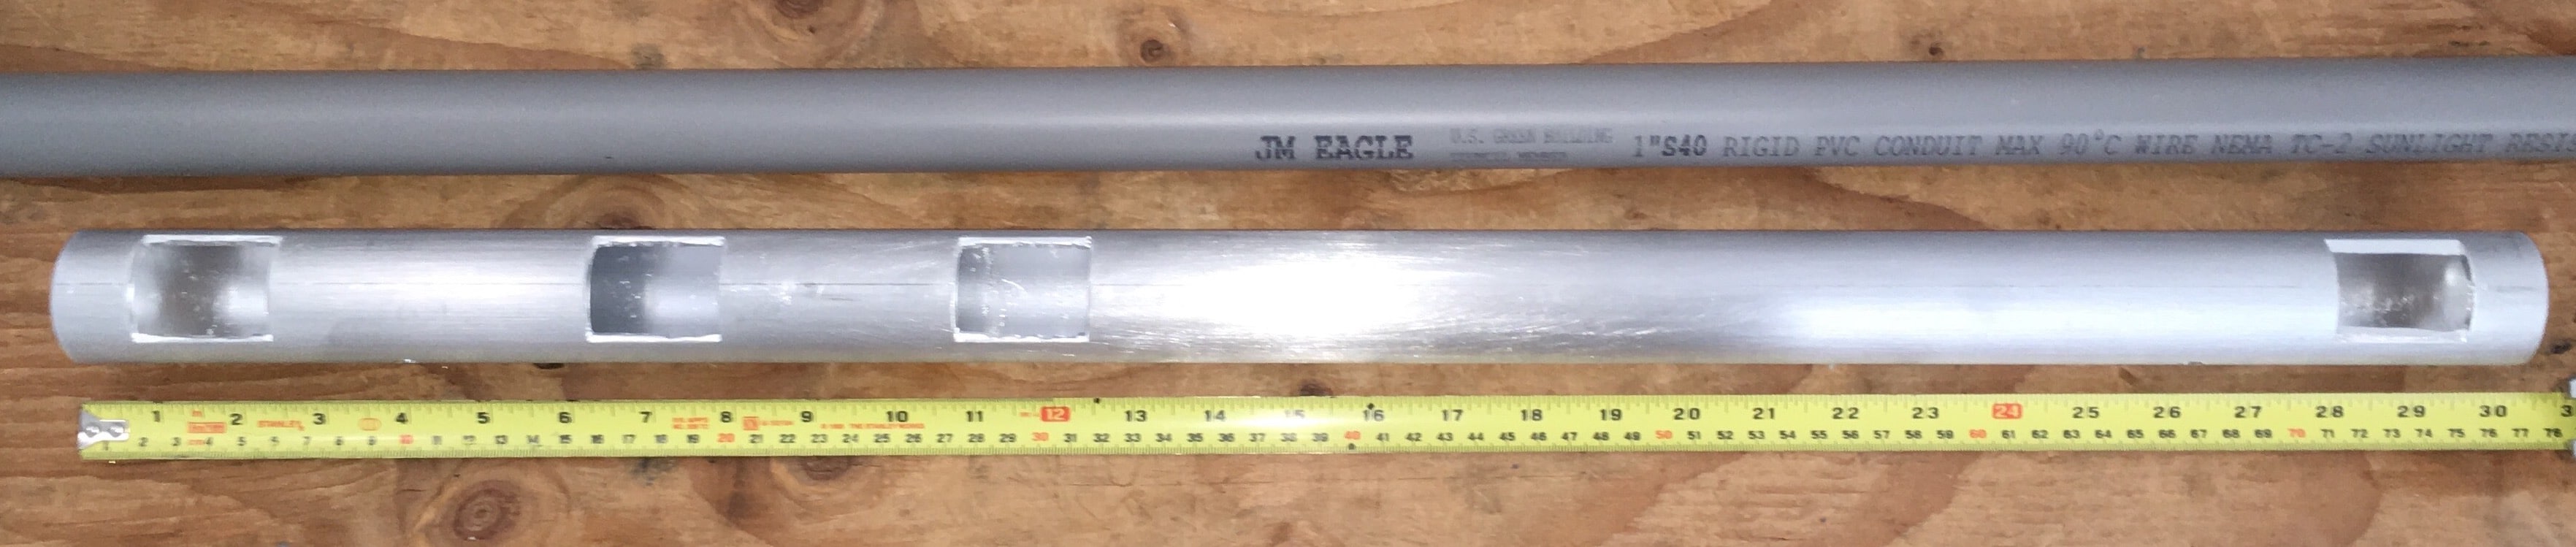
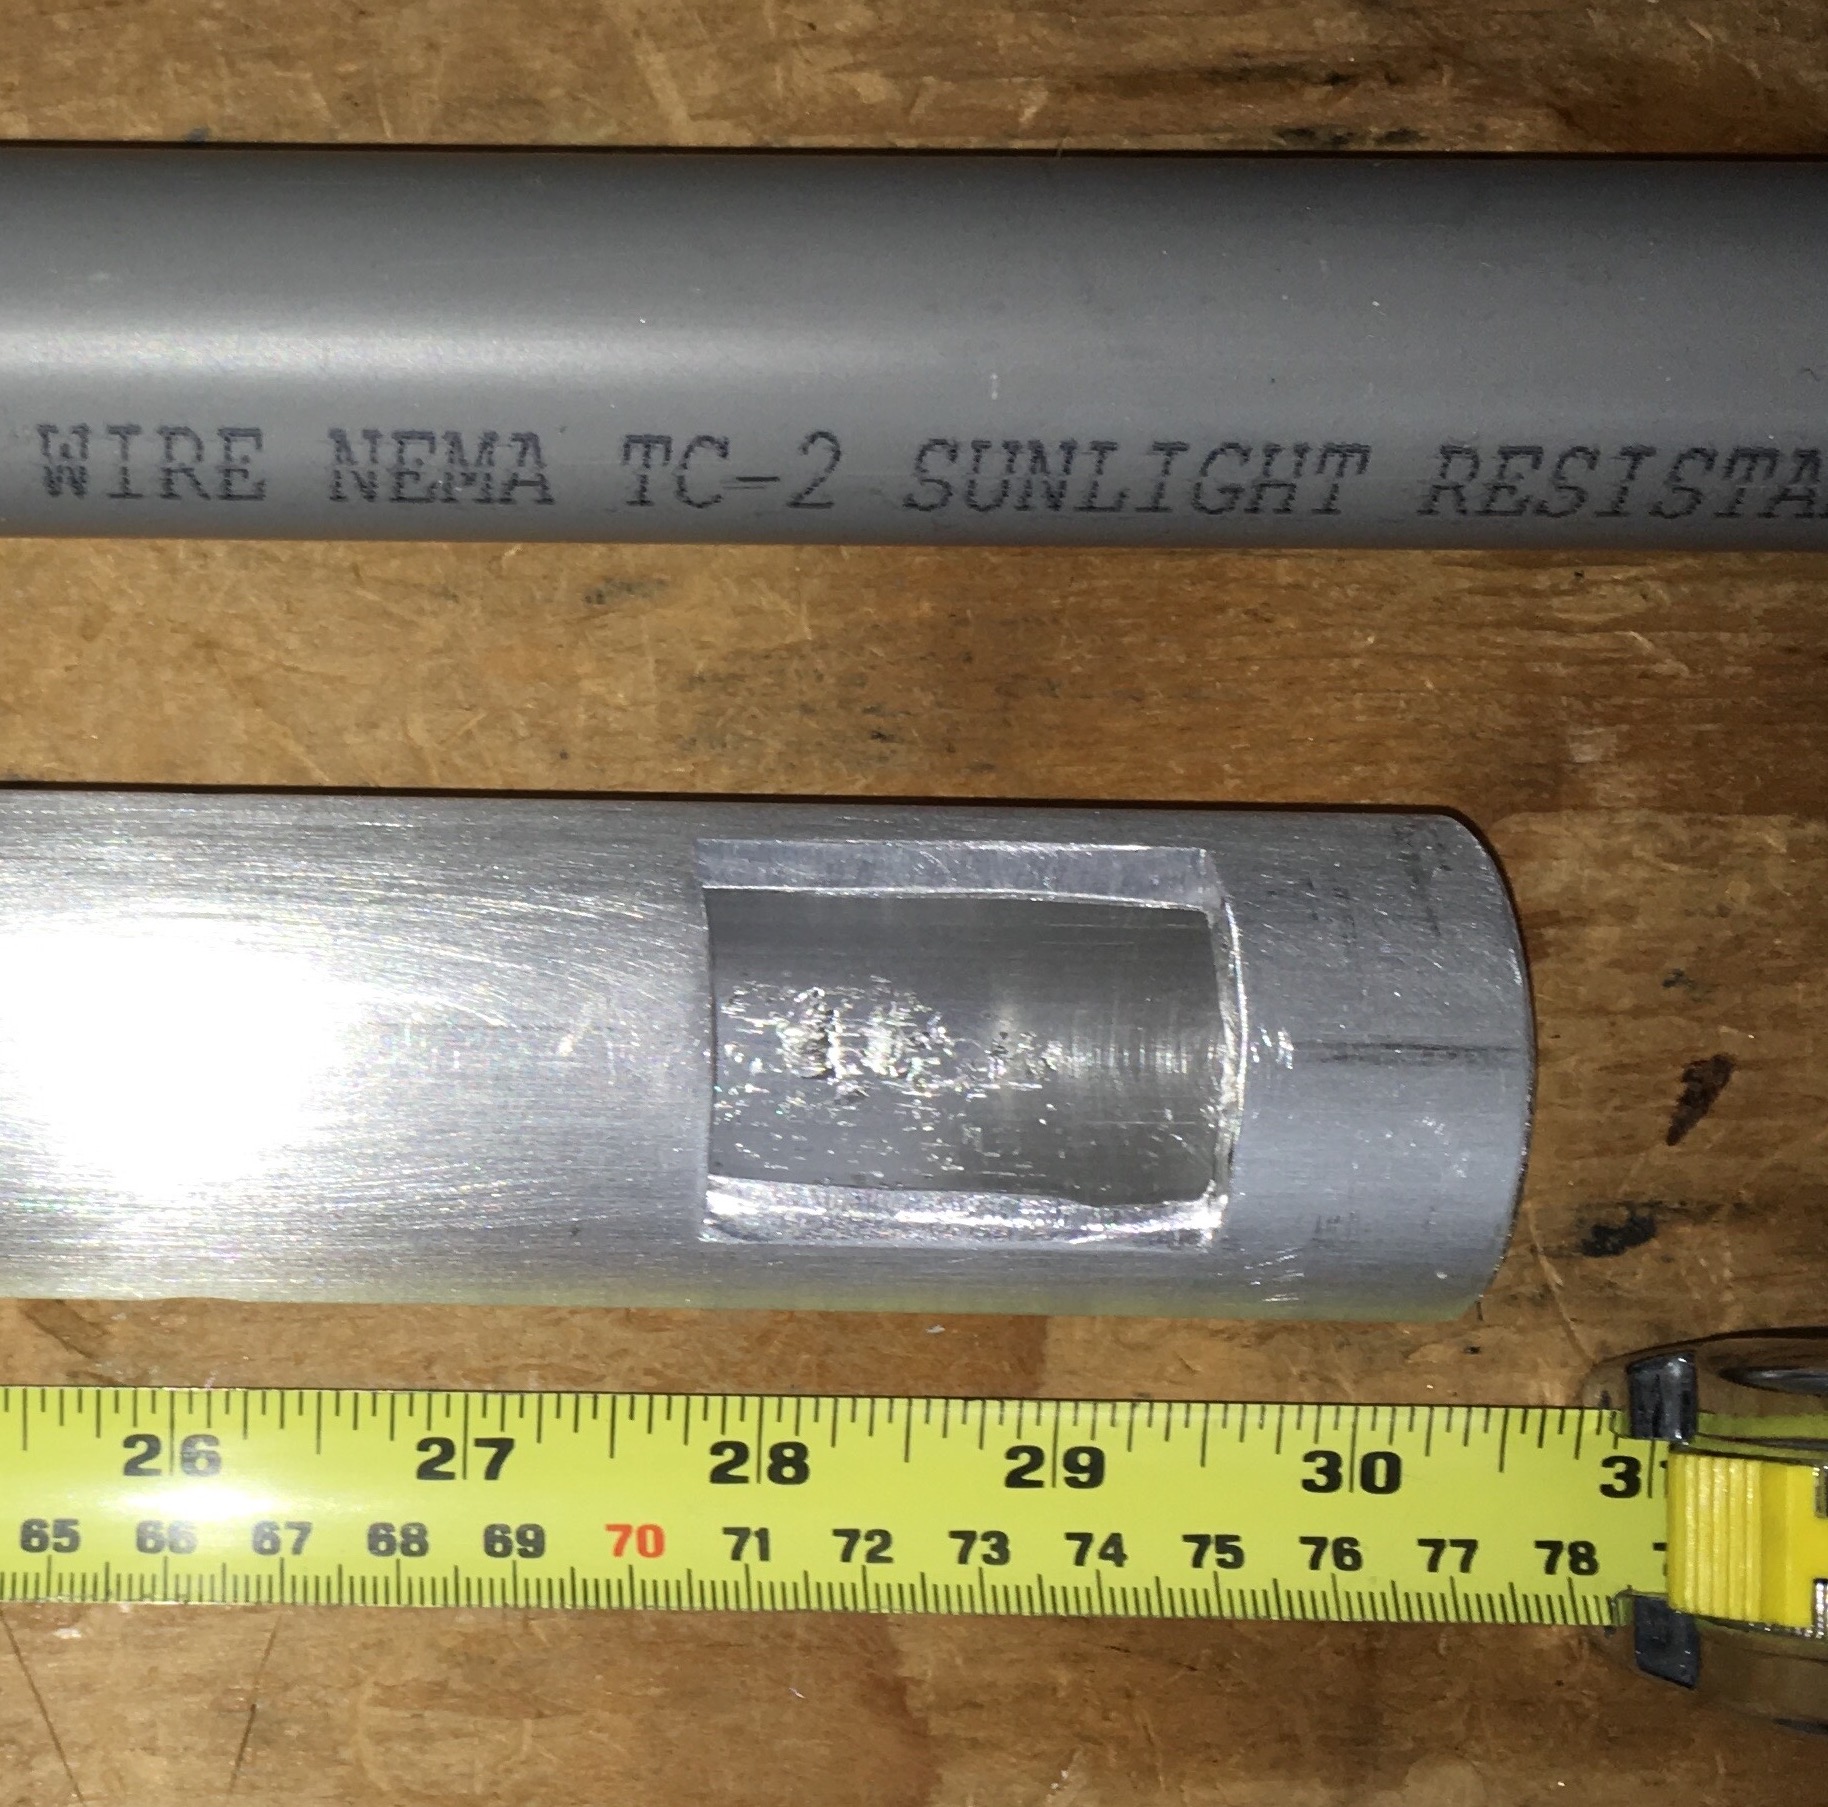
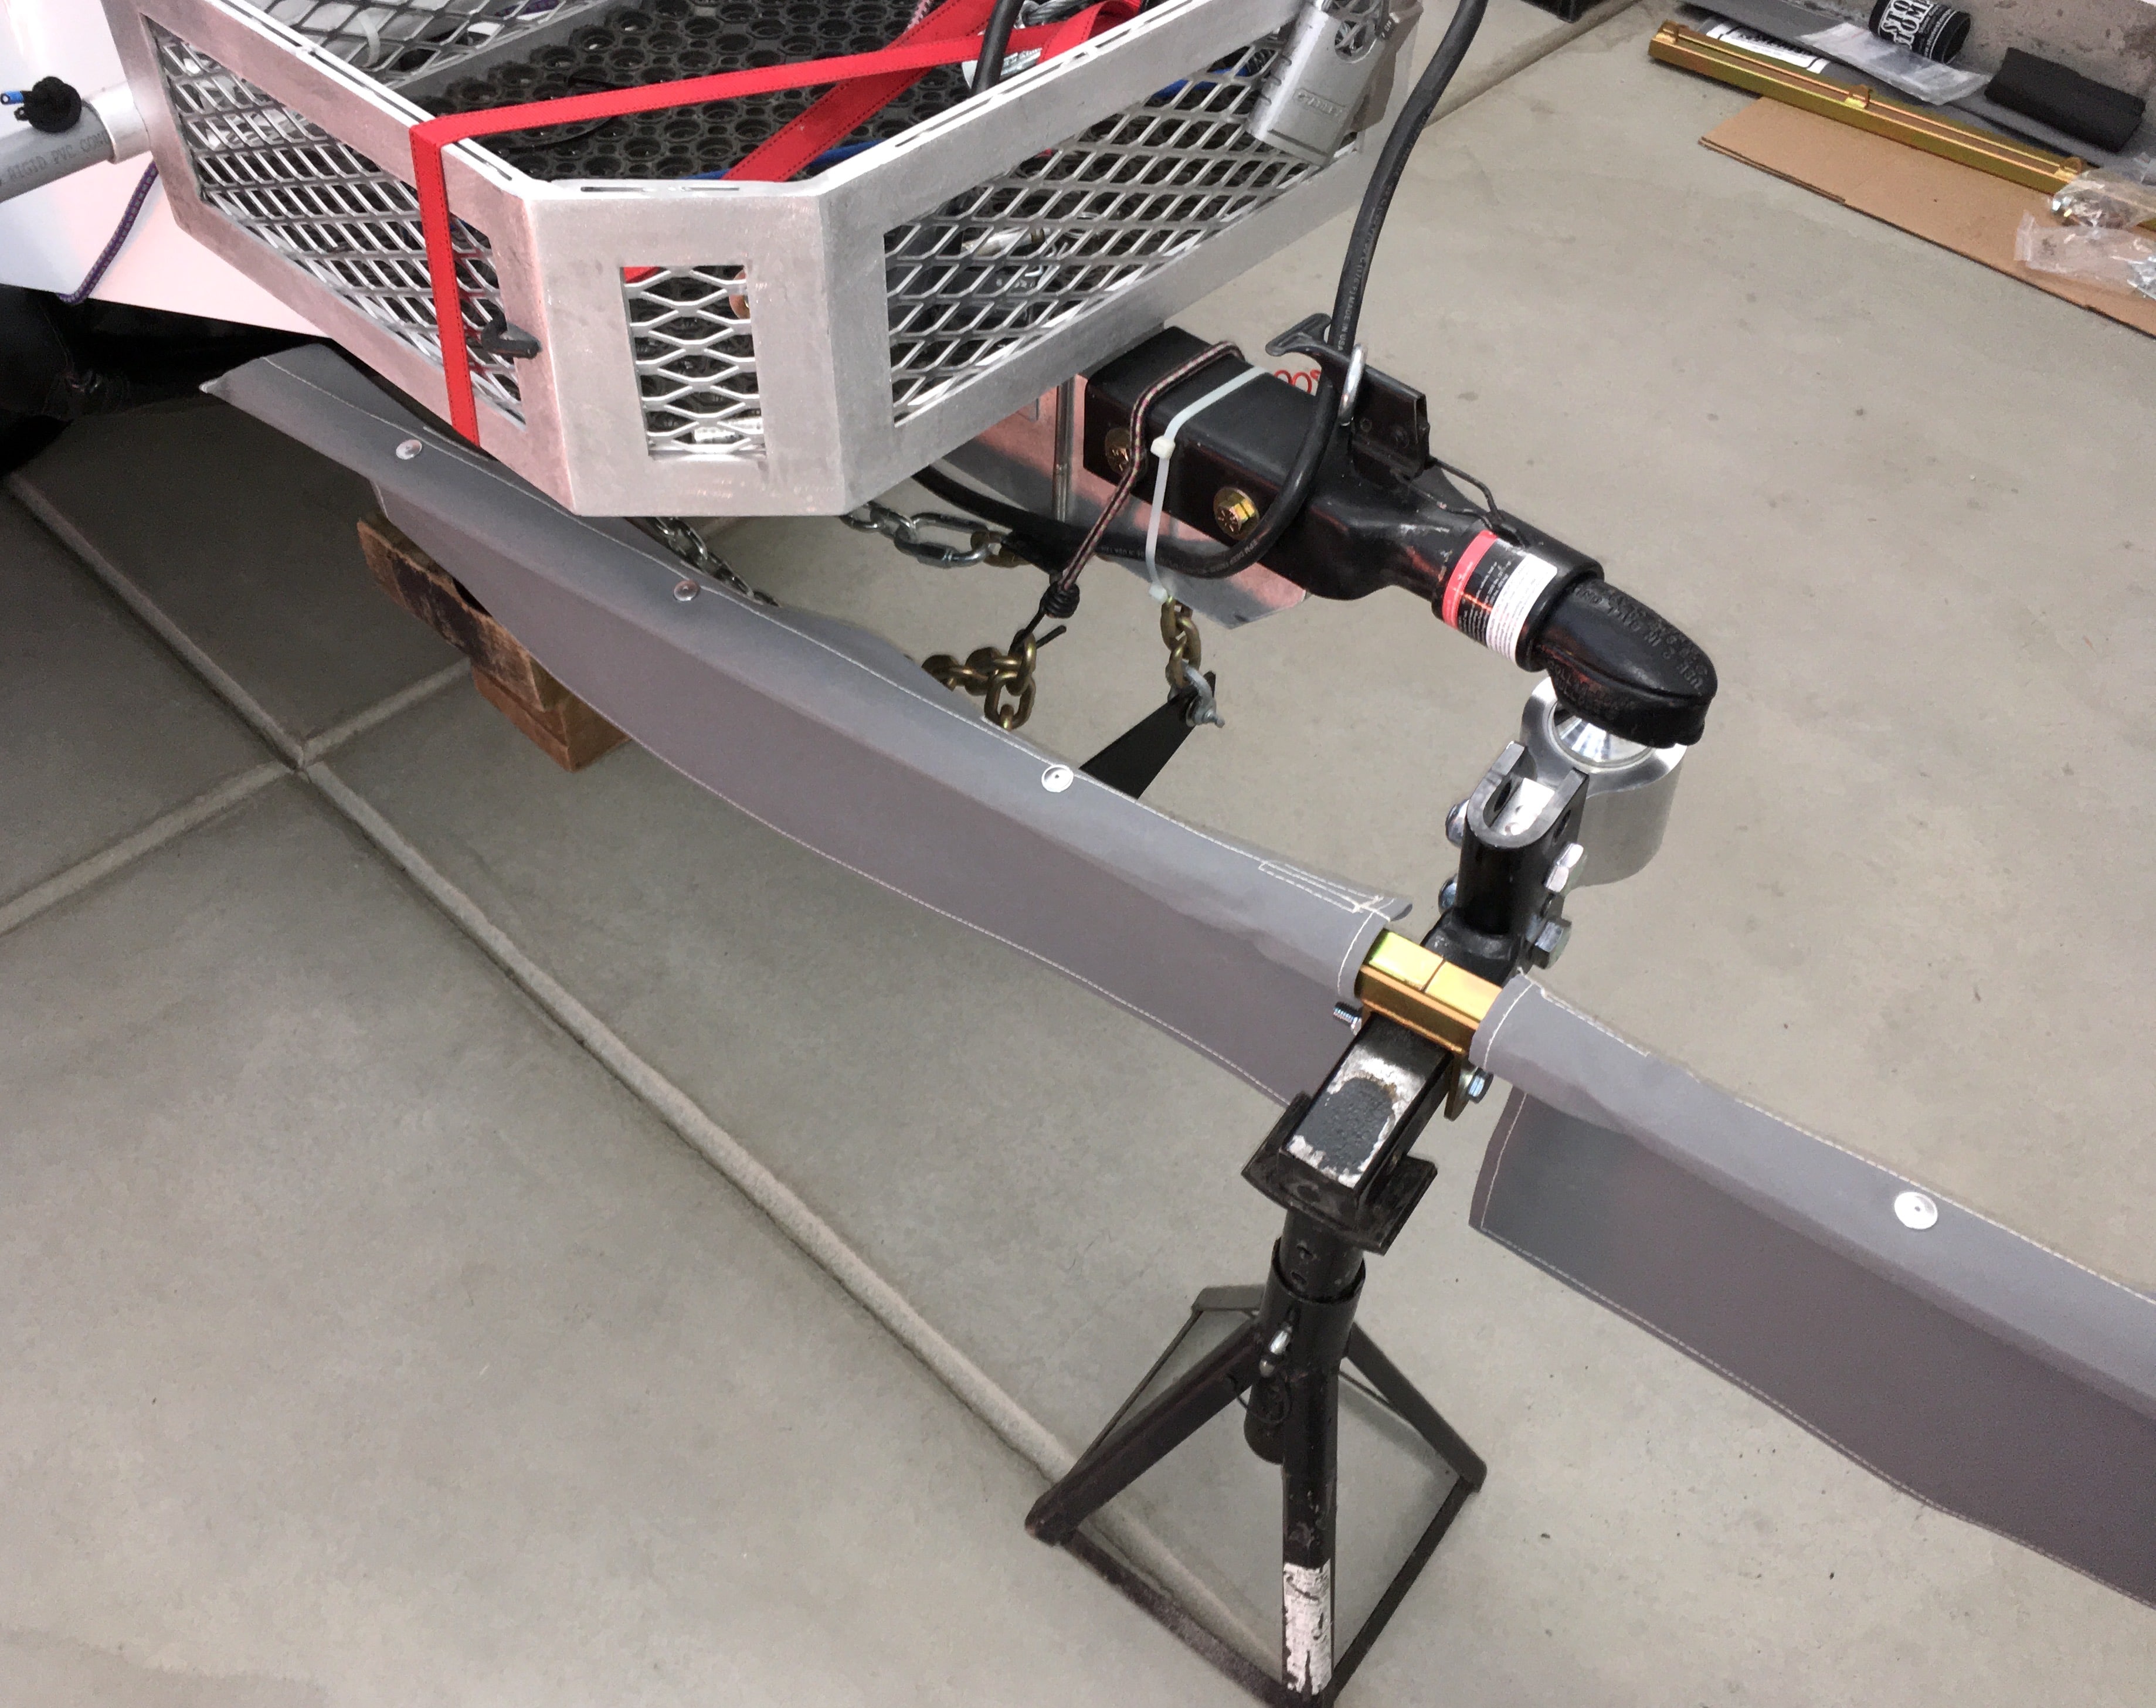
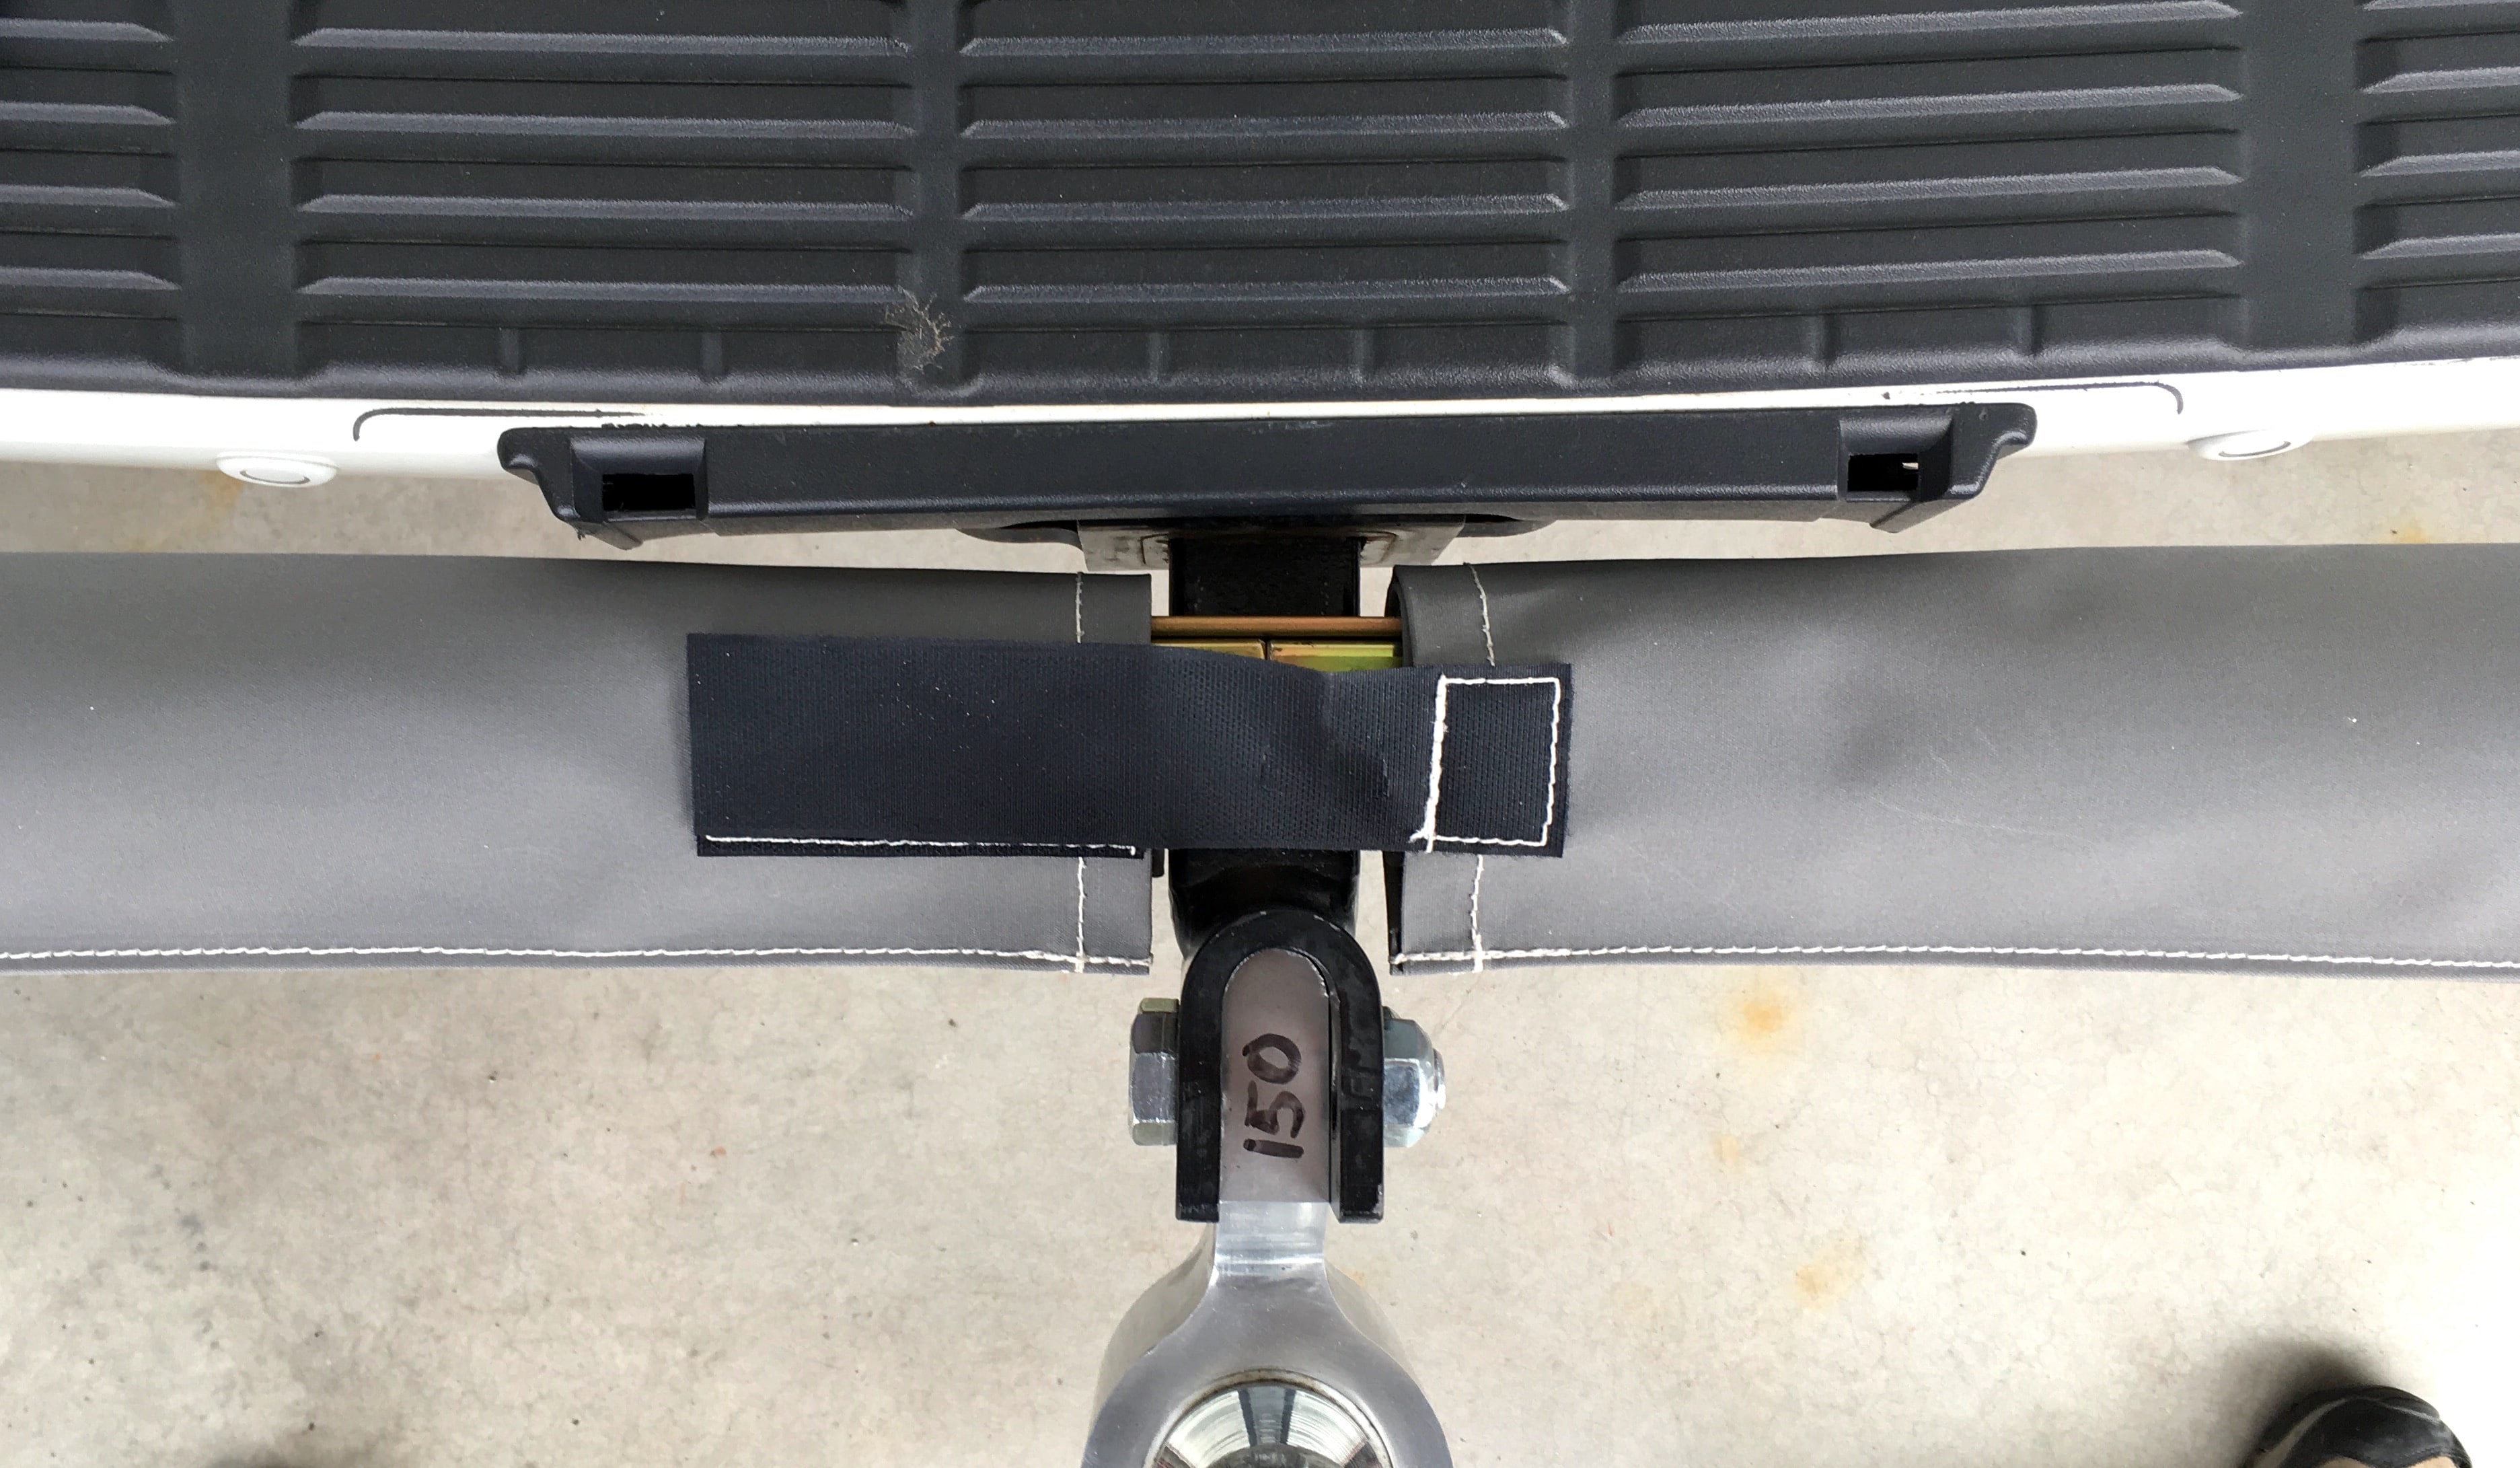
PART 4 EDIT 03/27/18 CENTER SUPPORT BAR The bar mount is made of 6062T6 aluminum tubing, 1 ¼ ID x 1/8 wall (Schedule 40). I had to cut and grind clearance pockets so that I could nest it in between the basket and the jack. It is a snug fit (needed to be tapped into place with a mallet) and is secured with four great big nylon cable ties. It is rock solid but quick to remove if needed, to remove the jack for example. I did not want to weld or drill into the basket. If you have access to a GOOD welder, a permanent welded join would be better overall. But you would have to remove the basket for jack access. Detail showing the two plastic inserts that go in the mesh sleeves (9.25”) and the two main support tubes (36.25”). They are ground to clear the basket frame, I drilled then for retaining pins but I do not think they will be needed. MORE TO COME. John Davies Spokane WA
1 point
-
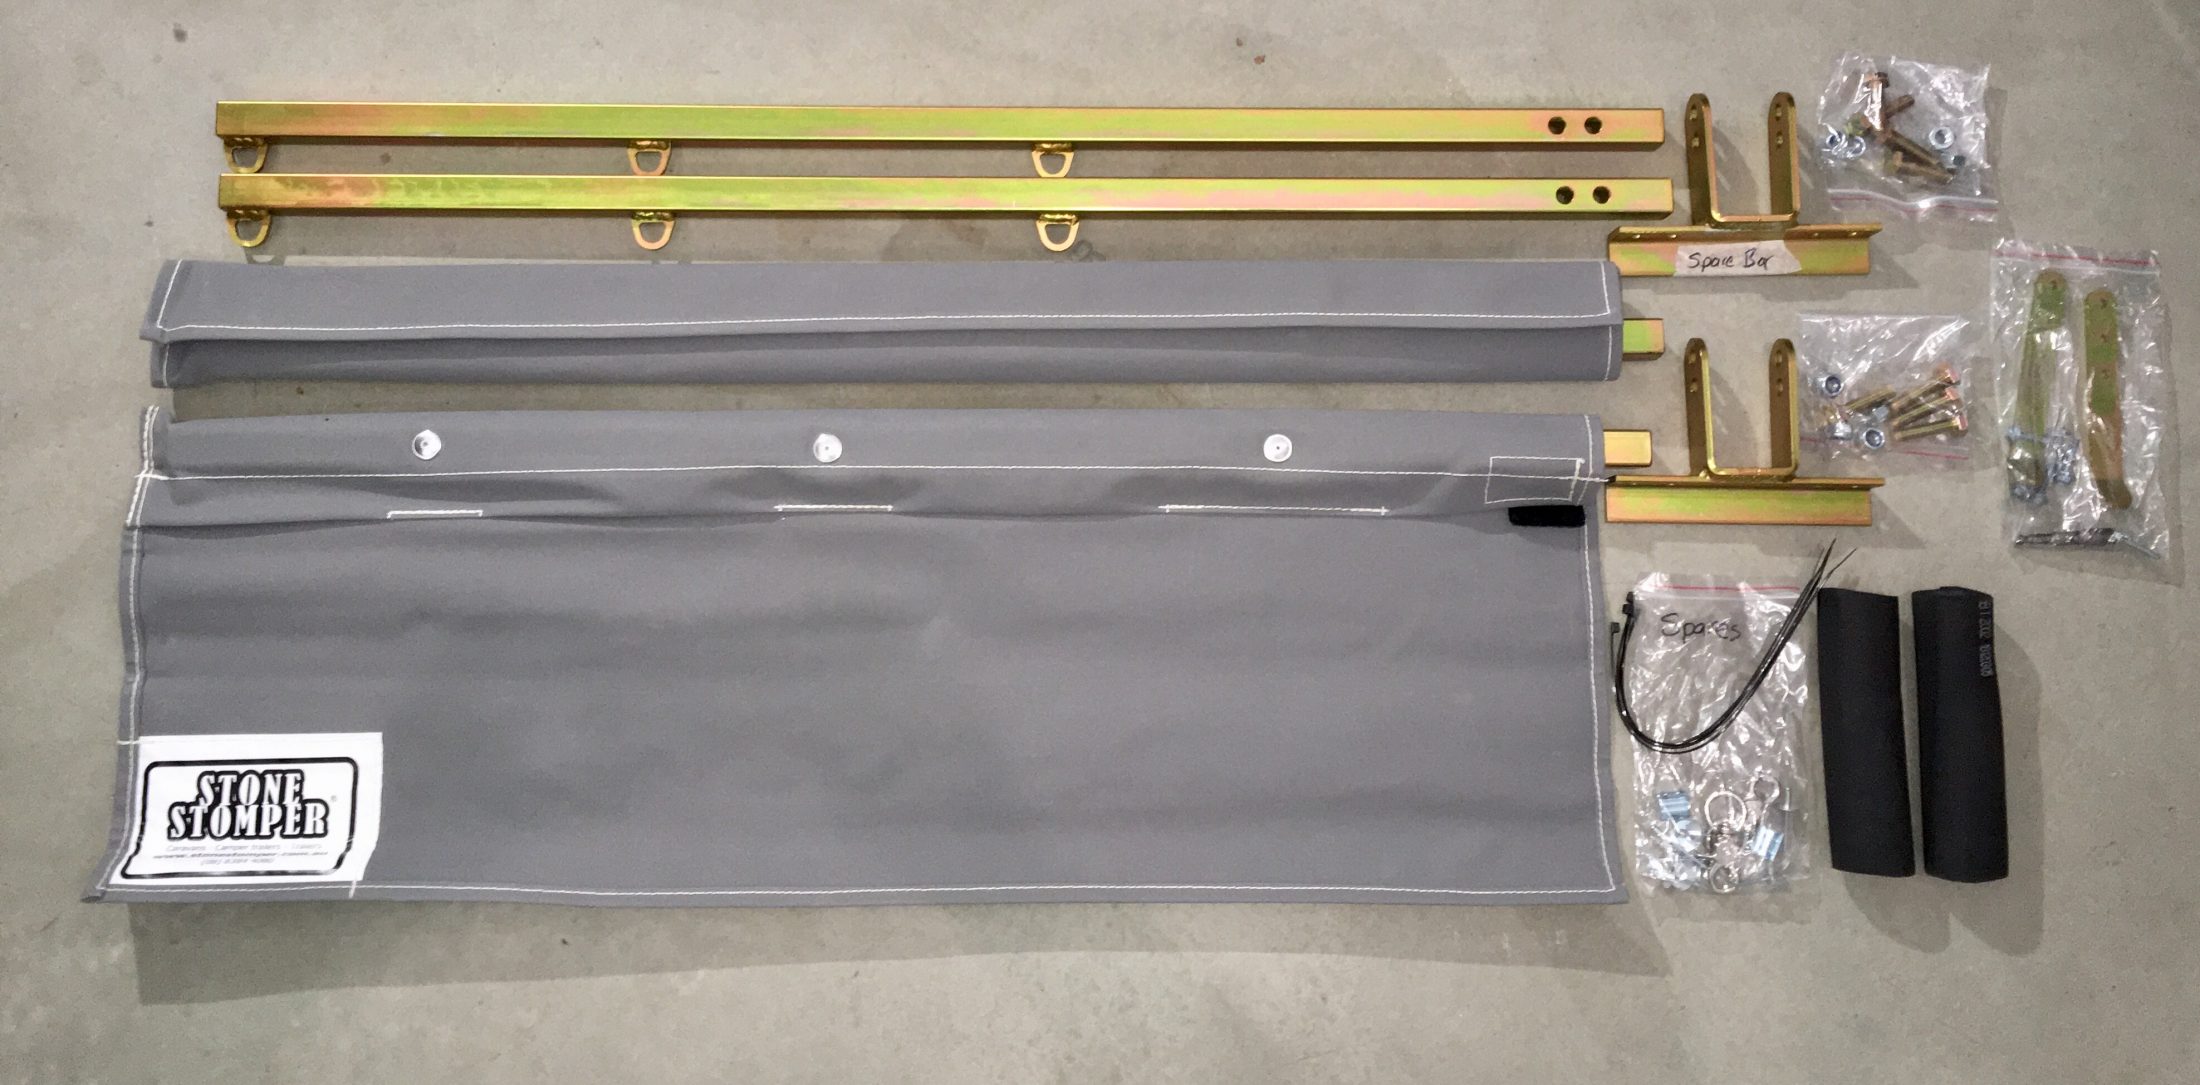
PART 3 EDIT 03/27/18 FRONT BAR DETAILS The steel bar on my SS is 2 meters end to end and it does clear my storage basket at full “jackknife”, a position I would never achieve. My rear bumper and quarter panel would hit first. Views of the front bar and hitch connected to the Land Cruiser. The sleeves are installed and they are longer than the bar itself, which extends out just past the width of the sidewalls of the rear tires. For more on this, refer to the pics at the end of the thread. MORE TO COME. John Davies Spokane WA
1 point


-
Recent Achievements
-


")


