Leaderboard


Popular Content
Showing content with the highest reputation on 07/06/2022 in all areas
-
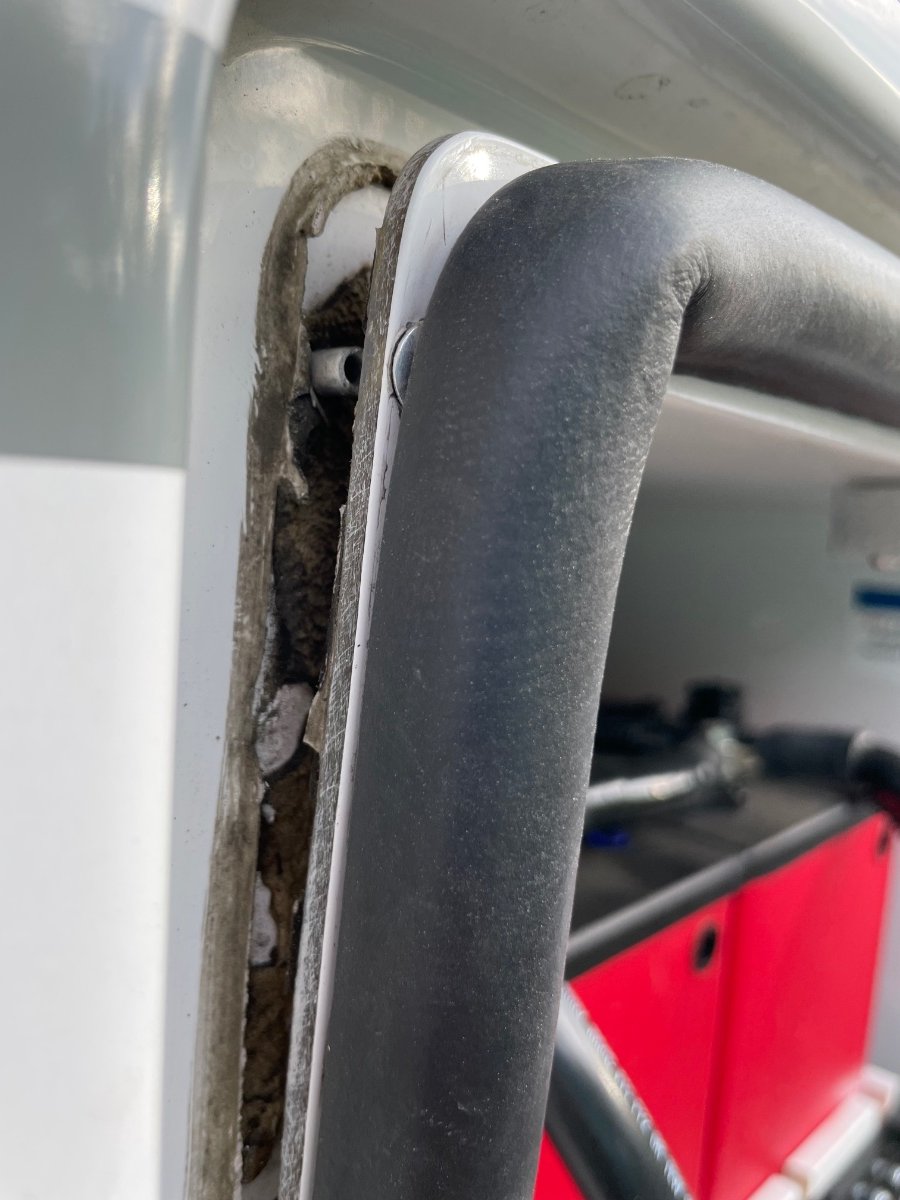
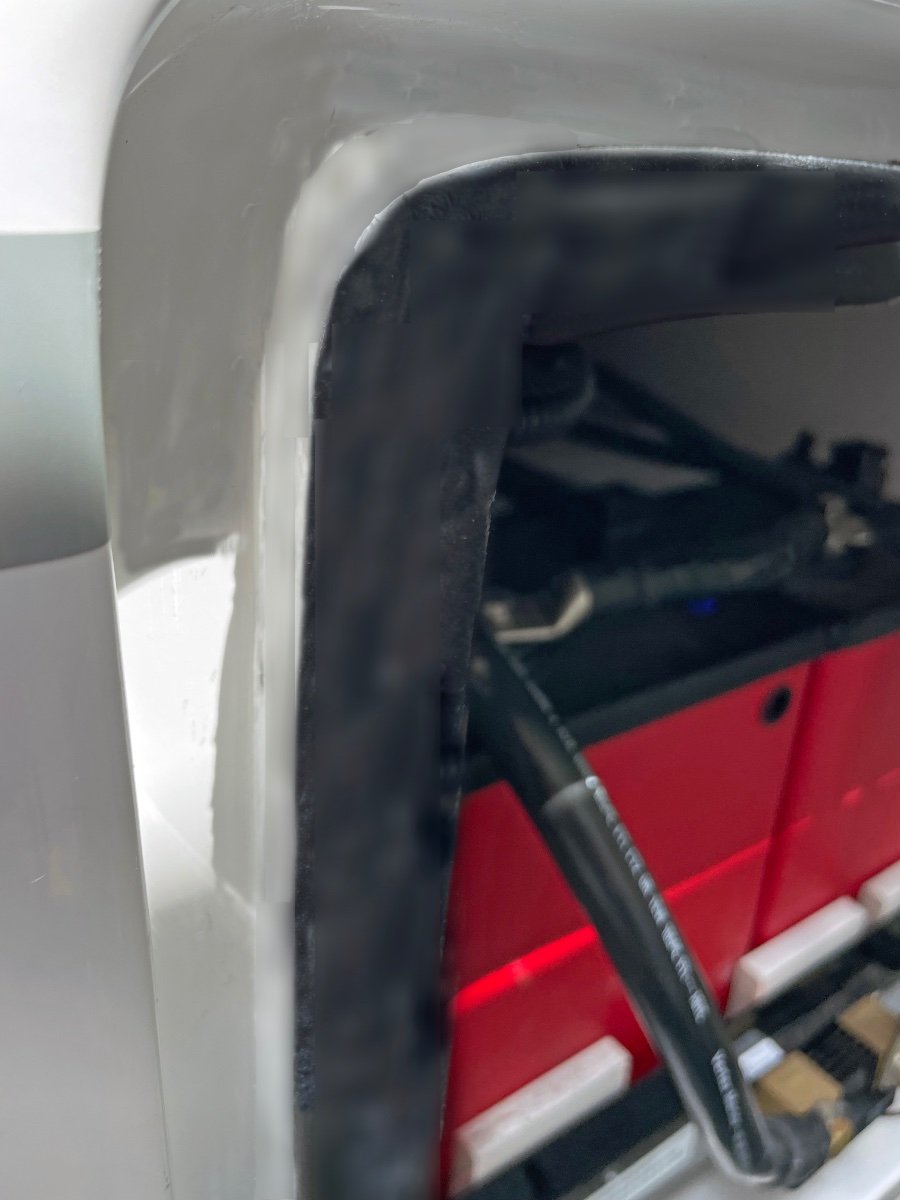
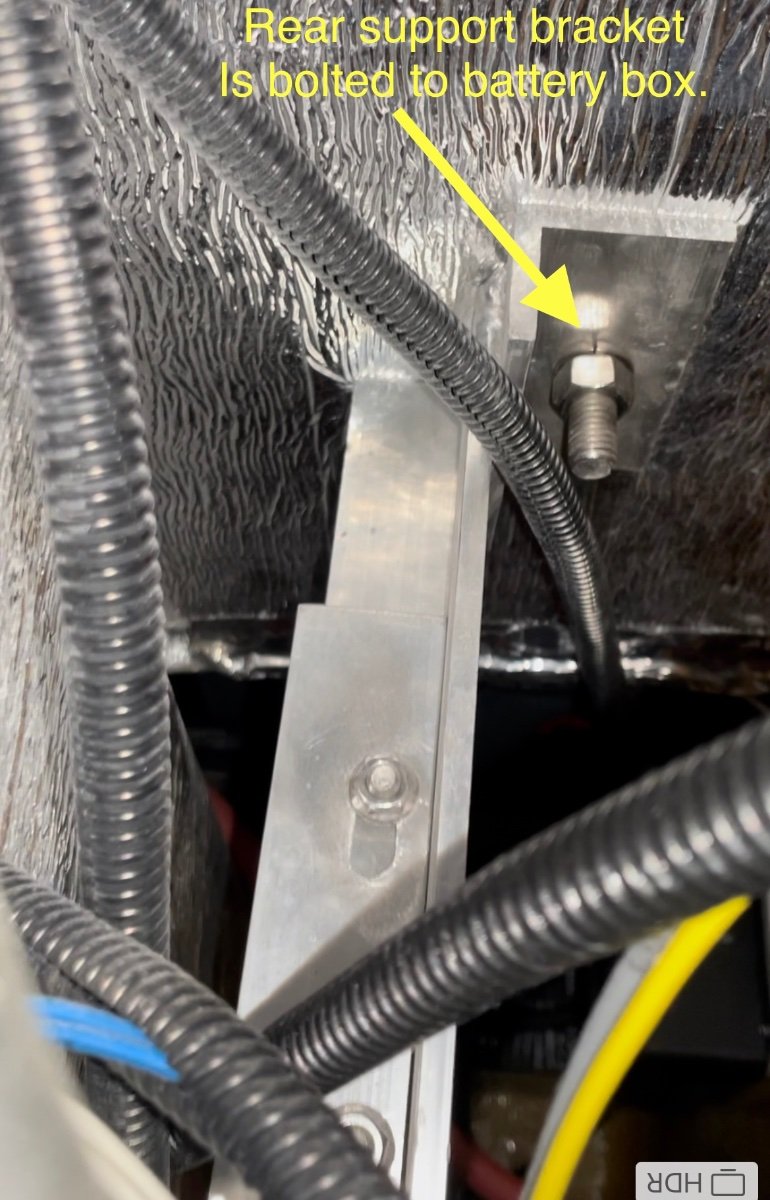
This spring as we were prepping for a new road trip, I noticed the battery box door seemed to be sticking out further than normal. I thought I would adjust the latch to pull the door in a bit tighter. What I found was that the battery box had started to tip forward away from the main hull as shown the pix below. All the rivets up both sides and all across the top of the box had sheared and the box was tipped out about 1/2". I contacted Oliver Support to understand how the box was designed, mounted etc. They cleared me for travel after having me check the support strut inside the trailer (under the pantry area) . After some further consultation I was able to perform a repair. Here's a sketch of how the battery box is installed in our Hull 505 (2019 Elite II) trailer. The repair steps I took following Oliver instructions were: 1) Remove the batteries from the slide tray to get weight off the box. 2) Drill out all sheared rivets. (3/16" bit) 3) Release the 2 support bracket bolts inside the trailer under the pantry (one of which is adjustable). (This step is a pain and requires some long extensions for the ratchet wrench to make reaching nuts possible.) 4) Tip box back into position. (Check that the box base still has a slight outward tip for water drainage.) 5) Re-tighten support bolts. 6) Re-rivet all around the perimeter. 7) Clean seams and add a bead of boat life white sealant around the battery box seam. (See pix below). Repaired Box Above: Door closes with a good seal all around and the box sealed to the body. We are going to keep an eye on this as we travel this next year, and make a trip to the Oliver factory for them to inspect and repair if necessary. I'm not sure of the root cause or mechanism by which the box tipped out in the first place. One concern would be that the box is putting too much pressure on the outer hull while bouncing down the highway. I don't see any indications of cracking in the glass hull or box at this point. Hope this helps if anyone else see's an issue. Craig Hull 505
 9 points
 -
I just took the cover off and unscrewed the screw ring, sanded them with 180 grit sand paper, painted then with an outdoor white spray paint for plastics, cost $4.78 for the paint and still have 4/5 of the can left for future use. So I have about a dollar in the restoration and it turned out perfect, it's been one year since it was redone. trainman5 points
-
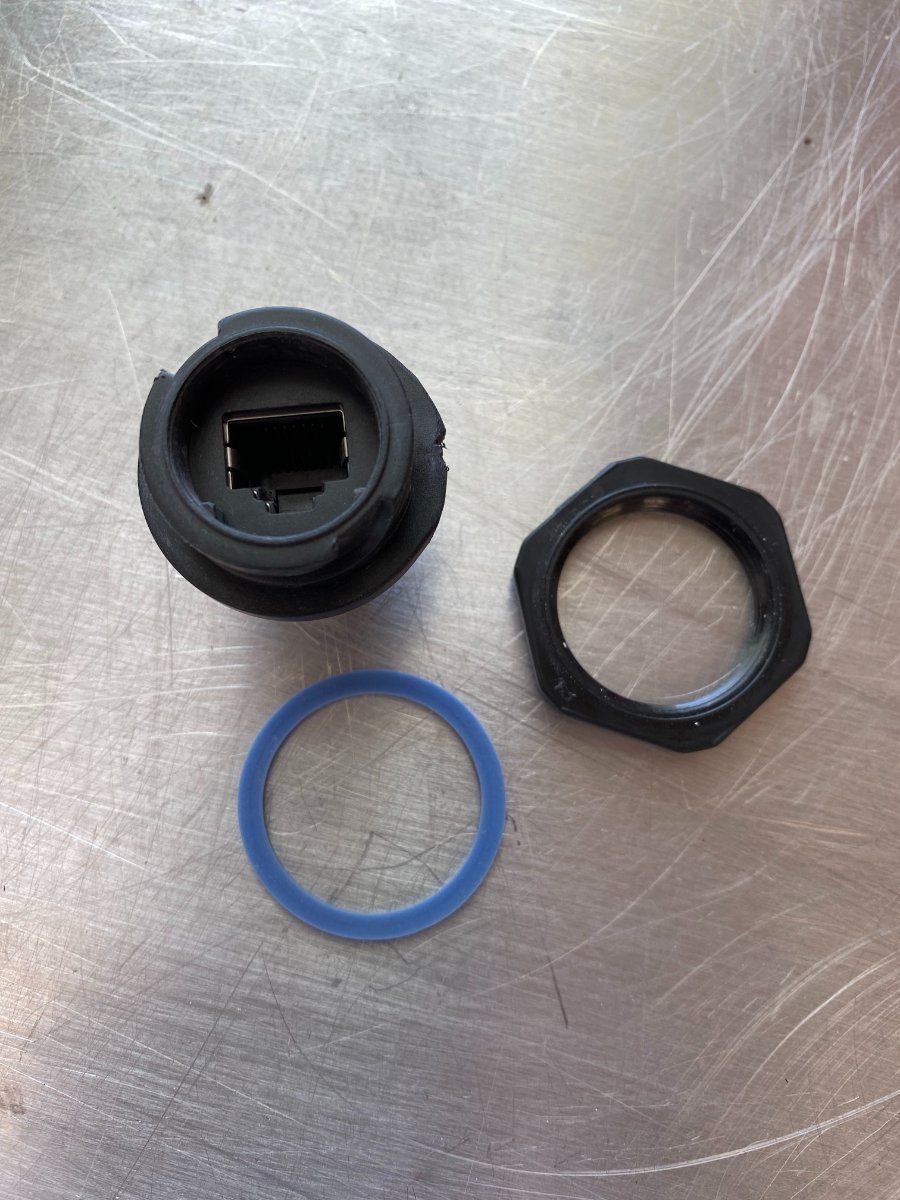
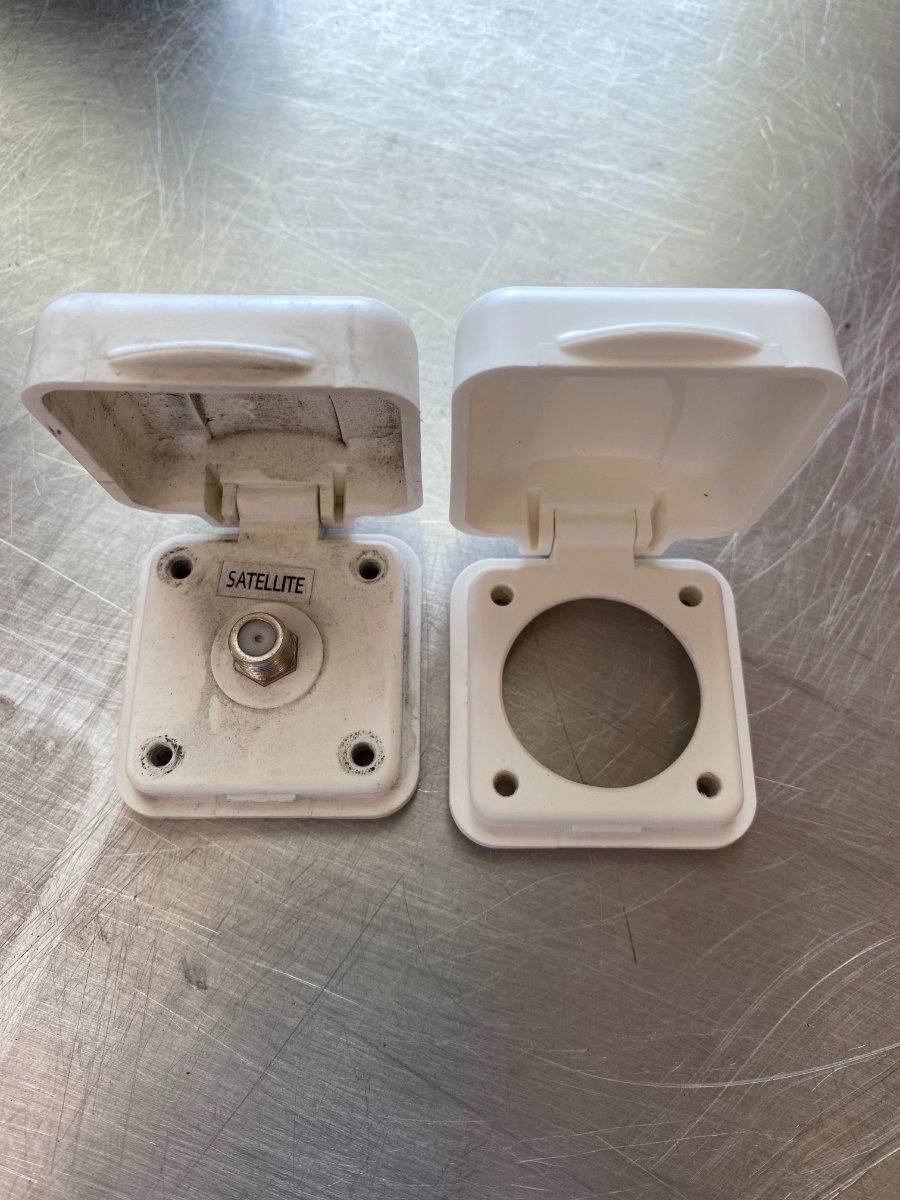
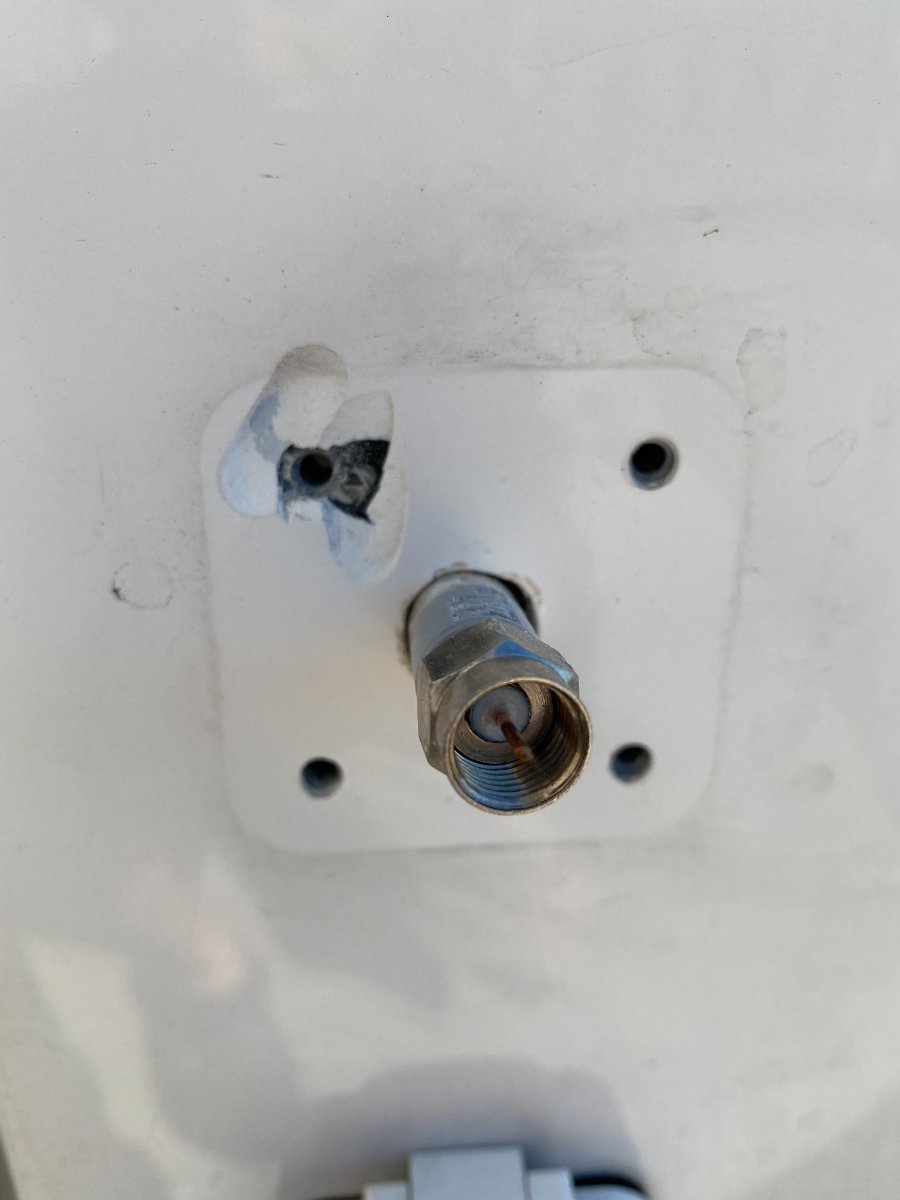
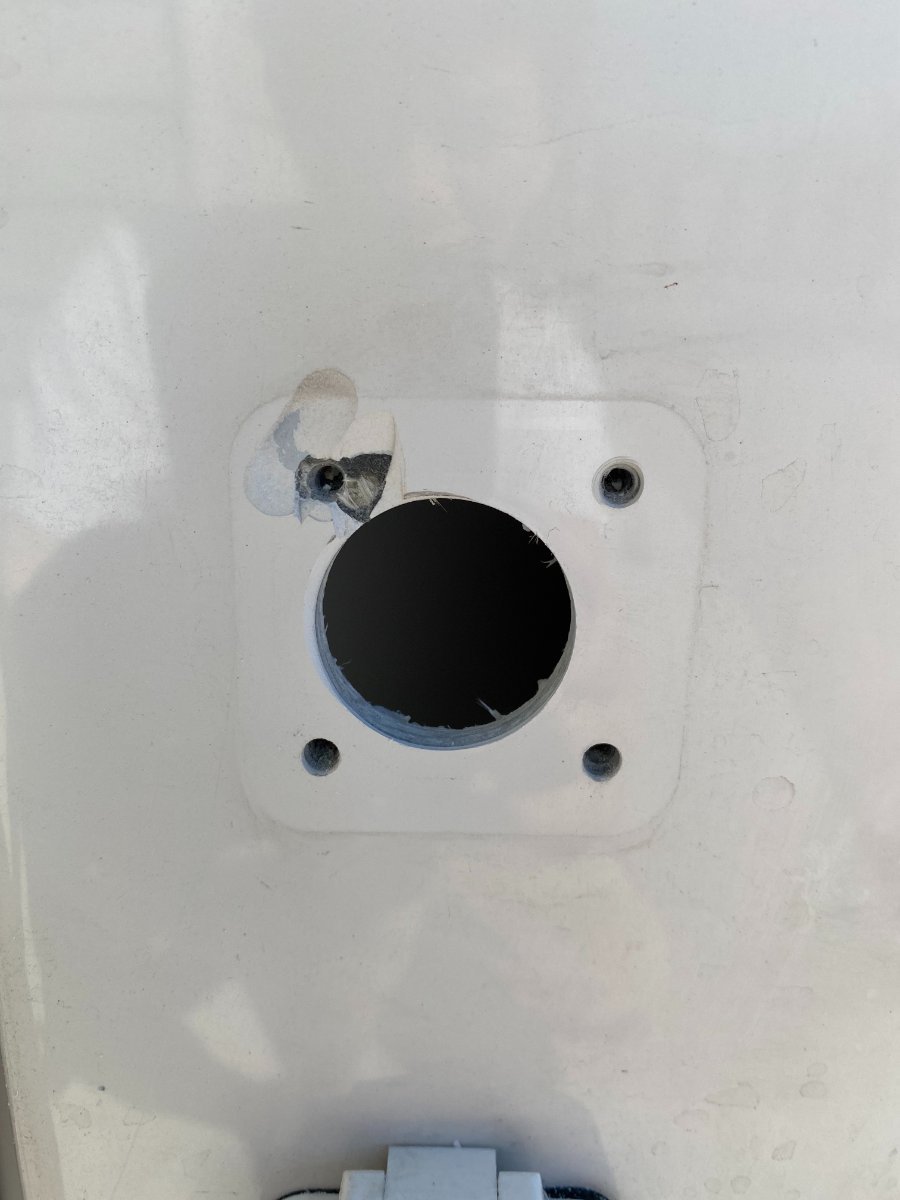
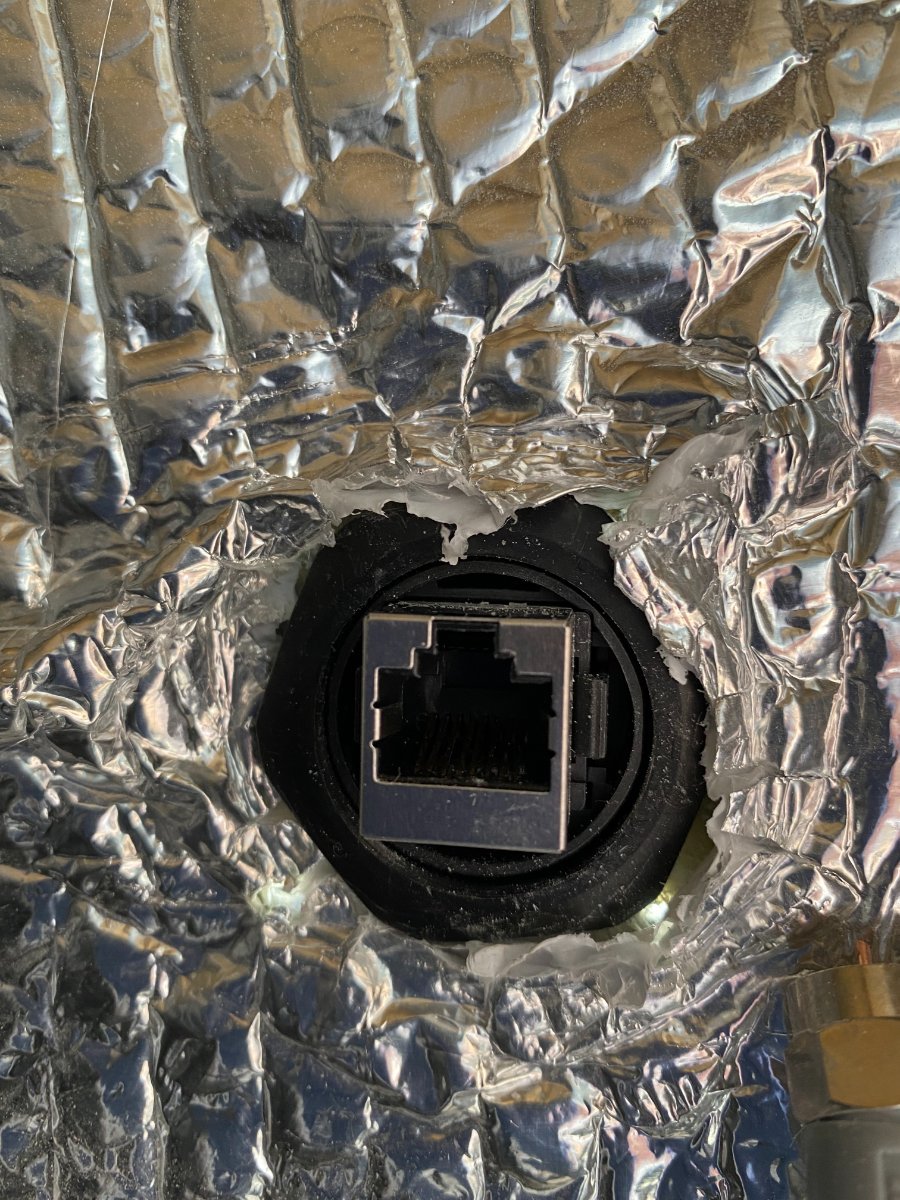
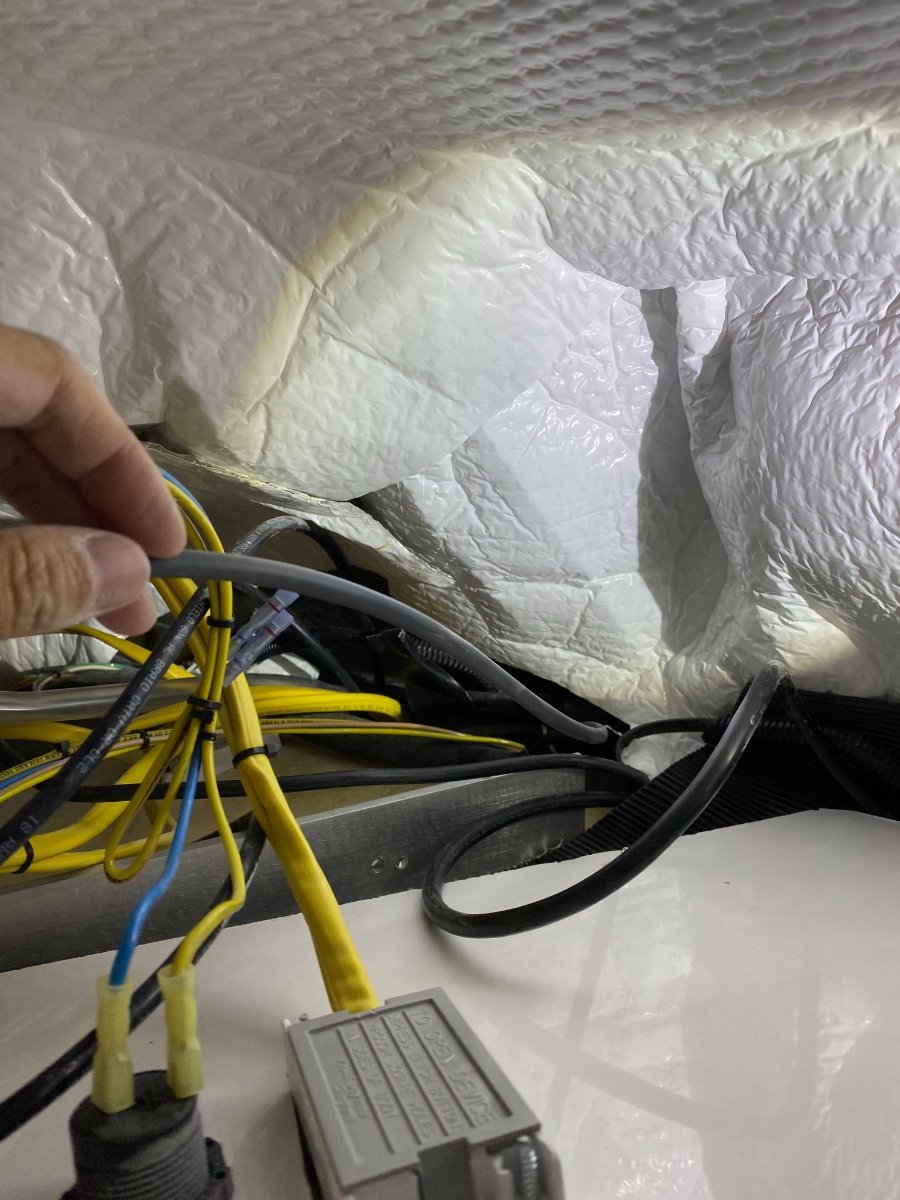
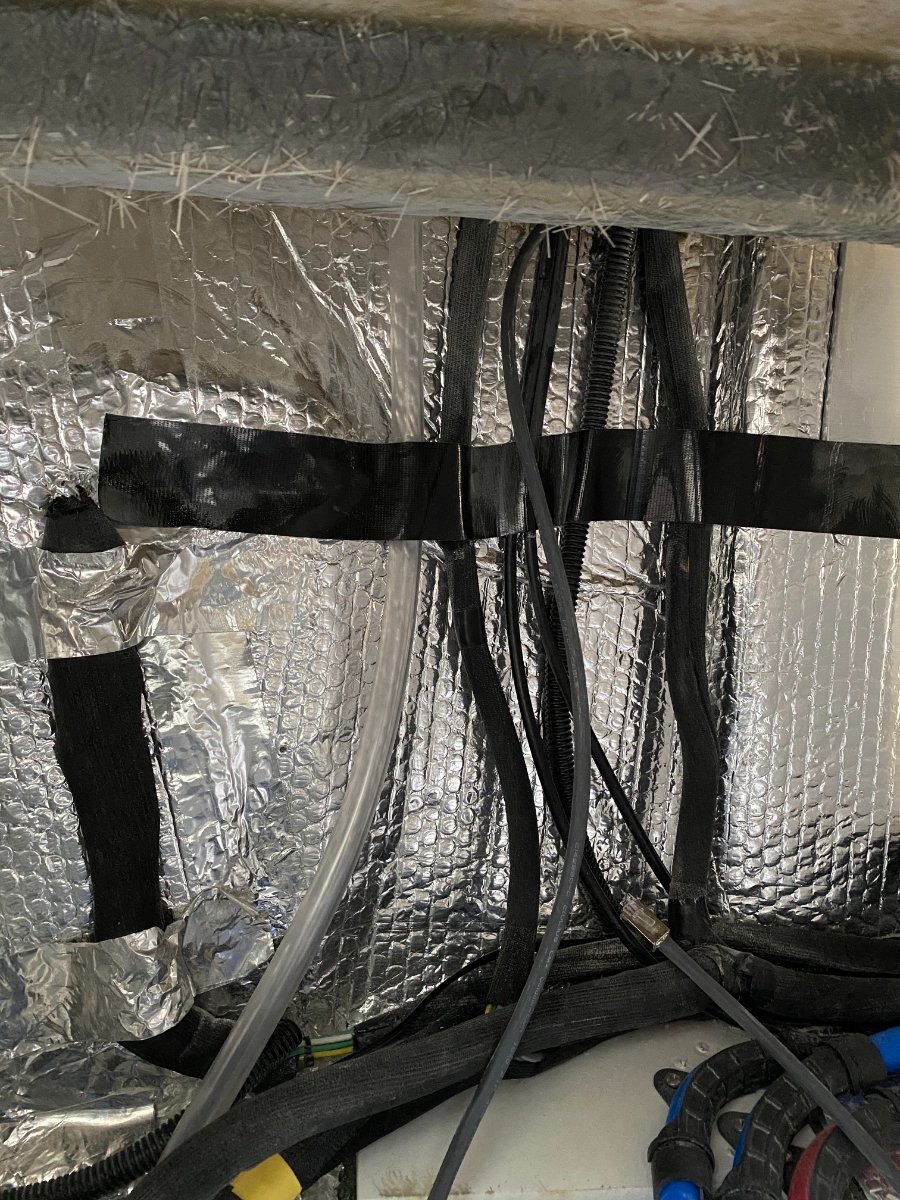
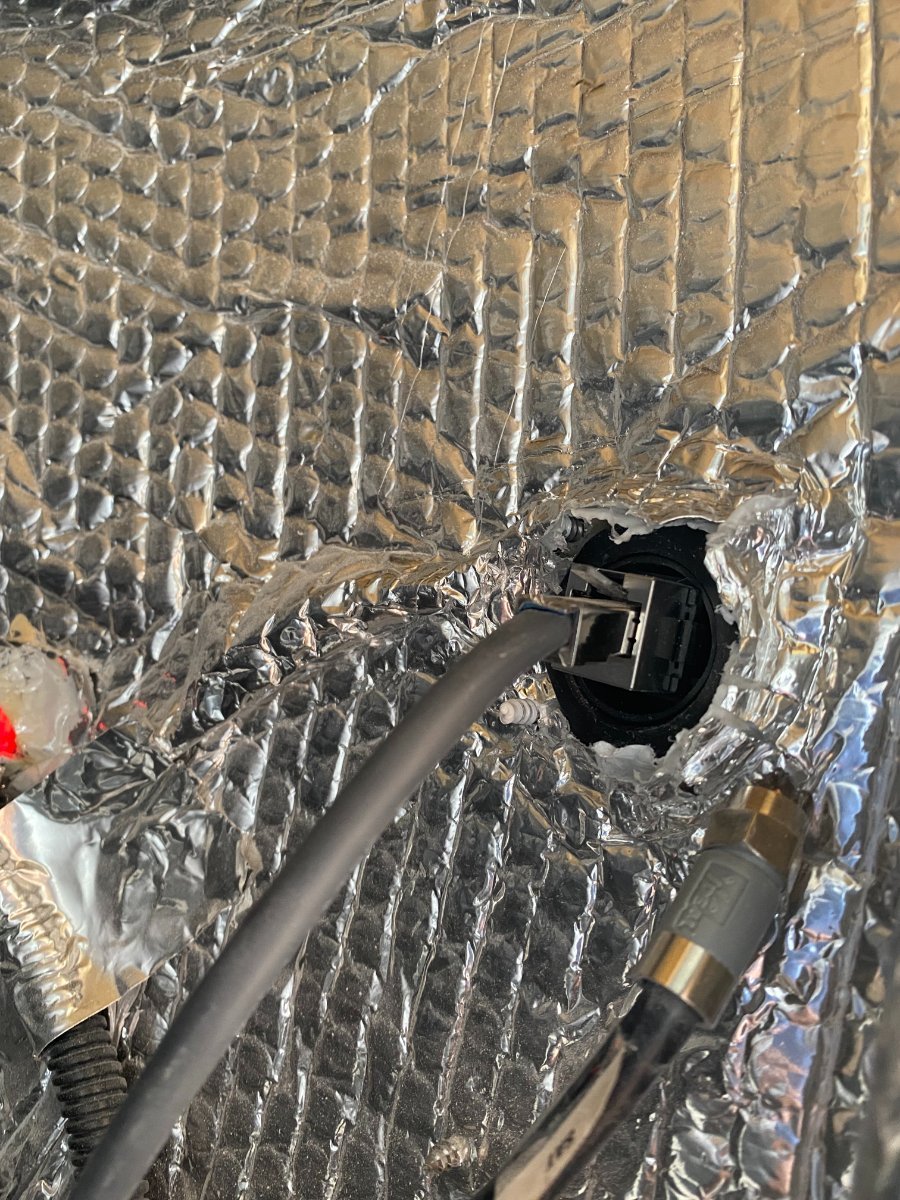
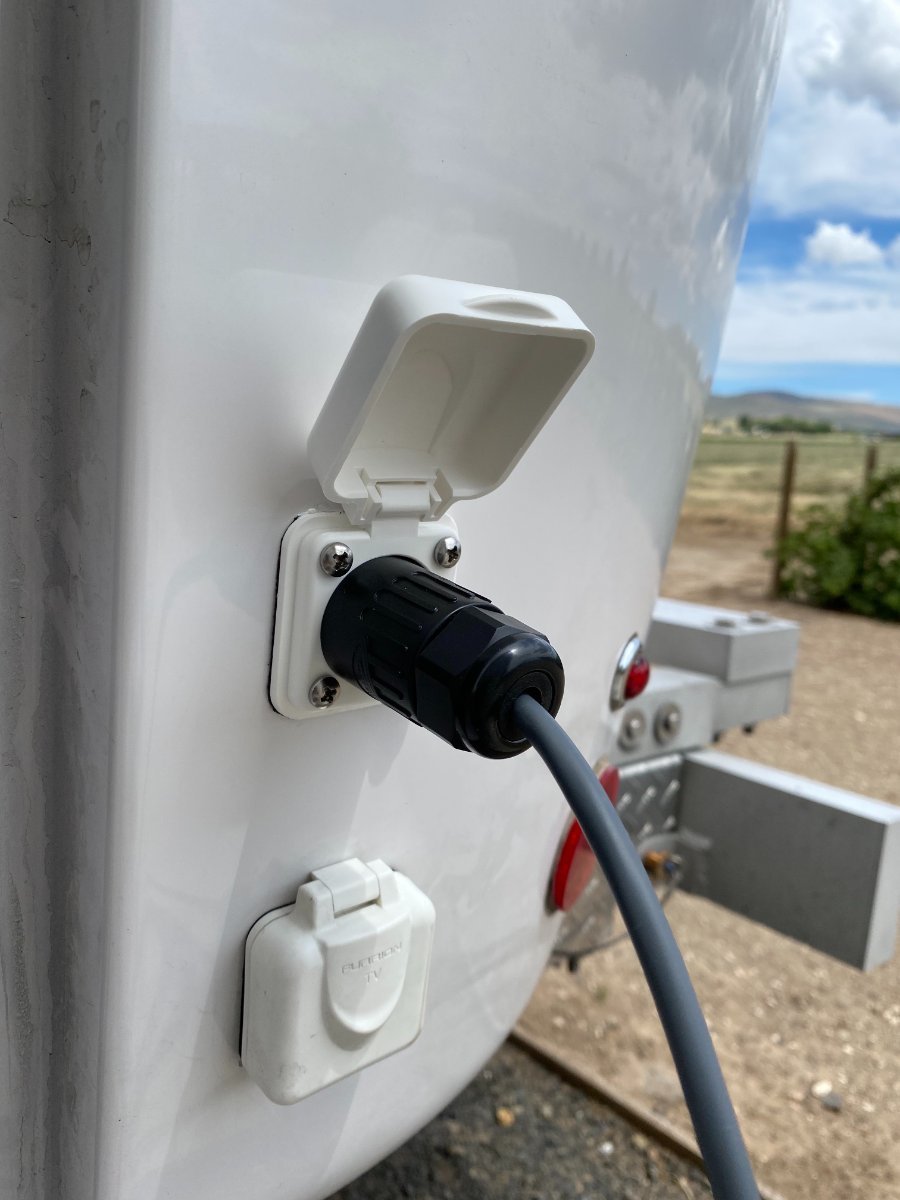
This project is to create an inlet port for Starlink cable into the attic where I put the Starlink router. I decided to repurpose one of those TV/Sat ports. Below are the pictures of the Furrion coax inlets. The left picture is the original and the right one is modified by drilling a big hole using hole saw. This is the waterproof RJ45 inlet port I got from Amazon. Next steps are removing old Furrion and enlarge the cable hole. To my surprise, I found a nice gift from the factory hidden under the seal. No big deal, I can add a little bit of 3M sealant to patch that up. Then install the RJ45 connector, left picture is from the outside, right is from the inside. This is what it looks like after putting back the cover. Next is to fish the cable from attic down to the belly near the furnace and pull it along the back and plug into the RJ45 inside port. You will have to cut the cable and install RJ45 male connectors. There are a few video on YouTube about this. Then plug it in at the RJ45 female at the inside of the inlet. The cable end from the dish will be on the outside. Plug the router in and enjoy fast Internet!
3 points
-
I insert the lid into the hatch housing turn it and it clicks and it’s secured. Not sure if you call that a hinged? I really like the ease of use vs the threading version.3 points
-
Yep, that’s the one Philip Andrews said came on the 2023 Truma option; the Truma VarioHeat and the Truma AquaGo. Not the Truma Combi. Before I bought the Land Cruiser, I was looking at flatbed truck campers. I found a few mentions that the separate units was a better more reliable and efficient option then the Combi. The Combi’s obviously advantage is size.2 points
-
As an ex aircraft tech, my comment is, those rivets simply do not belong there. Hollow aluminum pop rivets are really weak and not exactly reliable. I would prefer to have an aluminum backing plate bonded inside the hull flanges at the top and bottom. Install the box, drill through the hull and flange, install structural rivets like Cherry Max. Those won’t shear their heads like the ones pictured did. An even stronger setup would be countersunk machine screws and threaded inserts in the backing plates, as David mentioned above. I don’t think nuts inside would work, you can’t really reach the area very well, and they are buried in foil insulation. Putting blind rivets directly into fiberglass is not a great idea, they need a solid material to grab on to. Some interesting reading: “While on the topic of rivet stems, the ability of a rivet to retain its stem under conditions of high loads and heavy vibration separate aircraft rivets from their commercial cousins. A rivet loses much of its strength if the stem falls out. Many low-cost commercial blind rivets will not reliably retain their stems under difficult conditions. This is why they are generally never used for anything on an airplane that holds it together or keeps it running.” https://www.kitplanes.com/best-practices-blind-rivets/ John Davies Spokane WA2 points
-
Trying to understand just where the rivet failed. Hard to tell from the pic, but it looks like it failed just under the head of the rivet? If this is the case, then I would recommend 3 things. 1.Put a very slight countersink on the battery box rivet holes, just barely enough to break the sharp edge from the drilled hole. That sharp edge could wear away the rivet from vibration, especially if it's aluminum. If you removed the entire battery box, I'd soften that edge on both sides of the hole. 2. Use stainless steel rivets and not aluminum, they are stronger and I don't see issues with galvanic corrosion in this application. 3. Finally, back up your rivet with a washer of like material (if you can get to the back side of the rivet). Just my 2 cents. If I was designing this from scratch, I probably would have gone with rivet nuts (with backup washers), or a thru-bolt design, for a much more secure connection to the hull. But probably not able to use these as an after the fact repair. Looks like you did a good job. Hope it holds up for you! Dave2 points
-
$13 for for the newer hatch that Oliver Service sold me. I prefer it over the threaded hatch.
2 points
-
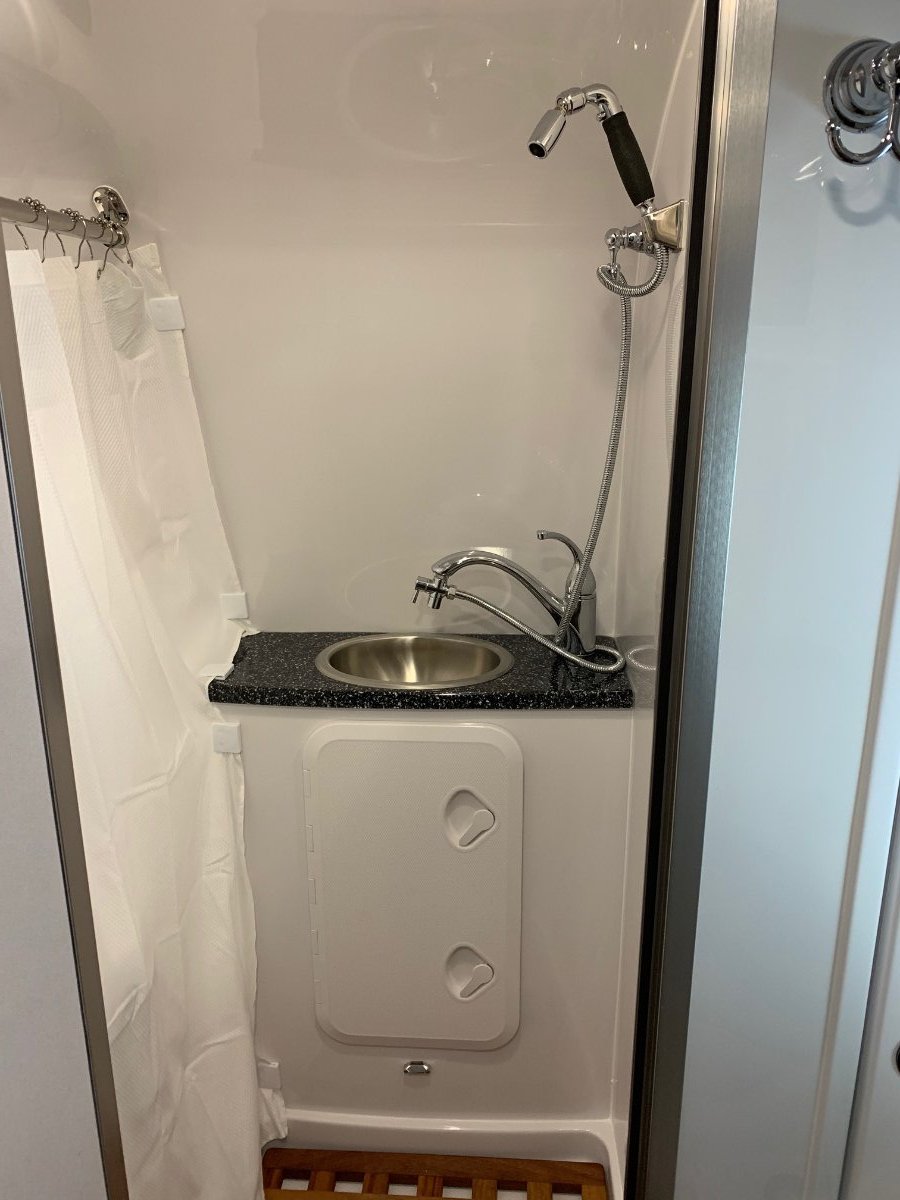
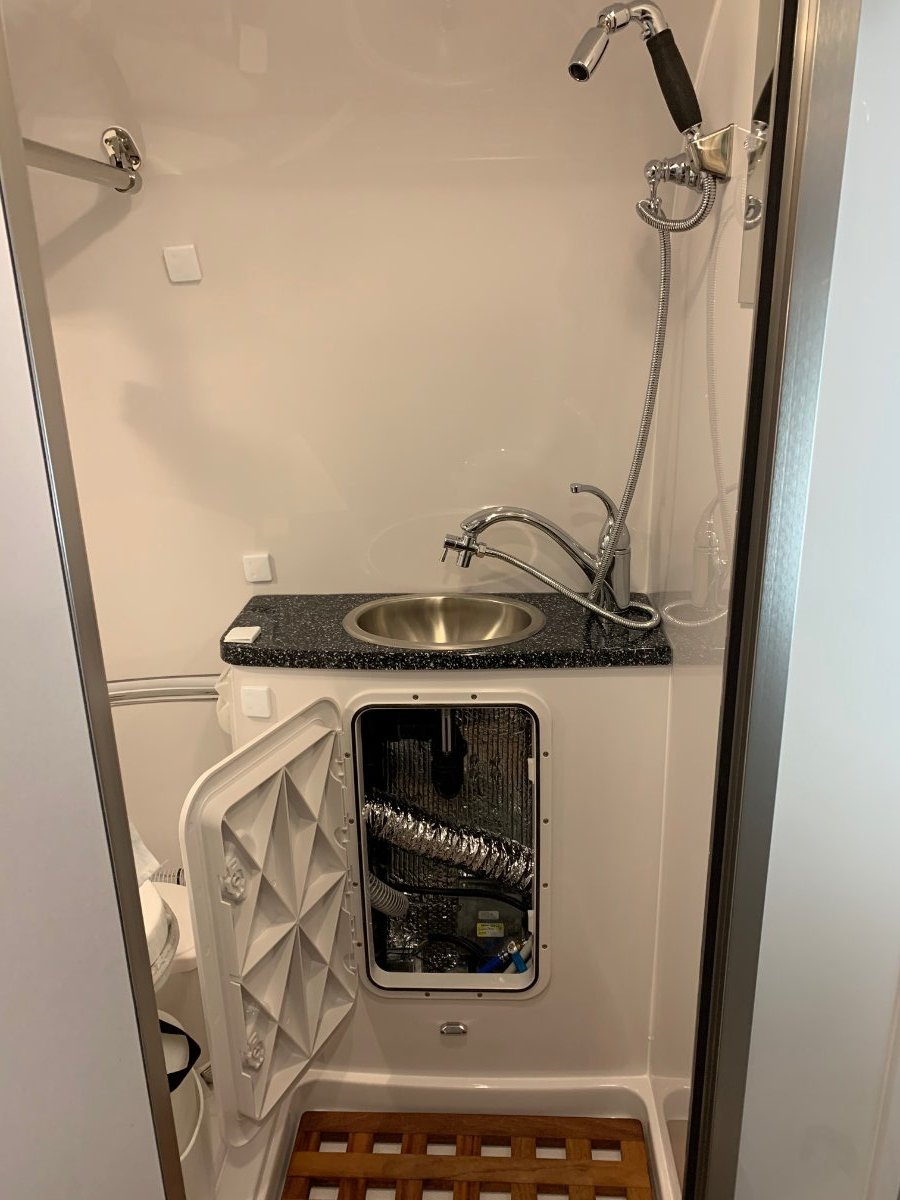
My mission after the first few camping trips was to install a better shower head in the Oliver. I especially didn't like the fact that I had to turn the water off at the faucet handle and lose the setting. Research turned up a highly regarded brand called High Sierra. I searched for those on this forum as well and found that at least one person (Overland) has also upgraded to a High Sierra. I chose the same ugly one with a nice new faucet but an even uglier diverter. 😄 I also hope my wife doesn't notice that her washcloth holder is gone now. 😬 I decided that a permanent access hatch (DasMarine Marine Deck Access Hatch & Lid with Lock, White, 24" Length X 14" Width (606MM. Length X 353MM. Width) in it's place was a better value (at least to me!). I can get at all my new valves now.
1 point
-
When we purchased our 2015 LE2 used during 2016 it had two group 27 12V lead acid batteries without factory solar. The following information & installation has happened over a few years. Initially we purchased a Renogy 100W suitcase solar panel and used it charging the batteries through the trailer's 7 pin connector. Wanted to have a more efficient way to charge batteries. Installed a Furrion Solar port and mounted Renogy Waterproof solar charger in the battery compartment. Use about 36' of 10/2 cable with 12' sections from solar panel to Ollie's Furrion Port. Had to drill holes in Ollie's pretty finish for the Furrion Solar port next to battery compartment. Furrion inlet under port bed: Renogy Solar 20A Waterproof Charge Controller mounted on plastic kitchen cutting board in battery compartment: When Ollie is in the shade it's nice to be able to reach out up to 36' placing panel in the sun, panel in lower LH corner of photo. Highest charge amperage seen using 36' of panel cable is 6 amps and highest charge amperage seen is 7.1 amps using one 12' section of solar cable. We purchased a Honda EU2000i to charge batteries on poor solar days. Installed a EZ start on the 13.5K Dometic AC so the Honda gen-set can also run the AC unit, or microwave, or hot water heater. Been actively reducing Ollie's weight when possible, currently Ollie's ready to camp weight is around 4950 pounds with full 6 gallon hot water tank and all other water tanks empty as per CAT scales. Replaced two group 27 12V (125 pounds) batteries with one BattleBorn 100AH Lithium (35 pounds) battery for loss of weight and Lithium battery performance benefits. Also installed the Progressive Dynamics Lithium charging section in our Progressive Dynamics convertor that BattleBorn said would work fine with their battery. Using the Honda gen-set connected to Ollie's 30 amp connection, the Progressive charger slowly drops charge amperage then cycles charge rate between .25 amps to .4 amps at full charge. BattleBorn told me not to worry about TV alternator damage when connected to TV with 7 pin plug with our particular system. They said because of charge cable's small diameter and distance from TV to battery, would not see very high amperage charge with TV connected. So far with BattleBorn battery at 75% charge while connected to TV with engine idling have not seen more than 3.5 amps of charge. Our current TV has 180 amp alternator and with ignition turned off, the 12V power supply to Ollie is also switched off. Initially installed a Victron BlueTooth shunt to monitor the battery, but my Android 5 was not supported by the Victron system. Believe Victron unit is the way to go, but at the time my Android was not compatible so purchased an inexpensive shunt & monitor from Amazon to monitor the battery. Found a automotive 2" instrument mount on Ebay to mount the monitor: https://www.amazon.com/dp/B07FGFFHC6?psc=1&ref=ppx_yo2_dt_b_product_details The battery monitor is not waterproof, use a 1 1/8" hole saw to cut out 1" OD plastic cutting board plugs to fill the existing ventilation holes in the battery compartment door. Did not want to mount these plugs permanently, sealed with clear RTV silicone for easy removal: The benefits of the Lithium battery is much faster charging with gen-set or solar panel with plenty of battery capacity for our style of camping. Will be doing more camping without electricity and water connections with this system, too.1 point
-
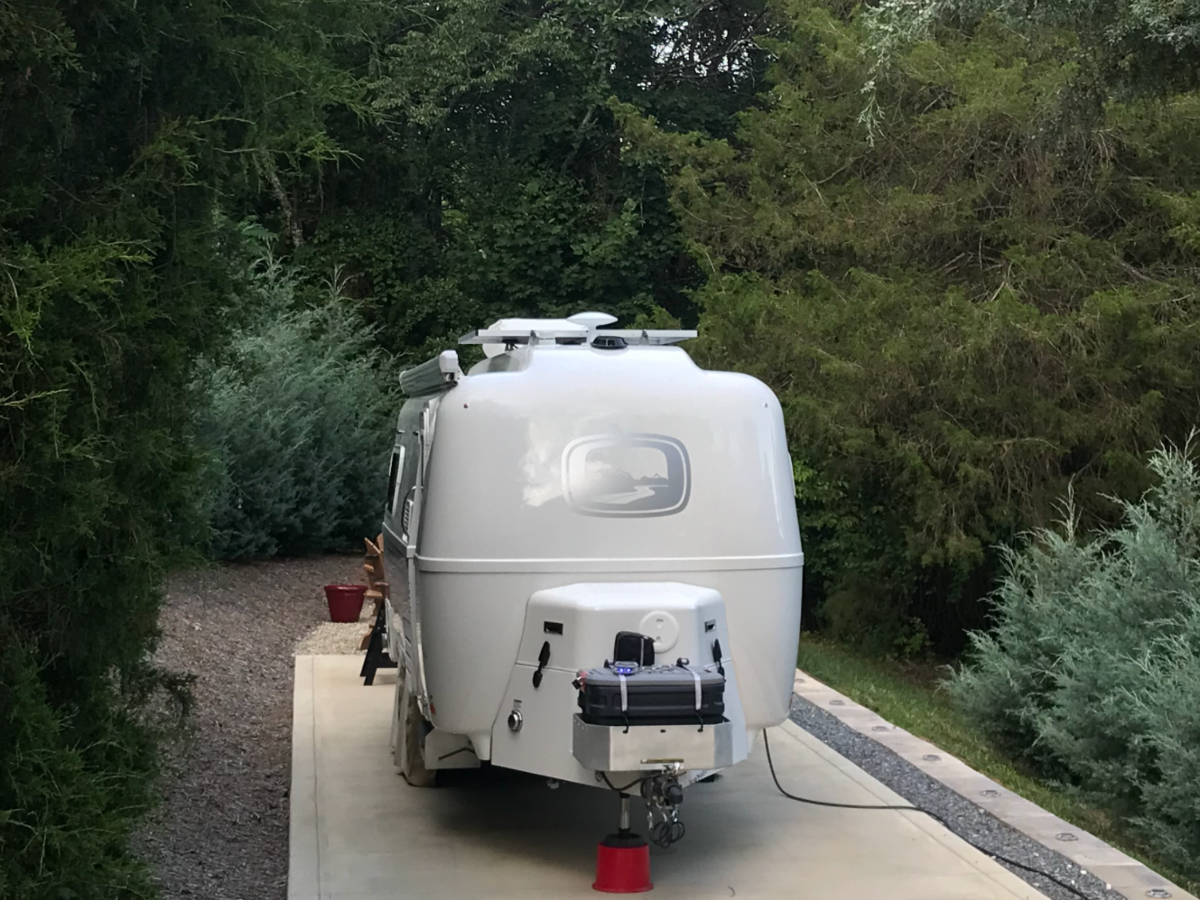
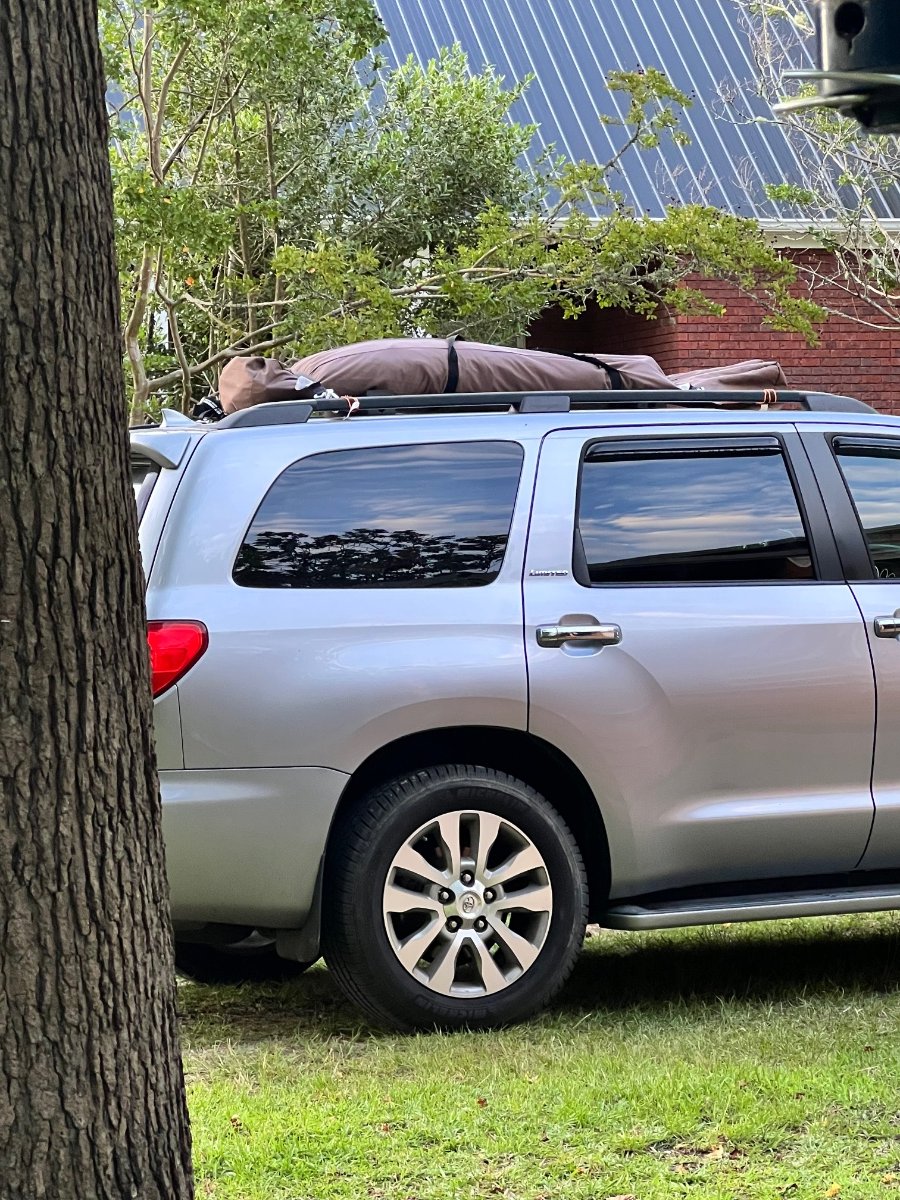
I’ve secured something to our rooftop of our Toyota Sequoia. It is an essential for us. What do you see in my rooftop Rorschach Test? it isn’t a body, believe it or not… it is a Clam Quickset Pavilion shelter. We’ll be at Mt. Pisgah campground on the Blue Ridge Parkway from 7/1-7/10.
1 point
-
FrankC started a topic in May 2021 re missing 'wheel center trim caps'. He had lost one & wanted to know how to replace it. The post did not provide a definitive answer as the one potential item from Amazon is now unavailable. The post segued into grease caps. So, we needed 2 caps for our camper. As the Forum did not provide an up to date answer [there may very well be an answer but I did not locate] I did various Google searches & finally called Dexter. She had no idea what I was talking about. 🙂 I then opened a Service Ticket. A couple of hours later, Rider from the service center called. Oliver refer to this cap as a 'center cap' & they place a sticker on it. I had no idea that black & silver swish-y looking thing was a sticker! I suggested to Rider that the design be changed. Rider & I agreed that no one would be asking him for his opinion. 🙂 The cylinder protruding from the axle & in which the cap will be placed is called a hub cap. Learn something new everyday. My purpose in creating this topic is to let people know what Oliver calls this thing & where & how to get. See below photos. Center Cap Contact Oliver & they will send you what you need/want. I ordered 4 & was charged $38.60, includes shipping.
1 point
-
If you prefer, Service will send those to you without the decal. Bill1 point
-
Ah, nice! Just a quarter turn type catch to retain the lid. Definitely more convenient than the full threaded type I have.1 point
-
John, Thanks for the heads up on those Cherry Max rivets. Wicks Aircraft Supply sells them as well. I sure don't see the rivet stems in Galway Girl's pics.... Yea, not the best place to employ pop rivets, especially soft, non structural aluminum ones. That box is heavy loaded up, and on the Elite2, since it is located right over the wheels, I wonder if that area may be subject to more vibration than other parts of the hull, just thinking out loud. The way those rivet heads broke off sure looks like a stress (vibration) related failure to me. Oliver may want to rethink this detail. Dave1 point
-
I asked Oliver sales about what Truma AC unit they are installing. I was told it was a 13,500 btu unit. I went on the Truma web page and the only unit I found that is 13,500 btu is the Truma eco. There is no heat pump capability on this Truma eco AC unit. I would be interested to know if anyone else has better or other information from Oliver. A AC unit that is a heat pump would be beneficial.1 point
-
Indeed. I was thinking about trying to handle that ss deck plate, mounted vertically , in the rain, and all I could think about was how much it would hurt if it slipped and fell on my foot, at over two pounds. Ouch. I think I'd stay with plastic or composite. Plenty of available choices. White blends better with the doghouse, especially since the off center installation would bother me, visually, in stainless.1 point
-
Dave, Thanks for the recommendations. It is amazing that fiberglass (key word glass) cuts through rivets. I need to do the project again I'll implement your suggestions. I'l also discuss your ideas with the factory when we close the ticket. Close ups of how the rivet failed. The factory had asked for these pix below. I'd be interested in your thoughts on the failure mechanism of rivets in the pix.
1 point
-
My 6" inspection hatch in the propane tank housing is really discolored and this hatch would certainly be an upgrade. Maybe after I win a lottery! Mossey1 point
-
Another excellent write up, thank you! I have had my slide tray out for a re-paint after a battery leak, so I wholeheartedly agree with working the support bolts under the battery box is a challenging endeavor. Four hands to make doable. You detailed instructions will be help someone in the future, so kudos to y’all in the great northwest! Mossey1 point
-
Consider taping the gel coat surface in the area of cutting. Charlie.1 point
-
Our 2023 order has the Truma WH and AC. The model of the Truma AC is a heat pump so you can get some heat out of that and the unit still has a propane forced air heater. No idea on the brand of that, but its not combined with the Truma Water heater.1 point
-
I can't find it now, but I asked this question on the Oliver Facebook group. Oliver sales employee Philip Andrews said that the water heater and furnace were Truma separates, not the Combi unit.1 point
-
John Davis: FYI, Looking at the 2023 Build (rate) sheet under "Water Heater & AC Packages" it states the following options: Ssuburban Water Heater & Dometic AC - $0.00 increase or Suburban Water Heater & Dometic AC with Micro-Air Easy Start - $450.00 or Truma AquaGo On-Demand Water Heater & Truma Aventa AC - $3500.00 or Truma AquaGo On-Demand Water Heater & Truma Aventa AC & Electric Antifreeeze Kit - $3800.00 No Furnace combo model is listed. In the catalogue, it only lists LP Ducted Furnace, no brand is given. Maybe the web site gives more information1 point
-
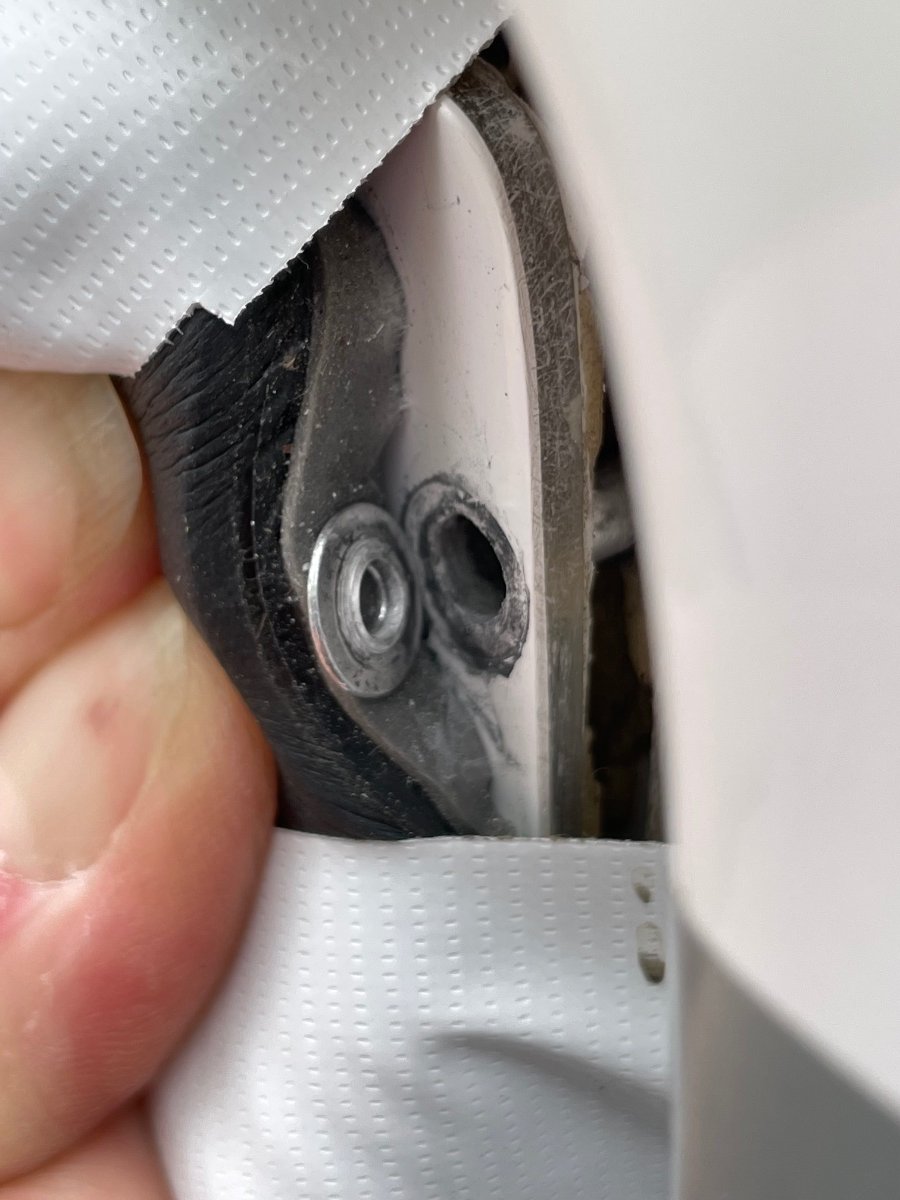
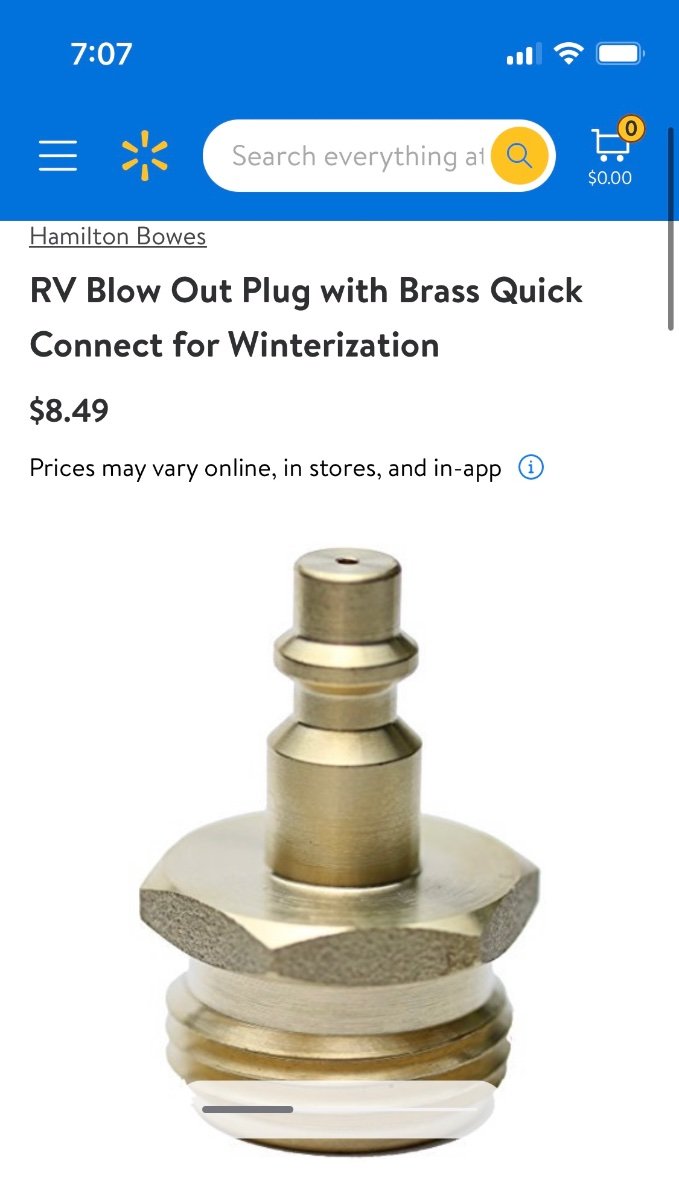
Blowout stopper? Same as blowout plug or blowout adapter? I haven’t heard the term before. You can’t drain water tanks, any of the three in an Ollie, with compressed air. They are all vented to the atmosphere so they won’t expand and cause damage. They don’t need to be completely empty regardless, because a small amount on the bottom can freeze and it won’t hurt anything. Maybe, maybe not - the three dump valves might possibly get damaged….. thus the need for a small amount of RV antifreeze in the two nasty tanks, after they have been drained. FYI the over the counter plugs you buy do not work especially well, the Schrader valve type is really restrictive And the quick disconnect type is even worse: Both are designed to maybe not explode your water system if you accidentally connect it to a big 150 psi high volume compressed air source. But at 60 psi you just don’t get much flow. You should remove the core on the first one and throw it away, or drill out the hole as large as possible for the second type, and always make sure your air source is adjusted correctly. The goal is a large volume at low pressure, not a small volume at high pressure! Remember to carry one and an appropriate compressor all the time, don’t leave them at home, you might get caught by an unexpected arctic blast even in Summer. John Davies Spokane WA
1 point
-
While we were having our Ollie serviced this past June a salesman in the Oliver showroom mentioned to my wife and I that a new 2023 OLEll fully optioned is $107,000. Wowza!! It sure made us glad we purchased our 2020 when we did. -Patriot🇺🇸1 point
-
Thank you! Home base is Athens, GA1 point
-
@Jenna, I know you've been looking for awhile. Congrats on finding the trailer just meant for you!1 point
-
Congratulations on your new Oliver! Welcome!1 point
-
Congratulations on your Oliver and welcome. Always lots to learn, the more you learn the better it gets! - Patriot1 point
-
Glad you are part of the Family now - WELCOME! Bill1 point
-
@Jenna King’s Ransom How very apropos! Mossey1 point
-
Congratulations! Glad the patience paid off. Hope to see you out on the road - Mike1 point
-
Our 2008 was originally grounded to the ball. Gave us issues at times. Brakes would flash nc, c (not connected/connected) at times (going over a bump, going downhill, especially.) Wouldn't charge without being hitched to the truck, from the connected pigtail. Solved that with a new ground to the frame. I'd forgotten that, until now. Sorry, it's so very long ago. Yes, I should have reported this to Oliver, but I think we discovered the issue during the production hiatus, and didn't think about it. Any good local horse trailer or utility trailer repair company could probably help you with that issue, if that's truly your issue. (May be easier to get an appointment with a horse trailer repair, than rv repair shop. Just a thought.)1 point
-
The hatch I used was 14" x 24" and fit perfectly width-wise as the inside cutout required was 13". I also had to enlarge the height of the opening and removed a few inches from the bottom (protected area I was cutting with masking tape) just as @mossemidid.1 point
-
Still using my 4 pack T-105's here too. A couple of months ago in another thread I had thought mine were on their way out, turns out the culprit was my Blue Sky Solar Controller which had a broken leg on the inductor (coil) and thus was not charging correctly and for reasons I'll never know provided information to the IPN Remote that stated all was normal. After the repairs my Trojan battery pack seems to be back to normal even after 7 years of storage in Montana winters. Turned the solar off two weeks or so ago and batteries maintained a charge of 12.8 volts, down .05 volts from the first day of disconnect. Can't complain about that. However I have convinced myself LiFePO4 batteries are in my future. It would be nice to shed a couple hundred pounds plus not having to deal with maintenance of lead acid.1 point
-
Purchased an iPhone and replaced the existing battery indicator and shunt with a 500A Victron Bluetooth Smart Shunt on Ollie yesterday. This system works great for our needs: https://www.victronenergy.com/battery-monitors/smart-battery-shunt#pd-nav-video Extra wire/cable needed to roll out battery tray.1 point


-
Recent Achievements
-


")


")


")


