Leaderboard



Popular Content
Showing content with the highest reputation on 07/18/2022 in Posts
-
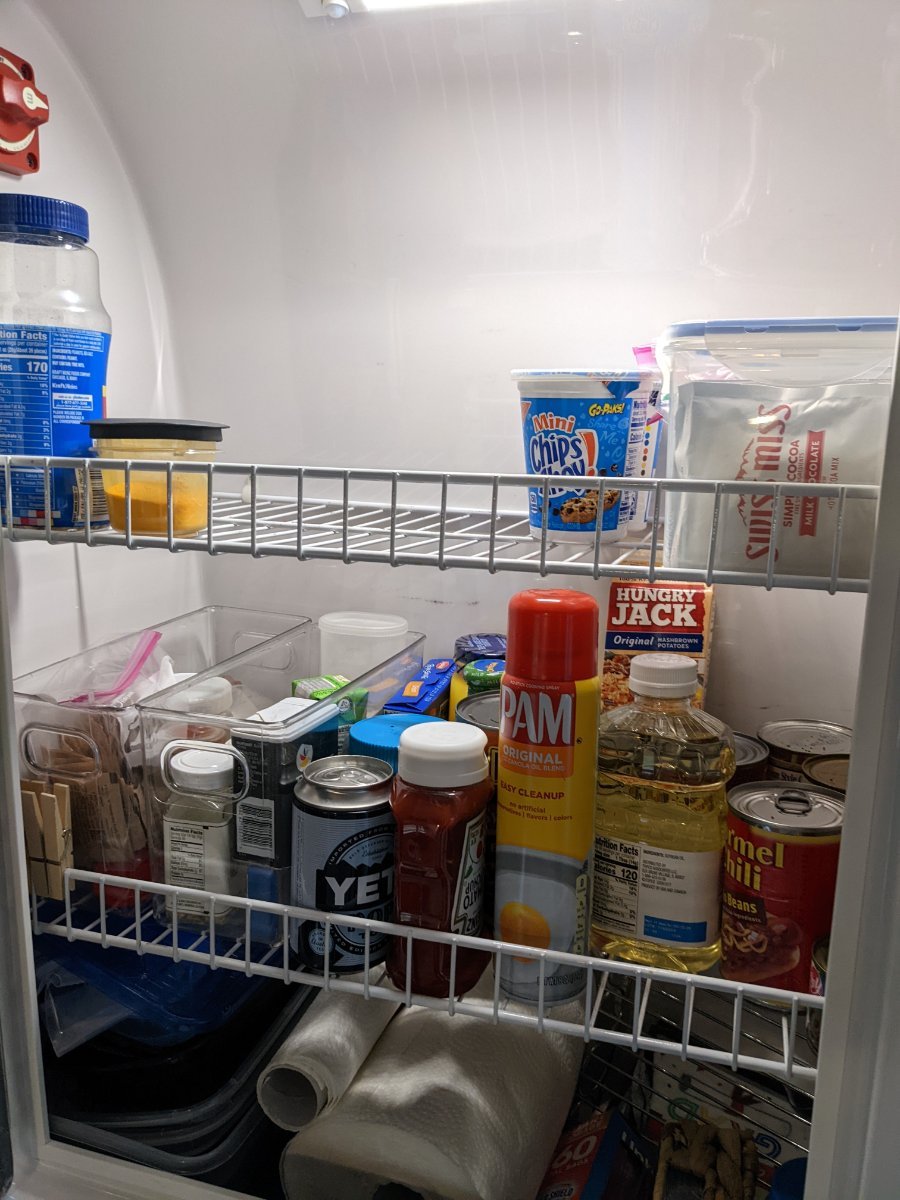
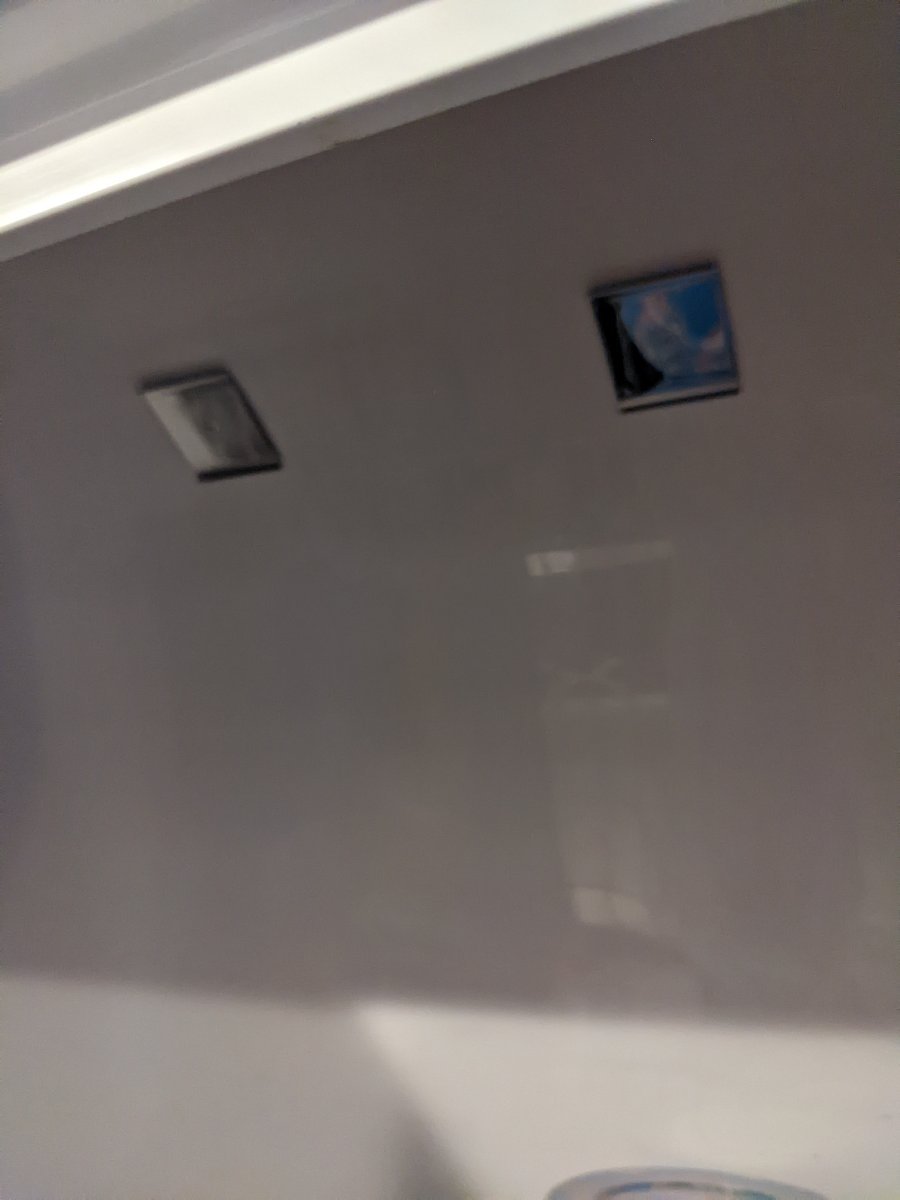
Not sure if this has changed since my 2018 LEII but we do not have a light in our pantry. I have been through a couple of stick on lights and finally found one I like. Sunbeam+ Under Cabinet Light. It comes with adhesive metal tabs the light is magnetic and sticks to the tabs. It needs to be easily removed because it recharges with a USB type C plug. It is motion activated and turns off automatically after 20 second. It has three color options, light blue, amber and white./ $22.00. I will update this post after traveling to update how long it lasts on a charge and if it falls off the magnets during traveling. https://www.acehardware.com/departments/home-and-decor/novelty-items/miscellaneous-novelty-items/6012170 lightvideo.mp4
 4 points
-
I have the GM 1/2 ton with 3.0L diesel. It definitely uses a lot more DEF fluid when towing but I haven't attempted to measure it. Would say that it's for sure at least double usage, but it hasn't been a problem. If I'm on a longer trip and the DEF tank is not topped off then I put a 2.5 Gal container in the bed just as convenience. I haven't had trouble finding it and have picked it up at Costco, Walmart, Lowes, etc. It's a bit of an inconvenience compared to a gasser but I'll gladly deal with it to get 18 MPG towing my LEII and 30 MPG on the highway not towing -- plus the low end torque, much less power loss at altitude (compared to gas) and the automatic engine brake is great on mountain descents.4 points
-
I took a page from @csevel and copied her window vent idea. I did add a couple of small twists. I used a thicker/softer automotive weatherstrip where the window meets the vent. I also put some of that weatherstrip across the top so the vent panel kind of springs in like the screens do (press upward to install/remove). Note: you do have to release the bottom edge of the window shade to get the vent into place. Then I added some EZ gutter over the window, leaving a 1/4" gap around the frame for future recaulking. Hoping this will allow us to leave that window open in light to moderate rain now. On the downside, we've had another warranty issue. The RV Lock electronic lock failed. Examination revealed that the lock was improperly installed in the door cutout. The installer simply let it rest in the bottom of the cutout instead of centering it vertically before drilling the holes in the jamb edge (or the cutout hole is too big). This left a tiny gap at the top edge of the exterior lock body where water intruded, causing the lock electronics to fail. OTT is sending another lock, but the jamb screw holes are already drilled too low so I'll have to install the new lock in the same spot and run a bead of clear sealant over the top edge of it to keep water out in the future. 😕 Still waiting for our replacement toilet flange, too. OTT shipped the parts via ground rather than overnight or 2-day. Somewhat miffed at that since we can't camp until I fix the toilet. Between the Dexter axle recall (not OTT's fault), the toilet, and the lock, we're losing a lot of our camping season. And, camping time has suddenly become very precious to us.
3 points
-
https://gabriel.com/wp-content/uploads/2017/01/Gabriel-HD-Tech-Bulletin-Shock-Installation.pdf I think somebody at Oliver is overdoing it…..BTW the shocks on my trailer are Monroe Gas Magnums. It is interesting, the Oliver warranty is just one year, but if you buy and install them yourself it is lifetime. Something to consider if you have one or more blown ones. https://www.carid.com/monroe/gas-magnum-rv-driver-or-passenger-side-shock-absorber-mpn-555001.html And if you do experience blown seals, it may be due to running way too much air in the tires. Two of mine blew in the first season (60 psi!). I replaced them and since then all have been fine at 42 psi. You are “supposed to” replace both on the same axle, but I suspect that recommendation is more for cars and trucks than for an RV. John Davies Spokane WA
3 points
-
As John said, your #2 item/cracked rubber shock bushings unfortunately seem to be the (poor) industry standard on ALL vehicles to save pennies. Here’s a photo of a shock bushing on my 2 year old Ford F-250, and my Oliver shock bushings look about the same. Seems ridiculous when there are known good alternative material options like polyurethane for the bushings that the shock manufacturers could easily use that are only slightly more expensive. When my Oliver shocks eventually do need replaced I’ll install PU bushings.
3 points
-
Wow, this is an old thread, I had sort of lost track of it. You should grease the ball, but you also should add a can of spray brake cleaner and paper towels to your tow kit, because you will have to clean off the ball every time you unhitch, otherwise it will soil your pants or bare leg. Bad words will follow! It doesn't matter what type of grease, but a product that comes in a tube is much easier to store and to apply. It only takes a small amount, where the shiny spots and wear are positioned. https://www.walmart.com/ip/Park-Tool-Polylube-1000-Grease-Tube/33294585 It does attract dirt, so clean out the cavity in the coupler every now and then, or it will just turn into valve grinding compound 😉 John Davies Spokane WA3 points
-
I'm a month away from having to finalize my options, too, so I bet we're taking delivery around the same time. I already have the upgraded mattresses on my options list. I've slept on the standard RV mattress with a mattress topper before, and am looking forward to a much more comfortable mattress and better nights sleep. They are pricey, and I'm sure heavy, but to me they're worth it.3 points
-
This article pretty much sums up what everyone here has to say about Oliver. Very hard to find a company that stays on the good side of bad press releases. Nice work OTT! This says volumes about who you all are. RV makers differ in informing owners of dangerous RVs defects2 points
-
I just traded in a 2012 Toyota Tundra 5.7 L for a 2022 Tundra 3.5 L V6 Twin turbo. It is working great! Big improvement in gas mileage without the Ollie I'm getting 20 mpg in the city, with the Ollie about 13 mpg. I did not have a problem with the old Toyota and the new one is better.2 points
-
1 and 3 are normal. The green circle is your shock bushings. Ideally they should not look like that, but it is actually very common, even in a nearly new truck. I think over tightening the nuts may cause this. I would inspect them annually, if they start to lose chunks of rubber, then you should change all eight pairs. You should also look at your shocks to make sure they are not leaking oil from the top of the lower cylinder (blown seal). I have never heard of spring maintenance on a trailer. That website is talking about trucks IMHO. I have never done anything except lube the grease zerk fittings, and check the hardware for tightness. Springs can and do fail, I am not sure you would be able to see a crack before it actually broke. As far as cleaning goes, one half hour run down the highway in heavy rain will clean them pretty well…. they get pressure washed by the water shooting out from under your TV. It would not hurt to spray a little penetrating oil on the rusty ubolts, right at the nuts, that will make it easier to check the torque and might help to prevent more rust in the future. It is unsightly but will remain purely cosmetic, unless you start towing in winter. The amount of threads showing past each nut should be the same. I am not sure why one ubolt is uneven. You could try to adjust it, but I don’t think is is a big deal, as long as it is clamped down tightly. Here is my 2017 LE2 Hull 218, I just now took a pic: Please add your trailer and tow vehicle info to a signature, so it will appear after all your posts so we will know what you have. There have been a lot of changes over the years. PS, my axles may look nicer than others this age because I have protective rubber flaps which keep the rocks and water from striking them directly. John Davies Spokane WA
2 points
-
Trainman, In 2019, I was all in at $4,600. That included: - (2) Zamp panels, combiner box and all mounting hardware - (2) Battle Born 100ah batteries - Victron solar controller - Victron battery monitor - New converter/charger - All connectors, wire, circuit breaker and tools for the insulation The detailed list is attached. Andrew Copy of Solar And Battery Purchases.xlsx2 points
-
@MnG KY I think a call to the service department is direction I would go. It looks like you should still be under warranty. Mossey2 points
-
I have a silly question concerning which department installed your 2 5/16" Bulldog coupler. If the 2 5/16" coupler was installed in the production department, I would consider that an upgrade. If it was installed in the service department, I would consider that a modification. In the past, the Oliver production department would not install the Bulldog 2 5/16 coupler as an upgrade when building a trailer. That modification was completed in the service department. The reason I point this out is because there have been complaints on this forum about Oliver’s production policy of no longer allowing custom upgrade’s as they did in the early days. And when I read your post above, I thought it might set an unrealistic expectation for someone thinking of ordering an Oliver. So can you clarify which department installed your coupler? Mossey2 points
-
I’ve never heard of any failures of the Bulldog 2” coupler on an Oliver trailer. But some owners upgrade to get a bigger safety margin on the weight rating. The 2” Bulldog is rated at 7,000 lbs., same as the Oliver Elite II GVWR (Gross Vehicle Weight Rating) of 7,000 lbs. The 2-5/16” Bulldog is rated at 12,500 lbs. but there are other critical parts of the trailer such as the axles that are a limiting factor as well for the GVWR. The Dexter axles used on the Elite II are rated at 3,500 lbs. per axle (see photo of the axle label below), so two axles gives a weight limit of 7,000 lbs. for the trailer. Some owners that travel very heavily loaded have also upgraded the axles on their Oliver along with upgrading the Bulldog coupler.
2 points
-
Oliver supplied the 2 5/16 coupler we had installed on our build. They charged me something like $250 to make it happen...I just had to ask for it. One of the few custom upgrades still available.2 points
-
Mike, I am a recent AndrewK graduate that self installed solar panels and lithium batteries on my 2019 LE2. Like Andrew, I too am willing to offer any help. Pm me your contact info if I can help.2 points
-
I love my KTT mattress. It is as comfortable as the mattress we have at home. Here in the Northeast it is humid in the summer and not in the winter. I reallly recommend the hypervent under the mattress (amd even the cushions at all time particularily those times that are humid. I bought my hypervent on line, cut it to size and installed it myself. We also have a small dehumidifier which I use in the summer months.2 points
-
Hi John, I don't have the standard mattress, I have the older KTT mattress. It is the most comfortable mattress I have slept on. We have a firm mattress at home and I put a 1" foam egg crate foam under the mattress cover. I love going camping because of the comfort. If you decide to go with the standard mattress and do the wool topper and don't like it, there are a couple of custom mattress shops in Portland that could make something for you. And yes the only complaint about the latex is the it is really heavy. it is like moving a 60 pound wet noodle that is 6ft long. Do make sure you get the hypervent under the mattresses. In my opinion it is a must in the in the Northwest. I you are a summer camper only it's not really needed. If you go camping in the winter you will need it. We go camping as long as we can safely get to the beach in the winter weather and it is really easy to get the moisture on the walls. We have vents open and pushing a small amount of air through the Oli all winter long to keep the moisture in control. Thought about doing a Dehumidifier next winter. Thanks, Bob Sweethome, OR2 points
-
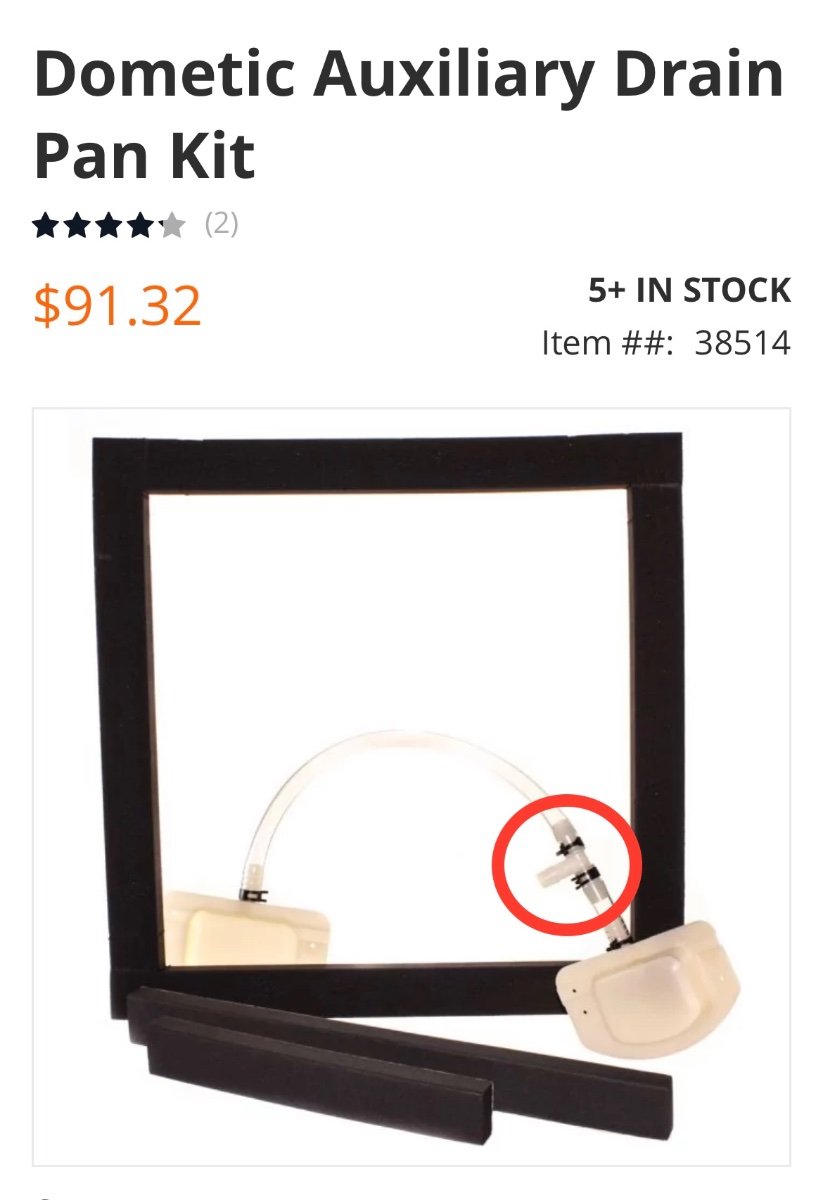
I believe this is the auxiliary drain kit that includes the small pans, one of which is shown in the picture in my previous post. The tee shown in your second picture is the tee in the picture below. The tube that eventually exits at the rear street side corner is attached to this tee. https://www.dyersonline.com/dometic-auxiliary-drain-pan-kit.html
2 points
-
Alberta and Randy, In our 2019 Elite II, the condensate tube runs directly back to the back wall of the trailer and down a few inches to the street side of the rear window. to the spot is exits the trailer. As I an idea on how to clear out the tube, I would remove the tube form the tee you are showing and blow compressed air down the tube that runs toward the back of the trailer. Another idea would be to use a turkey baster with hot soapy water and shoot it down the tube. Hope that helps, Andrew2 points
-
On hull 313 the tubes run to these white condensate catch pans on each side of the A/C
2 points
-
Hello all, I started a new series of YouTube videos all about products, storage solutions and optimizing space for the Oliver, as well as a tour of my Oliver/decor. I have tons of great tips/products to share and really enjoy the challenge of organizing small spaces. My previous camper was a 16ft Airstream Nest so I’ve learned quite a bit about optimizing space and functional organization. I really hope to grow my channel for Oliver users since there are so few organization videos specifically for an Oliver. I’am not affiliate with any business, I do not get paid for links shares. It’s just me sharing ideas and products I love that work well in the Oliver. Please like and subscribe and I hope you enjoy the videos. Here are the links to the videos thus far.1 point
-
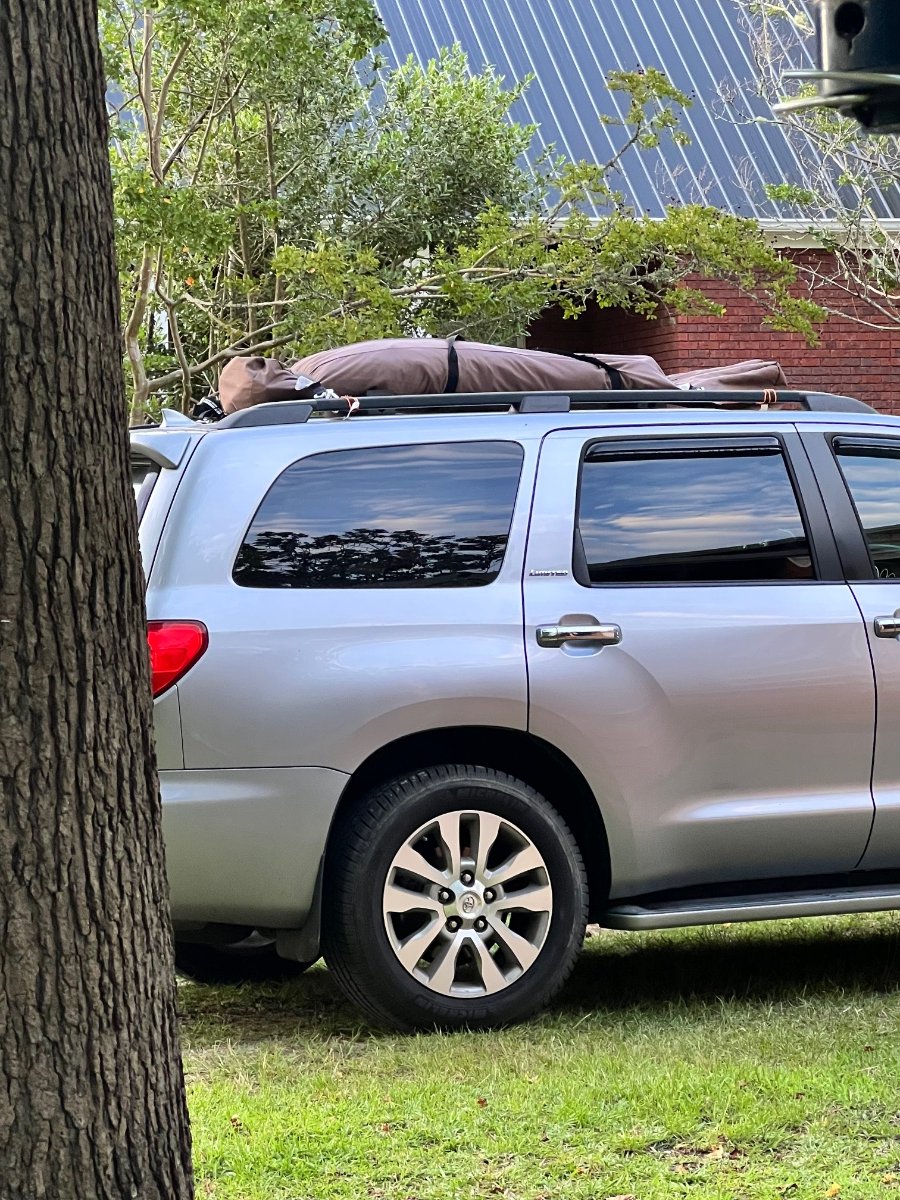
I’ve secured something to our rooftop of our Toyota Sequoia. It is an essential for us. What do you see in my rooftop Rorschach Test? it isn’t a body, believe it or not… it is a Clam Quickset Pavilion shelter. We’ll be at Mt. Pisgah campground on the Blue Ridge Parkway from 7/1-7/10.
1 point
-
I thought I was fairly knowledgeable about DEF, but I learned a few important things, like don’t store a spare gallon long term in more than 85 degrees or it will degrade. Here are a few interesting facts. “the typical average light duty truck will consume 2-3 gallons of DEF per 800 miles. However, most new trucks with an average miles per gallon rating of 20+mpg will go roughly 8,000-10,000 miles on a tank full (10 gallons) of DPF. Each truck is different, The only cons to DEF include the additional upfront cost to the truck, added nominal weight and some additional room to store an extra gallon of the fluid. The pros are better fuel economy, increased horsepower, more optimized combustion, fewer regenerations issues, less wear on the engine and in addition it only releases nitrogen and water vapor into the air. Manufacturers have found that engines containing SCR technology oftentimes get better fuel mileage compared with other smog reduction internal systems. Fuel mixed in with the SCR finds an added source of elements to burn. Fuel mileage can be improved by as much as 5%-7%” https://www.capitalremanexchange.com/20-facts-you-need-to-know-about-diesel-exhaust-fluid-def/ Sort of related: https://www.rvtravel.com/good-news-def-head-alternatives-coming/ None of this makes me want to buy a diesel truck….😳 John Davies Spokane WA1 point
-
Regarding the cracked rubber shock bushings, those on our 2022 LEII show similar cracks. I noticed their condition the first time I went under the trailer to look for the Zero grease fittings. Our Hull 990 was delivered 2/17/22 and now has had approximately 3000 miles of use. In such limited time and use, I would expect the bushings to be dirty, but not significantly cracked.1 point
-
How timely! Our CO alarm is just starting to "act up". Thanks for your well documented post.1 point
-
You can open a ticket from the front page of the forums, with your hull # , problem, name, and contact info, as well.
1 point
-
Oops! Fixed!1 point
-
I’ve been using this grease from Reese. Seems to work well so far. But any white lithium grease would probably work just as well. Reese Towpower 58117 Hitch Ball Lube https://a.co/d/ijYGGoO1 point
-
I have had my trailer for 4 months and pulled about 4500 miles so far. I do not have the Anderson hitch because my tow vehicle does not recommend do to unibody design. I am seeing ball wear as mentioned in this most. It is uniform around the surface of the ball. What type of grease are you all using?1 point
-
Great job on the window vent! FYI, @csevel is a she, not a he and it was probably a typo. Mossey1 point
-
Thanks Kirk! I guess I would have known that if I was shopping for a new Ollie. I am naturally attracted to shiny objects, so I try to avoid looking at sales brochures.🙈 Do you know if that was an option in before 2023? Mossey1 point
-
Well a update on my 3.0 Duramax max tow PKG. 4100 miles with 2900 miles towing the Oliver or my 6000lbs boat. Average milage towing all at 70 plus 16.4 mpg and in all 7.5 gals of DEF used in all 4100 miles. Two and a half gals of def per in 1300 miles of running 70+ plus towing the Oliver. Love this motor compared to my past 5.3 max tow PKG truck. On one short 30 flat puling the trailer it was 19 mpg running 55-60. Due have to keep a eye on it likes to climb past 80.1 point
-
We purchased a 4" memory foam mattress from Walmart $150.00 king/queen, can't remember, but cut down the middle half of the factory mattress size and shortened it a bit, then rounded the ends to fit on top of the factory stock mattress. We are very happy with this comb, find it comfortable, so it works well for us. We had this foam mattress in our Casita for a short time and moved it to our twin bed Elite II and so far we sleep great. I'm not sure if this is called a mattress topper or not. trainman1 point
-
Thanks for the video on the Magma pans. I've got them on my Amazon list thanks to you. I love that they are made in the USA and not China, that they're stackable, and fit nicely in the overhead bins. I had a lot more storage in my previous travel trailer and really need to think about space and functionality for the Oliver. Great videos.1 point
-
Thanks everyone for the quick replies. I continued researching after I posted and found mossemi previous post (thanks for your link again here! ) and spoke with scubaRx. I believe I have a path forward... will see if it's successful. Appreciate all your input!1 point
-
This Link covers my Dometic A/C Drain Leak Repair. Mossey1 point
-
If you have the standard Bulldog it is a 2”. A 2 5/16” would be too big. Mike1 point
-
Katjo, Many thanks for the wonderful tips on organization. We have subscribed to your channel and look forward to more great content!1 point
-
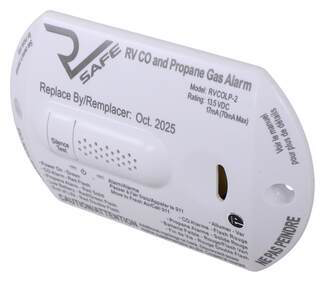
I just replaced the one in our new older trailer with a alternate brand. The one used in the 2017 Oliver was hard to find (Atwood) and about 40% higher in price. The installation was easy enough as one of the two supplied faceplates covered the existing hole and only required a pilot hole for the new screws. Below is the link to the one I installed. No more alarms in the middle of the night! https://www.etrailer.com/RV-Gas-Detectors/RV-Safe/RS34FR.html
1 point
-
Ours did that on a long trip once in the middle of the night. I don’t have a lot of patience at 3:00am. I lifted the dinette seat and cut the wires. Problem solved. I ordered a new on the next day from Amazon and it was waiting for us when we got home. I don’t recommend going too long without one, but if it’s broke, it’s broke. Fortunately there are also Camping Worlds and other RV repair places all around. Mike1 point
-
We love our GMC turbodiesel, and dealing with DEF is no problem. Initially, I kept a backup container in the bed. I soon learned that many of the major truck stops have DEF right at the pumps, and that is far more convenient, saves space in the bed, and keeps me from one more thing to purchase at Walmart. It may be a little more expensive at the pump; however, it is worth it to me. I monitor the DEF level and never let it get much below half. Never have I had a problem locating it, but I recommend keeping a close eye on it. My truck gives a message when I have 1000 miles of DEF remaining. To me, cost is incidental.1 point
-
That's how it worked with my hitch, though Oliver ended up keeping the hitch when I took it for a test fitting and then had it ready for me at delivery. Since my hitch won't work with a standard receiver, I just leave my receiver with them whenever I take it in for service so that they can move the trailer around.1 point
-
They would not have to leave it off. It could be easily swapped in about a minute with a previously drilled 2 5/16" coupler, right before pickup, with the new owner. Also, the 2 5/16" coupler would work fine with a 2" ball for moving it around the factory. I move mine all around the place with my tractor and a 2" ball mounted to the bucket.1 point
-
It doesn't really work that way. The 2 5/16" coupler comes not-drilled. So thre is a bit of measuring and drilling involved. It is almost identical and fits the frame exactly as the 2" coupler does. Also, this will not stop the ball wear. For those using the Anderson hitch, you might check with them to see if they offer a 2 5/16 ball or not. I switched to the bigger ball and I'm glad I did, but it's partly to match other trailers I have and not entirely for strength.1 point
-
I'm pretty much in the same boat. Three other trailers with 2 5/16" hitches. Plus, the bigger ball just seems a bit better, but not necessary for normal Oliver loads. I'm not running the anti-sway hitch so that is not a factor. In any negotiations with Oliver about changes, it might be better to leave this one alone because it's just an outside mechanical switch to something else and nothing that requires work to the electrical system or body. I converted mine to the 2 5/16" coupler and posted a couple of pix on "Modifications to hull #92" in the modifications section. This modification does not affect anything else on the trailer and can be done at home quite easily. The new "blank" just has to be drilled and then it slips right on. The new piece isn't really much stronger as it's the exact same channel welded to a slightly bigger ball coupler. It's mainly the ball that is reliably stronger. Instead of looking for the highest rated 2" ball just to meat the GVW of the trailer, you can easily find a 2 5/16" ball rated for twice that, or 14,000 lbs. My truck also has the class 5 receiver (2 1/2") and was bushed down to 2" for the stinger I was using. So I switched to a 2 1/2" stinger at the same time which got rid of a lot of play and rattling. I've also found that if you get a steel tube stinger, instead of a solid forged one, the tube type fits a bit tighter. Then I installed a 5/8" Grade 5 bolt and nylock nut as a pin (select a bolt with 3" of unthreaded shank. This turns out to be about a 5" bolt) This method is very strong and the bolt/pin cannot escape. It reduces the chance of theft and it can pinch the receiver tube down just a bit to eliminate any side to side play. Works very well.1 point
-
John, It depends on what you describe as "normal". I consider what you are experiencing as normal considering the design. Anderson proudly says their balls are soft, so wear will happen. The ball turns with the coupler in this design, so the wear will be concentrated in one spot. It would be even worse if you followed Anderson's original recommendation to NOT grease the ball. The Bulldog coupler is not accurately machined to fit a ball precisely, so you will get wear in spots. This is not a defective coupler as it is never a problem with a hardened ball with a downforce from the coupler. And finally, the Bulldog is not designed to be used with the extreme forward push the Anderson hitch applies to it. It can take it, as it is a good design, but that is not a force it is set up for. Not to be too negative, but when you look at the history of the Anderson hitch and the comments they make about how to use it and their responses to problems, it seems obvious it's not a perfected product. They do stand behind it, but the public is doing the Beta testing for them. The frame clamps are marginal, the balls are soft and wear, the geometry of the chain design gives limited weight distribution, the friction/sway clutch fails and has been a big problem with lots of warrantee replacements, first they recommended no grease on the ball and then they said to grease it, they have even recommended turning off the stability control on the TV if your vehicle is unstable while using the Anderson, etc. Don't blame this on Bulldog. Their couplings are very strong and a bit crude, but they will go forever with a good ball and no heavy and continuous forward load. If you want to reduce the localized wear on the ball, best to grind the inside of the socket to better match the ball in the wear area. Just don't be surprised that this is happening. As a comparison, I have towed about 4,000 miles with my Oliver with no special hitch. Just a ball in the Bulldog. I make a point of going deep into the mountains and desert. The last trip I was in low range, 1st gear for a long way up a rocky trail. My Ram was spinning the tires trying to pull Ollie up there through lots of holes and over rocks. This is fairly normal for our use. The ball is polished and some chrome warn off. No big deal. The inside of the Bulldog coupling looks new except for some grease and dirt. I have a conventional tow ball available anywhere for about $15. I have an Anderson hitch that came with my Ollie. It sits in the garage and has never been used by me. No need to because Oliver's are very stable and the Anderson design doesn't make sense to me.1 point
-
It's impossible to get away from wear when you have a forged, two piece coupler on a machined ball. Under normal circumstances, this would be predominantly on the top area of the ball, due to the tongue weight down force. This is where mine shows wear and it was expected. But with the particular design of the Anderson, there is a very large and constant forward force applied to the ball. The Bulldog coupler doesn't seem to really be designed for this, but is perfectly capable of handling it as long as the sliding sleeve does it's job. The way the two forged pieces come together to enclose the ball doesn't describe a perfect spherical shape to match the ball and there has to be some grinding. Load leveling hitches in general put a lot of force of the coupling/ball interface. Anderson used to say not to grease this interface, but I've recommended to always grease it. Bottom line: There will always be wear with this design. The chrome finish is the first to go. The ball and socket fit will never be perfect. Wear will be much faster with load leveling than with a simple coupling. I've never been a big fan of the Anderson design, but with the tongue design of the Oliver and the factory offering only this brand and design, it seems there will have to be some maintenance or replaced parts occasionally. I doubt anyone really needs one of these special hitches as the Oliver is incredibly stable by nature. Heavier rear springs or air bags would handle the tongue weight more efficiently than the awkward geometry of the tensioned chain design. If damping was needed, and I doubt it is, a strut design might be better than the cone clutch and chains of the Anderson that seems to always be making too much noise and need replacement.1 point
-
As John requested, here are a couple of pictures of my ball. This ball has about 4,600 miles on it. While it is difficult to tell from the pictures, I do not consider the wear to be excessive - it appears to me that basically the chrome plating has worn in the spots shown, but, there are no real gouges or divots that would indicate to me that anything was amiss. Bill
1 point
-
Well it is great to see that John is hooking his Andersen WD up properly. Unfortunately the wear on the ball is normal when our hitch is used as designed. With the chains correctly tensioned the coupler does push on the back of the ball and will leave evidence of that. With our WD hitch and a regular coupler the locking claw leaves a (smiley face) in the chrome plating because the ball is designed to be softer than the claw so the trailer is not having excessive wear in inconspicuous safety related spots. It seams to wear rapidly at first then it stops once the initial wear has settled in. Anytime there is metal on metal friction there will be wear, even with grease. As we can see from John's original ball, the difference is where it happens. Is it on the top and front of the ball with a traditional hitch or is it on the backside with the Andersen? If the ball is harder than the coupler the ball will not show much sign of wear but the inside of the trailer coupler will, however; that often goes unnoticed until it is to late. With the design of the Bulldog coupler there is a different wear pattern on the ball and it should wear to a point similar to the photo John provided then neutralize. This should not affect the performance or the safety of the connection at all.
1 point

































-
Recent Achievements
-