Leaderboard


Popular Content
Showing content with the highest reputation on 09/25/2022 in all areas
-
We enjoy camping at Mt Pisgah, too. Doubt if we will be camping there for the rest of this year, but will head back next May! Hopefully will meet other Ollie campers there next May! Met another fine Ollie owner there earlier this summer!
 4 points
 -
Thanks to all for comments & recommendations! We have been regulars at this campground for approximately 30 years, and for the many reasons you’ve listed, it never gets old! We’ll be back at Pisgah again in about a month…and will be back as soon as they open again in May 2023!4 points
-
If you don't wax those decals, you will have one heck of a time getting bugs and other "stuff" off. I always give my decals a bit of extra wax just to make sure they are as "sealed" as I can get them. Bill4 points
-
Good call on adding info to the signature window.3 points
-
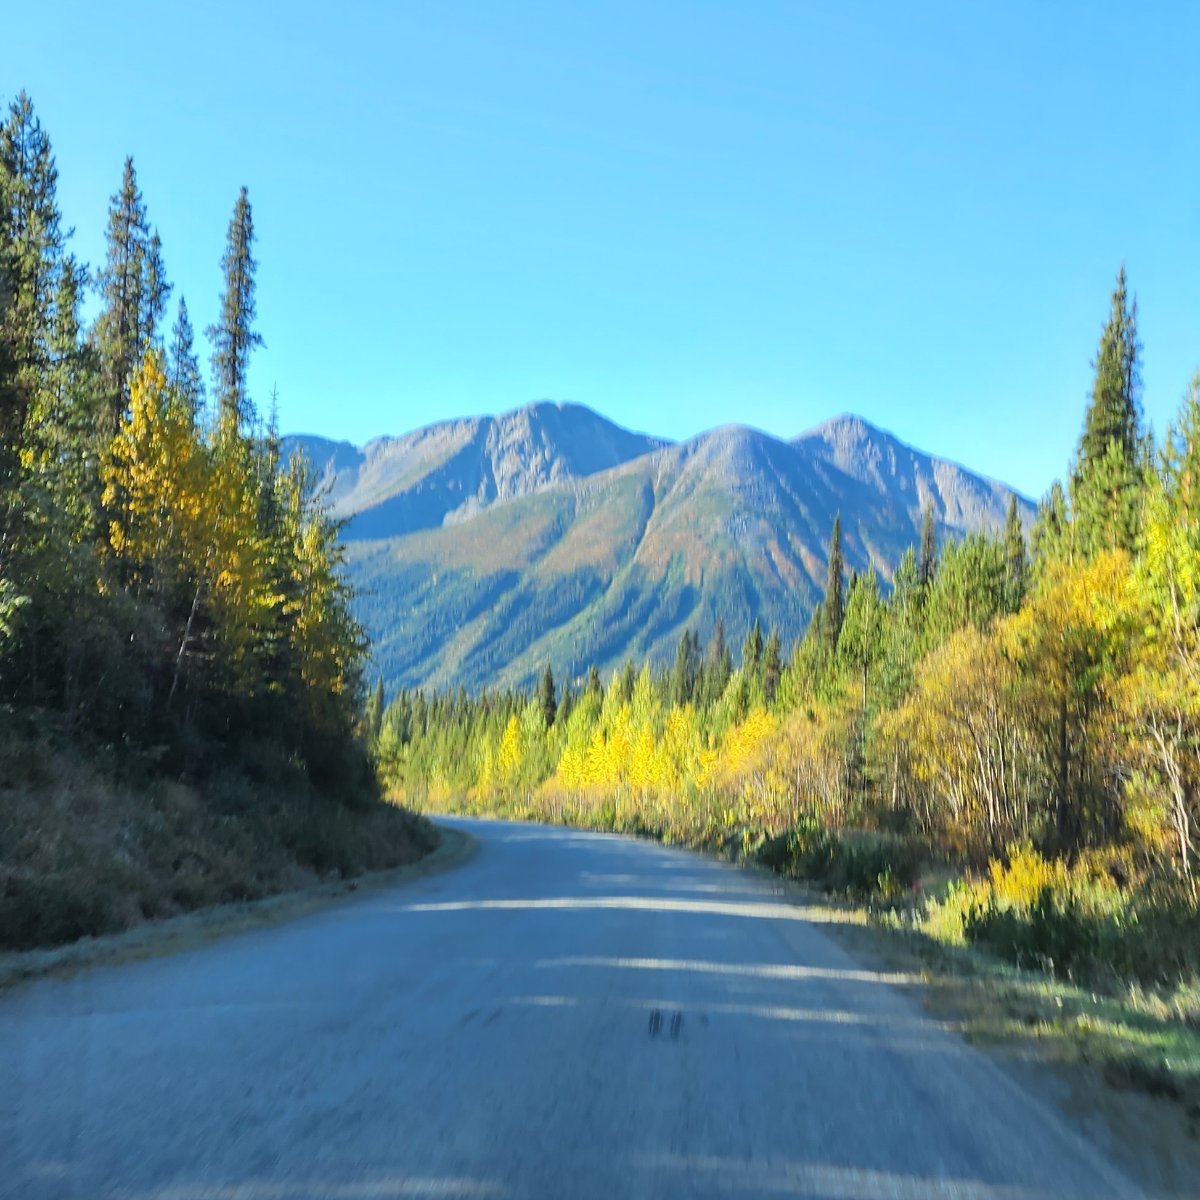
We know that view well, and it's simply amazing! Like @Patriot, we feel blessed to even be part-time residents of WNC. (Our camping property is 40 minutes away.) If you are still there, tell Mr and Mrs H hi from us. And have a blast. I'm sad we can't be there this week. Which way are you headed from there? Not too far down the parkway, probably 35 minutes, the visitors center near east asheville/Fairview (53a off 40, don't remember the parkway milepost number, but drops down to us A74) is beautiful and interesting, as is the folk craft museum nearby. Great short film about the creation of the parkway, and interesting exhibits. And, should you need anything, once you drop down onto A74/240, you're close to Walmart, home depot, Lowe's, kohl's, aldi, Petsmart, Highland Brewing, etc. You'd never know it on the peaceful and amazingly beautiful BRP.3 points
-
Ditto. Decals still look pretty good, 15th season.3 points
-
Yes, decals get wax.3 points
-
Has the stove worked in the past? Are you pushing and holding the knob in? At that time you should hear or smell gas? If there is then flowing gas, you can then push the igniter in but need to hold the knob in for a time for it to settle in?2 points
-
Thank you all2 points
-
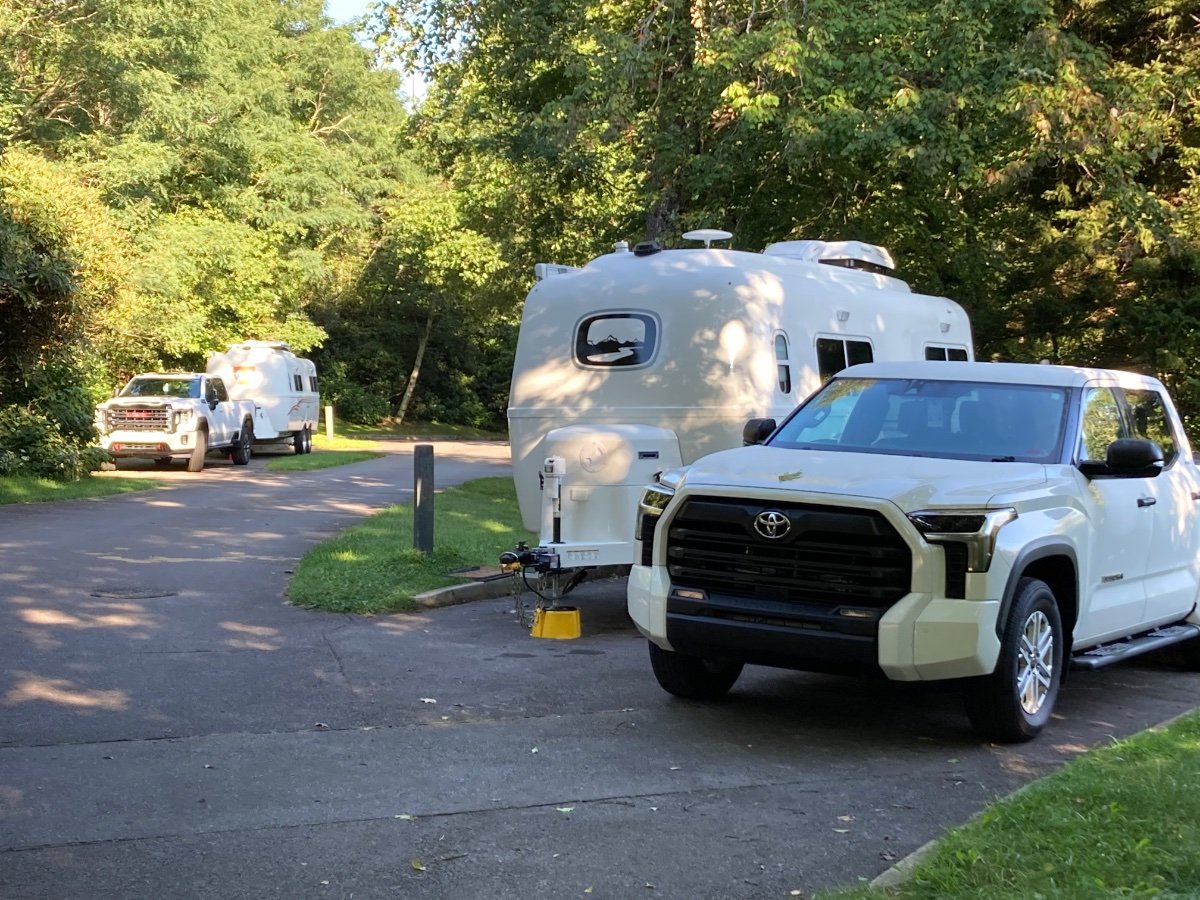
We arrived at Mt. Pisgah campground on 9/22/22 and to our great surprise and pleasure met Hokieman & Mrs. Hokieman, owners of hull 797. We own hull 997. It is always great to be at Mt. Pisgah, and even more so since we’ve made new friends.
2 points
-
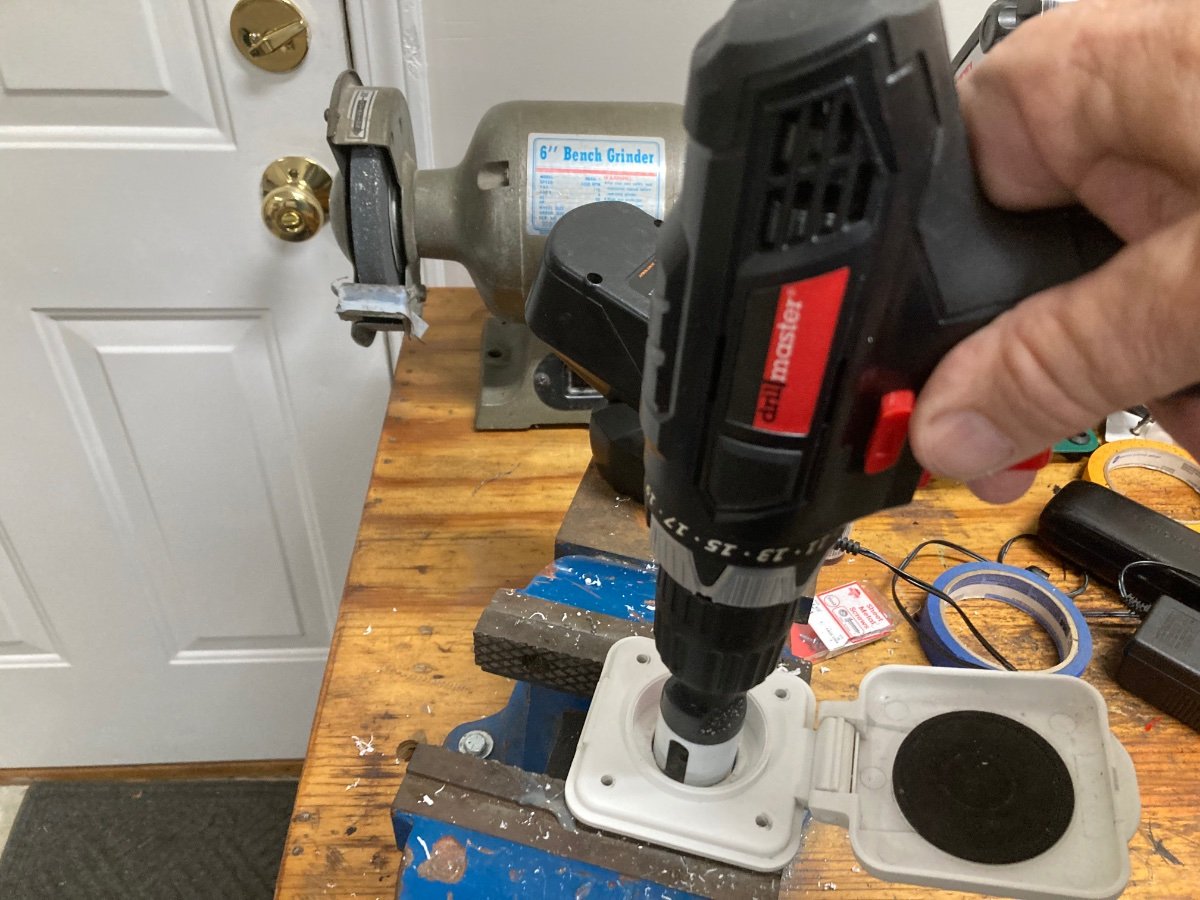
John and Kim, Thanks for your post! We must have been camping when you made this post. Already made the Solar port modification increasing the 10 amp port to 20 amp port before seeing your post today. Renogy website covering solar panel wiring, parallel, series, or parallel/series system. https://www.renogy.com/learn-series-and-parallel/ Renogy recommends wiring the solar panels parallel when using PMW charge controller to maintain output voltage for the controller to work in high efficiently. I see now why SeaDawg was asking if I was wiring the panels in series with a MPPT controller, we have a PMW controller, Voyager 20 amp waterproof controller seen on the Renogy website, I’m learning daily! Here’s the original 10 amp Furrion solar port. Purchased a 20 amp Zamp solar port and modified it to fit the Furrion solar port. Used a belt sander to reduce the outside diameter of the Zamp port down to 1.70”. Made a rubber gasket to seal between the Zamp port and Furrion housing. Drilled four holes through the rubber gasket, and Furrion housing using the Zamp port’s existing holes as a template. Used a 1 1/8” or 29mm hole saw to drill through the Furrion housing so the Zamp port would fit. Wanted the original Furrion lid gasket to seal the Zamp port properly: Finished solar port:
2 points
-
If you're still there, we've enjoyed renting kayaks at Lazy Otter in Mills River, also hiking at Devil's Courthouse and other hikes nearby.2 points
-
The 19 definitely didn’t have the tranny cooler. Gen 1 & 2 did and the folks I know with them never had issues. Glad to see it back on 4th generation. Just annoying that the code I read off the transmission fault suggested an open servo gate. Think I read it is a $50 part. But…no transmission rebuild allowed. Rideandfly - that’s great gas mileage. I was getting 13.5 until we hit MO. Had a strong head wind pretty much all through Missouri and Kansas. 70-75 punching through the wind brought us down to 11. Overall from NC to Denver 12.2. Probably the addition of the battery and generator brings the truck weight up / mileage down. The Ford transmission really holds gear in tow/haul and seems to favor sub 2000 rpm’s. I have to be at 72-73 on a flat to get it to bump up to 10th. It will hold 9th from about 65 - 72 again on flat road.
2 points
-
Here's latest CAT scale results for our 2022 SR5 2WD Crew Cab Tundra's new curb weight after installing accessories. I did not document accessory weights during installation. Installed Toyota side rails, Toyota folding hard bed cover, Toyota bed mat, Toyota Mud guards, and Timbren SES rear suspension kit. Weighed the Tundra with all contents removed, accessories installed, full 32 gallon fuel tank, and no occupants. Original rear differential jounce blocks: Timbren rear differential SES suspension system: Original payload of 1400 pounds from Toyota: Subtract new Curb weight from GVW to learn new payload. Very surprised by the results: GVW 6990 pounds - New Curb weight 5440 pounds = 1550 pounds. Toyota was very conservative with the payload weight of this vehicle, I'm sticking with listed 1400 pound original payload. Reading Truck on payload and towing capacities: https://www.readingtruck.com/calculating-your-trucks-maximum-payload-and-towing-capacity New Curb Weight:1 point
-
We are one of the registered Oliver owners who show our trailer to those thinking of buying an Oliver. We created new "trading cards" to hand out as appropriate to visitors and for friends we meet on the road. In this instance we've also included a QR code, which when scanned with a smart phone or tablet will show the link to our blog page where we review various campgrounds, and list some of the many accessories Oliver owners find useful. Please give it a try and see if scanning the QR code takes you to our website: https://4-ever-hitched.com Craig
1 point
-
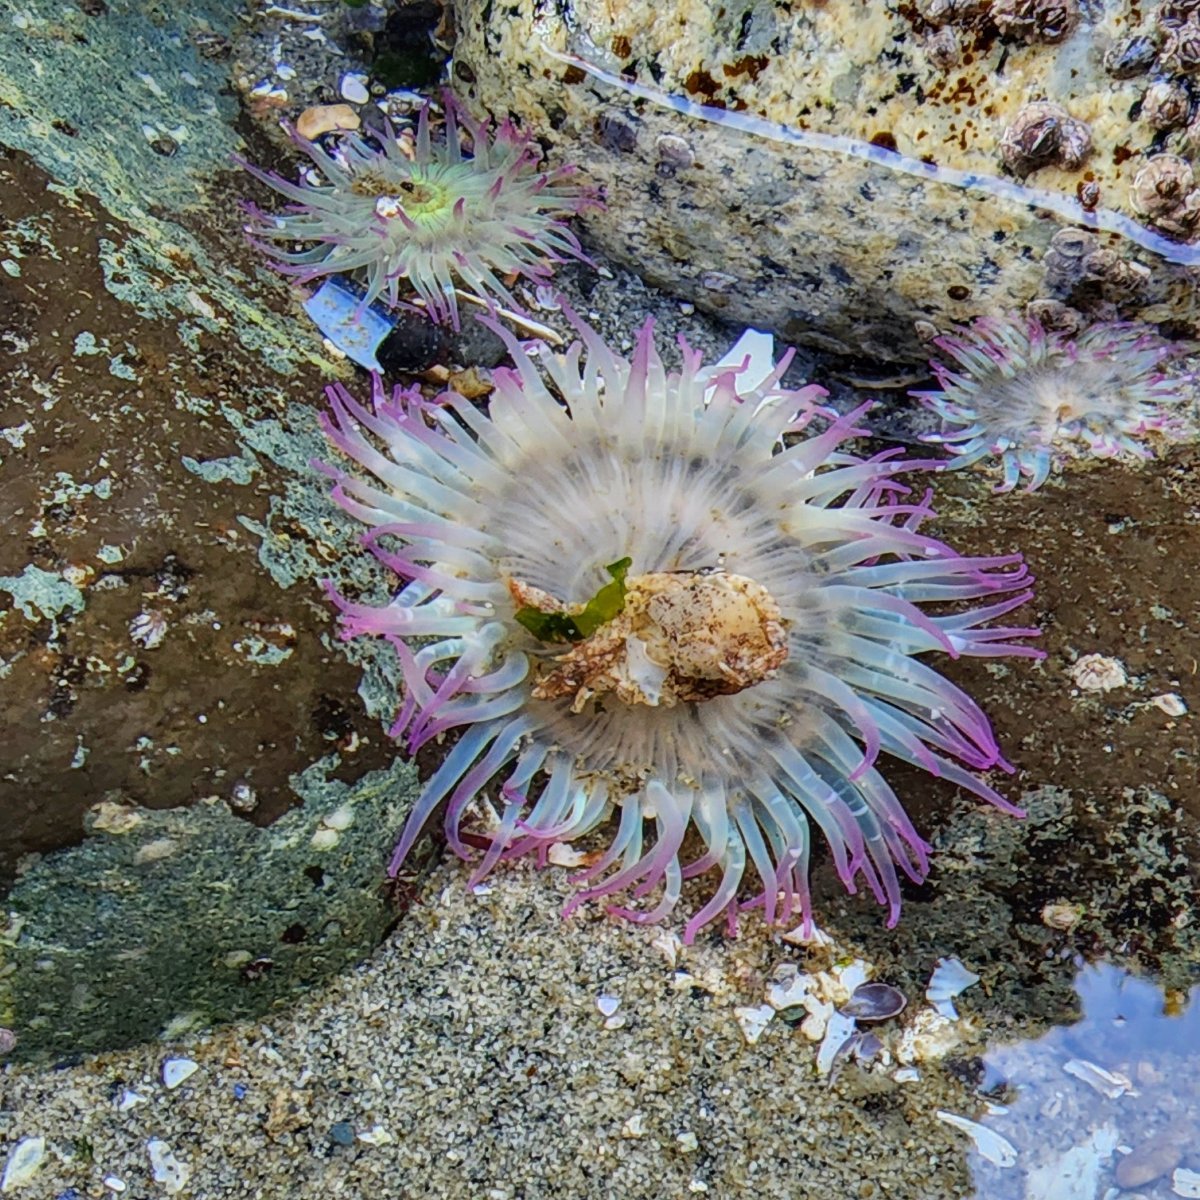
We are on Vancouver Island now, Miracle Beach to be exact. I've spent hours playing in tide pools at low tide. Heading to Pacific Rim NP (Tofino area) tomorrow for a few days then to Victoria. The Cassiar was beautiful. Aspens in their glory the top half. Boya was wonderful & quiet. There is an artesian well near the dump station & you're asked to limit your fill to 20 gallons. And, as always, the Gray Jay's (who thought the button on my cap was edible) were entertaining.
1 point
-
Well, still some questions in my mind before you dive into checking the jets. (In my experience, it's highly unlikely that the jets on both burners would clog up at the very same time.) Accessing the jet is a multistep process, and probably best done by a service tech with proper tools, if you're not an experienced rv diyer. The jet orifice is very small. (Always, if working on a gas appliance, turn off the lp first.) How much have you used your cooktop? Are you pushing in the control knob completely, on "high" or "light", whichever setting you have, and continuing to push in while you try to light the burner? This is a safety feature on rv stoves. Once lit, you still have to hold the knob in until the thermocouple heats up enough to allow gas to continue to flow. (On my older smev, it's a slow count of three.) So, double safety. If you're following the above procedures, neither burner gets gas, and your cooktop hasn't been messed up by boilovers, Etc., I'd open a service ticket. Also, please add your info to your signature, or add info about your trailer in your post. Best of luck.1 point
-
Is it just one burner, or neither will light? Do you hear or smell any gas when you hold in the button? Can you light it with a match, but not the piezo igniter? Does it light, then go out? Hold the button in longer, and see if it will stay lit.1 point
-
Nice job rideandfly. Is there a way you can change the Furrion cover to say 20A?1 point
-
slt3888 Welcome to the forum. What size/model Ford do you have? It would be nice if you fill in the information about your TV and Oliver in the signature line. Click on your name in the top right corner. Another window will open, click on Account Settings. When a new window opens, click on Signature on the left side. Edit the signature section with the information you would like to appear at the bottom of your post’s and click Save. Thanks1 point
-
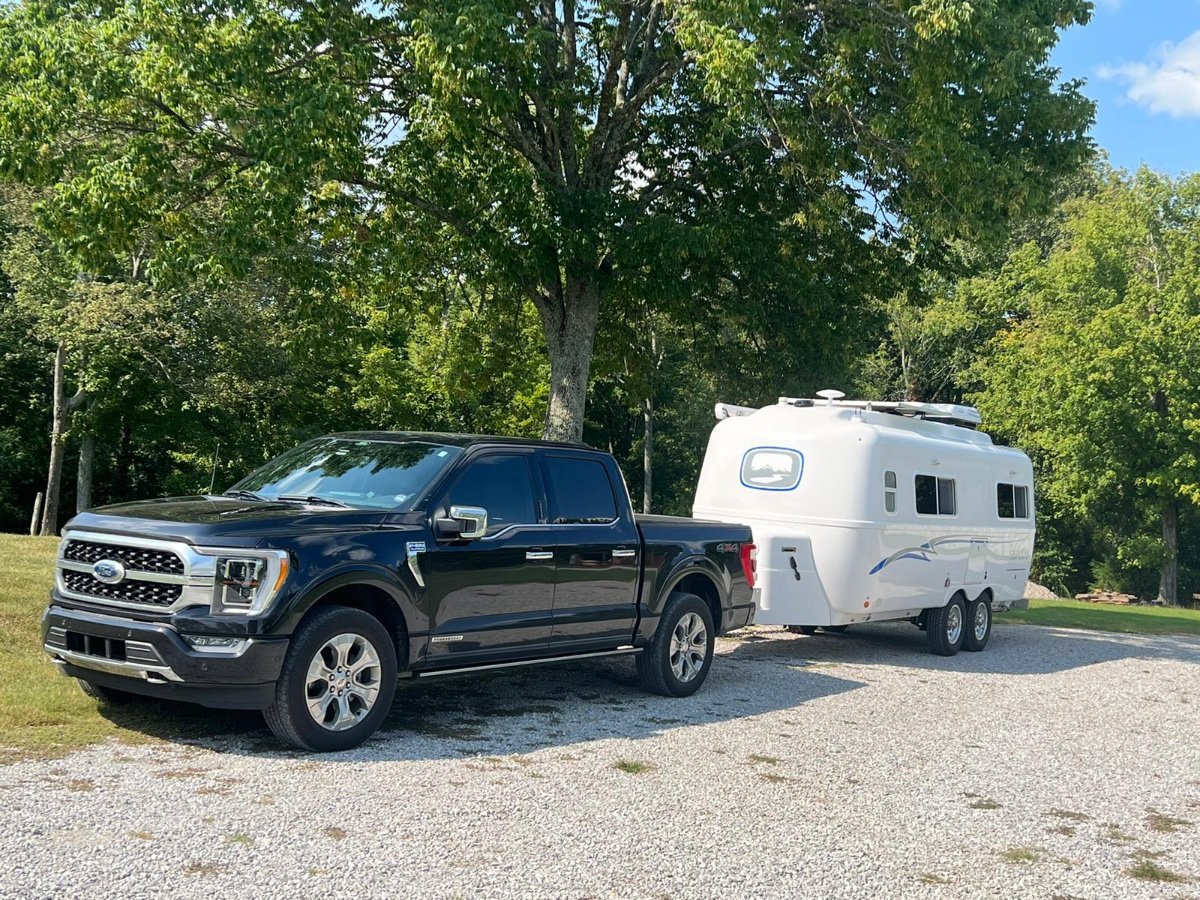
Fine looking rig!!!!!!!1 point
-
How beautiful!!!1 point
-
Yes, we do wax over the decal.👍🏼1 point
-
Exactly what I’m looking for! Thank you so much.1 point
-
Mt. Pisgah and the southern end of the Blue Ridge Parkway is a gorgeous area with some of the highest elevations. The Smoky Mtn Expressway is also a really pretty drive. My wife and I rode our dual sport motorcycles from the Smoky Mtn Expressway all the way to Front Royal, Va several years ago. It was a memorable week long fun adventure trip. We live in the foothills of Western NC and have spent time at Mt Pisgah. So glad you enjoyed the beautiful vistas of the BRP…it’s a national treasure for sure. Check out Mtn Mitchell and Grandfather Mtn as well for some incredible views. We love living in the western NC. 🇺🇸 -Patriot 🇺🇸1 point
-
Here's another "for what's it worth story". If you zoom in real close, I think my new truck is located in the bottom right corner, Florida panhandle looking lot. It's the white one. Your 2022 SuperDuty F-350 XLT has been "Built" and is currently awaiting shipment. Built Your vehicle has been built and we are arranging shipment to your dealer. This step could take a few days to a week. Select the "Learn About Your Vehicle" link for information and videos about your new vehicle. Ford Accessories Order Confirmed 02/08/2022, Step 1 of 5 , Completed Order Confirmed02/08/2022 1 In Production 08/22/2022, Step 2 of 5 , Completed In Production08/22/2022 2 Built 09/13/2022, Step 3 of 5 , In Progress Built09/13/2022 3 Shipped Step 4 of 5 Shipped 4 Final Preparation TBD, Step 5 of 5 Final Preparation 5 Vehicle Details Ordered On 02/08/20221 point
-
And, we all know that meeting Anita is worth every penny of that $4,000!😍 Bill1 point
-
It’s not an issue. We have the maxxfan open almost always as well as the bath fan. That provides ventilation. Sometimes during really hard rains we shut the bath fan because some of the rain bouncing off the roof can make the bath floor damp. If it isn’t a hard rain, keeping a window cracked is something else we do. Mike1 point
-
Carmax can be a good option. I bought one car from them, a 2006 MINI Cooper S that was four years old. Low mileage and fair price. The day I picked it up I went straight to the BMW/MINI dealer and paid $120 for a complete bumper to bumper inspection resulting in a page of issues, mostly worn out seals and gaskets and a few other things. The next day I drove it back to Carmax and showed them the inspection results. They honored their 30 day warranty and fixed everything, about $2,300 of repairs. Unless you buy something that is only a year or two old or has very few miles I would recommend a good inspection and a possible return visit to Carmax. Mike1 point
-
That is correct. Payload includes all occupants (people, dogs, spirits, aliens, etc), any additions to the vehicle since it was manufactured (camper top, bed slide, Andersen hitch, helper springs, all camping gear, cell phone chargers, GPS, boxes of Kleenex, snacks, luggage, etc). If it was not in or on the vehicle when it was sitting on the car lot it is considered cargo. However, payload does not include the weight of any of the fluids that are necessary for the operation of the vehicle (fuel, oil, antifreeze solution, transmission fluid, etc)1 point
-
Because it really is just as, if not more important than, the towing capacity. From both a legal and a safety standpoint. I guess that's why I've gone through four different tow vehicles for the Outlaw Oliver. I've finally gotten to a point where I don't have to worry about capability or legality.1 point
-
No, towing capacity and payload capacity do not add together. Think of it this way, PAYLOAD weight is the downward vertical load (towards the ground) on the tow vehicle, acting downward on the tow vehicle suspension. TOWING weight is the horizontal load being pulled that puts stress on the engine, transmission & brakes to go and stop. You could exceed the payload limit (and break the suspension on the tow vehicle) without even driving forward. And the tongue weight of the trailer (tongue weight is the downward weight that the trailer applies to the hitch, usually about 10% of the total trailer weight) must be included in your payload number total. And your vehicle has a tongue weight limit number as well somewhere in the vehicle manual/specs. Adding a basket and generator to the front of the trailer as you mentioned will increase the tongue weight as well as the total trailer weight going up.1 point
-
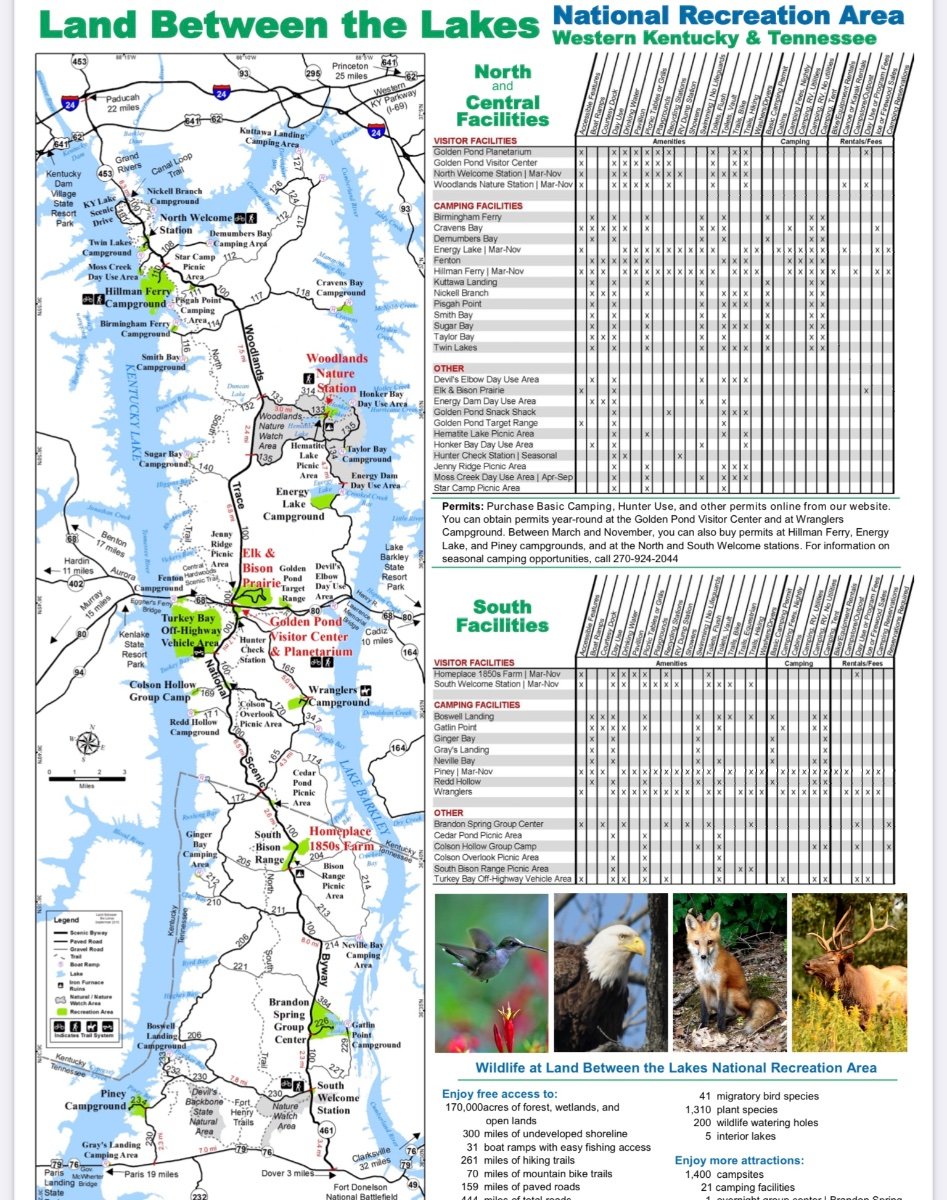
Welcome to the forum, please fill out your signature so we know what trailer and tow vehicle you have. Do you have towing experience? I can’t recommend any specific places along your route, though Land Between The Lakes is near Paducah and has a whole bunch of camping options and 170,000 acres. The last time I was there was around 1976, so my memories are off a little 😬 I do caution that some of the secondary county roads in middle and west TN are extremely twisty and up/ down/ up, and they should be avoided if you haven’t towed before. Stick to major state and US highways and avoid the ridges and “hollers” (hollows). John Davies Spokane WA
1 point
-
What has been your favorite camping spot for your Oliver, ever? This includes anywhere in the U.S., Canada, or Mexico. Thank you, Margaret This is where I've tent camped in the past, but Ollie is different, though a shorty might have made it up there. The Lost Man Campground in Colorado, 10k feet in altitude. The yellow tent was mine.
1 point
-
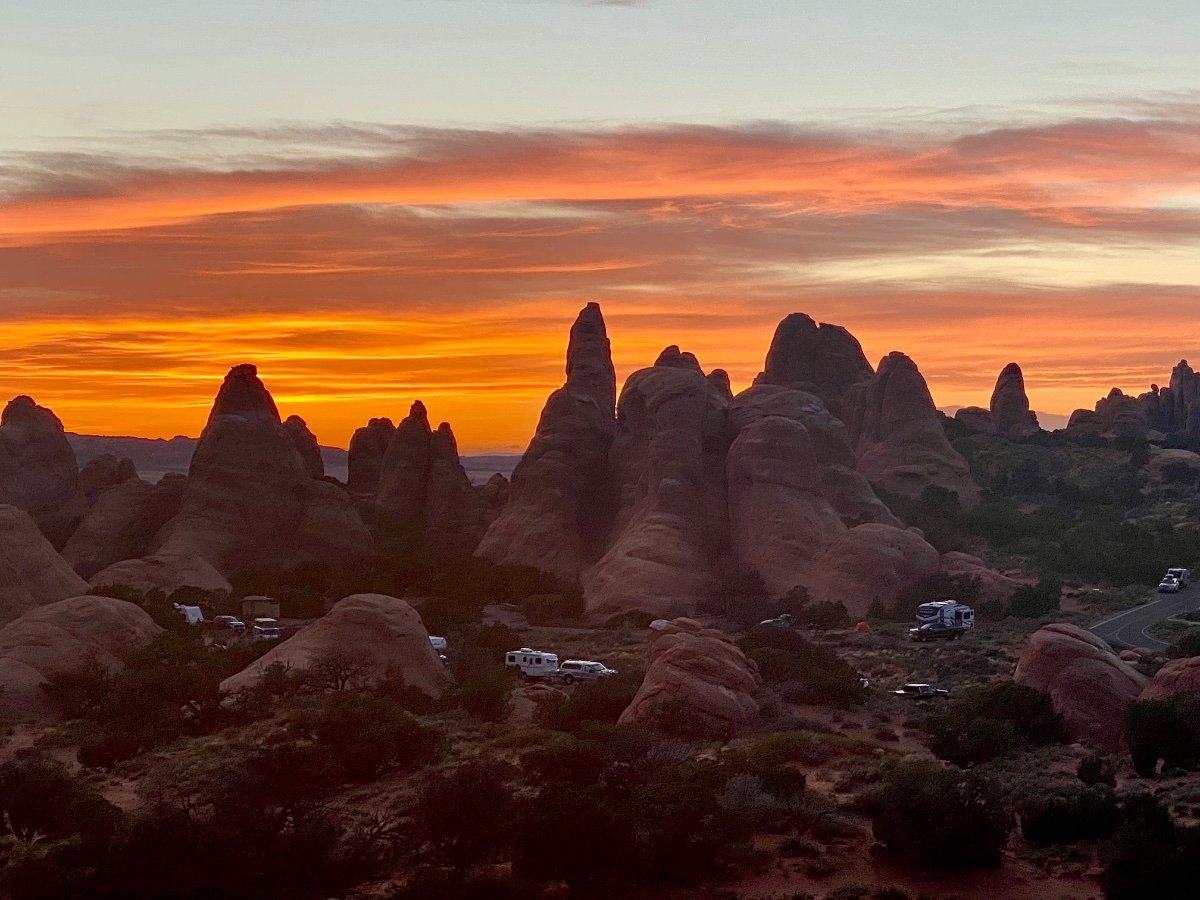
I prefer to think we are still (always) in pursuit of our “favorite” boondocks camp spot 😊 So far I’d say it’s Devil’s Garden in Arches NP. Incredible views, rock formations and hiking trails right in the campground. Sunrise and sunsets were amazing
1 point
-
I won't even let the ends of my fresh water hoses touch the ground! Ewwwwww!1 point
-
Dog Canyon campground, Guadalupe NP. 60 miles South of Carlsbad, NM, just barely over the border into Texas. Only 4 RV sites. No hookups but potable water and flush toilets nearby. The 4 RV sites are close together but the hiking, scenery and wildlife are wonderful and the peacefulness is great. I have been there three times now and two times was the ONLY camper in the whole campground for several days. A bit out of the way but worth it. https://www.nps.gov/gumo/planyourvisit/dog_canyon_campground.htm1 point
-
I’ve been to the Gaspe Peninsula! I was there about 30 years ago, though, so I imagine things have indeed changed. Yes, it was indeed magnificent. An ex bf and I drove the entire peninsula, but we stayed in youth hostels, as this was before I had ever owned any tents or campers. We went to Percé Rock, and also to a National park, name fails me. We went up to the mountains and saw permafrost (still there???) and saw caribou, It was cold, for summer!1 point
-
One of my favorites (and there are so many!) was on the Gaspe peninsula, Quebec. Most of the Provincial and national campgrounds were closed, so we "settled" for Camping Griffon. Simple rv park, we were one of maybe three campers there in early October, and we watched whales from our campsite. The owners were so very nice, even though we spoke little French, they spoke some pretty good English. Our camper was so small, they gave us a seaside tent site. The showers were older but clean and heated, and a very short walk in the brisk evening! Things have possibly changed. That's 12 or 14 years ago. But, the Gaspe is a beautiful drive.. do it north to south, if possible, as you generally are on the land side, not feeling like you're hanging out on the edge of the cliff (though you are, sometimes. )1 point
-
Yeah, when the tide is way out but incoming it can be surprising how quickly a two foot high flow of water crosses a hundred yards or so toward the land. It's not zero risk on outgoing tide but the risk is for sure lower, especially if you watch several wave sets come through to see what's going on. But yeah sneaker waves are real. We really enjoyed walking both Ruby and Beach 4 during this stay, and of course the beach right at the campground was handy for several nice walks. I think I like Second Beach even a bit more than Ruby but now I'm splitting hairs I suppose, and I can't take my dog there. There are some beaches between Bandon and the CA border that I am fully smitten with but it's a MUCH longer drive from home. Will be heading down there (with reservations at Cape Blanco and a few other spots in-between here and there for before and after) in late October when the weather is often surprisingly awesome on the coast. The beaches down along the Samuel Boardman corridor are pretty wild and of course the beach at Bandon is super photogenic. Here's a pic from Second Beach (currently closed due to being on tribal land, due to COVID concerns btw!) four or five winters ago, when I was staying at nearby Mora campground, which used to be FFS all year but now is on the reservations season along with Kalaloch Beach CG during high season 😞. Mora is also "boondocking" per the definition being used here.
1 point
-
Jim, I love that Kalaloch area when it isn’t raining or too crazy busy in the high season, it looks as if you went a few miles north to Ruby Beach. That is simply glorious. It is one of two places in the USA that I want my ashes scattered, the other is White Crack CG in Canyonlands NP, my heirs can take their pick… Scary though during a big negative tide, my wife and son went waaaaay the heck out onto the sand, I stayed back, I have this innate fear of huge sleeper or tsunami waves…. you can just see them in the very center of the pic. It would be a very long way to run. BTW it is pronounced “Clay-Lock”. Two equal syllables…. visitors should be aware that gas stations are scarce, and the ones inside Olympic NP are insanely expensive. Just outside the Park boundaries they are just a little expensive, use Gas Buddy, don’t pay an extra 40%… John Davies Spokane WA
1 point
-
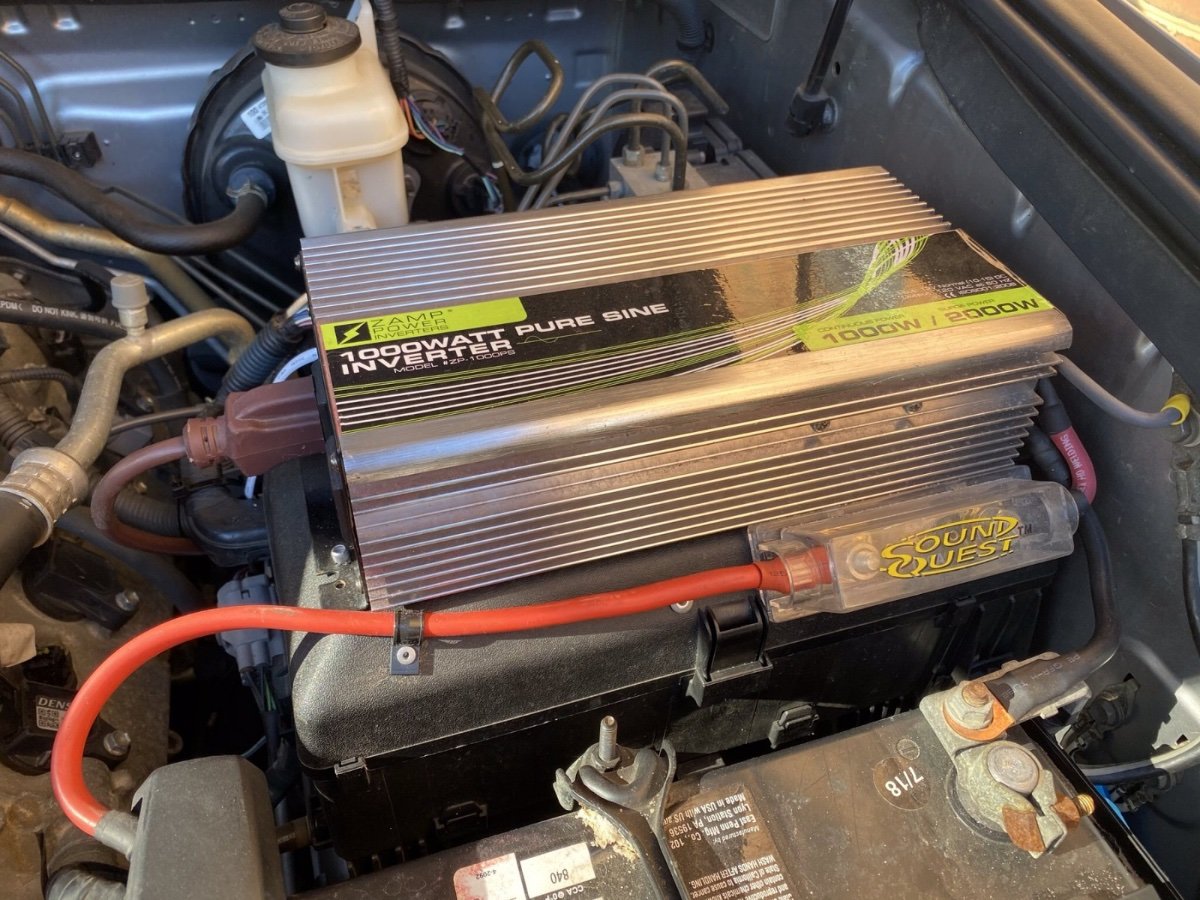
Edit 10/16/22, in case that link disappears. Yikes! He mounted a 2000 watt (surge) inverter in the engine compartment; these units will shut down at temps above around 150 degrees F. The heat is really bad for them. And no way is that unit OK for a wet environment like that. Zap! He ran a 120 VAC 16 AWG live household extension cord past the engine, exhaust and under the truck chassis! The first is just poor planning, the second is super dangerous and against all kinds of codes and logic. I did not read any further, this is criminal. Please do not do this. John Davies Spokane WA
1 point
-
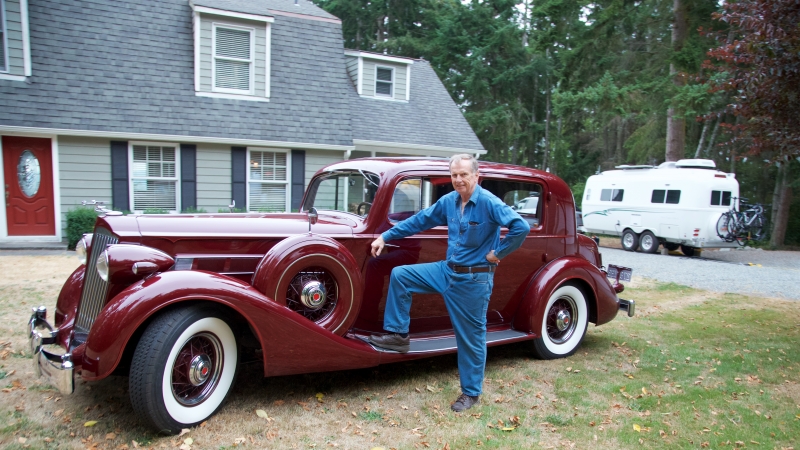
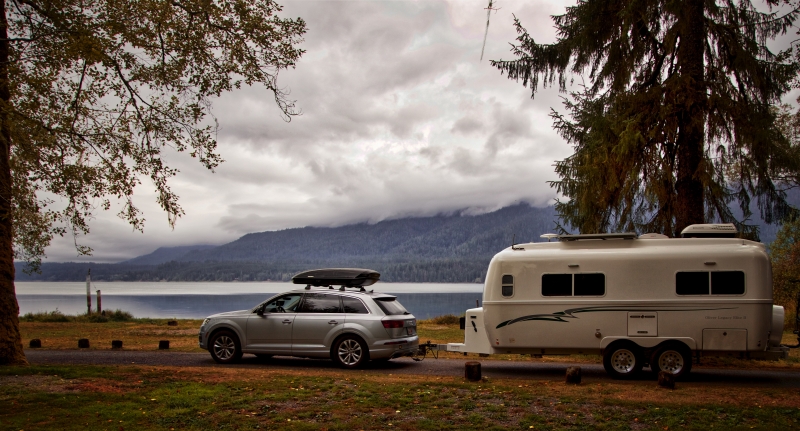
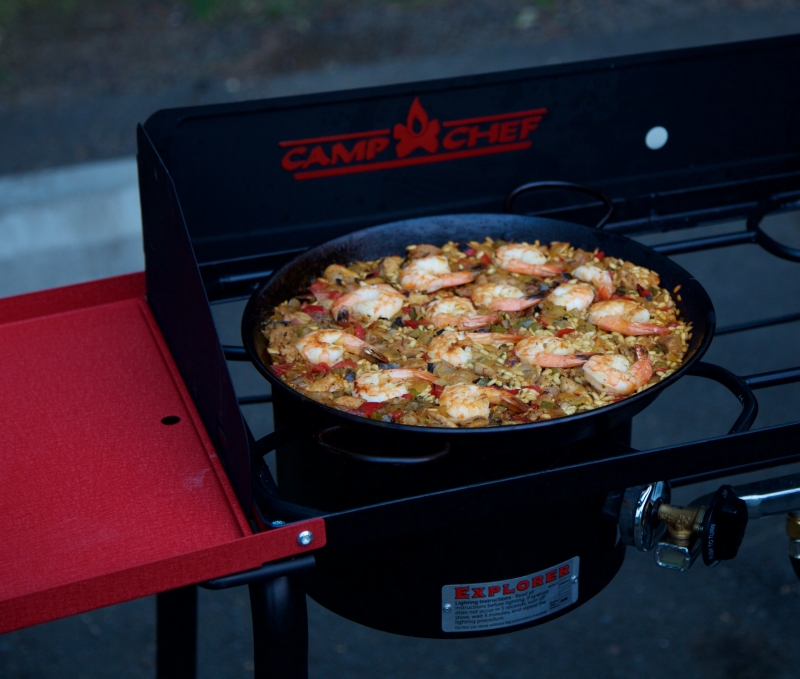
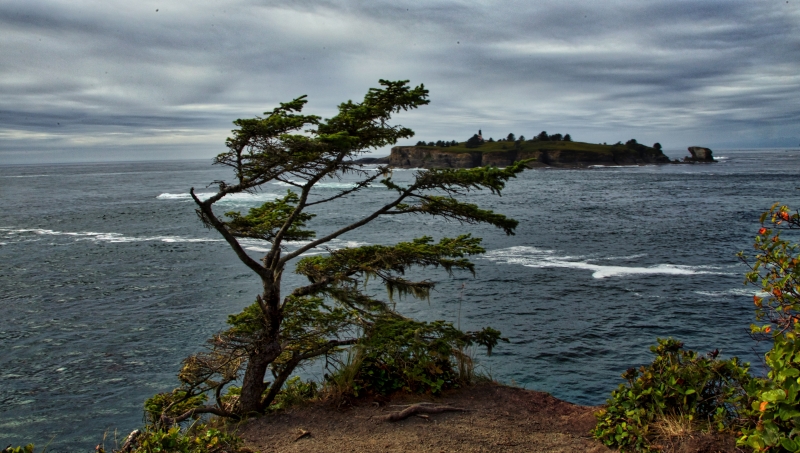
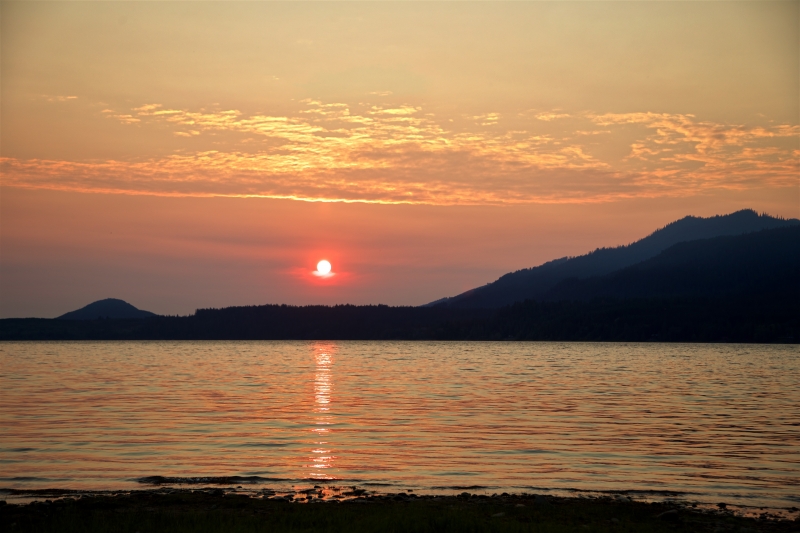
Where’s Ollie? Ollie went on a trailer caravan trip to Olympic National Park with his cousin Casita! This was a long trip, two weeks. I now define a trip as a long trip if you need to plan a laundromat stop in your itinerary. My sister and her husband live near Bend, OR, and they have a Casita. We met up in Yakima, WA, where we spent a day wine tasting before heading to Coupeville on Whidby Island, where we driveway camped at my other sister’s college roommate's home. I sense that there are a lot of automotive aficionados on this forum. Our hosts are fans of Packard cars, and they have a number of old Packards that they have restored. Ollie and Casita then rode the ferry across Puget Sound to begin their adventure on the Olympic Peninsula. Ollie had to pay the 40-to-50 foot fee for the ferry, while economical Casita got away with the under-40-foot fee. Size does matter! Olympic National Park is truly spectacular! Mountains, rivers, waterfalls, lakes, oceans, rivers, and rain forests! We camped at Lake Crescent, Neah Bay, Hoh Rainforest, Kalaloch Beach, and Lake Quinault. Two nights camping at each location, mostly in National Park campgrounds without hookups. These are rain forests, with a lot of downed trees, and I enjoyed photographing the fungi. I even got black slugs lounging on mushrooms. We ate very well. We bought fresh salmon and black cod from a fisher on the dock at Neah Bay. Susan acceded to my wishes and we tried our authentic Paella recipe on our camp stove. Really delicious! Neah Bay was particularly enjoyable. The Makah tribe has an amazing museum there. The hike out to Cape Flattery is definitely worth doing. Cape Flattery is the northwest-most point in the continental US. It was fun travelling with others, and we each learned a lot from each other’s camping tools and tricks. I think Amazon is going to be busy with deliveries to my sister’s house… We had one major plumbing problem, which I will post in an appropriate thread. I have some questions which I will post later, and I already posted my trick for Cellular Boosters. I will end with some sunset photos: Happy Trails, David
1 point
-
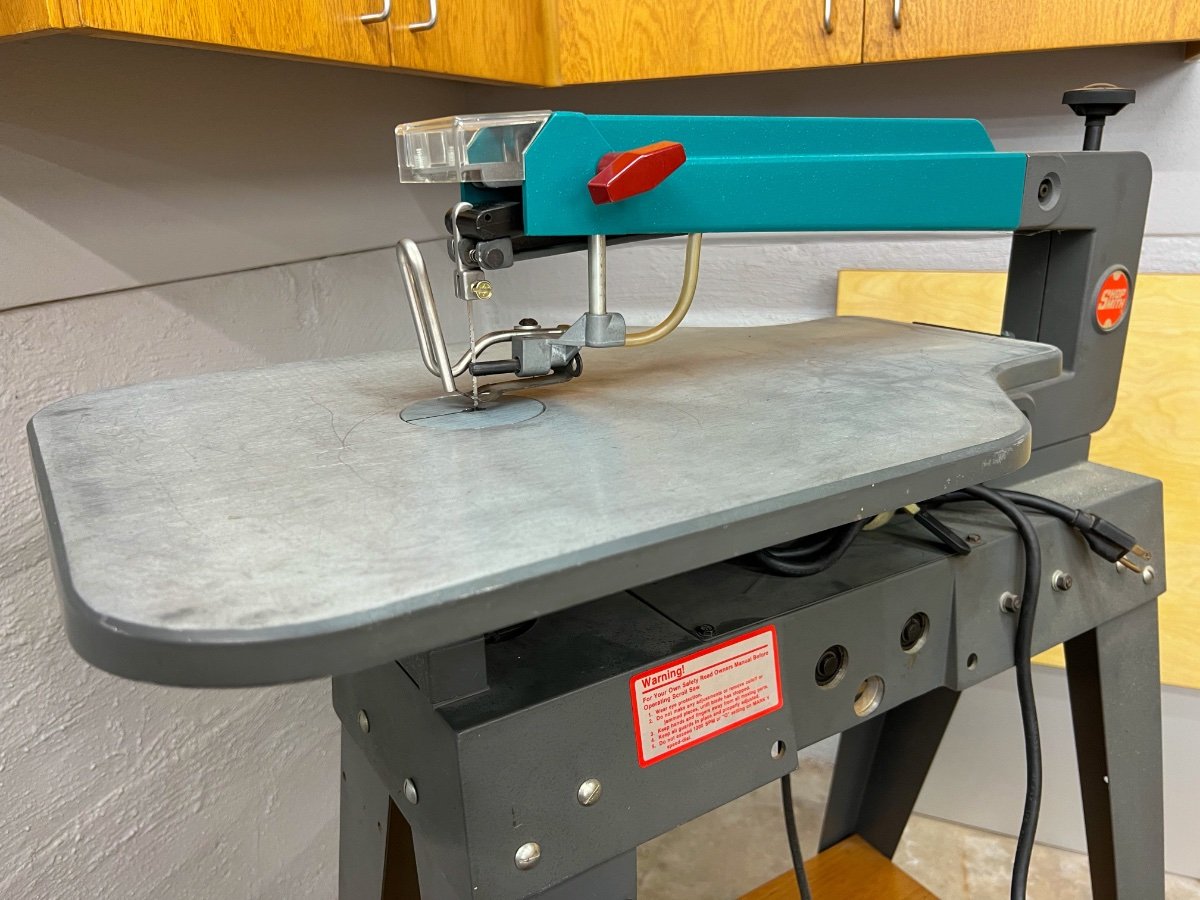
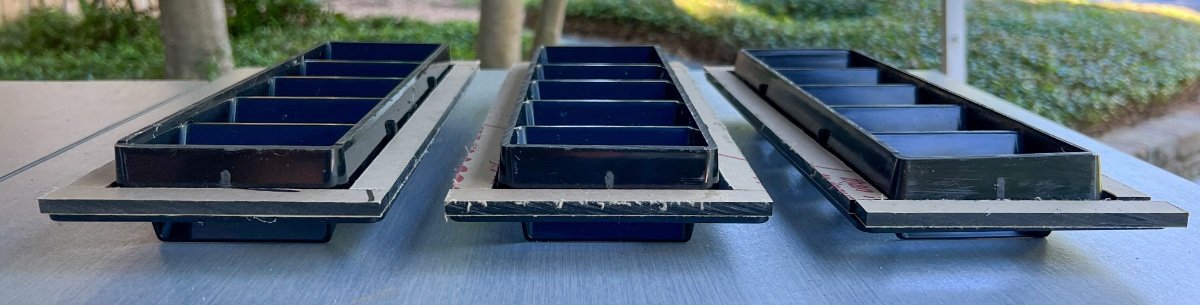
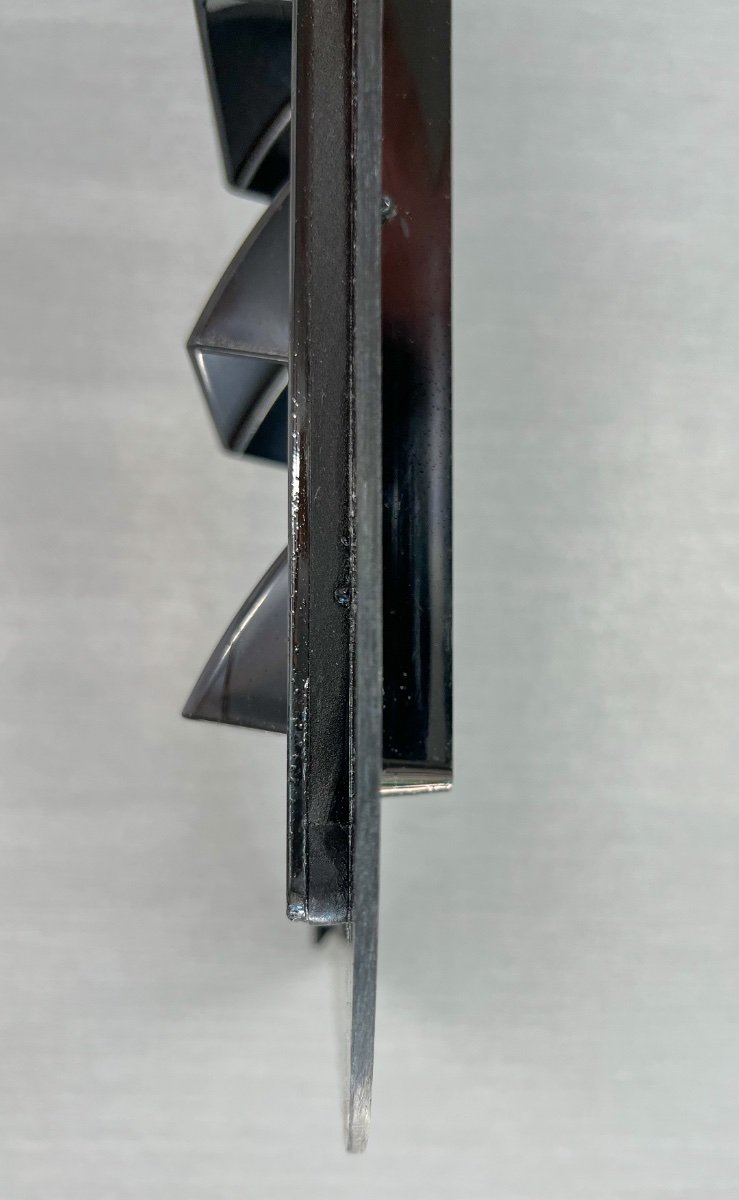
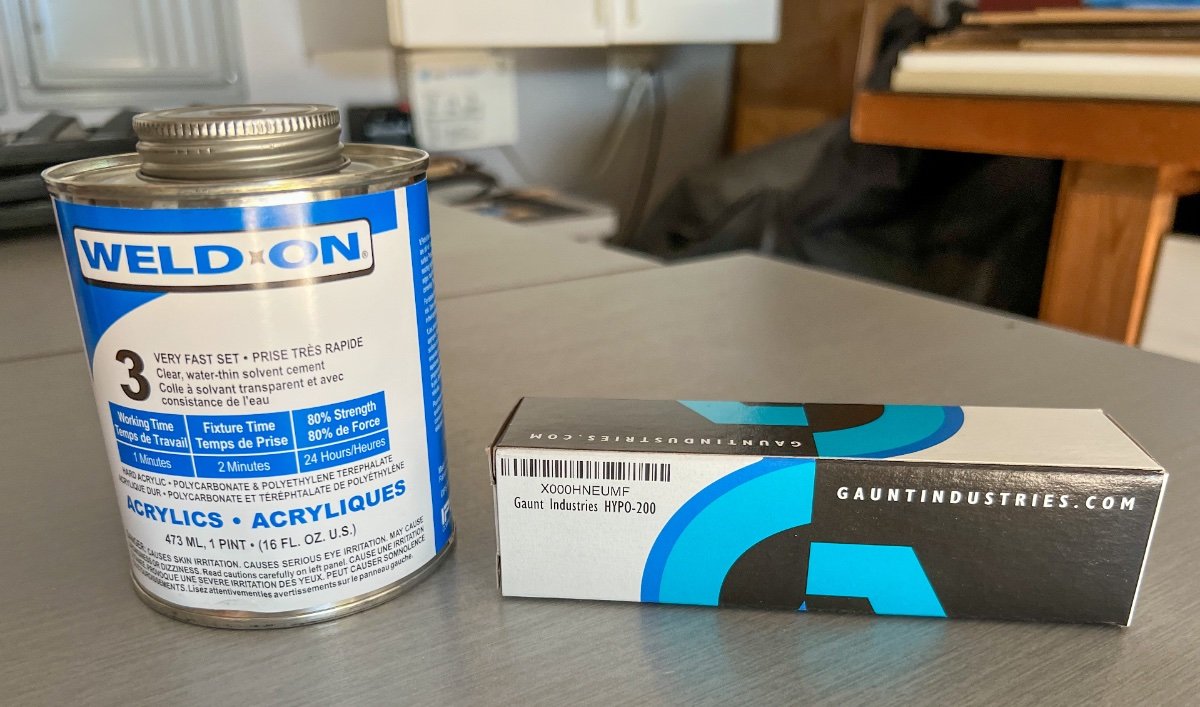
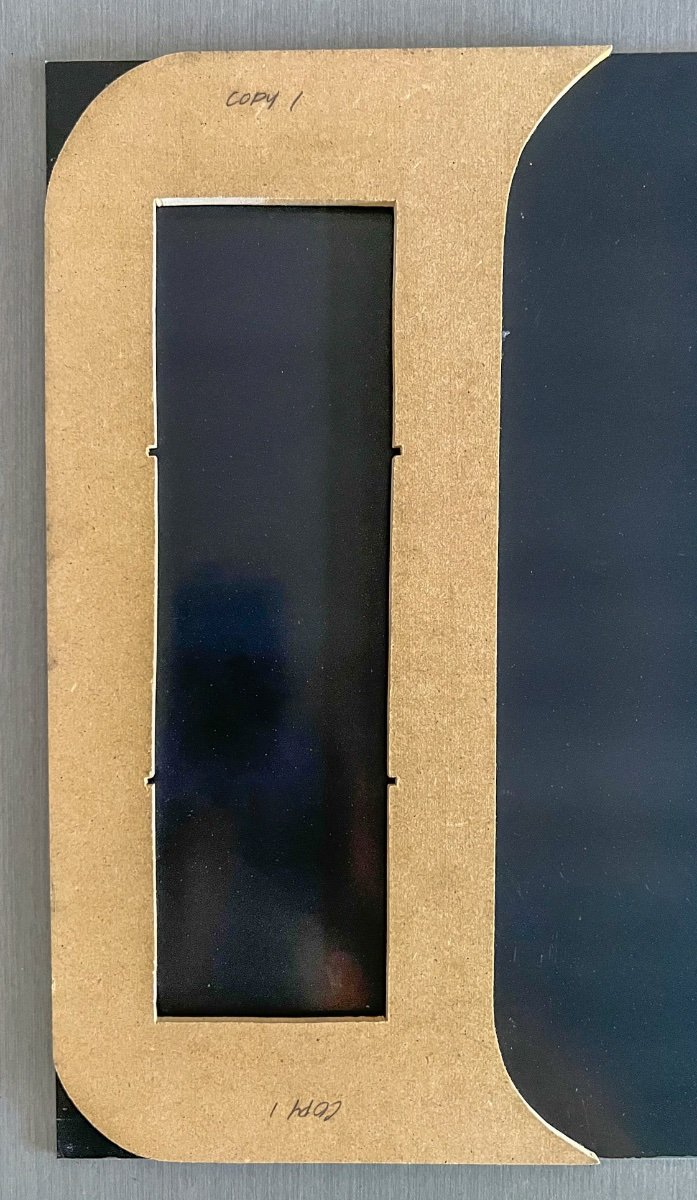
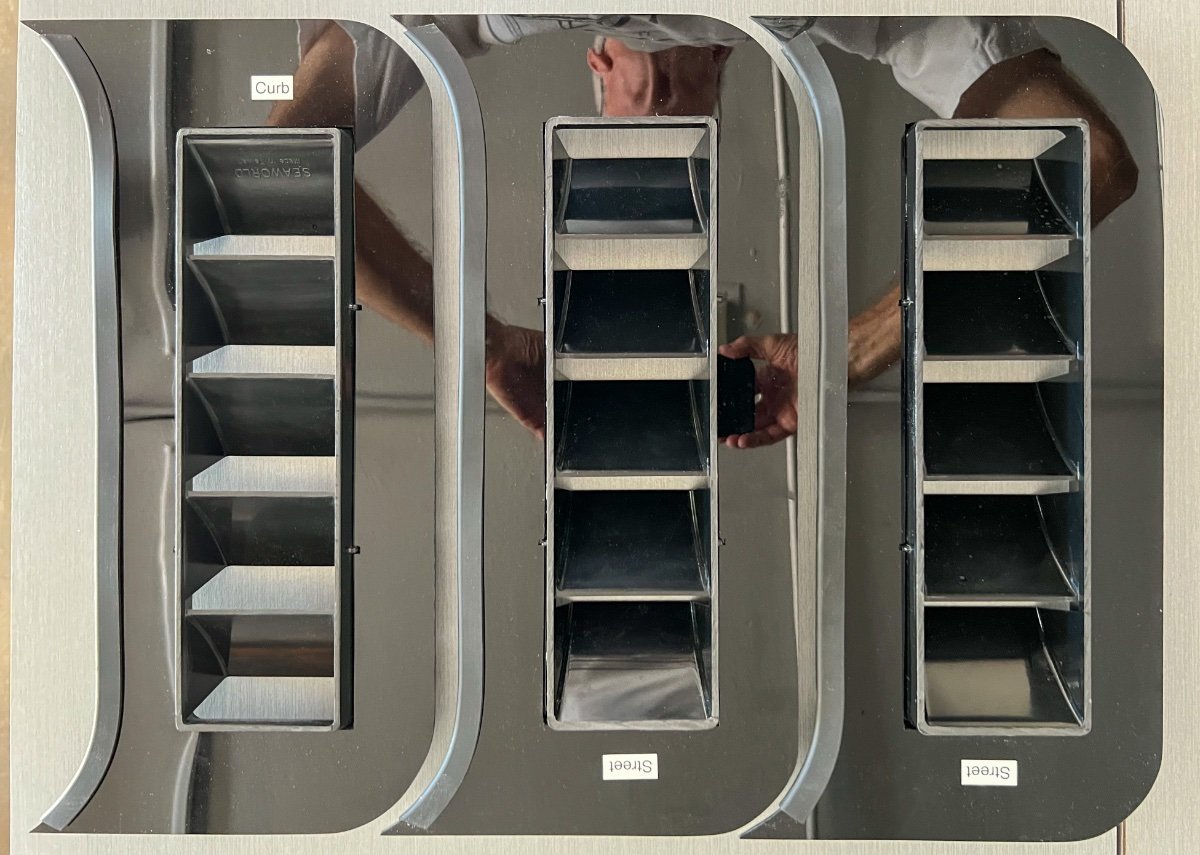
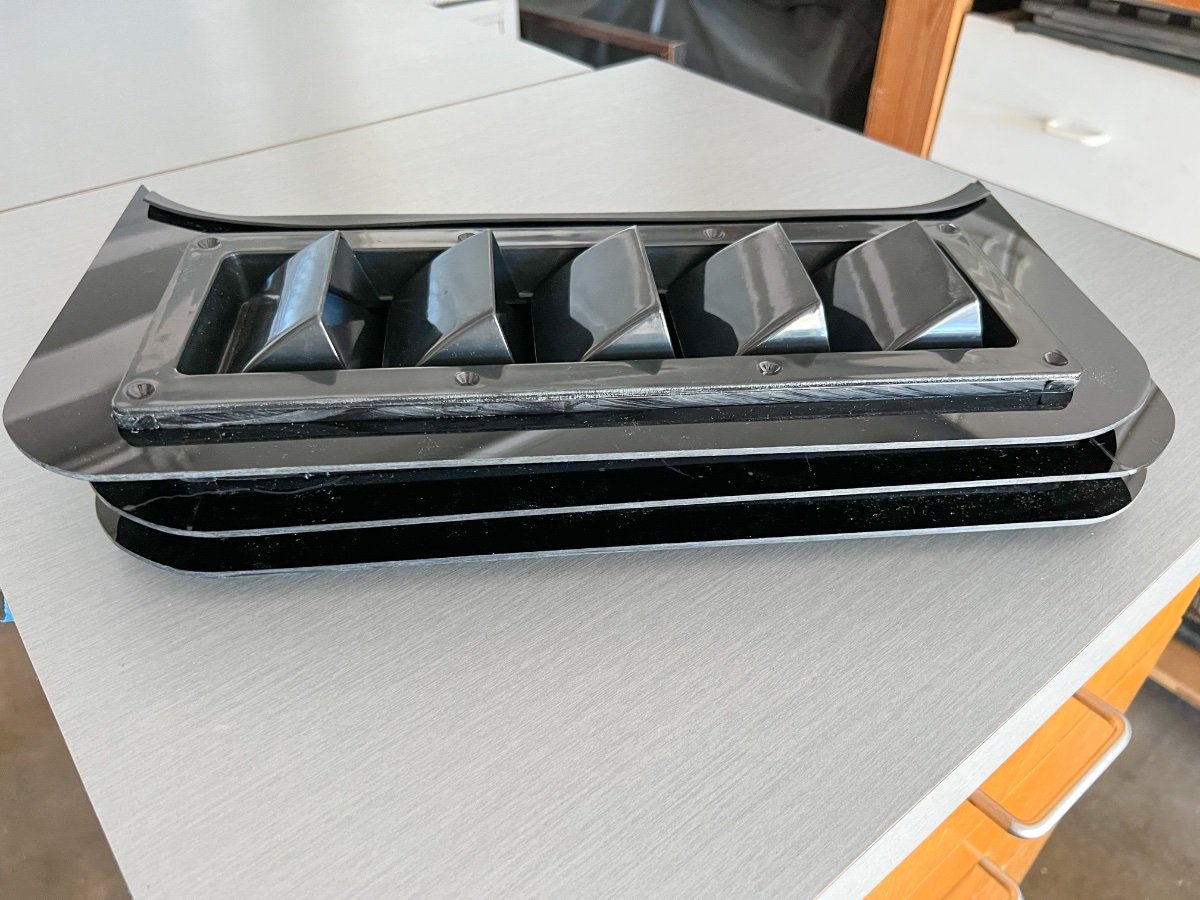
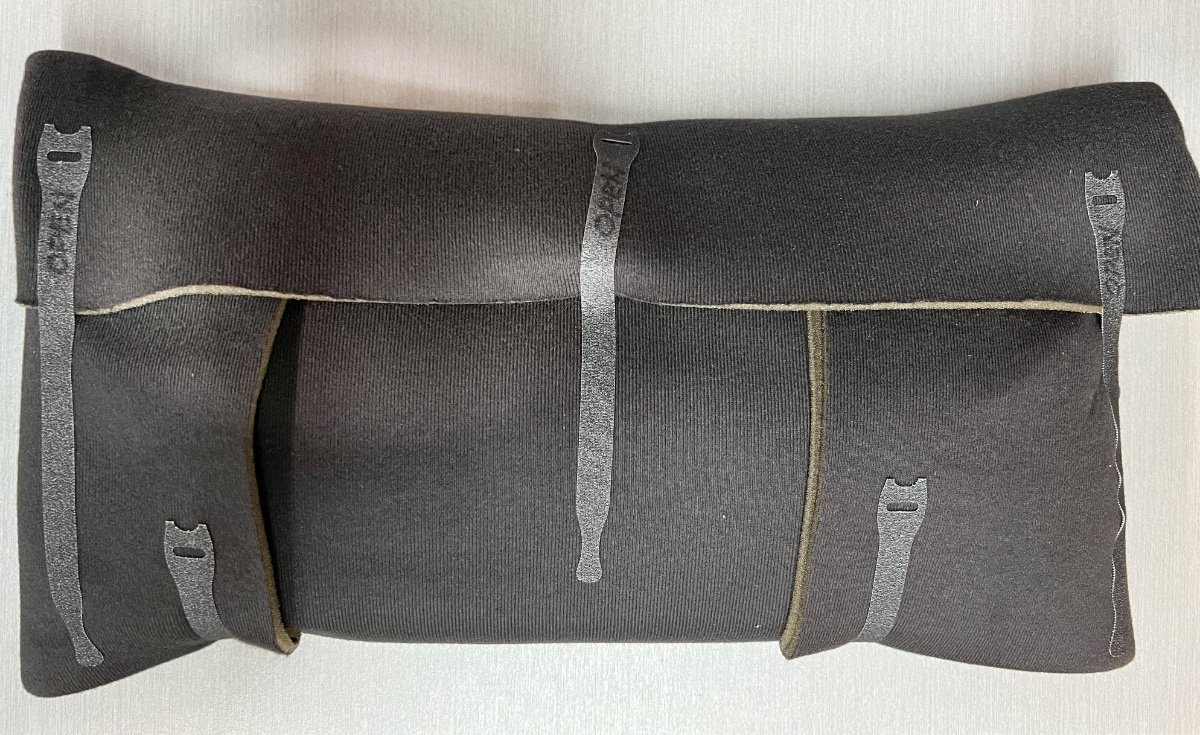
I recently undertook fabrication of a set of louvered ventilators for the three side windows of our LEII, following the excellent design posted by @csevel. I want to share some lessons learned for others who may want to fabricate a set for their Ollies. The window vent consists of two main parts, a purchased louver ventilator and a custom made acrylic mounting plate, shaped to fit a partial window opening, into which the louver is mounted. I executed the fabrication a bit differently from @csevel. Since I wanted to produce a set of three louvered ventilators, I made a template using 1/4" medium density fiberboard (MDF) for the mounting plate. I, too, used one of the window screens as a guide for the edge contours of the template to match the sliding windows and frames. The final mounting plate template is 16-3/8" tall and 6-5/8" wide at the midpoint. The rectangular opening is 3-½" wide x 12-1/16" tall. After tracing the screen contour for the vertical edges of the template, I clamped the window screen to the MDF and used the screen as a template for my router to follow, to cut the shape. Cutting external edges of MDF template I had purchased the White Water Plastic 5-Slotted Louvered Ventilators from Amazon, although they are now shown as unavailable. I recommend searching for other sources, such as West Marine. It appears the same product is sold under multiple brand names. I used one of the purchased louvered ventilators to determine the size of the rectangular opening required in my MDF template and centered the outline for the opening. Note the rear of the louvered ventilator is tapered, so the opening needs to be large enough to accept the entire rear projection through the MDF mounting plate template, with the flange of the louver meeting the mounting plate. The rear projection also has two reinforcing ribs on each of the long sides and one each on top and bottom, which require notching the sides of the opening for clearance. To cut out the rectangular opening in the MDF template, I first tried to use my router, but found it very difficult to control the router and tried various guides, unsuccessfully. Achieving accurate cuts freehand with the router was also very difficult. In retrospect, using a router table to cut the opening rectangle would not be too difficult if done with straight outer edges, prior to cutting the outer edge curves. Frustrated by my lack of skill with the router, I switched to using a scroll saw to cut the rectangular opening in the mounting plate. This requires drilling a starter hole inside the rectangle, then inserting the scroll saw blade. The scroll saw proved very useful in making accurate cuts to make the MDF template. I tried to cut the rectangular opening as accurately as possible, which was relatively easy to do. If a scroll saw is not available, I recommend using a high quality hand held jigsaw as another option. After cutting the outer curved edges and rectangular opening in the template, I sanded the edges smooth and inserted one of the louvers into the template to test for fit. I used blue painter's tape to hold the louver in the template while testing the fit in the window opening. Test fitting the MDF template and louver I inserted the MDF template and louver into the window opening to verify the curved side abutting the window fit closely, with as small a gap as possible. I made slight adjustments to the template with a belt sander mounted upside down on a work table. I also verified the template could be inserted into the window track while inside the trailer, without requiring removal of the window shades or screen. While inside the trailer, position the mounting plate and louver through the window opening and tilt the top topward the upper screen track. The mounting plate is first inserted into the upper track of the screen, then placing the bottom of the plate into the lower window track, then moving the top of the mounting plate from the screen track into the window track. Sounds confusing, but works easily after a few tries. When the mounting plate template is inserted into the window track and pressed against the window edge, there is space above and below the plate and the window track. Once the mounting plate template is in the window track, it should be lifted slightly as the window is moved to shut against the plate. This should result in the curved edges of the mounting plate mating closely with the curved outer edge of the window, top and bottom. Closing the window against the mounting plate secures it in place, seated against the vertical edge of the track and the edge of the window. After several trial fittings and minor adjustments to the template, I was satisfied the template mounting plate would fit snugly to minimize the chance of water leaking in at the junction with the window. I did all of the trial fittings on the street side window above the bed. Only then did I test the template in the other two similar windows, which is when noticed the edges of the three windows are not uniform. The street side aft window had some black sealant projecting from between the two panes of glass. On the other windows, the sealant material does not extend from the edge of the two panes of glass. When fitted against the outer pane of glass in each of the three windows, the mounting plate template proved to be a snug fit, when carefully inserted. As a final test of the fitment of the mounting plate template, I tested to verify each of the window screens would close. Initially, they would not. The rear of the louver ventilator projects one inch from the rear of the front flange, causing interference with the screen and preventing its closure. Since the louvers do not have any screen built in to prevent entry of insects, operation of the standard window screens is essential. @csevel indicated her screens would close with the louver in place. I suspect my louvers and hers may not be exactly the same depth. Or, since our trailers are five model years apart, there may be differences in our windows. My solution to resolve the screen interference issue was to reduce the rear projection of the louver ventilator 3/8" by: Removing 1/8" off the rear projection of the louver ventilators using a table saw; Fabricating spacers from 1/4" thick acrylic sheet to insert between the mounting plate and the front flange of the louver ventilators. Removal of 1/8" of depth from louver ventilator 1/4" Spacers dry fitted to rear of front flange of louvered ventilators In the photo above, all three louvered ventilators have had their depth reduced by 1/8" and 1/4" spacers dry fitted prior to cementing in place. The spacers are 9/16" wide, surrounding the rear projection of the louver ventilators. (The protective paper coating is still in place on the spacers in the photo.) Side view of spacers bonded to rear of the flange of a louver ventilator The spacers were bonded to the rear of the flange using acrylic cement applied using a small application bottle with a needle applicator (from small box in photo below). After dry fitting, I cemented the spacers to the louvers, starting with the top and bottom, while the side spacers were in place loose, without cement. After the top and bottom spacers were firmly cemented, I cemented the side pieces. I found using spring clamps to hold the spacer pieces in place worked well while the cement set. I test fitted the louver ventilators inserted into the template mounting plate to verify the interference problem with the screen was resolved. The screens cleared with very little space to spare. Fabrication of Mounting Plates Having completed the mounting plate template, I next made a copy of the template, also from 1/4" MDF, as a backup in the event I damaged the master template. Making a copy also served as a dry run for routing the acrylic sheet. Using double sided woodworking tape. I fastened the template copy to a sheet of 1/8" black acrylic sheet, in preparation for cutting the first mounting plate. (Use the woodworking tape sparingly- 6 pieces 1 inch in length is sufficient. Otherwise, it can be difficult to remove, with adhesive left behind.) MDF template on acrylic for routing From experimentation cutting scrap acrylic sheet with the router, I had found the router bit would quickly melt the acrylic sheet. To avoid melting the acrylic sheet, I removed the excess acrylic material from around the template and the rectangular cutout, leaving only 1/16" to 1/8" of material to be removed by the router bit. I was then able to obtain smooth edges following the template for final trimming with the router. With the template attached by woodworkers tape to the 1/8" acrylic sheet, I used the scroll saw to cut the acrylic, keeping the saw kerf 1/16" to 1/8" away from the template. This freed the first piece of acrylic from the larger sheet and removed excess acrylic material from around the template. I mounted my router, with a 1/2" flush trimming bit, to a small router table. I then proceeded to trim the remaining acrylic sheet from around the template, both the outside edges and the rectangular cutout. After routing the first mounting plate, I repeated the same steps two more times, attaching the template to the acrylic sheet, trimming away the excess material using the scroll saw, then making the finish trimming using the router mounting in the table. When I had routed all three mounting plates, I lightly sanded the edges of the acrylic mounting plates to remove the sharp edges. Assembly of louver ventilators to mounting plates The louver ventilators with spacers attached are dry fitted to the mounting plates. Once satisfactory fit is verified, the parts are ready to be cemented using the acrylic cement. NOTE: The louver ventilators for the Street side windows are oriented opposite those for use on the Curb side. Position the mounting plates properly to abut the windows and insert the louver ventilators with their louvers on the outside and the louver openings facing down. I found it easiest to start by cementing one of the short ends of the louver ventilators to the mounting plate, using a couple of spring clamps to hold the parts together until the cement formed a firm bond, which takes about 5 minutes. Proceed to cement successive sides of the louver ventilator to the mounting plate, one side at a time, applying spring clamps until the cement cures. Use the needle applicator to apply cement at the intersections of the parts. Allow the cemented parts to cure overnight. The acrylic cement is very effective at welding the acrylic parts together, producing a very rigid assembly. Completed set of louvered ventilators and mounting plates After assembly, I added the same rubber edge trim recommended by @csevel to the edge of the mounting plate which meets the window edge. This trim seems to conform well to close any gaps between the windows and the mounting plates. The completed units are quite rigid and nest reasonably well. I set the width at 6-5/8" for two reasons: To yield three mounting plates from a 24" x 24" sheet of acrylic To keep the mounting plates and louvers as small as possible to facilitate storage in the trailer. I made a pouch to contain the louver ventilators to make it easier to store them without concern for damage to them or to other parts of the trailer. I had leftover car headliner material, which is relatively thin, with a foam backing, to which Velcro straps readily attach. Summary This project, which I first thought rather simple, provided several challenges. I spent much more time than expected to achieve an acceptable result. Given the extended drought and high temperatures in Texas, I have not had an opportunity to test the effectiveness of the vents, nor how well they keep rain out. In a week we depart for a two and a half week trip to Colorado to photograph fall color. I expect we will encounter some test conditions in the mountains. I hope this information is useful. Please feel free to contact me with questions. Regards, Don
0 points
-
This is an ad from our local Dodge dealer in Ventura, CA. I know there are supply shortages but this feels like highway robbery (pun unintentionally intended). I am hoping to get my Oliver in a couple of years and plan to special order a truck with just the features I want. I hope this nonsense is over with by that time. I will be spending my retirement dollars and don't want to just burn a wad of them.
0 points


.thumb.JPG.dd838cdb3df463dab6a16861fa23a319.JPG)


-
Recent Achievements
-


")


