Leaderboard


Popular Content
Showing content with the highest reputation on 11/10/2022 in all areas
-
Update: Mike Sharpe at Service got back to my service ticket promptly. He’s going to go out on production line tomorrow morning to see if he can come up with best way to get it straightened out. I’ve found a few flaws with my Oliver, nothing major. The response and solutions from their Service Dept. are outstanding, It’s one of the best companies I’ve ever done business with.7 points
-
My wife hums in her sleep. I want to say that is really annoying, but I know better..4 points
-
We take delivery on Hull #1291 tomorrow. I plan to conduct a thorough inspection and test all systems over the next several days. It will be interesting to see if the many service tickets reported by all of you helpful forum posters have caused Oliver's production quality control to improve enough to provide us with a flawless trailer. Stay tuned.4 points
-
Hi y'all. We left Hohenwald today and drove to David Crockett State Park. It towed great behind our 2017 Ford Expedition EL with heavy duty tow package. There were some steep (to my surprise) sections and it pulled OK. We will be going over the Rockies so that will be a good test. So far, I am very pleased with Oliver.
 2 points
 -
The Winter of my discontent? Do I hear Santa bringing a bunch of Ollie gifts?🎅 Seriously - I'm guessing that you have been doing a bunch of reading here on the Forum and in the Oliver University. But, I'm guessing that there is still a bunch more to do. Spring is such a wonderful time to get an Oliver (like there is really a "bad" time?). All that planning for where you will go and the things you will do - exciting! Bill2 points
-
I think you should open up the bath vanity and check to see if the duct is even connected. Seems to me there's a possibility that the excess was never routed through the vanity and just left laying loose under the shower pan. You can also take a flashlight and look through the bath vent to see if the duct is connected to it, but the issue will ultimately have to be addressed from inside the vanity. There isn't any access to that duct section from under the curbside bunk.2 points
-
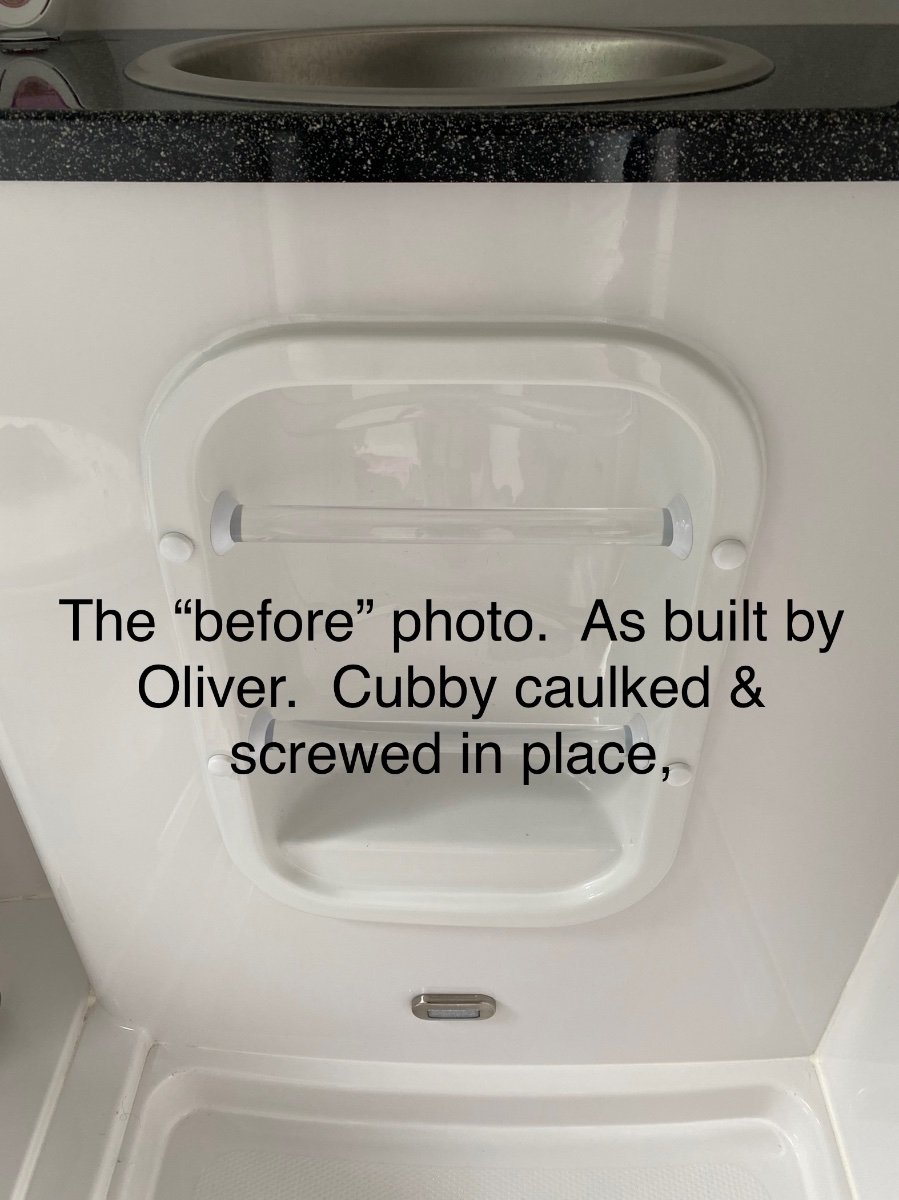
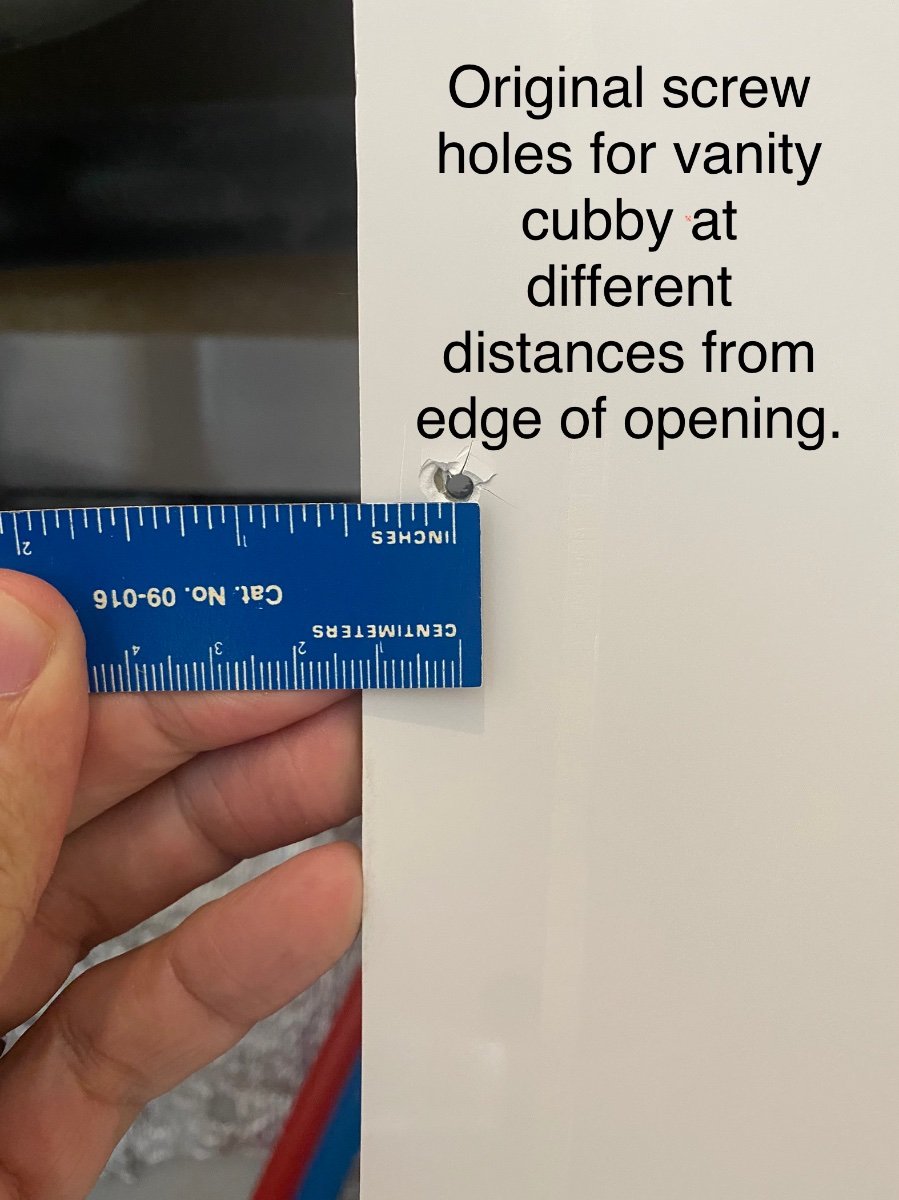
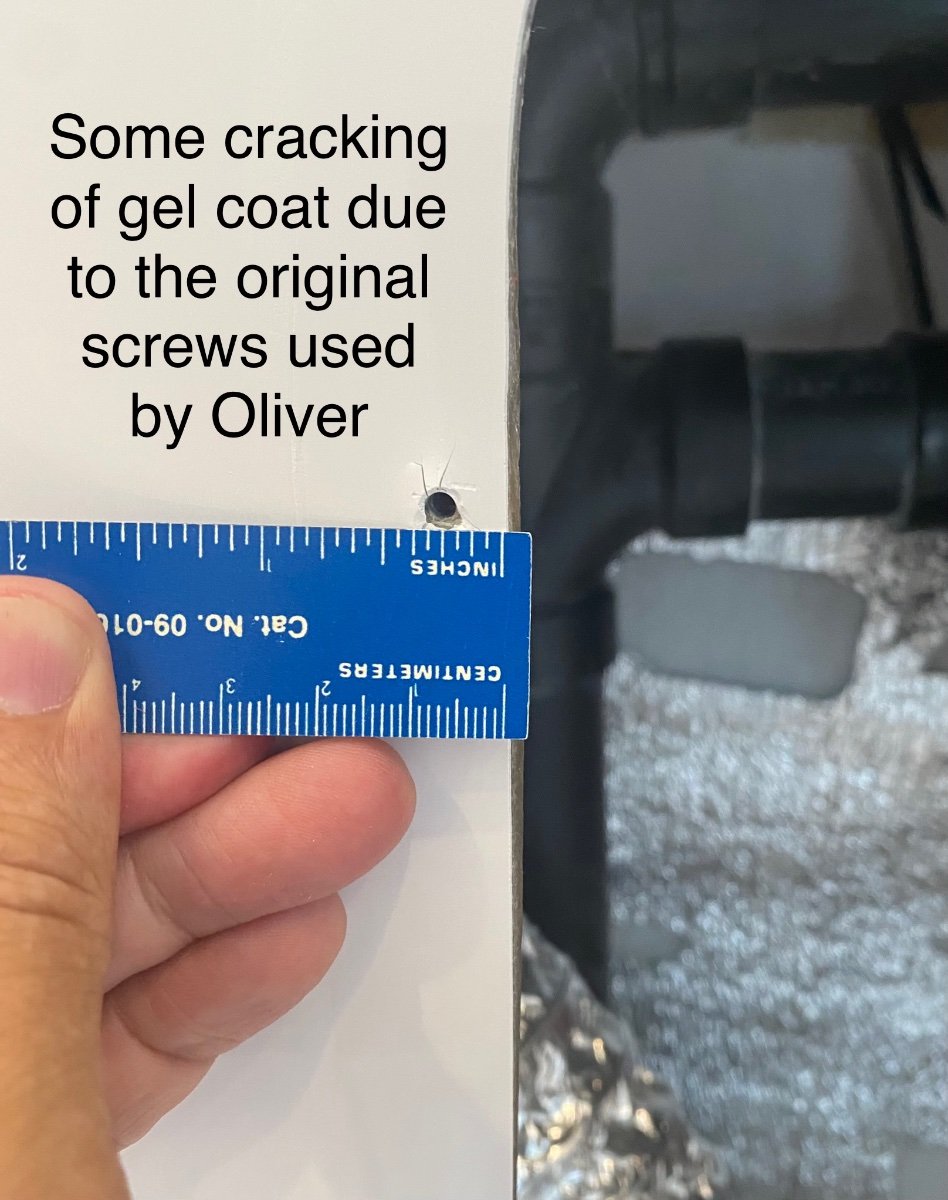
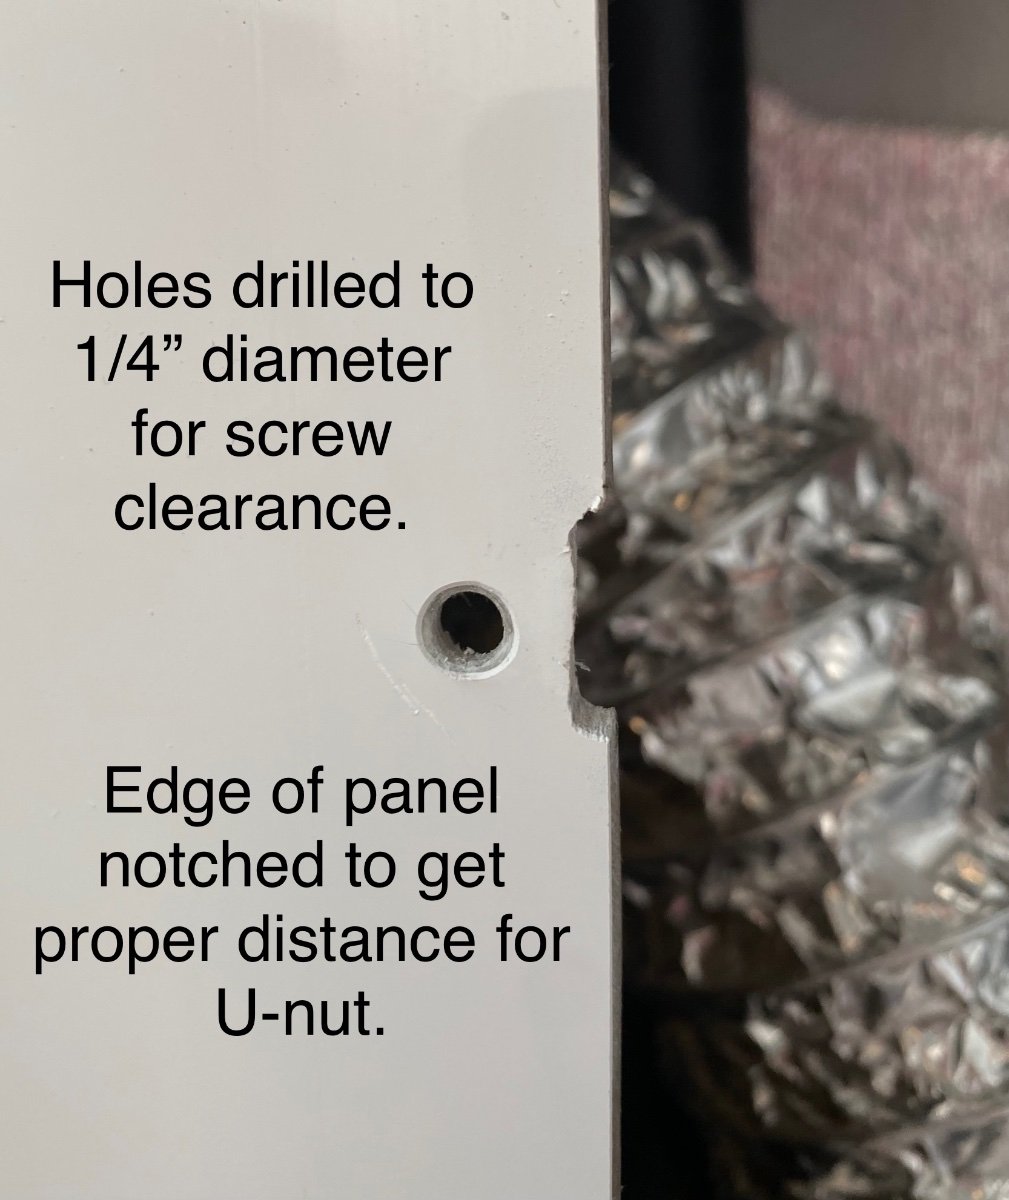
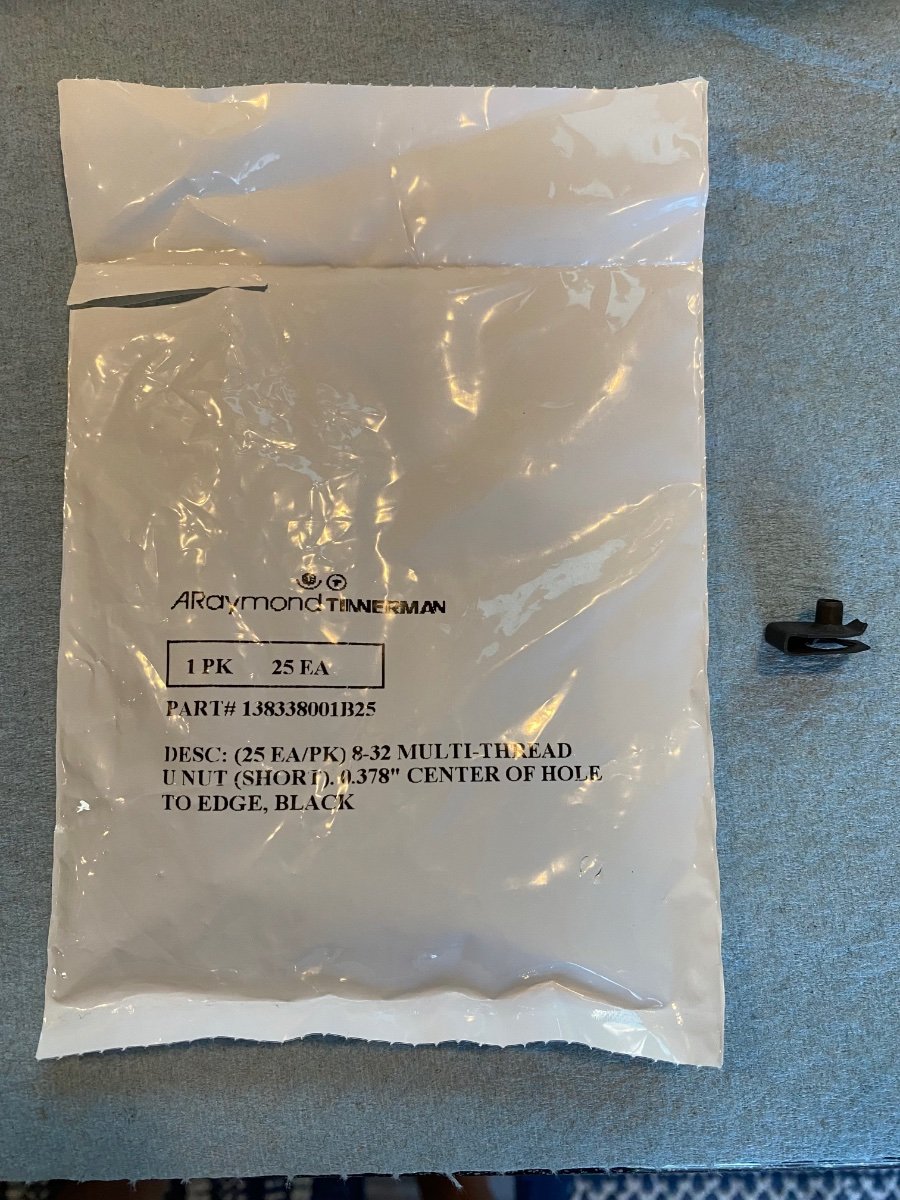
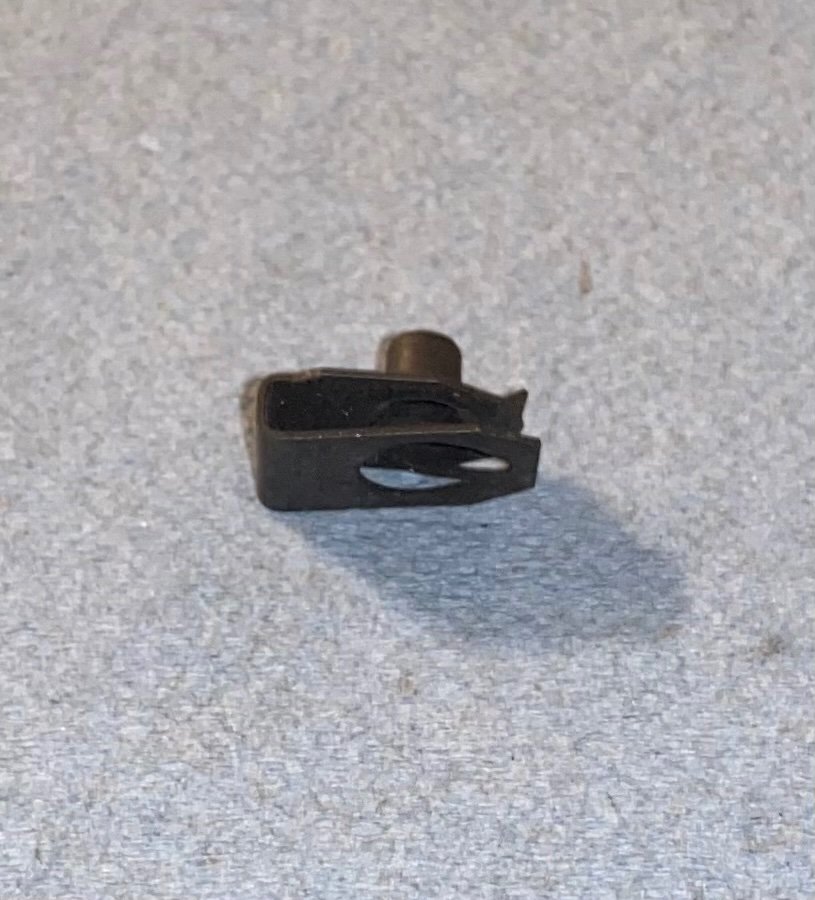
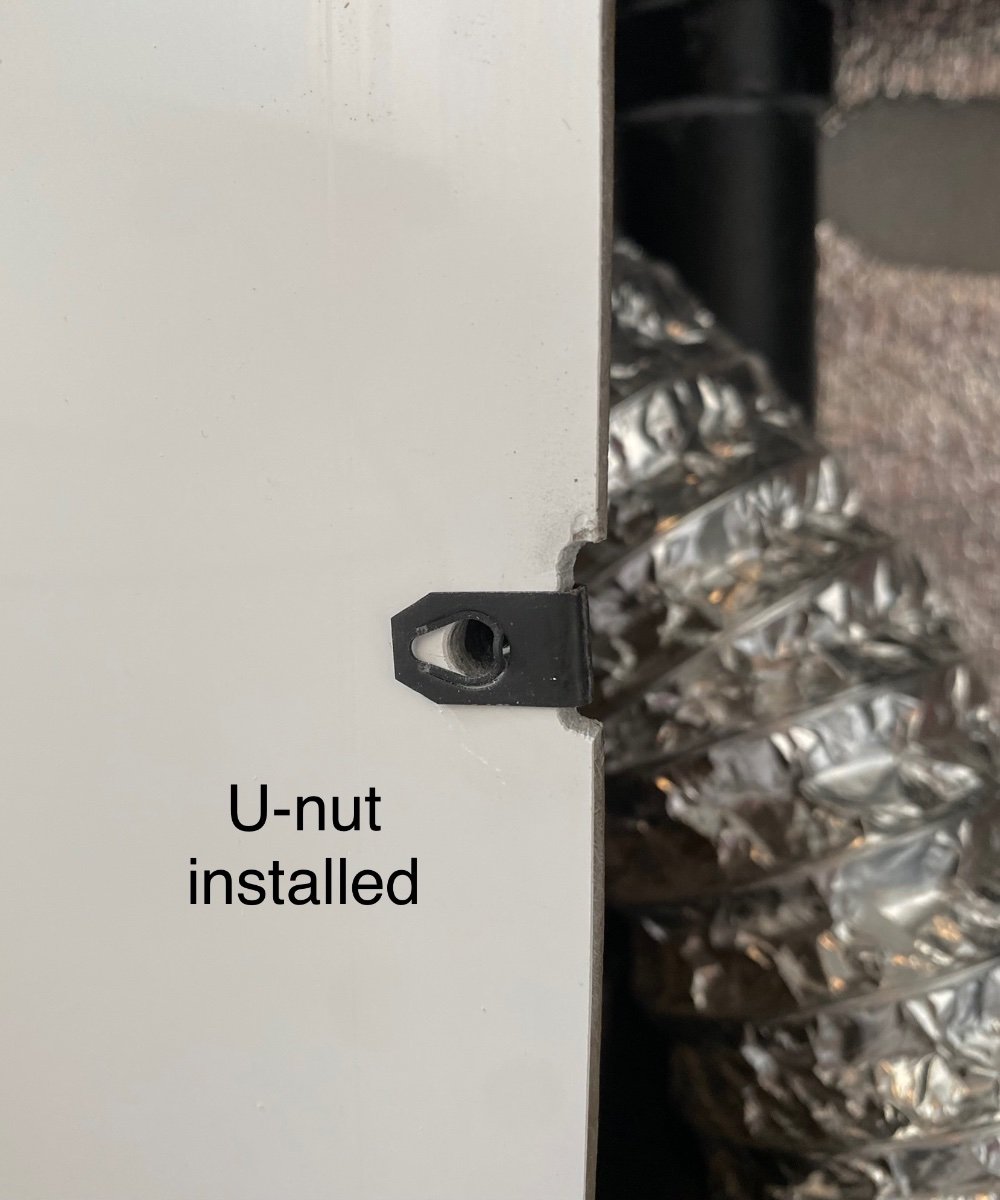
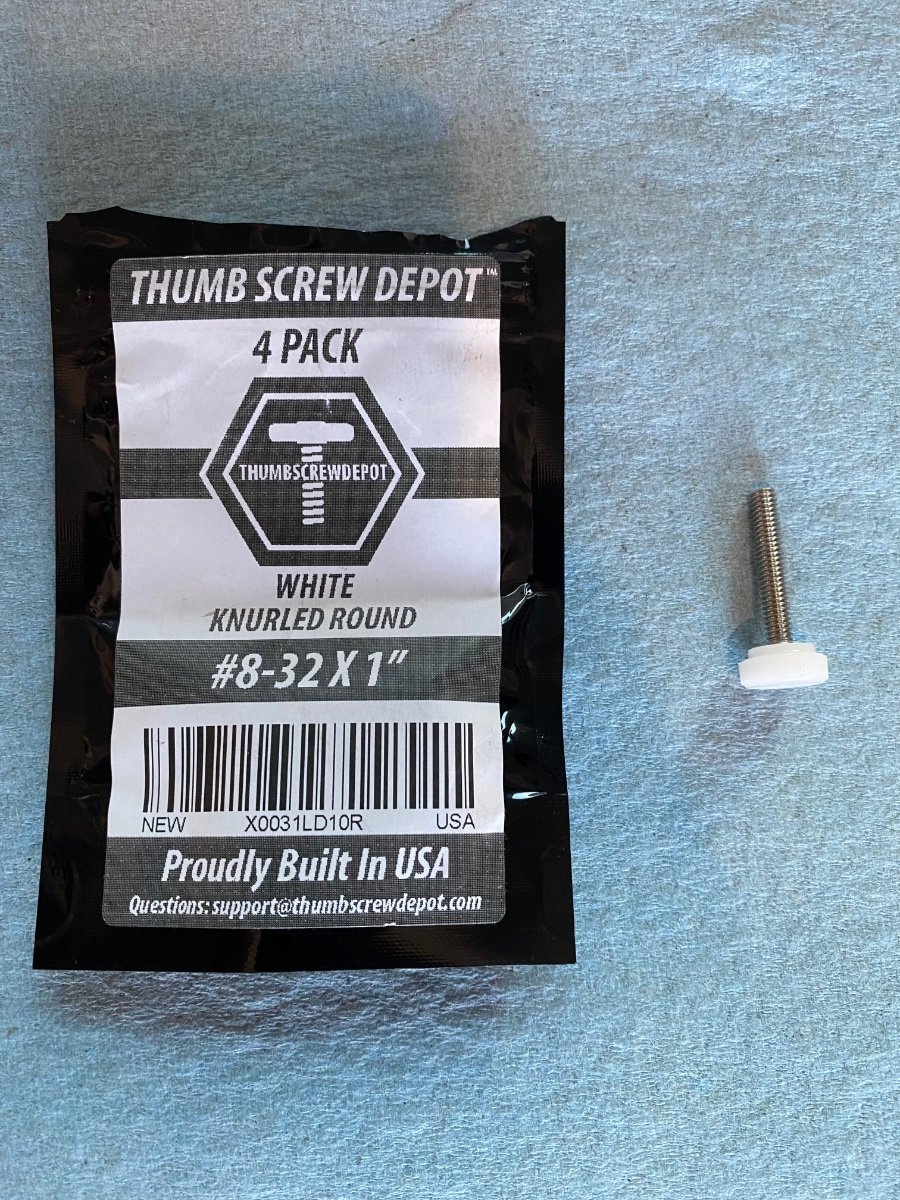
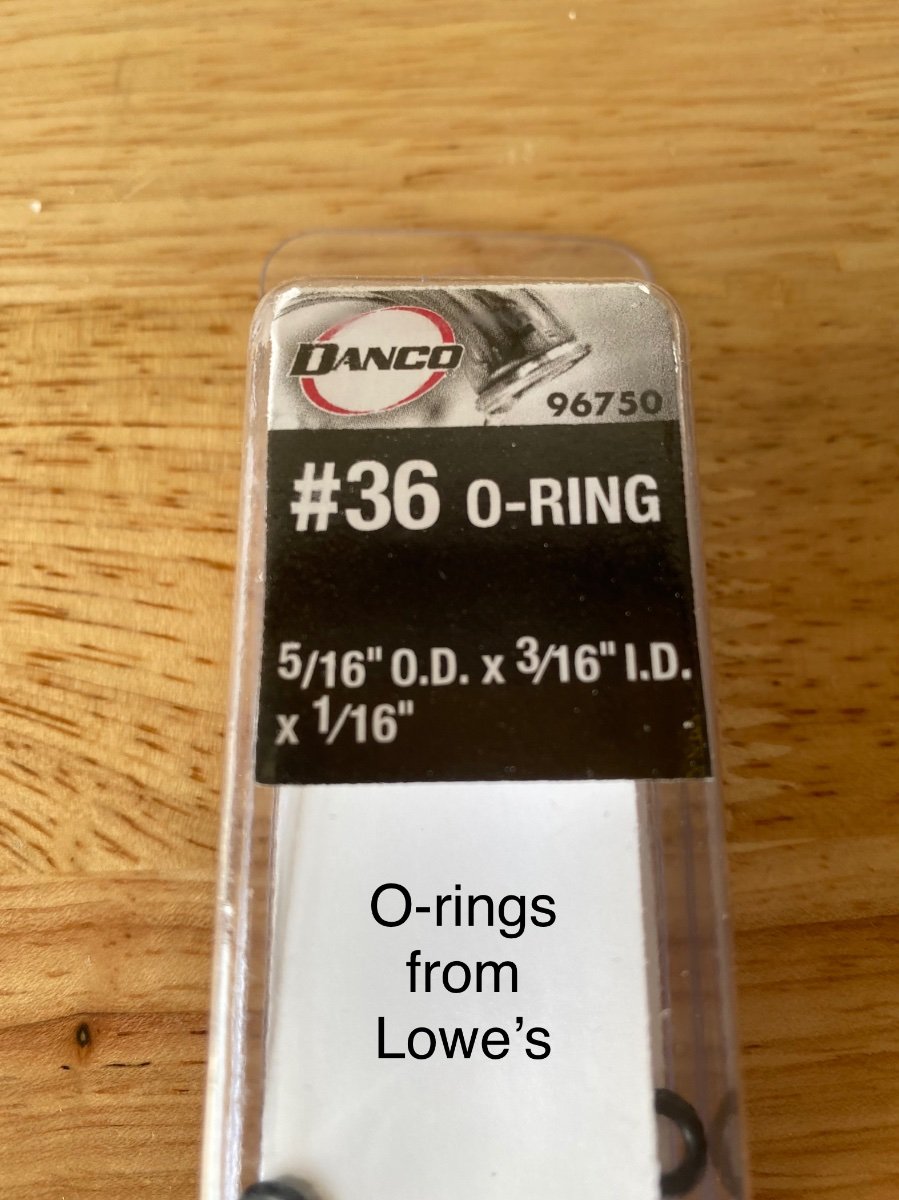
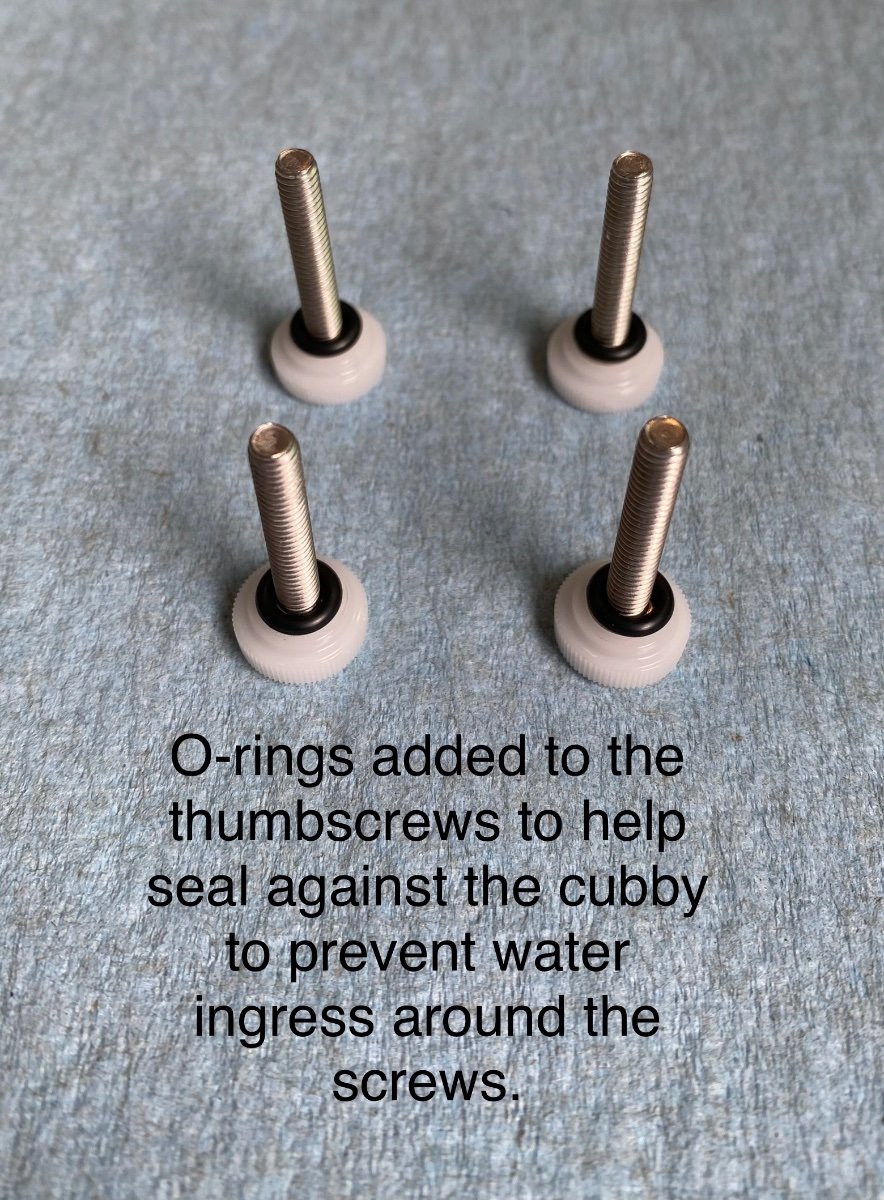
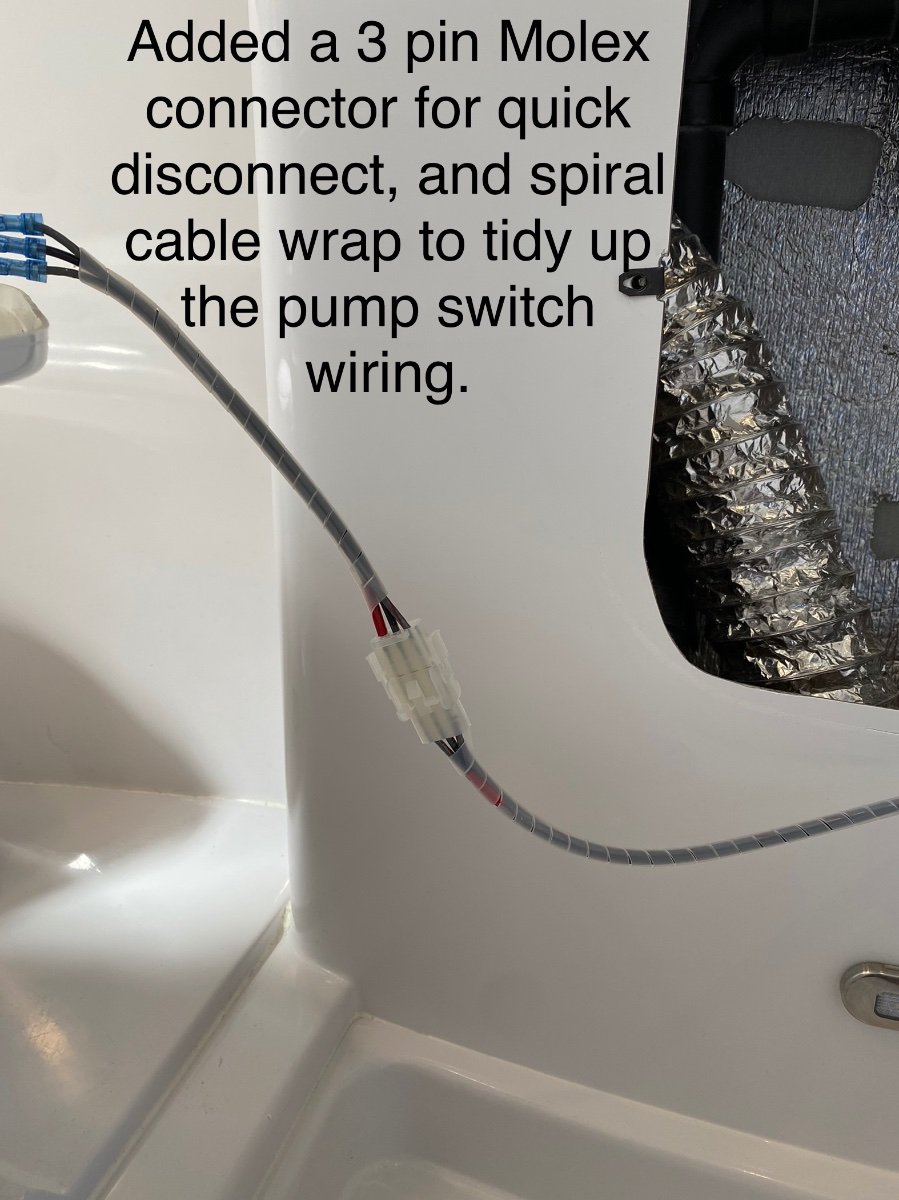
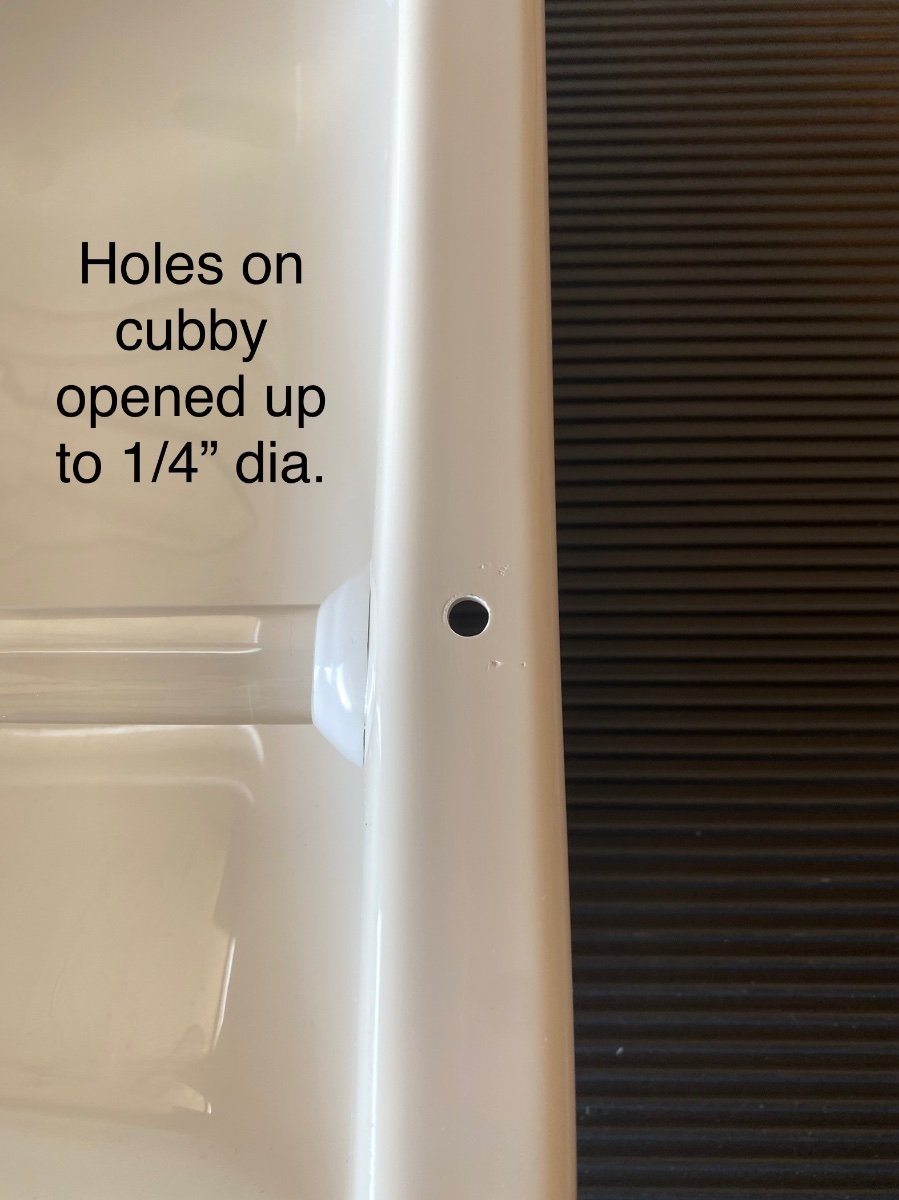
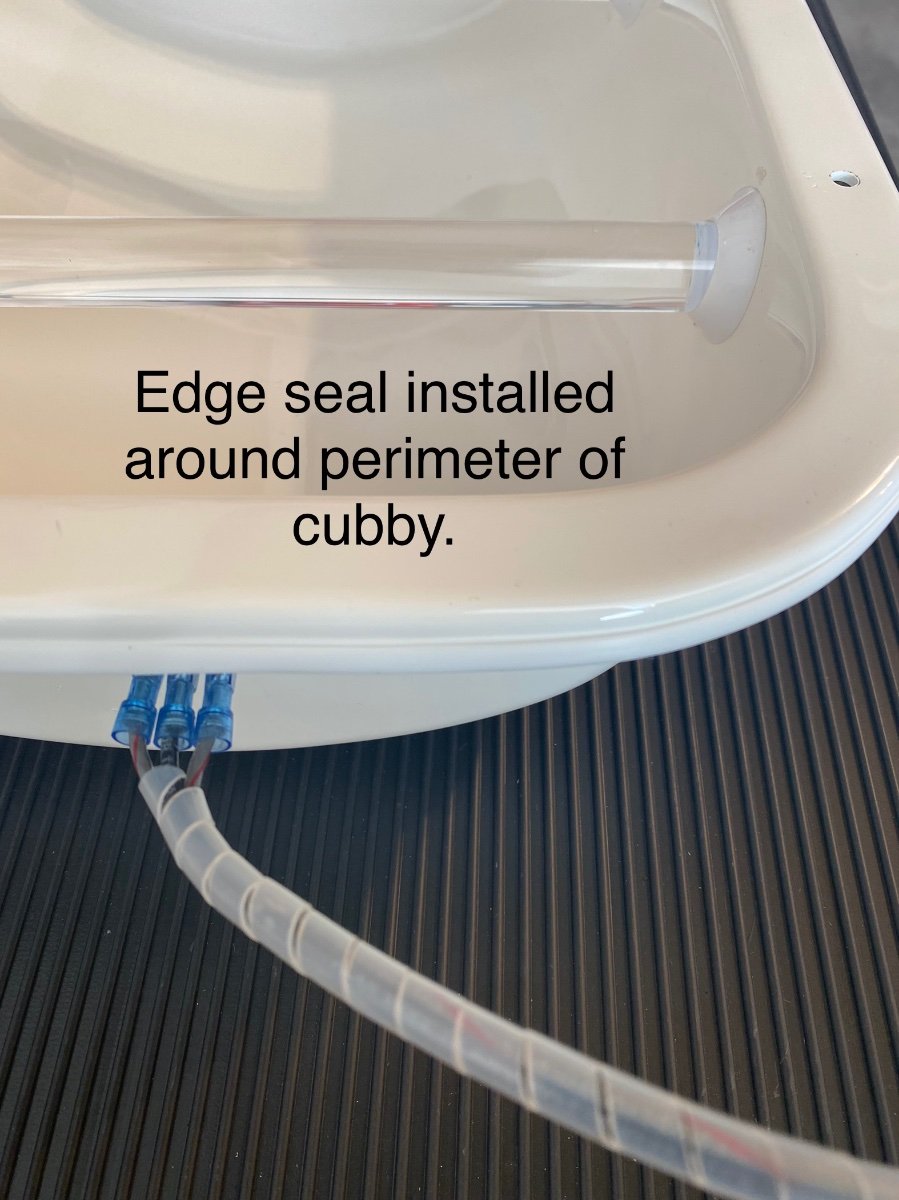
One of the great features of the Oliver trailer design is the fast and easy (no tools needed) access to ALMOST all of the plumbing, heating, and electrical systems through the hatches under the dinette seats and the beds, or by removing the kitchen cabinet drawers. One area that’s NOT readily accessible is the area under the bathroom vanity, even though there is plumbing, electrical, and furnace ductwork all tucked inside the vanity. The storage cubby in the front of the vanity is screwed AND CAULKED in place by Oliver at the factory, so access is a bit more complicated than the other areas. I recently needed to get into that vanity area for some inspection and maintenance, and after completing that I wanted to make future access easier (no tools needed and no caulking). I know some owners have replaced the storage cubby with a hinged marine access panel, but I didn’t want to lose the cubby storage. So here’s a detailed description of a simple modification I did, along with links to the parts used. Access is now fast and easy. No-Slip Clip-On Barrel Nut, for 0.025" to 0.15" Panel Thickness, 8-32 Thread Size https://www.mcmaster.com/94850A111 #8-32 x 1" Thumb Screw Stainless... https://www.amazon.com/dp/B09FZVLZKD?ref=ppx_pop_mob_ap_share uxcell Edge Trim U Seal Extrusion, Silicone White U Channel Edge Protector Sheet Fits 0.5-2.5mm Edge 3Meters/9.84Ft Length https://a.co/d/1uWUZB3 Molex -3 Match Set - (3-Pin) w/14-20 AWG, Wire Connector - 2.13mm D, Latch Lock, MLX https://a.co/d/gapvioi
1 point
-
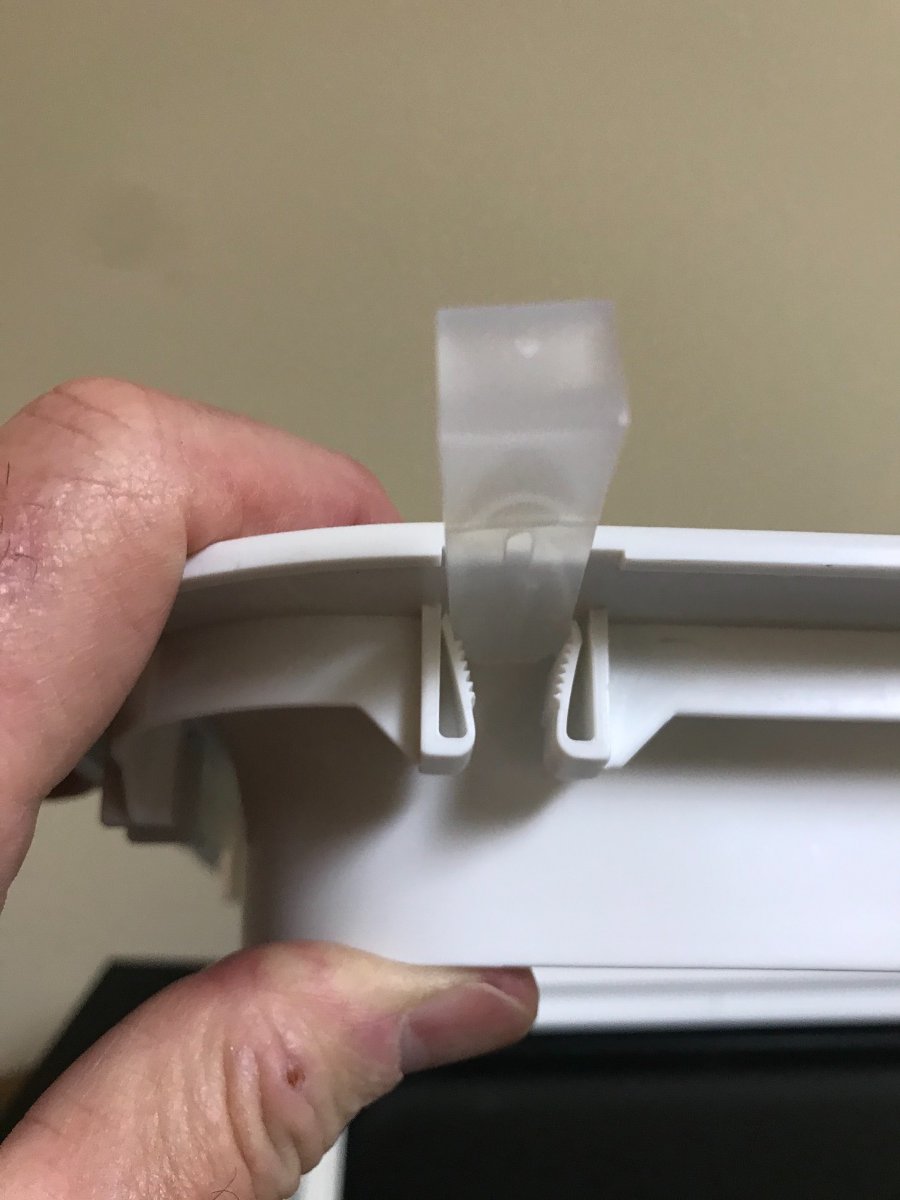
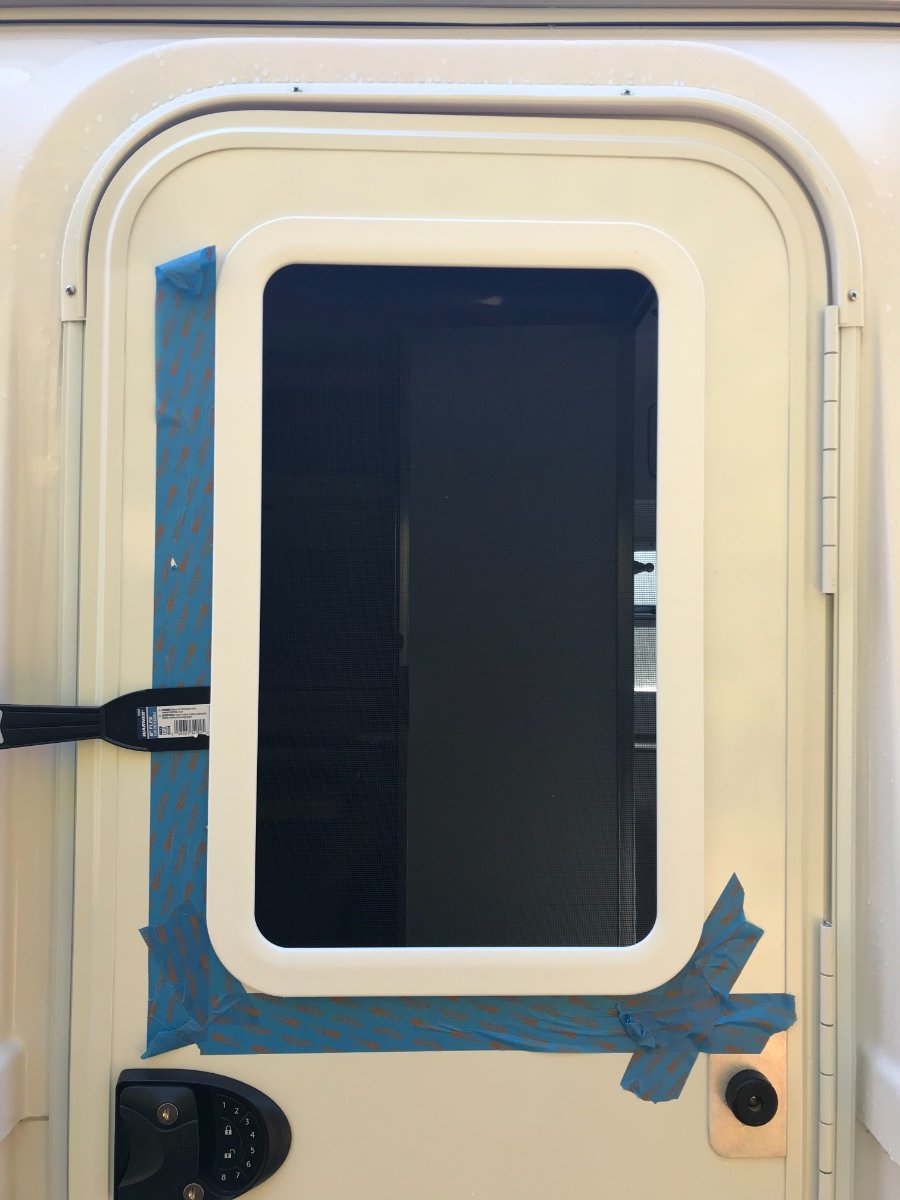
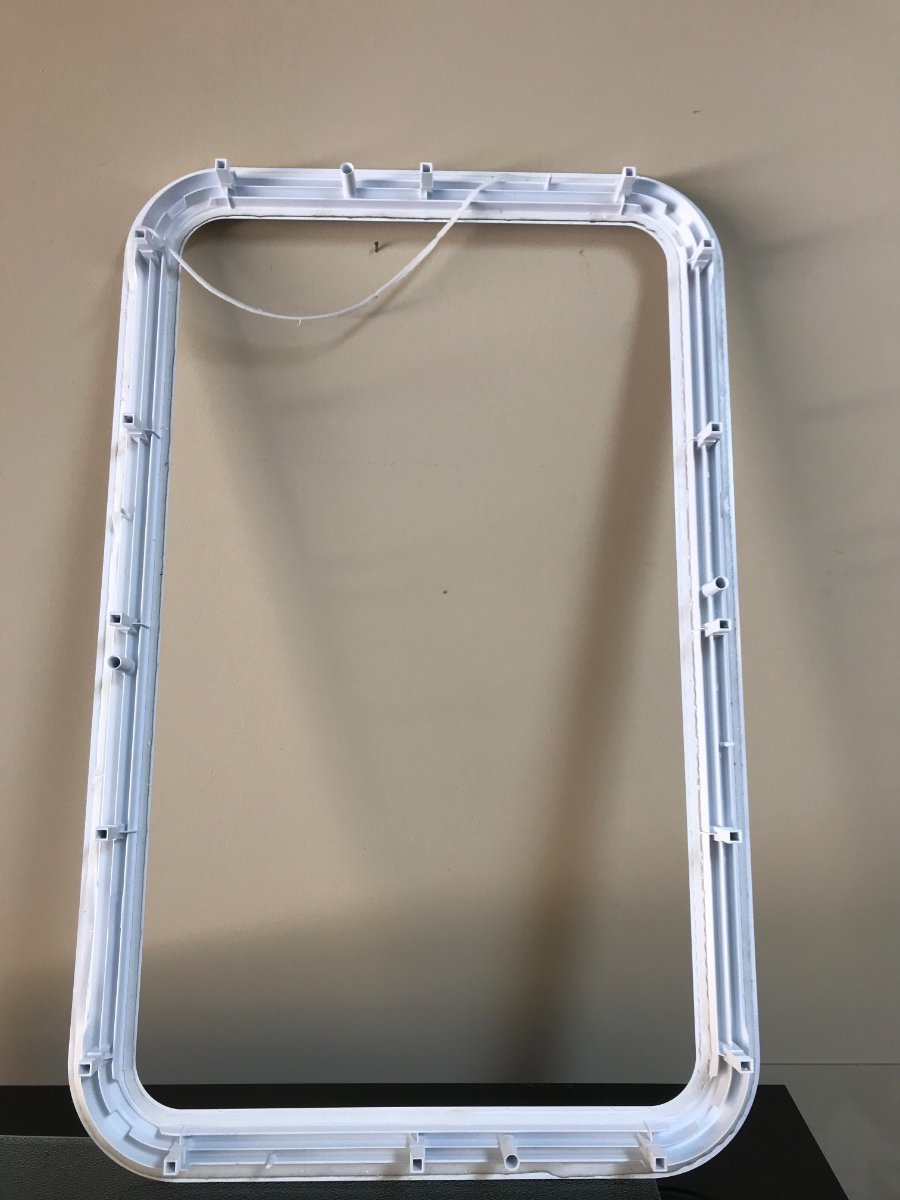
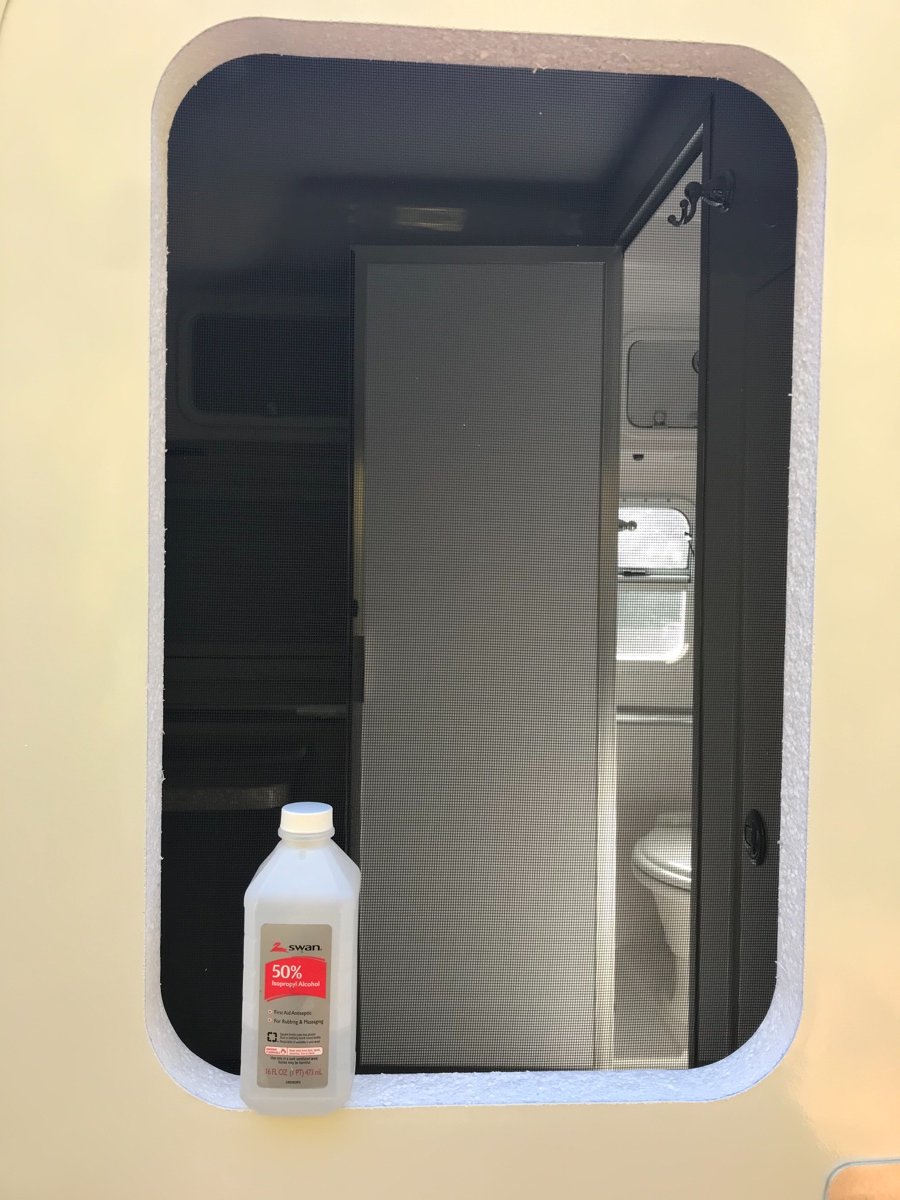
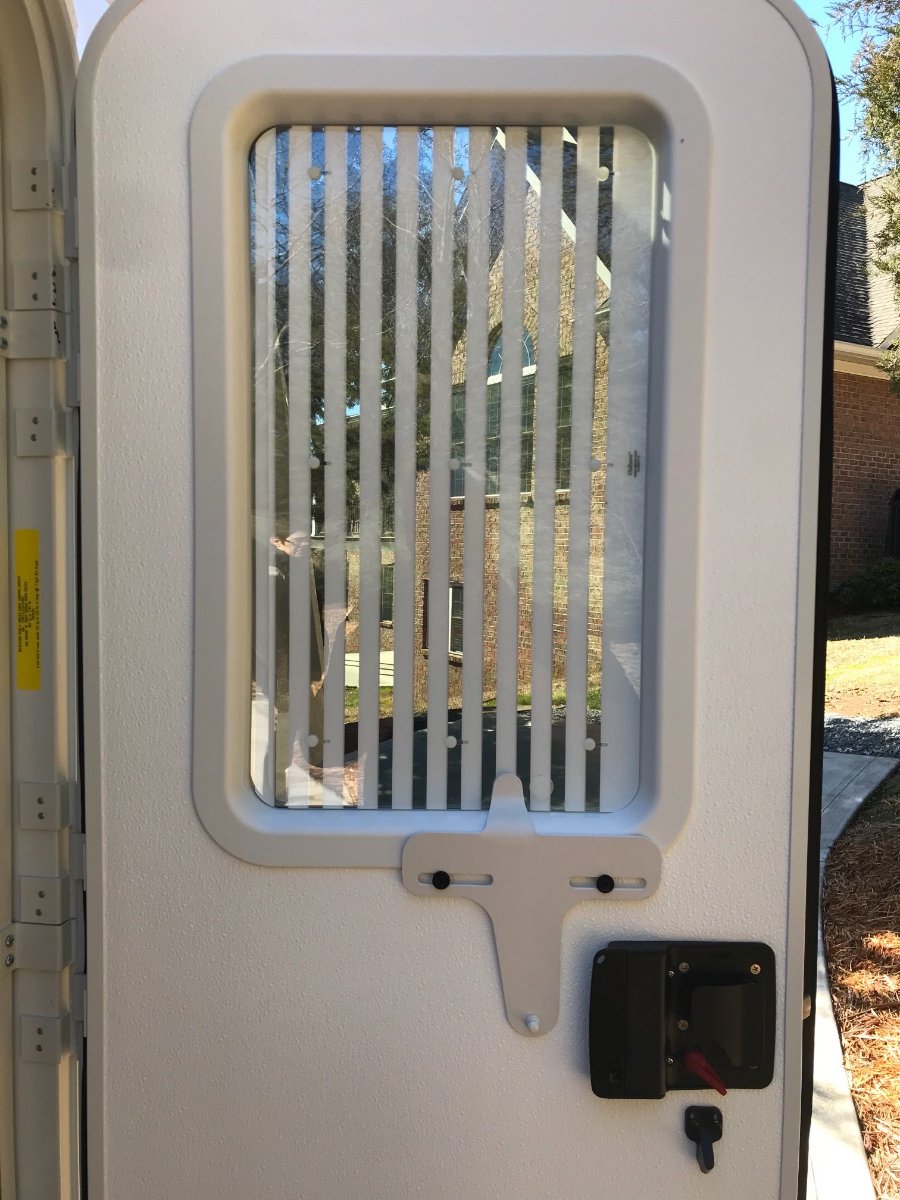
Long install post- I decided it was a gorgeous sunny North Carolina day and just a good day to install the new tinted glass and blind I ordered from Zarcor. I made this a stand alone post as this window install was a bit different from other installs I have read about here. It appears the Lippert now uses a sealant on the exterior window frame which adheres the frame to the door frame opening. They also use a similar sealant on the interior of the exterior frame, which holds the glass FIRMLY in place inside the window. I could not remove the old opaque glass from the old frame. I decided since this really appears to be a one time use sealant that purchasing a new exterior frame would be required. Reusing the old frame and compromised sealant was not an option for me. You will see where the sealant on the old frame came off after removal from the Ollie window door cut out or frame. Some of the old sealant came off on the old opaque window. I was glad I had purchased a new frame through Zarcor to do the install. The new frame was $28 plus shipping. Once I removed the old frame and opaque glass, the install was pretty straightforward. The new window frames use what appears to be a ratchet mechanism which once both frames are sealed together they lock into place. No more rope caulk or screws to tighten down when you sandwich the new window interior and exterior frames together. Zarcor sends (16) little plastic tabs (pics) that release the frames from each other. Without these tabs you cannot remove the frames. Below are a few photos to help describe the process. It’s not terribly difficult; just take your time and read the instructions. We are really happy with this mod and like the idea of seeing who is knock knock knocking on our Ollie’s door. $175.00 for this mod including shipping from Zarcor. The staff at Zarcor made this mod seamless by answering all questions I had before moving forward. Just really great folks to do business with in San Antonio,Texas. This is a fairly easy window mod and I would highly recommend it if you prefer being able to see who is knocking at your door. Take your time and remember be gentle as your working with plastic and glass. link - https://www.zarcor.com/rv_products/rv-door-window-kit/ (16) tabs provided by Zarcor to remove existing frame. You insert equally around slots on the exterior of the interior frame edge. You will see the slots. Ratchet mechanism that holds frames together. Likely to speed up window/door plant assembly production cut costs. After removing the interior frame, a thin bladed puddy knife can be used to separate seal. Old frame and compromised sealant - Another photo of old exterior frame after removal- Throughly clean off old sealant off door frame- Installed new frame, and tinted glass, my bride was a tremendous help with an extra set of hands 🙌 👍🏻. The blind install was again pretty straight forward and it works great! It attaches with several small Velcro tabs. The blind can be operated with the interior screen door closed, just slide screen door plastic opening for access. Finished exterior - we like the way this tinted window matches the rest of our glass. The contrast of the tint vs natural light -
1 point
-
Mobilejoy: It was your post about not finding an actual amber LED replacement light and having to do a covering film that prompted me to ask if anyone has found an amber light we could use instead. My experience with films has been good, but over time, especially in a stone hazard zone (like under Ollie), they eventually start "leaking" white light rays. i would rather replace the white light source with an amber one and not have to mess with it again. Hence my question. I'm not an outdoor low wattage LED expert for sure. However, surely someone knows of a small LED low wattage 12V amber light that would fit into these fixtures or better a fixture such as Mossey's for this application. If not, then MobileJoy's amber Lamin-X film solution would be acceptable I think for the Porch light as it is not in a flying rock zone. GJ1 point
-
Nov 10, 2022 Update: I had provided Jason E. the manufacturers info and also our concern about using their MAX number for lugs. He sent it up the chain at OTT. Below is Jason's response to the lug not torque question. Glad to hear that OTT has recognized the reality of torque tool accuracy and not having owners exceeding the MFG maximum recommended lug nut torque. Especially when the MFG's provide a torque range. So basically, a small victory for the owner peanut gallery I guess. Personally I am going to use 100 ft lbs on my aluminum rim lugs. Gives me ten pounds over or under for my torque wrench accuracy. GJ ++++++++++++++++++++++++++++++++++++++++++++++++++++++++++++++++++++++++++++++++++++ From: Jason Essary <Oliver@olivertraveltrailersservice.zohodesk.com> Sent: Thursday, November 10, 2022 4:25 AM To: John P. Russell, Jr. <jprredhorse@gmail.com> Subject: Re:[## 12307 ##] Tire Pressure Overstatement for many OTT units using aluminum 16" Rims Hey John, I have been informed that after speaking with the wheel vendor that they have stated that the wheel torque should be between 90 - 120ft lbs. With this being said Oliver has decided to drop our torque from the 120ft lbs down to 110ft lbs. Regards, Jason D. Essary Customer Service Director ++++++++++++++++++++++++++++++++++++++++++++++++++++++++++++++++++++++++++++++++++1 point
-
Jason told us last week we have Hull #1337 for planned delivery 9FEB... counting the days. Interesting to note that from this thread my math says they expect to deliver 46 in 3 months and then 24 in a month and a half February and March. That seems to be a pretty steady one every other day rate even through the Holiday's and model year changeover.1 point
-
Did they forget to put food in bear bag/away from the camp? Reminded me of a story I've read once: some folks were working as wood cutters with camp set up in the middle of nowhere(most of the food was air dropped on them I think). So on one of the drops they've got a bottle of booze or something and got completely smashed. Needless to say, they forgot to throw away food scraps... From the words of the guy, both woke up drunk being dragged through bushes 'cause bear came to eat scraps and got tangled with tent ropes. Ended up dragging 'em for couple of hundreed yards before untangling. Now that's an experience that won't make you forget about taking care of food 😄1 point
-
So excited for you!!! Take pictures and let us know how it goes!1 point
-
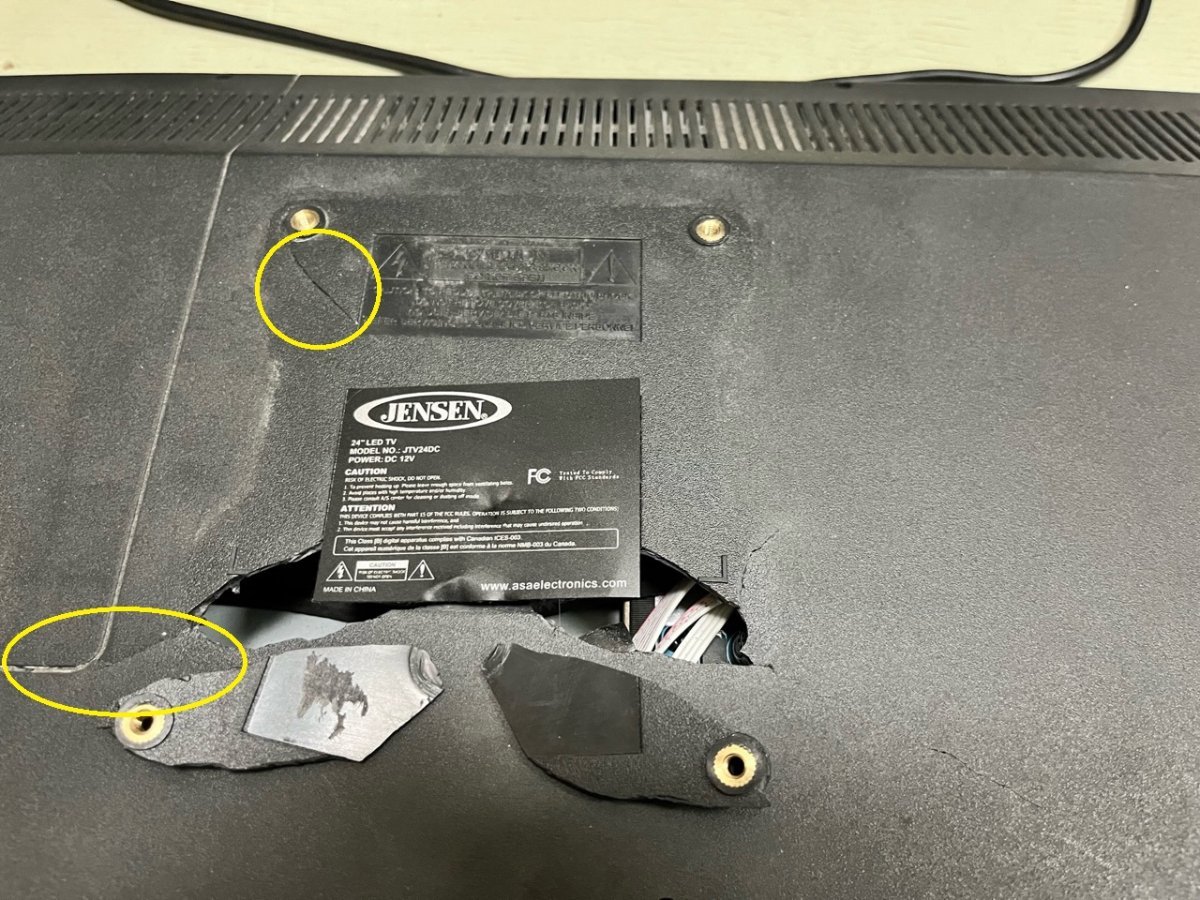
Our TV actually broke at 2 of 4 attach points (see picture, with yellow circles on addtl fractures) and started to come apart at the back where the bracket attaches to it, so I have removed the TV. Sometimes we would find the TV down when we entered the trailer while stopped between setups. I always pushed it back up to the catch, sometime it was down again, when we arrived at our final destination. I say sometimes, but not always. We would then put it up when we were setup and inside unless we were actually viewing TV, which was like not very often. Possibly caused - by starting out with trailer tire psi of 80 (at delivery) and we did not change that for about the first 10,000 mi, until I started to read threads on recommended tire pressure, then we dropped it to 65psi. It would still come down, but not always, and then we lowered our trailer tire pressure to 55psi. By then I noticed it was beginning to pull apart at the back of the TV. If I had to do over, I would leave it down when under tow, and then raise it up to catch, when we are setup and inside. I never did put in pool-noodle sections to act as shock absorbers. Before our next outing, I will repair the broken area and re-attach it in the trailer. We will however leave it down while under tow... and put it up when setup and Willis (KamperKat) wants to lounge on top of the nightstand. i will also look at any adjustment that can/need to be made on the bracket as mentioned above. Regards,
1 point
-
I think it must be the Truma hot water heater. I may try it on Eco tonight. It comes from that area and not the pantry area. John1 point
-
Doesn't that coiled up under there keep the shower floor warm? Makes midnight visits more comfortable.1 point
-
That might be from the Xantrek inverter when it's charging the batteries.1 point
-
We get a little noise from under the seat closest to the pantry. It is a exhaust fan that keeps components vented. It cycles on and off. It annoys me.1 point
-
Good luck and enjoy the process! Bill1 point
-
The Truma hot water heater will make a humming noise and ECO mode like Frank says will not make noise. I will turn it to regular mode if I want it hot a little quicker1 point
-
Congratulations on your new delivery! I look forward to your travels and hope that you enjoy it as much as you'd hoped. 140 days left for us! Safe travels, Steve1 point
-
When I was flying a club Cessna, I used Adolph's meat tenderizer on the leading edge to remove stubborn bugs. The Enzymes seem to work and I would use a Starlite product after to seal the surface. That was a few years ago and there must be better products available as previous posters have suggested.1 point
-
So excited for you! The wait is over! Wishing you a safe journey home and many wonderful memory making adventures to come in your beautiful new Ollie.1 point
-
Congrats! The next best thing to delivery day is each morning you awaken inside your Ollie in a new and exciting location. Enjoy your travels and new experiences.1 point
-
I can smell that popcorn from here!😊1 point
-
Do you have the Truma hot water heater? If so, in normal operating mode it will cycle on and off to have hot water immediately at the ready. Not very loud but just enough to be annoying. We hated hearing that at night while trying to sleep, so putting the Truma in ECO mode stops that cycling but it takes a little longer to get hot water flowing.1 point
-
If you're traveling in the vicinity of Tupelo any time soon, I can show you how to run a new wire for that light or if you have an afternoon we'll just fix it.1 point
-
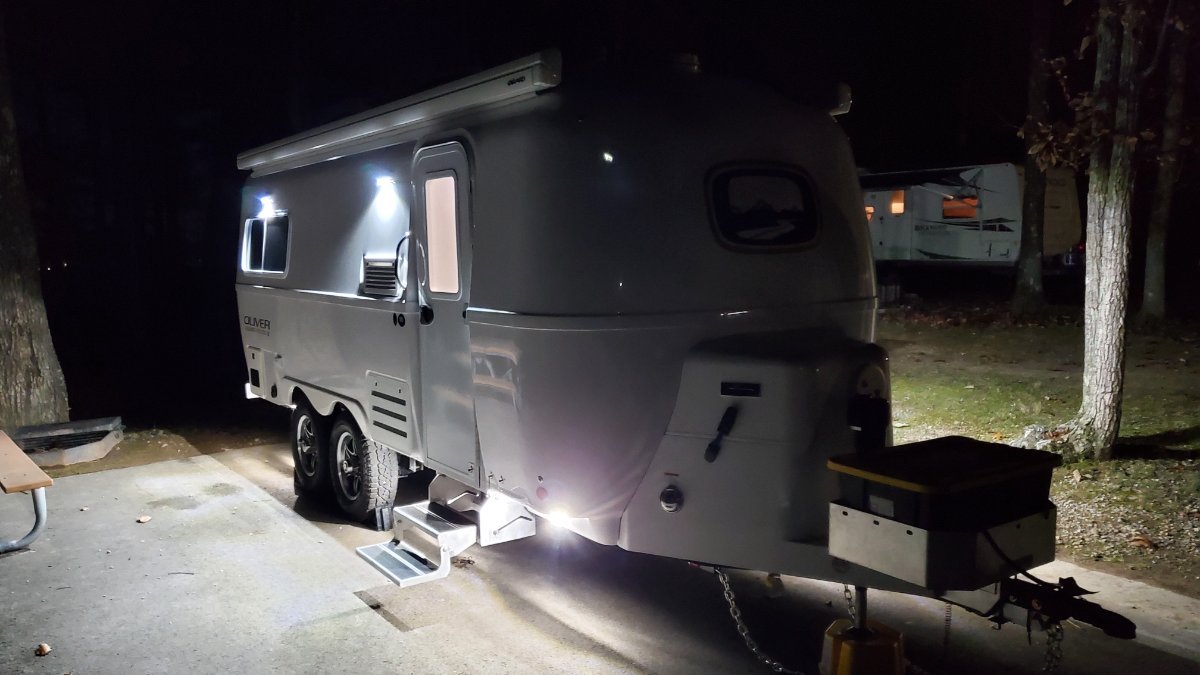
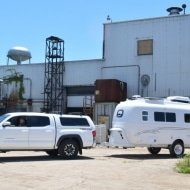
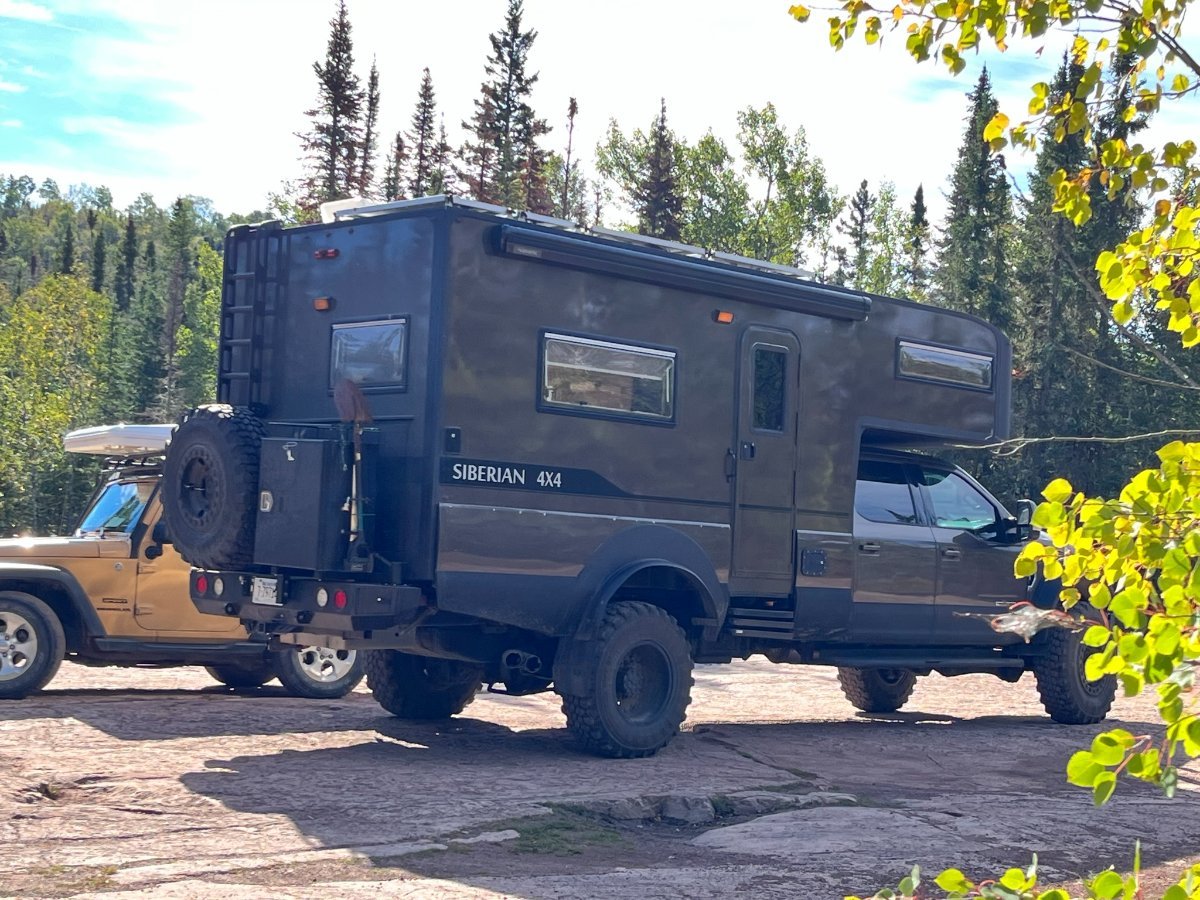
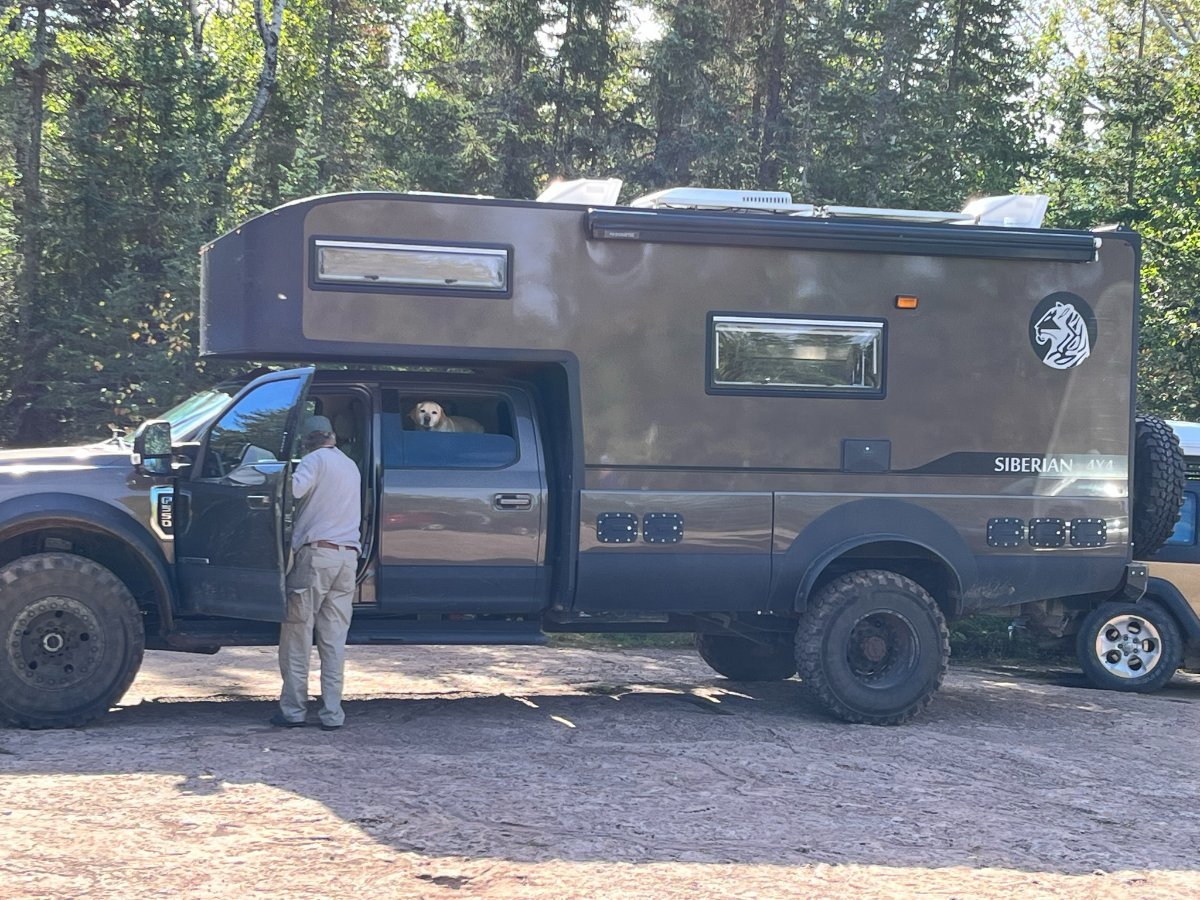
We were in Ontario (Thunder Bay Area) for this summers adventure, and one of these rolled up. Mounted on a F550. I believe he was from FL, and had been all thru Canada on his way home.
1 point
-
Great way to help protect those areas. This season, I've unscrewed the exterior shower head , brought into the inner shell and put the head back on. Also pulled the cold and hot knobs so now there is a deeper space behind the little door to the shower to add a layer of closed cell foam. We used reflectex on our battery compartment as well and it made a huge difference. Used two layers of that stuff on both the garage and battery doors.1 point
-
Thanks JD. Early this summer as part of our LiFePo4 upgrade, I replaced our OEM 2K inverter with a 3K Renogy. As you know it is a LOT larger and heavier than the OEM 2K unit. I drilled out the four mounting holes, and added supplemental wood supports to accommodate the longer Inverter and to bring the four 3K mount holes in line. I too was concerned about the weight and poor support. Some JB weld and through the bunk vertical wall went four SS bolts, SS Fender Washers and 1/4 X 20 bolts with nylock nuts. Yep I trust JB Weld, but I trust it more with thru-bolting with SS bolts and fasteners. So yes, if anybody wants to look, you can see under the street side bunk rail two of the four attachments. PS: Used he same approach on the mounting of the Victron 12/12-30 charger under the street side front dinette seat facing aft. GJ1 point
-
John - you can re-list yours 🙂. Just sold our Dometic for $700 to a nice couple from Vermont. We agreed to meet in the middle and met them in New Hampshire. Super smooth transaction. Within 45 minutes of putting it on Craigslist I had interest. First person that emailed me bought it. Feel really fortunate. One less thing to trip on in the garage!1 point
-
Liana - Most broken mirrors are a result of either leaving the door unlocked while in transit or in applying too much torque to the frame of the door while opening/closing it (i.e. opening the door from the top or bottom thereby twisting the frame or slamming the door against the dinette seat when opening. In any case - instead of going to a local glass shop for a replacement, I'd call Oliver Service and ask what they want for a replacement - it could save you some money. Good luck! Bill1 point
-
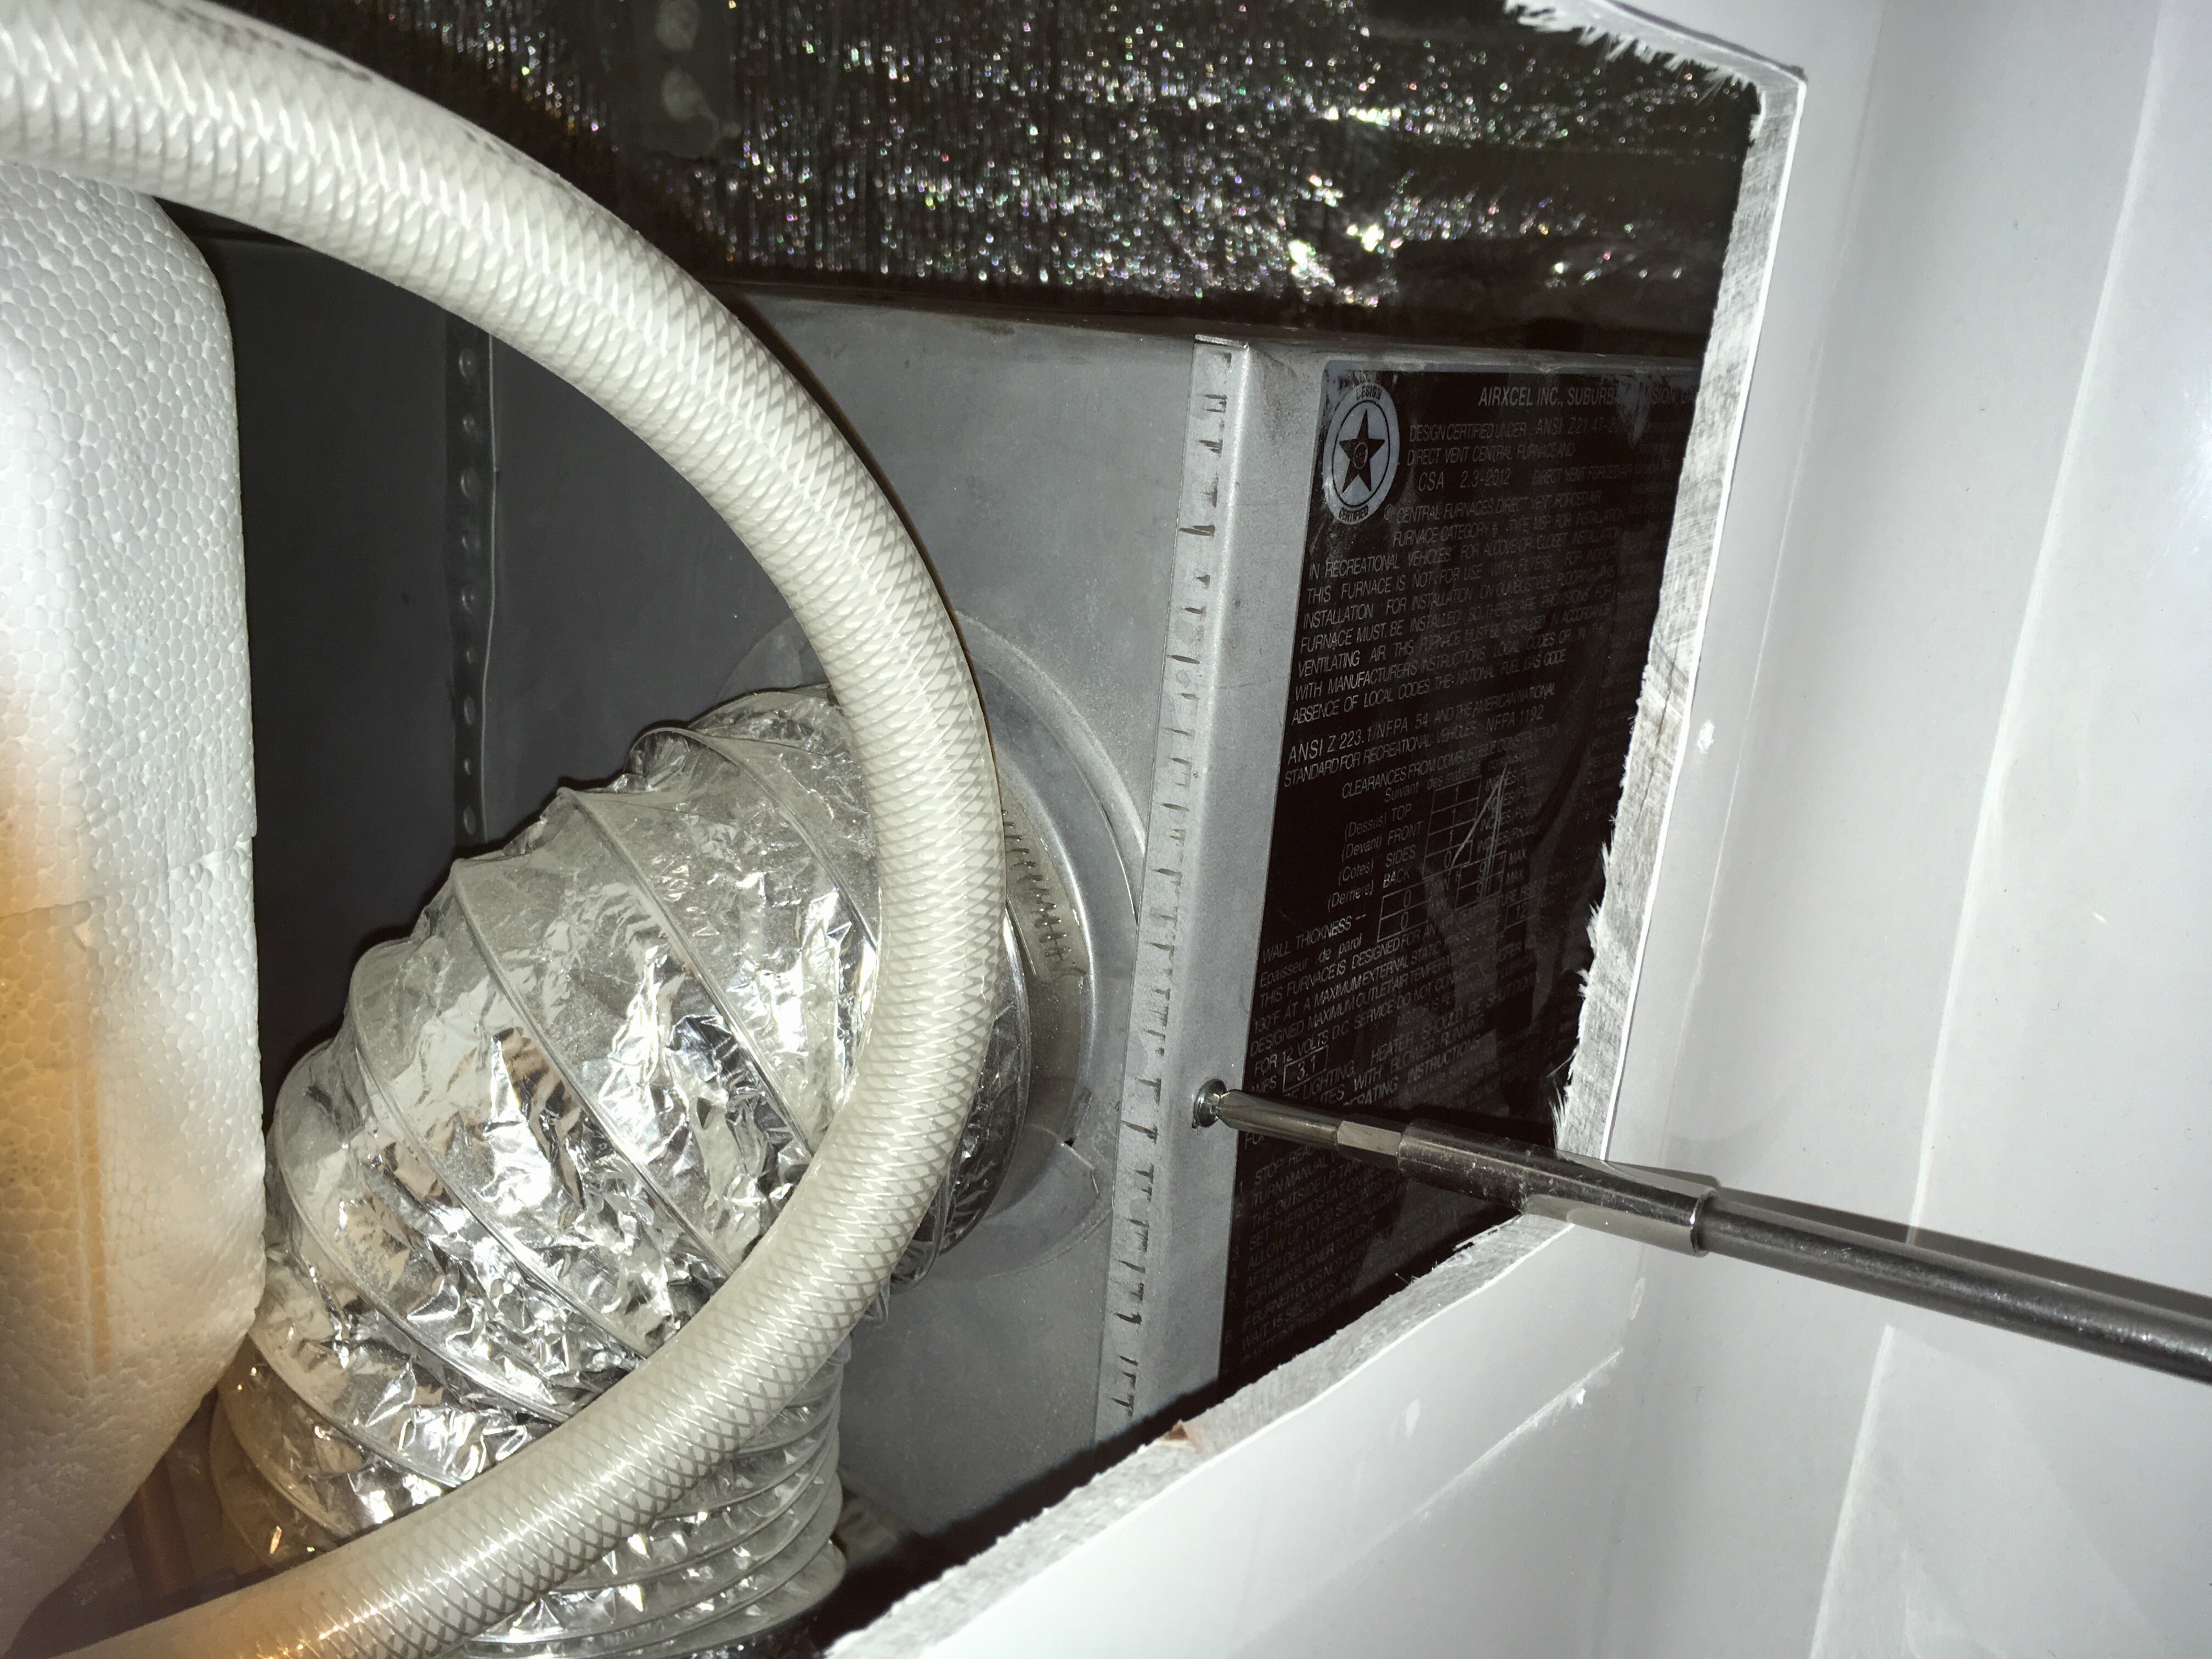
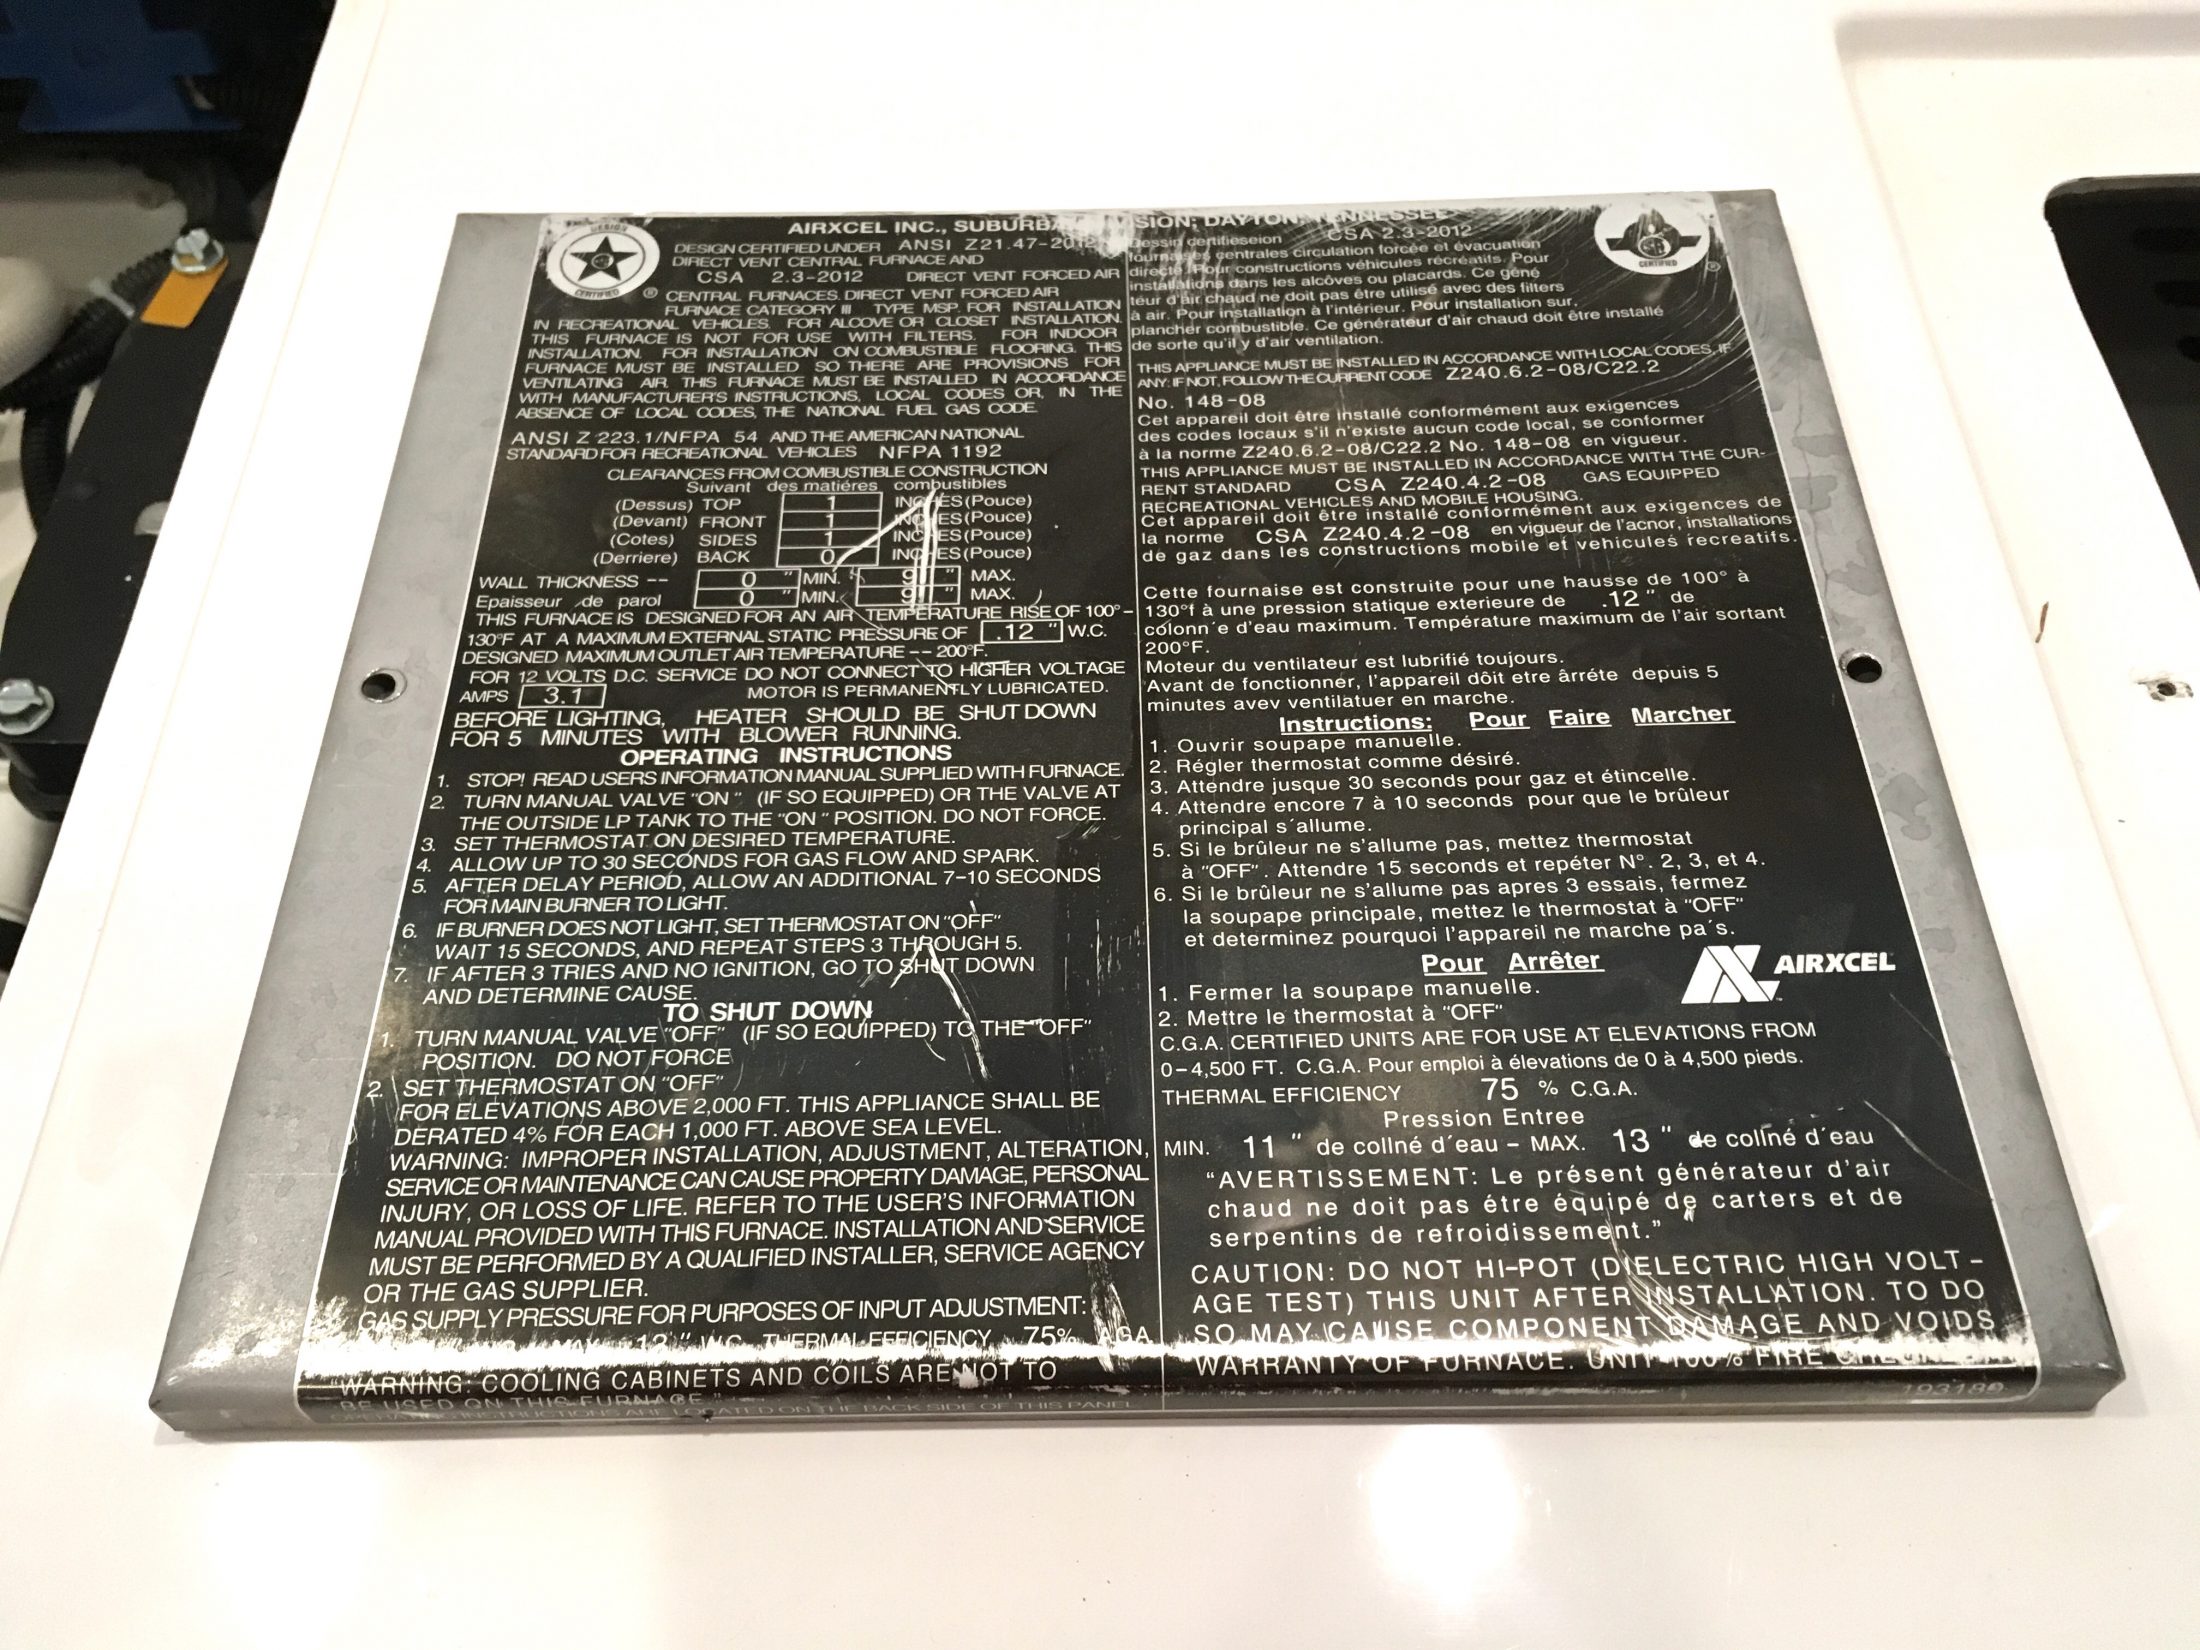
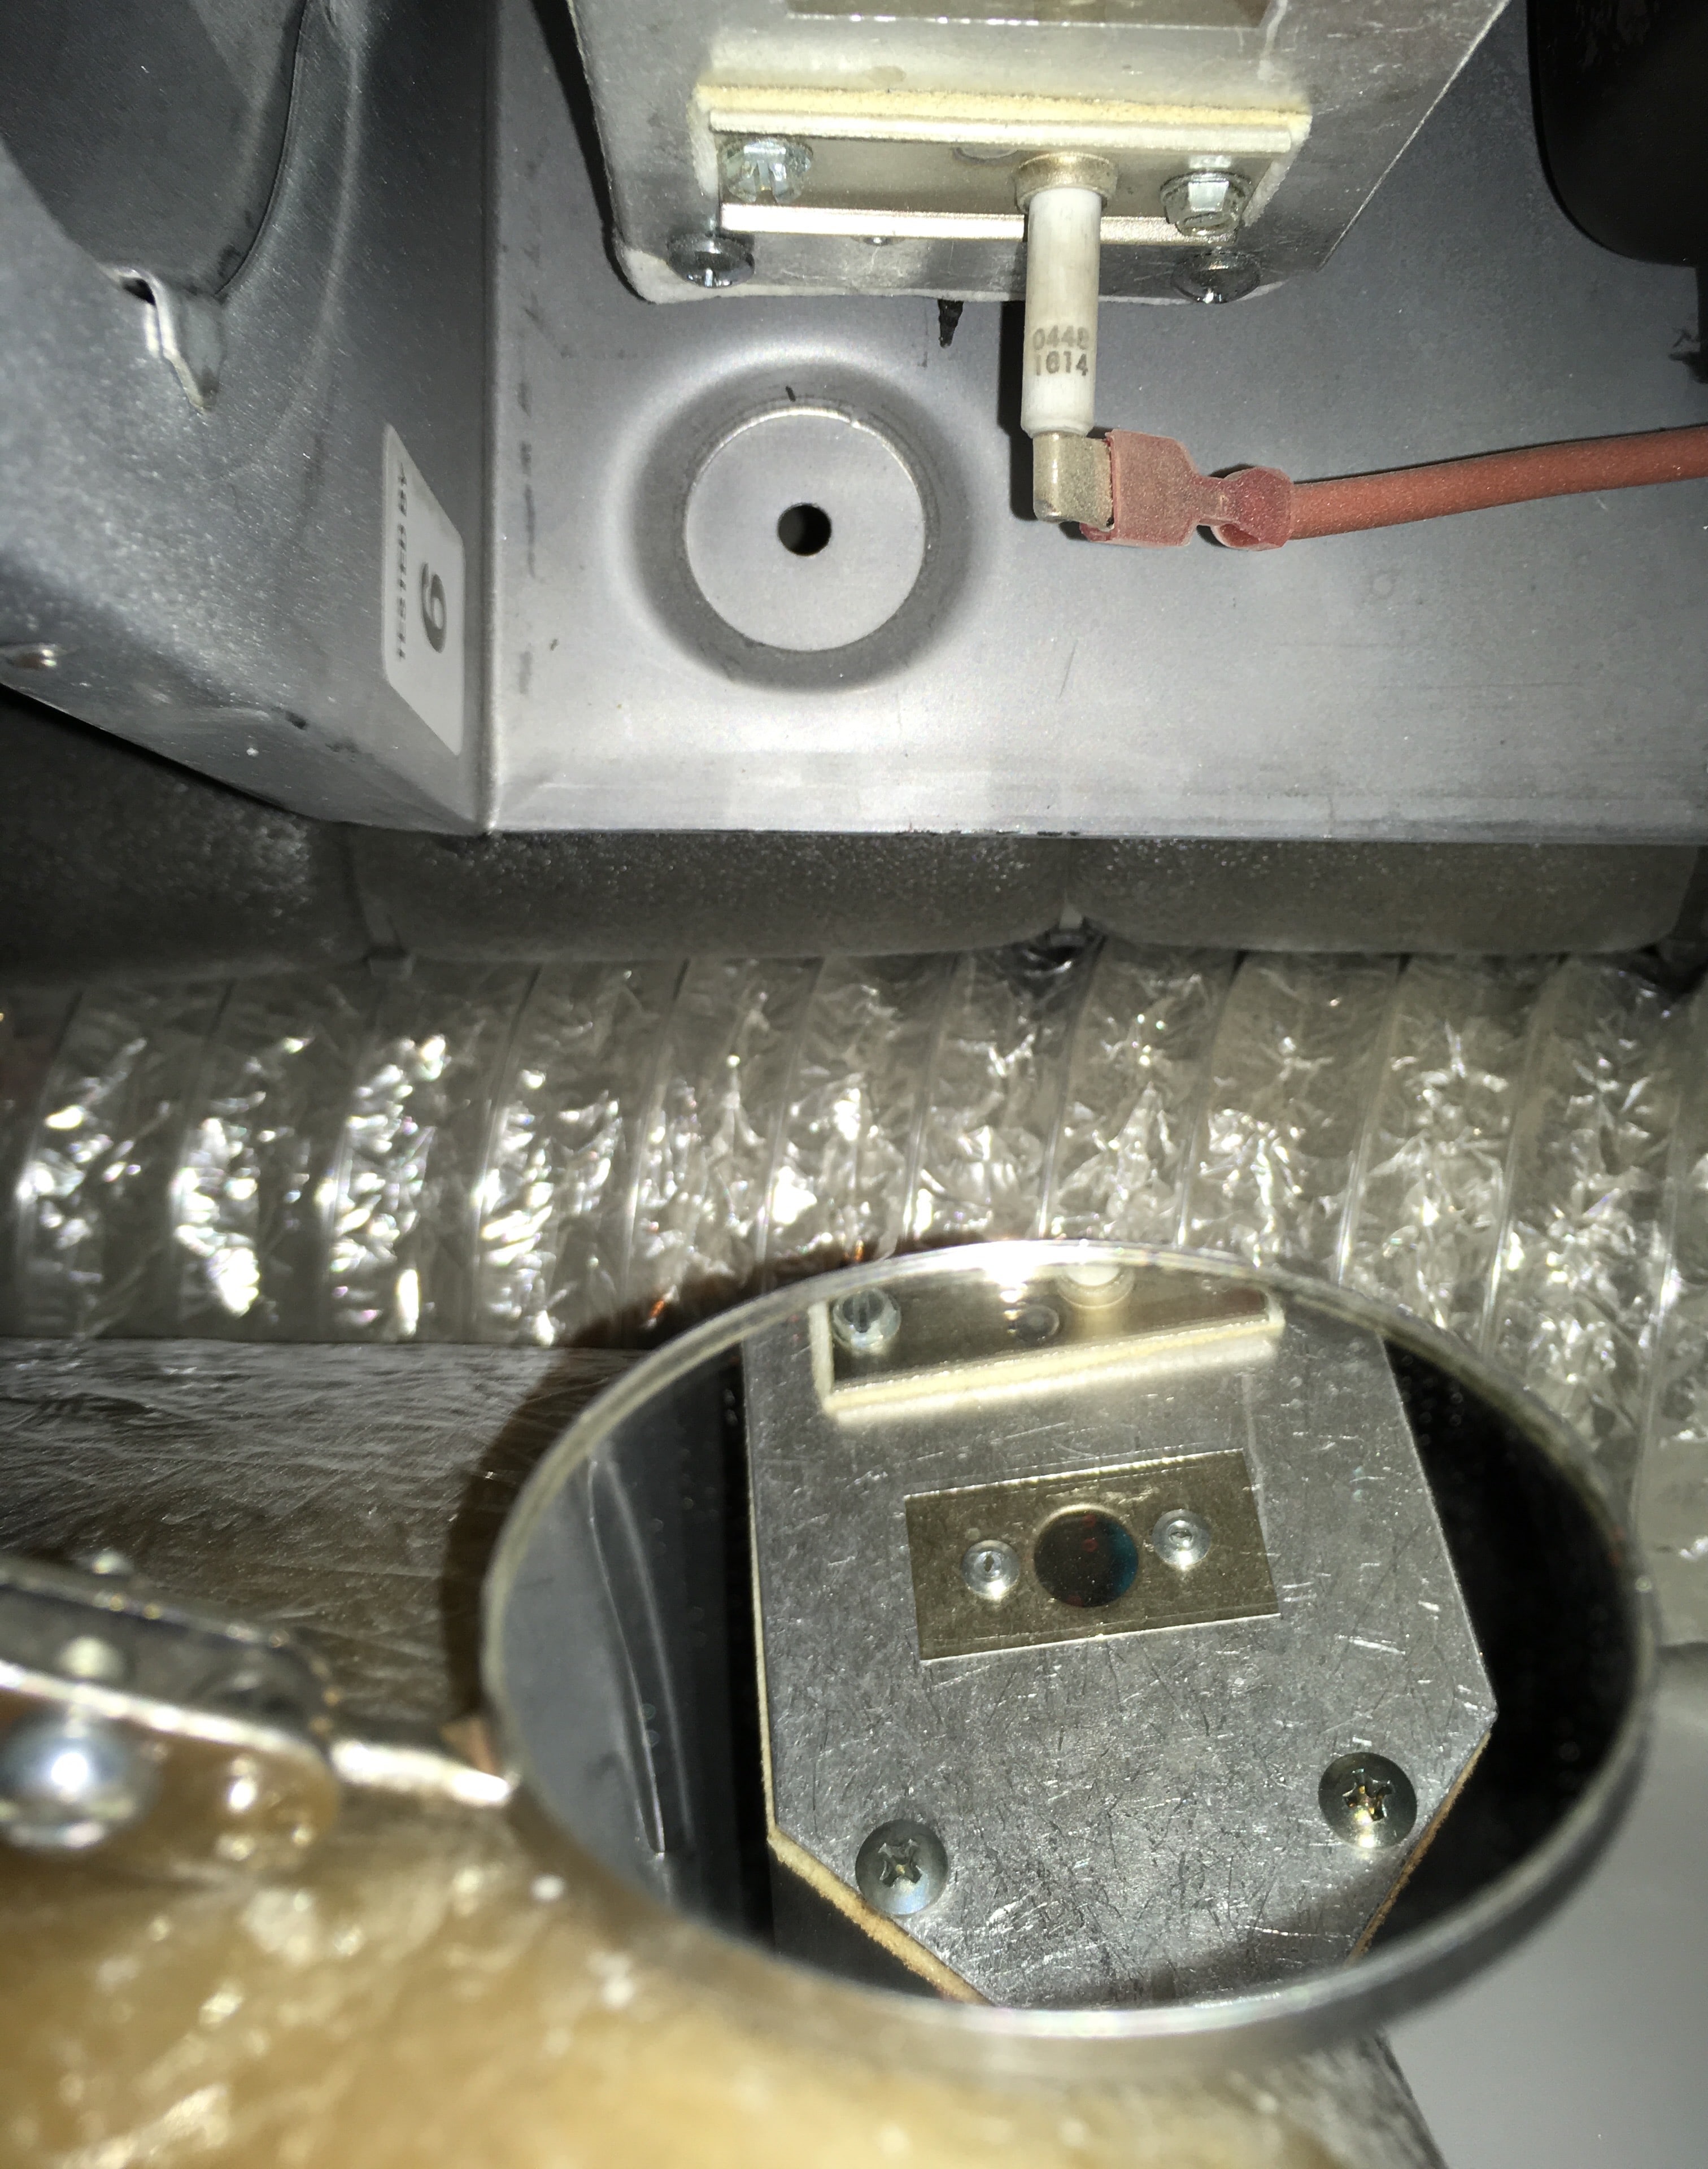
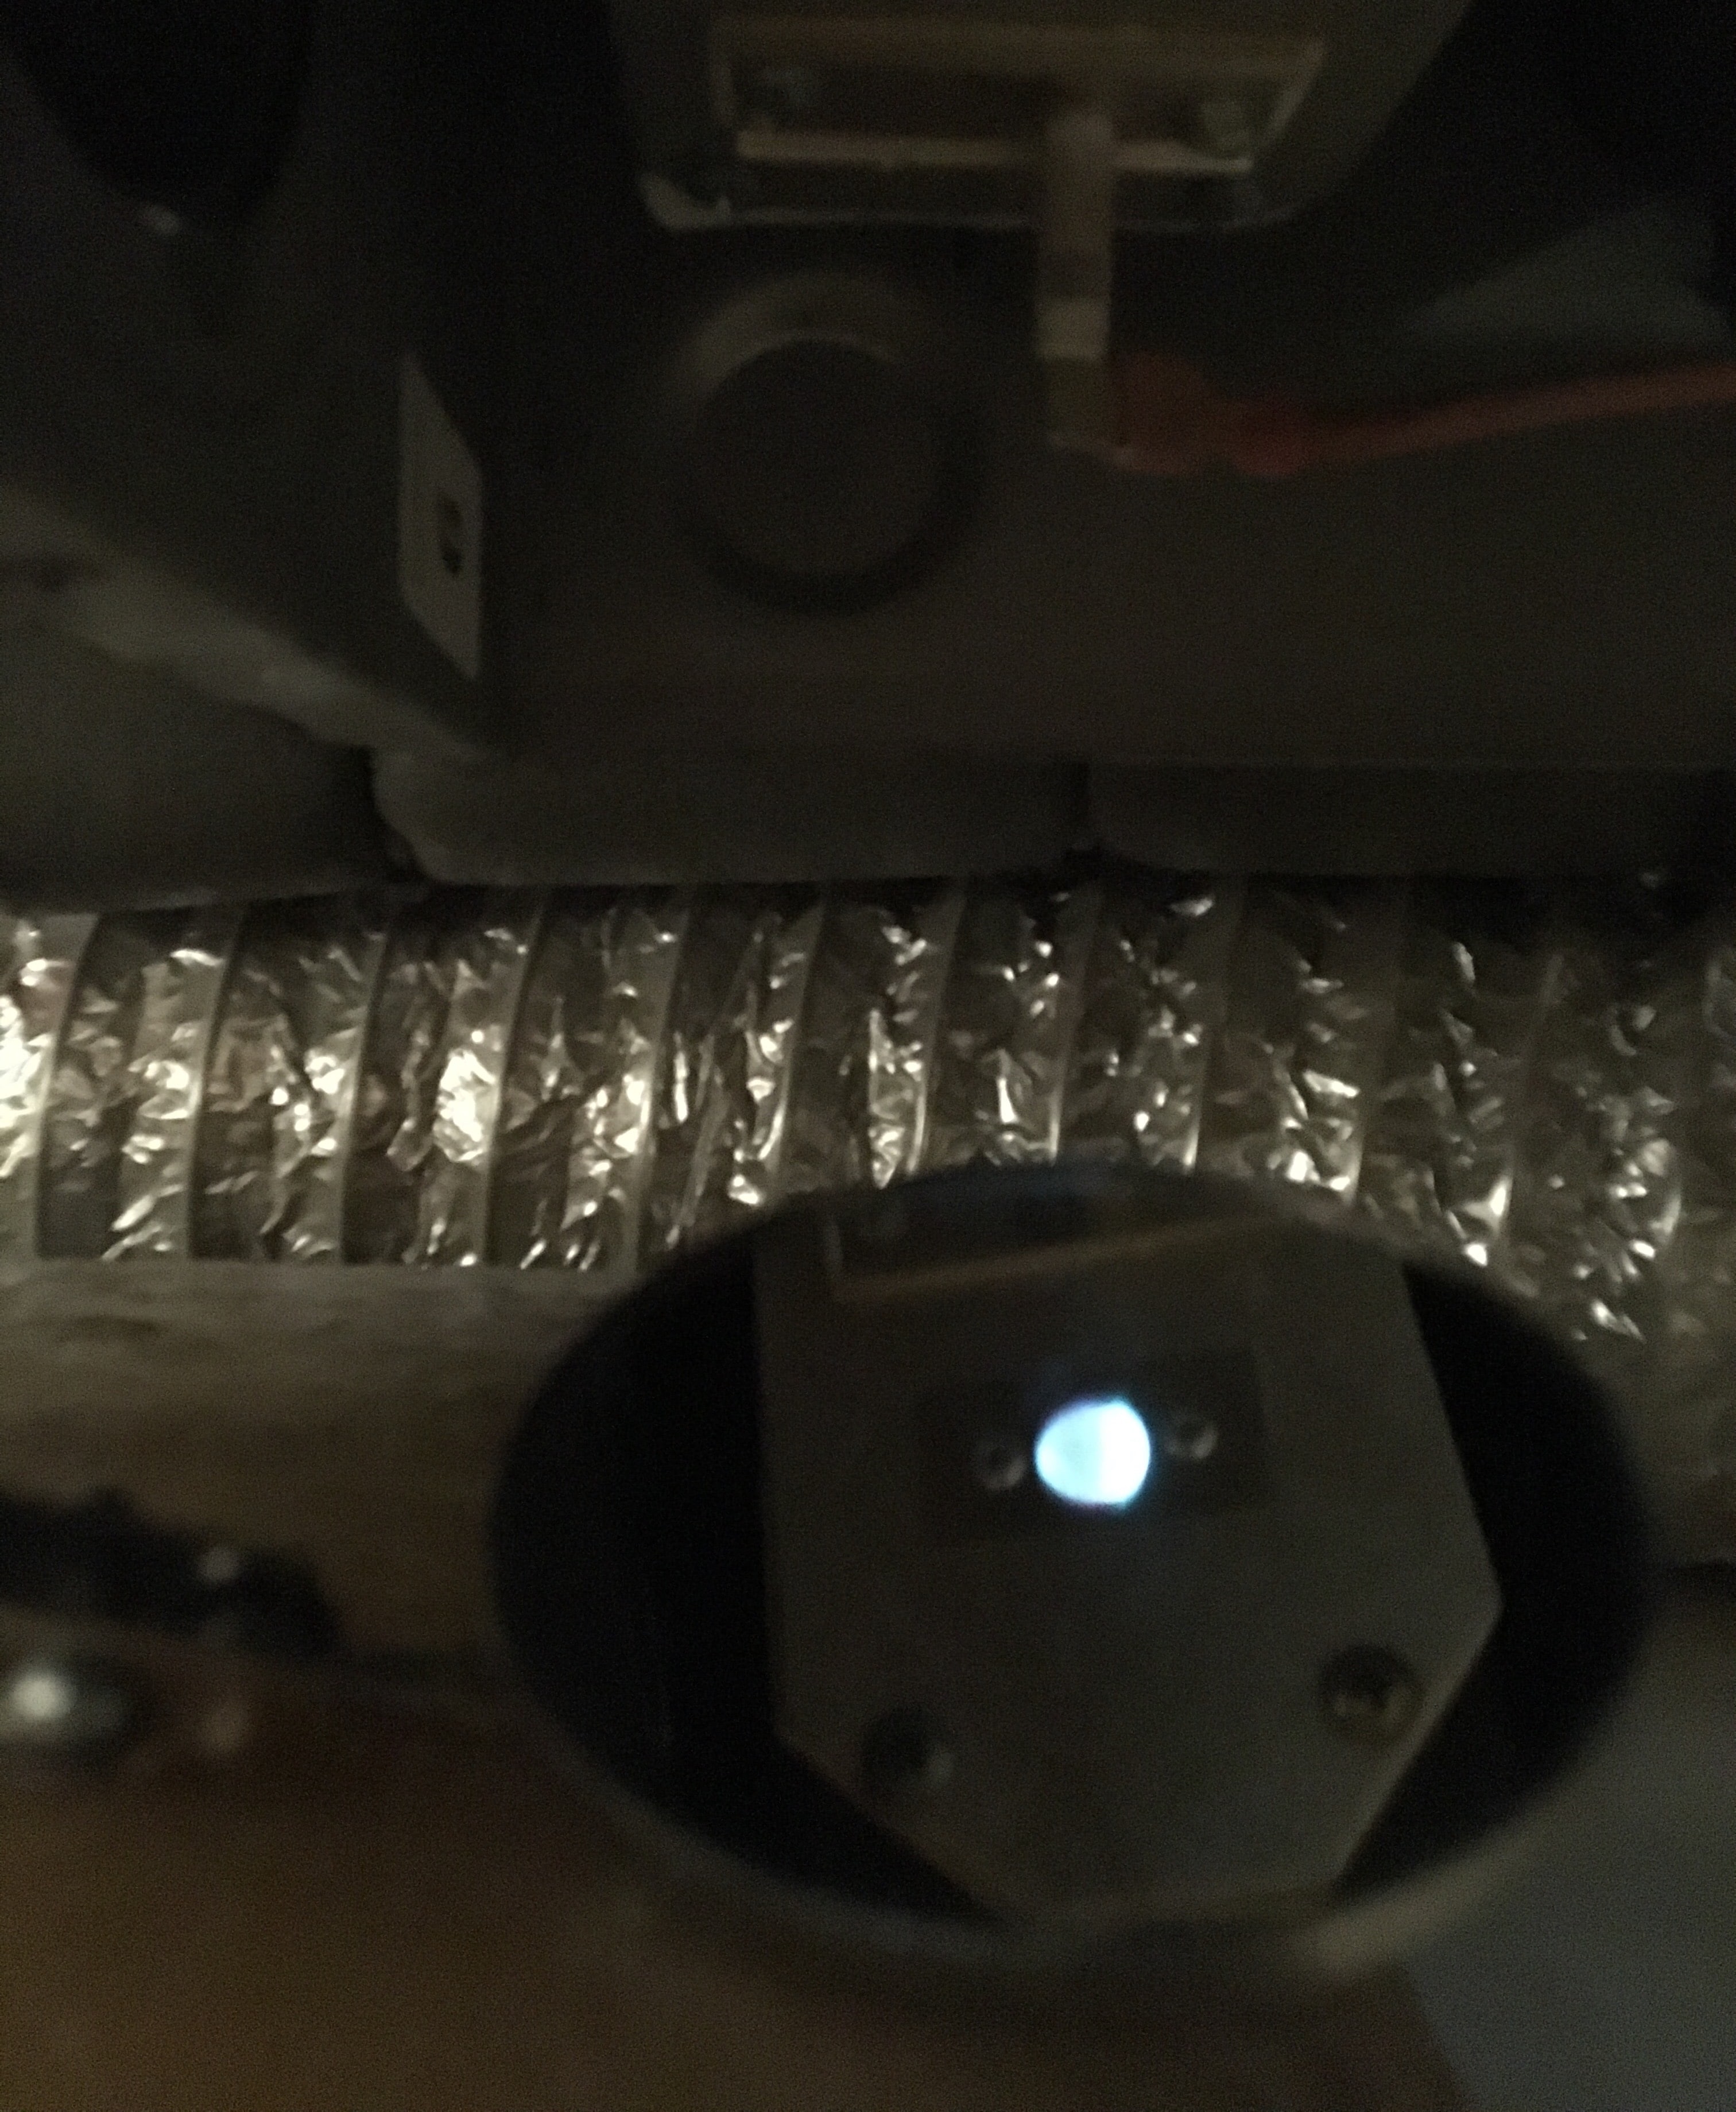
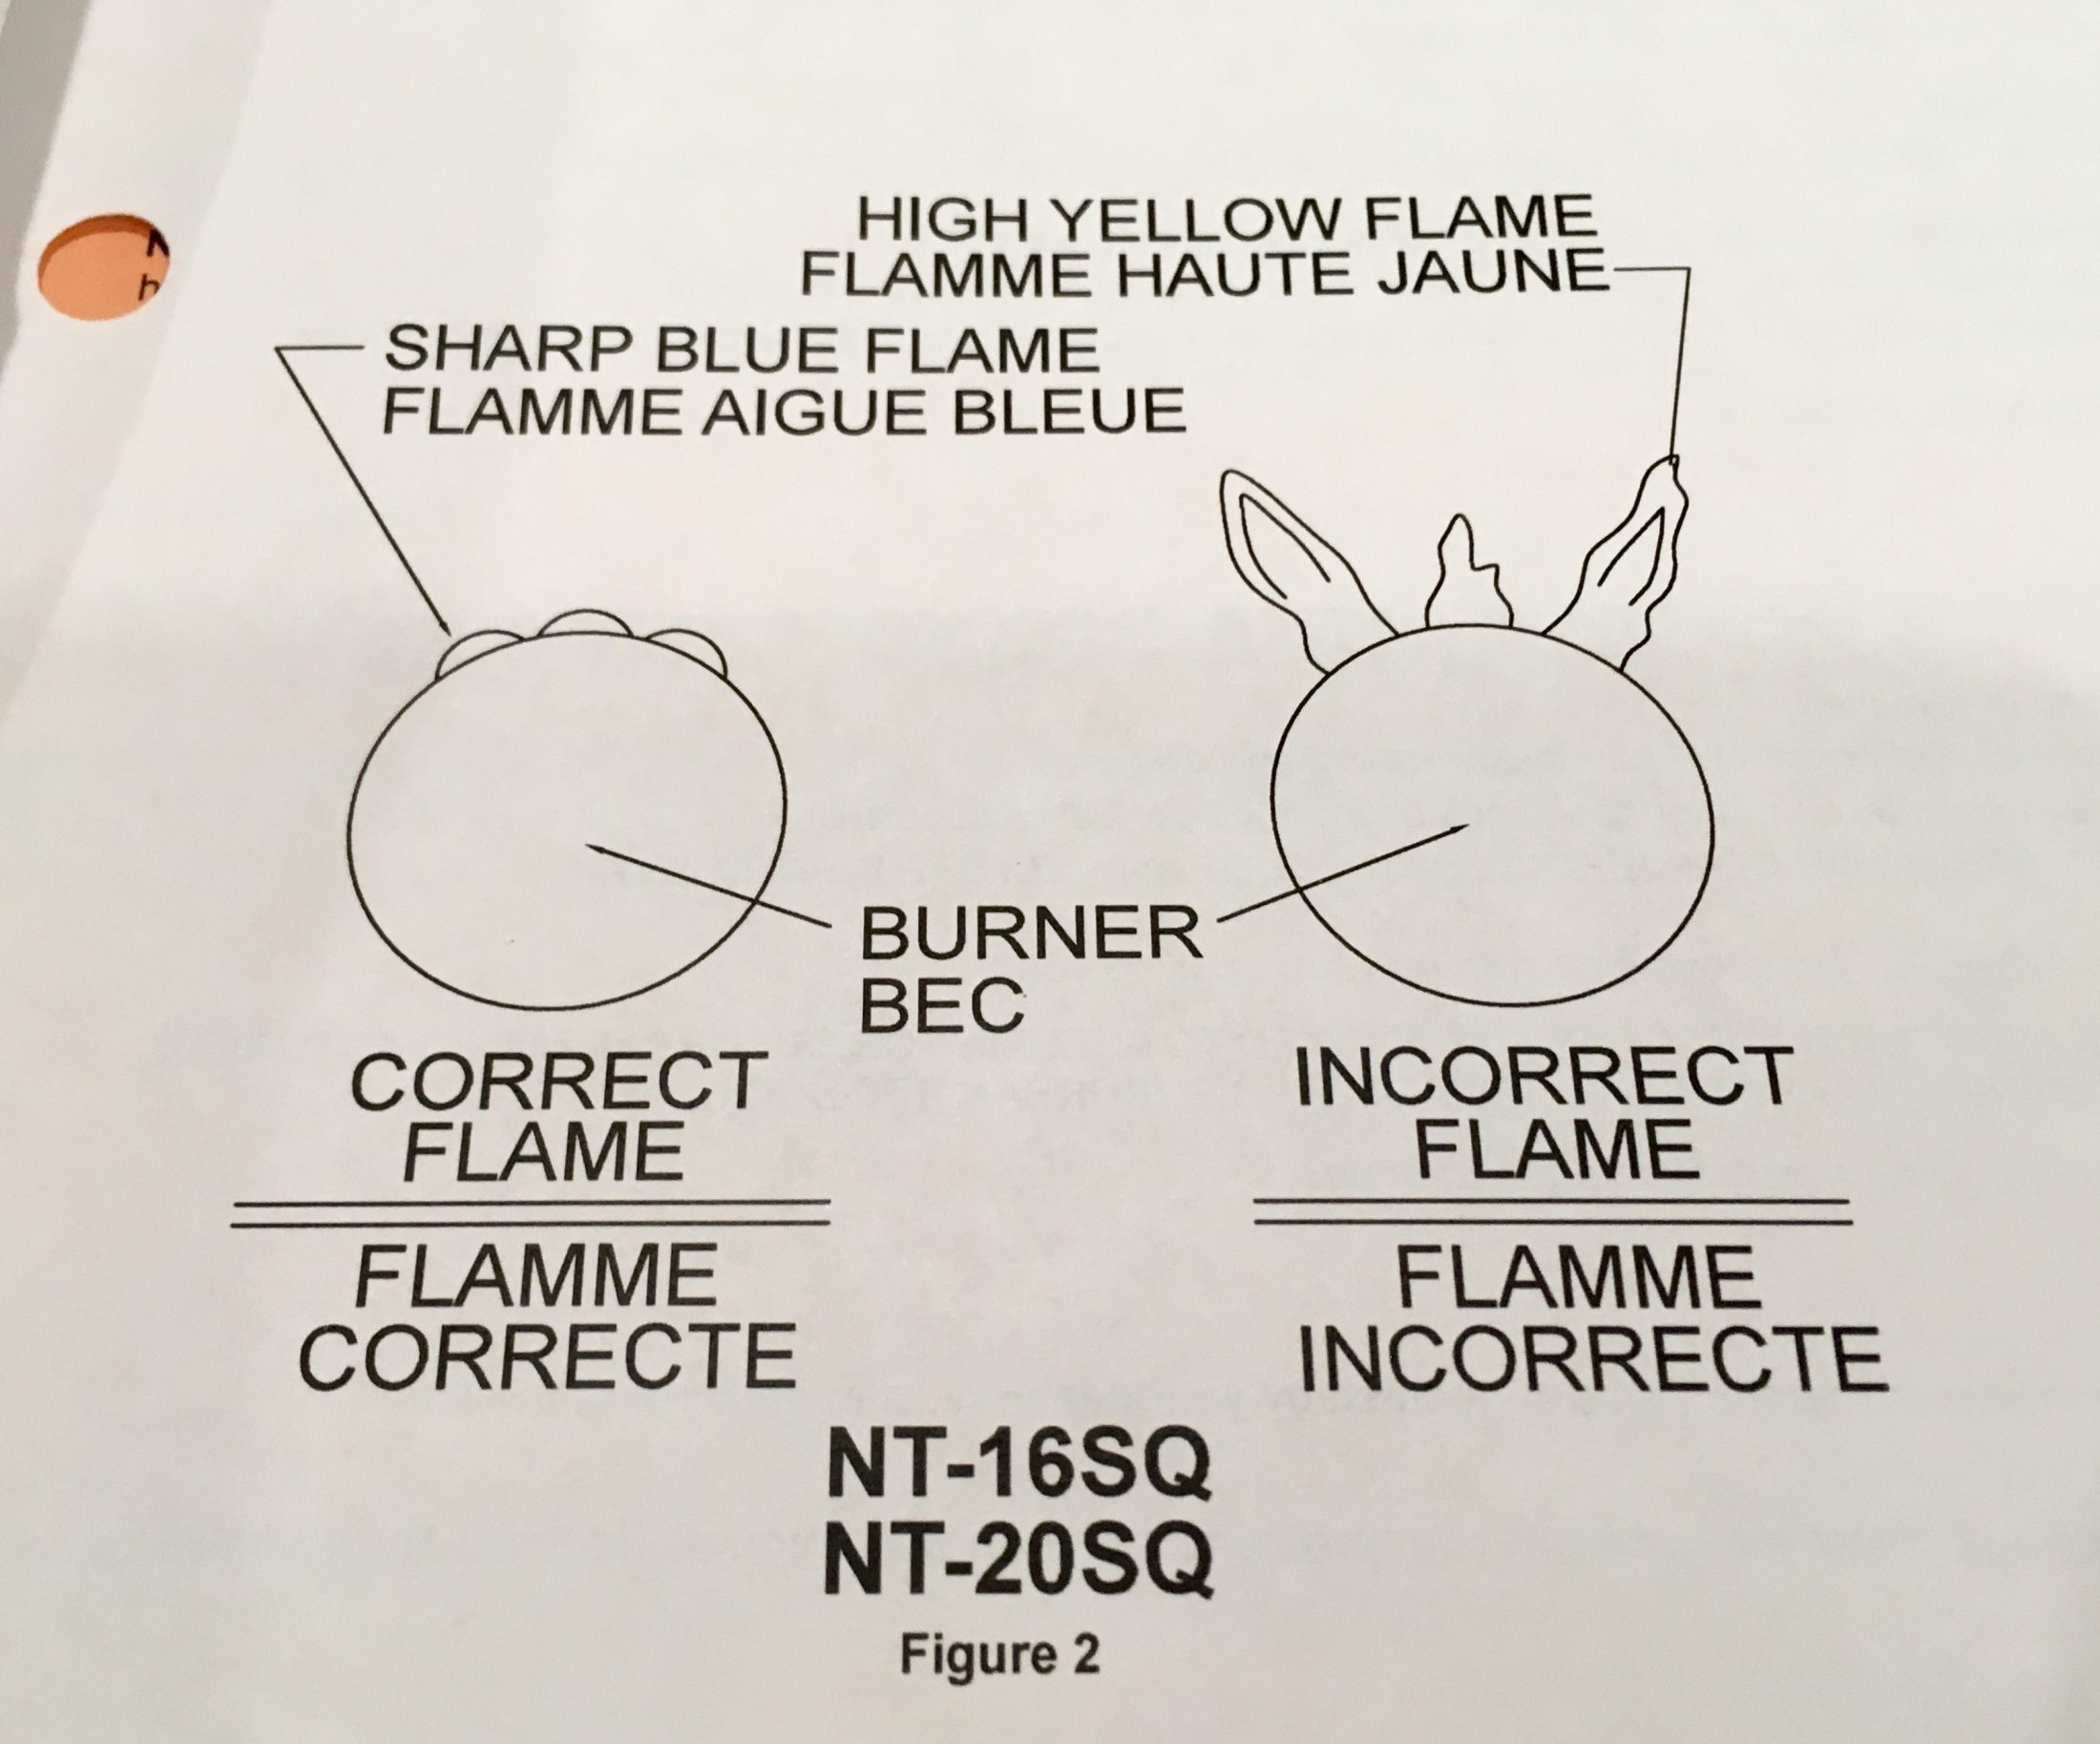
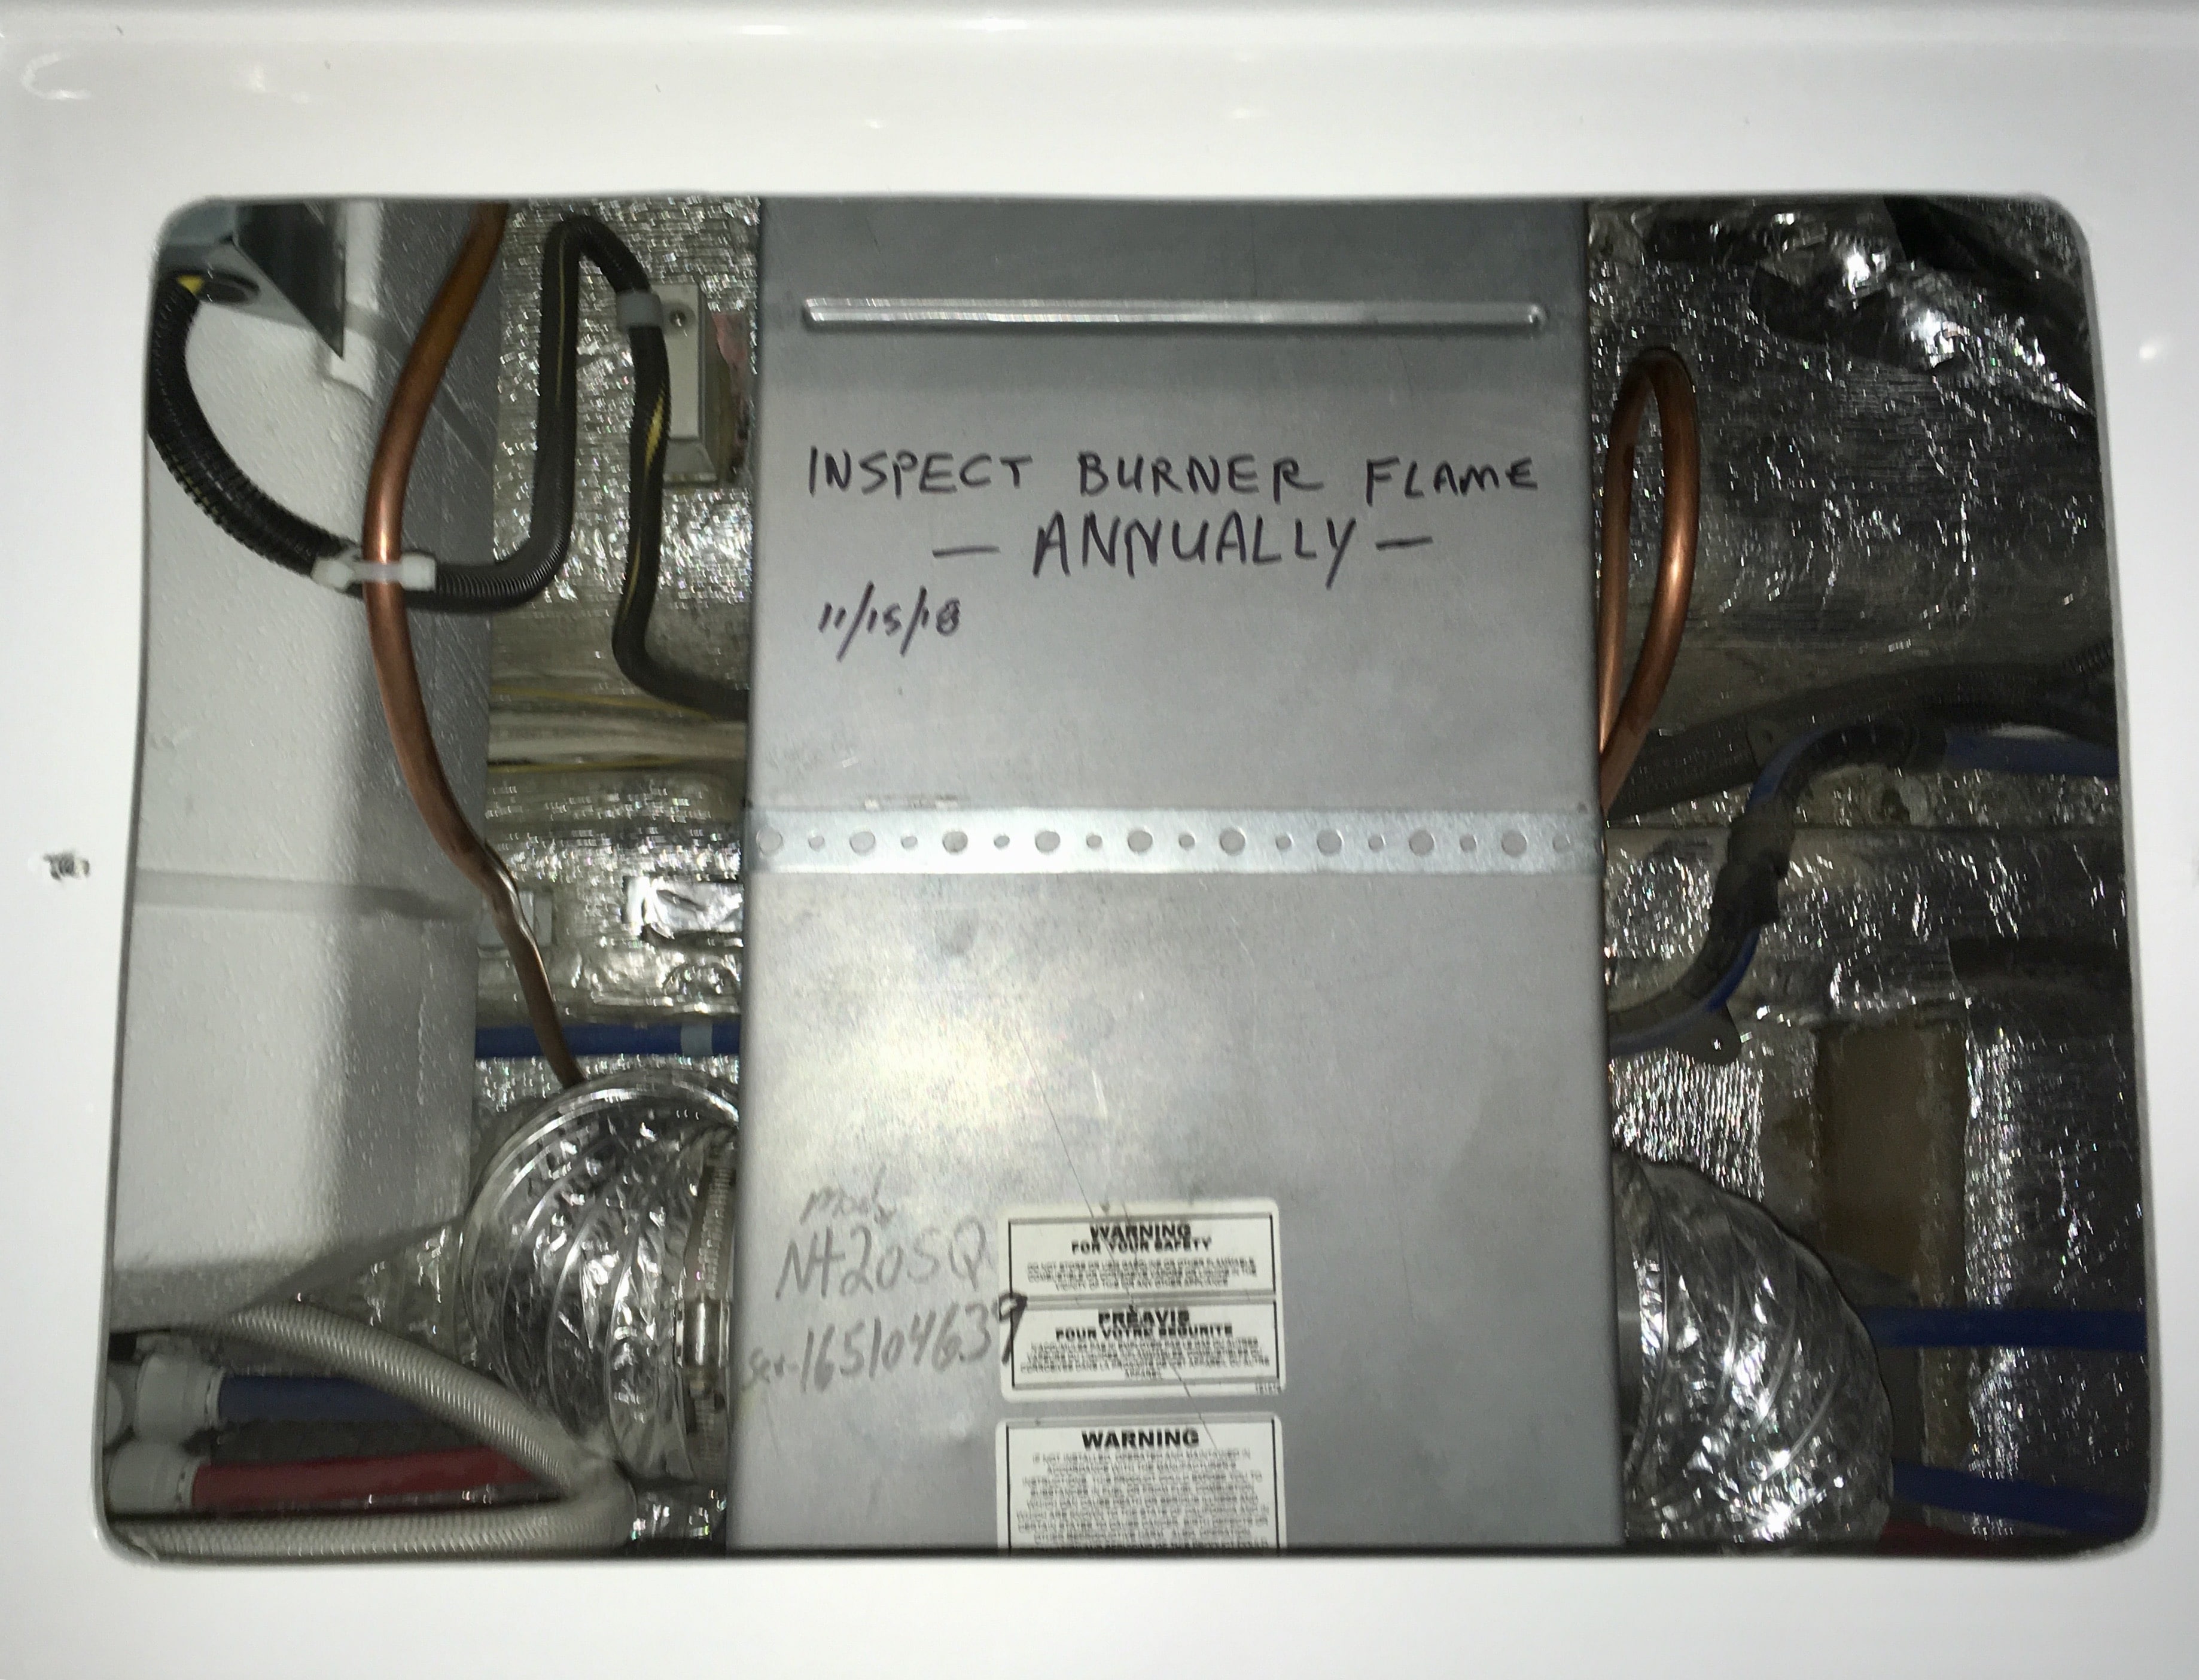
Actually you can't do a whole lot without taking it completely out. You can look inside the two outside holes to make sure they are not blocked, and to look for soot, which is a sign of distress (or high altitude use). You can however get to the ignitor, and view the burner flame from inside the trailer. The manual recommends an annual check of the flame to make sure it is OK. Here is how you can do that. It will take about 30 minutes. Remove the rear top access panel under the mattress, on the curb side, and also remove the air return grill, (two screws). If you have a work light, drop it down in the hole so you can see. CAUTION: the screws to be removed are stainless steel and non-magnetic. If you drop one it may disappear forever under a pipe or duct.Be prepared to find a replacement. I did not drop any...but it was a close call a couple of times. Remove the front screw of the furnace cover, easy: The second screw is hard to reach, it is on the other side inline with the first one. I used a stubby to get it out: Remove the sheet metal cover. Here it is with a bunch of instructions, on BOTH sides: I don't know the purpose of putting the operating instructions INSIDE the furnace. The bottom of the fiberglass cover would be a more logical location....! This is what is inside the opening, it's an air plenum of sorts to distribute air from the fan, which you cannot see. The silver plate holds the ignitor, which you could easily change in a few minutes, and it has a small clear window for viewing the hot stuff inside the burner can. I don't know exactly what would be accessible if you removed that plate. Notice that Oliver puts foam insulation on the water pipes below the sharp edges of the furnace housing. Bravo... The area is very hard to see directly!!! I used my phone to take pictures so I could see what was there, and I used a 2 inch round mechanic's mirror to watch the flame. Here it is with the furnace running, with a camera flash: And this is sort-of what it looks like, no flash. With your bare eyes it is easy enough to see the flame. The flame should be blue and stable, no yellow or flickering: If the flame looks good, put the cover back on and write down the info for future reference: If the flame doesn't look as it is supposed to, there is a problem and the furnace will have to be removed and checked by a professional. While you are at it, visually inspect around the furnace to make sure the ducts and the gas connection and wires look OK. John Davies Spokane WA
1 point
-
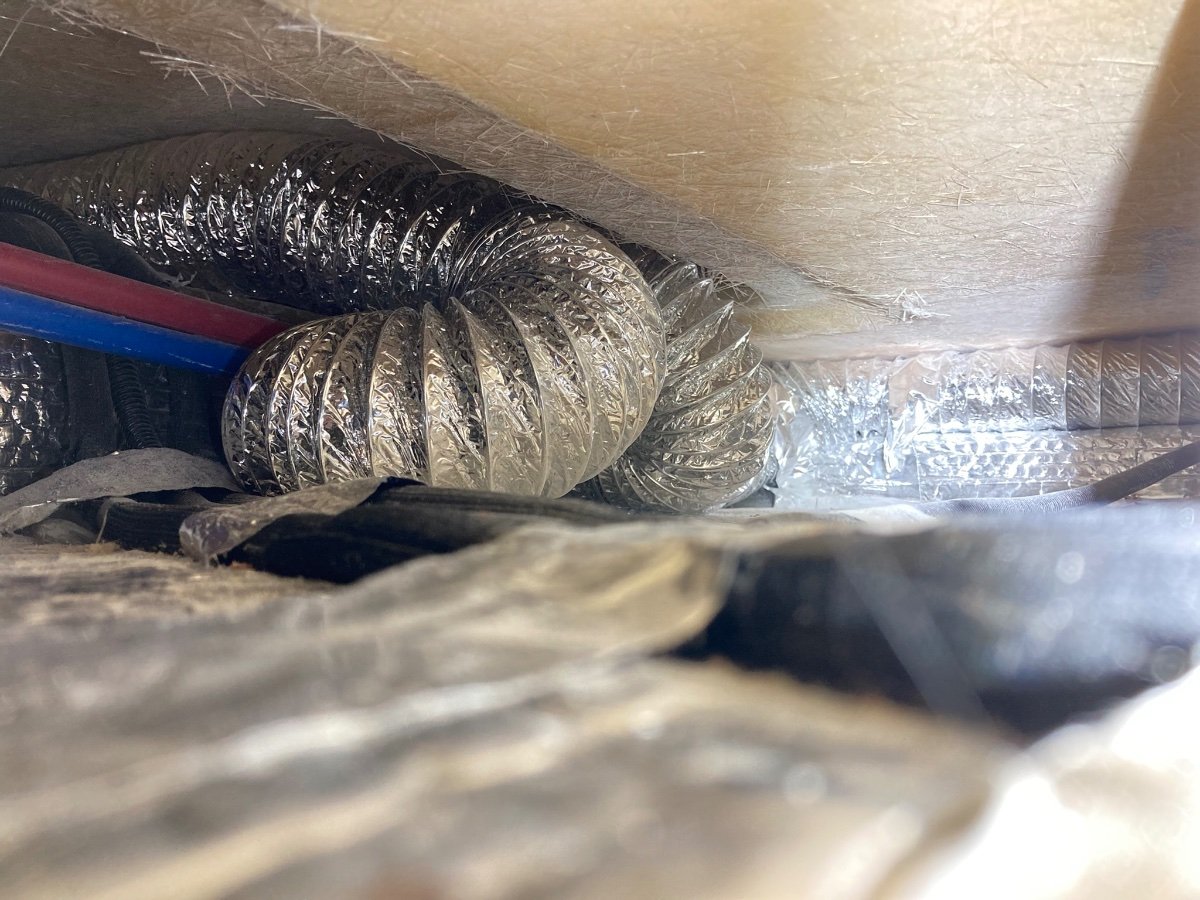
The inadequate flow to the bathroom vent in the LE2 has been discussed many times, along with some possible solutions. Just to be sure I did not have a kink, I went poking around under the front dinette seat taking pics in the bilge. I discovered loops of flex duct hose, possibly it may be pinched. Surely this restricts the flow somewhat, but how to straighten it out? I could remove the panel under the bath sink, and try to gently tug on it to get the kinks out. I’m concerned I will tear the hose, and it does not look easy to get to for repair under that floor. I’ve got a Service Ticket in to ask, but I thought I’d check here to see if anyone has noticed a similar problem.
0 points
-
No problems with bugs at these temps. Last year, during the early October bow season, my two sons hunted and tent camped the same area. Again, no bugs but when they returned to their tent following a day of hunting, the tent had been torn down by a bear. Needles to say, their hunt was cut short as they quickly packed up and skedaddled back to their truck. They were much more comfortable this year, camping with me in our new Oliver...my days of tent camping, during any season, are over now that we have the Oliver!0 points


-
Recent Achievements
-


")


