Leaderboard


Popular Content
Showing content with the highest reputation on 12/08/2022 in all areas
-
Tom and I won't have our Ollie E2 (Hull #1321) until January, but here are some favorite photos from 2022: We hope you all have a wonderful holiday season and a happy and healthy new year! Best, Doreen and Tom DE64BCCB-E2B2-4144-B81E-49912B2C2242_1_201_a.heic
 3 points
 -
I have the Dometic furnace and thermostat. When I get a minute I plan to isolate the two wires that go from the furnace to the controller in the AC. I will then use a volt meter to determine when the thermostat is calling for heat. If the flame goes out and I still have 12 volts on the open side of the switch then its not the thermostat causing the problem it would have to be something internal in the furnace. I need to Isolate one problem at a time I ruled out air flow both on the supply and return. At this point I believe its in the control board in the AC but I need to dig a little deeper to be sure.3 points
-
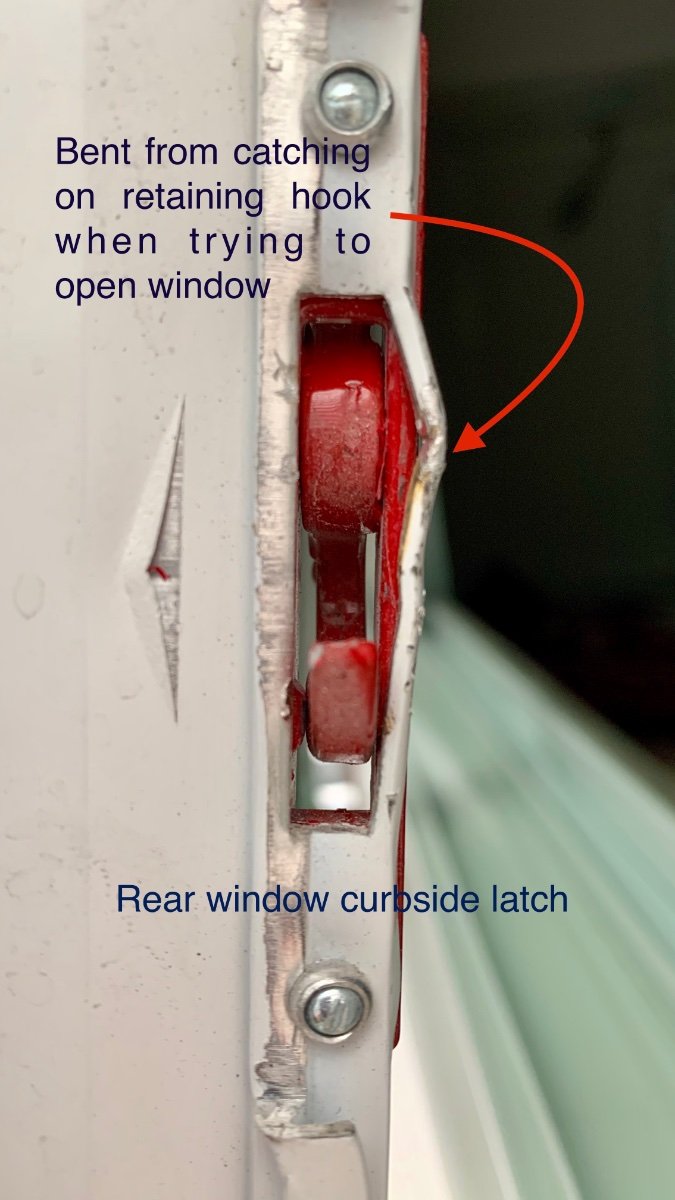
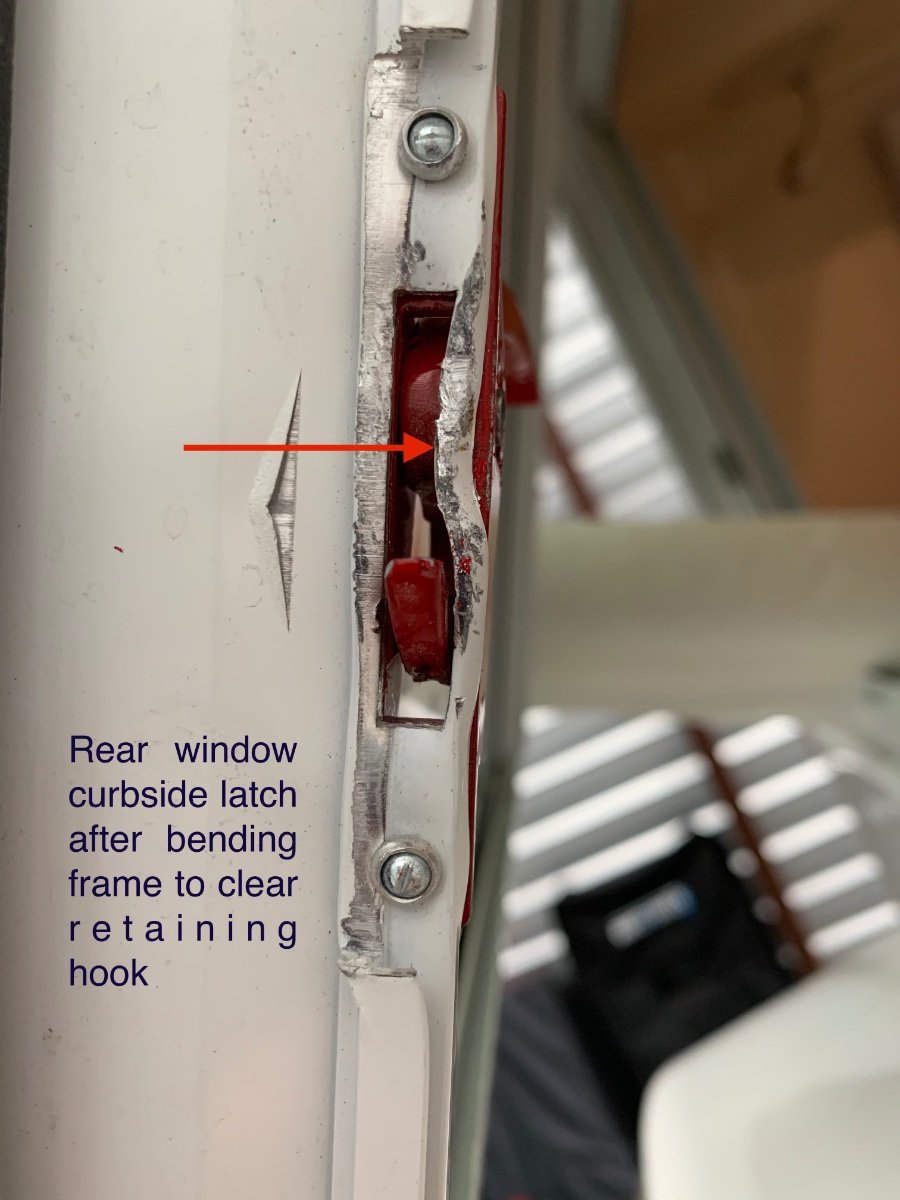
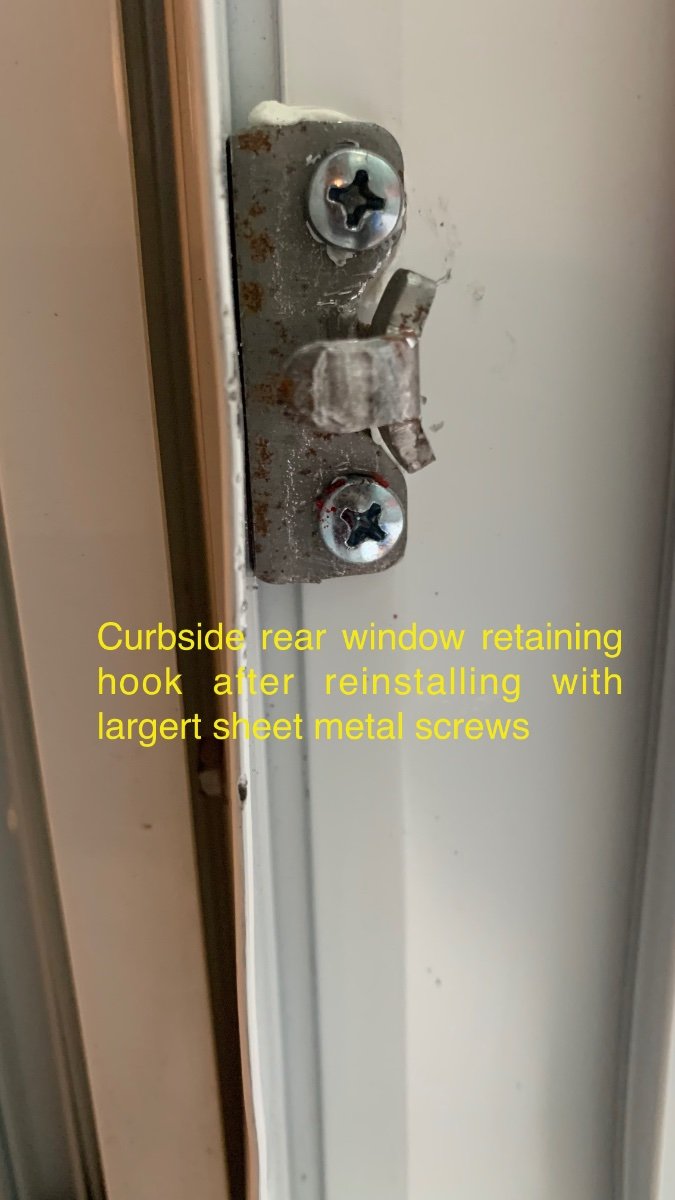
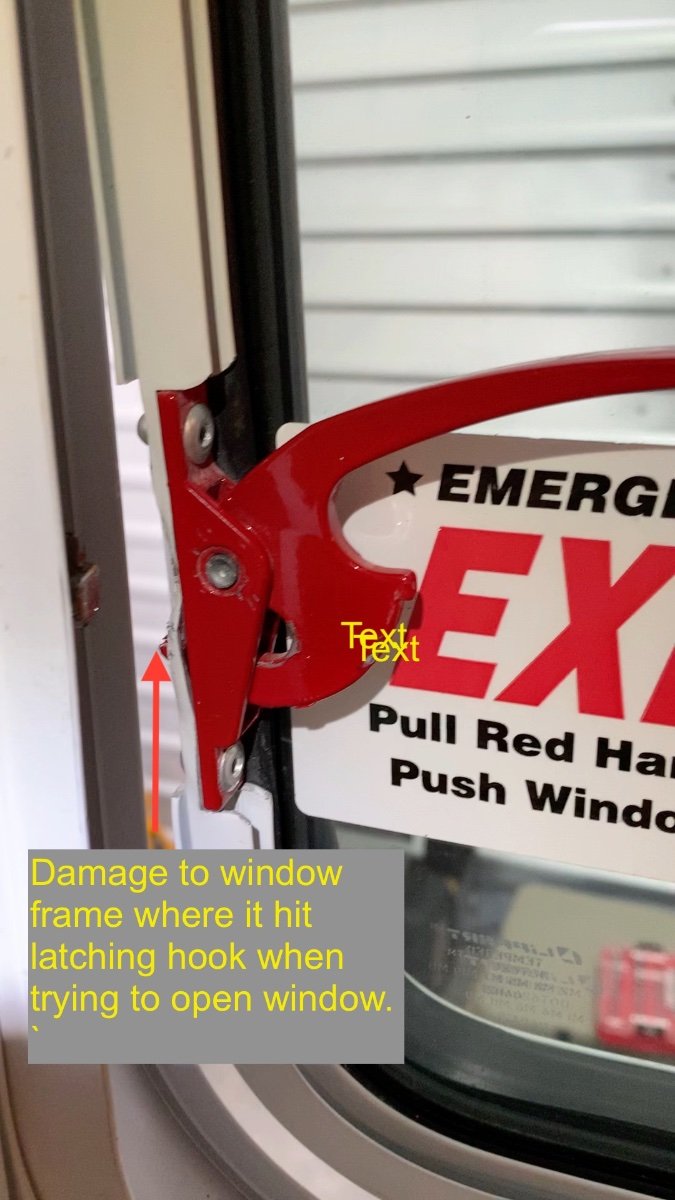
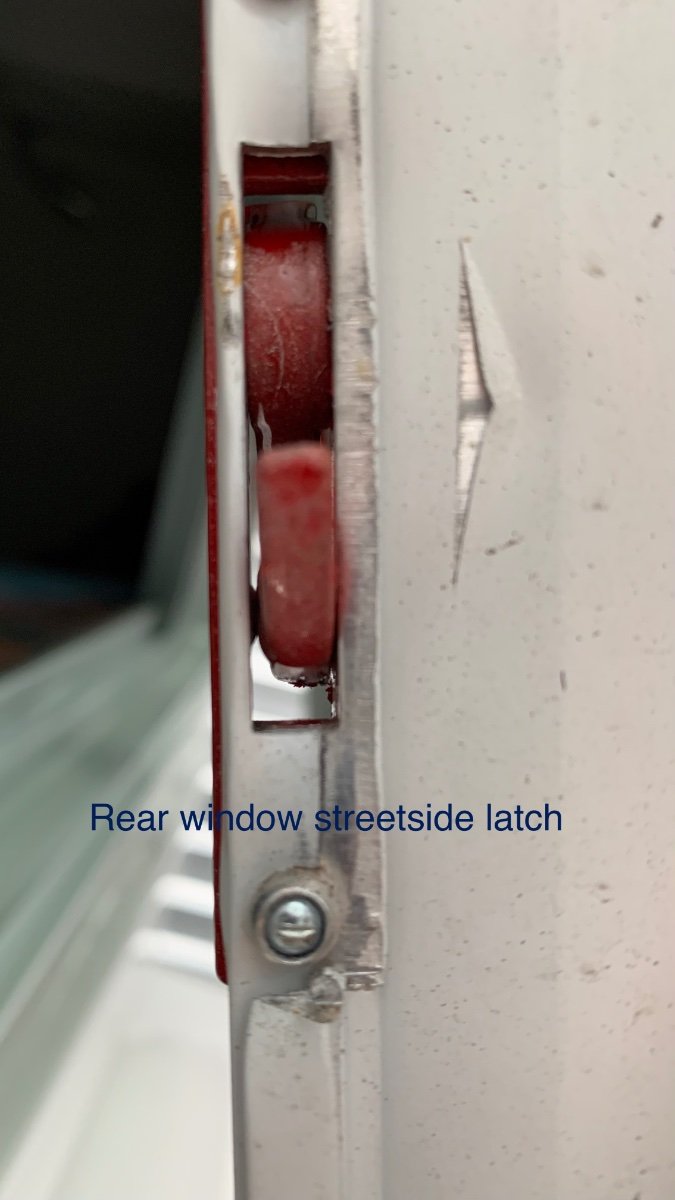
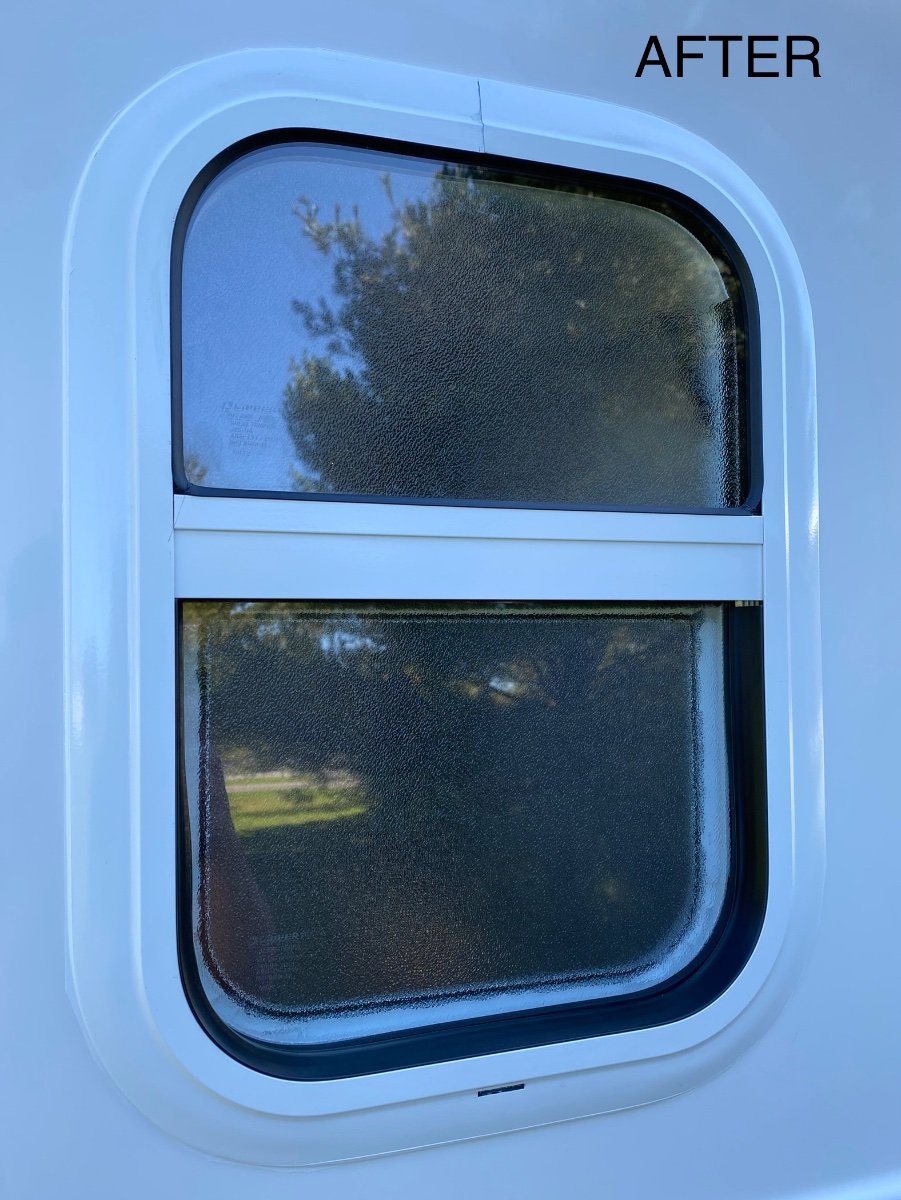
While cleaning our Ollie prior to storing it indoors after 8000K miles traveling this year, I discovered that the rear emergency escape window would not open - the latch would not release completely on the curbside. I had not previously tried to open the rear window since taking delivery in September 2021 (oversight on my part at delivery, trust but verify). With the curbside red handle completely open, the window would only open about 3/16ths of an inch, just enough to see that the metal hook that the red lever grabs onto was loose, and was impinging on the frame of the movable window. With some gentle lateral prying, I was able to open the window. When I attempted to tighten the screws that attach the metal hook to the window mounting frame, they were stripped. I reattached the metal hook using larger sheet metal screws and thought the problem was solved, but that would be too easy. After much pondering, it turns out that the hinged window was not perfectly centered in the external mounting frame, being offset approximately 1/8th inch to the curbside, and there is no way to change that - it was just a defective window assembly from the supplier. With my precision hammer, I modified (bent) the part of the moveable window frame that contacted the metal hook enough that it would allow the window to open and close, but not without some contact between the parts. So, the window is now functional, but not pretty when open, which won't happen very often, but resale value would be compromised when the time comes to part with Ollie, as I would have to disclose the damage. Mike Sharpe at Oliver Support has been very helpful throughout this process, and has offered to send me a replacement window assembly. I asked Mike if the installers at Oliver actually verify that windows work properly after they plug them into the hull openings, because delivering a defective emergency escape window would be a huge liability for Oliver in the event of injury or death. I can't imagine how a functioning window assembly could fail if it had never been opened. I have not gotten a reply to this question yet, as it was after business hours in Hohenwald when I posed this question. Because I live in far northern California, and am not planning to travel back to the mothership any time soon, I need to find a reputable RV repair facility that works on fiberglass trailers to install the new window assembly. I know that there a handful of Ollie owners on the West Coast, and would appreciate recommendations for repair shops that would be within a day or two travel time. So, for current or soon-to-be Ollie owners, make sure your emergency escape window works properly.
2 points
-
I would send Anita an email requesting your hull number and VIN. If you've paid your 50% these should have already been assigned. Our 50% payment cleared the bank today and Josh knew we were excited about getting the hull number so he sent an email today.2 points
-
Well it took a few days but Josh just emailed me the VIN and Hull number of the Ollie-Haus which is #1373. Another step has been checked off and now to just get through the winter months. Woohoooo!2 points
-
I don't recall and I am not near it right now or I would be happy to snap a pic and send it. Give service a call and I am sure they will let you know. They have been very responsive.2 points
-
True - but - Actually for both the Ollie and for my Tow vehicle, the spare tire is a real pita to check the tire pressure. The extra sensors allow for checking these two tires without the hassle of actually getting to the tire stem. Bill2 points
-
Don't forget an extra 2 sensors - 1 for the Ollie spare tire and one for the tow vehicle spare tire! Bill2 points
-
Four thoughts: A. Topgun2's statement is spot on. There is not much we can do about the heat in our tires except changing our driving habits as the road surface varies. That said, there are a substantial number of blowouts due to heat related to under-inflation causing sidewall flex and that causing blowouts. So, general consensus is that within the tire pressure range, it is better to be a bit high than lower. B. Knowing the impact of your trailer and all loads in and on the TV is important. Get this by weighing your TV and trailer, each fully loaded. Also weigh your TV with just normal day to day loads. With these numbers, check the tire pressure guide from your tire MFG. Adjust accordingly. And keep Thought "A" in mind. C. It took me a long time to understand how much tire pressure changes between "Cold" and hot conditions. I often thought I had a slow leak or a bad air pressure gauge during morning checks. So I recommend checking tire pressure early in the morning while the sun has not yet had much of a chance to mess with the tires. Once you have set them, don't worry about them during the heat of the day. As a young man while towing across Texas, I checked them at the gas station in El Paseo in 105 degrees. I made that mistake of lowering the TP to "Cold" pressure. The result was two blown trailer tires about 90 miles from nowhere. Sidewall flex heat generated from under inflation.... Once again, see Thought "A" above. D. Get a TPMS for your trailer and TV. They can give you advance warning that can easily warn of a slow leak or underinflation before it becomes a mess. I highly recommend the below air compressor and tire pressure gauge. I also use the below TPMS and have had good service. It however is a bear to program and reprogram. I bought my TPMS in 2018. Hopefully by now there are more user friendly ones. So, I recommend looking to the OTT Forum for more current TPMS recommendations. Bottom line is for this topic, for sure buy quality. ESSENTIAL TIRE MAINTENANCE TOOLS Dewalt 20V Air Compressor TPMS JACO Air Pressure Gauge NOTE: Every Jaco product is designed, manufactured, and supported in the U.S.A. Jaco has been manufacturing in Franklin Massachusetts for more than 45 years. Their tire pressure gauge is calibrated accurate to ANSI B40.1 standards.
2 points
-
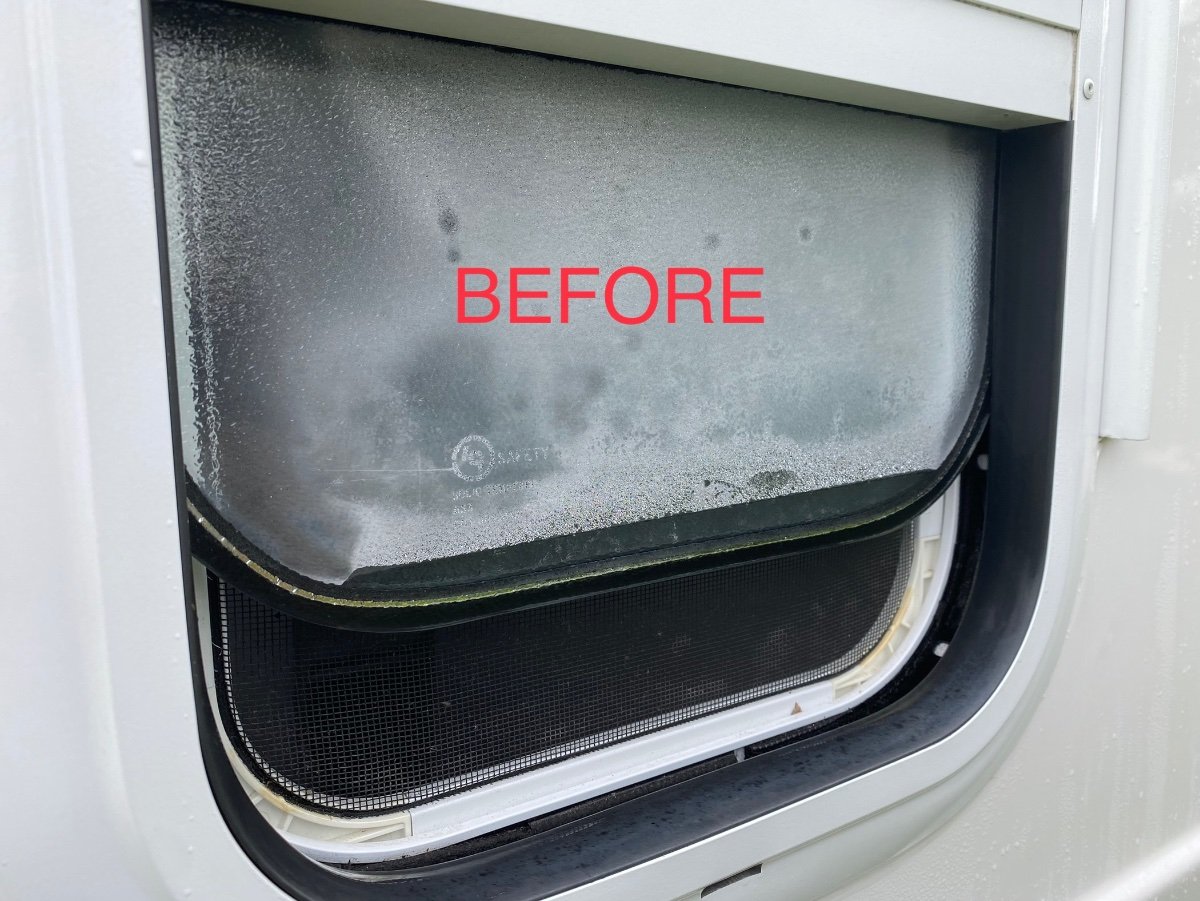
Fargoman, I have had to replace the bathroom window three times due to fogging. I would be more than happy to walk you through it once you get the replacement or help you install it. Message me your contact information when you are ready. Andrew2 points
-
Do you folks increase the tire pressure at least in the rear while towing and if so by how much? I have always done this albeit not scientifically and there seems to be no end to the amount of conflicting information about this on the internet. Some people swear the front tires need to be increased also, but this makes no logical sense to me. Thus far I have increased my rears from the recommended 35 psi to 40-45 psi but leave the fronts at their normal rating. Finally my current set of tires have been on my F150 for 9 years now and still not worn out and visually look fine, with probably another 10-15,000 miles left on them. I figure I should replace now before camping and touring season starts up. I currently have the Michelin LTX M/S on, but considering the Cooper Discover AT3 AS4's. Anyone have experience with either or have another suggestion. Thanks a bunch.1 point
-
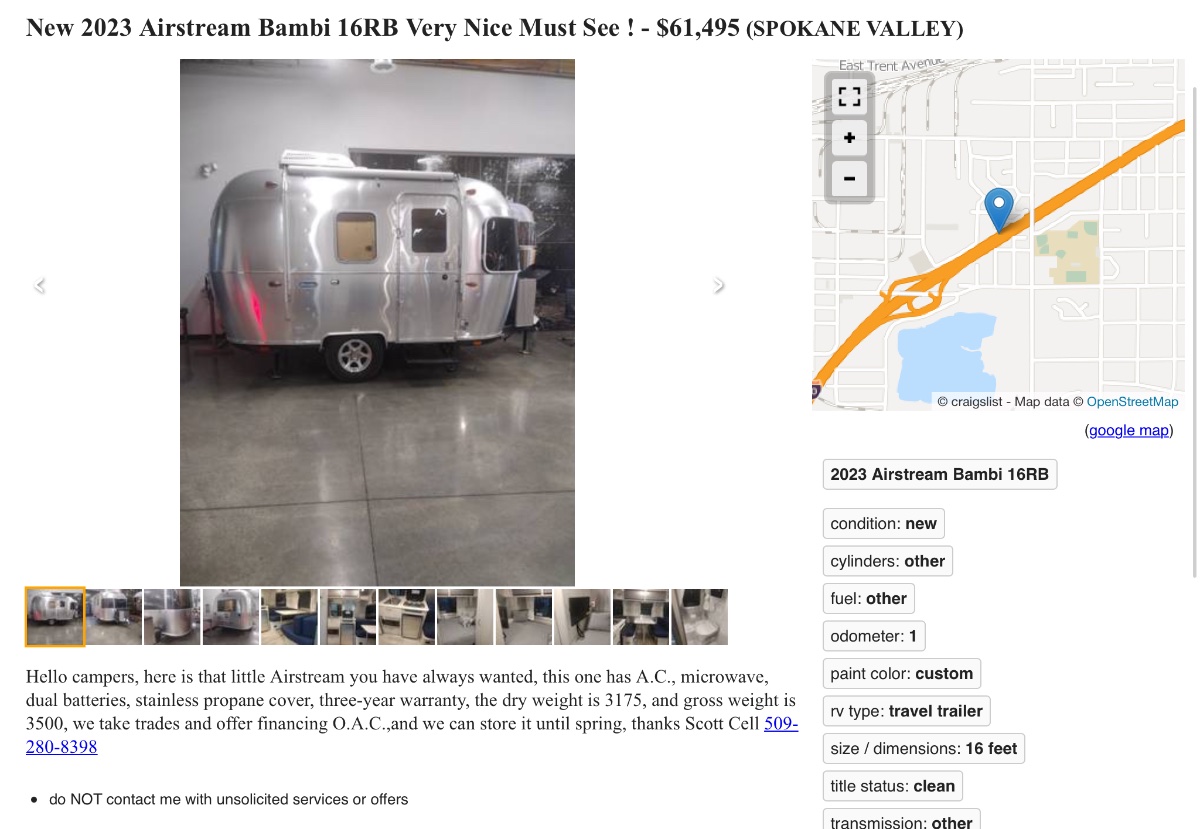
It has a 23 gal fresh tank, full of water that adds 192 pounds…… Is that a typo? If not, what were they thinking? John Davies Spokane WA
1 point
-
Just filled up at Sheetz here west of Cleveland at $2.74/gallon1 point
-
I wouldn't think so. First, there should be a clear definition of "short cycling." When I refer to short cycling, I'm using the HVAC definition, which basically means supply air does not distribute before returning to the unit - whether that be a furnace, an air conditioner or both. Charlie.1 point
-
Boerne, TX this morning: unleaded $2.64, diesel $3.99.1 point
-
Probably correct. The Airstream website has the following. 3,500 lbs GVWR, and 500 lbs carrying capacity, but that’s probably bare bones standard equipped model, so any options (and 23 gallons of water) would use up most of that 500 lbs. pretty quickly. Not much left for food, clothes, camping gear, etc.
1 point
-
I have an EEZTire TPMS like GJ above but since most of the more popular brands of these work in a similar fashion, I doubt that there are significant differences. I've found that I get about 2 years out of a set of batteries. However, when I have Twist stored I take the sensors off the tires, and, remove the batteries. I'm sure that Matt will be happy to hear from you. Bill1 point
-
Great pictures! Same to you also. John1 point
-
Let me resurrect this thread! 🙂 This link explains very well the difference between a desiccant and compressor dehumidifier. https://ionmax.com.au/blogs/resources/desiccant-or-compressor-dehumidifier#:~:text=Desiccant dehumidifiers operate much quieter,level of over 45 dB. In a nutshell... Desiccant dehumidifiers: Can increase the surrounding temperature up to 3-5°C **nice for colder weather**, perform well regardless of the surrounding temperature, hence, a desiccant dehumidifier is more suitable if you live in a climate with four seasons. Compressor dehumidifiers: work well at temperatures above 20°C (68°F), suitable for indoor environments that are warm, excellent choice for those living in year-long warm climates1 point
-
Ken, Fantastically useful info. Thanks on that. My responses and thoughts in bold in body of your post above.1 point
-
I was hesitant, as everyone has lots of grandkid photos. Somewhere we have slides from when our two daughters were little. And under a bed I have a tub with all the polaroids and 8mm movies from when I was little, plus some color slides from when Dad was a toddler in the early '30s. The two grandkids are our oldest daughter's, and we're on a shared Apple Photos gallery with them. Apple limits shared galleries to 5000 images, and they're on their third one in just four years! 🤪 I hope there is some way to see them 90 years from now like I can still see my Dad's. (or my photos and tintypes of my great-great grandparents from the 1800s for that matter) As it is now, we can't even watch Deb's an my wedding video from 1981, because it was on Betamax...1 point
-
PS. I think your suggestions on insulating windows and beds is spot on. I also had already but a layer of the double bubble which lives under the beds. Used the same material to insulate doors to garage and battery compartment. We also unscrewed and pulled the exterior shower head into the basement and removed the hot/cold knobs so there was room to insulate the interior of that box.1 point
-
The thicker reflectix stuff is called "double bubble". Available on Amazon. We used it to make inserts for all the windows, except the one in the basthroom, with two layers of the reflectix sandwiched together and taped at the edges. These are held in place by the window shades. Built an open cell insert encased in reflectix to cover window in door (held in by screen door) and one to cover the Maxair vent when not open to vent out moisture. As to winterizing, we chose an Oliver primarily based on it's claimed capacity as a 4 season trailer. After a lot of testing we found that with water system on, the trailer is fine to mid 20s. After a ton of tweaks, we are confident we should be good down to tens or a bit lower. I am confidant that by carefully monitoring vulnerable water line reas, and comparing to outside temps, I should be able to quantify the line where I'll need to winterize vs when it is safe to run with water system on, even if I need to do so while while while camped.1 point
-
The Tire Minder TPMS system we recently purchased for the Elite II we picked up on November 10, 2022 was relatively easy to program. It performed well during our 2000+mile journey back to Idaho. With ambient temps ranging from the teens to the 50's F, we noted about a 3-PSI pressure increase from 50 PSI "cold" to 53 PSI "hot" as the tires warmed while on the road. It will be interesting to see what happens when towing in warmer temps, next spring.1 point
-
This recent post has some details for you, see Geronimo Johns post. Hitch Height1 point
-
Could your fill a couple of 55 gallon drums of that diesel and bring it over to my house? It's still about $4.50 here.1 point
-
When we first started dreaming about RVing back in early 2020 we looked at several setups including truck campers and were really impressed with Earthroamer and Truckhouse, both are amazing rigs! Ultimately we decided that the Earthroamer was too much truck for us for the type of camping that we expect to do and Truckhouse required too much custom modification of the power train and would likely not be covered by Toyota's warranty even though it would be a brand new truck. I can't say enough about those builds though, they are amazing! ....Maybe some day! Good luck with your upcoming setup!1 point
-
Today I drove from western NC Virtually due north via I-26 to I-81 to I-77 south of Cleveland. Cheapest regular gas was around $2.69 while the highest price was $3.59. TN and VA generally had the cheapest. Bill1 point
-
Assuming all windows are installed similarly as the bathroom window, the window is sealed on the outside by both butyl and caulk and secured to the hull by several screws from the inside which sandwich the hull between the inner and outer metal window frames. Once these screws are removed from the inside, the inner frame comes off easily. Best to have someone on the exterior holding the window in place as you remove the screws in case the butyl and caulk gives way and the window falls to the ground (mine was held tight by these two materials and necessitated the use of a plastic razor and a plastic putty knife on the exterior between the hull and frame to release the window from the hull). If I recall, I cleaned the hull opening first with a plastic razor blade, followed by a microfiber cloth with mineral spirits, followed by another cloth and alcohol. The butyl rope was applied fully encircling and around the underside of the window lip. When you place the new window in the opening the butyl compresses between the window frame and the hull, creating a hidden seal between the two. Careful tightening of the screws holding the inside window frame compresses the butyl and draws the exterior window frame to the hull. I used a dripless caulk gun and cut the nozzle very near the tip so it had a small, beveled opening. You only need a small bead of caulk around the window. Application did not require much caulk nor any smoothing. I suppose you could use blue masking tape both on the hull and window frame, exposing only the area you wished to have caulk applied, then use your finger to smooth, removing tape before caulk dried. If you are not used to caulking, I recommend practicing on the joint created by a couple of boards screwed together til you get the feel.1 point
-
I concur. I just replaced my bathroom window under warranty (the issue was a Lippert issue and not due to Oliver production). Service sent me the new window, butyl rope and caulk. Mike patiently walked me through the steps of removal, surface prep and reinstallation. It went quite well and was very simple to both remove and install. I was quite nervous before I started. Now after having done it I wouldn't hesitate on performing the procedure.1 point
-
I just replaced the bathroom window in our Ollie as well due to fogging between the glass panes. The window replacement is actually pretty straightforward if you have basic handyman skills. As Andrew mentioned, removing all the old caulk to get a good clean surface is the hardest part of the job. I used Dicor Butyl foamcore tape (link below) to bed the window to the hull. Very sticky, and a round profile so it goes around the corners of the inside surface of window frame very easily without wrinkling, so it makes a very good seal. I finished it off with white DAP AMP caulking around the perimeter (UV resistant and specified for metal and fiberglass). https://dicorproducts.com/product/seal-tite-butyl-foamcore-roll/
1 point
-
Fargoman, Replacing a window is really a very simple process. The only real work is removing the old caulk. I have found using just butyl tape works very well, requires no caulking and is a much cleaner installation. If you are anywhere near San Diego, I would be more than happy to help you with it. Andrew1 point
-
If the pressure in your tires raises much more than 10 degrees above ambient air temperature it is time to consider adding air. However, you must take into consideration things like road surface (black asphalt is hotter than white concrete on a summer day), and, is the tire in direct sunlight. Remember, for most general highway driving it is the heat in a tire that causes most damage to the internal structure of the tire. Bill1 point
-
I used to raise the pressure in the rear tires, but don’t anymore. I’ve never raised the pressure in the tires on my current truck. I’ve got about 15K miles towing so far and have noticed no unusual pressure changes while driving and towing. I also had the Michelin LTX tires on a previous truck and liked them a lot. I’m getting ready to change out the tires on my 2500 and am sure I will go with the Cooper AT3 XLT. I put them on my trailer last January and I like them. Why not have the truck and trailer match? 🤪. Mike1 point
-
I saw Diesel at $5.85 gal at local station last night. Regular gas (87) was $3.13 gal0 points


-
Recent Achievements
-


")


