Leaderboard


Popular Content
Showing content with the highest reputation on 02/03/2023 in all areas
-
1. I used an Eye bolt so the string wouldn't get smashed against the underside of the outer hull. In my first iteration of the plates, I actually epoxied the Eye bolt to the underside of one of the plates, which came out looking terrible, and I didn't use the plate anyway since I wanted thicker steel, and I wanted magnetic in case I needed to use a magnet to maneuver the plate over any wires. 2. I didn't think to use a slow curing adhesive, and in retrospect I'm glad I didn't. If I keep the trailer a few more years (but at the rate my kids are growing, it'll probably be too small for our family), I assume solar panel technology will get better, and I'll want to get more aerodynamic panels, like the Zamp Obsidian series. With the way the mounts are now, I can easily remove them and relocate them if necessary. When I put these on, I was trying to solve so many issues, I couldn't be bothered to also redesign the panels I'd even use since I wanted to get back to camping. 3. I think the brass bolt was 1.5 inches. 4. I drilled the brass bolt out myself at a buddy's house who has a drill press. The brass drilled out easily. I only used a machine shop to drill and tab the 410 stainless steel plates because 410 is tough to work with. The local machine shop only charged me $5 per drilled and tapped hole, and at $40, that was one less aggravation I didn't have to deal with. 5. The countersink is important because it makes it easier for the bolt to locate the threads. On my first iteration of plates, I didn't have the countersink, and I couldn't find the threads. 6. I just used string from Home Depot. I had to pull one of the plates out with it, and it worked just fine. 7. It wasn't a rod, it was a long metal strip of metal from Home Depot. It's sold in 48 inch length, and about 1/2 wide. I needed thin and flexible to duct tape a wrench to it. I just kept using the same piece of metal for the whole of my experience. I had to wash off the oils from the metal before taking it in the trailer, and I did paint it since the metal rusted easily without the oil. It'll show up in my part 1 video. Again, I was making everything up on the fly as I went along.4 points
-
Here's a quick video of how I attached the solar panel mounts to my trailer. It'll say part 2, and I'll upload Part 1 and Part 3 on Sunday. Part 1 shows how I removed the old mounting brackets, and Part 3 shows me actually installing the mounting bracket on my trailer. But Part 2 shows the theory and why I did what I did. It's 12 minutes, but everything will make sense once you watch it.4 points
-
After further review, the 2018 IRS letter ruling referenced above may not apply after passage of the Inflation Reduction Act of 2022. It is arguable (but far from crystal clear) that this new legislation changed the status of batteries installed with solar panel systems eligible for the Clean Energy Credit, so the 2018 IRS letter ruling referenced above has been rendered moot by that statute. Take a hard look, or another look, at this article referenced by Steph and Dud B above: https://www.solar.com/learn/how-getting-a-home-battery-affects-your-federal-solar-incentive-tax-credit/ It also appears to me that the 3kw minimum, whenever it applies, is not relevant to Oliver owners who have at least 250ah of battery capacity included with their installation. At 12v, 3kw= 250ah. So, our Lithium Pro Package, for example, with 390ah of battery capacity, more than meets this minimum. I welcome other input on this issue. Again, this is not tax advice! You must consult with your own tax professional, or attorney, and make your own decisions when and if to claim the Residential Clean Energy Credit. But, I hope it helps you obtain reliable and informed advice from your tax professional.4 points
-
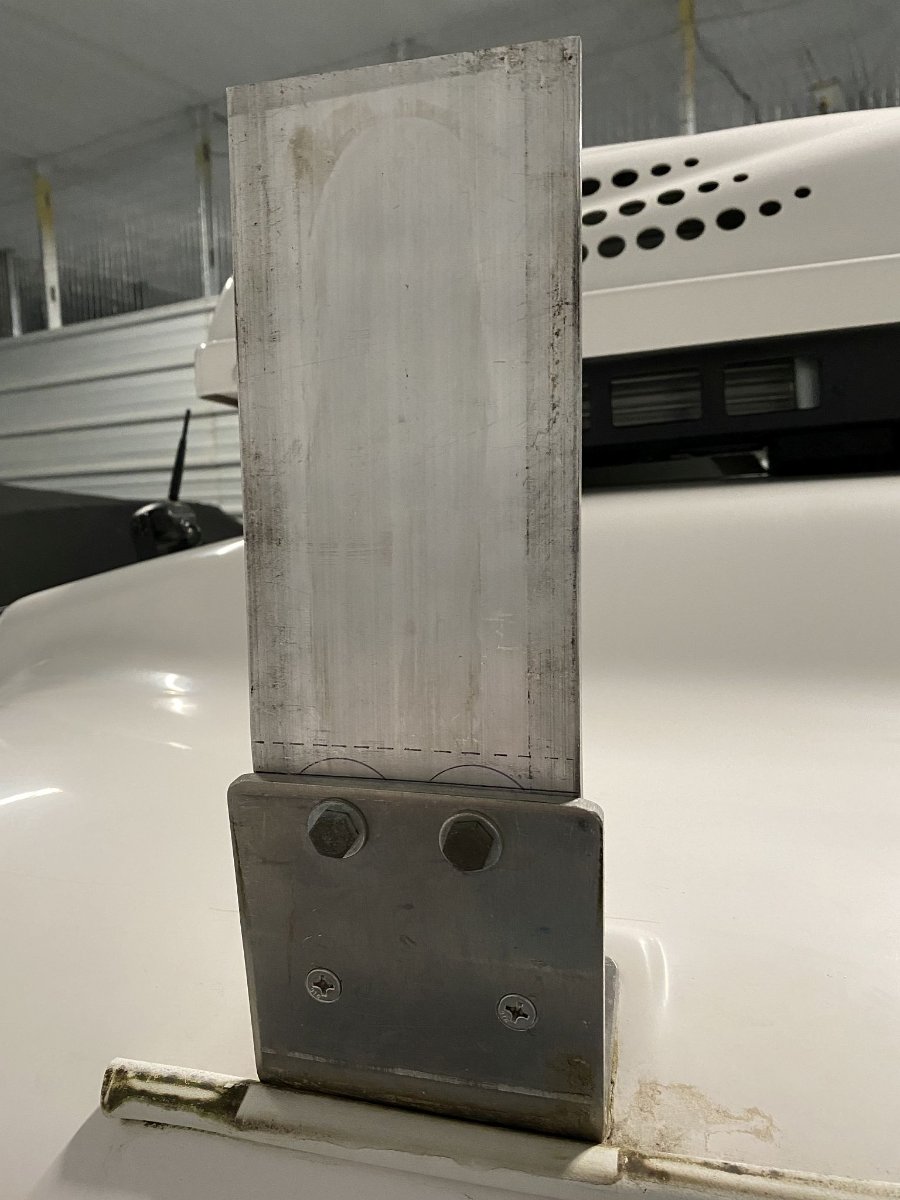
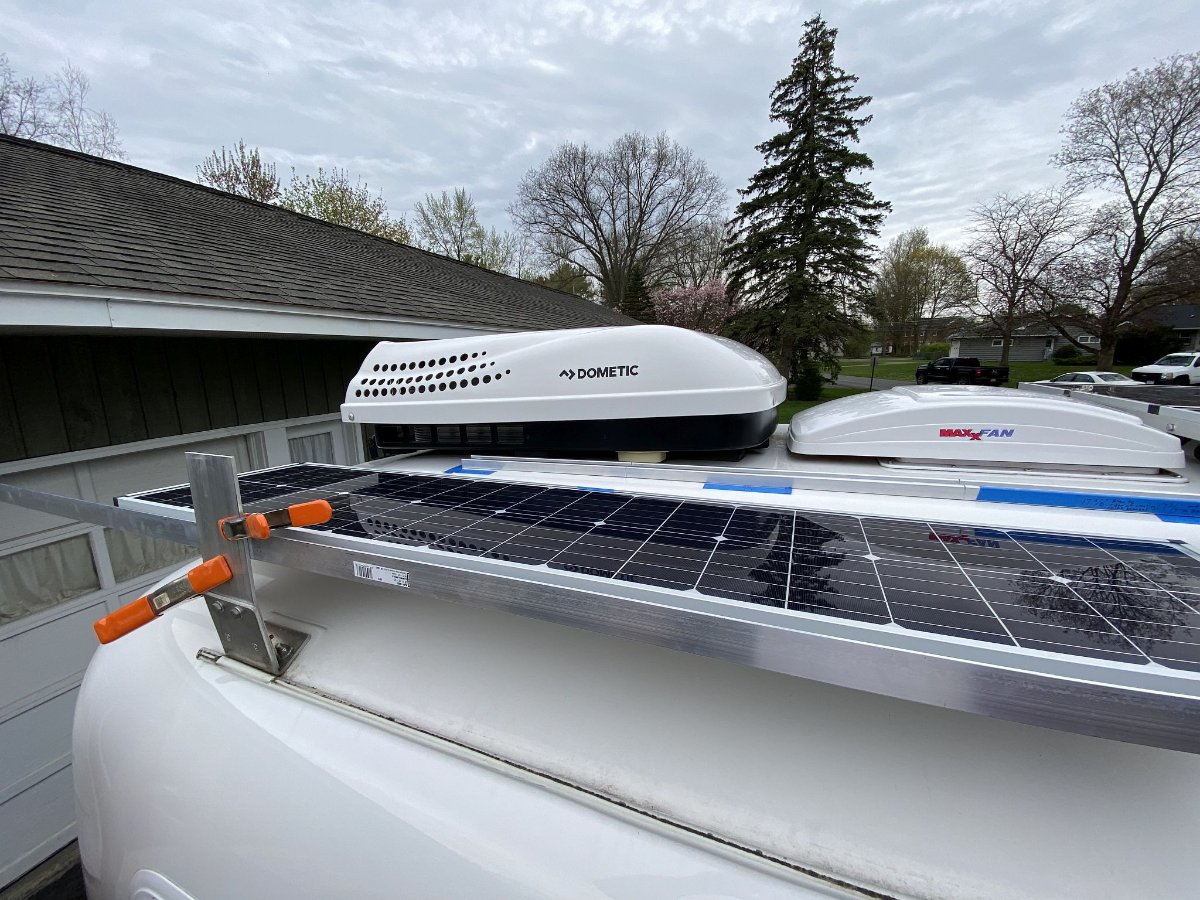
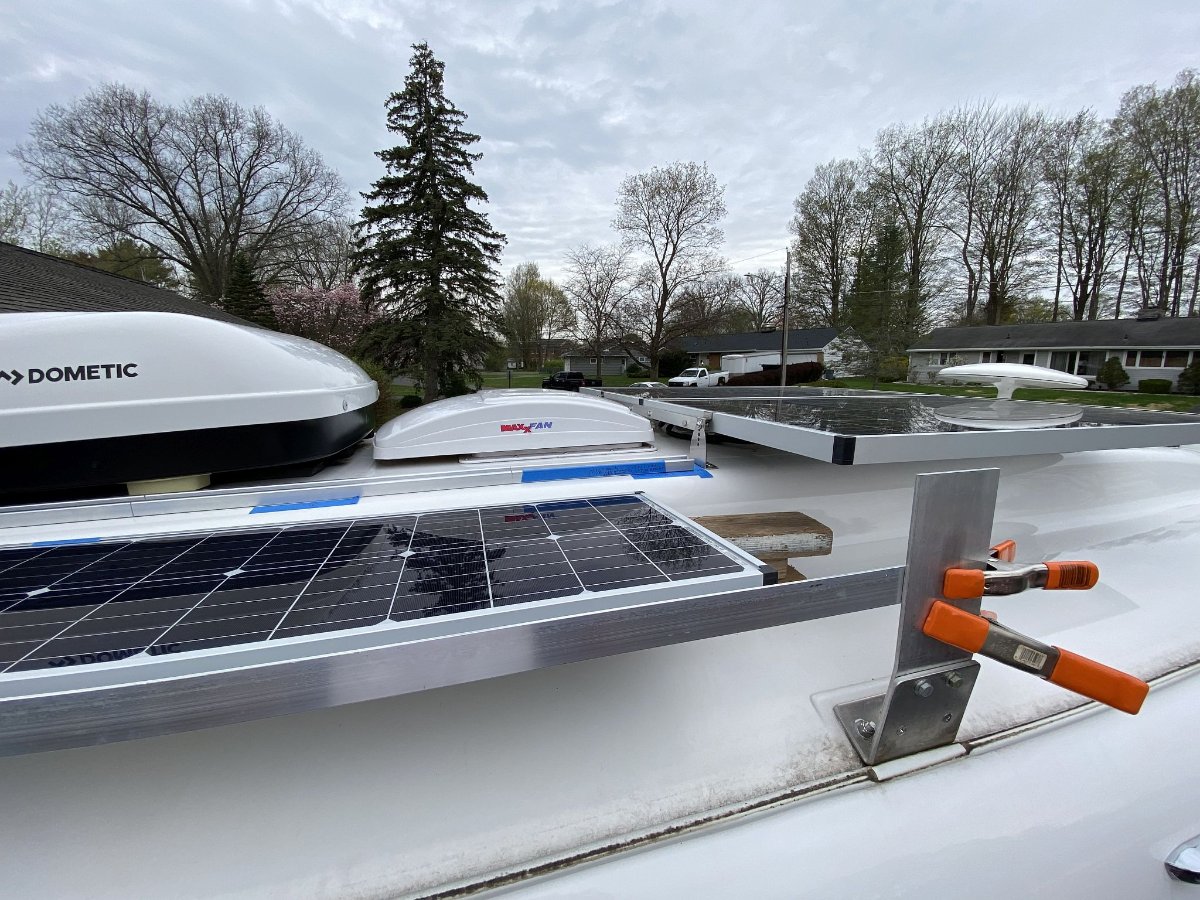
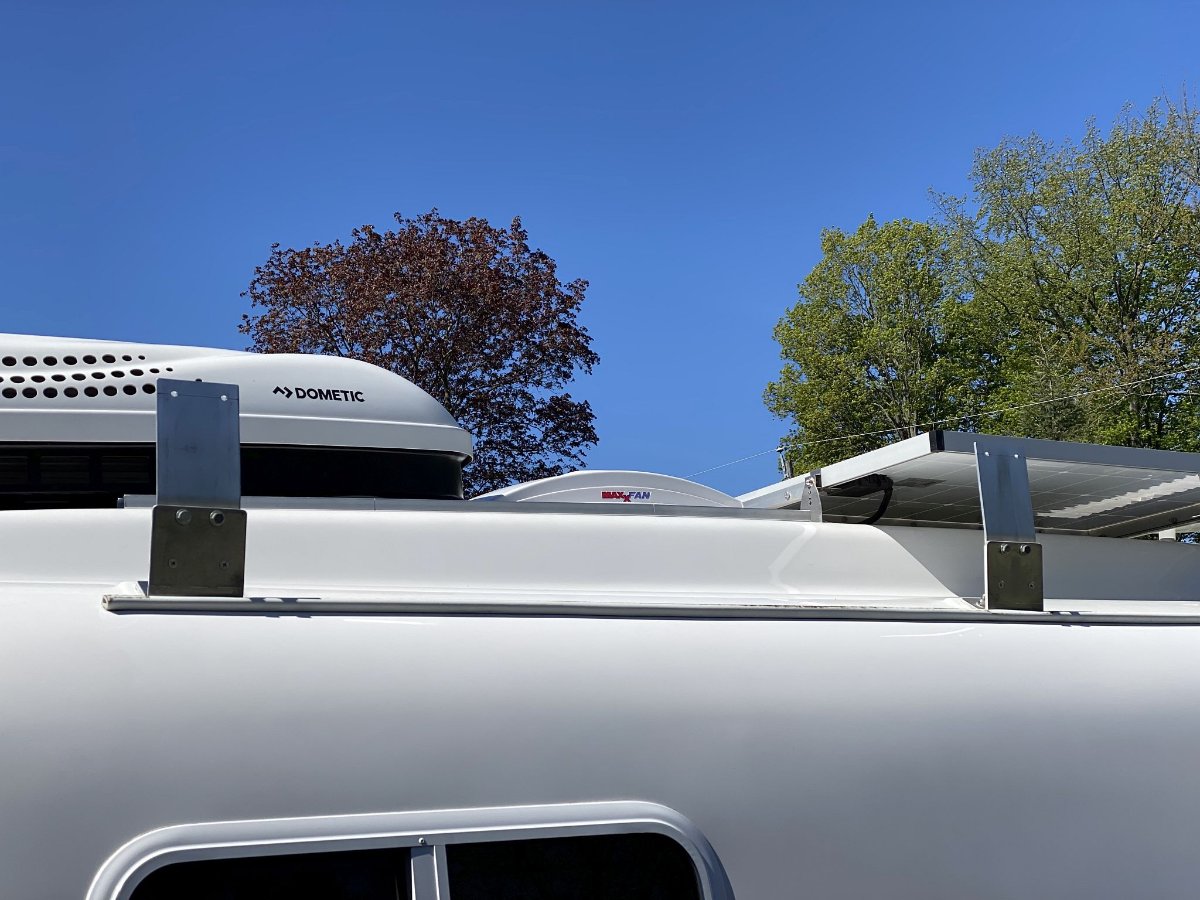
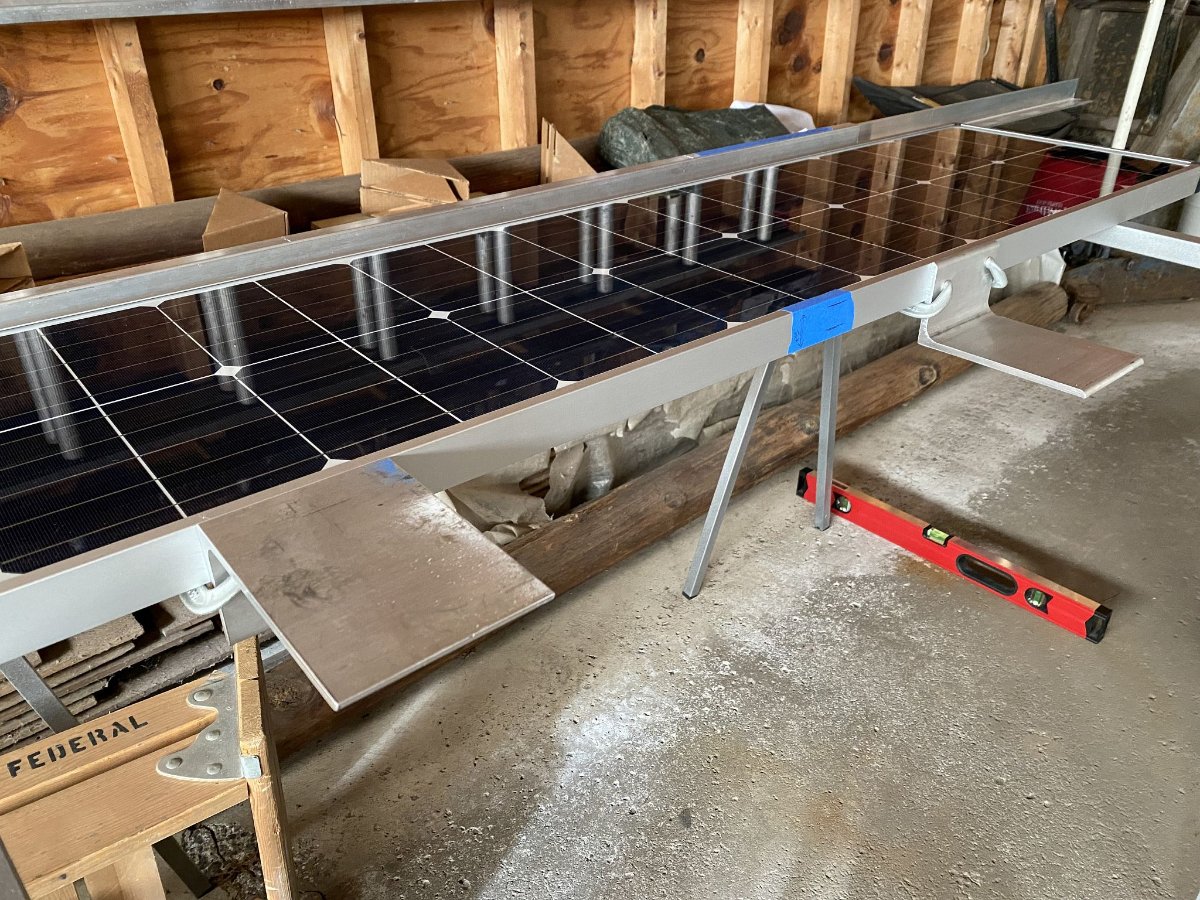
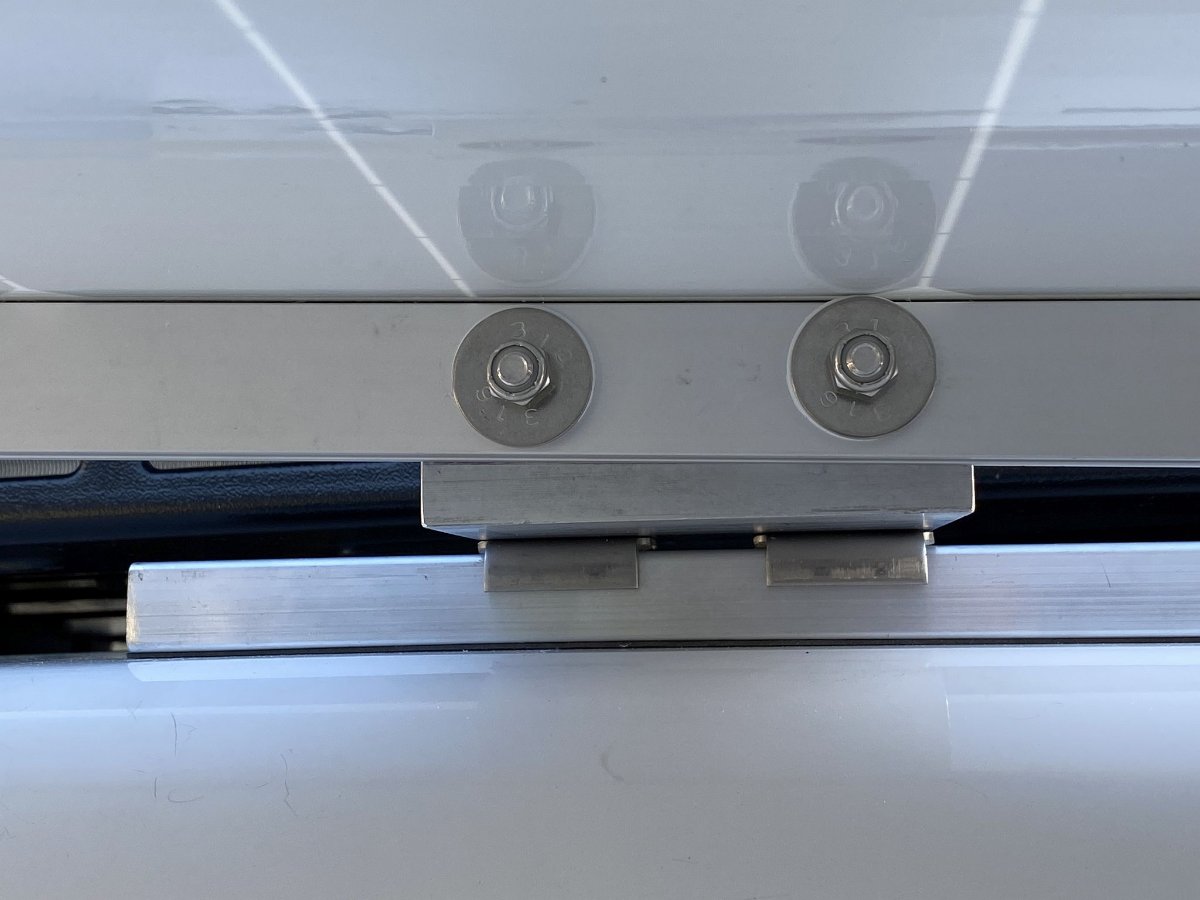
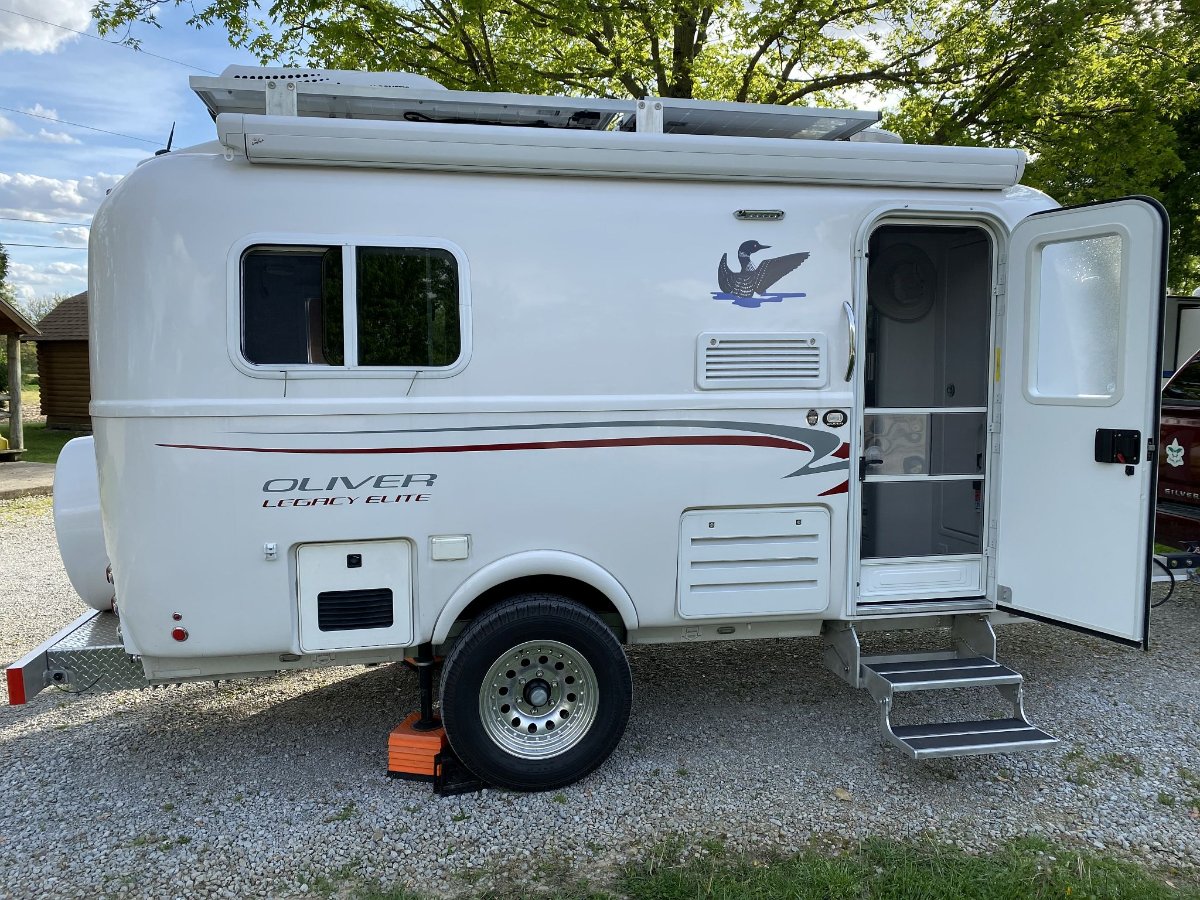
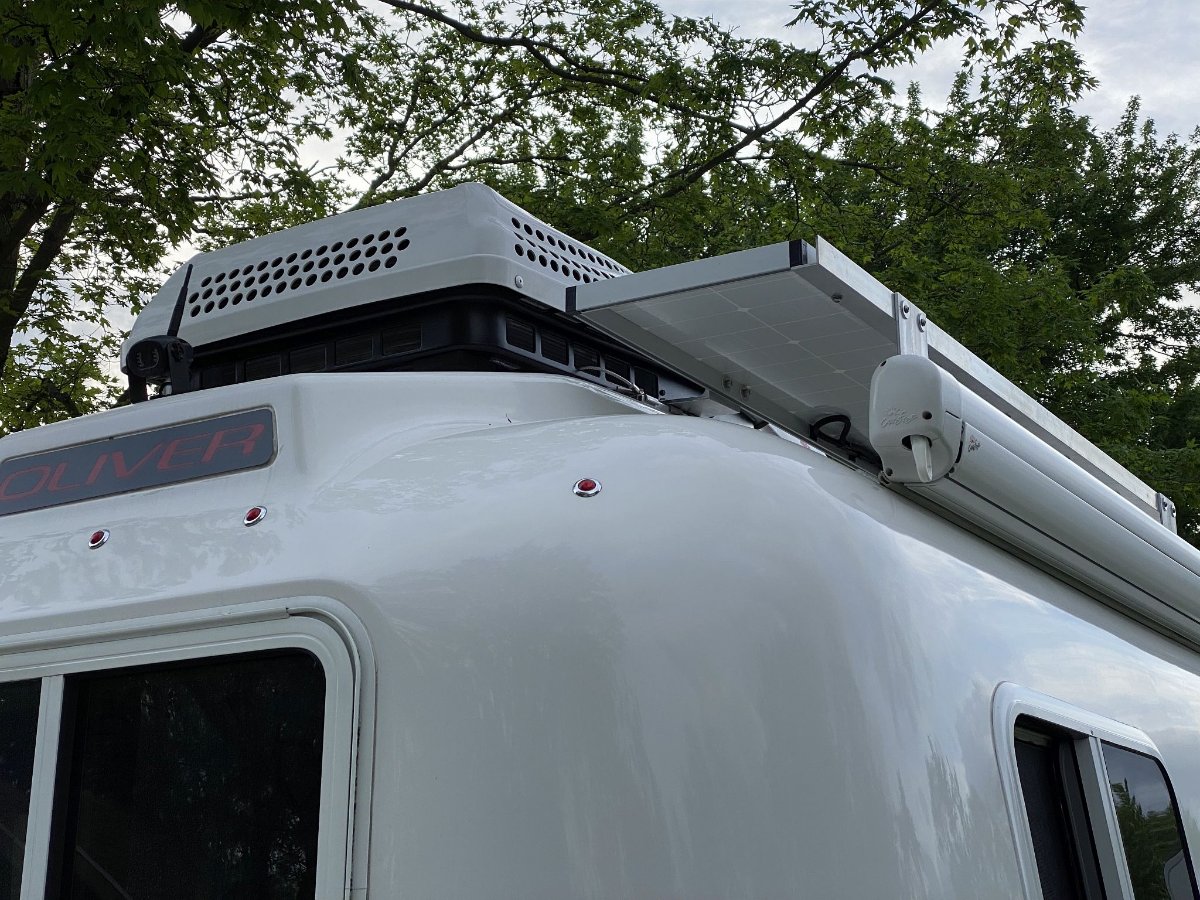
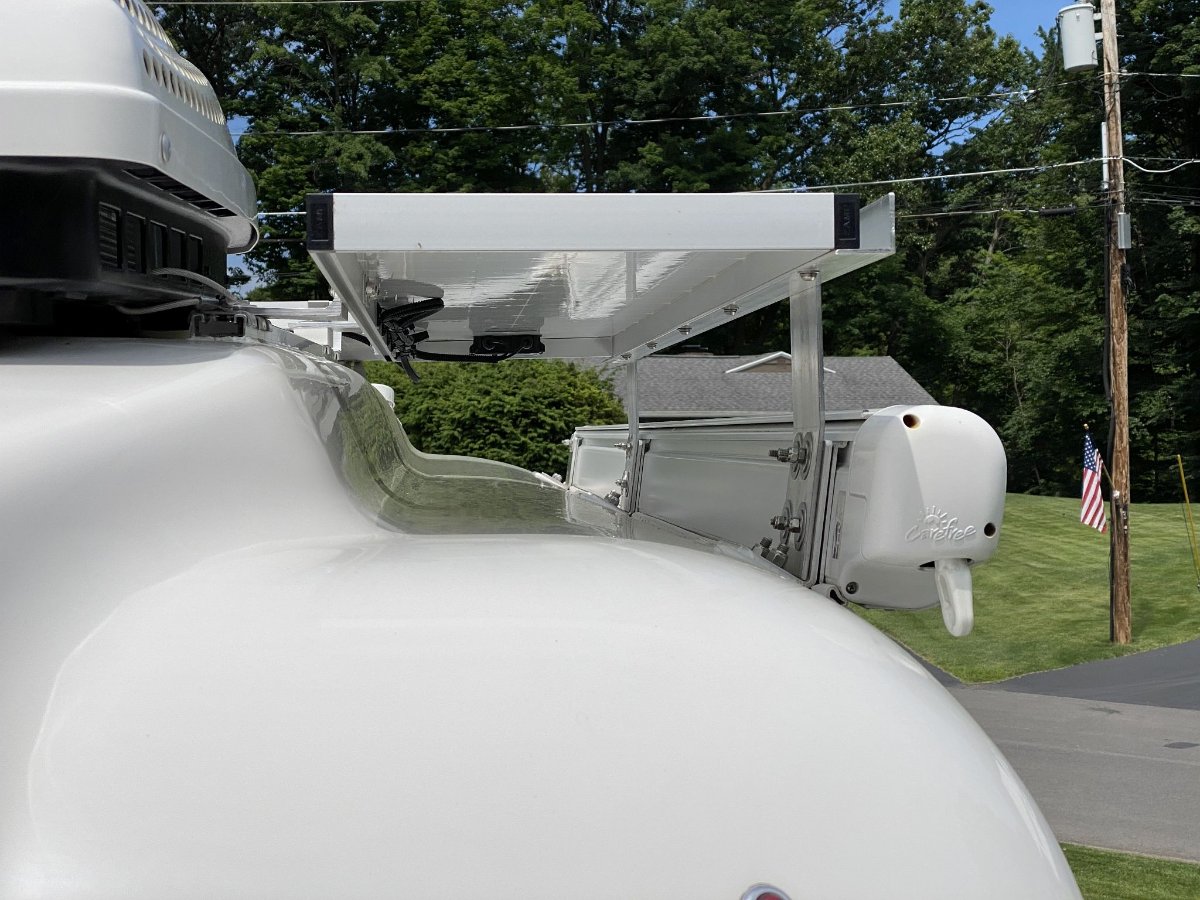
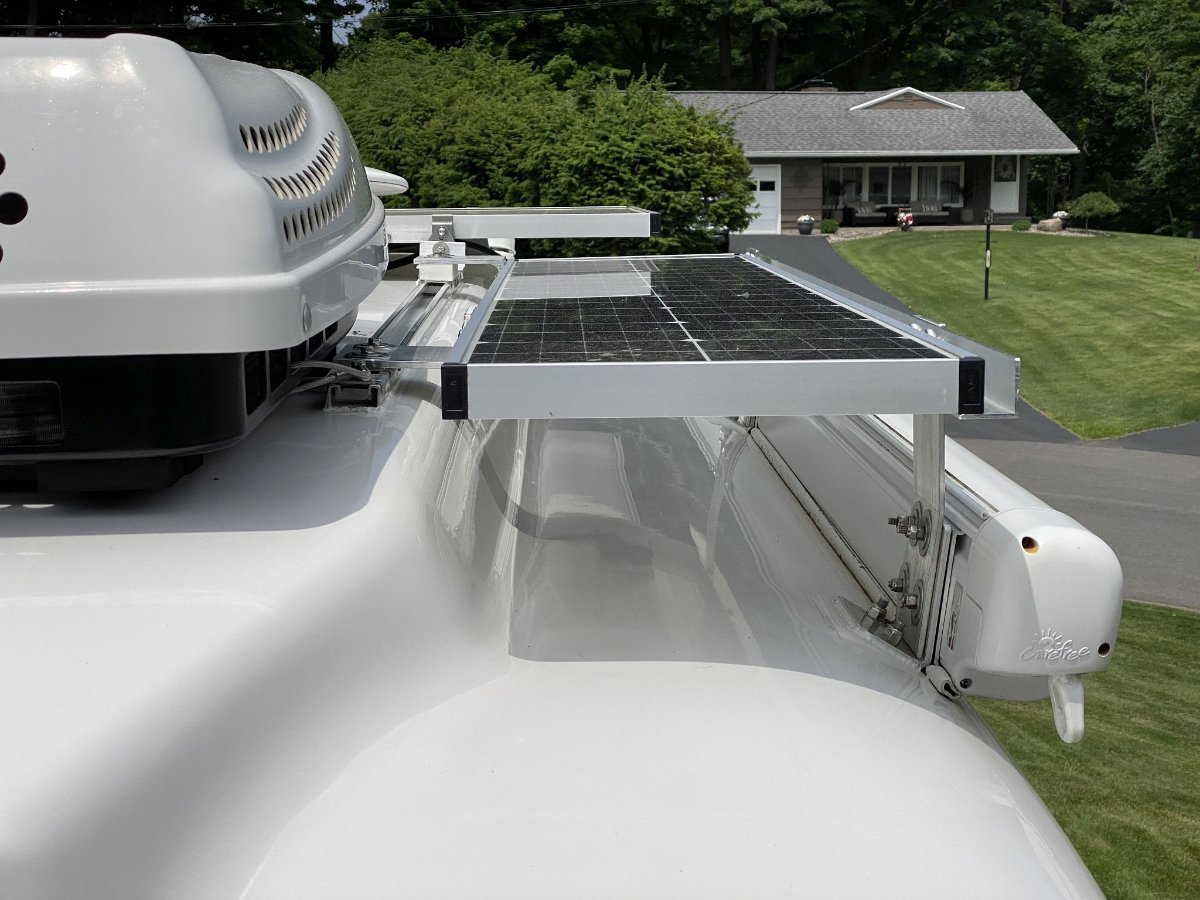
The LE only has 3 awning brackets. Using the front or middle bracket directly would cause interference between the existing panels and the new panel, so I used an offset from the middle bracket, plus the rear bracket. Awning off: Bracket alignment and attachment. Bottom 2 screws are flat-head so as not to interfere with awning attachment. Upper 2 hex head bolts are temporary until the awning is remounted through those holes. From memory, the awning brackets were something like 9 degrees from vertical, so the new solar brackets needed to be bent in order to be vertical where the solar panel attaches on the top. You can never have too many clamps and spacer blocks! Curbside brackets cut to proper height and mounted. Note the inboard aluminum strut channel is VHB taped to the roof... it had to be partially cut in 2 spots in order to be able to bend the flat, continuous base to follow the slight front-to-back curvature of the roof while still keeping the strut in one continuous piece (for maximum VHB tape contact area). Inboard brackets made from large aluminum angle, one rightside up and one upside down to follow the curve of the roof. Rear inboard angle bracket mounted "upside down" and at a slight angle to follow the roof curvature "Belt 'n suspenders" bracket at front of strut channel to help keep strut from lifting with wind load on the panel. Rear attachment to strut channel, with safety cable to help keep strut/panel from flying off the roof if VHB tape lets go. Top view of almost-completed installation Completed and in-service!
 4 points
 -
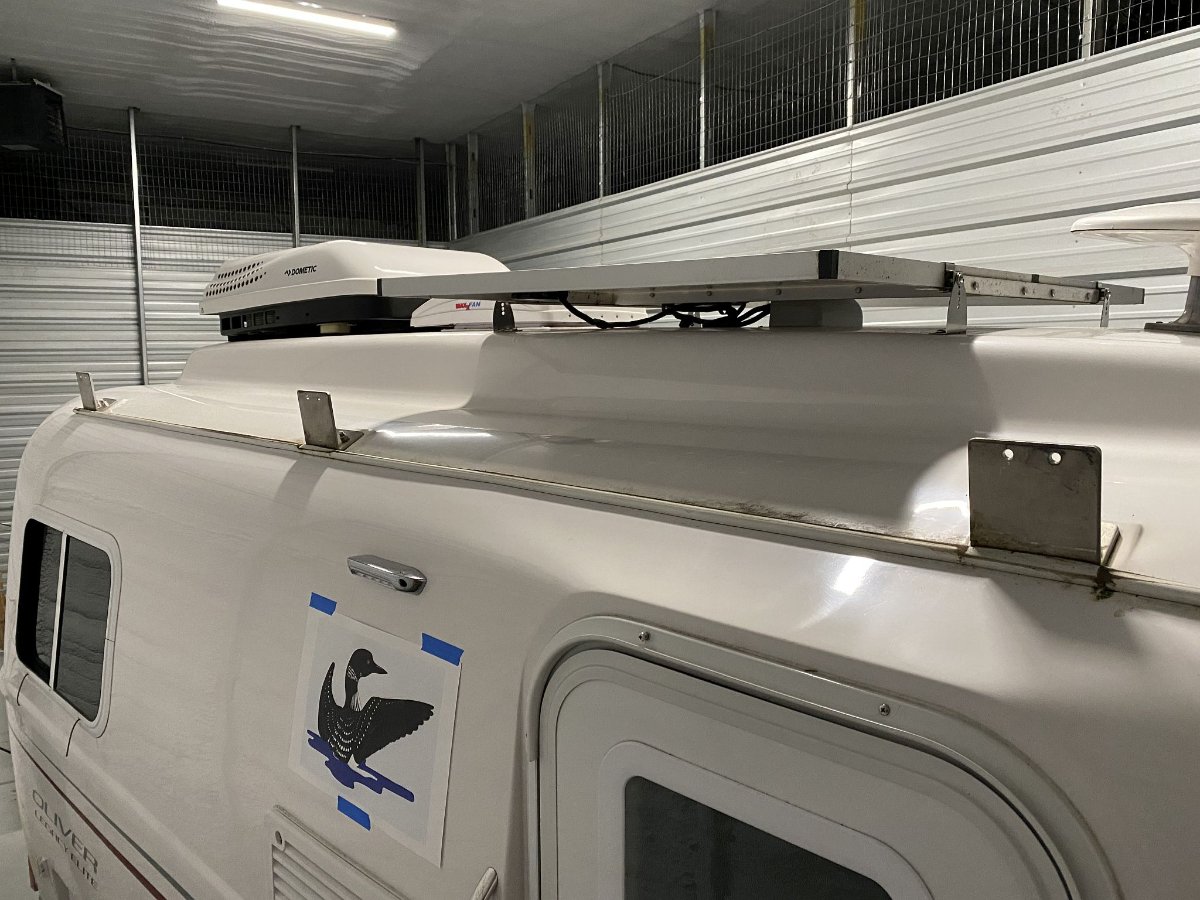
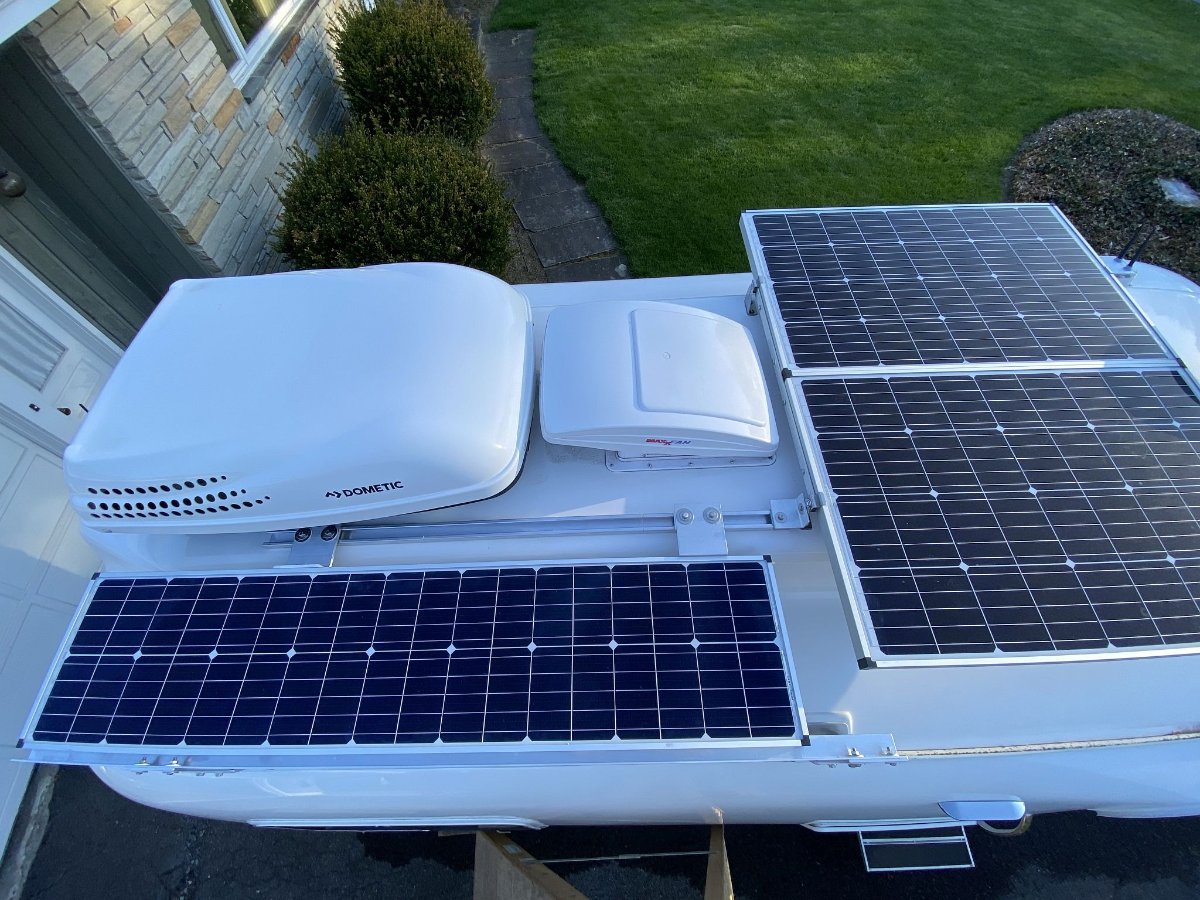
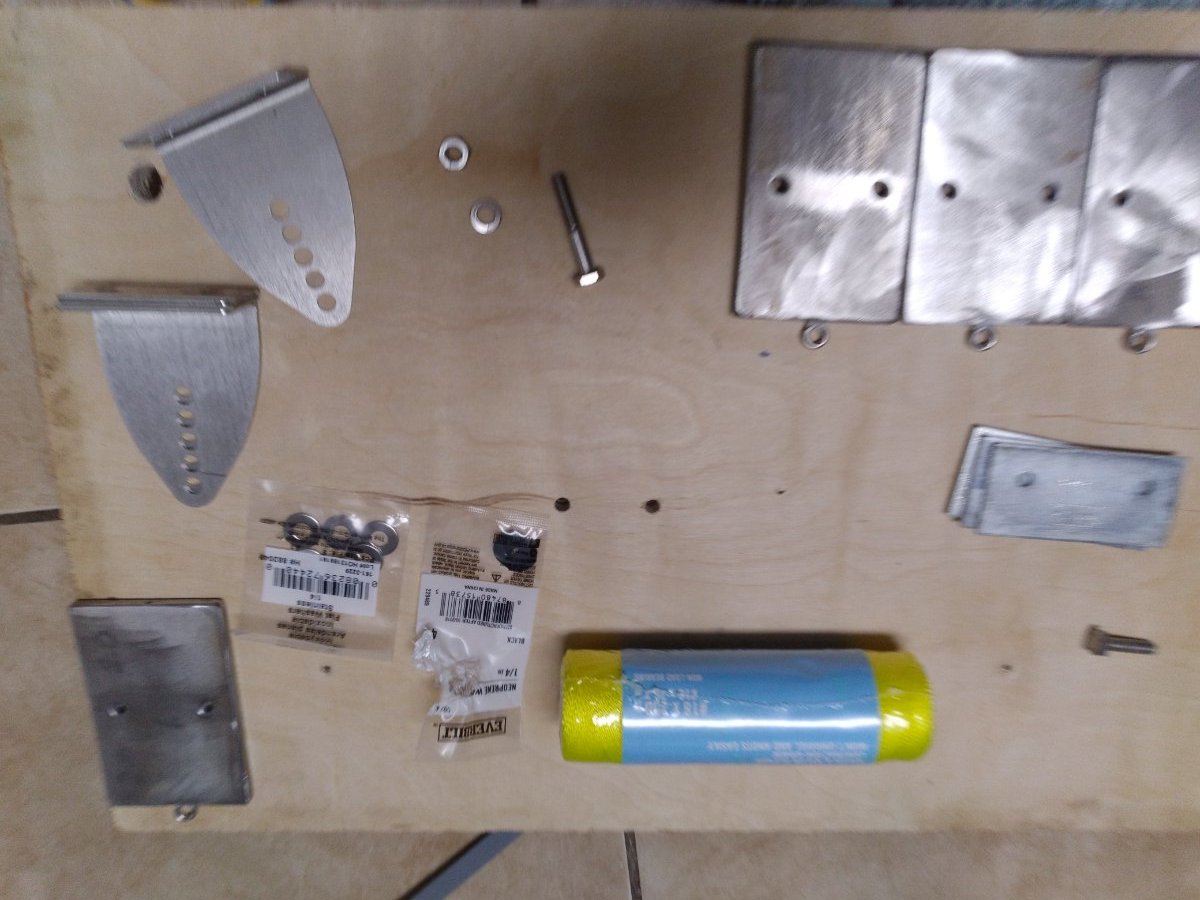
Yes, it is possible to add solid metal mounts between the hulls without cutting up the fiberglass, I know because I did it. My trailer came stock with the solar panels already attached. However, back in 2021, my solar panels got damaged and the mounts got bent. Thankfully, it was only the solar panels and their associated mounts that got damaged; the fiberglass was perfect. I attempted to take off the mount by unscrewing the bolts, but they just turned in place. I would have hoped the factory would have permanently attached the nuts to the underside plate, but they did not. I called the factory and spoke with someone (don't remember who, it was almost two years ago though) who advised the only way to get old mounts off was to either cut into the inner fiberglass hull to get a wrench on the nut, or to try and cut off the bolt from the top. Furthermore, I was advised to attach new mounts with hardware, I would still need to cut into the inner hull. I detested the idea of cutting into the inner hull, and so I found a way around it. I took off the MaxxFan which is only held on by four screws to its mount. This allows access to view the area between the hulls. You'll notice when you do this, the factory epoxied a plastic PVC spacer around the perimeter of the MaxxFan. You'll need to drill a hole in this and it will allow access to the space between the two hulls. I bought a cheap borescope off Amazon with a long extension wire. This allowed me to view the nuts and plates used by the factory. I used a piece of metal bar and duct taped a wrench to it. I was then able to insert the metal bar and carefully manuever the wrench around the nut. Then with a friend's help, he unscrewed the bolt from the top side. I had put some duct tape around the bottom of the wrench which thankfully stuck to all 8 nuts, allowing me to remove them (I put new duct tape on each time. Now, on my hull #220, which is a 2017 model, the factory had not permanently attached underside plate. In fact, they didn't even use a high quality set up, they only used some Fiamma awning metal plate spacer for each solar mount; it looked terribly pathetic, and they weren't even epoxied to the underside of the outer hull. They just fell down when the nuts were removed. To remove them, I duct taped a magnet to my metal bar and dragged them out one by one. Now, the dilemna was how to attach the new solar mounts without cutting up the inner fiberglass hull. Here's what I did: I sourced some 410 stainless steel that was a 1/4 inch thick. The factory had used screw and nuts for 1/4 x 20 threads, which results in a nut thickness of around a 1/4 inch. I used 410 stainless steel because it magnetic which would allow me to use a magnet to grab it if it wasn't in the right place. I cut the stainless steel to around 2 or 2 1/2 inches wide and around 3 to 4 inches long. This mimicked the Fiamma metal plates the factory used, except my steel was thicker and stronger. I then paid a machinist to drill and tap the metal plates for 1/4 x 20 threads. I also added an eye bolt and put a string through it so I could easily drag the plate back if necessary. You can see the plates in the above picture. You can also the Fiamma plates the factory used on the middle right of the picture. To get the plate in position between the hulls was tricky to figure out, but ended up being easy to attach once I figured it out. I put two pieces of string down each hole for each mount. Prior to putting the string down, I attached a piece of metal. I then inserted my magnet on the metal rod, which connected to the metal on the string, and I was able to drag the string to the opening I made at the MaxxFan. I then threaded the string through the holes in the metal plate. I then dragged the strings from the top of the outer hull, which put the plate right underneath the old holes for the old mount. To attach the mount, I took a 1/4 x 20 threaded brass screw and drilled it out so it was hollow inside. I then put the string through the hollow bolt. While pulling tight on the strings, I threaded the hollow brass bolt into the stainless steel plate. Once that was attached, I used screws and attached the other side of the plate. I then removed the hollow bolt and attached another regular bolt. I know I'm not describing this very well, but I thankfully made a few cellphone videos when I did it back. I never bothered to make it into a youtube video, but I have Saturday and Sunday off, and I'll turn my old footage into a quick clip and upload it Sunday. Once you see the video it'll all make sense. The end result I was able to attach new solar panels and mounts, with underlying metal plates, all without drilling into the inner fiberglass hull like the factory told me to do. The only cutting I did was to the spacer around the MaxxFan, which is easy to repair and is completely hidden by the MaxxFan trim. Anyway, I'll post the link to my Youtube video on Sunday.
4 points
-
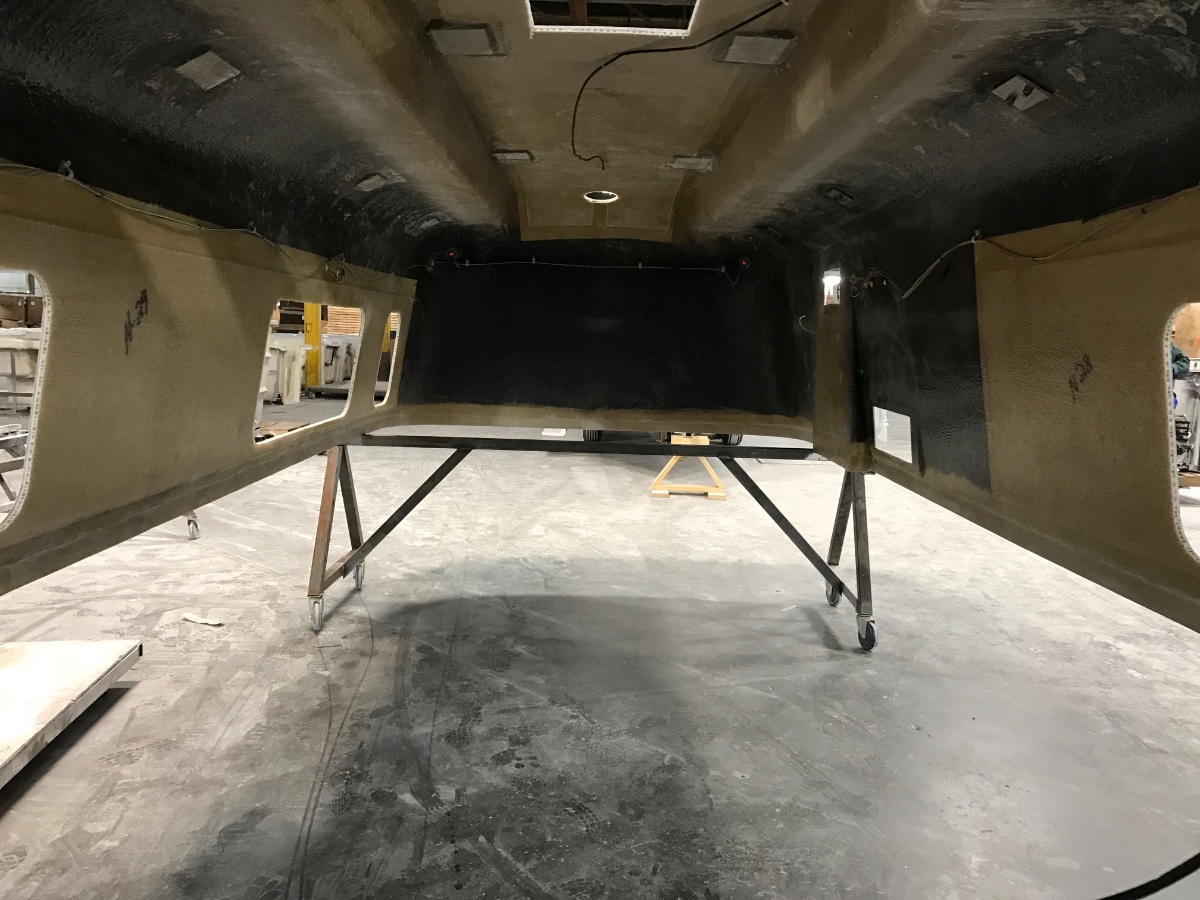
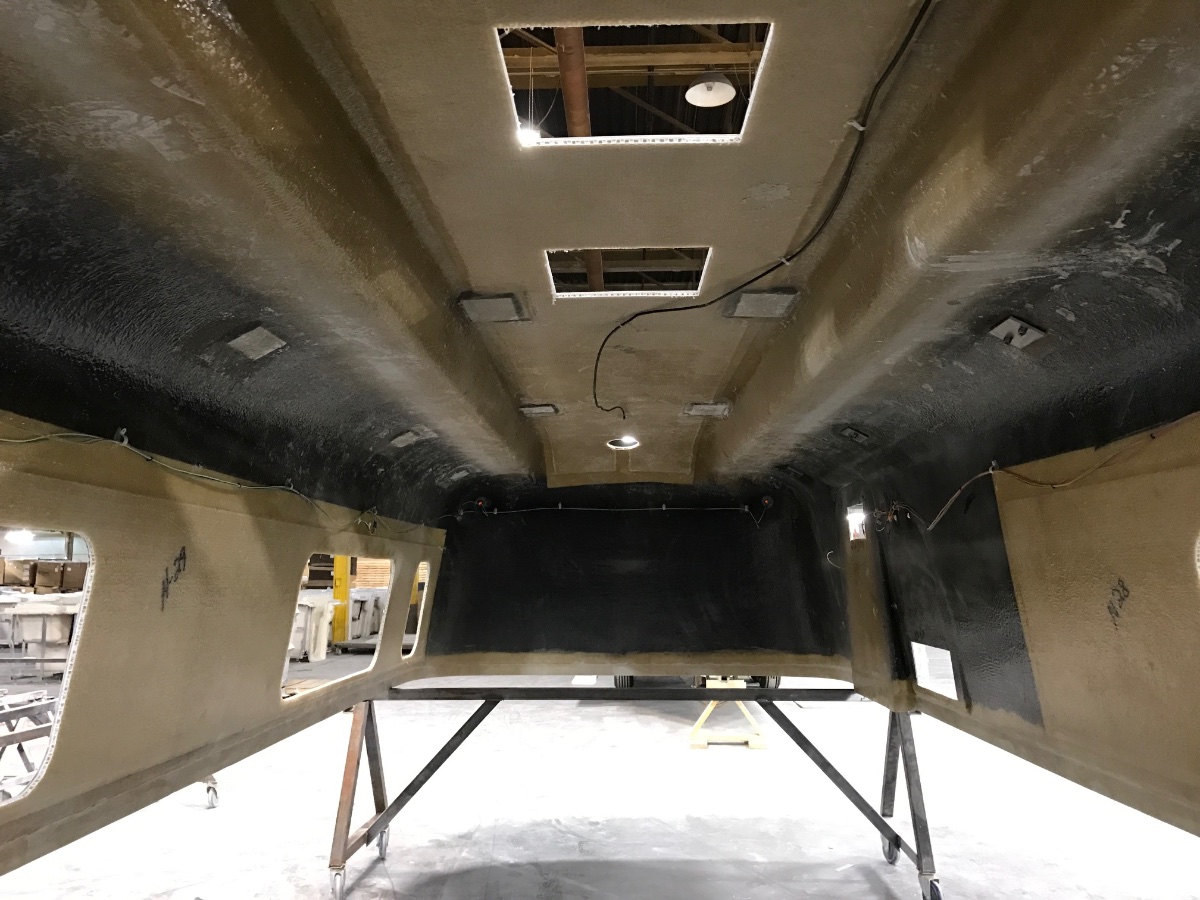
My 2017 hull #208 has the solar panel backing plates. My trailer did not originally come with solar. ScubaRx helped me install the controls and wiring and Oliver service installed the panels. I have a photo that I took during construction of the underside of the outer shell that clearly shows the plates fiberglassed in place along with plates in all of the awning mounting locations as well.
3 points
-
I didn't have a choice, I live too far away from the factory, and my fiberglass skills aren't good enough to make a seamless repair. Thankfully, when my solar panels got hit, the weak point was the mounts, which is what bent, thus preserving the fiberglass, but all 4 mounts were too far gone to be easily straightened. Once I figured how to fix everything, it wasn't that hard, and didn't require that much patience. The tough part was coming up with the idea for the hollow bolt, and the decision to just tap and thread the plates themselves. If I had to do it over again, I could probably knock it out in about 4 hours maximum. Once you see the video, it'll all make sense.3 points
-
I have just investigated this very point: Can we file for a tax credit in regards to the solar panels, inverter and batteries for a newly purchased Oliver. I was extremely skeptical of the claims (in Oliver Trailer Owners FaceBook group). In the discussion, I think everyone was an Oliver owner. One was a licensed CPA with much experience and had researched the tax codes specific to the very questions that Oliver owners were asking. In addition, there were at least three that had successfully filed (under the advice of professional CPA's) and received their credit for everything (Panels, inverter and batteries) in 2020 and 2021. I (like some of you) found in the code where the batteries could be included only if they were used exclusively to store solar energy. This was the sticking point of the persons like me that felt it might not be possible, because we can also plug into shore power and charge our batteries. The Tax code is always lagging behind new technology and the common sense fact that no solar panel system can work without having a storage system as part of it. Beginning 1/1/2023 the batteries were clarified and can now be included. Tax code is written and when there are conflicts, CPA's and lawyers will argue and then precedent is established as courts make findings. There was much ambiguity from 2020, 2021,2022. There was (in the discussions) numerous persons confirmed that their CPA's were advising Oliver Owners to claim everything (panels, inverter and batteries), and the several that have successfully done so and received their tax credits. In addition, the IRS rules have already clarified this "sticking" point going forward in 2023. In all these discussions there were a least a couple that were going to file their personal taxes this weekend (using their trusted CPA) and I hope to hear back from them if there is any new info that comes out of it. Another point that came out of the discussions is that there is no concern with claiming an Oliver as a "2nd home". Prior years the credit was 26%, in 2022 it is 30% and I think 2023 goes back to 26% also. With a brand new Oliver, where the cost for the solar panels, the inverter and the batteries is very easy to itemize (because Oliver spells it out on your invoice)... capturing the total cost is easy. In our case it is $9,500 for the Lithium Pro package... and the sales tax of 7.25% my total cost was $10,189 times a 30% tax credit should equal $3,058. The form that needs to be filled out is Tax Form 5695 (Residential Energy Credit). I'm going to file an amended tax return (using that form) and the very worse that could happen is it could be refused... but based on common sense (it's still makes a good argument) and with enough persons that have already successfully done so, I don't think our tax credit will be denied.2 points
-
Observing the remarkable efforts documented above to add solar panel brackets, I am compelled to renew John Davies' recommendation that you consider flexible solar panels. I mounted an 11-watt flexible solar panel on top of a Pelican 1600 case 20 years ago to recharge batteries on extended river trips for my CPAP machine. I still use it. To increase my solar capacity, I added a second Pelican 1600 case, with a somewhat smaller, but more powerful 20-watt solar panel, last year. Flexible solar panels have gotten better and less expensive over the past 20 years. They are commonly mounted on fiberglass boats. If I were in your shoes, I'd be considering large flexible solar panels that can simply be screwed to the outer hull, rather than standard solar panels that require brackets. Below is a link to one option: https://www.renogy.com/350-watt-solar-flexible-kit/?gclid=EAIaIQobChMImNHpxvf5_AIVXjKtBh3qrQMFEAQYASABEgLXR_D_BwE2 points
-
dewdev gets the credit for the suggestion. I just shot the photos!2 points
-
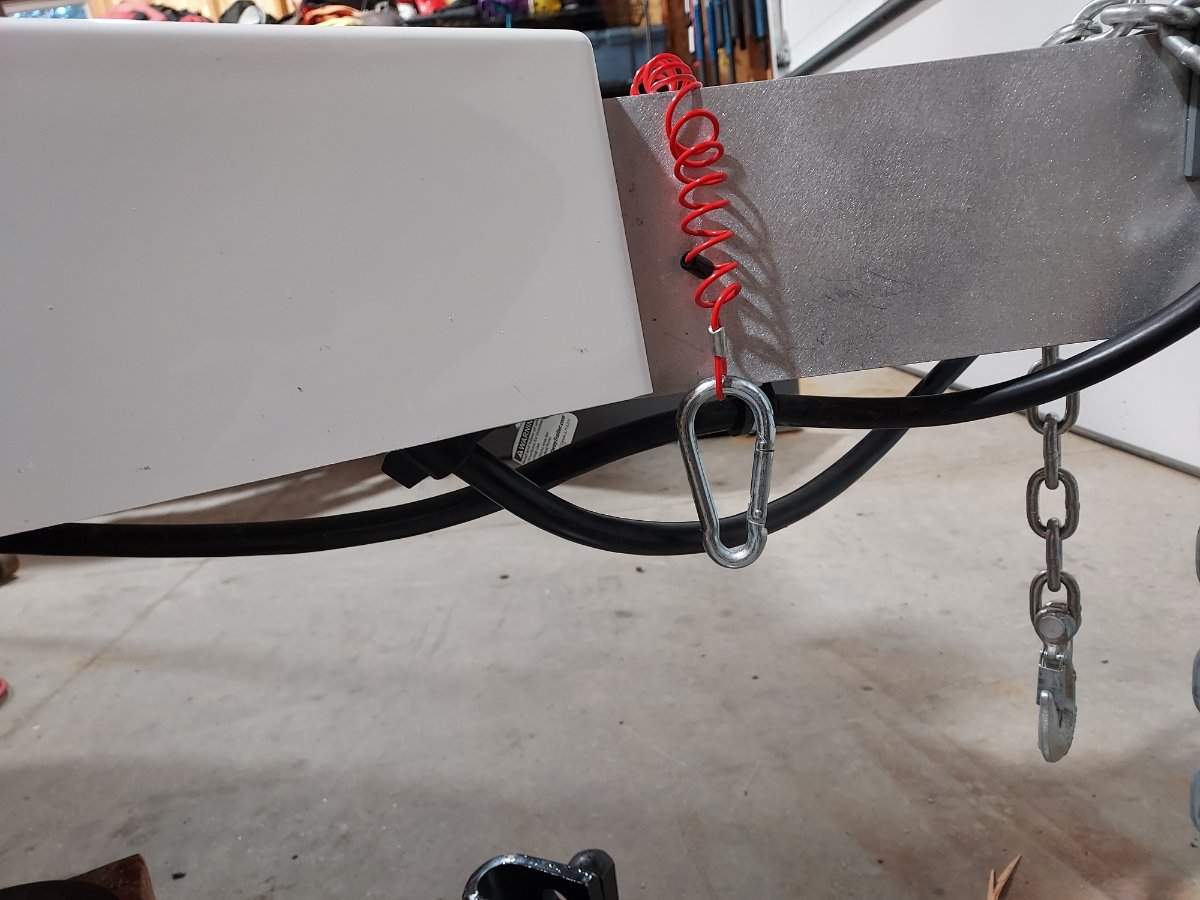
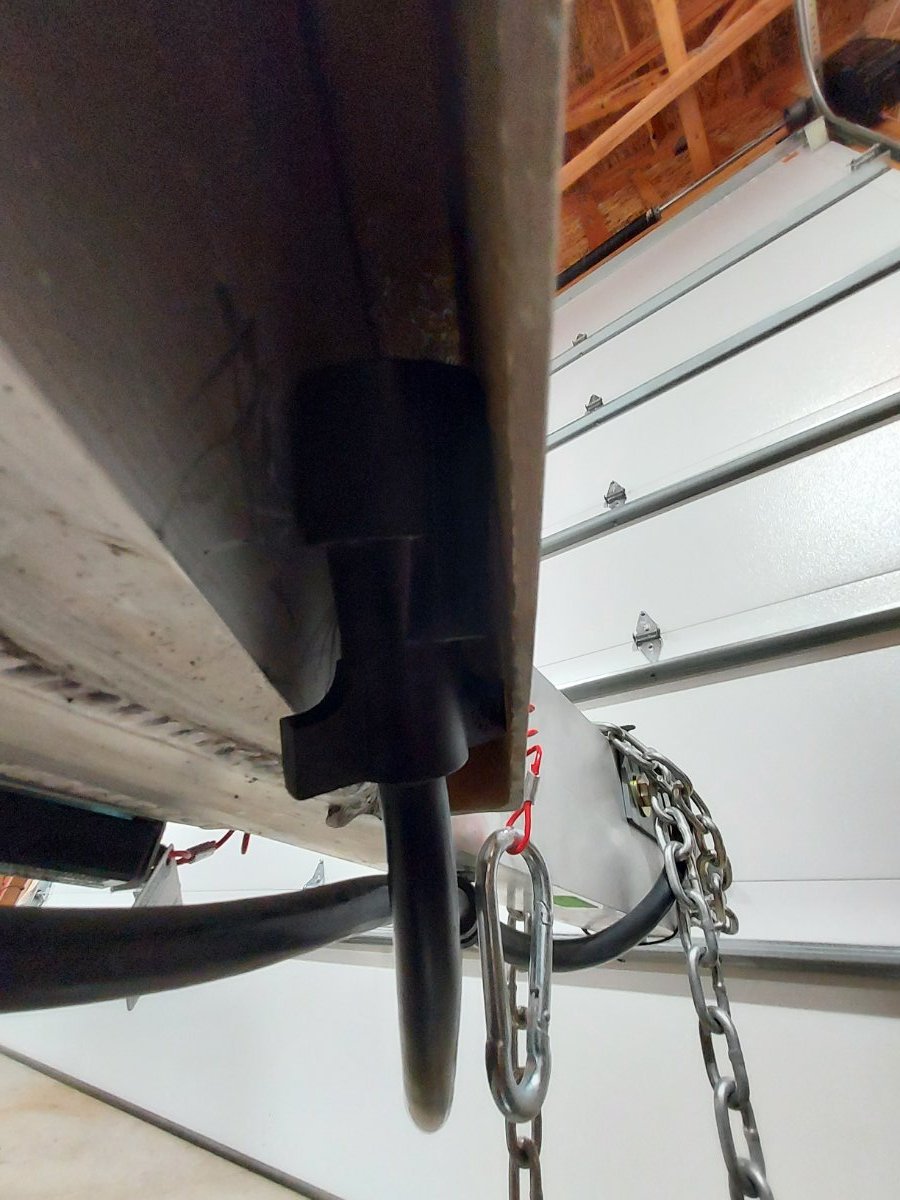
See attached photos. The first was shot from the side of the trailer A-frame. The second was shot from underneath.
2 points
-
It would seem to me if the battery is capable of being charged 100% by solar which I believe they are then they should eligible for the tax credit. If I boon dock for a year and never connect to shore power seems to me Im running 100% on solar. Just because you can charge them by plugging them in doesn't mean I ever will. What if I plug them into an external solar array it seems to be a gray area2 points
-
Minimalists!😜
2 points
-
The previous owner of my Ollie showed me the following storage procedure after he had a problem with the Ollie lights being on: Costs nothing. If you look at where the Oliver fiberglass hull is near the trailer's tongue, you will see there is a gap between the fiberglass and the trailer frame. This gap is big enough for the trailer plugs to fit up into and out of the weather. I have never had a problem with moisture or rain water storing it this way.2 points
-
Thanks, V Bistro! I thought I was sent the wrong size hoses. However after replacing the first hose , it leaked around the hose by the Acme connector. I replaced with the other hose I had been sent (package of 2) and the second hose leaked from the same area. Will be sending back to amazon. Be sure to leak check after replacing. My original hose are back on and leak free. Moral for me...don't fix if it ain't broke! John1 point
-
Interesting, mine was built just after yours, but they didn't attach the plates. Maybe because mine is an Elite 1 and yours is an Elite 2.....? I was really hoping the plates were attached on mine, I was disappointed they weren't.1 point
-
Rvernerd: Thanks for posting the pictures. Your pictures are exactly how I do it. When first using the Ollie In 2018, the moisture problem (rear lights on) appeared. Tried a holder bracket mounted to the front storage bin but that was not the best approach. Have not had a problems since implementing the mentioned storage location. If the cord is not plugged into the TV it is stored in this location 100% of the time.1 point
-
Andrew, thank you.. I think I'm on a good path to getting my panels on the roof. "Stranded" (above in this conversation) has come up with a very cool bracket solution. I'm committed to AMG batteries for the foreseeable future. I have a Zamp controller now but open to look at new more efficient controllers w/ better battery management tools. a new controller would need handle AMG batteries now and lithium down the road. Because my roof is a clean slate, I will be able to mount my panel brackets within reason, anywhere on the roof. I'm open to panels other than the 170 watt zamp. I could leave the 170 watt panel I have on my truck with an umbilical cord to supplement what ever I put on the trailer. I look forward to talking when you get home. best1 point
-
They are from AM Solar. Andrew1 point
-
another Wow... love the creative solution. at this point I'm hoping to get the stock 340w panels on brackets w/back-up plates per Stranded's coaching. This will be a big win. I'm hoping these panels will do the job to service 4 AMG / around 400ah batteries. If we desire more panel surface after the stock panels are in place, I feel fortunate to have awnings /brackets on both sides of my trailer. Picking up on your installation ideas would make for a clean / solid solution for additional panels .. Very Nicely done.1 point
-
Stranded - impressive (and creative) repair!1 point
-
A couple of folks have posted threads detailing solar panel mounts utilizing awning brackets: https://olivertraveltrailers.com/forums/topic/3379-zamp-solar-panel-add-ons/ https://olivertraveltrailers.com/topic/added-2-90-watt-panels-to-the-solar-array-for-520-watts-total/ We did something similar on our 2018 LE... adding an extra 90 watt panel parallel to the curb-side awning, attaching the "outboard" side of the new panel to the awning mounts and the "inboard" side to a long (approx 3ft) piece of aluminum strut channel that was VHB-taped to the roof. As a belt 'n suspenders safety feature, the front end of this strut channel was bolted to one of the existing solar panel brackets, and the rear end was stainless steel cabled around one of the air conditioner frame vents. Lots of custom angles and tapered spacers to match up with the roof contours, but it turned out quite solid. We get up there and check the attachments a couple of times each year just to be sure. Might be possible to make a cross-frame between both awnings to support solar panel(s). We only had the one awning however.1 point
-
That’s what I’m talking about.1 point
-
Hi Brian and Sondra, Chris and Stacie Neuhaus here from Indiana. Exciting to know they are "breaking ground" on your new home away from home. I know you guys must be feeling the excitement build. The folks at Oliver are a joy to work with, almost like family. They make the whole experience a lot of fun. We are feverishly working on a total remodel of a very small retirement home we bought a couple years ago. The plan is to live in a very small house out in the country that will require minimal upkeep and free up time for travel and exploring seasonally. I'm getting to the end of the project just in time to move in and anticipate the arrival of our Oliver. We ordered our LE2 in November and have a start date in early March and delivery is scheduled for April 19. We struggled for a number of years ourselves with the type of travel trailer we wanted for retirement, but in our case we thought we needed room for toys. We've become more realistic in the last year and finally knew the LE2 was really perfect for the type of travel and camping we wanted to do during retirement. Thanks for sharing and we look forward to crossing paths and getting to know you and everyone in the Oliver family in the years ahead.1 point
-
I thought I responded to this query, so I apologize for the delay. We bought the VMAX XTR-235AH marine batteries and they did fit in our 2019 LEII battery tray but required me to strap the long way on the battery tray as indicated in our posted pictures. I purchased directly from the VMAX distributor in Michigan and order on Monday or Tuesday and received the batteries on Thursday or Friday of the same week. I did take the time to insure they were fully charged before installing including letting them sit for 24 hours. The batteries have only gotten stronger since the install. I did do a test early on to insure that I wouldn't have a recurrence of the issue running the furnace for several days after a full charge. They worked well. I am also going to try to keep the SOC above 80 percent to make sure we get the number of cycles expected. This important for AGM or VRLA deep cycle batteries.1 point
-
Frank, that did it! Thank you so much.1 point
-
A word of caution. A jumper wire can turn on the lights. But, as was done at the Rally, the bright LED lights of the Ollie can be offensive to other campers. So maybe should only be done at an Airstream Rally to outshine them?1 point
-
You guys are nuts - you can't track a Bigfoot with a trailer in tow, no matter how rugged it is. You've got to go for a basecamp / chase vehicle combo. So just concentrate on softroad capability for the trailer, and then kit out your tow vehicle for when you're on the hunt. I'd recommend the Elite I and Mr. Davies' favorite Landcruiser.0 points


-
Recent Achievements
-


")


")


")


")


