Leaderboard


Popular Content
Showing content with the highest reputation on 11/13/2023 in all areas
-
We all get by with a little help from our friends. 😊👍🏻👍🏻3 points
-
FYI, an upgrade to Lithium Iron Phosphate (LiFePO4) batteries would require many other upgrades as well, probably including some of the wiring in your trailer, and likely the inverter/charger. Although I am a LiFePO4 fan, such an upgrade does not make sense in your use case. You just need batteries to run your 12V systems in between shore power hookups. I recommend avoiding 12V Flooded Lead Acid (FLA) batteries (like the ones that come in most cars and trucks) because they require maintenance, and if too deeply discharged, can be permanently damaged. It would be worth the extra cost to me to get deep cycle Absorbed Glass Mat (AGM) marine batteries, as they are sealed, never leak, and do not require periodic checking and top-off. As I recall, the AGMs installed by Oliver were 6V wired to produce 12 Volts. If yours are 6V, it would be easiest to replace them with identically-sized 6V batteries, wired the same way. 12V batteries would require a different wiring configuration. I recommend you buy 6V batteries providing the same number of amp hours (Ah) you have had, if you can find the right ones that fit in your battery tray. If you only buy only one battery, you may have an unpleasant surprise if it is not adequate to power your 12V systems as long as the originals did. This can be significant, for example, if you run your fridge on DC while on the road between shore power stops. I second the recommendation to check out Batteries Plus. If you take the trailer to one of their retail locations, they have knowledgeable salespeople who can help ensure that your replacement batteries properly fit in your battery tray, that they can be secured using the factory tie-down straps, that the positive and negative battery posts match up with the locations of your "old" AGMs, etc., so the solution will hopefully be "plug and play." And, you can swap out your old AGMs right then to avoid the core charge on the new ones. They might even remove the old batteries and install the new ones for you. As an old guy with a bad back, that would be important to me, because AGMs, like FLAs, have lead/acid chemistry, so they are heavy! Good luck!3 points
-
Not boondocking and assuming you are on shore power 100% of the time: I would answer just get one 12V battery and call it done. COSTCO. Also, keep in mind that your 12V battery system also fires off the brake magnets in an emergency breakaway situation. So having at least one is a must for several perspectives. GJ3 points
-
I've seen a few variations of rear bumper mounting for generators on other trailers. But if you made a permanent bolt-on mount on the Oliver rear bumper, that puts the generator right by the beds/back windows, bad for noise and VERY bad for exhaust fumes.
 2 points
 -
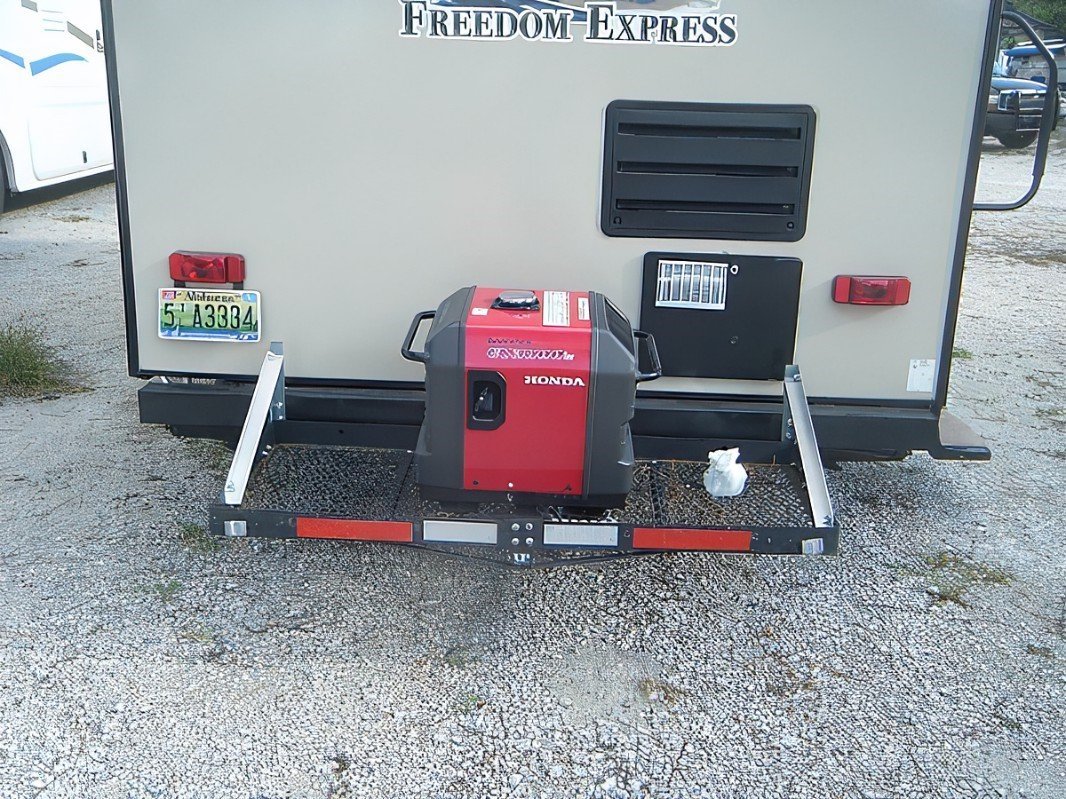
Hey, @Badger: Like mentioned above - there's really no option for a permanent mounting location other than the cargo basket or perhaps a covered aluminum lockable cargo basket. @Patriot has a well thought out mounting arrangement for his 3300W Honda, FYI. However, if you could give us an idea of your OTT's general configuration such as: Solar output (Watts)?, Inverter output (Watts)?, Battery bank storage capacity (AmpHrs), GENSET output (Watts), etc., we could help you with ideas of how to transport, use, and secure your GENSET. For example, when boondocking - our GENSET will stay locked in the TV and will likely not see the light of day unless there's many days of cloudy, dark, nasty WX where the solar modules can't keep up with replenishing the battery bank and they'll need "topping-off" using the generator. Everyone's OTTs are configured slightly differently and owners have their particular "style" of camping - this combination tends to drive different uses of their GENSET, if even needed at all. At a high level, there's no "right way" or "wrong way" of doing what you're asking - but we need more details to give you our suggestions. Glad you've reached out to the forums - there's a ton of expertise here and owners willing to share their ideas... Cheers!2 points
-
A filter is just for particles and bugs - for hard water with dissolved minerals, you must use a water softener, which will definitely help with scale. In fact it will clean out old deposits from throughout the plumbing in several months. John Davies Spokane WA
2 points
-
One other thing you might try is to charge the batteries slower. Setting 24 allows you to change the charger current. By default it is set to 150A. When I had poor 30A shore power at a campsite (low voltage), I changed this value to 25A, and it allowed the AC to operate for a while before the input voltage level fell to the point where the EMS rejected the input power source. Ultimately we wound up changing campsites. The setting can be adjusted in 5A increments between 5A and 150A.2 points
-
@Nan To answer your second question. Do a price comparison for sure. I recently purchased (2) AGM batteries for my Diesel Super Duty at Batteries Plus and they were really great to work with. https://www.batteriesplus.com/store-locator/nc/gastonia/batteries-plus-423 I would not go with Lithium if your know you are never going to boondock. Patriot🇺🇸2 points
-
Our Oliver Elite 2 #1125 was one of the 25 or so units that had balance beads in the tires from the factory. My understanding is that the wheel/tire combos arrived at the mother ship already mounted and with the balance beads installed, a fact that was unknown to Oliver at the time. Once this fact became know to OTT, they mitigated the problem by sending out a set of 5 valves that have a sort of filter screen to prevent the balance beads from plugging up the valve mechanism which would result in the valve being held open and lead to loss of tire pressure. OTT also provided a visa debit card loaded with $25 to cover the cost of a tire servicer to replace the valves. We did the replacement last year and assumed all would be fine. The trailer has been sitting for about 2 months, a couple of weeks ago when I was prepping it for a voyage I discovered the TPMS was not functioning due to the batteries in the sending units having gone bad so I pulled out my trusty tire gauge and set out to check my tire pressures, only to find that when I removed the TPMS (caps) that the air was flowing freely out the valve stem, exactly as it had been doing before installing the "filter" valves meant to solve this problem. I immediately replaced the cap to prevent any further pressure loss, kicking the tires to determine if they seemed inflated enough for the 60 mile journey to the tire shop, which they were. Discount Tire in Montrose, Colorado was prompt to break down the tires, including the spare, thoroughly clean out the balance beads, replace all the valves, balance the tires the normal way (without balance beads) and remount the tires on the trailer, took about 60 minutes and they had 4 techs working on it at the same time. When I went to pay the bill the service manager smiled and said, 'Don't worry about it, just come to see us the next time you need tires." I told him that they had nothing to do with the balance beads installation, he acknowledged that fact but held his ground and refused payment. What a wonderful experience. To any of you who have had to deal with the Balance Bead issue, the solution of the filter valves is inadequate, the tires need to be remove from the rims and the Balance Beads physically cleaned out...Be Aware!!1 point
-
Basically, an Oliver Owner has three choices on where to put his/her portable generator. 1 - Put it in the basket on the tongue of the trailer. 2 - Put it in the rear of your truck and deal with having to futz around with it when you want to use it. 3 - Put it in the garage at home and leave it there.1 point
-
Yes! And, its still a bad idea.1 point
-
Did I mention that this rear mounting thing is a bad idea?1 point
-
Bad for weight distribution, too. Many Olivers are already at or even slightly below the 10-15% tongue weight recommended for stability.1 point
-
There appears to be some confusion around setting number 28 which is a dedicated internal circuit breaker for the 3000 watt inverter. The factory setting must stay at 25 amps because it requires at least 20 amps of 120 volt input current to charge the batteries at the factory default 150 amp charging rate. Stated differently and ignoring losses, the inverter requires a minimum of 2,100 watts of 120 volt shore power to achieve the 150 amp charging rates (150 amps x 14 volts = 2,100 watts). 2,100 watts of 120 volt power results in a shore power draw of 17.5 amps (2100 watts / 120 volts = 17.5 amps). If setting #28 is set to only 15 amps, I believe that it is guaranteed the inverter will shut down and not charge the batteries. Once the battery charging stops, the inverter will after awhile reset, restore shore power and start charging the batteries again. The inverter starts charging the batteries at a low rate initially and slowly ramps up the charging voltage until it reaches a steady state 150 amp charging rates. If setting #28 remains at 15 amps, then it will never reach 150 amps charge rate because shore power will shut down again and the cycle will repeat itself over and over. OTT should verify the above, but I don't believe there is ever a reason to reduce the AC input limit in the inverter/charger to below 25 amps. Rivernerd's advice to use an extension cord with a higher amperage rating is excellent advice in all situations. The reason is to reduce voltage drop. The footnote to the table above that rich.dev posted states that the inverter will trip shore power and switch to battery power if the shore power voltage drops below 106 volts. An undersized extension cord can cause significant voltage drop. For example, assume the voltage into the house from the utility is 118 volts. Further assume that there is an unusually long 75 foot run of 12 AWG romex from the breaker box in the house to the wall outlet feeding the extension cord to the trailer. In this example, the voltage at the wall outlet has already dropped by 6 volts to only 111.96 volts, merely due to the 75 foot run from the breaker box to the wall outlet, assuming a 20 amp current draw at the outlet. Now lets assume that you use a 12 AWG (20 amp) extension cord between the wall outlet and the Ollie. Adding the additional 50 feet of 12 AWG extension cord will further reducevoltage at the Ollie by an additional 4 volts to only 108 volts. Everything should still work fine. However, if one were to use a 14 AWG extension cord instead of a 12 AWG extension cord, the voltage at the Ollie will drop to only 105.8 volts and will cause the inverter to cut off shore power (and battery charging) because it is less than 106 volts. While this situation is unusual and situation specific, everyone should probably own a "kill a watt" or similar meter to quickly eliminate voltage concerns. This can be inserted between the extension cord and the Ollie plug to observe real time voltage and power consumption into the Ollie. They are only $30 or less and have many beneficial uses around the house besides measuring voltage. https://www.amazon.com/P3-P4400-Electricity-Usage-Monitor/dp/B00009MDBU?th=1
1 point
-
I also encountered problems with air loss from Shrader valves which would not seat due to obstruction from balance beads. I suspect the problem affects more than 25 trailers. @AlbertNTerri indicated their hull number to be 1125. Our hull number is 990. As had been indicated by nearly everyone posting on this subject, Discount Tire has loyal customers for a reason. I have been doing business with them for over 25 years. I don't recall ever encountering an issue with their service, but do recall many occasions on which they exceeded my expectations. Fortunately, their nearest store is within 3 miles of our home.1 point
-
@Rivernerd, thanks, I was aware I should not use a traditional charger designed for lead acid batteries to charge lithium batteries. I will certainly post on the advice I receive from Oliver Service, and the results. Don1 point
-
@MobileJoy, I had overlooked setting 24, assuming that reducing the value for setting 28 (input breaker size) would result in lower charging current. Now that you have pointed this out, I will reduce the charging current to 15 or 20 amps. The symptoms I have observed lead me to suspect the inverter is trying to charge the depleted batteries at 150 amps, which is obviously not sustainable. Thanks very much pointing this out. Don1 point
-
We had the new valve stems installed by Oliver, but just didn't trust those beads. We took the trailer to a truck tire place where they removed the tires and the beads and vacuumed the inside of the tires for good measure. They reinstalled the tires and balanced the wheels with weights, and rotated the tires. No more beads.1 point
-
Thank you so much for teaching me what I need to do. I really appreciate it!!1 point
-
Richard, I know this is a little late in the game but I believe Badger's solution was to purchase the bonding plug that Phil mentioned.1 point
-
@Dave and Kimberly, it occurred to me that the current draw from significantly discharged batteries could be quite high, as you described. I have never tried to re-charge from such a discharged state. The most extreme case I recall was recharging from about 50% SOC after having the trailer in storage for a couple of months (placed into storage at ~50%, as recommended). I have tried changing the parameter 28 setting to 15 amps using the Xantrex app, to no avail. I hope to receive a call from Oliver Service tomorrow in response to the service ticket I logged. Thanks for the reply. Don1 point
-
I've never seen one physically attached to the trailer in any way other than in the generator (excuse me, cargo) basket on the front. This is a very poor idea, but I suppose you could fabricate some sort of carrier for the rear. Other than that, there's no other open space. Did I say that was a poor idea? Good luck, though...1 point
-
GJ - Actually, THAT pic was taken in my workshop. The two holes in the "L" plate are from those self tapping screws that I put in place (the first time) through the 4 inch circle that I cut in the floor of the cubbie above the MW. I could never tell if the "L" plate is screwed hard against the MW cavity ceiling because you simply can't see in there once the MW is in place. However, if it is not hard against then it must be fairly close. The "problem" is that the two screws are the only thing holding the MW in place and the "case" of the MW is simple sheet metal. So, even if the "L" bracket is hard against the top there will still be flex in the rest of the MW cabinet which will place strain on the only other contact point(s) the face plate. I frankly was surprised by how much the MW still moved. But, bouncing down dirt roads let alone expansion joints on our super smooth interstates just might explain a bunch of things. No, I did not epoxy or "liquid nail" anything in place - the simple friction fit seemed to do the trick. All I was trying to do was to keep the MW from bouncing and it appears that I succeeded. If you try to do something similar to what I did - be mindful of trying to not restrict airflow too much given the heat that can collect in and around the MW. It is rare that I use my MW for longer than 3 or 4 minutes in one sitting. But, for years it was the lack of airflow inside this space that prevented Oliver from offering something like the convection oven that is now available. Bill p.s. In re-reading your comments above I'm thinking that a better mental pic of the wood box(s) into which the MW is placed might be of some benefit. Basically, it appears to be a box inside a box or at least a three sided box inside a box with the three sides being the top and (at least ) two sides - I'd bet on a regular five sided box with one side missing - the front where the MW slides in, but, since I didn't want to tear what was there apart, I really don't know. Having said this - I was a bit surprised when Oliver Service told me that I would need to drill a 4 inch hole in the cubbie above. And, when I drilled that hole (it absolutely ruined a 4 inch carbide hole saw doing this - that fiberglass in really touch stuff - I looked in expecting to see the area where the MW was located. All I saw was what turned out to be the top of the "wood box" I mentioned above. Blindly, I drilled pilot holes for the self tapping screws and that is where the two holes in the "L" bracket came from. Next, I was worried that I'd play hell getting those two screws back into those two holes when it came time to put the MW back in place the second time. But, (maybe luck was on my side) it was a piece of cake given that I (obviously) slide the MW right back into the same original position. Hopefully this helps. p.p.s. Where did you dig up that pic? A moldy oldie for sure. I had forgotten that I even took the pic.1 point
-
If you don't boondock, agm or fla are your best friends. We bought our 6 or 7 year old agms at a local, trusted battery store. You can check pricing of similar batteries at big box stores and auto supply. Batteries are heavy, so shipping increases prices often on amazon.1 point
-
Believe me when I mention that there are actually several threads about this very topic. Just don't make us all LOL by changing the entrance light to a red one that you switch on and off. Since I would not have ever personal knowledge of such matters, I'll just postulate it must be Ferengi humor. GJ1 point
-
I was thinking that we would replace the filters annually, being part-timers. This is the time of year to empty the plumbing lines and tanks. I never have used any kind of RV antifreeze. So, I could change the filters after blowing out the lines when the filter canisters should be half empty. Once with our Bigfoot I had forgotten to reduce air pressure on my shop compressor prior to blowing out the lines. Was somehow lucky that time, but it's usually set down at 50 PSI or less. I've drained the HW heater 3 times now, since our June Oliver purchase, and every time there is sooooo much scale (just did it again yesterday). I use a cleaning wand and more and more scale keeps coming out. I could have literally filled a gallon jug with scale so far! I have a new anode to install this time. I'm also going to work the OTT vinegar procedure to remove scale from the cold-water lines soon. Yes, it would be easier to have an external unit, no installation required, though if I can get it nicely installed, it would be so much easier at every campsite or fill-up of the fresh holding tank.
1 point
-
It's like looking directly into the sun.1 point
-
Let's just stick to answering the questions asked. Which you mostly did, thank you very much. @GAP please pass on John’s very thorough explanation of the retrofitting. I doubt it could be improved upon very much. The new owners probably have a valid (albeit personal) reason in wanting to change out the composting toilet for a regular one because there are also "SOOOOO many reasons" to not want one. One reason is medical. Most folks don't discuss their intimate bowel habits with the other members on an open forum. Even though it's true that 90% of new buyers choose the composting toilet, there is a plethora of medical reasons that these are not the necessarily the best toilet choice for everybody. The greatest obstacle to properly using one may well be the need to keep solids and liquids separate. What if your “solids” are usually mostly liquid. There is a wide range of problems that can cause chronic diarrhea; some of the most common causes include irritable bowel syndrome (IBS), inflammatory bowel disease (Crohn disease and ulcerative colitis), mal-absorption syndromes, like celiac disease, in which food cannot be digested and absorbed. There are also infections such as C. diff (also known as Clostridioides difficile). There are, as well, many other less common causes of chronic diarrhea. There is probably no drug on the market that doesn’t include “diarrhea” among its many side effects. Ten percent of Americans have Type II diabetes. The most prescribed oral medication for that disease is Metformin, but its gastrointestinal adverse effects such as diarrhea, flatulence, nausea and vomiting can be a barrier to its use and quite possibly make using a composting toilet very difficult. I seriously doubt there has ever been a discussion between a sales rep and a potential new owner that checked off 'composting toilet' on their order list about any of these issues.1 point


-
Recent Achievements
-


")


")


