Leaderboard


Popular Content
Showing content with the highest reputation on 07/11/2024 in all areas
-
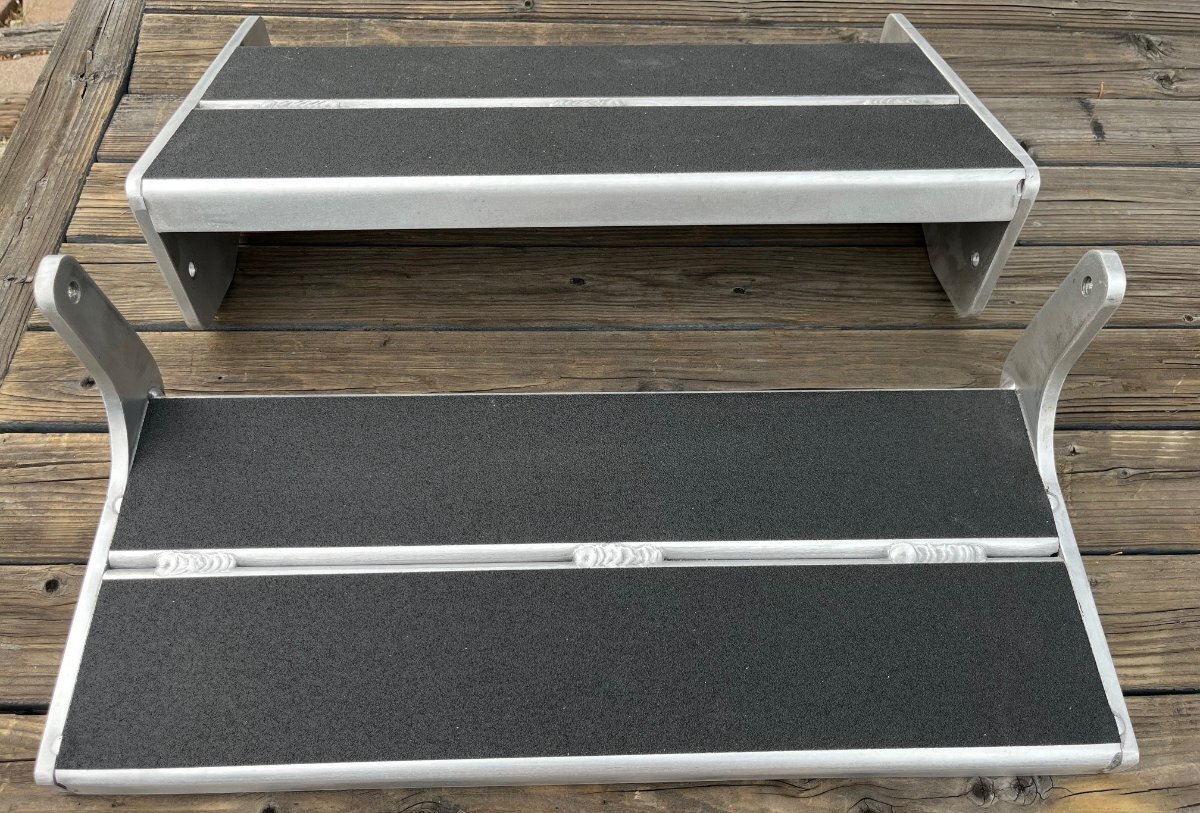
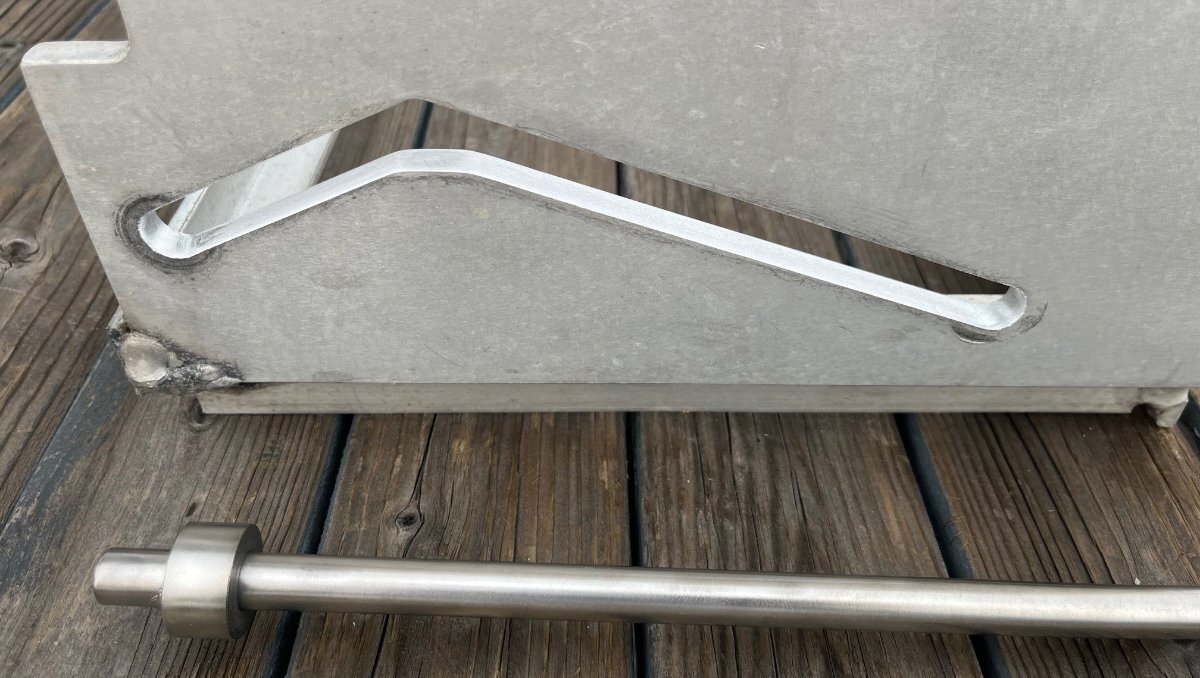
Hull #113 now being 8 years old has needed a lot of upgrades and M&R our first year of ownership. A point of contention as always been the manual stairs, the back-breaking effort it takes to pull them down, metal on metal, and more so to put them up. I had greased the moving parts, and it did not seem to help much. Pressure washing it last time, an edge of the slip-resistant tape came off. Prior owner had wrapped the steps with some kind of rubber cushion and that dirtied the steps where it laid. They looked awful. It was time for proper restoration! I disassembled all components of the stairs so they could be cleaned and reconditioned in my shop. If you do this, make sure you have everything you need out of the Oliver as it is very difficult to get inside afterwards! First, I used a heat gun to loosen the glue on the tape and scraped it off. The glue residue was intense. I used 3M General Purpose Adhesive Cleaner, and it barely budged it. The rest I sanded off using a cordless Dewalt orbital sander and near a dozen sanding discs. There are better sanding tools, but this is what I had. After more and more detail sanding the aluminum started to look pretty good. The key detail work to getting the stairs to operate easier was to file the groove the axle slides within (see pic 2). I used a small hand file and spent an hour working it in the direction of the movement. Most of the machining marks were 90 degrees the wrong direction. I only sanded this groove on the base as I did not want to detail that whole frame, just the steps. I used this product for the stair surfaces: Amazon.com: 3M Safety-Walk Slip Resistant Tape, 4 in x 15 ft, Anti Slip Tape, Adhere Without Wrinkling, Curling, Tearing, Shrinking or Lifting, Self-Adhesive Backing For Quick & Easy Application (610B-R4X180) : Industrial & Scientific After sanding and placement of the anti-slip tape, I applied an automotive ceramic coating to all the sanded aluminum to slow oxidation. Got to this point today. Friday I will have time to remount. The frame is held on with 4 standard carriage bolts and nylon locknuts. The two stairs are connected to each other with a short, geared press-fit specialty bolt with a Torx-55 head, that are not easy to remove. Pictures were taken before applying the ceramic coating. It should look great when mounted. Boy, I hate sanding and polishing work! 🤣
 6 points
 -
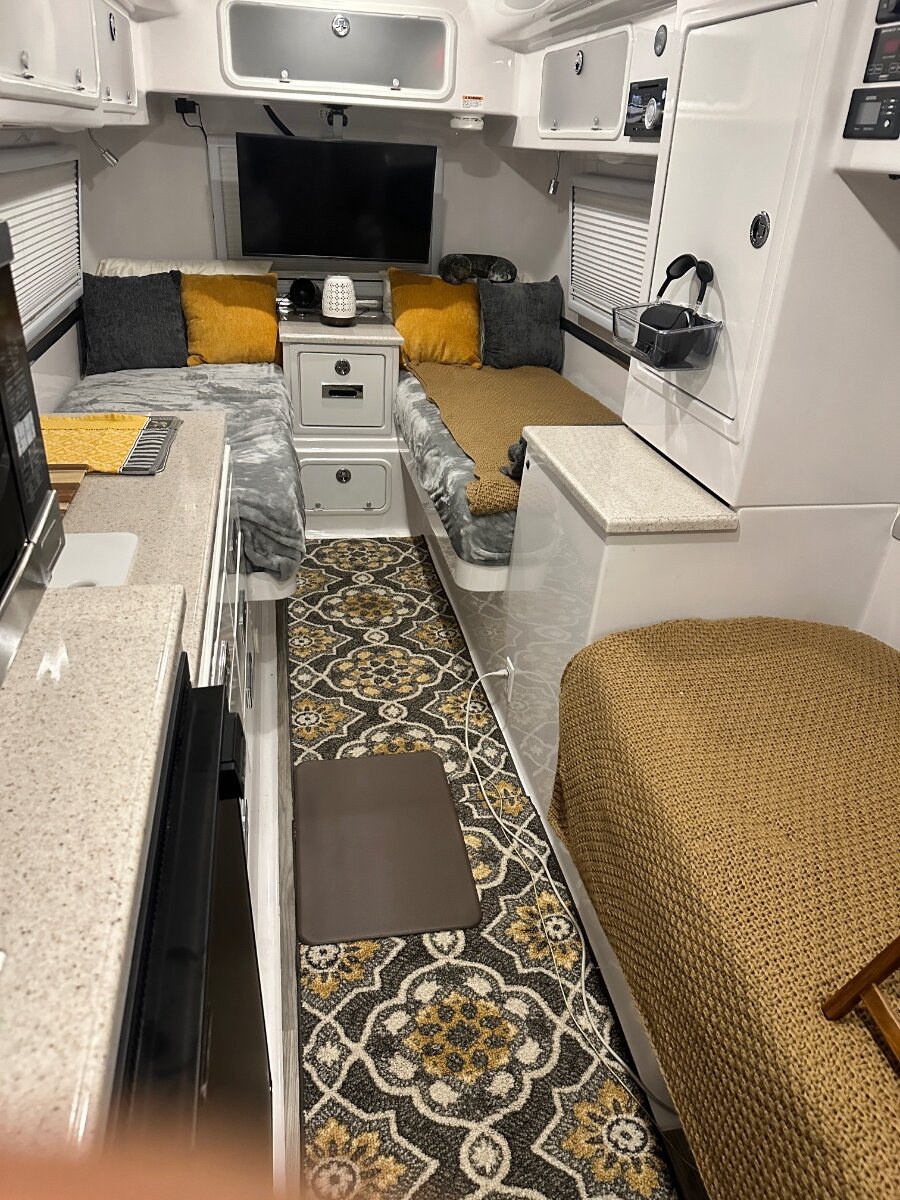
24” TV and dinette are no more, replaced with 32” TV and permanent “day bed”—dare I say, living room vibes?
6 points
-
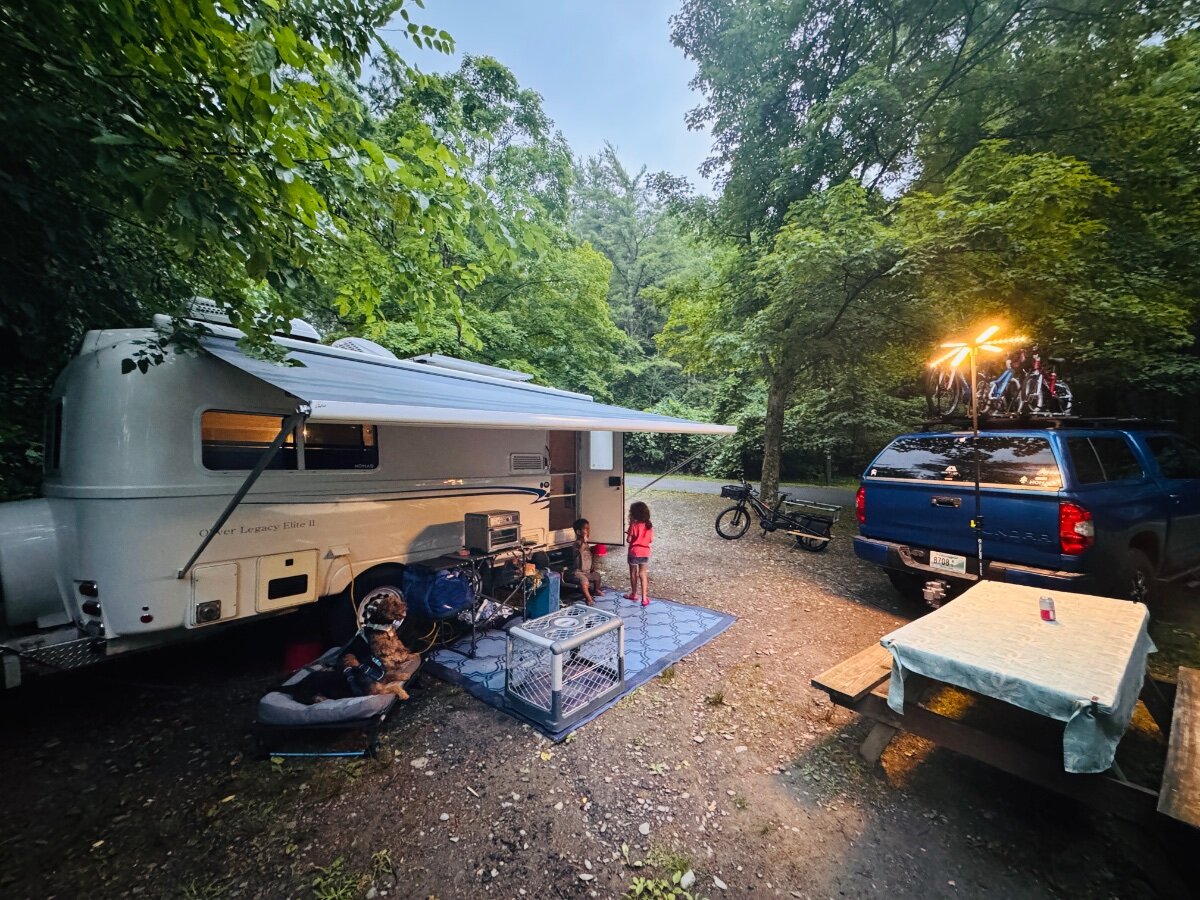
Sitting outside at Taughannock Falls, NY in a primitive campsite with 25% battery life left (920aH bank). I have been running the AC off and ON for 2 days. First time I have had to put to use all of my battery backups (GZ4K, etc). And yes most of the AC run time has been for the 2 knuckleheads we enjoy so much. Mimi is expecting again! And, I agree, It just depends how much boon-docking you plan on doing. I wish I had 2000AH! Best, Mike Side note: Starlink is working great!
3 points
-
John, that is good looking work. The oldest of these double steps have now been on the road for over 10 years. The first 50 or so trailers came with a folding single step. Many of the early builds had their single step replaced with the double ones. Since aluminum has some sort of natural tendency to stick or bind on itself, most all owners of trailers older than a few years have likely encountered this issue. I've always just hit it with a little WD-40 and called it good. MY solution in no way compares to what you've done, but it will last long enough to get you home from a month long trip when you can do a really good job. Thanks for the write-up.3 points
-
Bit the bullet today and I will soon be 600AH into LiFePO4! 🤣 These were $1,100 ea since I first heard of Epoch. They just dropped the price $100 and are running a 4th of July sale, 10% off another $100, and free shipping, NO sales tax, life is good!
3 points
-
Thanks for the heads up...order on its way. I'll review the initial post before installing and provide any updates on hull 505 installation. We're preparing for a trip from Seattle Area all the way to Nova Scotia then down to Florida by Dec. Craig (Galway Girl - Hull 505)2 points
-
Not sure what Jason's comments meant regarding new Dexter axles not fitting on @Wayfinder's hull....??? @ScubaRx's hull #050, as well as our #226 retro-fitted the D52's w/12" drums and Alcan 5-leaf spring packs - both are config'd with the EZ-Flex system. We'll be interested in hearing the back story....2 points
-
I purchased this LED fan last year, was going to install it… Hate to get on a ladder, on a tall incline, gravel drive, uneven ground. The OEM fan still works fine. Working on other upgrades as this items sits in waiting. One day…2 points
-
Well, as I just posted in the FB group. I can't get new axles on #110, they will not fit, but I did go ahead and get new AGMs for now! I just do not have time this year to fiddle with Lithium experimentation myself. They are installing my Dexter EZ-Flex system, which I had not yet gotten around to installing. A shame they spend so many man-hours trying to fit the axles onto the frame. I'm very pleased though with everything so far. Very impressed by the integrity of the Oliver service team. Jason did say the Progressive Industries converter I just upgraded to, which has a Lithium switch on it, part # PD4045CSV, is not "certified" with Lithionics, but is for Battleborns. The way I use the camper now, I really have no real "need" for Lithium, although I know I will love the future upgrade. Let's face it, guys can get each other "excited" over new shiny tech toys. I know I do. This might be the last set of lower-end batteries. Mine were not even able to maintain the hot water pot, which only needs 1050 watts of power. Since the "rube" who installed the batteries at the NC dealer connected the positive inverter cable to the wrong end of the batteries bank, the batteries did not degrade evenly, or together. So, screw it. Out with the old. At least Oliver will wire everything back up correctly. They have all the pre-cut connectors I'm sure. Jason said it takes less than an hour typically to install the batteries. Hopefully no more surprises. New large windows are in along with new shades.2 points
-
FYI, last week I helped a friend replace the AC unit on his (some other brand) trailer. He was replacing an old Dometic Brisk model with the new Dometic FreshJet 3 Series 13,500 BTU. The install was pretty straight forward (plug and play), it only took a couple hours for two amateurs to complete the installation. My friend was able to reuse the existing control panel from his old unit. I was not able to compare the noise/sound difference between the Brisk and FreshJet, but I am really impressed with the FreshJet compared to my Oliver’s Penguin model. My friend and his wife say that the new AC is a game changer and will allow them to travel more in the summer season. I ordered a FreshJet for myself this past weekend from RV Parts Country, and to my surprise it arrived to my home in East TN in two days. My friend and I are planning to install it on my Oliver late next week. I will post more information after the install. Alan2 points
-
Hi all, I spoke with the tech regarding the Dometic Fresh Jet and here is what I know so far: -The quoted price does NOT include the interior duct feature - but you don't need it because you can use your existing one -There is no need to cut the fiberglass because it uses the same footprint. -There is no remote or heat pump on the US option at this time. -He *thinks* the drainage will be the same, but I asked him to confirm this with the company rep. He was supposed to call me back on this Friday but I did not hear back, so I have another call in today. I will update when I know. I am still in their queue for a couple more weeks, but I am planning to go with the Fresh Jet and use the existing thermostat. It will save me a lot of money and be the simplest change. I will continue to keep folks posted. I did tell him there are a number of interested people wanting to see how this goes. Thanks! Mary2 points
-
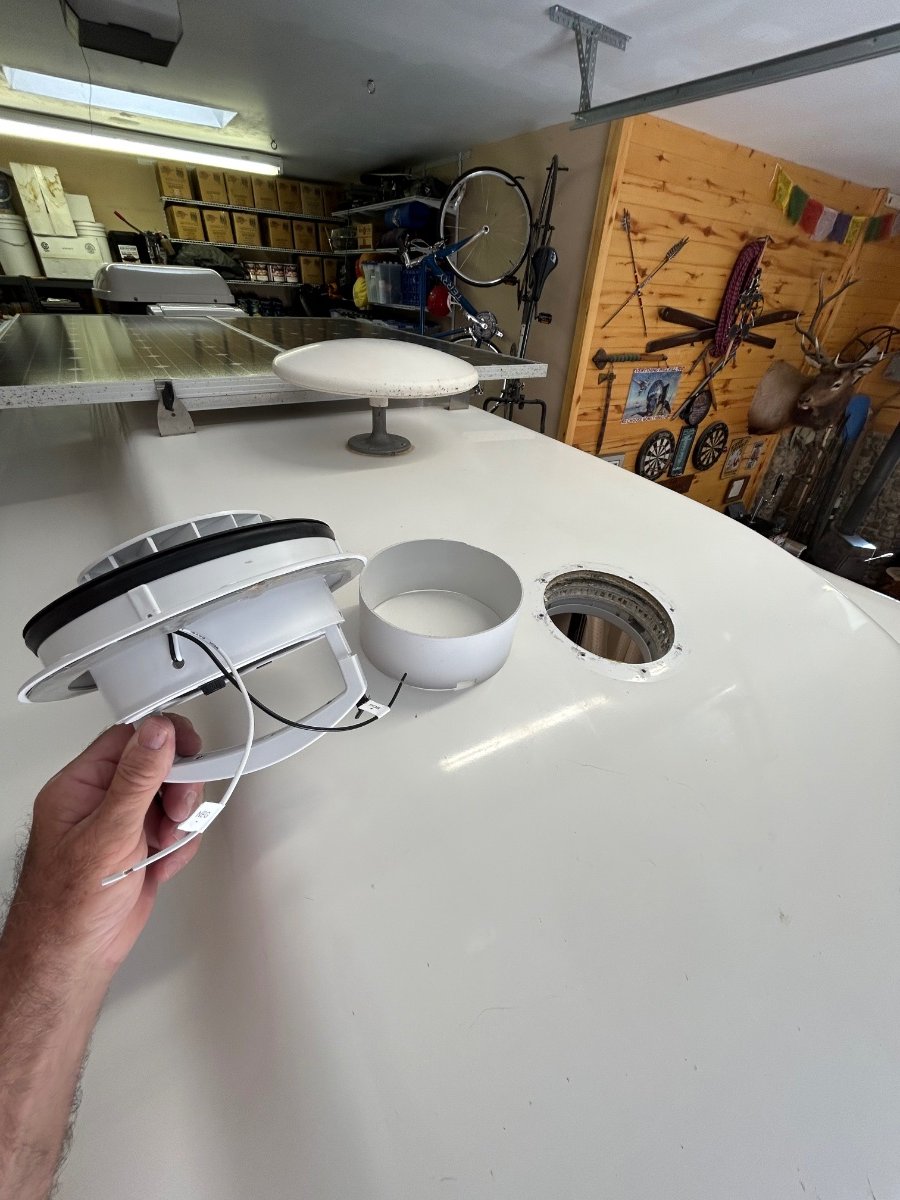
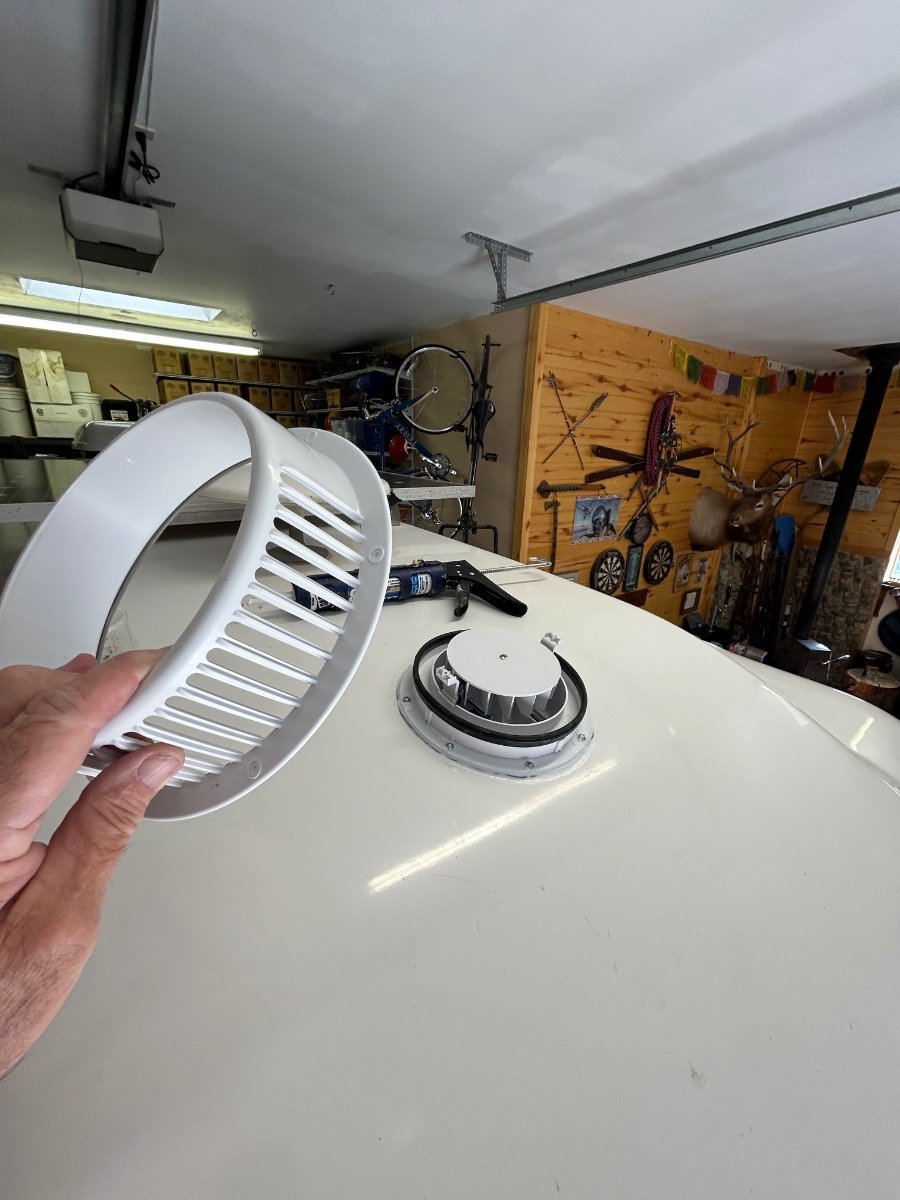
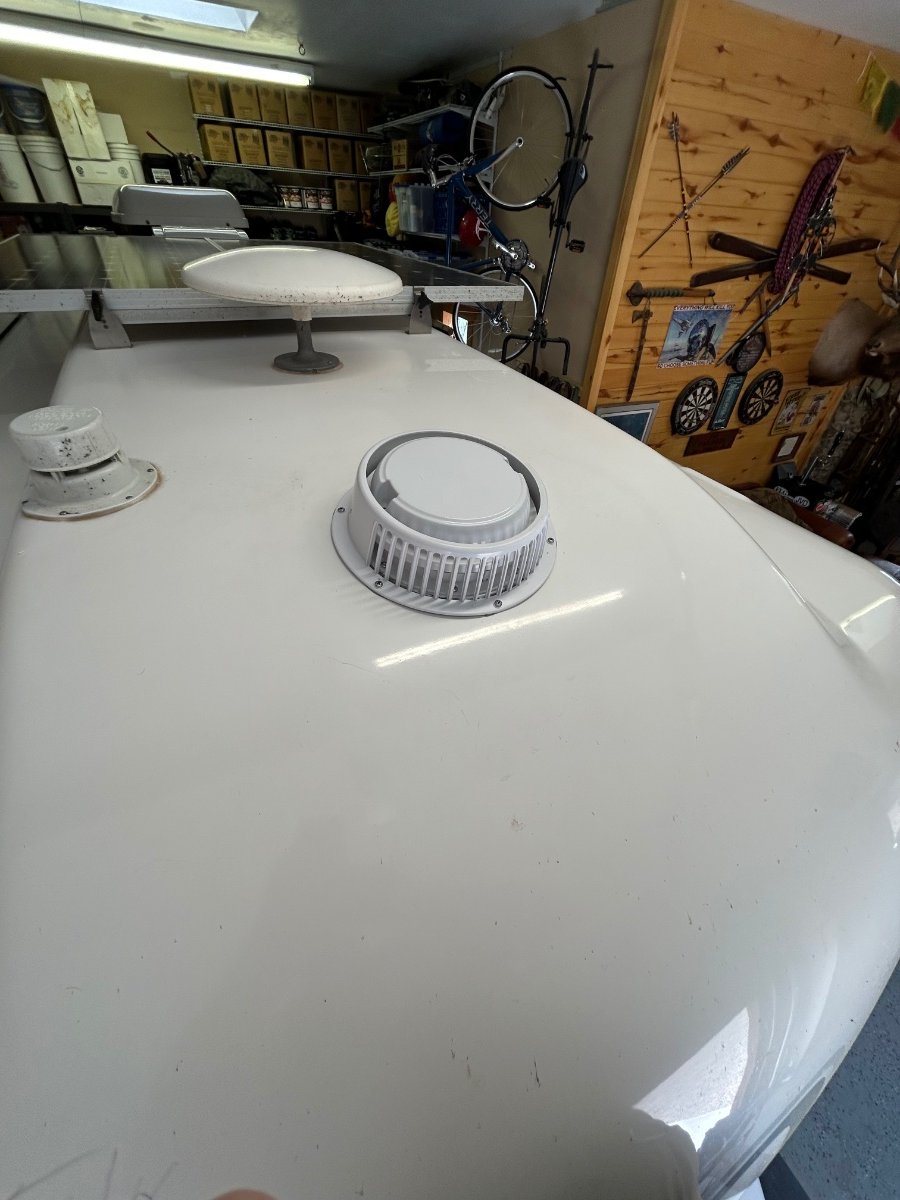
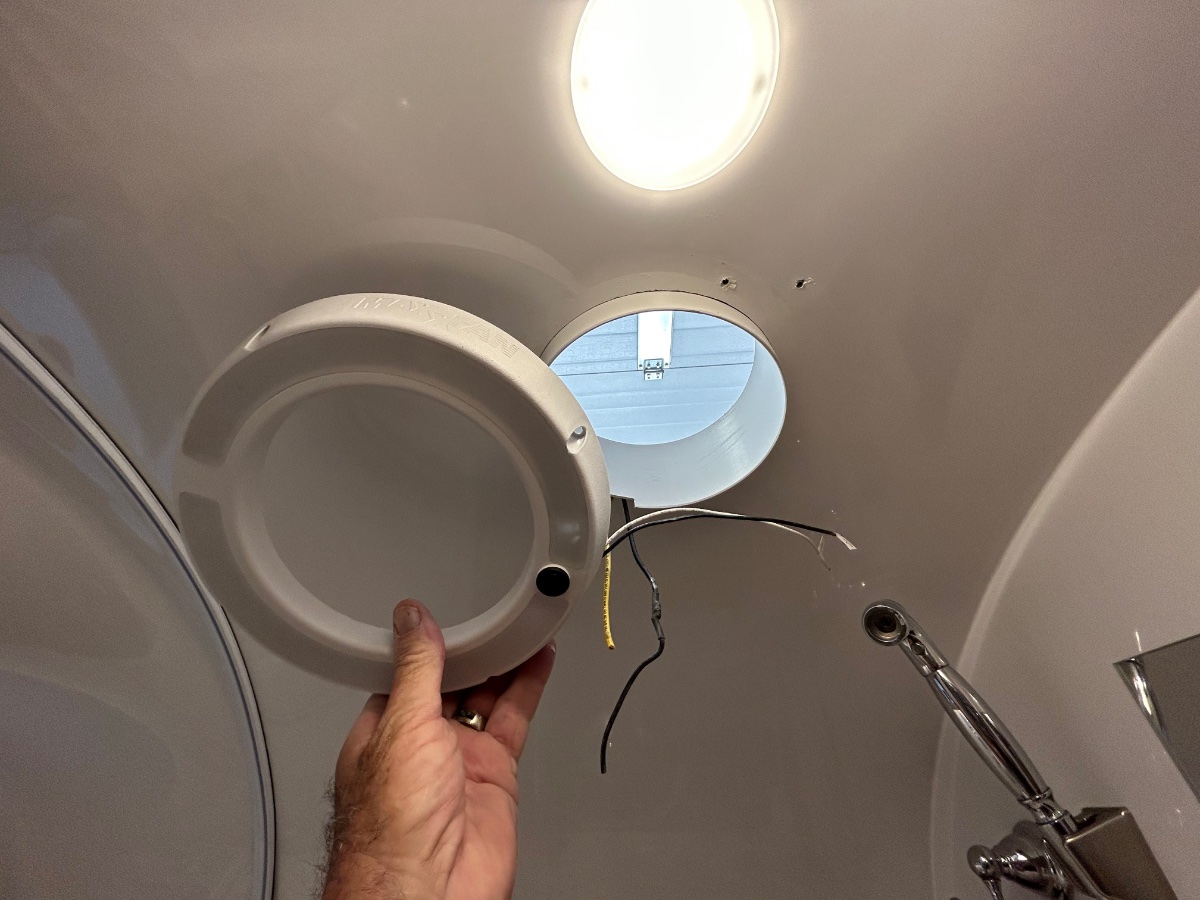
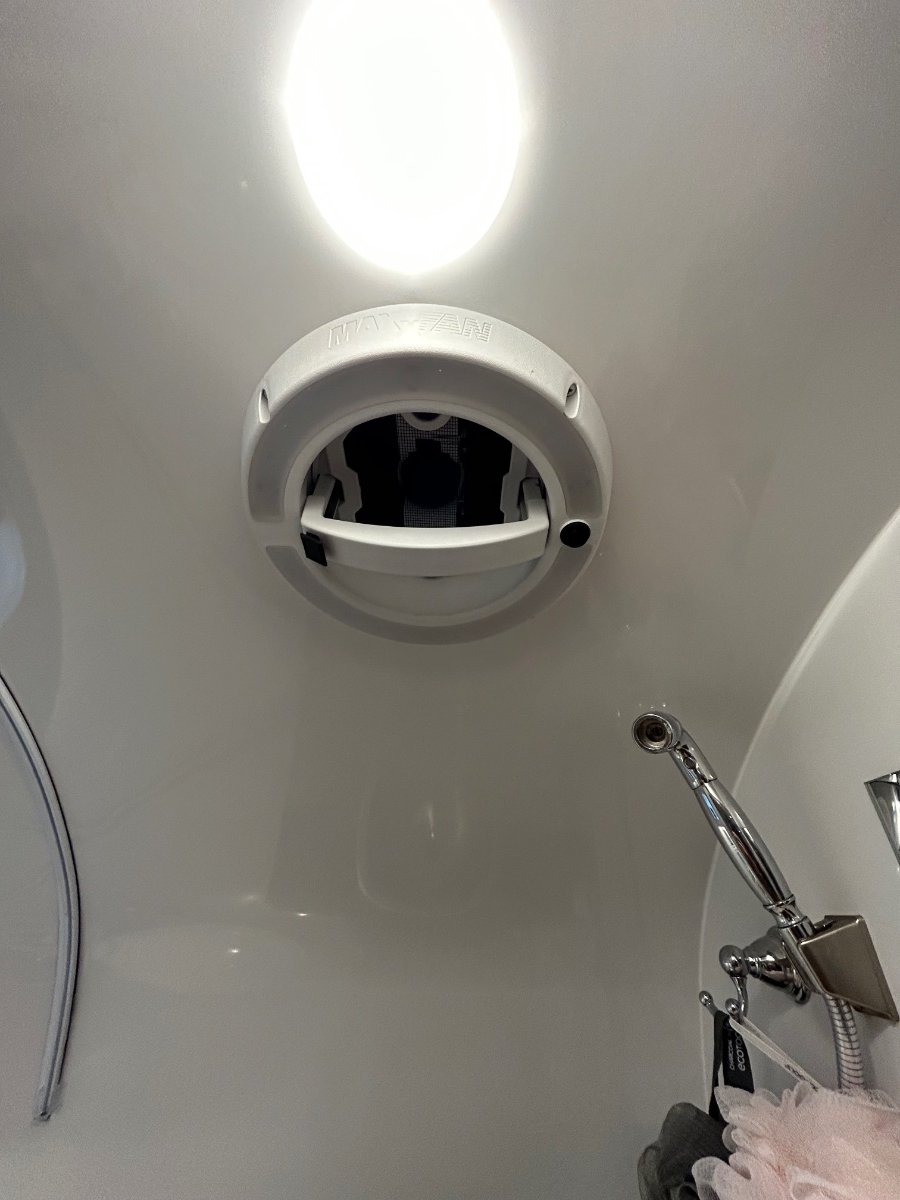
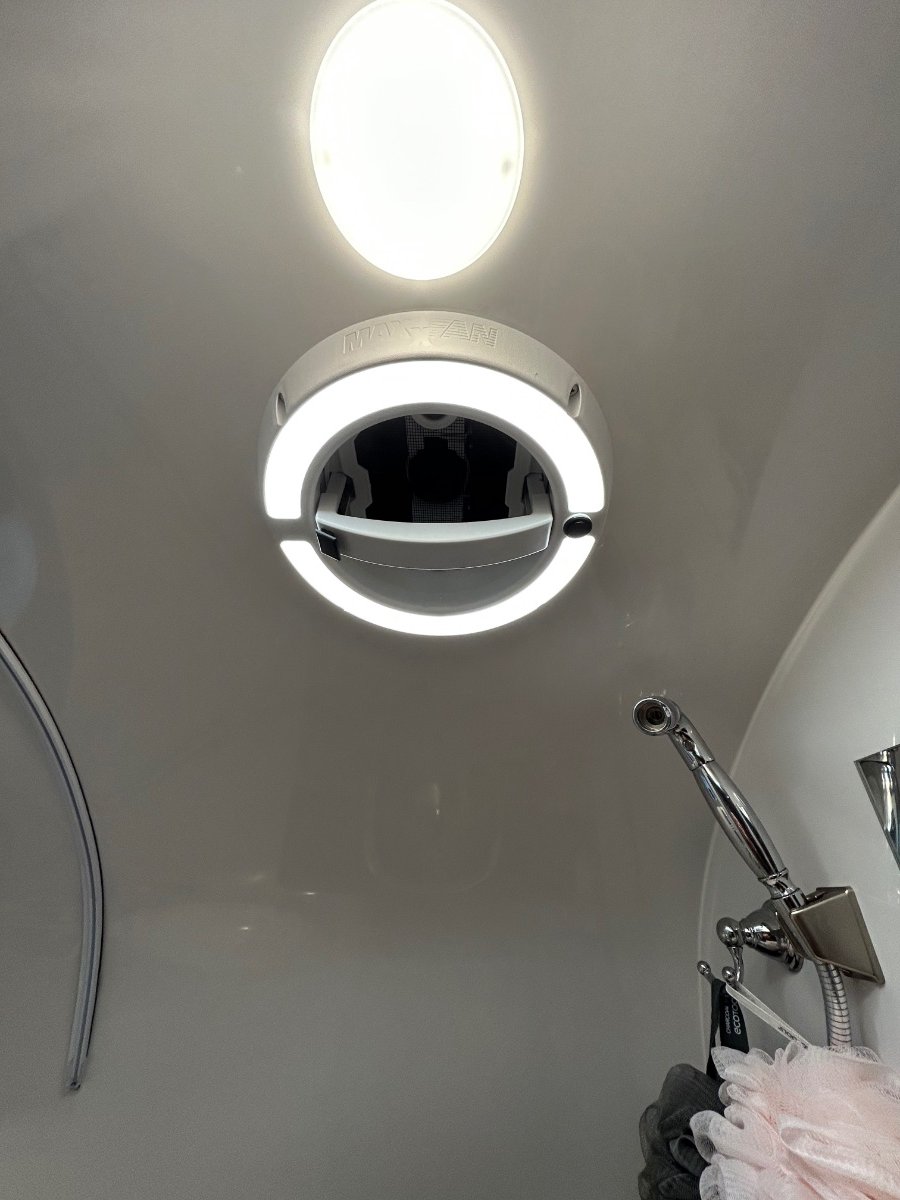
Ok... I love these forums! Nothing like great ideas shared by a group of common minded OTT owners. I'm thinking I stole this one from a comment that @SeaDawg mentioned a while back regarding his "LED-lit" Shower Fan. Well, Diane read his post and thought it would be a good upgrade - so, the new MAXXAIR w/LED unit arrived yesterday via Amazon (Happy Wife - Happy Life category). This would be the short story of its installation... First off, the original VANAIR Ventline fan assembly operated perfectly - no leaks, no bearing wobble, smooth actuation, but alas, no LED. It's the exact unit we had in our previous SOBs. BTW: Its up for grabs - a "freebee", I'll cover any CONUS shipping costs for anyone needing a Ventline. There was major brain cramping involved to plot-out a list of instructions for the R&R drill, especially the Removal phase. The first "R" was straight forward - using a plastic "razor" scrapper to remove the butyl tape from the gelcoat. Cleaned gelcoat with a fresh microfiber cloth doused with an ounce of rubbing alcohol. 2. Filled original mounting holes with clear silicone, they will be further sealed with the butyl tape attached to the new fan housing. 3. Cut-to-fit the included plastic sleeve that fits between the top flange and bottom (shower side) trim piece. Applied clear silicone around circumference of plastic sleeve and upper gelcoat. BTW - the OTT factory fan hole was exactly the correct diameter - no additional cutting was needed (WHEW!). 4. Mounted new assembly up top, carefully pre-drilled/chamfered 8 new holes in exterior gelcoat. Lightly torqued-in stainless screws enough to "push" butyl tape out from flange. Trimmed tape and applied clear silicone around perimeter of flange. 5. Rain guard: The new unit included a "rain-guard" which may be helpful if operating the fan in a heavy downpour. Applied butyl tape on the RG flange and carefully pre-drilled/chamfered 6 new holes for the RG. Trimmed tape after torquing screws in and then applied clear silicone around perimeter of RG. Attached fan cap with the provided 2 white screws. 6. Applied clear silicone to the trim piece groove where plastic sleeve seats. Carefully pre-drilled/chamfered 4 new holes for the trim. Connected 12vDC power to fan motor and LED - used solder and heat-shrink for connections. Tucked wires inside trim piece and mounted it with 4 screws. 7. Unlike the Ventline unit, the MAXXAIR has a locking mechanism when depressed allows the fan lid to open/raise. Its raises/lowers smoothly. Fan and LED each have separate switches. And as, I believe, @Patriot has recently said, "Let there be light!" One and done... Happy Wife.
1 point
-
I took my 2022 EII trailer in to have my loud Dometric exchanged for the Houghton/RecPro. And the tech told me he just finished a training on the new Dometc Fresh Jet and it is supposed to be the quietest AC on the market. it would be an easier retrofit, and when I look it up on Amazon, it says the sound level is 58 dB. That is lower than Houghton, I think. They are backed up for a month so I won’t get it done right away and I’m wondering if anyone else has researched this. I welcome everyone’s feedback.1 point
-
@rideadeuce - Hey, Mike - are those a couple of airedales you have there? I used to have a female that looked just like them! You're right @jd1923, the DC/DC charger really makes the battery package work for us, BTW. Gone are the days of having our AS with 4 heavy AGMs!1 point
-
Well @MAX Burner travels in and out of NM where it’s sunny 90% of the time and Art has a capable DC-to-DC charger. @rideadeuce Mike used his 920AH in a test running the A/C 8 hours on the highway. Beautiful pics btw, most showing dense clouds. Very soon you will have the Atmos A/C installed and that should run 50% longer, all else being equal. 600AH should be good for us. I will mount the two front-to-back. They are just under 14” at the base and will fit nicely. There will be 6” extra width in the tray to fill. If I want a 3rd in the future, I can remove the tray to fit another. We have Oliver owners where their style is not using an inverter. Personally, I don’t get that extreme. We just replaced our microwave with an air fryer and after this upgrade, Chris can run the oven anytime and anywhere. I’ll need an Inverter upgrade next and these batteries may sit on the shelf until I install both together, clean up the 4/0 cables. I was ready to spend $500 more for 920AH, if they had fit, but not double for 920AH with Victron Comms, that I would hardly have a need for.1 point
-
Thanks Rich, yes, “32 was the largest TV available while maintaining the same mounting bracket; although, it will no longer fold back into the ceiling—something to consider.1 point
-
Our 3 x BB's are a perfect AH storage capacity for our style of camping/boondocking, FYI. But when it comes to AH's, "MO is BETTA", IMO. Frankly, I don't know what I'd do with another 300AHs! Keep the AC running for the Knuckleheads when we're away, I suppose! HA!1 point
-
It came from the factory with the 5200lb axles, but I'm not sure whether the EZ-Flex system did too or if it was installed afterwards. I'm assuming that I would be able to upgrade to the newer axles without issue, but I've been burned by assuming before!1 point
-
Very nice!👍🏻 I’m also looking at replacing the TV with a 32”. Did you use the existing TV mount, if not can you post a link for the mount and 32” TV, please and thanks? Oh and can the TV still fold backwards for storage?1 point
-
Looking good John! Do you maybe have a link to the ceramic coating you used?1 point
-
Y’all are amazing! A few weeks into this and your Oliver is already heads up over some of ours, where in my case we’ve been working hard for over a year. Maybe that’s due to your 6 years of careful thinking and planning. G-bless!1 point
-
After years, we stained our deck again. Chris went to Depot with a printout of the stain I wanted. She came home with something the Orange-Aproned HD associate substituted, some acrylic cr@p. Took another trip to the Depot to get “oil-penetrating” stain. There are soooo many hyped bad products marketed today. I have a saying, “if they spend $$$to create a commercial to sell their product, buy something else!”1 point
-
For sure, Melissa is top notch! We love staying with her :)1 point
-
Got to know the details on these axles fitting. Hull 110, OTT says does not fit. Mine is hull 113 so likely the same as yours. @MAX Burner is hull 226 and I believe Art had OTT install new axles before the annual rally.1 point
-
I'm not entirely sure yet, but it was a measurement that was, I think Jason said, 3/16 inch off, or something like that. I'll get details when I pick it up. Hopefully no more issues were encountered by the team. I don't want to be... "that guy". LOL1 point
-
Best bang for the buck upgrade we've done yet.1 point
-
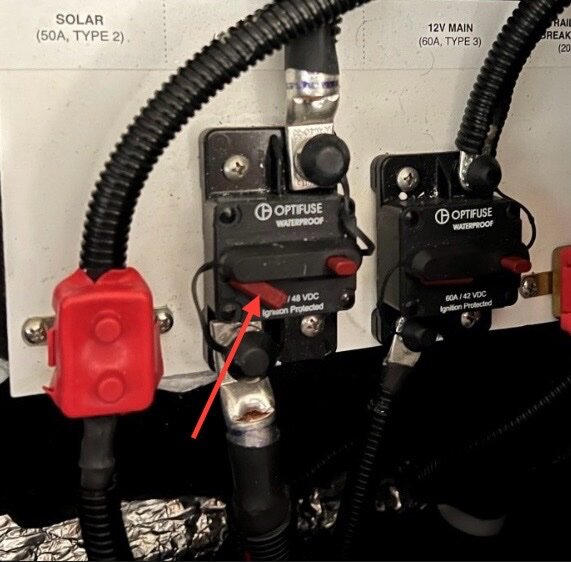
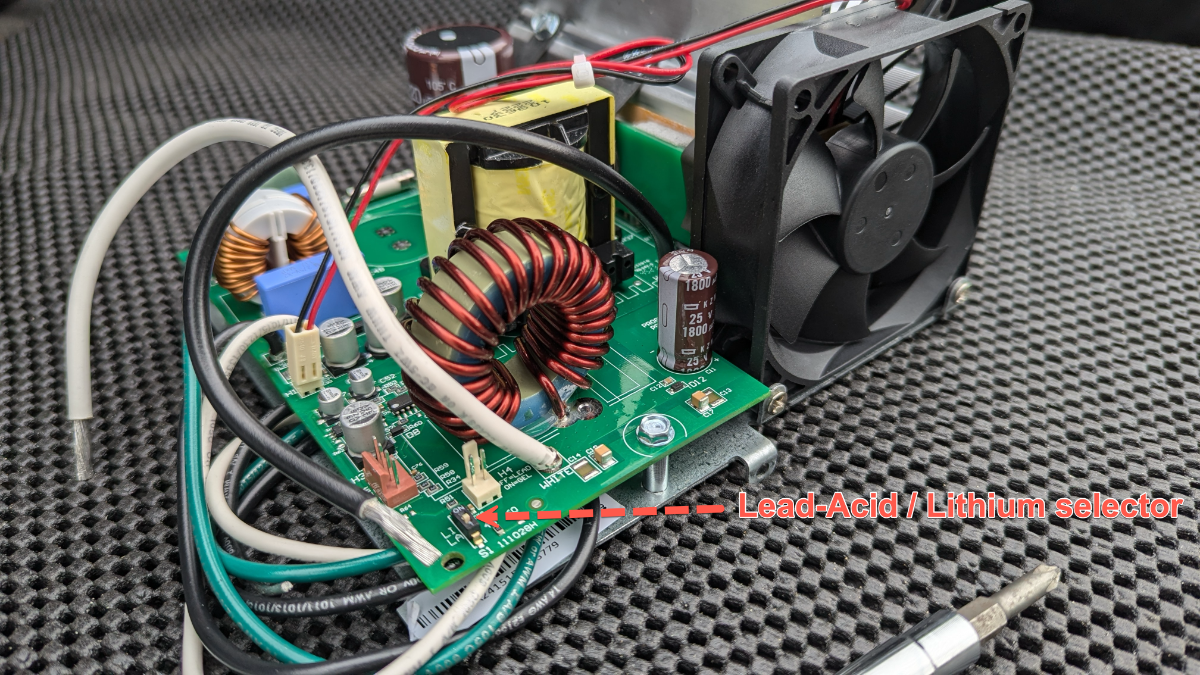
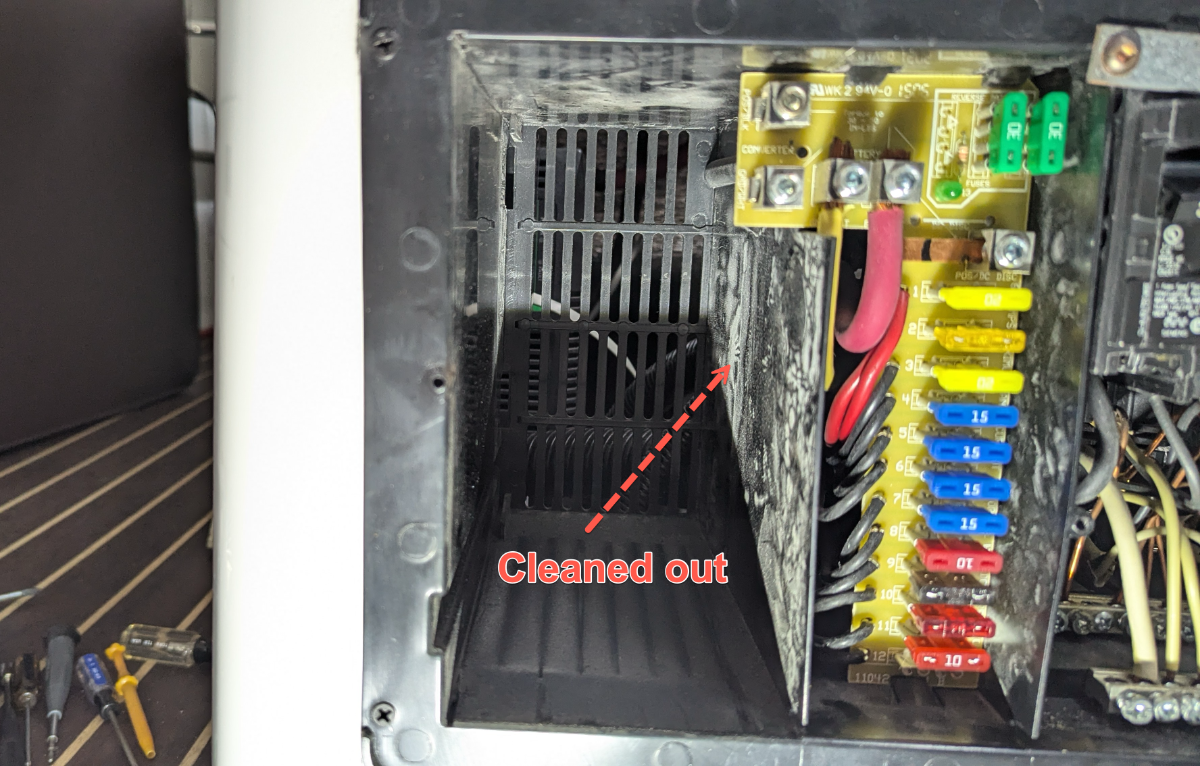
Make sure the red lever on the Optifuse resettable breaker is pushed inwards (see arrow on picture). The Optifuse breaker on the left shown in the photo is in the open state when the lever is popped out like that. The Optifuse on the right is closed. The red rubber covers on the outer two items are just contact covers on the other self resetting breakers. The Optifuse breakers can manually opened by pressing the little red button on them (which will make the red lever pop out), and then pushing the red lever back in to reset. And this is my first post in a long while since we sold our Ollie. A sad day when it was towed away, but it went to a good new owner. We’ve moved on to other travel plans now. But I still lurk here on the forums occasionally 🙂
1 point
-
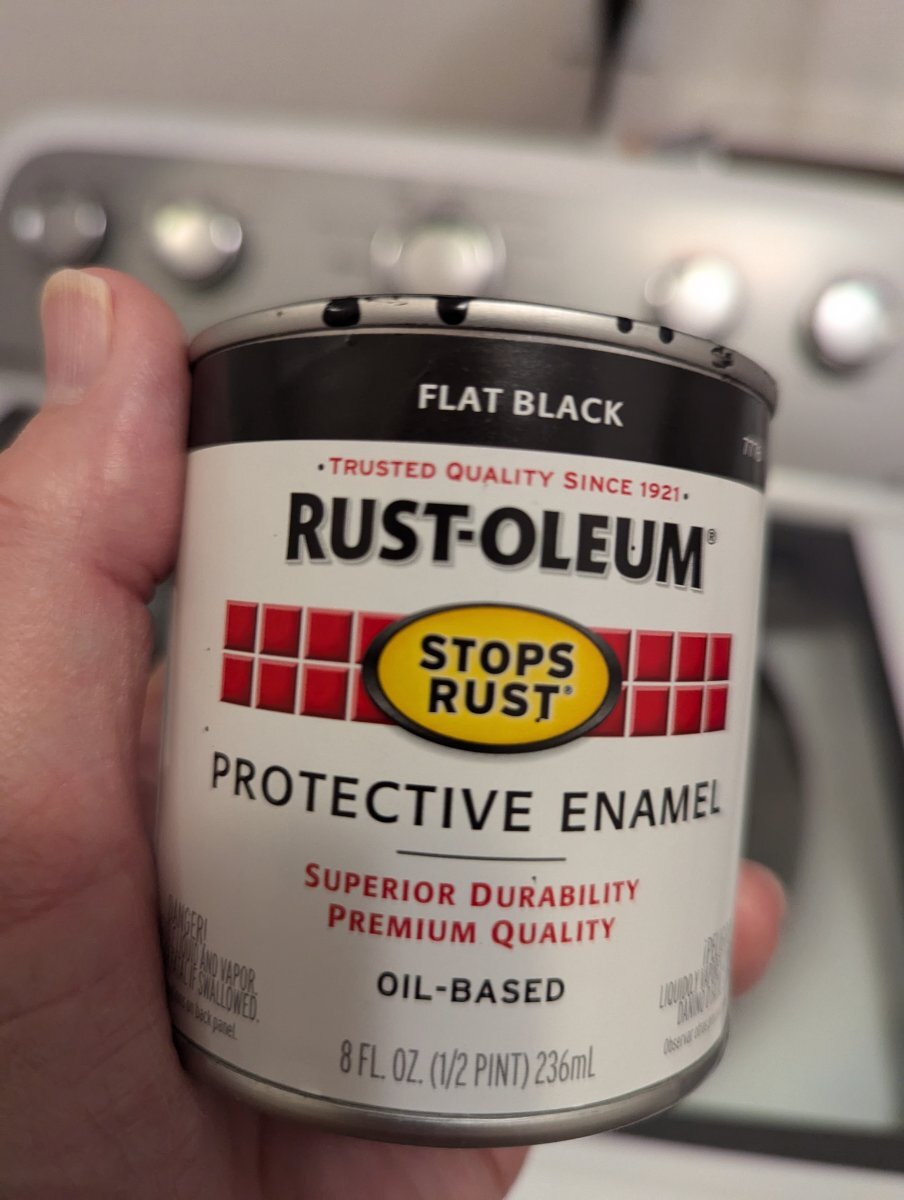
👍 Their Oil-Based is the best for rust prevention and adhesion, based on my experiences! Next up, Rust-Oleum Professional spray cans.1 point
-
This is what we use, and a small can and a couple of small brushes.
1 point
-
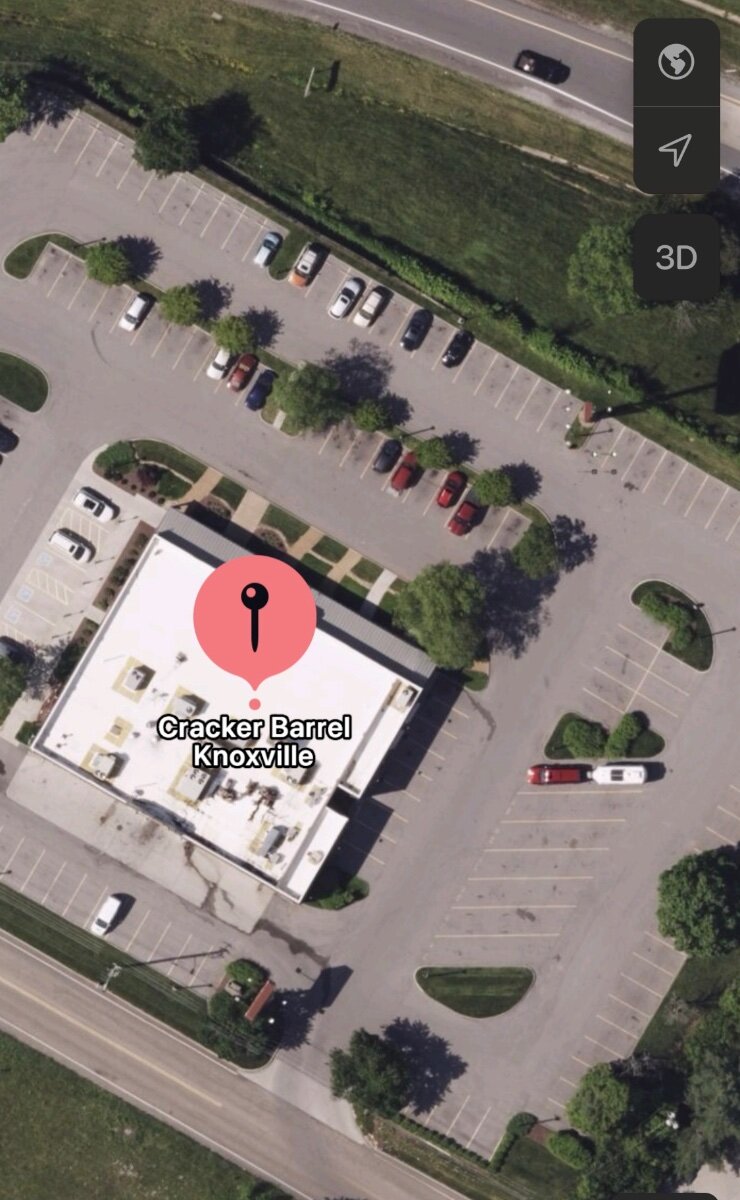
topgun2, this is what happens when you stay in Cracker Barrel parking lots too often! Google maps cameras catch you. This location happens to be on our way most anywhere west of Virginia so we stay here often. Maybe too often! 🤪
1 point
-
Two nights ago it was 27 degrees here along the Taylor River in my Gunnison NF dispersed camp site. I'm going to be sorry to leave this weather when I move on! PS @topgun2 -- yesterday I finally spotted 3 Moose right along the river, just down the road (closer to the reservoir). No Elk, but Doe with spotted Fawns. This has been a wonderful area.1 point
-
I had this video pop up on my "suggested list". Very informative. I never did understand all the different sizes and names for wires. Americans! We're some stubborn folk, aren't we?! Looks like he's doing a good job with his new training series too.1 point
-
@Wayfinder If you need a place to over night while have service done, we highly recommend here - https://www.clarkthecrow.com/ Melissa Wickline the owner is an incredible person and host and we had an awesome stay. 🌟🌟🌟🌟🌟 Safe Travels!
1 point
-
For anyone interested in purchasing one, Home Depot has the Maxxfan with LED on sale for $73 at the moment. MaxxFan Dome Plus with 12-Volt Fan and LED Light1 point
-
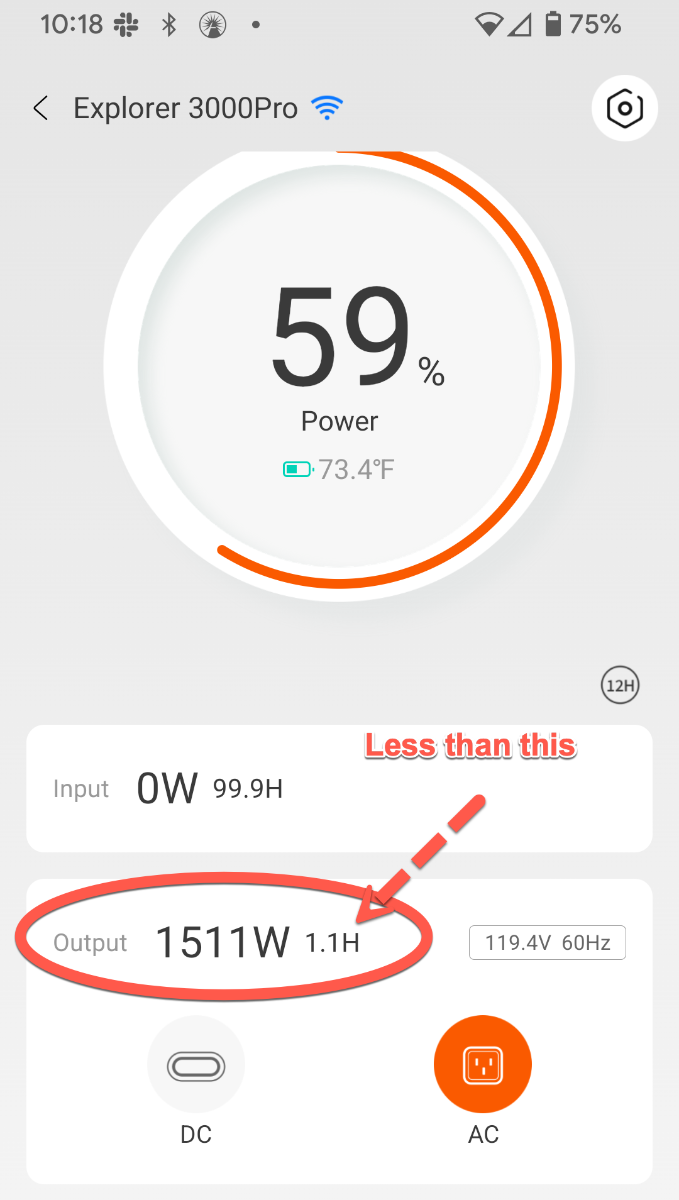
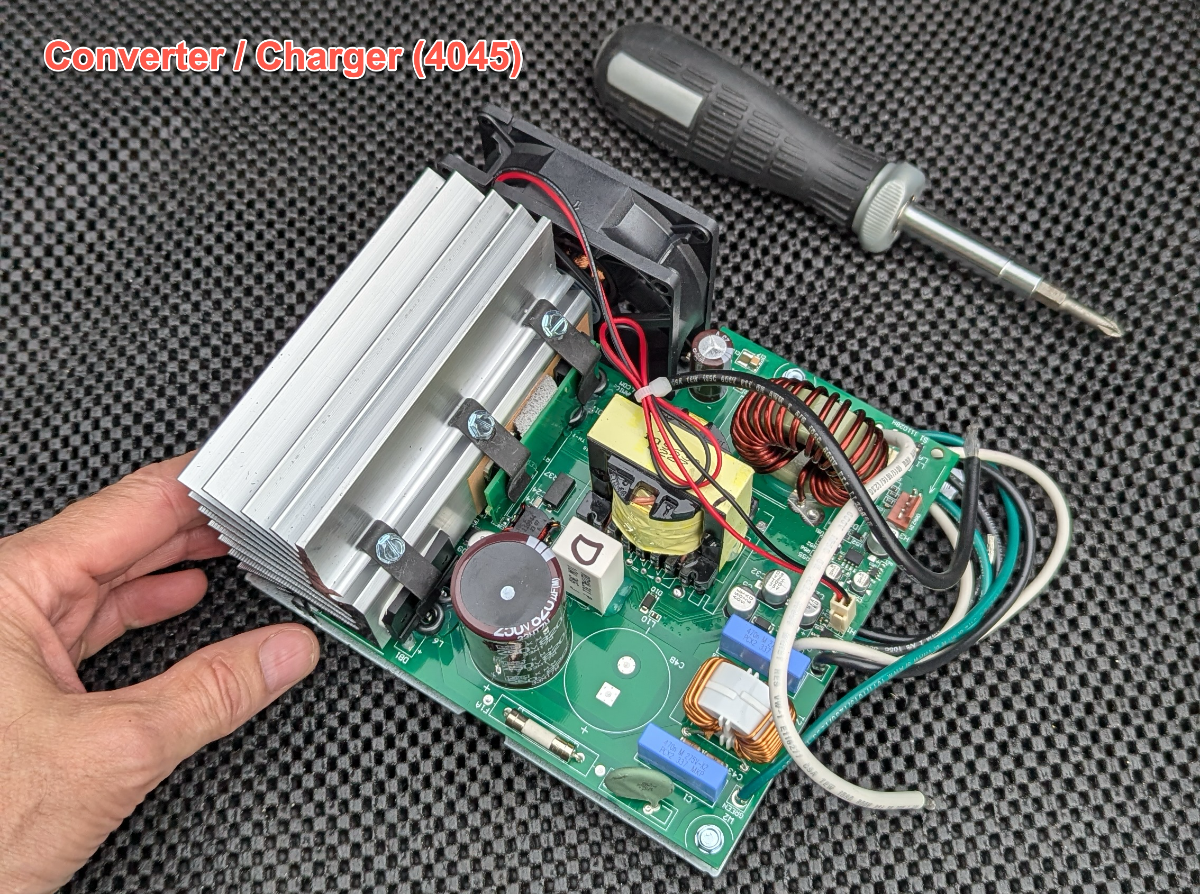
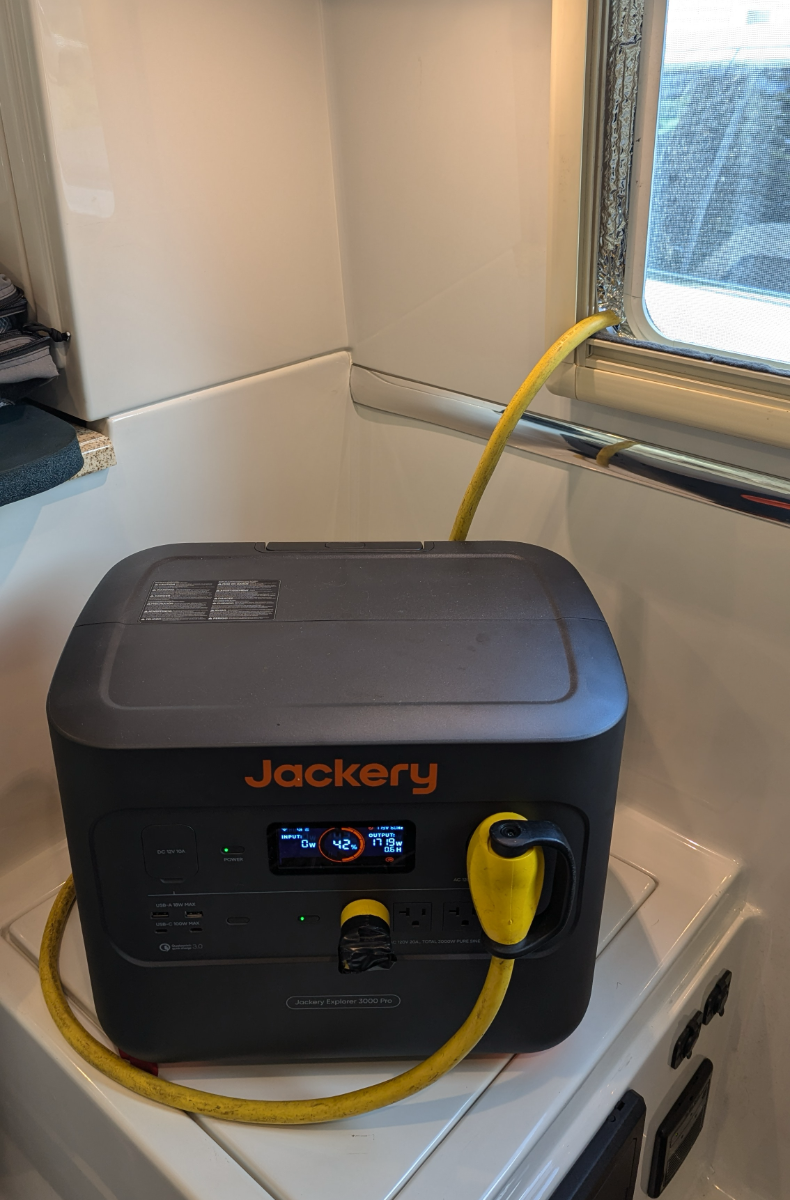
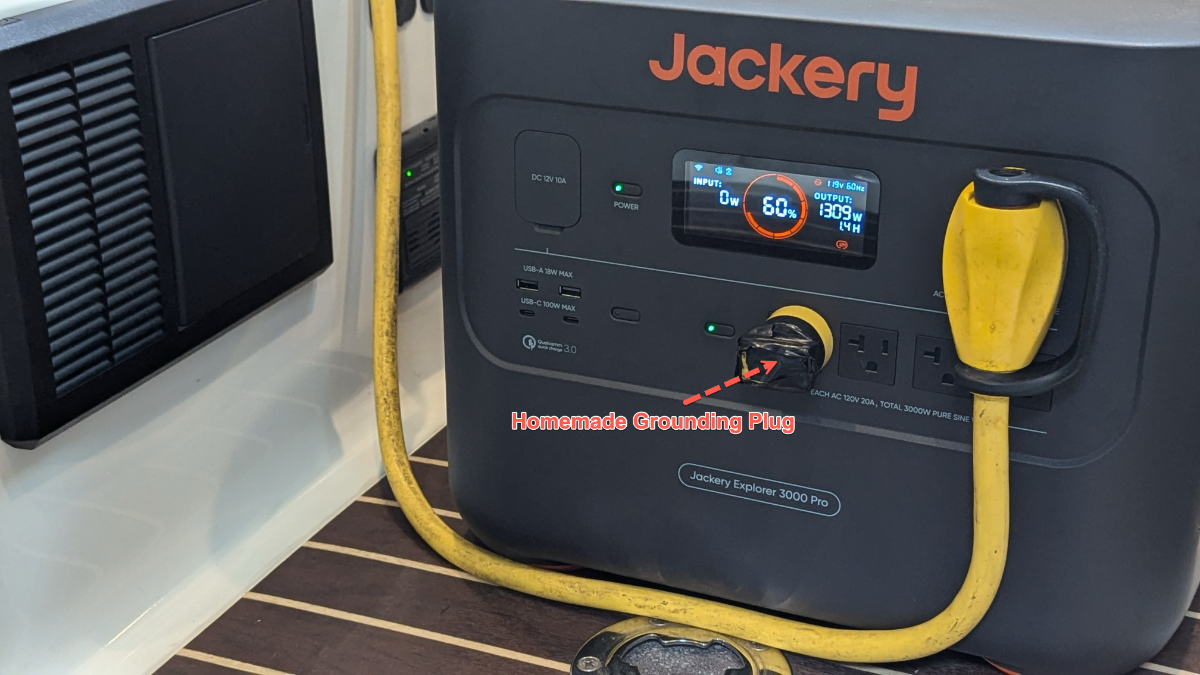
Well, as many of you know, the converter/charger upgrade is easy. I had no issues with mine. Step one "check". The cricket noise may or may not have gone away. I cannot tell with Tinnitus - same sound. I checked basic functionality of the charger/converter with my Jackery 3000 Pro. Everything seems fine. Even ran the A/C for a while.
1 point
-
Also, check to make sure the drain pipe from the bathroom sink and shower is firmly seated into the top of the gray tank. Ours was not glued, just wedged in and it popped out once after a bumpy ride. Mike1 point
-
That is so awesome! Thank you for sharing the video. Really nice to hear your pretty voice clearly, with the ac running. How long were you able to run it on solar? Which battery pack do you have?1 point
-
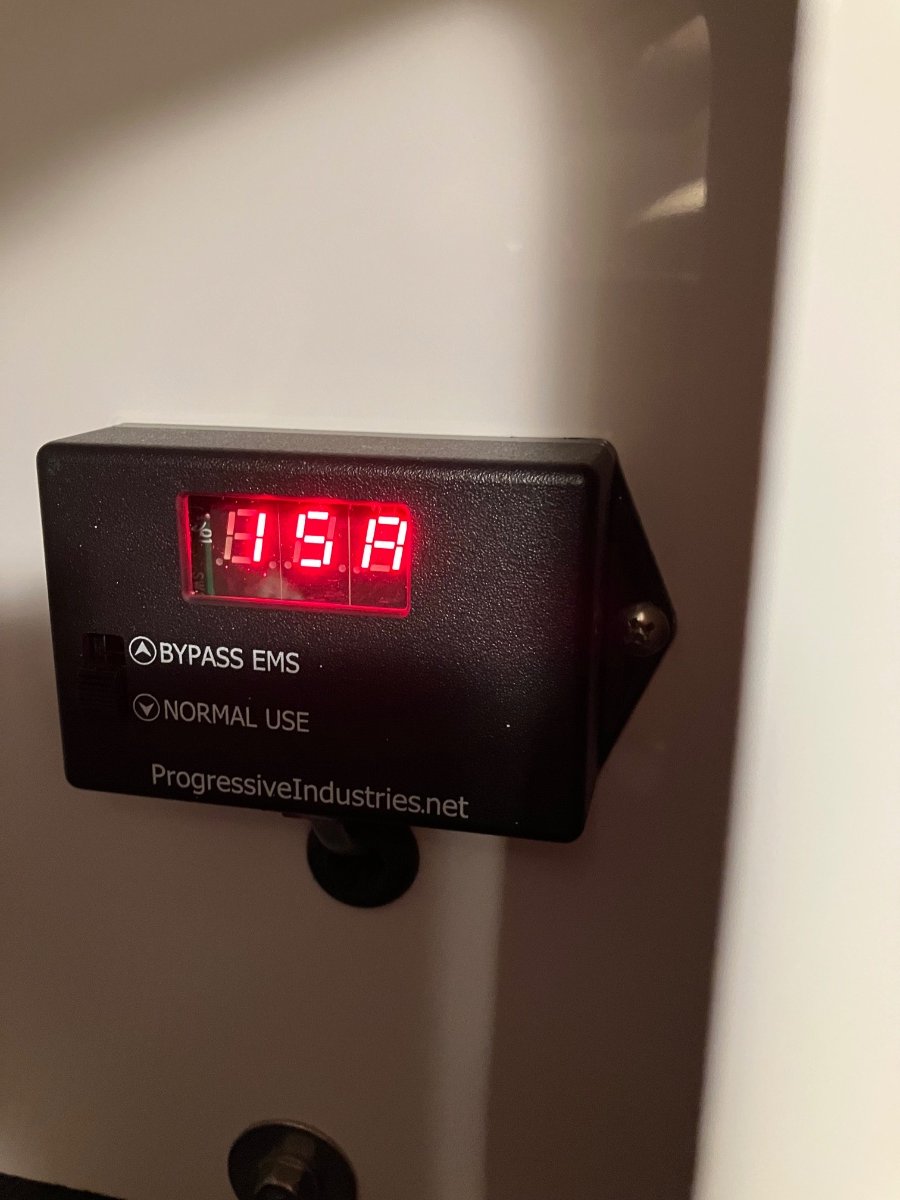
RoadLotus: I have my Oliver connected to a 20 amp circuit in the bay of my workshop. According to the Progressive Industries monitor the AC is drawing between 12 and 15 amps, that is without any other loads on the system (and with the inverter battery charger function turned off). So far the AC unit has been on for about a day and a half without any issues.
1 point
-
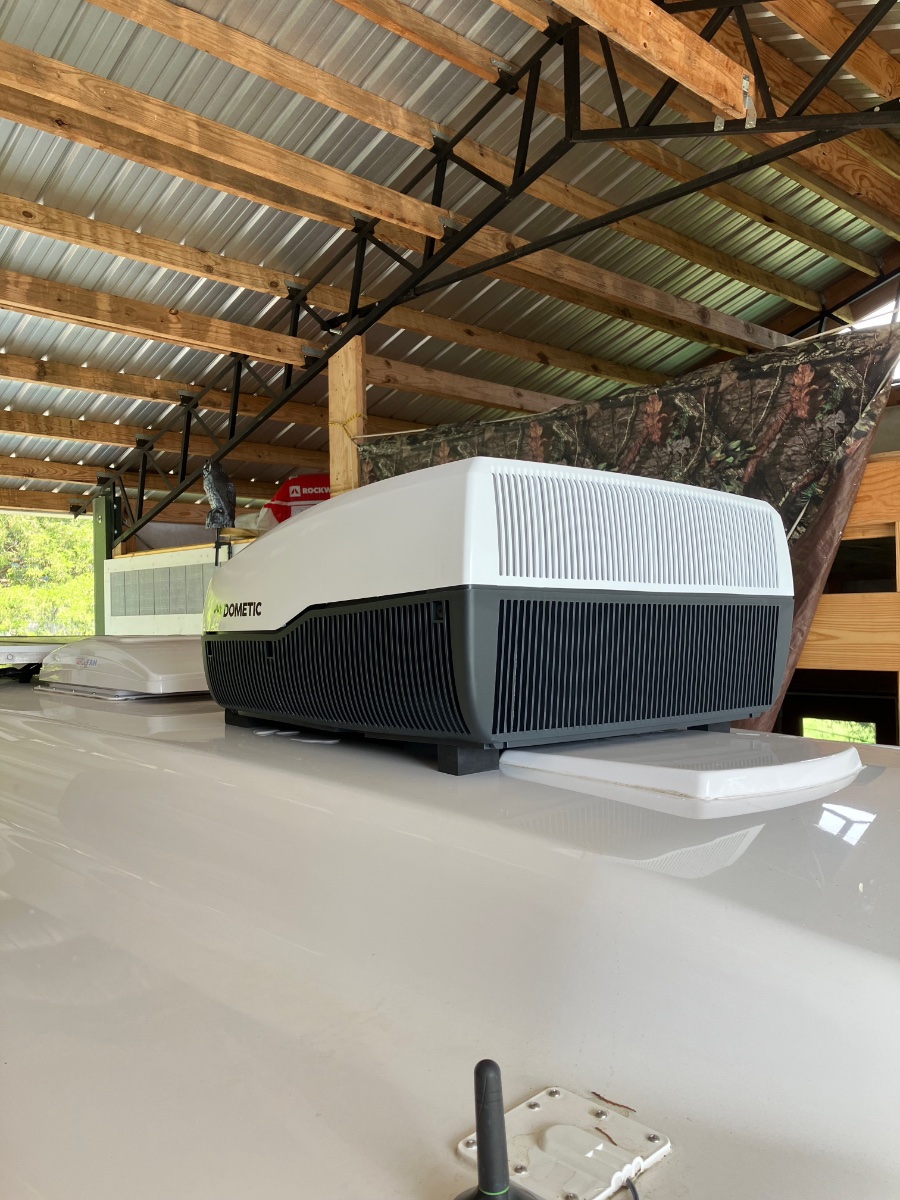
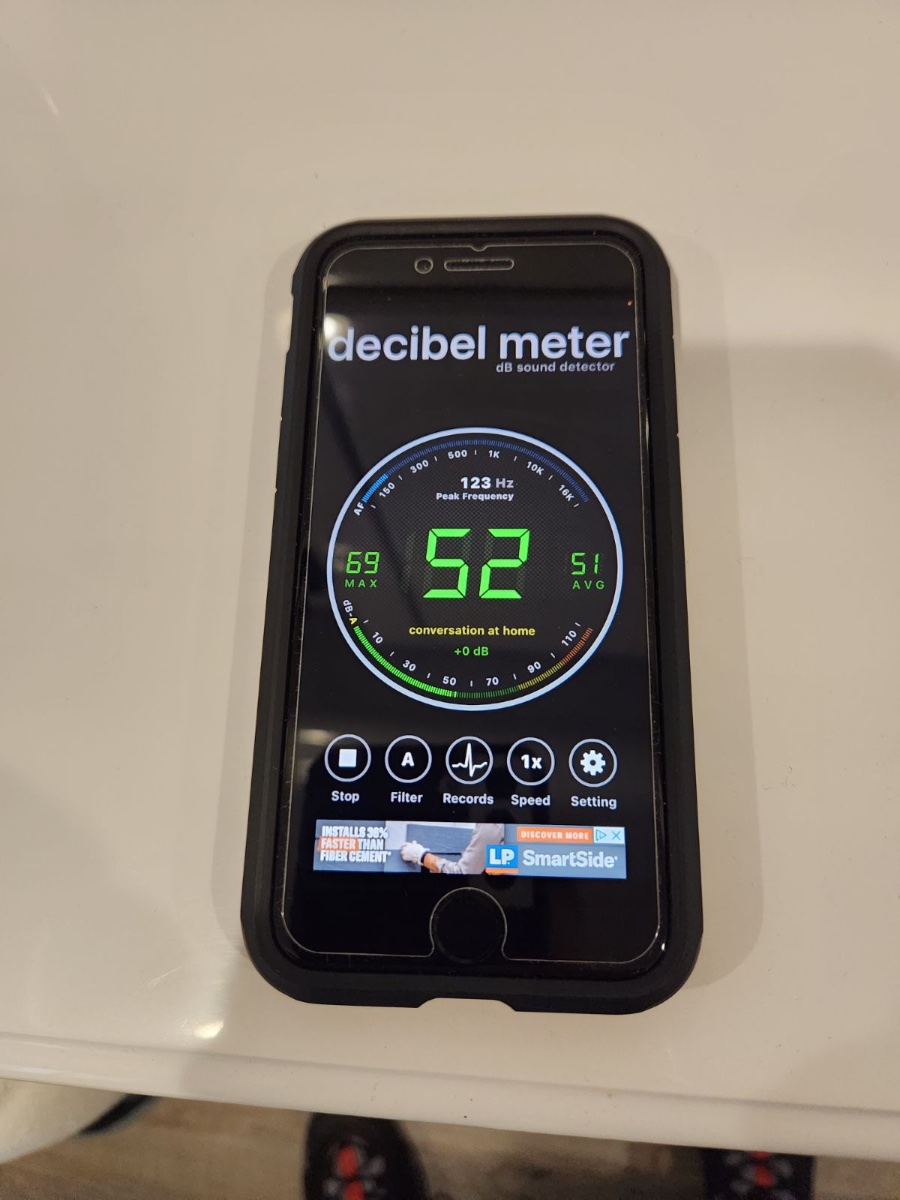
Happy to report that I have installed the Dometic FreshJet air conditioner on my Oliver this week. The install was fairly easy only taking a couple hours for two of us to complete. I rigged up a 3 to 1 pulley system in my workshop to lift up and remove the old noisey Penguin model. The new FreshJet is significantly lighter than the old unit, and a friend and I were able to stand on some scaffolding and lift it up and onto the Oliver. The wiring connections were easy to complete using the existing thermostat control box. I purchased the FreshJet 3 Series from RV Parts Country; $896.00 plus $124.00 shipping. So far my wife and I are happy with the performance of the FreshJet, it quickly brought down the indoor temperature and humidity on a hot Tennessee summer day. Best of all is the difference in the sound levels between the old and new units (69db versus 52db). Many thanks to @RoadLotus for researching the FreshJet and making everyone aware of this quiet AC option for the Oliver.
1 point
-
Hi @MobileJoy I won’t have the fresh jet installed for several weeks. So I can’t say either way what would be best. I live in California, so traveling to Tennessee, for the truma is not feasible. That’s why I was looking at the Houghton. The fresh jet is a new option that I hadn’t known about. But it looks good on paper. I guess I’m going to be the test case! Once it is installed, I can do a video on it and run a decibel meter if that would be helpful for folks. But right now it’s all speculation on my part. it sounds like both truma and the fresh jet have strong reviews so either one is probably a good choice. But we will see 🙂1 point
-
OK, so the tech said drainage lines up. I have ordered the unit so it will be ready when they get to me. So excited!!1 point
-
Our smaller Houghton doesn't have one. I think the bigger Houghton has a heat pump. The Truma? I don't know. Heat strip or heat pump? @Patriot can fill us in, I'm sure. Will be good to know about features vs cost, etc. Would be really great if the freshjet hooks up with the condensate drain. Thanks, @Roadlotus, for asking all the questions.1 point
-
@Roadlotus, does this price include the new interior unit/Adu, as well? I usually see Dometic units priced separately, since many can be used with a ducted system. If so, that's a great price. (The Houghton we bought included both units in the quoted price.) @Patriot, I'm curious about the fiberglass work necessary for your Truma upgrade. It seems as though all the rooftop units and vents these days are sized for the standard 14 x 14 opening. What did Oliver have to do for the Truma? When we installed our Houghton, we had to file and square up a jagged corner or two, but that was it.1 point
-
Please note the shop I am working with is backed up for at least a month, so I will share more as I progress! I was fortunate the tech had the training on the new Dometic just last week and suggested it as an option when we were discussing the Houghton.1 point
-
Following. Very interested.1 point
-
Yes the current Dometic AC’s are noise makers! Truma and Houghton are so much quieter that now Dometic is forced to step it up! Ya gotta love competition in the free market! 😊 Patriot🇺🇸1 point


.thumb.jpg.e34bf01ef7f7d5e99ad31856d45afbeb.jpg)


-
Recent Achievements
-
")


")


")


