Leaderboard


Popular Content
Showing content with the highest reputation on 07/13/2024 in all areas
-
Everything's BIGGER in Texas!4 points
-
We used a plug in "cigarette plug" charger for laptop. Don't carry one anymore. Phones and USB tablet are fine. We don't watch TV, so yeah, not an issue. I have 12v hair dryer (somewhere, havent used it in 20 years) and a 12v blender, from the late 70s. I cook on fire, grill, or lp stove. We're admittedly oddball. We camp to get away from the signals and entanglement, but keep a line open for family. I honestly don't care about ever getting another hard-wired inverter. But that's me. Everyone has a different camping style, and they should equip their trailer accordingly.3 points
-
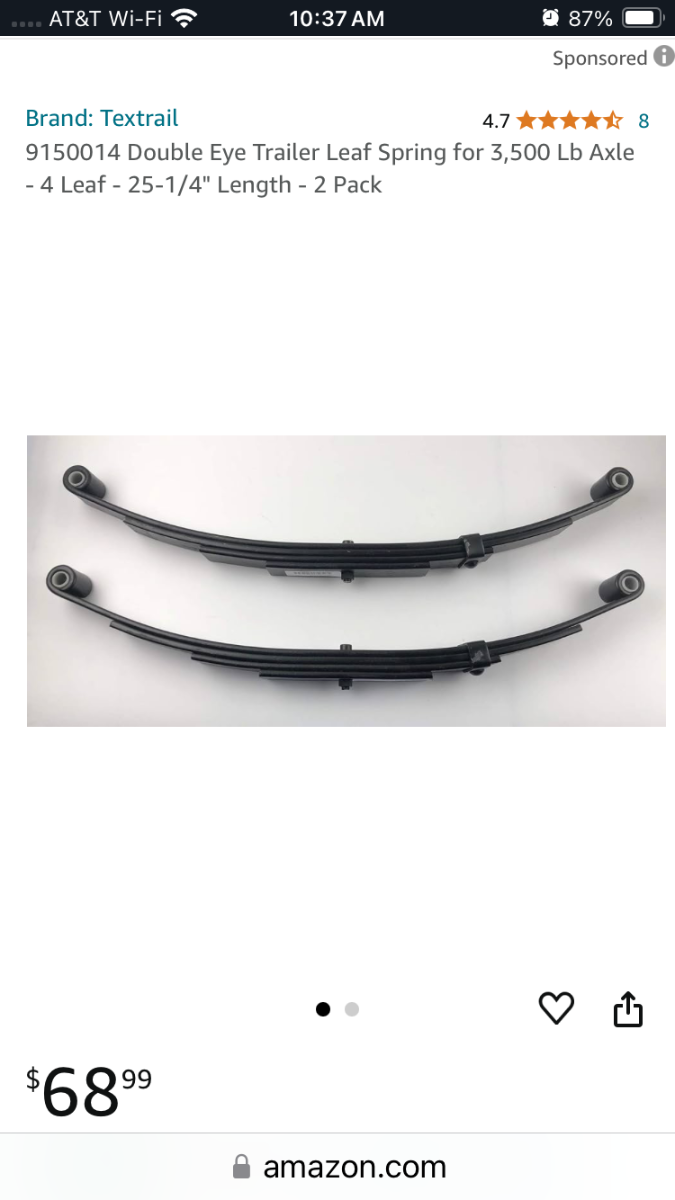
Here is the replacement spring info Oliver Service sent me for my 2021 E2. They can be found on Amazon in pairs for $68. Note that the springs on Amazon appear to have nylon bushings rather than bronze, but they would serve to get you back on the road and home where you can figure out your final solution Please open a service ticket with Oliver so they are aware of the issue and can advise for your exact hull#
 2 points
 -
Thread here: https://www.google.com/url?sa=t&source=web&rct=j&opi=89978449&url=https://olivertraveltrailers.com/forums/topic/9996-made-in-usa-leaf-springs/&ved=2ahUKEwj7uaXMrKSHAxWUElkFHRtoA9wQFnoECCsQAQ&usg=AOvVaw2TuWEqPQCoyqb1wVMIHpcR One of the posts lists his replacement specs as: "Made in USA with USA sourced 5160 spring steel -Bronze eye bushings vs. plastic -2,000lb rating/ea vs. 1,750 (will not change gvwr as axles/bearings remain determining factor) -5 leaves vs, 4 -second leaf extends underneath eye on each end (protecting common break area) -steel, bolted spring keepers (one each end) vs a single, sheet metal band -width = 1.75" -drop = 3” -length (eye-to-eye) = 25.25” The company I sourced them from is ALCAN."2 points
-
It is recommended to use 1/0 pure copper cables when installing a high output alternator, in addition to keeping all stock ground wires. Most manufacturers offer a ‘Big 3 Wiring Kit’, but I made one up with an Amazon order from the WindyNation store. This also includes upgrading the stock grounding cable from the battery to engine block (in my application) to 1/0, as well.2 points
-
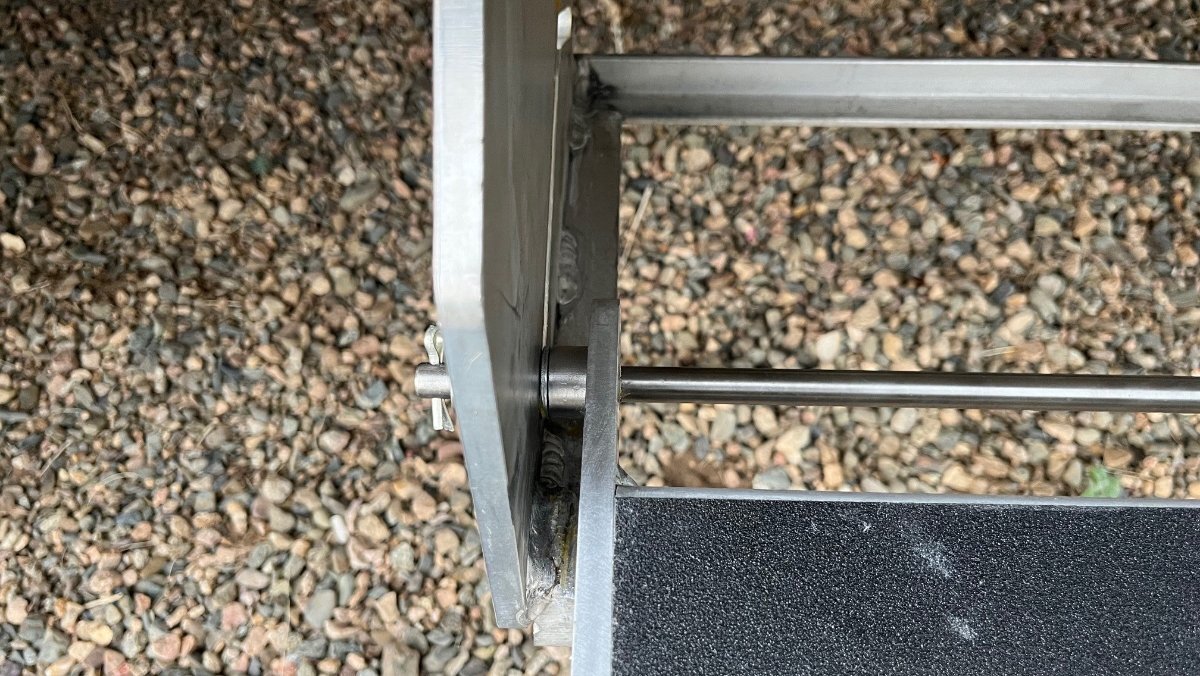
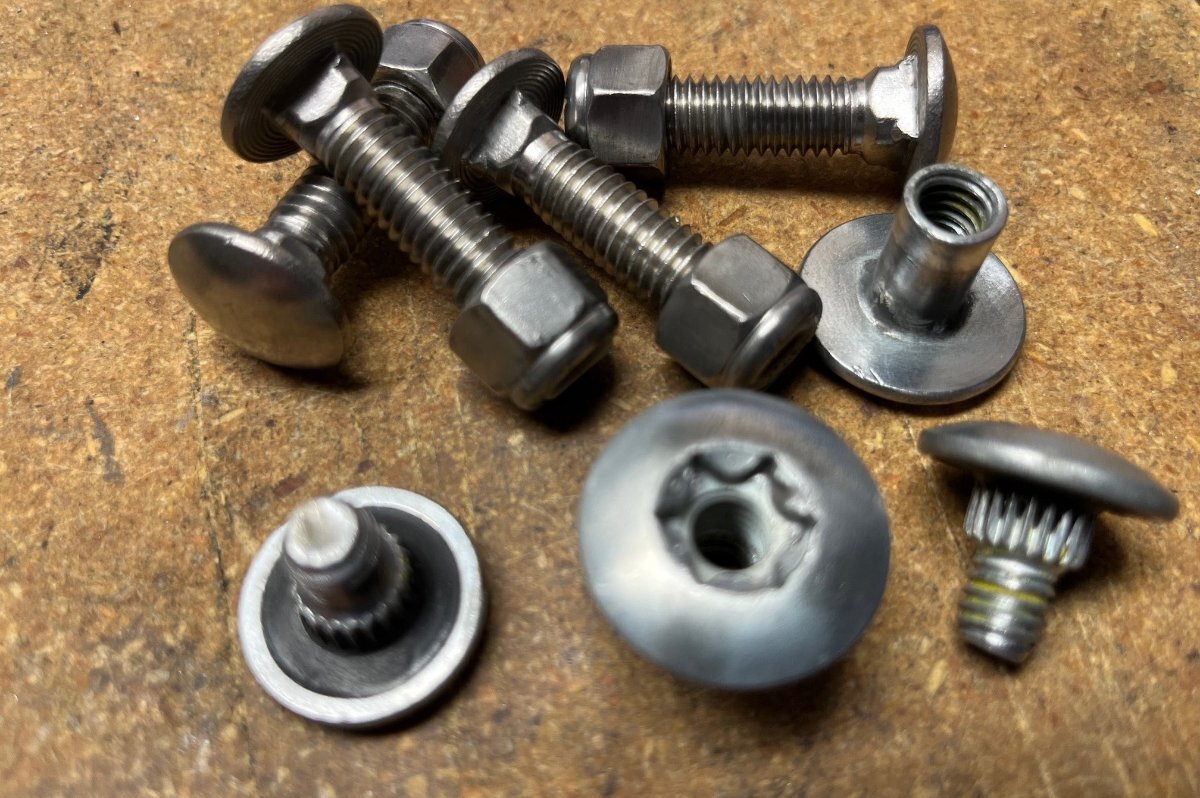
I got ours done today and I asked Chris to walk on it first with her light touch. I didn't want to even climb aboard with my work shoes on! 🤣 Yes, they will get dirty again as soon, as we hit an Arizona dirt road, likely September. Man, all-in-all this turned out really nice! Dirty later yes, but I can pull it down and put it up with one centered hand and just a light push. I did make a minor modification, adding washers to take up space on the axle, since there was about 3/8" of left to right slop (way too much). The added washers cut that in half. This is some of the issue in the difficulty in working the steps. Anybody considering this full maintenance, order a new set of short splined Torx bolts from OTT first (see pic). These are very short and upon compression, they get somewhat deformed. I was able to rethread one, but not the other after many attempts. Temporarily I used a 5/16" bolt with nylock nut. I have rebuilt a half dozen old car and truck suspensions, done over 20 brake jobs and if I could not get these bolts to thread, most DIYers would not have a chance, I promise. I have another item or two I want to order from OTT and will likely by 3 of these. One to replace the bad one and a pair for the next time (unless they cost $20 each)! The secret in getting the steps to push and pull smoothly is to file the up-n-down slanted groove where the axle lies (pic above). Then I lubed all contact point with Napa Sil-Glyde: Lubricant - Multi Purpose Sil-Glyde Lubricates 4oz. Plastic Tube BK 7651351 | Buy Online - NAPA Auto Parts (napaonline.com) I've used this product in multiple brake jobs, rebuilding the calipers on my '84 Goldwing and more (lasting for YEARS now). After rubbing it into every contact point, the ends of the axle, every spacer and washer, the bottom edge where the steps contact the frame, and the frame contact points too (not a WD-40 fan)... Work the steps back and forth several times and then spend time removing all the excess, as excess grease collects dirt. I'm not going to fight with these steps anymore, and for years to come!
2 points
-
In 2017 when we picked up hull 208, the factory had not balanced the tires. The guys lifted the camper in the shop with all four tires off the ground, removed all four, and balanced them. The three jacks readily lifted the camper. Since then I have had one side or the other off of the ground on several occasions in order to level the camper. That said, I have the Andersen leveling wedges and use them nearly every time we camp instead of using the jacks for anything more than just stabilizing. Early on, there was one instance that I know of where a rear bracket was not completely welded and broke when the camper was being stabilized. Other than that one incident I have never heard of any issues with the ability of the jacks not being able to lift the LEII. Understandably, with an abundance of caution/safety, Oliver has backed off on suggesting that the jacks can be used to completely lift the camper. We must remember that the lightest our campers will ever be is just before we take possession of them. After that, they begin to gain weight. The phrase “just because you can, doesn’t mean you should” comes into play here.2 points
-
theOrca, The Dometic FreshJet comes with a very nice factory seal where it makes contact with the Oliver. It also comes with four additional factory installed blocks at each corner that help distribute the weight of the unit over a larger area. In addition the FreshJet weighs less than the Penguin. The bolt pattern is inside of the opening, the same as the old noisy Penguin. I hope this answers some of your concerns, you are welcome to message me if you have any questions about my AC installation.2 points
-
"If" I powdercoated the steps, I'd probably go with silver. Aluminum color. I treat mine with garage door silicone spray, and no issues. White would undoubtedly get really dirty looking, riding where they do. The incredibly sturdy double step is standard for most of you, but it was an upgrade (years later) for those of us with 2008's. I cracked a rib on a crazy site trying to reach a footstool below the step. 2010? It flipped. Anyway, one of the best upgrades, ever, standard for all you new folks.2 points
-
Nice truck, but I can't see it handling very well in the water... 🦆🚣♂️1 point
-
That's a good way of wording it. My 2WK Xantrex is inverter only (no charger and no ATS). All it does is supply 120V AC to two plug-in outlets. The switching in this system occurs in the PROwatt SW, an external switch.1 point
-
You're not misunderstanding. Without doing the math myself, Victron's numbers appear correct. Over-engineering is common in DIY efforts and going to heavier gauge cable doesn't hurt, just costs more money. OTT installed 4/0 in our hull too. The length of the run, from the batteries to our 2KW inverter under the rear dinette seat is about 1m or 4 ft at most. The Oliver is over-engineered in many ways, and we appreciate that. The cost difference of 2-3m of 4/0 over 1/0 cable, at wholesale to a manufacture, is not much and they are being over-safe for a few bucks. When I go to install a DC-to-DC charger, two cables the length of TV and TT, likely over 25m, I will buy the gauge required and nothing more due to the retail cost of copper today!1 point
-
I’m glad I part my hair down the middle!1 point
-
This is the issue. For example, at home we program our thermostat for summer A/C temps between 78 degrees in the heat of the afternoons and much cooler to 74 overnight to keep some air movement and sleep better. For winter heat, the numbers are much lower; down to 64 degrees prior to dawn and up to 70 in the evenings. This makes us comfortable at home. The last thing I want in the Oliver, or anywhere else for that matter, is for when it gets naturally cooler overnight approaching dawn is for the heat pump to come on when the temp gets 1-2 degrees lower, OMG! A valid design has at least two set temps, one for each system (at home we have 4 per day for A/C and 4 more for heat). Why do these design engineers not understand something so basic. When I talked to Kevin at SDG, the Atmos rep and installation co., he explained it in this way. I asked him, why would I want that? He explained it as a positive feature, and I replied that to me this is an issue. I would rather the A/C not have heat pump, or at least the ability to turn it off. We use the ceiling A/C when it's hot, run the LP furnace when it/s cold and I have NEVER seen a 24-hour period where we want or need both.1 point
-
4/0 is what was factory installed on our 2023 model. Since main fuse is 300 amp, conductors have to be rated for that amount of current.1 point
-
Update: July 13, 2024 I completed the Houghton 3400 “Humidity Mod” as presented in the attached "Wiring Modification for Interior Fan" document. This excellent write-up was provided by GSM Bear, Version 2 and posted 7/30/2023. His document needs to be fully understood before starting this Mod. It took me about 2 hours working off a ladder on the curb side to carefully complete the mod. Suggestions: The suggested wire measurements are adequate and allow for re-termination if necessary. No need to add any extra length. I recommend that you prefabricate the new brown, black, and white wires. Much easier to do so on your bench vs. on the roof. Then physically plug them into the relay. One less thing to worry about when on the ladder. You will need all the “Parts and Tools Needed” as listed by GSMBear. Additional Tools and Supplied I Found Useful: Ladder Head lamp Wire cutter Magnet on a stick Large Phillips bit Silicone to reseal the electrical box Needle nosed & regular pliers Camera (I took pictures to allow me to “blow up” to get a closer look into the electrical box connections.) Mod Results: The Houghton ran as expected as the fan shut down with the compressor when it cycled down to low speed (Fan set to auto). Houghton also worked as expected with the fan set to low speed. This is the ultra good dehumidifying and quietest setting. Significantly lowered the humidity levels in the cabin. I had to set the remote temperature to a MUCH lower setting to get the cabin to a cool level. The unit Cycle time was significantly extended with the mod. As in extended way too infrequently. I believe that at the end of a compressor run, the fan shuts down with the overhead super cold coils, The coils then chill the air in the unit and being heavier it sinks down past the thermistor. As a result, the process keeps the thermistor “Chilled”. This delays the restart longer than desired. Moving the thermister to a location outside of the unit is needed Hence, the Thermistor Mod is required, as GSMBear states in his document. More to follow with completion of the Thermistor Mod in the next day or two. GJ GSM BEAR V2 RecPro Houghton Interior Fan Mod v2.pdf1 point
-
Question about your GFCI comment. At least with my factory wiring, the GFCI protection for all of the trailer outlets came from the GFCI feed at the Xantrex. Removing the Xantrex (which I am doing shortly) removes the GFCI feed to all of the outlets. I haven’t dug in yet, but it appears I need to either add a GFCI breaker in the panel (don’t know if that’s even possible), or install a GFCI outlet at the first outlet from the panel and then feed all others downstream on the load side of the GFCI. How did you do this?1 point
-
Thanks for the segway JD! I completed the Houghton Humidity Mod (Install Relay) yesterday. Phase II is to do the thermistor relocation mod, Should have it done in the next day or so. Both are required as GSMBear stated in his July 2023 posting. I'll be posting on what I learnd and thoughts on the Houghton Thread. GJ1 point
-
The stabilizer jacks well exceed their intended use; but do require special attention as to not over extend/retract, which can cause a fuse to blow and/or gear head damage. Additionally, one should routinely check the jack mounts for loose hardware and ensure they are examined as part of the departure checklist.1 point
-
@Ronbrink Emailed Tony @Mechman.com and ended up ordering the Elite series alternator for the Tundra. Thanks for reminding me. Hand-made in Knoxville, TN Mike1 point
-
Many have commented over the years on the use of the stabilizer jacks to lift the trailer enough to change a flat tire, well exceeding one or two inches of lift. However, from a safety aspect the trailer should always be connected to a TV when doing so and never ever have any part of your person under the trailer during the process. That said, I feel comfortable using the jacks to further tweak the level side-to-side, but only after utilizing some kind of leveling blocks or wedges first, thus minimizing the degree of actual jack lift. Once the leveling task is achieved, wheel chocks/wedges are placed to lessen any movement when disconnecting the TV.1 point
-
There are a few other manufacturers of quality high output alternators, some if not all provide custom builds.1 point
-
Following. Our Victron MPII just arrived, along with all of the other Victron equipment. Install to commence next week. Like others, the power assist mode was the primary driver. I found when running on generator power (dual Honda EU2200i) paralleled and in ECO mode, the generators could not start our Houghton heat pump. So I had to run them with ECO mode off all the time. I'm hoping that with power assist from the Victron, I can run the Honda's in ECO mode and still start the Houghton. Considered adding soft start too, but will wait and see if the power assist works as advertised.1 point
-
Rebecca and I send best wishes - hope that the surgery goes well and quick recovery.1 point
-
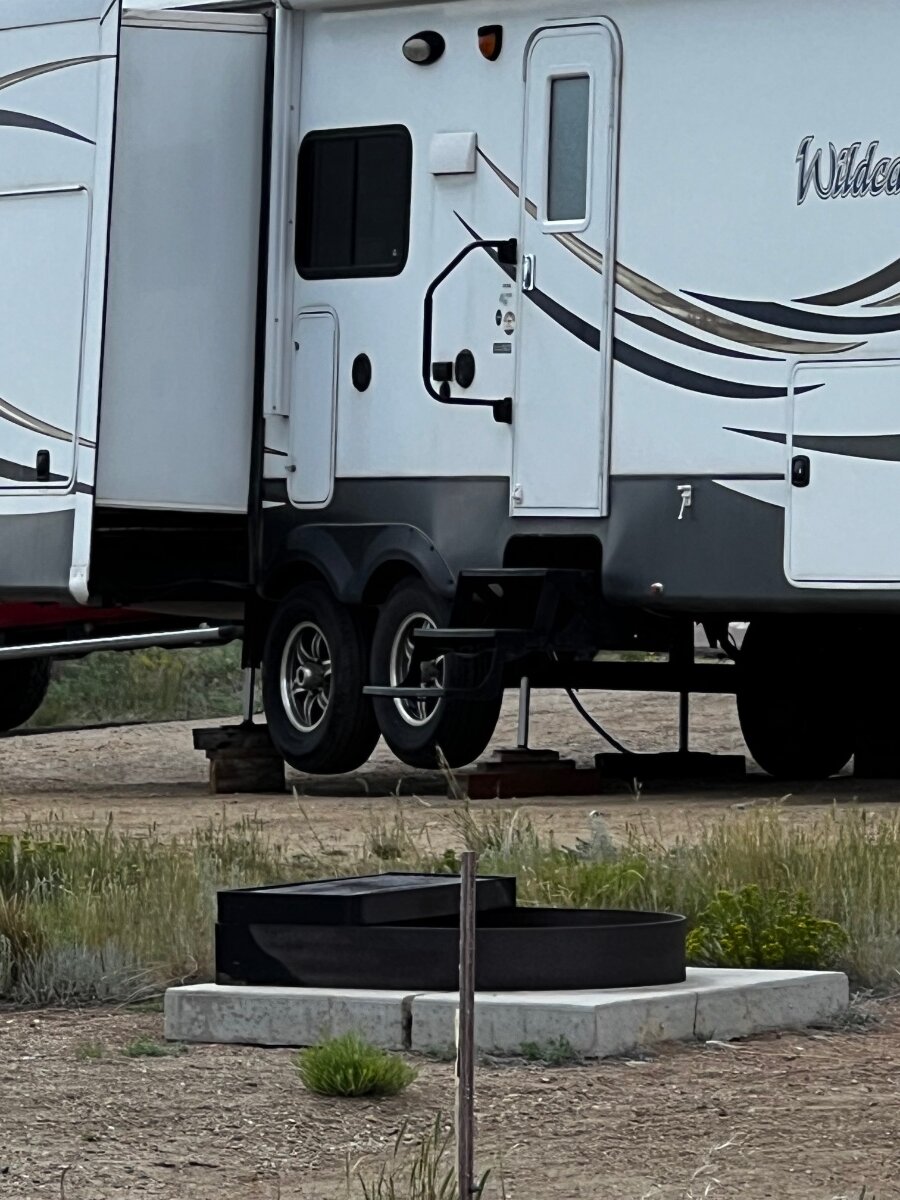
Would not recommend using them like this. Plus - I have no idea how the occupants ever reached that first step.
1 point
-
@jd1923, it's easy, and you will make your wife very happy, imo.1 point
-
Call Ryan at Blue sky/sunforge. Or, send him an email. He's so very helpful. Our Blue Sky gear has been incredibly dependable.1 point
-
It amazes me that since OTT created this defect, back when hull #110 was built, that they did not correct it now when you were in the shop. They should have cut out the old hangers, and welded new ones at their expense and then you could have paid for your desired axle upgrade.1 point
-
You can use them temporarily, for example lifting high enough to mount the spare tire if you get a flat. As far as when camping, you want to have 90% of the weight on the tires and front jack. Use the rear jacks just for finish leveling. I use these to bring the trailer to the right height, left or right, and then apply the jacks for enough pressure so that the trailer does not wobble in the wind or when climbing the steps. Amazon.com: ANDERSEN HITCHES | 3604-2 2-Pack Camper Leveler System Must Have RV | Camping Travel Easy Storage Jack Stabilizer Block | Levelers Blocks for Campers and Fifth Wheels : Automotive1 point
-
The two rear jacks are exactly the same mechanically as the front one, they just don't have a control head. Barker makes them specially for Oliver so you won't find them listed online.1 point
-
The first thing I would do is to plug the MW into a standard 110 outlet using a GFCI extension cord like This one. If it doesn't trip when you open the door then your GFCI outlet on your Ollie is most likely going bad, and if it does trip, then the MW itself is the issue.1 point
-
Y’all are amazing! A few weeks into this and your Oliver is already heads up over some of ours, where in my case we’ve been working hard for over a year. Maybe that’s due to your 6 years of careful thinking and planning. G-bless!1 point
-
Please add to your list: Ron and Brooxie Brinkley, Hull #579, Hull Name My COW, Site #227. Thanks1 point
-
Just remember that if you disconnect the batteries from everything including the solar charge controller you need to disconnect the charge controller first from the solar panels. Or risk damaging the solar charge controller.1 point
-
For anyone interested in purchasing one, Home Depot has the Maxxfan with LED on sale for $73 at the moment. MaxxFan Dome Plus with 12-Volt Fan and LED Light1 point
-
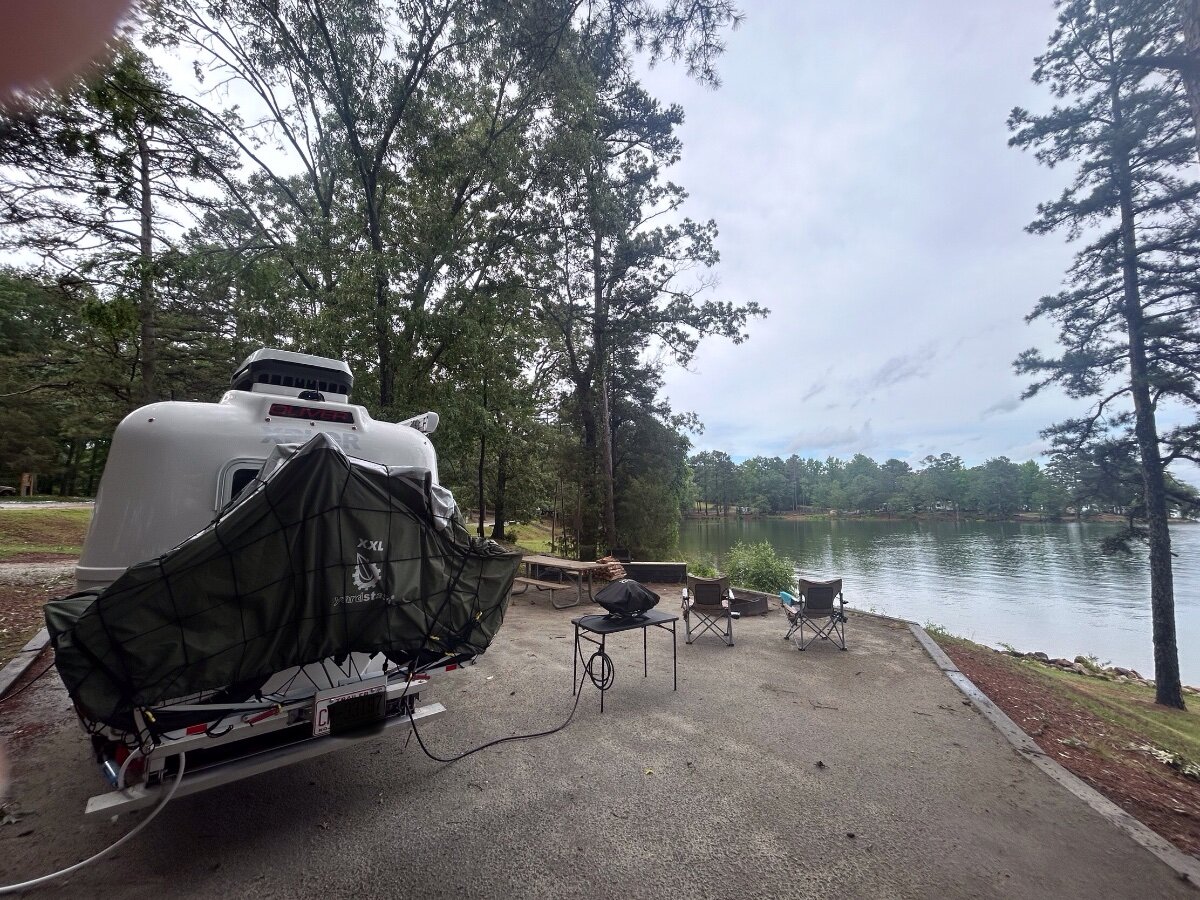
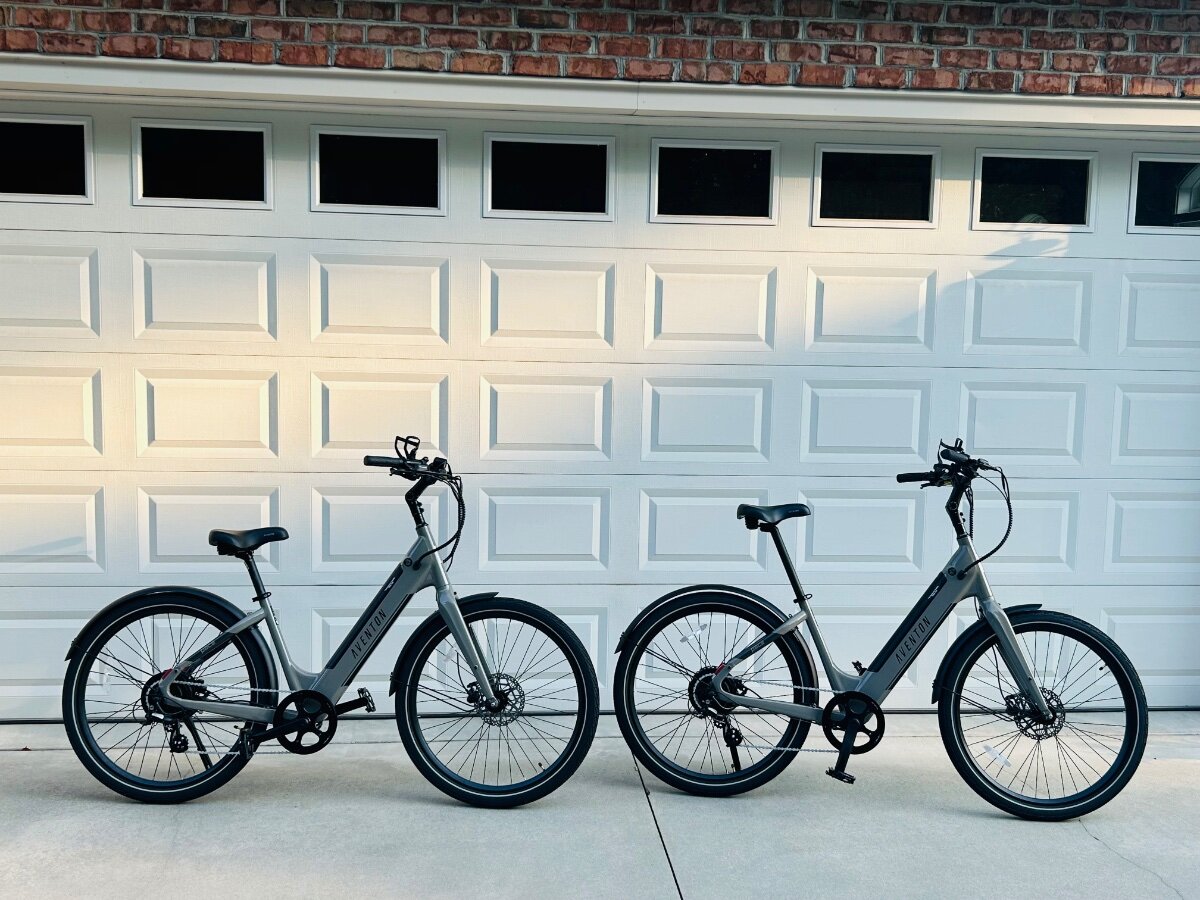
Something to consider is a XXL Yard Stash cover. It really helps keep our bikes clean and dry. No issues with rear light visibility. 👍🏻 We recently added these Aventon class 3 Pace 500.3’s STs in “Basalt” color or putty gray to our stable with the current free extra battery promo going on. If you test ride one, you may will quickly come down with a permanent big smile and severe case of the “wanties”. Aventon nailed it on the torque sensor. They reeeally are a blast to ride! We ordered our bikes from our LBS before the recent $200 tariff price increase. I highly reccomend purchasing through a local bike shop and NOT online for many reasons, most importantly if you need any warranty work. We have an excellent relationship with the owners of our local shop which is a huge plus. These bikes come with a solid 2 year warranty and very positive reviews on YouTube and individual owner reviews. Pedal On!! https://www.aventon.com/products/pace500-3-step-through-ebike?variant=43302187827395 Had the shop install these prior to pick up - https://tannusamerica.com/?tw_source=google&tw_adid=696203111208&tw_campaign=21175368863&gad_source=1&gclid=CjwKCAjwm_SzBhAsEiwAXE2CvylXQsoLuEG60SH7YcvO73R0ySnlJ67FAjHIGwI4OVw3xpDThyf2NBoCjnsQAvD_BwE
1 point
-
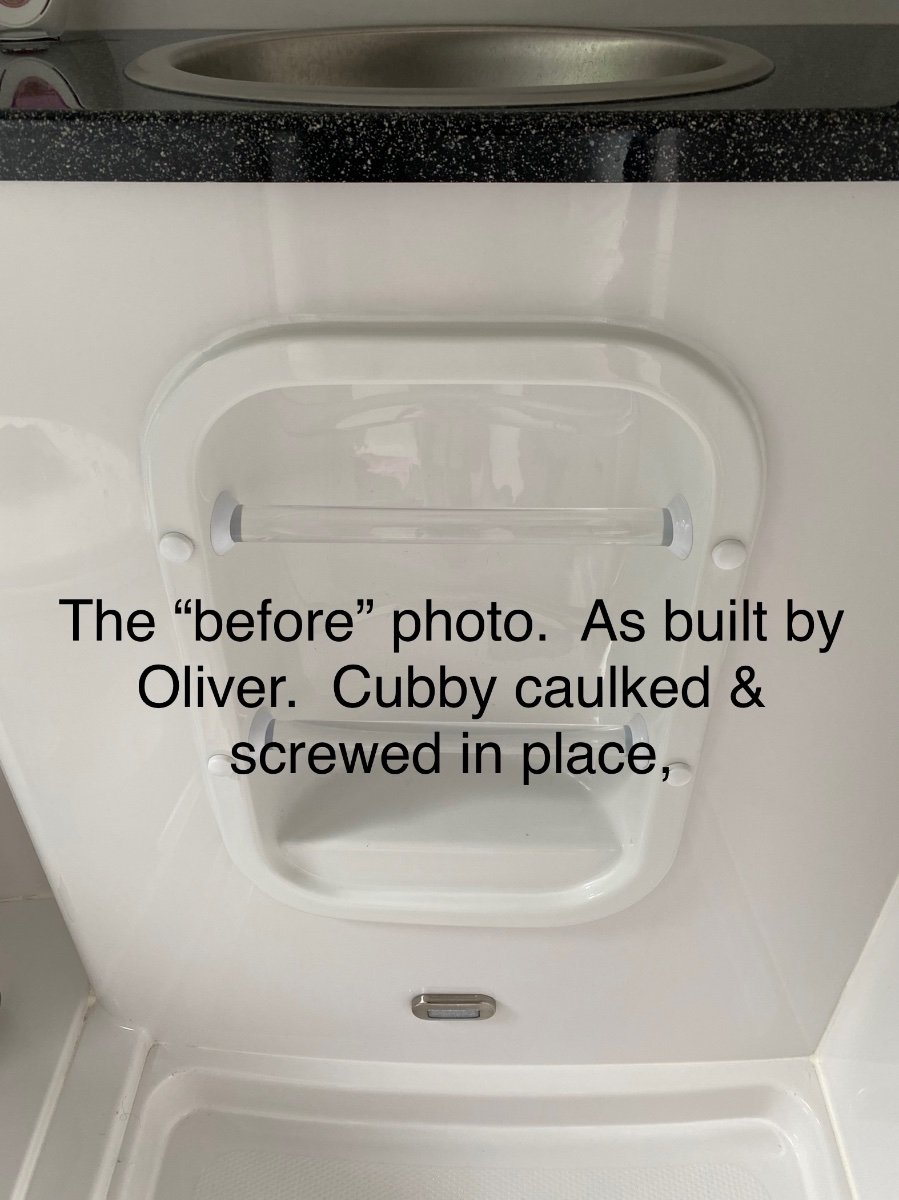
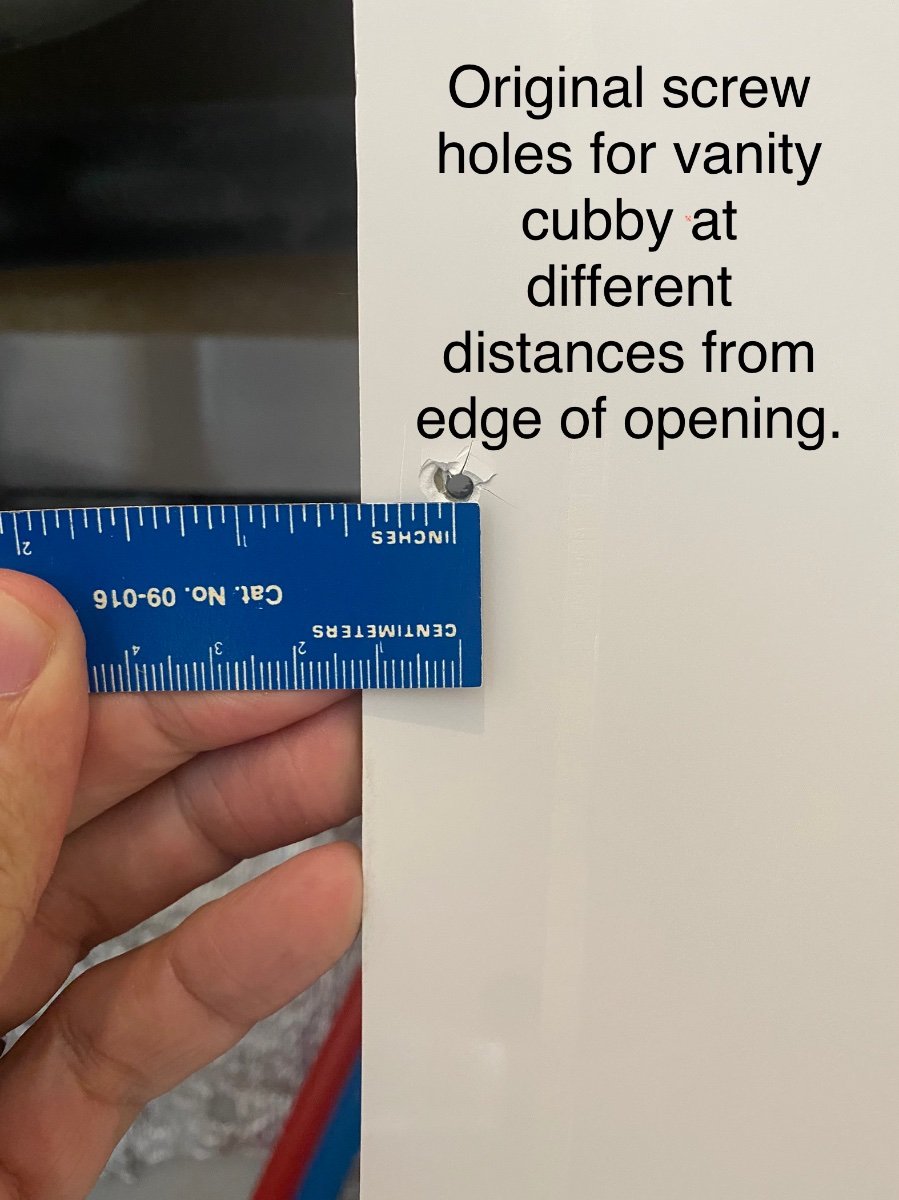
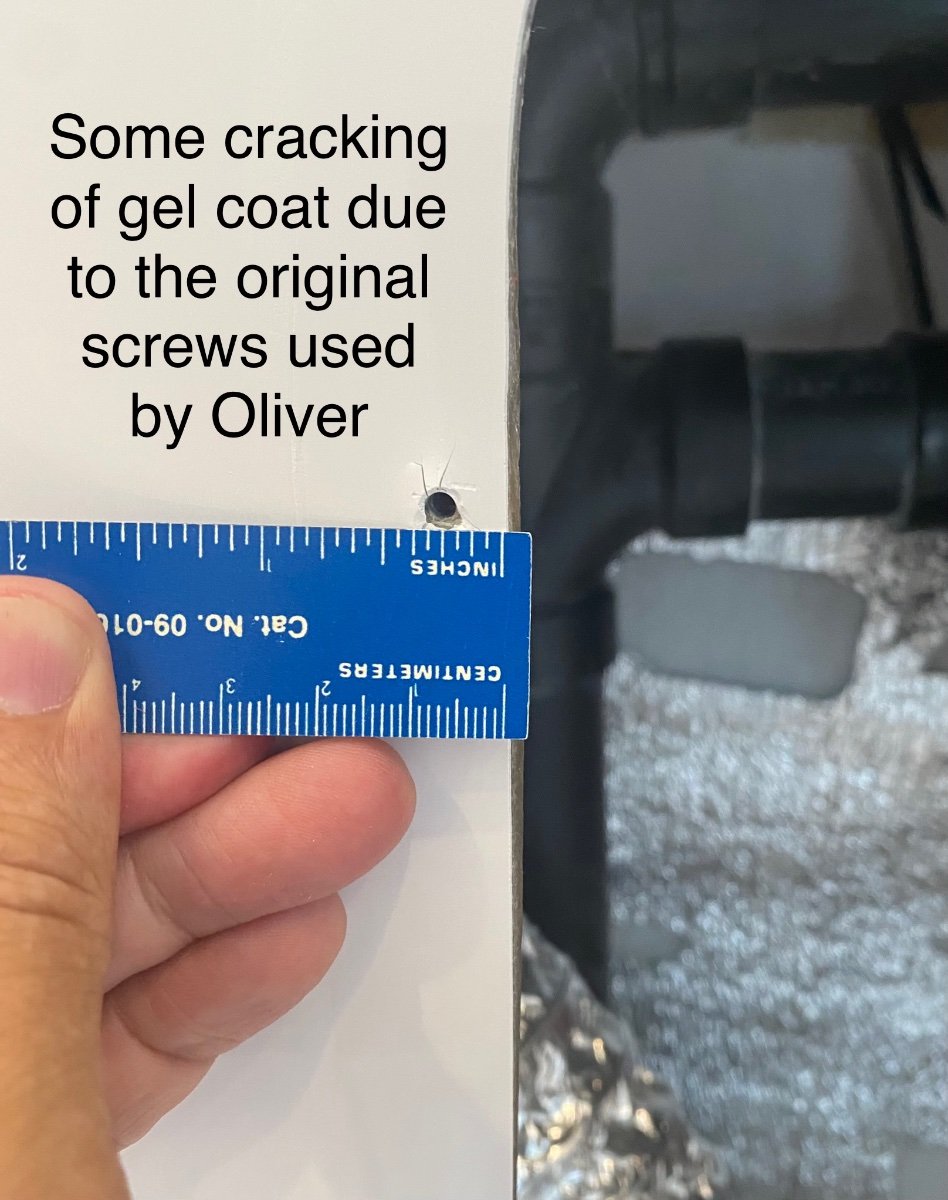
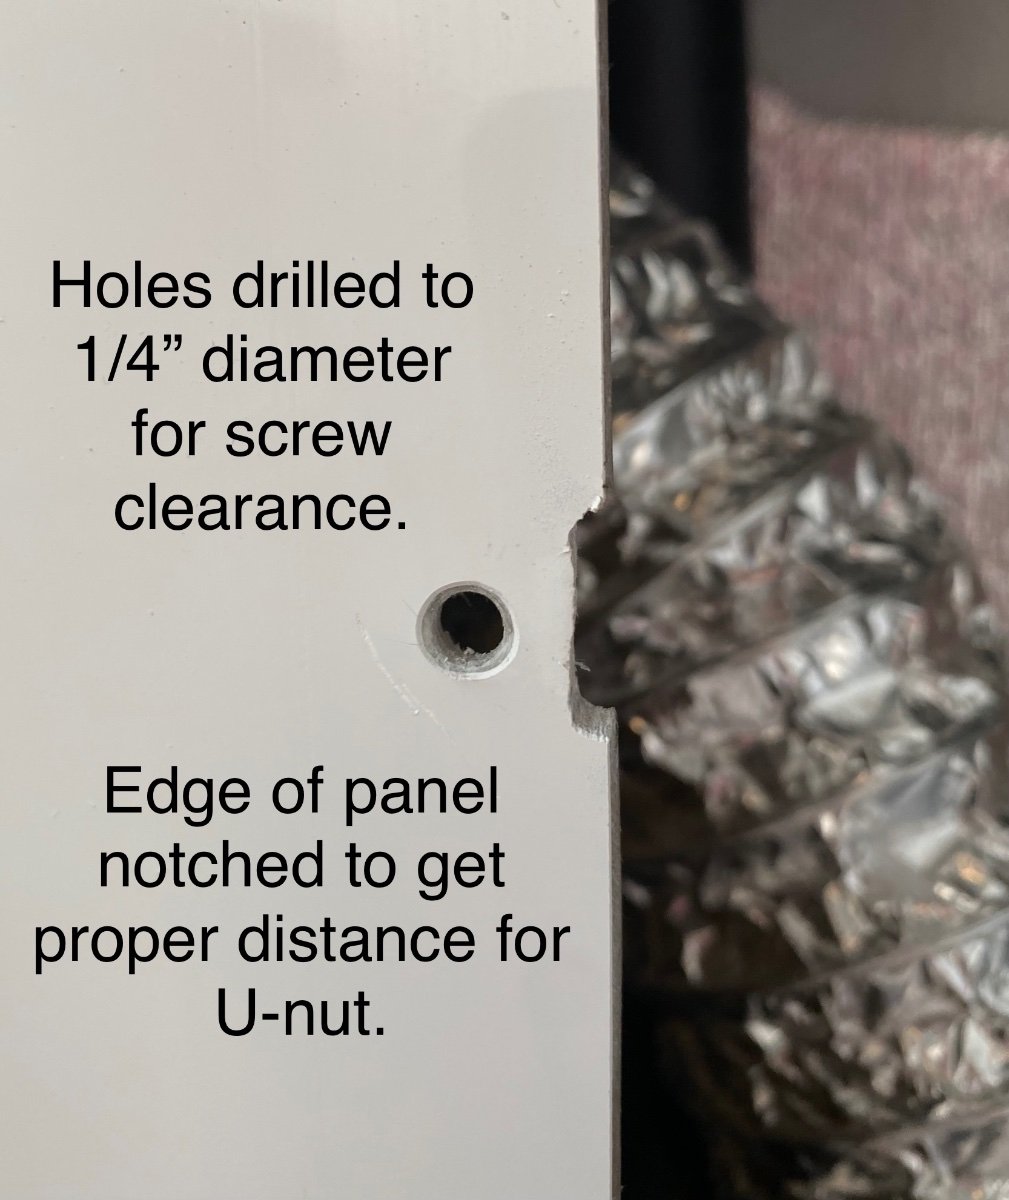
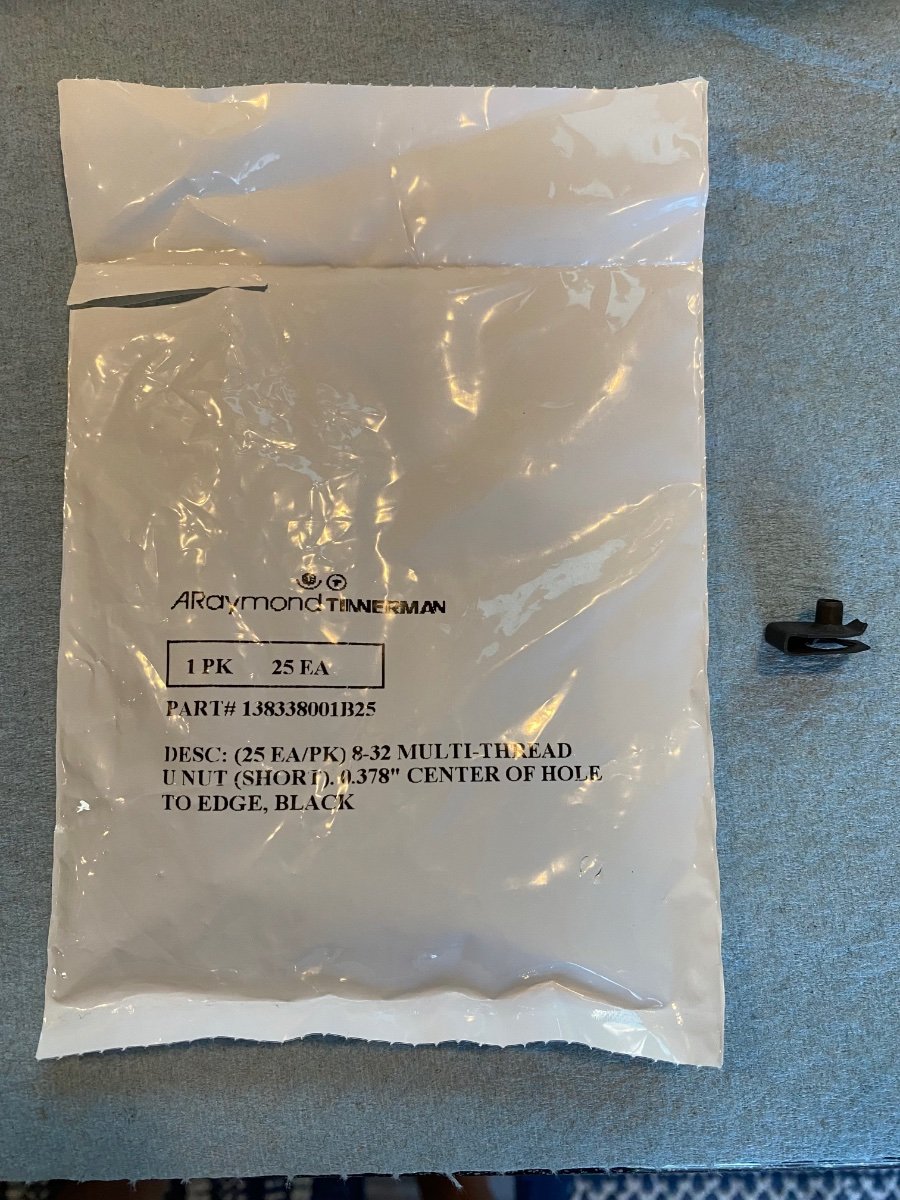
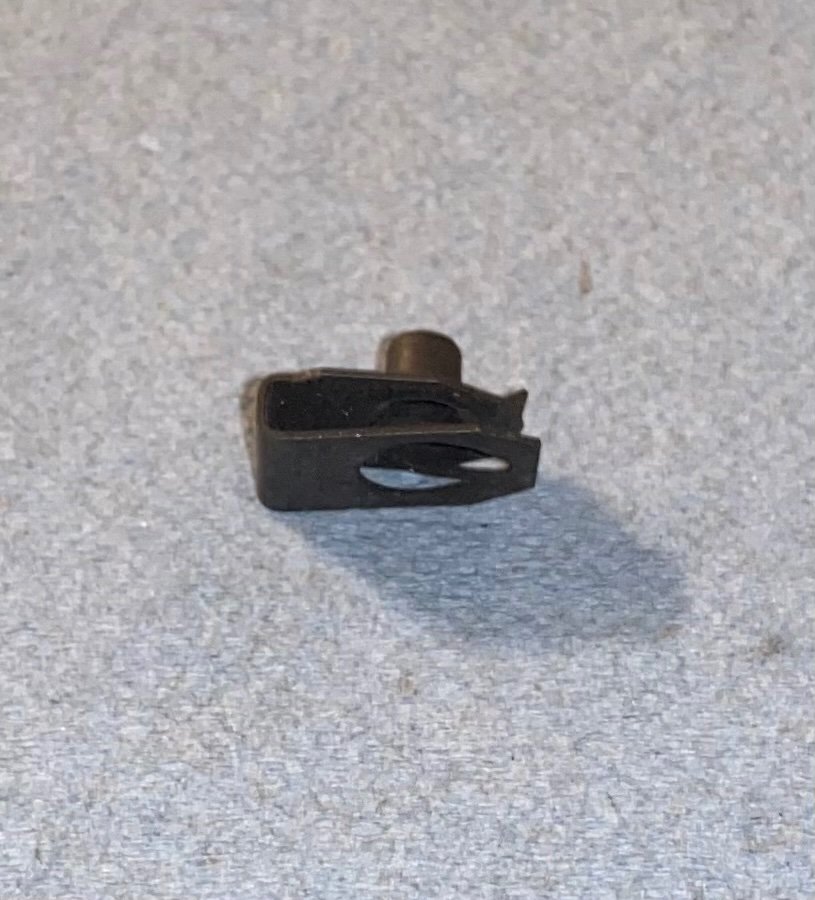
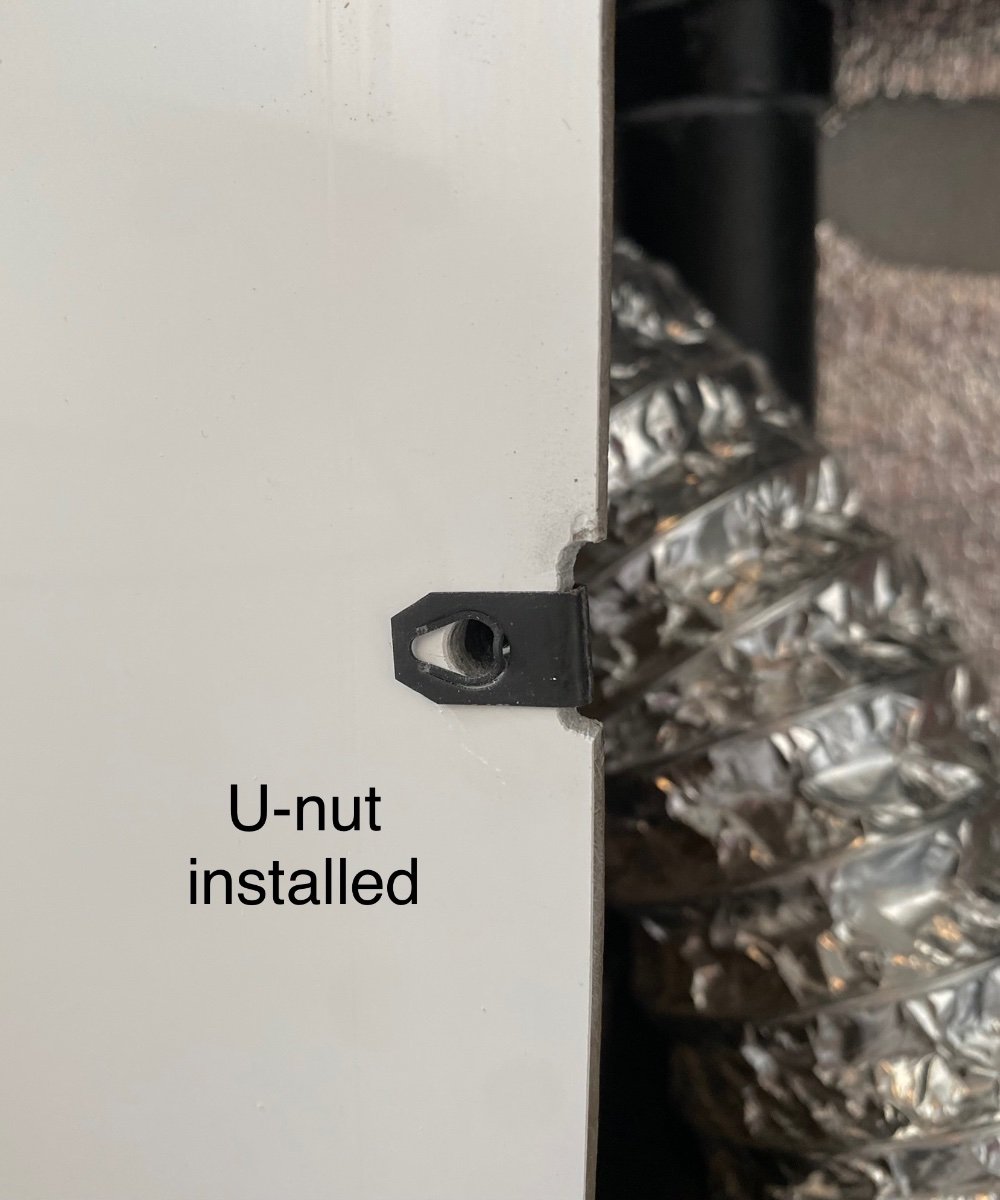
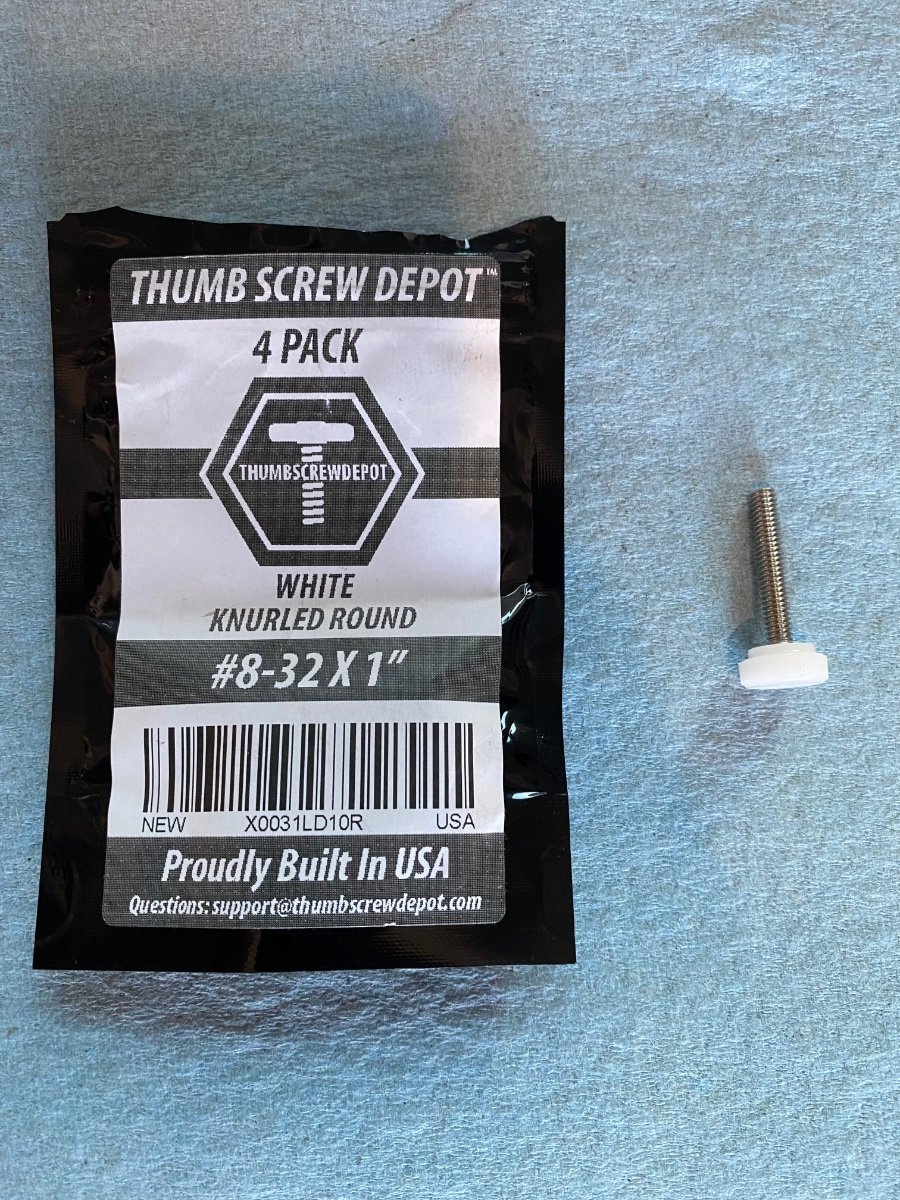
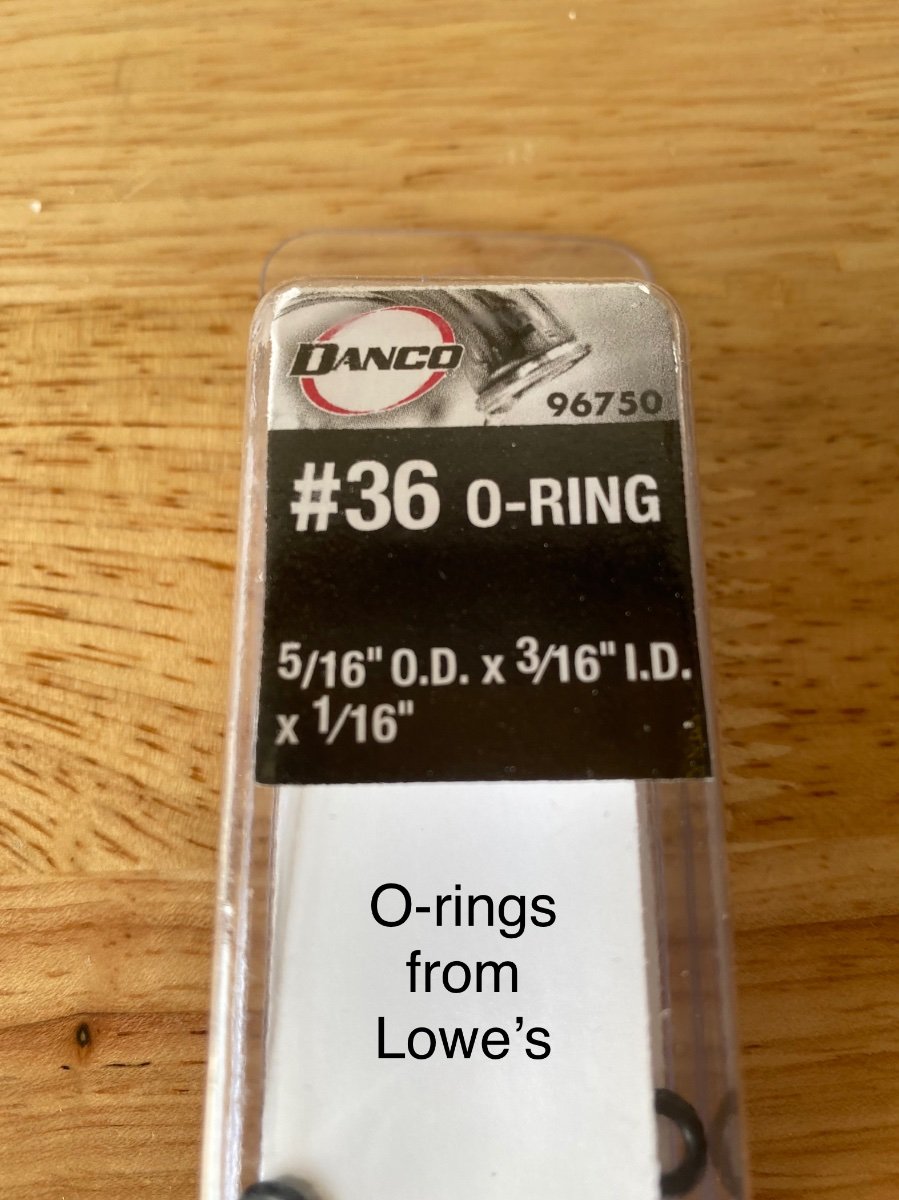
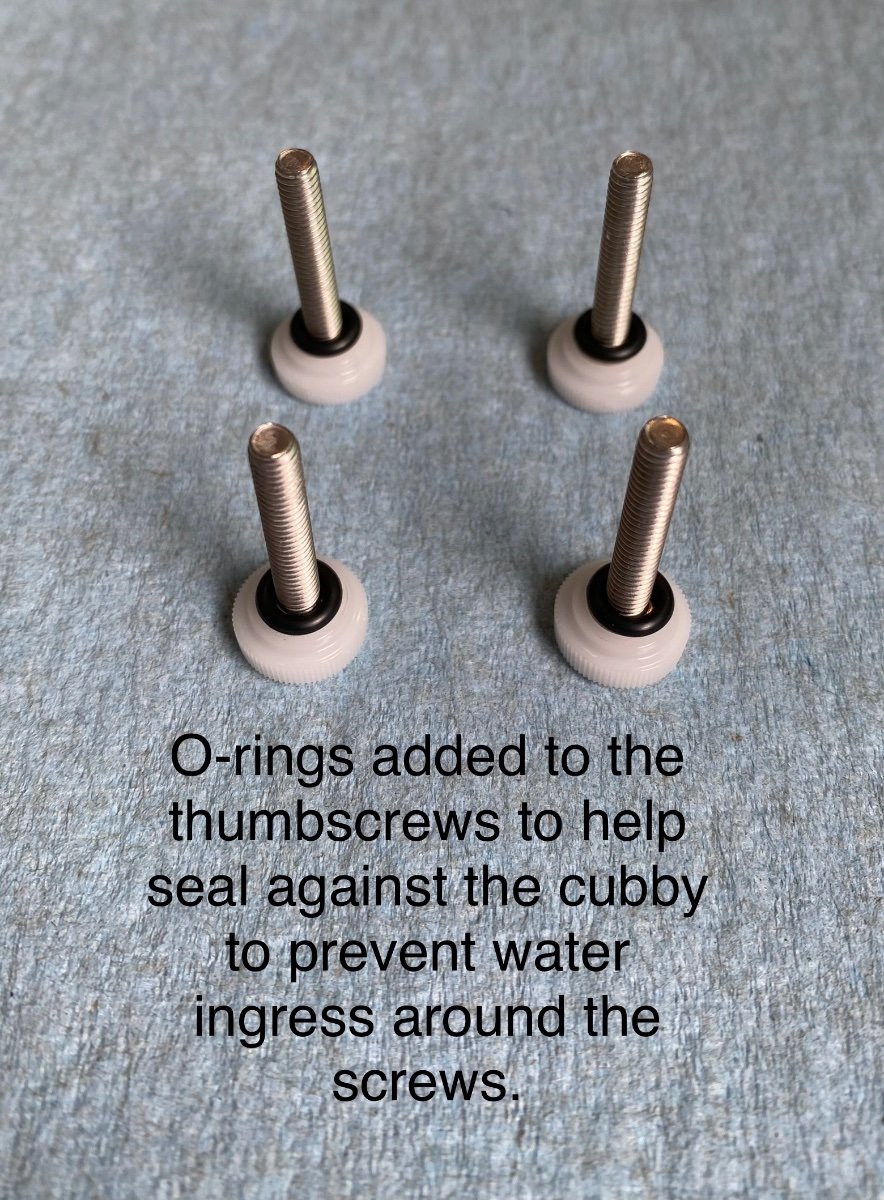
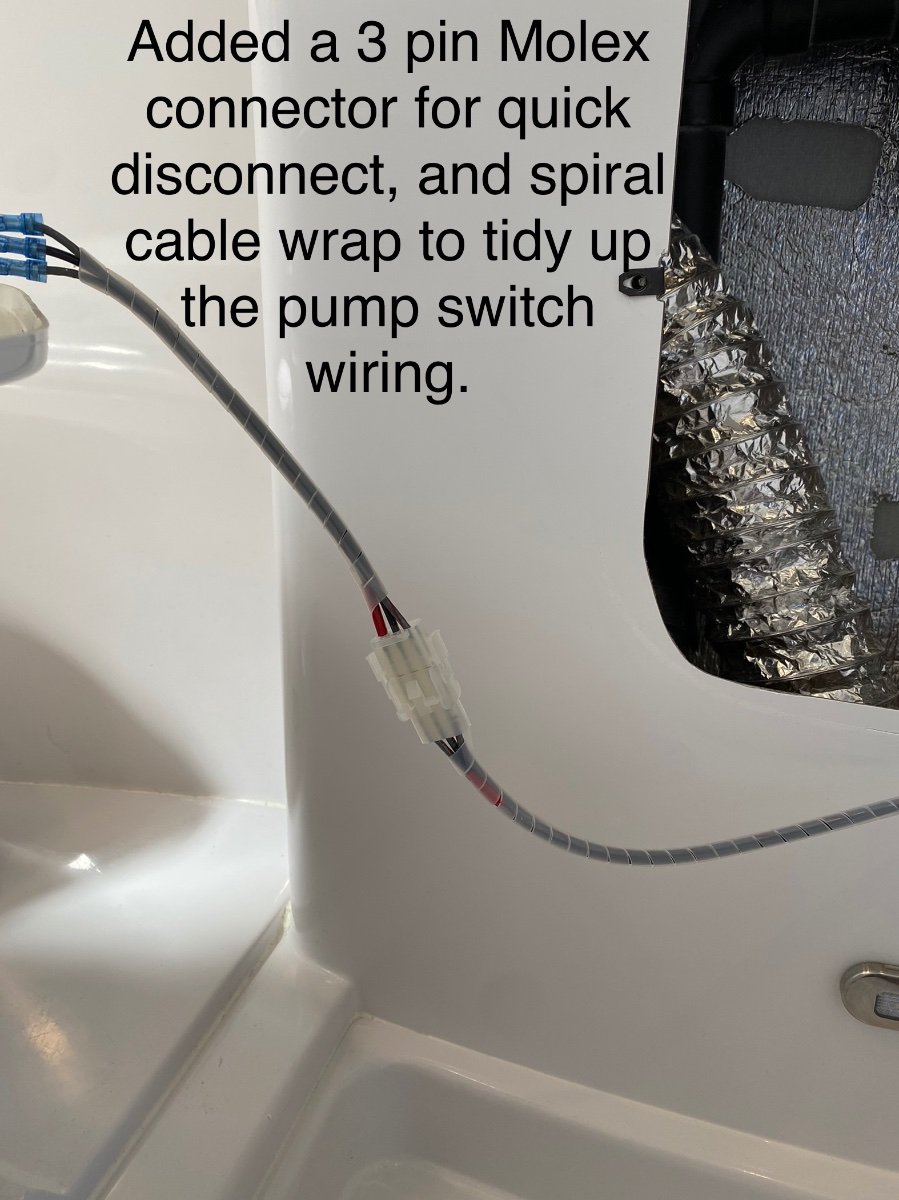
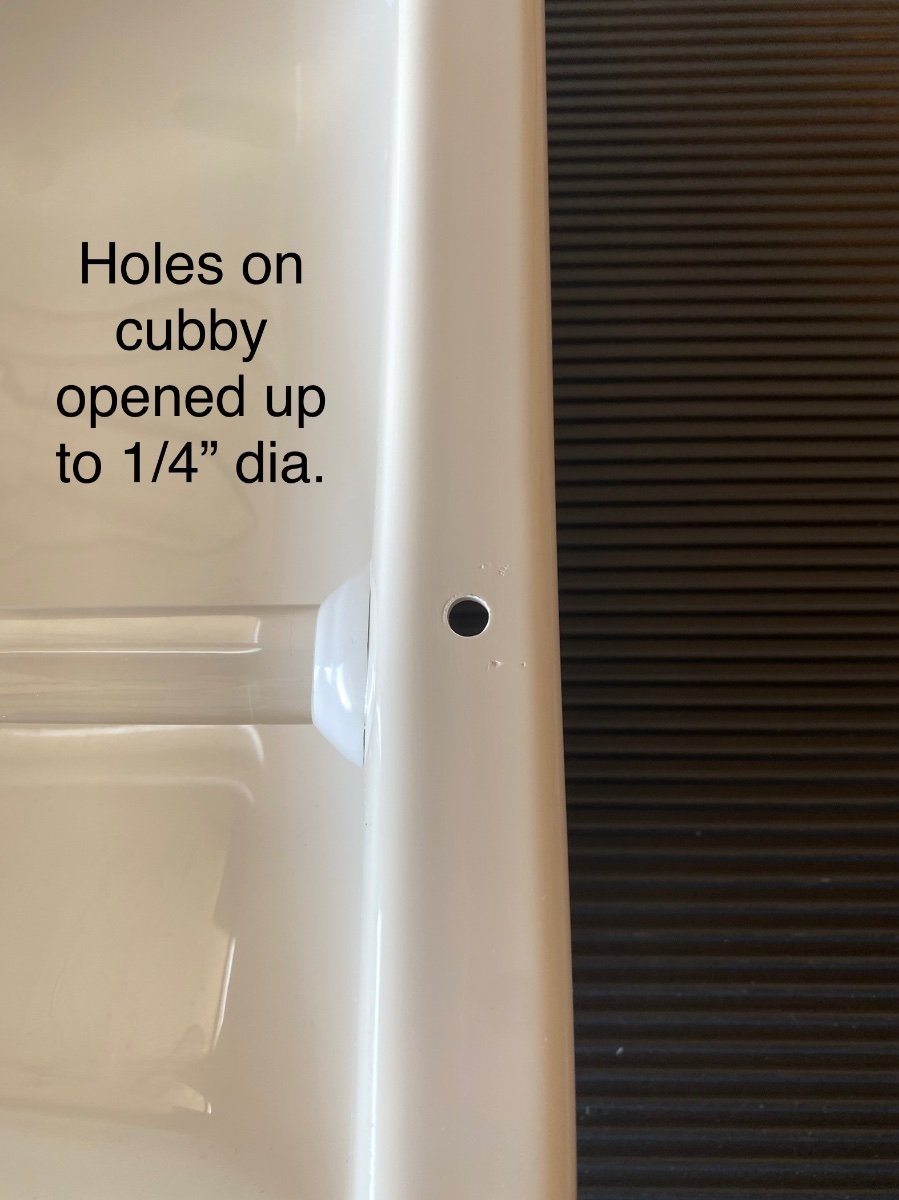
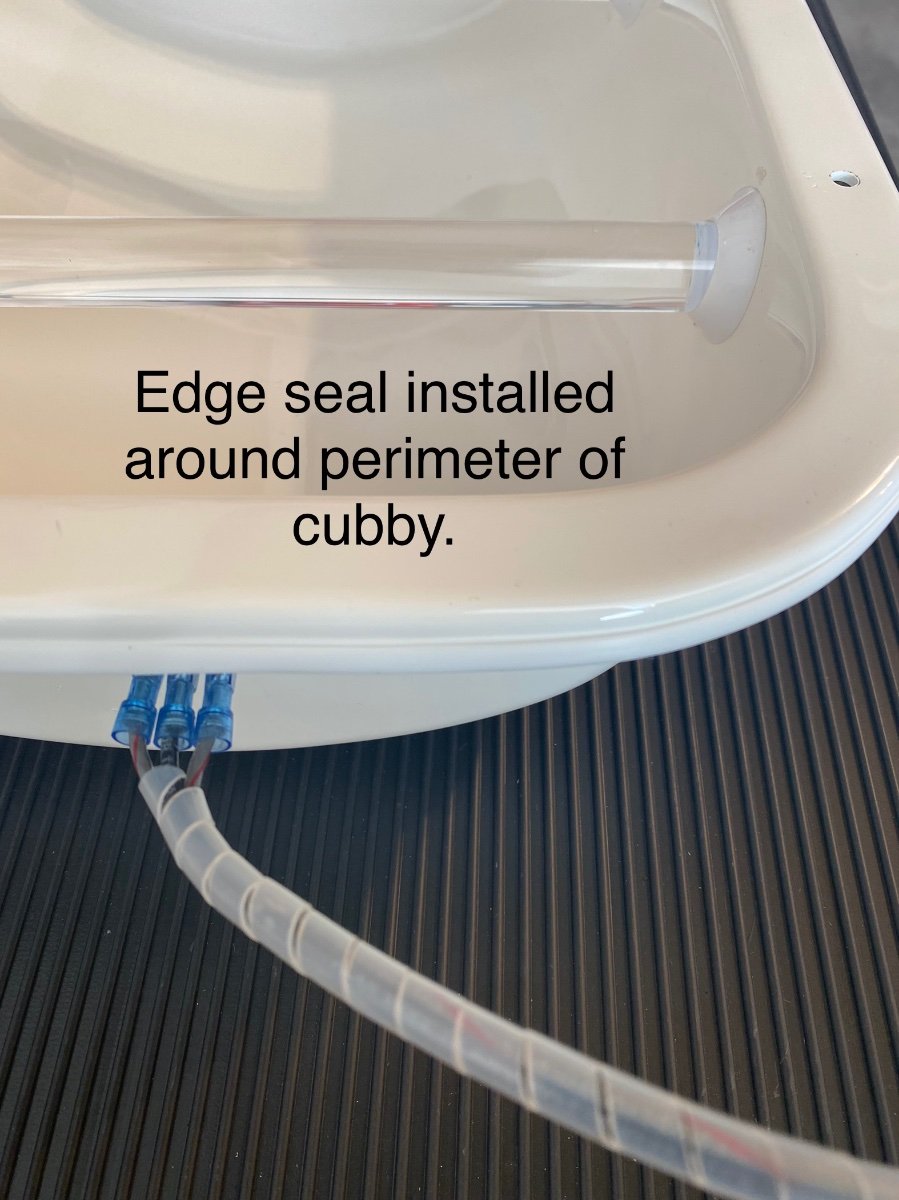
One of the great features of the Oliver trailer design is the fast and easy (no tools needed) access to ALMOST all of the plumbing, heating, and electrical systems through the hatches under the dinette seats and the beds, or by removing the kitchen cabinet drawers. One area that’s NOT readily accessible is the area under the bathroom vanity, even though there is plumbing, electrical, and furnace ductwork all tucked inside the vanity. The storage cubby in the front of the vanity is screwed AND CAULKED in place by Oliver at the factory, so access is a bit more complicated than the other areas. I recently needed to get into that vanity area for some inspection and maintenance, and after completing that I wanted to make future access easier (no tools needed and no caulking). I know some owners have replaced the storage cubby with a hinged marine access panel, but I didn’t want to lose the cubby storage. So here’s a detailed description of a simple modification I did, along with links to the parts used. Access is now fast and easy. No-Slip Clip-On Barrel Nut, for 0.025" to 0.15" Panel Thickness, 8-32 Thread Size https://www.mcmaster.com/94850A111 #8-32 x 1" Thumb Screw Stainless... https://www.amazon.com/dp/B09FZVLZKD?ref=ppx_pop_mob_ap_share uxcell Edge Trim U Seal Extrusion, Silicone White U Channel Edge Protector Sheet Fits 0.5-2.5mm Edge 3Meters/9.84Ft Length https://a.co/d/1uWUZB3 Molex -3 Match Set - (3-Pin) w/14-20 AWG, Wire Connector - 2.13mm D, Latch Lock, MLX https://a.co/d/gapvioi
1 point
-
The nightstand drawer is a great catch-all until you need to find something. The drawer is deep, long, and can hold a lot of stuff, but finding something is always, a dig until you find it. My two-piece organizer solves that problem by dividing the lower part of the drawer into a larger back compartment and two smaller front compartments. Sitting on top of these lower compartments is a sliding half drawer that provides quick access to the most needed items – remotes, keys, glasses, etc. And with a simple push, you can get to the items below. Crafted from mahogany with birch plywood bottoms, it is assembled using miter and dado joints for years of use. To this, a hand-rubbed oil finish is applied to show off the beautiful mahogany and make it a fantastic upgrade to your nightstand. I charge $115 + UPS shipping. I do not require a deposit as I like my clients to see my craft before they compensate me. I accept checks and Zelle for payments. Lead time is one week. PM me if you would like me to craft one for your Oliver.
1 point
-
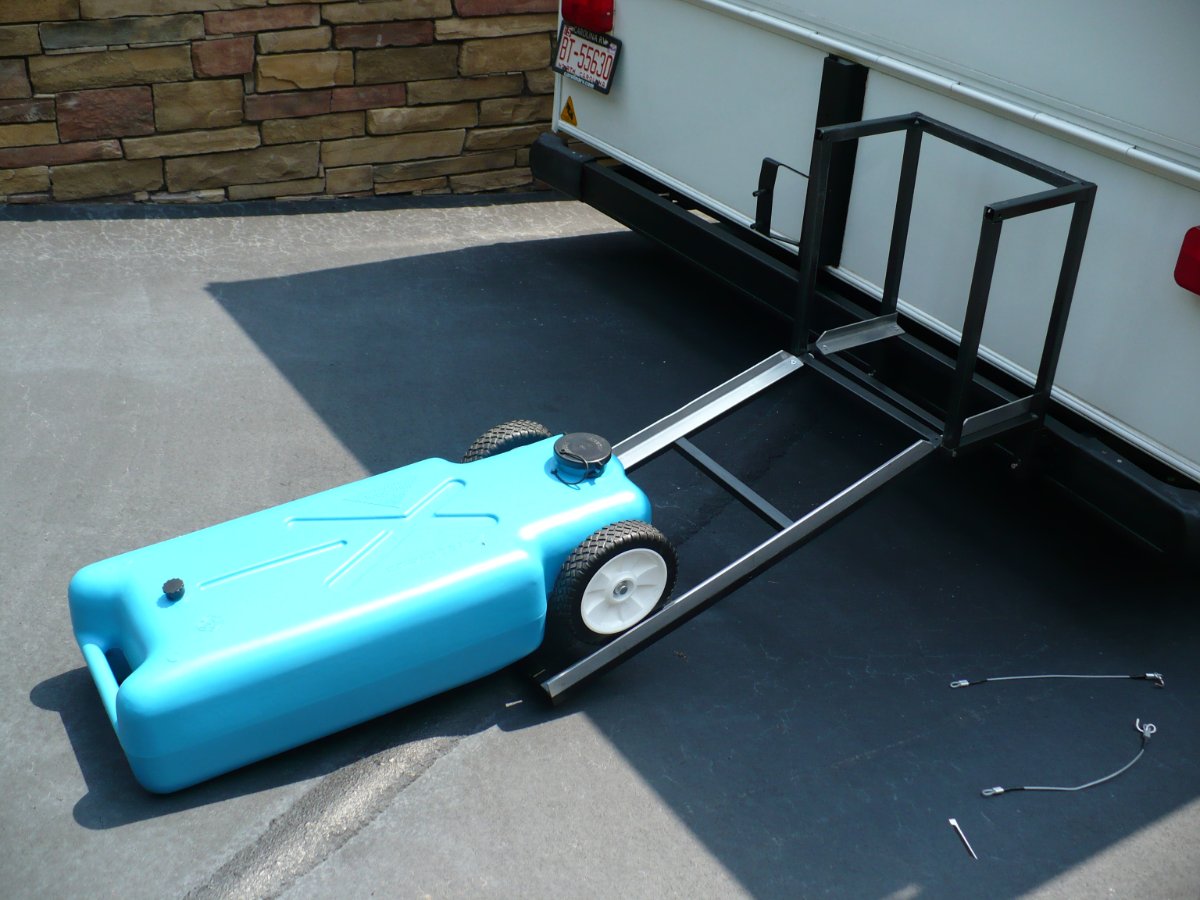
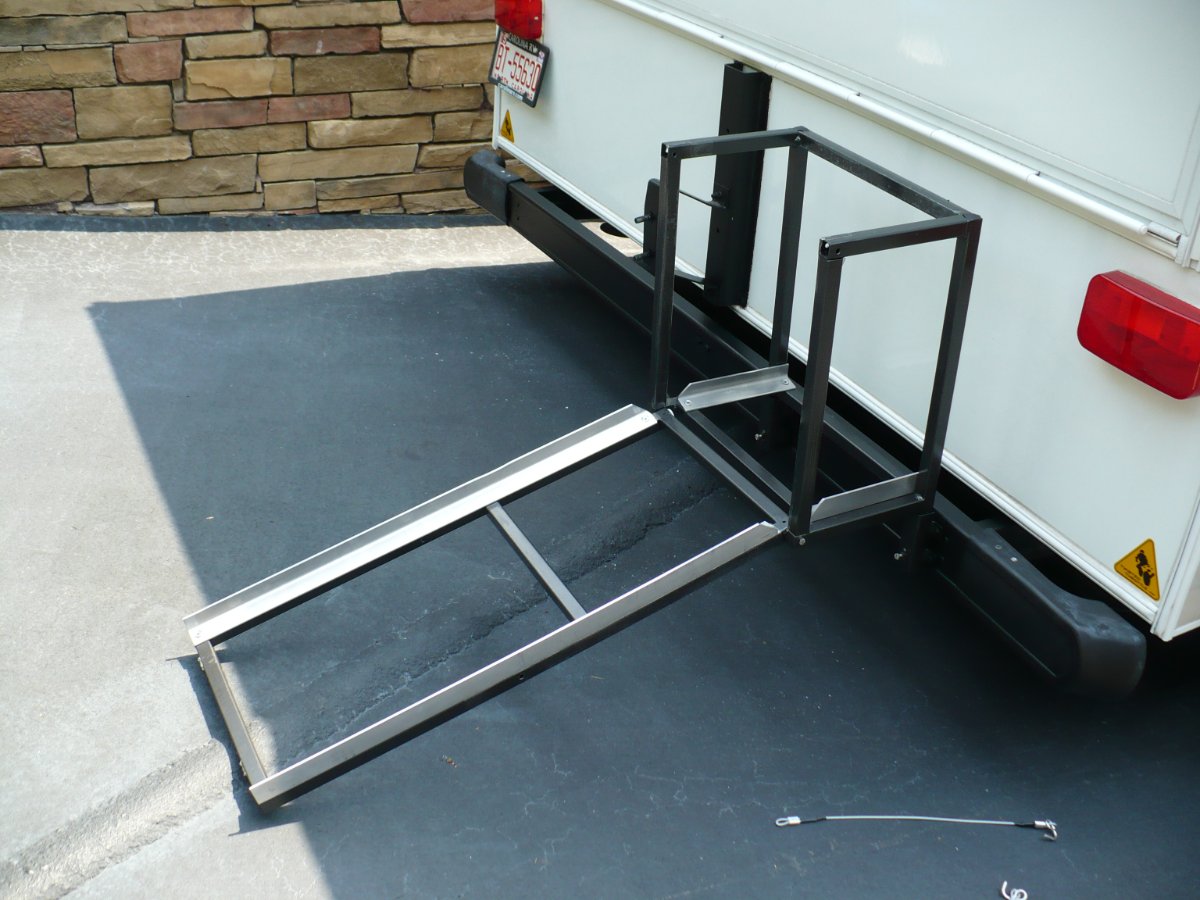
I now carry a small waste tote (empty) in the bed of my truck. But, with an RV I owned prior to seeing the light and getting my Ollie I constructed a storage rack for this tote which I attached to the rear bumper via two slightly larger square steel tubes such that the rack could be inserted into those two tubes and secured with four pins. I think that a similar system could be used with the Oliver but I've never had enough interest to work on it.
1 point
-
Let’s see, 20 gallons of fresh shite at about 10 pounds each. That tote could easily weigh in at 200 pounds or so. Don’t drop it on your foot or you will be loudly proclaiming to everyone within earshot what the contents are. 🤬😵💫1 point


.thumb.jpg.e34bf01ef7f7d5e99ad31856d45afbeb.jpg)


-
Recent Achievements
-


")


")


")
")


")

")

