Leaderboard


.thumb.jpg.e34bf01ef7f7d5e99ad31856d45afbeb.jpg)

Popular Content
Showing content with the highest reputation on 07/15/2024 in all areas
-
I live in Duluth if you need a hand with anything! Happy to run up with some tools, beer, and/or moral support!8 points
-
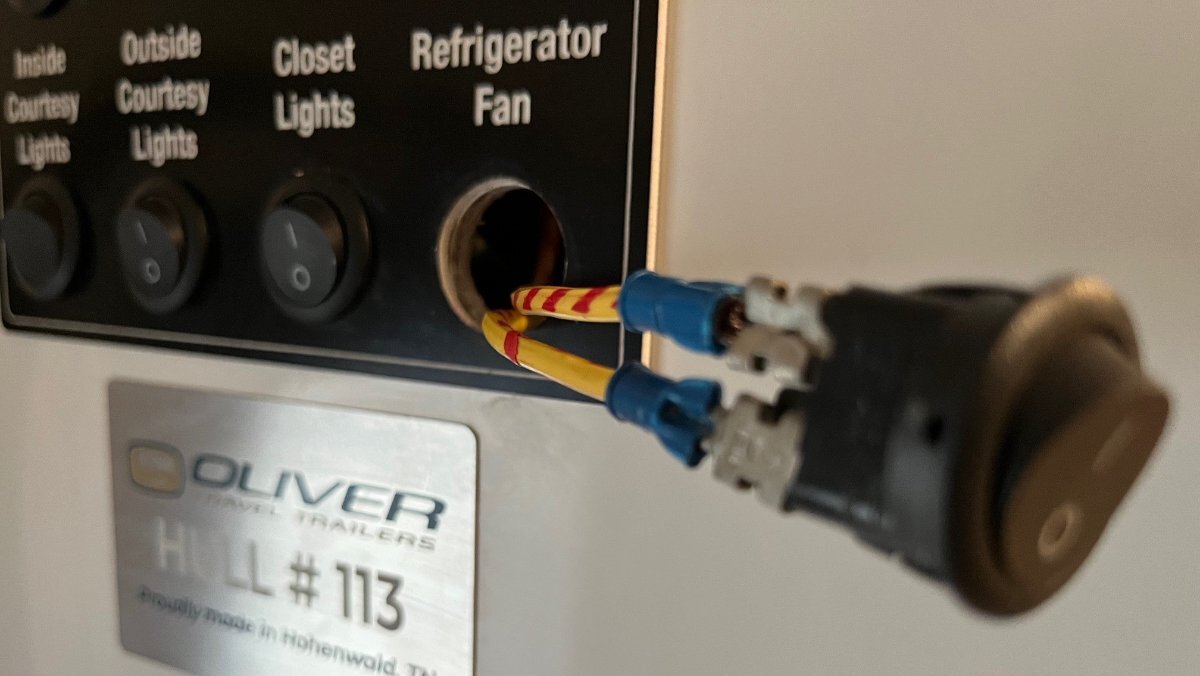
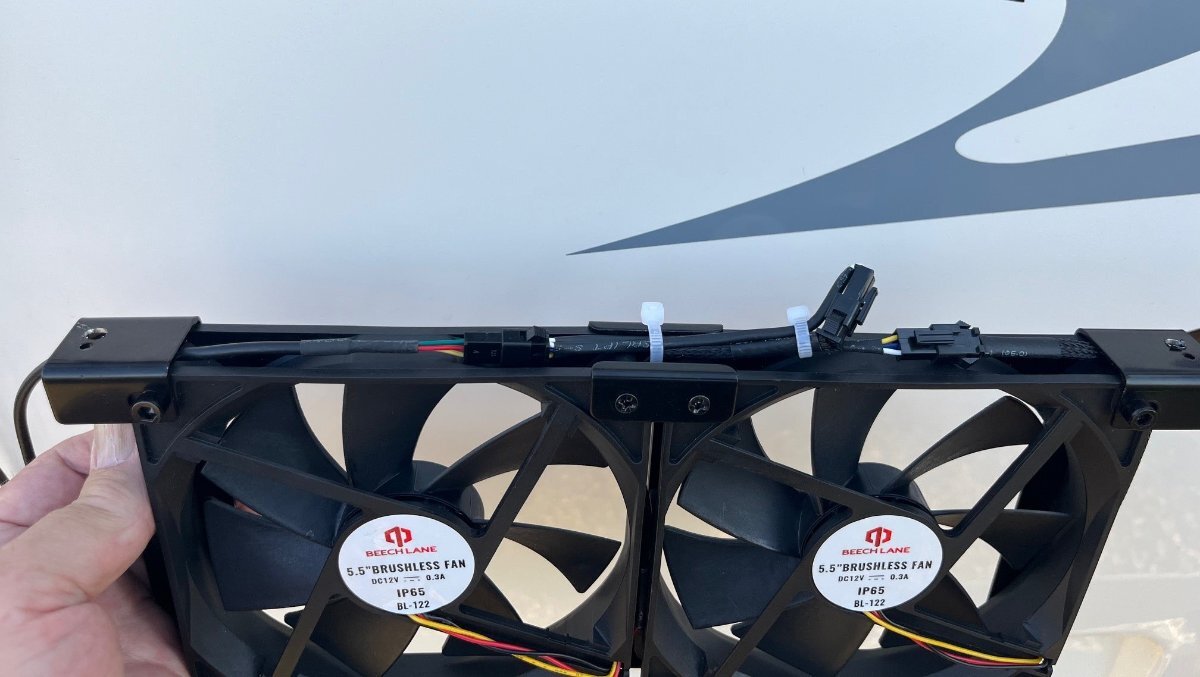
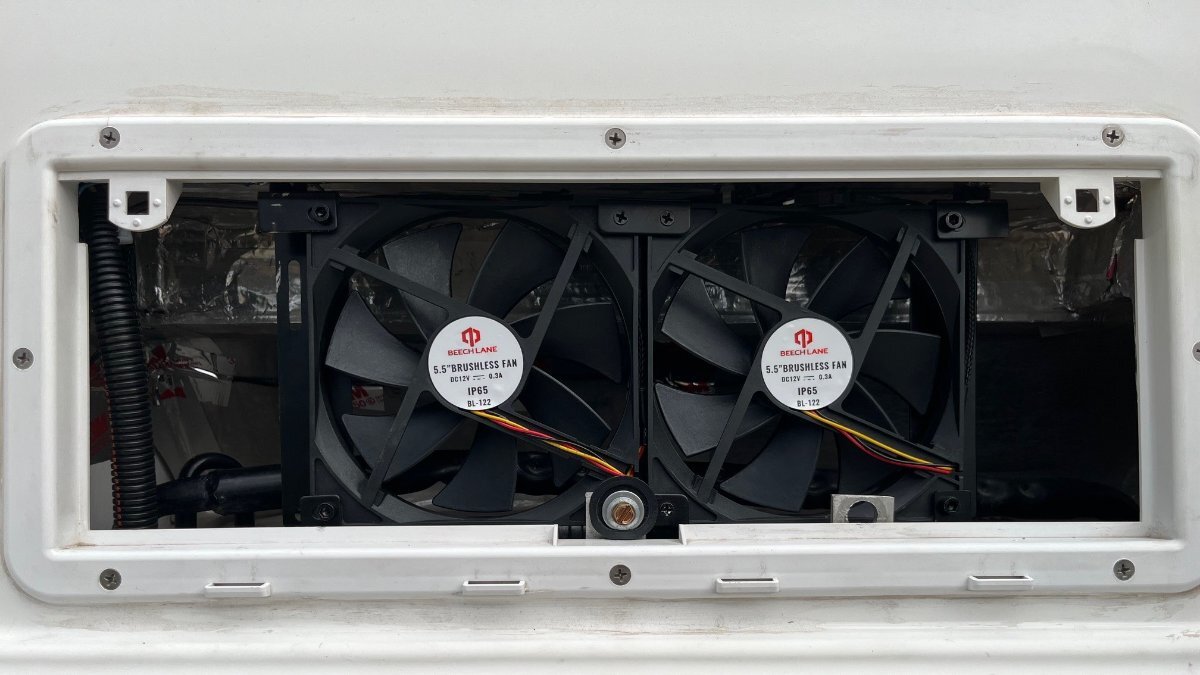
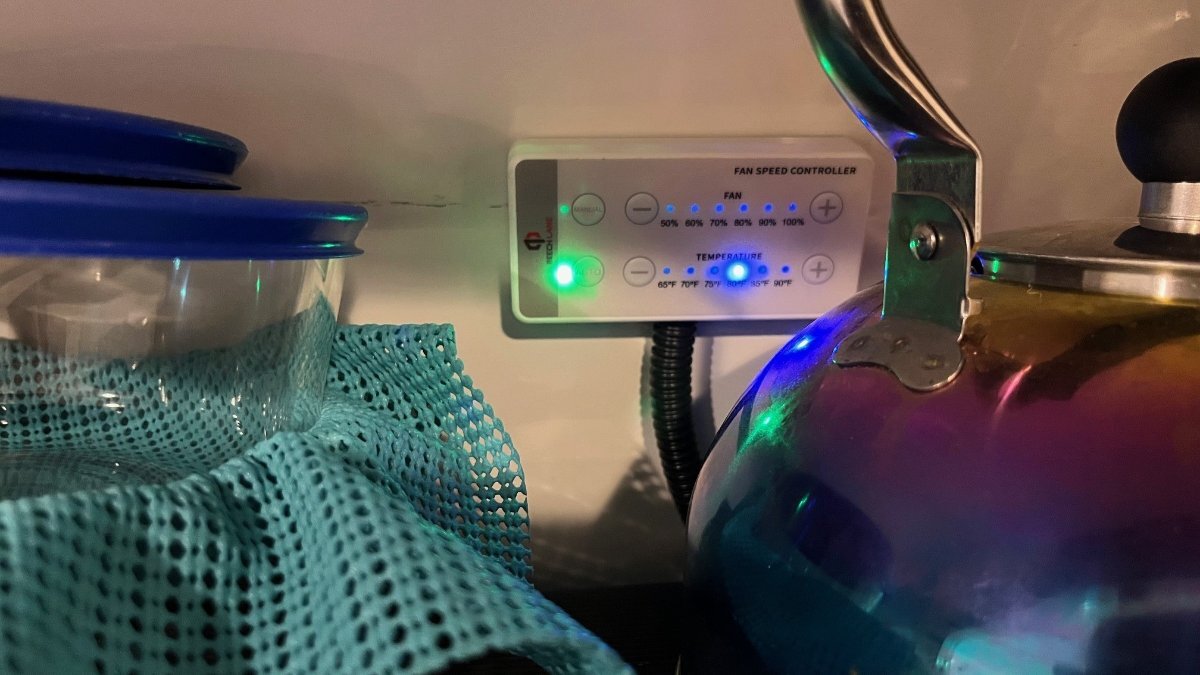
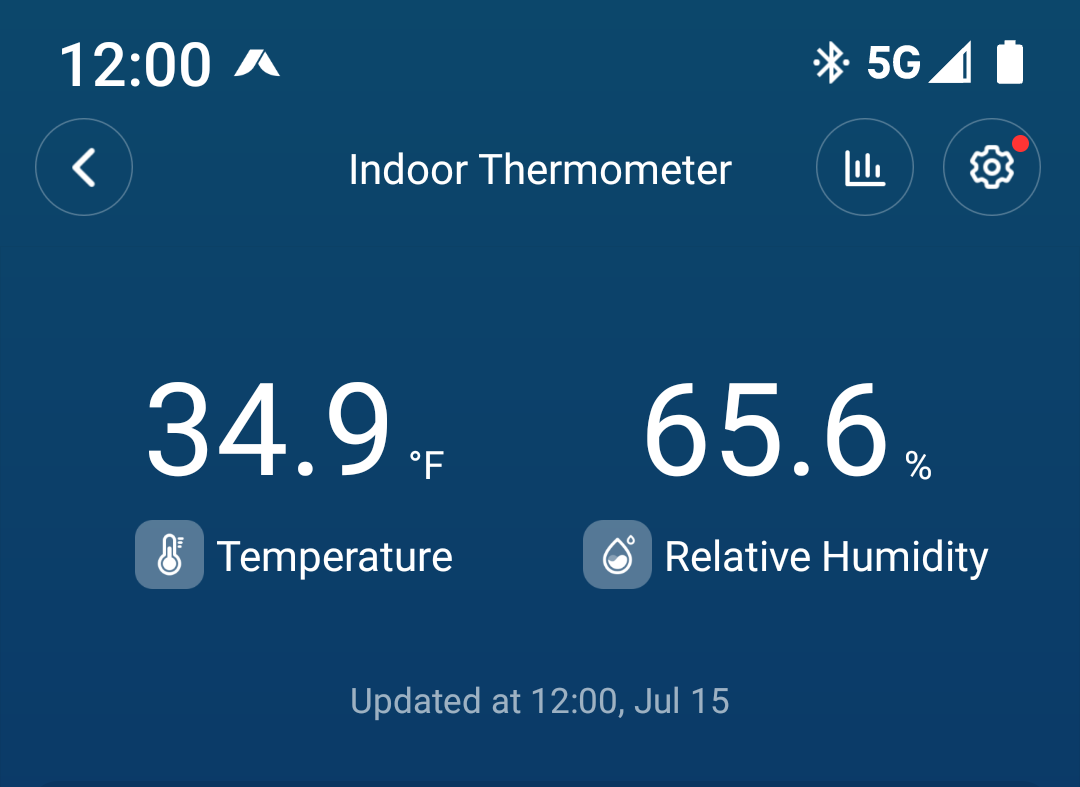
Worked on this Saturday afternoon and an hour today to button it up! I started working it like some installs here, and I was able to poke a steel fish-tape from the back of the pantry down and right through the foil-wrapped Styrofoam to the exterior fridge opening. Then I thought about routing the wires down and realized if I fish the wires down about 20" further back at the rear of the fridge, the wires could go straight down to the bottom in one line. The bottom of the close side of the fridge is where the LP burner is located, and you would have to divert your wiring somewhere. The whole Beech Lane wire harness and a pair of switch wires (yellow/stripped red) fished through after cutting the opening shown with a rounded chisel and a few tugs. The temperature sensor taped to the upper incline. Switch legs run up and the across the back of the upper kitchen cabinet. Yes, removing the 110V outlet makes fishing easier. One leg is connected to the ground at the exterior base of the fridge and the other to the fan ground. I taped this switch prior to reinserting. The fan comes with clips to mount to the exterior vent cover (not a great idea for several reasons). I modified the fan assembly so that the cabling would be captured by the frame and tied down. Notice the screw holes left and right drilled larger for mounting to the ceiling of the vent opening. The fan was first rubber-mounted with one screw bottom center in place of a small screw that held the two fans together. Drilled pilot holes and screwed up in each top corner. Notice the 1/2" automotive wire loom LHS that holds the harness and switch wiring. Bottom vent opening showing the junction B+/B- source, with harness +/- connected here and taped. Control panel in upper kitchen cabinet, mounted with 3M VHB. No interior drilling harness just hides behind rubber floormat. Can reach in nicely or move the tea kettle if you must. Everything tested positively, the ON/OFF switch on the OTT light panel, manual mode with fan speed adjustments, and auto mode temp settings matched my RUUVi sensor readings. It was hot in the afternoon and then a front came through and dropped temps 20 degrees. The fan turned itself off and when I set temp two clicks lower it resumed. Thanks @Ronbrink for your help! The Beech Lane product is great, works well, fits the opening fully, and is quiet even on 100%. When it's running, and you're inside with the entrance door shut, you will not hear it. If you do not have the OEM built-in ON/OFF switch, don't worry you should not need one. My panel has one, so I felt obligated to make it function again. No complaints from this old installer! 🤣
 4 points
 -
Nice job! Adding dual fans was a game changer for us. Where we're currently camping it's 90+ outside and our packed fridge is staying in the mid 30's on AC without any problem. It would sometimes get into the danger zone before the addition of fans.
2 points
-
There is no part number. When you call, ask for Lew or Mike and tell them you have a Oliver Elite II(this way they can make sure the centering pin is set up for our spring under axle configuration). According to Alcan, their springs are rated at 2,750 lb/ea. While most of us who have installed them notice very little incremental stiffness, you should be aware of this going into the purchase. If you order your new ubolts and nuts from them, make sure you know your axle diameter when you call so they send the correct ubolt size.2 points
-
I took both my torque wrenches to my auto mechanic. I've been a loyal customer and he was happy to take them. When the Snap-on truck stopped by, as they do fairly regularly, he had the calibration tools on hand in his truck as they regularly test/calibrate torque tools for all the shops they visit. One of my wrenches was a Snap-on, the other was a Precision Instrument. Fortunately, they both tested in spec. Good to know! Dave2 points
-
@jdmmtx ; If you're still in need of replacement leaf springs, you're welcome to have my OEM 4-leaf springs - no longer needed because we replaced them last April using the Alcan 5-leaf spring packs that @Steph and Dud B mentioned above. Shoot me a PM with a shipping address and cover the shipping costs... You can have 1 or all 4 of the springs. They are in serviceable condition. Cheers, Art2 points
-
SDG said they would document and take pics of the install. I will try to gather as much information as I can, as well. On family vacation, so I am kind of sneaking this into the mix. Ha! Mike2 points
-
When installing bronze bushings in Ollie's spring eye, I coat the outside of the bushing and inside of the spring eye with castor oil to help the soft bronze slide into the spring eye easier, attempting to prevent damage to the soft bronze bushing. The last bronze bushings I installed used a piece of threaded rod from a local Lowes with flat washers and nuts.2 points
-
Thread here: https://www.google.com/url?sa=t&source=web&rct=j&opi=89978449&url=https://olivertraveltrailers.com/forums/topic/9996-made-in-usa-leaf-springs/&ved=2ahUKEwj7uaXMrKSHAxWUElkFHRtoA9wQFnoECCsQAQ&usg=AOvVaw2TuWEqPQCoyqb1wVMIHpcR One of the posts lists his replacement specs as: "Made in USA with USA sourced 5160 spring steel -Bronze eye bushings vs. plastic -2,000lb rating/ea vs. 1,750 (will not change gvwr as axles/bearings remain determining factor) -5 leaves vs, 4 -second leaf extends underneath eye on each end (protecting common break area) -steel, bolted spring keepers (one each end) vs a single, sheet metal band -width = 1.75" -drop = 3” -length (eye-to-eye) = 25.25” The company I sourced them from is ALCAN."2 points
-
Just remember that if you disconnect the batteries from everything including the solar charge controller you need to disconnect the charge controller first from the solar panels. Or risk damaging the solar charge controller.2 points
-
It never fails to amaze me how far out in front of Oliver corporate we owners are. I inquired of HWY RV in Salem Oregon as to the install of a Dometic Fresh Jet 3 to replace the Penguin II noise generator in my hull number 615. They messaged Jason E, and he advised them that "as we have not installed a Fresh Jet 3, we advise caution as the fit might not support the unit properly." That is a very reasonable decision, and stopped me from proceeding. However, in searching the Forums it appears that at least three of us have switched out the A/C and no one mentioned any problems. Lack of reporting is not "data," so I have asked Dometic to provide me with footprint and bolt pattern drawings of both the Penguin II and Fresh Jet 3. Will they do it? I guess that depends on the attitude and enthusiasm of the person at Dometic who gets my email. I sure hope they do as I am very leery of proceeding when "not 100% sure." Could someone who HAS switched a Penguin II for a FreshJet 3 please comment on footprint and bolt pattern? (Please!) In summary, so far I have not found actual data as to the direct comparison of any of the three units mentioned. If and when I get actual data, I will append it to this topic. I can say that I really liked the attitude and professionalism of the service folks at HWY RV in Salem, Oregon. If my replacement project becomes a go, you can be sure that they will be the folks that do the work.1 point
-
1 point
-
You could wrap a chunk of pool noodle or, make a new one pretty easily, with a bit of luan, a piece of foam, and some velcro. Mines still in pretty nice shape, 16 seasons in, surprisingly. But, so are my cushions. Back on the day, we were allowed to buy and send our own fabric to the upholstered. I chose a commercial grade, stain resistant coated fabric, and that has possibly made a difference. Sorry if I "gumped" you.1 point
-
Haha, reminds me of what my brother-in-law said he learned in the marines about assume - it makes an ASS out of U and ME. I hate to admit that the older I get, the more I am reminded of that quote!1 point
-
Mine is an inverter and it appears @katanapilot has a Xantrex 2KW inverter/charger.1 point
-
Another caution: Different hulls have different dimensions, trays, and batteries, Hence one pic may not work for all as our stack heights vary. On my 2018 with 100 AH batteries I could not use such a thick cutting board. Check yours before purchase is a good plan. GJ
1 point
-
We're definitely considering the Lynx PD unit as well for when we drop the hammer on upgrading to the MPII - its a very clean option as compared to our Blue Seas bus bar, IMO.1 point
-
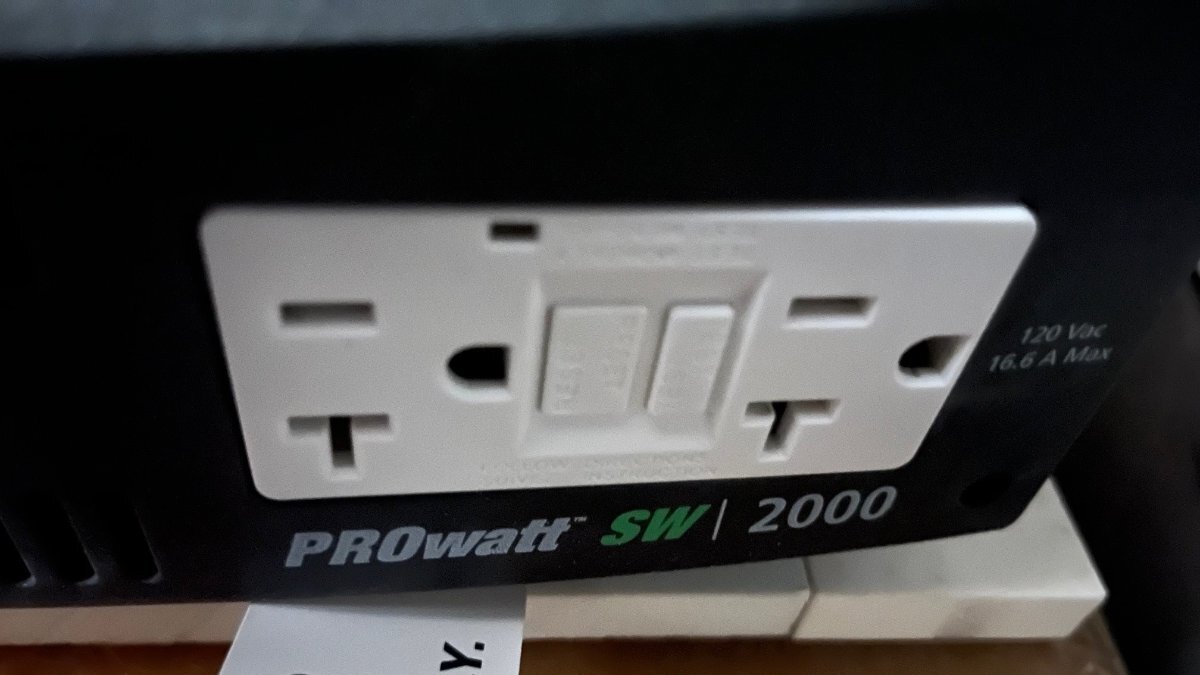
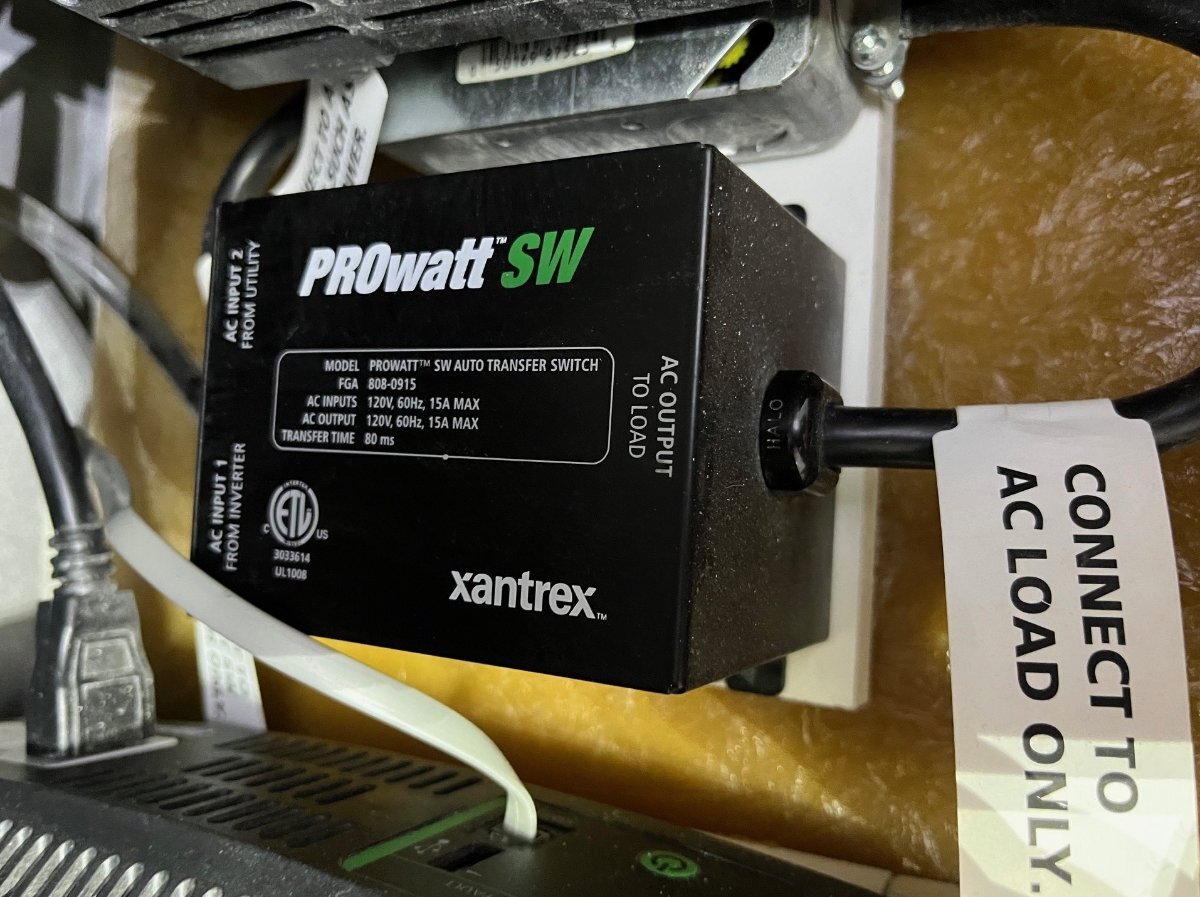
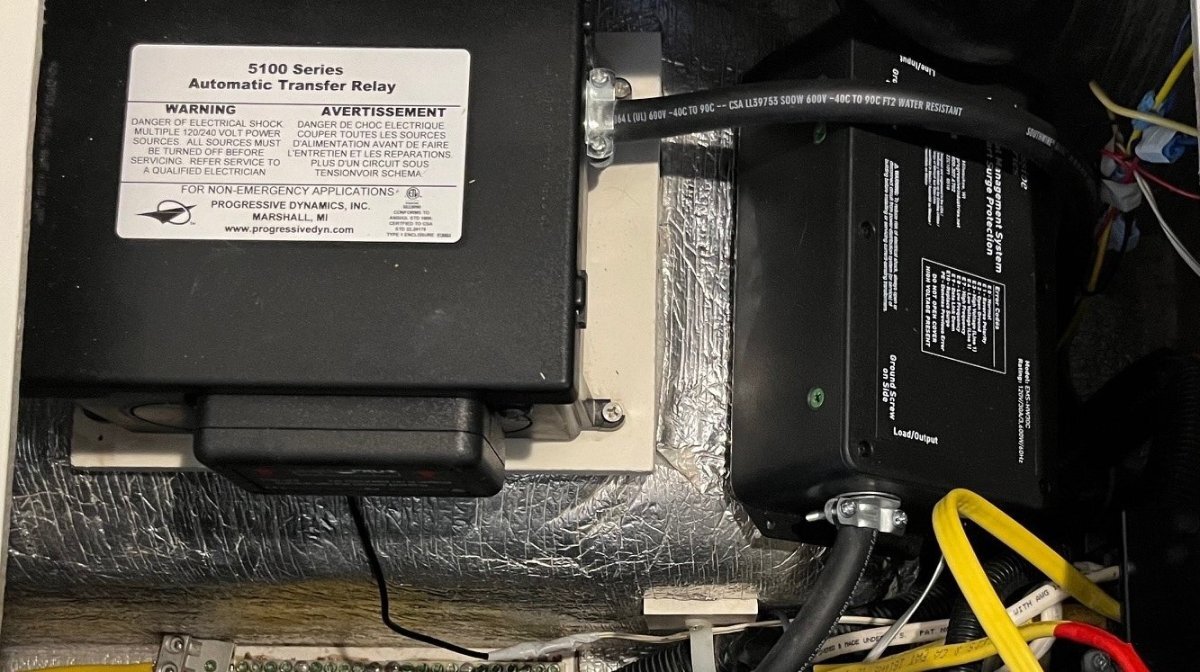
Same here and that means there is no GFCI unless running the inverter. It's also odd that Mike with hull 308 has a GFCI outlet and your hull 628 does not, like my old hull 113 does not. Why? I believe we have two generations of OTT hulls and Xantrex products, mine being a 2016 and yours a 2020. My 2KW Xantrex only has 6 possible connections. On the backside with the fans, there are 3 DC connections, B+ an and B- connected by 4/1 AWG cable directly to the batteries and a 6AWG(?) ground that connects to the yellow ground bus under the rear dinette seat. The front side does have a dual GFCI outlet, rated 120 VAC 16.6A, the monitor cable and LCD screen The older Xantrex in our hull does not have what you wrote "20 amp feed to the AC input of the Xantrex." Do you have the more modern look Xantrex, fully rectangular, squared edges painted gray? Or does yours look like mine, rounded edges metal looking black vinyl coated? I believe you have the newer generation Xantrex. BTW, who cares! I'm ripping mine out end of July, the Xantrex, the Xantrex ATS, the funky little electrical box stuck in the corner that connects inverter supply to most 120V circuits, all the but the A/C. I will show my work here and looking forward to seeing yours. All that matters, is... After all the old is removed, you connect the Victron MP to the batteries in the same way and to the ground bus. You connect shore power from the PD5100 ATS to the AC input and connect the 50A L1 output circuit to the entire Oliver 30A AC panel. This time including the 20A breaker for the air conditioner that was previously bypassed. Can't wait! Pictures to follow: 1) GFCI close-up on inverter 2) PROwatt SW, with junction box above and inverter below 3) Rear Dinette seat with PD5100, self-installed EMS, Xantrex 2KW inverter and self-installed KISAE TS20 switch for running A/C on inverter.
1 point
-
Since my #110 cannot get new axles due to frame hanger welds, I might beaf up the springs.1 point
-
Hey guys. I tried trudging through some of the 8 pages on the Alcan leaf spring thread listed above. Wow, that was a long thread. But I did not see mention of an actual part number to reference for the Alcan. Did I miss it or do they go off the basic specs of the springs that @Geronimo John mentioned in his attached document (very handy, thank you). EDIT: Ah I see, it's a super small business, so likely no specific part number, and just give them the specs. Thanks. Chris1 point
-
We spent last week at Ridgway State Park, just 20 minutes north of Ouray. We drove up from our son’s house in Durango but didn’t take 550 this time. We took the western route which is about 40 minutes longer but provides with some different scenery. It takes you by Telluride. It was a nice drive. This is just a few miles outside of Telluride on the way to Ridgway. Another stop on the way up to Ridgway. Our site at Ridgway State Park We did a walk around the town of Ridgway. This is the town park in the middle of town. Downtown Ouray. Downtown Ouray. Hiking around the Ridgway Reservoir. Nice hike, good views. More hiking.
1 point
-
John there are many videos on YouTube on how to calibrate it yourself, here’s one.1 point
-
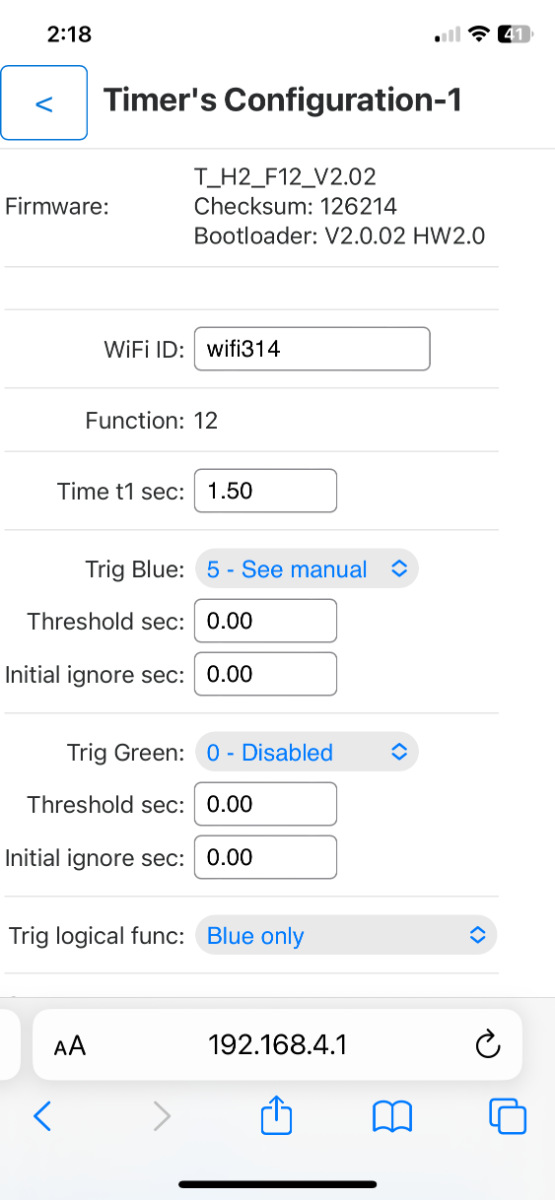
Here are the program settings for the relay:
1 point
-
Me too. My install is coming up on Wednesday. The first Atmos 4.4 bought for an Oliver was returned before install because it was the color black and the owner decided to wait on the white version to become available. At least, this is what was told to me by Kevin at SDG. The manual shows it has an AUTO MODE. You should be able to pick AC or Heat or AUTO and set corresponding temps. The unit does not receive heat signals when in cool mode only. If you can only pick a single temperature in AUTO MODE... that would be a bummer and I will be unhappy as well. At that point, I would just use the separate HEAT ONLY and COOL ONLY modes. It also has a timer OFF FXN and dehumidifier mode. The heat pump is very nice thing to have IMO and can easily be turned off. Since the unit is quiet, I actually like the idea of the fan running to circulate the air until I turn the unit off or set the timer to turn off. The APP is the only thing I can't find much information on but ratings are good. For sure, I will let y'all know how the ride home from MI to TN goes!
1 point
-
Given the PD5100 ATS, the MP inverter would treat a small generator as a form of under-powered shore power and the Power Assist would kick in, adding required power. But yes, adding the SoftStart lowers the initial surge to allow running on a household 15A circuit without tripping a breaker. The extra features of the MP2, I will likely not use. It is the dimensions and +1AH more on idle is 24AH per day. Still what fits best will make the decision. Next week I will open all street-side basement panels, measure, plan, decide and purchase. Given the MP2 is better, why can I buy one for $997 and the MP is $1,169, from authorized dealers. Another point for the MP2!1 point
-
The MultiPlus-II combines the functions of the MultiPlus and the MultiGrid. It has all the features of the MultiPlus, plus an external current transformer option to implement PowerControl and PowerAssist and to optimize self-consumption with external current sensing (max. 32A). - Victron The MultiPlus-II is a newer model; it is also a single inverter/charger unit, but it has some improvements over the original MultiPlus. It has a more powerful microprocessor, which allows it to provide more accurate and precise control over the charging process. - Victron MP-II form factor is longer and slimmer. So, depending on install may be easier to mount. Idle power draw is less for the MP2 11w vs 25w for the original. Having installed it, in retrospect, I might look at using Victron Lynx power distribution instead of DIY bus bars. A lot to think about. Best, Mike1 point
-
You're not misunderstanding. Without doing the math myself, Victron's numbers appear correct. Over-engineering is common in DIY efforts and going to heavier gauge cable doesn't hurt, just costs more money. OTT installed 4/0 in our hull too. The length of the run, from the batteries to our 2KW inverter under the rear dinette seat is about 1m or 4 ft at most. The Oliver is over-engineered in many ways, and we appreciate that. The cost difference of 2-3m of 4/0 over 1/0 cable, at wholesale to a manufacture, is not much and they are being over-safe for a few bucks. When I go to install a DC-to-DC charger, two cables the length of TV and TT, likely over 25m, I will buy the gauge required and nothing more due to the retail cost of copper today!1 point
-
From the Mulitplus manual: "Automatic and uninterruptible switching In the event of a supply failure or when the generating set is switched off, the MultiPlus will switch over to inverter operation and take over the supply of the connected devices. This is done so quickly that operation of computers and other electronic devices is not disturbed (Uninterruptible Power Supply or UPS functionality). This makes the MultiPlus highly suitable as an emergency power system in industrial and telecommunication applications." The ability for the inverter to choose between an AC source or DC battery power is what I meant by internal ATS and ALL Victron 3KW inverter/chargers (and greater models) have this functionality. They all also have Power Assist, which is not only internal switching but smart partial switching when shore power is lacking in covering the full load, it pulls what's necessary from the battery bank. Another way to word this is these more capable inverters do not require an external switch, like the Xantrex PROwatt SW (see pic1) or the KISAE TS20 that some of us have added to switch the air conditioning between AC/DC. The common usage of the term ATS in a RV is the switching between generator and shore power, like the PD5100 (see pic2) installed in our Olivers. The Quattro can switch AC/DC uninterruptable as the Multiplus and ALSO has the capability to switch between 2 AC sources like the PD5100, hence the PD could be eliminated if installing a Quattro. I thought about this for about a second, but it's more expensive and I'm not running a generator anyway with a 3KW inverter and 600AH in new LiFePO4 batteries. I had a PD5100 fry in our Bigfoot RV that I replaced, but if it does so in the Oliver with this upgrade we'll just run on the inverter. It's funny in the video, he used the name Multiplus all through the video and in his last sentence he said "Quattro." The 3KW Multiplus, MPII, Quattro, and other high-end models, all have a 50A line1 output. In my hull the Xantrex PROwatt SW is wired to all AC circuits but the air conditioner. The purpose of the KISAE TS20 is to add another ATS for the air. When the Multiplus is installed, given 50A output for a 30A panel, it will be wired to all loads on the panel, including the air conditioner, and no need for external switches like the Xantrex PROwatt SW and KISEA TS20! Why not?
1 point
-
4/0 is what was factory installed on our 2023 model. Since main fuse is 300 amp, conductors have to be rated for that amount of current.1 point
-
theOrca, The Dometic FreshJet comes with a very nice factory seal where it makes contact with the Oliver. It also comes with four additional factory installed blocks at each corner that help distribute the weight of the unit over a larger area. In addition the FreshJet weighs less than the Penguin. The bolt pattern is inside of the opening, the same as the old noisy Penguin. I hope this answers some of your concerns, you are welcome to message me if you have any questions about my AC installation.1 point
-
Footprint and the required opening are different subjects, not at all the same. Footprint equates to where and how much support the roof provides the upper unit. You do not want unsupported weight when fiberglass is being stressed by having that weight transferred to it by leverage. It is desirable to have the entire floor pan of the upper unit supported by the roof. Bolt pattern is always "outside" of the 14x14 opening, and is sometimes very different between brands. These are subjects which require "data" to resolve.1 point
-
They should all fit the 14x14 opening. It's more so re thermostat change and how the condensate drips. Truma requires a special fiberglass build. Personally, I've had enough of Dometic, with the noisy Penguin in the Oliver and another Dometic where the fan lost alignment, shifted and jammed beyond repair in the Bigfoot we had. Anything but Dometic for me. @Geronimo John and several others have installed Houghton models, many threads here. @rideadeuce has scheduled a professional install of the Atmos 4.4 next week and I'm sure Mike will post info on that. I'm looking forward for this feedback compared to cited Houghton issues. Both of these models run the fan continuously which is something I will NOT live with. Known issues are humidity, not an issue for our climate, but I'm not sleeping with a fan running all night. Houghton has cycling issues, without moving the thermistor or something, not cool. There is a relay fix for the Houghton fan and if we go Atmos, I will figure out a relay fix, or hopefully somebody online does so first. The Atmos switches automatically from cooling to heat pump and can do so at dawn when it gets colder. I cannot get confirmation whether there are two set temps, for cooling vs. heat. Again, not cool. Is there a manufacture out there that understands these issues, who makes a better design?1 point
-
topgun2, this is what happens when you stay in Cracker Barrel parking lots too often! Google maps cameras catch you. This location happens to be on our way most anywhere west of Virginia so we stay here often. Maybe too often! 🤪
1 point
-
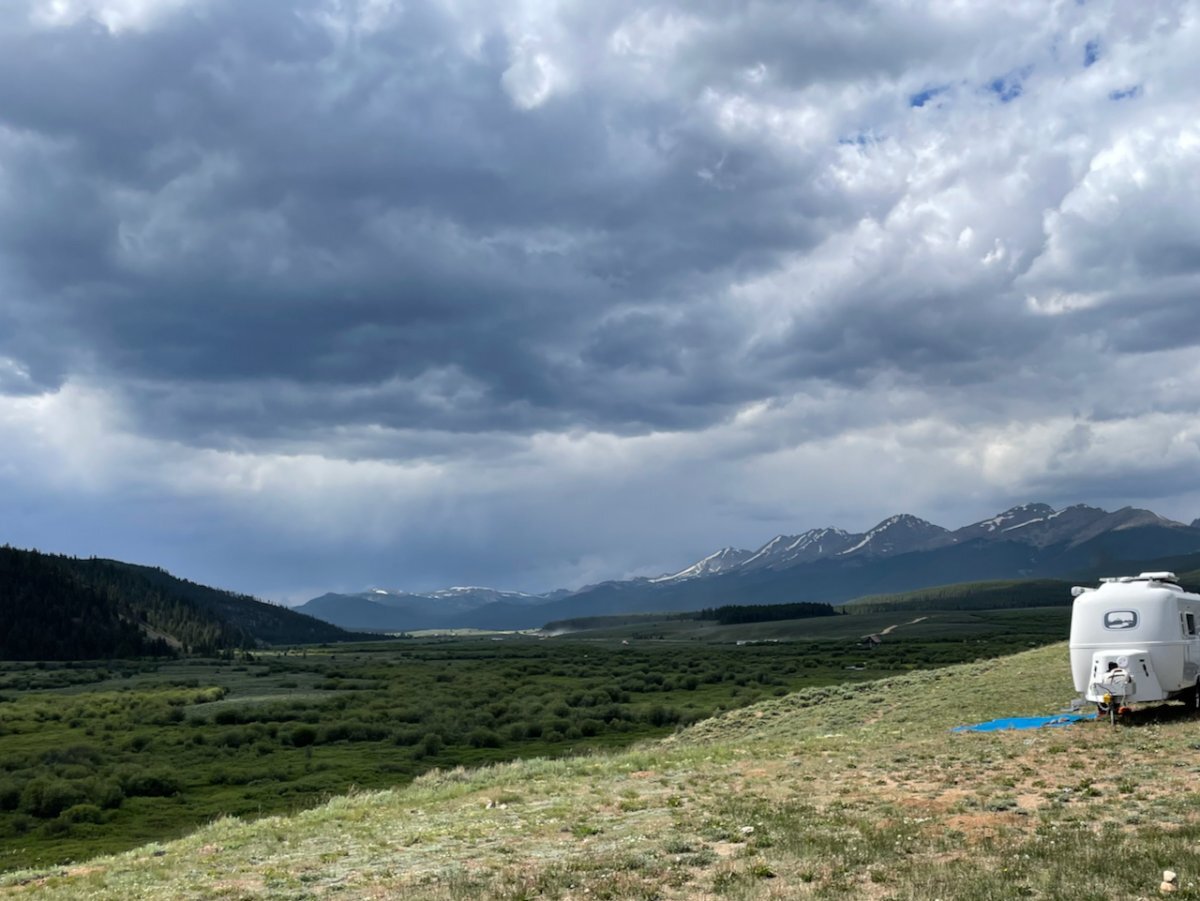
Happy 4th of July to Everyone! Gunnison NF, Colorado -- dispersed camping with weather
1 point
-
If I'm following correctly, the compressor would only run for 3 min at a time yesterday but ran for 12:30 straight today? I wonder why? Also, may be perfectly normal for this unit, but a temperature differential between cabin temp and supply air over over 30 degrees seems too high to me. If the supply air is at 40 degrees the actual evaporator temp is most likely very close to freezing the condensate on the fins.1 point
-
In homes and commercial buildings you're dealing a much higher ratio of evaporator surface area to conditioned space so humidity rise will be much smaller, but it will still be there whenever you blow air over evaporator coils with condensation on them. And I'm not doubting your findings under your test conditions, I just know when I tested running the fan after shutdown here in Florida with +90% outside RH that the humidity began to rise immediately. I do see how skipping that first 52 seconds and then running the fan occasionally to sample the air over the thermistor might keep from having to relocate it and not release as much humidity into the cabin, though..1 point
-
Running the blower for 52 seconds right after shut down would defeat the purpose, I think... In my expedience, humidity starts rising immediately after the compressor shuts down if the fan continues to run. I wouldn't be worrying about a slight improvement in efficiency if I were trying to keep the humidity as low as possible.1 point
-
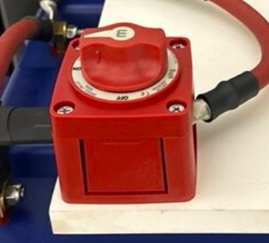
For the electrical wizards skip this post. You know it already. Most DC systems with fuses (Like our 300 Amp fuse on the + side of our OEM batteries) would have their master On/Off convenience switch on the same side of the battery as the fuse. Granted, both will get the job done. Just that being on the positive side is more prevalent than on the negative side. Not a big deal for most applications. But it could be for a first responder not familiar with your owner mod. For example, Fire Fighters are trained to to look for a RED handle or device on the primary current carrying lines during a fire operation. This is because they are taught that when working with DC Electrical, there typically are only just four different colors: Red – Red cables carry the positive current. Black – Black cables will be the negative cable. Grey or White – Grey or white cables are the ground wires. And they are generally looking for the red wires to kill the power with their super sized cutters. I have seen this several times. Sadly, I have also seen first responders cut wires within inches of a master On/Off switch. None the less, it is no coincidence that the vast majority of RV master on/off switches are red in color and are mounted on the RED positive lead. As many of you have seen this at least three times.... once again: If you are going to add a convenient and quick way to totally kill the DC power of your trailer, I highly recommended this unit: Blue Sea Systems 9003E (350 amp rated). It just happens to be...... wait for it...... RED WHY? RV and NEC codes require that all high power DC circuits have at least one current limiting device. In the case OE2's, most if not all have a 300 amp fuse on the + side of the battery. (See Note Below). If a second current limiting device, such as a supplemental On/Off Master Switch, is installed, it MUST be rated for at least the capability as the primary current limiting device (IE. generally our 300 amp fuse). For this reason the minimum size any engineer worth their salt would insist on using is at least a 300A master switch. The impact of using a smaller switch can be "enlightening" and very costly. PM me if you want the full monte explanation. I personally chose the above one. John Russell (AKA GJ) Registered Professional Engineer, Former USAF Fire Marshall and Incident Commander NOTE: For our OE2's, I have not yet seen any OEM Inverters beyond 3,000 watts. And 3,000 watts at 12.7 volts = 236 amps. So it is likely that ALL our OE2's have 300 A fuses on their man positive battery cable fuses as OTT tends to design the wiring for all options offered, and the 3,000 watt inverter is the big boy unit. If your fuse is higher or lower, please let us know.
1 point
-
I suspect they all wish they'd gone hiking that day, instead. Fortunately, no serious injuries, except to the suv: https://www.nps.gov/yell/learn/news/240712.htm
0 points


-
Recent Achievements
-
")


")


")