Leaderboard


Popular Content
Showing content with the highest reputation on 09/02/2024 in all areas
-
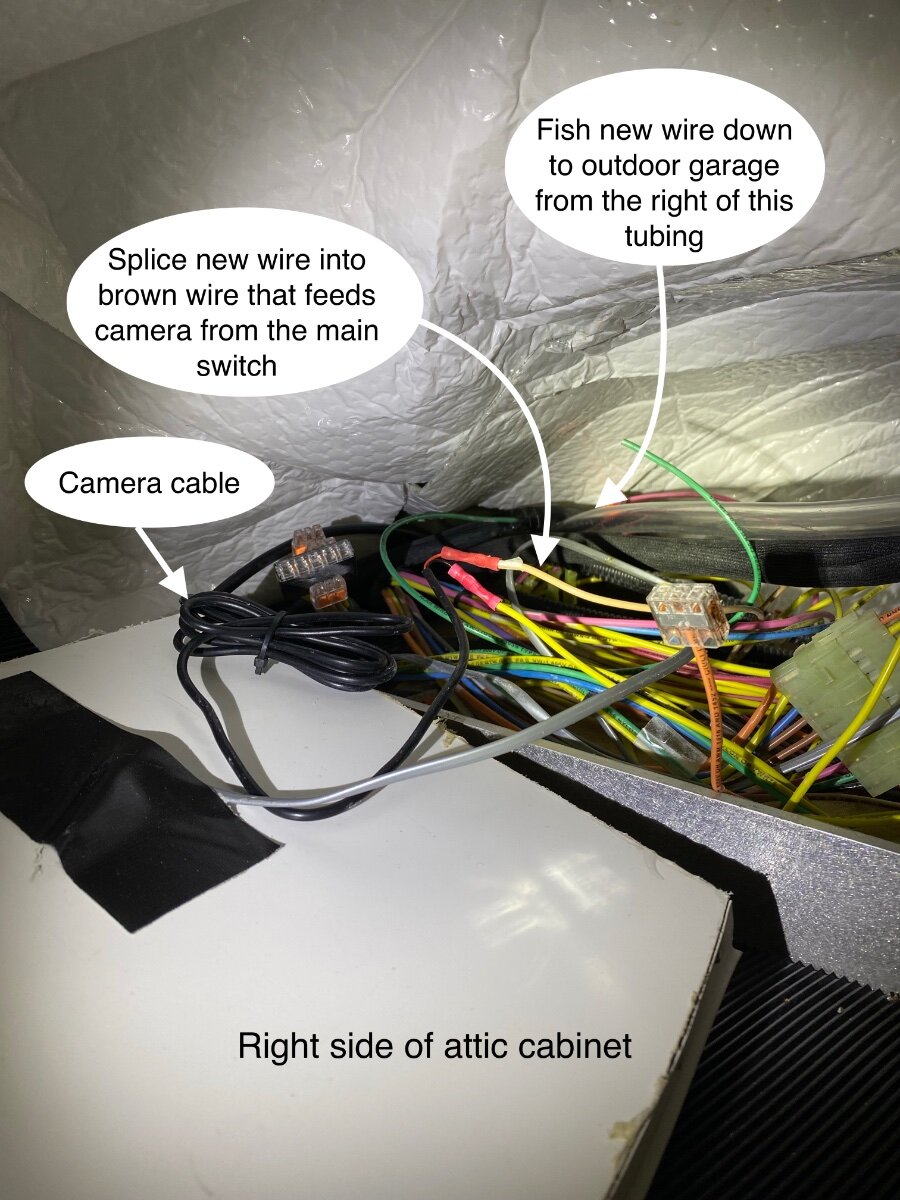
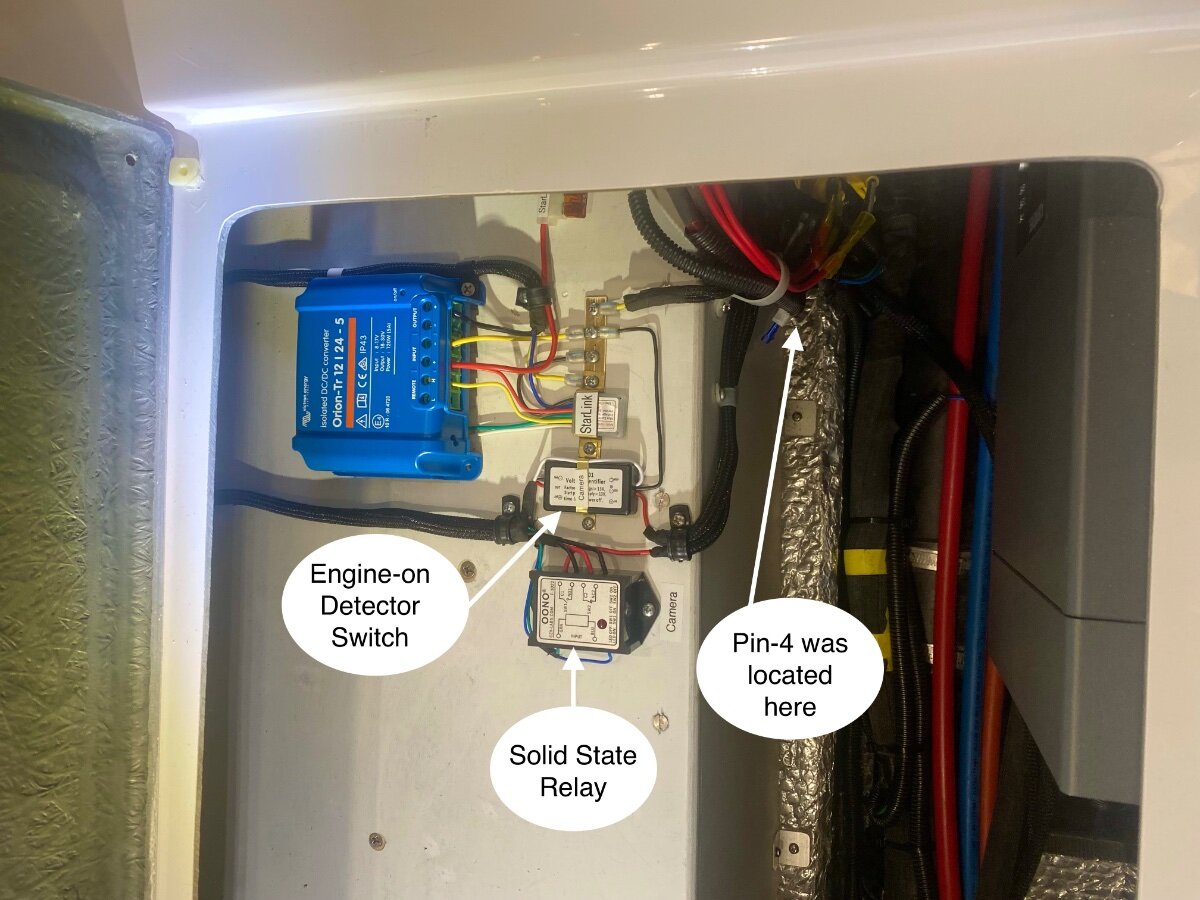
It seems like every time we really needed the rear view camera, we had forgotten to switch it on before leaving. This modification turns the camera on automatically whenever the trailer is connected to the Tow Vehicle and the engine is running. The main camera switch will also continue to work as normal if ever needed. This is done by using an “Engine-on Detector Switch” that turns-on when there is an increase of voltage in the Tow Vehicles 12 Vdc charging circuit (Pin-4 of the 7-Pin wiring harness). When the detector turns-on, it supplies 12Vdc to a solid-state relay, which then supplies 12Vdc to the camera. The switch and solid-state relay are inexpensive, and the wiring is fairly simple. However, this will only work on trailers with lithium batteries where the TV charging circuit is not connected. This is typically the case for trailers with lithium batteries because they can draw more charging current than the wire is rated for. In Oliver trailers with factory installed lithium batteries, the (Pin-4) charging wire is capped-off and sticking out of a wire bundle next to the inverter. It’s a black #10 wire. Start by removing the two small lag bolts holding the right side-board of the attic cabinet. This gives access to the camera wiring, it’s a coil of small black jacketed cable with red and black wires. A brown wire from the camera’s on/off switch is connected to the camera’s red wire. From the same attic area, you can get a fish tape down between the walls and into the outside storage garage. There is a clear shot from the right of the drain tube. Pull a single new wire from the attic to the garage, then along the garage ceiling and into the area under the rear seat where the new switch and relay can be mounted. One end of the new wire will be spliced into the brown wire from the camera switch, and the other end goes to the relay’s Normally Open switch. Find the “spared” Pin-4 wire, as described above, and the new relay and engine switch can be mounted near by. I attached my switch and relay next to my Starlink power supply and added a brass strip as a ground bus. However the relay and switch are small and they could mounted any number of ways. See the sketch for wiring details. Note: The Engine-on Detector Switch and the relay is powered from the TV (Pin-4) The relay powers the camera from the same circuit that it currently uses to prevent cross feeding of circuits. In my trailer, this was the fuse labeled “Electronics” in the 12 Vdc fuse panel under the dinette. I used a “Y” spade fitting to connect a new wire to the fuse in tandem with the existing wire, or they could be spliced together. Both the relay and switch are connected to the negative ground bus under the rear dinette seat. Amazon shopping list: IJDMTOY LED Daylight DRL Automatic On/Off Switch Controller ONO DPST 8 Amp Power Relay Module AIRIC 1/4 inch Split Cable Sleeve 36 Piece Electrical Spade Connectors (Auto part stores usually have them too) I hope someone finds this useful Cheers! Geoff
 10 points
 -
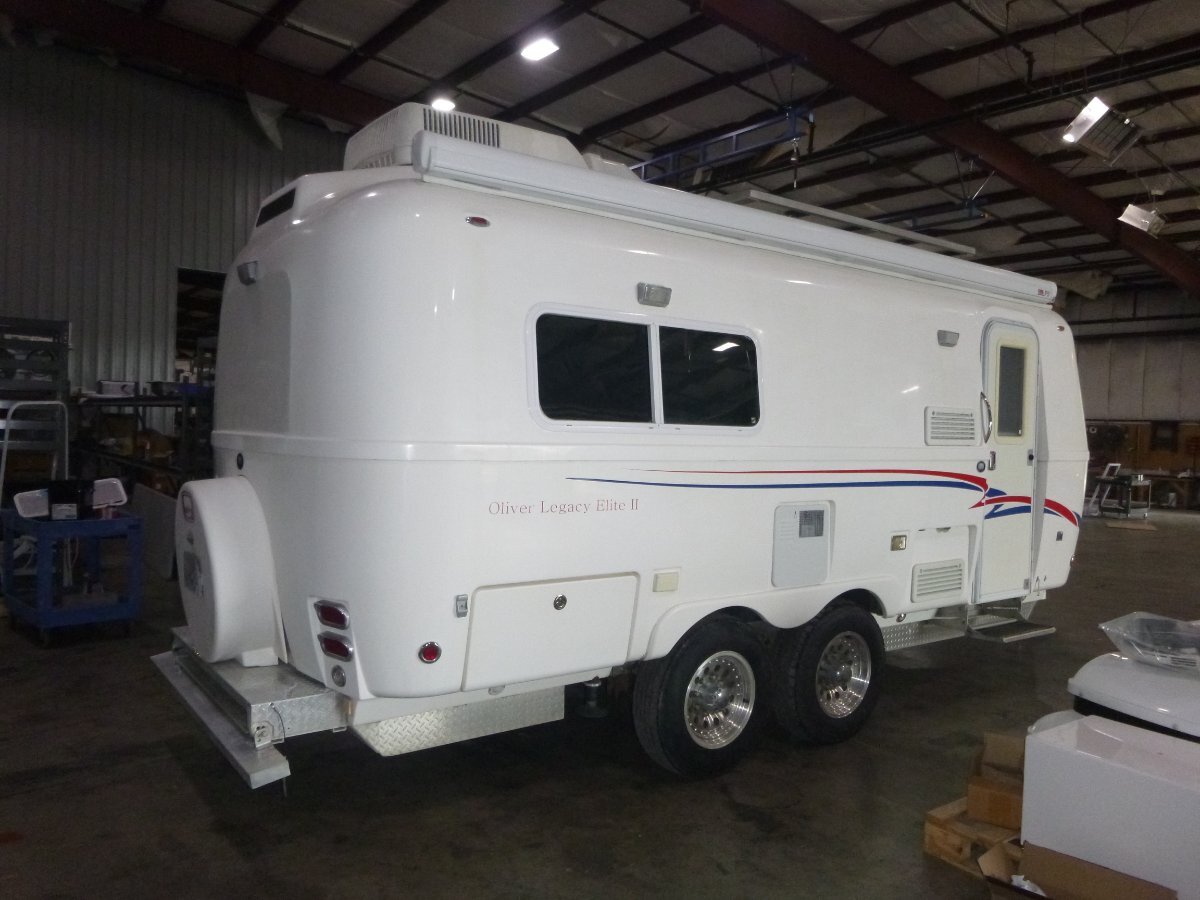
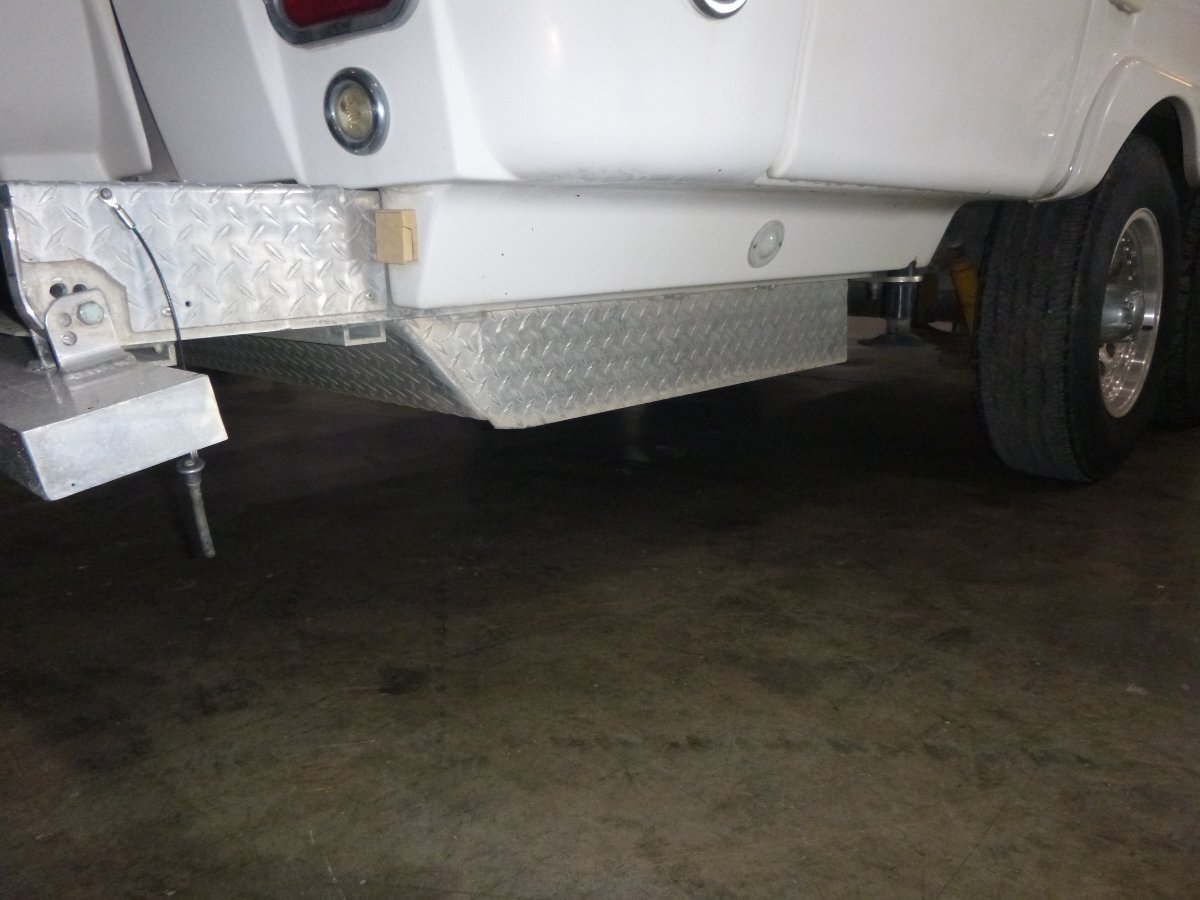
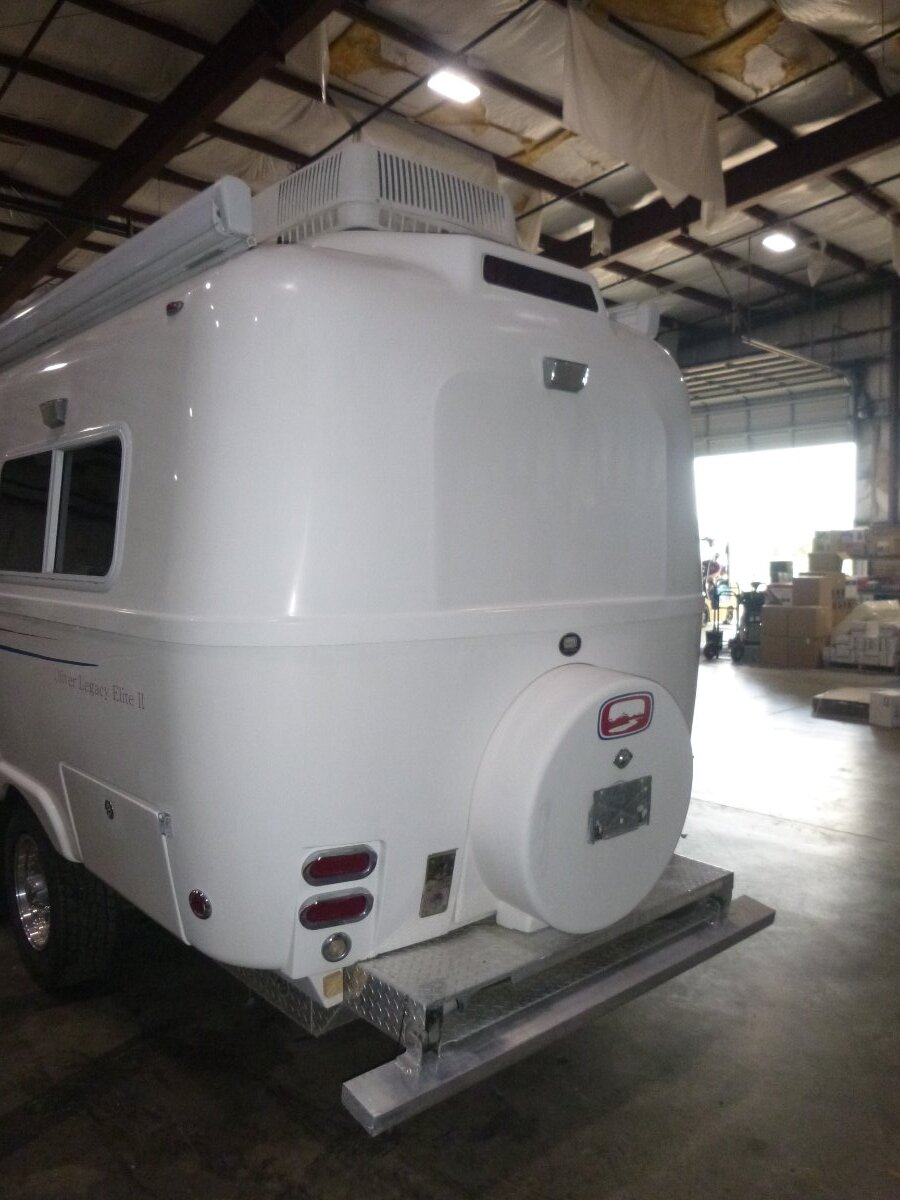
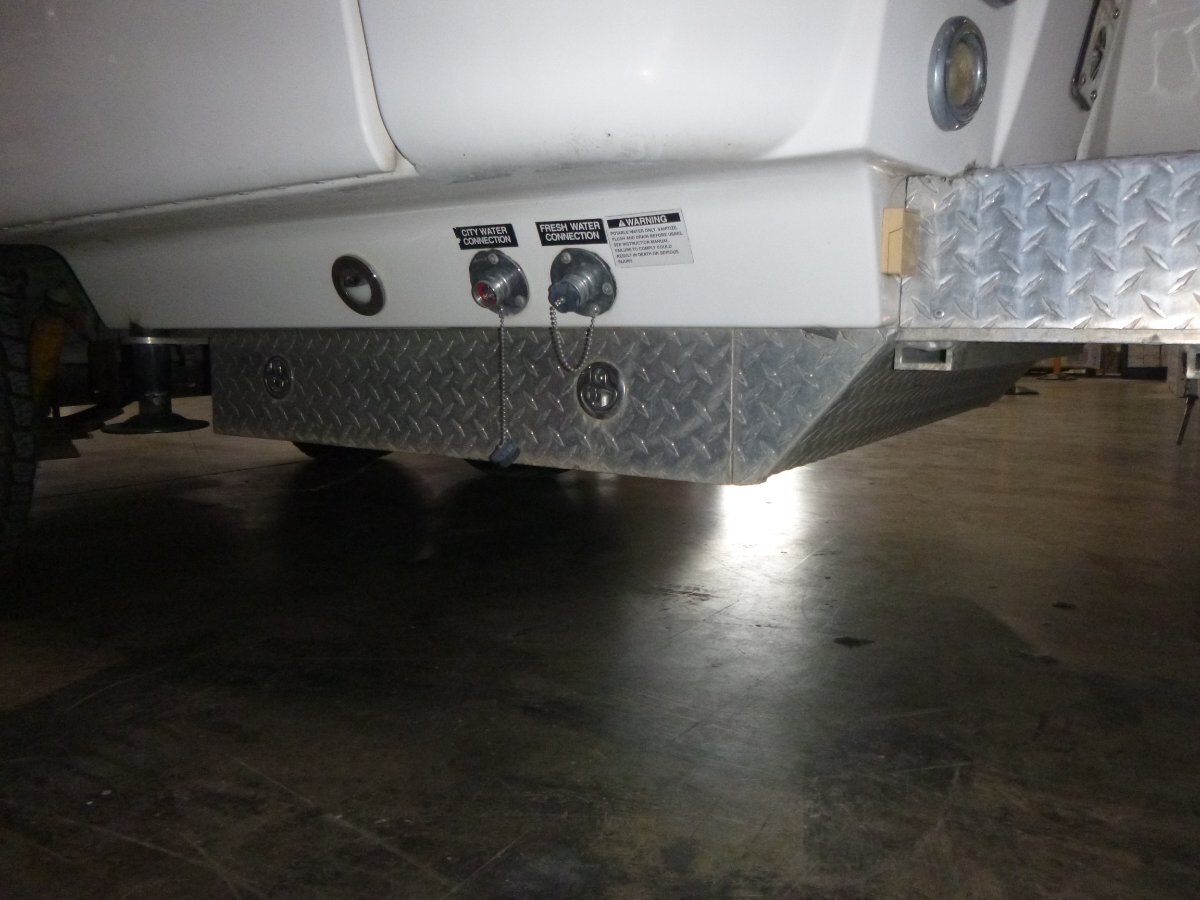
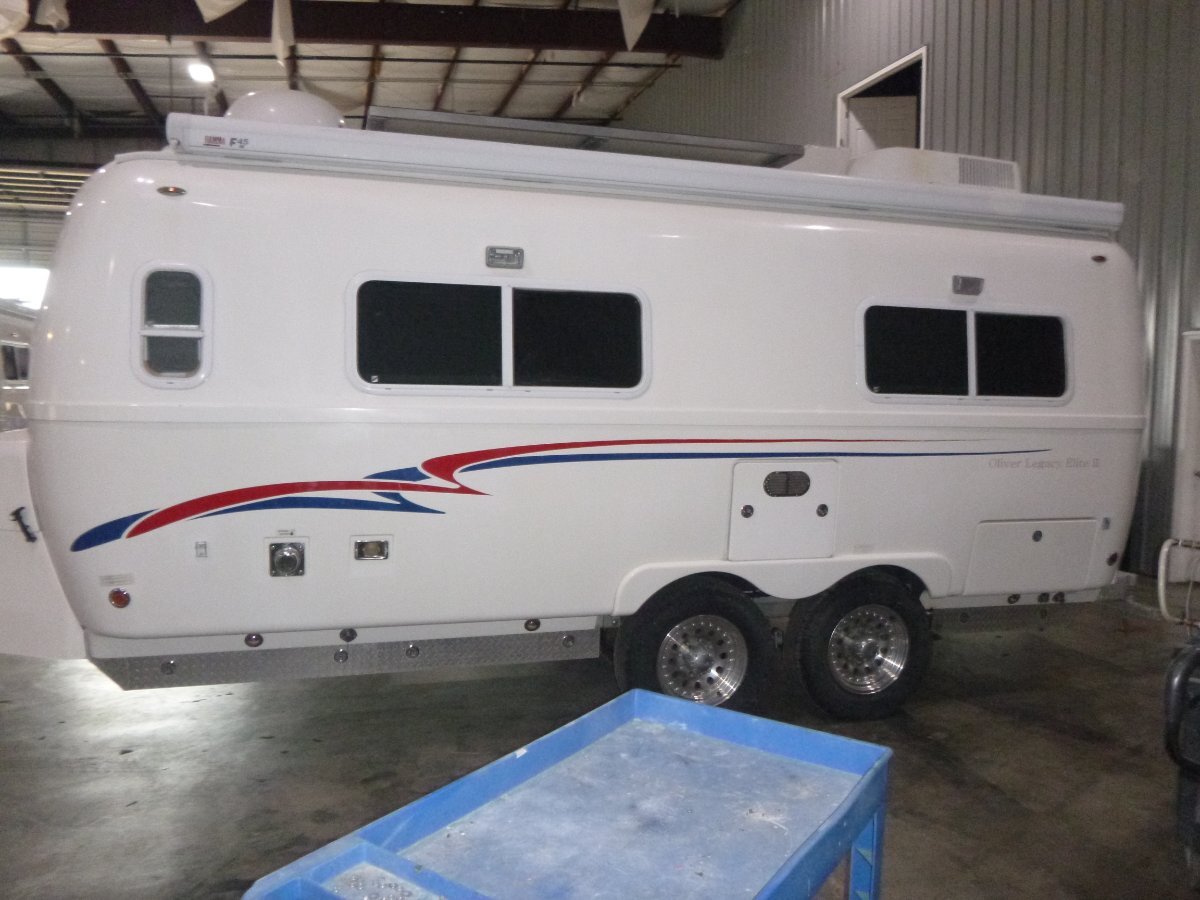
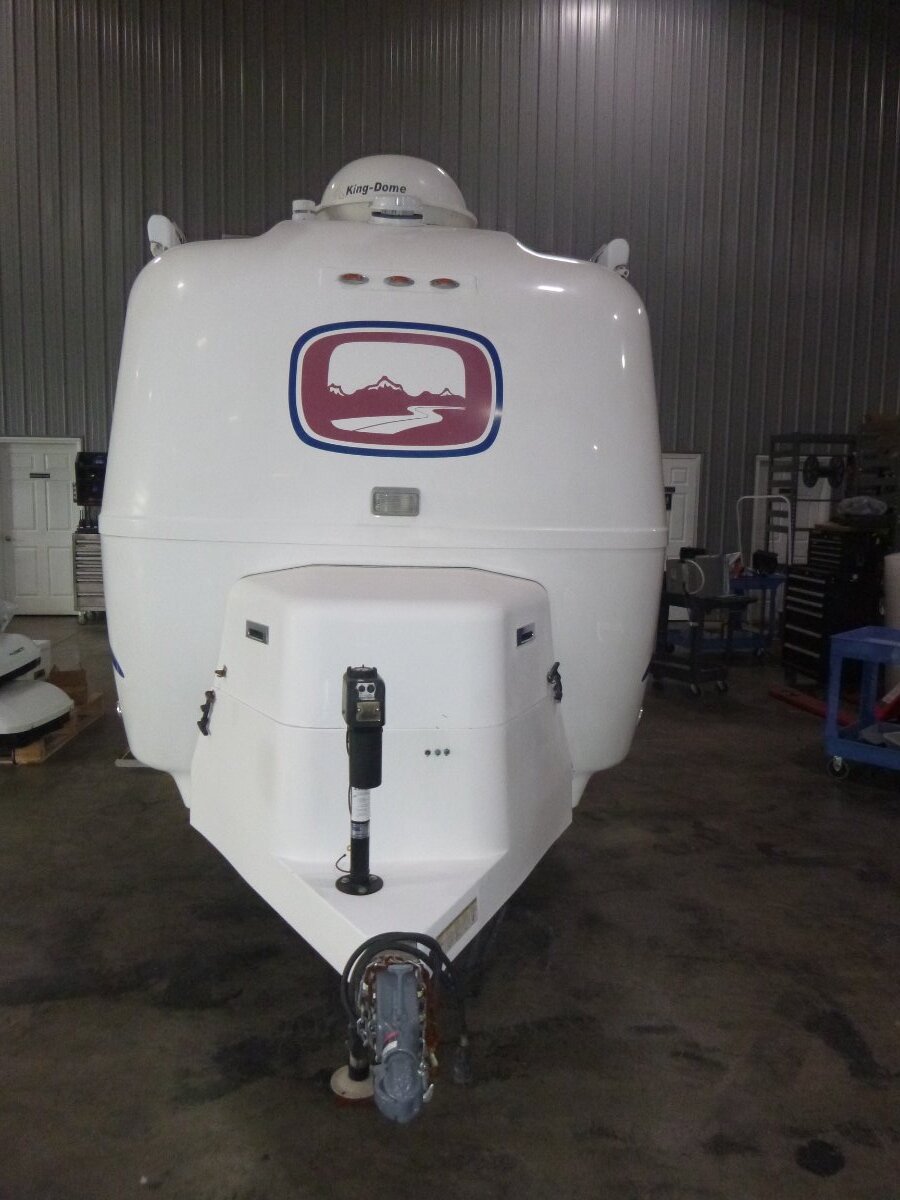
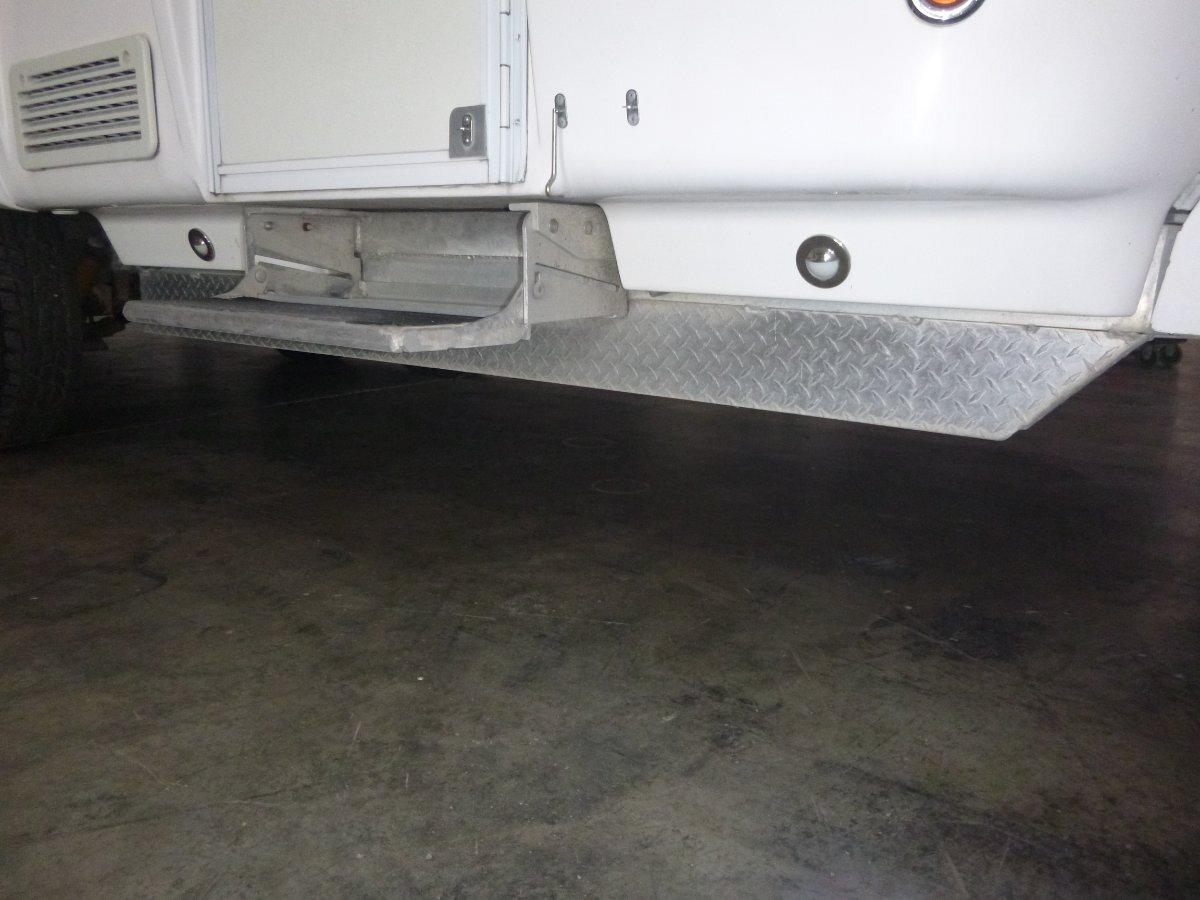
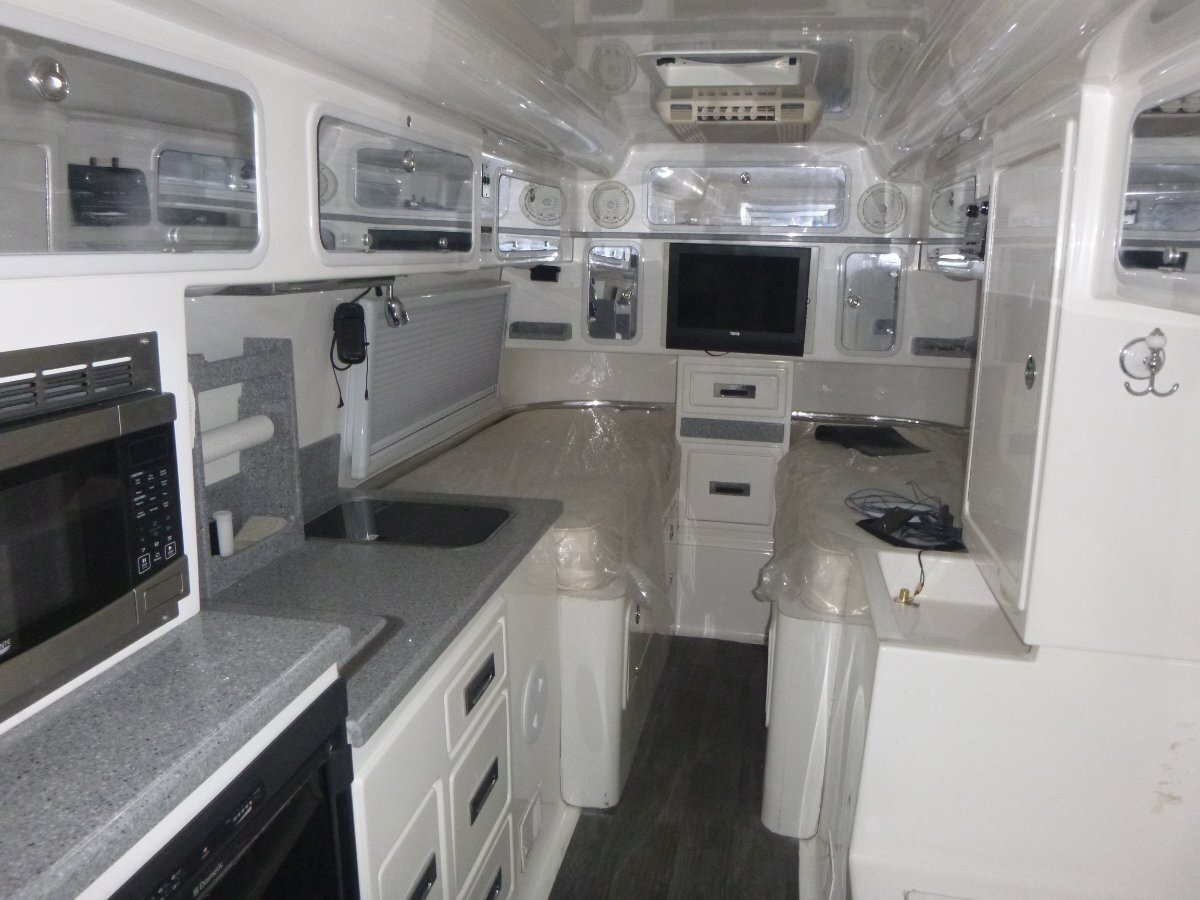
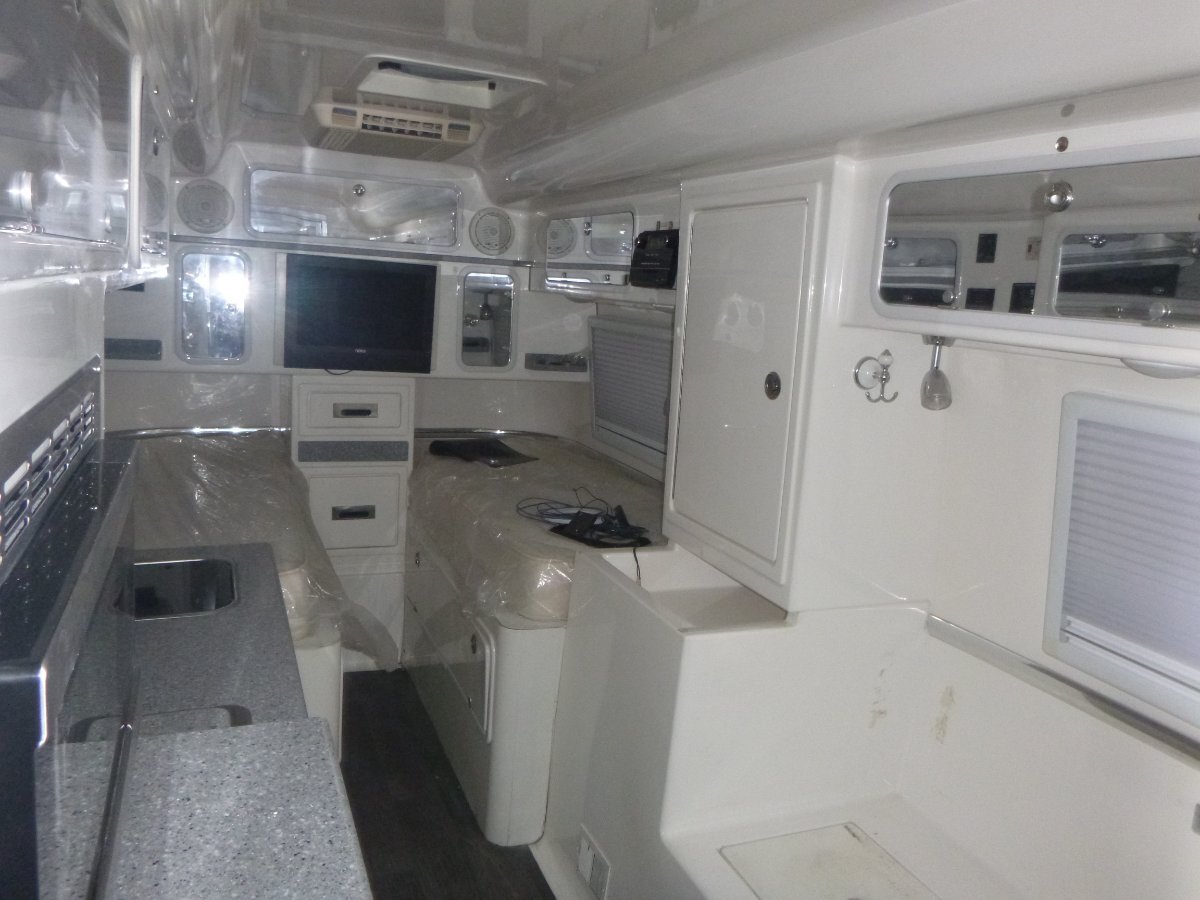
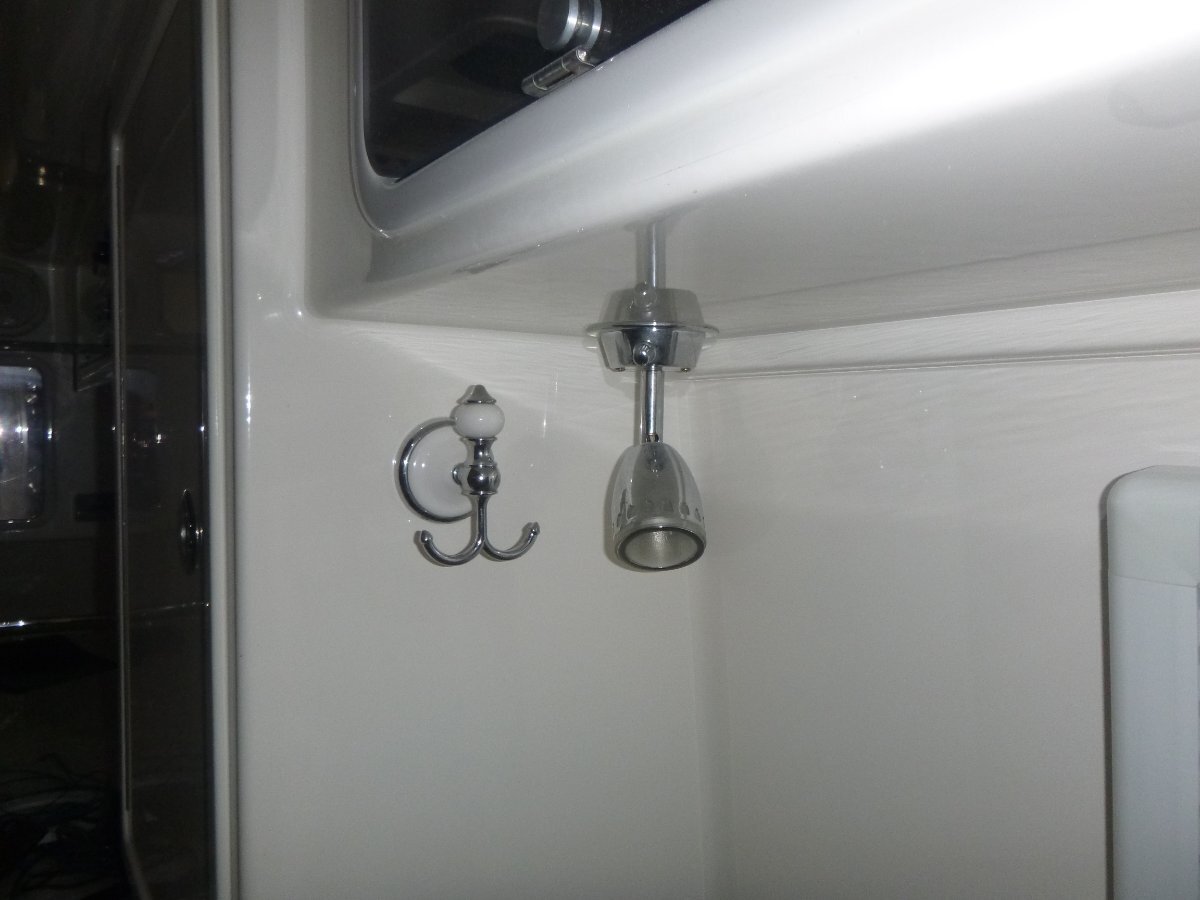
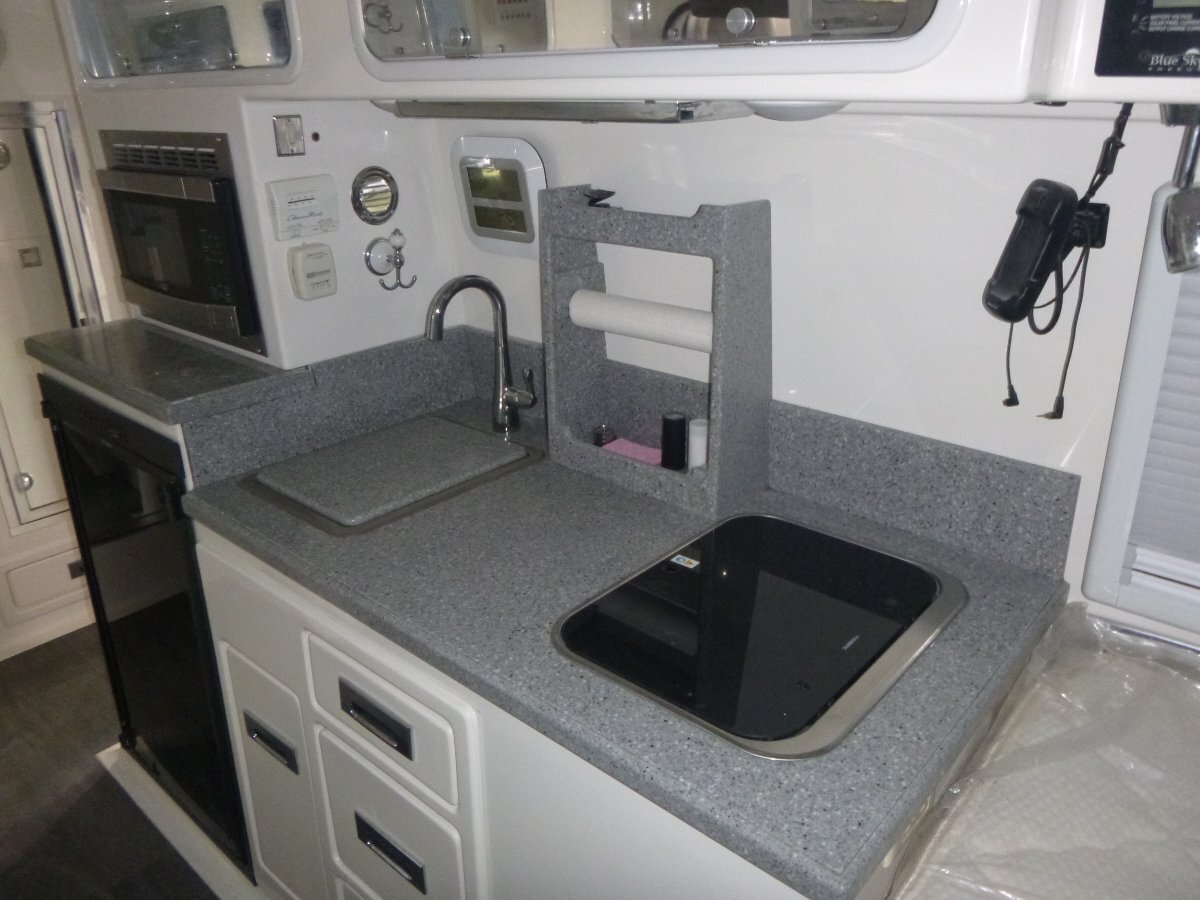
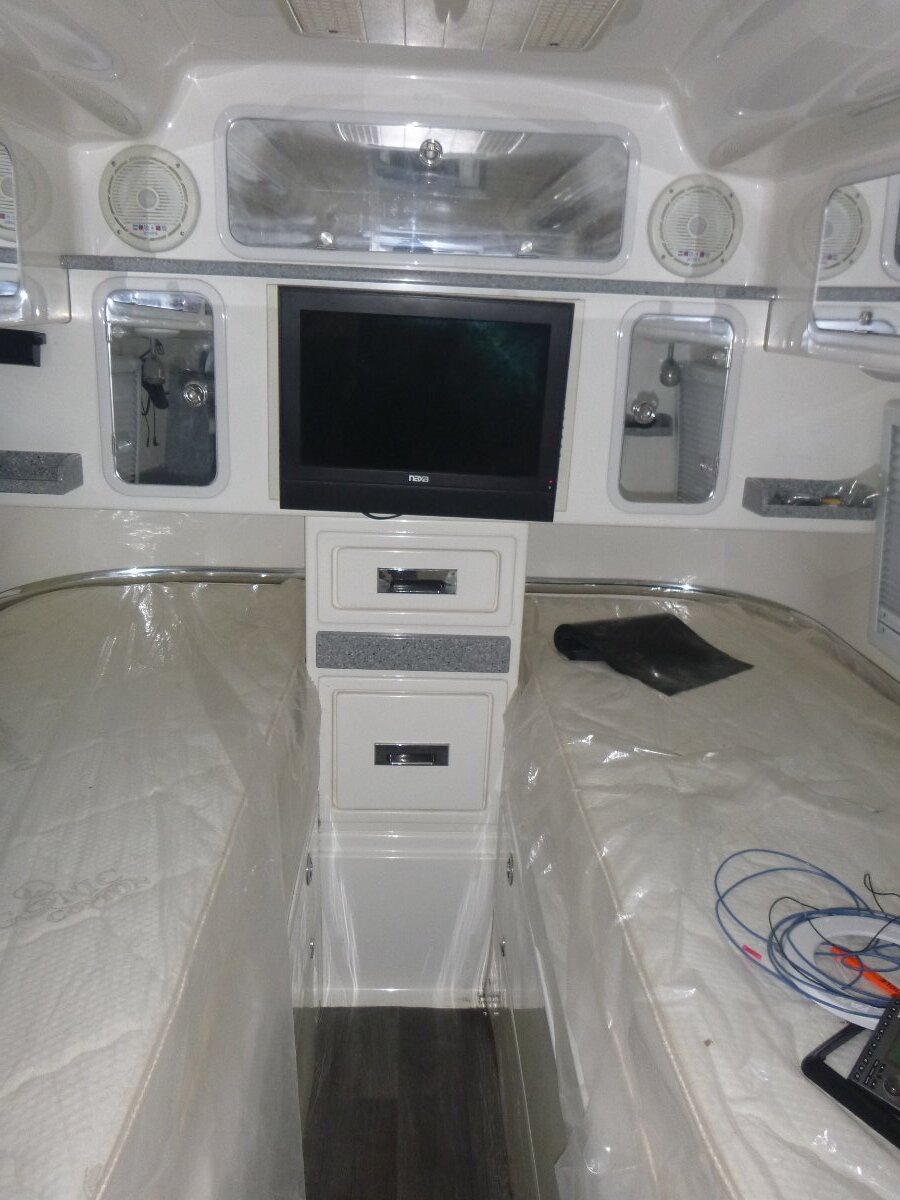
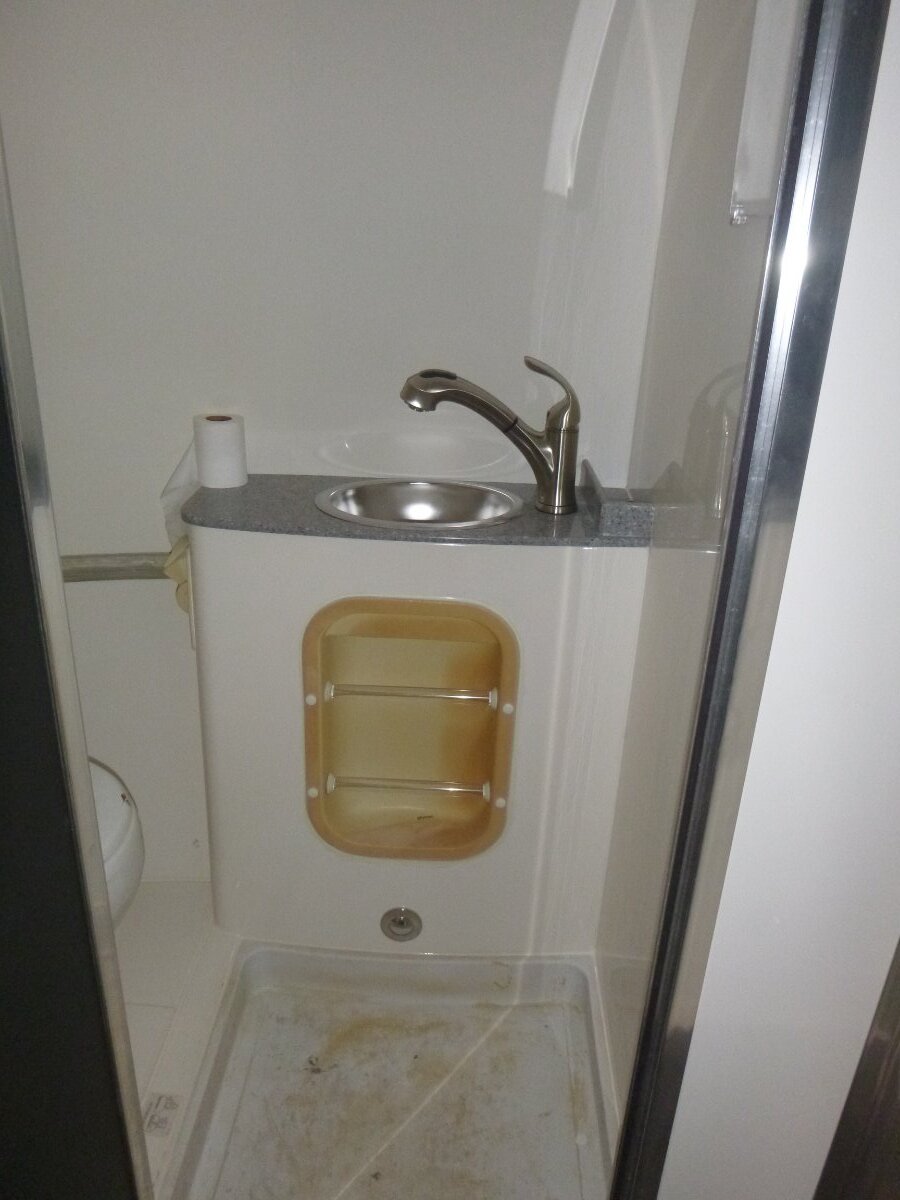
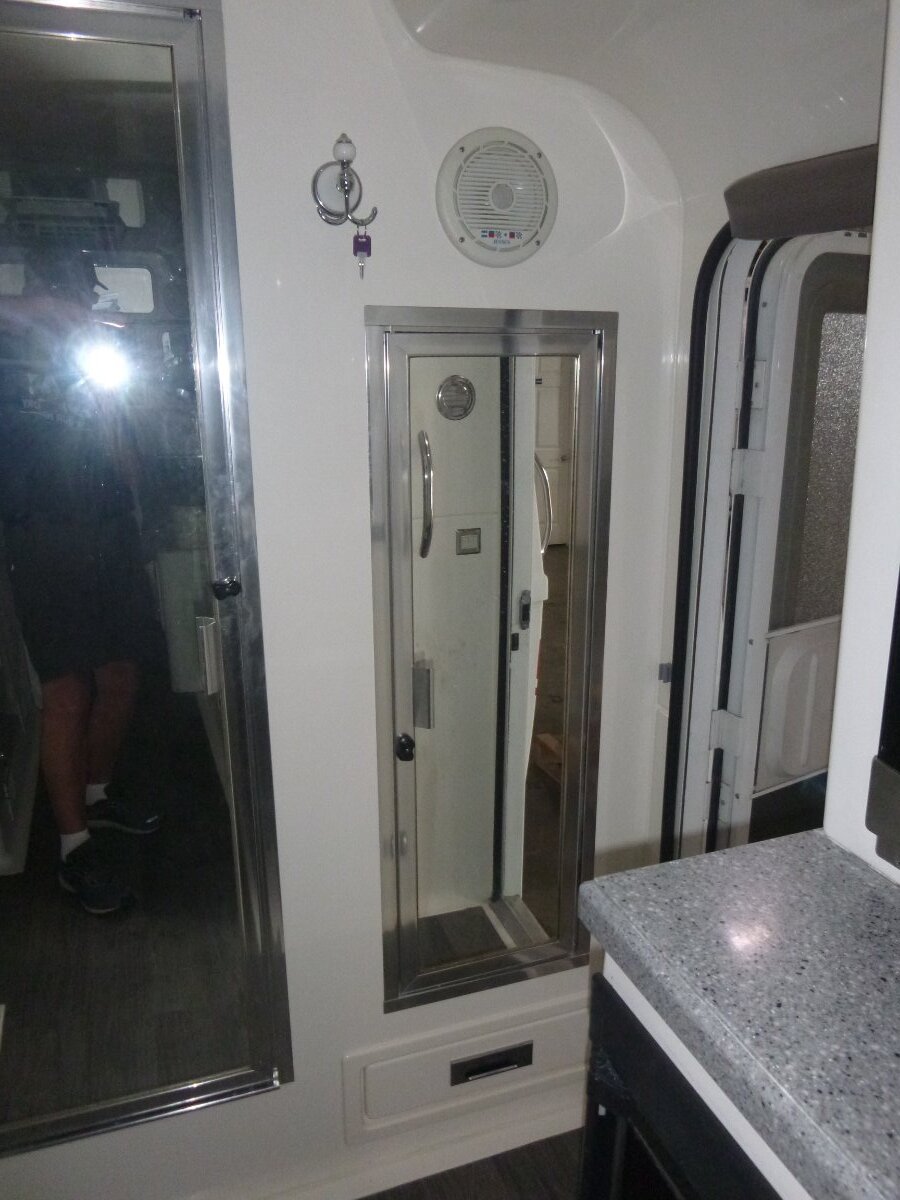
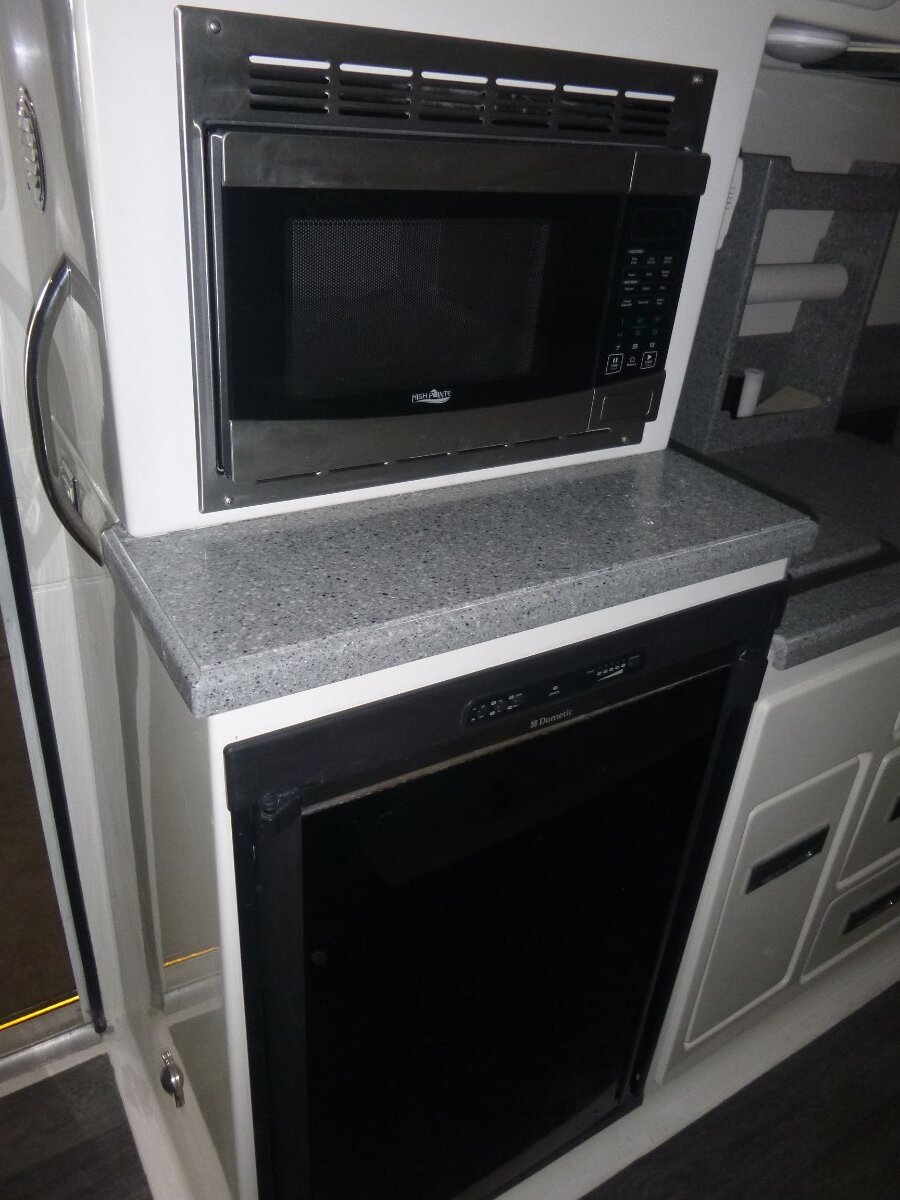
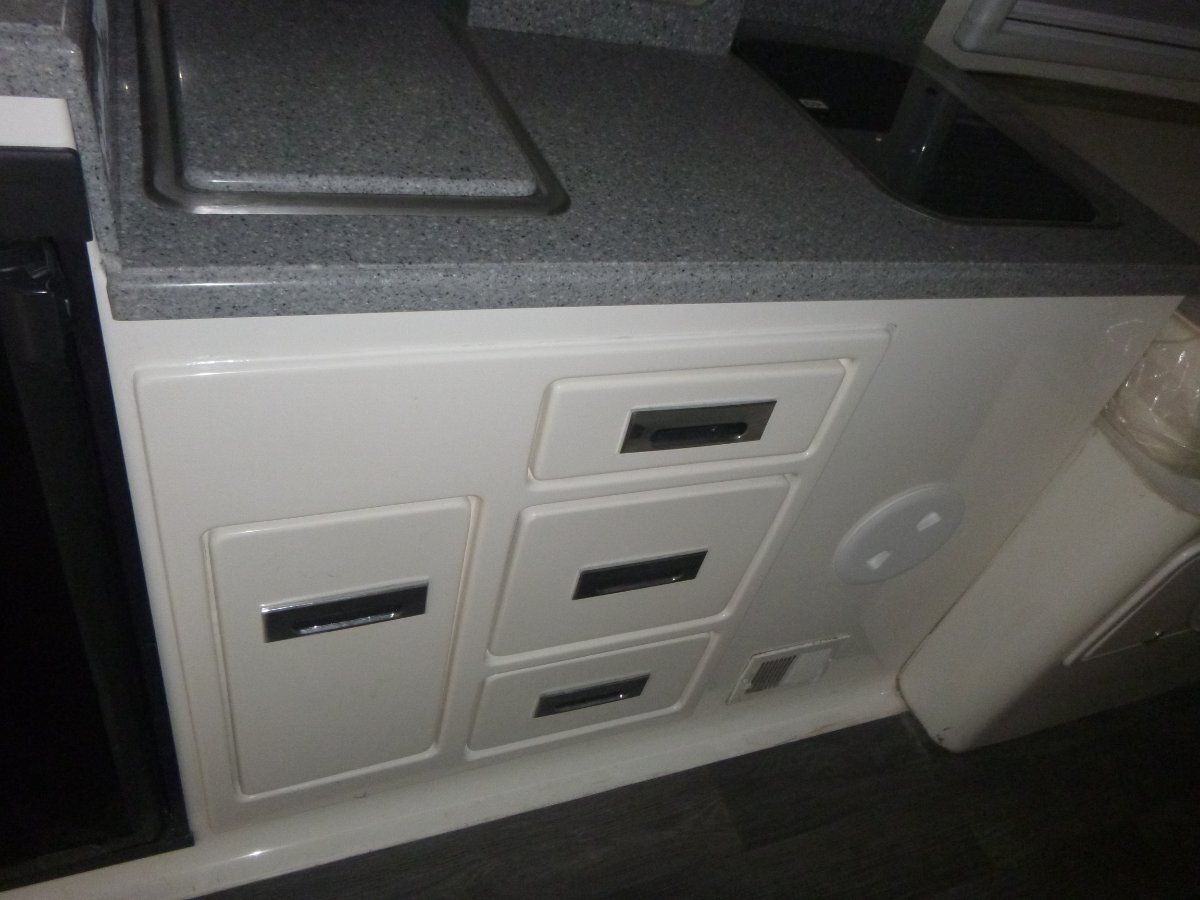
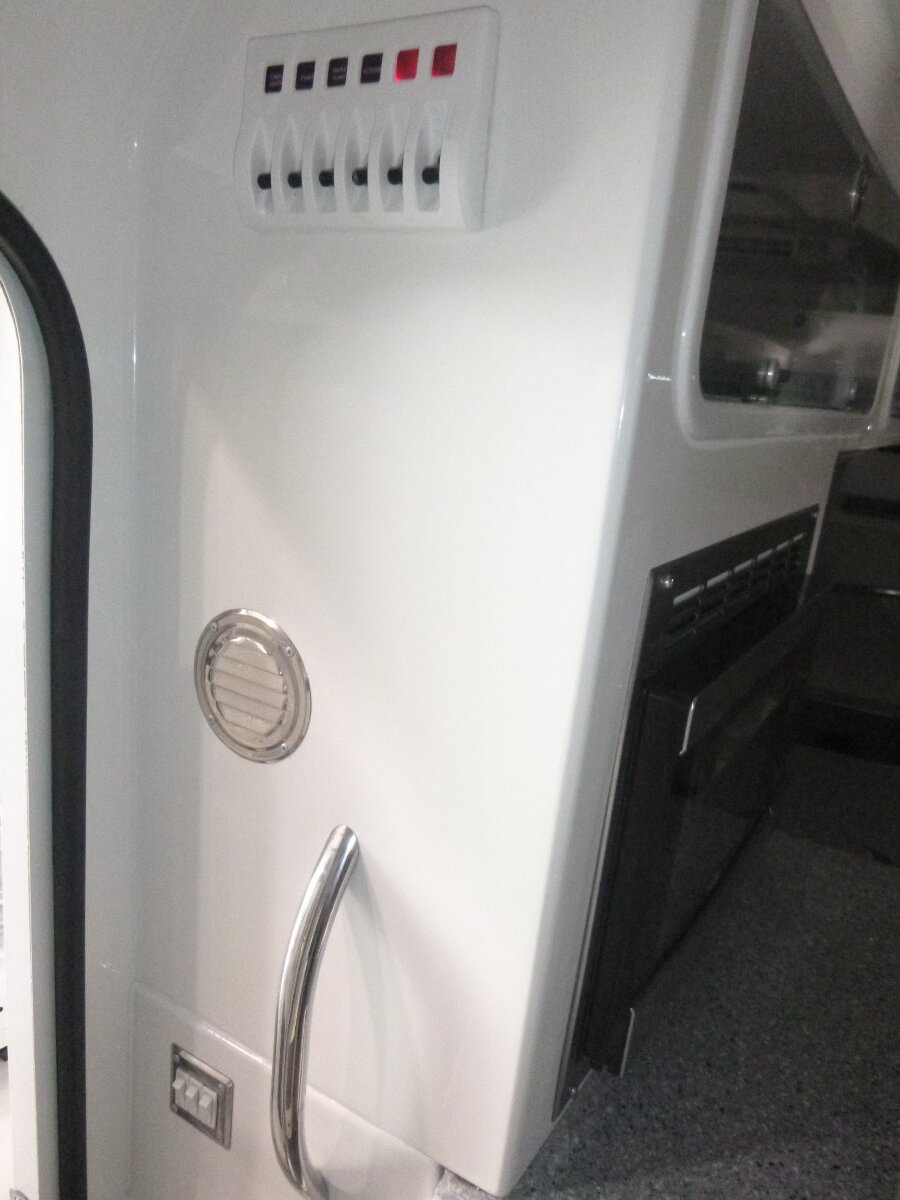
As promised - below are some pics of Mr. Oliver's "Beast". I assume that the name derived from the fact that it is estimated that this Oliver weighs in at something at or near 10,000 pounds. Partially this is due to the interior counters being made of Corian - not fibergranite - the addition of the under carriage storage areas, the bed risers, etc. Shape eyes will note things like the lack of a rear window (no emergency exit), the location of the front and rear under carriage storage, the location of the water heater, the design of the reading lights and "coat" hooks and bath faucet, single entry step, etc. Enjoy this classic! Bill
8 points
-
We have solar and a 2000W Xantrex inverter, but do not carry an electric coffee maker. Like @MobileJoy we use a tea kettle on the LP stovetop and a Melita pour-over cone & paper filter into a stainless thermos bottle each morning. Our son boils water on the cooktop and uses a french press. Choices abound 🙂4 points
-
If it's only your morning coffee, consider boiling water on your propane stove and using a pour-over. If you also need to grind beans, there are hand-powered grinders available. Check out https://www.hario-usa.com/collections. I have a 3000W Xantrex, solar and lithium, and I use a Hario pour-over for coffee.4 points
-
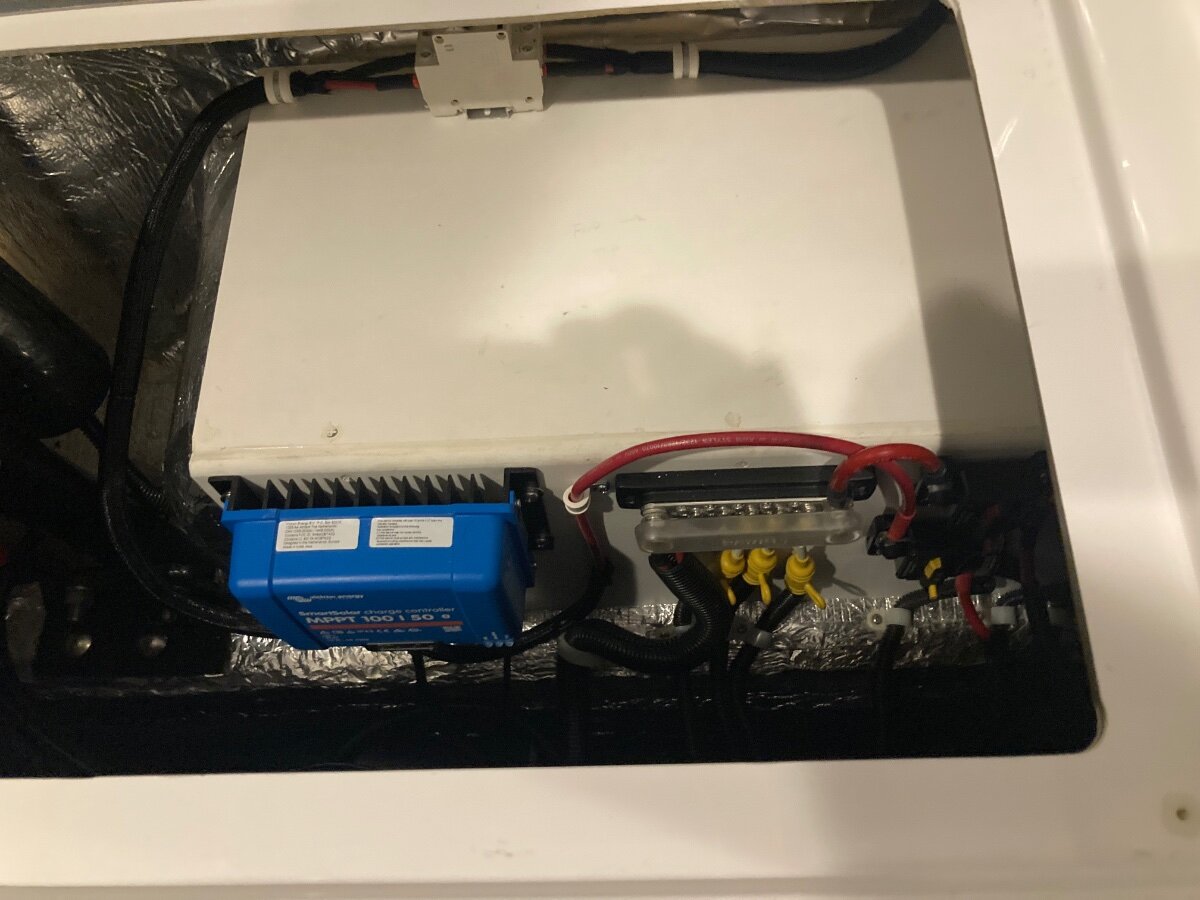
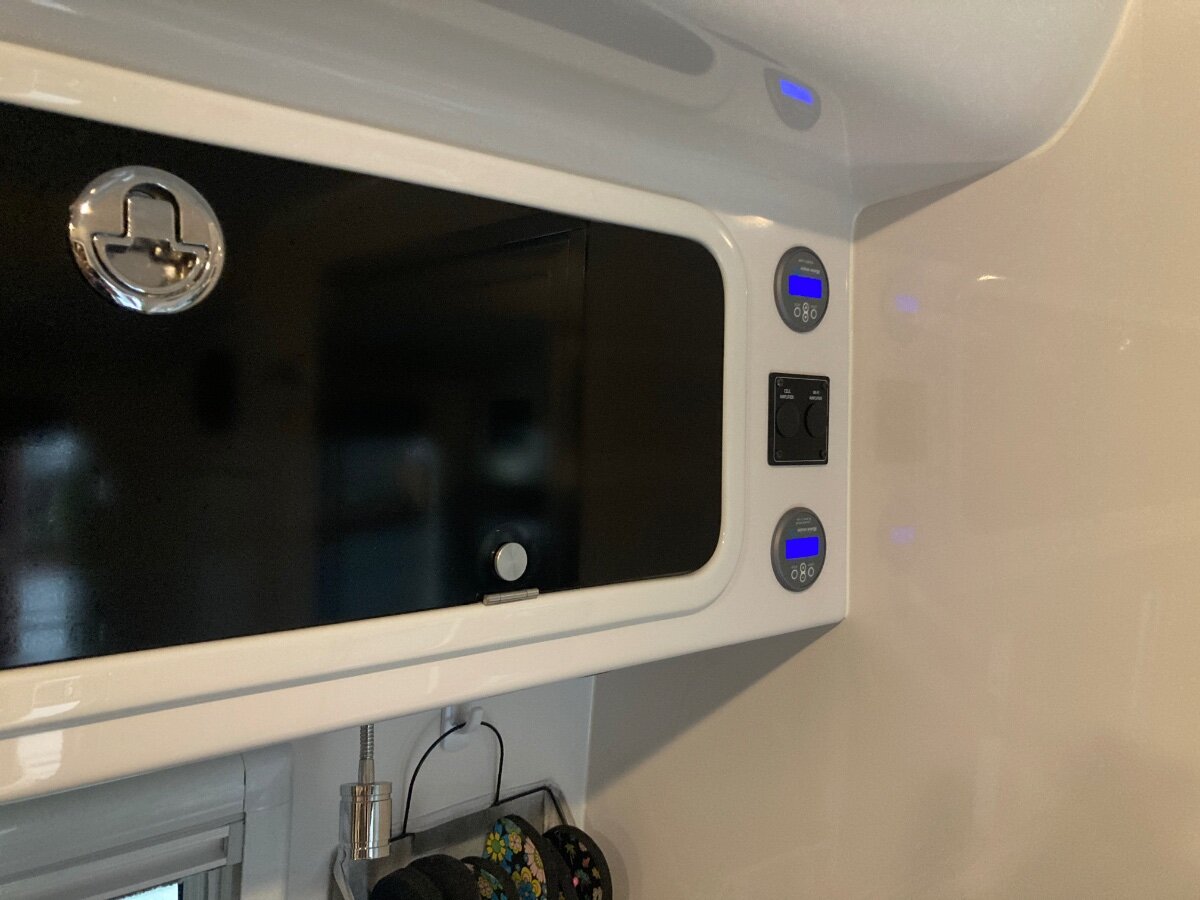
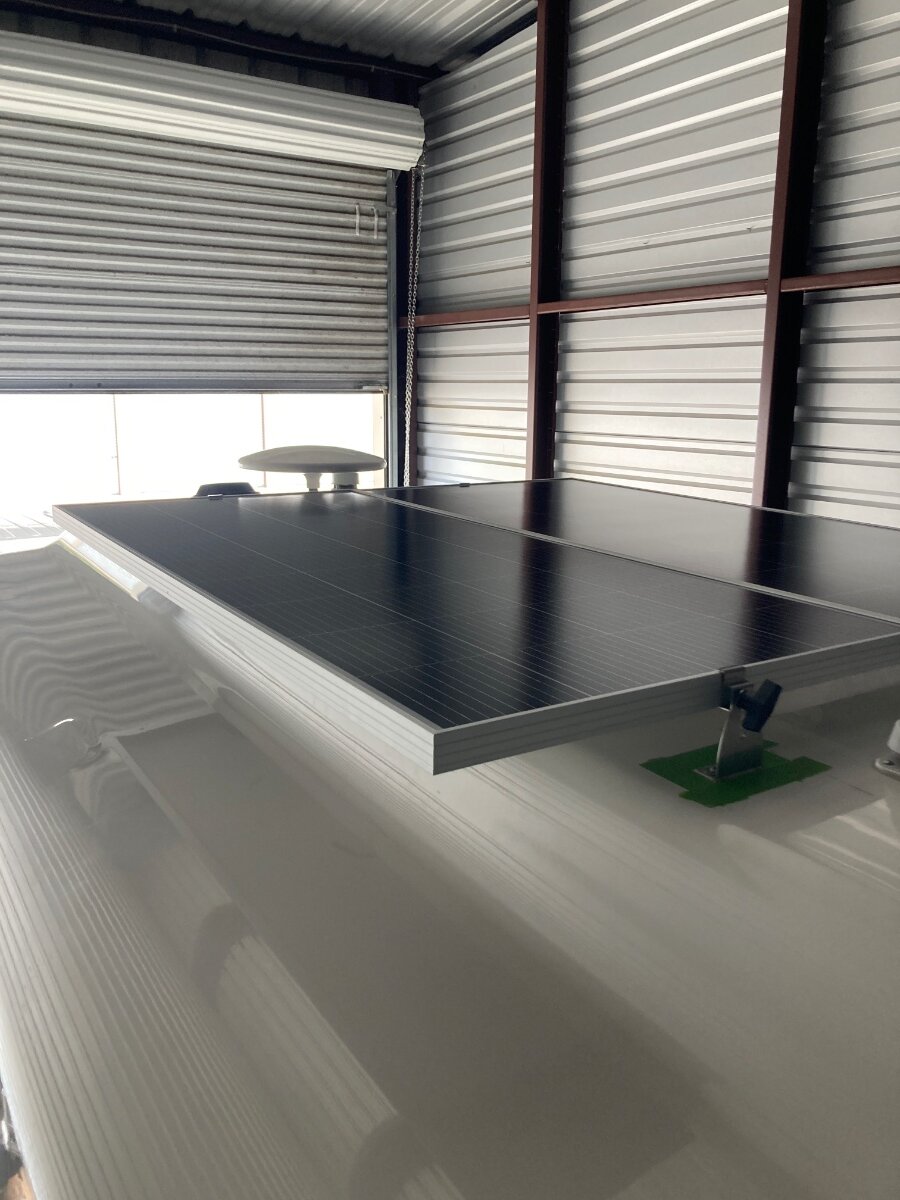
Finished up the rest of my solar install. Went with the Victron 100/50 controller installed under the street side bed. Took the opportunity to clean up this area and made some room for any future upgrades with some PVC sheet I was able to find at local Home Depot. Also wanted to clean up the battery compartment so I have only (+) and (-) 4/0 cables in there. Forward street side bed under the pantry installed victron shunt and a negative bus bar. Under rear dinette installed a positive bus bar, battery to inverter cutoff switch and a solar cutoff switch. Finally installed the MPPT and shunt displays on forward street side cabinet above the dinette. I wanted to leave the area above the radio open in case I decide to install cerbo gx display later. Had to purchase the longest v.e.direct cable victron offers in order to make this run. The only area I get wires pushed through was from the basement to the rear attic by following close to the AC drain line. I was then able to route the wires across the back of the upper cabinets.
4 points
-
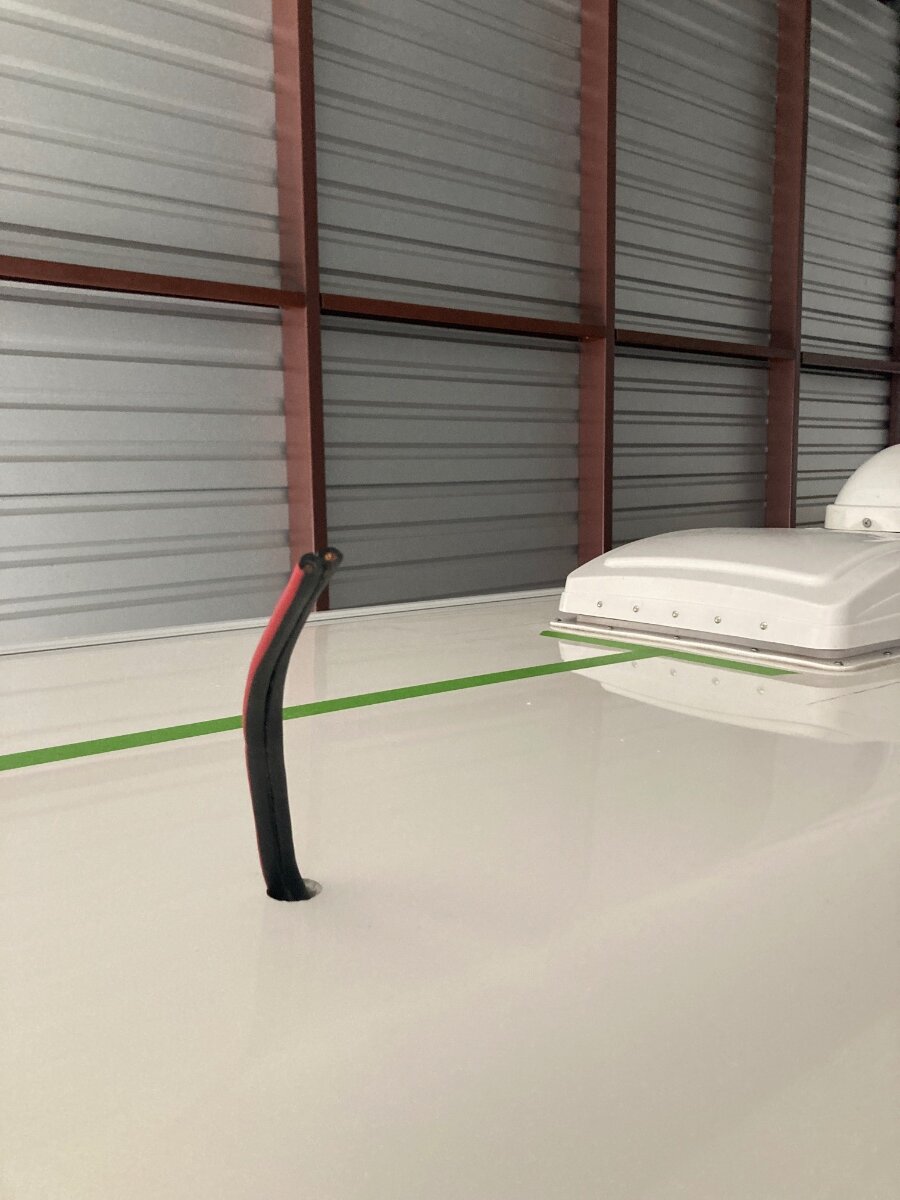
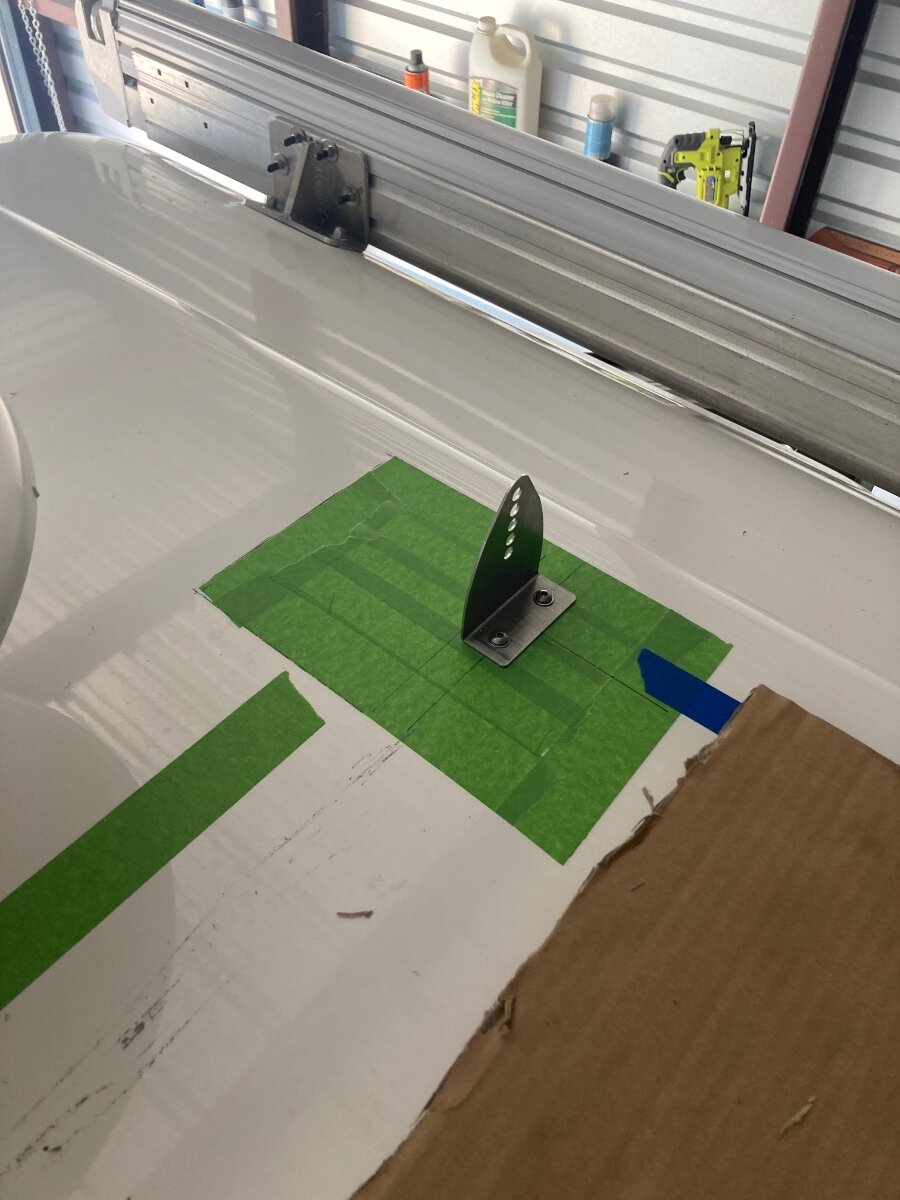
Started installation of solar on Hull 484. Little bit of background information. I purchased a 2019 LE II in April 2024. Although the trailer was not ordered with a solar package it was prewired for solar by OTT during the build and also had the aluminum mounting plates on the roof under the fiberglass. Thank you to owners @AndrewK and @carnivore that have completed this before and posted on this forum. @carnivore ran through his install over the phone with me and even provided me with spare mounts he purchased from AMSolar during his install. I would not have had the confidence to start drilling holes into my roof to locate the preinstalled wiring without these owners doing it before me. Panels are mounted, just need to complete the wiring on roof and seal around the mounts. Mounts were secured with VHB tape and screws by drilling and tapping into the aluminum plates. I went with 2 - 200 watt panels from Rich Solar for 400 watts total. Ordering a victron solar controller and smart shunt. Will post update when the electrical side is complete.
3 points
-
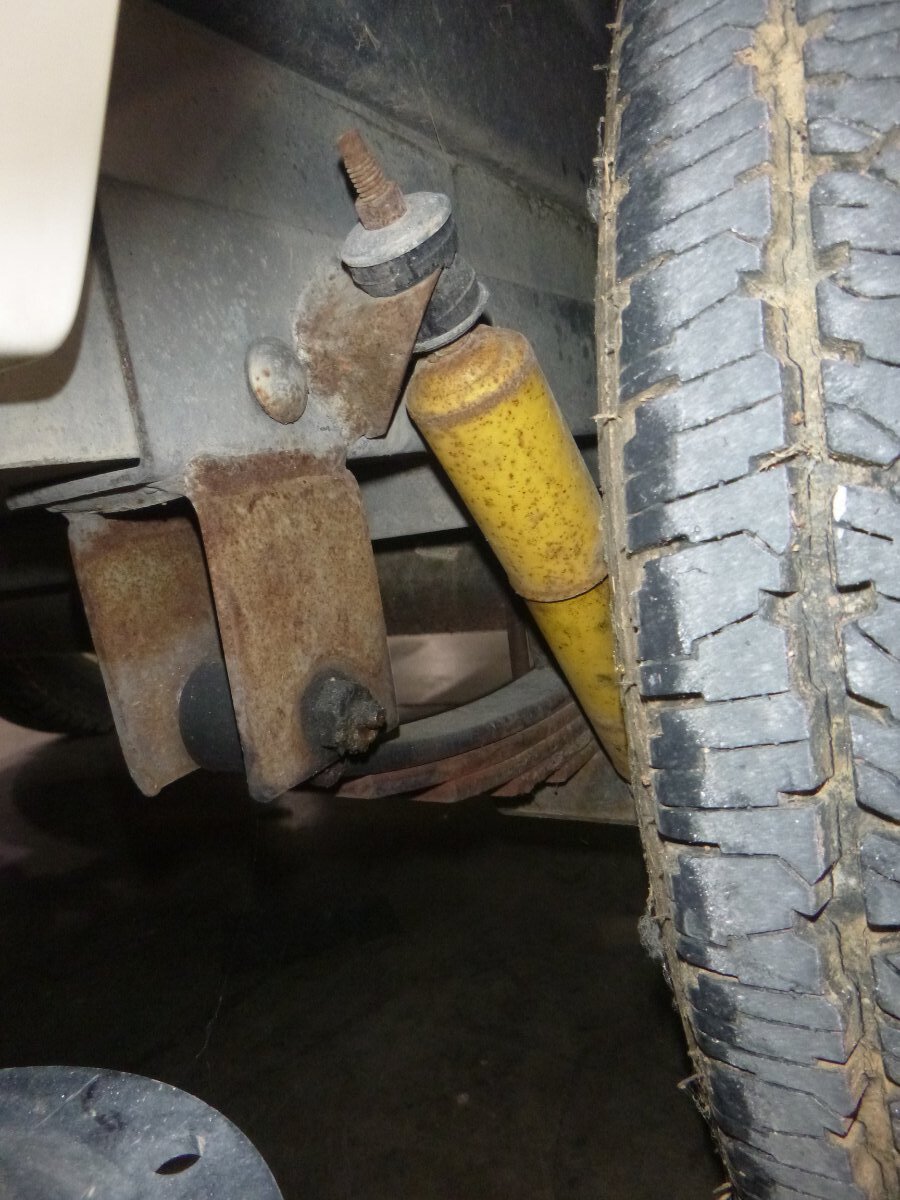
Wow, thanks for the pics.. I can see where it got the name "Beast" now.. Lots of similarities with our Hull 45, which was built right after, such as the 3 running lights at the top front, round reverse lights, coat hooks, reading lights, switch panel, retractable power cord, galley drawer configuration, and single step, but those mods are something I've never seen anywhere else before! And the heater located in the rear street side is very interesting. I wonder why he decided to put it there and lose the rear pass through functionality? Also, looks like it *was* upgraded to 5 leaf springs after the original build as shown in the pics I posted a few days ago. Probably at the same time all those mods that surely added a lot of additional weight were done.3 points
-
Hi. Based on your hull number, I would say that you do not have sealed wheel bearings. They should be inspected and greased annually. As for the fridge, I'm assuming your gas is turned on at the tanks. How long have you waited for the fridge to cool? It takes a long time, usually overnight, before it will reach temperature. You'll feel it at the back of the freezer compartment first. If it's been longer than that with no cooling, can you hear the flame running behind the lower outside vent door? Usually, you would hear a clicking sound as it tries to light, followed by a very soft noise from the flame. This is not constant. Once the fridge reaches temp, the flame will cut in occasionally to maintain that temp.3 points
-
Or if 460AH is enough, a couple regulars here have installed two of these: https://www.litime.com/products/12v-230ah-plus-lifepo4-battery The 2-pack is $984.58 plus tax, free shipping, on sale for another 30 hours. Though I certainly understand waiting for the right time, as I continue to spend way too much on our Oliver!2 points
-
I was in the automotive business for quite a few years and learned alot about bearings and grease. I also have been boating for over 40 years and dunk my trailer in salt water all the time. Over the years I've learned that China can make quality bearings depending on who manufactures them. I prefer the Japanese bearing because they seem to have the best quality control. Had the least issues with them and got the most life time without on ball going bad first. Mobil I synthetic grease seem to work the best because it's not effected by water and withstand high tempertures with melting. Doesn't mix and look like chocolate milk and lose it lubricating ability. I've been using Mobil I sysnthetic on grease fitting on my vehicles and three trailers and never had a issue with bearing failures. Just my take.2 points
-
The one that leads to their next adventure!2 points
-
See new topic post - Jim Oliver's Beast - posted September 2, 2024 Bill2 points
-
Agreed, the only way to have an inverter (or any kind of charging station too) is to also have the means to charge your batteries. You could add a solar suitcase, or a DC-DC charger tied to your truck alternator, so that you would charge while towing. You need something. Looks like you have four 82AH 12V lead-acid batteries wired in parallel for 368 AH total. You could be making a pot of coffee say two mornings if the third morning you would be back to shore power to recharge. However, it appears you have no battery monitor so no way to tell where you stand on state-of-charge (SOC). Taking a close look at your pictures, it's very odd that a 2022 model with no solar or inverter would have multiple extra holes drilled into the battery bay. Also, it looks like you have 4/0 cables between the batteries yet a smaller gauge leaving the bay. These would likely have to be upgraded to operate an inverter, though not sure without truly knowing the AWG. OTT mounted our 2KW Xantrex inverter under the rear dinette seat and when I replaced it, with the much larger 3KVA Victron MP2 it had to go under the rear streetside bed (see pic of OTT OEM install). BTW, this working 2KW setup is for sale cheap if interested. Our OEM installation also came with 340AH rooftop solar and we could run many appliances, including the microwave, except on truly overcast days (then LP for coffee). There are a whole lot of inverter, solar, battery upgrade threads here. I would study these for a while and come up with an upgrade plan that fits your needs. It will take a combination of upgrades that can range from a small to large expense and amount of work depending.
2 points
-
Typically the inverter would be mounted under the curbside bed (if twin model) and would be wired into the outlets to power them when you are off grid. A coffee maker could drain your batteries very quickly without a way to charge the batteries. Another possibility you might consider something similar to a "portable power station." They come in all sorts of sizes and costs and run on lithium batteries. https://www.rei.com/product/226836/ecoflow-delta-2-portable-power-station?sku=2268360001&store=&CAWELAID=120217890016383415&CAGPSPN=pla&CAAGID=107744412944&CATCI=pla-2087785025725&cm_mmc=PLA_Google|21700000001700551_2268360001|92700076752586024|TOF|71700000066695894&gad_source=1&gclid=CjwKCAjwodC2BhAHEiwAE67hJJcxaXVRBKoDVQUqzcOLMkYRGRAL5qkqjqU-RB3WyrkQOlvmdaFu2RoCyZAQAvD_BwE&gclsrc=aw.ds2 points
-
Mossey asks all the right questions. If the cable is no longer attached to the valve it is probably just a matter of pushing the handle all the way in and then loosen the set screw on top of the valve, reinsert the cable and tighten it down. I’ve pulled both the black and gray cables all the way out from cleaning and lubing. They easily insert back into the sleeve to the valve. Then it’s just a matter of putting the cable under the set screw and tighten it down. Mike2 points
-
@Patriot - Glad to see you've got the mini SL up and operational. We knew y'all would love it! FYI: Headed up the spine of the Rockies in a week for the annual MC ride - first stop is at Soldier's Stone monument near Saguache, CO 163 miles north east of South Fork. It's adjacent to the Continental Divide Trail and accessible from a nearby parking area. Very moving monument, worth the "look-see." Soldier's Stone is a monument dedicated to all those who died during the VN War from over a dozen nations from the mid-50s to 1975. Well worth the visit, IMO...
2 points
-
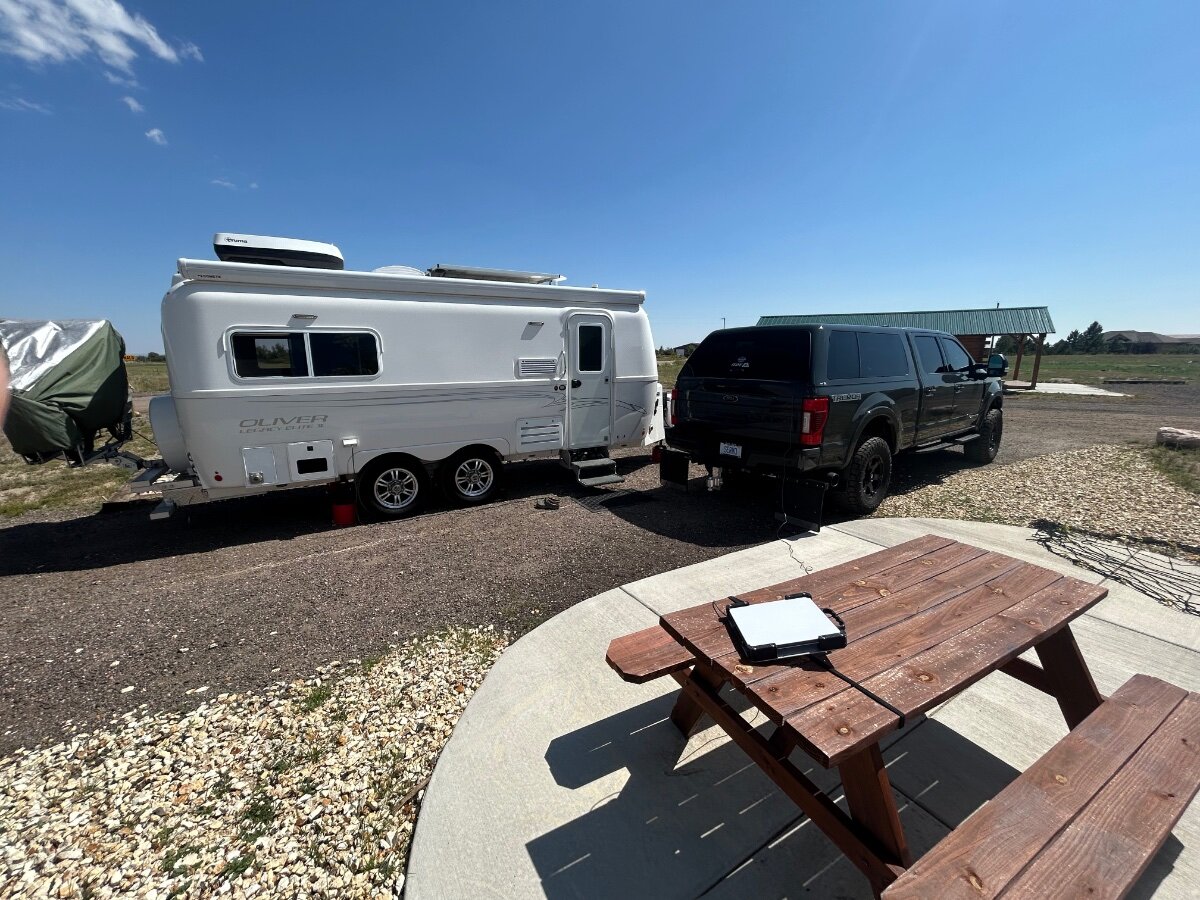
As promised here is a quick update on our SL mini field use. It’s a game changer for us. No more local WiFi or cell hot spot to think about. We are presently in Colorado Springs and the mini took about 8 min to deploy and we were up and running. Certainly the wide open Colorado skies allowed for quick recognition of the satellites. I do think the mini will serve us well. It’s a cinch to pack up and stow. Onward to South Fork and then beautiful Wolf Creek Pass, then make our way to Durango, Ouray, Montrose and then Grand Junction. Cheers all! We are happy to be traveling!
2 points
-
@jd1923 thank you, I have been keeping an eye on the prices for these since you did your install post.1 point
-
Hard to beat this price and two of these fit nicely in the battery tray. Epoch has a USA10 code now for 10% OFF. Buy direct from Epoch and they charge sales tax and shipping. Buy from this company and get them to honor the Epoch 10% OFF sale. They do not charge tax and shipping. I bought these for $1,798.20 total during their 4th of July sale. Epoch Batteries 12V 300Ah | Heated & Bluetooth | LiFePO4 Battery - Epo – Renewable Outdoors
1 point
-
That'll work.1 point
-
Holy mackerel - did anyone else see that "mountain lion" in the pics above!1 point
-
Love having more options but I think this comes down to use case. If you are unsure of which one will best suit you, here is a great comparison of their two newest dishes.1 point
-
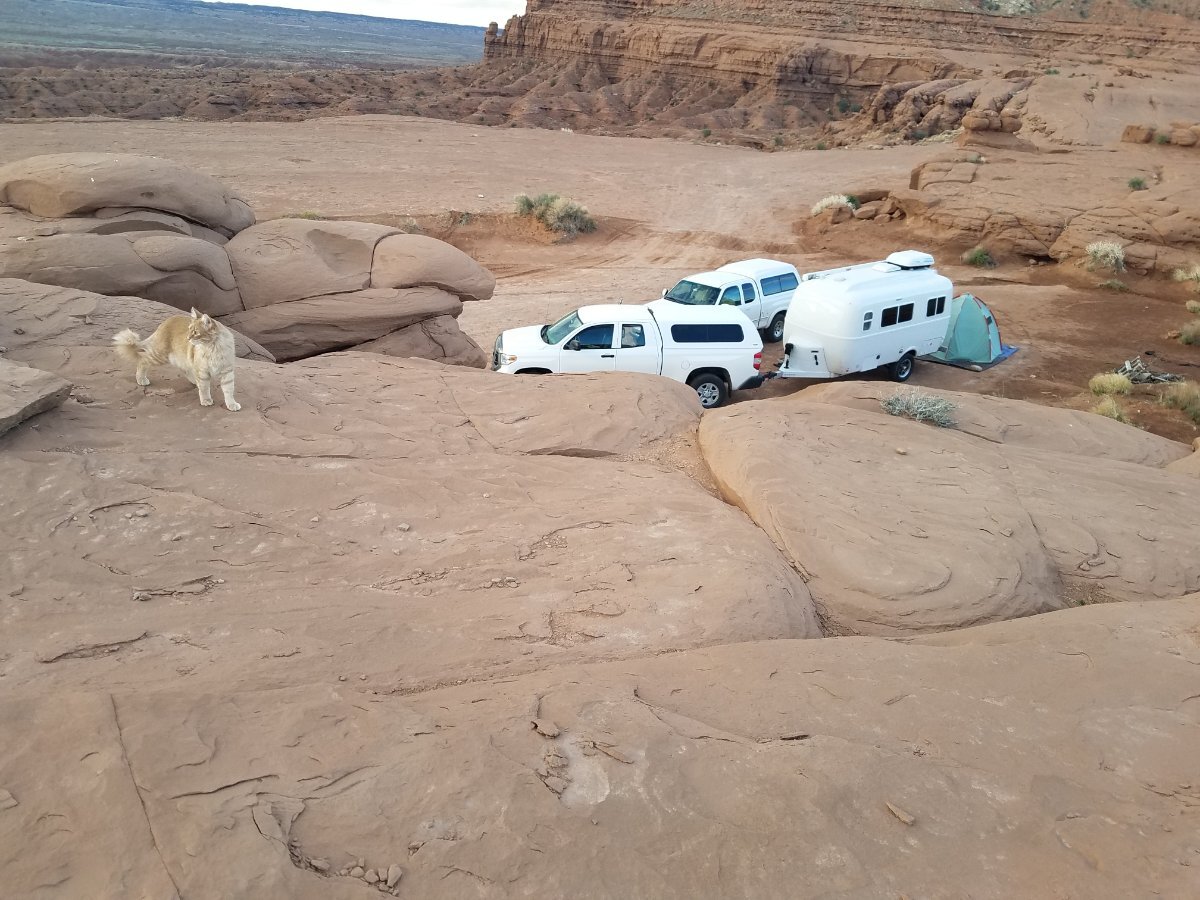
Boondocking in Utah. Unfortionatly we had a lot of rain at the biginning.
1 point
-
My wife doesn’t drink coffee, so a pour over of some sort has been my coffee making routine for a loooong time. I am presently using an AeroPress and an old Jetboil camping stove. The AeroPress is a lot like a French Press except it is nearly indestructible, no glass. Or you could heat water on the kitchen gas cooktop. Mossey1 point
-
Which runway?😗1 point
-
@Steph and Dud B, you are CLEARED FOR TAKEOFF!1 point
-
Rearview Camera is on our pre-trip checklist: RV Quick Checklist: 66 items shared Monitors □ 1 Change GPS to Movement/Daily □ 2 Rearview camera on □ 3 Install repeater Bathroom □ 4 Bathroom drain closed (in) & flagged □ 5 Shower curtain secured □ 6 Bathroom cabinet shut □ 7 Bathroom window closed □ 8 Bathroom vent closed □ 9 bathroom items secured □ 10 bathroom door closed Interior □ 11 Check ladder secure points □ 12 Awning switches off □ 13 Awning remote stored □ 14 Microwave tray secure □ 15 fan in fridge □ 16 fridge doors locked □ 18 Sink cover stored □ 19 Stove off □ 20 cooktop cover closed □ 21 pots/pans/dishes □ 22 furnace/AC off □ 23 Marine fan stowed □ 24 roof vent closed/fan off □ 25 Remotes stored □ 26 antenna booster off □ 27 AC alarm off □ 28 TVs secured □ Solar on/off □ 29 Gas water heater off □ 30 water pump off □ 31 weather radio off □ 32 Xantrex setting #28 to 5 (storage) or 25 (camping) or 15 (generator) □ 34 tires checked □ 35 doors/drawers/windows closed □ 36 blinds closed □ 37 Cabin lights off Exterior □ 38 LP gas off □ 33 thermometer stored □ 39 Electric water heater off/on □ 40 sewer hose secured □ 41 tire covers off □ 42 leveling jacks up □ 43 water/elec./TV/sewer d/c Truck □ 44 Close tailgate □ 45 bikes secured □ 46 Wheel step removed □ 47 Ball hitch pinned and locked □ 48 parking brake set □ 49 Chains on □ 50 breakaway cable □ 51 Coupler pinned □ 52 Tongue jack up Hitched □ 53 vehicle lights checked □ 54 wheel chocks out □ 55 Linx levelers stored □ 17 fridge on 12v □ 56 door mat stored □ 57 doors/compartments locked □ 58 steps retracted □ 60 trailer transponder in Mechanical □ 59 trailer brakes checked □ 61 radiator clear □ 62 washer fluid checked □ 63 ATF checked □ 64 brake fluid checked □ 65 coolant checked1 point
-
Geoff, this is a very interesting mod, and I can see others taking the “Engine-on Detector Switch” concept for other projects. For us at this time we are non-Lithium's so 'Turn On Rear View Camera' is on our 'Towing' checklist, just as 'Turn Off Rear View Camera' is on our 'setup' checklist. I also verify it is on when I get to 'check out' Maggie, whilst we are are running thru the Rear (running, signal, brake, bkup, flashers) Lights sequence just before we start towing. I will of course be following the feedback here. B~Out1 point
-
Another cool project to add to the list! Thanks for documenting this.1 point
-
Very clever @Snackchaser! Nicely done.1 point
-
I'm not going to get the nice case. An extra battery is always good, but we have enough. This eBay seller had this item for $200 with a Labor Day 20% coupon. Today I got a notification they lowered the price to $160, only $128 plus tax: DEWALT DCGG571B 20V MAX Variable Speed Cordless Grease Gun (Tool Only) New 885911330381 | eBay Bought one today! $141.35 OTD with AZ sales tax. I'll find a plastic bin for it when sitting in my garage, not bringing it on trips. And a thank you to @mossemi who got me thinking about this. I will grease truck and trailer after I get this and before we leave for the Texas Rally in October.1 point
-
Max Burner, We will definitely try and stop for a “look see” at Soldiers Stone Monument. Paying a tribute to brother and sister vets is a high priority for us. Thank you for the nugget! We will miss you by one week. Your trip sounds like a really great time! Post up some pics! Patriot🇺🇸1 point
-
Our meal was great and the host gave us get two free Taco cards and a desert on the house. John I think having a Torchy’s that close to home could be dangerous. 😋 😄 We could easily become regulars. Ha!1 point
-
Congratulations what a great accomplishment with wonderful memories!! I agree with @MAX Burner the Lobstah Rolls looks amazing! We gotta get back to Maine.1 point
-
I spoke to Cindy and her husband and they will give our suggestions a try. Mossey1 point
-
I am going to have to make some assumptions with the limited information you have provided. I am also going to ask some questions so I can try to help. 1. Did the pull/push handle stay attached to the stainless steel wire? 2. Did the SS wire pull all of the way out out the black sleeve? 3. Do you know where the grey tank valve is located? 4. Do you have a twin or full size bed? 5. Do you know how to access the area below the street side bed and front dinette? Mossey1 point
-
Yes, that's how I tested the switch.1 point
-
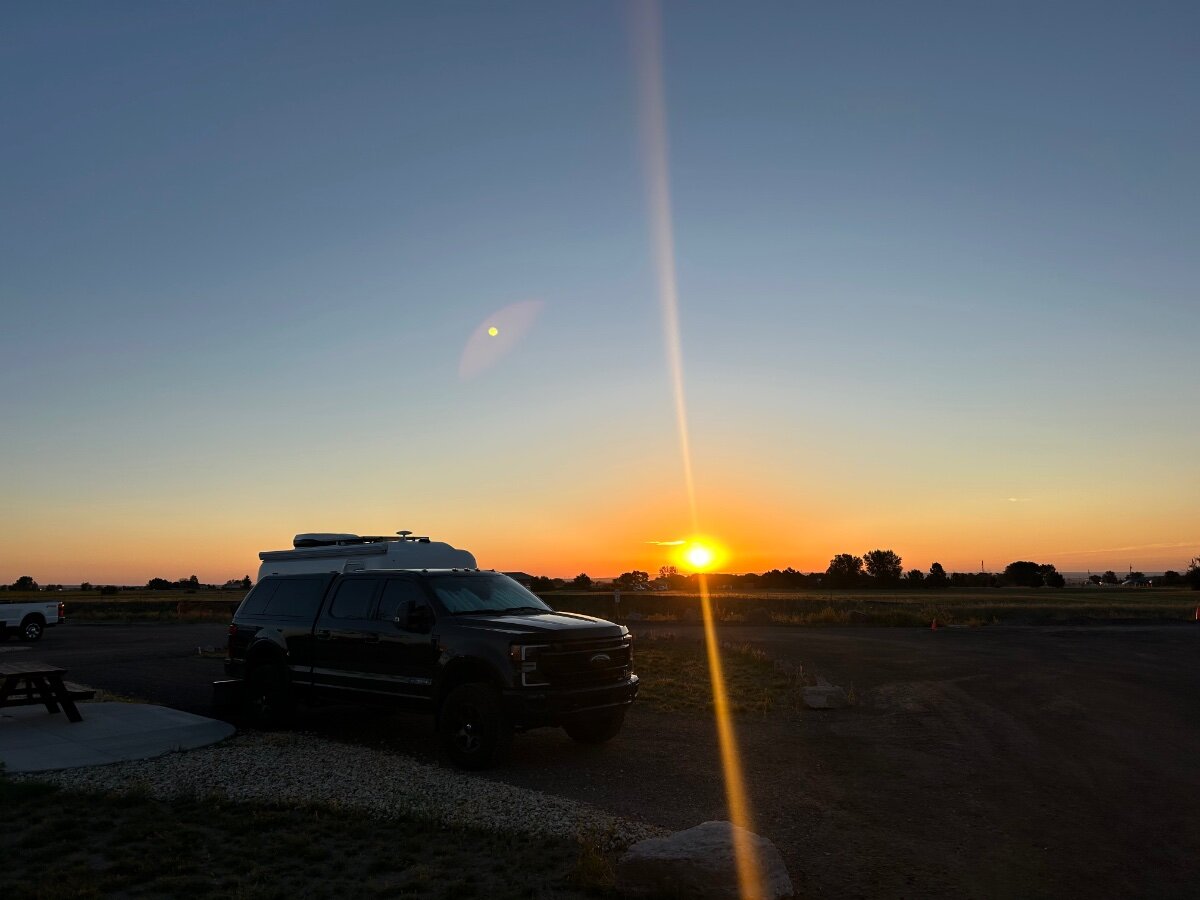
After a great blueberry harvest we are finally back in beautiful Colorado! We are base camped for a few days here in Colorado Springs and the weather so far has been awesome. We are enjoying the cool 50 degree nighttime sleeping temps with our windows wide open and the cool desert breeze is great for sleeping. The day time temps have been in the 70’s to 80’s. Our plan to make our way to South Fork, then Durango and onto Montrose. Eventually we will end up in Grand Junction to get the 5 leaf pack installed. From there we will head to Utah, Wyoming and possibly Montana. If in Colorado Springs area check out Torchys Taco’s 🔥 for all kinds of yummy tacos with a kick! The “foodies we are” Ha! 😝 Safe Travels to All! Sunrise, and sunsets are my favorite times of the day. SL mini deployed - a total game changer! My lovely bride enjoying lunch. Needless to say we skipped evening dinner.
1 point
-
Got some exterior and interior pics of Jim Oliver's Ollie today. But, I can't post them until I get home early next week. Bill1 point
-
Winston and Brandi did a fabulous job of restoring Jelly Bean. If you ever see it don't be afraid to ask for a tour. Jim Oliver's Beast presently sits in the Oliver Service area. However, Scott Oliver has plans to move it to his home in the near future. Hopefully I can get some additional pics of it this afternoon. Bill1 point
-
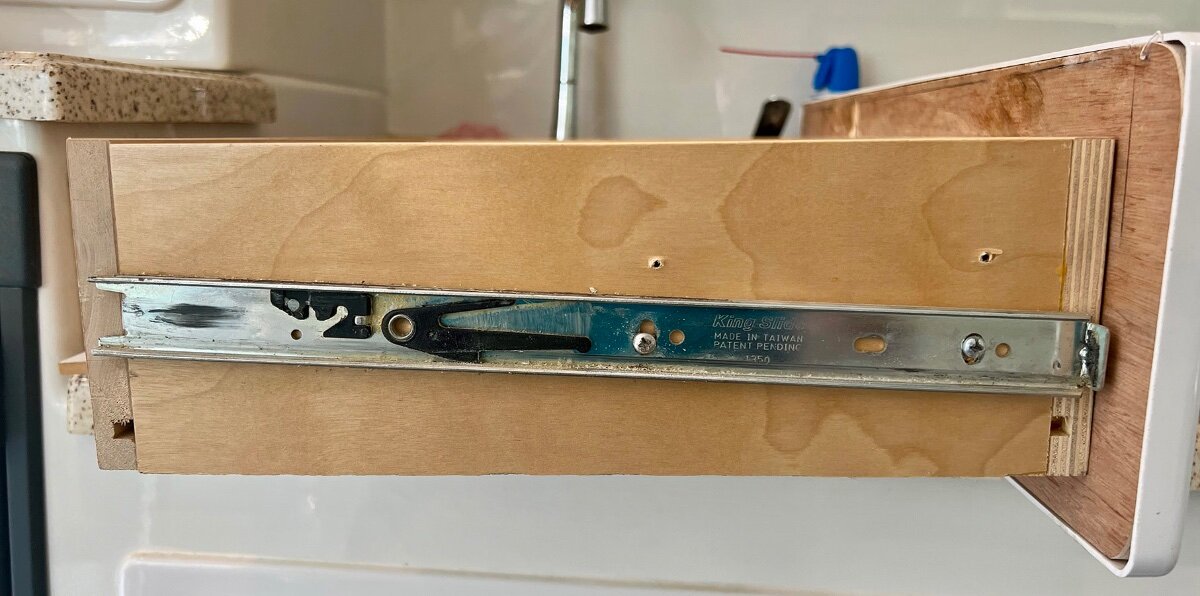
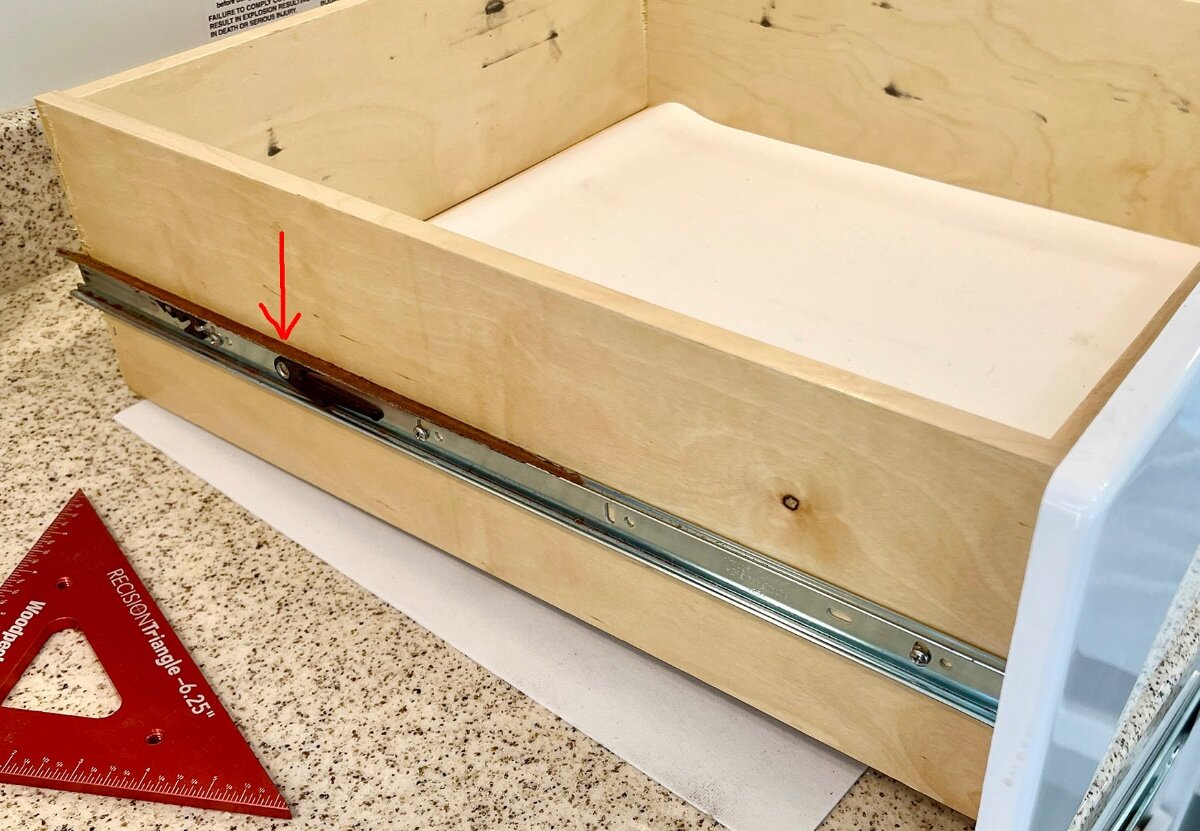
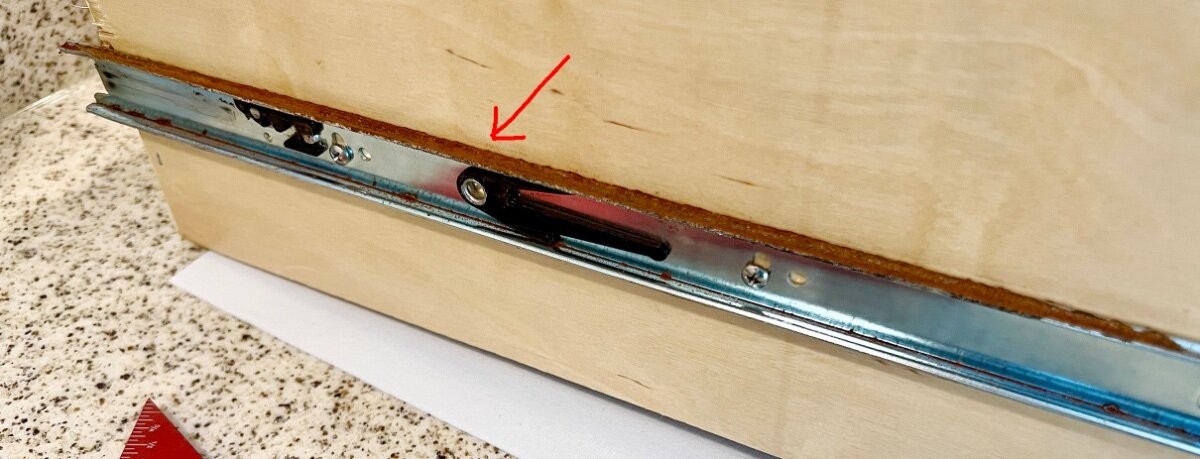
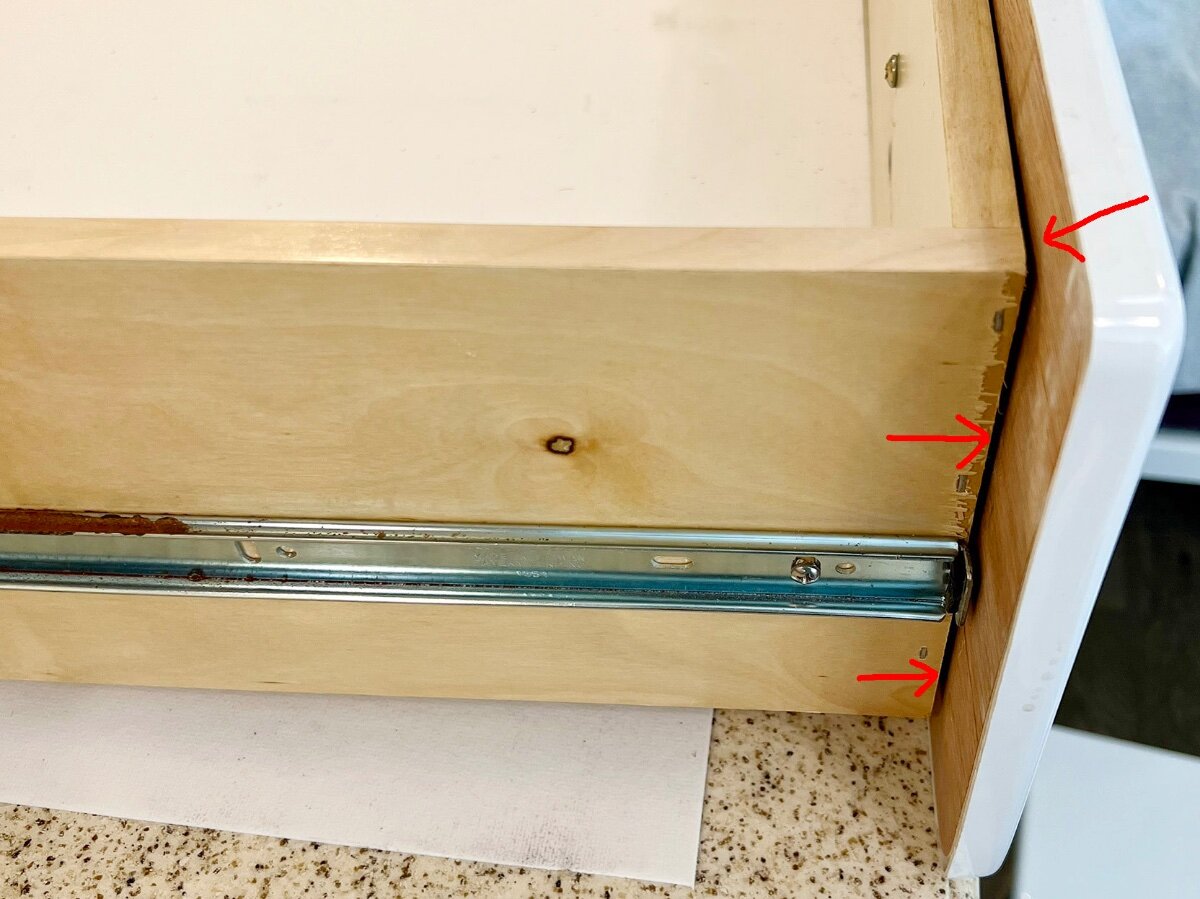
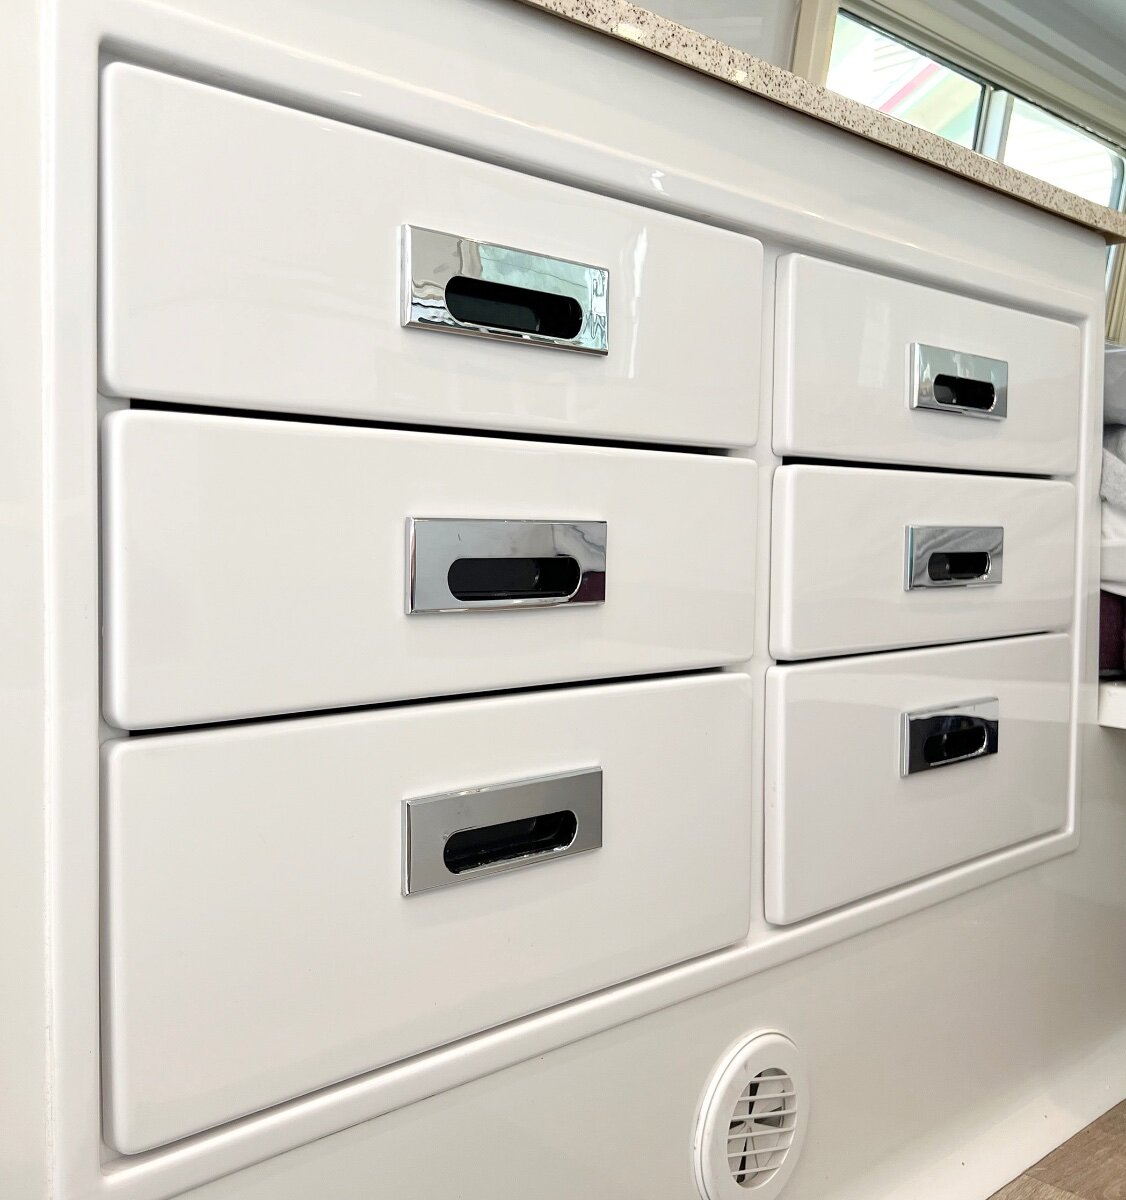
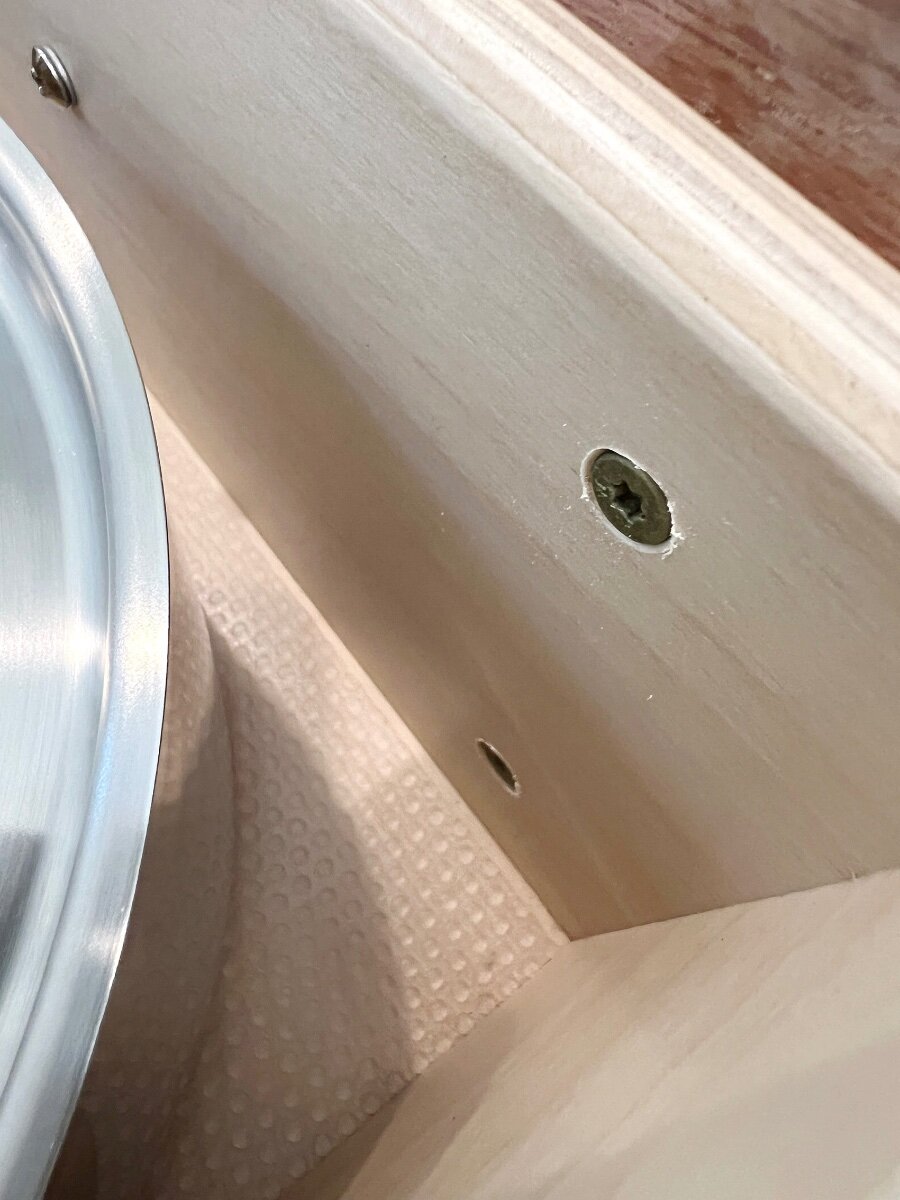
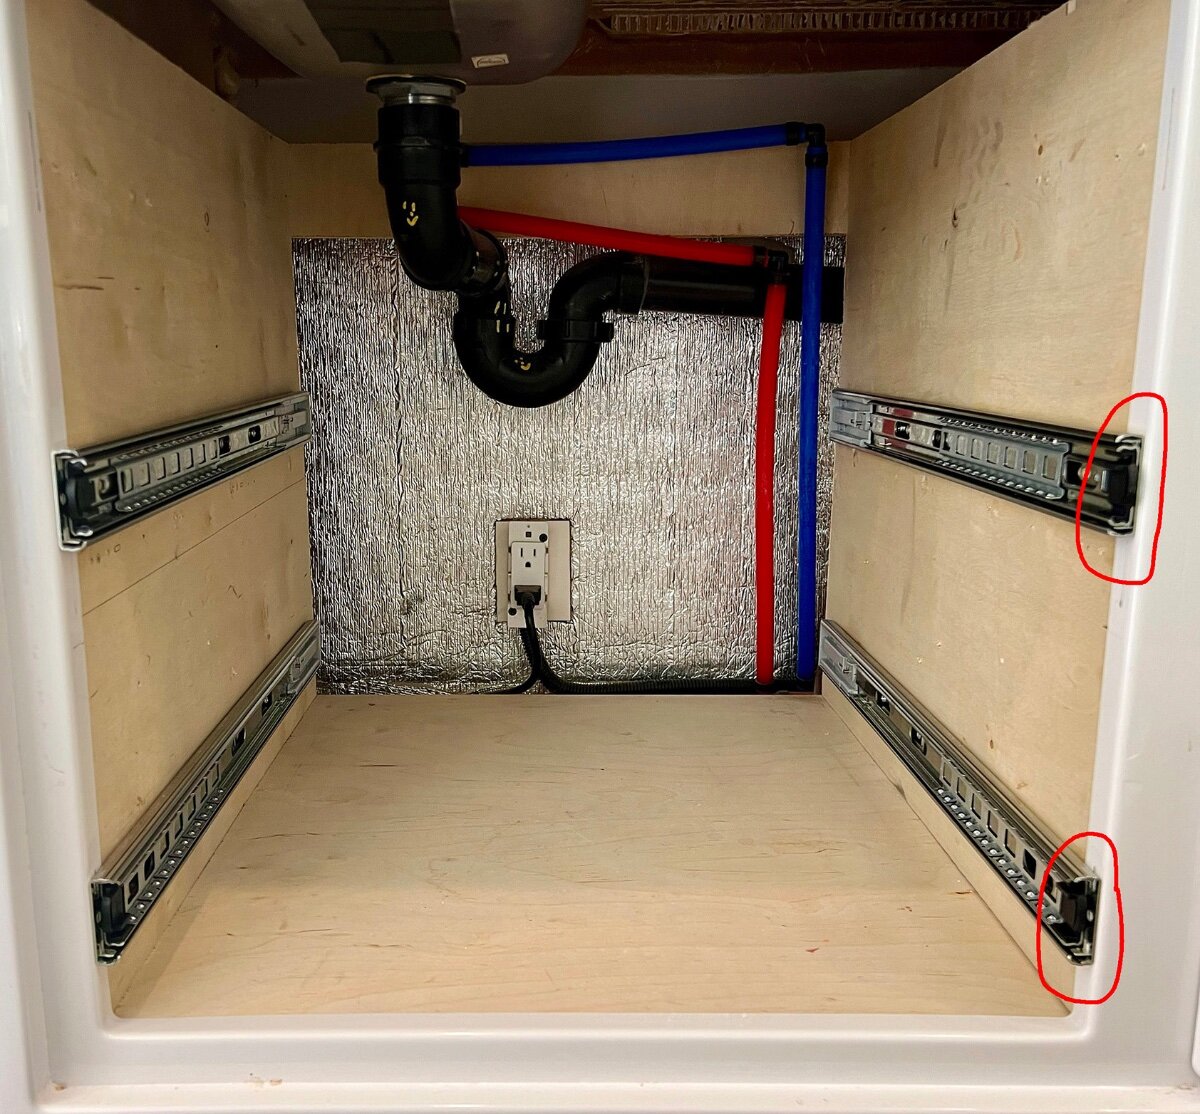
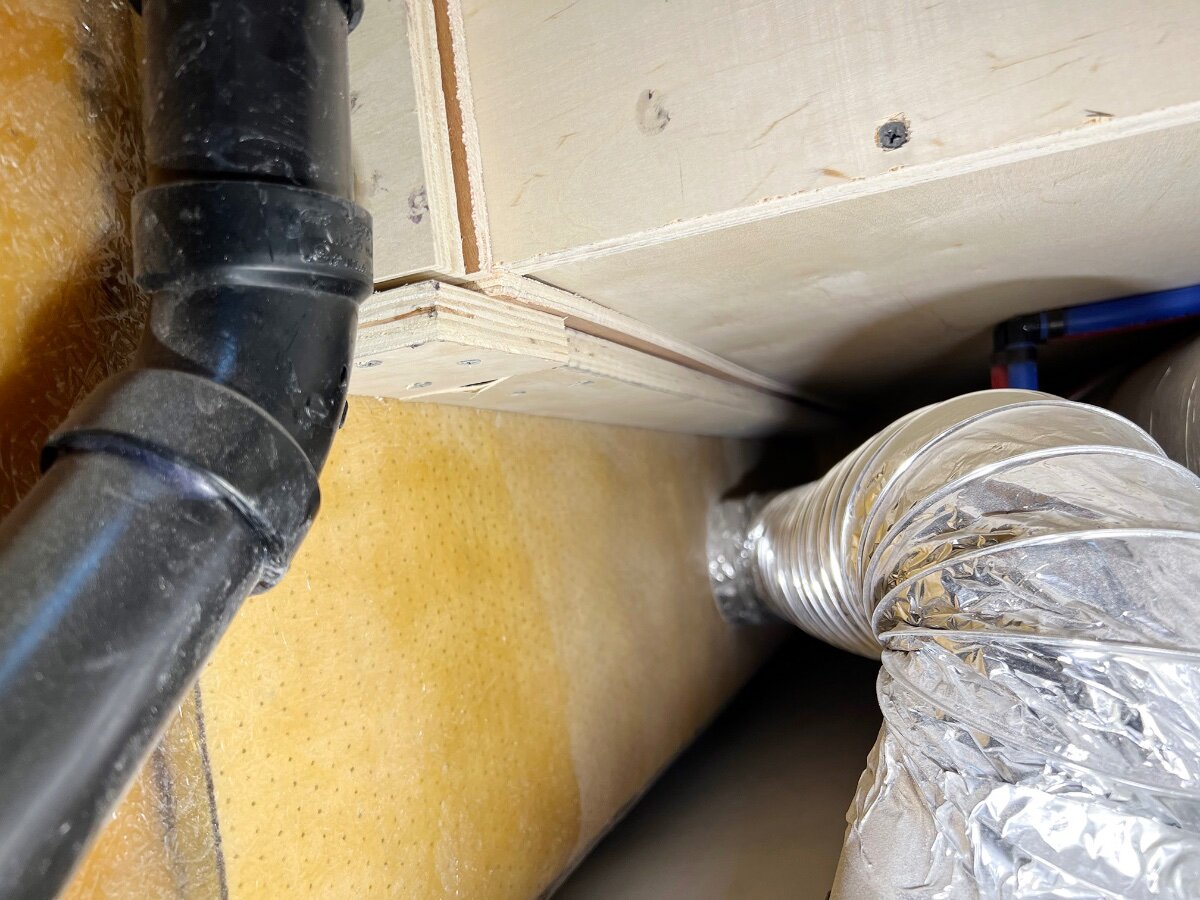
Some of you might have seen my recent post on another thread, Shake Rattle and Roll, regarding items including screws etc coming loose while towing. My situation had become considerably worse as previously stated in regards to the entire set of drawers and associated hardware with the kitchen cabinet drawers. Cutting to the chase I had to replace all of the soft close glides for a litany of reasons which I will detail below then rebuild and redesign the entire drawer setup and arrangement. Some of the glides had corroded severely preventing their ease of use, and in other cases the boxes themselves were made in what can only be described as sloppy construction, inconsistent sizes, and most of them considerably too small for their respective cabinet openings allowing for the glides to come completely out of, or off their rails. If this isn't enough the cabinets themselves were built out of square, out of plumb, and not parallel from front to back or side to side. Hopefully this will provide help to those who might be having some of the same issues. Let me know if you have any questions be glad to help if I can. For starters attached are some photos of the errant issues we were having. Image below illustrates how poorly this set of drawer glides were installed which of course imposed a closed drawer that pointed downward, top portion closed while the bottom tilted outward. The red arrow on this drawer points to the corroded glide rail. This is the worst example in all fairness. closer detail that illustrates the above perhaps better. In the photo below you can see where these drawers were only stapled together and with no glue anywhere. To make matters worse the cheap plywood used for the plastic face frame inserts was never treated for moisture and thus over a period of time would expand contract then warp and pull away from the drawer box itself. The only method for installing these drawer faces was nothing more than caulk, no screws nothing to hold them in place over a period of time in different weather or humidity patterns. Effectively each of the faces had warped convexly as seen in this photo. This is an example of the old drawer boxes once the plastic fronts were removed with scrapers, pry bars and chisels. Note how the 4 inch drawer is 1 inch longer than the 6 inch drawer, and this was consistent throughout for no discernible reason that I could determine. All of my new drawers are a full 20 inches long with the exception of the 12 inch drawer that mounts under the kitchen sink otherwise it would collide with the sink drain, probably not a good idea. Most but not all of these plastic face mounts to the drawers are cracked severely or in some cases mild cracks as illustrated below. Eventually I will replace all of the drawer faces with something else in the future and just be done with the cheap 1/2 inch plywood glued/caulked into these plastic cavities. Now for the rebuild. Below you can see where the drawer positioning is much different. Rather than the 4 inch depth drawer to 6 inch depth drawer, then back to the 4 inch on the bottom row it seemed to make much more sense to do two rows of 4 inch drawers (with 6 inch face fronts) then install the 6 inch drawer with 8 inch front on the bottom row. In addition the upper right drawer as originally installed was only 12 inches deep much like the drawer that mounts underneath the sink. This made no sense to me because there was plenty of room for a full 20 inch drawer to easily slide beneath the cooktop stove. In order to make sure there would not be an overheating issue I ran the both burners for a period of time with my hand touching the bottom of the stove. Never even got warm. It is important to note this stove is built with a second dead air space layer. This allows for much better usage of kitchen tools and storage. Details from the rebuild. Basically I used Kreg Pocket Hole jigs and screws to build the boxes but also used reinforcements below with right angle corner hardware and ran a bead of hot wax glue across all of the underside of the boxes/drawers. Materials were half inch baltic birch plywood, with 1/4 inch birch plywood bottoms dado'ed into the sides and fronts. Closeup detail of hardware and messy hot wax glue. I also used a small painters palette knife to spatula the glue while still hot and pliable further into each joint. It was fairly easy to run the heat gun for 6-8 inches of glue line then press the glue further into position, then start on the next 6-8 inches. Pocket holes can be seen in the photo below. To mount the face fronts back onto each drawer I used 3/4 inch Big Timber screws that are self tapping, however in order make sure they were solid each drawer front was clamped to its respective drawer during installation of screws. As you can see each screw is counter sunk as well allowing for a deeper bite. Note didn't want to glue them on in addition to screws knowing I would eventually replace the fronts with completely new materials. The photo below shows two sets of new drawer glides installed properly that being with front of the glide recessed approximately 1/16th of an inch as illustrated by the red circles, not the full 1 inch as originally installed by Oliver. By installing the glides so far back into the cavity of the cabinet boxes the glides would never fully come to their closed positions. Not sure why the water hoses to the kitchen faucet were installed to the front of the rear cabinet brace at the back as seen in this photo. There was plenty of room to route those blue and red lines between the hull and cabinet which I just might do the future. It is also worth pointing out the opening space on the plastic trim for the cabinets is about 1/4 to 3/8 th's different from right to left side which translates into building each side with different width drawers. The space allowed for this type of drawer glide accommodates 1/2 inch on either side for a total of 1 full inch smaller width drawer compared to the cabinet opening. This is and always has been a tight specification. The original drawers were off by at least 1/4 inch or more. View from the basement. Honestly I have no idea how the entire assembly of the kitchen cabinet drawers even stay in place going down the road. Boxes are screwed together with 3 drywall screws and sort of situated into these pockets made of 2-3 inch depth plywood. I have no idea how those pockets are held in place and it doesn't appear there is any support at the back of the cabinets as they set hovering over the wheel wells by perhaps half an inch. Would love to hear a more informed opinion about this. A few finished results installed. Some of you might see that instead of implementing 4 drawers at 4 inches I ended up building 4 inch on top, 5 inch in the middle, then the standard 6 inch for the bottom drawer. Increasing the middle 4 inch to 5 inch depth provides a bit better depth of space while still allowing plenty of adequate space between each drawer.
1 point
-
Thanks, he therein further confirms my thought on the matter. My recently acquired 12,000 joules ‘sacrificial lamb’ with circuit analyzer for less than 50$ before tax.
1 point
-
Finally, I upgraded my cloth to marine vinyl that is waterproof, looks and feels like leather to me. Latex foam with Muslin wrap for cushion. Cushions are noticeably heftier and more comfortable. Looking forward to using the them. Bonus, I can use the old back pillows to make up the king bed conversion without taking from the dinette. Ordered from Foamorder.com, took a couple of weeks to ship but well worth it IMO. Best, Mike
1 point
-
@rideadeuce Great upgrade Mike, and very helpful showing all the details! Chris wants fabric color vs. a brown leather look. We are thinking of going with these (two sets) but still waiting on our purchase. I also like the increase to a 5" cushion vs. the original 4". Not sure how the backs will fit but we could tailor them shorter if needed. Just another idea! Available in many colors with good reviews: Amazon.com: RSH DECOR: Sunbrella Deep Seating Cushion with Pillow Back | 24” x 24” Seat | Water and Fade-Resistant Performance Fabric | Outdoor Chair Cushion Set for Patio Furniture | Canvas Burgundy : Patio, Lawn & Garden1 point
-
Tood & Kat, this would be a simpler solution. Prior owner had this product under our cushions and an extra roll in the cabinet! Works great, cushions do not slide at all. You want the 20" roll, not the more common 12". Kittrich is the company name and "Con-Tact" is their brand. Con-Tact Brand Grip Premium 4 ft. L x 20 in. W Gray Non-Adhesive Shelf Liner - Total Qty: 1 - Walmart.com1 point
-
Our solar suitcase system has evolved over the years. Using a solar suitcase panel is about using storage space efficiently for transport and ease of use with the panel or panels. Use three 12' sections combined of 10/2 solar panel cable when Ollie is parked in the shade when reaching out from the shade to sunshine. Normally we can get away with using one Renogy 100W solar suitcase, but we only use one 100AH Battleborn Lithium battery and don't have a 12V/120V inverter. See around 6A charge with a PMW controller mounted close to the battery on a good solar day. Have seen around 11A charge with two 100W solar suitcases, using a MPPT solar controller mounted close to the battery with solar panels connected in series using 36" of 10/2 cable. Posted this in other threads. Originally installed a 10A Furrion solar port that was OK with one 100W solar panel, but wanted a 20A solar port for a higher capacity port. Since I already drilled the hole in Ollie for the Furrion port, decided to modify the Furrion port by installing a Zamp 20A port in the existing Furrion port. Also drilled four through holes to mount the Furrion port with an interior backing plate and locknuts to reduce the stress on the fiberglass. Furrion Solar port installation: Modifided Furrion Solar port by installing 20A Zamp port in the Furrion port:1 point
-
Which Renogy did you get? (Zamp does seem overpriced.) I was just looking at this one (16 LBS): 220W Lightweight Portable Solar Panel | Renogy This one is a monster at 30 LBS! Not easy to luge around. It would be great if you could split this unit into two 200s and use one or both. Carrying each half at 15 LBS. Maybe I could customize the wiring to achieve this, but perhaps overkill! 400W Lightweight Foldable Solar Panel | Renogy I've got to figure out how much solar I need for 600AH LiFePO4. I know there are many articles out there and I have to research. Any advice? I have 340W on the roof and it would be great with additional panels we could run air conditioning on a sunny afternoon off our new Victron MP2 3KVA inverter without too much loss of battery SOC.1 point
-
We get hail often when the monsoon rains first hit with a bang and high winds. There was a lot more, all over the deck. The heavy rain that followed melted all but what was under the eaves. It hailed twice this week alone. No damage recently. I got a new $16K roof from Farmers a few years back. It sounds terrible with the high winds, but the hail is small. Last week Chris had my pretty '92 Lexus SC400 at the pickleball club. She was very worried and called me. But what can you do, you can't go out in it. I told her that old sports car has real metal, not like what they make today! Wanna see real hail? Probably not, but twice in the Round Rock Texas area, we've witnessed golf ball sized hail. Got under the viaduct JIT both times! Car dealers had the big hail-sales, but you'd have to be really needing a deal to buy one! BTW, the other pic shows a relatively young, beautiful Alligator Juniper! Bark like the gators you have in Florida. I water her regularly and treasure 'er in our backyard. It's the iconic tree of the Prescott NF. Check out this one, likely 300 years old with diameter as wide as Chris' full reach!
1 point
-
One more consideration. Replacing an external unit is a lot easier than the cost and time to replace the onboard unit.1 point
-
Just so everybody is on the same page, the bearing Kit shown above is for the 3500 pound axles used on the Elite II's through 2021. In 2022 Oliver started installing a 5200 pound axle on the Elite II models. This axle is the same size that has always been supplied on the Elite's except it is de-rated to a 3500 pound weight capacity due to using a 4 leaf spring pack (3500 lbs) instead of the normal 5 leaf spring pack (5200 lbs.) These new axles are now standard with Dexter's Nev-R-Lube Bearings. If you have a 2021 or earlier Elite II with the standard bearings they cannot be replaced by the Nev-R-Lube style. There were changes made to both the hub size and the spindle size. The complete axle would have to be replaced. If you have a 2021 or earlier Elite I it will require the standard bearings for a 5200 pound axle. If you have a 2021 or earlier Elite II it will require the standard bearings for a 3500 pound axle. Advantages with Dexter's Nev-R-Lube Bearings: * No need to pull the hubs to repack the bearings or replace the grease seals when checking the brakes. * No more inner and outer bearings. Just one sealed bearing cartridge. * Pre-set adjustment means installation is easy and human error is virtually eliminated in bearing adjustment. * Pre-lubricated at the bearing factory providing resistance to contamination. * Sealed for life which means increased durability and reliability and no more bearing maintenance. * 5 year or 100,000 mile warranty against defects in material and workmanship. I do want to emphasize if you do have a trailer that has the Nev-R- Lube bearings installed there are periodic checks that need to be performed to make sure they are in good working order. Nev-R-Lube Bearing maintenance needing performed every 12 months or 12,000 miles. 1. Elevate and support the trailer unit per manufactures instructions. Never jack the trailer up on any part of the axle. Always jack the trailer up on the main frame rails of the trailer. 2. Check for excessive wheel end clearance by pulling the tire assembly towards you and by pushing the assembly away from you. Slight end play is acceptable. 3. Rotate tire slowly forwards and backwards. The wheel should turn freely and smoothly. 4. Excessive wheel end play, restriction to rotation, noise, or bumpy rotation should be remedied by replacing the bearing unit. Note: A slight amount of grease weeping from the seal is normal. Excessive leakage may indicate abnormal bearing operation. The important thing to remember is that even though this bearing is sealed and does not need lubricated it still needs to have a yearly inspection for the end play. Having this checked will hopefully keep you from having wheel bearing issues on that next adventure you are planning. If there's a downside, it would be that if/when you need to replace them it will cost a lot more than the old style bearings and seals. A sealed Nev-R- Lube bearing Kit -42MM CARTRIGE & ATTACHING COMP, FITS 5,200 LB & 6,000 LB AXLES - Part #K71-997-00 will cost over $300 per wheel. I would be remiss to only replace one at a time.1 point


.thumb.jpg.e34bf01ef7f7d5e99ad31856d45afbeb.jpg)


-
Recent Achievements
-


")


")


")


