Leaderboard


Popular Content
Showing content with the highest reputation on 04/28/2022 in all areas
-
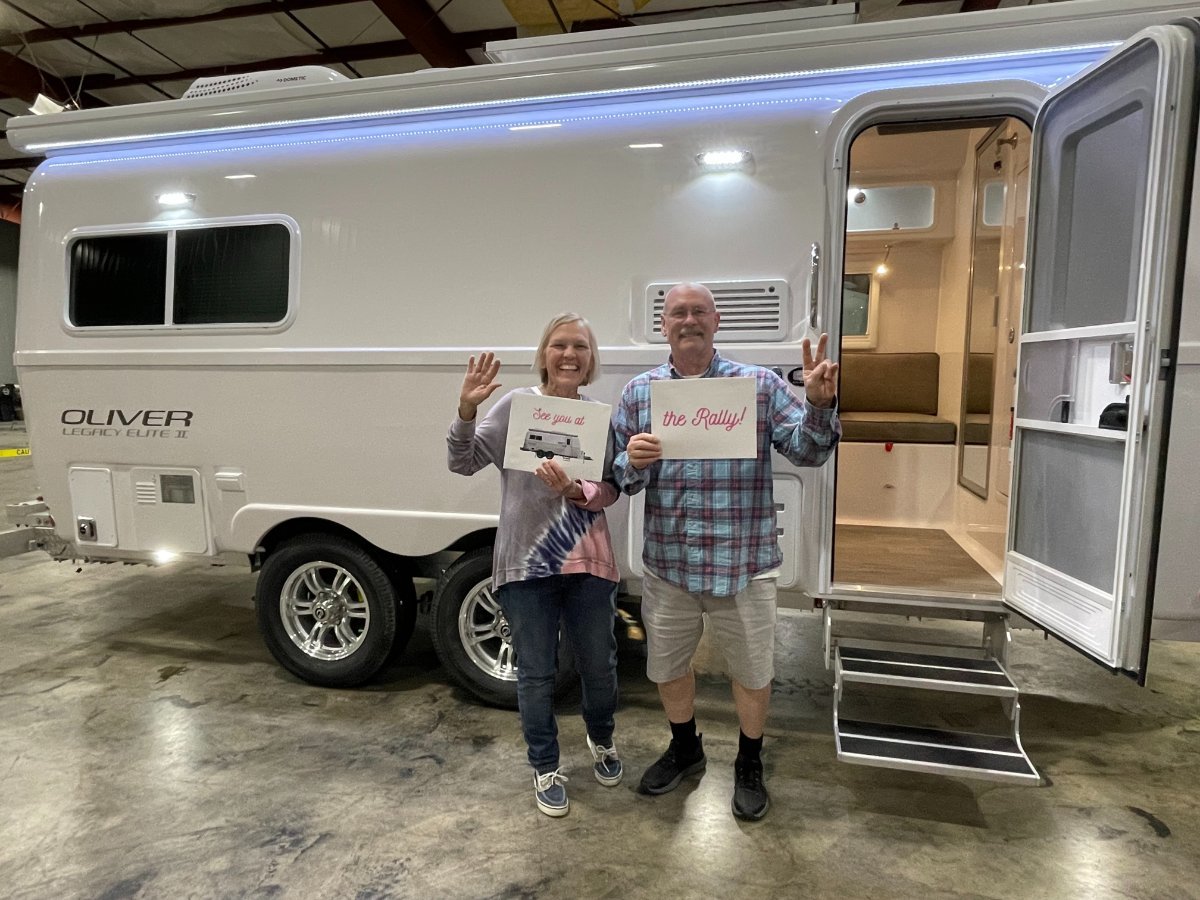
Delivery Day went great yesterday! Kudos to Ryan for a thorough orientation that enabled us to learn, have fun, and ask endless questions before choosing our spot on the Oliver Campground. It's been so much fun meeting other owners and learning from their experiences during our stay here so far. We were also blessed with beautiful weather on pick-up day and a quiet peaceful evening for our first night stay. Today, we are enjoying another sunny and warm day in the 70's before we head home tomorrow for PA, where it's currently in the 40's according to family members. Oh well. We eagerly look forward to seeing you all at the Oliver Rally, which is quickly approaching. Peace, love, & safe travels!
 7 points
 -
Prediction: the diesel will feel like there's no trailer back there at all. You'll have to be careful when you hitch up or you'll be 2 hours away before you realize the trailer isn't behind you. 😁5 points
-
Seeing one that "lives" in Garden Valley, Idaho convinced us to place our order. According to our Oliver salesperson, there are several Olivers owned by Idaho residents, in addition to the one in Garden Valley (where we live). There are a couple in the Boise, Nampa area. And, I know of at least one at lot closer to Moscow, in Spokane. There is no substitute for seeing, touching and walking through one. I recommend you coordinate with your Oliver salesperson, and make the trip. But, promise me you won't sue the owner if you take a fall! Oliver doesn't "backstop" owners who show their Olivers in the rare, but possible, event of an injury during the showing. This was discussed in an earlier thread on this forum, causing some to opt out of the "show your Oliver" program. Just be careful, and make the decision that you will return the courtesy of showing you the trailer by taking responsibility for your own safety.5 points
-
Yes they do. Our 2021 has the vents even though we chose lithiums. I would think, from a liability standpoint, it makes sense to leave them in place. If a change is made to standard wet cells, lack of ventilation could result in an explosion. Easy to add a layer of insulation inside the cover panel eliminating the ventilation and providing additional insulation to the lithiums in freezing weather. My plan is to use closed cell foam insulation attached to the cover with velcro so that the insulation can be easily removed. Our low temp over the winter was in the mid teens F and the battery temp never got below 40 degrees F. That with a small space heater set on low in the main cabin. We powered up the battery heating pad although I do not know if the BMS ever sent power to the pad. Also kept the Truma heater on during cold weather.5 points
-
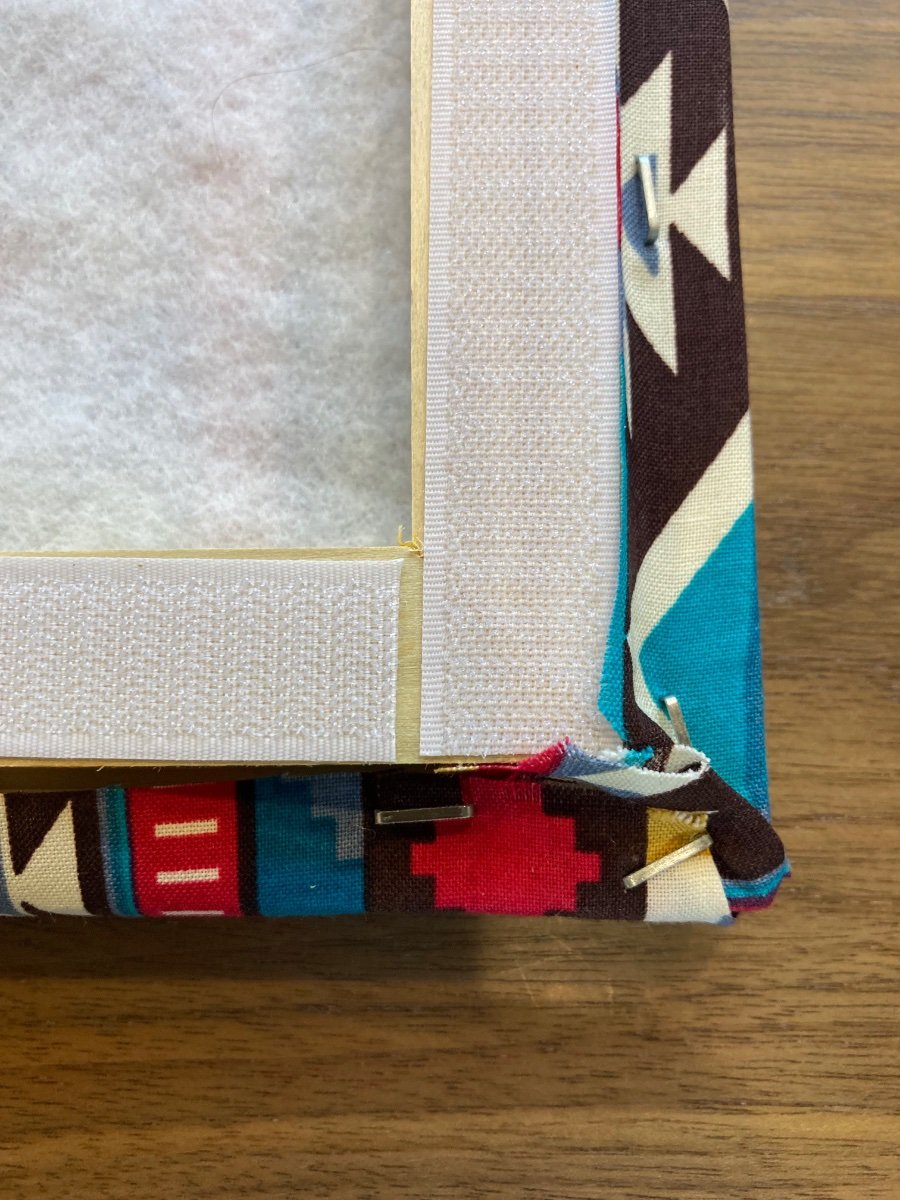
Your pictures are fine at the size they are! But if you want to change the size, here is how. Upload the picture and insert it into the message field. Then double click on the picture, which brings up this dialog box shown below. (Note I am using a web browser on a laptop. It might be different on a phone or a tablet.) The default is 1000 pixels in width for high resolution images, but this will be a lower number for low resolution images. If you enter 500 pixels into the width box your picture will be one-half the size. You should keep the box checked for Keep Oriinal Aspect Ratio, unless you want to squish your picture in funny ways. Then click on the Update button Note you can also add a Title for the image, and set the alignment if desired.
4 points
-
Up until now, I have been towing my 2021 Elite II with a 2018 Toyota Tundra Longbed with a topper. It tows the E2 great and I have never had issues with accelerating, climbing passes or stopping. M.P.G. is between 10-12 depending on terrain and wind. Fully handles the E2 as I had hoped. I also own a 2003 Dodge 3500 longbed 5.9 Cummins 6-spd manual with dually delete. Truck also has a topper. Have had thus truck since new and it usually tows a 26' enclosed car hauler while carrying a popup camper in the bed. MPG while towing has been around 12 (13-14 without the camper). Getting ready to head East to Hohenwald soon towing with the Dodge. Will be interesting to compare the two. Will post a update at the other end.2 points
-
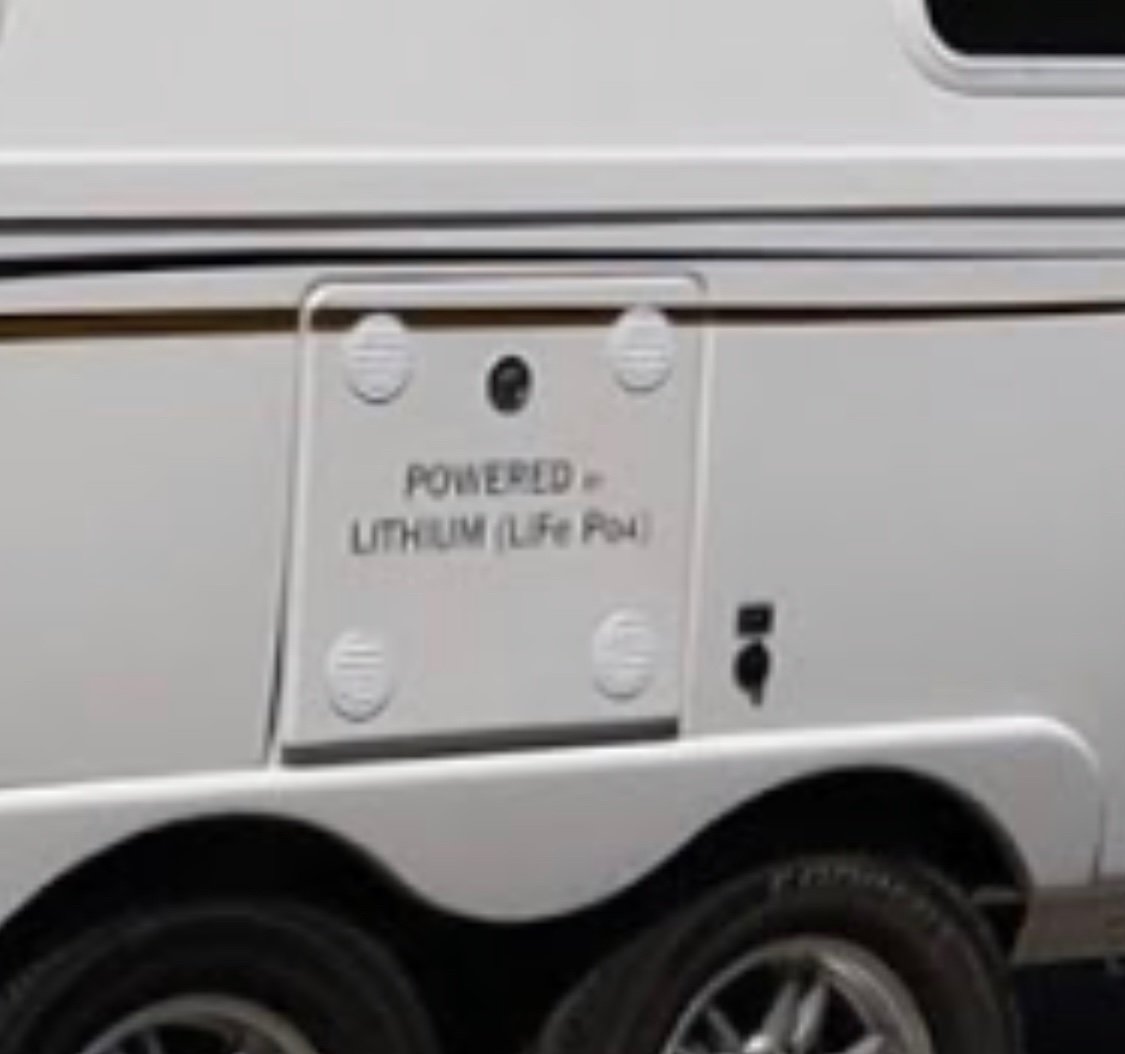
On a new E2, If you go lithium do they add air vents in the compartment door?
2 points
-
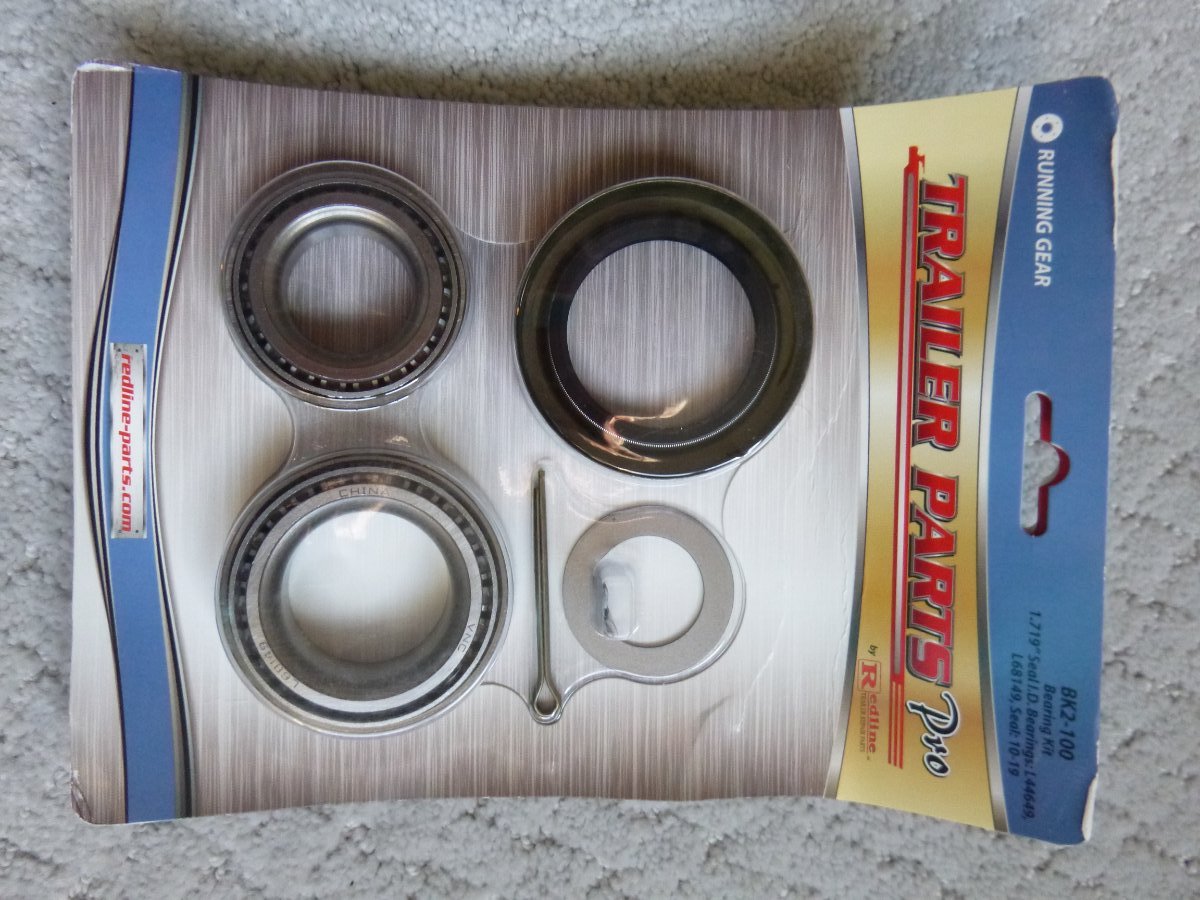
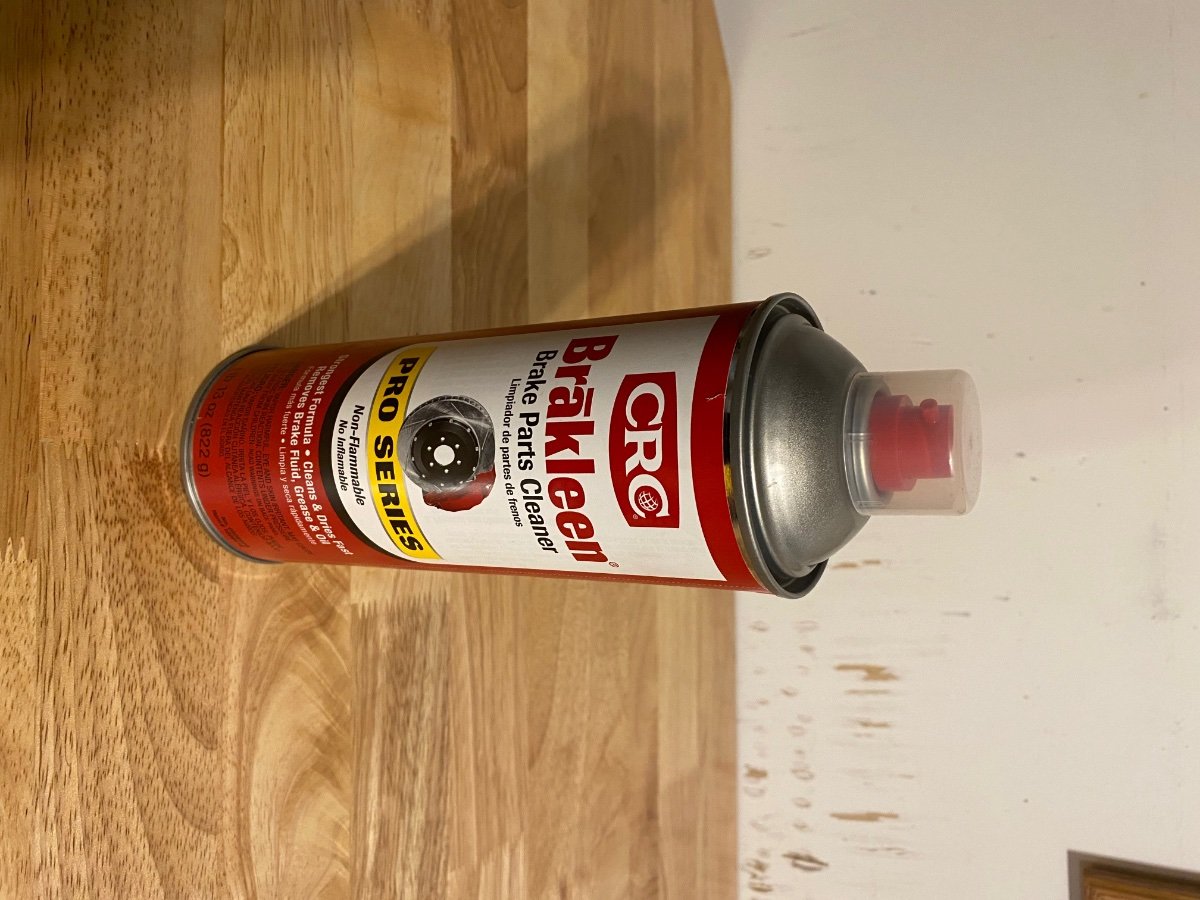
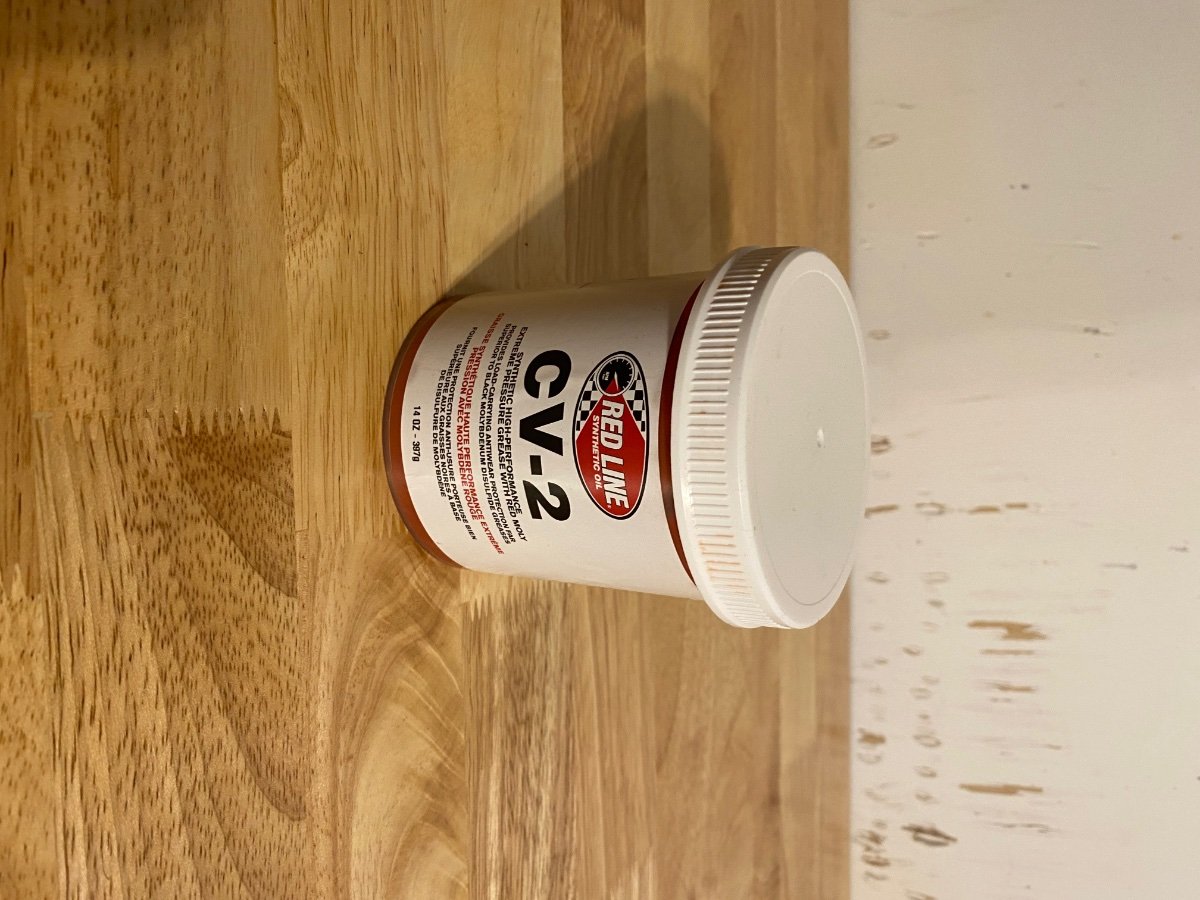
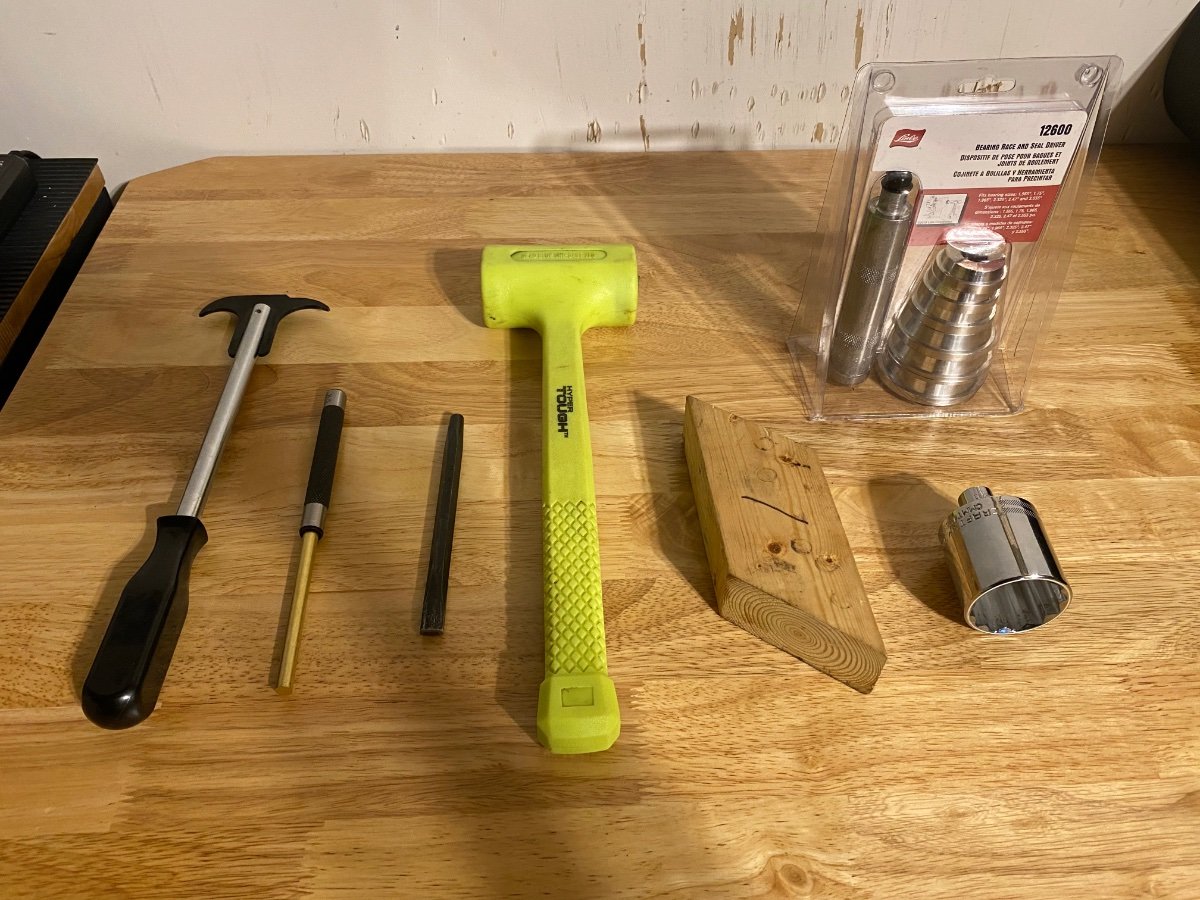
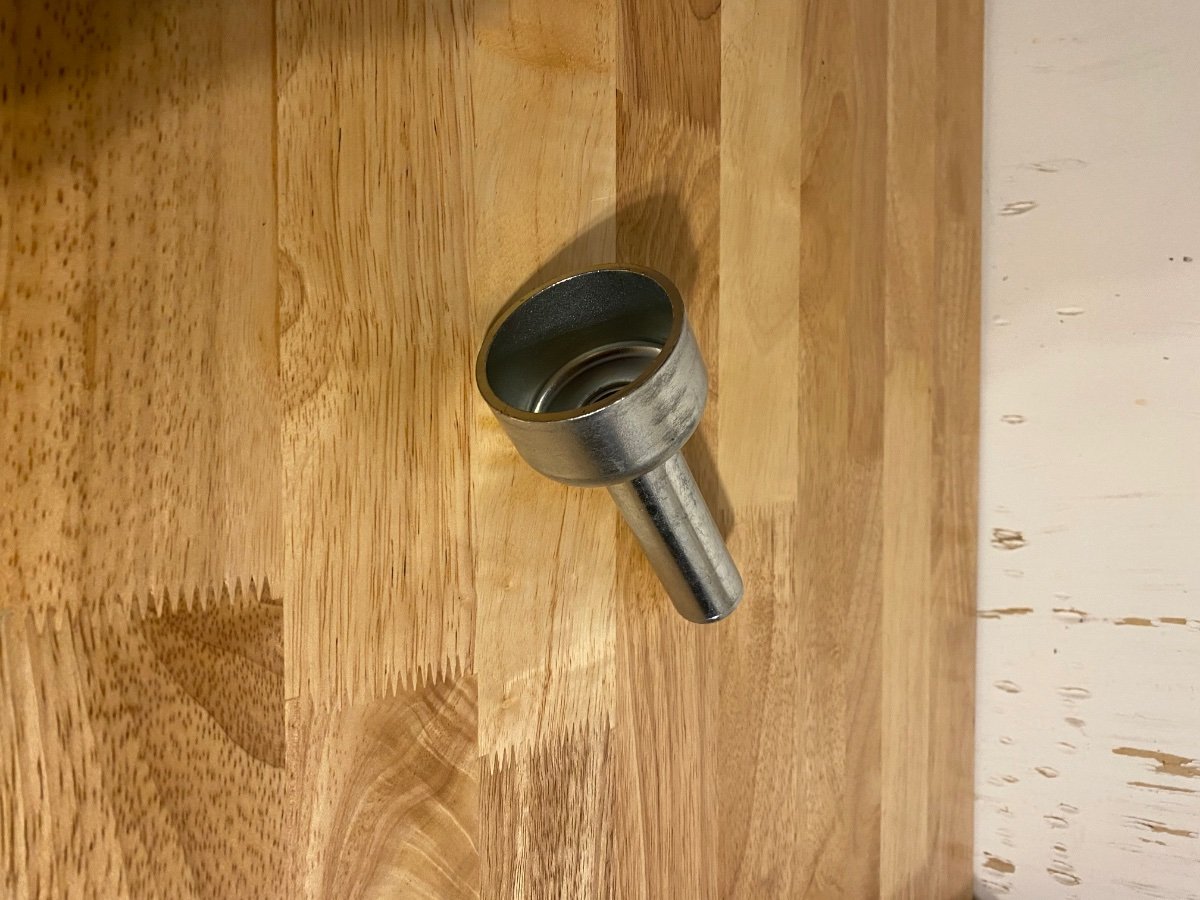
Flat tire - I carry a "plug" kit that I can get in WalMart. I've always carried one of these kits - with or without the Ollie in tow. Wheel bearing issue - I carry a set of bearings like this: While I could change out the bearings with this set, that is NOT my intent. It is fairly easy to get the drum off the axle and carry that to virtually any gas station or tire shop that has a mechanic. The issue is not doing the job on the side of the road where it could be fairly dangerous, but, getting to a safe place and NOT having to wait for them to order the bearings. Yes, these bearings are fairly standard, but, I don't want to hear, "I'm sorry, we just sold our last set this morning". I've been carrying two of these sets around for the past seven years - just in case. And, before you ask - yes, they are made in China. However, I figure that they will last long enough to get me home where I can do a proper job with good bearings and good grease. Bill
2 points
-
As you discovered there is no source for a Dexter recommendation for 1/2”-20 studs with alloy wheels, I have never been able to find it, nor did Oliver Service ever respond to my request for their source. Maybe you could ask 😬. If you poke around on tire sites and wheel manufacturers websites, 90-100 is the generally recommended value. The 90-120 figure is for steel. Here is one chart: … https://www.etrailer.com/question-94709.html I have been installing wheels for all my adult life and no way would I consider 120 to be appropriate for an Ollie. I would love to be proven wrong. But I have had no issues with wheels falling off at 90. They must be rechecked after installing the wheels, but they don’t loosen after that initial change. Just because the factory does something doesn’t mean it is acceptable. Like sending owners away with 80 psi in their LE2 tires, which is TWICE the needed amount. Or installing “*******” pattern wheel hubs on the LE2 that make it impossible for an owner to install a standard 10” disk brake kit 😤😤😤. John Davies Spokane WA2 points
-
Aaron: I will be coming south from Alaska 3rd week in August. Then near Moore, Idaho at the KMFP for about ten days. Then heading to SLC after that. If any of that is close to you, feel free to PM me. Geronimo John2 points
-
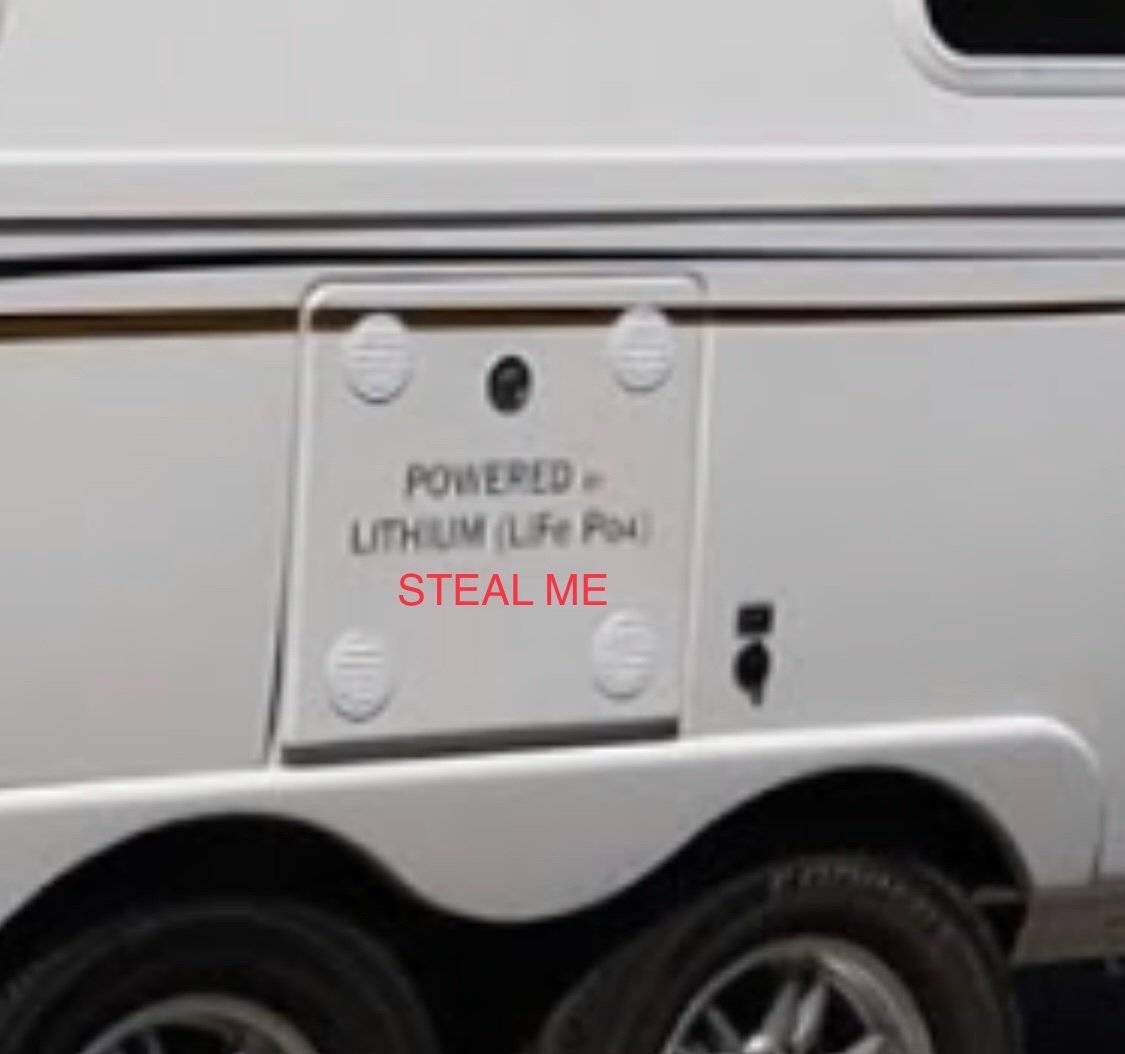
Lol, 😭 I saw that photo online and used it as an example. I would not want to advertise lithium batteries inside. We are in the queue for a September delivery. To bad about the RV battery code (4 lithium). We are still on the fence about getting lithium batteries. John, Moscow Idaho.2 points
-
Hmm, seem odd. There a few in Montana including mine. Yeah with LiFePO4’s you most likely wouldn’t want vents in the battery compartment especially up here in the northern hinterlands. Better to keep them insulated and warm than cold. Don’t know what part of ID you’re in but PM me if you would like to see ours.2 points
-
I'm confused! At the Rally - do I look for the white Oliver or the white truck or the white legs?😆 Seriously - THAT is one good looking rig. Glad that everything went well and that the weather was good to you - at least until you got home. Hope to meet both of you at the Rally! Bill2 points
-
Hi FrankC, I just semi-finished this project. Hull 996's flange should have lasted longer than 2 months, IMO. The 4 screws are difficult to loosen but they are large diameter, coarse thread screws that merely tap into the fiberglass, as far as I could tell. My problem was attempting to remove the flange. There is, for lack of a better description, a tailpiece molded onto the flange and I had a difficult time loosening/twisting so I could remove and replace. Well, I was able to twist it somewhat and pull up on the flange to remove it part way and I was afraid to completely pull it out as I don't know if I can get a replacement flange to fit back in the hole. Sounds weird but I think it's wedged in so tight that it's pulling the top of the tank up and down as the partially removed flange just bounces up and down like it's on a spring. My problem was that one of those locking bolt cutouts was broken and I just rotated the flange around to use the other 2 cutouts, an idea that came from a fellow Olivarian (:)) at the Bluebonnet rally. Thanks, Phil 🙂. I don't have a replacement flange at this time and I really need to know I'll be able to get the flange's tailpiece back into the black tank, since it's such a tight fit. I plan on drawing on the knowledge from the folks at the upcoming rally. I did call OTT and was told about the tight fit, but I still need to know what going on down there where I can't see anything, not lol. I didn't get the flange to go back in because of the springiness and my remedy for that was to sit on the toilet to compress everything and tighten the bolts down. Everything seems good and tight for 2 weeks now. Best of luck! John1 point
-
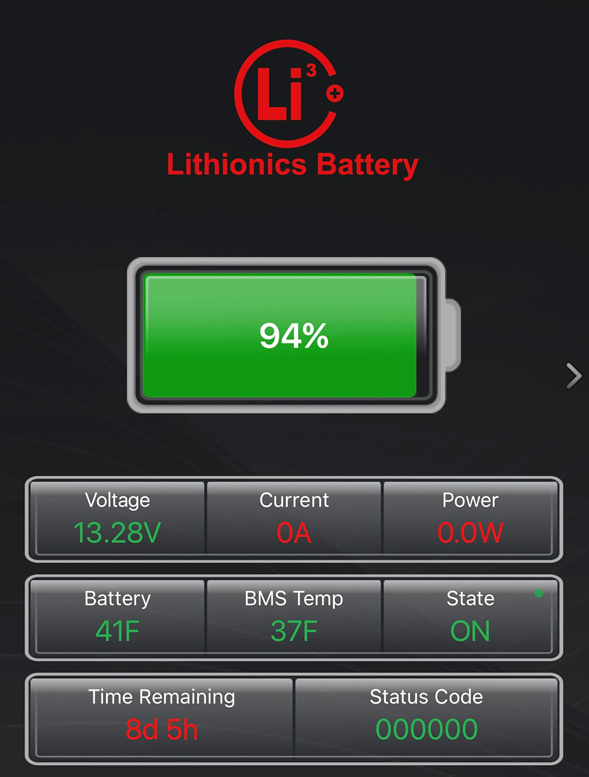
So after picking up Hull #1047 in March we returned home. At pickup I had downloaded the Lithionics app and checked SOC and voltage on all 3 batteries in the Solar Pro setup. Camped with hookups on way home without issue. In my driveway at home when not on shore power and inverter on, I noticed two of the 3 batteries showing current and power draw in red. The third battery did not show any draw. Same behavior when on shore power and charging (only current and power are green). See images below for on and off shore power. I took out a service ticket and Oliver team contacted Lithionics. We did some troubleshooting with no success. Lithionics sent me packaging to return the battery. They disassembled and inspected the battery and then recalibrated the Battery Management System (BMS). They then did a full discharge/charge cycle and report the battery is working as expected now. . 😌😁 Lithionics were awesome to work with. Made shipping easy and great communication. I wish I had understood and monitored this at pickup but hey, ya live and learn right?
1 point
-
Weird. I'd keep a close eye on that.1 point
-
Purchased white plastic kitchen cutting board from Walmart (UHMH Plastic sheet can also be used) and used a 1 1/8" hole saw to cut out 1" OD plastic plugs to fill the existing ventilation holes in the battery compartment door in our 2015 LE2. Didn't want to mount these plugs permanently, sealed with clear RTV silicone for easy removal.1 point
-
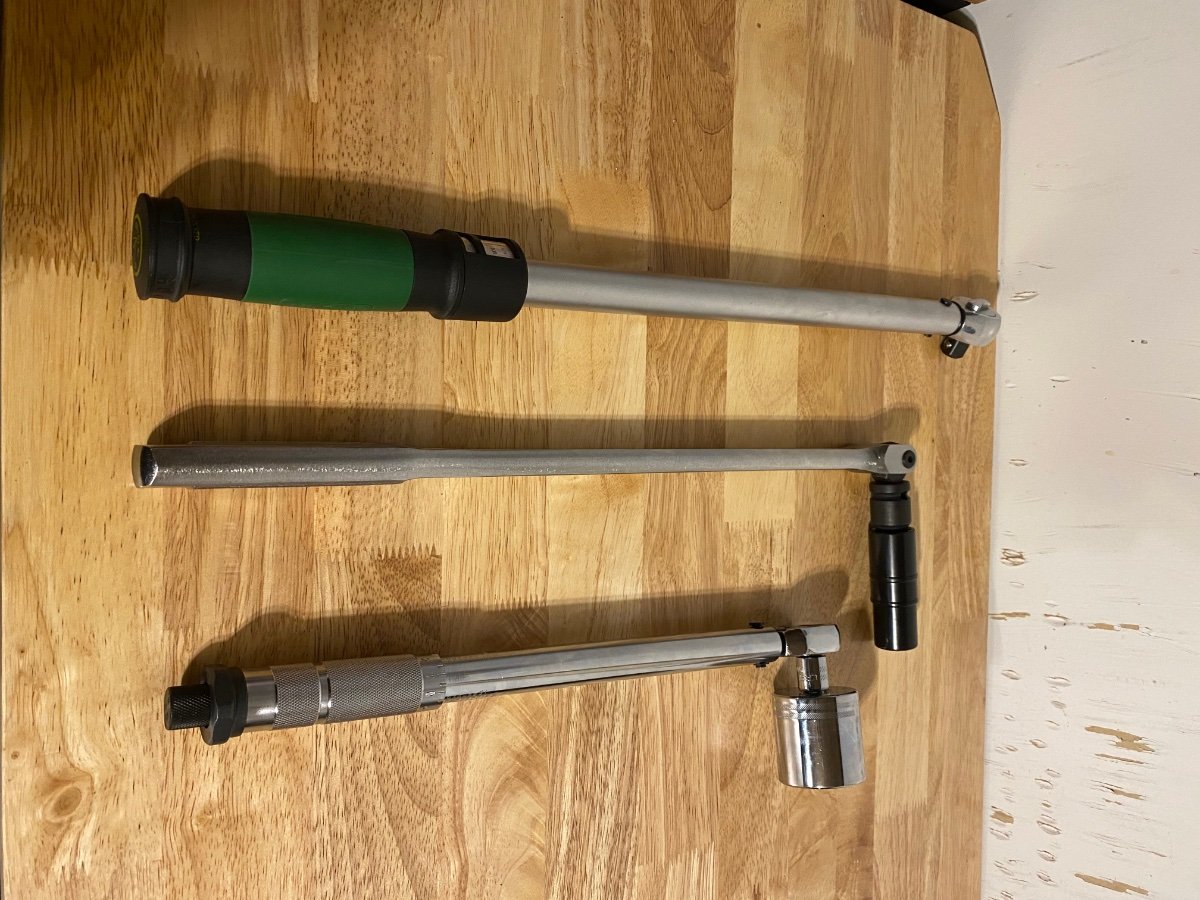
Flat tires and wheel bearing failures are the things that can leave you stranded. Waiting many hours or even days for Good Sam or some other roadside assistance isn’t something I care to do. Actually met a couple who were stranded and lived in their 5th wheel trailer for 3 days on the side of I-70 waiting for a replacement wheel bearing. I believe in being prepared Probably not the norm for all Ollie owners but I don’t want to be stranded waiting for help for some issue that I can fix myself. So I carry quite a bit of tools, parts and supplies. A Dewalt portable tool set in a carrying case with full ratchet/socket sets in 1/4”, 3/8” and 1/2” drive sizes, open end wrenches, US and metric Allen bit and torx bit drivers, screw drivers, etc. Misc pliers, wire cutters/strippers, large crescent wrench, hammer. An electrical multi-meter for diagnosing electrical issues. Spare fuses, crimp connectors, etc. Torque wrenches for the lug nuts and axle nuts (different torque ranges needed, one wrench won’t cover both). All the special tools needed as described in earlier posts in this thread for a complete bearing replacement and grease repack if needed, such as a seal puller, drift punches, dead blow mallet, bearing driver set, 1-1/2” socket for the axle nut, grease cap driver tool. Brakeleen for cleaning old grease out. Redline CV-2 Bearing grease to repack the bearings. 4 complete sets of bearings (Timken Set4 and Set17), seals and grease caps, enough to service all 4 wheels if needed. A grease gun with Lucas red-n-tacky grease for the suspension zerk fittings. A large military surplus HUMVEE scissor jack that’s perfect for the Ollie. A few 12” & 18” long pieces of 4”x4” lumber to use for cribbing with the jack to make lifting the Ollie much quicker. A small DC air compressor. And a few other things that I’ve probably forgotten to mention. All kept in toolboxes in the bed of the pickup truck. I just did my annual wheel bearing service (which included replacing the original bearings) took about 4 hours total to do all 4 axles plus grease the suspension Zerk fittings. But I was in no rush. Maybe an extreme for what to carry on the road, but I’m much more comfortable traveling/towing the Ollie knowing I am prepared.1 point
-
Searched for torque values based on the assumption the rims are LionsHead brand and found a couple of responses on eTrailer that suggest the torque values Oliver uses may be the rim manufacturers recommendation. I suspect my rims are LionsHead, but I haven't confirmed that with Oliver. https://www.etrailer.com/question-558830.html https://www.etrailer.com/question-471670.html1 point
-
Curious what did you use? Hard to tell from the photo. Even though I swore I wouldn’t do it, but am on the verge of springing for the lithium batteries right now and planning out various ways to insulate and seal.1 point
-
We replaced our lead/acid batteries with a lithium battery and plugged/sealed Ollie's battery door vents.1 point
-
I fixed your screen capture. I think I would be out there with a plastic scraper taking off that stupid decal the very first night…… does this advertisement come on all the lithium optioned hulls? 😳 The vents are RV code, Oliver cannot leave them off..I think the white discs are very unsightly, the earlier hulls had pretty Perko chromed brass marine locker vents.I suspect that those were discontinued, I may have bought the last stock for $15 each….https://olivertraveltrailers.com/forums/topic/5301-how-to-lithium-battery-powered-vent-system/ John Davies Spokane WA
1 point
-
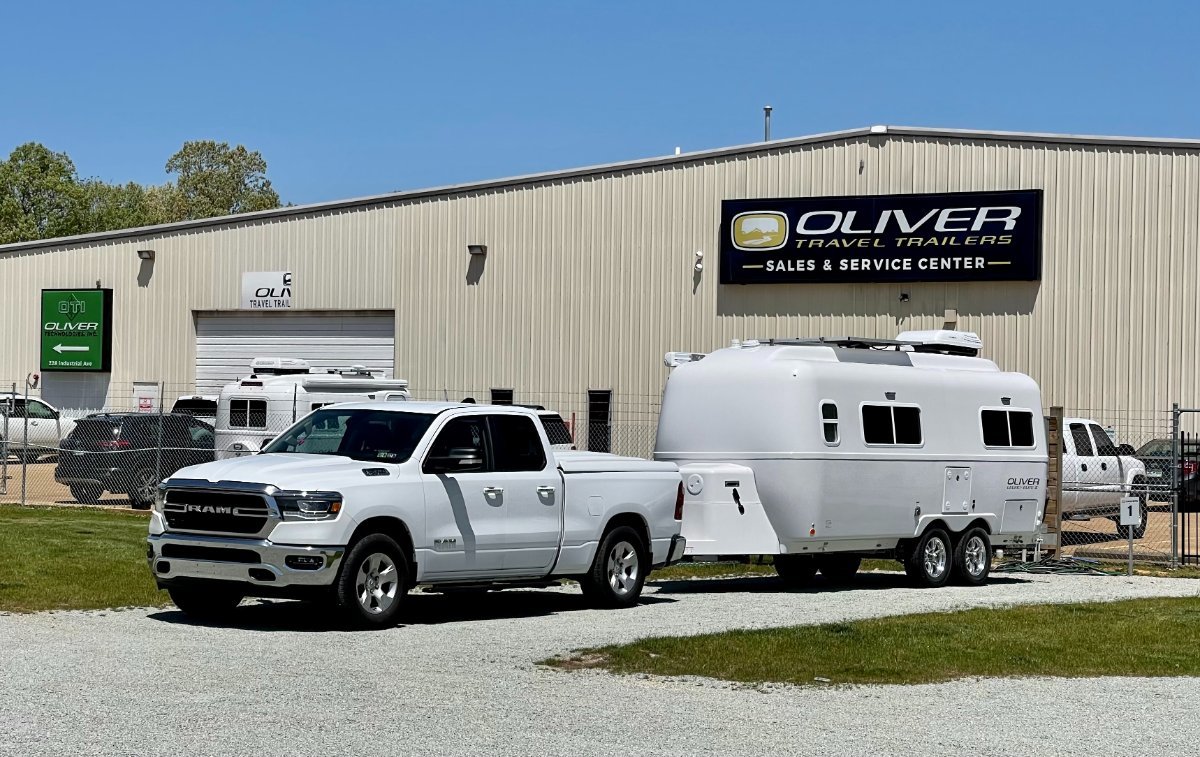
Very nice. We are white truck fans ourselves. Congratulations and a safe trip home.1 point
-
Wonder how these bolts could have got backed out? Did you add a lock washer or lock tight to prevent this from happening again? Thanks for the update. Will be adding this to my annual logbook💯 PerryG1 point
-
Try a local Ace Hardware….. https://www.acehardware.com/departments/home-and-decor/kitchen-utensils-and-gadgets/indoor-floor-mats/60008 I rarely use anything larger, this traps stones and pine needles, and you can clean it with a flip of the wrist, then set it just inside the cabin entry for travel. John Davies Spokane WA1 point
-
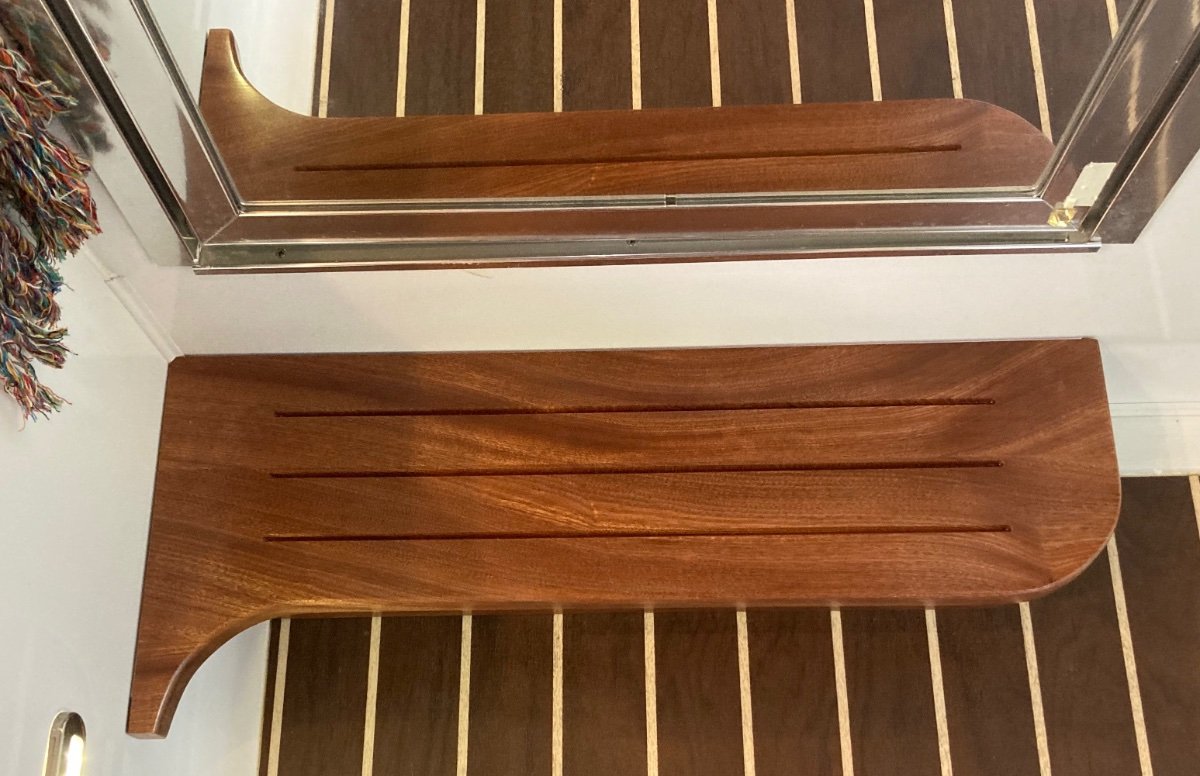
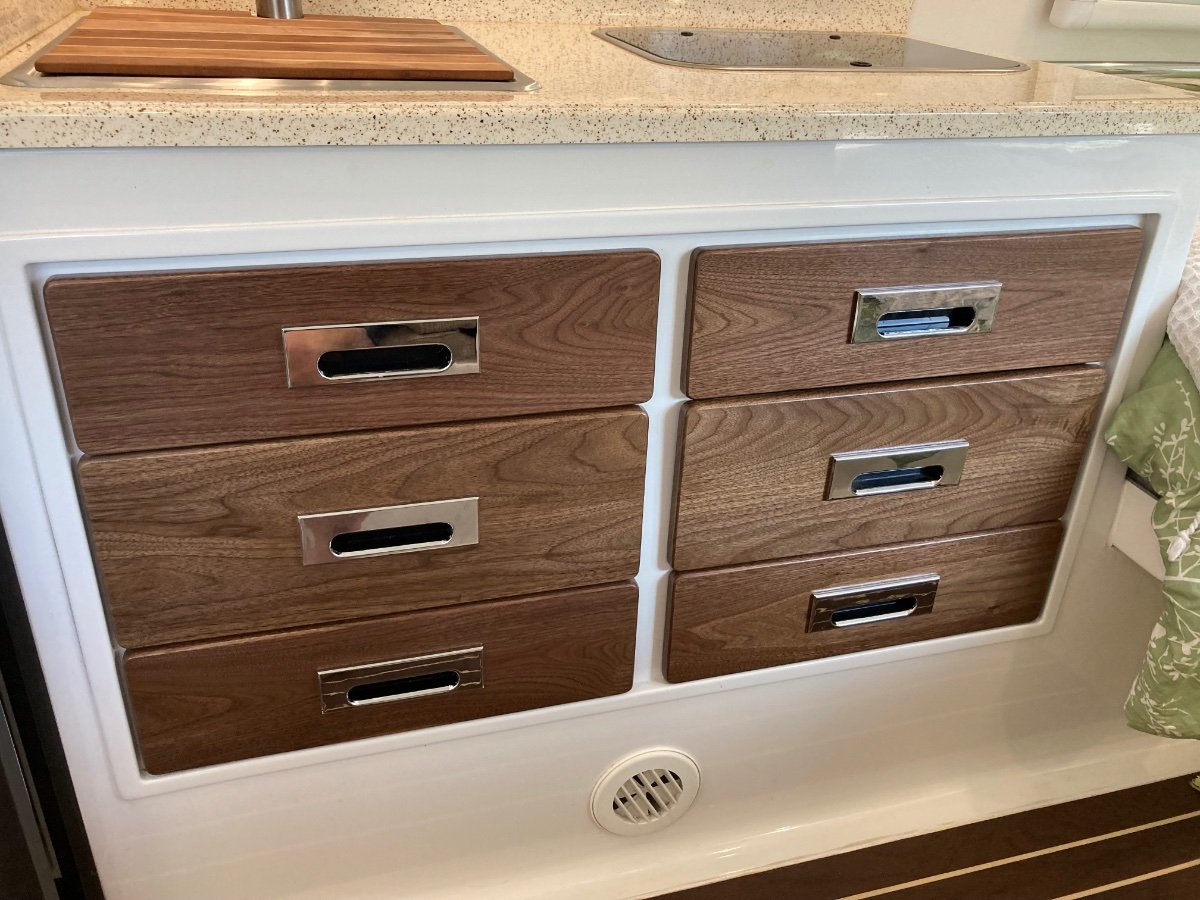
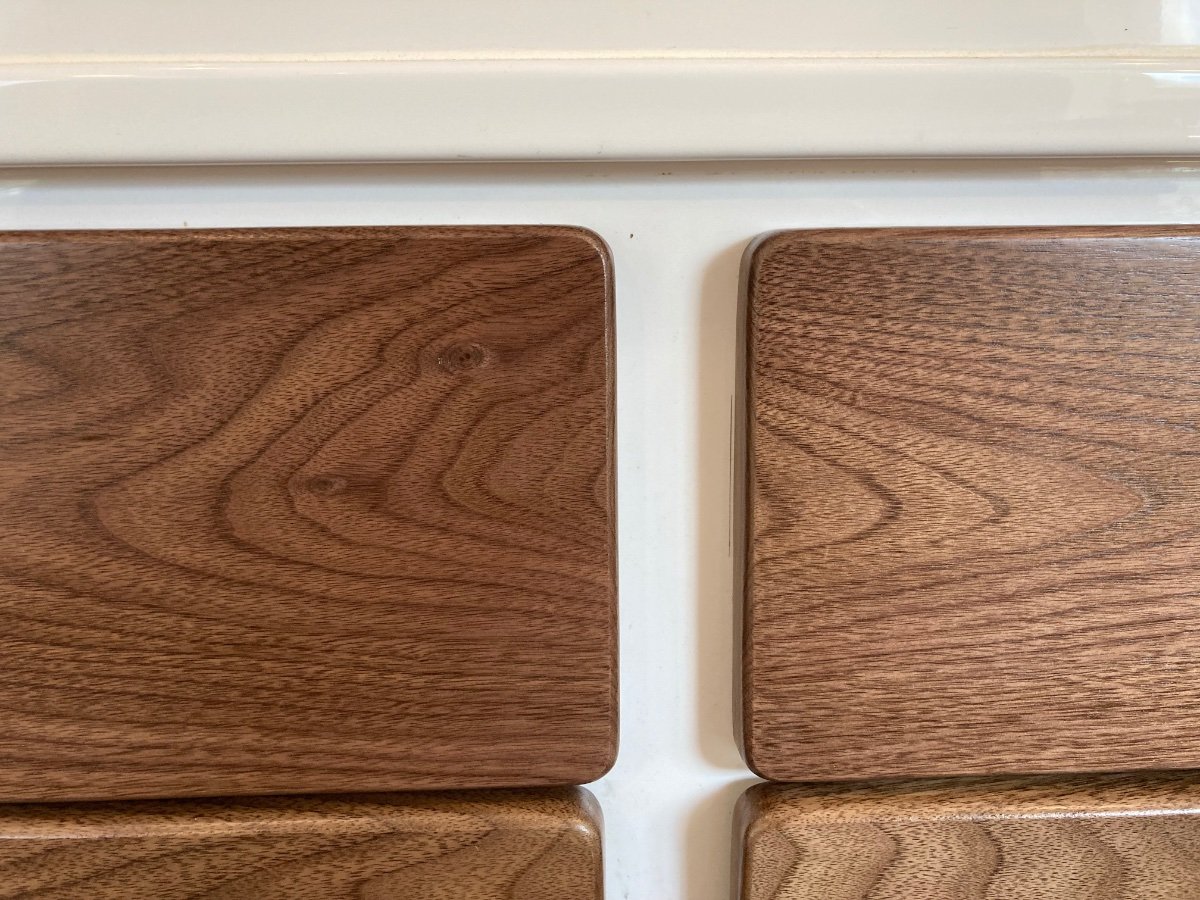
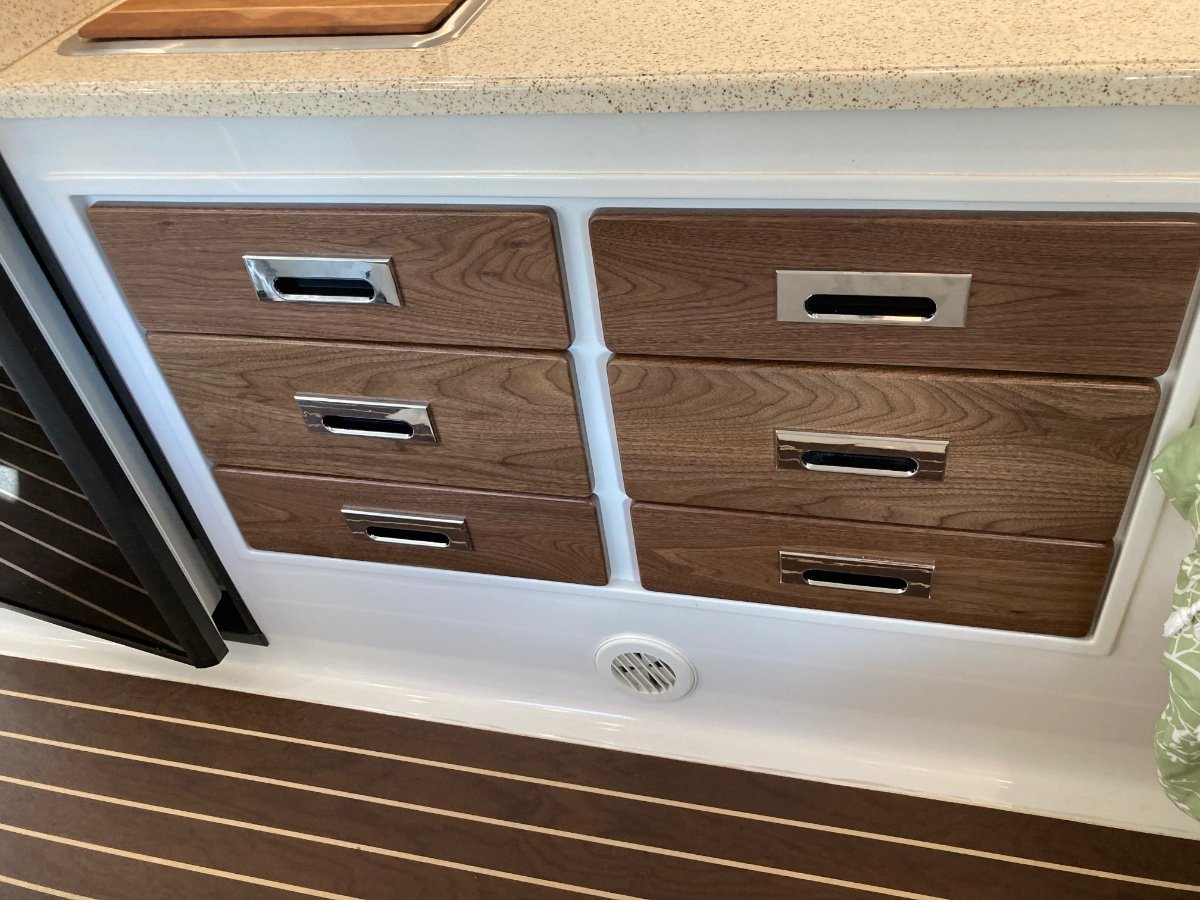
New Catalog. New Products. I have wanted to update my catalog for a few months and today is the day. I have three new products that I am very excited to show you. LINK TO PDF CATALOG First, up are my 7-piece Grain-Matched Drawer Front set. Whether on their own or combined with my wood countertops, they make a beautiful statement and are a distinguished upgrade for your trailer. Available in board match walnut or mahogany – meaning one board from left to right so all the wood grain lines up and matches across each drawer. Next, is my Bath Doorstep. Stepping into the Oliver bathroom can be a challenge for some of us. A normal step is 7” high yet, Oliver's step is 9.25” high. Added to this awkward height is that you must step down into the shower pan once your foot clears the opening. If you need a little help with this, my Bath Doorstep is a great option. And far from last, our 3-piece Acoustic Design Panel set creates a decorative opportunity that also reduces the reverberation and echoes in your Oliver. This improves the sound of your television/stereo and plain conversations, with the added benefit of making the ceiling all your own. Attached to the ceiling with Velcro. Change your décor, change your fabric. One Payment Note: I will no longer be using PayPal for payments. Their rates have gotten too high for the value they are providing in my opinion. Going forward I will accept Checks and Zella. If you have an order in process before today, you are grandfathered in to use PayPal.
1 point
-
The Dexter video is very helpful. https://youtu.be/GnH-h3W9XvI As mentioned before the complete bearing sets must be replaced, you can’t leave the old races in the hub. And the seal and grease cap must also be replaced. So new bearings, seal and grease cap on each axle. Here’s the tools/etc. that I used for my recent replacement of the bearings on all 4 wheels: Breaker bar & 3/4” lug nut socket for loosening the lug nuts to remove wheel. Screwdriver to pry off old grease cap. You may have either a spring clip or cotter pin as the axle nut retainer. Mine have the spring clip that can be reused. Cotter pins should be replaced. The axle nut should come off by hand since it’s only supposed to be finger tight at final assembly. Seal puller from Harbor Freight to remove old seal. Brass and steel punches to drive out old outer races. Brakleen to remove all old grease from hub and axle spindle, and clean the inside of the brake drum while you’re at it. Also check your brake pad thickness while you have the brake drum off, Dexter says 1/16” minimum thickness for the pads. A bearing driver set to install the new outer races. A good high quality grease to pack the new bearings. A dead blow mallet. A wooden block to install the new seals. A 1-1/2” socket for the axle nut. Torque wrenches for the axle nut and lug nuts. I use two different ones because of the difference in torque settings. The axle nut is to be torqued to 50 ft-lbs. to seat the bearings, then backed off and finger tightened, then install the retainer clip or cotter pin. The lug nuts are 120 ft-lbs. I don’t have one single torque wrench that can cover that range for the axle nuts and the lug nuts, so two torque wrenches in my tool box. Grease cap driver tool to install new grease caps properly. Follow the Dexter video. And I carry all of this with me, including spare bearings, seals and dust caps, in my road tool kit, along with a heavy duty scissor jack, a full ratchet/socket set, small air compressor, and other common hand tools. Flat tires and wheel bearing failures have been common points of failure that leave people stranded. I like to be prepared. Mad Max was the Road Warrior, call me “The Road Worrier” 🙂.
1 point
-
We had a similar thing happen in SE Colorado in 60-70mph winds. The door didn't blow open on its own, but was completely torn out of my husband's hands when he opened it to exit the trailer. Winds were from the North, door opened to the west....whoosh!0 points


-
Recent Achievements
-


")


")
")


