Leaderboard
Popular Content
Showing content with the highest reputation since 02/15/2026 in Posts
-
If for any reason you are not satisfied with the color match, I'd guess that you could lightly sand out some of the Marine-Tek and coat over it with the appropriate color gelcoat. Note - Oliver can tell you what type and color gelcoat is on your Ollie.7 points
-
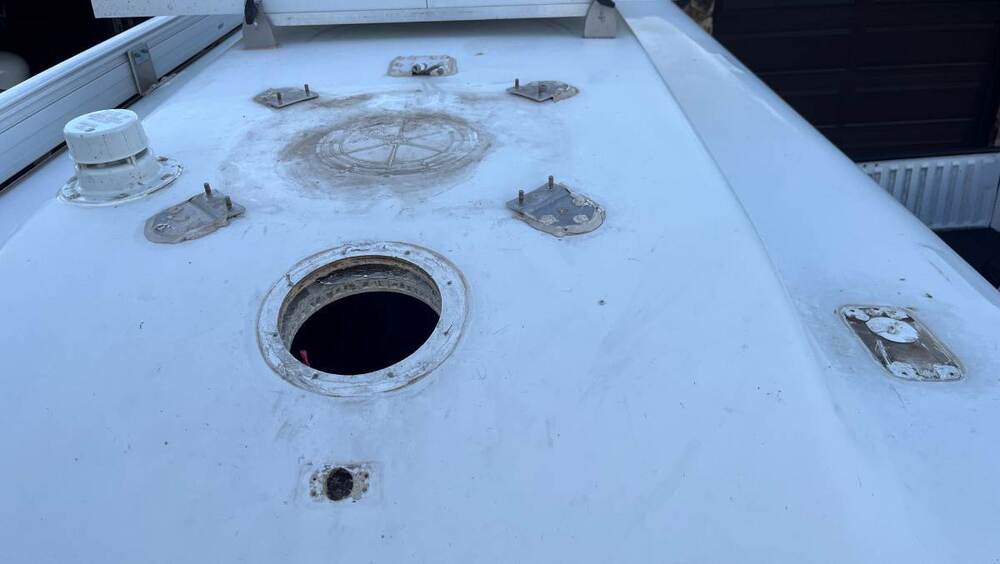
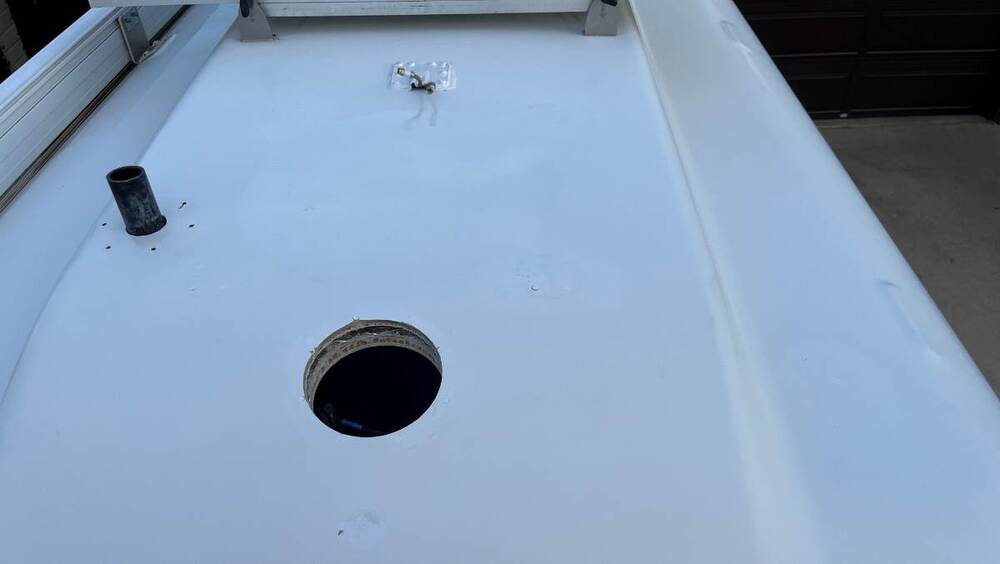
Hello @Mroth, this is not truly my area of expertise, but given how many holes are drilled in OTT installation processes, and that I have removed many of the old-tech products on our Oliver, I've filled way too many holes! I've used this epoxy based product and the color match is good. It's just a touch whiter than our older hull and I've read somewhere that the newer hulls are a tone brighter. I would say this product may work well for your purpose in the shower. It's simple and inexpensive. https://www.amazon.com/Marine-Tex-RM305K-White-oz/dp/B0014419V0/ I have also plugged the holes made for the TV mount, the drain pull handle in the bathroom, the door hook outside, both cameras and everything in these pics (see before and after).7 points
-
Those that might be contemplating getting a Levelmate should know that a newer model was released last year called the Levelmate Max. I had never gone for a Levelmate before but decided to try the Max version and have been extremely satisfied. There is absolutely no need to hardwire it because it runs on three AAA batteries that last over a year and can be replaced in under a minute. As far as technology upgrades over the Pro and Pro+, the Max adds a gyroscope in addition to the accelerometer. This enables one to observe continuous instant changes in level (side to side and front to back) with the trailer hitched and vehicle moving (called leveling on the go). This feature can be useful in finding the best spot to stop and unhitch when boondocking on uneven ground. Another feature is that it can remember the preferred tongue height when it is time to hitch up without having to back the vehicle up to the tongue first. Levelmate recommendz permanently mounting it with screws but I used 2 inch wide heavy duty velcro to mount it just inside the door under the rocker switch panel. No holes drilled.7 points
-
A short (by comparison for once) summmary: I concur with the "To Each Their Own" concept. That using hind-sight is an unfair approach to just about anything. That OTT has and still makes a product we all are proud to have, use and keep. That over time our requirements and circumstances will change. We will all end up modify, donating or selling our Olivers. We each exhibit moments of brilliance, and moments we wish we would have avoided. This forum is vibrant because we understand the above for ourselves and others. God bless Scott Oliver, his family and the OTT TEAM they have built. And all the participants of this forum. John Russell7 points
-
I’m probably a minority here, but I like my bubble level. It’s used everytime we set up. Generally accurate although it does take adjusting every so often. I haven’t gone for some of the electronic/automatic upgrades (digital door lock, motorized black/gray tank gates, auto levelers, etc). I like simplicity. It’s instructive to remember how Oliver Travel Trailers began. Jim and John traveled around in their Casita(s) for their fiberglass businesses. When it came time to get a new Casita they decided they could make their own. They did, and sometime around 2007 the Elite I was born. They were not RV industry experts, just experienced RVers who used their fiberglass experience to create a new travel trailer. The mechanical parts (electricity, plumbing, etc) have evolved over time with the early trailers not being very standardized. When I look at the newer models compared to those built when ours was, they’ve come a long way and have continued to refine and make improvements. Those of us with 2015/16/17 trailers don’t have that benefit of lessons learned over the years but we still have a solid trailer. Our trailer is 10 years old, just over 110,000 miles and can/does pass for a new trailer (thanks CGI guys). All systems work fine and reliability over the last 6 or 7 years has been outstanding. Mike7 points
-
No one (certainly me) has said that "OTT has good reasons for all things they do!". As I would hope you already know, in manufacturing there are a myriad of factors that enter into virtually all aspects of even the smallest detail of any product. In my almost 11 years of dealing with OTT products and personnel I believe that they are truly concerned and connected with virtually every aspect and they seek to make our trailers better in every way that they can while still producing a product that meets all of the requirements necessary/desired for the broad segment they are trying to serve. Indeed, many of the "improvements" made to these trailers have been at the insistence of owners. In my personal opinion, some of these "improvements" have actually made the trailers less desirable to me. You have made this point before without consideration or concern for any segment of the market that chooses (for what ever reason) to not be "bothered" with yet another electronic device. I regret that it is "painful" for you to have to deal with those that (again) for whatever reason choose to not use a "LevelMate" or, perhaps, even cell phones. I'm truly glad for your delight in the ease and simplicity you seem to find in using these types of devices. I would certainly agree that they do have a place and time. But, ALWAYS and in ALL situations is a bit of a stretch. About 500 days ago the area where I live was badly hit with a "hurricane" that literally destroyed several towns and this area is still dealing with the issues caused. One of the things that simply didn't work during this storm was the cell phone network. Perhaps in the eyes of some (actually most if looking at the current stats regarding cell phone ownership - some 95% of adults in America own them) having a land line for phone service belongs in the "stone age". But, I'm sure glad that we still had/have ours when this happened. I've never felt the "need" for being perfectly level or perfectly comfortable, or virtually perfectly almost anything else since my days in the Army. Again, I'm sorry that "It gets me when...". I believe that people do with their money what they want (within the law of course). With cell phones to LevelMates, to Oliver's and beyond people can spend money as they choose. Yes, I do wonder sometimes about these choices that people make. Heck, I even question my own sanity from time to time but I sure don't let it bother me. I'm sorry too that you have had to spend "2 years making too many corrections and improvements!" to your Ollie. From reading most of your posts I believe that some of these "corrections and improvements" had to be made due to the neglect or mistreatment your trailer suffered from its previous owner(s). Others things that you have done, indeed, correct, improve or update original things done during manufacturing. Finally, I prefer to believe that much of our "100's of pages long" Mods section here on the Forum has more to do with improved technology, materials, design and related factors than it does with Oliver not having good reasons for doing what they did. As an example - I believe that you have basically rewired your entire Ollie (and nicely so too). You did this because you saw "problems" with the original wiring that (for good reason) caused you concern. And, since this original wiring was done during the original build your assumption is/was that Oliver was somehow "bad" for allowing the wiring to be completed in this manner. But, as with many things, there is more to the story than what one usually sees by only observing what they can immediately see. Back when your trailer was built, Oliver didn't have "in house" electricians. They knew how other RV's were wired but felt that if they hired certified electricians they would get the best wiring for an Oliver available. From the history I know, there were as many as three individual electricians (I'm sure that they knew each other given the small town/area around Hohenwald) that usually came into Oliver after normal working hours to wire our trailers. This is why not all trailers produced at that time were necessarily wired the same. After "problems" were being reported by owners, Oliver felt that they should have more control over how the trailers were being wired in order to reduce the number of "quality control" issues they were having. Once Oliver took this area "in house" they standardized the wiring for all trailers. This meant that all trailers would be wired with the same wiring harness and would, therefore, actually cost more in wire but less in installation as compared to hiring these "outside" certified electricians. These same type of issues were the reason for the switch from BlueSky to Zamp solar controllers even though Oliver was chastised for not having an MPPT controller, These same type of issues came up with the switch from 16 inch to 15 inch tires and with the orientation of the propane stove and with window blinds and with interior design choices and with ..... In my experience, Oliver has no comparison (not even close) to any other company in the world that I've ever been associated with or done business with. They have consistently done things for customers that are far and away beyond anything that might be considered necessary - regardless of warranties or any other related legal issue. If Oliver has a fault in this area I believe that it lies in the lack of marketing all of the things that they have done other than letting the final product speak for itself. Does this mean that I believe Oliver is perfect? NO! But the company and its product are the best thing on the market even at the price of $100,000. Bill7 points
-
Bill, Very accurate and well stated. Thanks for your thoughtful and respectful insight and most importantly your input! Without question based on our ownership and traveling across the country field experience Oliver is the best TT traveler on the market. As our good friend Rodney you to say -“Everything you need and nothing you don’t”. 👍🏻🇺🇸 - David6 points
-
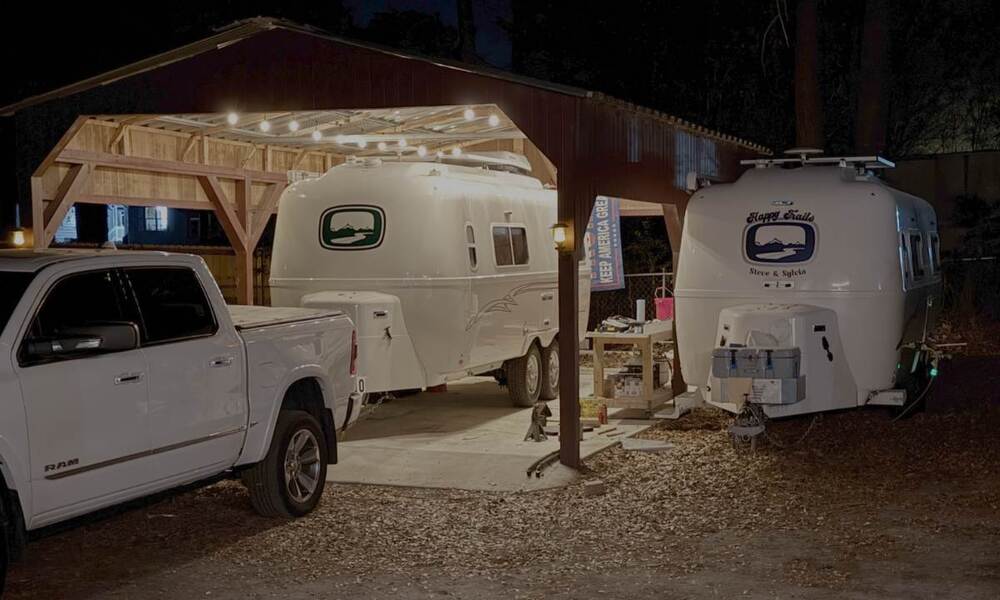
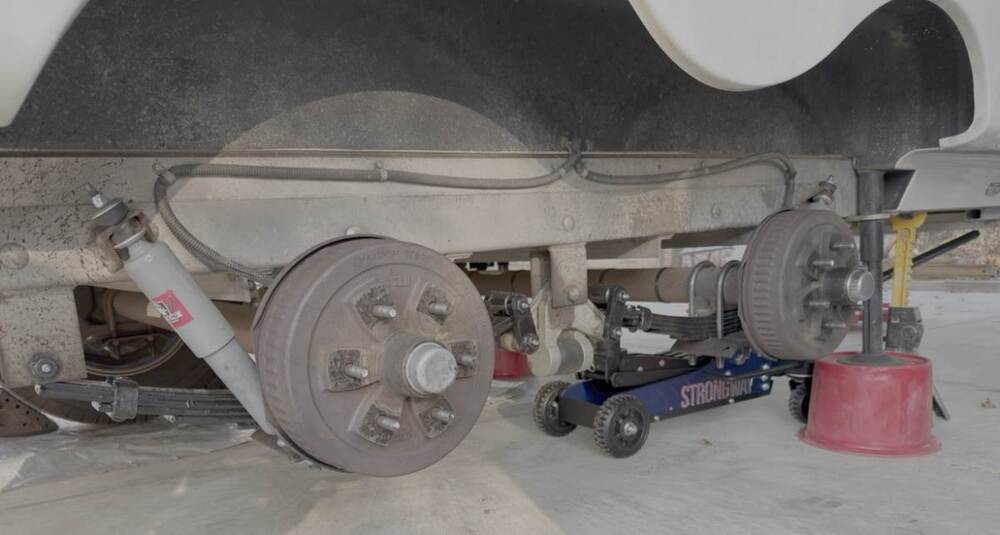
Well, thanks to my buddy Steve, we had a good time putting on the new springs at a great location. He's paying me back for helping him put his springs on. Based off what Lew at Alcan said, this is around 200 Oliver's receiving the springs. Pretty good. Once the weather clears I'll do the first 50 mile ride, come back, and retorque the U-Bolt nuts again to 90 pounds. Oh, and between two of you (us), do not lose your 7/8 inch deep impact socket, and do not forget to pick one up before starting the job. LOL Or, driving to the store to get one will delay you. LOL Helpful tools and hints: The new Ryobi impact drill, grease gun, and 4x4 hydraulic jack were all amazing - made things easy. Best to also have two small bottle jacks, 2x" & 4x" wood for cribbing. Not to mention PB Blaster, or equivalent, for the old U-bolts nuts, and small wire brush to clean off those old U-bolt threads before attempting to remove the nuts. One nut got bound up and I had to use old muscles and extra leverage to get the nut off. (Fun times). LOL6 points
-
Ron, From what you describe, this is a power issue, not an audio source issue. So you can rule out the HDMI ARC feature of many modern components that sends a signal to automatically switch the stereo to the active sound source. However, there is another HDMI feature on some higher end TV/Stereos that allows the TV to also turn on another component such as a stereo. If this is the case with your TV, then you might have a HDMI cable issue causing spurious signals. Try unplugging the HDMI cable to see if that resolves the problem. If it does, then try a new high quality HDMI cable with a Ferrite choke (little barrel looking thing that goes over the cable). This is a quick and easy check to eliminate one potential cause. If that doesn't work, then it could be something to do with the yellow Accessory trigger wire common on 12 volt stereos. I'd have to think on that one a bit more, so let us know what you find. Cheers, Geoff5 points
-
Hi. Go to Google and search for "Oliver trailers lithium upgrade." Several relevant threads pop up, including this one: Lead Acid to Lithium - Ollie Modifications - Oliver Owner Forums https://share.google/oayGb76nRTfLxwQnx Lots of good information in those threads that can help you.5 points
-
5 points
-
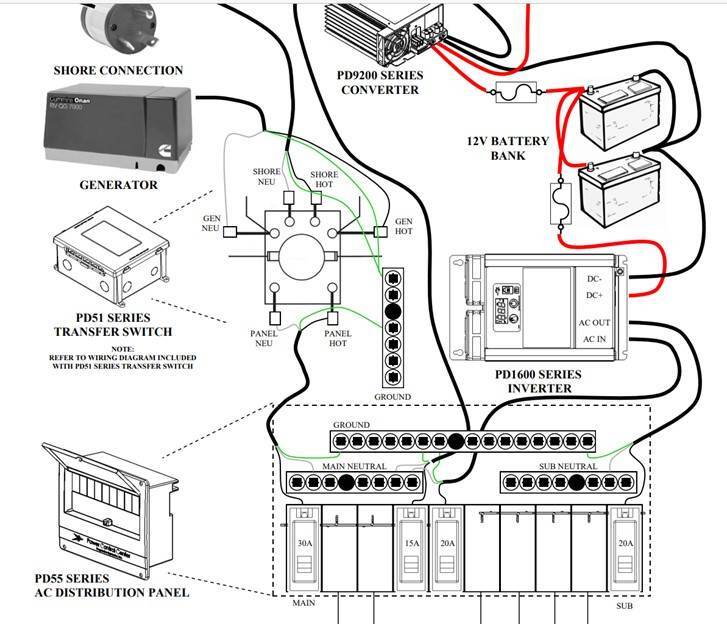
These are very good reasons. We're all different and we all have choices. I am the DIY guy in anything automotive, electrical and mechanical systems. For example, I only pay for an alignment after I've replaced every suspension part myself. I learned solar/inverter system installations on a Bigfoot Class that had none to start. Installed rooftop panels using only VHB tape, drilling only two 1/4" holes for the wires, a dab of Dicor on each. Installed a PD 1800 KW inverter/charger and customized the AC power panel to be a split bus panel (sawed the bus in two, one for A/C and one for inverted circuits)! The graphic below from PD gave me the insight I needed to do so. "Should we ever sell? No way, never! 🤣 I still have my 1984 Goldwing Standard restored to factory condition. Two Lexus, a 1992 SC400 and '08 GX470 both restored. Call our son Adam lucky, as none of these, especially our Oliver, will ever be sold. They will one day be his, always kept in the family. When you put 100s or in this case 1000s of hours in our now amazing hull #113, she's here to stay, and should in its present condition outlive me! That hull named XPLOR has had only the best of love and care! Likely the best looking, best outfitted hull out there! My bet is... David will never sell! 😎4 points
-
4 points
-
This thread show an excellent inverter/battery upgrade installed by a local service company. If you are going to DIY, I've documented installation posts that show these installations step-by-step. You asked, "I assume the Xantax 2kw was the inverter or?" Yes, in my case you can see that on page 1. No more Xantrex 2KW inverter (only) with the small PD charger in the power panel (kept it there for back-up). No more lead acid... Now the Victron MP2 and 900 Ah (3x 300) Epoch LiFePO4. You will find mine is a simpler installation. Did not spend on Lynx products and I did not want a cabin screen (we seek battery info 98% of the time outdoors, while towing or from the living room of our home). IMO, Bluetooth apps are all you need, but many like having screens. When doing so, I also removed all fuses and breakers from under the streetside bed so they can be conveniently accessed under the rear dinette seal. The best addition that several Oliver owners have added is the DC-to-DC Charger! Every time we tow we add at least 40 Ah for every hour towing. This is about 4x what we get from 320W in rooftop solar. See this for the complete installation. => Hope this helps! 😎4 points
-
I too had a battery box separation and repaired it 3 days ago. Unfortunately I badly damaged the door gasket. So far I haven’t been able to get a call back from anyone in Oliver parts. Does anyone have a source or make & model for the battery door gasket material?4 points
-
3 points
-
3 points
-
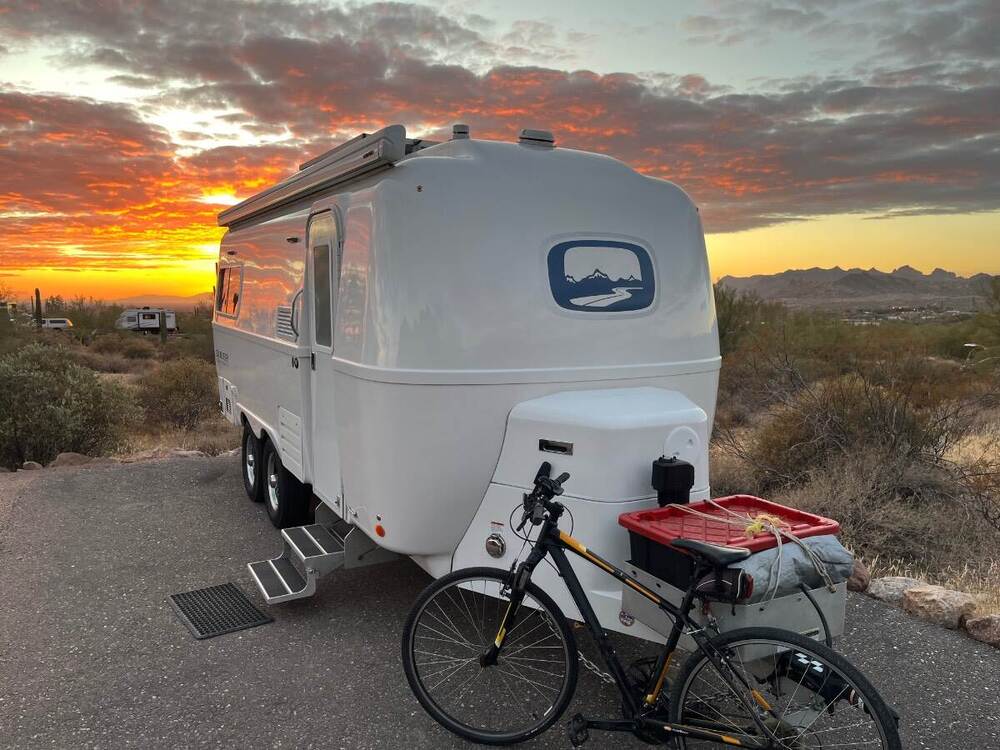
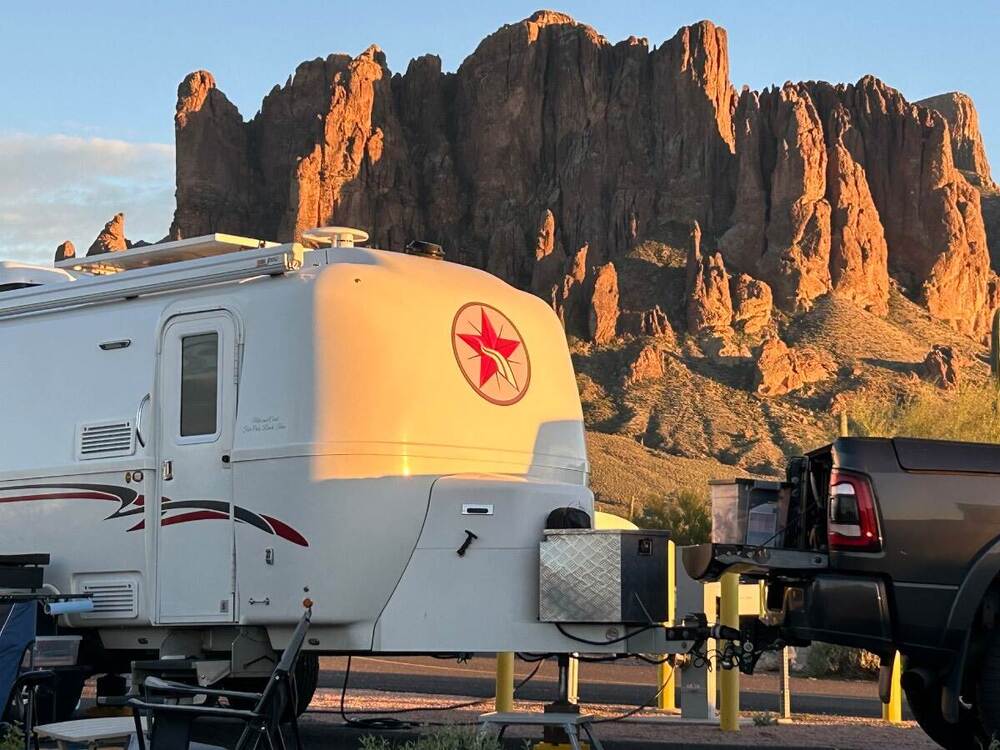
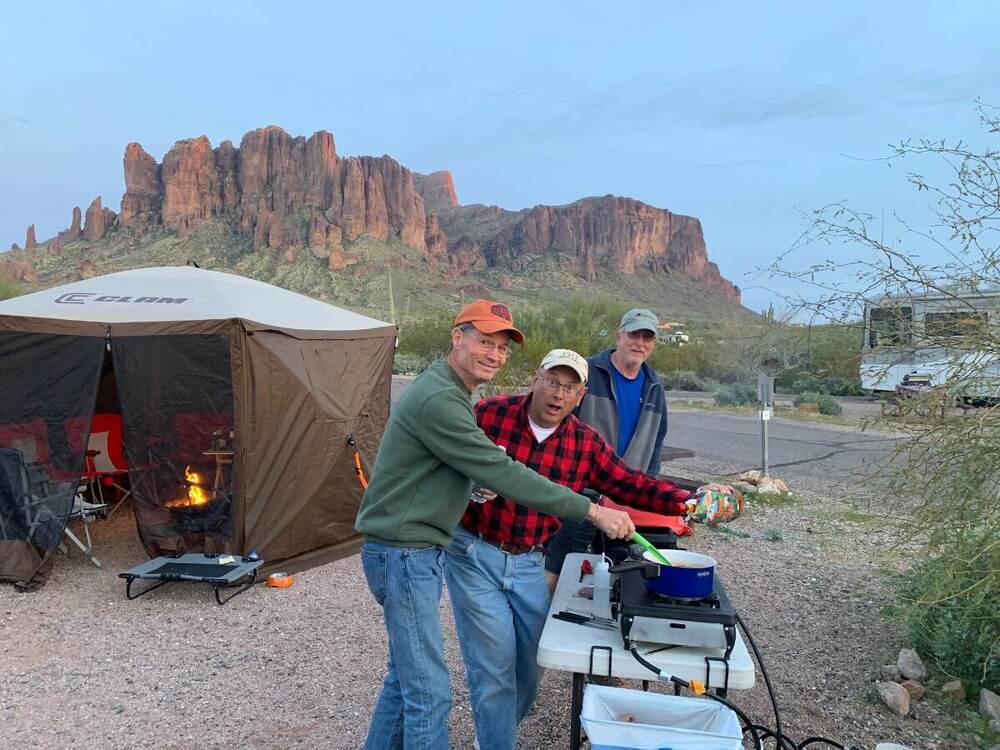
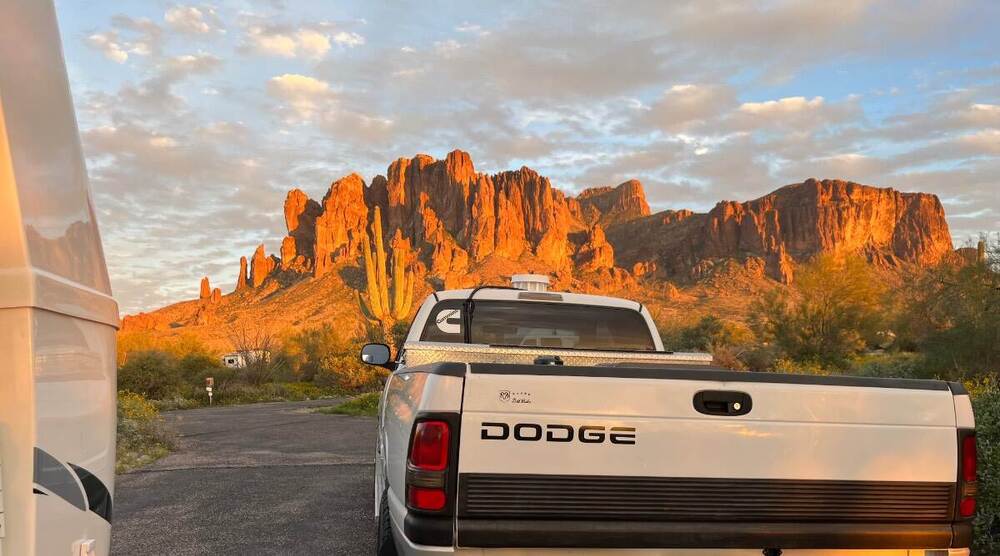
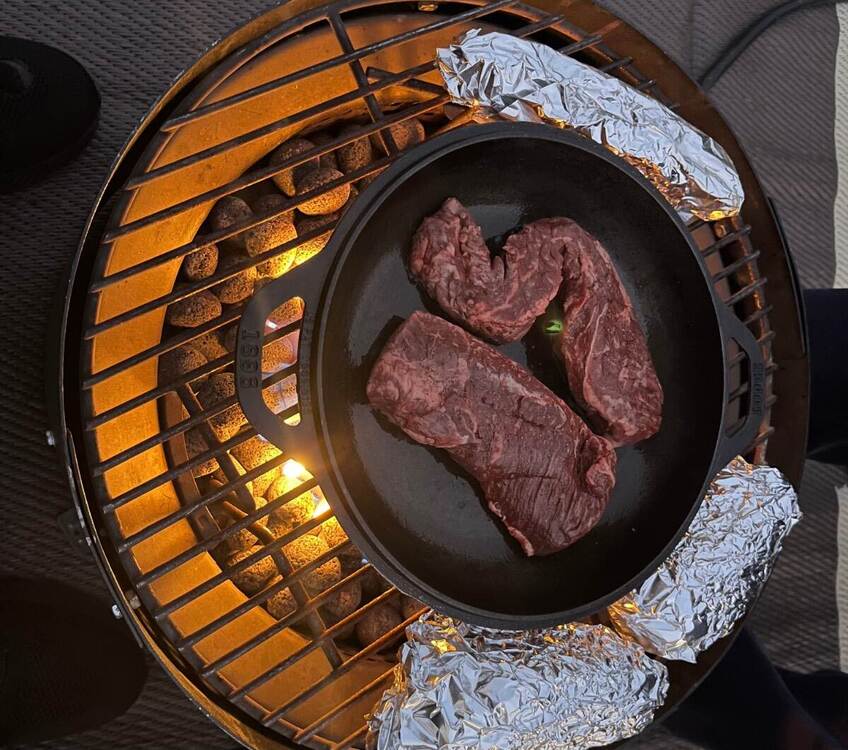
4th visit to Lost Dutchman. I’ll make it up Flat Iron one day (got halfway up last time as it was getting dark)! Came this weekend since the PPA Pickleball pro tournament is in Mesa this week, only a half hour away! What a view! Hangar steaks, baked and sweet potato with asparagus, cooked over the fire ring! 😎3 points
-
I just received a call back from Oliver parts so I just ordered from them what they use. Someone on here asked what type of adhesive Oliver uses. I’ll know for sure after I receive the replacement part but looking at what I removed, it appears the adhesive was probably already on the gasket.3 points
-
@Trailerjohngo Shoot me a private message and I will be more than happy to discuss with you details of my install via phone call or PM. As you will see from my first post, I opted to have a complete Victron system installed professionally by an excellent company in White House, Tenn. My main reasons for a professional install is all components and install are warrantied by the company doing the work as long as I own my Oliver. The warranty also conveys to the next owner should we ever sell. My system allows for the company to remote in should I have any issues as long as we have a WiFi signal. We have a SL mini so that’s not an concern. I am not nor claim to be a DYI guy when it comes to this level of electrical work. I also wanted to be able show that Victron system was installed by experts should we ever sell. I opted to have the Victron DC to DC charger installed as well which eliminates having to carry a generator. Shoot me a PM if you I can help with additional questions! And welcome to the fourm!!3 points
-
I've just sent Mike Sharpe an email asking for this information. Hopefully he will have a chance to reply soon. Bill3 points
-
Trailerjohngo - Welcome to the Forum! There is simply a ton of "stuff" here on the Forum to include the Oliver University with videos concerning many of the aspects of the Oliver trailers (as Steph and Dud B point out above). With regards to your Elite II visit - be sure to take a camera and a notebook. If the current owner doesn't know an answer to any of your questions, either an Oliver Salesperson can answer it or come on back to the Forum and give us a shot at answering it. Many of the questions you might have are already answered here but you never know until you ask. Enjoy your visit and we all hope that you too will soon become "family". Bill3 points
-
Hate to admit this here on the forum.... but..... Me as well. I travel solo a LOT and the number of wasted trips back and forth does get a bit old. As in older than this RoF! GJ3 points
-
Sounds like it does more than my bubble level! Maybe it’s time I bite the bullet and upgrade.3 points
-
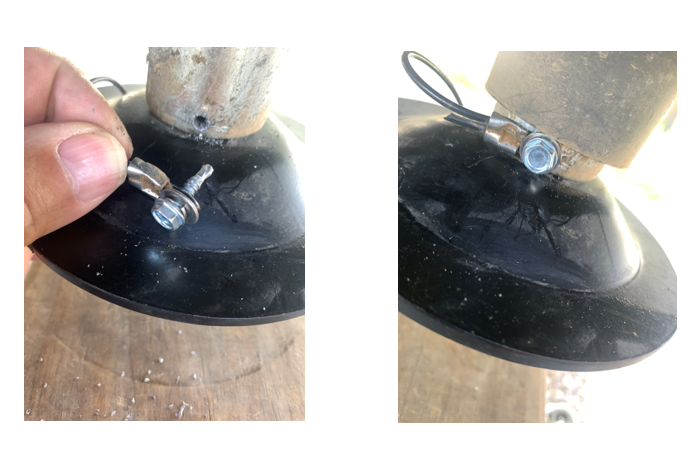
How wise you are. Been there and was suprised that my jack foot had taken a hike when I was not looking! Simple solution: Stainless Steel Cable (Really small) and a couple cable ferrules: Drill a hole in the jack foot and put a small loop and ferrule so it will not pull out of the jack foot. Another loop attached to the jack leg. Just enough room if you think small. In the event that the jack bolt leaves us, we should hear the tinkle tinkle of the foot being tortured by the pavement! Either way a spritz of black paint and a bolt and $35 saved. GJ3 points
-
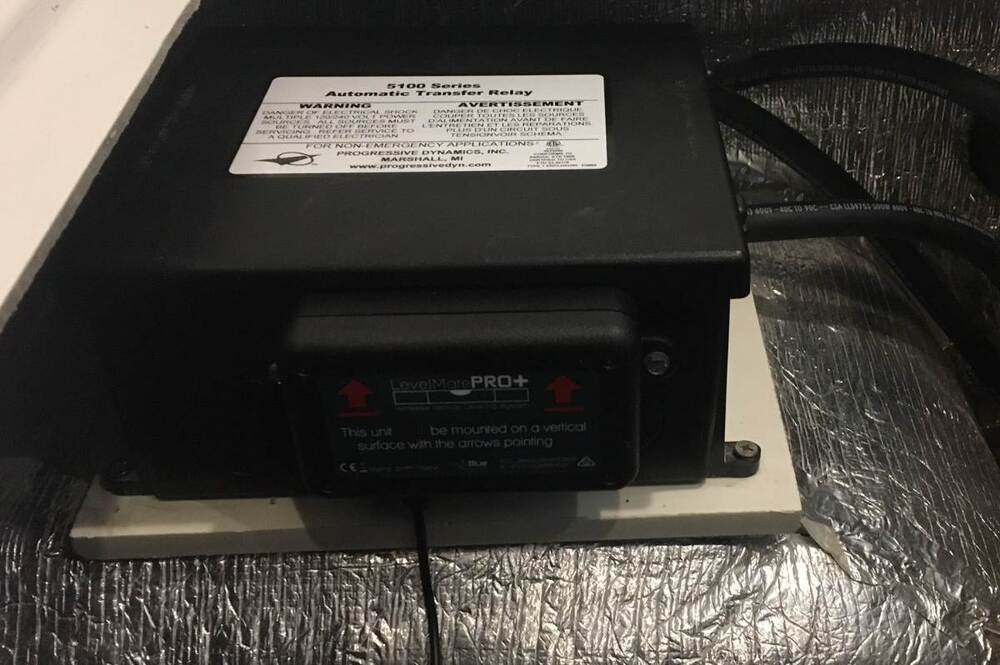
If you like gadgetry, then the hardwired LevelMate PRO PLUS is highly recomended! Unfortunately, a lot of us bought the LevelMate PRO that is not hardwired, it's powered by a short lived button battery. No worries though, it can be hardwired with a simple DIY upgrade: Hardwire your LevelMate for under a buck Talking about gadgets and leveling, I heard a reliable rumor that some old fool built a completely unnecessary AUTOMATIC LEVELING SYSTEM for the Oliver's stabilizers! 🤫3 points
-
"Overall, I did notice a HUGE difference with driving over bridged and not-so-perpendicular railroad tracks. The camper did not rock back and forth nearly as much as with the 3500 pound, ten year old, springs." We noticed that also and had some movement of items in the trailer in the first few hundred miles. All has settled in now and we like how it rides. John3 points
-
Believe whatever you choose - I only wanted to clear up the definitions that were being tossed around along with the associated prices. Bill3 points
-
The shorter your jacks, the more stable your trailer will be. We use the round Andersen Jack Stands. The Jack Stands reduce the jack extension by approximately 7"+.3 points
-
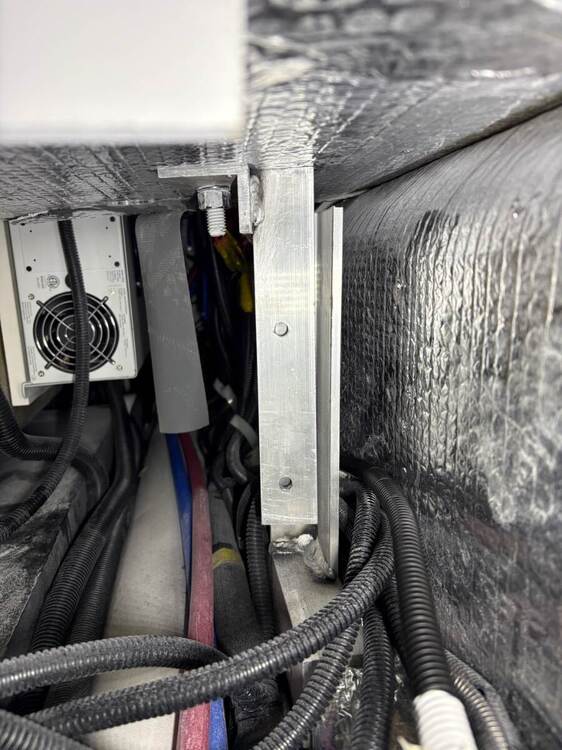
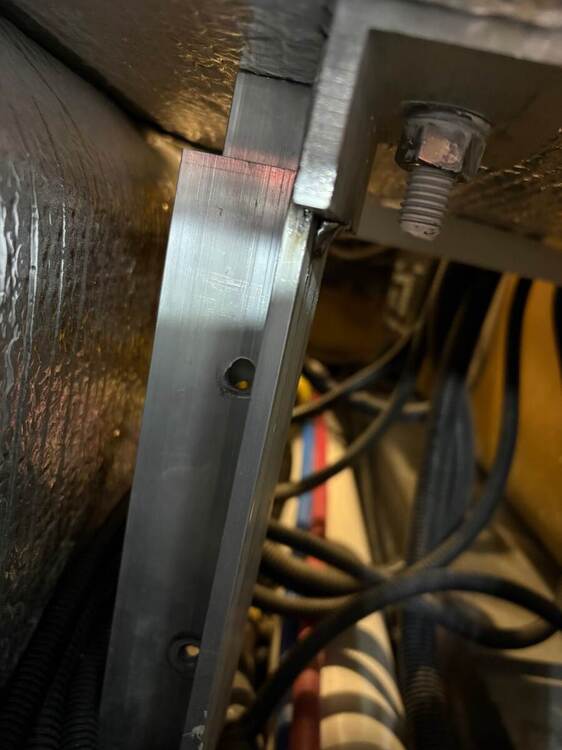
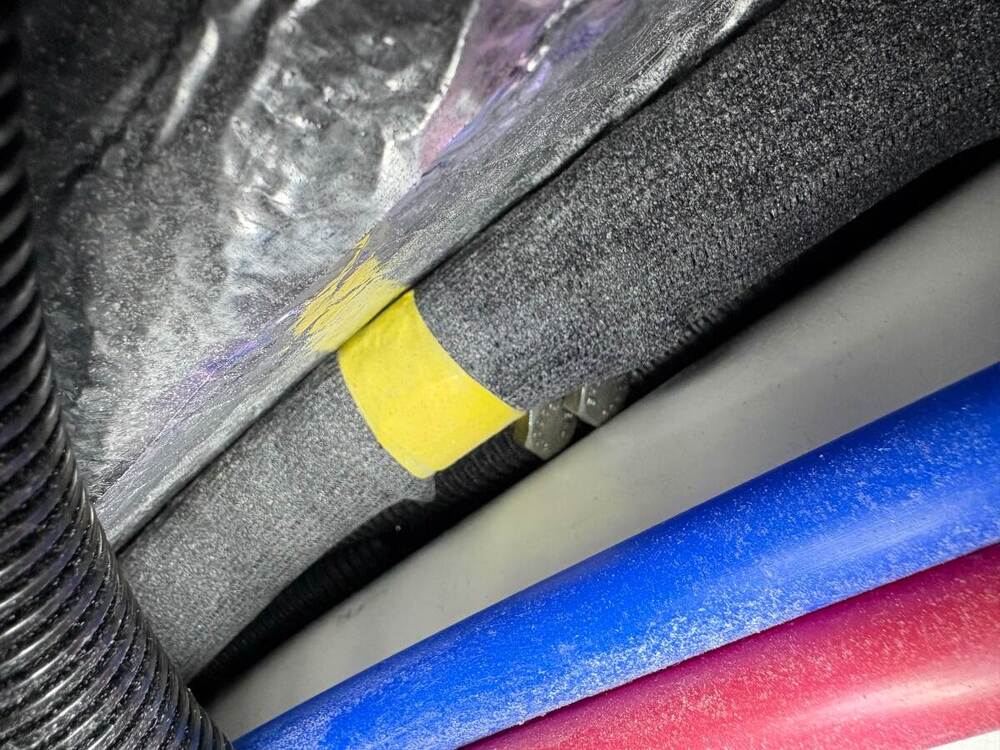
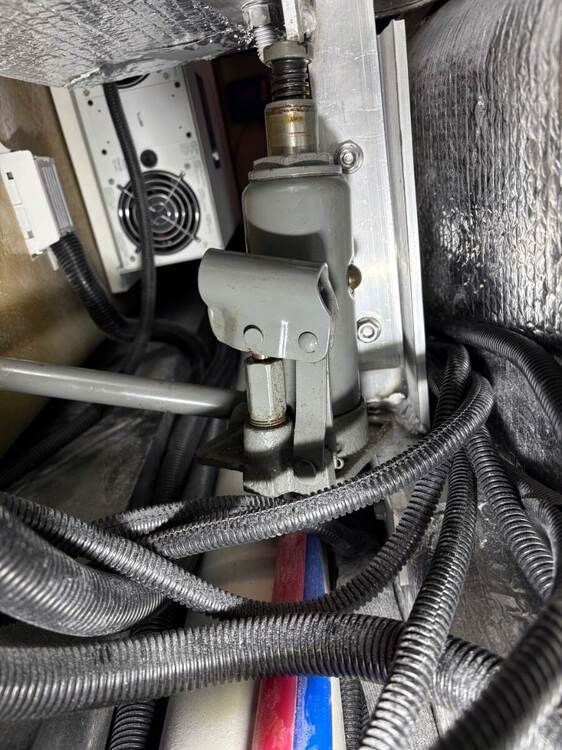
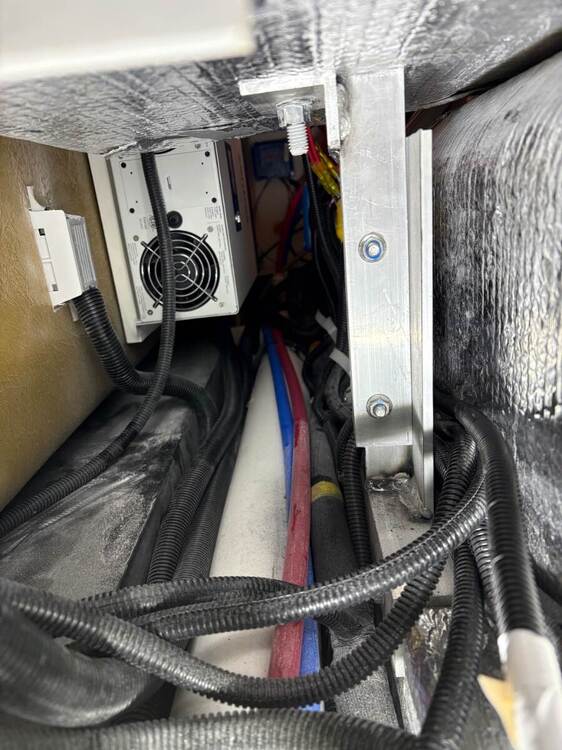
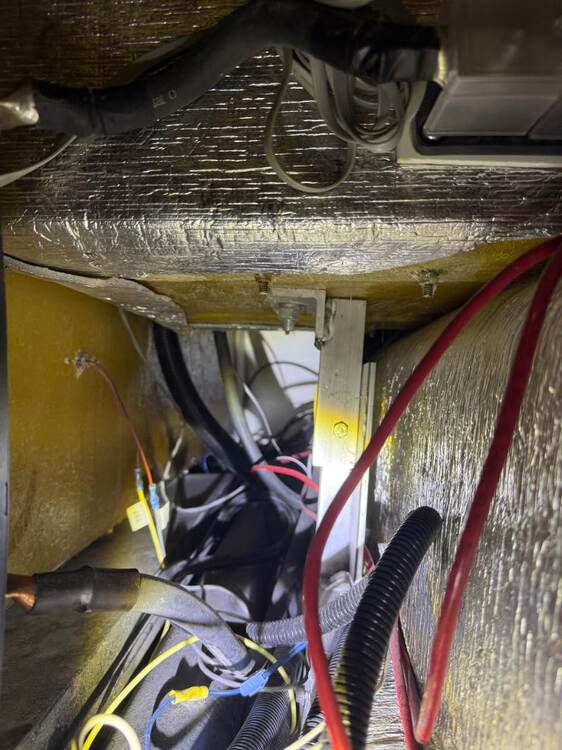
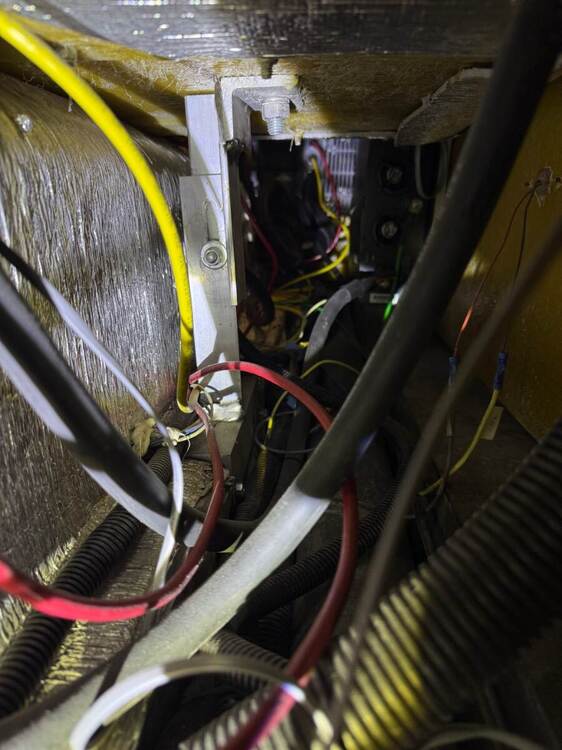
After seeing this thread I decided to check my battery support this morning. I really didn't expect to see any problem, but I received a surprise. My battery box support had two holes with no bolts. After some searching I found the bolt heads peeking out from around the wiring harness and after getting those I lifted the wiring harness and found the nuts. The idea of using a small bottle jack in this thread worked for me. I was able to place a 4 ton jack in there and raised the bracket until the holes were aligned enough to start the bolts, but I could not get them to go all the way. The angle of the bracket was off. I chose to use a small c-clamp on the bracket going from curb side to street side, that allowed the bolts to go through enough to get the nuts started. Finished it up with some blue Loctite on the threads. I have enclosed some photos of the repair. Finding this on my one year old Oliver was not expected. I would encourage everyone to check this support bracket on your Oliver to prevent future problems.2 points
-
Does this happen when not hooked up to shore power? I have the same set up. Both the TV and Furrion receiver are 12V so shouldn’t be affected by shore power. Mike2 points
-
I just got off the phone with Mike (Oliver Parts/Service). The part number is: 3075 The part description is: 3/4 inch bulb The cost is $15.00 plus shipping The amount in stock is: 3 - more are on order Carnivore - during the call with Mike he remembered that you had called requesting this information. Mike called you back and left a voice message on your phone on the 18th. He also said that he was going to try calling you again right after he could get me off the phone. Bill2 points
-
If it was me, I'd look in the aftermarket! Took me a quick search to find this product. I assumed a 1" diameter but did not measure ours. This or something like it would likely work fine: https://www.amazon.com/dp/B0D3PKNY47/?_encoding=UTF8&pd_rd_i=B0D3PKNY47&th=1 CAUTION: You should determine cause for your separation. Check your support beam below the box. View it from both sides, streetside bed (see my picture above) AND look from under the rear dinette seat. OTT forgot a weld on one of my jack brackets. They also forgot to finish this support beam install! Hard to believe, but true. I've compared ours with some of Oliver friends. The others have two bolts which is mandatory! I have to get in there again, drill and add a second bolt! With batteries out, most of the weight off the battery tray, from underneath see if there is movement of the support beam. I plan to remove my batteries AGAIN. Then get a bottle jack under there to see if the support can be raised just a little. The fact that this single bolt is at the bottom of the groove shows it's at the lowest setting. Likely the beam/tray should be raised some for proper support. Then I'll tighten the single bolt installed, drill a second hole through the top of the slot to add a 2nd bolt, then torque down both. Thank goodness we have no door separation, but those who have should investigate the support beams below. Some have reported missing nuts, or nuts falling off the bolts. (How does a Nylok nut fall off a bolt? It doesn't. It was likely laid there never threaded on. Go figure.)2 points
-
Wow, that turned out great. That is the product I was considering using. Seems very popular with boat owners. Seems a lot simpler than mixing resin and catalyst. I was wondering how well it would match. I’ll give it a shot. Thanks2 points
-
So the Max version has some new technology, and costs more. The older version tech works fine. IMHO, I would not want any battery model in view Hardwired it can be hidden under the dinette or anywhere else out of view. And why change batteries when we all have 100s of AHs on board. Took me 10 min to install under the dinette given you have the DC fuse panel and ground bus right there! 😎 I’ve been writing LevelMatePRO and Geoff @Snackchaser wrote a good correction above. The wired version is the LevelMatePRO+ (plus version). He has a cool way to wire the PRO. Maybe it could work for the MAX version too!2 points
-
I was told that it was a requirement of the RVIA. If you are at an RV show - look at that same area(s) and from what I've seen, all of these type panels are fastened in place. Bill2 points
-
John stated this nicely. Our first time out, everything in the Attic was upside down! We had the hangers in the closet bounce off, clothes on the floor! A new suspension needs to seat and settle, period. Since our first outing, never another issue. But perhaps Chris, you left the lid on the salsa jar a bit loose last time... 🤣 Removing the 5th leaf... IMHO, good thing you left things as Alcan engineering had designed. They do not suggest the 4-leaf configuration and they know more than we do. I will say however, as an experienced auto mechanic and engineer, I have not followed all of their torque specs. Yes, you certainly need 90 ft-lbs for the U-bolts but I personally believe their specs on the wet bolts are too tight. They spec 80 on the end bolts and 65 on the centers. I went with 65 and 55 so that the suspension flows better up-n-down. The nuts are NyLok, so they're not coming off. Just my take and this does help. 😎 Cabinets opening? They are loose to begin with! OMG, such blasphemy? Did I again criticize OTT? Shame on me! Please forgive me for suggesting DIY improvements! 🤣 I rode inside our trailer once, Chris towing gently down a local paved road, before our Alcan upgrade, and EVERY overhead cabinet was rattling, even banging loudly. I added a 2" strip of foam tape on both resting pads of every cabinet and they snug nicely now and do not rattle anymore. Something like this works great and I promise you will NEVER have an upper cabinet open again! Welcome to the 200+ Alcan Oliver club and I commend you in doing this install yourself as only a very few of have done so! 😎 https://a.co/d/0b1cbrph2 points
-
2 points
-
I have used my rear jacks to change a tire and make a slight leveling adjustment. I use the best leveling device made, a 2' level🤣. So when I went to check under the bed panels after taking delivery, I was shocked to find the panels were screwed in place. How anal is that? I was told that an attorney conducting an audit said secure the panels. I pulled them all.2 points
-
I did a final torque of the U-bolts after 200 miles and the nuts only needed 1 to 3 quarter turns. I must say though, like others noted before me, I did have some minor.... "disruptions" (not damage) inside the trailer after that 200 miles - never seen before disruptions. I did have a rear upper cabinet door open for the first time ever, but at the same time, I noticed that the latch was free-floating on the panel and on all three rear panels. They were obviously lose before the trip, so they are snugged up now. Add that to the annual inspection list. Also for the first time ever, I had a bottle of salsa open up inside the fridge. No glass broken. So the bottom of the fridge must have been very bumpy to unscrew a lid. I will inspect plumbing area and electronics soonest. (updated: all good so far) Why do I mention this? Well, I'm thinking, and this is just me, so you do you, but I should have removed that lower/smallest 5th plate. Let's face it, that thicker steel is not going to break easily, especially with the second leaf being so extra long. But, oh well, I have 5-leafs now - all good. I'll just ensure things are buttoned up tighter. I can carry more alcohol and steaks now too. Overall, I did notice a HUGE difference with driving over bridges and not-so-perpendicular railroad tracks. The camper did not rock back and forth nearly as much as with the 3500 pound, ten year old, springs. 4-Leaf: 2250 x 4 = 9,000 lbs (just my recommendation after 200 miles - just things to consider - others here have only used 4-leafs) 5-leaf: 2750 x 4 = 11,000 lbs2 points
-
Yes - the reason is that if you choose to use the onboard jack OR "legos" or "Andersen" type ramps, some type of device that tells you when you are level will be necessary. Just because Oliver is recommending to NOT use the jacks (for leveling) does not negate the fact that you still need to level. Bill2 points
-
Good work, Chris. I know you will be happy towing your next time out! 😂 I'm guessing you did this at Steve's since both Olivers are there. GREAT carport with concrete pad, I'm jealous! We have a 3/4 acre parcel, but I can't figure out a spot 25 ft off property lines for the city, that's easy to back into, and is level. I'll have to keep hiding our Oliver behind the Tuff Shed where it partially blocks the southern exposure. Yeah, now 200 Alcan-upgraded Olivers! Welcome to the club! 😎2 points
-
We've had the 640Ah Lithionics from the start with a 3-way fridge. More battery power than we've ever needed. I think the lowest we ever got was 63% after a week camping in full shade during rainy weather. It's funny. We were used to camping with a single lead acid deep cycle battery in our old trailers so I still find myself going around turning off lights and watching the battery SOC like a hawk. I have to learn to relax. Like @Steve and MA said, holding tanks are the limiting factor now.2 points
-
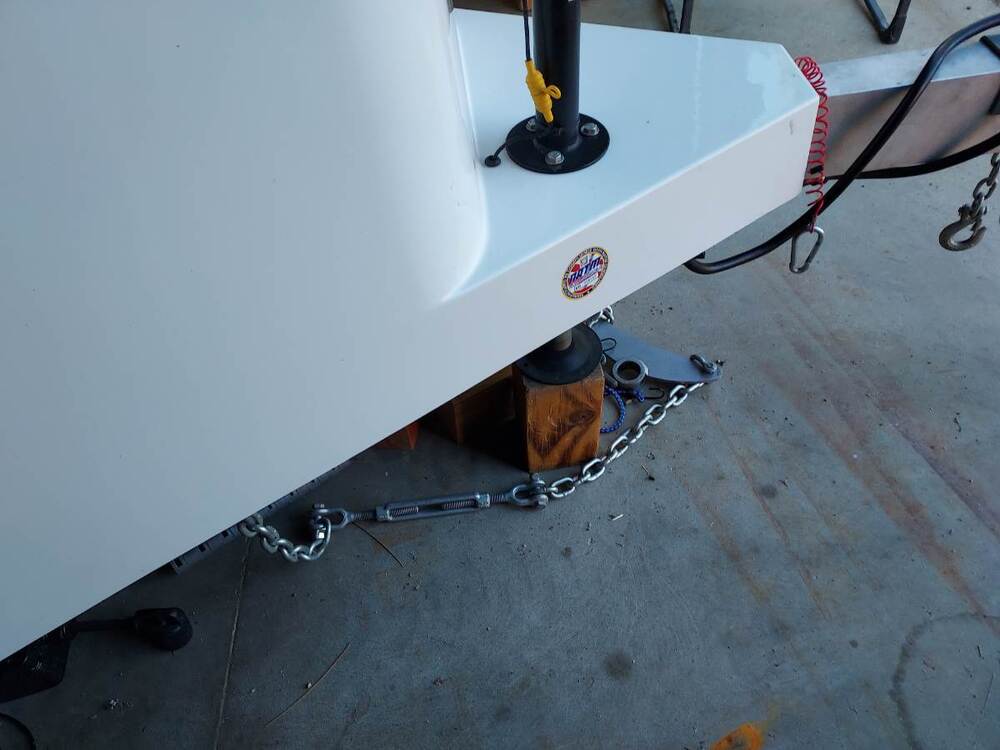
We, too, level and raise our Hull #1291 (2022) with the jacks. But, we always use support blocks for two reasons: (1) to avoid jack damage if we forget to raise the jacks before driving off and (2) to shorten jack travel distance. See photo below of one of our three support blocks in place under the front jack. Since that photo was taken, we have added Snap Pads, as recommended by Patriot, above. We like 'em. One caution: ensure that the jack foot is placed on level ground, or the foot plate can be bent, requiring replacement. If using the jack on a slope (such as on the side of significantly crowned roadway), place tapered levelers under the jack foot to provide a level platform. Don't ask me how I know...2 points
-
We only recently upgraded our springs and we’ve been at 50psi in our tires for many years. I think the heavy AGMs and many miles is at the root of this issue. There are a number of rivets all around the box that were all popped/damaged/pulled out. It doesn’t seem that that could happen all at once, but probably happened over time and miles. Our lithium batteries, installed 4 years ago, are 1/3 to 1/4 the weight of the AGMs. The Oliver response to my trouble ticket was to check and send pictures of the brace inside the trailer. I did and the response was that I could probably use a good adhesive to repair it since the brace holding up the box looked good. I didn’t like that answer so I asked to be sent over to service for some advice. Mike S in service said they use rivets to repair and also inspect the support bracket. I’m debating whether to try this myself or just make a trip to TN. Unlike Galway Girl, my bracket only has one bolt and it is in an adjustable slot. Other side: It’s interesting that the box is leaning out from the trailer and the bolt is at the bottom of the slot. When I pull the battery tray out, the box moves out more but every so slightly, less than 1/16”. I would think that the sag would be the other way around, leaning into the trailer since the weight is over the support more than 99% of the time.2 points
-
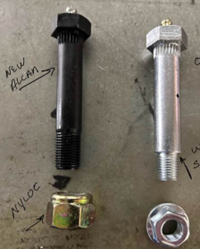
Chris: Some thoughts about the standard wet bolts vs step bolts for trailer springs: Standard bolts generally used for light duty trailer shackles using a 9/16" diameter shackle bolts without a zirk fitting. Step Wet Bolts Bolts are used for heavy duty axles where the step is necessary for proper function with bronze bushings. I believe that all of the OTT trailers, and the most other heavy duty trailer spring shackle bolts are step bolts. Yet Alcon is using a standard bolts. This got me wondering about the topic. Wet bolts sandwich the springs between the subframe mounting "tabs". With the step, the step bolts mechanically limit the clamping of the springs. The result is that the bolt head is prevented from turning in the mounting tabs by two means. First, the splines. Secondly the friction on the tabs by the step and the nut itseld. As a result of the design, the spring always has some clearance allowing it to more freely rotate relative to the bolt center line. My concerns are: The Alcans could easily be over tightened thereby forcing the mounting tangs against the springs. This process would result in the spring binding in the tabs and facilitate the stripping of the bolt splines thus creating a "spun bolt". A spun bolt will act as a crude bearing causing the mounting tab holes to quickly wear. And the repair is rather difficult. Been there myself. Use of Nylock's in high torque situtations often results in the Nylock becoming impossible to remove with hand tools. To do so, one will likely want access to air tools or electric grinders to literally cut the nut off. Trying to do so with a hack saw and punch will be tedious, especially it appears that their bolts are very high quality grade 8. As such, failure of a wet bolt will complicate life a lot. The only way I would want standard bolts for a splined application is if the bolt head head was fixed using a Hex Capture Washer. After two years of working with OTT Jason, this approach ended up being the only acceptable long term repair for a spun bolt spline. DIY - Dexter EZ-Flex Center Bolt Spline Repair (20 APR 2024).docx What are your thoughts about Alcon not using step bolts on our springs? Thanks GJ2 points
-
1 point
-
Like Mike, I'll use them to change tires which OTT suggested years ago until likely lawyers got involved in policy (over engineering) . Oh yes, we certainly all have opinions! 🤣 I don't like to level at a campsite with wheels/tires off the ground for days. I don't feel it's safe and will show reason to follow. When you find out the leaf springs on your new Oliver are borderline in weight capacity and upgrade to (search for keyword) "Alcan" springs or the like, the Alcan suspension is so firm that when leveling you tires will quickly be lifted off the ground! I had the bracket to one rear jack break. Good thing I was home servicing the Oliver and nobody was inside as the hull banged down, fell on the curbside! If this happened while sleeping, the person on the streetside bed would have been thrown into the center aisle and on the other side against the wall. I'm not kidding! When camping I level with Andersen levelers and only stabilize with the jacks so to keep the wheels on the ground. I also find when using this kit I do not need or use additional wheel chocks. Chris puts them into place easily as I drive up them to level watching the LevelMatePRO app from the driver's seat! These tools work great! 😎 https://www.amazon.com/ANDERSEN-Accessories-Levelers-Leveling-Motorhome/dp/B01LYQ1Z8S/?th=1 If you go with LevelMate, get the PRO model, hardwire it hidden under the rear dinette seat out-of-sight, and never worry about access and battery changes. https://www.amazon.com/LogicBlue-Technology-LevelMatePRO-Wireless-Leveling/dp/B01FGGSWPW/?th=1 Hope this helps!1 point
-
1 point
-
After talking to an attorney friend it’s time to eat some crow and admit my mistake. The Oliver is an extremely well balanced trailer and I can get the truck and trl within all legal weight limits without the Anderson hitch, however, it was explained to me that vehicle oem’s install the class 3 hitch and derate it with the caveat of using a weight distribution hitch, he told me that there is no federal law to require me to use the wdh, however I could get in trouble on a state by state basis. so… after 8 yrs my options are, get an Anderson, or replace the class 3 hitch with a class 4, and replace my bumper to make it fit, I ordered an Anderson this morning. The next vehicle I order will be spec’s with a class 4 hitch, sometimes lessons learned can be embarrassing, but it happens🤷1 point
-
Recent Achievements


