Leaderboard

.thumb.JPG.dd838cdb3df463dab6a16861fa23a319.JPG)


Popular Content
Showing content with the highest reputation on 08/10/2021 in all areas
-
Pisgah Inn will now allow non-guests to eat lunch there if you make reservations. We were across the road at Mt. Pisgah campground for 4 nights this week. Best hike we did was the Black Balsam Knob hike (off Forest Service Rd. between mileposts 420 and 421.)
 4 points
 -
Interestingly, I checked my board which is in a trailer delivered in December 2020 as I'd read of issues and had seen a suggestion to pull it out and apply conformal coating. The board on my unit has some sort of clear coating over all the electronics on both sides so I assume it was treated with conformal coating at the MaxxAir factory. Perhaps they got tired of doing warranty replacements of the board...3 points
-
https://jalopnik.com/winnebago-made-a-flying-rv-that-camped-where-no-other-r-1847458400 Imagine the maintenance needed to keep a helicopter with a 1300 bhp radial piston engine operating. Safely…. The turbine option would definitely be my choice. And I would no longer need to bring along my gas leaf blower to clear the pine needles and dirt away from the site. John Davies Spokane WA
2 points
-
I used to love that magazine. I was surprised that I didn't remember that issue until I looked at the date and realized I was overseas at the time. I should have asked my dad to mail them to me each month. @John E Davies if you got one of those you would have to put an addition on the other side of your house to store it. Will the HOA allow airplane hangars?2 points
-
I've been checking the recpro site occasionally to see if the Houghton ac has been in stock, and lately, it's been good, both in black and white. Today, I noticed another interesting ac unit on their site. https://www.recpro.com/recpro-12v-rv-air-conditioner/ This one runs on 12v, not 110, with an average of 80 amps in their testing, so theoretically, those of you with the big lithium installs might just be able to run ac overnight, without a generator or hookups. It's way too big for my rooftop available space at 33 x 48, but very low profile. Coachmen is supposed to be using this in their new model Galleria, on a sprinter chassis, so we'll probably get some reviews from those owners soon. All I could find was one youtube, and some testing charts from Premier. It's inverter compressor technology, so no easy start necessary. But, it also comes with a $2500 price tag. And, #2 wire needs to be run. It's encouraging, however, to see some new players in rv ac.
2 points
-
Hi John, Each campsite is different. The private RV parks will often have a sewer pipe at each campsite, as well as a 30a outlet and a faucet for water. In that case, you connect your hose from the faucet to the "city water" connection on the trailer, and you connect the big "slinky" hose to the trailer black pipe outlet inside the rear bumper and put the other end in the campsite sewer pipe. The sink/shower water will go into the gray tank and the toilet will go into the black tank. You'll then have to periodically empty the tanks into the already connected "slinky" hose and campsite sewer pipe. So, no, you can't bypass the holding tank. I'd recommend waiting until both tanks are more than 50% full to empty them out because you'll get better results due to heavier liquid flow. Some private RV parks as well as most state and national park campsites have one or two dump stations at the entrance/exit to the campsite. So, you'll have to keep everything in your holding tanks until you exit. Hope that helps.2 points
-
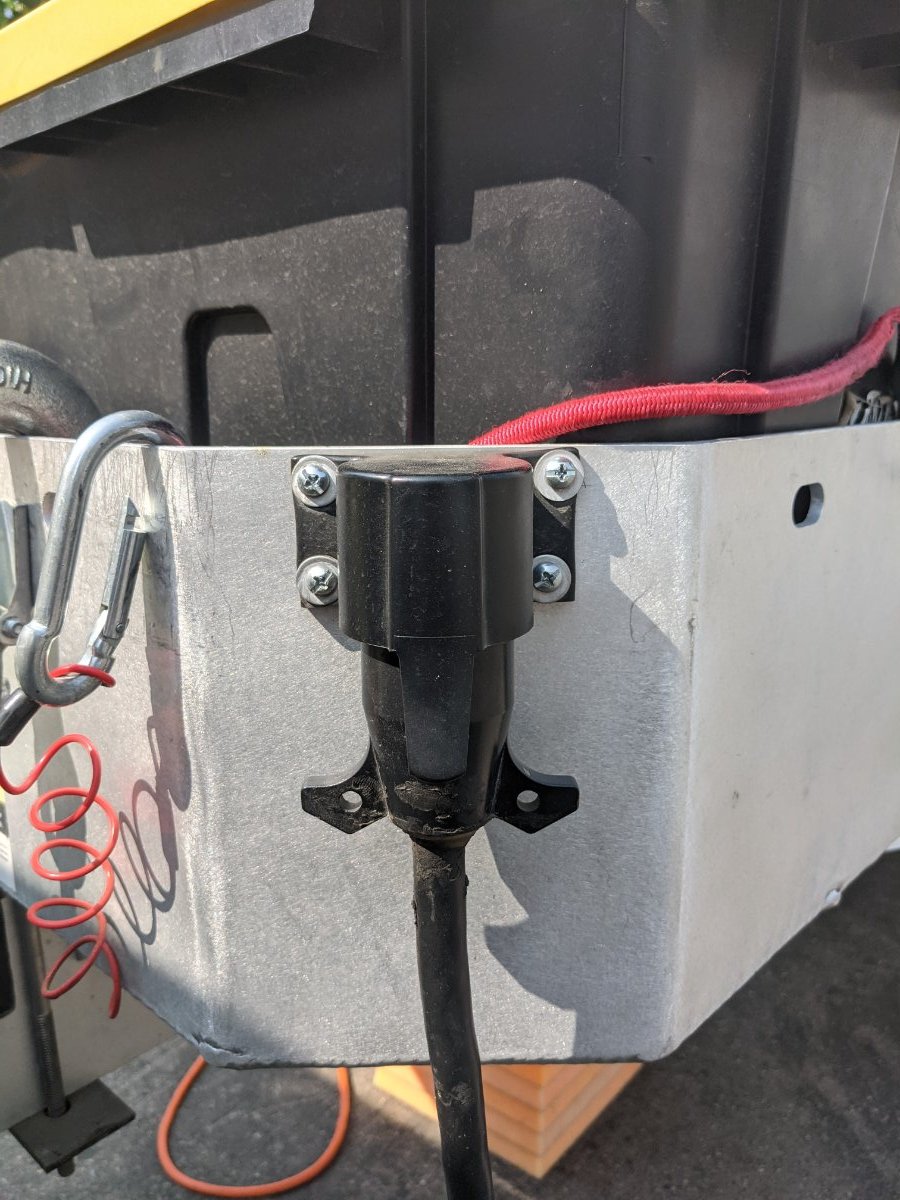
Ours is working fine. I used 3M VHB tape to mount it to the cargo box instead of bolts. I used the primer that 3M sells for the tape on both the plastic holder and the metal cargo box. It's been holding up quite well thus far. It is a nice low-stakes test of using VHB tape on the outside and w/o any caulking to protect it - 3M says this is usable "indoors or outdoor" and that it "Creates a permanent seal against water, moisture and more."2 points
-
I have not had a problem.
2 points
-
Just pointing out the added weight of the water. Looks like you have considered that. Here's a thought... You could get yourself an old fire truck (pumper) for a TV and boondock all summer without a refill 😆!2 points
-
Mike, I graduated from Starkville HS (1972) MSU (1976) Played Football and ran Track2 points
-
With a heavy duty truck I have an almost limitless payload for everything I can stuff into it. The tank might also be handy to have a portable power washing setup for maintaining outside surfaces at home and on the go. The black tank is noticeably smaller. If the two tanks were combined into one large grey tank, the composting toilet was used, and an external water source (in the bed of the pickup) was available to top off the fresh water it could go a long time. All I would need is another external tank for urine or dump the included unit every couple of days.2 points
-
Thought I would put this up here in case anyone else is having the same issue I had. Soon after leaving the factory, the plastic strip that lines the bottom edge of the tank cover started to come off. It was a very cheap piece of 'L' plastic kind of glued on here and there. Really, it was pretty ugly even when new. So I finally found this very nice 'U' channel on Amazon that fits perfectly. These trims come in a vast variety of sizes and colors. It appears to be a very high quality vinyl compound and has internal fins that grab the cover on both sides, so no gluing is involved. I just set it in the sun to warm up and gently tapped it on with a rubber mallet. Before doing this, I carefully scraped off all the old glue residue with MEK and a plastic razor blade, followed by a light scrub with a 3M WHITE scotch brite pad (love these for tough cleanup jobs on the trailer, no scratching) Then I filed all the edges to make sure there were no sharp edges or bumps in the fiberglass. Then a good wash. Here's the product: https://www.amazon.com/gp/product/B01F9FXQLU/ref=oh_aui_detailpage_o01_s00?ie=UTF8&psc=1 This looks so much better to me, and the fit is great, better than with the stock plastic trim. It's supposed to be marine grade, so hopefully it will last. My Elite took 5 feet to do. Those with the Elite 2 will need to measure, but the stuff is available in different lengths. It's all in the details! Dave
1 point
-
My fan has worked well since pick up in the spring of ‘16. Earlier this year the gears that open and close the top disintegrated. It was a fairly straight forward job to replace them. I looked at my circuit board but didn’t do anything to it. It’s been through all kinds of weather. I might take another look at it when we get home from this trip. Mike1 point
-
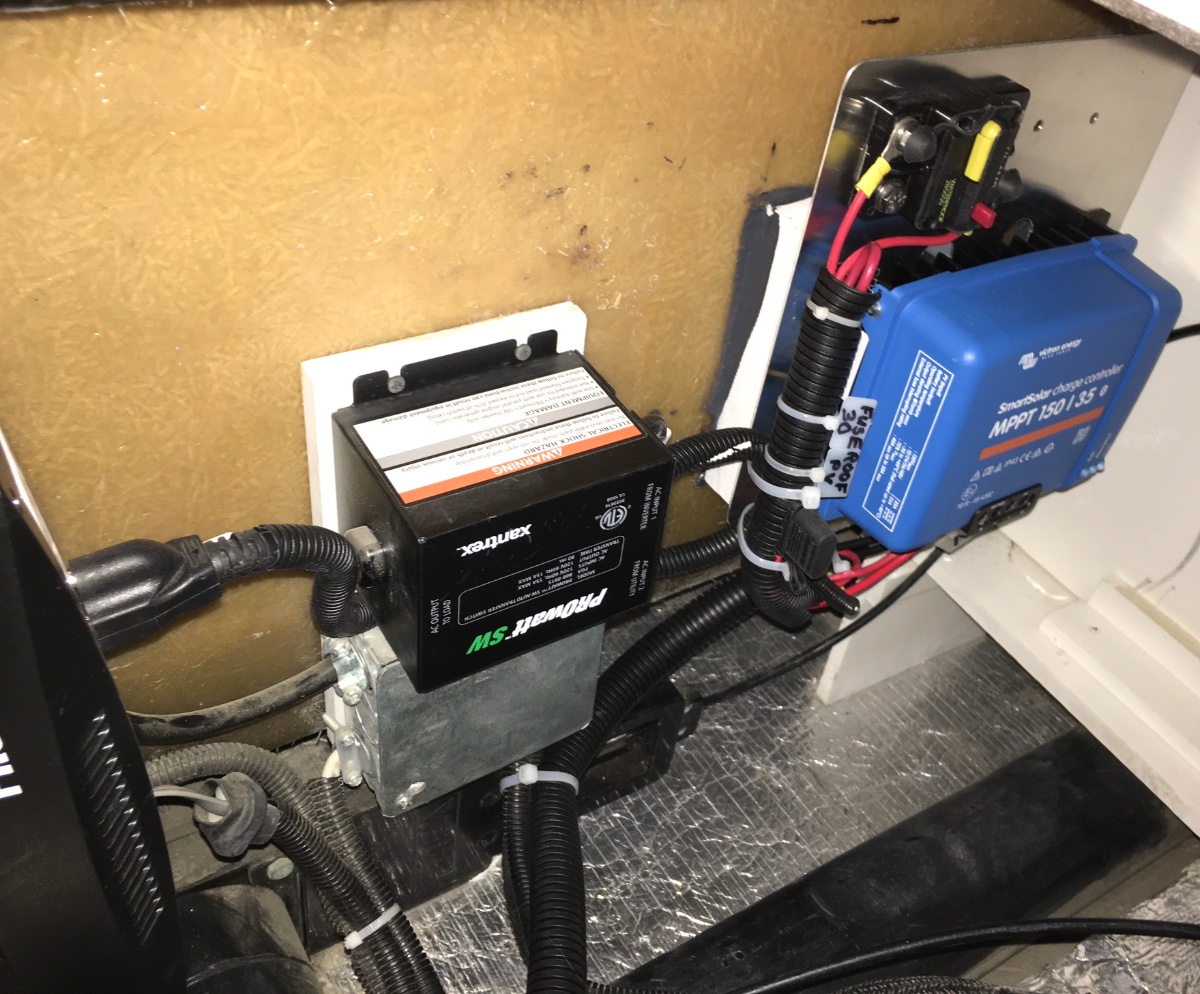
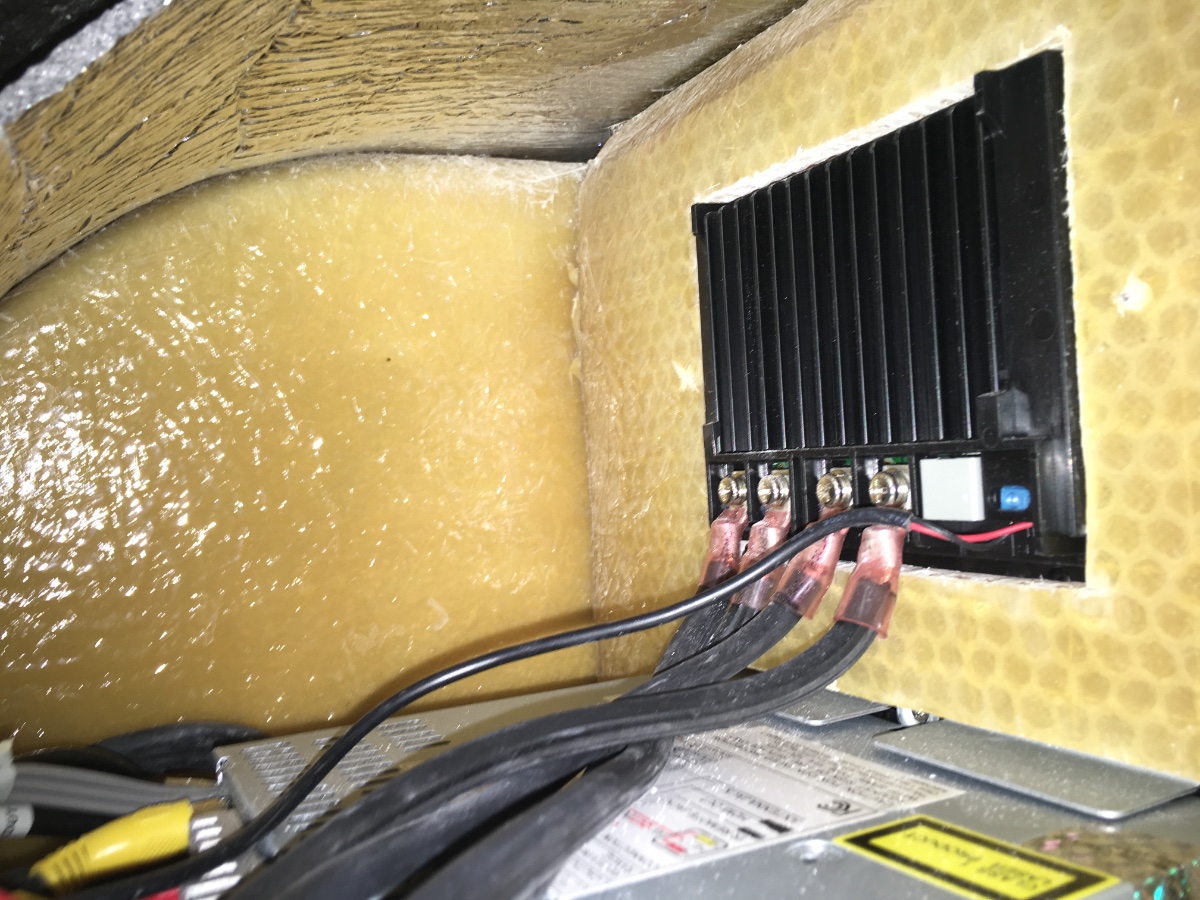
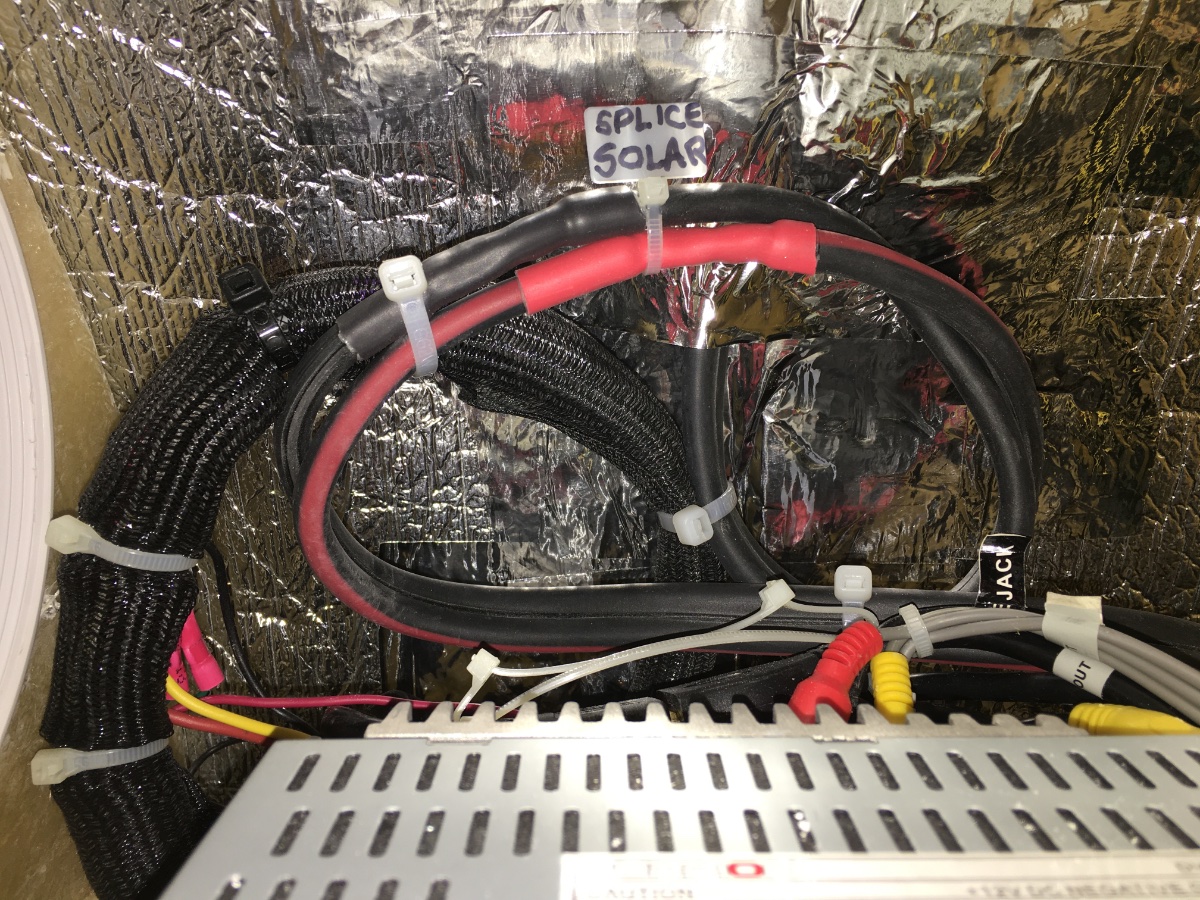
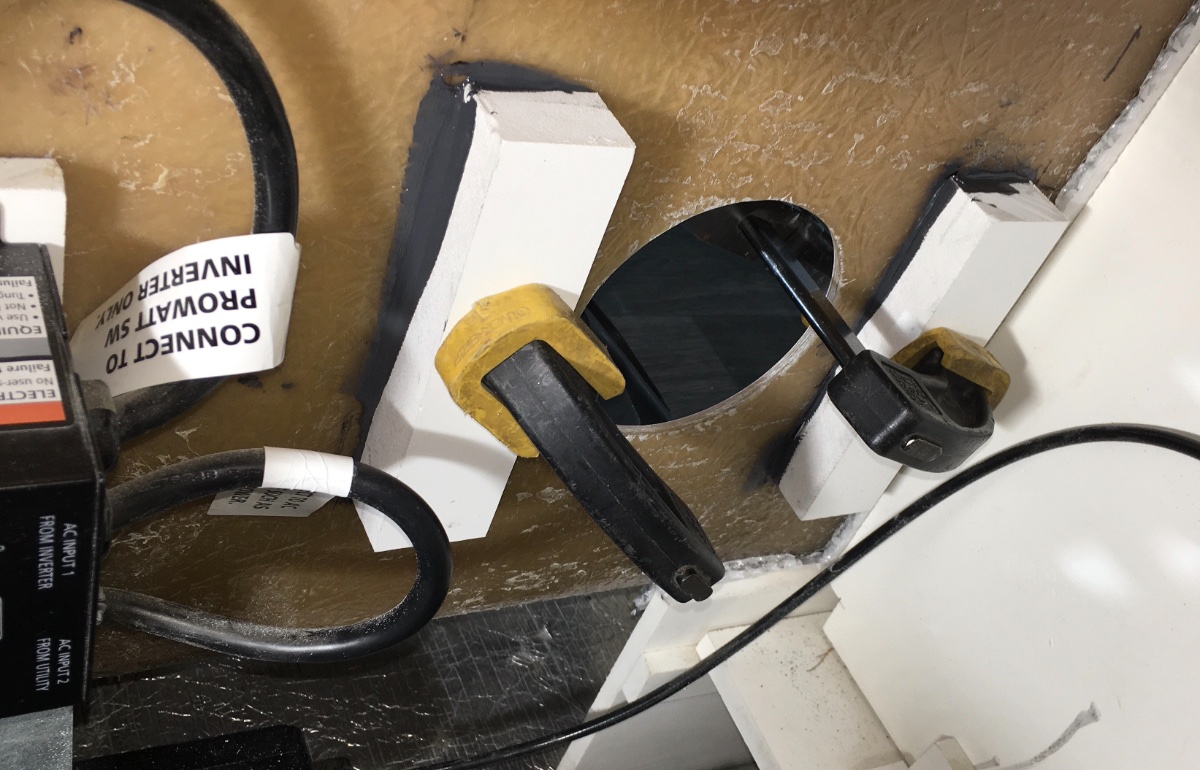
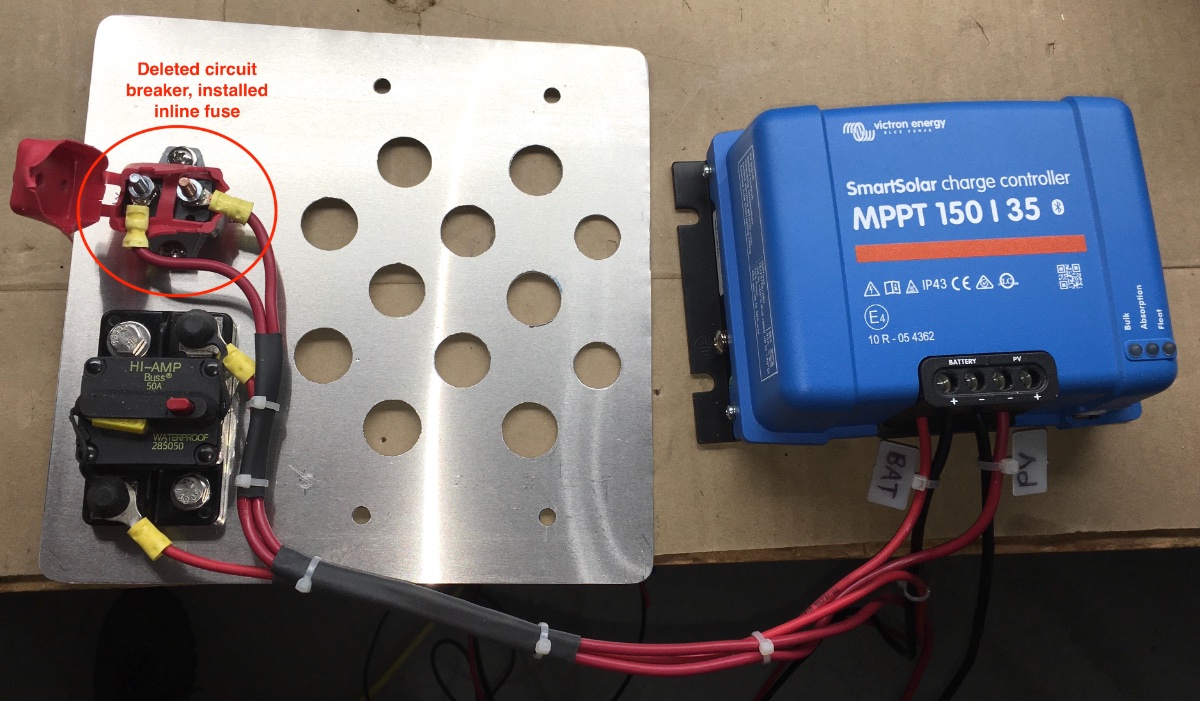
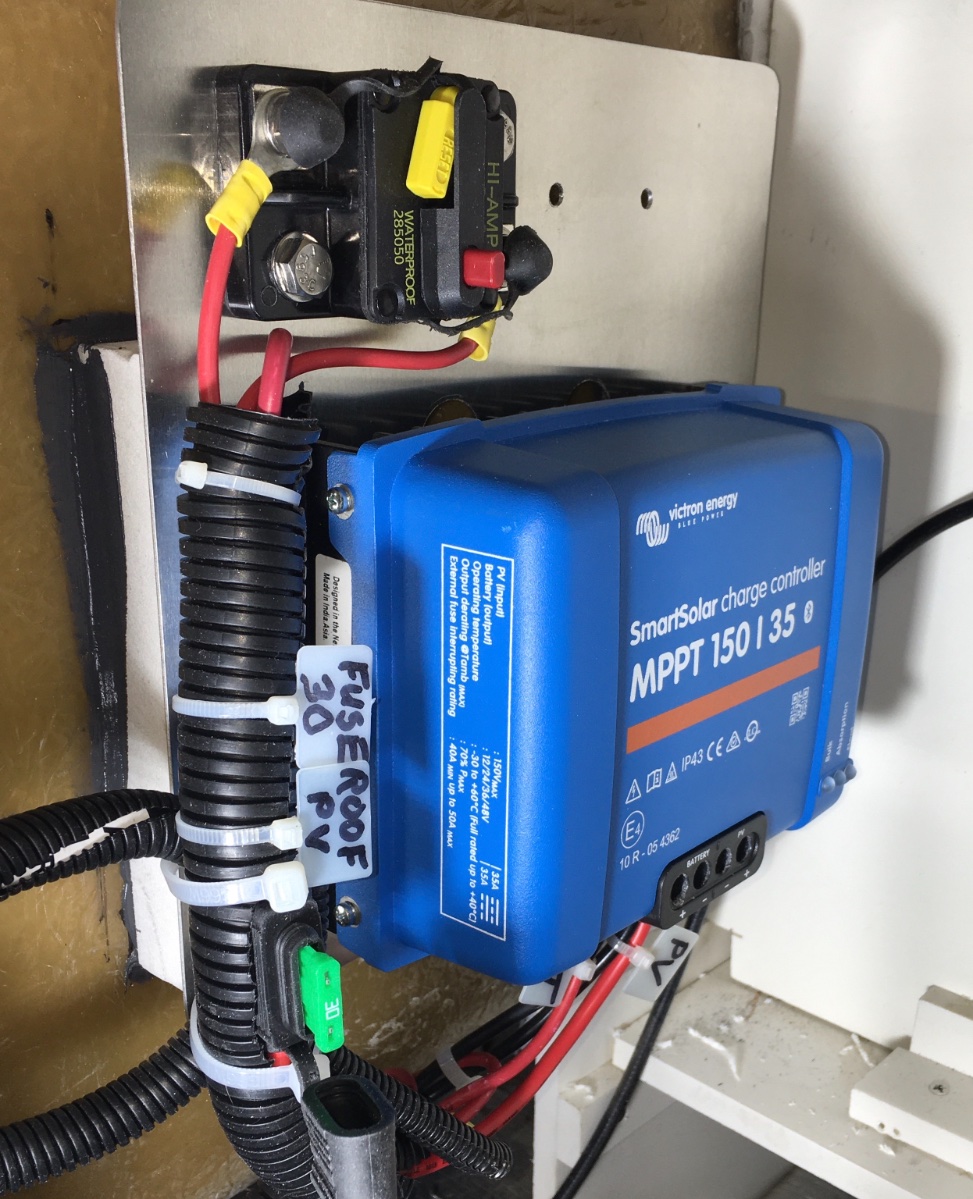
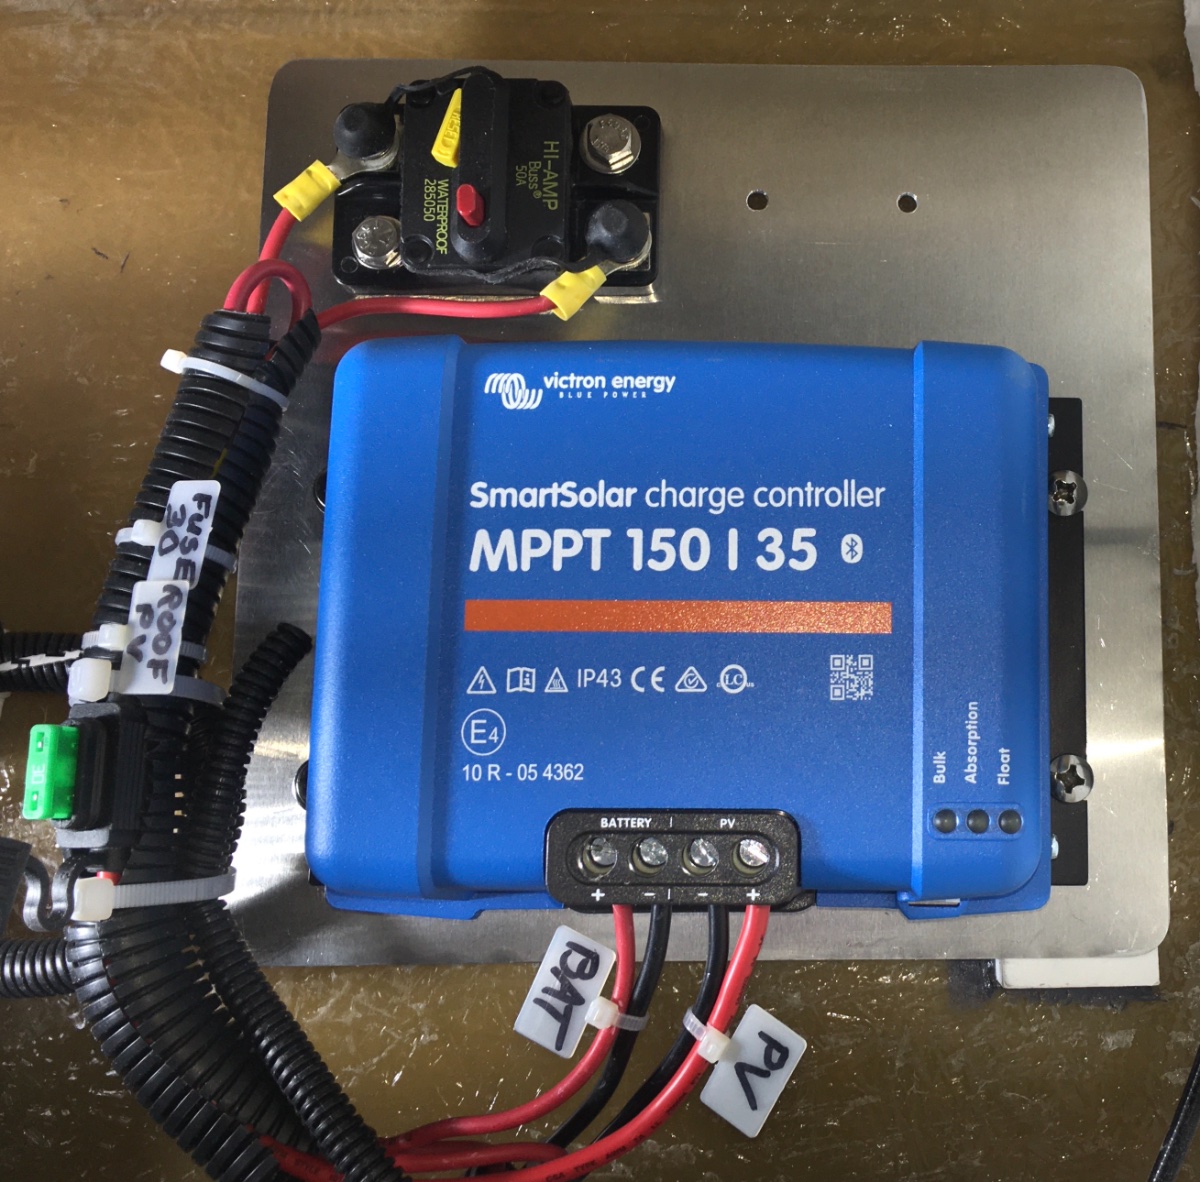
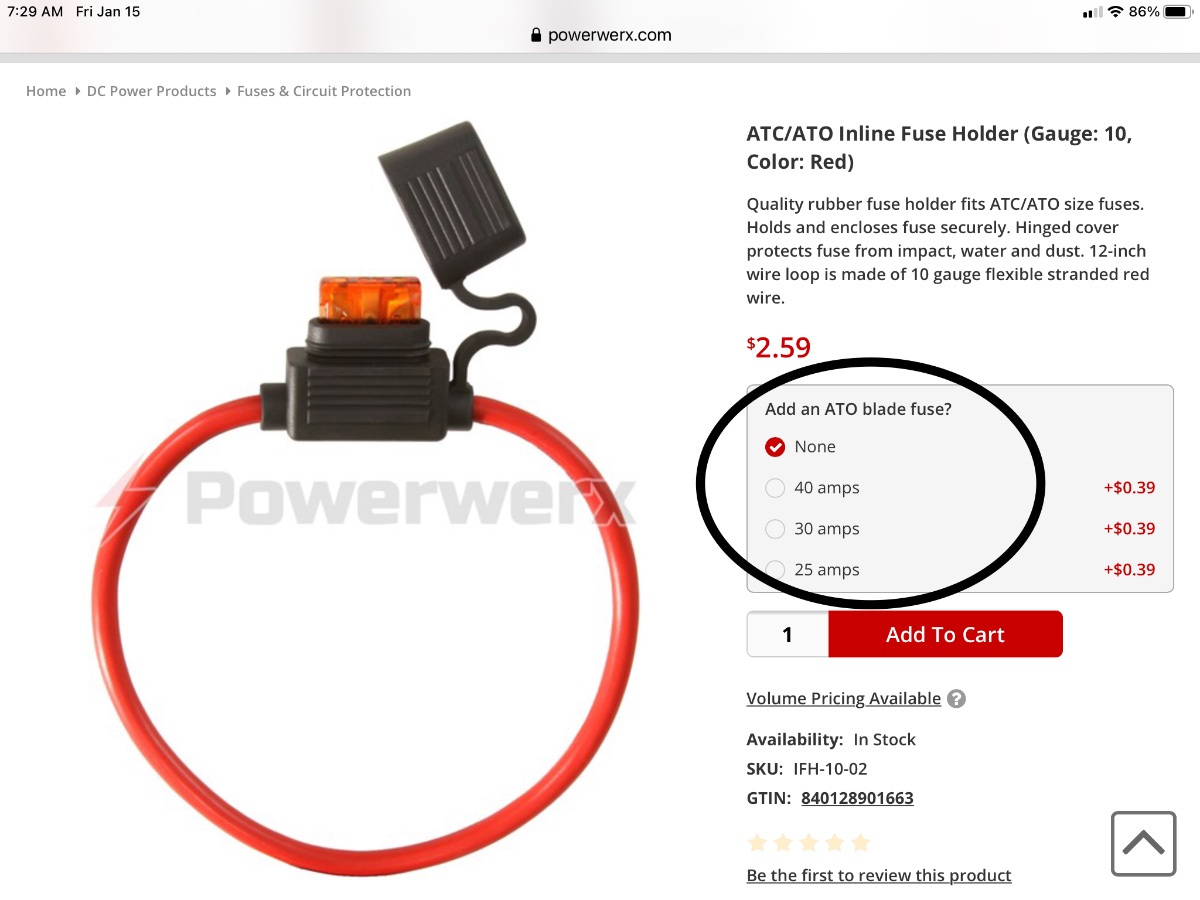
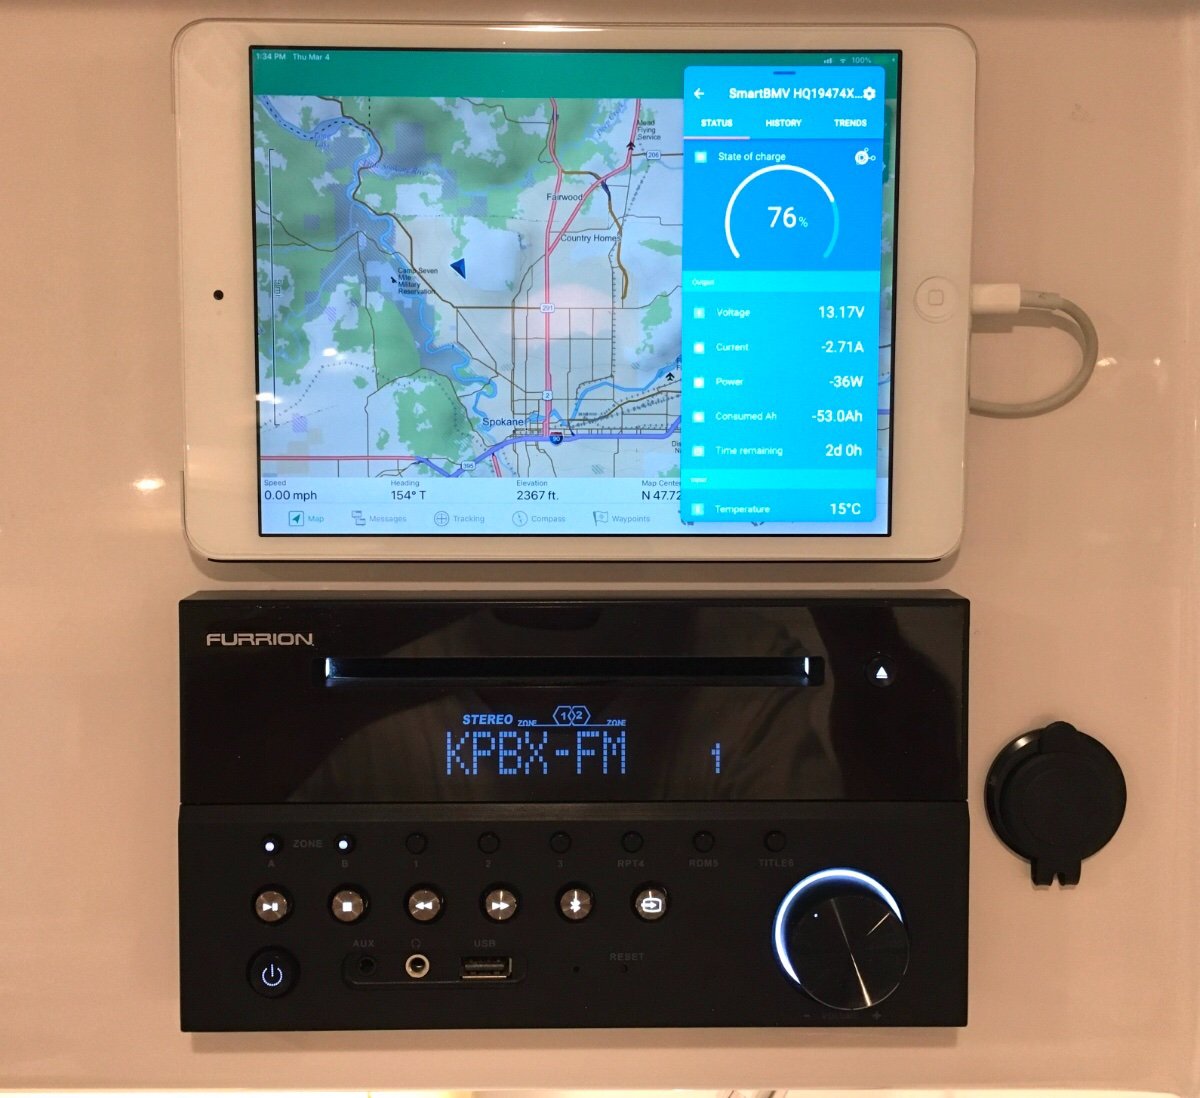
Remove the Zamp unit from over the stereo head - two input wires (from the roof), two output wires (to the battery) and the small temperature sense probe wires Cut off any excess length and then splice the two sets of cables together and secure them. This little cable tie is good for making I.D. labels. Drag the temp sense cable down into the lower compartment, you can sell it with the used Zamp controller. It has a value of about $35 new. Add extra aluminum tape if needed to seal and secure the wall insulation. The location I selected is a great spot for a big ventilation hole, an air intake for my Lithium Battery Box Powered Vent System , so I needed to add 1" thick HDPE spacers to let air pass through, using JB Weld epoxy, clamped overnight: I made a mounting plate from heavy sheet aluminum, drilling holes to allow air to get to the bottom of the control unit. I originally planned to use the Oliver installed self reseting circuit breaker, but decided that an inline fuse would be more reliable. The manual circuit breaker on the output wire is similar to the Oliver one installed across the gap on the DC bus. It allows you to disconnect the solar input by pressing the red button, and it is reset by closing the yellow arm back inwards:: This is the inline fuse, it is very nicely made and has heavy enough wire. It will handle up to a 40 amp fuse, I installed a 30 amp ATC one: Victron SmartSolar Charge Controller MPPT 150/35 brochur:e Victron Charge Controller 150:35.pdf This is pretty technical, it shows the Zamp roof panel charge curve, I added some data points showing where a lead acid and a lithium (LiFePO4) battery open cell voltage would appear. A lithium battery has a higher operating voltage, so a regular PWM controller is not as effective as a more sophisticated MPPT one that is able to alter both output voltage AND output current. A PWM unit is connected directly to the battery, and it simply switches on and off very rapidly to control the current. It is very crude, but inexpensive and reasonably effective under optimal conditions. I grabbed these descriptions from solar website, I cannot remember which. It and the following one offer some interesting comments: Temperature sensing charge control - the Battle Born batteries do not require (nor can they use) this function, it is built in to the batteries' onboard Battery Management Systems (BMS). However, by installing the optional battery temp probe that connects to my Victron BVM-712 Smart bus, the VictronConnect app will connect using its Bluetooth network with this compatible "smart" device. When I look at the app screen, the battery temperature is shown on both the Solar page and on the Batteries page. That temperature reading is very helpful in monitoring the health of the batteries. Settings: using the app you can alter a whole bunch of parameters. The important one is the charge absorption voltage. I set it to 14,.4 volts, a little lower than the Battle Born recommended 14.6 volts. I have read that a slightly lower voltage is healthier for those batteries, while not significantly affecting their actual capacity (percentage of charge). This is the same reason they recommend that they are not left continually "cooking" at 14.6 volts from shore power and a charger like my Progressive Dynamics one, it diminishes their life span. https://battlebornbatteries.com/programming-a-victron-smartsolar-charge-controller/ John Davies Spokane WA
1 point
-
Thanks for the very kind words. It was tough to get that particular pic, being buried behind and on the wrong side of that 6” round access hole. I took a bunch of pics with my iPhone, blindly until one came out centered and in focus 😬 https://olivertraveltrailers.com/forums/topic/5357-how-to-mount-a-tablet-computer-in-place-of-the-zamp-controller/ John Davies Spokane WA
1 point
-
We haven't had either issue (and ours is indeed mounter vertically so as to make it tough for any water to get into the open end of the plug)1 point
-
My local RV repairs guys told me our local high humidity causing condensation shorts the circuit board. The circuit board that came the fan and the replacement circuit boards I have purchased from Etrailer are not coated to protect them from moisture. It's just a matter of time before moisture will foul the board without a conformal coating to protect the circuits. Like i stated before, I went through three circuit boards. The last board I replaced, I painted it with conformal coating. It's still early in the life of the new board but I'm feeling like this will solve the issue or water shorting the circuits and the fan going haywire. https://www.amazon.com/MG-Chemicals-Premium-Acrylic-Conformal/dp/B07B8RY7M6/ref=asc_df_B07B8RY7M6/?tag=hyprod-20&linkCode=df0&hvadid=312443844861&hvpos=&hvnetw=g&hvrand=348473701483492761&hvpone=&hvptwo=&hvqmt=&hvdev=c&hvdvcmdl=&hvlocint=&hvlocphy=1014226&hvtargid=pla-554140506900&psc=1
1 point
-
Not all sites have full hookups, especially in the West and in National Parks and Monuments. Do not expect to have that convenience everywhere you go….. There are a number of different products, you can use these two with a 3/4” garden hose to drain the grey tank into the sewer opening. In some western states, when primitive boondocking in the desert, it is acceptable, but not actually legal, to run the hose away from the site and under a sage brush. Let it trickle over a few hours to prevent erosion! I have not used that second item, but i use the first and it works most excellently! The four ears are way more secure than the two ears on the Valterra version, those snap off if you look at it wrong. But buy a second Camco one as a spare, regardless. Alternately, just use the big 3” stinky hose that comes with the Ollie, it works fine for just grey water, though it is bulky and you must add a support thingy to allow it to drain properly. Or go out ocassionally and lift it up to get the trapped water to flow out. For a black tank with, errr, solids, you must wait until the tank is full, then drain it in a big rush, followed by a rinse, or all that yucky stuff will remain in the low spots. John Davies Spokane WA
1 point
-
I'm adding screenshots of the product for the day the Amazon link stops working. That looks really nice. I bought some u-shaped trim at an auto supply for ours years ago.
1 point
-
There’s definitely room to extend it under the dinette seat, and more than double it’s size; but the question then would be how to replace it if ever needed. The current one can be replaced easily by removing the raised part of the floor - perhaps a slightly larger tank could be angled in.1 point
-
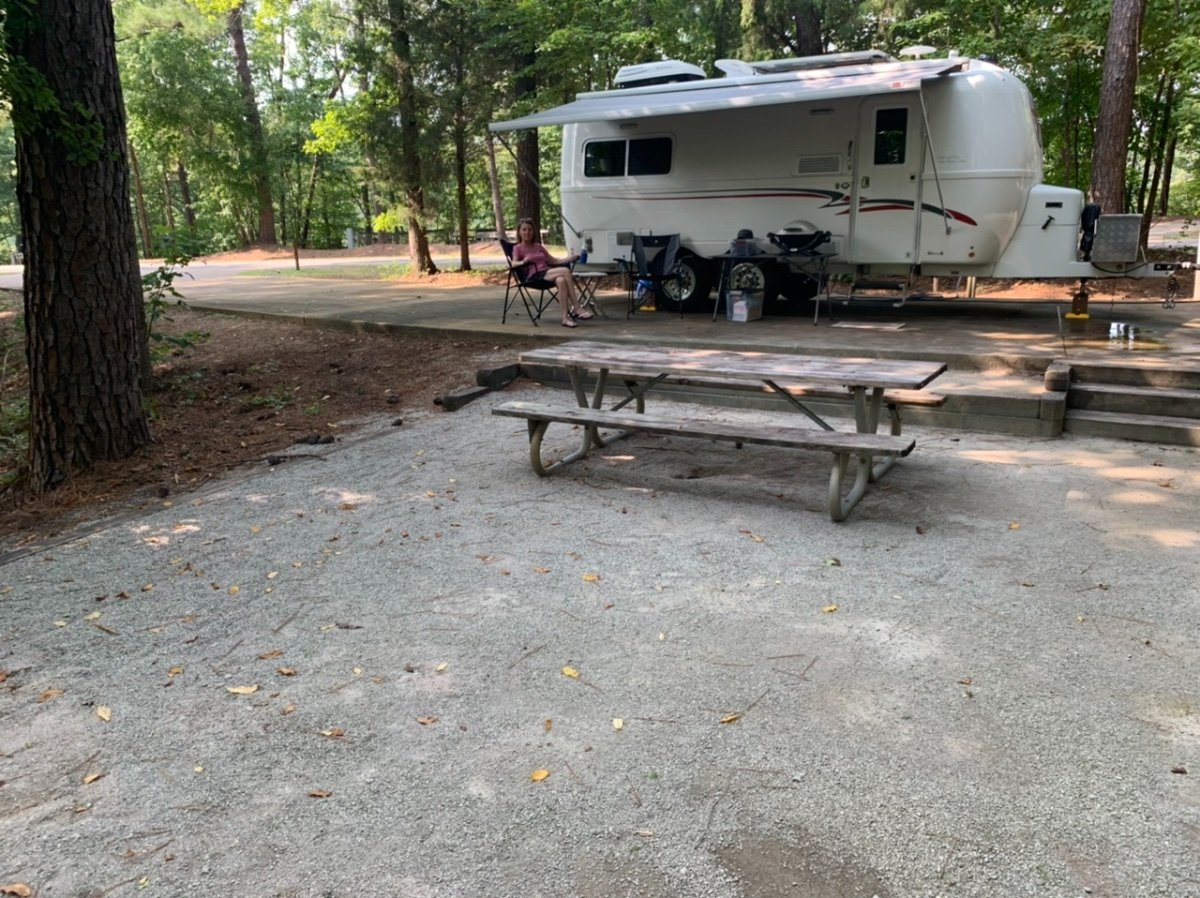
Nice shots, we REALLY like COE campgrounds!1 point
-
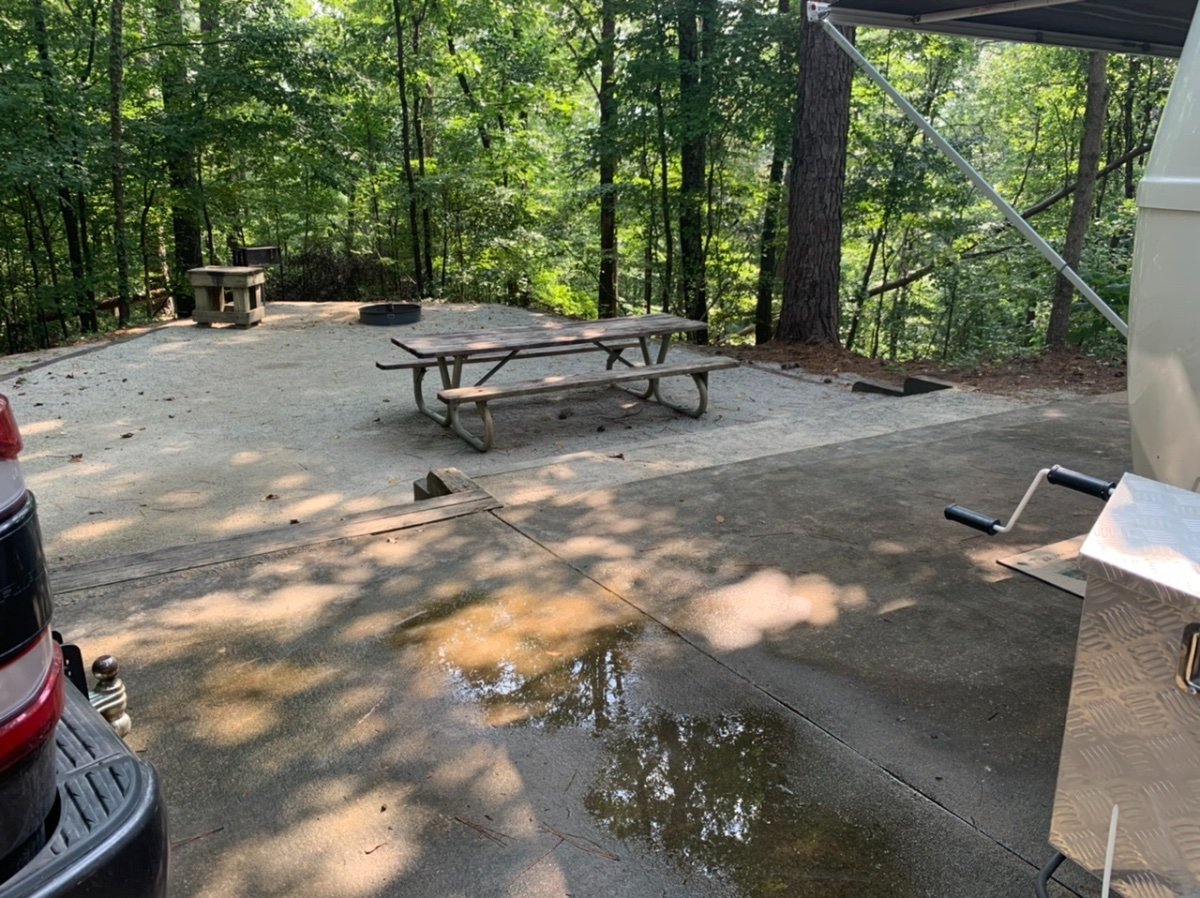
Camping at Deer Lick Creek COE just outside of Tuscaloosa. Just one other camper in our loop, probably a dozen sites around us empty. Hot and humid but quiet!
1 point
-
i stumbled over this post while looking for something else. I have been unhappy with the factory trim. This looks like a killer solution. Just ordered the trim. Has anyone presented this to the factory for production of new trailers?? Yes, Have more than i can use.. I would be happy to share1 point
-
Hi, thanks for your question! There was a thread about this a few years ago, but I can’t find it. I even started a service ticket back then asking WTF? I never got a satisfactory answer about where they got that figure. (The same ticket asked why they did not have a correct tire pressure chart.) The bottom line is that 120 ft pounds is simply too much for a 1/2” stud. Typical recommendation is 90. Some sources go as high as 110. This one says 90-100 for a 16” alloy wheel. And this one: Tire Rack, Wheel Lug Torquing OTH, 120 is perfect for a 9/16” stud. Do some research, if you can find a source that says 120 for Dexter 1/2” studs, please post a link, I would appreciate it. I have been using 90 for five seasons with no problems. After the initial installation I retorque them after say 100 miles, and they rarely need any additional torque after that. How is the download working? I haven’t been back to this thread in quite awhile. I am still using the log, it has been a great help. John Davies Spokane WA.
1 point
-
Hello John, I noticed on your service list that your torque values for the lug nuts is 90 lbs this is different than the service bulletin posted by Jason / see below 120 lbs seem a lot. Please explain why you choose a lower torque value than the factory recommendation JEssary Oliver Staff 40 Posted March 10, 2017 TORQUE SPECS WHEEL LUG NUTS STAGE 1: 90 LBS STAGE 2: 110 LBS STAGE 3: 120 LBS1 point
-
I hate mine too but I'm lucky that my counters are more ivory so it's not as distracting. Someone here recently painted theirs with Krylon, but it looked to be quite the job. The frames look easy but not the interior parts. I also read that total replacement is somewhere in the $500 to $700 range. Too expensive for my taste. Let us know John if you ever tackle it; if anyone can do it, it's you!1 point
-
Send a note to Jason Essary through the service ticket system.
1 point
-
Bear in mind that a 100 gal. auxiliary water tank will weigh 835 pounds when full.1 point
-
A few weeks ago, after a service call in Hohenwald, we camped overnight at the Starkville KOA as we were enroute to Laurel, MS. That was my first encounter with Starkville in nearly 71 years.1 point
-
Camped at Mt. Pisgah NC on the Blue Ridge Parkway to get out of the heat in the lower elevations last week. Highs at home in the mid 90s with high humidity. Highs at Mt. Pisgah, at 5000', were upper 70s and lows lower 60s at night. Found a nice shady site, did not take solar panel this trip, just gen-set. No electricity or water on these sites, but can't complain at $10 per night with the Geezer card. Use a 15 gallon Camco tote and tow to the dumpstation daily, hard to completely empty Ollie's tanks with downward sloped dump station in both directions, prefer to use a tote. Nice campground for a walk: View from the top of Devil's Courthouse on the Blue Ridge Parkway, we had been seeing smoke from Oregon fires, but this shot turned out OK, nice hike to the top, too1 point
-
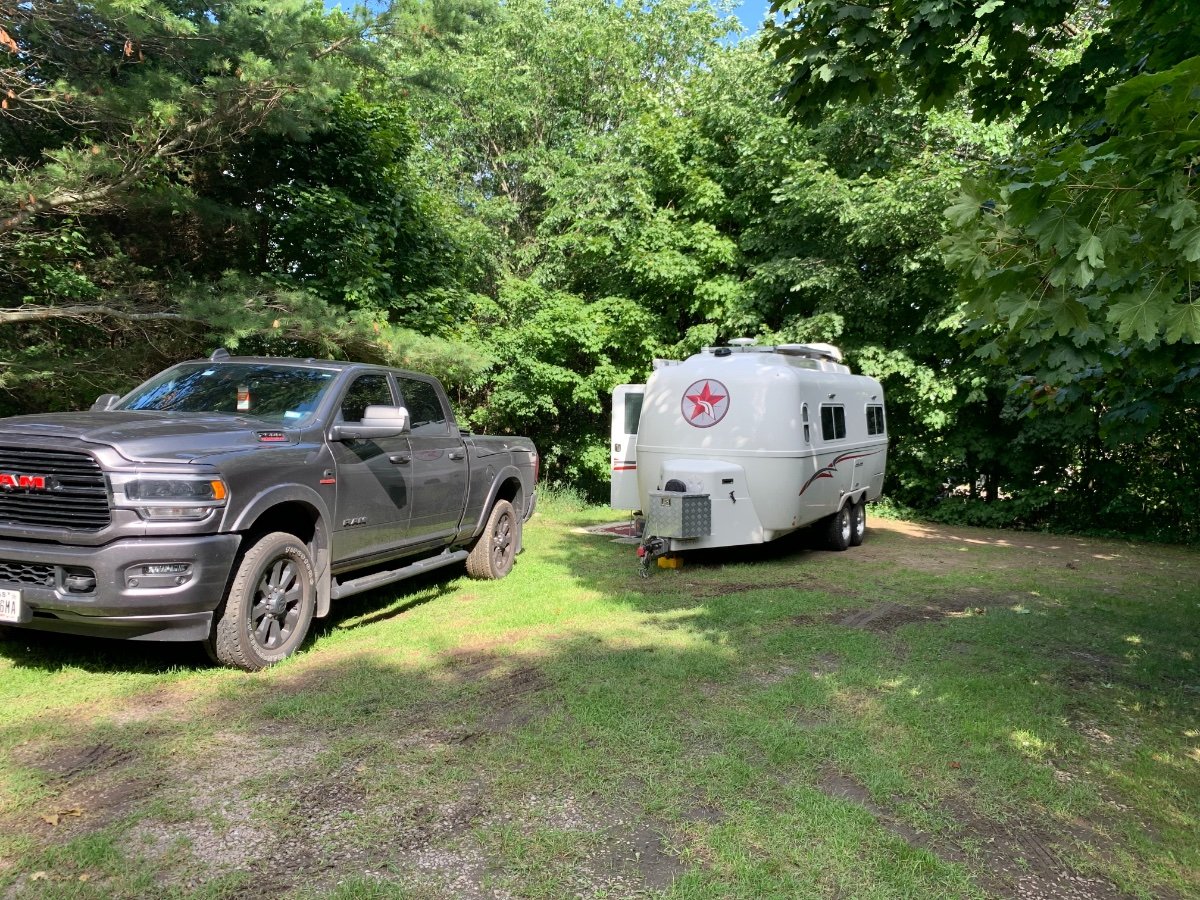
Camping in Vermont this weekend. We’re at Grand Isle State Park at Grand Island on Lake Champlain about 20 miles south of the US-Canadian border. Glad we brough sweatshirts, it didn’t get out of the 60s today. This is a nice park, well maintained. No hook ups, but large sites and lots of privacy.
1 point
-
Hull 688 has this issue. The trim keeps coming loose during every trip. I've tried some duct tape because I didn't want to glue the strip on. That hasn't worked. I got super lucky when search actually found this thread! I do believe this is the first time a forum search has provided a result I was looking for. 😉 The link is still good after nearly 4 years!1 point
-
John TY TY TY, I was looking for something along this line. Especially the 2 & 3 Tabs. Maggie said we could $ave Money by buying an Oliver, and now i will track it and show here how much we will be $aving... I too will keep a paper log... which is an empty printout of the TAB, and i will fill it in each day. when we eventually return home, then i will transfer it to excel.1 point
-
I drew a nice dark line on the socket,just before unhitching, I loosen 4 turns (ie start with line facing me, loosen to see the line return to the same spot 4 times). After getting the ball back on and whale tale in place, I tighten to see the line return 4 times to the same spot. I can always verify with threadcount as well. The Jack should never be used to raise the tow vehicle, but it is fine to raise the trailer until just before the gap on top of the receiver disappears. That is when the most slack (ie 0 weight on ball) in the chains is.1 point
-
John, Great effort, it certainly captures historical information. I looked at them, but not in great detail, although I'm pretty, or was, decent with spreadsheets, and data bases, my problem is keeping them current. Past performance is, in this case, accurate for me on future performance! So - I usually - no - always end up with pen and paper. I've done so with my new TV, and will do so with the Ollie. Simple to keep up, no electronics needed, and user friendly. Documentation on paper, works for me in this case. Yet I know I could do better. Kudos for your checklists - we used them this weekend - keeps my wife happy knowing everything is in ready order and good for launch. Its the teacher in her, herding kids all day requires rigorous systems, validation, and record keeping. Me, I'm a little more relaxed here, she contends I just "wing it" but I know the value of documentation. I just do it in my head. So thanks again.1 point
-
Torque Specifications WHEEL LUG NUTS: 90 - 120ft lbs. Note: Oliver has set 110ft lbs as the standard as of 2023 year models & older. BULLDOG COUPLER: 80 ft lbs AXLE/U-BOLTS: 70 ft lbs SHACKLE BOLTS: 40 ft lbs1 point
-
We’ll be south of Tupelo. We’re in Tuscaloosa now and leave in the morning going through Starkville west into Arkansas. Need to get home for some appointments. Last time we were through Tupelo a couple years ago you guys were out camping…. Go figure! We stayed at Trace State Park with the lakes that had no water.0 points


-
Recent Achievements
-


")


")


")


