Leaderboard


Popular Content
Showing content with the highest reputation on 01/14/2022 in all areas
-
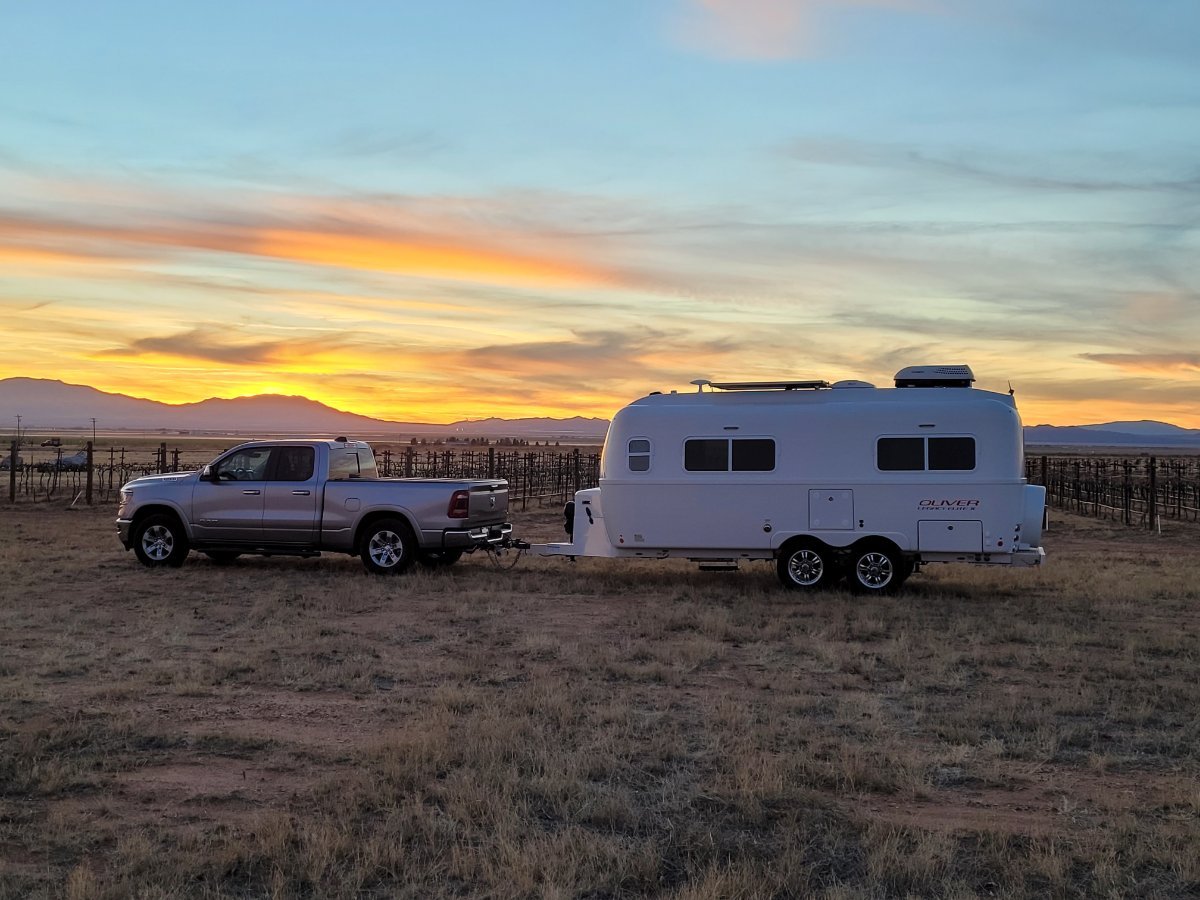
Birds & Barrels Vineyard near Willcox, AZ - a Harvest Host overnight stay 1/13/2022.
 7 points
 -
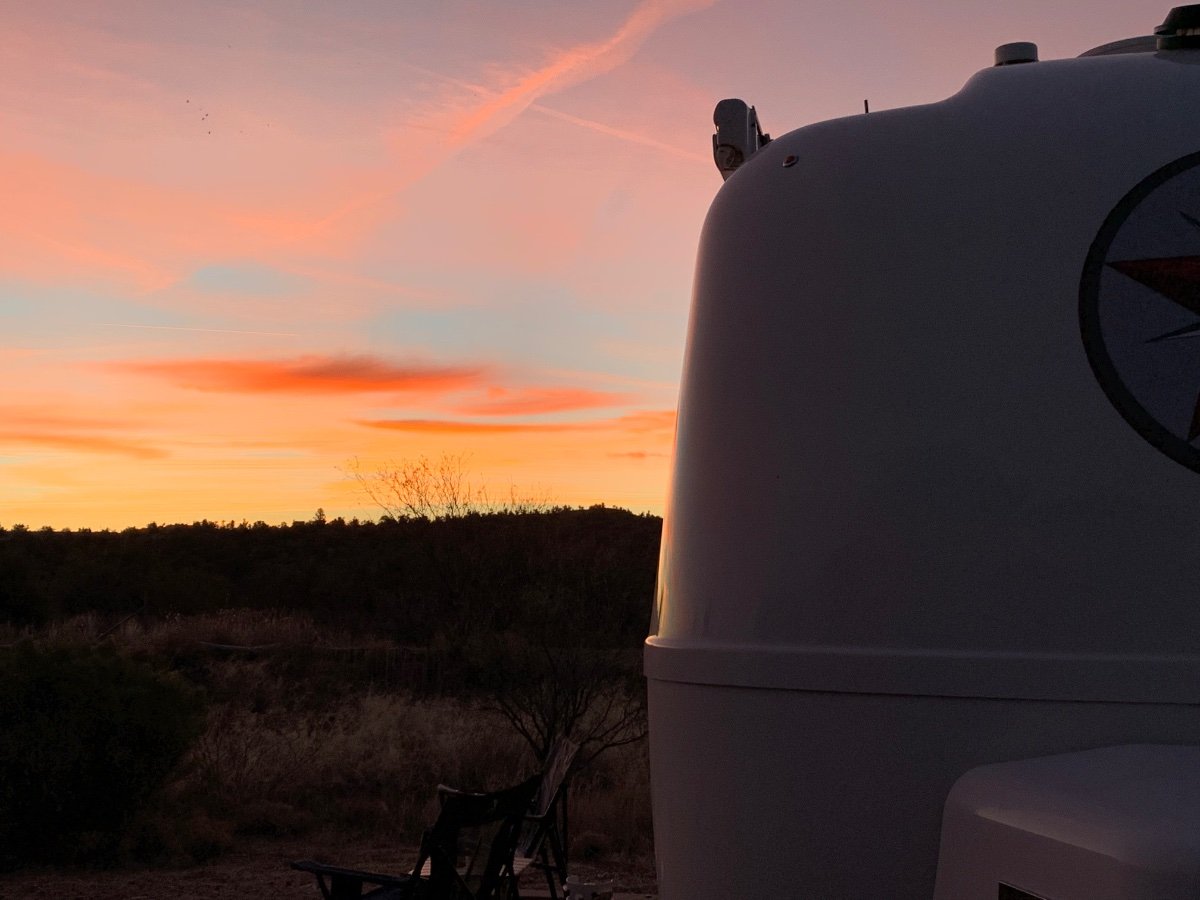
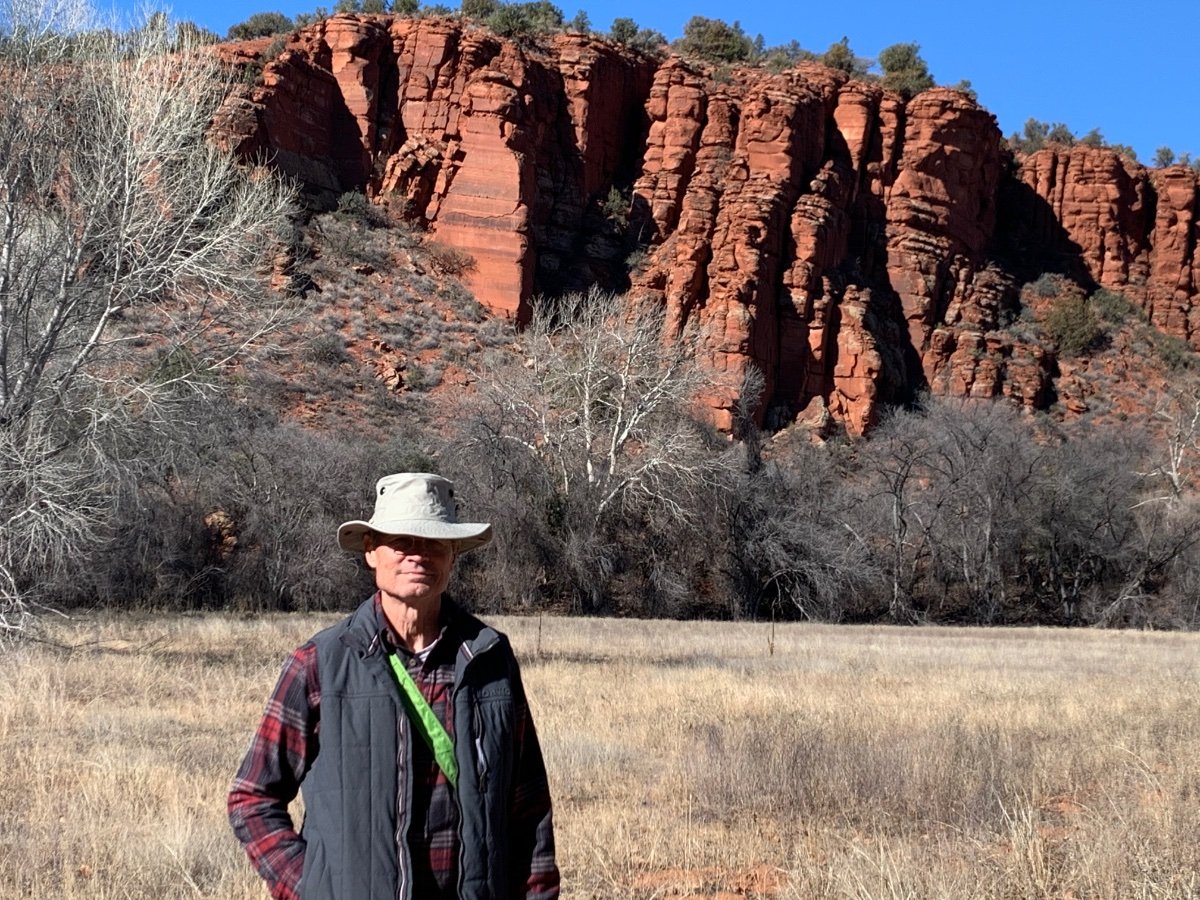
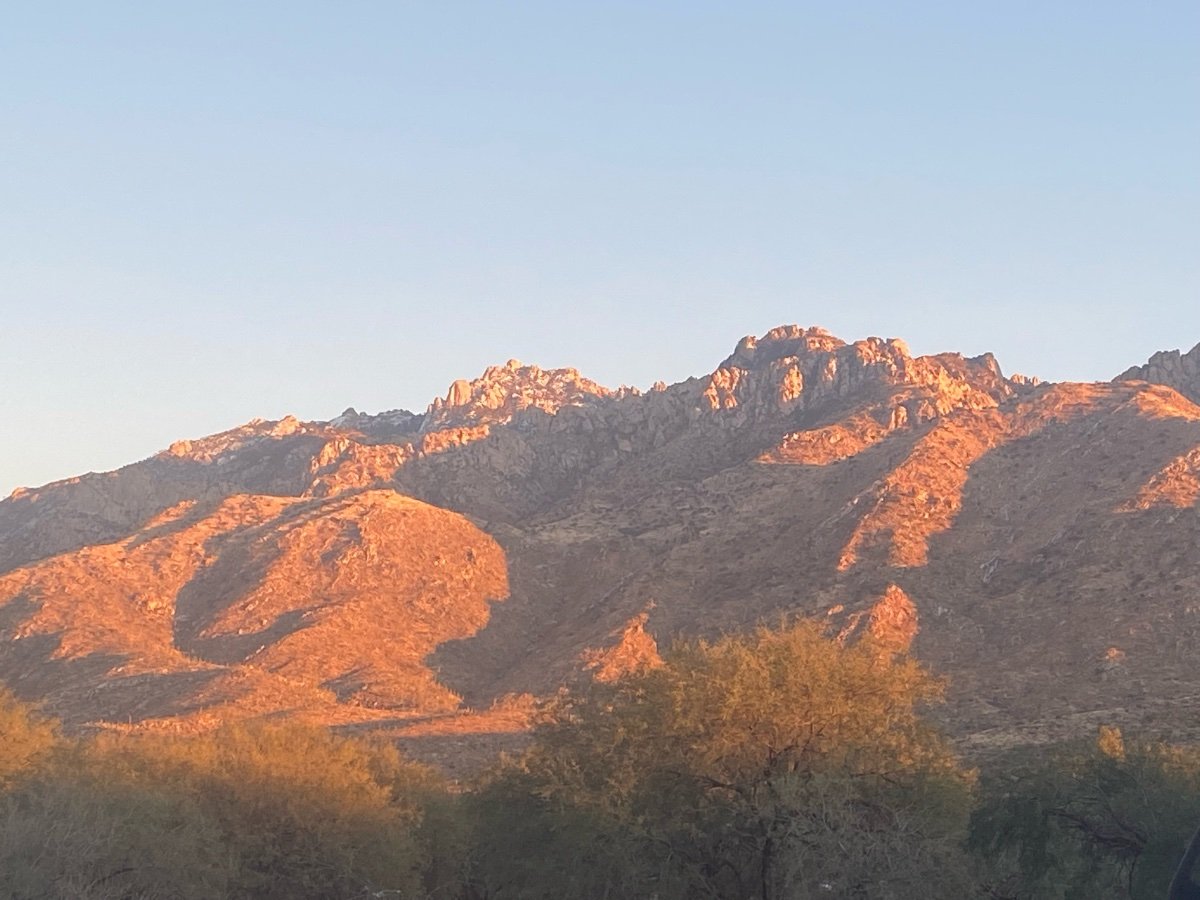
Sunrise at Dead Horse Ranch State Park just south of Sedona in the town of Cottonwood. Just 20 minutes from Sedona. This is Red Rock State Park a few miles north of Dead Horse Ranch State Park. No camping here but some nice hiking. We hiked to the top of the “hill” behind me for some great views. Dead Horse Ranch State Park.
3 points
-
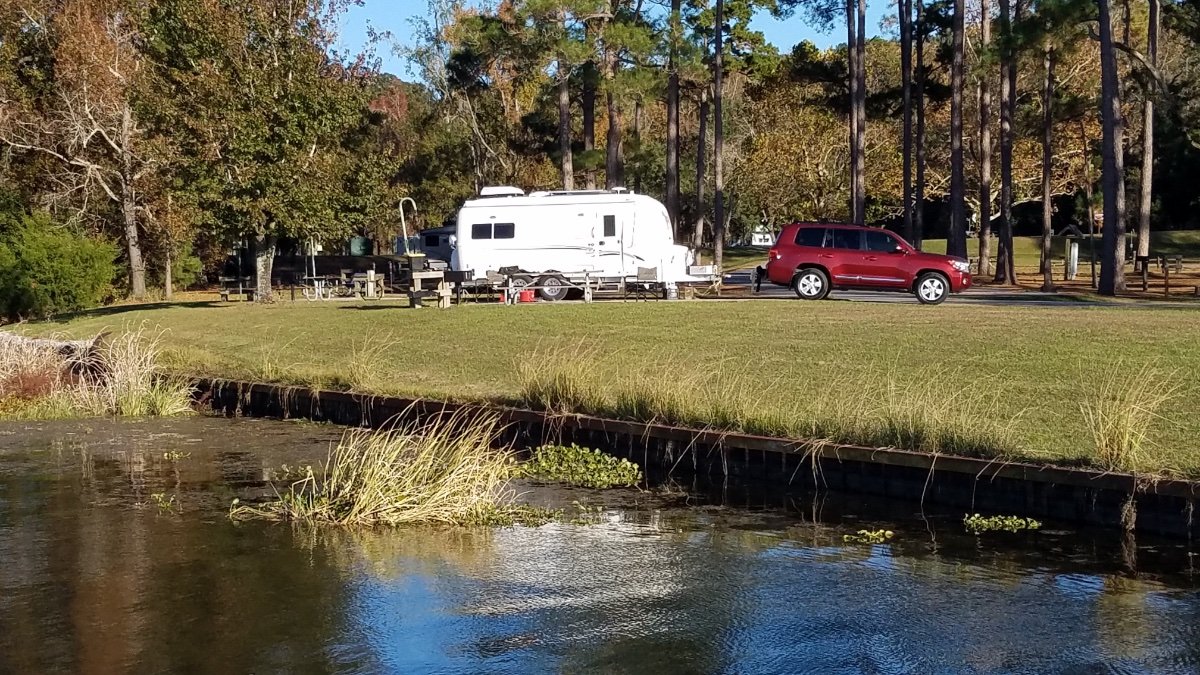
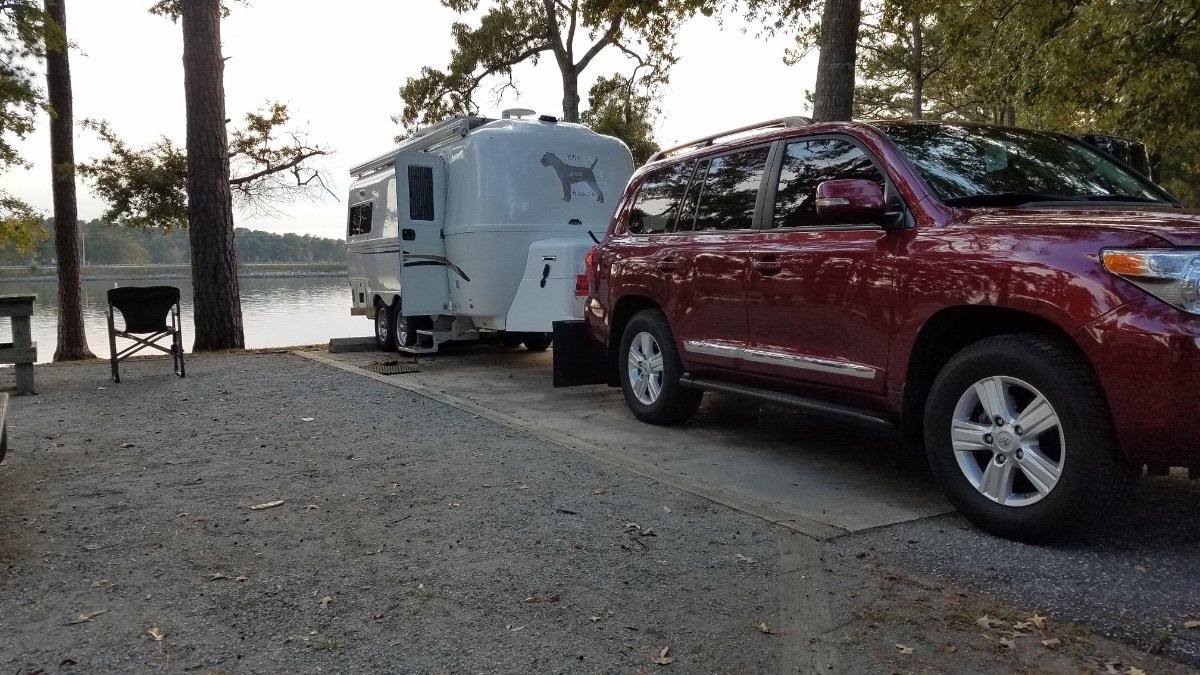
Two LEIi in the same campground. Gulf state park, Gulf Shores Al. One from Ky one from Il2 points
-
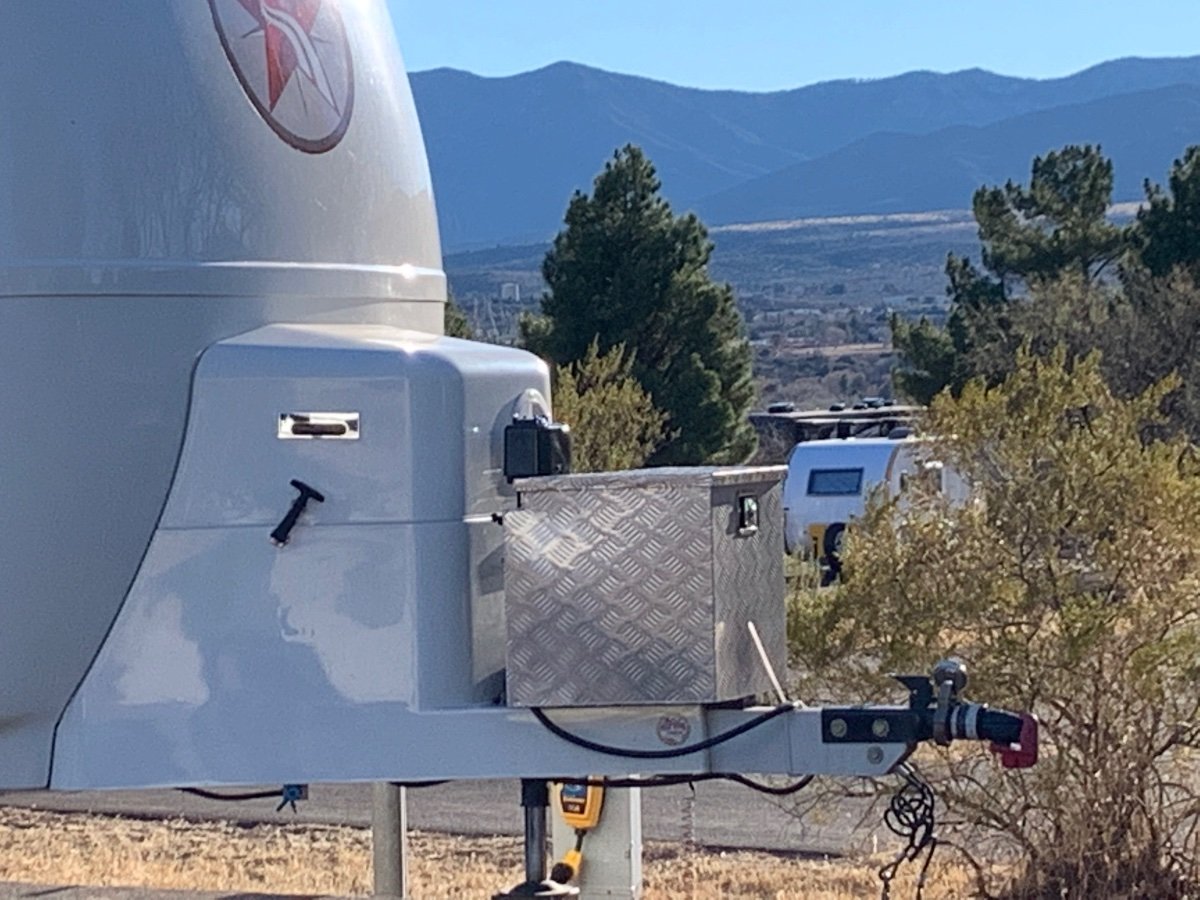
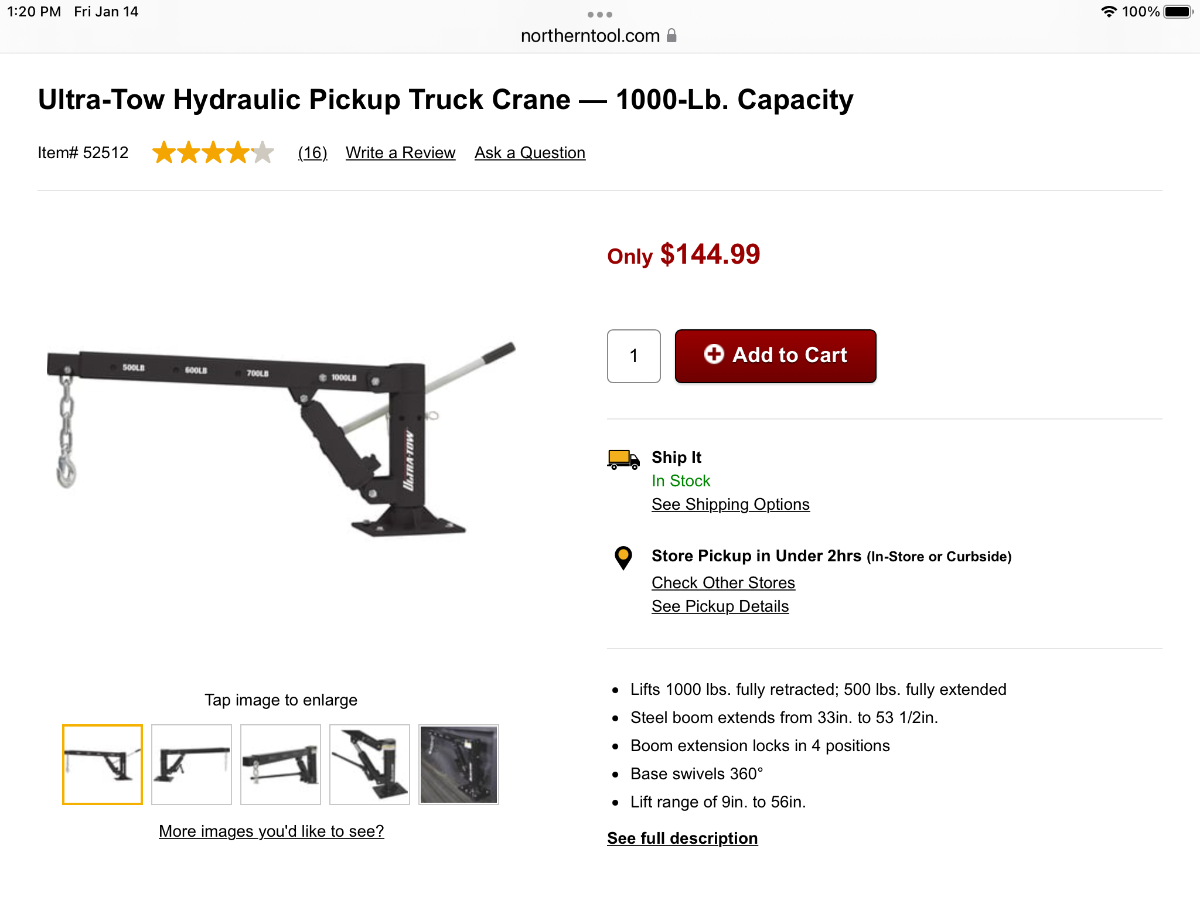
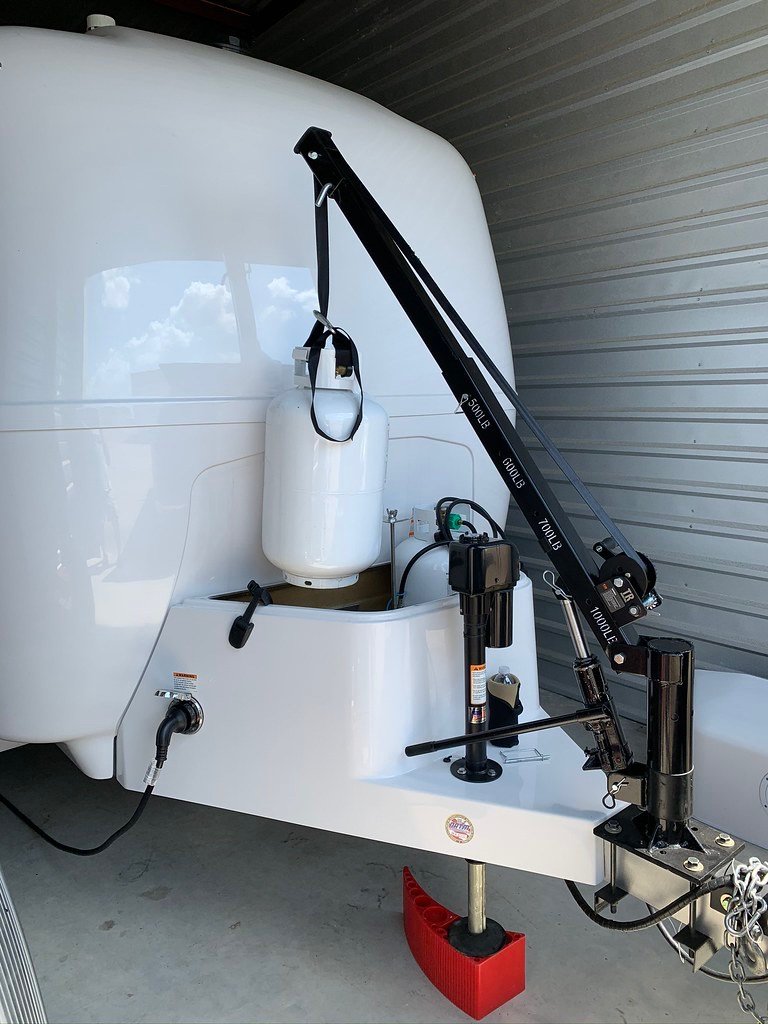
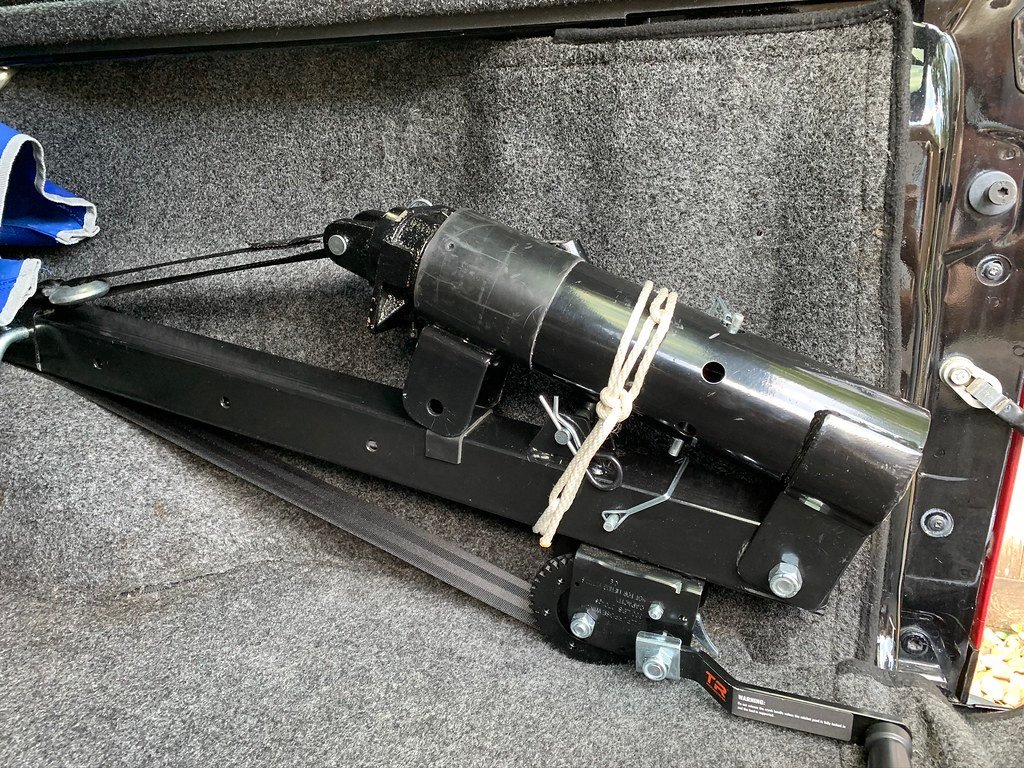
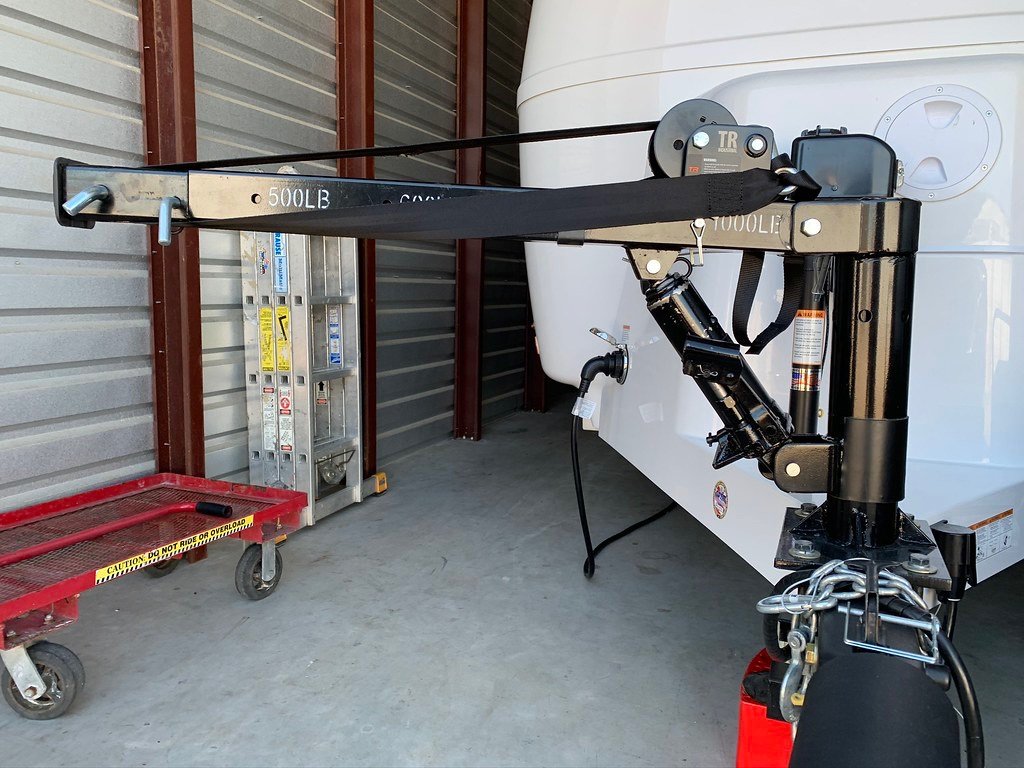
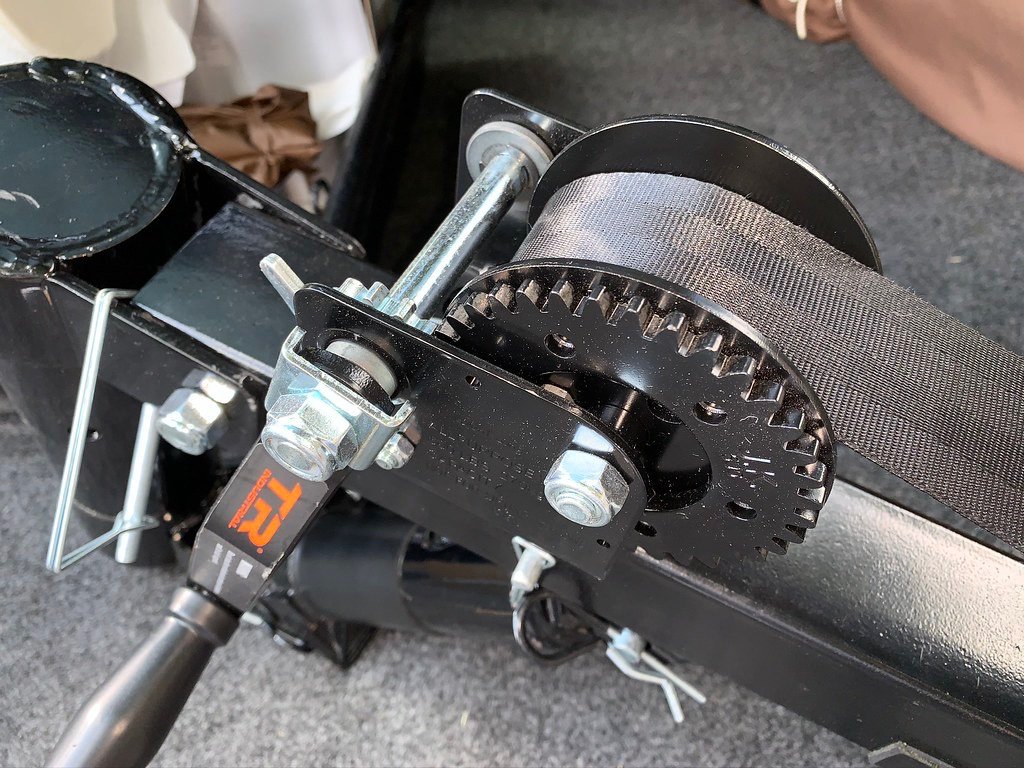
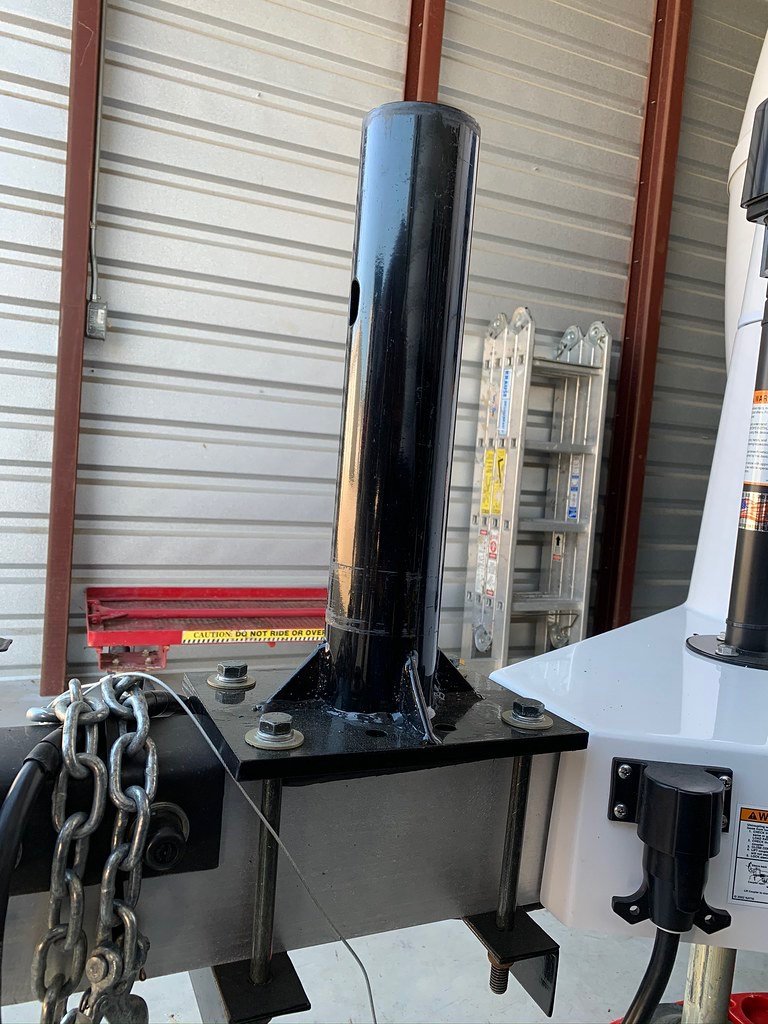
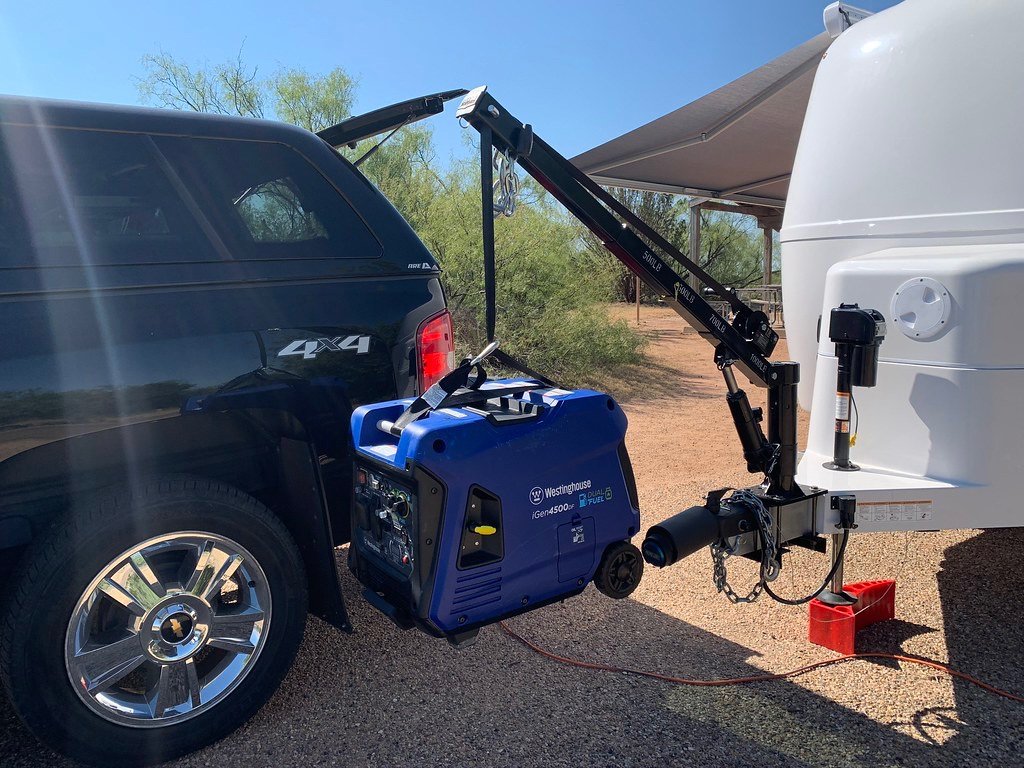
The hoist is a real back saver, use it to load the generator, as well as the Dometic completely loaded and full 30# propane tanks. The ‘truck crane’ is marketed for a truck bed installation, but I modified it to mount on the tongue of the Oliver. I also added a strap winch for enhanced performance which involved some fabrication. The Anderson under the front stabilizer is a Rapid Jack put to good use!
2 points
-
I've been over/on the Beartooth Highway numerous times - but - always on motorcycle. Having said that, I would not hesitate to tow my Elite II over it with my F-150 3.5 liter twin turbo. There are plenty of pull-outs for both letting faster traffic by and for observing the wonderful scenery. Be sure to use them in either case. Note that there is really not all that much at the northern end (Red Lodge) and/or I-90. So, if your intent is to only go for the drive I'd leave the camper near Cooke City, drive the Beartooth both ways, camp and then either head into Yellowstone National Park (northeast entrance) and the Lamar Valley (bunches of animals) or head towards Cody via the Chief Joseph Highway - another wonderful road. Last year (2021) they were doing construction on the Beartooth and closing the entire road after (I believe) 7pm. Be sure to check both when it opens for the season and for any construction details. Bill2 points
-
John, A new set of all season Michelins was mounted to our X5 about a year ago. We have used these tires previously and found they do well in winter conditions, not that we encounter them often. The full-time all wheel drive also makes a big difference. Thanks2 points
-
Another route, as an alternative to electrical tape which I don’t like to use for anything exposed to the elements, is self sealing silicone tape, like this. It’s great stuff to have on hand regardless. Personally, electrical tape to me is sort of like a pair of pliers: versatile, but there’s nothing you can use it for that another tool can’t do better. Of course, I have a drawer full of pliers that I use all the time. I also have a few rolls of electrical tape, but I can’t remember when I last used any.2 points
-
Hi Don, We asked OTT to de-winterize ours prior to delivery but it was not done. Our walk through person told us that even if you request de-winterization it will not be done at this time of the year. Our guide repositioned the valves for us and we did it after arriving at our overnight spot at OTT. We filled the fresh water tank, checked the water level indicator for operation, turned the water pump on, and flushed out all the lines including the outdoor shower. The anti-freeze just goes to the gray water tank and we''ll dump tomorrow before we leave, and make sure the gray and black tank blade valves work ok (we don't need that unexpected surprise later down the road 🙂 ). Good luck! John2 points
-
Please keep a very close eye on that weather. There is forecast to be "heavy" (3 to 12 inches) of snow in the western North Carolina area on this Sunday. I believe that this storm will be moving to the south and east of Hohenwald BUT it is better to be sure. Also, in coming to Hohenwald from the west (Dallas area), this storm will be diving from the north through the Midwest on Saturday. Certainly interstates should be OK by the time you get there. But, again, keep that eye on conditions. Bill p.s. I agree with Mike above - test your systems at the factory camp ground and then winterize if you must.2 points
-
Thanks to all who have given their advice. I apologize for not recognizing your helpful comments before. For some reason, I did not get any email notifications of these responses as I have in the past, and I couldn't find them by clicking on this site's "notifications." I assumed that no one had responded, which was dumb, as I have always, in the past, received abundant helpful responses when I had questions. As SeaDawg put it, there are "many ways to skin this cat." I have incorporated many of your suggestions. Just to let you know, this is what I have done and/or what I now plan on doing: 1. I have ordered the Zamp portable 180 Watt Portable Solar Kit and solar port (I'm impressed with the Zamp support I have previously received with solar issues, and most reviews have praised the company for its quality, warranty, etc.). 2. I will have my tech place the solar port in the battery compartment door. 3. I will have my tech wire the port to the battery negative and positive busses. In addition, I will consider upgrading later to the Victron MPPT, and I have already purchased the Emerson thermostat that John recommended. I hope to soon be set for some great boondocking. Thank you, everyone.2 points
-
We picked up in winter (Monday after Thanksgiving) and opted to do so dewinterized -- it was important for us to check all systems since we live so far from TN. I was glad we did -- the only real issue we found on our first night was that the fresh water tank indicator wasn't working. Oliver ended up replacing it on the spot. At a minimum I would recommend taking possession dewinterized to check all systems. Then if you think extreme cold will be an issue, you can always winterize again before you leave Hohenwald. Bonus -- since you're new, if something is unclear in the winterizing process, you'll be at the right place to get clarification!2 points
-
John, Thanks for the warning about OTT not having de-winterized your trailer. When I received a pre-delivery prep call I was told all trailers being completed at this time of year are winterized, but they can be de-winterized for delivery or at the time of delivery. I will call OTT to verify.1 point
-
Delayed again… https://www.theverge.com/2022/1/13/22881646/tesla-cybertruck-production-date-2022-removed-website1 point
-
Yep, two generators both dual fuel. The Oliver is my hurricane escape pod and the larger one has served me well for those 3-4 day mandatory evacuations. It will run 16 hours on a tank of gas, non-ethanol, and continuously during those times. I have also used it in roadside and parking lot overnight stays when the wife demands all of the comforts of home! I then got the smaller one primarily as a convenience for A/C on stops for meals or breaks when traveling; but have used it, on propane, for brief overnight stays, as well. I have solar panels atop my TV cap to run the Dometic dual zone and a DC-DC charger to keep the trailer batteries topped off.
1 point
-
One last comment, make sure you have fresh All Season tires on your X5, preferably ones that are decent in winter conditions. All Summer and most A/S tires perform very poorly below about 40 degrees F, so towing in frigid weather becomes more hazardous! If your tires are older than three years, be very cautious, because they do age harden and become skittish. John Davies Spokane WA1 point
-
I have "repaired" cords like this before. I keep a small tube of GE Silicone in the tool box. A small amount should do it. Then I wrap the area with plastic electrical tape. The tape is warm and pulled tight. It stretches a little and seals real tight. I go from the plug down the cord about three inches and at least three times. A molded on plug, even exposed a little as shown, is more water tight than a replacement plug.1 point
-
Thanks to all for the helpful recommendations and quick responses. They are very consistent and in line with the conclusions I had drawn from other postings on the forum. I had been thinking of the general weather movement as predominant west to east, so a special thanks to @topgun2 for the heads up on the expected movement of the storm forecast for western NC. I had noticed the forecast for Hohenwald included high probability of snow over this coming weekend. Seeing the forecast for highs in the upper 40s temps next Tuesday and Wednesday should eliminate most of the snow from the weekend. In any case, I will pay close attention to that storm. Don1 point
-
I got the box on Amazon 4 or 5 years ago. It was about $100. It holds my chocks and blocks, gloves and locks. Not much overhang. If you do a search on aluminum box there’s a thread in there about the installation.1 point
-
We have reservations at Dead Horse in about a month. Looking forward to it. Thanks for sharing these pictures.1 point
-
I can't tell from the photo if the insulation is split or if it was just cut short at the factory and has pulled out. If it's split, then it looks like a job for Sugru - I'd use trainman's advice for the fix and then use sugru to reinforce the joint so that it doesn't split again. If it's not split, then just do what trainman said, though I'd take the opportunity to seal around the joint to make it waterproof - will save you from potential issues later down the road.1 point
-
Ours has looked like that for a while. I keep meaning to fix it…..1 point
-
Don’t winterize. Pick up your trailer and camp in it as planned. You’ll be fine. We’ve been out a couple of weeks, it’s been below freezing almost every night. We just make sure our water hose is not attached when we go to bed. We’ll be in Zion National Park tomorrow for a week or so, night time temps will below freezing the whole time, 40s and low 50s daytime. Mike (Our first night in Catalina State Park, AZ the forecast said a low of 34. I left our water connected. Woke up to 29. Our hose was frozen solid! I didn’t move it and it thawed out by noon. Thankfully, no damage. Left the hose off the rest of the week and used the water tank. We did that last week at Dead Horse Ranch State Park, too)1 point
-
Easy fix, I'd say 10 minutes tops to loosen the plug housing and cut and pull the wires forward to take up the slack in the wiring harness cover. J B weld is not for rubber repairs. trainman1 point
-
Btw, you don't have to stay in a hotel, just because your camper is winterized, especially in milder winter temps. You can still use the toilet. Just flush with rv antifreeze. I feel bad for you, as new campers picking up in winter. But, you'll gain some new experience. I'd be on the fence, too. It would be nice to be able to test every system, without winterizing.1 point
-
John, I should have mentioned that I do have a generator, a Champion 2500 watt dual fuel, which I plan to run only on propane. I particularly want to test the generator hookup. I also have a pair of the Mopeka tank halos. @AndrewK kindly shared with me his list of items purchased for his LEII delivery, The list has proven very useful. I will need to take my chances on availability of RV antifreeze in Hohenwald or surrounding area (or perhaps from Oliver). Our tow vehicle space will be maxed out with all the stuff for inside the trailer, generator, clothing, etc. I had feared I would need to get a small U-Haul trailer, but I believe I can avoid that. The trailer dropoff was going to be a real inconvenience.1 point
-
Common problem. The insulation breaks there due to flexing. The plug is very easy to replace with just wire cutters and a screwdriver. Search Amazon for "7 pin trailer plug." They are about $5. If you can't do that right away, I'd cover it with electrical tape to seal it, then reinforce it with a zip tie around the cable connected to the plug "ears" with a couple more zip ties to take some of the strain off the damaged section.1 point
-
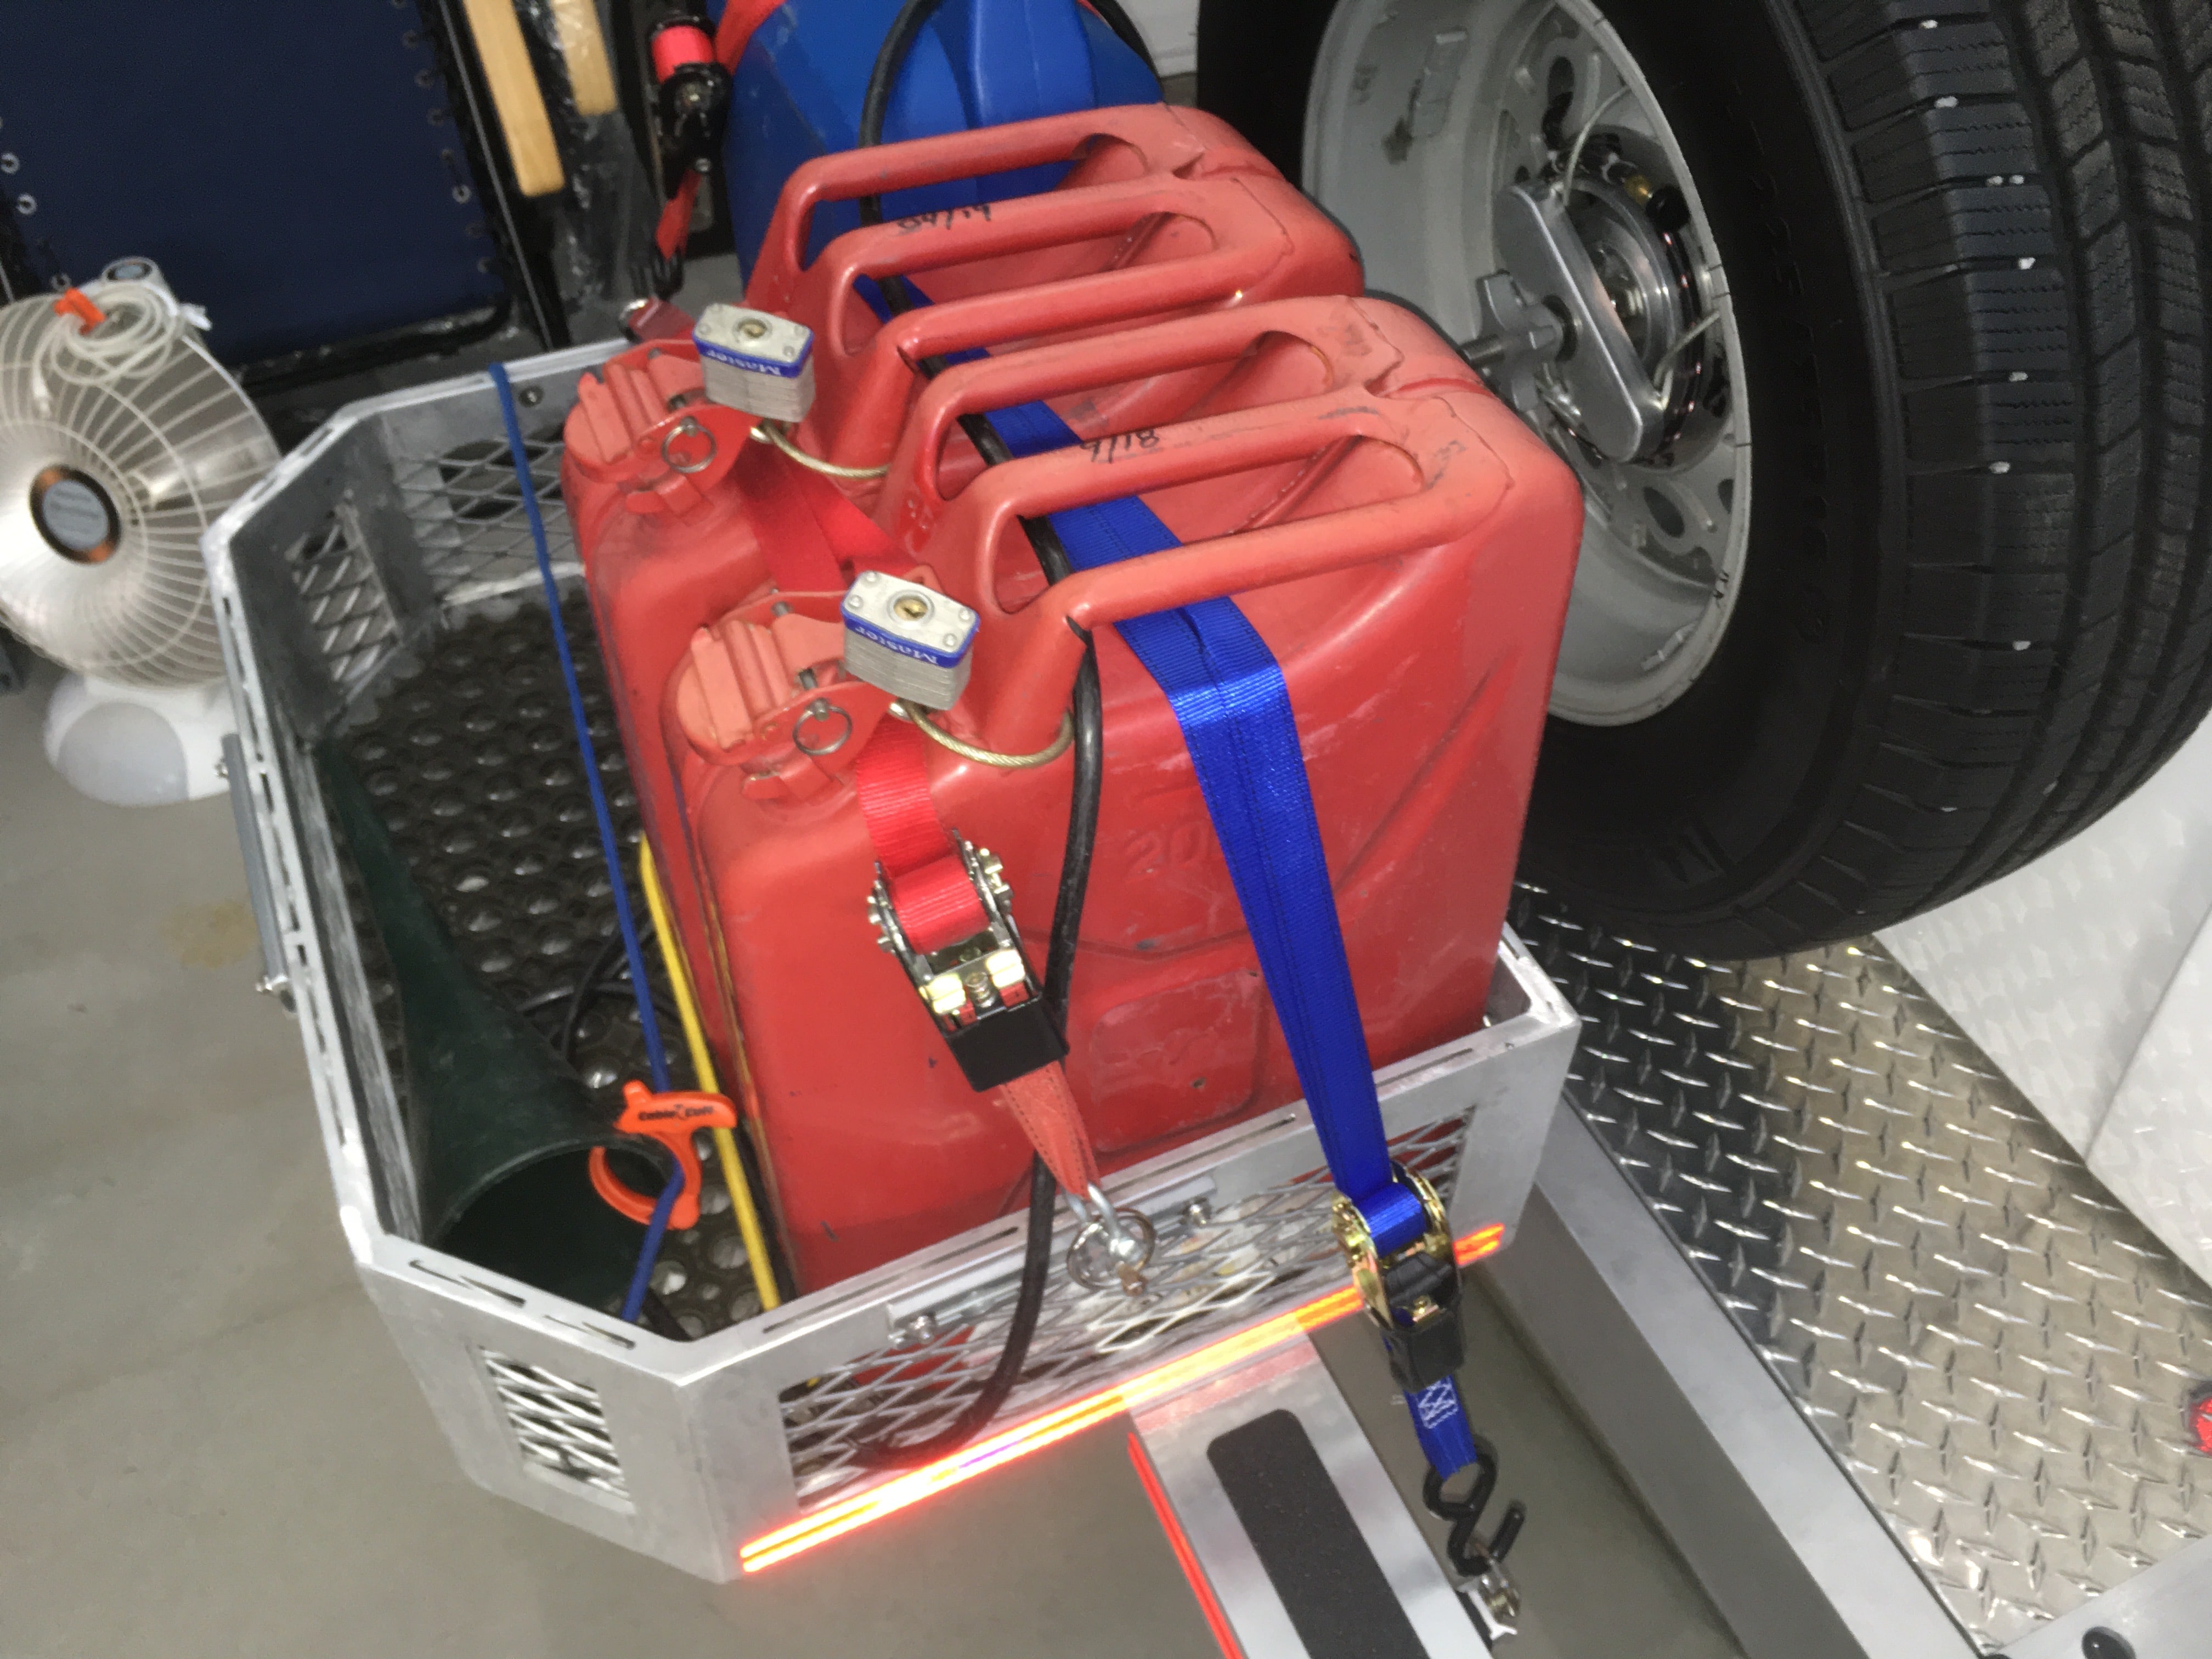
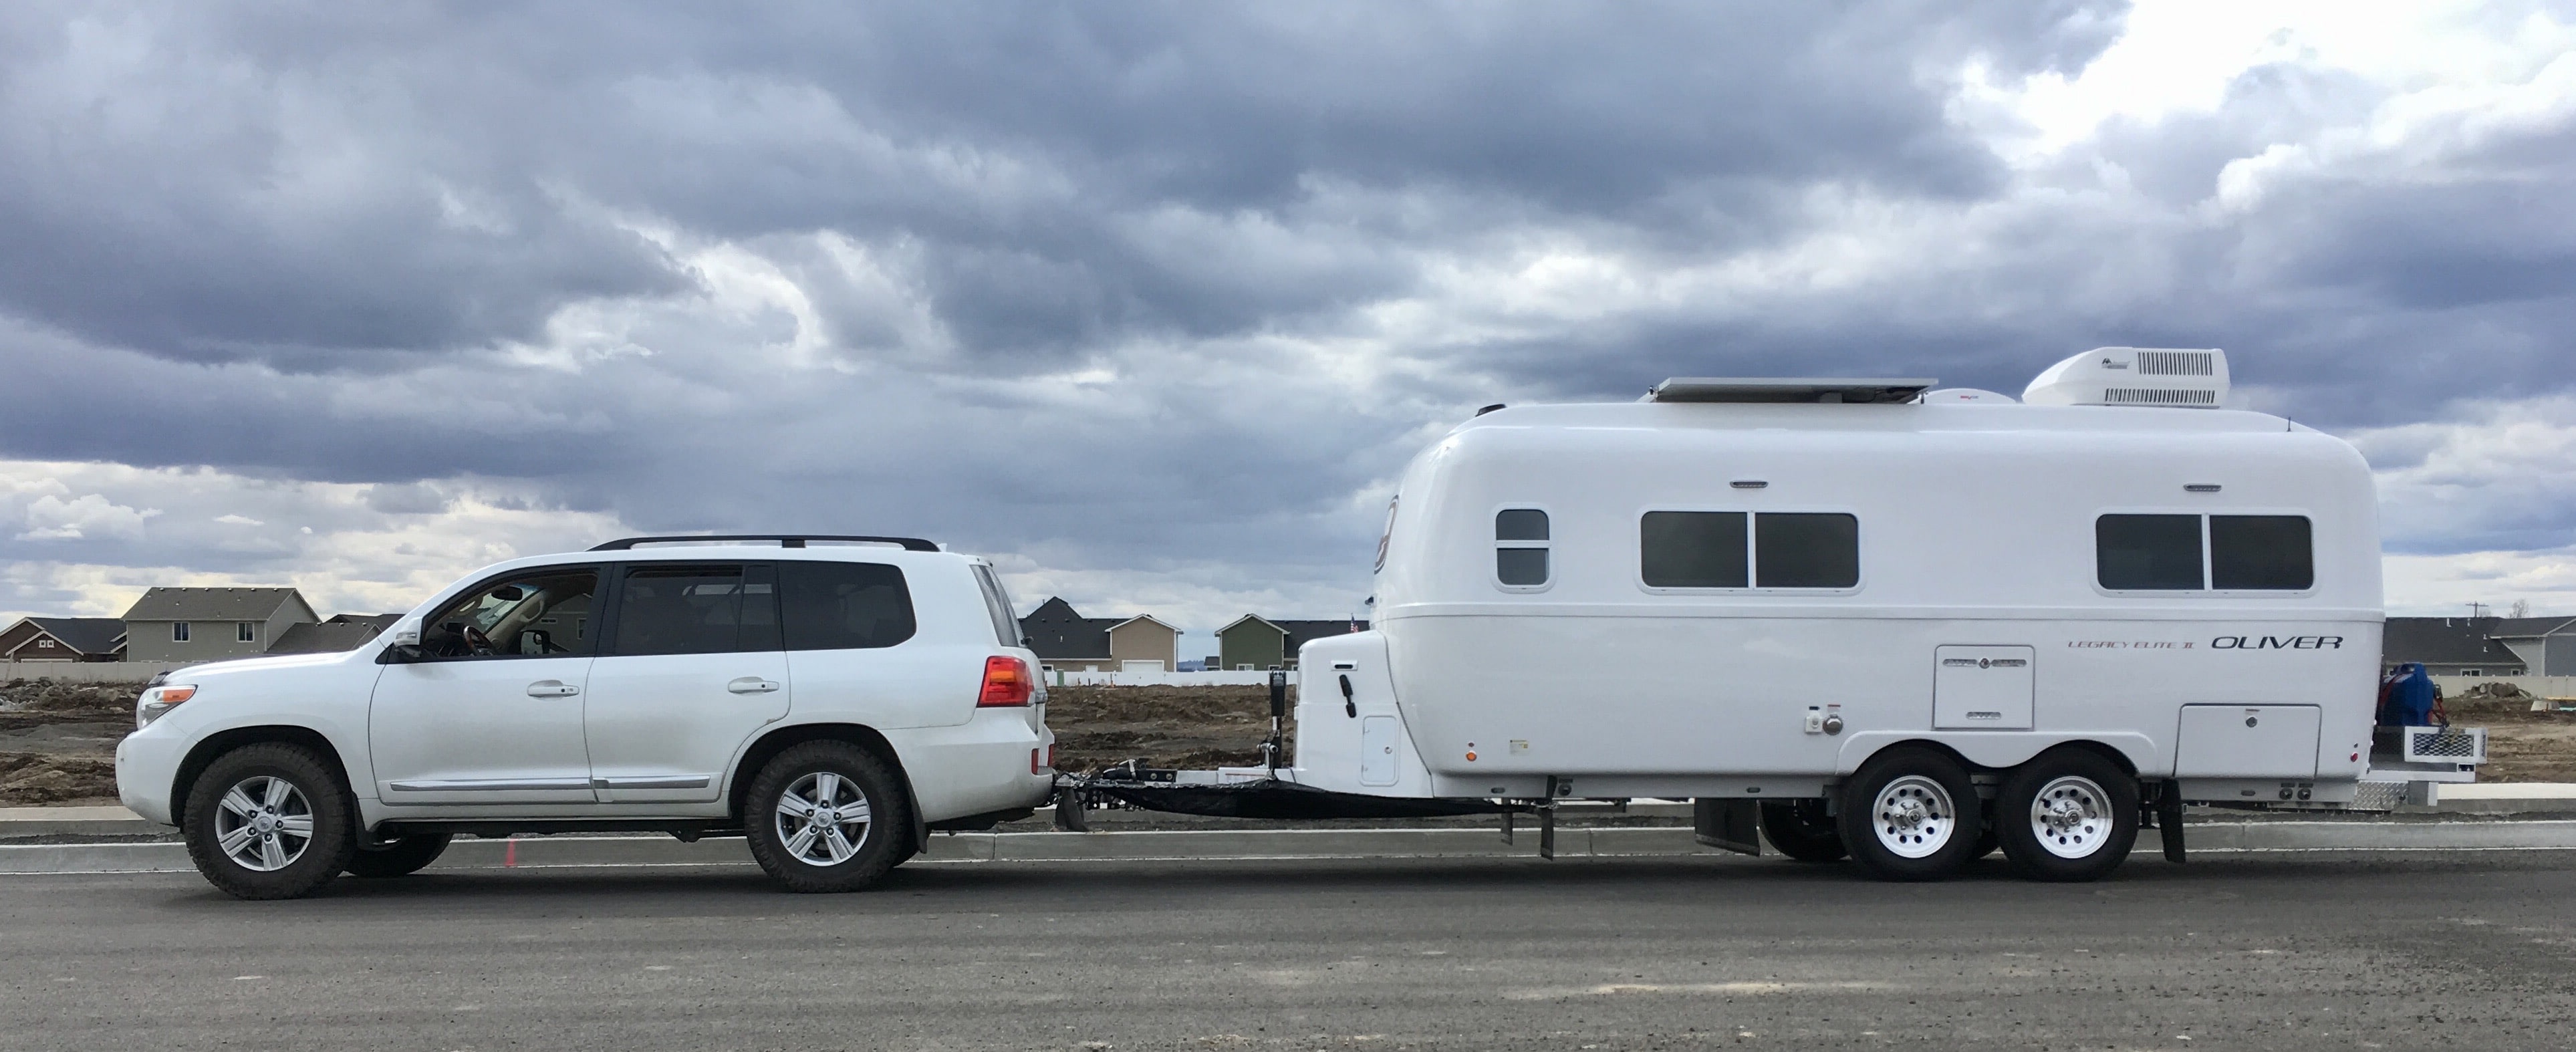
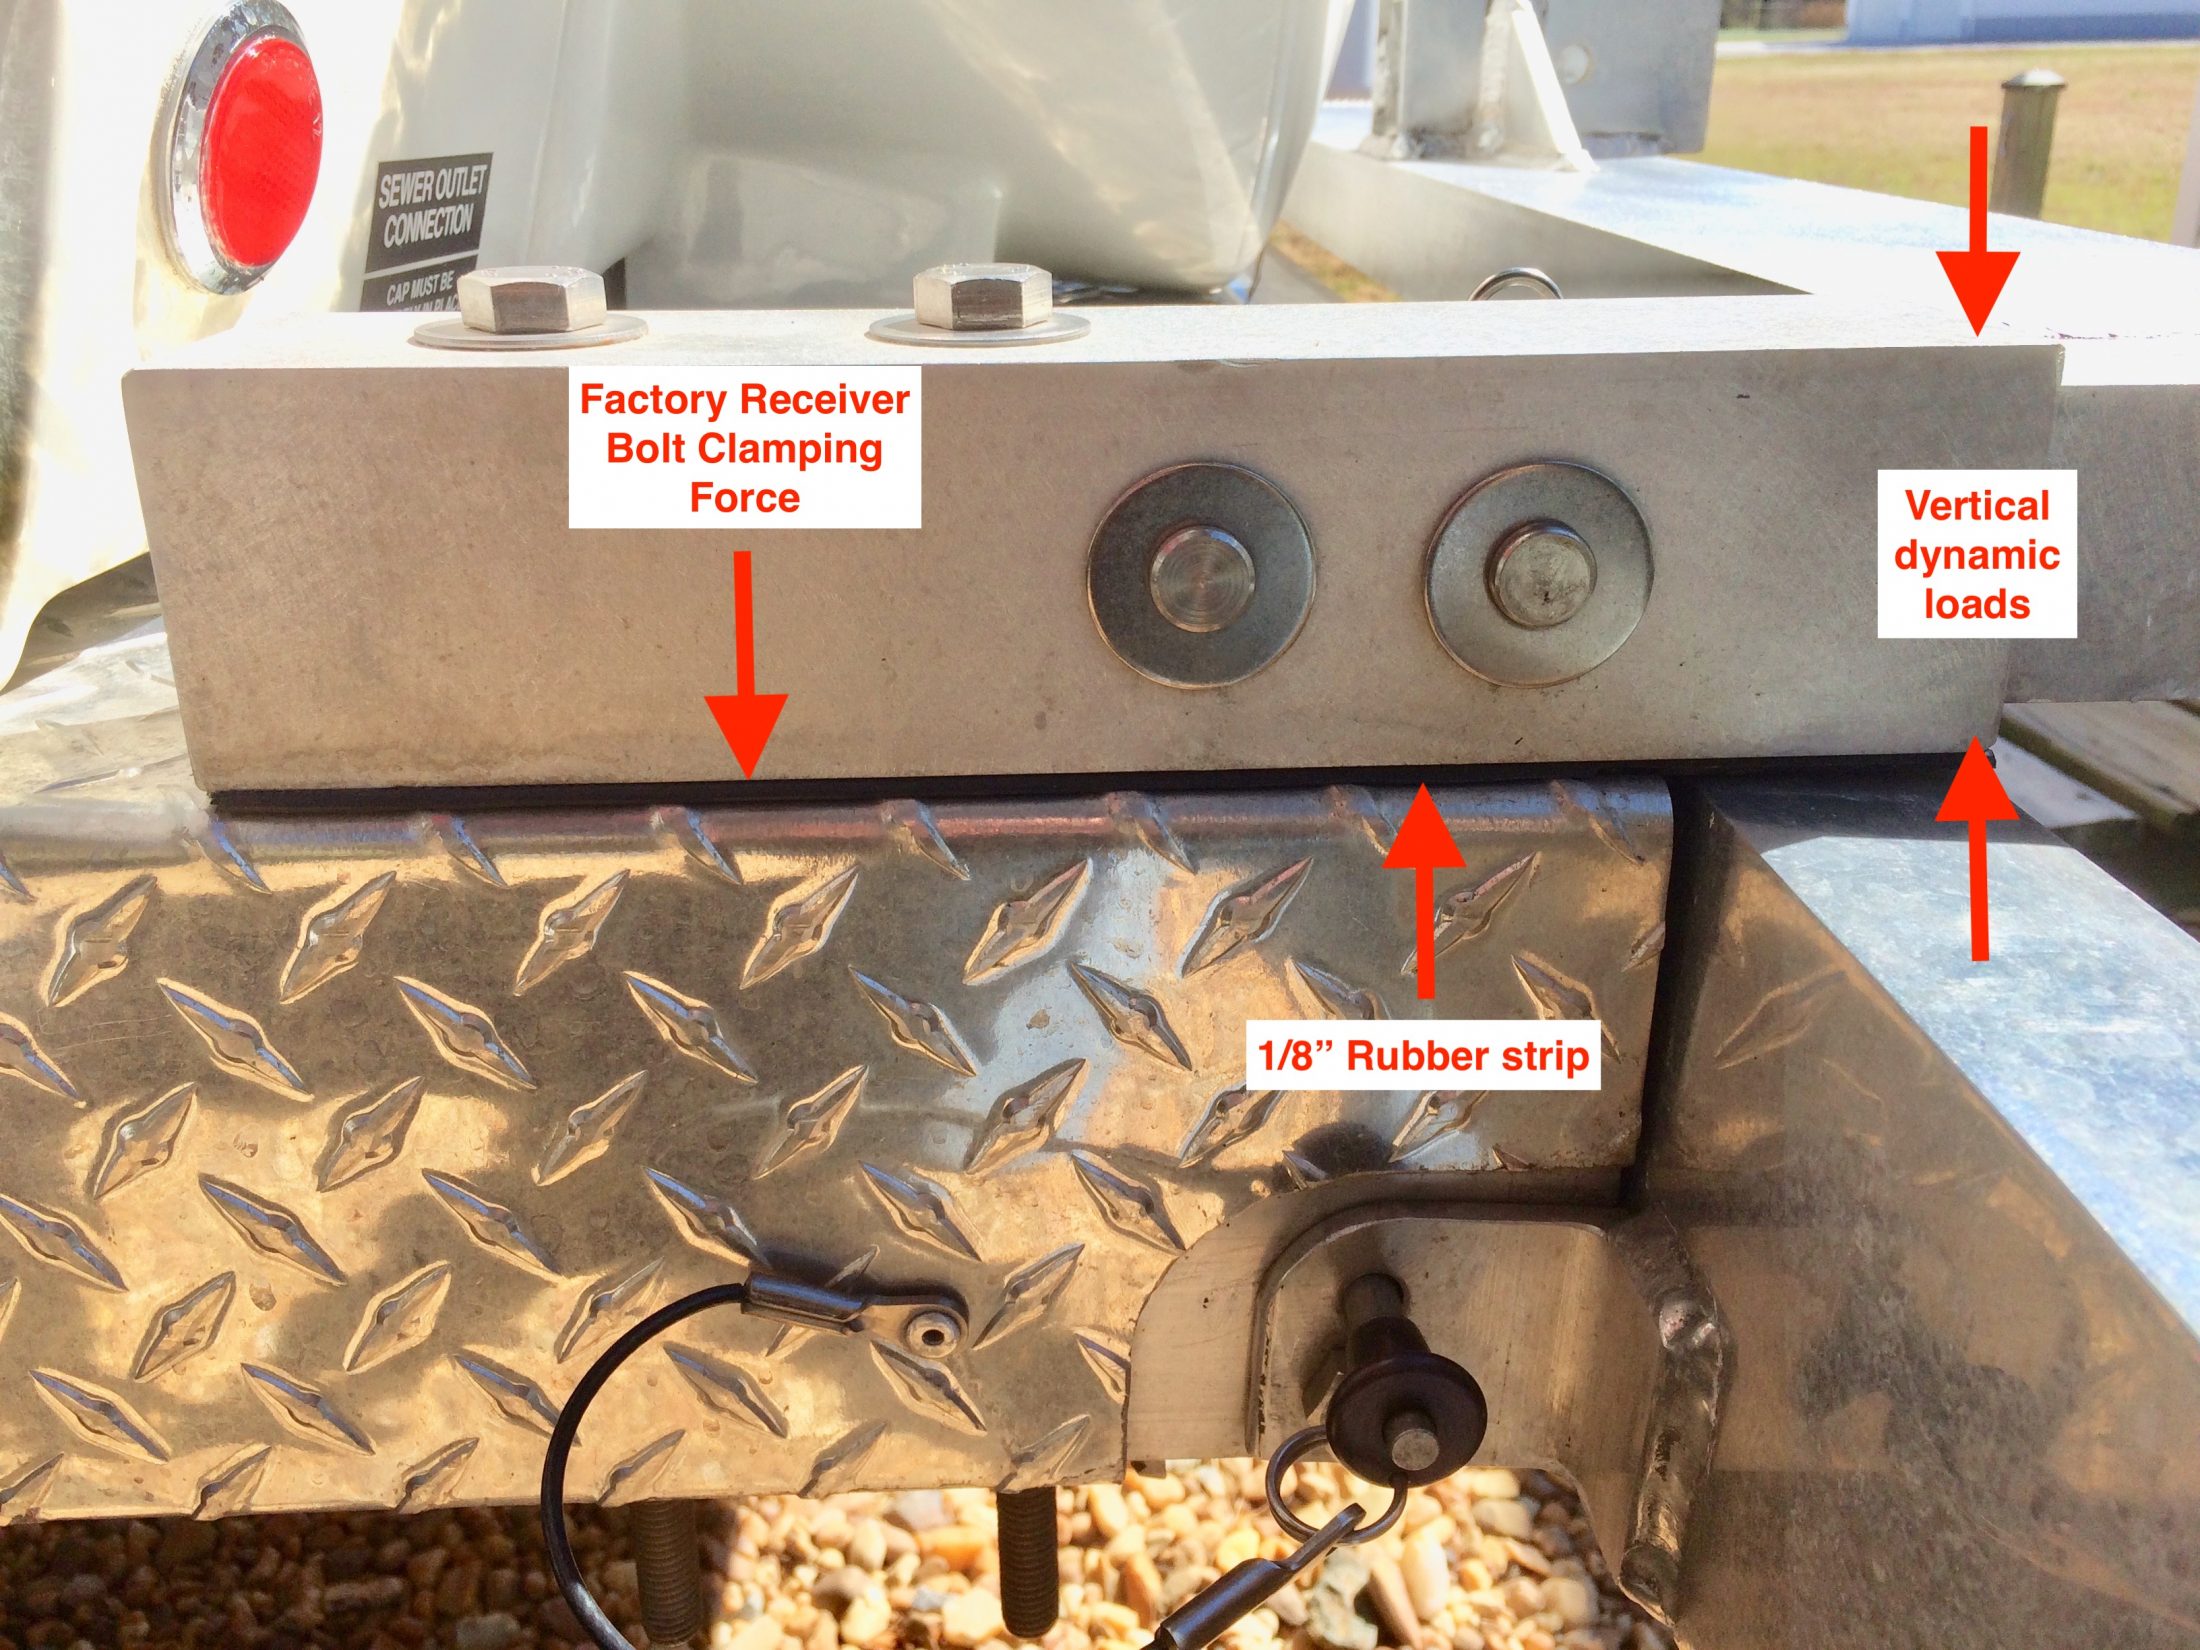
I wanted to move my Oliver front cargo tray to the rear of the trailer to lighten the tongue. For a light duty truck like my Land Cruiser 200, the weight reduction is very significant. I normally carry two full 5 gallon gas jerry cans, an empty 6 gallon water can and my heavy rubber chocks. The tongue weight was 720 pounds with full tanks and full propane. After the mod it is around 480 pounds. I will probably continue to use the Andersen hitch for its excellent jounce control, but I have the adjuster nuts backed way off so that there is zero tension on the chains at rest. My airbags, at 10 psi, level things out and support the reduced tongue weight very well. I won’t describe every step in detail. I will provide a basic materials list and some measurements. This is in NO WAY an easy mod, I rate it 7 out of 10, and this is for an ex-A&P mechanic who is comfortable working, shaping and drilling aluminum. The tray brackets on the bottom had to come off, and I left it to a local welding shop to mill them with their big milling machine, and to also weld some support spacers. Everything else I did in my shop with common hand tools, power tools, a handheld sander and a bench top sander, and a floor drill press. The current factory bike rack (and previous versions) have double receivers that are bolted down to the frame. Because they attach to diamond plate, Oliver uses a hard rubber strip under each one to keep them from getting destroyed by the very sharp teeth. The two big attach bolts are located in the center and front of the receivers. There is nothing securing the back, which in my view is a problem, since that is where the most of the vertical force is applied from the cargo. I did contact Jason in Service and asked how the latest factory bike racks were doings and if loosening was a problem. He told me that there were no issues. ….. Still, I decided to bolt my support arms directly to the frame - no receivers - and to remove all the sharp diamonds from the waste cover. This would allow me to eliminate the rubber strips, which I think are not a wise choice. I wanted my arms to have an intimate and solid connection to the frame. I did add 1/8” strips of aluminum bar to replace the rubber strips, to provide bumper clearance. Materials are aircraft grade 6061-T6, 1/4” wall, with square corners. This is close to the same stuff the factory uses for their racks and the trailer frames. All hardware is stainless, and I strongly recommend using silver anti-seize on all of them! Bumper removal is required. One of my nuts seized and I was able to snap the bolt using a big breaker bar. Waste area diamond plate cover removal is required. This was a *****, I will make a new thread for that and provide a link. Arm hole spacing: The critical factor is the forward hole, if it is too close to the hull, you won’t have room to get your drill in there because the hull swells out and interferes. I was JUST able to get my compact Dewalt drill in without any worries. If you have an angle drill, you could use it and a short 1/2” bit to get into this location. Beware! Drilling: I drilled as many 1/2” holes as I could using the drill press, so they were dead straight. I used the drilled arms as jigs, to drill the frame holes straight, and afterwards I opened up the arm upper holes so I could get the hardware and a socket inside. See pictures. When building something like this it is important to consider what happens if something goes seriously wrong, such as a major rear end collision. There needs to be a “fuse” - a designed-in weak point - where the rack can fail and hopefully minimize structural damage to the hull and frame. My rack is intended to fail where the cross beam meets the arms, not where the arms meet the frame (the underside of the frame rails is reinforced with an extra 1/4” bonded layer). Hopefully the rack will collapse upward and forward. The cans will meet the exposed rear tire and that will help to cushion the blow to the hull. These are real NATO style jerry cans and they are extremely tough. I would not feel happy about transporting plastic gas cans here. OTH if there is going to be a big fire, better here than right behind the truck.... RACK: EDIT 01/21/22. Added wall thickness for crossbeams and arms. JD 1 - Crossbeam 2” x 4” x 1/4” x 52.5” long. $68.00 … I could have gone a little wider on the beam (Oliver uses 7”, the same as the bumper), but my supplier had run out of the larger sizes and I think this is plenty adequate for the load (which is centered directly on top of the crossbeam). 2 - Support arms 2” x 2” x 1/4” x 24” long. $45.00 1 - Bar 1/4” x 1 1/2 x 24” long. $5. For reinforcing inside of trailer frame rails (epoxy bonded). 1 - Bar 1/8” x 2” x 24” long. $6. For spacers between arms and diamond plate cover. 4 - Bolt 1/2”-13 x 2”. Arms to frame. 4 - Bolt 1/2”-13 x 1 3/4”. Crossbeam to arms 8 - Nylock nut 1/2”-16 16 - Washer 1/2” x 1.062” OD (SAE specs, thicker and a better fit than a common washer) CARGO TRAY: Labor: mill off lower brackets, weld on two 1/8” thick support pieces: $80 1 - Bar 1/4” x 3” x 24” long. $10. For the tray reinforcing supports. 4 - Bolt 3/8”-16 x 3” trim excess length if needed. Use in the ends of the tray. 4 - Bolt Countersunk Allen head 3/8”-16 x 3” trim excess length if needed. Use in the center of tray to minimize interference with cargo. 8 - Nylock nut 3/8”-16 12 - Washer 3/8” x 7/8” OD MISCELLANEOUS: 2 - Tie-downs, Mac's: http://www.macscustomtiedowns.com/product/versatie-slimline-anchor-plate-assembly/Anchor-Plates When doing a major job like this, fresh drill bits are important, or if you know how, sharpen yours. I bought new 3/8” and 1/2” bits. It makes the job go easier. Large bits: I bought a set of 9/16” to 1” bits for $100. It is very rare that one would need them this big. The 9/16” fits the tongue bolts and hitch bolts. The 1” one I used to make access holes in the top of the support arms so the attach bolts would be recessed. Consider this optional, but if you follow my instructions you will need a 1” hole saw instead. OR use really long bolts and figure out a way to reinforce the arms internally with solid spacers. Tape: You must protect the aluminum while working with it, otherwise it will get scarred and scratched. I used 1” blue masking tape an duct tape. Use something that will be easy to remove a week later if need be... not regular tan masking tape. Files and sandpaper. I cleaned up cuts on the belt sander and finish polished parts with 360 grit wet-or-dry paper to make them look like the Oliver parts (which I believer are wire brushed). Work stand. I used an old B&D Workmate. it makes drilling and sanding big parts easier. Epoxy: JB Weld regular grade, to bond reinforcing plates under the top of the frame rails. Primer: Duplicolor Self Etching for aluminum. For priming the top of the waste cover after sanding it down. Lots of large clamps for holding everything together. Carpenters angle, tape measure, machinist square: for ensuring everything is straight and true. Measure THREE times, cut once! Patience, take your time, don’t make too many mistakes! If you want attempt this, good luck and feel free to ask questions. Pics to follow. John Davies' Spokane WA
1 point
-
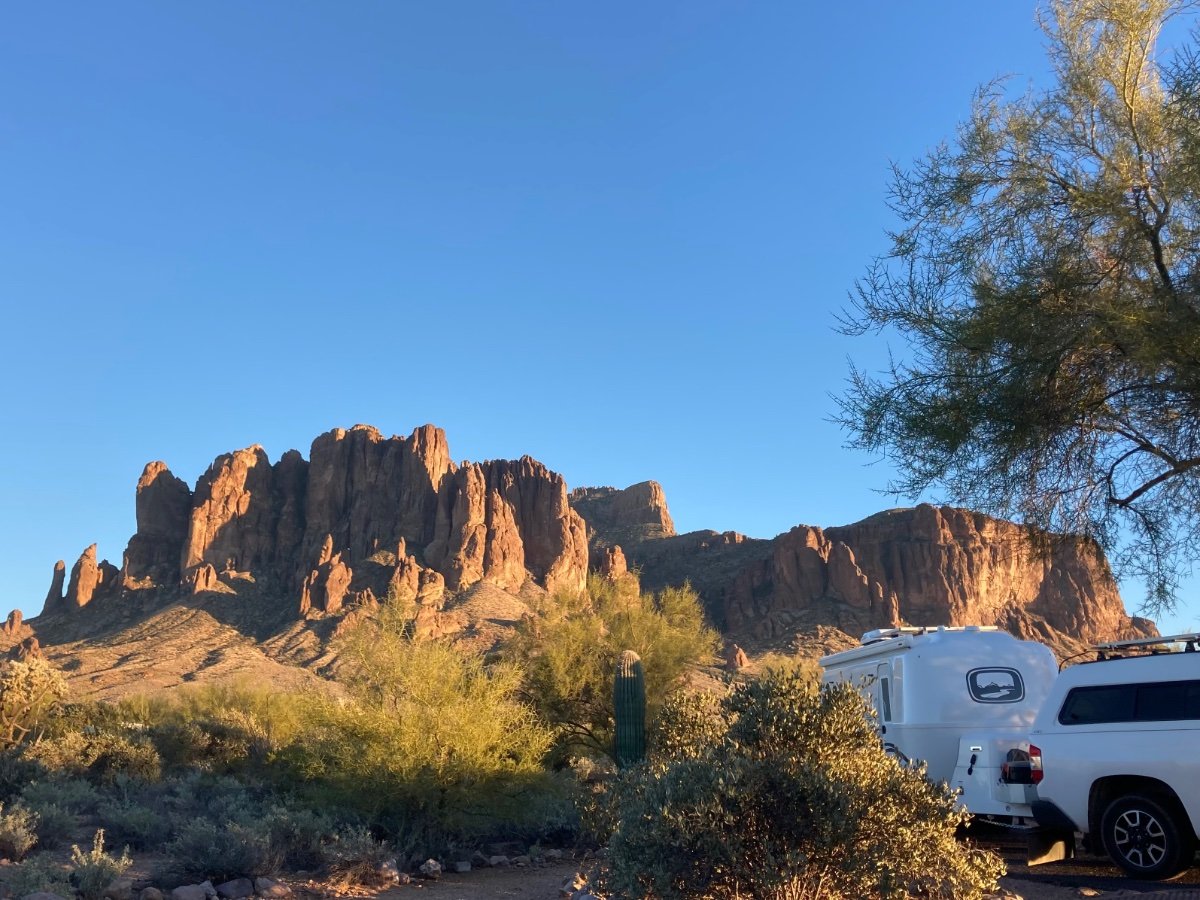
Lost Dutchman State Park, AZ. What a beautiful park
1 point
-
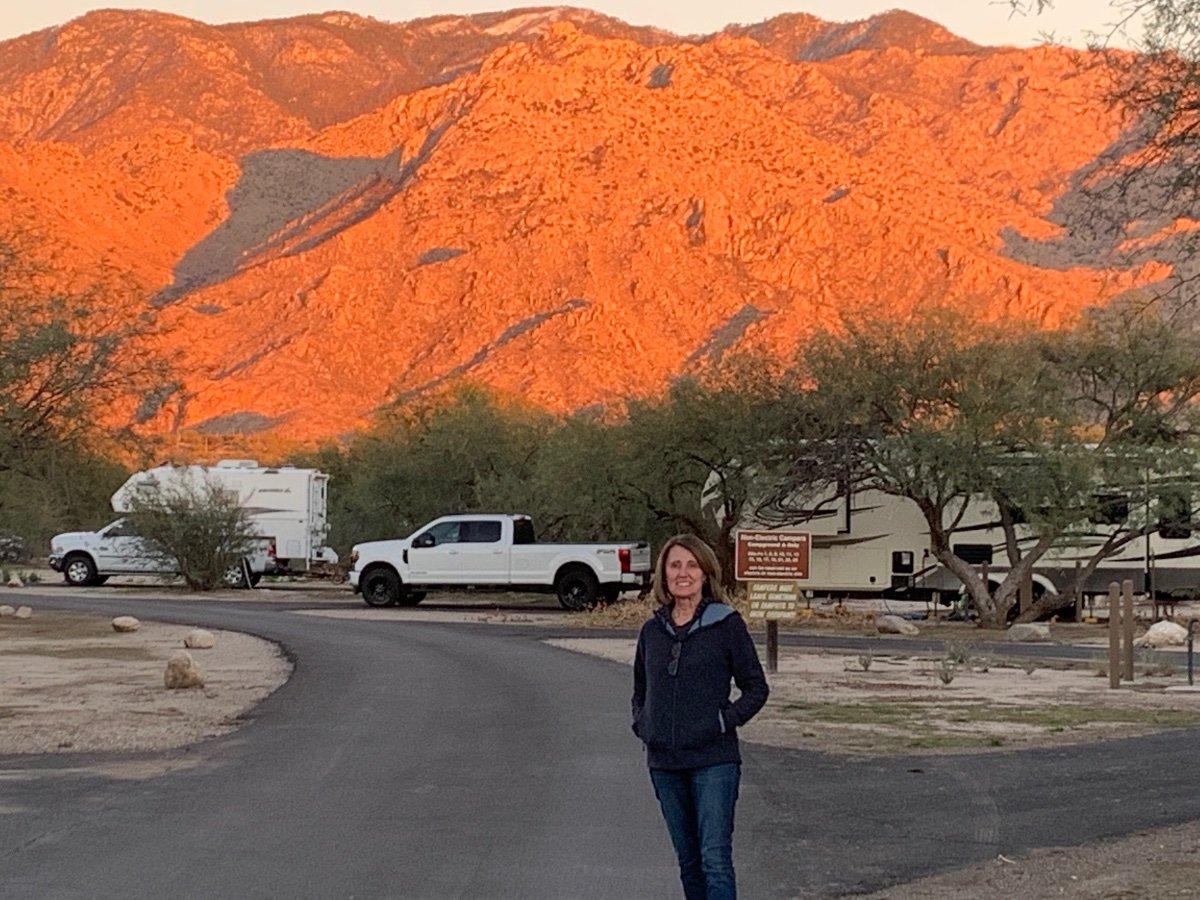
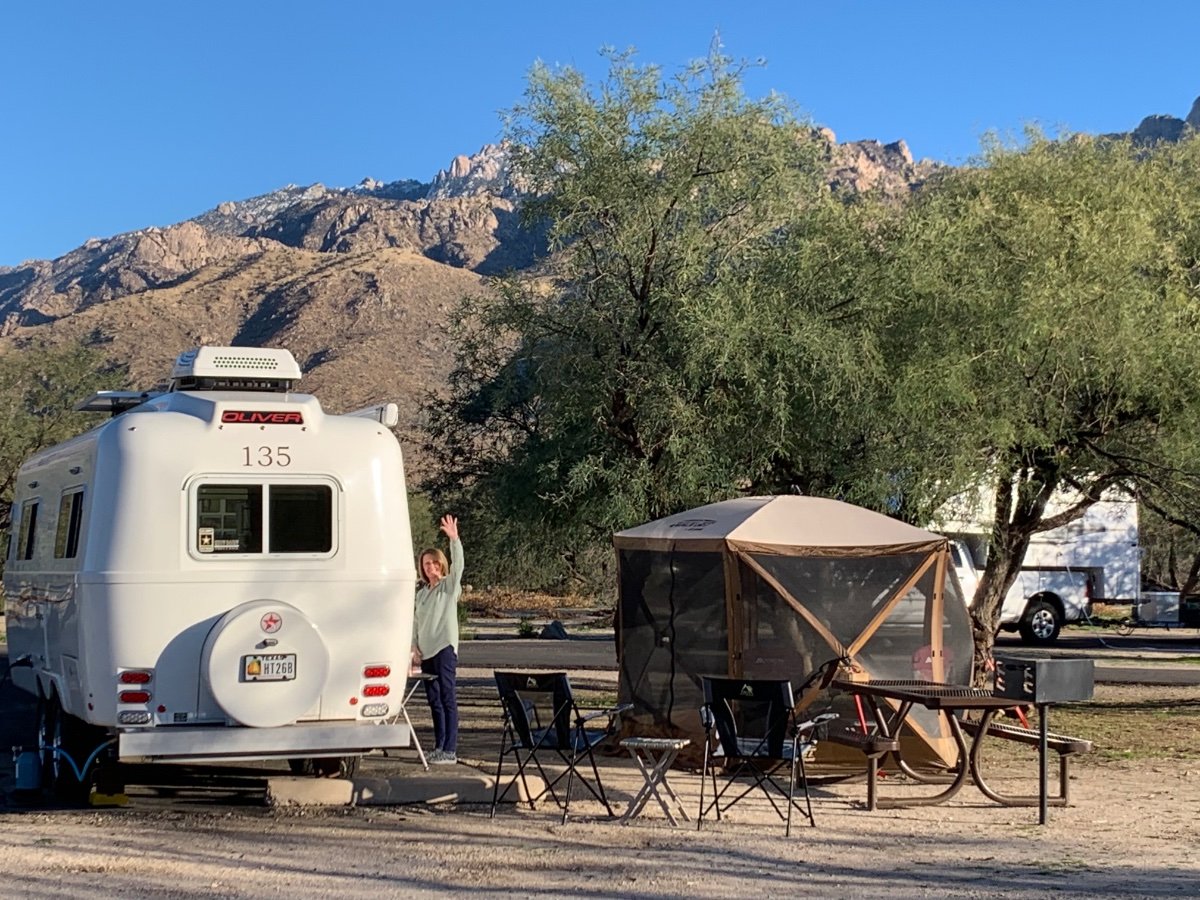
Sunset tonight at Catalina State Park!
1 point
-
We’re camped in Catalina State Park just north of Tucson. It’s a popular park, so reservations need to be made well in advance. There are 4 other Olivers here, two of them that we’ve camped with many times before.
1 point
-
We’ve got a Ram 2500 with a 6’ 4” bed, so it fits with a few inches to spare. When we had a 1500 with the shorter bed it went in diagonally, wasn’t too much of an issue depending on how much stuff you carry in the bed. Mike1 point
-
11-27 to 11-30, 2021 Eastbank COE campground near Bainbridge, GA. Very nice campground with clean facilities and grounds. And the heated shower house was a bonus as the low temps were 50, 34 and 37 our 3 mornings there. Mossey
1 point
-
11-10-2021 Overnight stop while traveling. White Oak Creek COE campground near Eufaula, AL. Very typical for COE campgrounds. It is clean, waterfront and cheap for old people. And they even had the heat on in the shower building. Sweet. Mossey
1 point
-
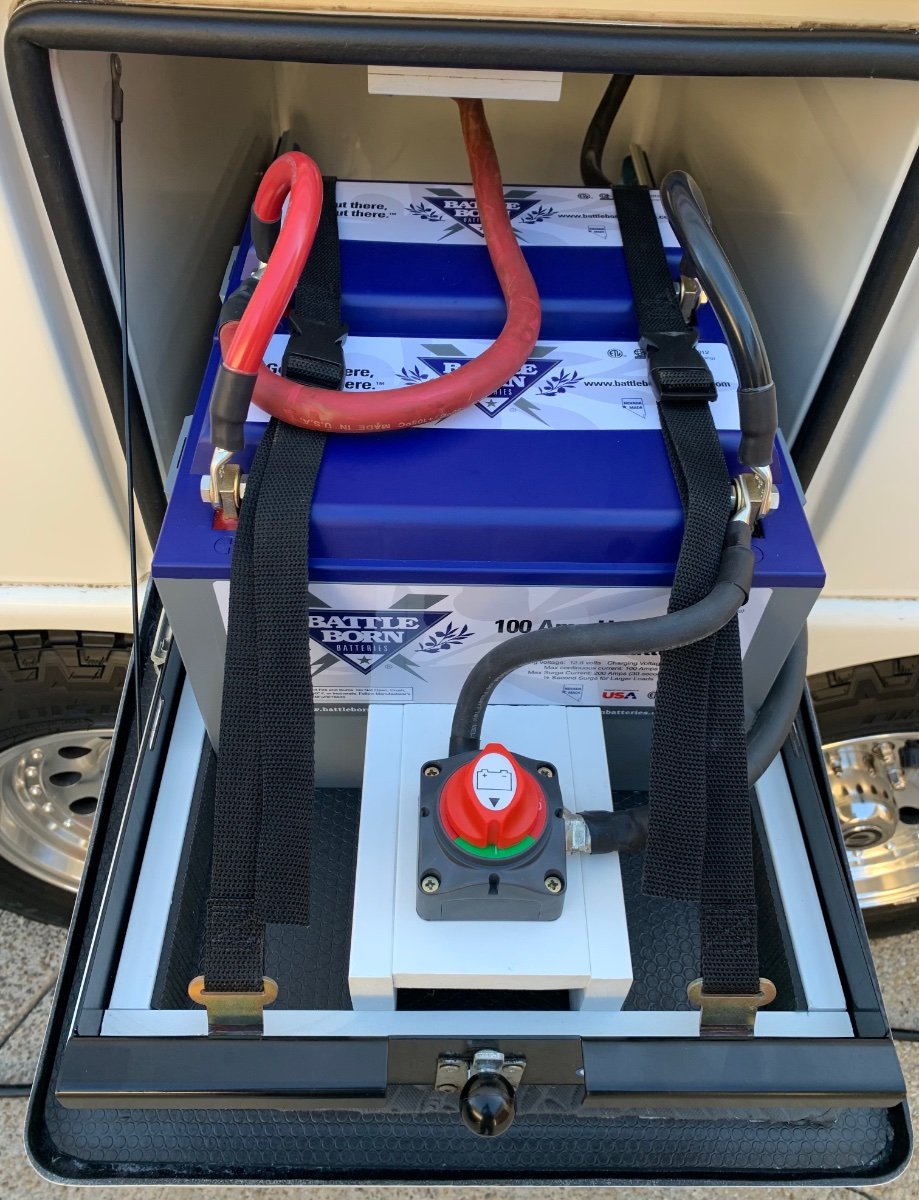
If you stand them up like your current AGM batteries you’ll only be able to get three in there. Some have turned them on their sides and got four in. Not sure of the specifics of that, but someone will answer. Here’s what two Battle Borns look like. If I remove the spacer in the front I would be able to get one more in standing up. So far two have been more than adequate. Mike
1 point
-
Were it me (and it's not), I'd probably opt for the solar pro, and see how it goes. Lithium prices keep dropping. You can always add them later, if you actually need them. Depending on the weather, (cooler temps), you can actually turn your gas fridge off for a few hours, if it's cold and full, and be fine, instead of running the 3way on 12v, if your solar doesn't keep up. We used to run ours on propane, traveling, when we had a 3way. (Unless in areas required by law to turn it off.) A 3way is least efficient in 12v. In our case, in the days when we still had a 3way, 200 watts solar, two 12v agm 105 ah batteries, we couldn't keep up running on 12v.1 point
-
David, Beautiful photos and nice looking bike rack installation!1 point
-
Mike, Looks nice! We will put Riverside campground/area on our list to visit! Thanks,1 point
-
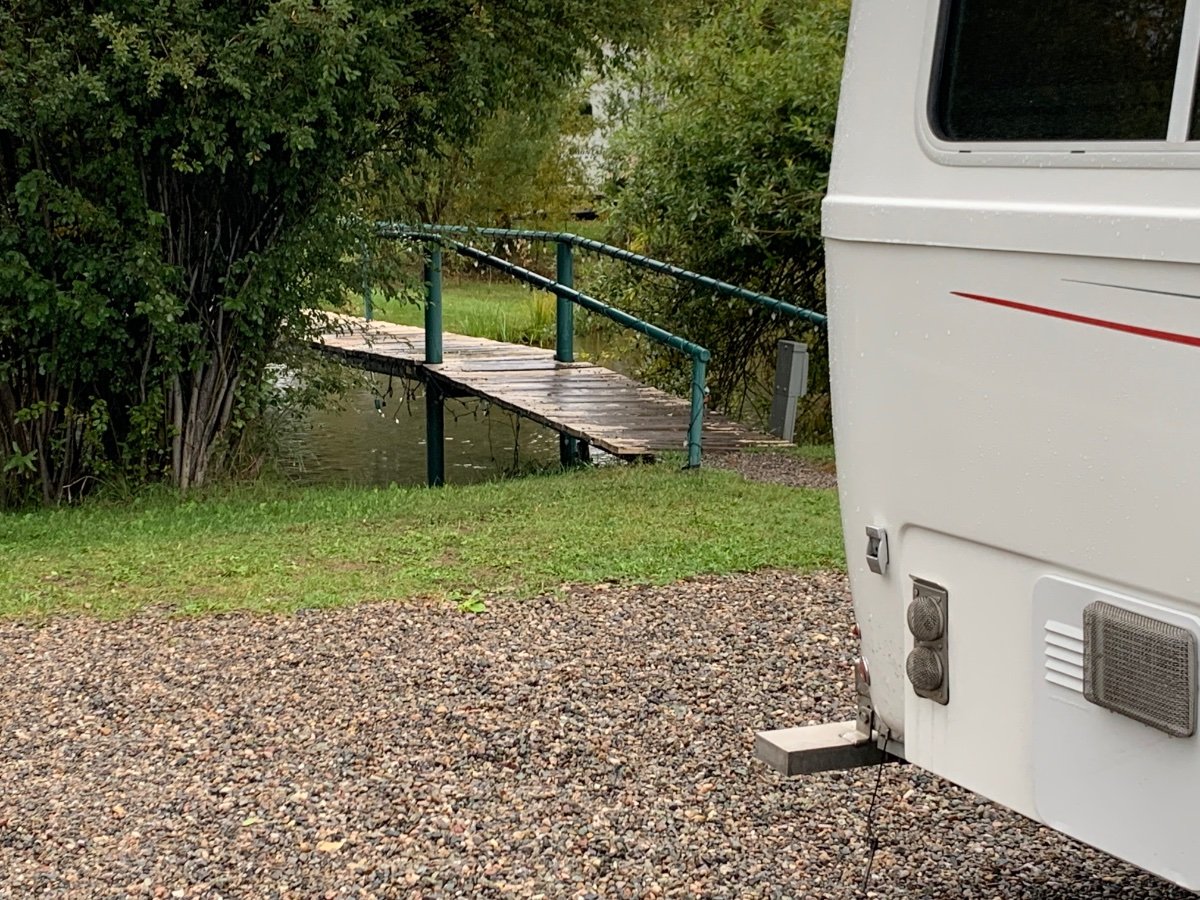
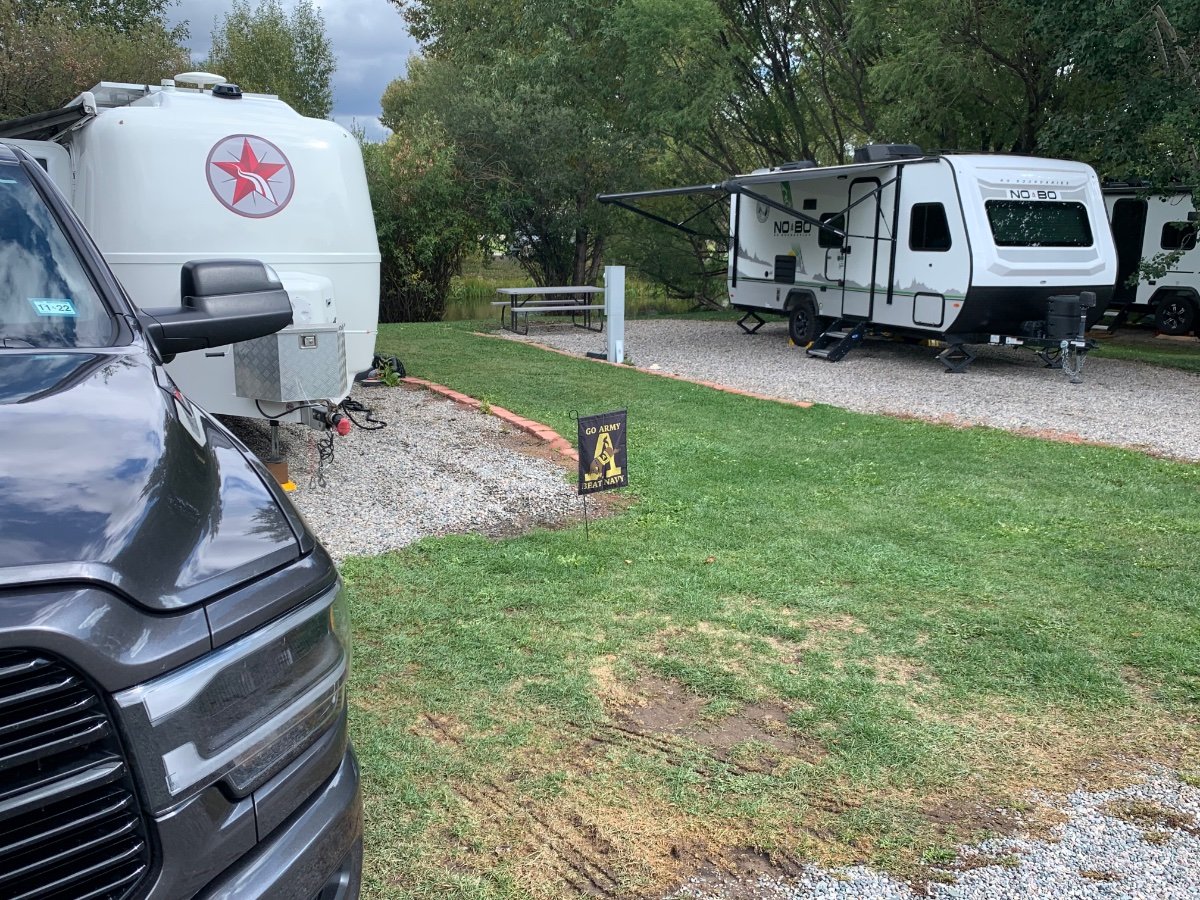
We just spent a week in southwest Colorado at Bayfield Riverside RV Park. Our son and family live in Durango and Bayfield is just to the east. We don’t normally do commercial parks but this one was nice, well maintained and convenient to what we needed to do. Our son and family pulled their RV out over the weekend and camped next to us, a new experience! Cowboy parade in Durango. Our site from across the river. Running river water can be very soothing! A very nice park, well maintained. Our site with my son’s NoBo next door.
1 point
-
Be safe out there and load up on that seafood. Its generally a bit fresher where you are now versus where you will be when the snow flies. Bill1 point
-
Have been in Maine (Bangor & Acadia area) for 2.5 days. Enjoying (making best of) the Rain & Fog. We will not try to enter Canada this season, but will drop down to Mass. tomorrow, do the East Coast for a while, then head back West and (then Home) up to ND, before the snow fly's. Been on the road 65 days, enjoying the various landscapes and all that this wonderful country presents to us. Bryan (Scrambled), Maggie (SnySdUp) & Willis (the Kamper Kat)1 point
-
We are up here now. we picked up the Blue Ridge Parkway at the SW end leaving the Great Smokey Mountains NP. we are up to Fancy Gap, doubled back with out SNYSDUP to see Music Center & Mt. ARY (Mayberry). Tomorrow we head out to Lynchburg Area, Drop Anchor, and explore. Then the BRP and the Shenandoah Skyline Drive, to Luray, VI. Eventually up to Maine, then back to ND.1 point
-
Pisgah Inn will now allow non-guests to eat lunch there if you make reservations. We were across the road at Mt. Pisgah campground for 4 nights this week. Best hike we did was the Black Balsam Knob hike (off Forest Service Rd. between mileposts 420 and 421.)
1 point
-
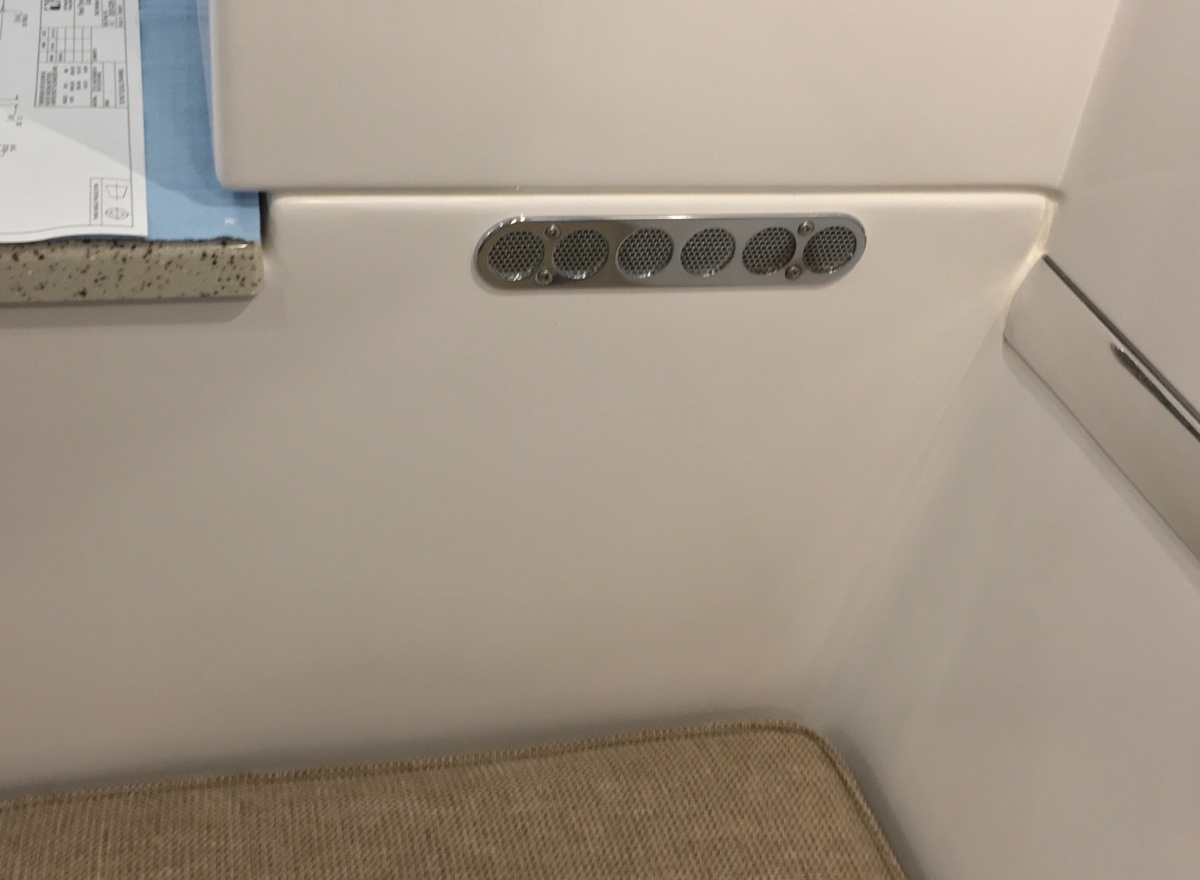
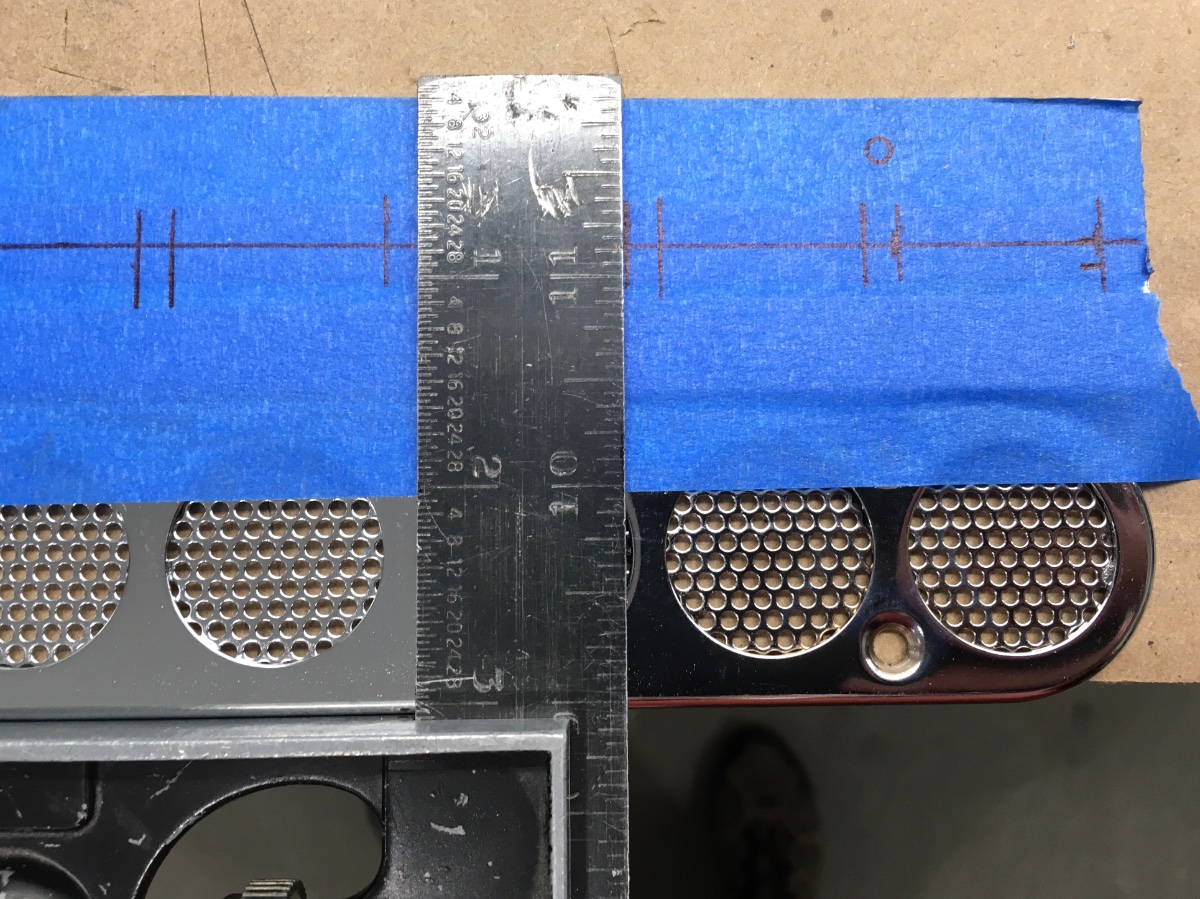
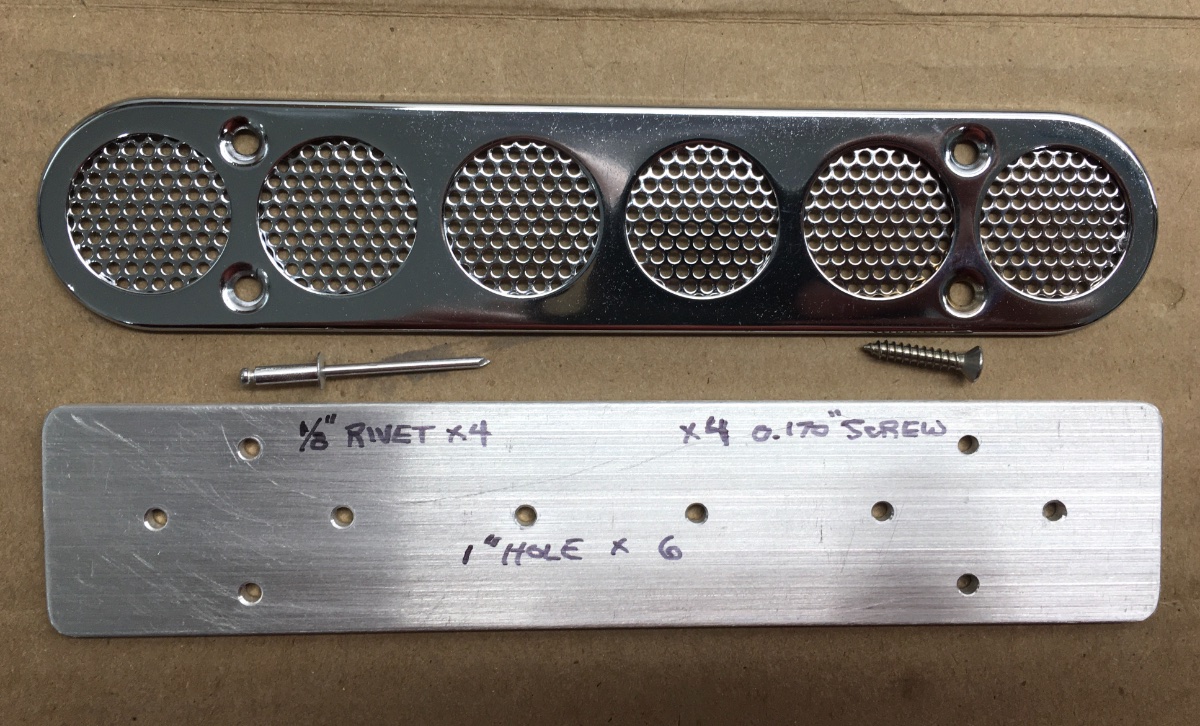
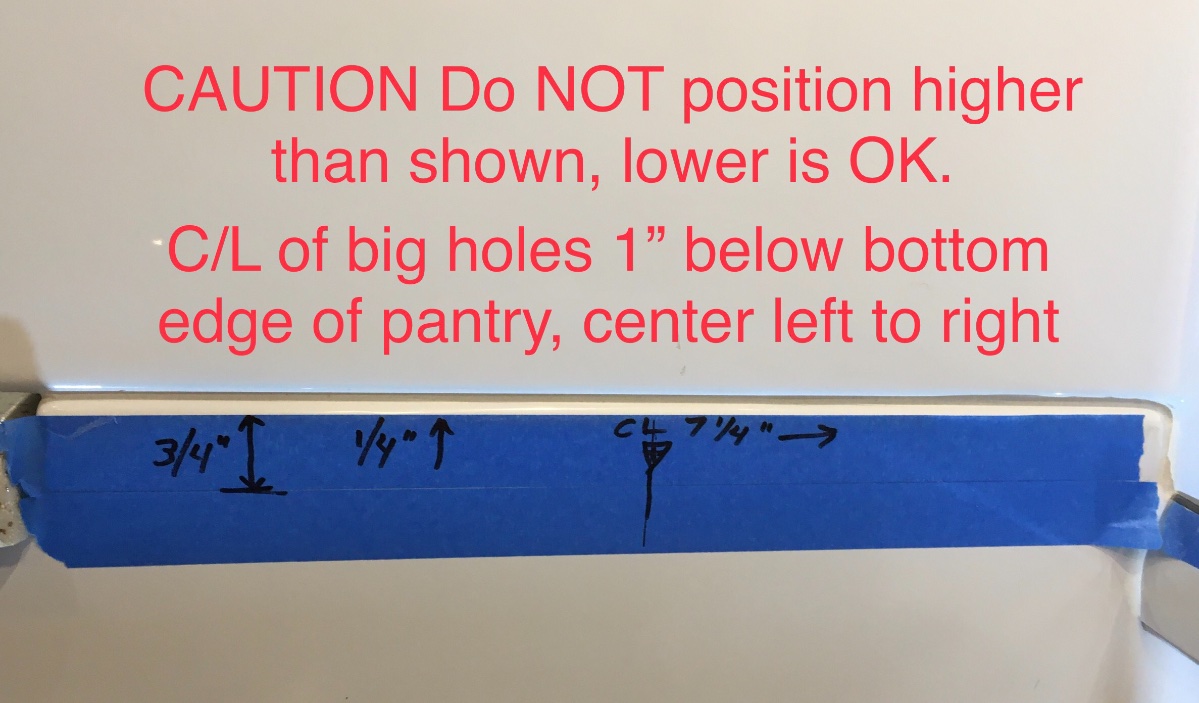
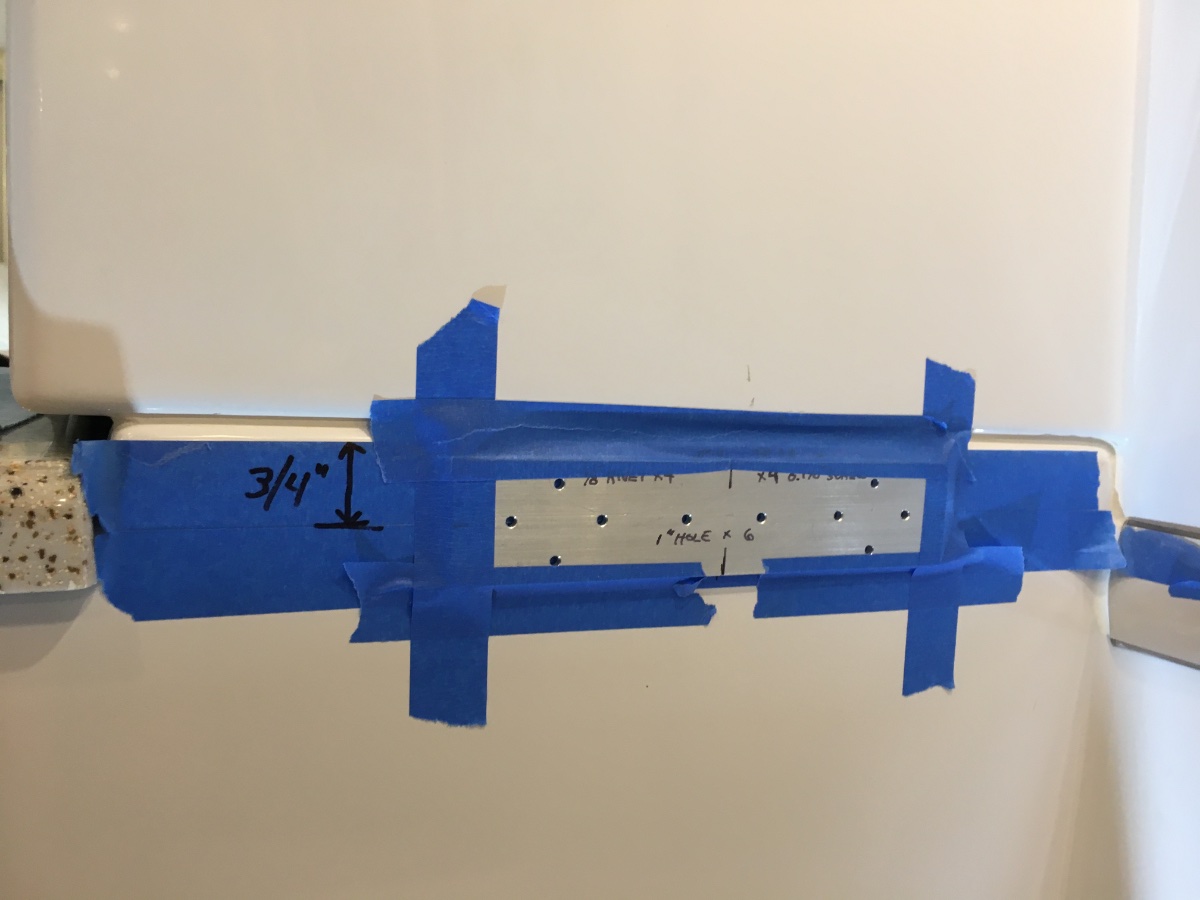
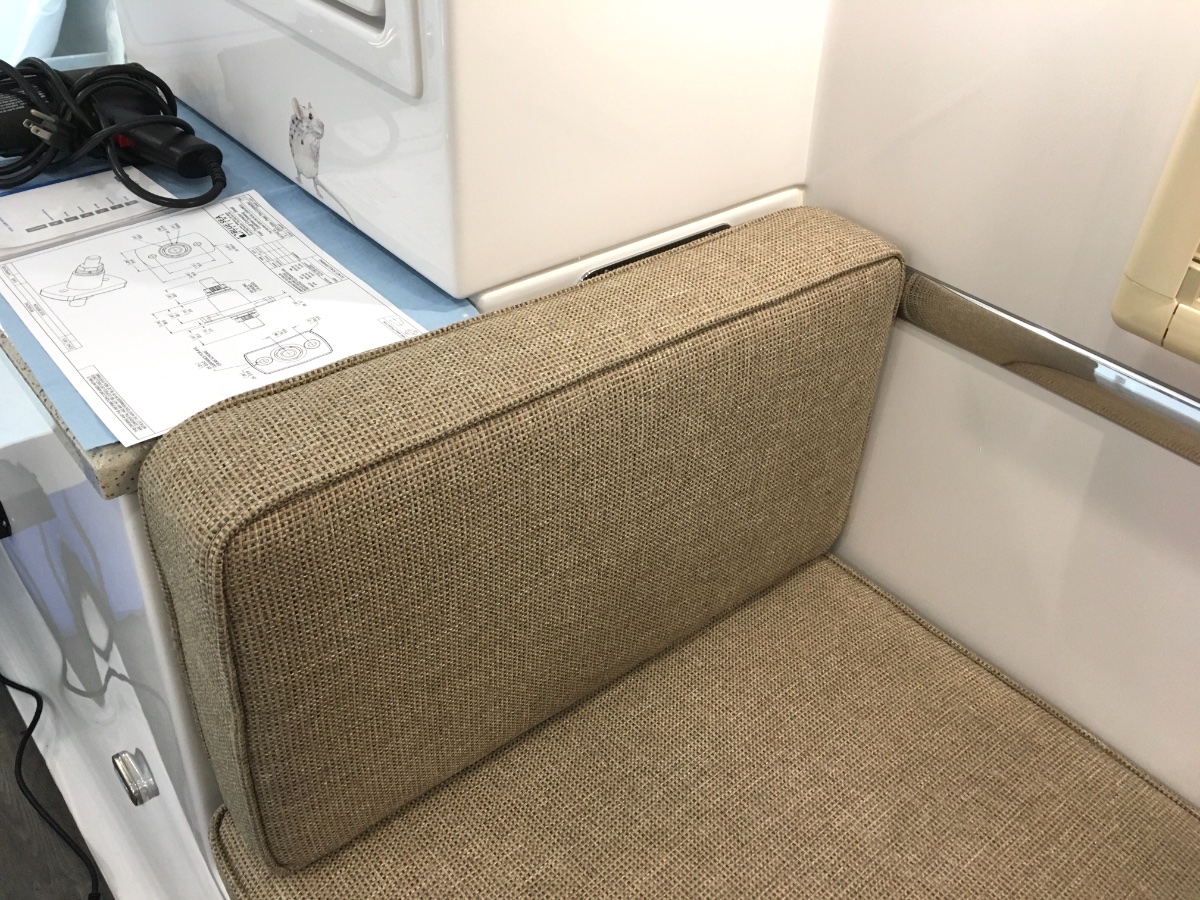
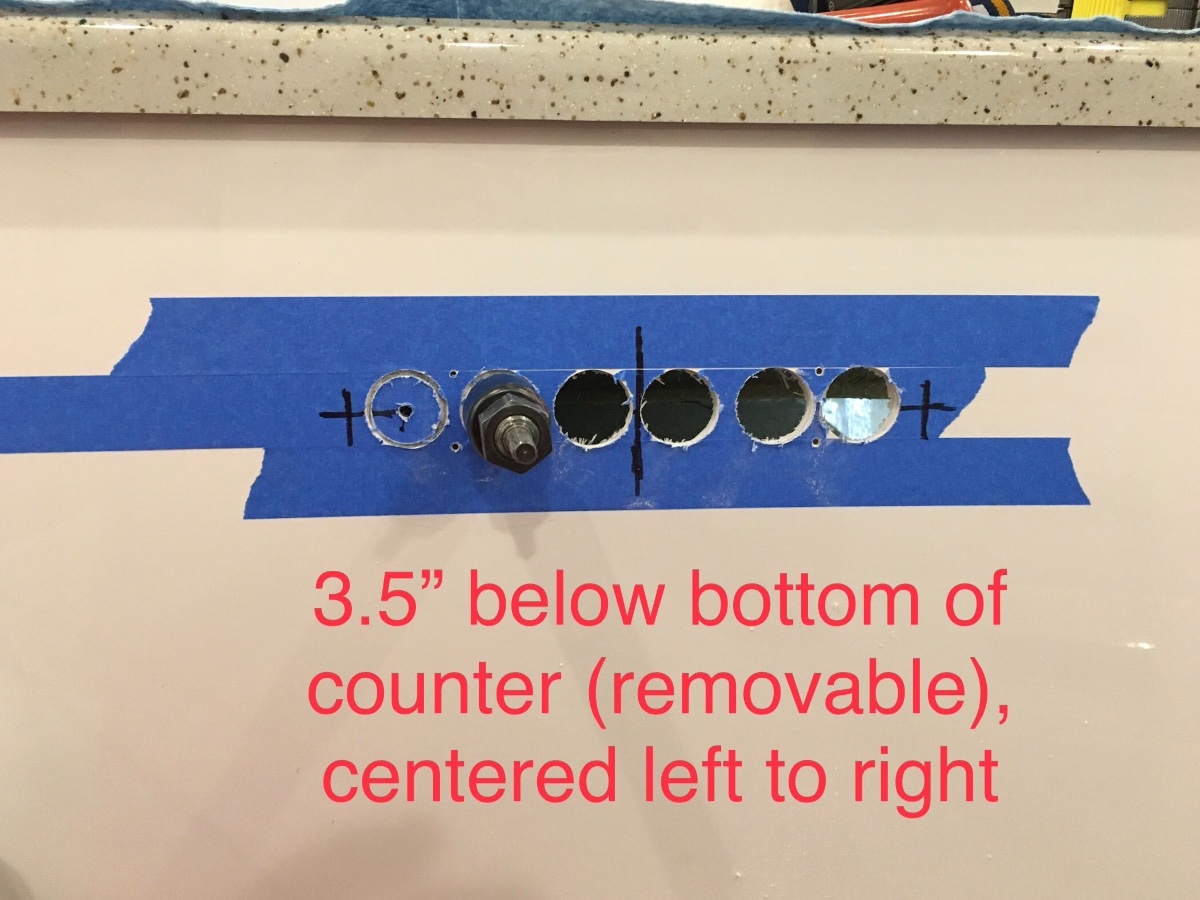
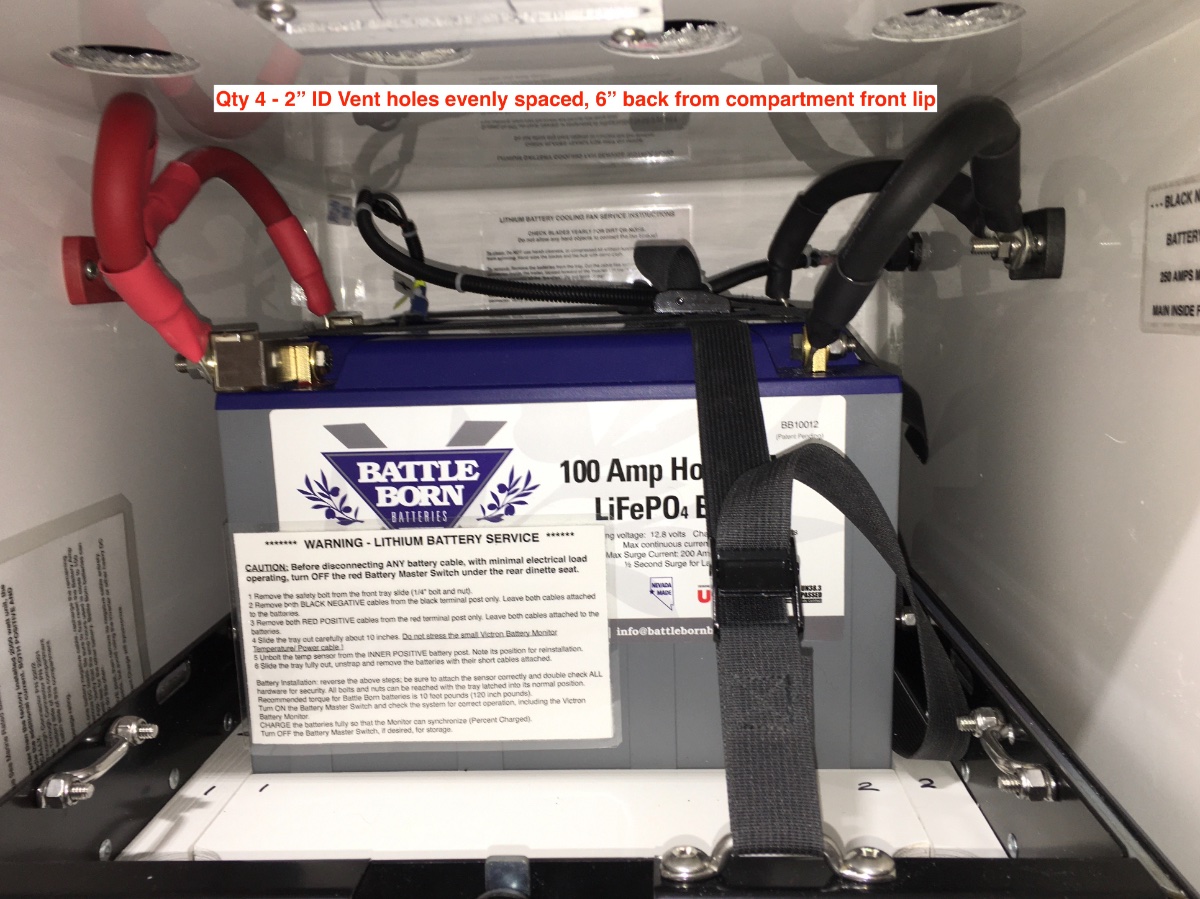
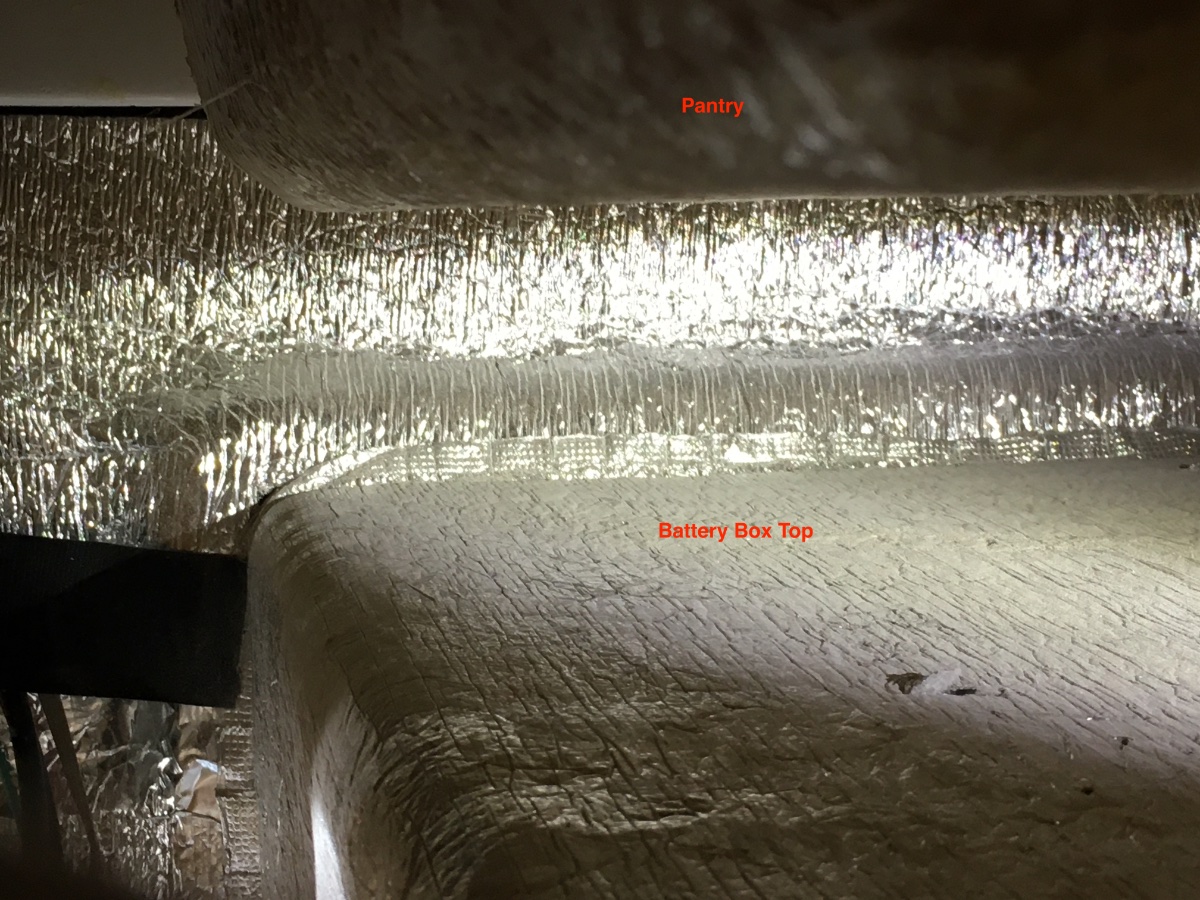
Battery box exhaust vents. Qty 3 - Perko 51840 Chrome plated brass (same part used on the battery door factory vents) ... https://www.go2marine.com/perko-ventilator-vent Make a template - there are a lot of holes to drill: The 4 mounting holes can be sized for 1/8" rivets (not recommended) or number 6 sheet metal screws. Choose the correct size for your fasteners! I chose screws. The front and back vents go here: You will be staring at these for a long time, so be very sure the holes are perfectly straight, measure thrice, cut once. Don't use a bubble level, measure up to the joining line. Here is the reason you can't position it higher: Deburr the holes CAREFULLY with 80 grit sandpaper (wear gloves or you will drive glass shards into your fingers), do not scratch the surrounding gelcoat!!!! Install the Perko cover. Repeat these steps for the rear wall. The optional factory granite countertop keeps the seat cushion slightly away from the wall in this position. If yours does not have the optional ones, the front vent will be blocked with the cushion as shown here.. Here is a view inside the compartment, looking back at the INSIDE of the rear vent. Notice you cannot position it higher or the screws will not clear the top: The third vent goes in the center of the inside wall, directly below the pantry shelf. Having three vents means that one blocked vent (a pillow for example) will not significantly affect the airflow. Finally, there need to be holes in the TOP of the battery box, to let air out from that space. Since I mounted a fan in the bottom, at the very back, I chose to place them in front, so air would move below and across the batteries, leaving no "still air" pockets. All other openings in the box should be sealed with heavy aluminum tape or a similar product. There is plenty of space on top of the box for air movement: John Davies Spokane WA
1 point
-
Weather update as of 6pm January 14, 2022: The forecast for Hohenwald for late Saturday night into Sunday afternoon is for rain changing to snow and then snow tapering off. Total snow accumulation is forecast to only be an inch or so. Unfortunately, this same forecast for Western North Carolina is not so "promising". Brevard, NC is forecast to receive upwards of 18 to 24 inches of snow. That's a bunch for virtually anywhere. But, for southern places that on average get only 6" of snow for the entire winter, its a major event. Break out the sleds because certainly there will not be much else going on around here for a few days! Bill0 points


-
Recent Achievements
-


")


")


")
