Leaderboard


Popular Content
Showing content with the highest reputation on 06/01/2022 in Posts
-
Borrowed this ingenious concept from @mossemi
 4 points
 -
I'm really missing 3m ultra marine. We've been using a collinite wax. Not as easy, but great results. The good news, collinite gives much more practice on the royal parade wave.... Hope mr. Miyagi approves. Lol.
4 points
-
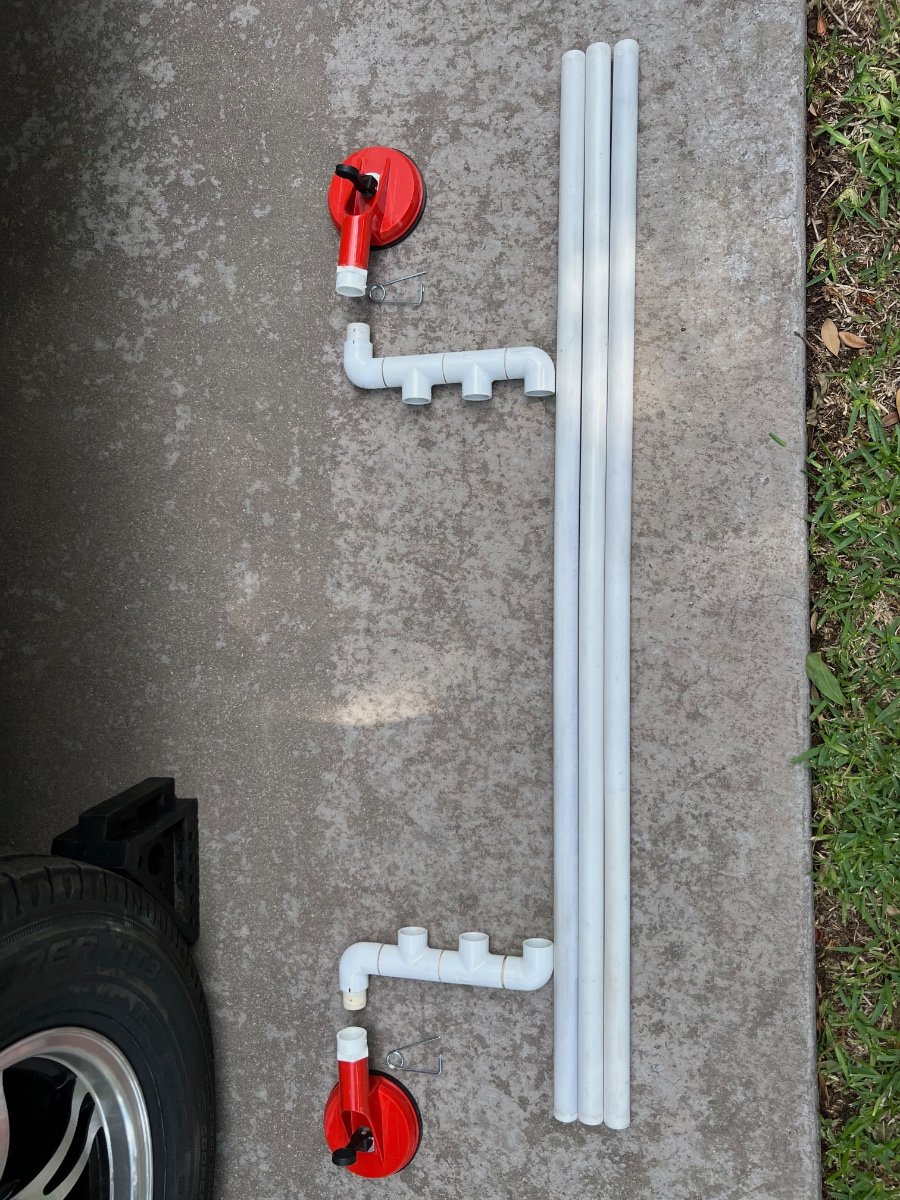
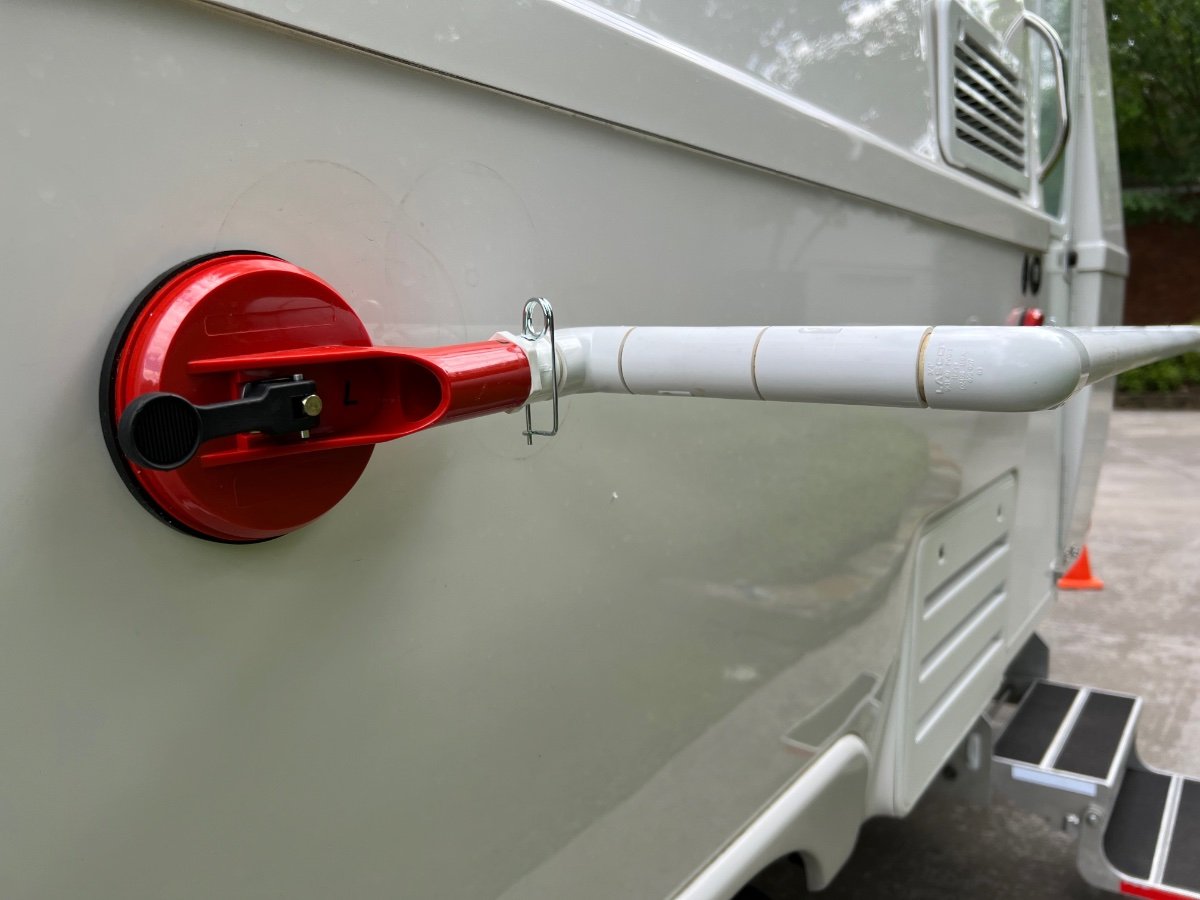
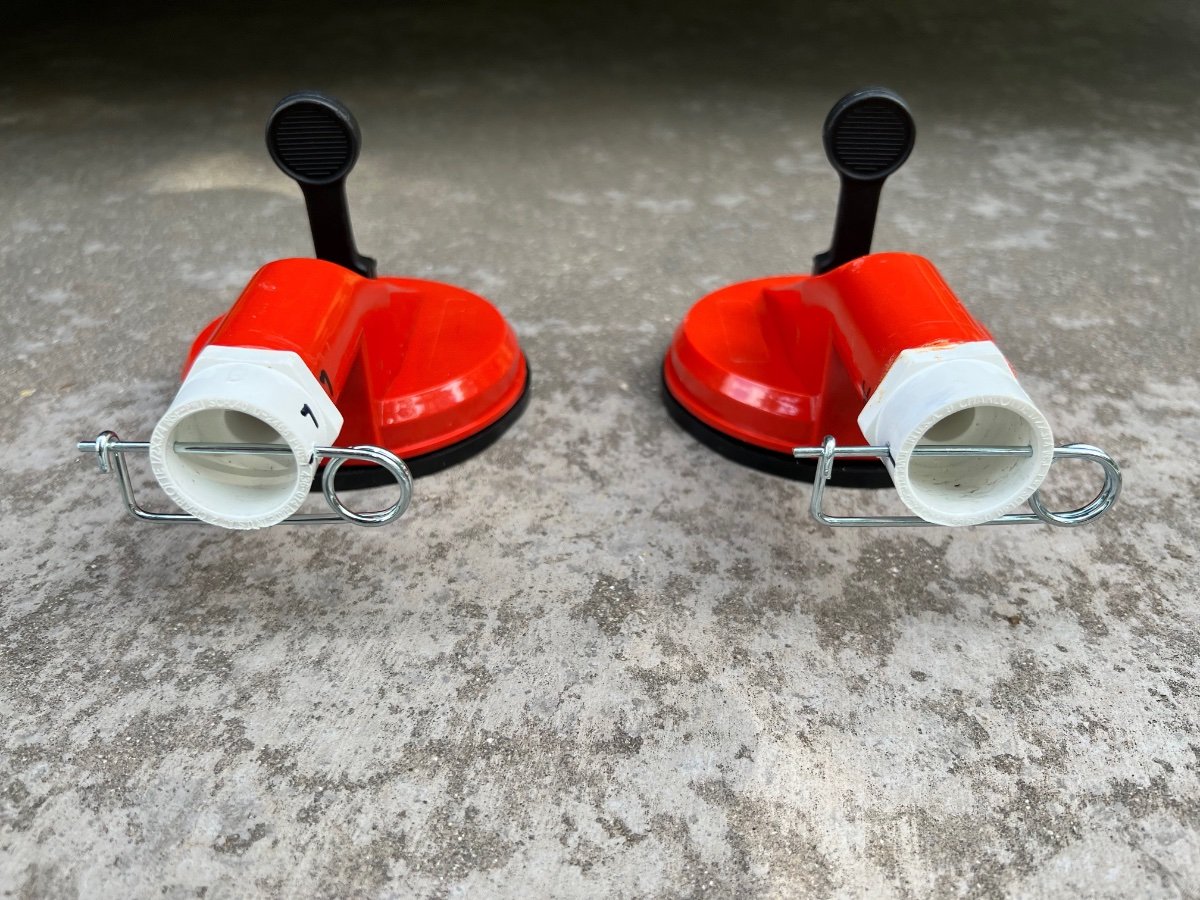
I had seen the posting on 4/22/21 by @Calypso showing an externally mounted towel bar on the side of Hull #520. The towel bar was made from a suction cup lifter and a piece of ¾" PVC tubing. I thought this a great idea and made one for our LEII picked up on 2/17/22. Due to nearly constant downpours in central TN the week we picked up Hull #990, we had immediate need for an external towel bar. We recently returned from a two week trip during which we also encountered several downpours. We used the towel bar nearly every day, often not having enough space to hang damp items. Upon our return I was about to make a second towel bar. I was thinking of adding an improvement to offset the bar/tube further from the hull of our LEII, to avoid having towels in contact with dirt on the hull. After mulling over a design for several days, I had an Aha! moment. I could modify my existing PVC towel bar assembly and add additional tubes for greater capacity, while also moving the tubes further away from the hull. Below are photos and a description of the result. Materials (Quantity, Description, Source, Cost, URL) 1- 4-2/3 In., 125 Lb. Dual Suction Cup Lifter (Harbor Freight, $8.99, https://www.harborfreight.com/4-23-in-125-lb-dual-suction-cup-lifter-57501.html?_br_psugg_q=suction+cup+lifters) 2- 3/4 in. PVC Schedule 40 MPT x S Male Adapter (Home Depot,$0.71/each, https://www.homedepot.com/p/Charlotte-Pipe-3-4-in-PVC-Schedule-40-MPT-x-S-Male-Adapter-PVC021090800HD/203811638 4- 3/4 in. PVC Schedule. 40 90° S x S Elbow Fitting (Home Depot, $0.75/each, https://www.homedepot.com/p/Charlotte-Pipe-3-4-in-PVC-Schedule-40-90-S-x-S-Elbow-Fitting-PVC023000800HD/203812123) 4- 3/4 in. Schedule 40 S x S x S Tee (Home Depot. $0.85, https://www.homedepot.com/p/Charlotte-Pipe-3-4-in-Schedule-40-S-x-S-x-S-Tee-PVC024000800HD/203812197) 2- 3/4 in. x 10 ft. PVC Schedule 40 Plain-End Pipe (Home Depot, $6.98/each, https://www.homedepot.com/p/Charlotte-Pipe-3-4-in-x-10-ft-PVC-Schedule-40-Plain-End-Pipe-PVC-04007-0600/100348472) 1- 0.091 in. x 2-3/4 in. Zinc-Plated Safety Pin (2-Piece) (Home Depot, $2.31, https://www.homedepot.com/p/Everbilt-0-091-in-x-2-3-4-in-Zinc-Plated-Safety-Pin-2-Piece-815408/204276312#overlay) The finished towel bar/drying rack shown in place below. The disassembled parts are shown below: I chose NOT to cement the entire assembly, since it would be much harder to store when in transit. Construction Cut the handle of the HF Dual Suction Cup Lifter in half transversely. A hack saw or bandsaw is recommended. File/sand the cut edges to remove burrs. Use PVC primer and cement to fasten the threaded end of each 3/4 in. PVC Schedule 40 MPT x S Male Adapters to each of the cut ends of the handles of the Dual Suction Cup Lifter. Cut the ¾" PVC tubing for the hanging tubes I chose to make 3 hanging tubes, each 45" long. This length easily fits in our rear cargo carrier and sags very little Adjust length to suit yourself. Cut 8 pieces of ¾" PVC tube to 1-½" in length. These short pieces serve to couple the elbows, tees and adapter together. Using a belt sander I slightly beveled the cut ends of the hanging tubes and the connector tubes so they would more easily slide into the tee and elbow sockets. Assemble the two "manifolds" as shown above, each having: 2 elbows, 2 tees and 4 of the 1-½" connector tubes. Use PVC primer and regular PVC cement to assemble one joint at a time. Be sure to align the open sockets of the tees and elbows. Hold each joint until cement prevents movement of components. The manifolds should be identical. NOTE: do not put PVC primer or cement on the short connector tubes which will be inserted into the adapters cemented onto each handle of the Dual Suction Cup Lifter. When the manifolds are assembled insert the hanging tubes into the three open sockets on each manifold. Again, I chose not to glue the hanging tubes to the manifolds for ease of storage. Insert the connector tube on each manifold into the adapters cemented to each half of the Dual Suction Cup handle. Again, do not use PVC primer or glue. With all components assembled, do a test fitting on the hull of your Oliver. Slightly dampening the suction cups significantly improves their grip on the hull. The hanging tubes and manifolds assembled should largely support themselves horizontally. I had leveled my trailer and used a level to also level the towel bar/rack. When the towel bar/rack is level drill a 7/64" hole vertically through the adapter coupling joining each half of the Dual Suction Cup Lifter to the short connector tube of each manifold. The purpose of the hole is to permit insertion of the zinc plated safety pin which will prevent the towel bar/rack from sagging, while still permitting the rack to be disassembled. Insert the zinc plated safety pins through the holes drilled into the adapter couplings to maintain the towel bar/rack in a horizontal position extending from the hull. I marked the suction cups and manifolds Left and Right to avoid difficulty later inserting the pins through the connectors. I also put an index mark on the adapters and manifold connectors for easier alignment. I have not yet tested this assembly in the field, but am confident it is strong enough to hold as many towels and clothes as will fit. I expect it could also support wet shoes or hiking boots. I hope this is useful to other owners. I welcome suggestions for improvements. As a final note, update your departure checklists to include removing and stowing the towel bar/rack.
3 points
-
This link covers a lot of storage ideas as well as Tooletries and Sudski. And I found it by searching for Tooletries. Mossey3 points
-
We tend to avoid even the thought of outdoor activities in April through Memorial Day, unless we plan for snow or rain. It's definitely been a colder and wetter spring this year. Ollie is still tucked away under a warm blanket. High country visits to the western Montana mountains...forget about it until after the 4th of July. https://www.kpax.com/news/montana-news/dozens-of-camping-trailers-abandoned-following-montana-spring-snowstorm2 points
-
What could possibly go wrong? 😃 Yeah, have heard that it's not cheap to get help recovering a vehicle there too. I know folks do get out there regularly around this time of year depending on where the water is but that you really have to be heads up about what the surface is like, and that it can change quickly as you move around.2 points
-
So you were using 2 surge suppressor’s back to back when the problem occurred. Are you still using both surge suppressor’s while plugged in at home? Mossey2 points
-
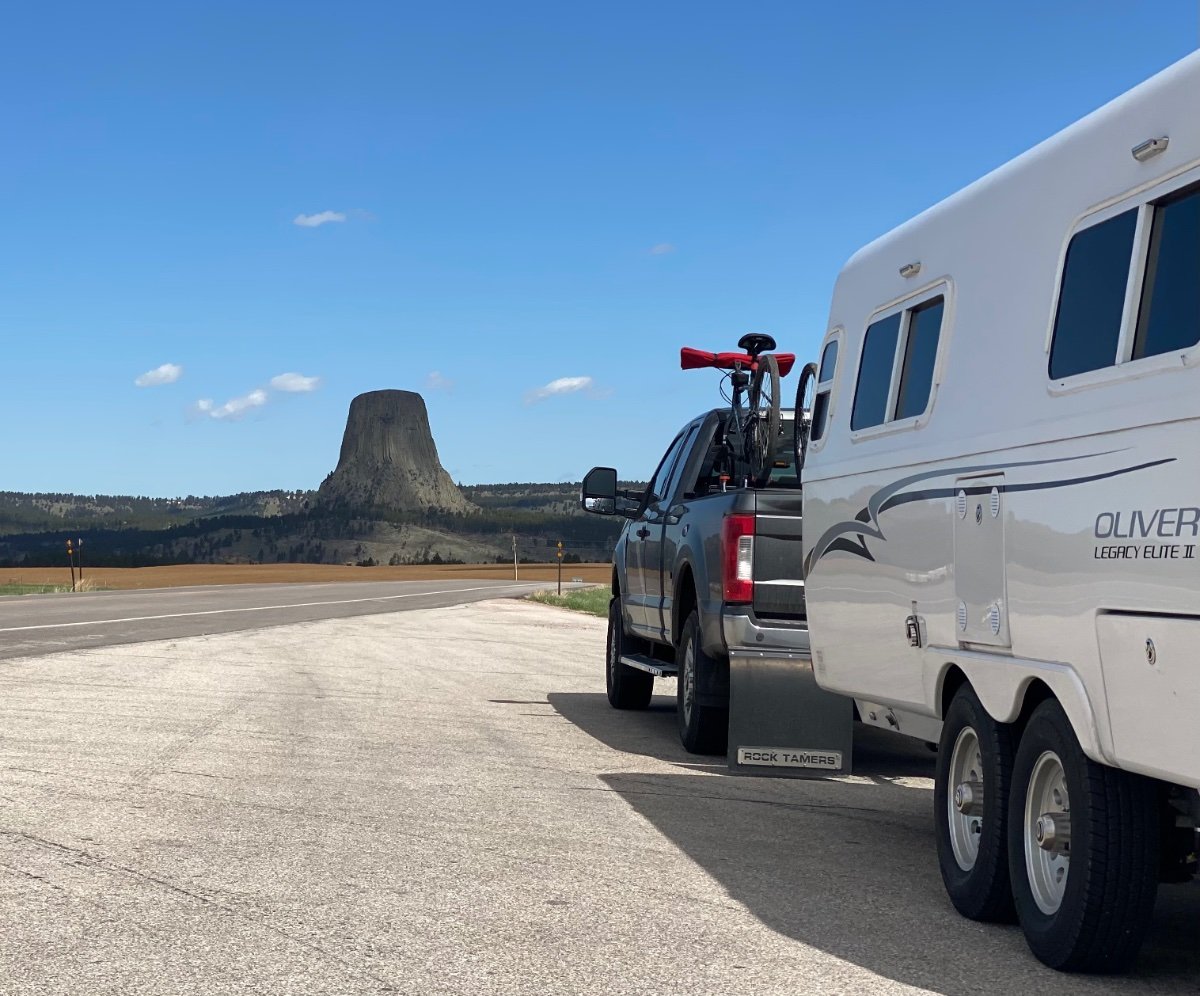
They should sail out at a about a 45 degree angle to the ground at speed, so the debris will bounce down and not back at the truck (and onto the bumper, tailgate and lights!). This is how the Aussies do it, it is even described that way in their Rock Tamers supplement to the manual. And yes, most unfortunately, rooster tails of gravel happen when the flaps are cut too tall, so they contact the surface over dips. I tried RTs on the trip home from Hohenwald (4000 miles) and decided they were not at all adequate for my needs. https://www.clearviewaccessories.com.au/wp-content/uploads/2019/03/RT_MANUAL.pdf Why RT USA doesn’t include this info is baffling! it is not like the Aussies have the only gravel in the world. FYI I made my own bumper inserts using the two 3 inch strips I cut off the bottom, that helped significantly! We just did about 3 miles of of rough double track (roughly “graded” by a tractor), 45 miles of two lane gravel ranch roads, with another 15 tomorrow, near Steens Mountain OR. Lots of dust, lots of washboard, at up to 40 mph (the Ollie rides smoothly at that speed). No stone damage. All the chaos is channeled by the Stone Stomper mesh fabric underneath the tongue and frame, towards the three sets of rubber flaps. 42 psi in the truck and Ollie tires, nothing came loose or broke in either. No blown shacks 😳 John Davies Spokane WA
2 points
-
Clay bars don’t really buff anything. They do the serious cleaning. After you wash and dry, you spray on a solution (I use a spray quick detailer) for lubrication then rub with the clay and it picks up everything that isn’t supposed to be there leaving a very smooth surface. Wax is after.2 points
-
The British version is pronounced Sera-Mikkdt2 points
-
If you spring for Foy’s replacement top above the fridge, you’ll regain that space easily. as far as the convection feature, I’ll report back next week after we spend 10 days boondocking. I have packed frozen cookie dough balls…2 points
-
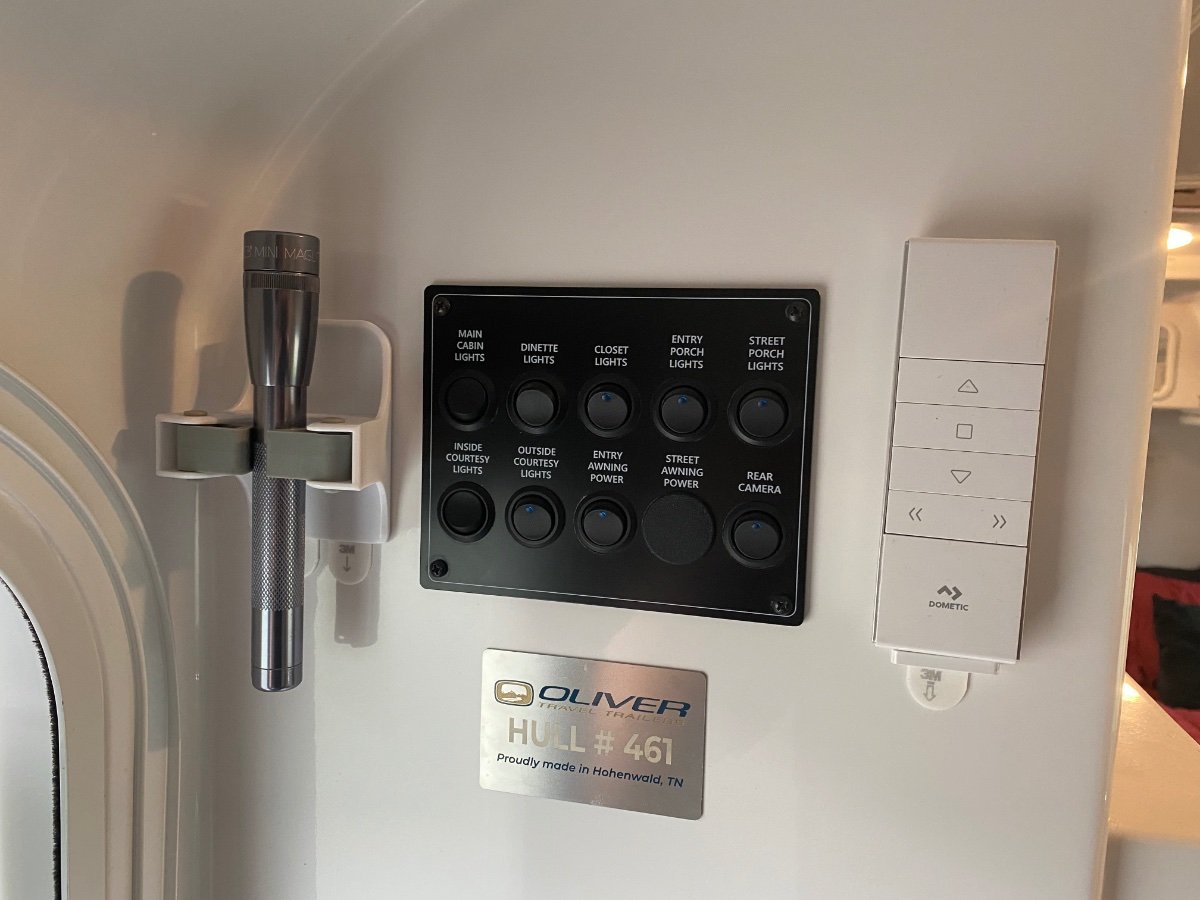
The 3M Command products are perfect for the smooth interior surface of the Ollie. Just added one of the Command broom holders by the door to keep a flashlight handy. The broom holder is the perfect size for a 2 AA cell MagLite. Also used Command strips to mount the magnetic holder for the awning remote so the remote is close by when set up at a campground (but the remote does get put in the nightstand drawer when traveling since the magnetic mount isn’t very strong). And the Command products all remove cleanly from the fiberglass so I (or a future owner) can easily change things in the future.
2 points
-
I am a huge fan of Mr. Miyagi. Wax-on, Wax-off. Found several tins of the discontinued, 3M Marine Ultra paste wax. Its pretty easy to apply and buffs out nice. Plus, It gets me ready for the Summer Parade Season with my parade wave (elbow, elbow, wrist, wrist). 🤪2 points
-
@Jps190, I'm with you. I'll wait and see. Our 2008, waxed twice yearly, with quality, uv protection carnuba based wax, still looks great, stored outside 24/7/365. We also wash it frequently, with marine soap. My only tangential experience with ceramic coating was my neighbor's 28 ft boat. Took two days to complete. Lasted 2 years in Florida sun and salt spray. Our boats do better/look better than that with twice yearly wax, and far less costly. My neighbor sold the boat, so didn't care. I would. I'd look for a local mobile detailer if I didn't want to keep up with waxing routines. Everyone has to follow their gut on this decision. Either way, if not diy, it's a high $$$ investment.2 points
-
I would not care to have the superfluous dicor everywhere, as I've seen on so many sob trailers and motorhomes. I think they throw all that crap up there to hide shoddy workmanship. It definitely makes tracing leaks harder, and resealing more difficult, if there are bulges of sealant, everywhere. Unlike others, I've had a couple roof leaks, in 15 seasons. The original dometic ac bolts needed to be retorqued after a year and many miles. Easy fix. Then, about a year or two ago, the bath fan leaked. Gasket failure. Needed reseating. We decided to replace it with a better fan, with a light, and no regrets, rather than reseating an old working fan. We used butyl tape to bed the new fan, and I love the overhead light in the bath. Oliver generally does an amazing job with sealing penetrations, and uses good quality, long life sealants, imo. I'm in my 15th season, and have very few complaints. Two small roof leaks, in over a decade, is pretty good, for me. We have also had a window sealant leak, and, the third tail light is the biggest culprit. Ours, I think is forever fixed, imo. BUT, hey, my trailer is in its 15th season. But, our boat is in its 44th. We're used to resealing, as necessary.2 points
-
Hello, We are Kathy & John from Michigan. After searching for several months we found a 2021 Oliver Elite ll just 10 minutes from our home! It was exactly what we’ve been looking for and we purchased it on 5/30/22. We previously owned an Airstream Nest that we loved for short trips but quickly found it too small for anything more then a few days. The amazing coincidence is the couple we bought our Nest from and the couple we bought the Oliver from are from the same city and just minutes from our home! What are the odds of that?! We are super excited to be a part of the Oliver family and look forward to many adventures!
1 point
-
My Garmin InReach Mini satellite communications device also can get weather without an internet connection. Just another reason to have more than one way to get important information. Bill1 point
-
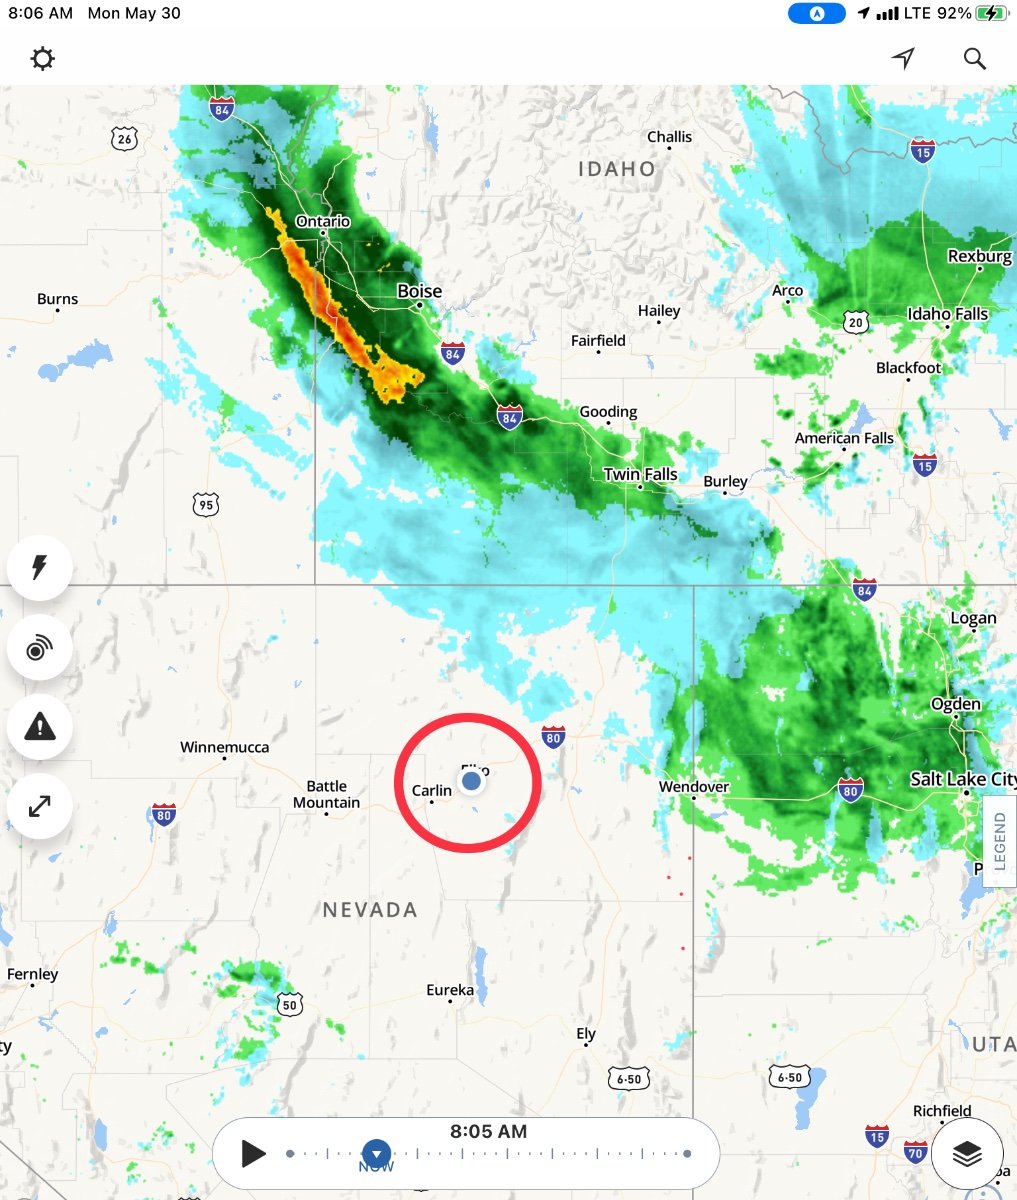
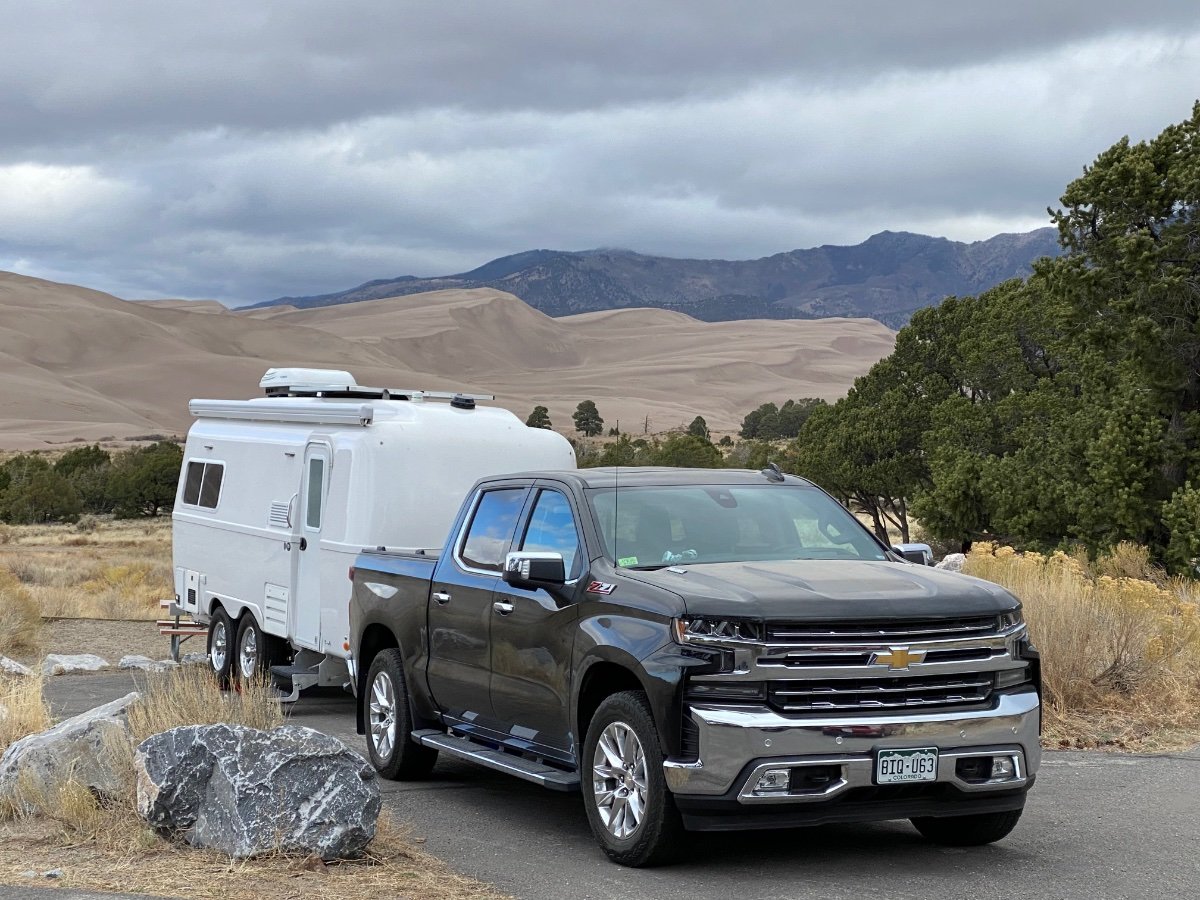
We were in Great Basin NP and the Ely/ Elko areas while all that was going on This pic shows why an occasional Internet connection is so invaluable. We were starting back to Spokane, which is more or less due north from there. Hmmmm…. Do we drive to Boise then west, or cut west and go north through Oregon? What an easy answer! We did ride out the worst of the wind and rain for two nights in Elko at the very lovely and affordable Iron Horse RV Resort, $45 per night full hookups. When we left Monday morning heading WEST, there was fresh snow on all the taller mountains. I am sure the high points in Great Basin got hammered. Spring camping in the West has its challenges. But the air is so very clean this time of year. John Davies Spokane WA
1 point
-
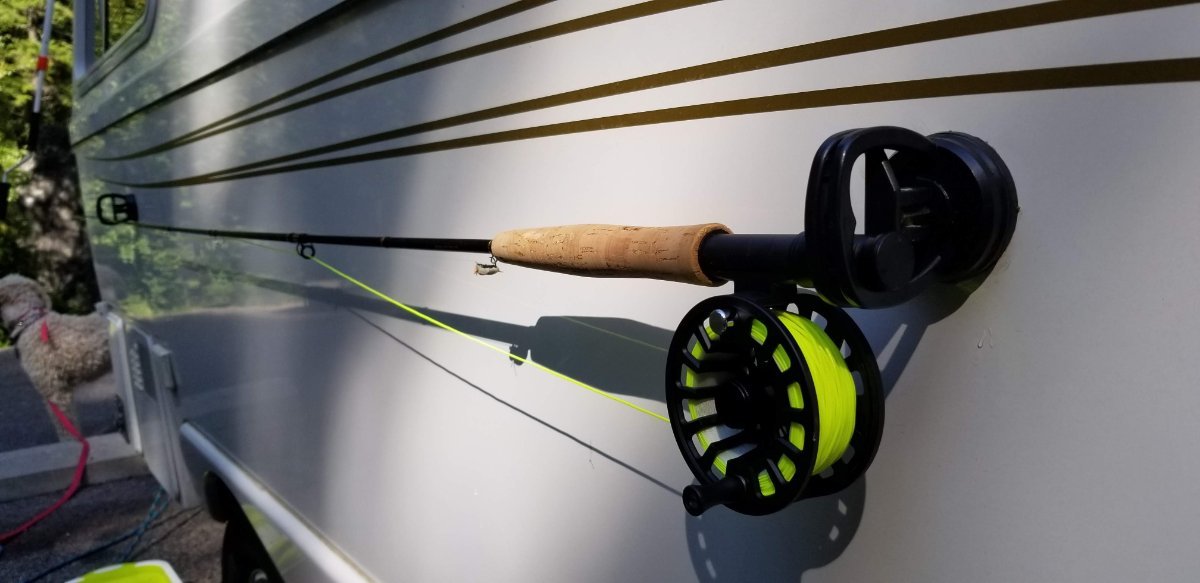
And people ask me why I always wait until after July 4th to head West for fly fishing. Bill1 point
-
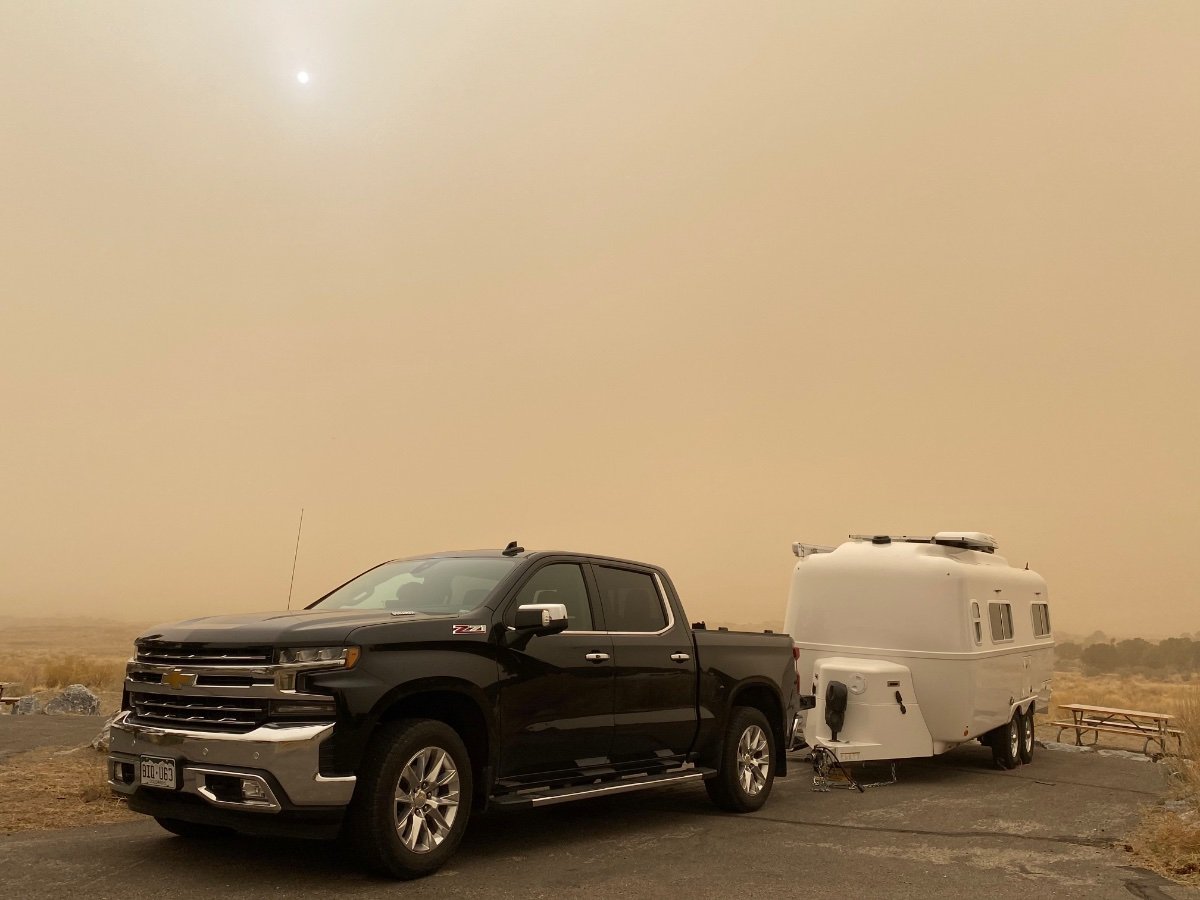
Great Sand Dunes NP in Colorado. Wind storm makes for a sand storm with 50 mph gusts and yes, that is the sun in the photo! Next morning we could actually see the dunes!
1 point
-
Here is what we use... Not large but good enough for a towel or a couple of bathing suits.
1 point
-
Please tell me you were not towing Mouse albert1 point
-
Songs, In Respect to the Ukrainian people. A mother's and son song, during a time of war. As long as there have been wars, there have been sad songs about war – and losing children or loved ones to the devastation of war. However, with the recent protests in Maiden, Ukraine, this old song has taken on a new life, mourning the loss of those killed while unarmed at the recent protests. “Plyve Kacha” or “Plyve Kacha Po Tysyni” translates literally to “the duckling swims”, but the lyrics are a dialogue between a mother and a son going off to war, according to the BBC’s Irena Taranyuk. She translates two of the most moving lines of the song this way: “My dear mother, what will happen to me if I die in a foreign land?” “Well, my dearest, you will be buried by other people.” Oh, duckling floats on Tisyna* Duckling floats on Tisyna. My mother, don't swear me, My mother, don't swear me. Oh, if you will swear me at dark hour, If you will swear me at dark hour. I don't know where I'll die, I don't know where I'll die. Oh, I'll die on foreign lands I will die on foreign lands. Who will prepare a grave for me? Who will prepare a grave for me? Oh, another people will prepare, Strangers will prepare. Won't you regret, mother? Won't you regret, mother? Oh, my son, how could I not regret? My son, how could I not regret? You were laying on my heart, You were laying on my heart. Oh, duckling floats on Tisyna21 Duckling floats on Tisyna. https://lyricstranslate.com1 point
-
Did you drive out into the playa? I’ve seen some cool sunset and sunrise photos with dramatic cracked mud from there1 point
-
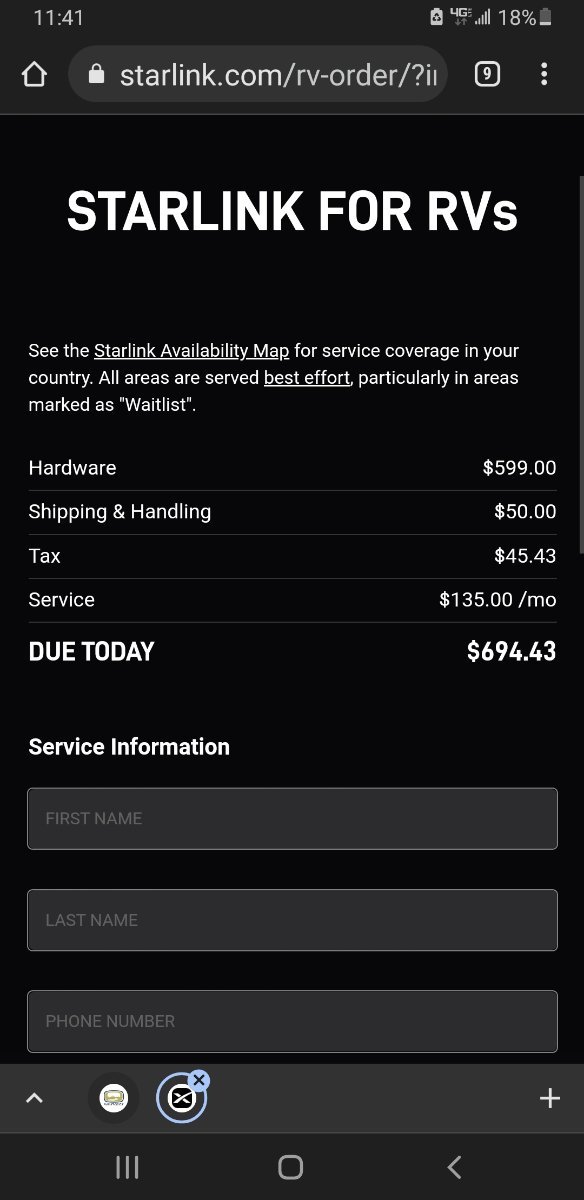
Had Starlink for RVs been available when we finalized our build, I would have skipped the Cradlepoint. But I had good experience with CP in another rig, so opted for it in our Oliver. That said, if you opt for CP, don’t bother with the service bundled by Oliver - Mobility Help Desk. You’ll get MUCH better rates if you simply purchase a SIM and plan directly from the carrier. Mobility Help Desk plans are ridiculously expensive, and the “help desk” doesn’t offer much help in setup and/or configuring the system to your needs1 point
-
Got 5 of these guys being sent to me. I ordered them today and they are all ready being shipped.1 point
-
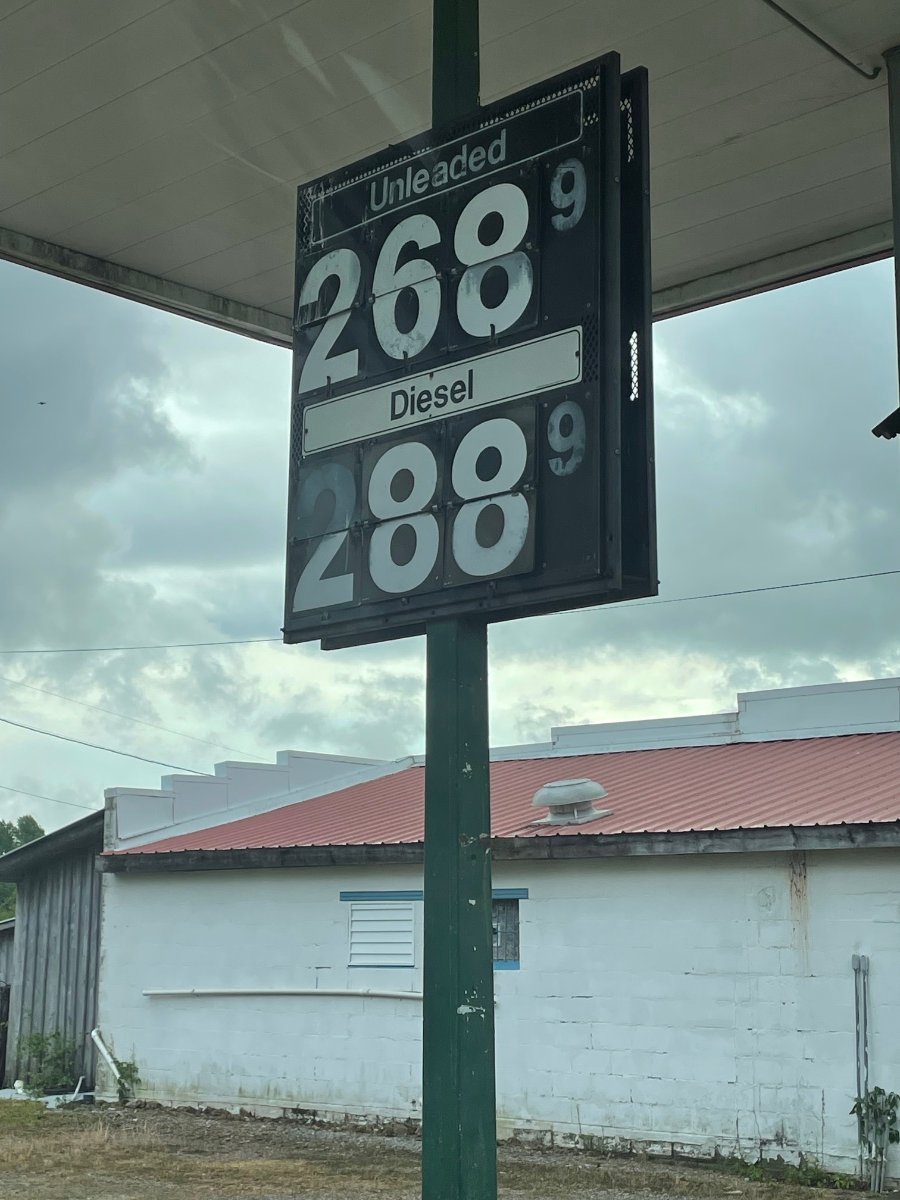
Fulgham KY, a few days ago. But the pump don’t work cause the vandals took the handle
1 point
-
Brilliant! Another item for the list1 point
-
I may just have to tackle this one! Nice Work!1 point
-
See my above link for Tooletries. They are also sold on Amazon. Silicone and no adhesive. Easy peasy to install and move1 point
-
Yes, even for the 2016 OLEII we received (2) 10' sections.😁 I still have mine - new, never been out of the box. Black tank is getting a bit full though 😉. Bill1 point
-
Nan, when you install your screens, put a small tarp on the ground in case one of the little spring hooks flies off the little tool. It makes finding the hooks much easier. (Ask me how I know...😂😂😂)1 point
-
That load should account for little more than 50 amps overnight. Something is wrong with this scenario. Hold off on that gennie until you discover what went wrong.1 point
-
This highly depends on where you will be storing your trailer. I have 2 vehicles with Opticoat pro ceramic on them. My truck lives outside and my wires car lives in the garage. If you are storing inside then I would say yes to ceramic on the trailer. If storing outside then I would probably advise against it. The coating I have is supposed to last "5 years". Wife's car still looks immaculate, but the horizontal surfaces on my truck (hood and roof) appear to losing there hydrophobic properties after about 1.5 years. If storing outside I would probably just wax it every 6 months or pay to have it done. With ceramic if it starts to break down you have to remove it with mechanical means to start over which will add to the expense of maintaining your trailers appearance. Wax is just wash/polish/wax again to be good as new. John1 point
-
Your question sounds straightforward but the answer is complicated and multi-dimensional. Cooling a hot trailer to the preferred set temperature is a function of the capacity of the AC expressed as the hourly maximum Btu's of heat that the AC can extract from the inside of the trailer versus the heat gain into the trailer from the outside. My AC is rated at a maximum of about 13,500 Btu/hour so I will use that as an example. If the trailer is absorbing heat from the outside (heat gain) at a rate greater than 13,500 Btu/hour, than the air conditioner will not be able to cool the inside of the trailer at all. It will be doing well just to keep the inside from heating to warmer than the outside. If the outside temperature is 95 degrees and the heat gain is 7,000 Btu/hour, then 7,000 Btu/hour of AC cooling capacity will offset the heat gain and the remaining 6,500 Btu of cooling capacity is available to actually cool down the inside to the preferred temperature setting. If the outside temperature is 105 degrees and the heat gain is now increased to 10,000 Btu/hour, then there is only 3,500 Btu/hour of cooling available to actually lower the inside temperature and it will take longer to cool the inside. As the inside temperature falls relative to the outside temperature, heat gain will continue to increase. Heat gain is a function of the several factors, the most important being the difference between the outside temperature and the inside temperature. The good news is that compared to most trailers, the heat gain in the Oliver is on the low side if the user cooperates. This lower heat gain is a function of many design attributes including the insulation between the hulls, the white outside color, the tinted windows and the "tightness" (very few penetrations of the hull) that minimizes the number of outside air exchanges per hour. To get the most out of your air conditioner, you must park your trailer in the shade, make sure all windows and vents are closed tightly, and don't open the door unnecessarily. If shade is not possible, extending the outside awning can help reduce heat gain in the trailer somewhat as can closing window shades. The speed with which one can actually cool down a hot trailer is a function of how warm the inside is to start with (stored heat in the thermal mass of the trailer itself) and the excess cooling capacity of the AC remaining after offsetting the ongoing heat gain from the outside. There are things you can do to achieve the best performance upon arrival on a hot afternoon. After minimizing heat gain to the extent possible by parking in the shade, etc. , make sure that the trailer is closed up as tight as possible by closing all windows, hatches, doors and vents to the outside. Then turn on the AC and set the thermostat down as low as it goes, and open all the inside vents on the AC itself to maximize airflow through the heat exchanger. You will want to turn the thermostat down way low because you want the compressor in the AC to run continuously until the trailer cools to the desired temperature after which you can reset the thermostat higher to hold the desired temperature. I have concluded the Dometic thermostat in my Oliver does not work very well. It will cycle the compressor off and on unnecessarily, even when the inside of the trailer is still well above the set temp. By setting the set temperature down to say 60 degrees initially, the hope is that the compressor will run continuously until the trailer is cooled . Any cycling will greatly increase the time it takes to cool the trailer. While the trailer is cooling down , stay outside if possible and try not to open the trailer door unnecessarily until it has cooled down inside. A human body adds several 100 Btu's an hour and two persons inside can easily add 500 Btu's an hour to the cooling load. Opening the door several times can do the same. Once the trailer has cooled inside to your desired set temperature or below, you can move inside, raise the thermostat setting to your preferred set temperature and the AC should cycle normally to maintain the inside temp you want.1 point
-
A Memorial Day Salute to those service members that served and sacrificed everything. Let us never forget, Freedom is not Free.1 point
-
Not sure I could drink enough beer to make me want to eat those.... Yuk!1 point
-
Well, that's about as gross as it gets! gazillions of cannibalistic, squishy, slime creating, Ollie splattering critters ambling across the road. Yuck, just yuck. On the other hand, it is not all as bad as it seems. Should you break down amidst the infestation, you will not want for food. According to that all knowing source, Wikipedia, "Native American tribes historically hunted and ate the wingless Mormon cricket as a staple protein, and today Thai bars and restaurants serve deep fried crickets with beer. Additionally, over 80% of the world today incorporates insects into various cuisines." Break out the griddle . . .1 point
-
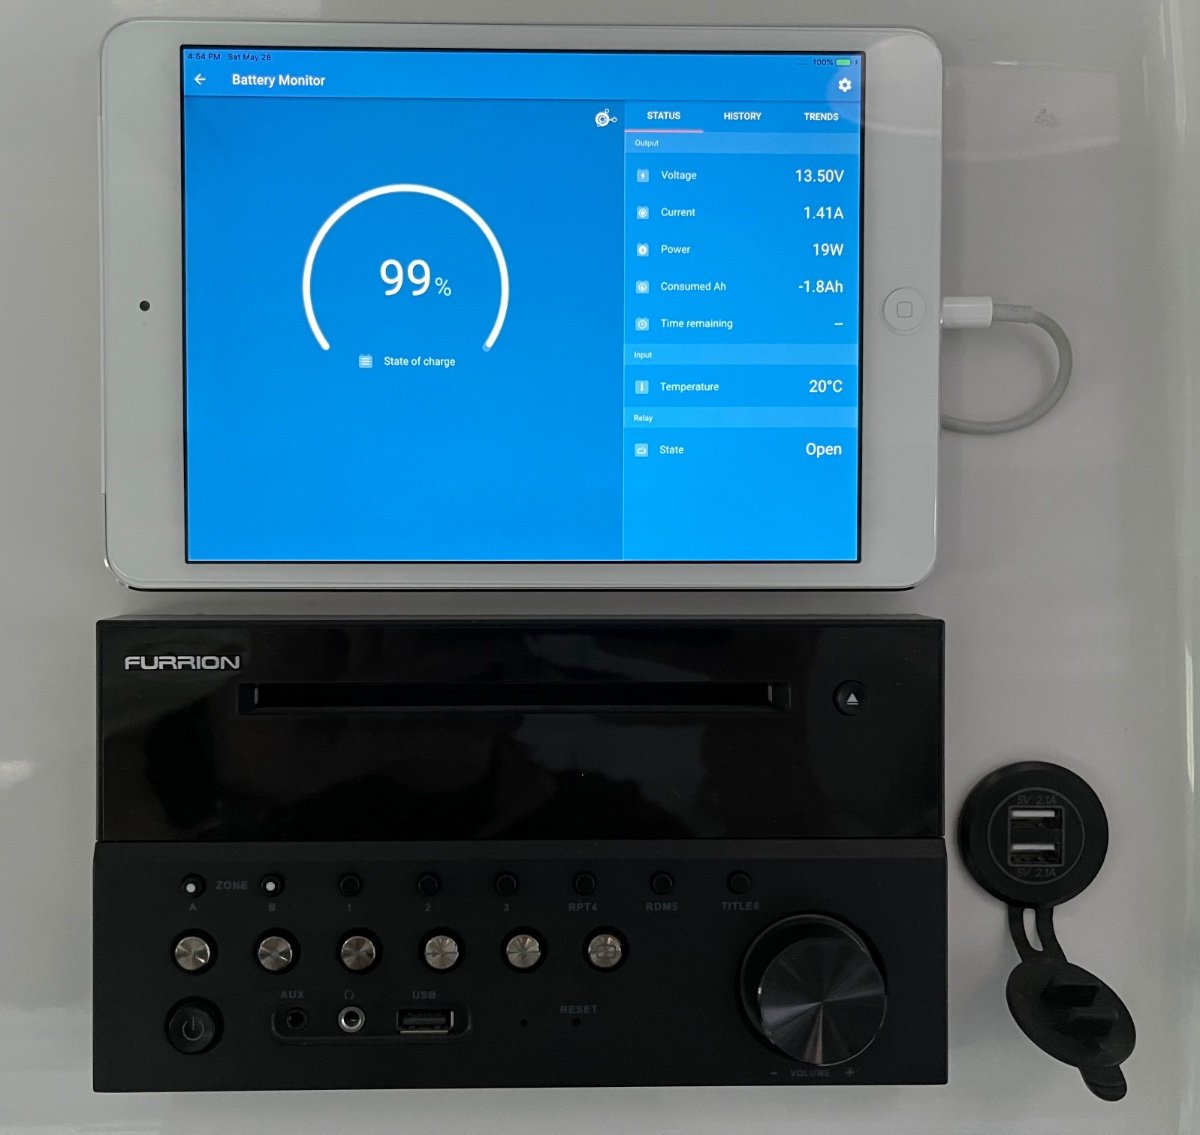
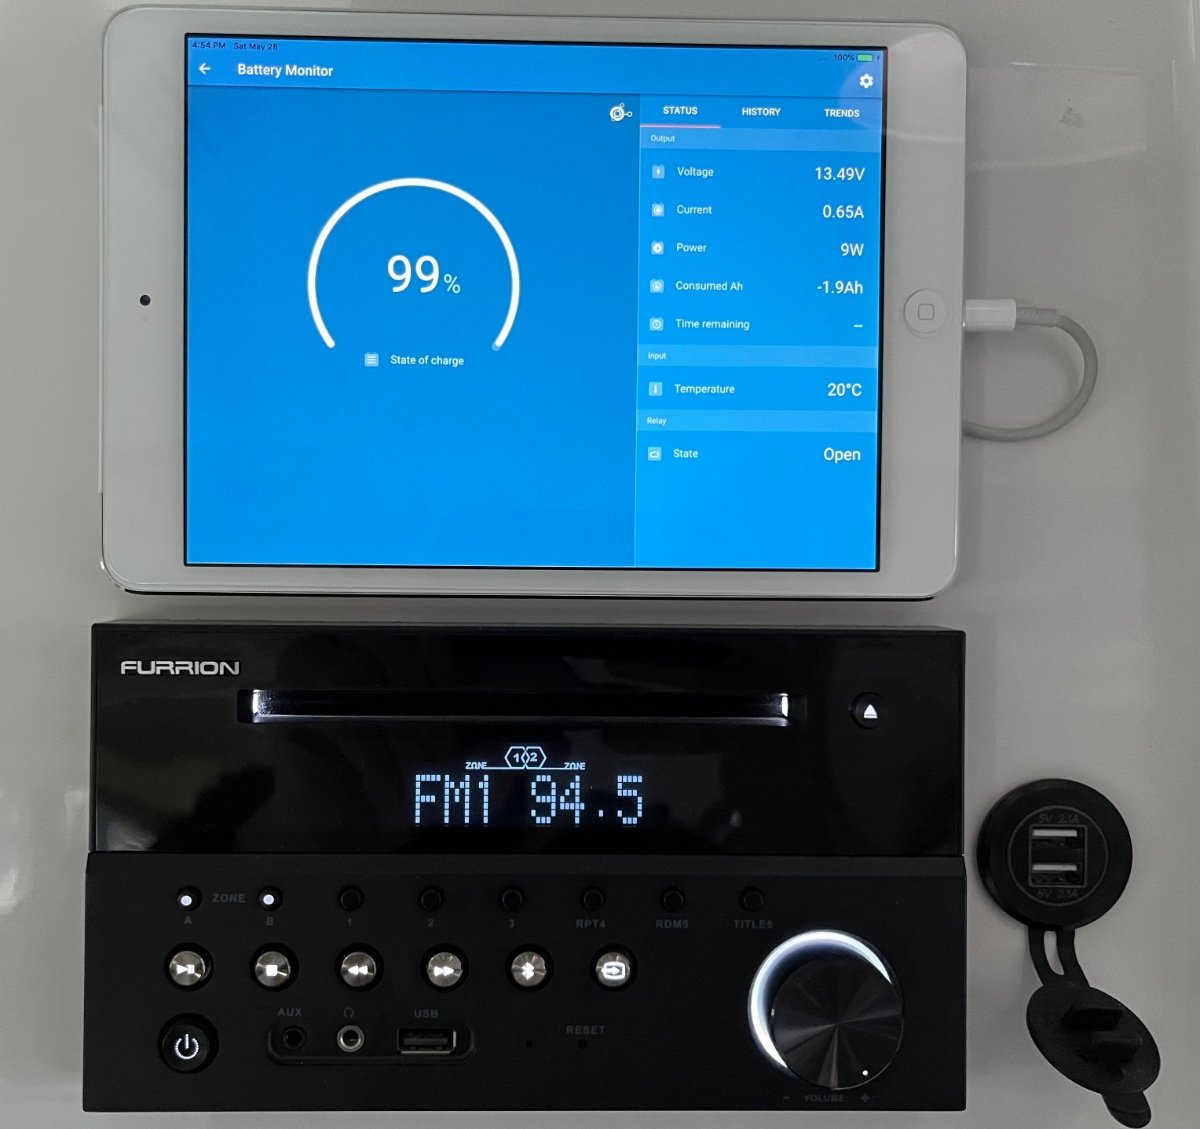
I posted this in another thread and from the positive reaction I decided to make it a stand alone one. For five camping seasons I have been hating the back lighting on my Furrion radio head. The normal mode is very bright, when I switched it OFF by pressing the POWER button It dimmed a little and showed the time. I have been pulling the circuit breaker for it sometimes….. until I finally read the @#$&* operating manual, a week ago. Normal ON: Short push STANDBY: Long push completely OFF: John Davies Spokane WA
1 point
-
We've had a long thread on Starlink running for quite awhile. Several people here have it at home, and @IL_Travelers has been using the roaming ability on a trip out west. His comments are on the page 4.1 point
-
Can be paused and restarted, pay as you go, in one month increments. 30 days to return for a full refund of equipment cost, per the website.
1 point
-
Also announced today, Starlink for RVs https://www.starlink.com/rv1 point
-
If you have 630 AH of Lithium battery storage I can't for the life of me imagine you would ever need a generator to supplement your electrical needs. Again we only have 450 AH in our 7 year old wet cell lead acids batteries which effectively only means 225 AH without theoretically damaging the batteries. We live above the 45th parallel and not once have we ever needed a generator, and this is camping from the first week of March through about mid Oct. To the best of my recollection the lowest our charge ever became was around 83-84% capacity due to cold weather and running the furnace far more than normal. Given our minimalist style of camping a 100 AH Lithium would probably work for us, based upon past history of electrical usage. However I will most likely do a 200 ± AH battery bank of Lithium once we make the change over. As the saying goes YMMV.1 point
-
From a ticket I opened last year (Jason): "The 340w solar panel system can generate up to 18.8a per hour but that is under perfect conditions which would be sunny day, no cloud coverage at high noon in the south. Between sunrise and about 10am this will be much lower but you should see it increase as the sun continues higher but will start to decrease around 2pm once the sun starts it descent. Under real world conditions you can expect on sunny days depending on your location and time of year to be anywhere between 50ah - 125ah. The farther north the less high sun exposure there is for the panels." The 18.8a number comes from Zamp. Here's a link to the solar panel: https://www.zampsolar.com/collections/roof-mount-kits/products/170-watt-long-expansion-kit In my brief experience with them, I have seen a maximum of 120ah collected in a combination of being on the road and at a campground one recent day in NC with a clear sky all day and full exposure in both places. It would probably be somewhat better at the summer solstice with clear weather. I have the Lithium Pro package.1 point
-
I found this review on YouTube. Hopefully, it provides you with more information to assist in making an informed choice about Starlink:1 point
-
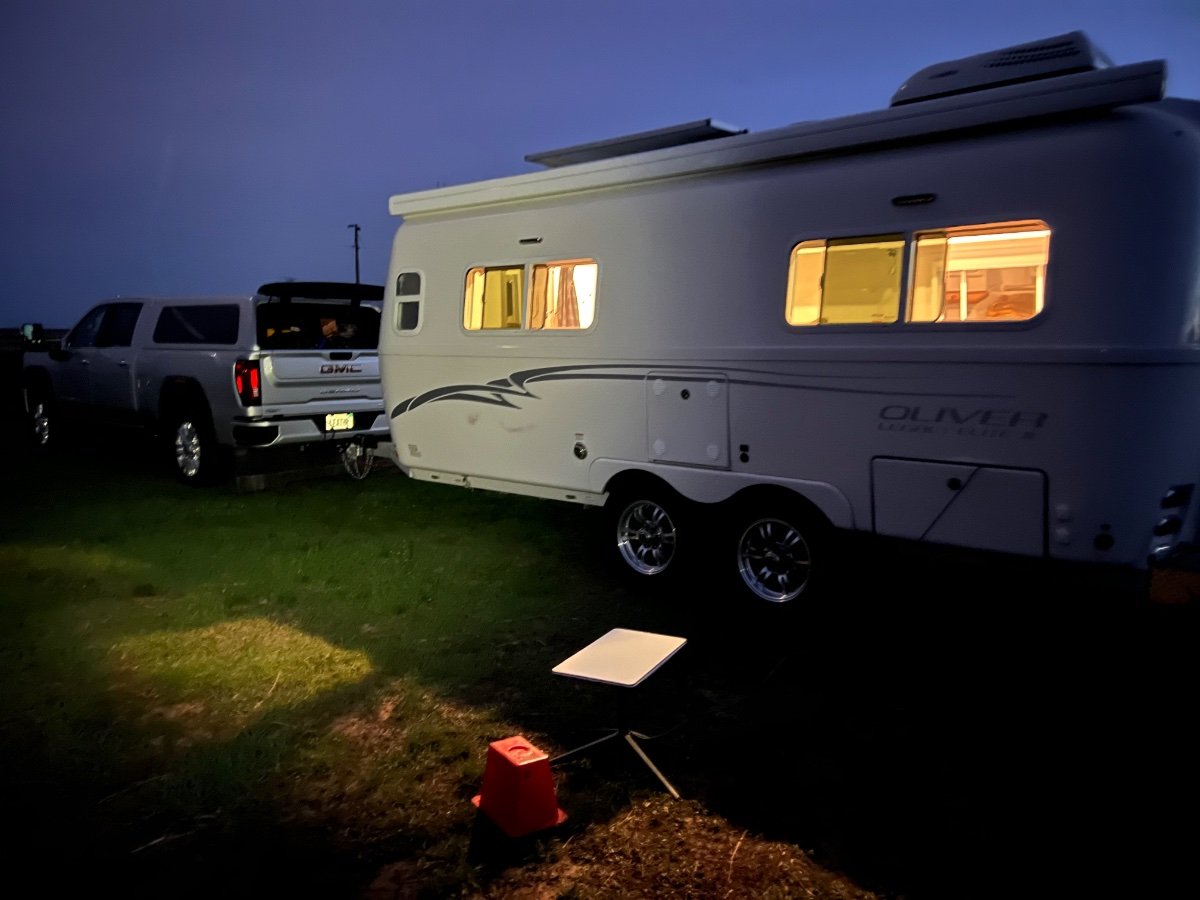
Hello Everyone, Finally, I have arrived at my first Harvest Hosts overnight! Diamond A Cattle Co., Pukwana, SD, is a great spot if you are traveling west on I-90. Kudos to my host, Crystal, who met me at the road and led me to her nice, flat pasture. There were two other campers boondocking; however, there was still oodles of room. What an exhausting drive; I counted 11 semi-tractor trailers blown over on their sides due to the storms and ferocious winds between Sioux Falls and Mitchell, SD. I was in a windstorm reminiscent of the Dust Bowl. If Oliver every wants a testimonial for wind-handling performance, that was it! Let's get to the real purpose of this note: TONIGHT'S UPDATE ON STARLINK With my Sheridan, Wyoming trip in mind, yesterday I signed up for Starlink "Portability," even though experience has shown that Dishy works fine in areas other than my local service area. For the extra dollars per month, it just seems to me the safer bet. Besides, Portability itself can be canceled for the months it is not needed. When I arrived at my HH spot tonight, I immediately went to work on Starlink. I set Dishy up on the rear street side and snaked the router cable in through the basement, through the door into the cabin, and then plugged it into the Starlink router. (NOTE: Coating the rubber seal on the router cables with silicone grease makes them much easier to plug and unplug.) I plugged the router power cord into the router and then into the outlet above the bed and within one minute I had my Internet WiFi network running in R-Villa. Running the Starlink speed test: 101 Mbps down, 21 Mbps up Ookla speed test: 123 Mbps down, 26.4 Mbps up Fast enough for all my purposes! The photo shows "Dishy" next to the red Andersen block. You can see the router cable running into the basement door.
1 point
-
UPDATE ON OUR STARLINK: Our package from Elon Musk arrived yesterday, 04-28-22. As I previously stated, I ordered the kit to be shipped to our home in Morton, Illinois with a service address of Sheridan, Wyoming, where we will be camping in a couple of weeks. I was eager to try out the system, since I have learned that most of the Starlink kits that are being shipped are equipped with roaming capabilities. I checked the Starlink map on the website and searching my localities. It is a simple task; there is a small icon in the upper left corner to click, and a world map opens showing light and dark green shading where coverage exists. I found that Morton, IL, had coverage; however, Tremont, IL, where R-Villa is in storage, was just outside the coverage area. I decided to drive the six miles to Tremont, set it up, and take a chance! I had learned from my research on Facebook Starlink groups that the coverage is sometimes better than the map indicates. It took me all of ten minutes to set up the "Dishy." The instructions are super easy. I used a Jackery Explorer 300 Solar Generator as a power source, placed the Dishy on the roof of my truck, and powered up. Even though I was not in my service area and the map said there was no coverage, Dishy immediately started searching and locked onto the satellites immediately. Within minutes, I had a Wi-Fi network set up! (I did turn off the snow melt feature, as it is a power consumer.) I entered the Ollie, turned on the Visio, and set the TV to the new Wi-Fi network I had just set up. Voilá, I'm streaming Netflix! This is a game changer!1 point


.thumb.JPG.dd838cdb3df463dab6a16861fa23a319.JPG)


.thumb.jpg.91ab93de4a01f9040d89cc75c92a3115.jpg)
-
Recent Achievements
-


")


