Leaderboard


Popular Content
Showing content with the highest reputation on 02/19/2023 in all areas
-
MnM- The really big deal on the repair is getting the gel-coat the same color as the original. The guys in Service at Oliver will be able to look up exactly what color of white your Ollie has on it and give that information to your repair shop. Or, since this is such a small (relatively) chip, Service could possibly ship a small amount to you people so that they don't have to buy whatever the minimum quantity is and, of course, charge you for it. Good luck! Bill4 points
-
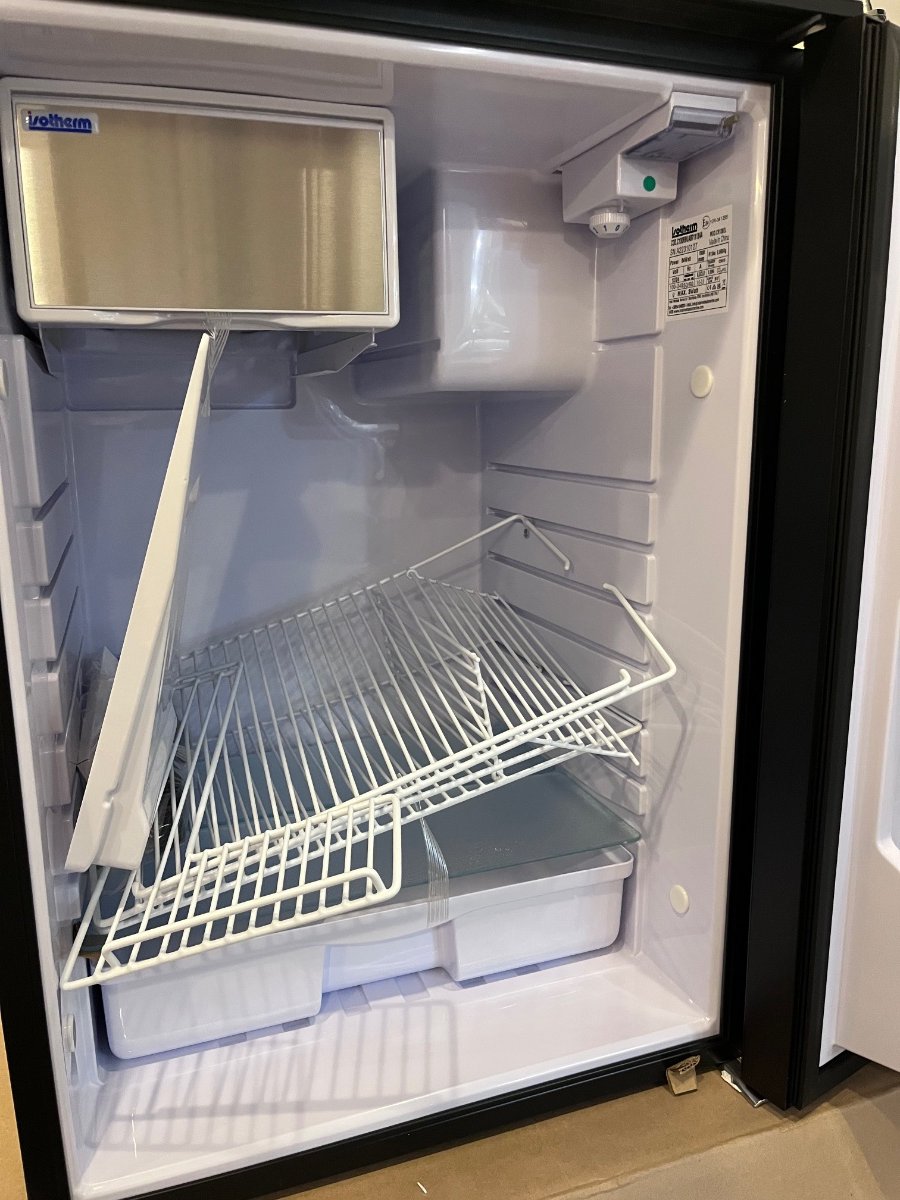
I finally received an undamaged fridge from West Marine. I set it on the cabin table (lowered position) and ran it for a few hours on 120 volts AC. When I first turned it on, I thought it was dead, then I saw the fan spinning and felt the compressor. Yep, running…. I did this sound test from 12” away from the compressor. Woohoo! I haven’t seen an actual sound reading before. I am blown away. But not blown away by how the inside looked “as received”. Nothing was damaged. I am doing extensive carpentry this weekend. John Davies Spokane WA
 3 points
 -
Hello ShhQuiet, i have just skimmed this stream and noted that you may need an Andersen Hitch. I have one lightly used that you may have at no charge. It has been holding down the cement slab in my shop since i got my F250 in 2019. The hitch will be free but shipping could be a big number (weighs around 60 LBS+ packaging) and would be at your cost. The hitch cost something like $570+ new. Shipping would be from California / zip code 95519 if you want to investigate the cost of freight. I will give you the right of first refusal then anyone else needing the hitch may have it. Please let me know if you wish to have the hitch. And congratulations, you have purchased a fine trailer.3 points
-
My guess would be something blocking the flow, especially since the hot water in the bath works. It doesn’t sound like anything froze, you did everything we would have done as far as heat goes. Mike3 points
-
Thanks Mike and Bill! I knew about flushing with gray after, but I never thought to allow some through first to wet the drain hose. Great tip! Nor had I thought about "stuff" accumulating in the gray tank. We plan to avoid as much food particles and grease going down the drain as possible. Kitchen traps smell worse than bathroom traps! Thanks again for the wise counsel!2 points
-
I wish they’d cancel rest of booking if you fail to show up on check-in day or call and let them know you will be late. Such a selfish mentality to not call and let them know as always folks who show up asking for a spot.2 points
-
We have an Amcrest GPS GL300 tracker. Whenever our Elite II is: (1) away from its fully-enclosed storage shed next to our home, and (2) not connected to our tow vehicle, we turn the tracker on. It requires a subscription fee, but we enjoy the peace of mind. I have read anecdotal stores of such trackers being used by police to find stolen trailers. In your shoes, I would leave the tracker on whenever it is parked in front of your home. The tracker is in addition to two different kinds of Bulldog coupler locks, which we install when leaving the trailer at a campground unattended.2 points
-
My Criminal Law professor in law school, Woody Deem, started each class session with the statement: "Criminals are stupid." He would then delight the class with real stories from his decades as the Ventura County California prosecuting attorney.2 points
-
Yes, you don’t want to leave the black tank drain open - just when dumping. For the gray tank I usually leave it closed until I dump. If you want to leave it open it shouldn’t pose any problems except you won’t have gray water to flush through your hose after emptying the black tank. Mike2 points
-
It is possible that some water lines are too close to the hull wall, if actually touching, that will cause problems. You can insulate them using 1/2” foam tubes, but a better solution is to add some 1” pink foam board (Dow Corning R5), if there is room. John Davies Spokane WA2 points
-
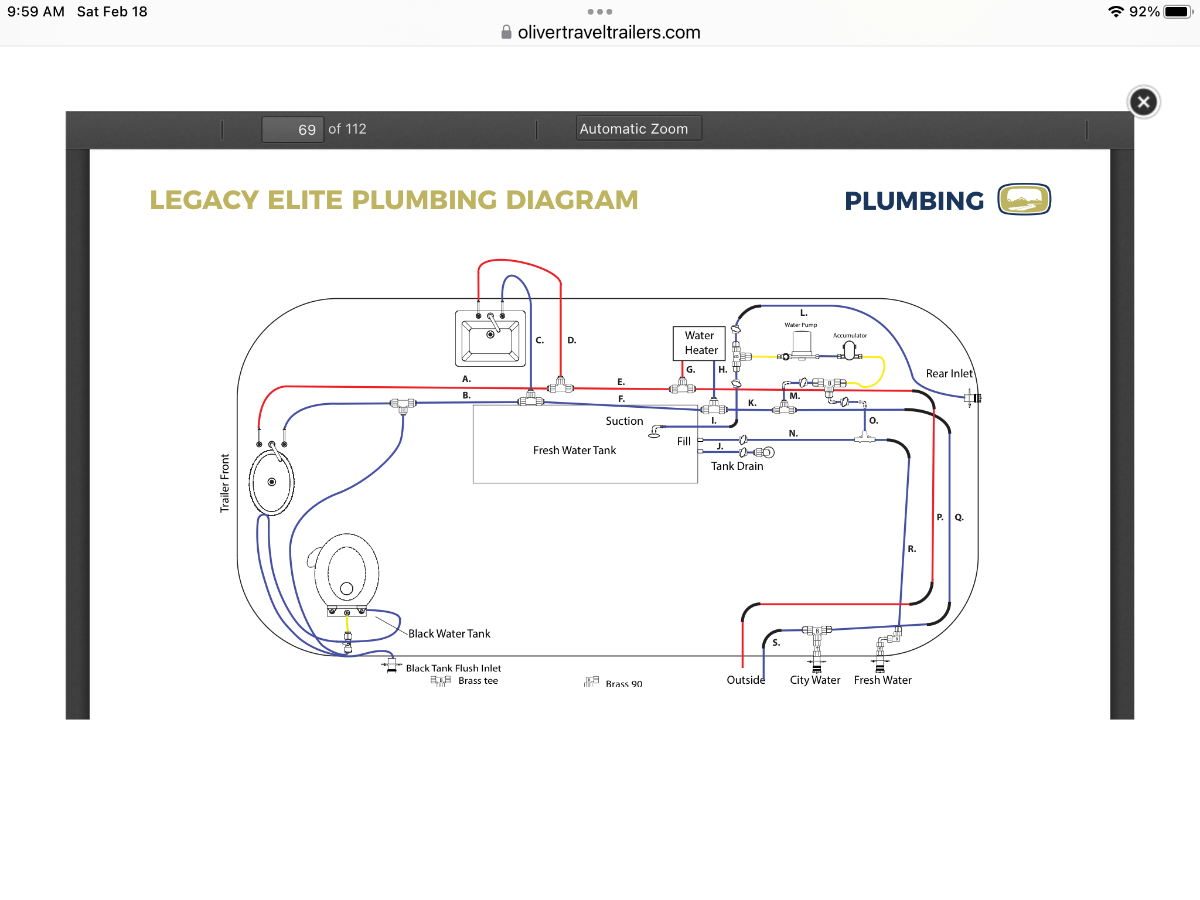
First - thanks everyone for your thoughts and ideas. Here is an update, sorry for the delay but we were traveling from Hohenwald to Willow Beach COE near Little Rock AR today and I did not want to type a detailed update on my phone. To update - I had left the kitchen sink hot water faucet in the "on" position, hoping that the sun would warm the curb side of the trailer, which fortunately in factory campsite five faces the sun as it rises. I started getting a slow drip, then a faster drip, then a small stream. Within the space of about 90 seconds from that first drip I had full flow on the hot side and the water quickly heated to normal hot water temps. Using the diagram above that Mossey posted, that behavior seems to strongly support a frozen section of line "D" - between the tee that goes on to the bath sink and the kitchen faucet. After I had full flow I used the "pump test" to see if the line appeared to be losing pressure - turned off everything and waited for the pump to start with no water use - and I am hopeful that we escaped without a split line in this incident. Now the question is ... "Why?" I need to see why I am not getting enough warm air in the space between the kitchen cabinets and the hull - or does that line run between the hulls? I don't know - if an LE I owner has dug into the sink guts and has advice I would appreciate any guidance. I am hoping to have time next weekend after we are back in our Dallas home base to do some intensive mapping of the lines under the curb side seats and behind the drawers. I also will not rest easy till I have eyeballed line "D" and the fittings on each end and make sure that there is no residual damage. Reading the other threads on the forum about hidden leaks behind the sink area has me twitching at every unidentified noise this evening, listening to see if it's a leak. 🙂 Again - thanks to everyone who jumped in on this thread and gave ideas and advice. As TopGun2 pointed out - the factory campground is not that helpful a place on a Saturday (LOL). That's the major lesson learned - never do a Thursday / Friday service visit - always make sure that there are people at the mothership when you are there!2 points
-
My trailer came already tinted, maybe because it was the 2016 demo unit, but if it breaks in the future, I will try it. Thanks.2 points
-
Being in AZ, getting it back to Oliver is not really an option for us. Will call them and see what they suggest. We knew the one downside of getting the Ollie is no easy repairs from Oliver for us. I’m pretty inclined to do most mechanical things but I’ve never messed with Fiberglass. We have a highly regarded small local fiberglass repair shop. I’d go there over the RV repair companies here local anyways.2 points
-
If it’s worth repairing, take it to Oliver and they will get you fixed up. They really know fiberglass and can do amazing repairs to fiberglass/gelcoat. It would look like nothing ever happened when they are finished. I would never take it to a marine boat repair shop, just my 02 cents. I hope it all works out for you. Patriot🇺🇸2 points
-
I would start inspecting the water system using the following diagram. Look for damaged hot water supply lines such as leaks or kinks. Inspect the handle of the faucet for correct operation. Mossey
2 points
-
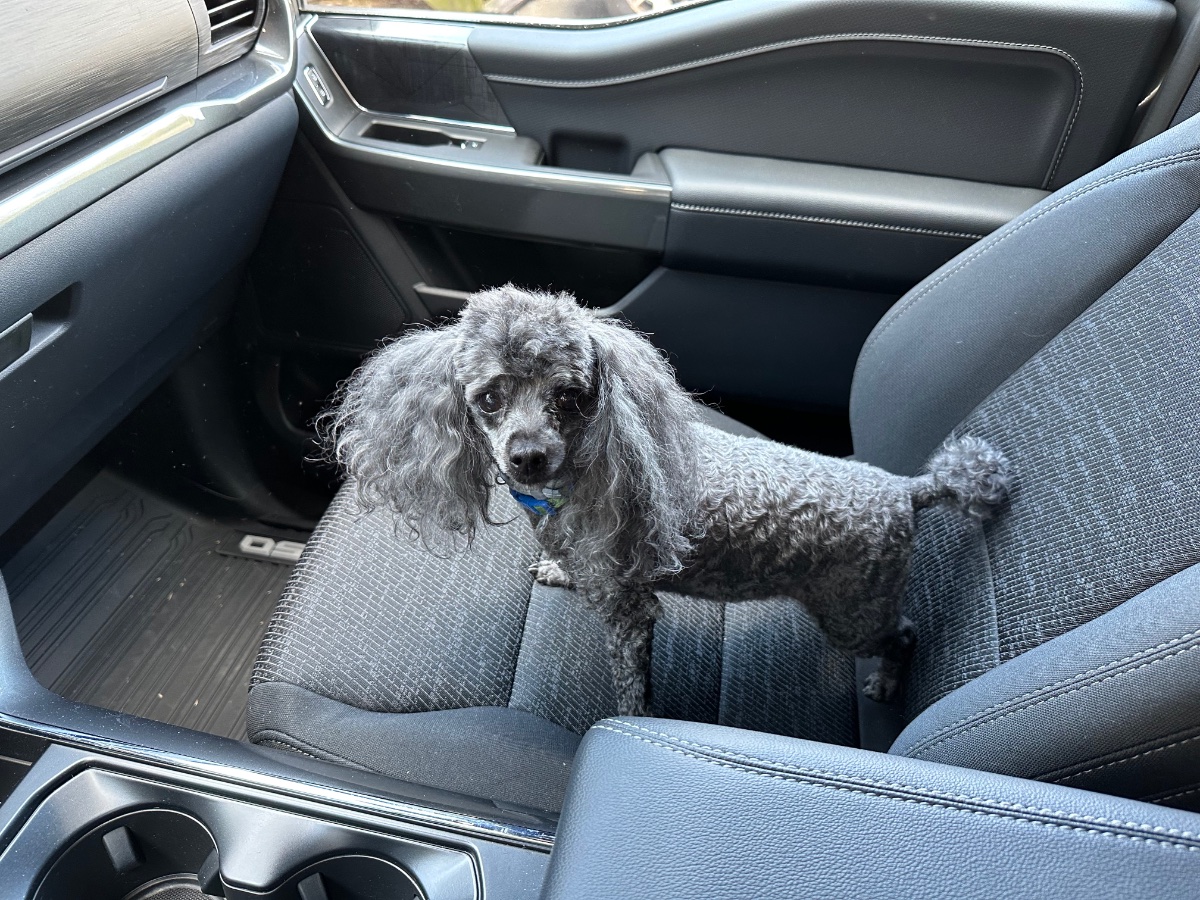
Aww, you asked for it! She was my late mother-in-law’s dog first, then my wife took her and now it’s just me and her. She is my special buddy for sure. 8 year old toy poodle and she weighs 8 pounds 😂
2 points
-
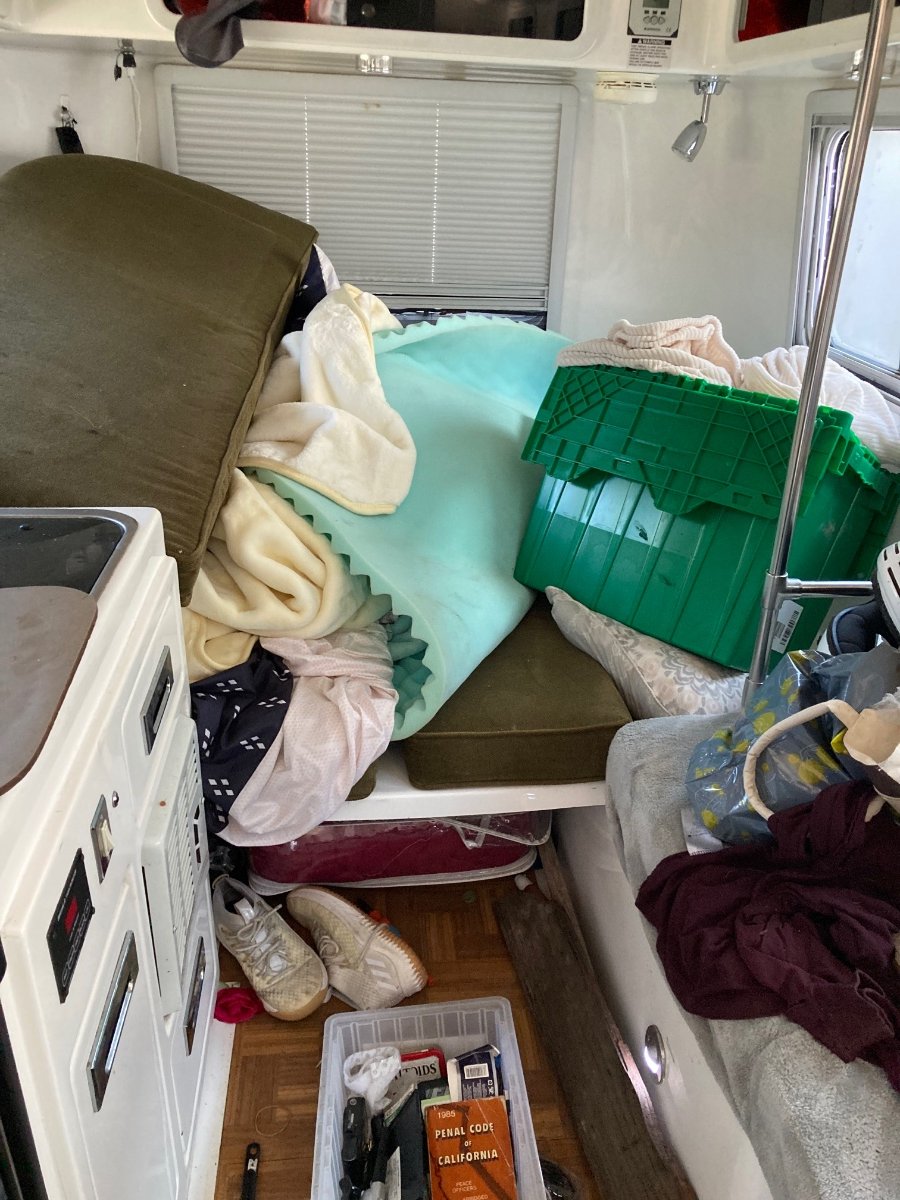
Hoorah. Ollie lives! Stolen rig returned! Police found it behind a stolen tow vehicle behind a locked gate (locks cut) in a rancher's field less than a mile from the police station. It was stuck in the mud and two people who had been living in it had gone out to get a friend to help them get out of the mud when the rancher arrived, and the thieves raced away. Police didn't catch them, but they did find identifying evidence (jail release papers) and opioid detox meds from the jail pharmacy for one of them. Of course, most of my gear was stolen, and a lot of their stuff was in it. Thank goodness for the fiberglass inner hull which will make it much easier to clean/sanitize. There's work to do: negotiating with insurance, broken off stabilizer jack to replace, spray paint on the hull, stolen spare tire and fiberglass cover, destroyed door lock, wrecked entry stair and scratches on the hull, plus cleaning, fumigating and replacing contents, but we will be on the road again this spring and summer. So here's my question: fourteen years in my driveway in a big city, and never messed with before. Reasonable quality hitch lock and motion detector lights. What all do you folks recommend as security systems. You can bet I am paranoid, and short of trying to build an enclosure, what do you folks do to keep your beloved rigs safe? Thanks, Angler, Hull #27 470257C6-C213-48CD-8B61-9549EEBF0A7F.heic 502D75D4-929A-499C-A8A7-E01237E6022A.heic2 points
-
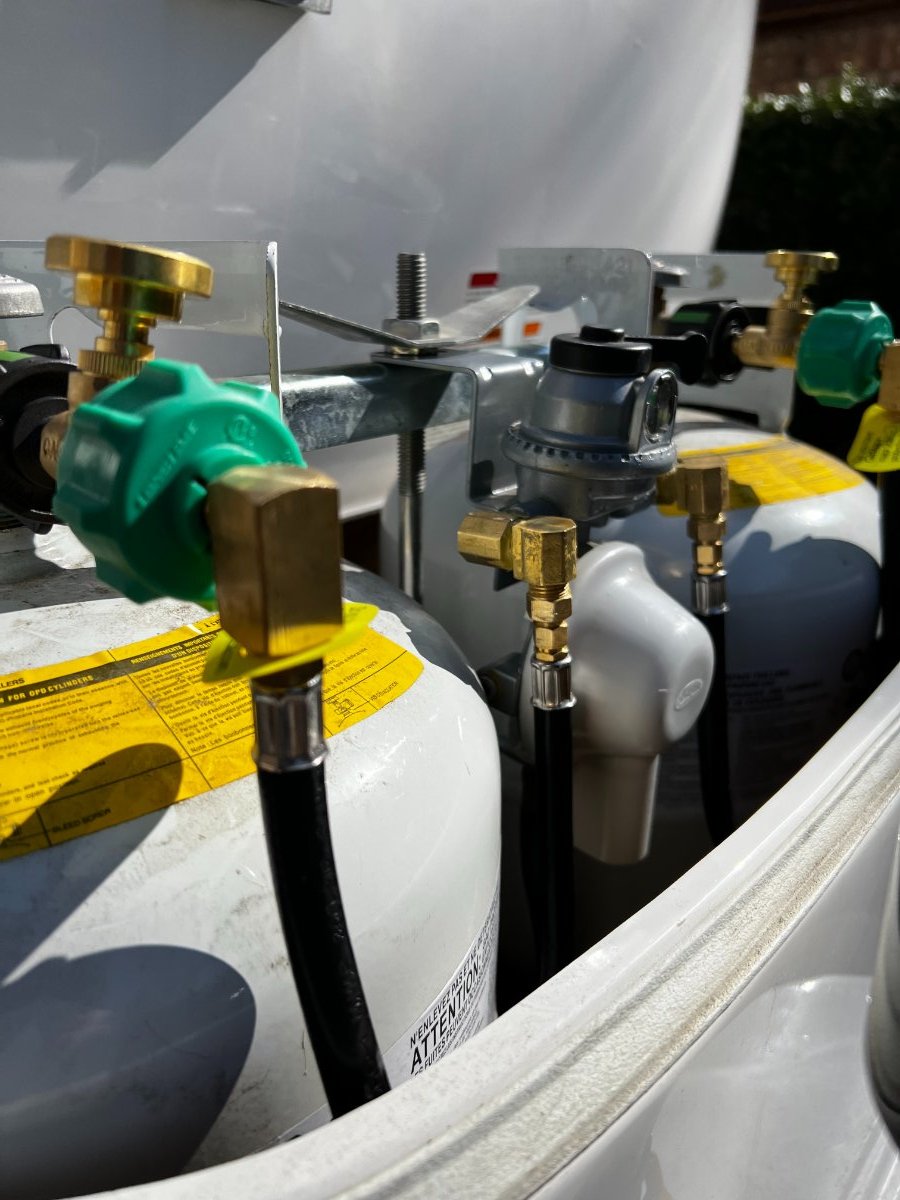
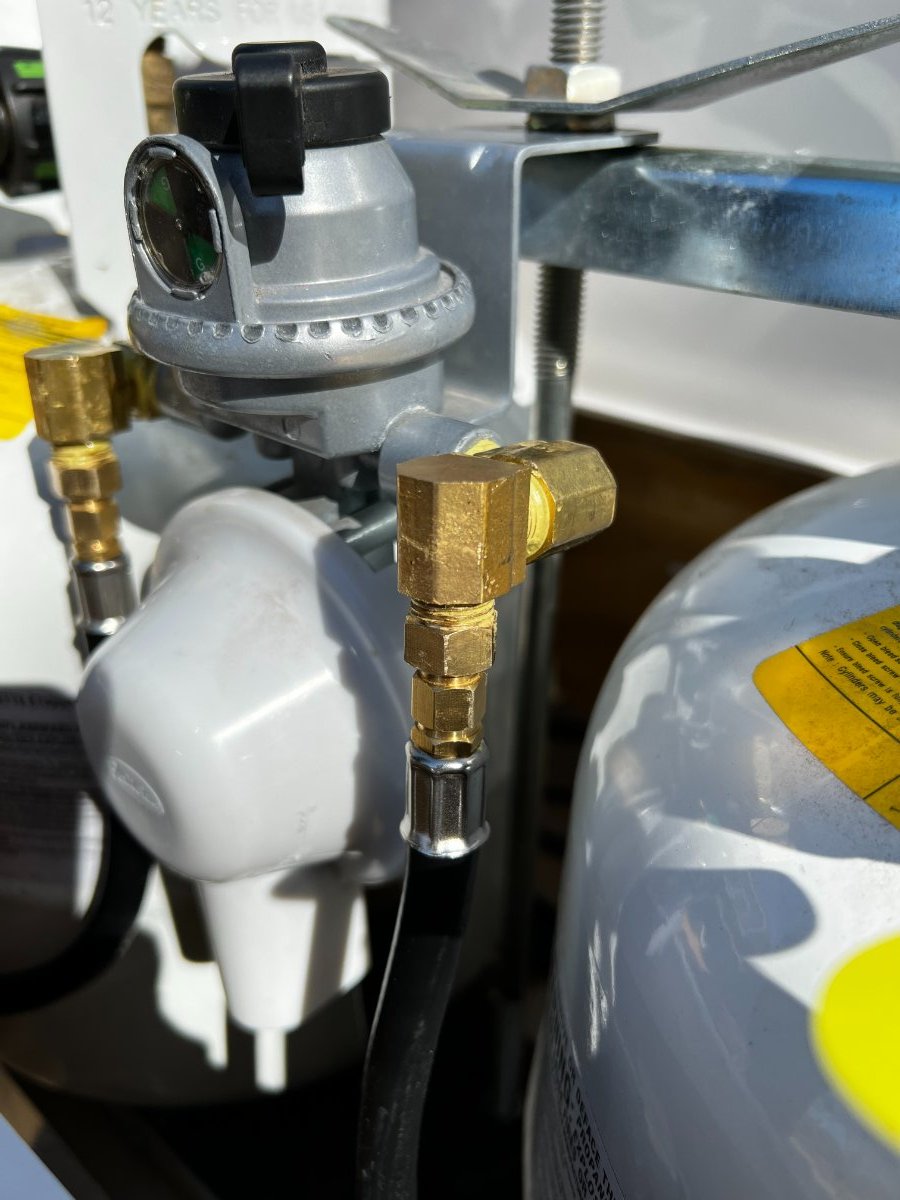
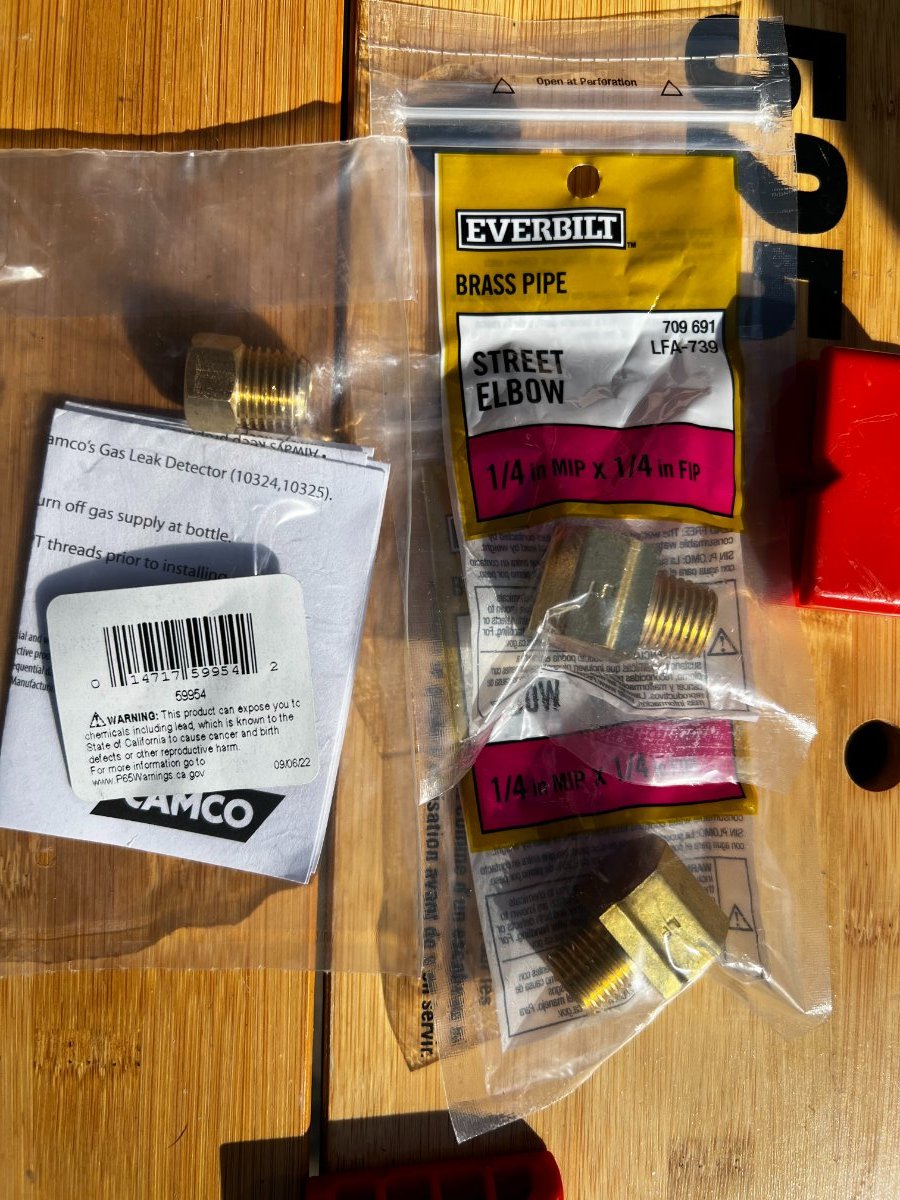
After reading @VBistro's excellent write up ( Propane Tank Mod - Installation of GasStop Valves ) on adding GasStop safety valves to LE II Hull #953 I decided that I wanted to tackle that on "Reset" LE I Hull #1030. However, as LE I owners know on the forum, what working on an LE II may or may not work on an LE I. When I put the gas stops on the LE I it was apparent that the LE I has a shorter propane box than the LE II, making the end of the hoses stick out of the box and preventing the lid from fitting correctly. I had to pull the GasStop valves off and re-evaluate. I really wanted those GasStop units on there. 🙂 Tried re-orienting the tanks, shifting hoses, etc. but nothing worked. So, I started digging around and found hoses with 90-degree heads. That solved the distance to the front problem. However – the replacement hose length was longer than the original hoses and ended up with a second bend in the line that – while technically within spec – did not make me happy for having done the work. So here is the solution that I finally came up with. Be aware that there are a good number of joints here – make sure you are comfortable with (1) gas, (2) wrenches, (3) Sealing cream or tape for gas, and that you test for leaks on each and every joint. Soapy water works great, if you know a home brewer or commercial kitchen operator Star San bubbles like crazy at the smallest leak and is a literal lifesaver in this case. Of specific note: This bit of info from @John E Davies is critical. At least for me, when I removed the old hoses, I could not get the old check valve off. It was so tightly sealed that I initially assumed that it was part of the original hose. I am including the replacement for the check valve in the parts as you will need to be able to remove it and palace it on the new 90-degree hose, or put a replacement on the new hose. Parts List (I have referenced Manufacturer Websites, most are available through Amazon as well) Quantity is for both tanks. 1) 2 GasStop Propane Shut-off Valves - Qty 2 GasStop – Use Gas Safer With GasStop (gasstopusa.com) https://gasstopusa.com/ 2) 90° Propane Pigtail Hose (12″, Rubber) - Qty 2 Product details – GasGear (gas-gear.com) https://gas-gear.com/product-details/#product1 3) ¼” NPT BRASS Street Elbows (double-check the size of your particular fitting) - Qty 4 Everbilt 1/4 in. MIP x 1/4 in. FIP 90-Degree Brass Street Elbow Fitting 802099 - The Home Depot https://www.homedepot.com/p/Everbilt-1-4-in-MIP-x-1-4-in-FIP-90-Degree-Brass-Street-Elbow-Fitting-802099/300095976 4) Pipe Thread Sealant (specifically formulated for gasses) -Qty 1 RectorSeal 1.75 oz. #5 Pipe Thread Sealant 25790 - The Home Depot https://www.homedepot.com/p/RectorSeal-1-75-oz-5-Pipe-Thread-Sealant-25790/100144191 5) Low Pressure Fitting - 1 / 4" M NPT x 1 / 4" F Inverted Flare w / Check Valve - Qty 2 Low Pressure Fitting (camco.net) https://www.camco.net/low-pressure-fitting-1-4-m-npt-x-1-4-f-inverted-flare-w-check-valve-59954 Method (Copied and expanded from original post) Detach propane hose from the ¼” straight NPT fitting at the regulator Remove the straight ¼” fitting at the low pressure regulator Remove the ACME connection at the propane tank Clean as much old pipe thread sealant as you can from both the regulator side and the hose side, being careful not to let any shavings enter the regulator Apply thread sealant to the male end of the new elbow fitting and install it at the low pressure regulator. Tighten to position the female end away from the trailer, toward the hitch. Place a second elbow fitting into the first, applying thread sealant to the male end. Tighten to position the female end pointing downward. This next step represents a preference thing for me. I feel that attaching the check valve to the new 90 degree hose before attaching the hose to the downward facing female elbow works better, as the end of the hose is an odd size for which I did not have a wrench requiring me to use an adjustable crescent wrench. Proper tool may be a small pipe wrench, which was not to hand. As always, apply sealant to the male threads and tighten firmly. Apply thread sealant to the check fitting’s male end and screw it onto the street elbow. You can use a pipe or crescent wrench to snug this connection. This is the connection where I ended up with a leak, as the dangling hose can make you think that you have it connected but in realith the hose is just binding. Re-attach gas stop to propane tank and new 90 degree hose to gas stop. Let sealant cure for 24 hours Pressurize system and leak test! Note – if your tank is full and the gas stop shows “low” this is a good indication of a leak. Here are some photos of the finished project. Again thanks to @VBistro, @MarkV, and @John E Davies for the original post and follow-ups for this great idea. I hope this helps LE I owners in making this modification to their Oliver.
1 point
-
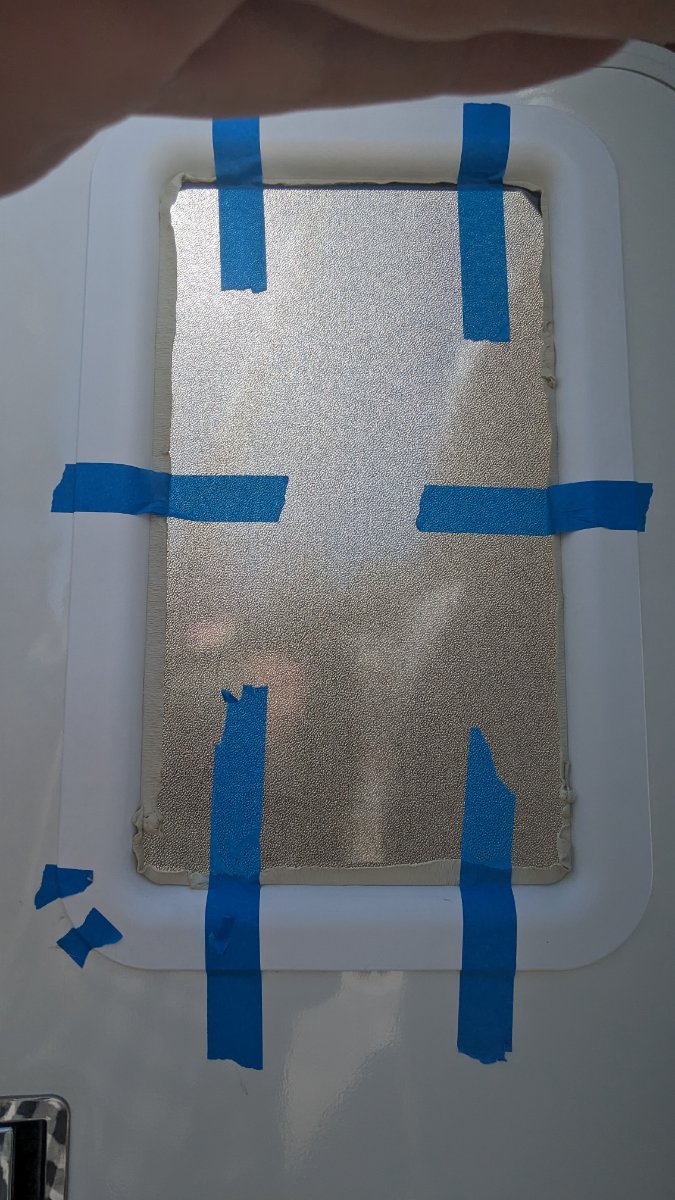
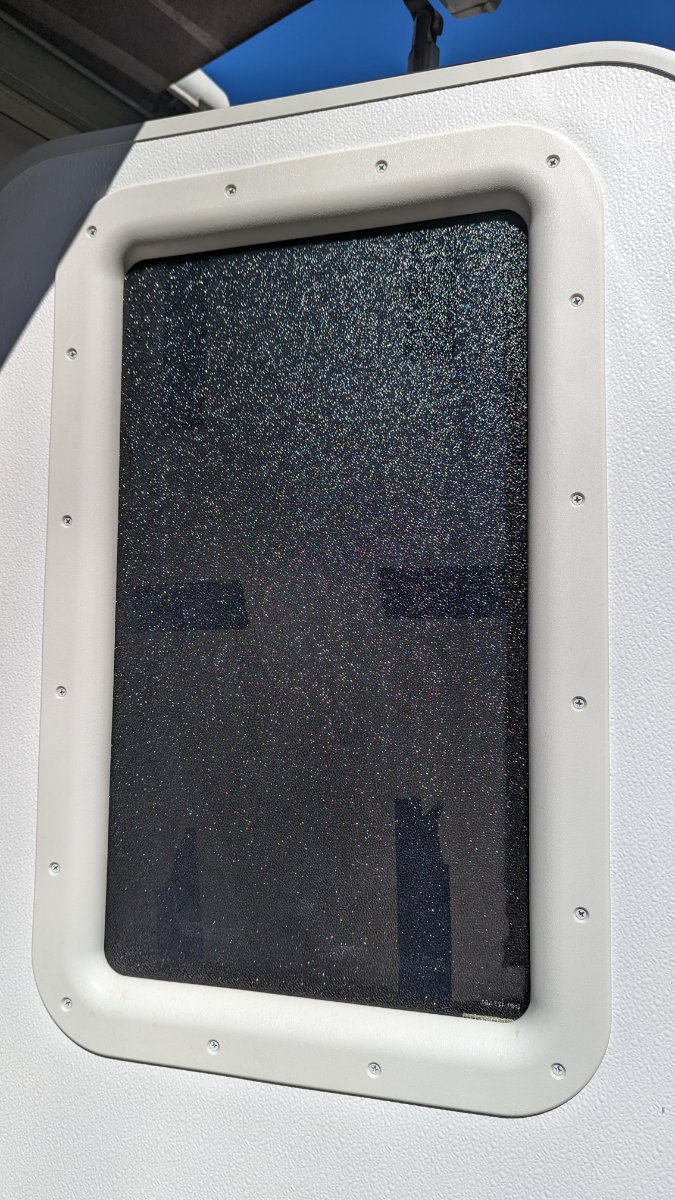
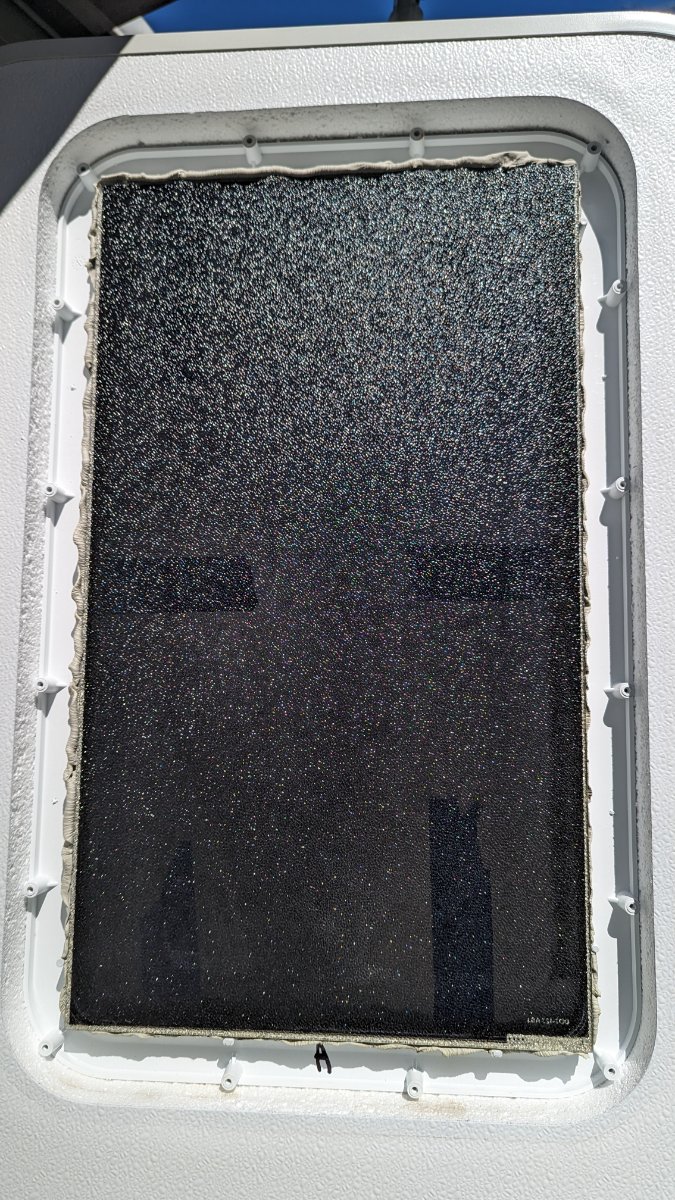
Well, a long over due repair is finally complete. For over a year now my door had leaked a bit if the rain hit that side of the camper. Whoever makes those doors for Oliver really does NOT use much sealant on the window and plastic window frames (inner & outer). I did "okay". I used Butyl tape that I had on hand. It made me feel like I was playing with Silly Putty again. I used it liberally so I hope that will be the end of the leak for a while. The clean-up of the outside putty took a minute or three do do, but not bad. It was a beautiful day out. Here's also a short video of pealing off the old factory sealant. Window-Sealant-Satisfaction-HB.mp4
1 point
-
Gelcoat has a color/number code, and you can order it through a marine supply/fiberglass supply. (In St. Pete, FL, fiberglass productsis our go to source.) . Last time I bought it, for the boat,, one quart was the minimum. And, like every other chemical these days, expensive. Marine tex is pretty close in color, not perfect, so you could just dremel it out and fill in. Or, see if Oliver has the correct color in stock. Gel coat repair is a multistage process.1 point
-
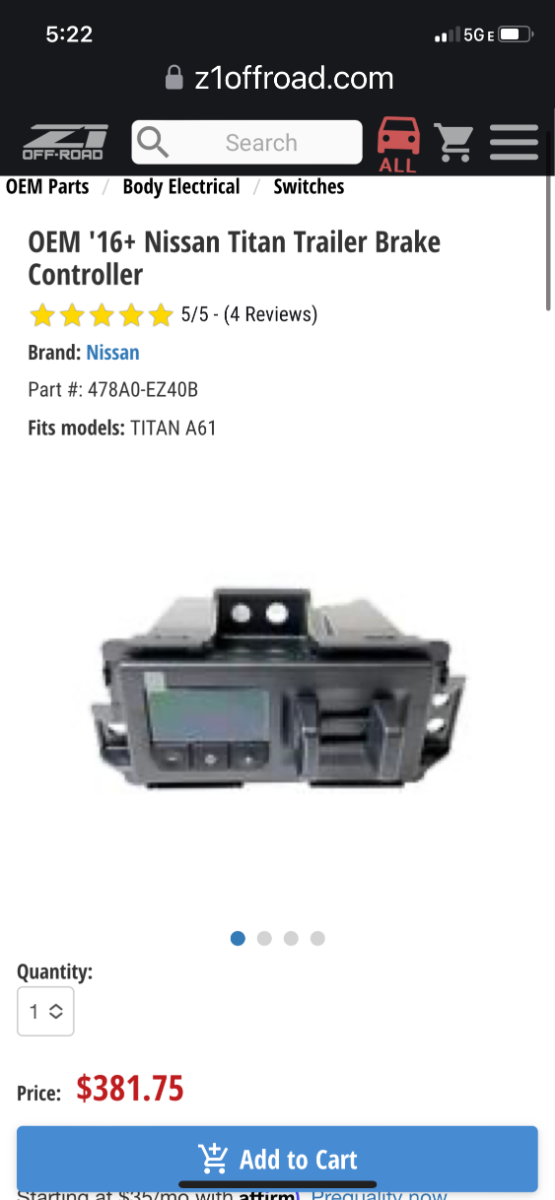
The Oliver trailer has no brake controller. The Oliver brakes are controlled by the brake controller on the tow vehicle. Since your tow vehicle has no trailer brake controller, you are basically towing with no functioning trailer brakes. A very unsafe situation, especially in any hilly/mountainous areas. If your vehicle had a trailer brake controller it would look something like this on the dashboard, a digital display with +/- buttons to adjust the trailer braking, and two small squeeze paddles to manually apply the trailer brakes when needed. Just because the tow vehicle has a pin connector on the bumper, that does not automatically mean the tow vehicle has a brake controller
1 point
-
The Proven Industries Lock does not cover either of the two bolts on the 2" bull dog hitch. I never thought about that being a weak point for protection of the Oliver, but I guess it could be. On the other hand, do thiefs carry a bull dog hitch to install on a trailer after taking off the one that is locked? I hope that they are not that determined or smart.
1 point
-
Ditto Rivernerd's comments! Might find myself in the same situation a few more mods down the road... John Davies - that poor fridge sure looks abused. Amazing there is no damage. Shippers and warehouse forklift drivers are not known for their gentleness and respect for our expensive toys 😞1 point
-
Really interesting. Both my beds have the wing and are same width. The extra $299 cost I assume was for extra cushions you get for the back of one side.1 point
-
I am keenly interested in whether the Isotherm fridge will fit through the door of your Elite II without removing the door frame. I noted that you had to take the old fridge out in pieces. My wife would strongly prefer a Danfoss compressor fridge over our absorption fridge (after I mentioned an article on RV fridge fires), so the day may come when I get to do what you are doing right now. I look forward to your usual clearly-written and photographed report on the process!1 point
-
@Big Cat, we have an older Hull, in our upper cabinets we only have the outer hull as a barrier. We use a GPS device from Trak-4, and it easily provides coverage from inside. We've used it for a couple of years and have been pleased with how it works.1 point
-
I definitely plan to try the ‘drip the faucet” idea next time we are in this type of temps. Will update as to results. As for the Truma, yes - we do have the Aquago and since we had plenty of propane I left it on Comfort for the night hoping that the water would heat “forward” of the tank. Unfortunately not enough into that line “D” area it seems. I’m guessing that was because of no water movement. Now to find the perfect balance of keeping the systems warm and not cooking the occupants inside 🙂1 point
-
@Big CatYou have not really said why you want to secure your propane tank cover. If it’s to secure your LP tanks you may want to consider this mod. No guarantees that your tanks won’t get stolen, but it is better than no lock and is an easy and inexpensive mod. Please add your Oliver hull# and TV information to your signature line so that members can more readily help you with questions. Patriot🇺🇸1 point
-
Update - The automatic switchover worked. I must admit - I was really worried about whether the automatic tank switch would work in this configuration. Just make sure that after you install the tanks (or turn them off, or refill them) you push down on the Gas Stop gauges to make sure that the flow is open. In 20 degree temp in the facory campground we had a successful tank swap - all while asleep in our snug little Oliver. So that worked. I feel much better now (LOL)1 point
-
[Note a version of this was originally posted in the Oliver Trailer Owners Facebook group - wanted to share it here as well.] Quick tip: if you fill your fresh tank and then can’t get the pump to pull you can break the suction lock by hooking up to the boondocking port and running water through the pump into the tank. Full details below. Thanks to the authors of several threads that I can't find for the life of me again that suggested the cup fill, city water, and the boondock method that ultimately worked for me. If I can ever find those posts again, I will properly credit them. Full details Picked up Reset LE I Hull 1030 today after first year service at the mothership. Staying tonight at the campground, and since it’s predicted to be 20F overnight did not want to leave a hose out to freeze. So, I put a half load in the fresh tank for onboard water needs. I know the pump was working at drop off since we did a Harvest Host night on the way out and all worked fine. After filling the fresh tank, I started the pump and it ran - but ran continuously. No water flow at the kitchen or bathroom sinks. Based on posts in this forum I checked filter screen for plastic chips. While there were a few in there it was not enough to block flow completely. I also used the trick of filling the filter screen cup with water to try to get it to prime. No joy. Of course, service is gone for the weekend at this point, so we are alone on the campground trying to figure out what to do. Searching the forums turns up the suggestion to fill the city water side then switch to tanks. Did that and did not get the pump to prime after switching back to the fresh tank. Finally came across the idea for breaking a vacuum lock through the boondocking port. Hooked up the campground water to the boondock port with valves in boondock configuration. I turned on the water and ran the pump for about 5 seconds while I could hear the tank filling from the boondock port. Turned off the water to the boondock port and reconfigured the valves to normal and started the pump. Got pressure and flow immediately. Success and no frozen hoses overnight.1 point
-
Several years ago, I installed a SiriusXM receiver and antenna in the attic. The antenna is between the insulation and the outer hull. I don’t know what size GPS you are working with, but it’s very easy to put it between the insulation and the fiberglass outer hull at the back of the trailer in the attic. If it’s small, it would not be noticeable to someone looking, but you would be able to easily access it. Mike1 point
-
Synthetic grout and white nail polish. Ask a lady to pick out the color as us guys are color blind... At least that's what my wife says. Then clear nail polish over that and poof gone to 99.9%. They will never see it. The bad new s that you, on the other hand will see it every time you walk by it. However, the not so good news is that in time your eyesight will diminish and the brain will forget about it. 🙂 GJ1 point
-
The main problem with taking it anywhere other than Oliver is getting a perfect match on the color of the gel coat. My Hull #050 (and the next hundred or so builds) are a different color from the current ones. They no longer keep the old color in stock.1 point
-
Nice work! However it would have been an ideal time to install this! This is one of my top (5) favorite mods that I am really glad I did. You will see there are no screws used to secure the frame on the new model Ollies just a small clip to insert. Also the newer frames come with the sealant already attached to the frame. A thanks to @topgun2 for suggesting this mod!1 point
-
Hey Forum Pals, I love all your comments. Thanks for the support, and it's great to have my rig back. Hopefully I will be on the road again in a month or so. I have been looking at the Proven Industries lock that Snake River suggests. My rig is about 30 miles away at the repair shop, so I can't easily look at it, but if my fading geriatric memory serves, it seems that the bulldog hitch is held to the frame by a single bolt. Does anyone know if the Proven Industries hitch lock covers this bolt or could the thieves simply unbolt the hitch and quickly attach their own to the rig. It also looks like Proven Industries also makes a killer wheel lock. Any one have experience with it? This theft has turned me a bit paranoid, and I have looked at a few videos of how easy it is to freeze (liquid nitrogen) or pick many of the low to moderately priced wheel locks. I'd love to hear more people's thoughts on security. Obviously the best is indoors and locked up, but I am not in a location where I can manage that. Any one have experience with removable bollards in front of the rig? I suspect that I will go with multiple items. Hitch lock, wheel lock or two, tracker, and perhaps pulling the pin to the brake locks so they are always on. It's getting a bit over the top, but...1 point
-
You also get the Truma Varioheat heater in that Truma package. That's a nice furnace that has variable furnace fan settings. With our old furnace it was either full on or off until the thermostat turned it to heat again. The Truma just turns the fan speed down and keeps the trailer at a constant heat. John1 point
-
Beautiful!!1 point
-
Her name is Oreo! That photo was taken when I was picking her up from the groomer, so her ears were extra fluffy 😁 She usually rides in her “travel” bed and I just ordered a neoprene console cover to keep her nails from digging in. I really do like the non-shedding aspect with poodles, the downside is that their fur just keeps growing and growing, so getting a clip is required. I usually take her to the groomer when i can’t see her eyes anymore 😂.
1 point
-
I believe that they said they are camped in the Oliver campground. Unfortunately - today is Saturday.1 point
-
Are you are still near the factory? They could check it out and tell you where the offending area is so you can modify your procedure in the future.1 point
-
Strange - After reading the circumstances, my first thought wasn't a frozen pipe - but - a clogged pipe from something line debris in the line. However, usually these types of clogs only slow the flow - not stop it.1 point
-
I can just imagine what Bosker and your pup would have to say about each others ears!1 point
-
Steve welcome to the family, So sorry to hear about your wife . You find that this is a group of very nice people who will reach out to help in any way needed.1 point
-
That is great news, I fixed your pics, HEIC files are not supported. One super method of securing your trailer would be to buy a hitch dolly, and swing it around backwards when you park it long term. I don’t think most thieves would even consider taking it if they couldn’t hitch up easily. Good luck. John Davies Spokane WA
1 point
-
Congrates on getting your Ollie back. With a bit of work and help from the insurance company, it will look like new in no time. If it were mine I'd strongly think about now being the time (with the insurance help) to do a ceramic coating. Besides the lock that snakeriveridaho mentions above, there are all sorts of wheel locks and big chains that can go through the wheels and/or axle to attach the Ollie to something even more solid. Unfortunately, if someone really wants to get it - they will. All you can really do is have good insurance and try to slow them down a bit. I'm sorry that you have had to go through this but I'm also happy that you have got your Ollie back! Bill1 point
-
I believe the #3 key is to the lock on the super secret hidey hole. You will be told its location after six months of ownership. 😂🤣😂🤣1 point
-
Agree 100%. We routinely see empty campsites with reserved cards on the site. It’s inconsiderate. My brother owns a restaurant here in Boerne, TX. He had reservations for 290 people for last nights Valentine’s Day dinner. Steak and Lobster. 184 showed up. One customer bragged to my brother that he made reservations at 4 restaurants in town and decided on his. My brother asked if he canceled the other reservations and he said, NO! Why would he do that? My brother explained that he was turning people away who didn’t have a reservation and he had ordered food for all who reserved, so not canceling was totally inconsiderate. Maybe restaurants should require a deposit for reservations. Maybe campgrounds should charge a penalty for not showing up with no notification. How hard is it to make a call? Mike1 point
-
I am so very sorry to hear that. This is the first stolen Oliver I've ever heard of. I'll watch for you. I remember your posts from the old days. (2008-9). I'm totally bummed out for you.1 point
-
Also, be prepared to purchase and install additional chain since most (if not all) Andersen's require longer chains than come standard. Bill1 point
-
Touch up PAINT is different than gelcoat. Touchup paint can last a long time. SeaDawg is correct gelcoat would dry up very fast and not be useable.1 point


-
Recent Achievements
-


")


")


